Community Brag Posts

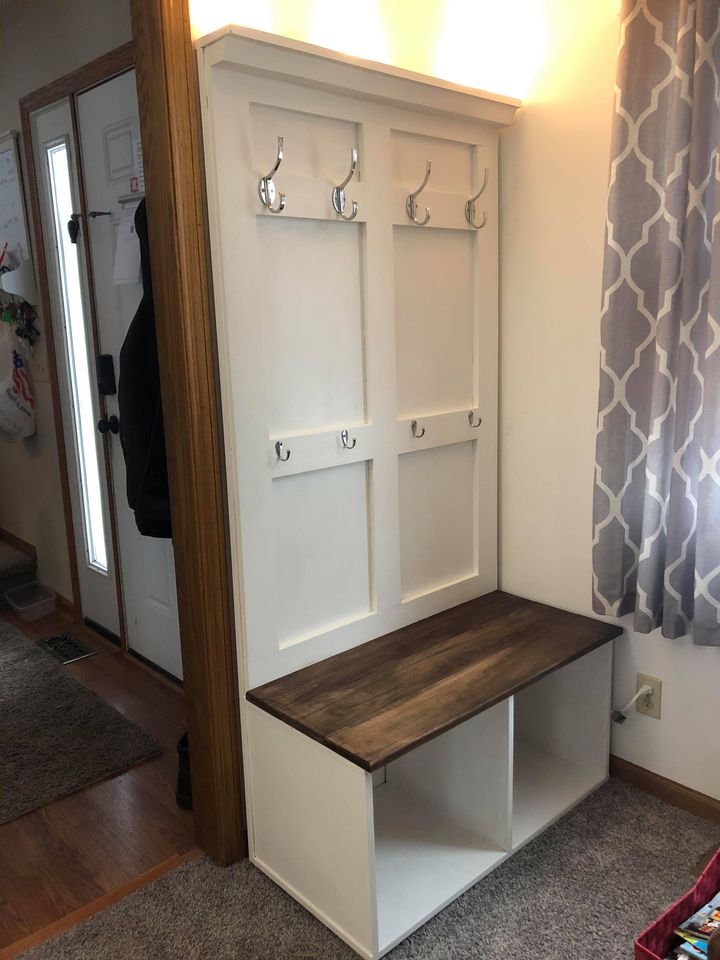
My Surprise B-Day Gift and Project Wrapped Into One!

Submitted by Diania on Sun, 01/06/2013 - 17:14

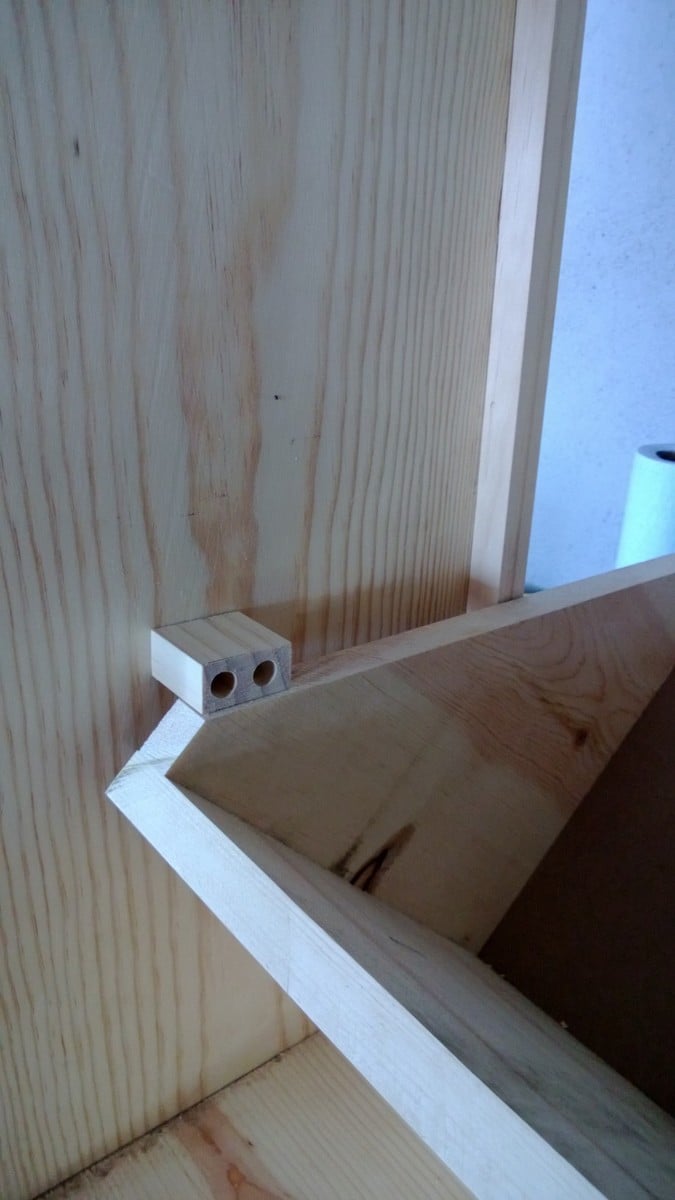
How this beginner project became my B-Day gift: After seeing this on Ana's site I just knew I had the perfect place for these, plus it was a great project to wet my toes :-) After talking my husband's head off for about a week with all the new things I'm going to build this year, we were finally headed to Lowes to get material. Well to my surprise he also bought me a Kreg-Jig(Master Series) I AM GOING TO BE A BUILDING MACHNE! LOL

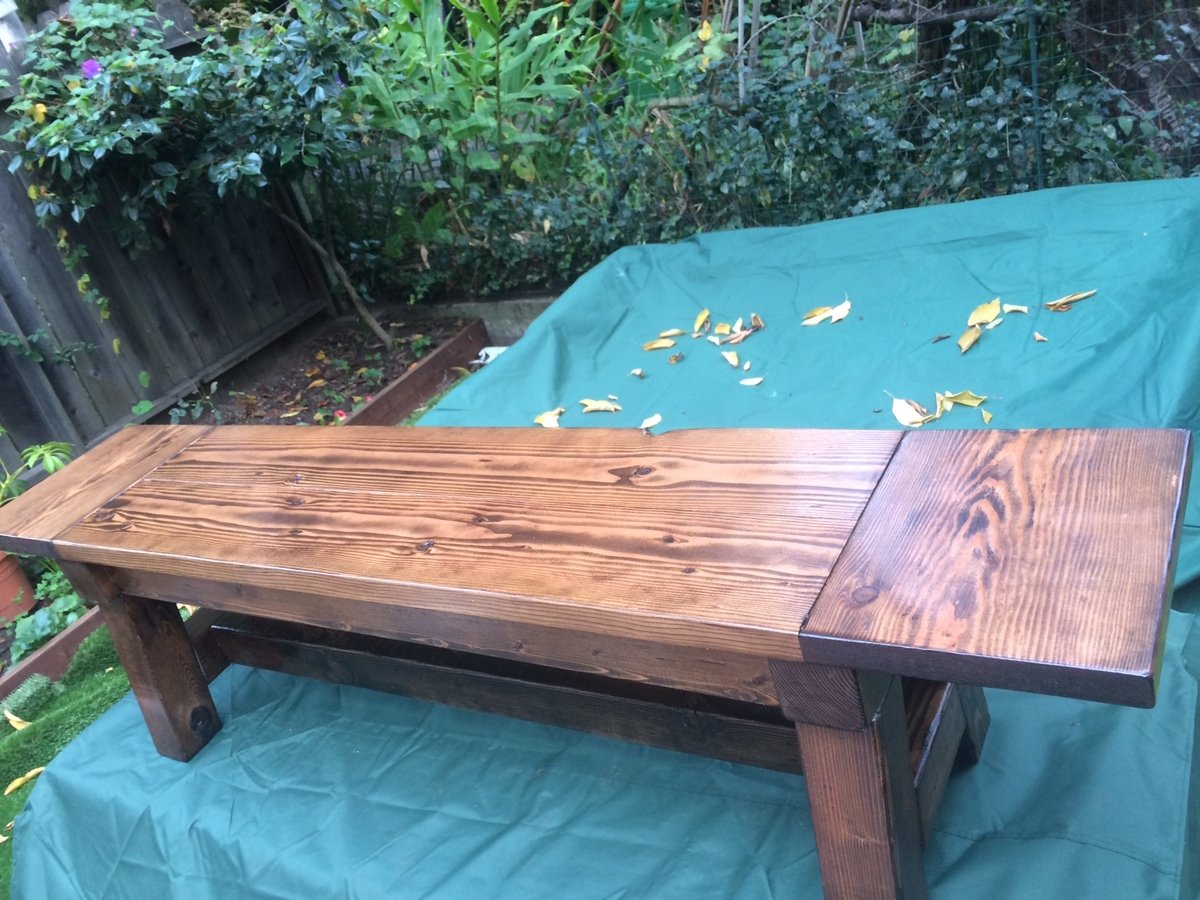
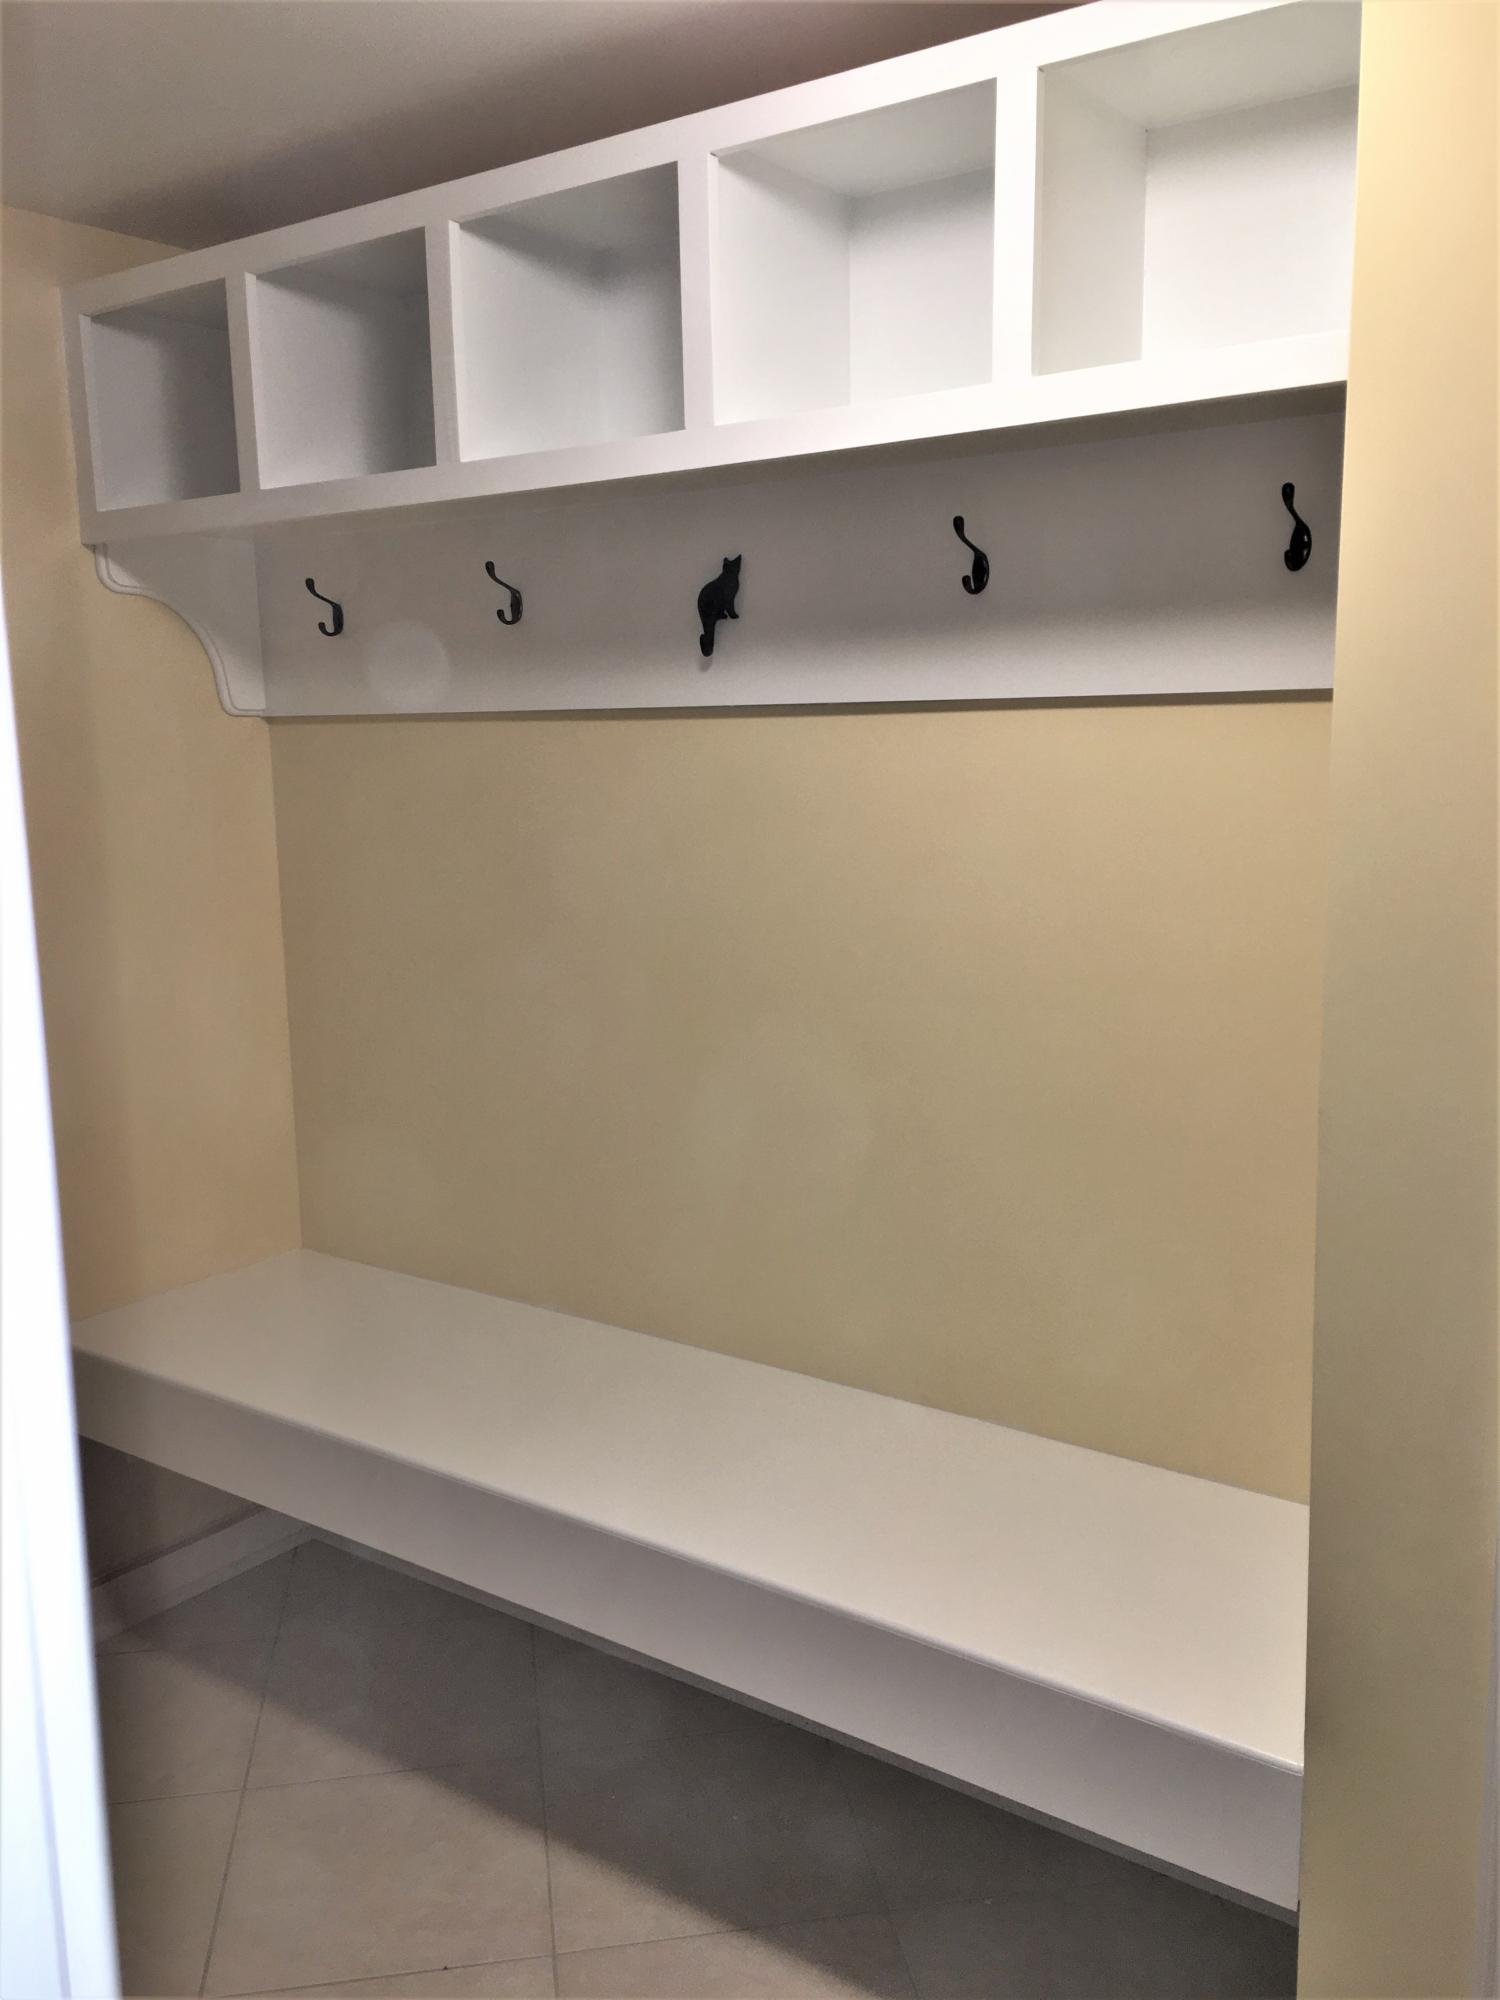
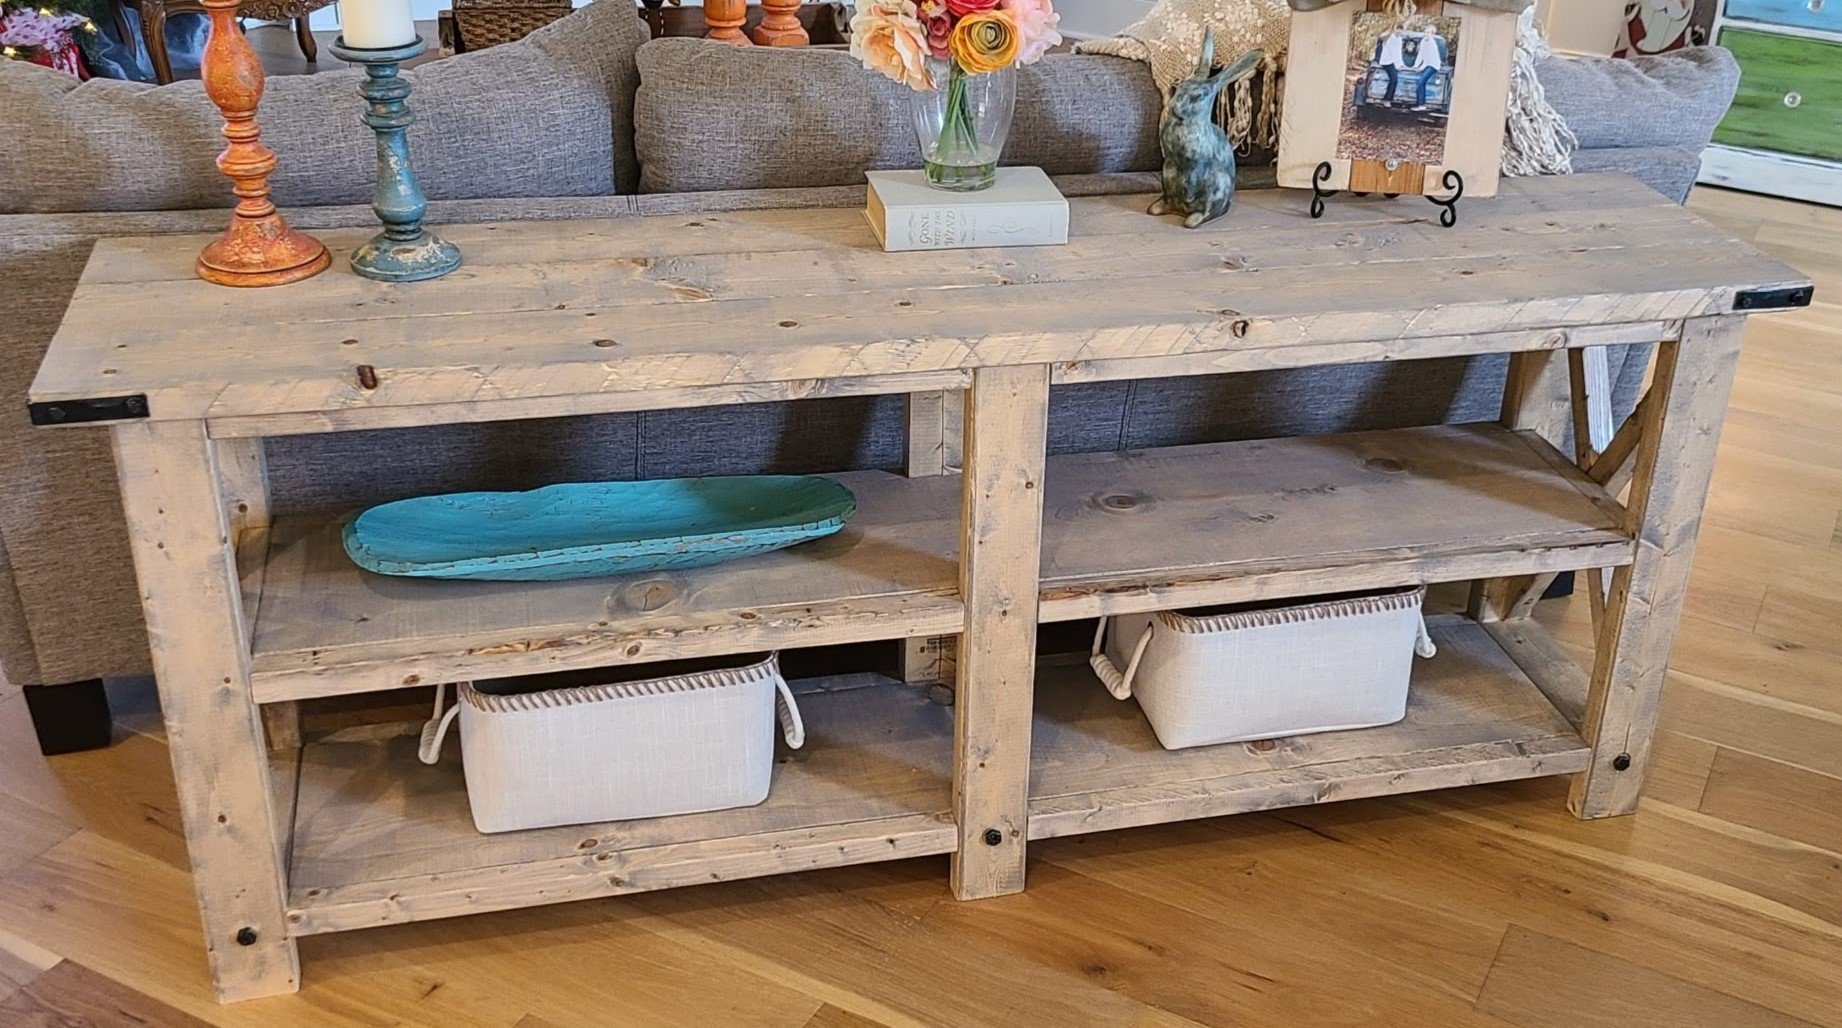
The cost really is around $10 or less but I spent some extra on Polycrylic to create a nice shine over the wood. I knew I wanted 8ft ledges so there was no cutting involved, wohoo! Here is what I used:

6 1x4 @8ft
3 1x2 @8ft
(I used 1 1/4in screws for project and 2in screws for mounting)
120 grit sand paper
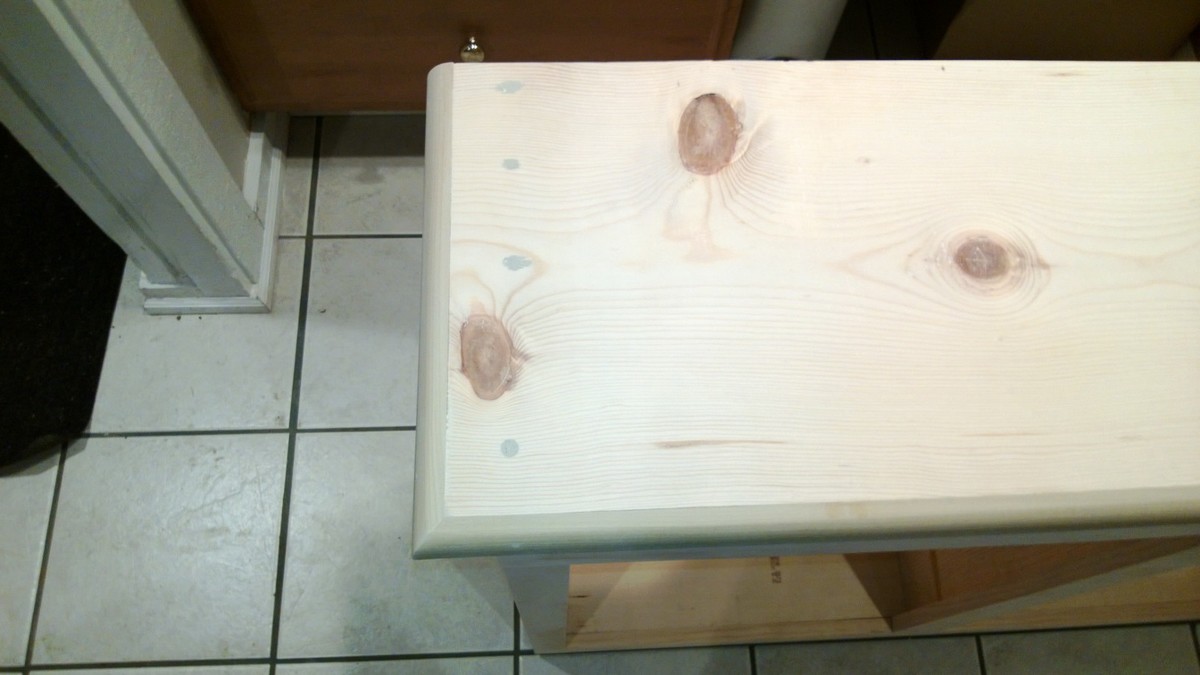
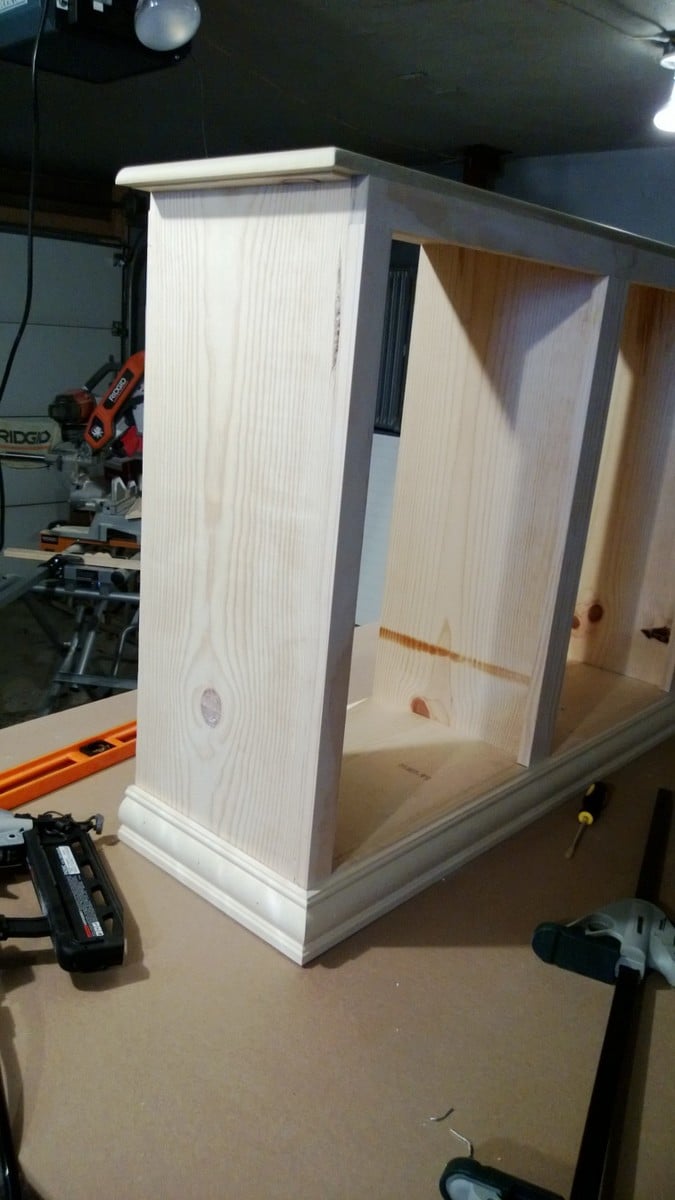
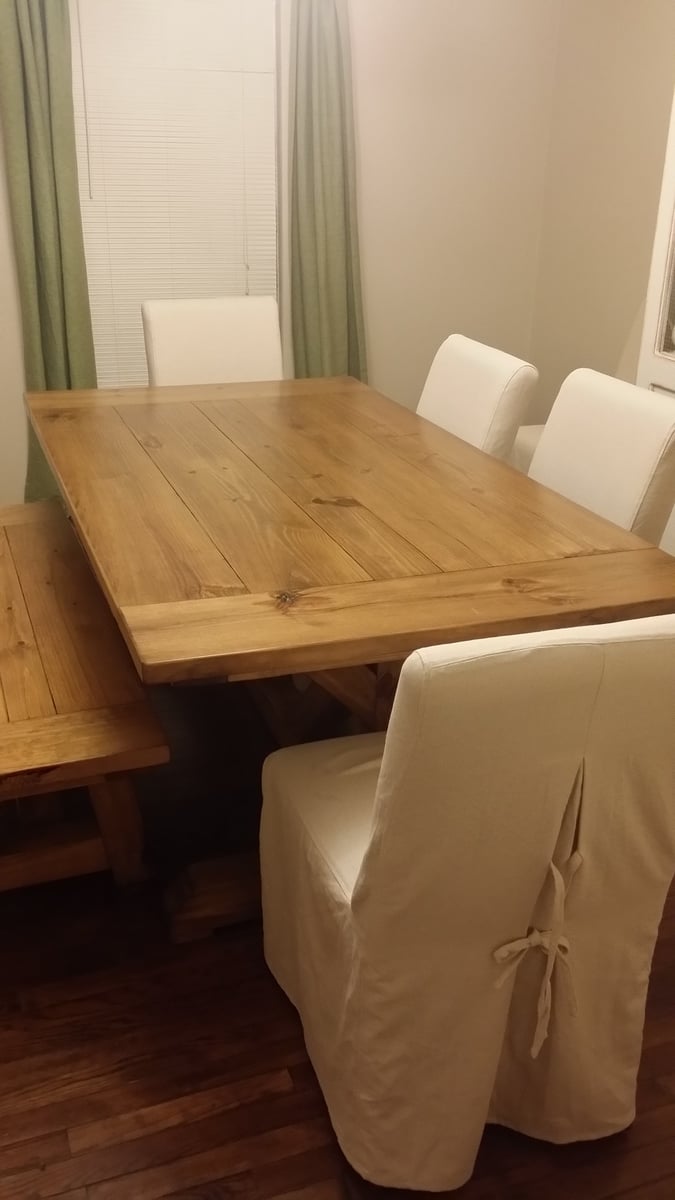
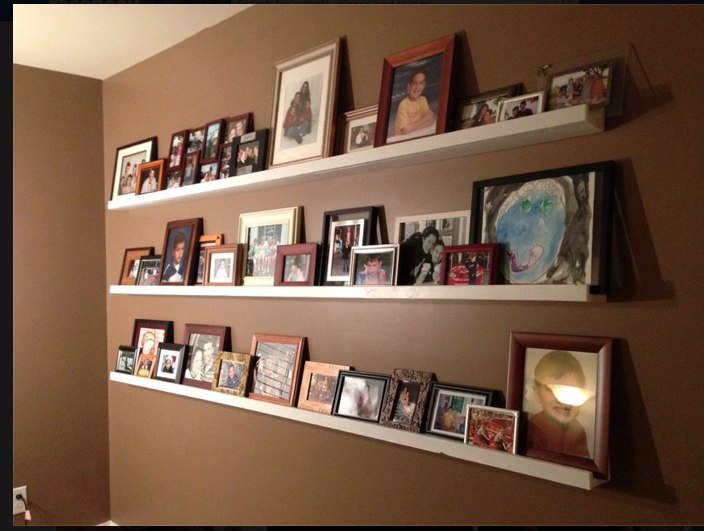
After putting together the wood in a jiffy as described in Ana's plans I then sanded. Even the sanding, which I did by hand was fairly quick. Next the priming and painting took the longest as it had to dry obviously. After a few coats, I sprayed the polycrylic according to directions on can. That's it...

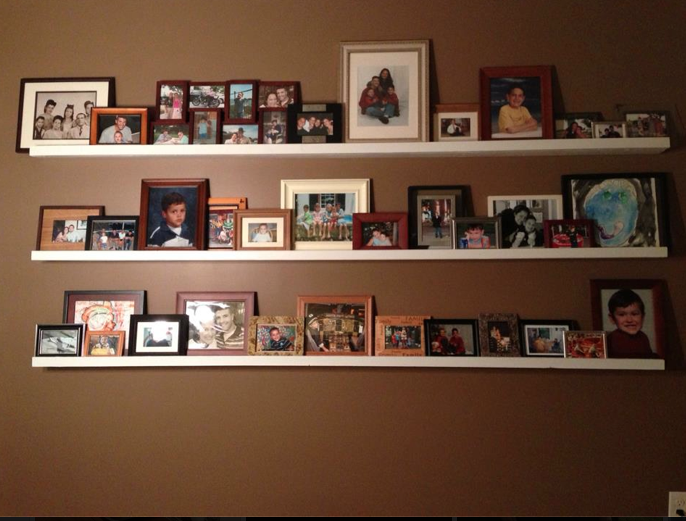
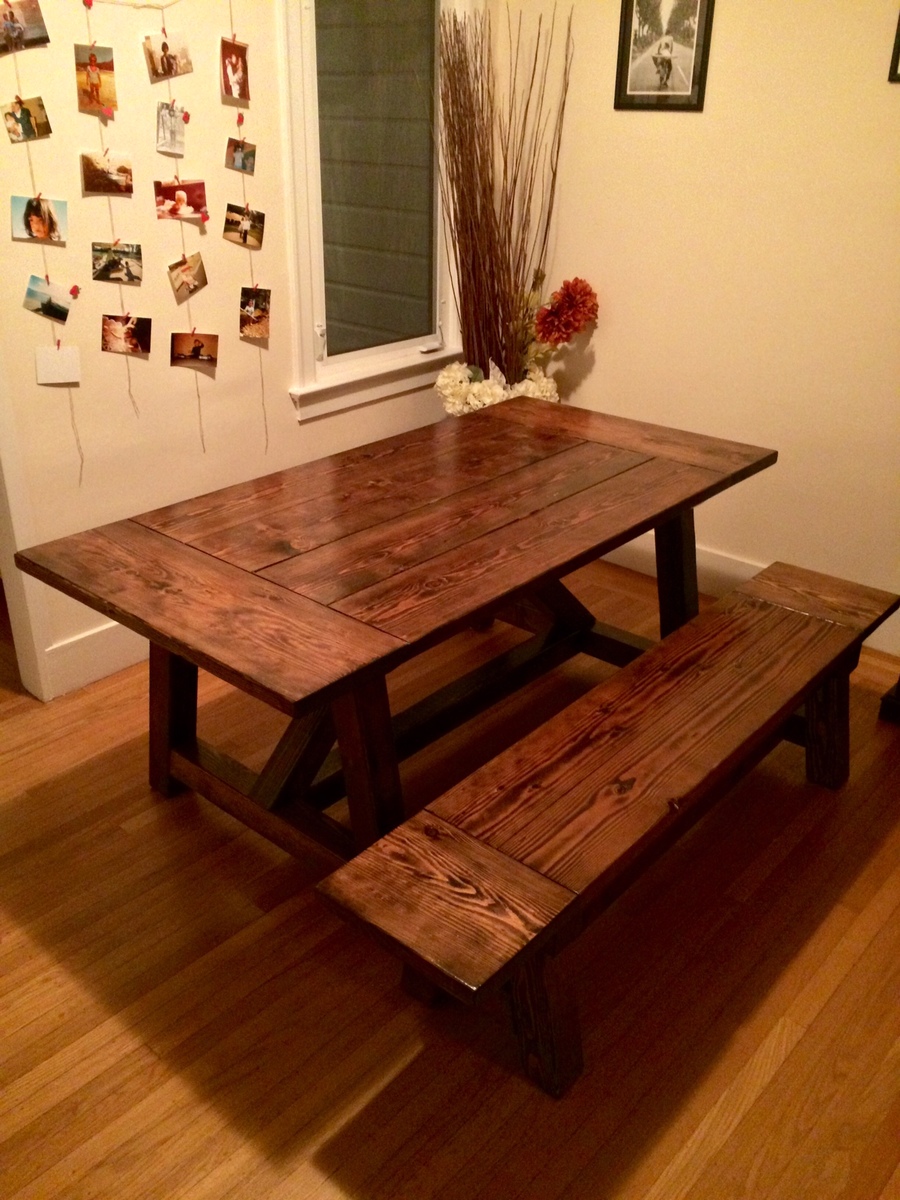
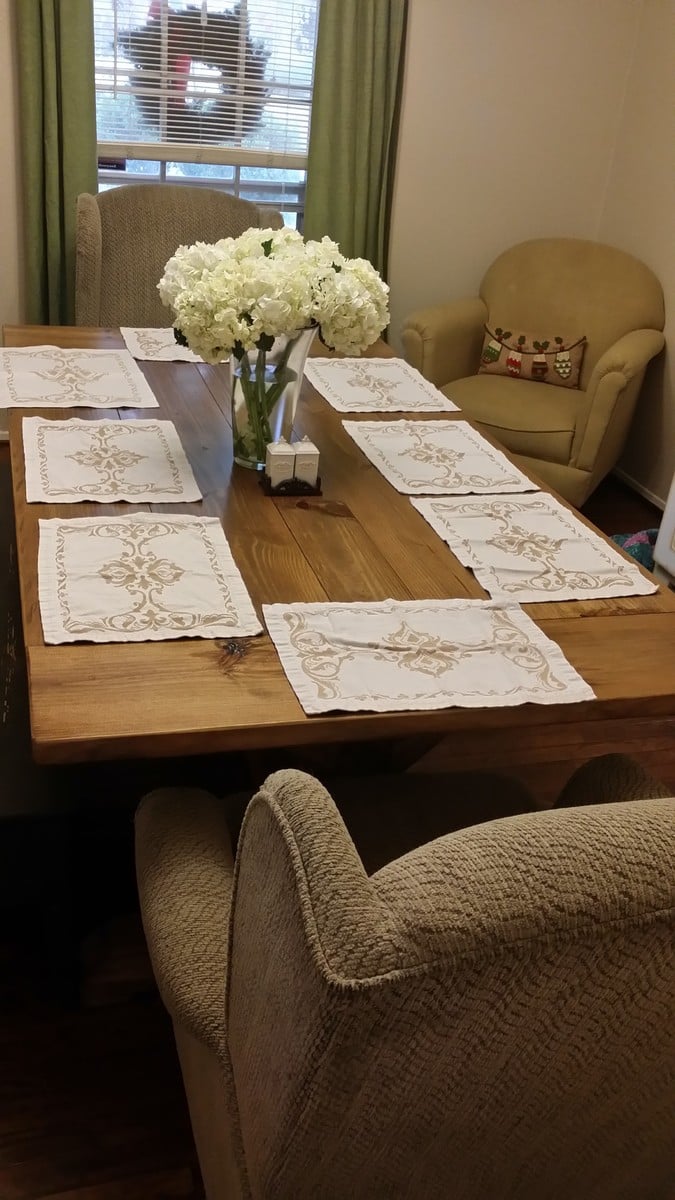
I was so excited as it was going up, I was planning on putting some candles, maybe some decorative stuff to go with the pics. I didn't realize how many pictures I have! Wow! Guess I'll have to dust off my Kreg-Jig and make more. :-)

Built from Plan(s)
Estimated Cost
$24
Estimated Time Investment
An Hour or Two (0-2 Hours)
Finish Used
Primer, White Glossy Paint, and Minwax Spray Polycrylic. Polycrylic is easy to use and very quick to dry.(about 30min) I simply used it to create a shiny look.
Recommended Skill Level
Starter Project

Garage Shelves

Submitted by coolove on Sun, 11/02/2014 - 23:16

This project was a bit of a challenge. My garage has uneven flooring and a concrete lip around the edge of wall so I had to make the back legs 10 inches shorter than the front. Overall, it turned out well and everything is completely leveled much to my amazement. I'm thinking of making more shelves on the other end of the garage to free up more space.

Estimated Cost
$90 including extra nails.
Estimated Time Investment
Afternoon Project (3-6 Hours)
Finish Used
None.
Recommended Skill Level
Beginner

Farmhouse Table

Submitted by JillianD on Wed, 01/09/2013 - 16:05

Calling myself an amateur builder is a colossal overstatement. I’ve never actually built anything, by hand, using wood. I’m quite crafty and very good at hacking things inspired by others {thank you all other bloggers and Pinterest for your continued inspiration}, but to actually build something from the ground up just hasn’t been added to the curriculum vitae…until now.

I actually hail from a family of handy builders. My grandpa used to build everything, from decorative shelves and stools to more utilitarian items, like bookcases and kitchen cabinets. My father, too, is quite handy; he’s the build-a-back-deck weekend warrior type.

This was my first Weekend Warrior project. My deadline: Thanksgiving dinner! I had no other table option. I either built this table or my friends and family were eating on the floor.

Estimated Cost
$150
Estimated Time Investment
Weekend Project (10-20 Hours)
Finish Used
weathered oak stain
Recommended Skill Level
Intermediate

Comments

Juanita_r

Thu, 01/10/2013 - 12:56

Just wanted to say (apart from "i love the table") that your story has inspired me to finally jump in. i too am like you, never physically built anything with wood, but have done some revamps and have done a ton of other crafts (i too would like to thank pinterest). reading what you said has just given me that finally push!!! Thanku

JillianD

Thu, 01/10/2013 - 17:14

Hi Juanita! Yay, I'm so glad. It really was a fun and empowering project. I can't tell you how many people looked at me like I was crazy, but a little patience and elbow grease can go a long, long way! Good luck and I can't wait to see the finished project.

rhettar

Sat, 01/19/2013 - 04:53

You did a great job! I love the finish you chose. Isn't it amazing when you think you can't do something and then when you finish it, you're like wow I did that! Ana's site has inspired me so much and I love to see that she has inspired so many others and to see the beautiful things they are making with their own two hands. Again awesome job and beautiful table!

Plate Rack

Submitted by Anonymous (not verified) on Fri, 11/13/2020 - 12:47

I was browsing Etsy for a plate rack and my Hubby said that he could just make me one. So I knew just where to go for the plans! He added crown moulding to the top, bead board to the back and painted it to match our cabinets. I love it! I use it to display his late mother’s Currier and Ives Plate collection. Thanks Ana!

Estimated Cost
$65
Estimated Time Investment
Weekend Project (10-20 Hours)
Finish Used
She twin Williams custom blended paint color
Recommended Skill Level
Beginner

Fancy X farmhouse with extension

This was the first piece of furniture  my husband  built. He also built a matching sideboard/buffet table.

Built from Plan(s)
Estimated Time Investment
Weekend Project (10-20 Hours)
Finish Used
I used a wood conditioner then used a dark walnut.
Recommended Skill Level
Intermediate

Modified Rustic Platform Bed

Submitted by kjshute on Fri, 11/20/2020 - 06:50

I built a modified version of the rustic modern 2x6 platform bed. I used 2x10s (instead of 2x6s) for the sides and feet to raise it up a little. I also added another 2x6 to the headboard to make it taller. If I had it to do over again, I'd probably use 1x for the headboard as it's incredibly heavy. The entire bed is immoveable without being deconstructed so it's going to be a challenge when I move. Overall, I'm really pleased with the result.

Estimated Cost
$300
Estimated Time Investment
Week Long Project (20 Hours or More)
Finish Used
Old Masters Fast Dry oil-based stain in American Walnut with a satin poly
Recommended Skill Level
Intermediate

Three Bin Laundry Sorter

Submitted by Meyer1120 on Mon, 01/21/2013 - 21:10

Modified the original plan to meet our needs of a laundry sorter. Had problems with the hinges so ditched them. I used dowels with a combination of a chamfer cut on the bottom of the door. Dado-ed the trim on the doors and slide the bead board panels in. The face frame is all held together with pocket hole screws, which I highly recommend because it eliminates nail holes and keeps the face frame square. This was my first wood working project, took me a little long to get it done. Thanks for looking.

Modified January 28

So here are some more pictures of my project. I don't really have any good pictures of the dowels. But what I can tell you is, I drilled holes through the sides of the face frame and the trim pieces and then measured where the holes would be in relation to the "drawer". I then drilled holes in the drawers at those measurements, I was careful to not go to deep. I think I went in half an inch. After that I started at one end and placed the dowels in, then put each drawer in. It wasn't easy but with a little patience it worked. The key is to wax the dowels so they will last longer as well. I also am including pictures of the top and bottom trim. On the top the original plans called for an overhang piece and I didn't like the way that looked. I ran the top board an inch long on each side and then wrapped it in quarter round trim. I did this because I plan on adding the Mimi Hutch Top. The bottom was built per the plan, but I ran into a problem with my bottom trim not being level and you could tell. So I raised the whole unit on 1 1/2 legs then placed it on a level surface and again wrapped it in a decorative trim. The key on both trims was a nice miter joint. Last picture I added was of my stoppers. I took scrap from the 1x2 trim and cut them to an inch and a half or two (can't really remember), then using the Kreg Jig drill bit drilled recessed holes. I then opened the doors until the side 45s were level then mounted the blocks on each side. I feel that it is better than a chain or string catch. Again thanks for looking and I hope I answered all of your questions.

Estimated Time Investment
Week Long Project (20 Hours or More)
Finish Used
Primmer and paint
Recommended Skill Level
Intermediate

Comments

moosmani

Tue, 01/22/2013 - 11:29

Dowels! What a great idea! Would you mind sharing how you did it? Could you possibly add some pictures showing the dowels? You did a great job. It looks beautiful.

mullid1

Thu, 01/24/2013 - 09:27

I love what you have made! Could you post pictures of the top and the bottom trim? I'm very impressed that this is your first project!

mullid1

Tue, 01/29/2013 - 09:12

Thank you for the photos and new instructions! You're awesome!!!

VLT

Fri, 03/15/2013 - 12:05

This is lovely; I like the trim job you did. Is there a way to post the plans so we can all get to them. I cannot believe this was your first project!

Liz82

Sat, 11/16/2013 - 18:23

I am a little confused. I love the three bin laundry sorter, but everyone is mentioning plans. I am not finding plans for it on the site. Also, what goes in to hold the clothes? There may be obvious answers, but I am not seeing them. I'd appreciate any help you could give.

towering inferno

Tue, 12/02/2014 - 02:58

I've been thinking of working up one very similar to this, also with 3 bins, but I didn't want to use chain either.  Those stoppers will be ideal - do you put them on both sides or is one enough?  Thanks for the share!

Karahd

Sat, 01/24/2015 - 11:29

Hi-

Im not sure if you still have the plans to this awesome project, but if you do, would you be able to share them with me? Ive been looking to make something like this forever, but just couldnt find any help!

thanks,
karah
[email protected]

petemoore

Mon, 02/08/2016 - 07:46

hi im the same as everyone can you send me the build plans with dimensions etc

many thanks

virginie D.

Wed, 03/02/2016 - 14:49

Hi

It's exactely what i need. so amazing. Someone can send me the plan please? I'm so newbie to do tat all by myself without plans. Thanks you.

virginie D.

Wed, 03/02/2016 - 14:49

Hi

It's exactely what i need. so amazing. Someone can send me the plan please? I'm so newbie to do tat all by myself without plans. Thanks you.

ajbreaux

Mon, 05/02/2016 - 14:22

My wife loves this . if its possible could i get the plans and hopefully have time to build it to give to her for mothers day ? thanks 

Kimhubbell

Fri, 12/02/2016 - 11:01

I would also love to have the plans for the 3 bin sorter. I am barely an intermediate so more specifics would be a huge help! Thanks to anyone who could help.

lworthy

Mon, 07/10/2017 - 04:19

 I absolutely LOVE your laundry sorter!!!! You did a fabulous job and the TRIM, WOW amazing!!!! I've searched Ana's website and cant find the plans' could you please email me the plans to [email protected].  I started building my own furinture back in October 2016 and the reward is amazing... Keep up the good work.

Happy Building,

Lisa

woodmama

Tue, 01/16/2018 - 22:18

I'm too new at woodworking to be able to tackle this right now, but would love to download the plans for future. My most successful project so far is a pretty standard bookshelf. I got a free plan, with lots of guidelines and explanations, at https://tinyurl.com/ydeup8lo -- it came with a 440 page guide, "The Art of Woodworking" that has tips and techniques, and am plowing through that right now.

momto3

Wed, 02/28/2018 - 12:53

This is amazing.  I am very new to woodworking.  Could you send me the plans please?  I would be most appreciatative 

Ljohns

Wed, 03/11/2020 - 23:27

I would love to have the plans for the three bin laundry sorter to build for my laundry room. Are the plans available? Awesome work!

4x4 Truss Table and Bench

Submitted by smiljke on Wed, 11/19/2014 - 07:18

Great Project! a ton of fun!

Estimated Cost
$200
Estimated Time Investment
Week Long Project (20 Hours or More)
Finish Used
Dark Walnut
Recommended Skill Level
Starter Project

Comments

First Project: Workbench with casters

Submitted by jamesjill on Tue, 01/19/2021 - 20:23

Success with first project, I am very happy with it.... although I need to find a better way to square things.

Estimated Cost
$175
Estimated Time Investment
Day Project (6-9 Hours)
Recommended Skill Level
Beginner

Comments

Changing Table / Dresser

Submitted by Ben W on Mon, 12/22/2014 - 09:09

I wanted to build a dresser & changing table combination for our son, who is due in January. I liked the Fillman (Pottery Barn's Fillmore) dresser plan, but also wanted to incorporate some ideas from Pottery Barn's Larkin Hi-Lo Changing table ($1100 - yikes!), namely the side cabinet, so I made a few modifications.

The side cabinet has a pullout shelf to accomodate a diaper pail or hamper. The changing table topper is removable so that this can continue to be used as a dresser when we no longer need the changing table.

I have built a few pieces from or inspired by Ana's site before, but none have been as rewarding as this!

Estimated Cost
$150
Estimated Time Investment
Weekend Project (10-20 Hours)
Finish Used
Sherwin Williams ProClassic Enamel (semi-gloss) in Snowbound.
Recommended Skill Level
Intermediate

Comments

Linda7

Mon, 12/22/2014 - 10:26

Beautiful build. Your modifications make this table very versatile, and I noticed that your spacing all around the drawers and door is so even. This should become a family heirloom.

Frosty Garden Greenhouse

It was truly great for us to find a greenhouse design from a fellow Interior Alaskan blogger. We kept coming back to this design, enough times to where we decided to actually build it.

We would be the first to admit that tackling a gambrel style building was slightly intimidating and not what we had in mind for our very first self-built building! But, we faithfully followed the cut lists and directions. It turned out beautifully! If you're in the same boat, have confidence that you can build this too!

We love the options available for making it your own. We decided to stain the greenhouse lumber of ours to match our cedar sided home. We also built a semi frost-resistant foundation, since we're a little north of Ana at 65 degrees and sometimes experience frost heaving. We also added full climate controls to ours, adding both fans and louvers that keep our greenhouse at perfect temperatures.

The performance has been great! Building this greenhouse has been the single greatest thing we have done in our years of subarctic gardening. We might even consider building a second greenhouse down the road. No matter how big your greenhouse is, it's never quite enough!

Thanks for the great plans, Ana! We appreciate your work!

Built from Plan(s)
Estimated Cost
$2400
Estimated Time Investment
Week Long Project (20 Hours or More)
Finish Used
Transparent cedar stain
Recommended Skill Level
Intermediate

Comments

Lighted hall tree

Submitted by jeff.meyer on Tue, 02/02/2021 - 16:35

A lighted hall tree.

Estimated Cost
200
Estimated Time Investment
Afternoon Project (3-6 Hours)
Recommended Skill Level
Beginner

Comments

Benchwright Coffee Table

This is a replica of the Pottery Barn benchwright coffee table.  I altered Ana's plans slightly by changing the design of the legs to be 2.25" by 2". I added full extension drawer slides.  The finish is a combination of transtint shellac base coat, gel stain, transtint dye, and poly. 


Built from Plan(s)
Estimated Cost
$250.00
Estimated Time Investment
Week Long Project (20 Hours or More)
Recommended Skill Level
Intermediate

Comments

coloradonp

Sun, 01/31/2016 - 18:56

Hi! The finish is absolutely gorgeous. I was wondering if you could give a little bit more detail on which products you used for the finish. I've only used oil based stains and I'm not quite sure what the transtint dye is. Thanks!

Adirondack Love!

This was my second build ever, and I'm so extremely satisfied with the entire process! Ana's plan was super easy to follow, and I couldn't be more proud of how they turned out!

Recommended Skill Level
Beginner

Comments

Loft Bed

Submitted by dadto3kids on Mon, 02/16/2015 - 20:25

I used 2 x 6's because of the distance (just over 12') I still need to build the ladder but my daughter insisted on sleeping up there anyway as she has been waiting for a few days as I worked om=n building this. No paint or stain yet, not sure how she wants it finished> I will update the photos as I finish the project.

Estimated Cost
$100-$120
Estimated Time Investment
Day Project (6-9 Hours)
Recommended Skill Level
Beginner

Comments

outdoor patio table

Submitted by dboy on Thu, 06/17/2021 - 17:31

Just finished my very first wood project ever . I think it turns out pretty good . But if I did it again I’d make some adjustments . This version is made from pine as cedar has been unavailable for weeks . Thank you for the plans

Built from Plan(s)
Estimated Cost
500
Estimated Time Investment
Week Long Project (20 Hours or More)
Finish Used
Helmsman spar urethane satin finish
Recommended Skill Level
Beginner

Comments

Fancy X Farmhouse table with 4x4 base

I used 4x4 post for the base.

Built from Plan(s)
Estimated Cost
$300
Estimated Time Investment
Week Long Project (20 Hours or More)
Finish Used
I sanded the heck out of the table. I then applied a coat of wood conditioner with a rag. I let it dry for about 30 minutes. I then brushed on a coat of minwax Special walnut. I only let it sit for about 10 to 15 seconds, then wiped off the access with a towel and blended it in with the same towel. I let that dry 25 hours and then brushed on a coat of minwax weathered oak. I let this sit for about 14 to 15 minutes then wiped off and blended in with a towel. I let it dry for 24 hours then applied 3 coats of the urethane. Letting it dry at least 12 hours between coats.
Recommended Skill Level
Beginner

Comments

aggielandma12

Sat, 03/07/2015 - 10:01

We are waiting on our slip cover chairs (on back order). I have built a matching bench that needs to be finished.

dadmandude

Tue, 05/10/2016 - 10:20

I'd also like to build this table using 4x4's.  Can you tell me how you came up with the lengths for the diagonal pieces?  Also, how did you attach the perpendicular end pieces to the top?  I've been looking to do that as well and on all the plans I've seen they used pocket holes and I know that will not last before the end pieces begin to sag.

Thank you!

Rustic X Console Table

My take on the Rustic X Console.

Built from Plan(s)
Estimated Cost
150
Estimated Time Investment
Weekend Project (10-20 Hours)
Finish Used
Minwax Wood Finish Oil-Based Slate Semi-Transparent
Recommended Skill Level
Intermediate

Comments

Sliding barn door entertainment center

Submitted by Anonymous (not verified) on Sun, 06/25/2017 - 09:17

Fun project, ordered the hardware for the rail system itself and the wheels were too big so I made my own rail system.

Estimated Cost
$300
Estimated Time Investment
Week Long Project (20 Hours or More)
Finish Used
Dark walnut stain
Recommended Skill Level
Intermediate

Comments