Washer & dryer pedestal
Made this for my mom for a Christmas gift. I had to modify the height for space requirements. Used white semi gloss that I already had in the basement, and distressed the edges with golden oak stain. Quick and simple job.
I used some of the remaining reclaimed boards from my buffet table build to make an end table for the living room. The build itself was very similar to the buffet table, just to a smaller scale. I didnt have long enough boards remaining, and had to get a little creative with the top, but I'm pretty happy with how it turned out.
I made this table 55" x 44" and it came out great. Fun project and not very difficult. On to the next project!
Thank you Ana for the great plans! We adapted the project for wood we had on hand. It is only 40 inches wide instead of 42”. Our widest pallet board was only 40”.
Thank you for continuing to inspire us! We made two couches a couple of months ago. Great plans!
I followed the plans for the Kids Tent / Reading Nook but used a 9'x12' painter's drop cloth canvas instead of curtain panels. (I made 3 tents so I cut this into thirds...)
To make it even more fun, I painted stripes on the canvas by mixing regular latex paint (Valspar in Orange Crush, Twist of Lime, Dive In, and Cheery on Top) 2-to-1 with a textile medium.
This was my first build. After searching high and low for a desk for my husband for Christmas, I decided to build him one......2 weeks before Christmas. With some help from my father, we somehow pulled it off! (without killing each other) I followed the plans exactly, except for one thing. I used a pine panel for the top so my hubby would have a flat writing surface. I purchased a 6ft panel (i think) and cut it down to 5ft. When he went away on a business trip, I transported it from my parents house (where the build was taking place) and assembled it. Then I put a big red bow on it and surprised him! Don't know how I'm going to top that gift!
This was a great simple design, My wife now has a place for her wine glass and doesn't need to worry about the dogs knocking it over. It also doubles as a workspace or table by simply turning it sideways to stradle her while sitting on the couch.
We needed a bigger coffee table for our family, especially for game day nachos! Stained the top but painted the base to resemble rusted iron.
There was a large hole in our living room. A large hole between our couch and the kitchen! I have always been obsessed with console tables, but never in a million years thought of ever building one!
And so, with the help of my sweet Blake, we were able to create this amazing, rustic, industrial, shabby chic, yadda yadda yadda PERFECT FARMHOUSE X-CONSOLE TABLE!!!
And no, we can't take all of the credit. We found this unbelievable plan on Ana White's Website here! She gives a perfect step-by-step-tutorial. All together, this project cost us roughly $75 and two days worth of time, but I can assure you, buying a solid wood console table at a store would cost nearly $500! Not to mention, WE made it, together...and so forever this will be ours. :)
Thanks Ana, we love ours! :)
A little bit of a different project for me. My husband concocted a plan to build his own bass speaker cabinets to take to band gigs. Wanted them to be lightweight and easy to carry. He bought the speakers, grates, ports, cable jacks, corner bumpers, and handles. I built the boxes :)
Built out of two sheets of half-inch birch plywood and coated with Duratex speaker cabinet texture coating for wear resistance.
Reclaimed this wood from a >100 year old home that was being renovated. The plans were from www.akadesigns.ca
What a fun build, the whole family helped!
I built this full size headboard for my son. It was a fun project and he loved the fact that I did this for him.
Built this pallet christmas tree for decorating the house during the season, nothing too difficult, just cut/paint/assemble.
Awesome table plans! This thing is super sturdy.
Very clear plans and directions. My husband and I built these and the table in a weekend. We added a back and made a table from the scraps. First time of not chasing furniture that has blown away! We love them!
We have made several of these tables, but we have made an adjustment to where there are no gaps in the seats or the table tops!
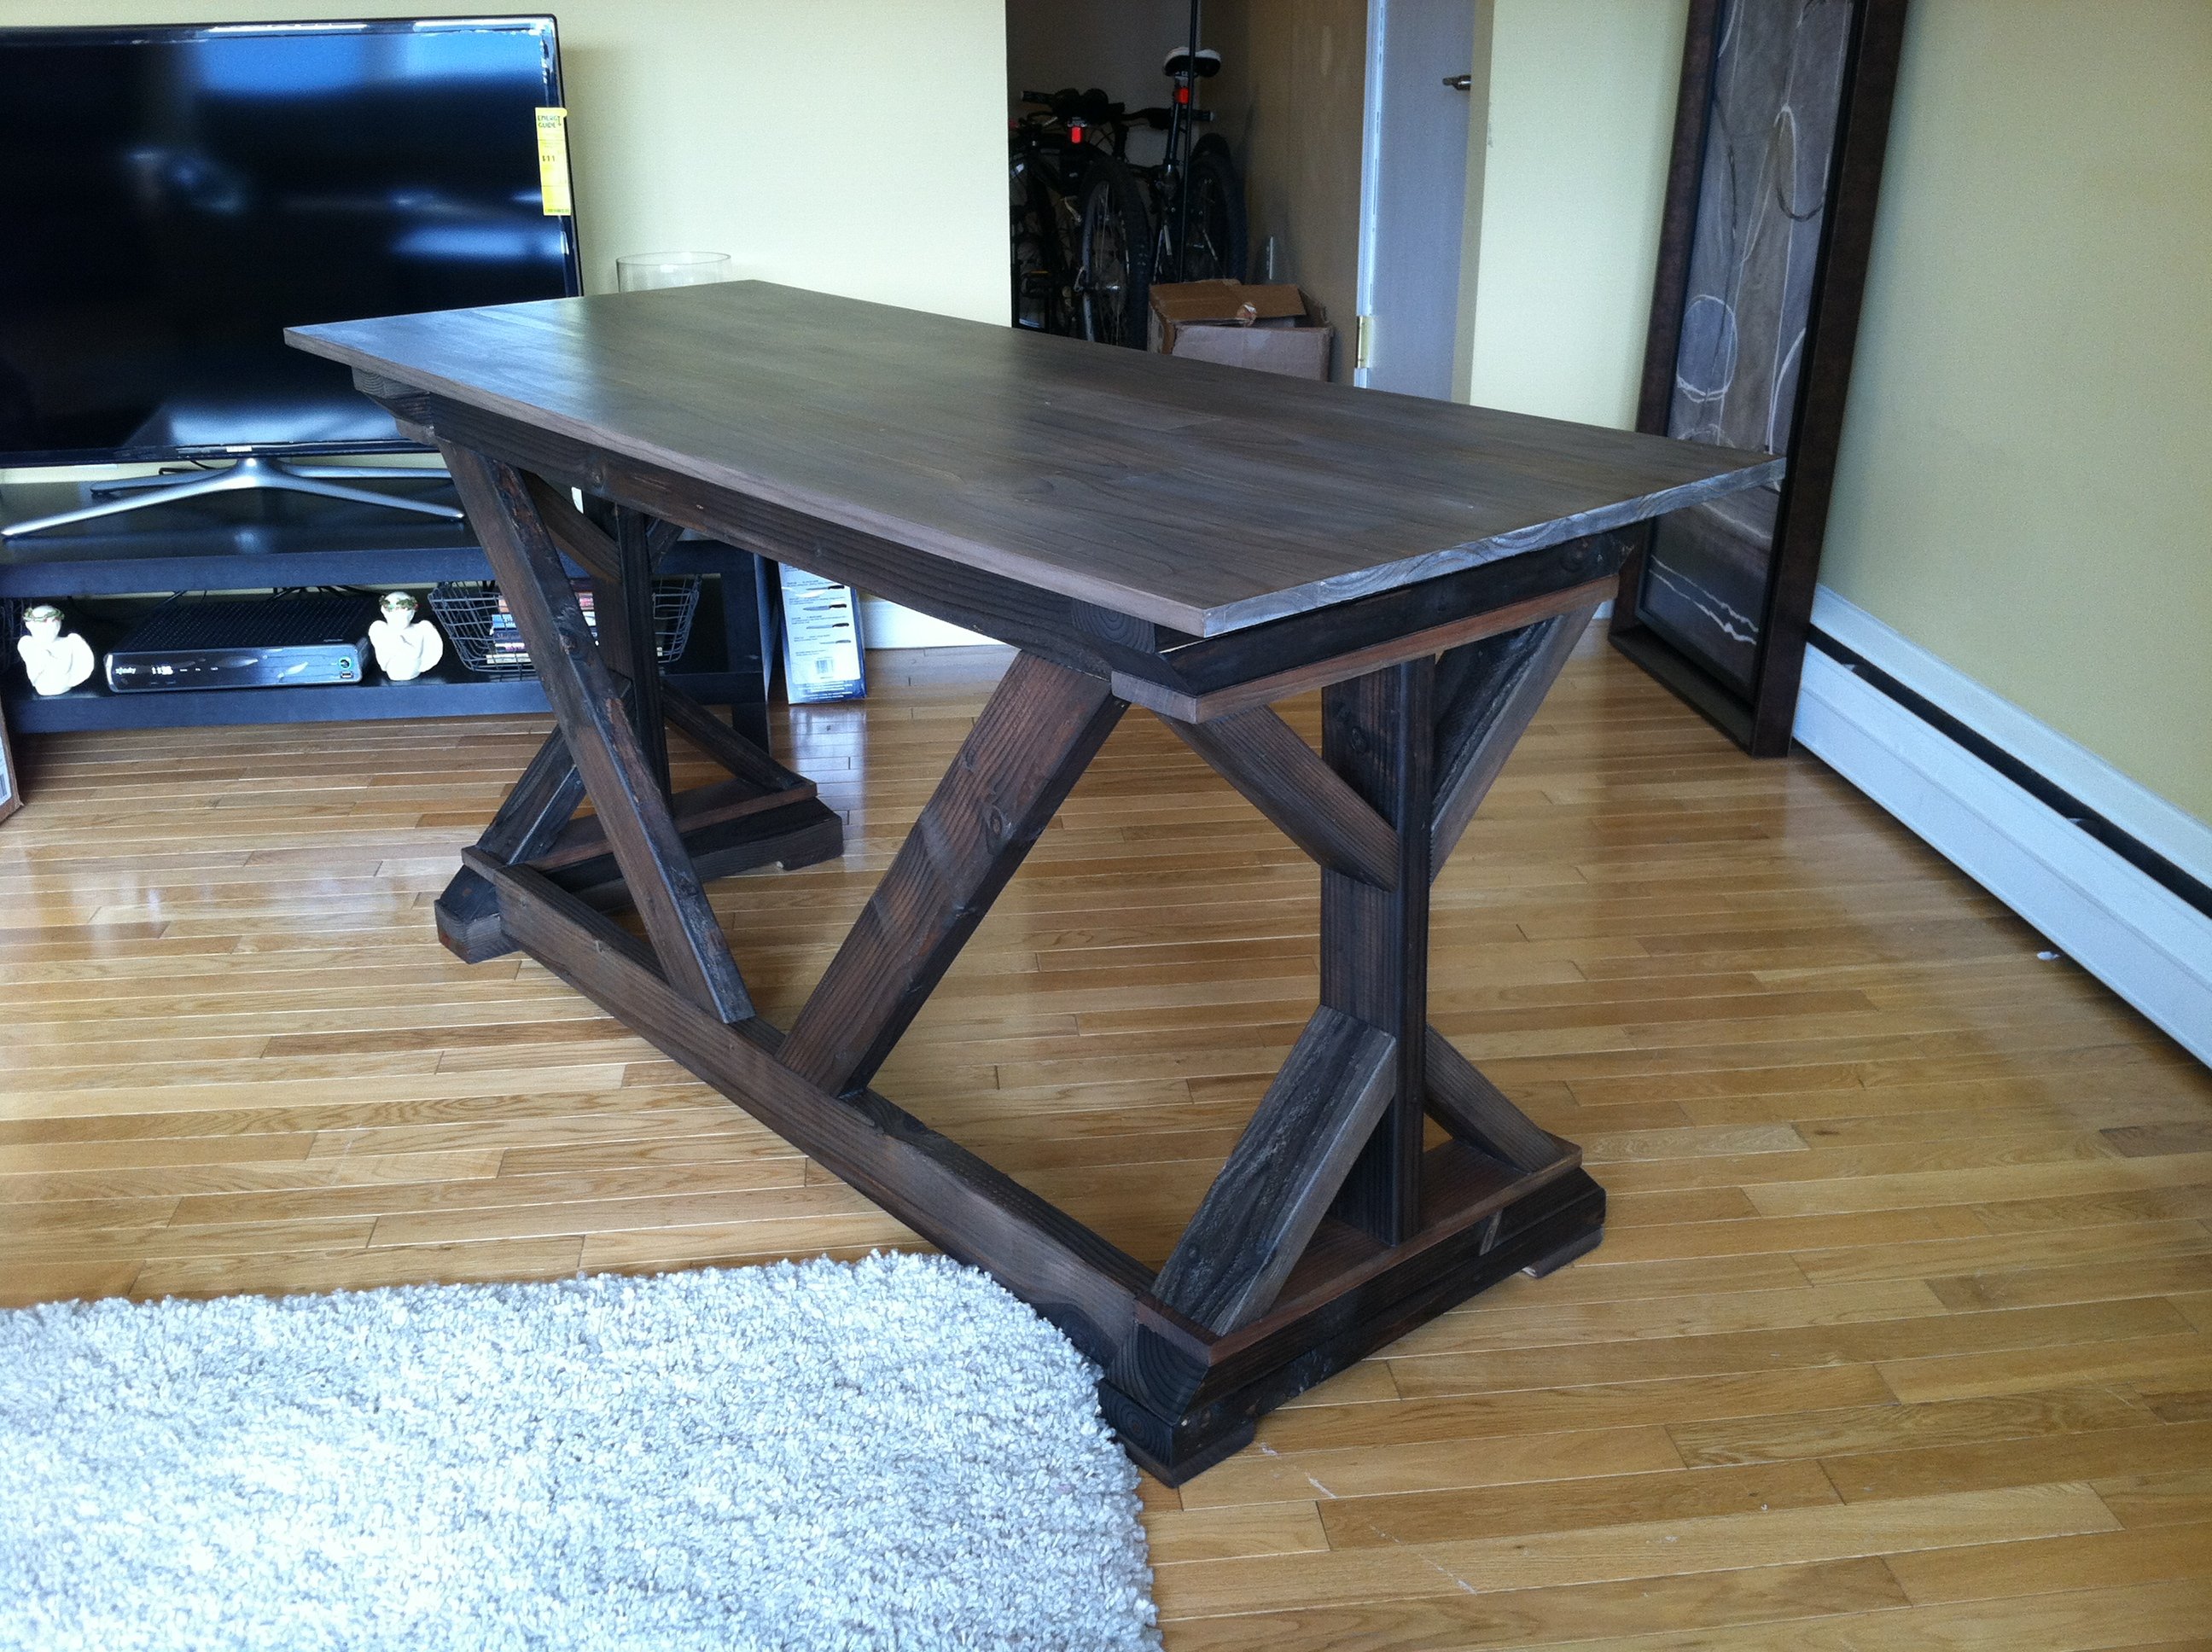
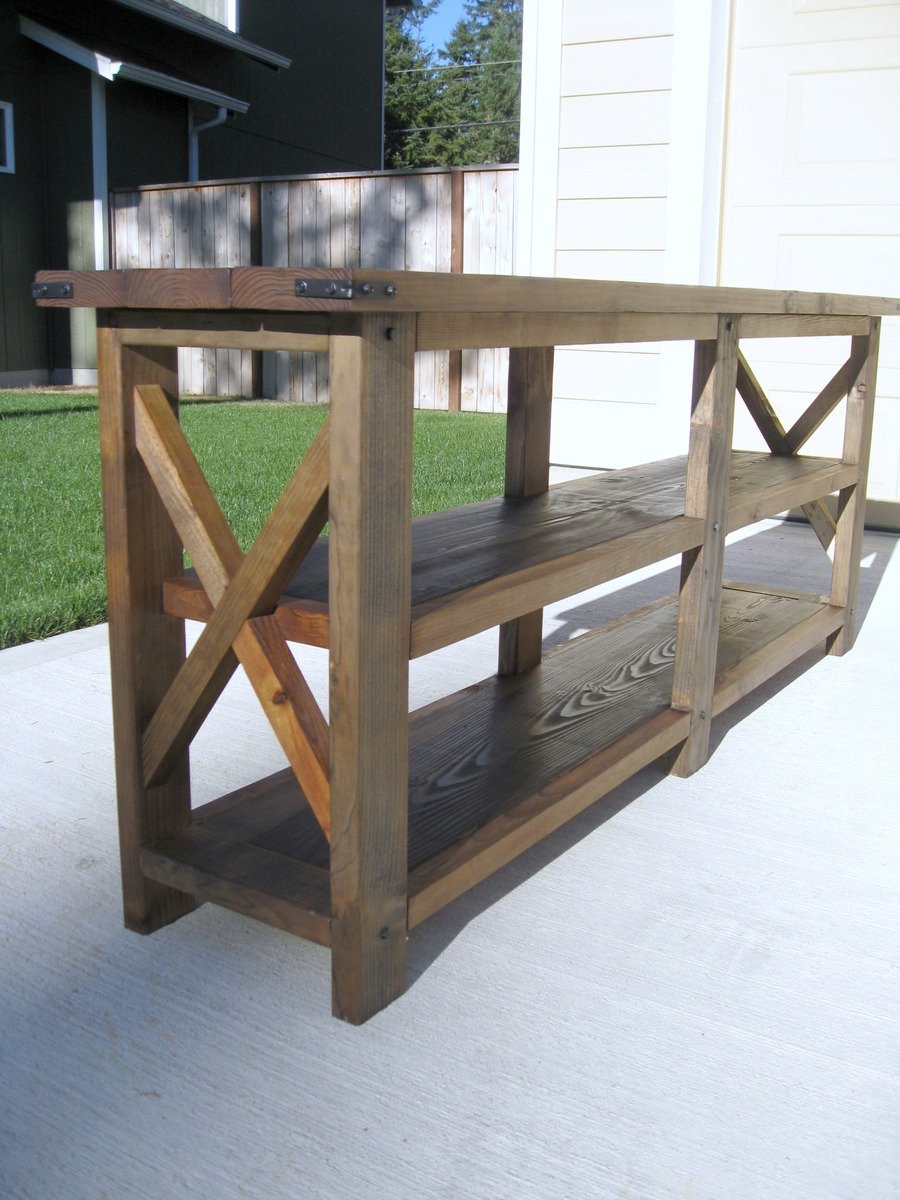
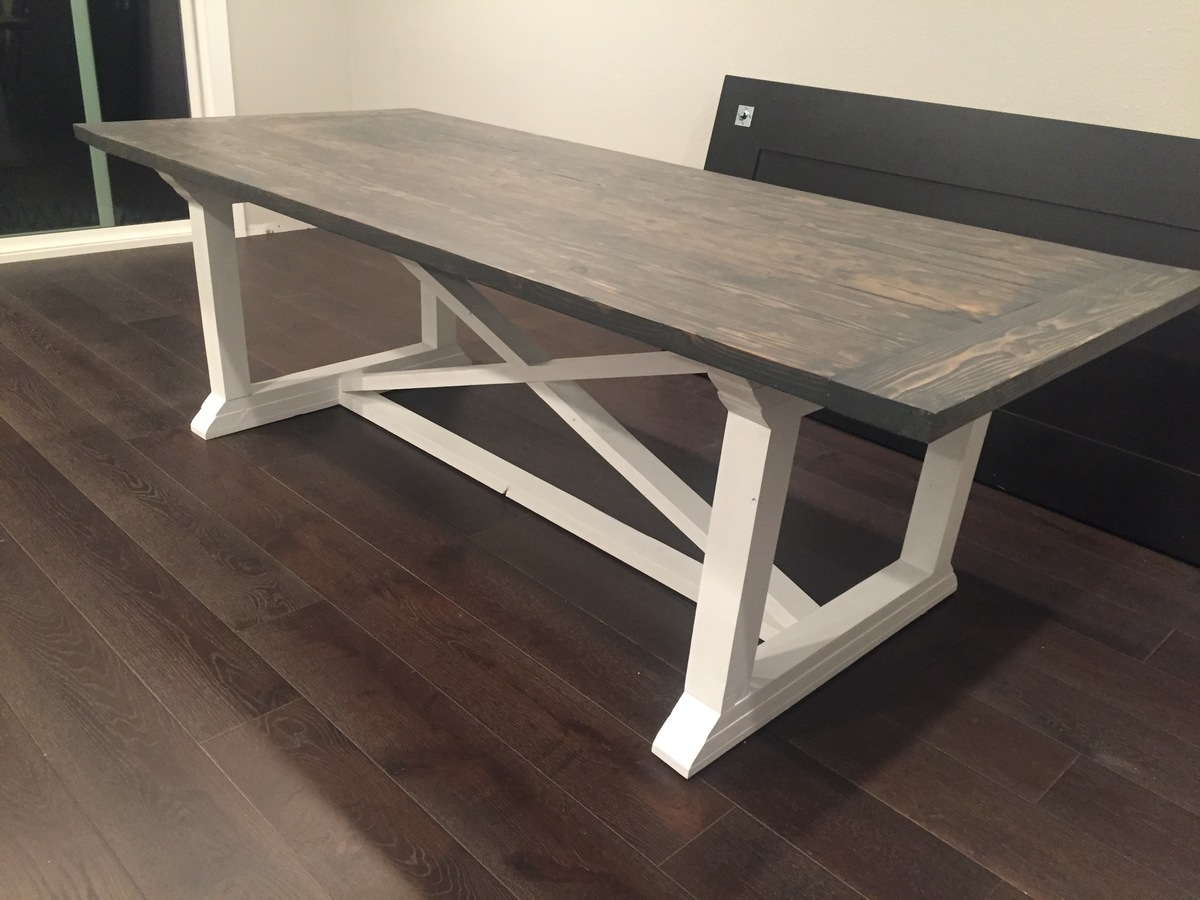
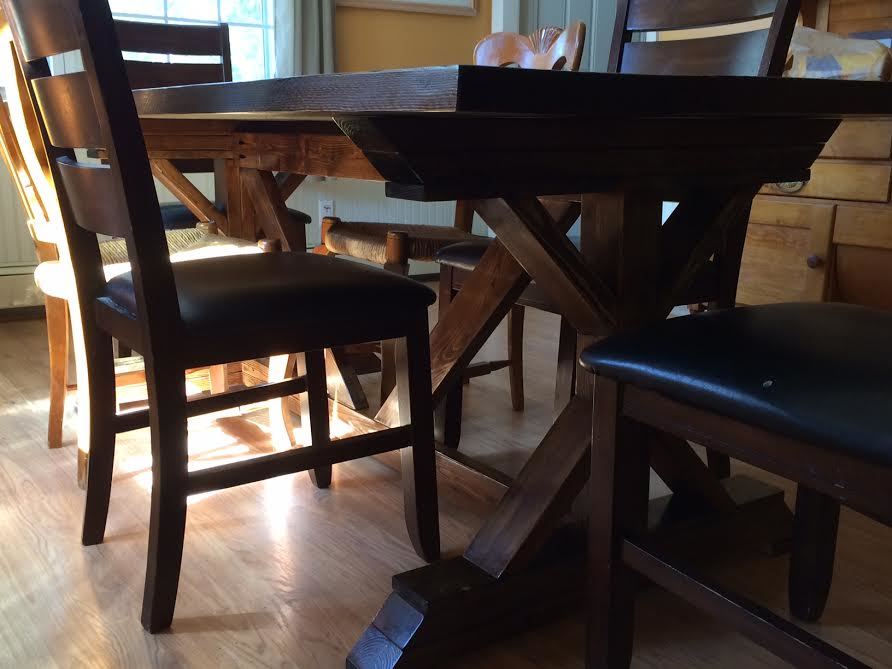
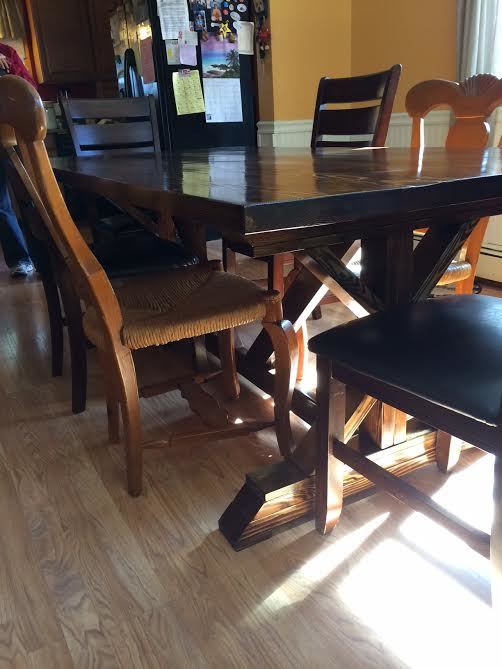
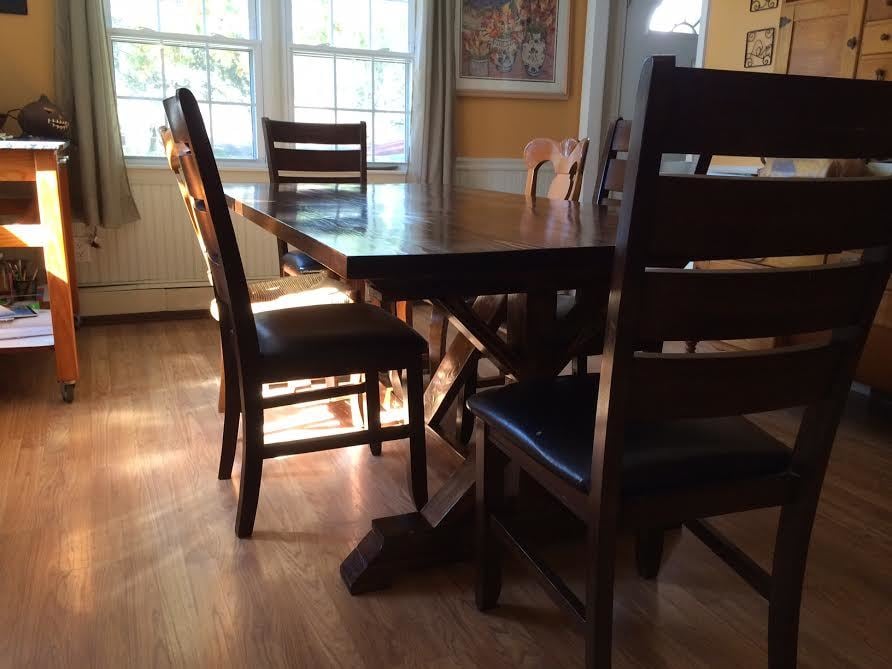
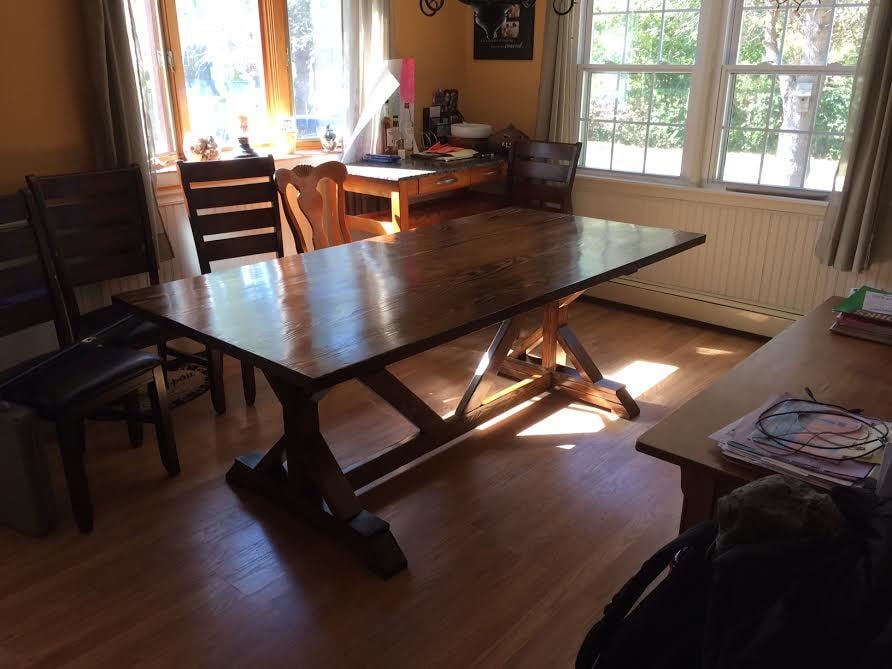
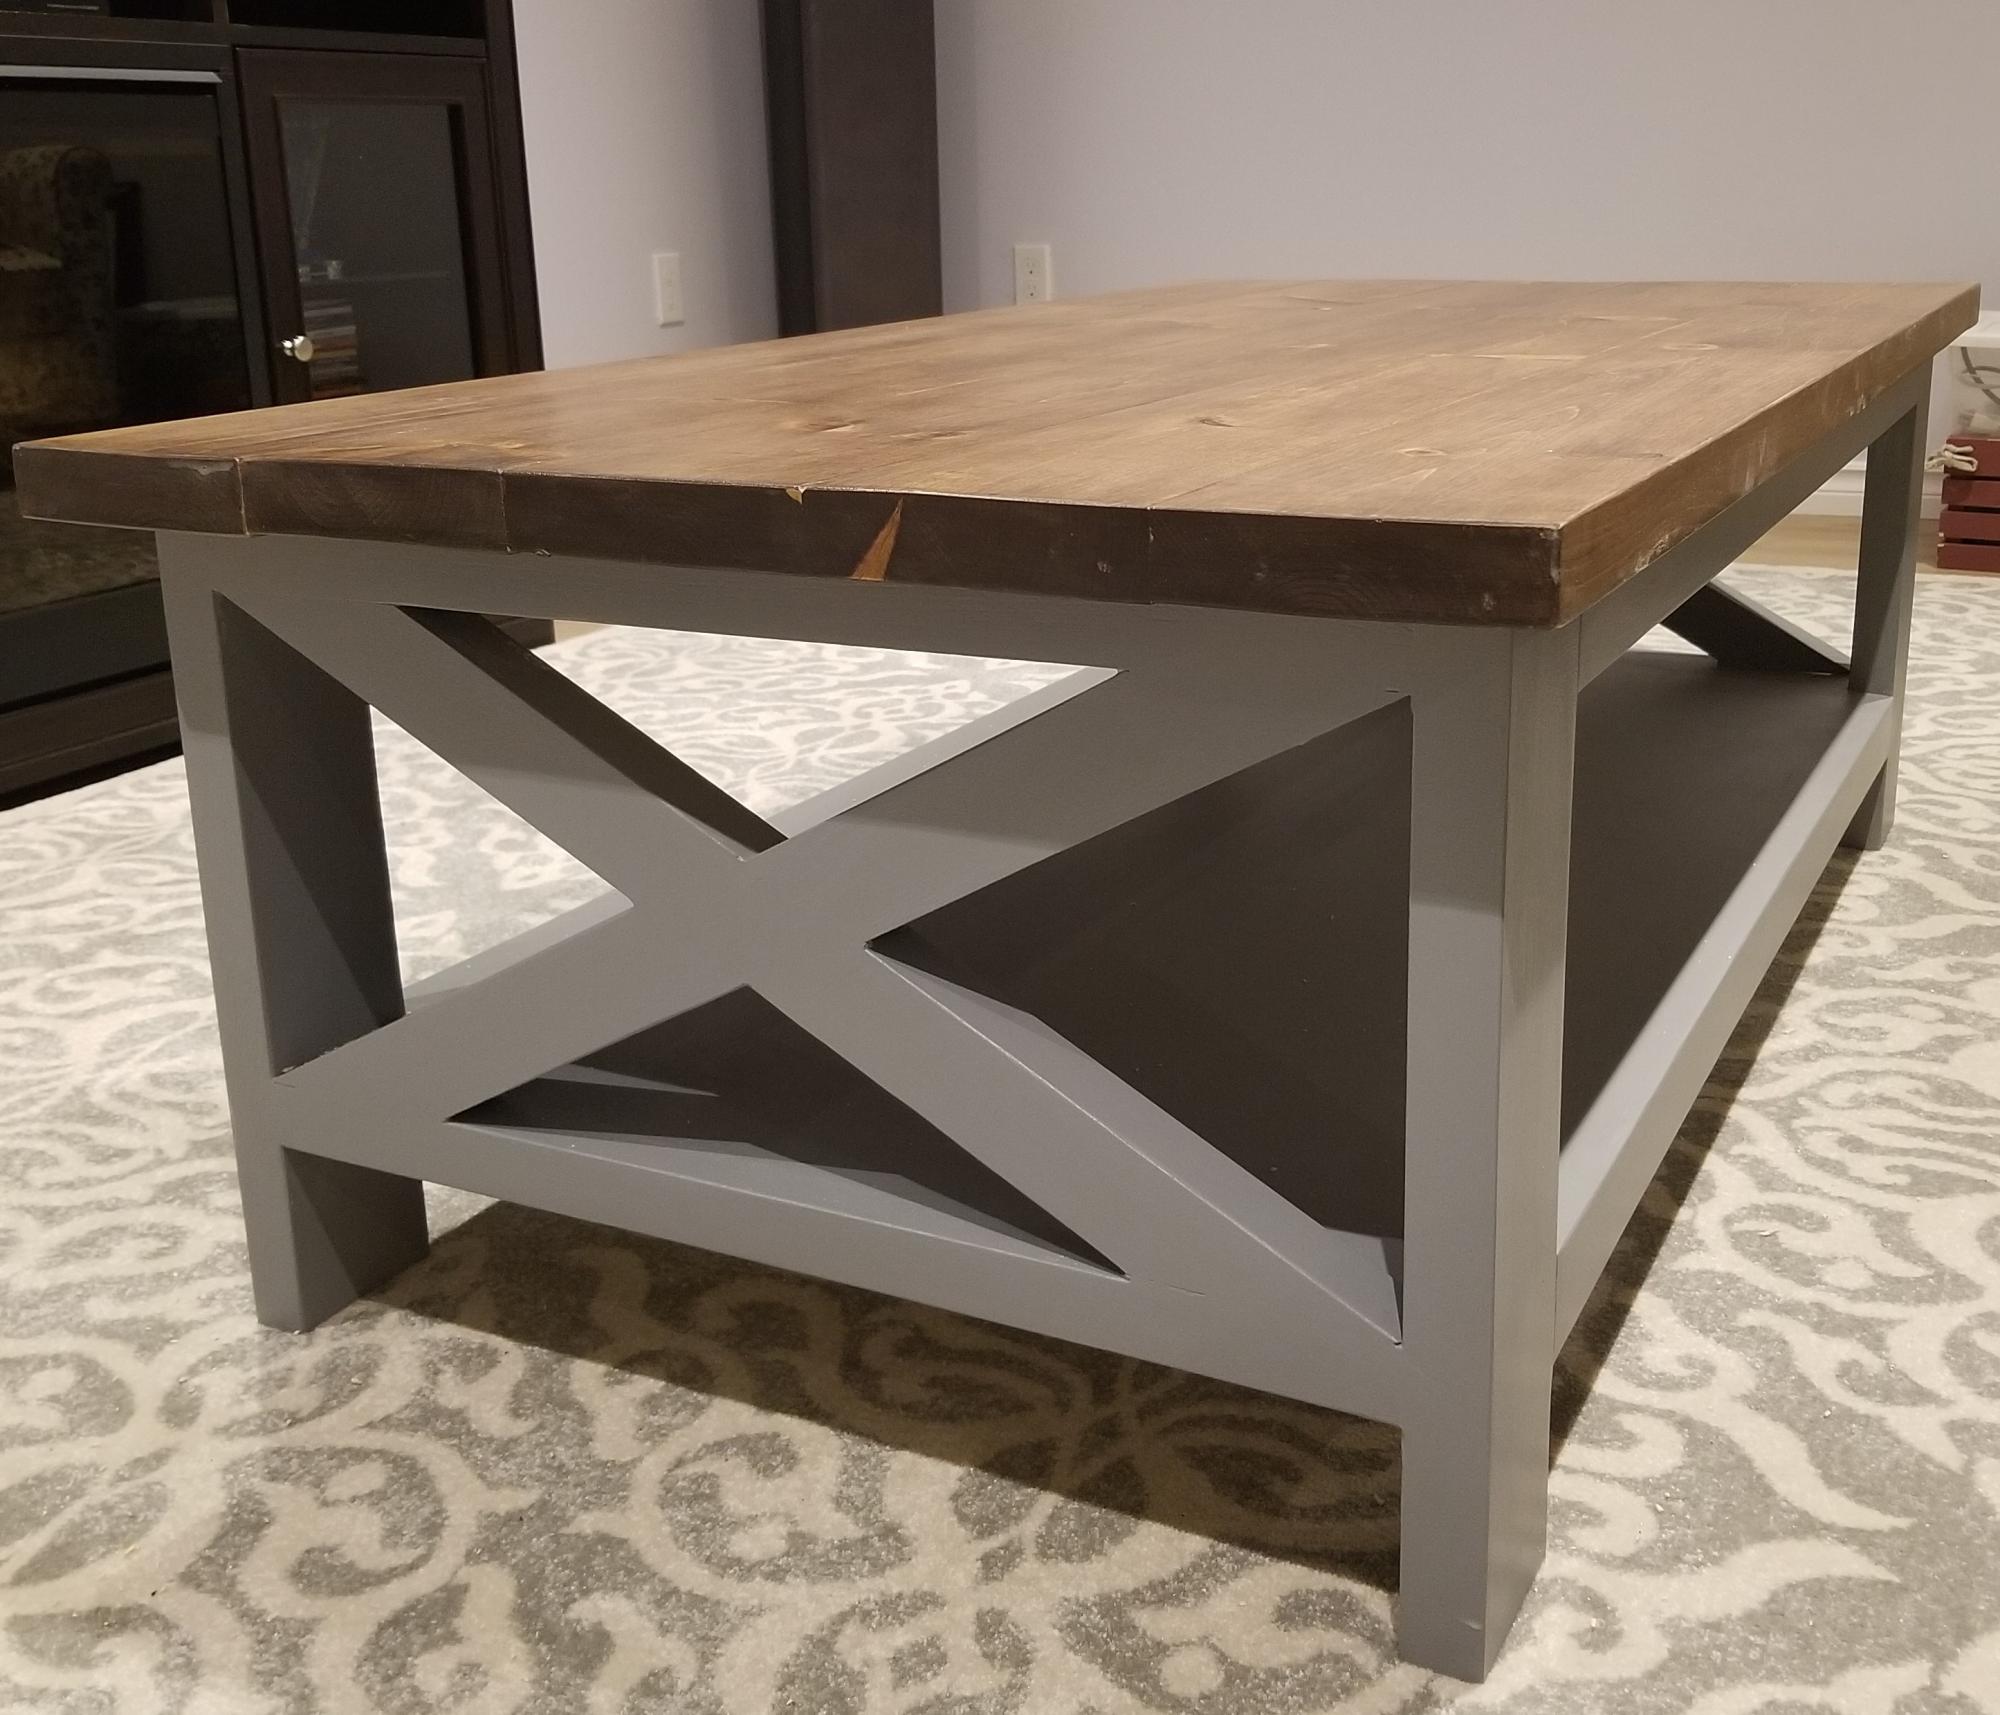
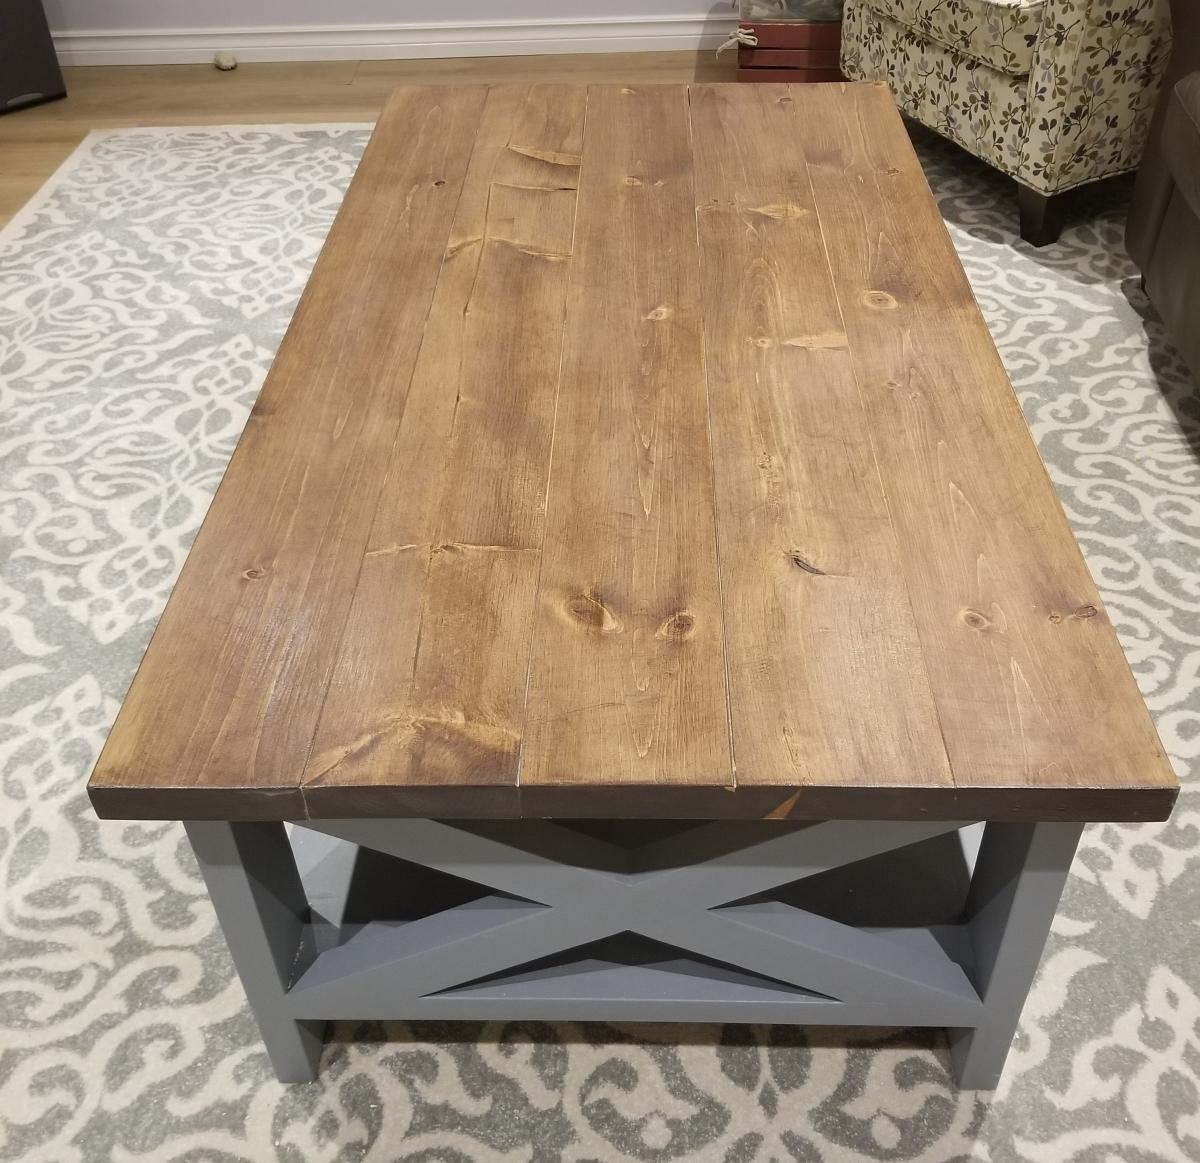
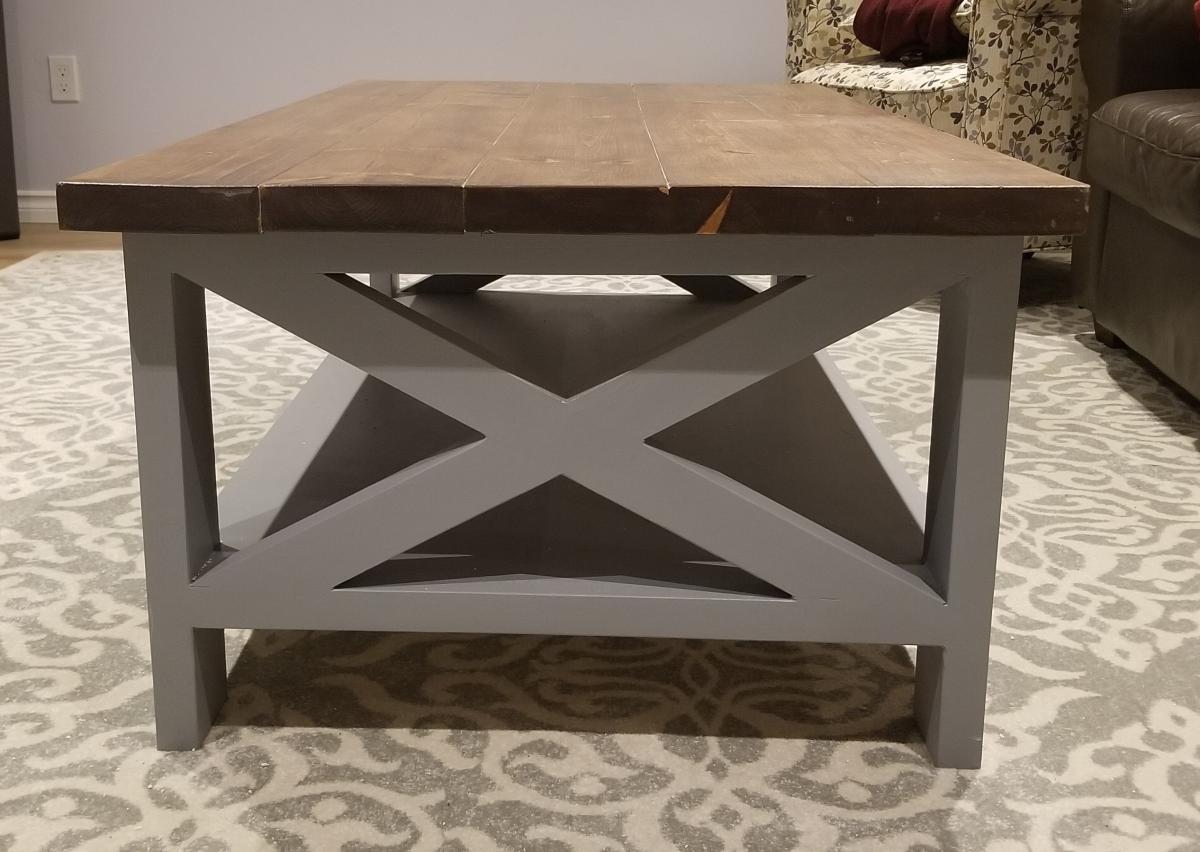
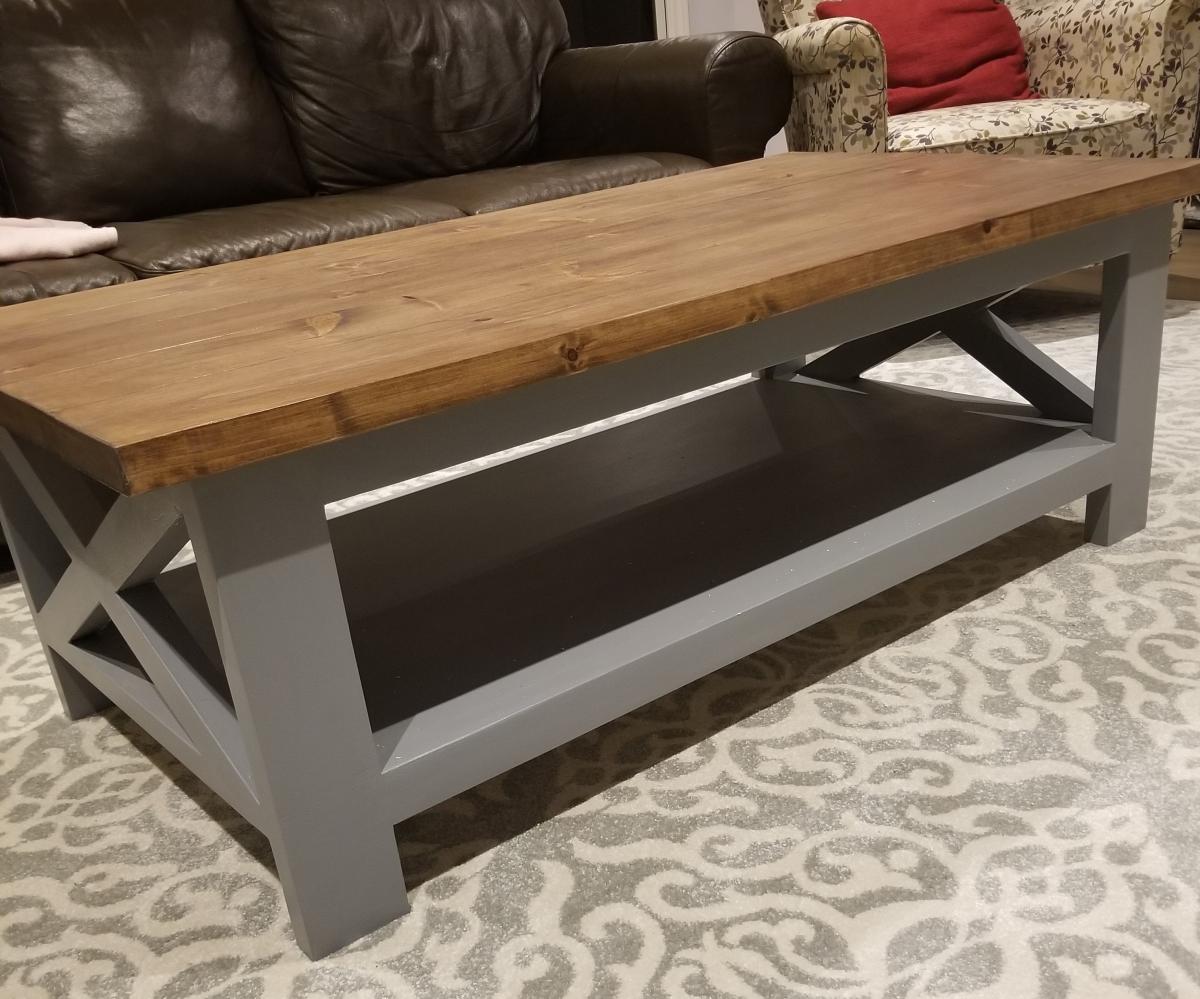
This 7 ft fancy x farmhouse table was built as an anniversary gift for some close friends, so they'd have a dining table large enough for their blended family.
Modifications to original plans
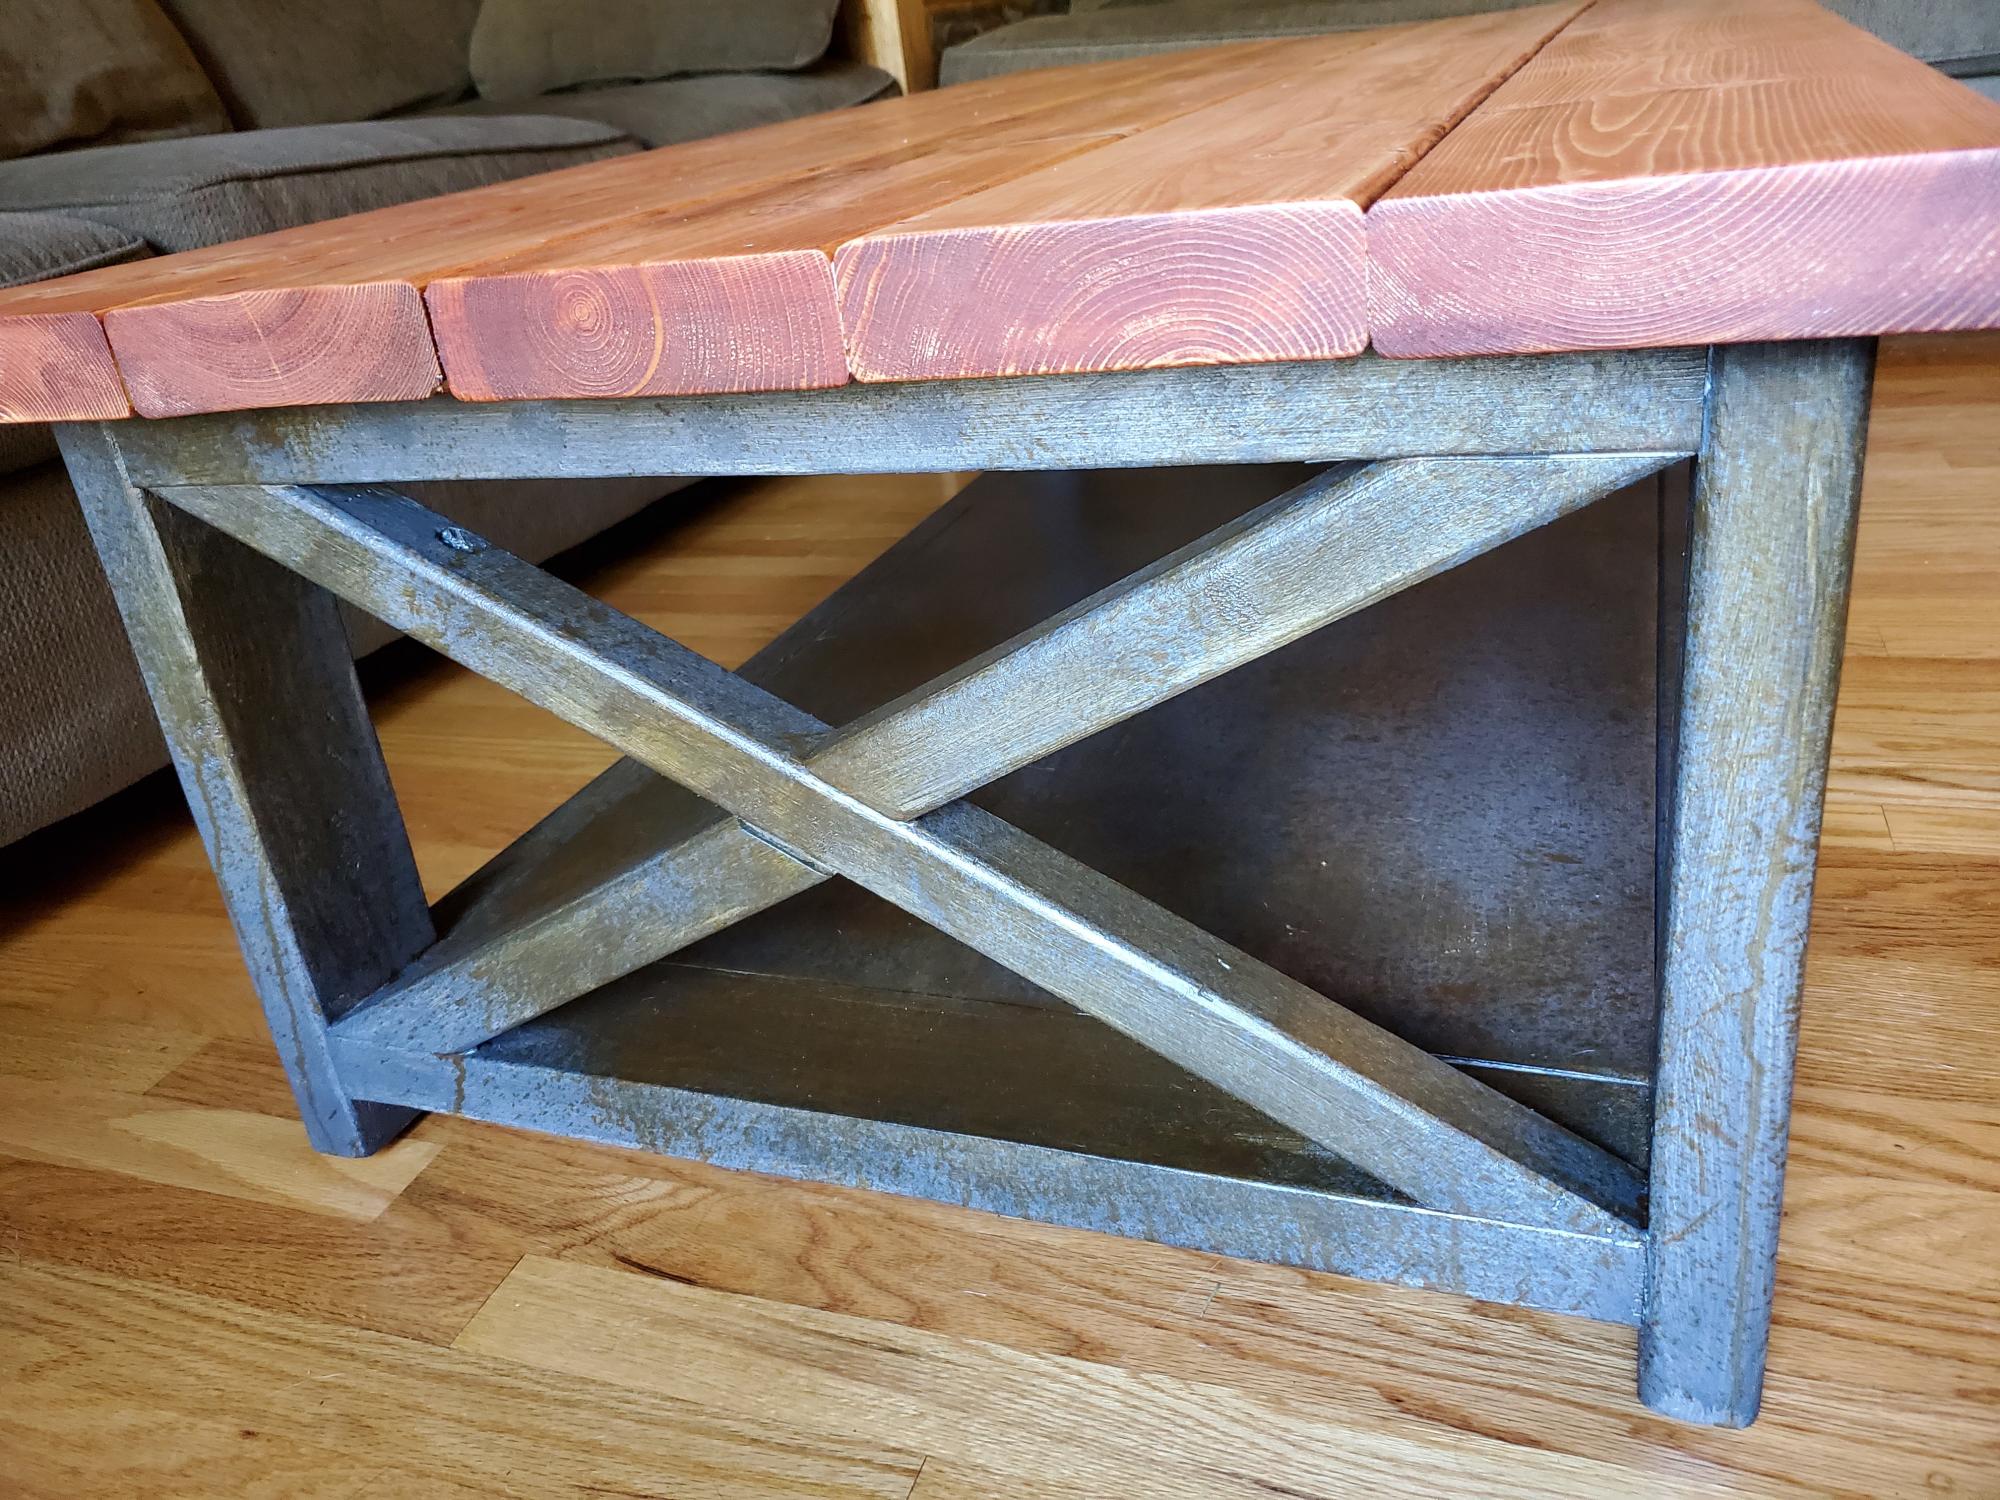
I shortened the top to 84" long, widened the top to 40"wide, and the (outside edge to outside edge) of the legs / supports to 60". This left plenty of room for a chair on each end. The diagonal support brace cuts were not modified.
Instead of pine, I used kiln-dried Douglas fir 2x4s for legs / supports. My local lumberyard sells in 8 ft pieces for well under $10 each. I rifled through the racks to find a bunch of straight, virtually knot free (ie clear) ones.
For the top, I sourced Clear Mixed Grain (CMG) Douglas Fir. Four 10 ft 2x12s were over $250 delivered. Not cheap! But they were straight and flat. No messing around with racked or warped big box stuff this time!
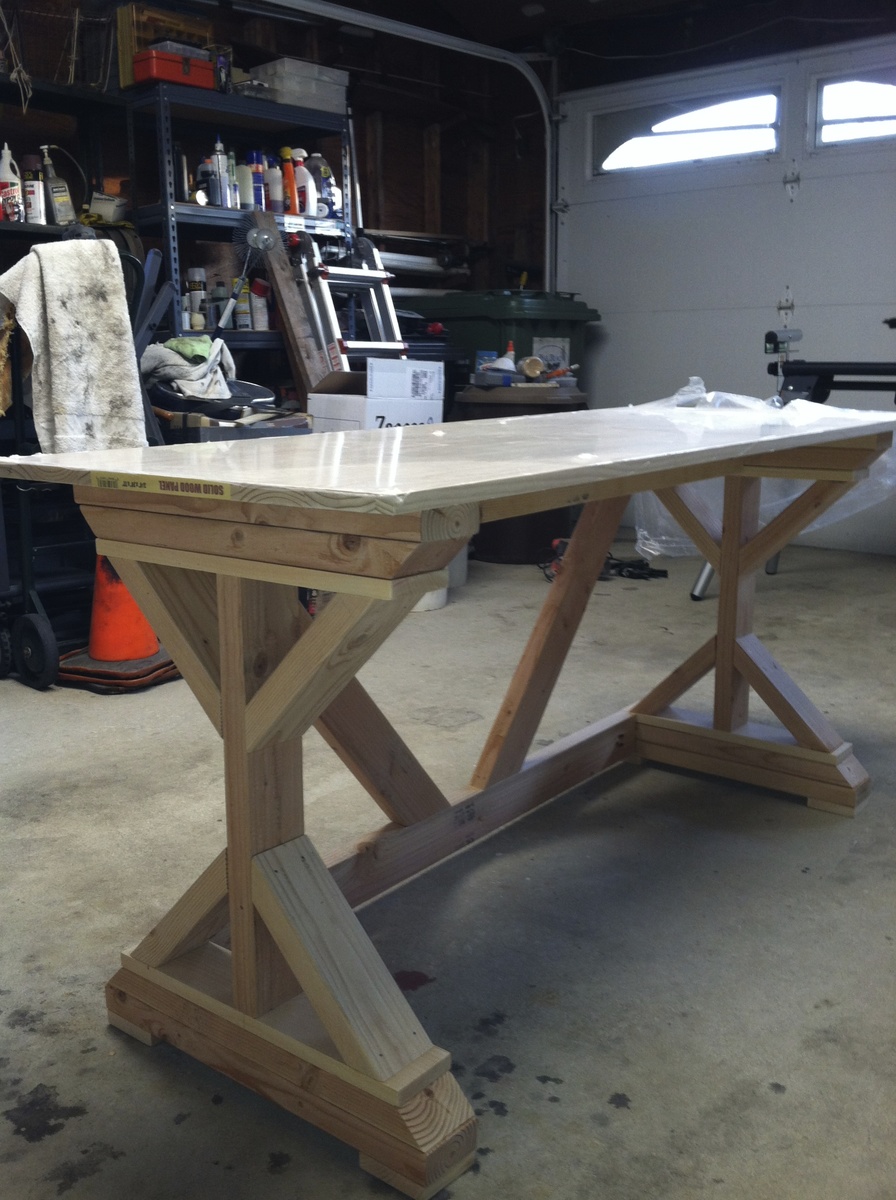
I ripped them down to 10" wide with a good table saw, rip fence, and fresh 60 tooth blade. I did not cut to 7 ft length immediately. Rather, I cut down to a few inches over that (more on that in a moment). I used the Kreg jig to drill pocket hole screws underneath, but I used Titebond III wood glue and pipe clamps / 5' galvanized pipes (6 of them, in alternating directions) to clamp the top together. I added 2" coarse thread blue-coated pocket hole screws the next day - really more for peace of mind.
To cut down to 84" length, I marked the lines with a straightedge & carpenter's pencil. I then used my circular saw (also with a fresh 60 tooth high quality blade) and a straight edge clamped to the wood as a guide. This gives you nice smooth end cuts without the worry of lining everything up perfectly during glue-up. Warning - you can splinter the ends if you aren't careful.
Sanding
I used a cheap Harbor Freight belt sander with 80 and 120 grit (be careful if you've never used a belt sander before, especially with coarse grits!) to even out the top and bottom. It didn't take much, luckily. (I bought a planer *after* completing this piece).
All cuts were sanded 60, 80, 100, 150, 220, 320 and 400 grit. Lesson learned: in the future its okay to stop at 220 or so. Sanding was done with a basic Dewalt quarter-sheet sander, with a 3m rubber hand sanding block, and plain ole-sandpaper in my hand. I shaped all edges by hand with 100/150/220.
Nails & Glue
I used a pneumatic nailer and Titebond III wood glue on the legs and supports, then a nail punch and wood filler to hide any nail holes. The aprons / stretchers were fastened with pocket hole screws and glue. I used plugs on the lower one, as it is more visible. The plugs are pretty much seamless - use glue and wood filler and sand out, nobody will ever be able to tell :)
A Quick Word on Wood Glue Selection
Many of the project plans on this site (and brag posts) mention the use of expanding glues like Gorilla Wood Glue, Elmer's Carpenter's Glue etc. These long open-time adhesives are easy to work with but they expand and are not as strong as Titebond.
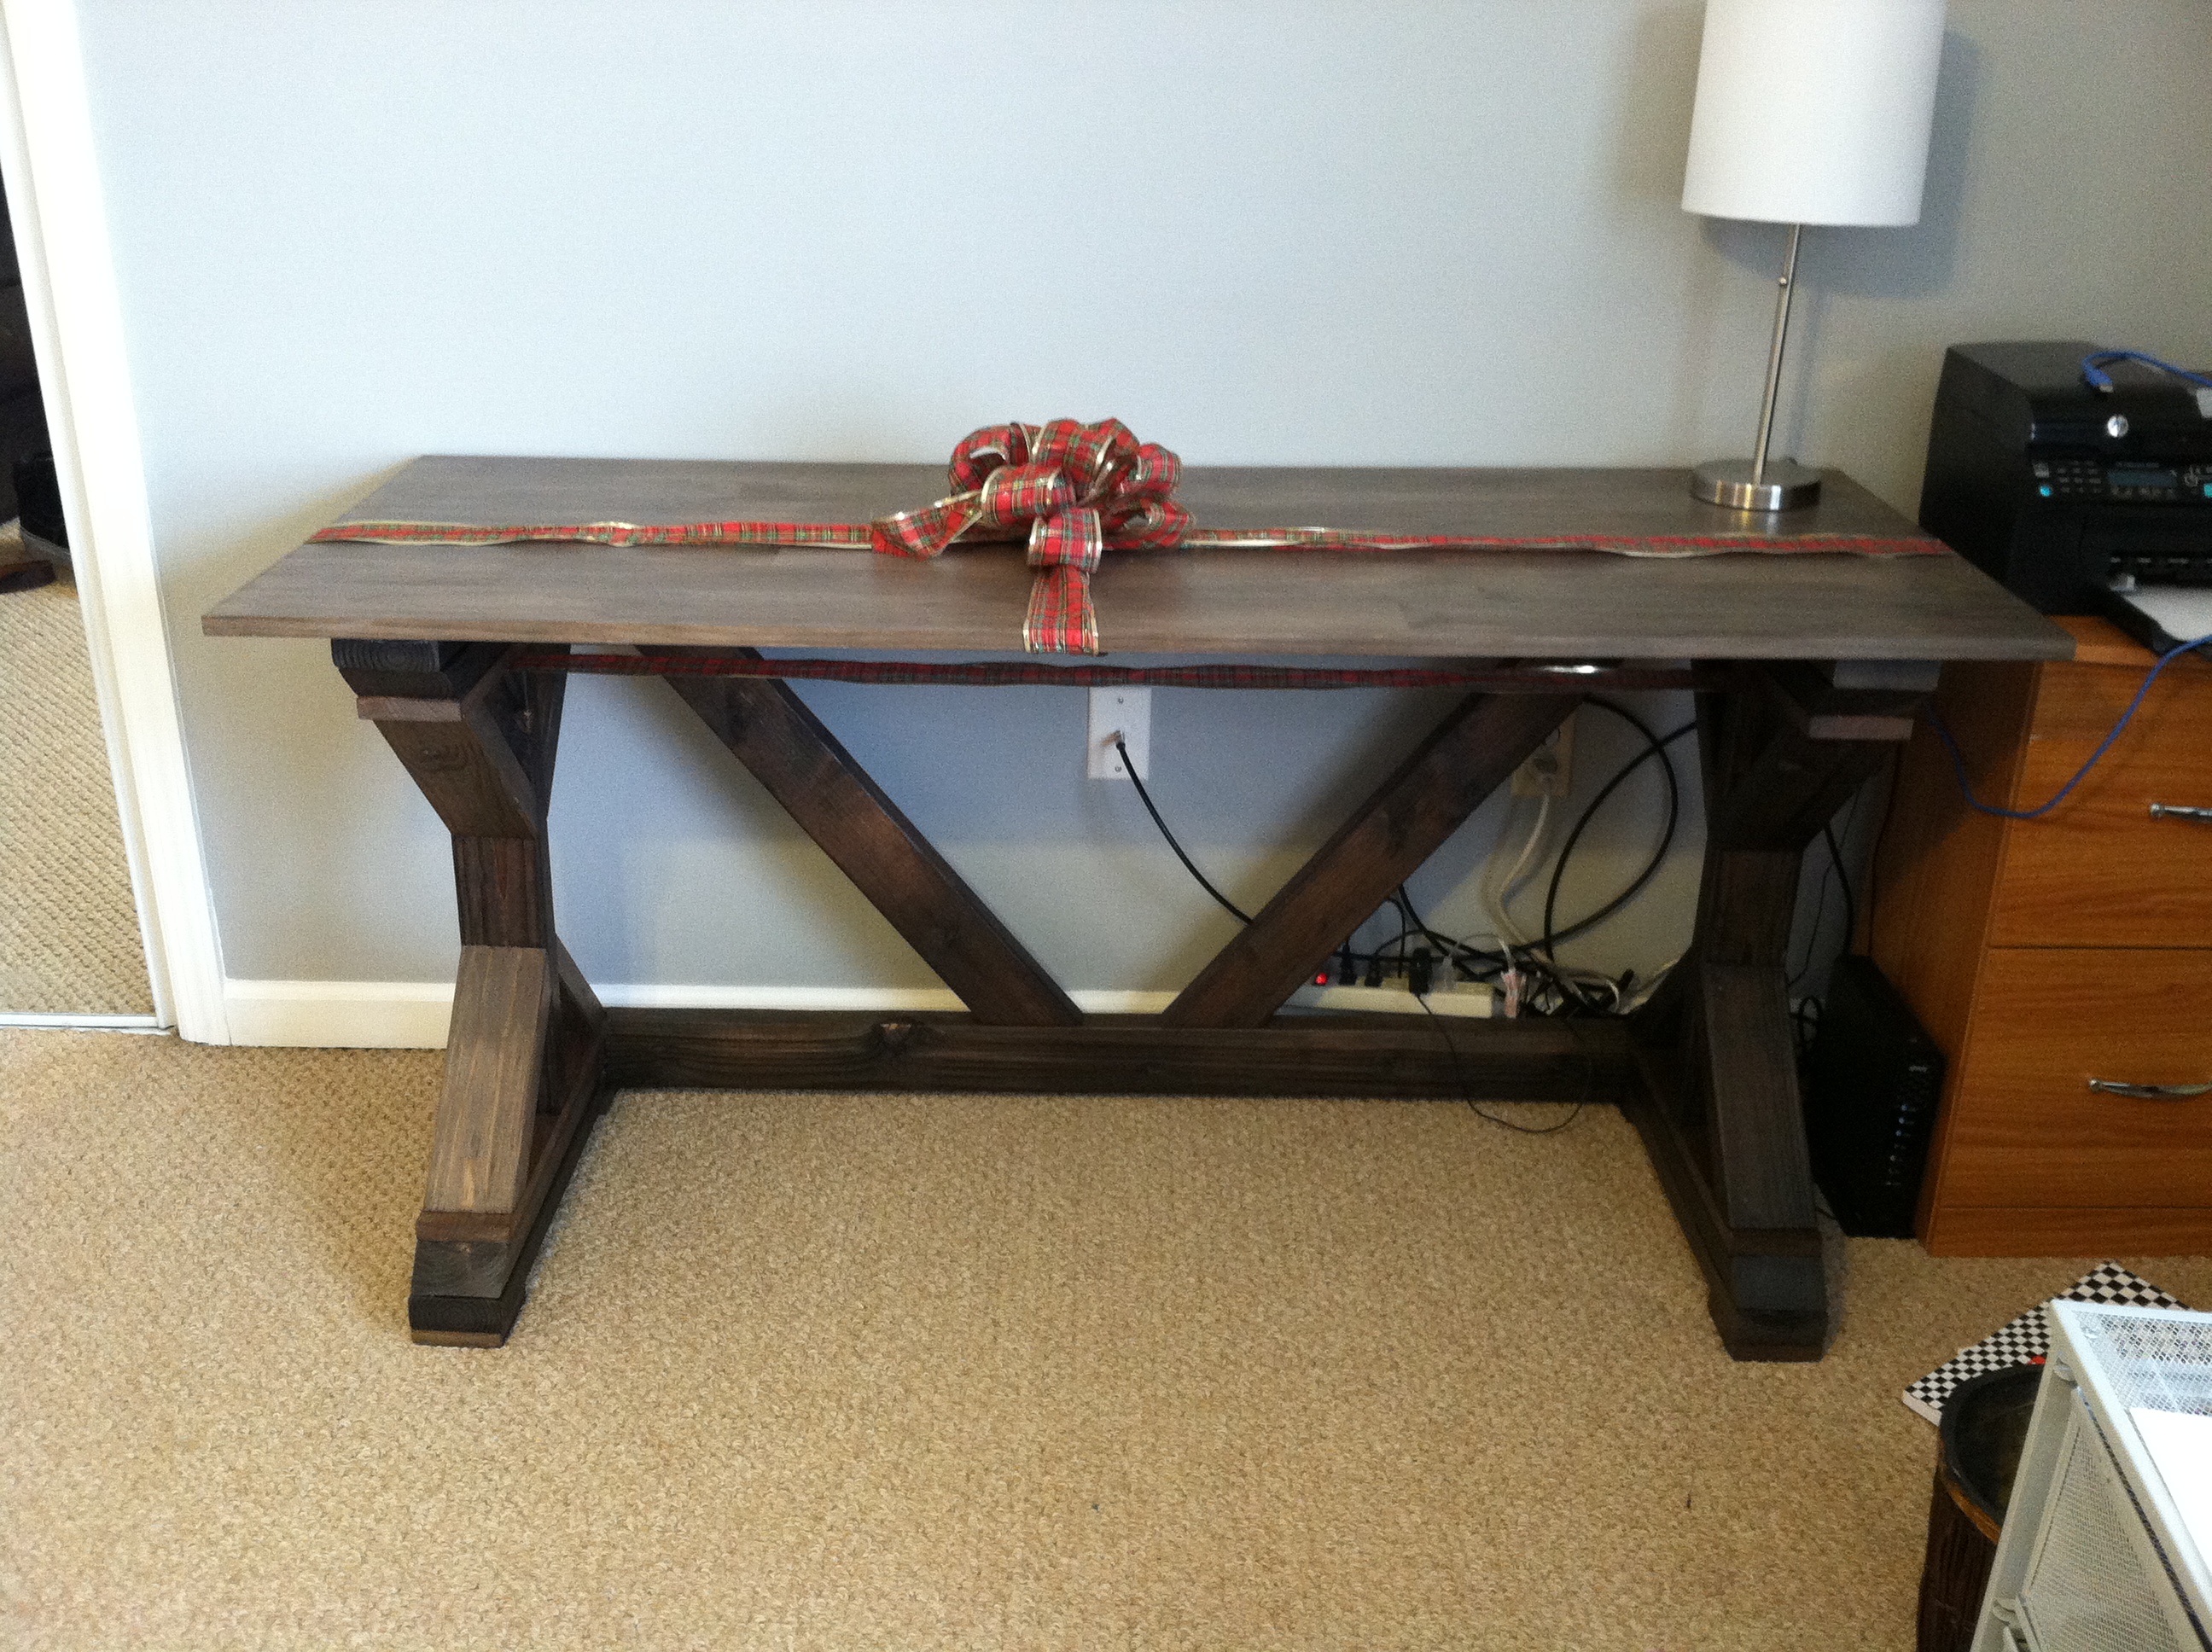
Stain & Poly
I used a clean rag (cut up an old t shirt..) to apply a generous coat of Minwax wood conditioner, wiping off any excess after about 15 min. I then immediately applied a coat of Minwax Dark Walnut stain. I used stain applicator pads but a good rag works just fine and wiped off excess after 10 or 15 minutes.
The top received 2 coats, the second coat applied a week later.
2 coats of Minwax fast dry polyurethane were applied via brush (high quality natural bristle brush). I lightly sanded with 220 after the 1st coat was fully dried, and with 320 after the second. Semi gloss was used for the 3rd and final coat. If I had a 'do over', I would have used wipe on poly and thinned with mineral spirits to eliminate brush marks more effectively. OR I would have used a foam roller (still thinning a coat or two with mineral spirits).
Important: I applied a single coat of poly to the underside of the table as well. Coating the entire piece stabilizes the wood, according to a few articles. This means its less likely to shrink or swell unevenly over time.
Attaching the Top
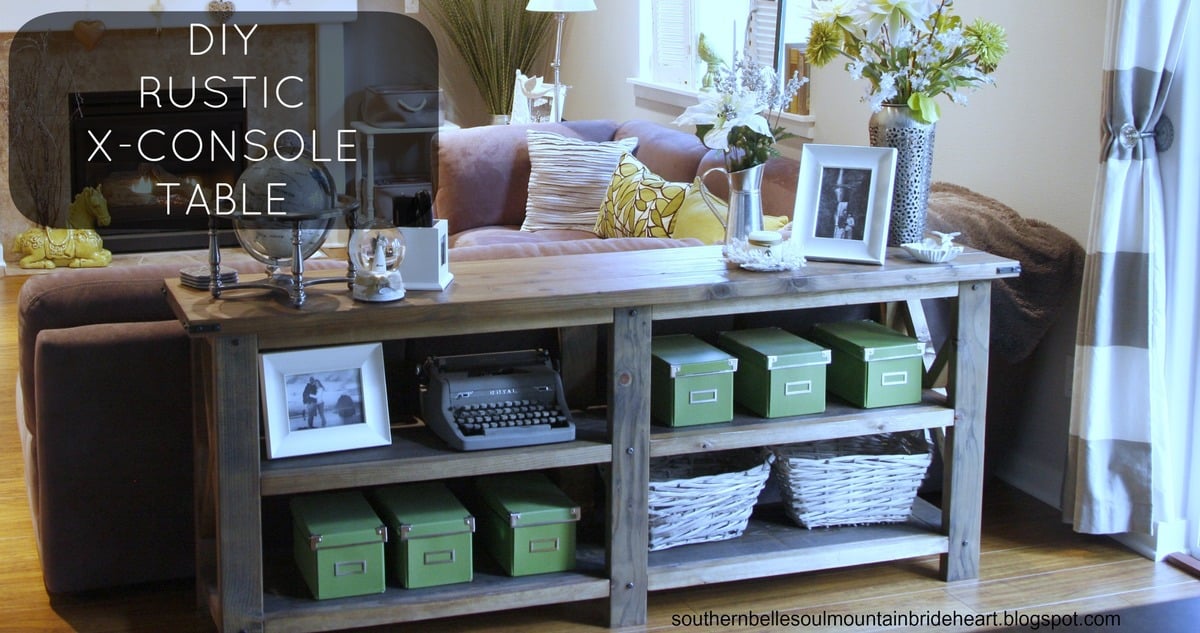
In Ana's / Shanty 2 Chic's original plans, there are comments from people wondering how to attach the table top to the supports. Originally, I planned on drilling through the sandwiched 2x4 supports and deeply counterinking screws. You can buy a surprisingly decent countersink drill bit set at Harbor Freight for very little money. You could also use something like 3M velcro tape. Either way, you would be able to separate the top from the legs for transport. If you do use Titebond III to glue it down, I'm confident it will never come off.
This is my first brag post and only my 4th completed DIY furniture project, so please LMK if I've forgotten to cover any important details.
Dan Gendreau
S Kingstown, RI
Fun weekend project! I had never tried pocket hole joins before. The Kreg jig worked out great. Looking forward to trying a bigger coffee table in this same style. Thanks for the plans!
When COVID hit I quickly realized that I had absolutely no hobbies - aside from Netflix (is that considered a hobby?) One day I went down a YouTube worm hole and ended up seeing one of Ana's video's. As I watched I thought "She makes this seem easy", I think I could do this. So I went and bought a few tools and got to work. I'm now proud to say my first project ever is done!
I really enjoyed making this table and I'm looking forward to new projects. My next will be matching side tables.
I learned a ton doing this and while I'm happy with the final outcome I'm also highly aware of all the mistakes I made. The thing is I didn't know I was making mistakes at the time. (I didn't know what I didn't know) A little bit of experience now helps eliminate those same errors next time around.
I certainly discovered that finishing is where all the magic happens. It's what makes the project look either amazing or just "ok". It's also the part of the build that takes the most attention to detail, the most patience and is also (in my humble opinion) the most boring repetitive part of the build. The reality is it's also the most important, transformative part. It definitely makes the difference.
Ana, I hope it's helpful for you to know that your video's really do inspire people to get creative and make things. I'm excited to start on my next project!
Sincerely,
Brent Rodgers
Ontario, Canada
When I saw Ana's plans for this doll bed I knew it would be a perfect gift for a little seven year old girl in my life this past Christmas. I love how it turned out and she was thrilled with the gift.
For more details about how I made the bed, bedding and quilt check out my blog at http://homeandawaywithlisa.com/blog/2013/1/3/doll-bed-with-bedding-patc…