Community Brag Posts

Christmas Tree Wall Shelf

Submitted by PhD_Phil on Wed, 12/20/2017 - 10:44

Christmas Tree Wall Shelf

Stockings hung using cabinet/drawer pull knobs that I found on Amazon

Built from Plan(s)
Estimated Cost
<$20
Estimated Time Investment
Day Project (6-9 Hours)
Recommended Skill Level
Beginner

Rustic X Coffee Table, End Table and Console

Submitted by jbayer80 on Thu, 06/20/2013 - 07:07

This was a blast to build. This was all a gift for my wife since the traditional 5th anniversary gift is wood.

The coffee table and console are both awesome! The only thing I would change/modify is the end table, because its kinda big and doesn't really look its part of the set other than the "X". I would maybe take about 2 or 3 inches off all sides or maybe 3 off the sides so its not such a box.

Estimated Cost
$500
Estimated Time Investment
Week Long Project (20 Hours or More)
Finish Used
Kona on top and shelf (s) with 4 coats of polyurethane. Currently there is nothing on all other parts because I wasn't sure what I was going to do. I think I'm just going to put a few coats of poly on the "naked" parts and call it a day. I thought about painting the other pieces but that would hide the beautiful grain in the Douglas Fir. I don't like the idea of the entire thing being Kona because it looks too dark on the others I've seen on here (for my house only), then I thought about a very light stain but think I settled on it being naked with the poly. I would honestly love to hear what you guys think as I have not touched it yet.

Actually I was thinking it would be nice for Anna to have a section with a "poll" for someone like me who is kinda stuck on a finish to post a picture and have other vote on a few options....thoughts??? Anna??
Recommended Skill Level
Beginner

Comments

Val Manchuk

Thu, 06/20/2013 - 07:31

I'll start one! Go for the poly. You're absolutely right, it will bring up the beautiful grain, and show off the "X" accents. Nice work, by the way!

Val Manchuk

Thu, 06/20/2013 - 07:32

I'll start one! Go for the poly. You're absolutely right, it will bring up the beautiful grain, and show off the "X" accents. Nice work, by the way!

spiceylg

Thu, 06/20/2013 - 08:39

Beautiful builds! Wow, they look wonderful. What an amazing gift! From the pics, the end table looks fine, too, as the furniture isn't a small scale. I love the two-tone so I say go for just the poly!

WorkShopWendy

Thu, 06/20/2013 - 12:08

I think you did an amazing job :) love the contrast of the two tones. Using poly for the rest would be beautiful. I cant wait to do this project myself.

JoanneS

Thu, 06/20/2013 - 15:47

What a wonderful gift! These tables are beautiful, great job on this build! I love the two-tone - One more vote for the poly! :)

jbayer80

Fri, 06/21/2013 - 13:04

I'm going to go with only the Poly over the bare wood. Thanks for the comments and advise! It will be a few weeks due to work and travel but I'll send updated pics once its done.

Jbird

Sat, 02/24/2018 - 21:18

I like the naked/poly look too. The other option I think would look good would be painting it white. The contrast between the white frame and darker kona top and shelf would be cool. 

Shou Sugi Ban (Yakisugi) Cornhole Boards

Submitted by Anonymous (not verified) on Sun, 12/26/2021 - 14:48

I'm James Farquhar, designer, and fabricator. This is the second set of cornhole boards I built this year. This set is the regulation size of 48" x 24" according to the American Cornhole Association. It is made from fir 2 x 4 s and pine 1 x 4 s (6 per board). Each board is glued with Titebond II and countersunk Torx top screws (#8 1-1/2 inches). It is coated with Minwax polyacrylic (8 layers sprayed on) and Howard's bee's wax (3 layers). The boards are secured with 3-inch toggle latches in pairs. Kayak carrying handles with four screw ports; I used the same Torx Screws I used to put the boards together, extra for strength. The total weight of the boards is 60 pounds. I used a Texas Flame Thrower to Shou Sugi Ban (Yakisugi), as a finish.

Comments

Northwest Ohio Pergola

Submitted by russell_h on Sat, 06/27/2015 - 17:57

I used flat stone and a masonry circular blade for the base of the corner posts. I also used 2 x 4's for both layers of the top boards. It was a lot of fun to build.

Built from Plan(s)
Estimated Cost
$250.00
Estimated Time Investment
Week Long Project (20 Hours or More)
Finish Used
I will stain and seal in a year
Recommended Skill Level
Intermediate

Farmhouse Style Bar Table - San Diego

My husband modified these plans by making it a 42" tall bar high table. He built it and I stained it with Dark Walnut Danish oil and it came out better than we imagined. Thank you for these awesomely cool DIY plans.

Estimated Time Investment
Weekend Project (10-20 Hours)
Recommended Skill Level
Beginner

Comments

Modified Simple Outdoor Dining Table

Submitted by ewood on Tue, 05/31/2011 - 08:04

Wanted a Patio table and when I saw the plans on this site I really liked it; I just changed the plan a bit. Everything was screwed from the underside of the table, also I attached the legs with 2" lag screws.

Built from Plan(s)
Estimated Time Investment
Weekend Project (10-20 Hours)
Recommended Skill Level
Beginner

Comments

Teeter Totter

This is one of the cheapest projects for my kids I have ever completed!! And the most rewarding. I think everyone of my neighbors has been on the teeter totter...including adults :) My kids just love it and I am thinking of making a few for my nephews for Christmas. I was able to find all the wood I needed in my scrap pile. I had the PVC pipe and bolt already also so all I had to make a trip to the store for was the foam for the seats. My son helped me build this in an hour. I liked the unfinished look so I just sprayed it with a little Thompson Water Seal. Thank you Ana White!!

Built from Plan(s)
Estimated Cost
$0 Lumber (scrap wood) $5 Foam padding
Estimated Time Investment
An Hour or Two (0-2 Hours)
Finish Used
Thompson Water Seal
Recommended Skill Level
Starter Project

Comments

Seasonal And Holiday

Fancy X Farmhouse table with built in copper cooler

Submitted by J Dixon on Sun, 08/23/2015 - 01:54

My version of Fancy X Farmhouse table with a built in copper cooler!!

Built from Plan(s)
Estimated Time Investment
Weekend Project (10-20 Hours)
Finish Used
Dark walnut colored danish oil base with satin poly top coat.
Recommended Skill Level
Intermediate

Comments

Codding58

Thu, 05/12/2016 - 12:27

VERY nice build!   How did you make the copper cooler, if you don't mind me asking.    Great Idea and love that you can hide it away!  Cheers

4x4 Truss Beam Table Black

I had trouble with the angled cuts not fitting perfectly. I have a circular saw, not a table saw or miter saw, so I had to measure with a protractor and mark, then try to follow my lines exactly. Tedious, but I like the table. It is mad heavy though!

Built from Plan(s)
Estimated Cost
$30 for stain. I had all the rest of the reclaimed wood. Otherwise, $150.
Estimated Time Investment
Weekend Project (10-20 Hours)
Finish Used
Minwax "ebony"
Recommended Skill Level
Intermediate

Comments

Farmhouse Doggie Daybed

Submitted by jkjackson on Sun, 04/24/2022 - 18:42

This was adapted from the Farmhouse bed plans to match our king size farmhouse bed.

Comments

Twin Farmhouse Bed with Trundle

Took the farmhouse plan and added a Trundle.   Was initially going to build two farmhouse beds for my two girls, but thought adding the Trundle would free up some much needed floor space.  The girls love it!

Estimated Cost
$150
Estimated Time Investment
Day Project (6-9 Hours)
Finish Used
Latex paint
Recommended Skill Level
Intermediate

Small Chicken Coop with Planter, Clean Out Tray and Nesting Box

Submitted by Anonymous (not verified) on Sat, 05/07/2022 - 07:29

My husband and I had so much fun building this for our ladies! We had some material leftover from the build of our house so we made a few adjustments. I’ve included progress pics because we found others very helpful during our build. We also added hardware wire and brick at the base to predator proof (not pictured).

Comments

Backyard seating

Submitted by Anonymous (not verified) on Mon, 06/06/2022 - 13:17

We needed some additional seating in the backyard so I built 6 Adirondack chairs for the fire pit and the bench using the plans that you have shared on Facebook. They turned out really nice and so far they have been a big hit!!

Thanks!!

Comments

Outdoor Grill Trolley

Submitted by angiemicn on Sun, 07/24/2011 - 05:39

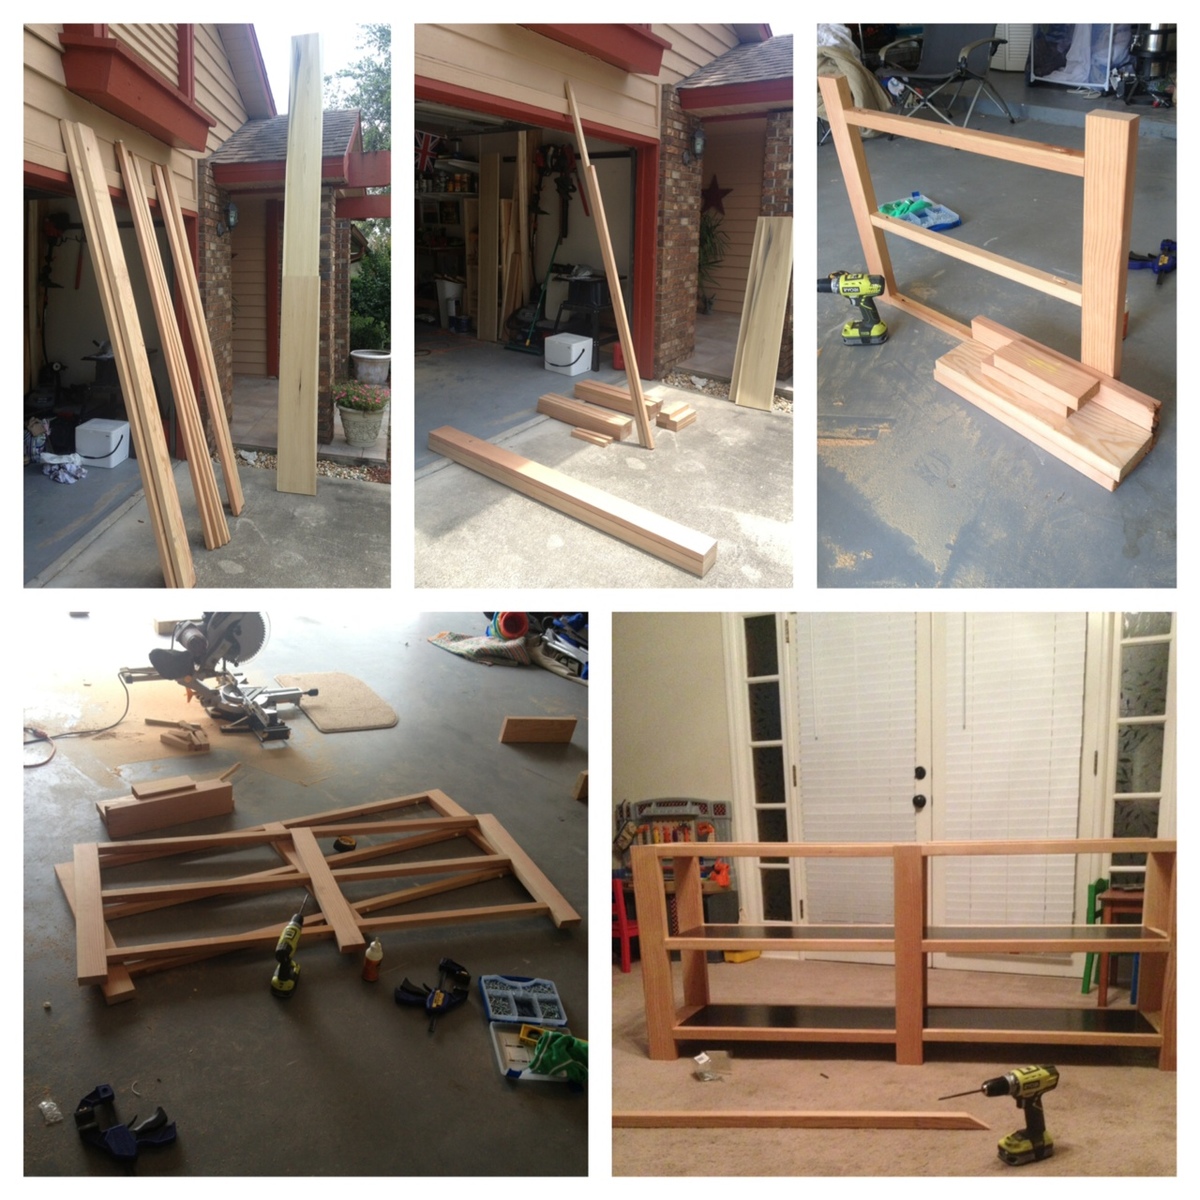
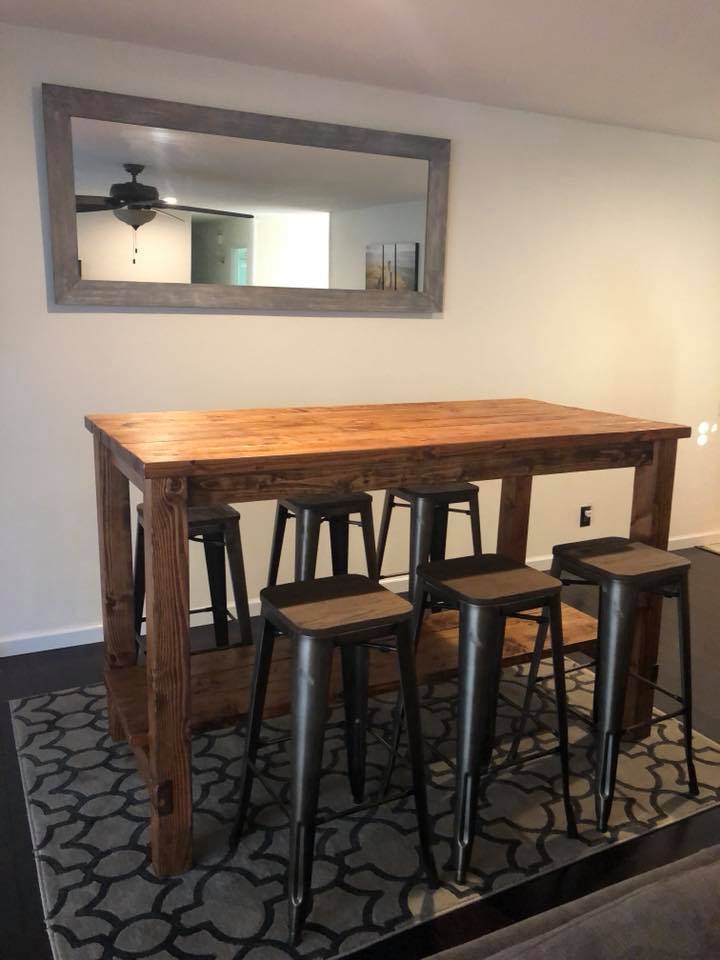
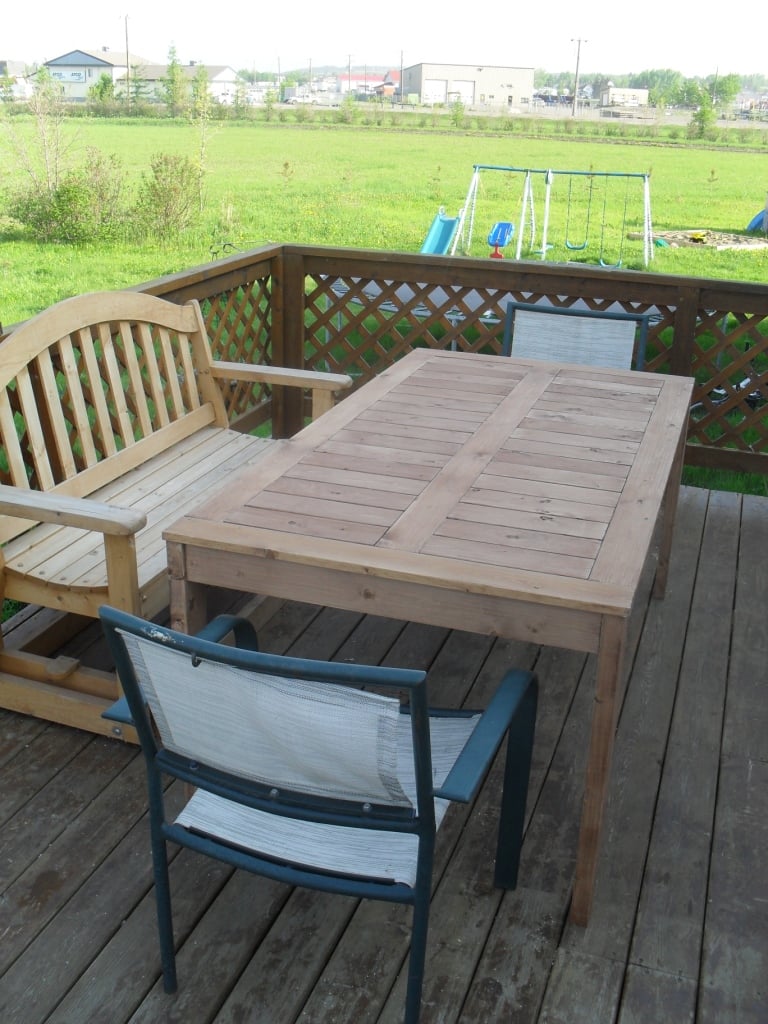
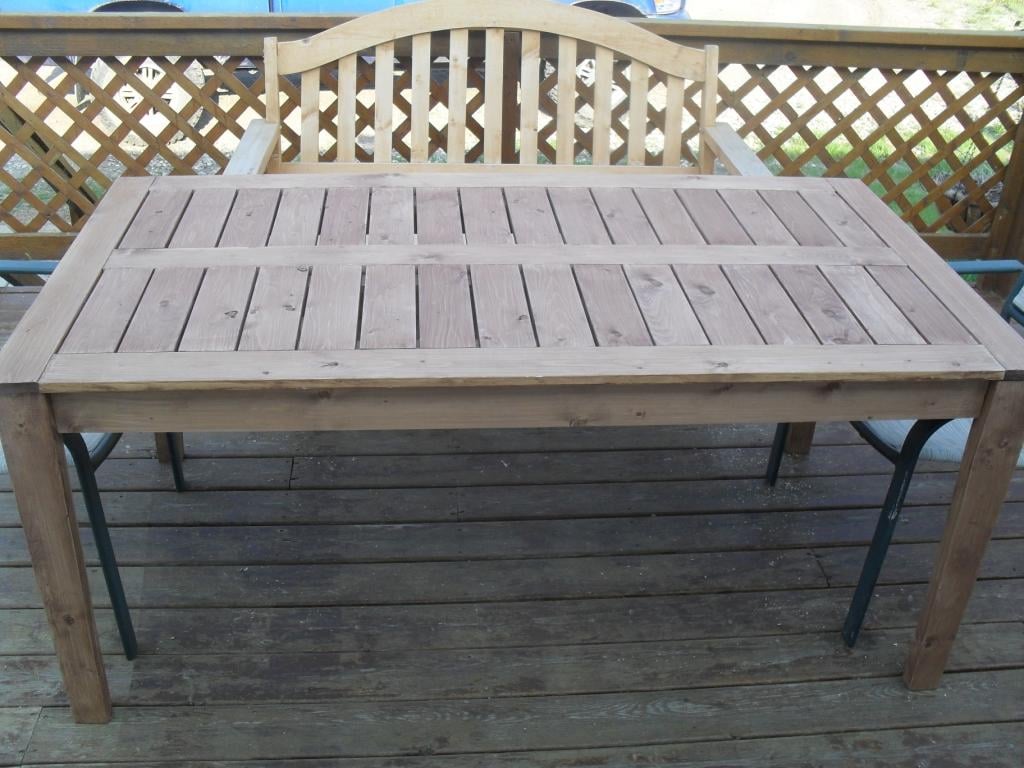
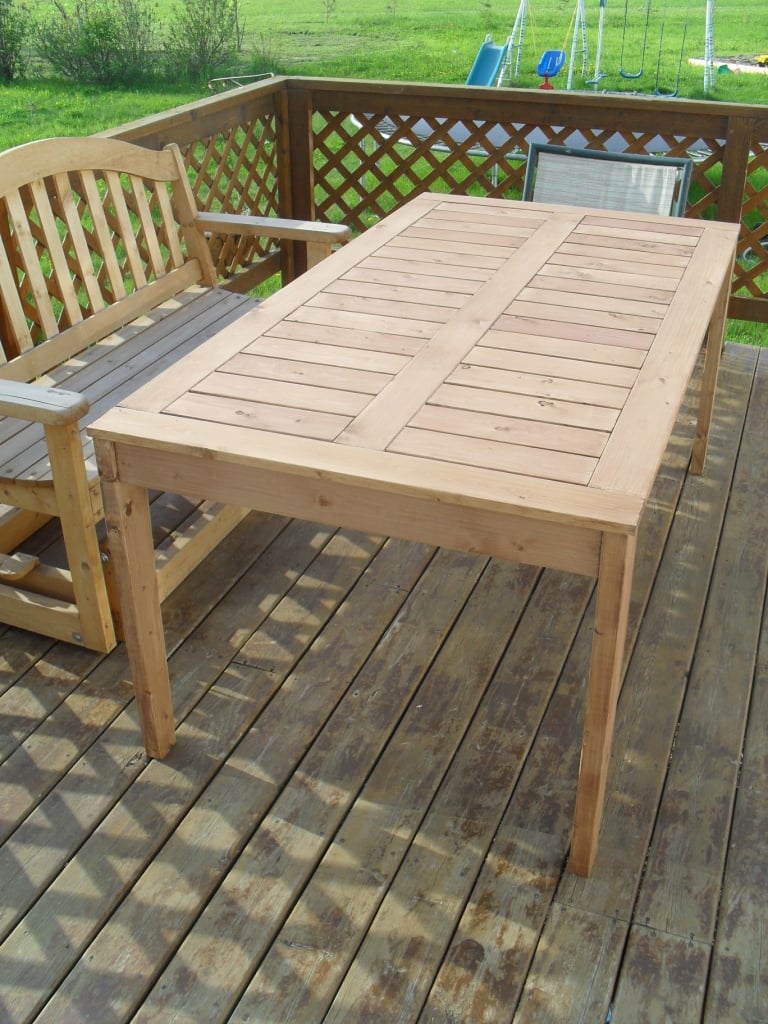
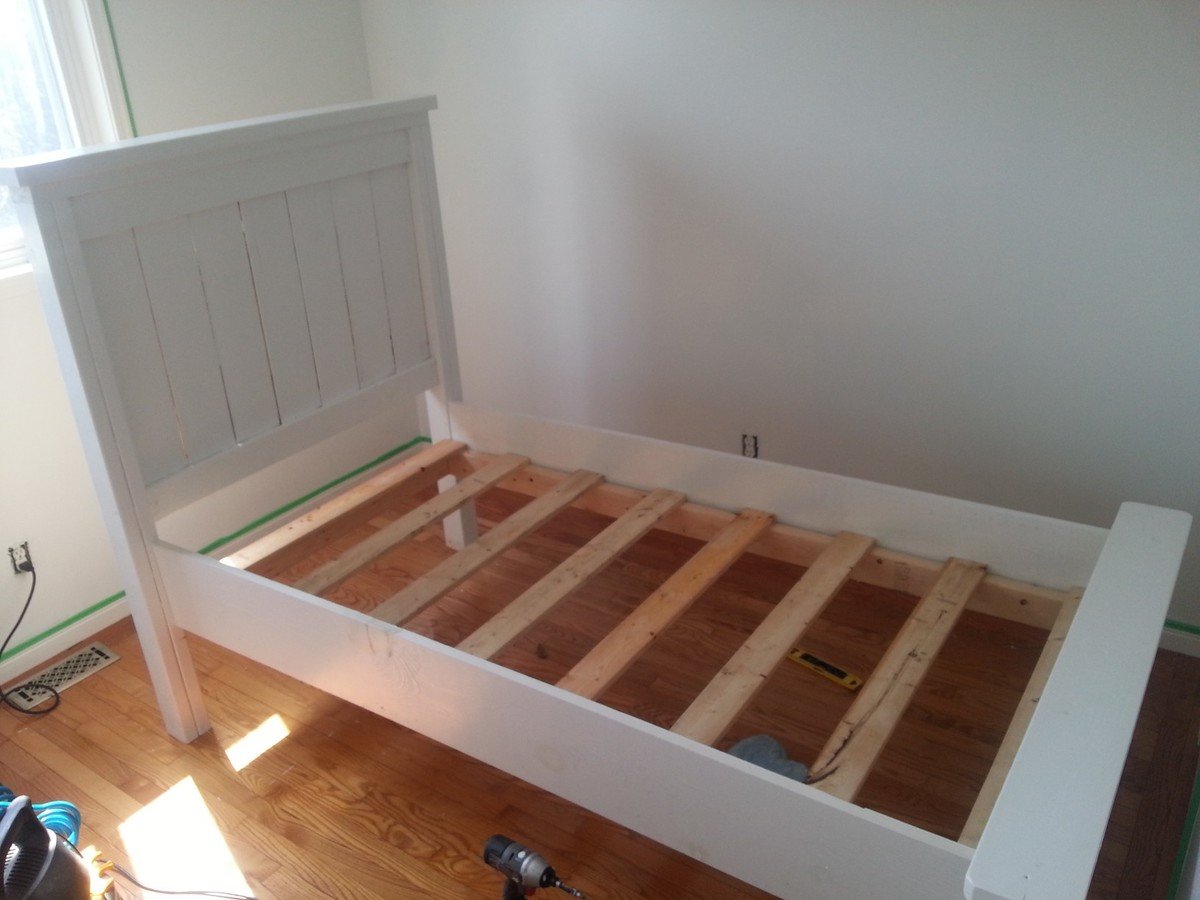
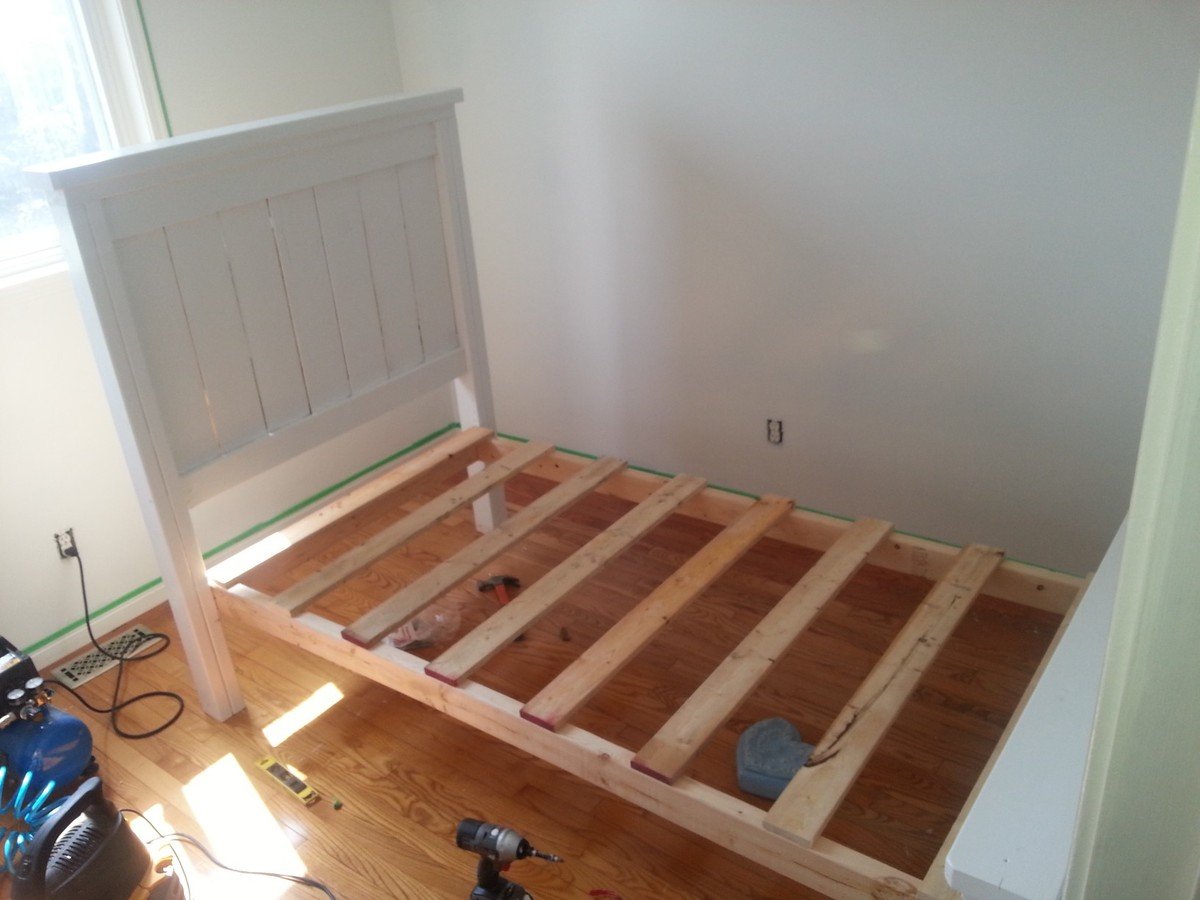
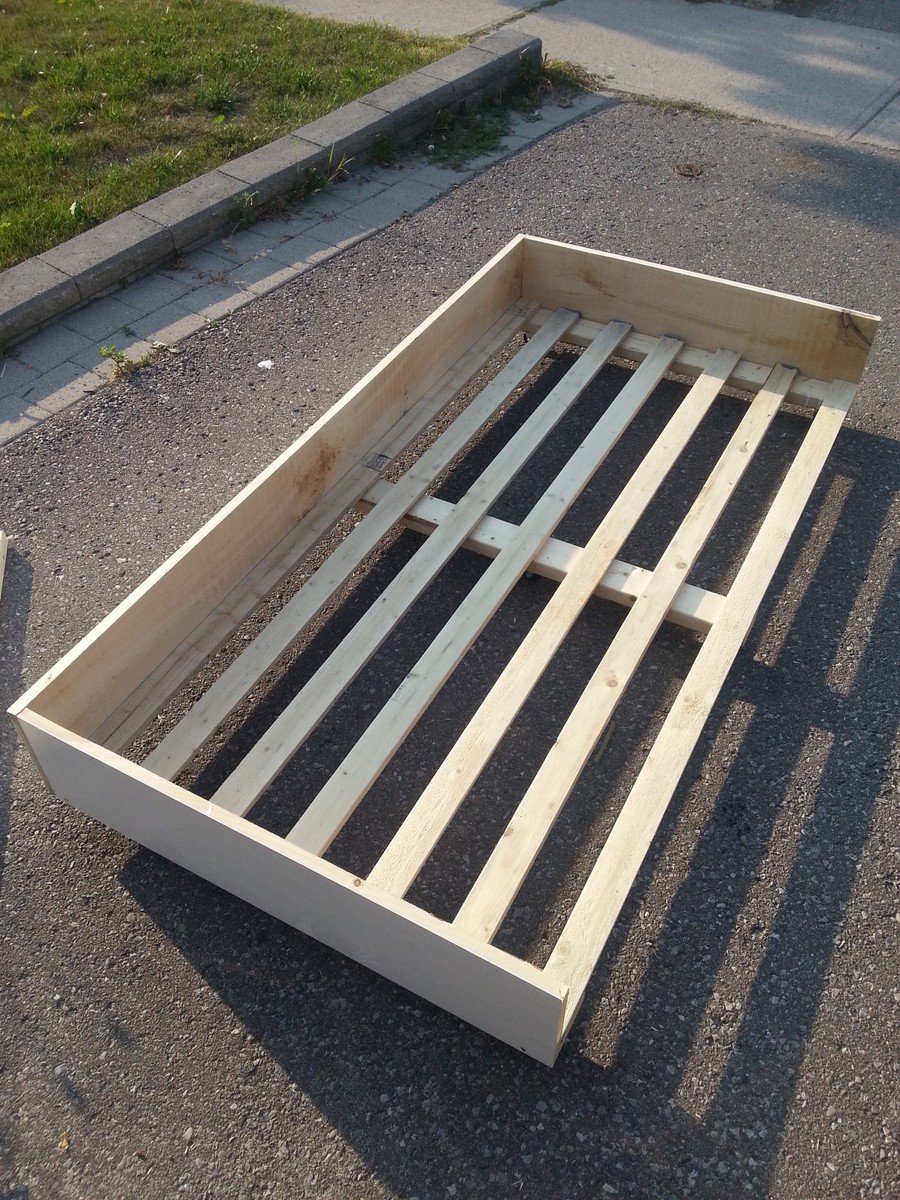
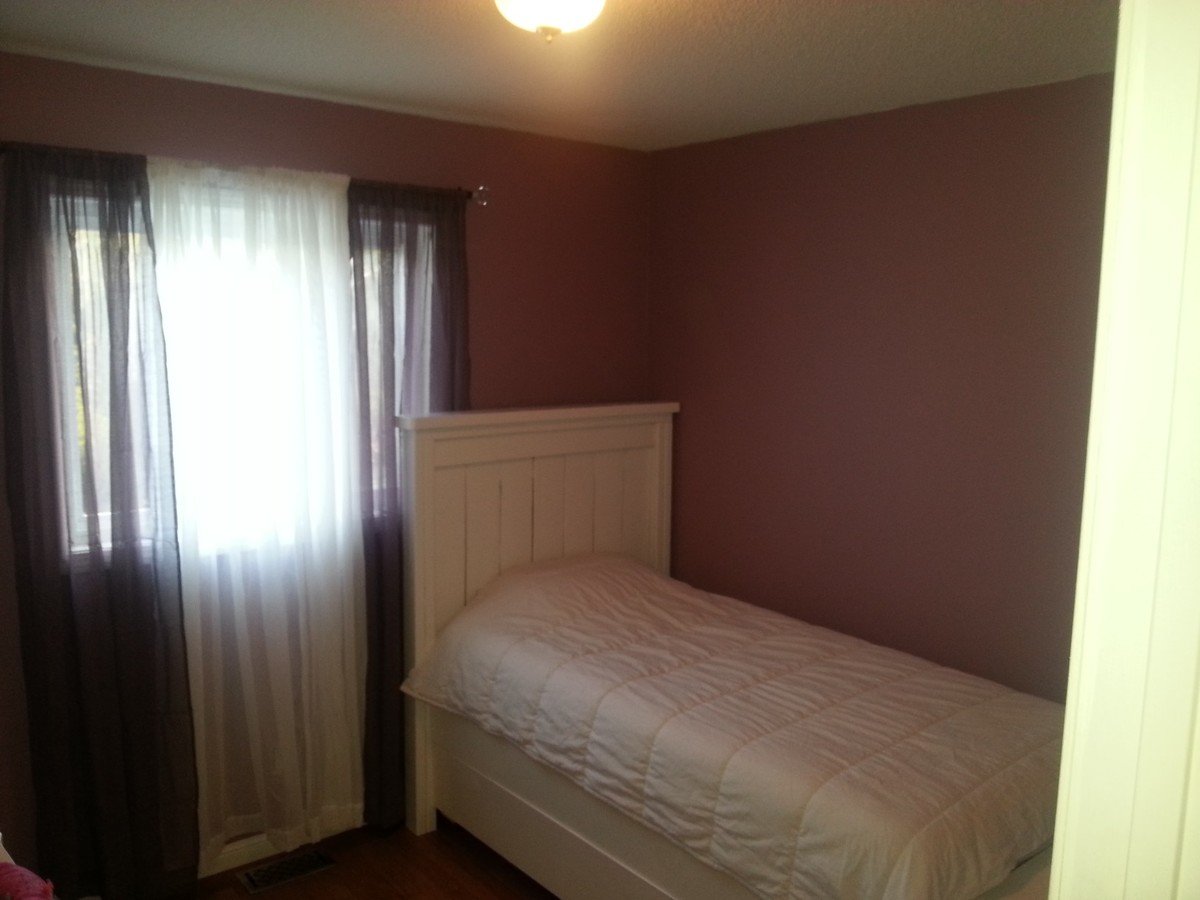
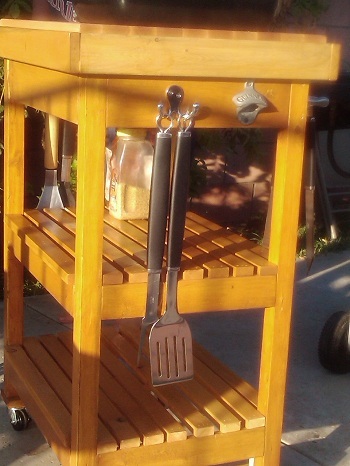
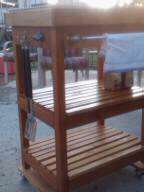
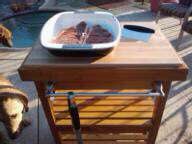
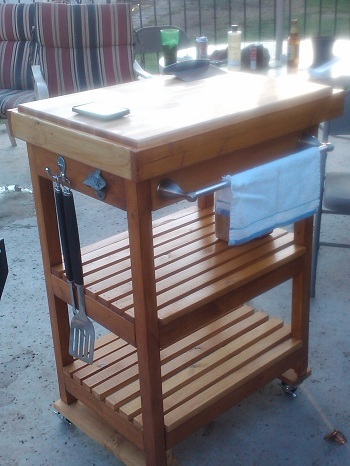
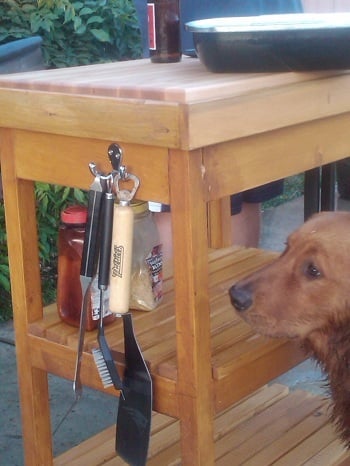
This started out as the Outdoor Multipurpose Cart....and after my hubbies evergrowing wishlist, it quickly become THE GRILL TROLLEY EXTRAVAGANZA!!!! I added the bulk and the height which he wanted, a John Boos butcher block 24x18, which is removable. Funny thing is, I also sampled Ana's Farmhouse frame to cradle the butcher block! I didn't want to put any holes in the 100 clam butcher block so it has it's own little bedframe. It's totally waterproofed and stained since it's new home will be beside the pool. I used all Kreg joints, so you could sit on this it's so sturdy. I also added 2.5 inch locking casters for the bottom. There's a stainless steel bathroom towel rack which doubles as a handle, lots of hooks for his BBQ paraphenelia, and the most important addition...The Guinness bottle opener. Totally hubby customized. And the best thing> I did it myself, setting it aside whenever a problem arose, but always coming back to it. This was originally a Papa's day present

Estimated Cost
150. (100 of it was just for the upgraded John Boos outdoor reversible butcher block! well worth it!)
Estimated Time Investment
Week Long Project (20 Hours or More)
Finish Used
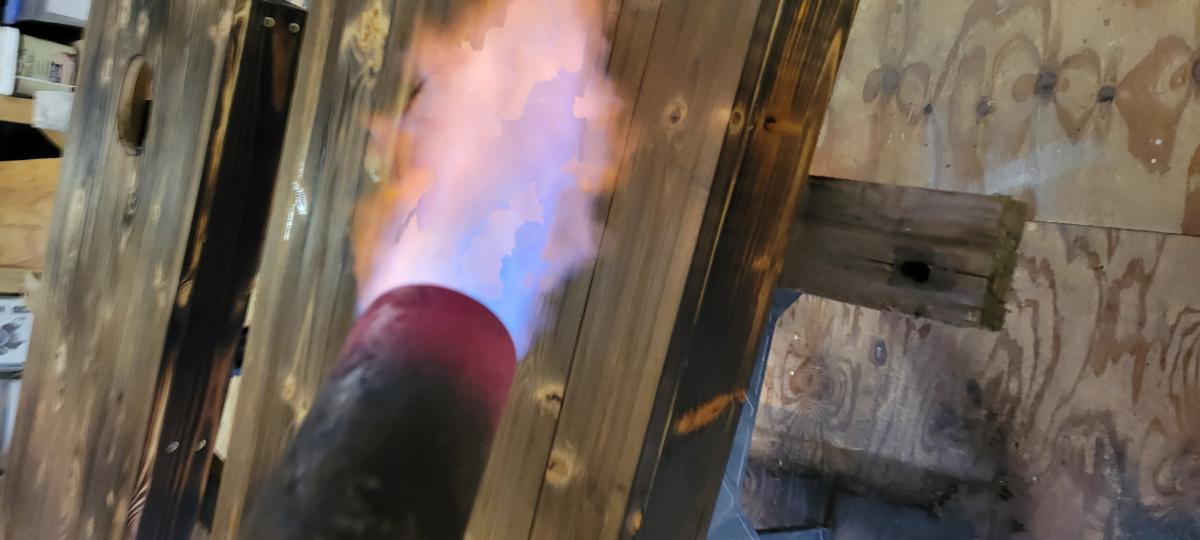
Thompson's Waterseal, Minwax Puritan Pine, 2 coats, but wiped it off very quickly, didn't want it too dark. I didn't want a uniform appearance, so I wet it down, heavier in some areas than others, with water, wiped the stain on, and was taking it off with the other hand.
Recommended Skill Level
Intermediate

Comments

Fortnite Battle Bus boys bedroom loft

Submitted by bbcarey on Mon, 10/15/2018 - 08:31

We remodelled my son's room and what better theme than Fortnite for an 8 year old... and what better loft than the Battle Bus!!

Estimated Time Investment
Week Long Project (20 Hours or More)
Finish Used
Latex paint
Recommended Skill Level
Intermediate

2 Drawer Modern Nightstand (with Charging station)

Submitted by mt51 on Mon, 09/02/2013 - 22:21

I really liked the look of the 2 Drawer Modern Nightstand but I wanted to add a twist to it. Since I can't live without my devices (laptop and phone), I decided to add an open slot to the middle shelf of the nightstand for power cables. It also has a space that I added in the back that can hold a power strip. Embarrassed that I did not paint the back of the nightstand but I was really done at that point after a long weekend's worth of work!


Pin For Later! 

2 Drawer Modern Nightstand (with Charging station)


Estimated Time Investment
Weekend Project (10-20 Hours)
Recommended Skill Level
Intermediate

Country Table - picnic

Submitted by TrayScates on Mon, 10/03/2022 - 19:00

Outdoor - pressure treated; added 1 foot to length.

Comments

Miter Saw Cart

Submitted by MNDadx3 on Sat, 09/21/2013 - 19:38

Great project - fun to build and helpful for wheeling my new miter saw around the garage.

I made a few modifications from the original plan:
- I used a 1x4 instead of a 1x3 for the bottom supports to add a bit more of a lip to keep things from rolling off of the shelf. The shelf is big enough to hold my small pancake compressor and ciruclar saw.
- Like others, I added a drawer (1X4 front/sides, 1/4" plywood bottom, 2x2 drawer guides).
- Like others, I went with simple strap hinges and then used some wood to support the wings when open. When closed the supports tuck neatly under the wings.
- I added some 1/4" plywood to make a back. I left enough of a gap at the bottom to be able to sneak my extension cords out to a power strip I mounted on the back.
- I made a fence extension out of a 1x4. I attached this to the left wing using wing nuts and hanger bolts so it is easy to remove if I need to. I spent time measuring carefully to make sure it lined up exactly with the saw's fence. It is nice for supporting longer boards and keeping them straight.

Built from Plan(s)
Estimated Time Investment
Weekend Project (10-20 Hours)
Finish Used
None
Recommended Skill Level
Beginner

Comments

MrCoffee

Sun, 09/22/2013 - 05:27

I love the way this came out. I believe I have your exact saw and I intend to use Ana's plan as well. Do you know how long you made the sides to accommodate the saw fence, or what your measurement was on the saw fence?

MNDadx3

Sun, 09/22/2013 - 06:54

I followed Ana's plan for the main carcass. My flip-up sides are a bit shorter than the plan, but only because I failed to follow the directions carefully and cut both of my sides from the same 24" strip of plywood (instead of a 36" and 30" per the directions) and was a bit short on 3/4" plywood. My sides are 24" long.

I made my fence extension from a 1x4. You can cut it to length so that it will fit any side.

MNDadx3

Mon, 09/23/2013 - 06:12

The deck is 3 3/4" from the top of the sides. That makes it level with the extensions when they are flipped up.

I have a 12" hitachi saw (not sliding), so if your saw is not the same then the measurements might be different.

My Rustic X Coffee Table

Submitted by Anonymous (not verified) on Sat, 01/26/2019 - 08:33

Rustic X coffee table I built from the plans on this website. This is the first piece of furniture I’ve built.

Built from Plan(s)
Estimated Time Investment
Weekend Project (10-20 Hours)
Finish Used
Walnut Finish
Recommended Skill Level
Beginner