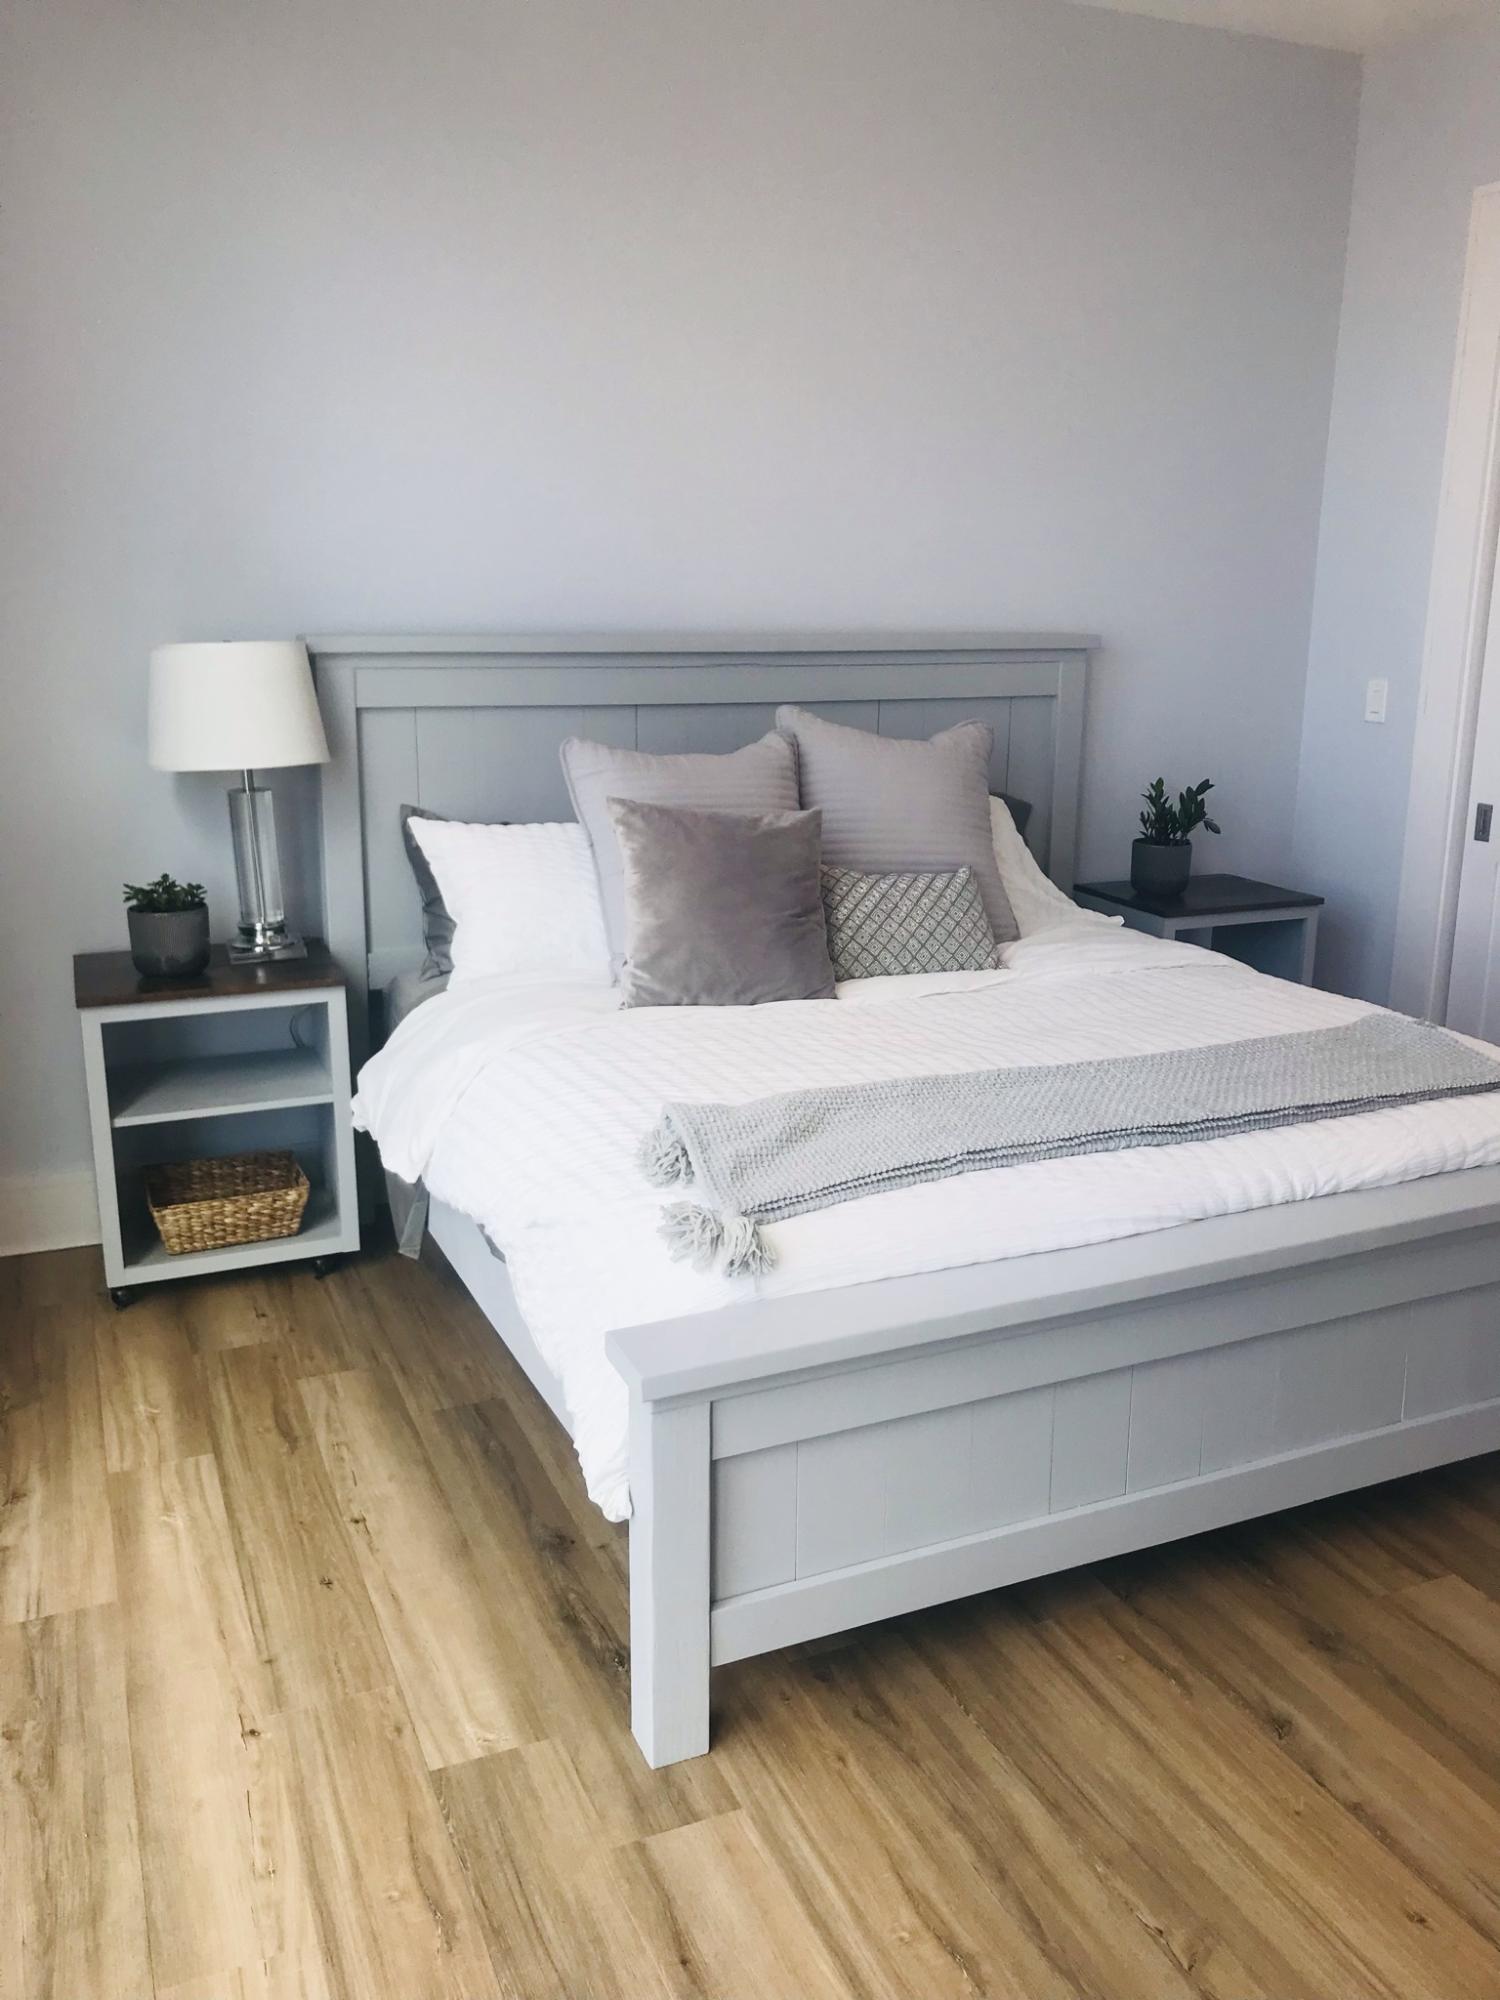
Farm house bed king
Easy to follow plans. This was only my second woodworking project so any beginner can do it. Thank you, Anna!
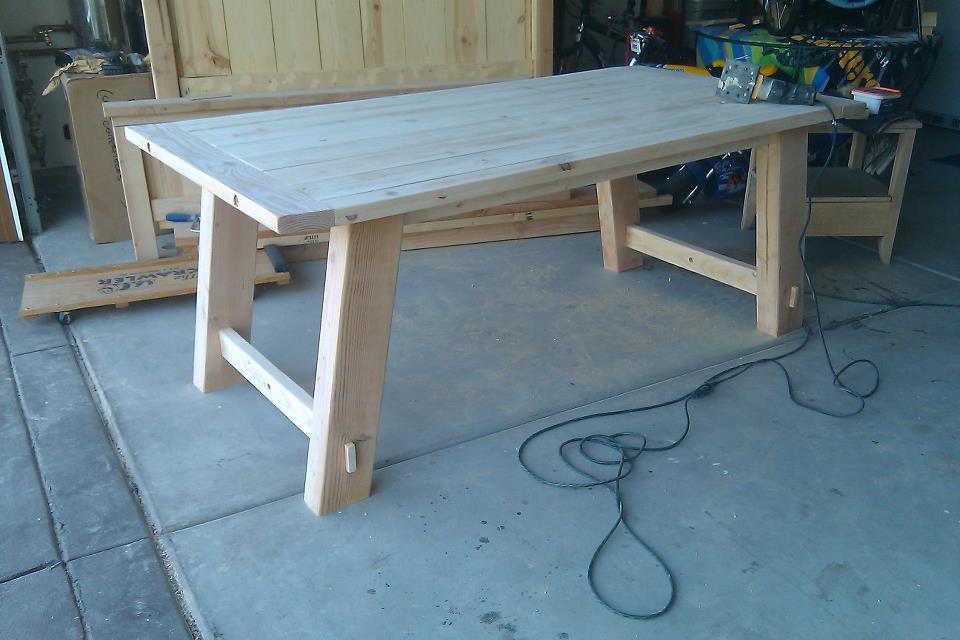
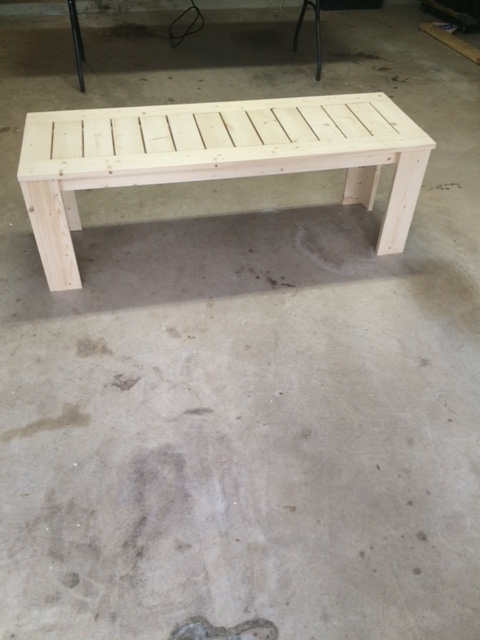
Built from Plan(s)
Easy to follow plans. This was only my second woodworking project so any beginner can do it. Thank you, Anna!
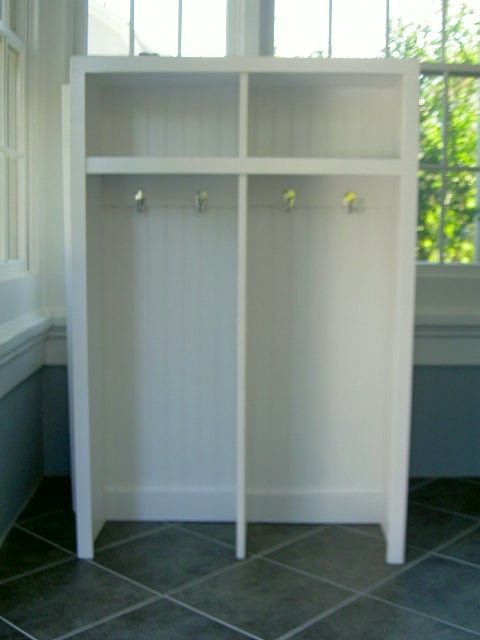
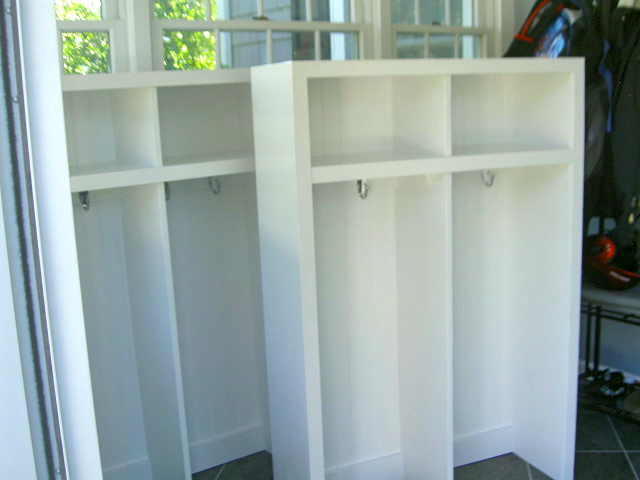
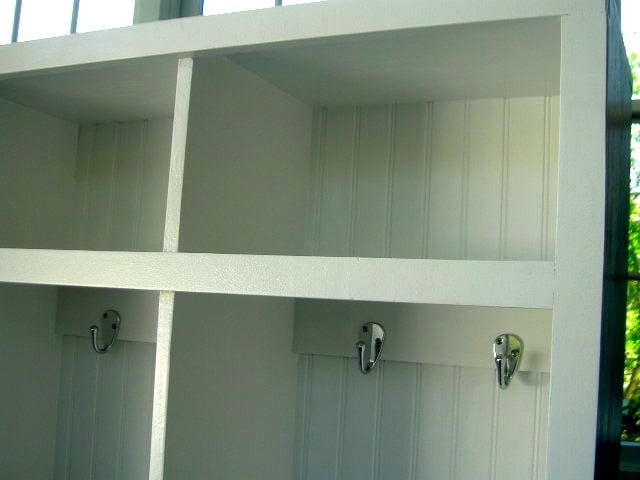
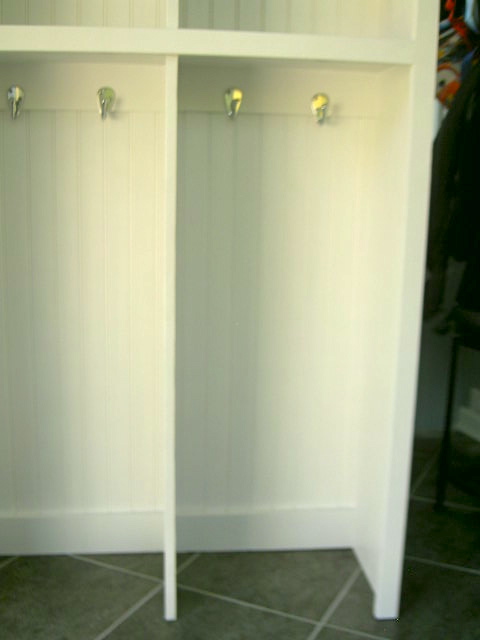
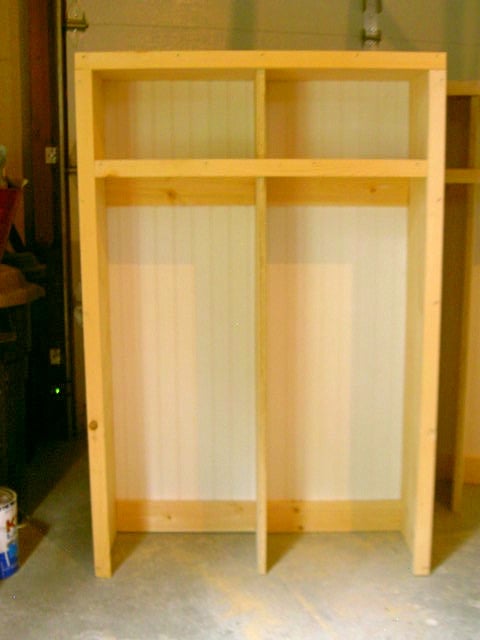
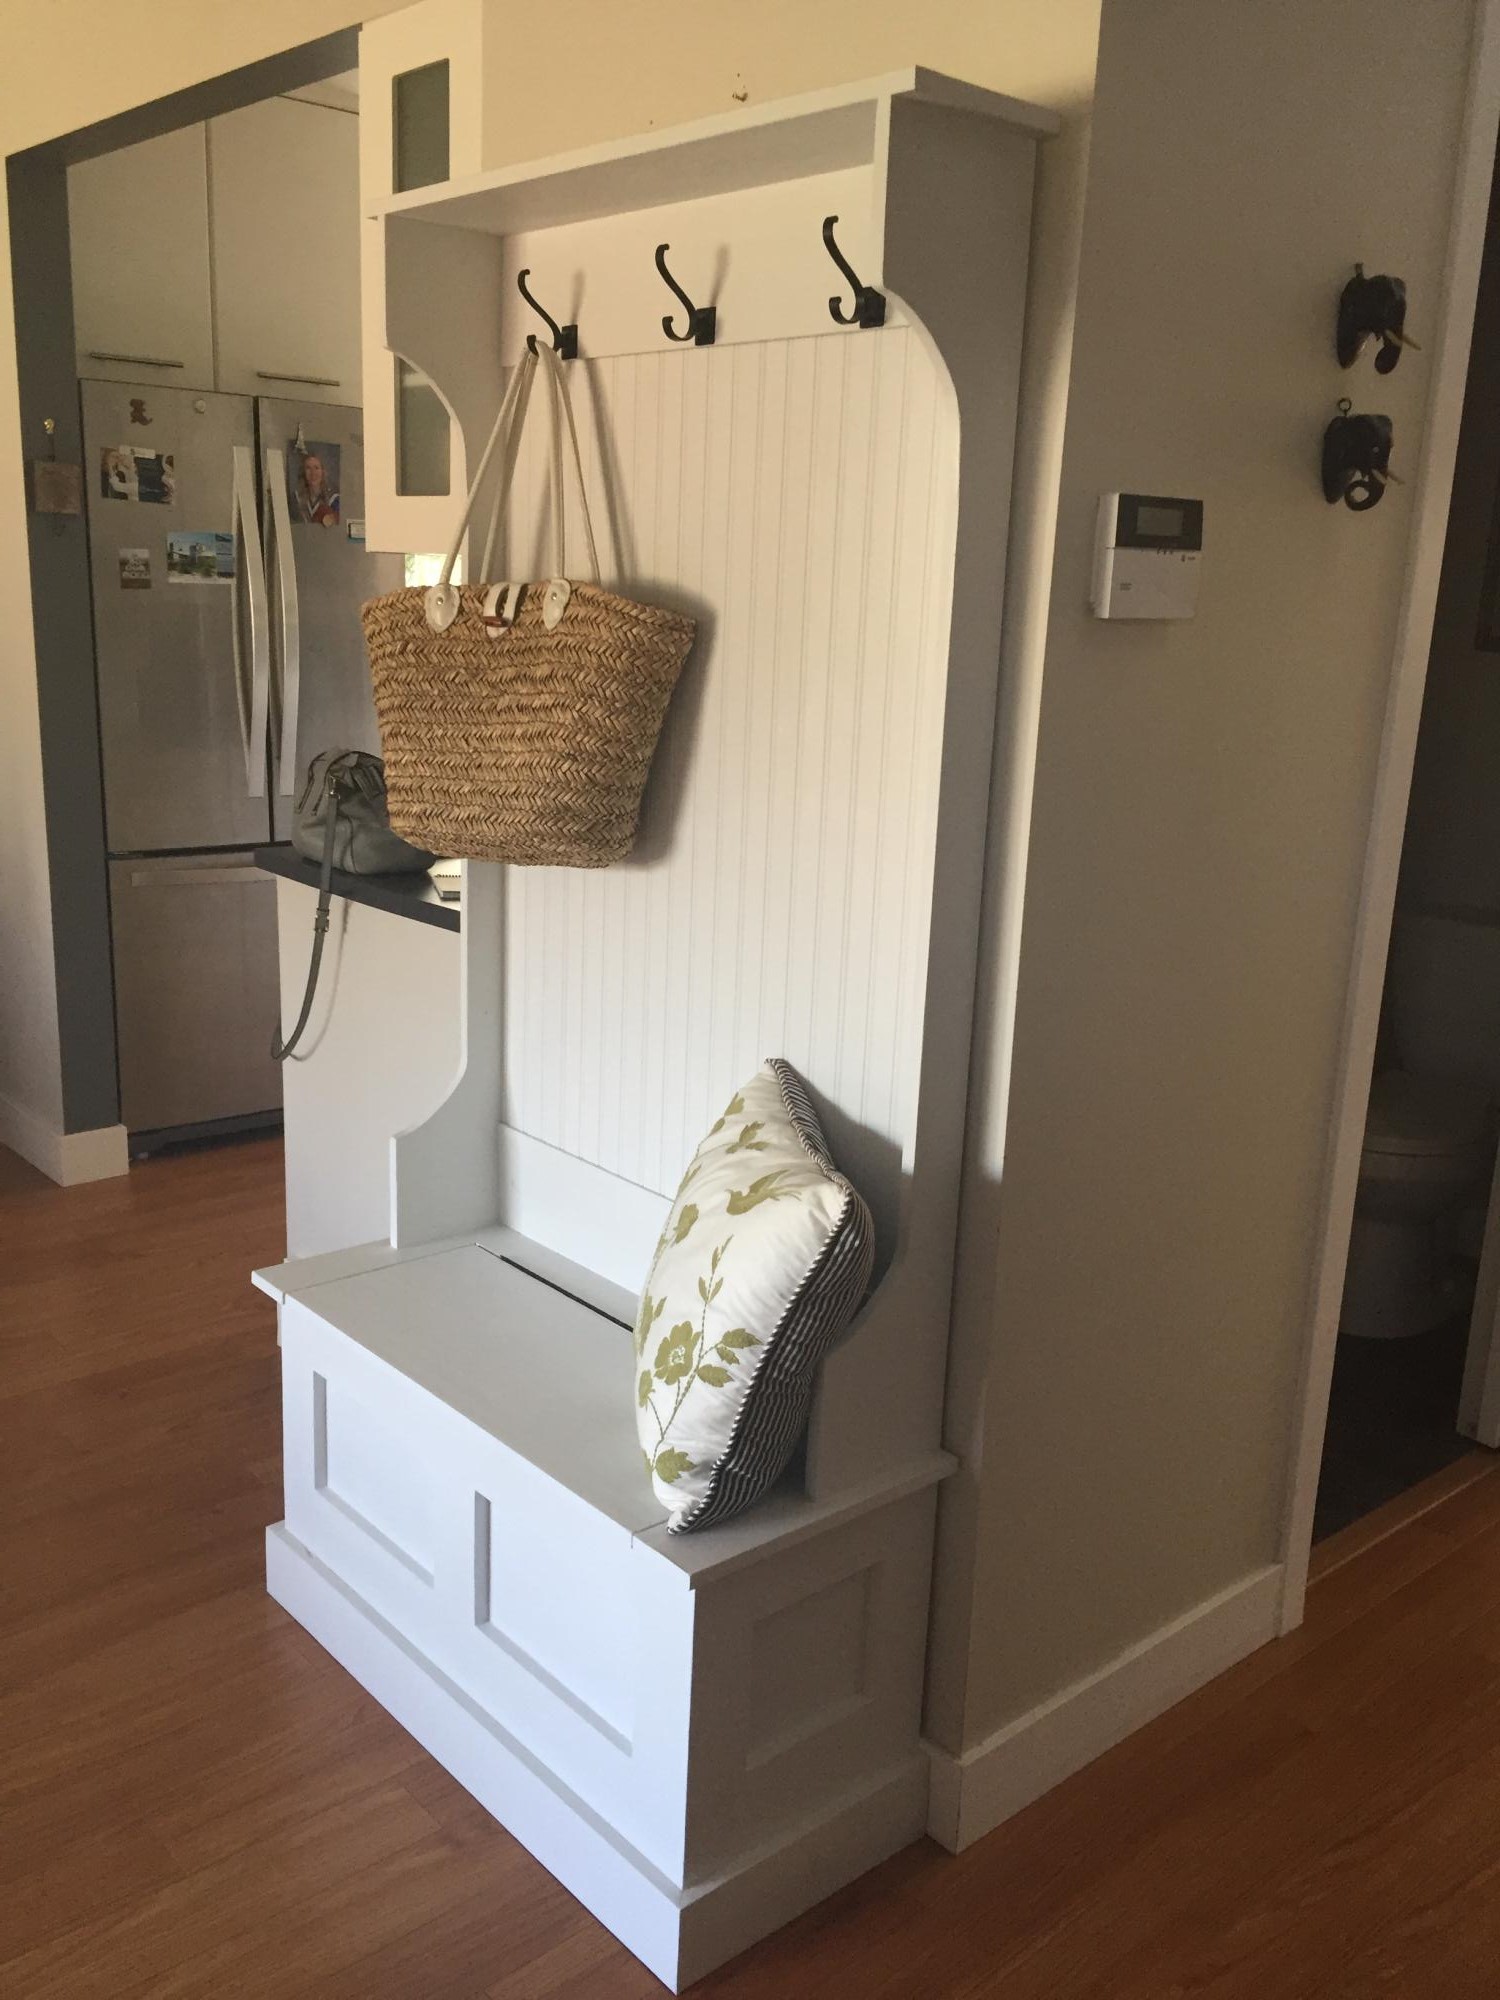
Entryway locker cubbies, top portion constructed in custom width and shelf height. Two sets.


Built this mini farmhouse style bed for my daughters 18" dolls... She loved it, thanks Ana!
This was my first real woodworking project and I feel like I learned a lot that I could pass on to others taking on this project. First post here!
It was a lot more time consuming than I thought. It is hard to estimate how many hours I put into it, but I'd say at least 20-30 hours of actual work is required. As a first-timer there was probably a lot of wasted time, and trying to squeeze in time for this around work, family, and other priorities probably added time. Other than a couple of days where I put in a solid 4-6 hours of work, the other days were an hour here or there that I could squeeze in. I decided to sand, prime, and paint everything before assembly. I think this was best for me, but I can see why others have recommended painting the entire bed white and then cutting in the color. After assembly there was definitely some touch-up required.
It also cost me a lot more than what others had posted. I spent around $900 for the project, including everything that was required...wood, new saw blades, new jigsaw blades, sandpaper - lots of it, screws - about 600 total, kreg jig, primer, paint, hinges, hinge supports, extra wood for a few mistakes along the way. I'm in Southern California and bought everything at a major home improvement store, so I probably didn't get the best prices on everything, but it is convenient to our house.
I started with taking the plans for the playhouse loft bed and playhouse loft bed with storage stairs - thank you so much for these! I built everything in CAD and converted it to a full size bed. This was very helpful for me as an engineer to see how everything was going to fit together. Even then I made some mistakes along the way! One of the best things this gave me was a consolidated cut list that showed me how many common size/lengths there were...like the 66 1x2x11.5's needed for the rails and the 13 1x3x68.5's (I attached this pdf here http://ana-white.com/sites/default/files/bill%20of%20materials3.pdf). This way I could set up a block on my saw and just knock out the cuts all at once and have them all be the same length. Building it in CAD also saved me on a few things, such as using a 1x4x120 instead of the 1x3x120 called for in the plans, which was not available at the store. This affected the dimensions of the stair walls and a couple of other things.
Things I learned along the way:
- pocket holes are cool and very useful; the kreg jig was well worth the $100
- wood isn't straight or square (I know, obvious for you pros out there!): the bends and curves over an 8 foot length of pine can be quite dramatic
- my garage floor isn't flat: assembly of the first rail taught me this!
- the rails are by far the most time consuming part of this project, between drilling pocket holes, assembly, filling pocket holes, sanding, priming and painting all the nooks and crannies, I probably spent 90% of my time on the rails...but my 5 year old really enjoyed drilling many of the holes and filling them with the kreg hole plugs and glue
- 4ft x 8ft MDF is incredibly heavy so you will need help to transport and it actually measures 49" x 97", so I didn't realize that I needed to cut 1" off of the height for it to match the 48" I had planned for...that would have been much easier to have the store cut for me! No table saw in my tool set...
- even with the help of CAD, I got confused during assembly on some of the directions, such as which wall would be facing outside or inside. This really only affected how I was trying to hide assembly features and screws, but something to look out for when you assemble. I replaced a couple of trim pieces that weren't as perfect as I wanted
- I used a lot more pocket holes during assembly than I expected, which was another reason that I say the kreg jig was well worth it
Differences in my plan:
- the stair widths are adjusted down to 22 3/8 from 22 1/2...you don't want the stairs grinding against them walls when you open and close them. You should check your actual width of your stair area before assembly because things might be different for you and squareness also affects this.
- I have four total stairs to account for the full size bed width, so heights and depths of each have been adjusted
- the lowest stair needs to be slightly shorter to account for the arc when raising/lowering it. As dimensioned, it will interfere with the front legs, so I used 10 1/4 depth instead of 10 1/2.
- I felt like the bed needed more support underneath so I added two more 2x2's with pocket holes on both ends
- I added hinge supports to the storage stairs to prevent squished fingers
Still thinking about added a window or door or some kind of access to the tallest stair compartment from inside the playhouse area...it is really tall so anything going to the floor in there might be hard to get out. The outer stair wall still seems kind of loose so I'm not sure if I need to add more pocket holes where it attaches to the back leg/wall or what. Not sure if I can add CAD models here, but I can supply them if anyone is interested.
Sat, 02/15/2020 - 08:53
Question, what is CAD? lol 🤔 Also, do you have more pictures of your full size playhouse loft bed with side stairs? How tall is this when over all done? You did an amazing job!! Thanks
Had a lot of fun making this! Followed plans exactly!
Just a fun plan free build from leftover wood

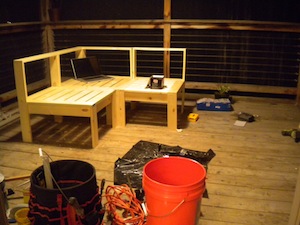
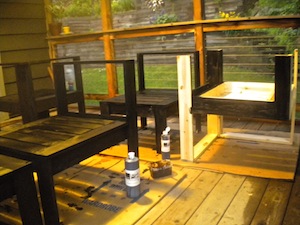
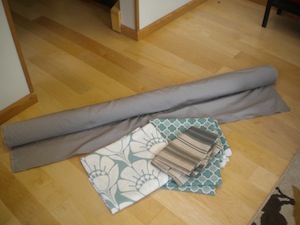
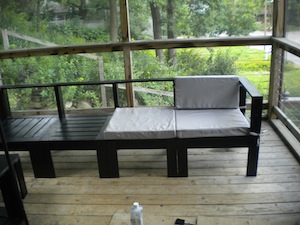
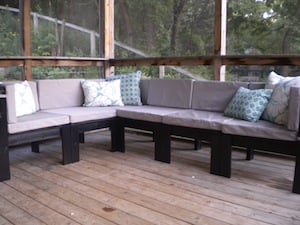
I can't thank Ana enough for her plans on this project. We recently purchased a big project house that was going to need a lot of work (and a lot of money.) That's why I was thrilled to find Ana's plans for the exact West Elm Wood Slat Sectional I was eying for my screened in porch. The exact configuration at West Elm would have cost $2130, but I built it and sewed all the cushions for just $288! Ana's sewing plan was really helpful too, but I altered mine to include zippers in the back to remove the fabric for washing, and ties to hold the cushions securely to the sectional. We finished the sectional with super easy india ink and poly for a deep black finish that still shows the wood grain. The screened in porch is now our favorite room in the house! Thanks Ana!
Mon, 09/05/2011 - 11:05
This looks really super! I clicked on your blog link and read a few entries (funny!) You did a great job! Love the fabric for the cushions too. How much India ink did it take to stain a piece this big? Did it take a long time to dry? cheers!
J
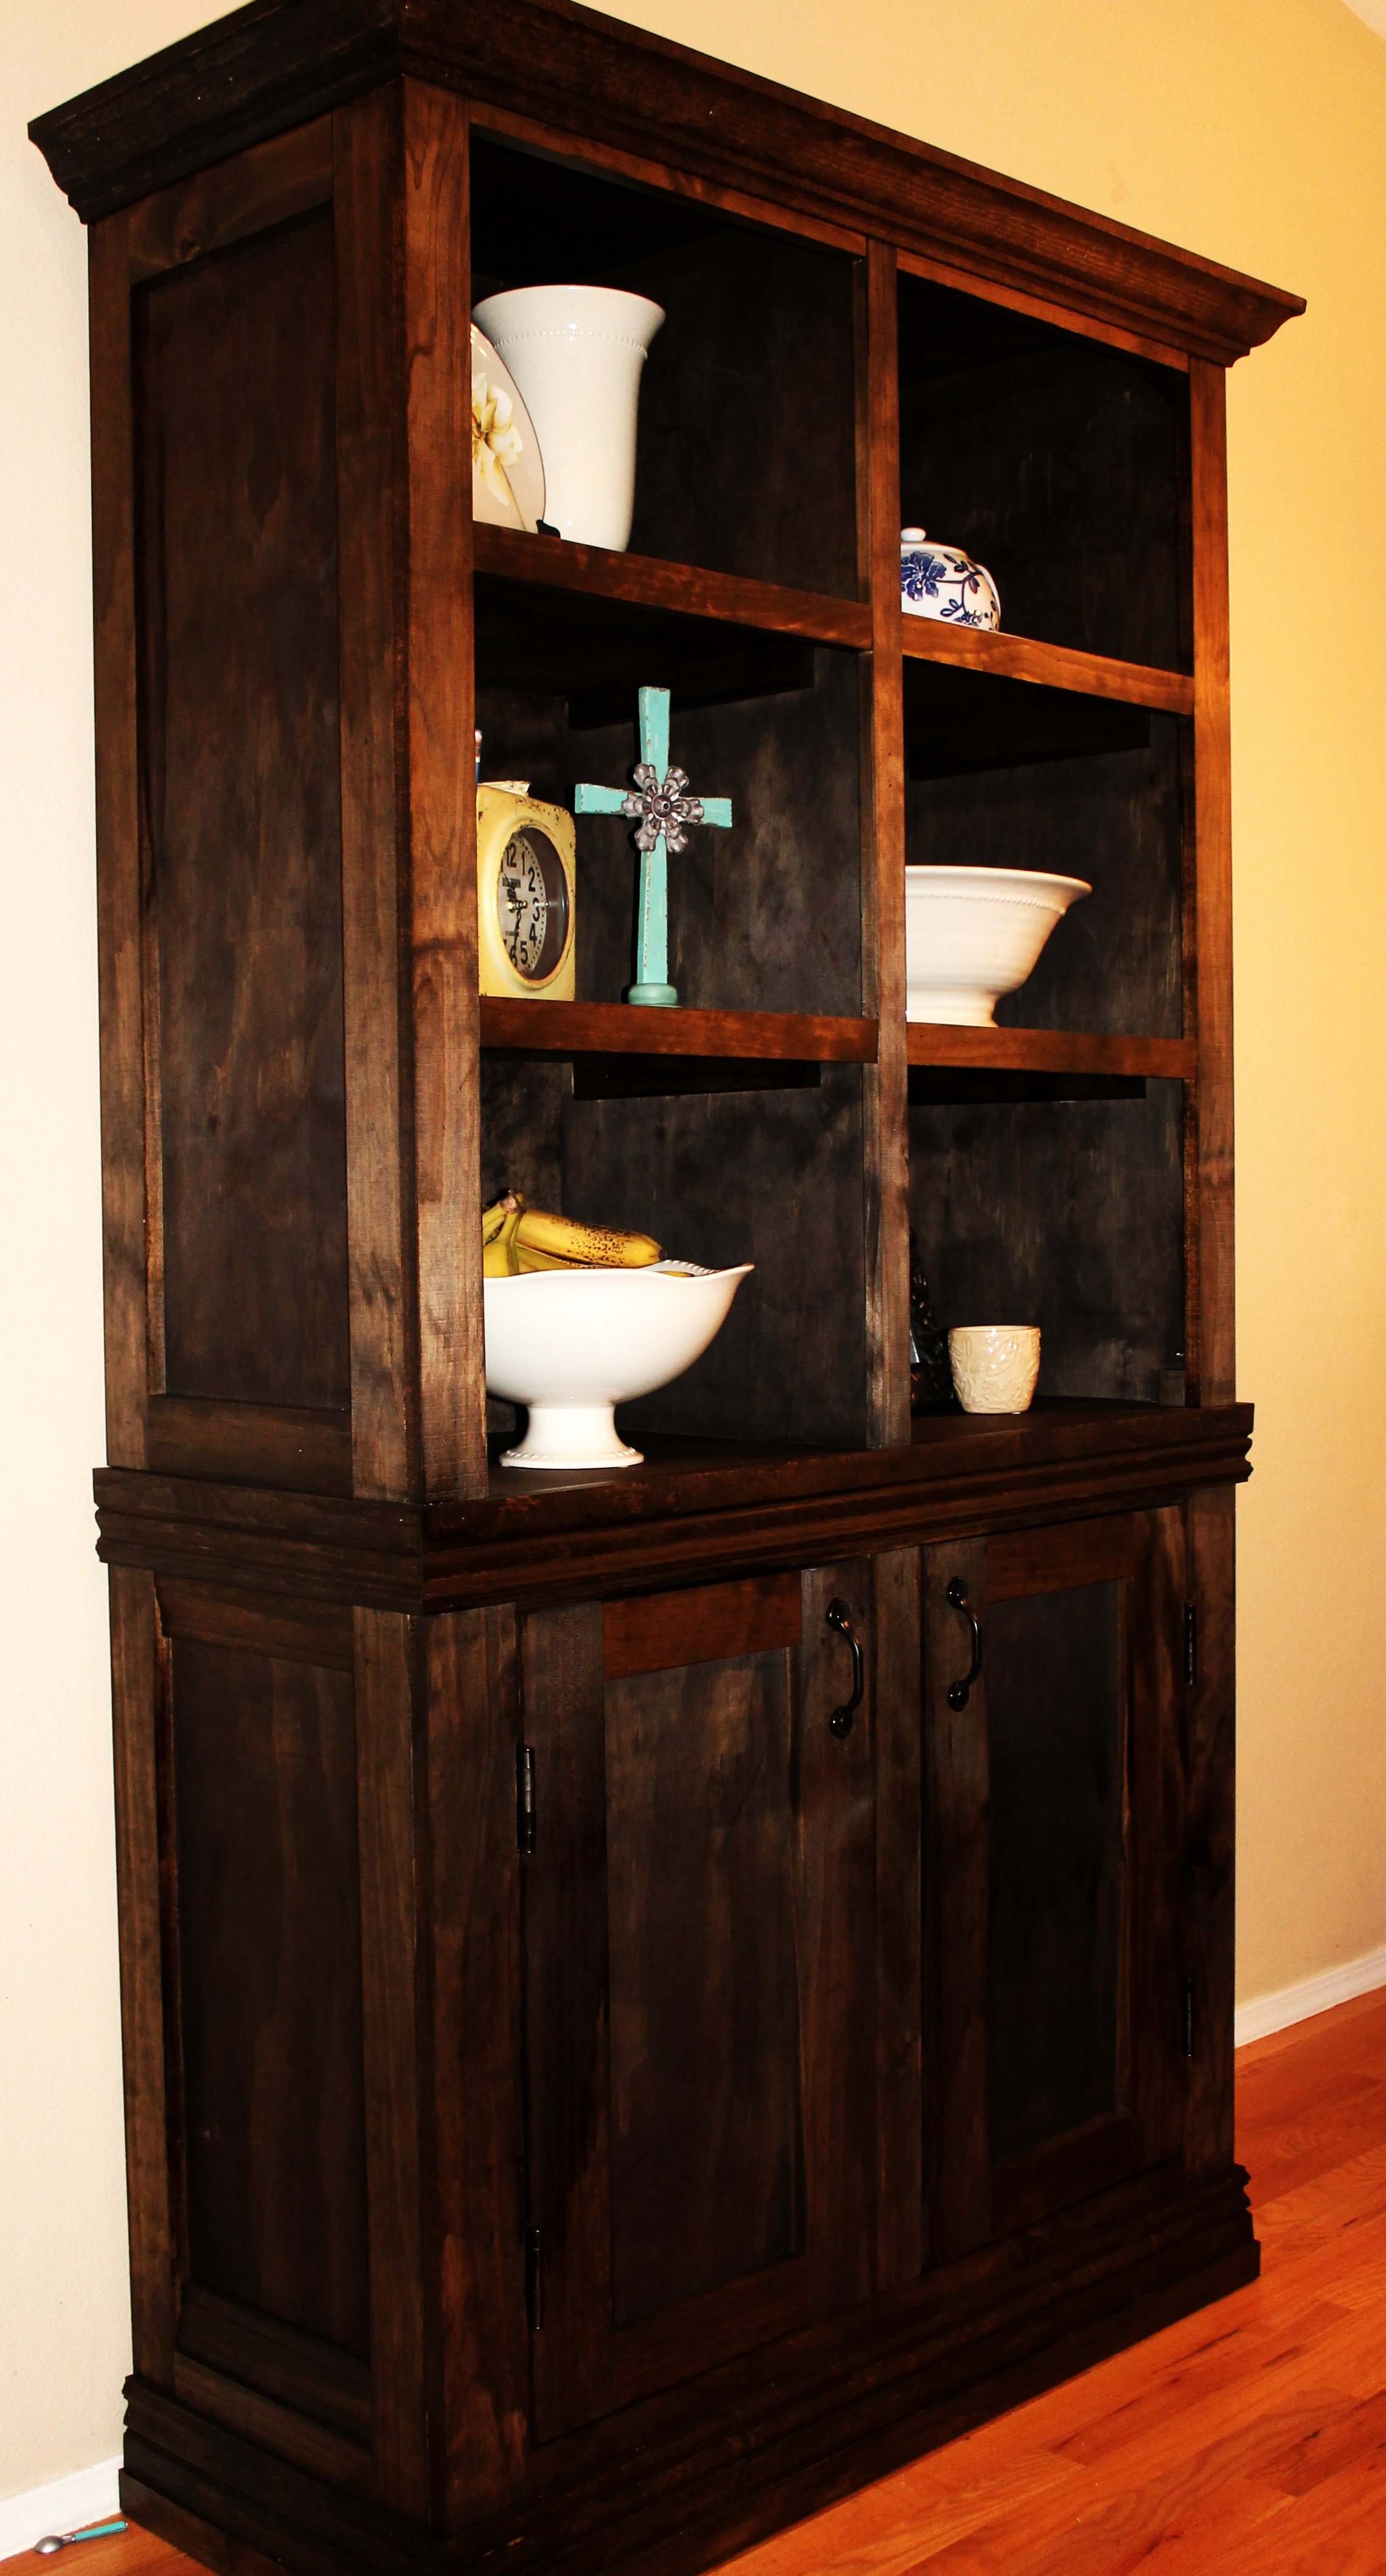
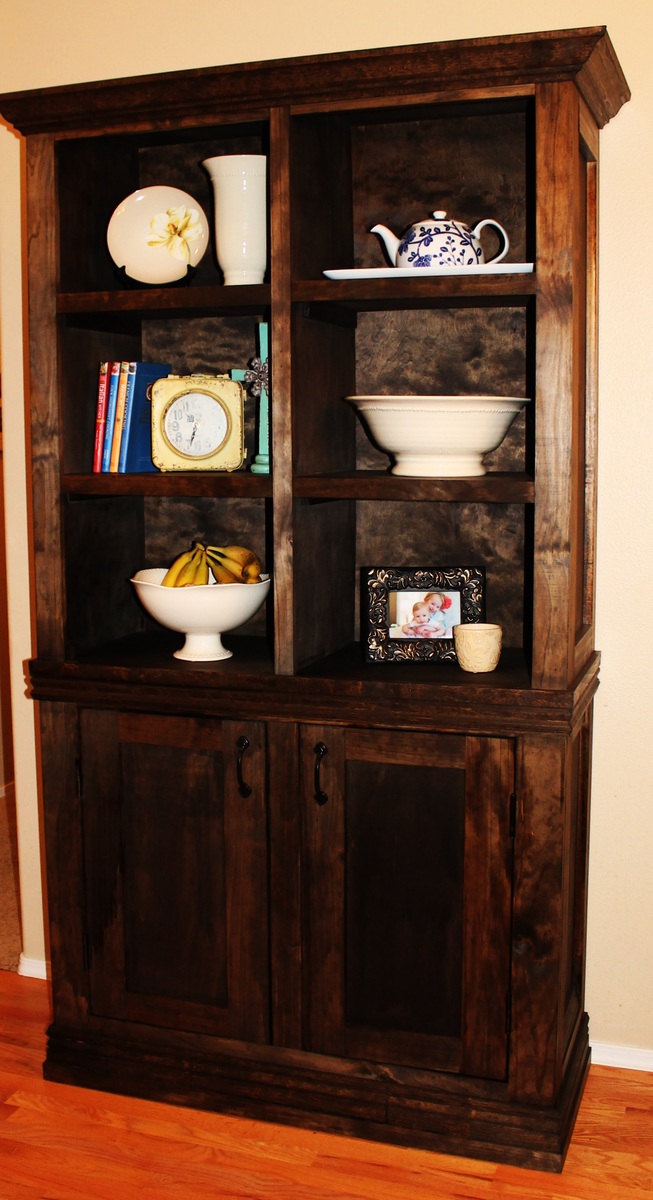
This was my husband's first build using Ana White plans. He scaled down the hutch and sideboard to fit our kitchen (42"x80"). It took about 24 hours to complete. We used a Minwax stain in Dark Walnut. I have looked for a piece to replace an ugly old baker's rack for years and hated the junk at places like Target. Everything I liked at Pottery Barn and Restoration Hardware were too expensive. I never found anything old that I liked enough to refinish so having the hubby pull this one out is basically awesome! Yay!
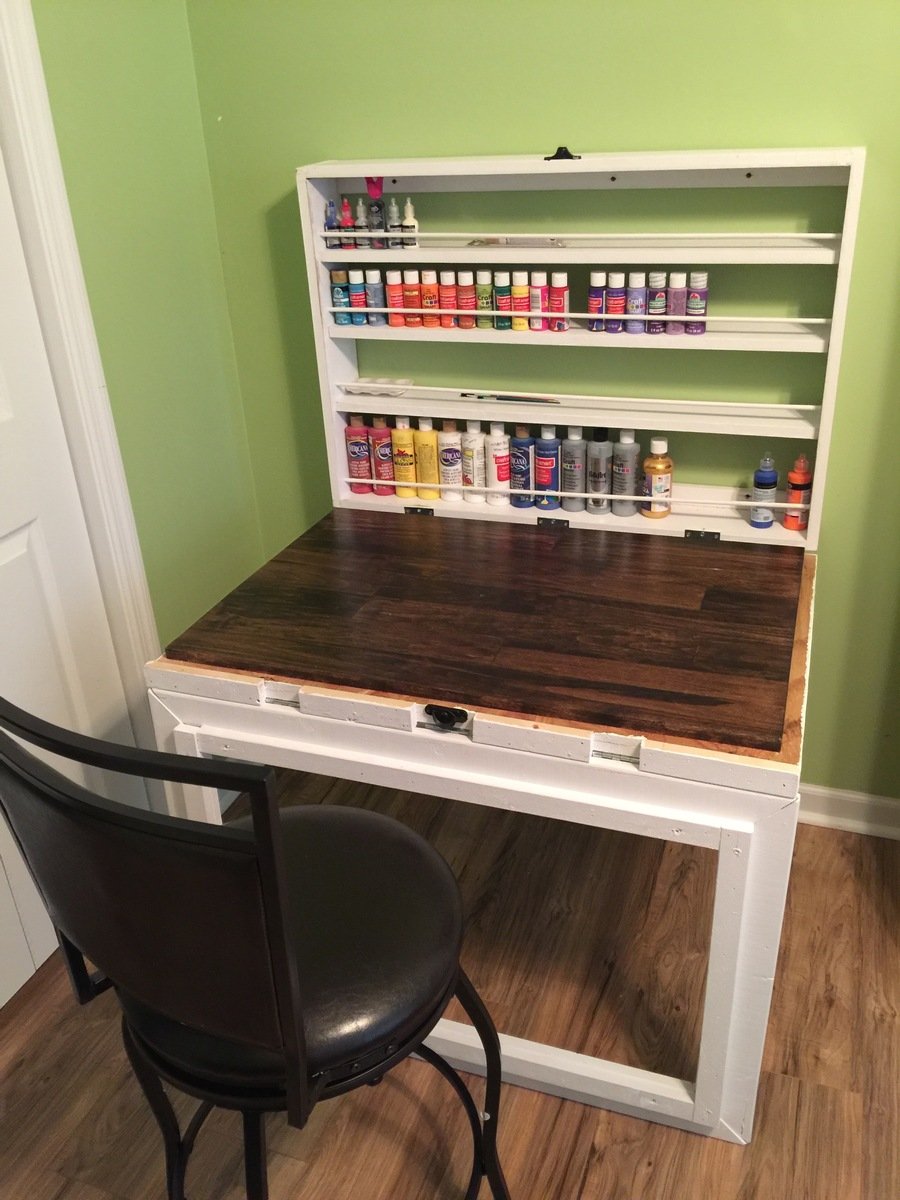
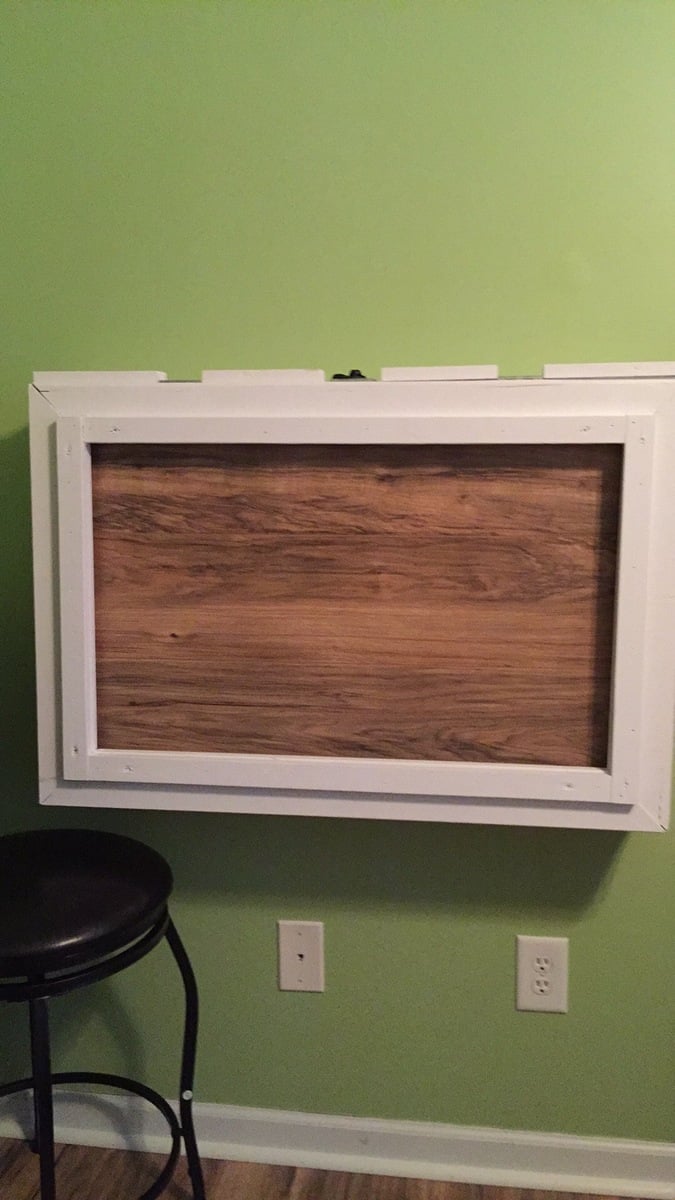
Built this for my wife and daughter for a space to paint and allow to dry with no concerns. Developed from simply looking at the picture with a lot of guess work to get what I wanted for the end project.
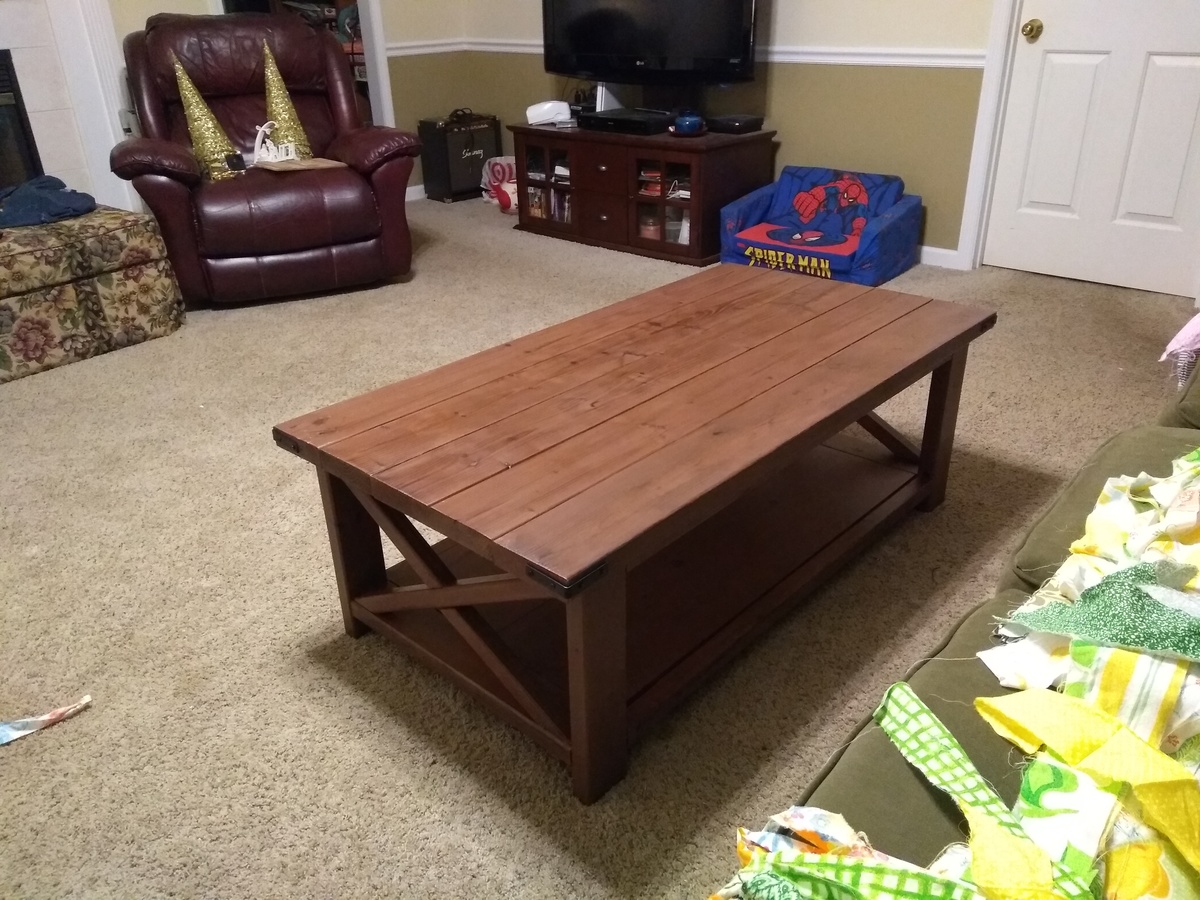
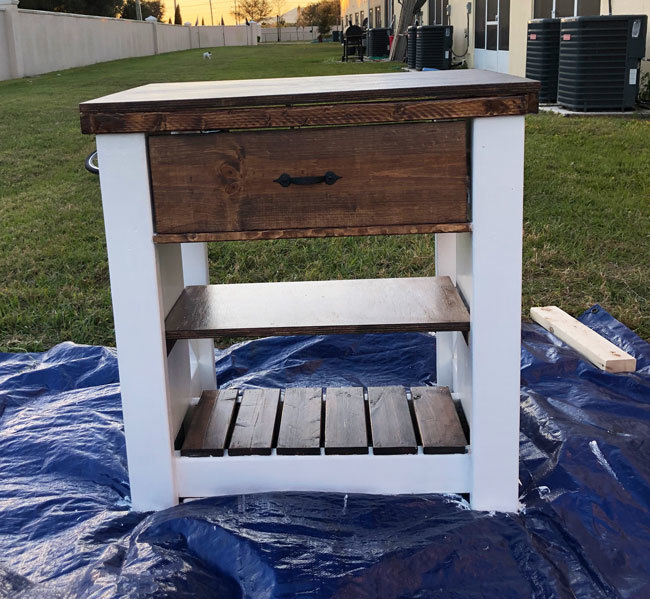
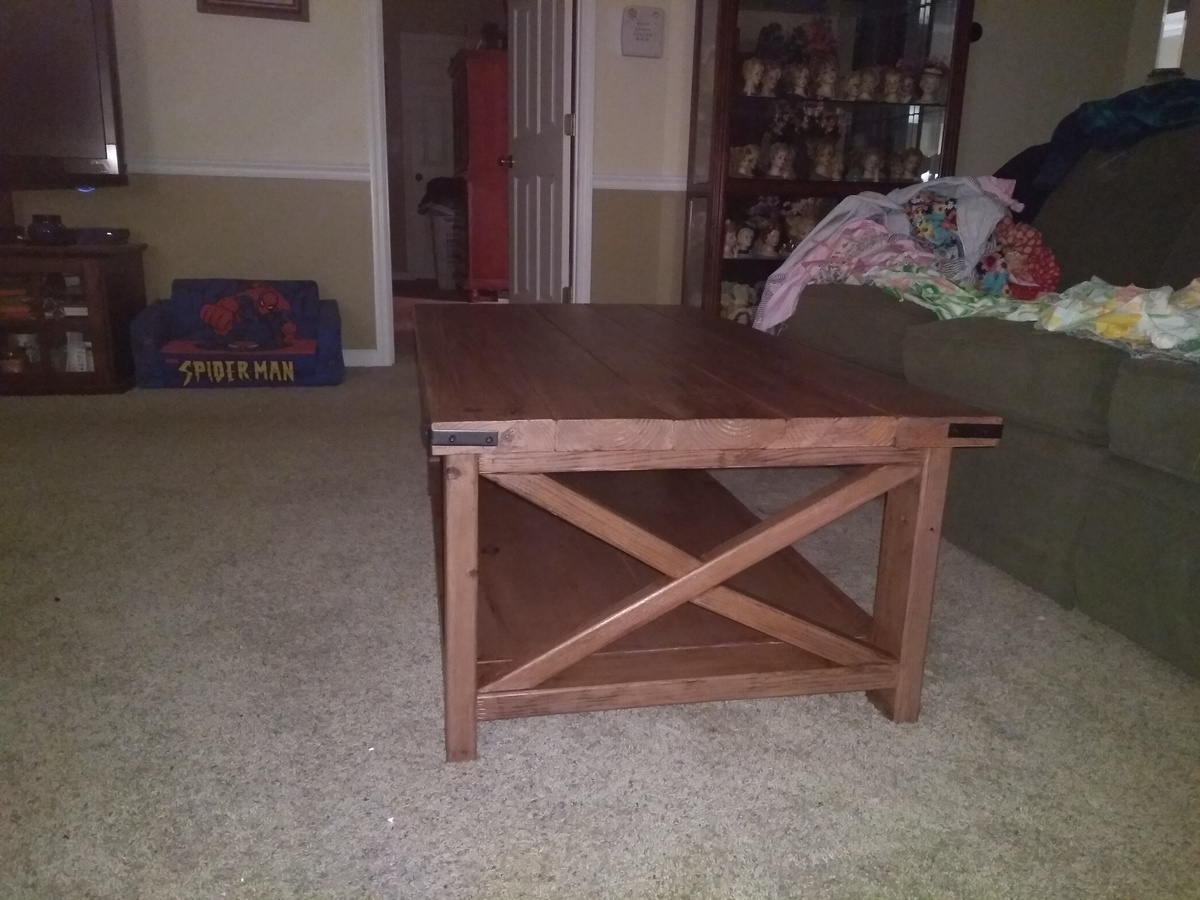
Glad to finish this build. Completed the matching end table over a year ago. Finally got around to find this table. I enjoy Ana's plans and look forward to selecting my next project. Thanks for the free plans!

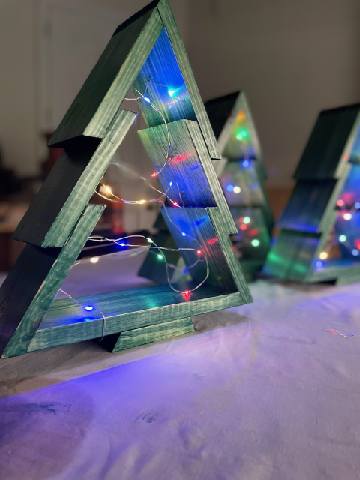
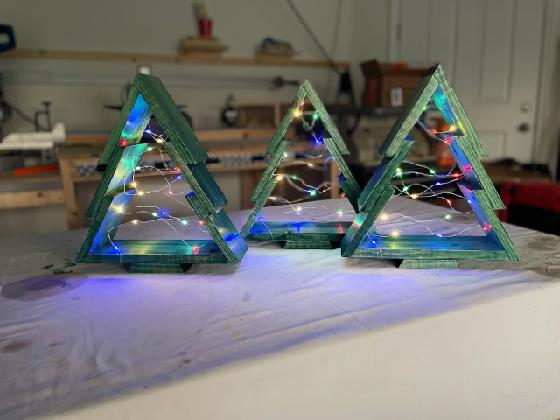
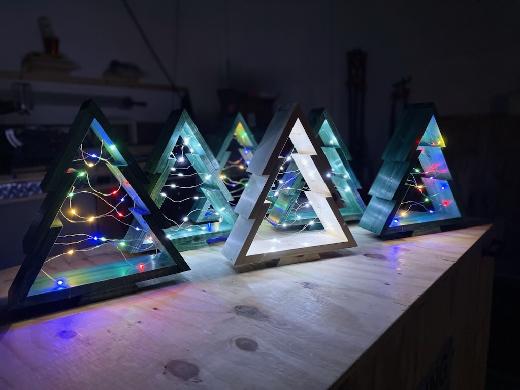
Adding the fairy lights to these tree's turned out to be a great idea. I think they turned out really good.
#Todays_Spare_Time
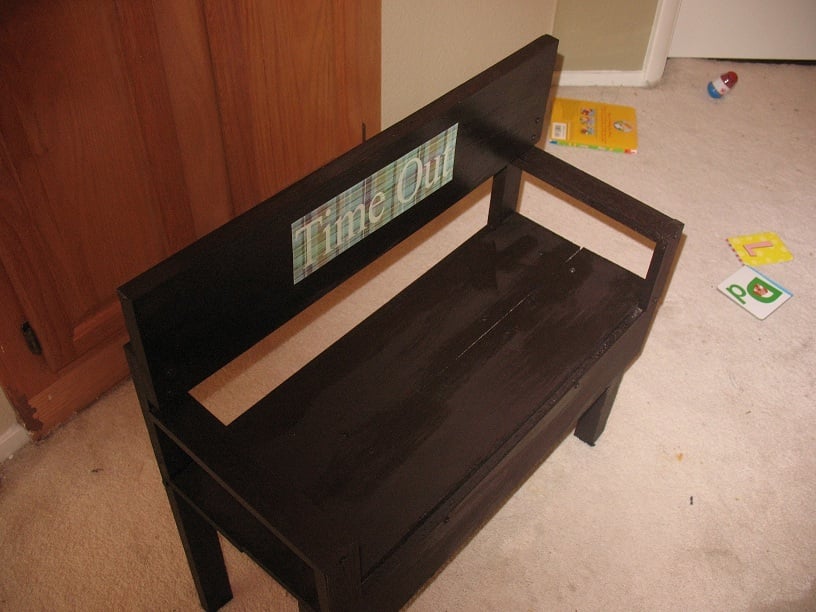
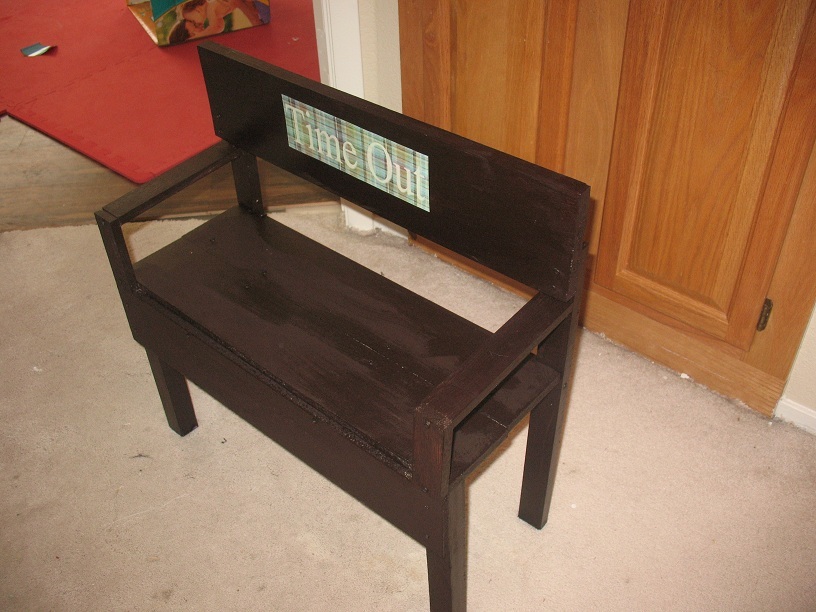
I built this from wood scraps. I saw one at Walmart online but thought it was too small. I built this to suit my tall toddler.

Thu, 09/29/2011 - 12:17
That looks awesome! I wouldn't have even thought to make one for time out! I think you're onto something! :-)
In reply to That looks awesome! I by Lady Goats
Thu, 11/03/2011 - 21:39
thanks so much! I saw it at walmart but wanted to make one a little bigger to fit a wall.
here is the walmart one
http://www.walmart.com/ip/Time-Out-Bench/12343327
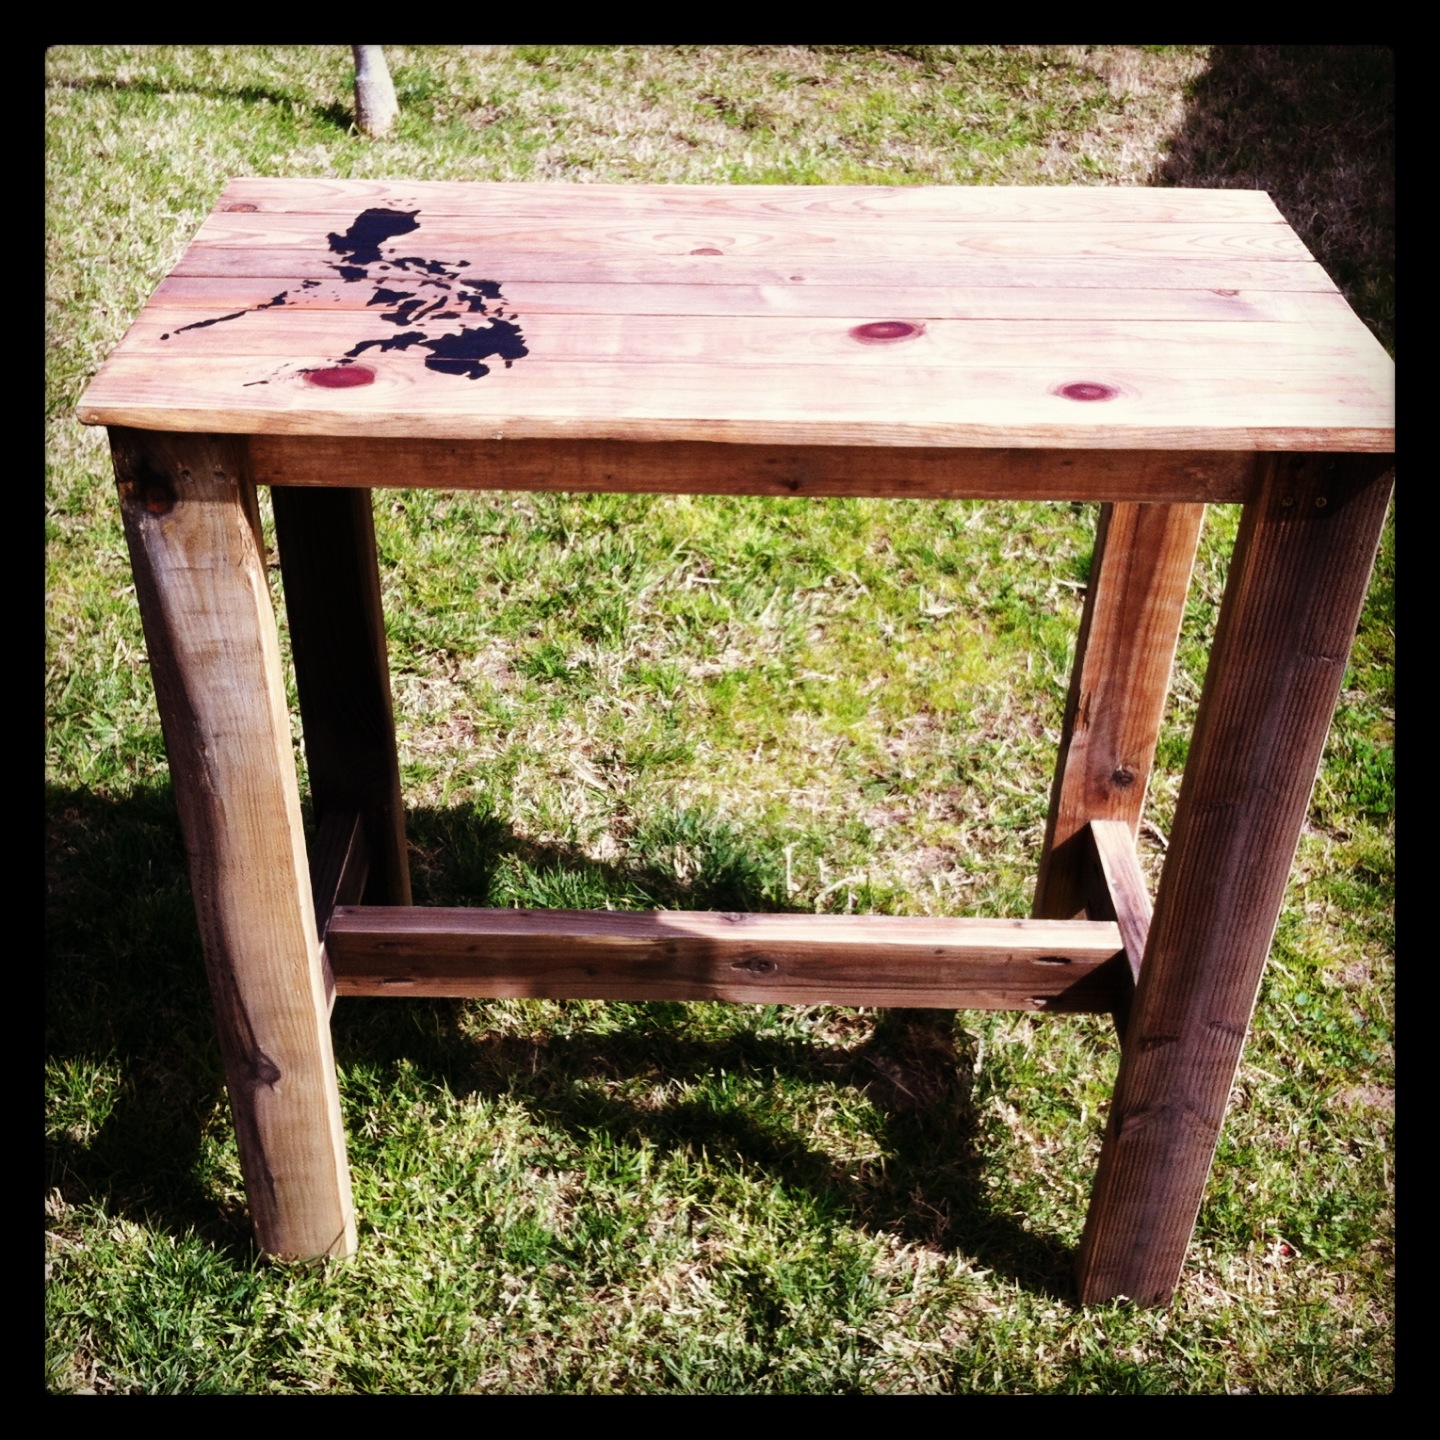
I call this the fish fry table because I built it for my mom to fry her fish on outside rather than in the kitchen. :) I did the old barn wood finish on it (vinegar and steel wool) and used a sharpie to draw the Philippine Islands on it. Conveniently, there was even a knot in the wood to emulate a tropical storm. Then sealed it with a clear gloss poly.


This was my first woodworking project, so it’s very easy to build. I made a huge Parsons bookcase, anchored to the wall, and affixed plywood and Ikea kitchen cover panels to the front to create a headboard with storage. Thanks, Ana, for the easy plans!

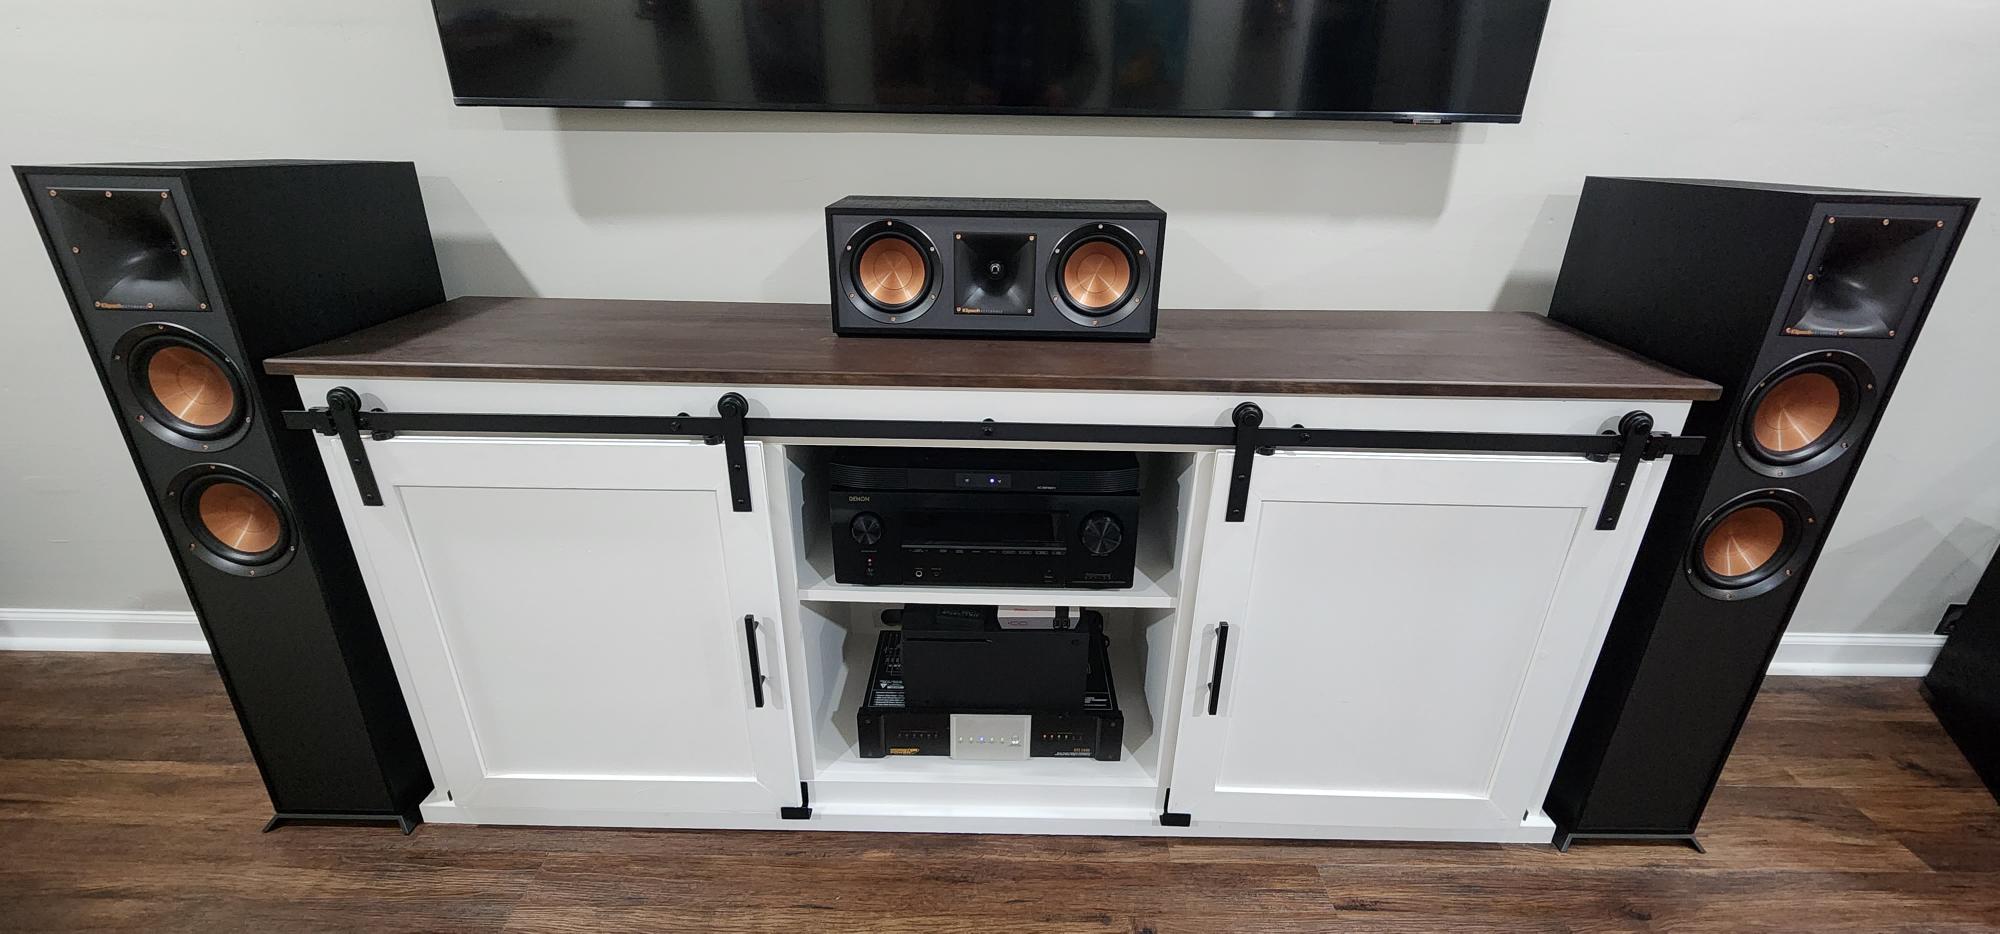
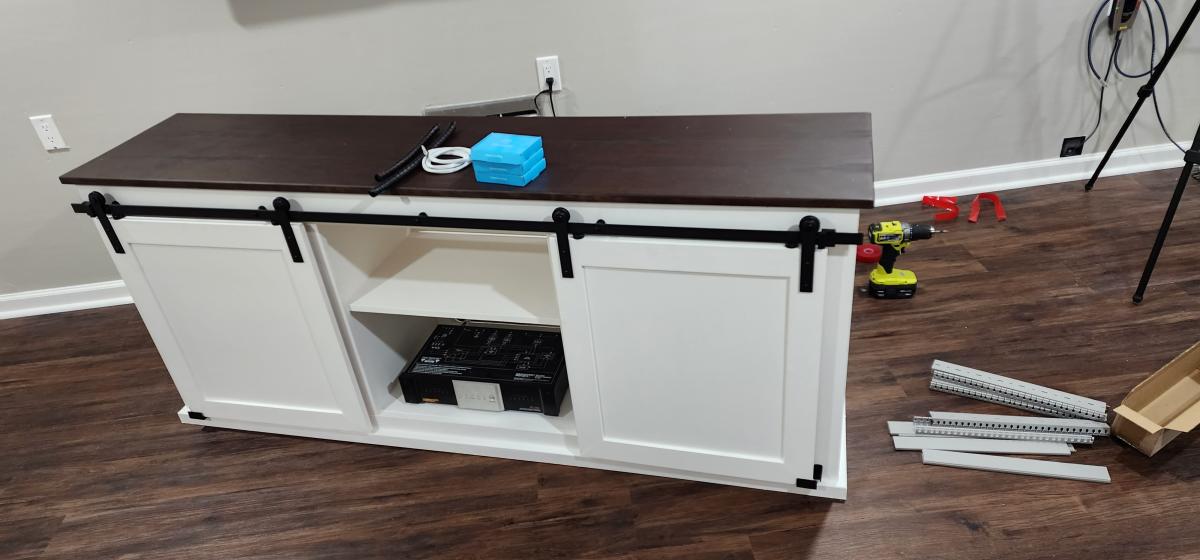
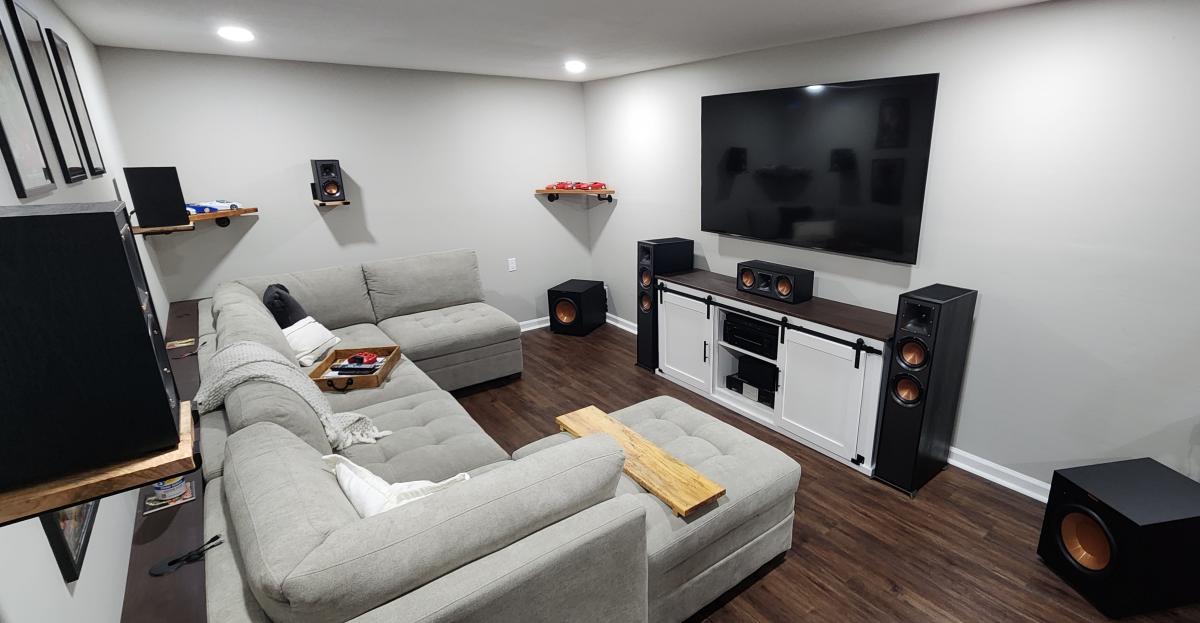
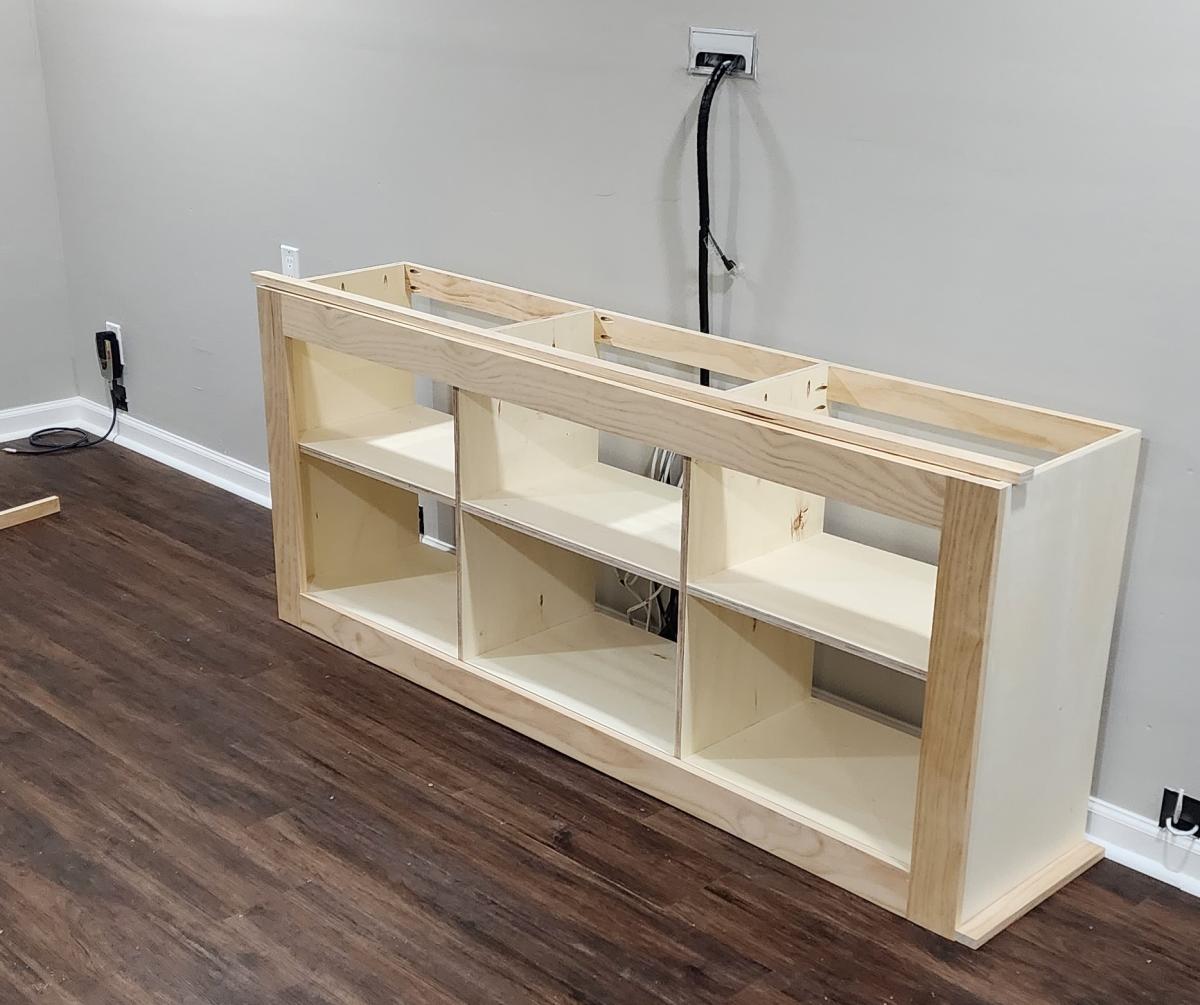
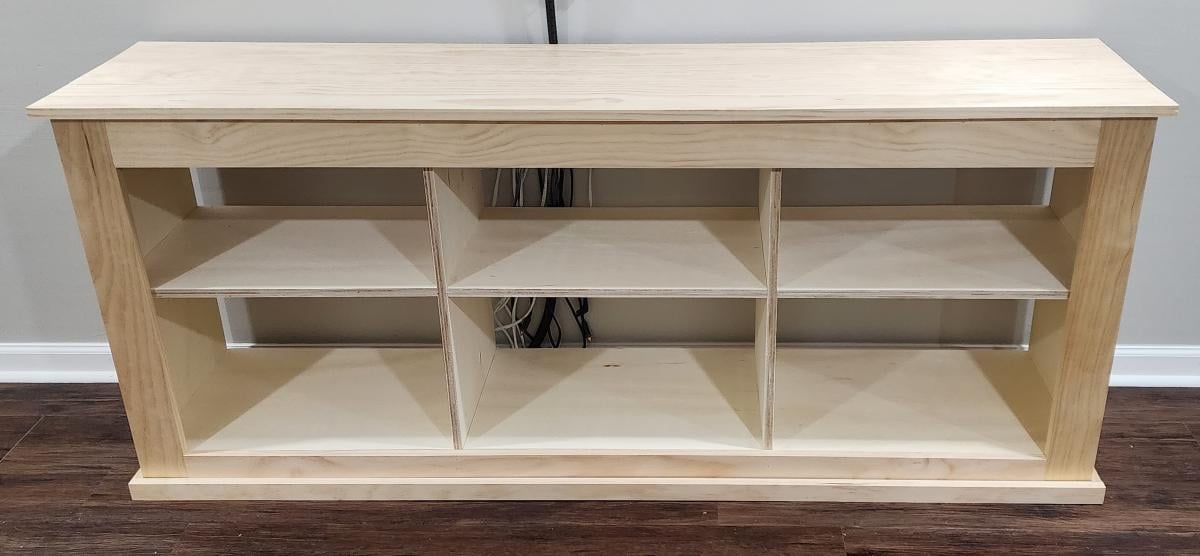
I didn't really like the modified 6' console plans, so I modified the 8' version. This gave me the center opening for my home theater equipment, power station, and gaming console. Besides reconfiguring the dimensions, the only other things changed were aesthetic. With the right tools, this console was pretty easy to build!
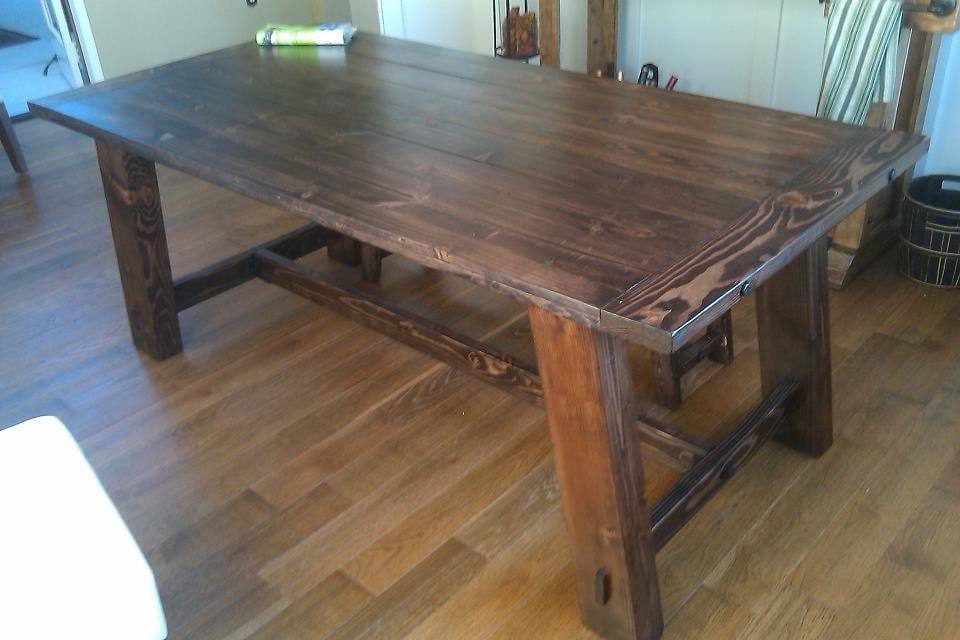
I built this table using a hybrid approach; I used Ana's plans as a loose guideline (leg angles) and drafted the rest using the dimensions supplied at Pottery Barn's website (for the fixed table, not the extendable version).
Wed, 09/14/2011 - 18:11
This is beautiful! Love it. Thanks for the detailed information.
Wed, 09/14/2011 - 23:04
This is awesome. I'm finishing up my first project (floor to ceiling bookcases) and looking for a dining room table to make next. This just might be the one. Thanks for sharing!
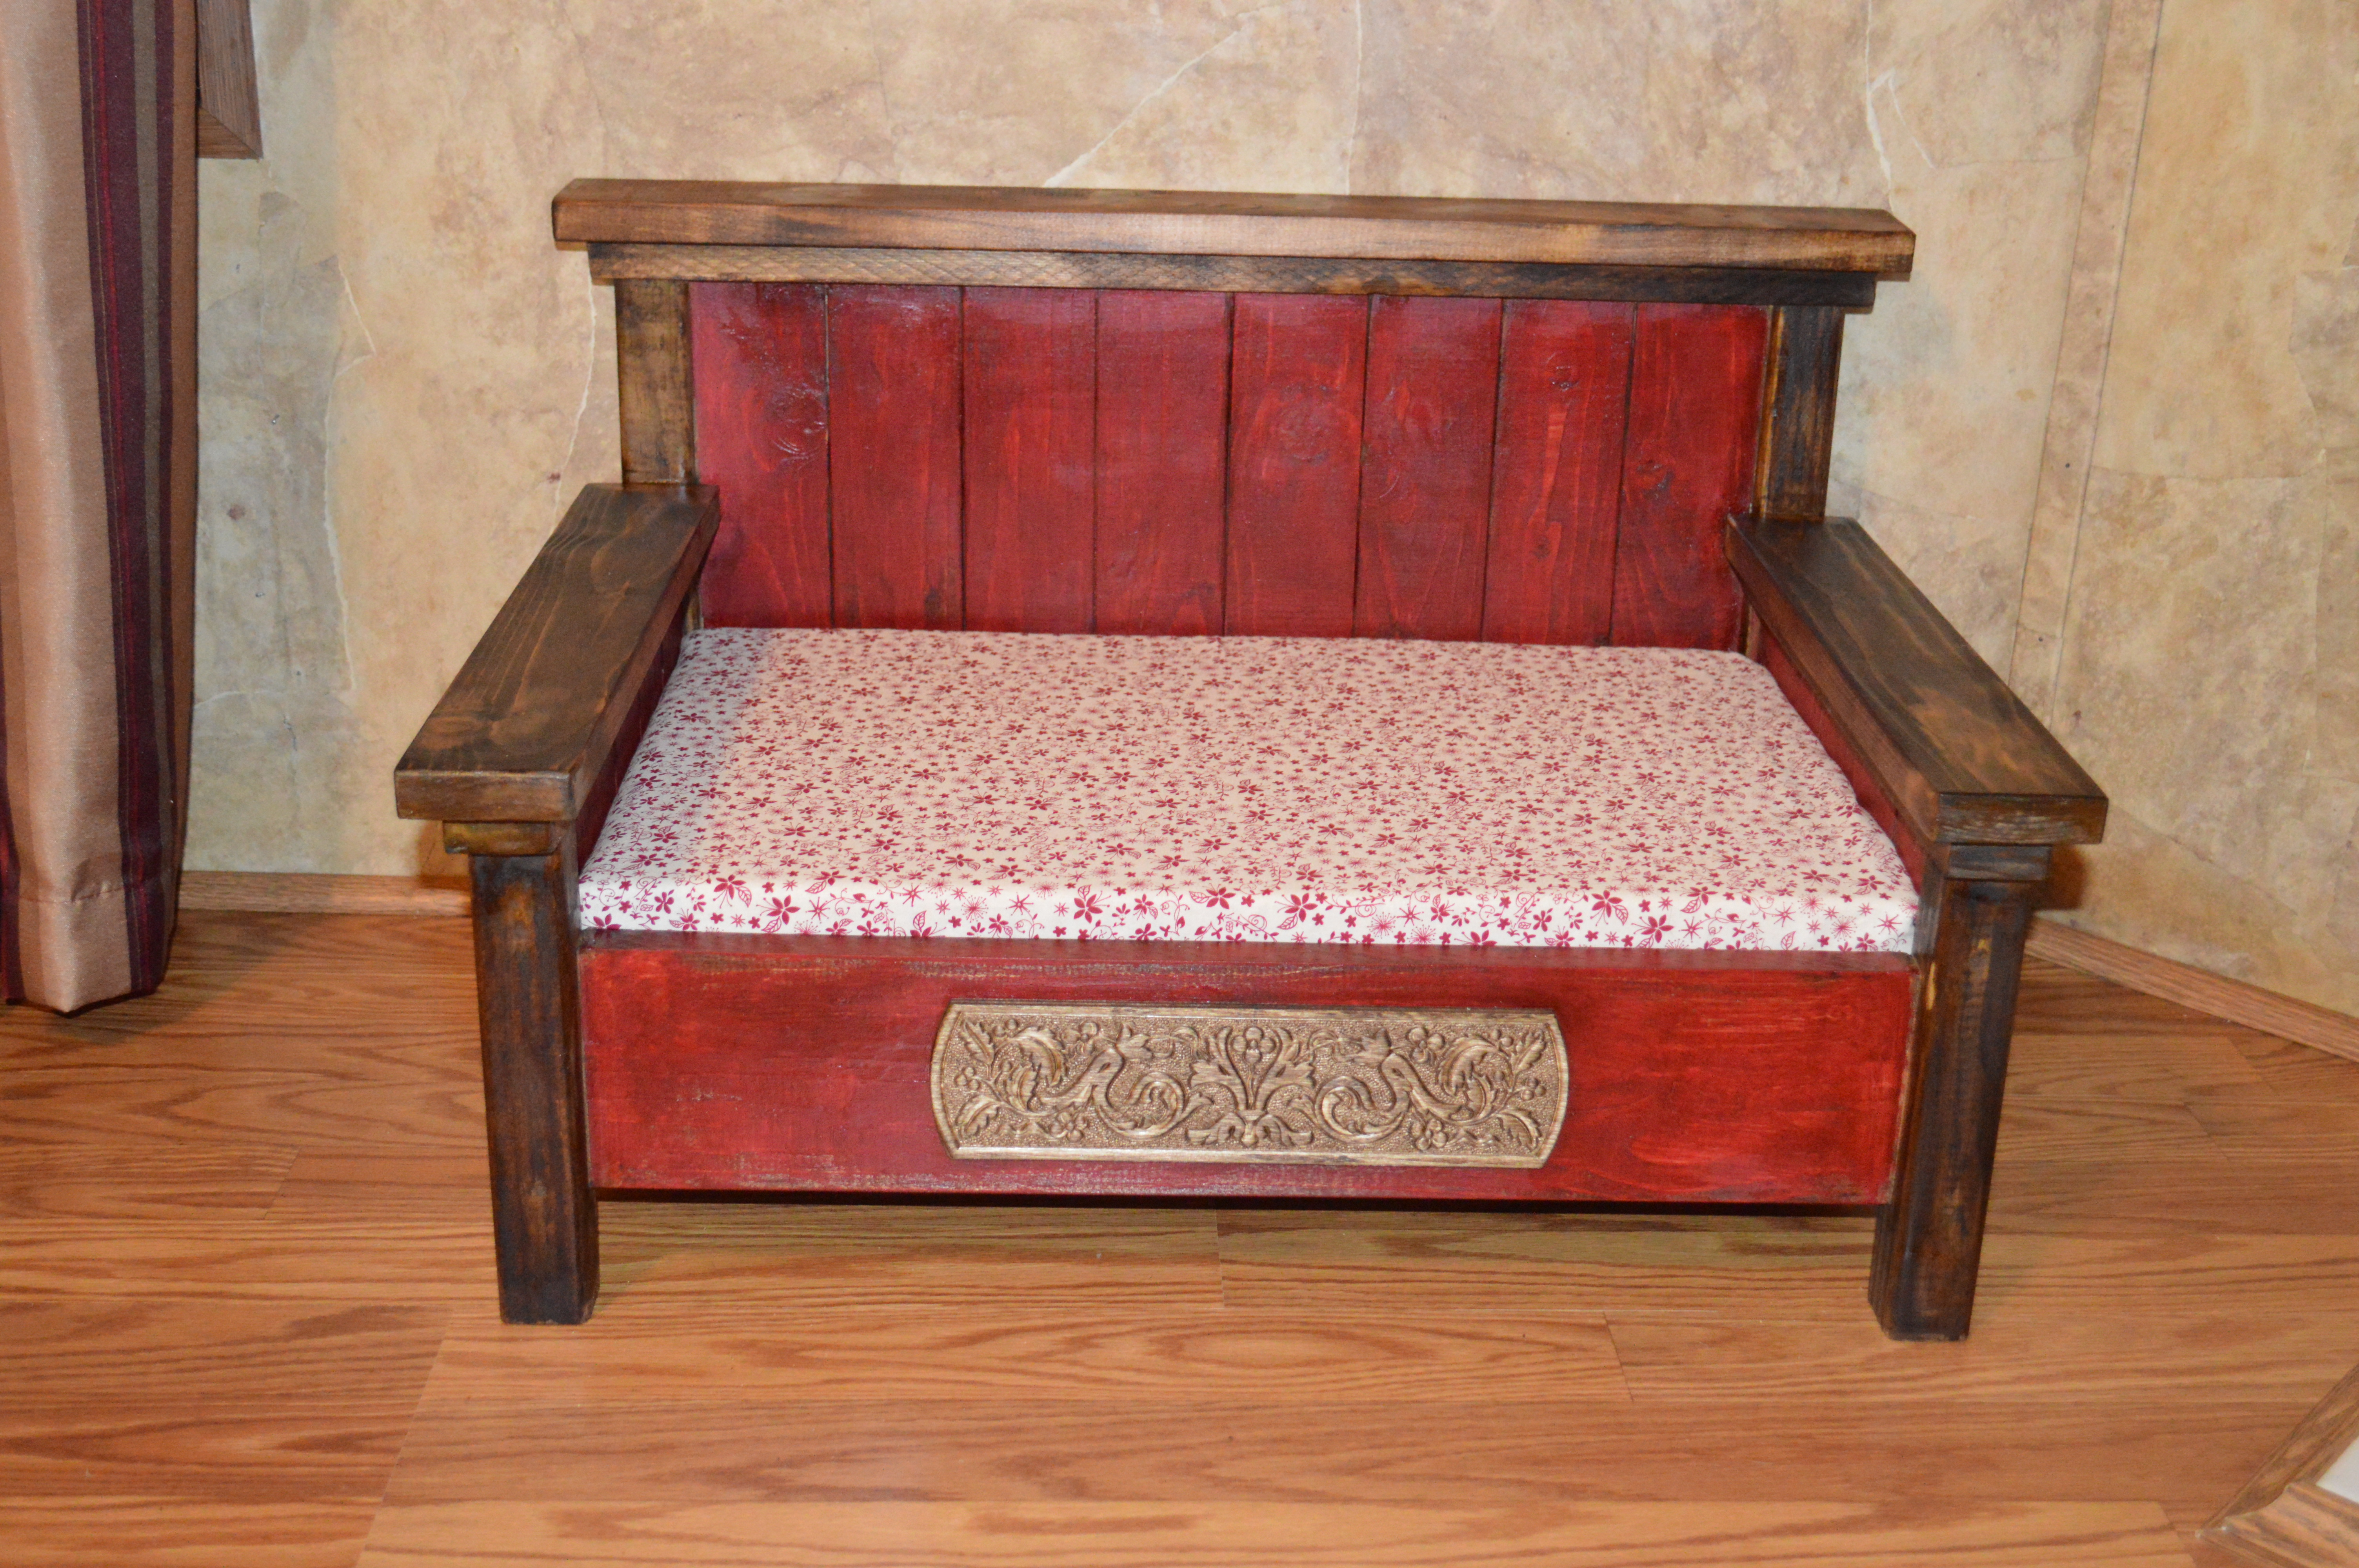
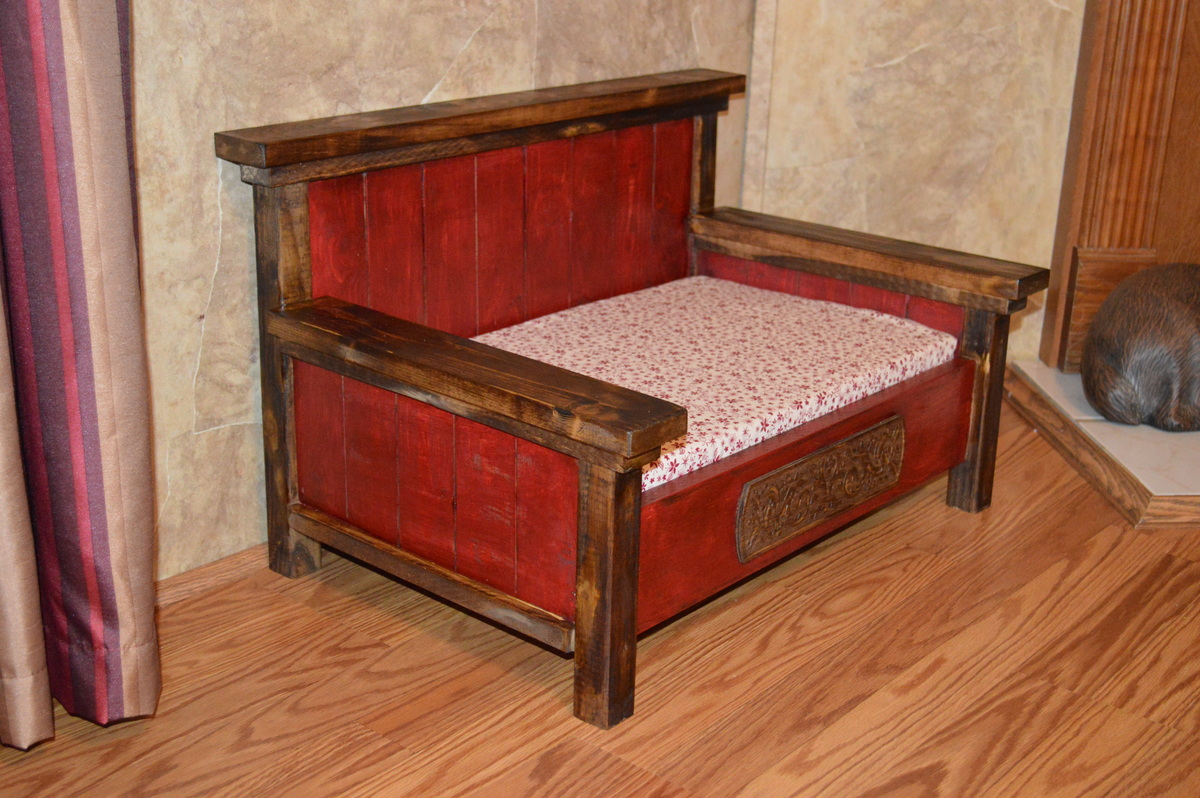
Primitive Doggie Daybed
What a beautiful bench to build. Will build the matching table soon.

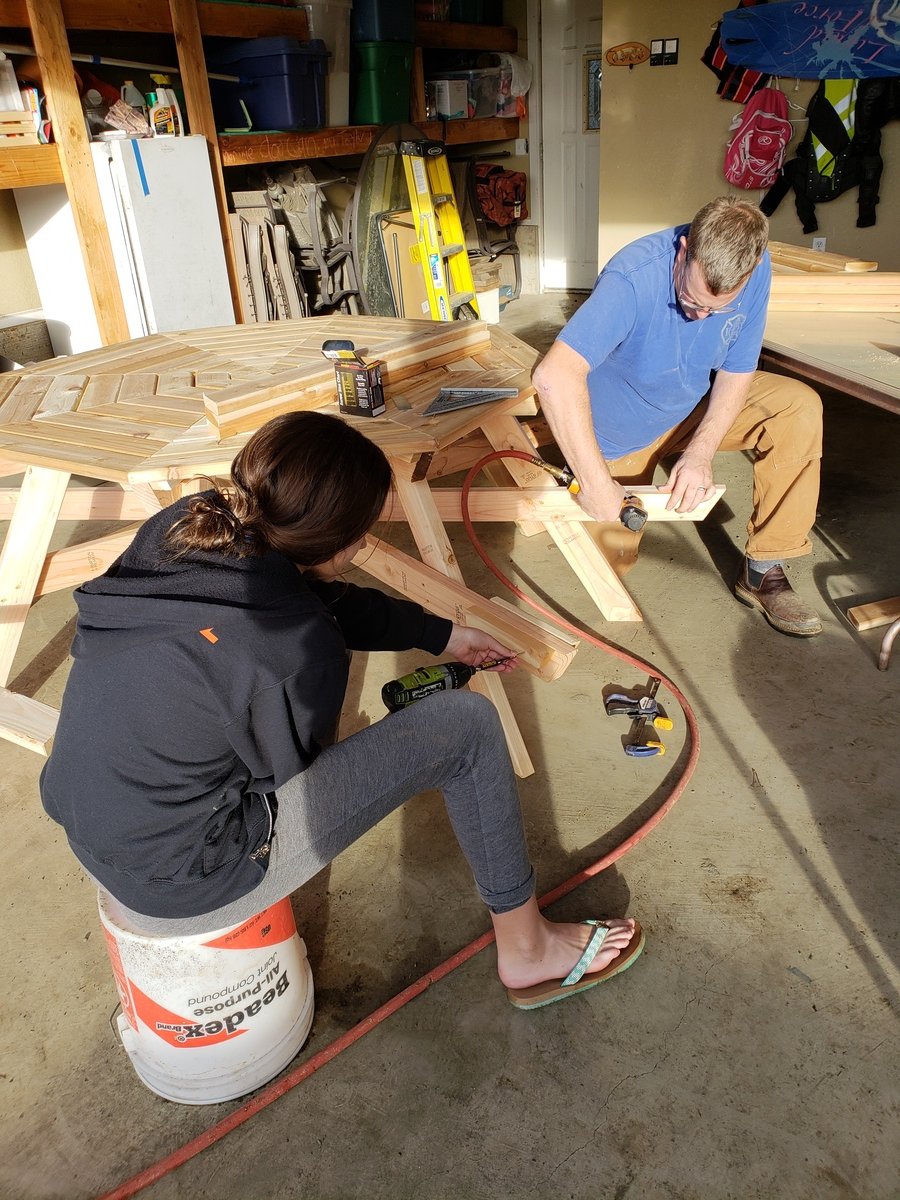
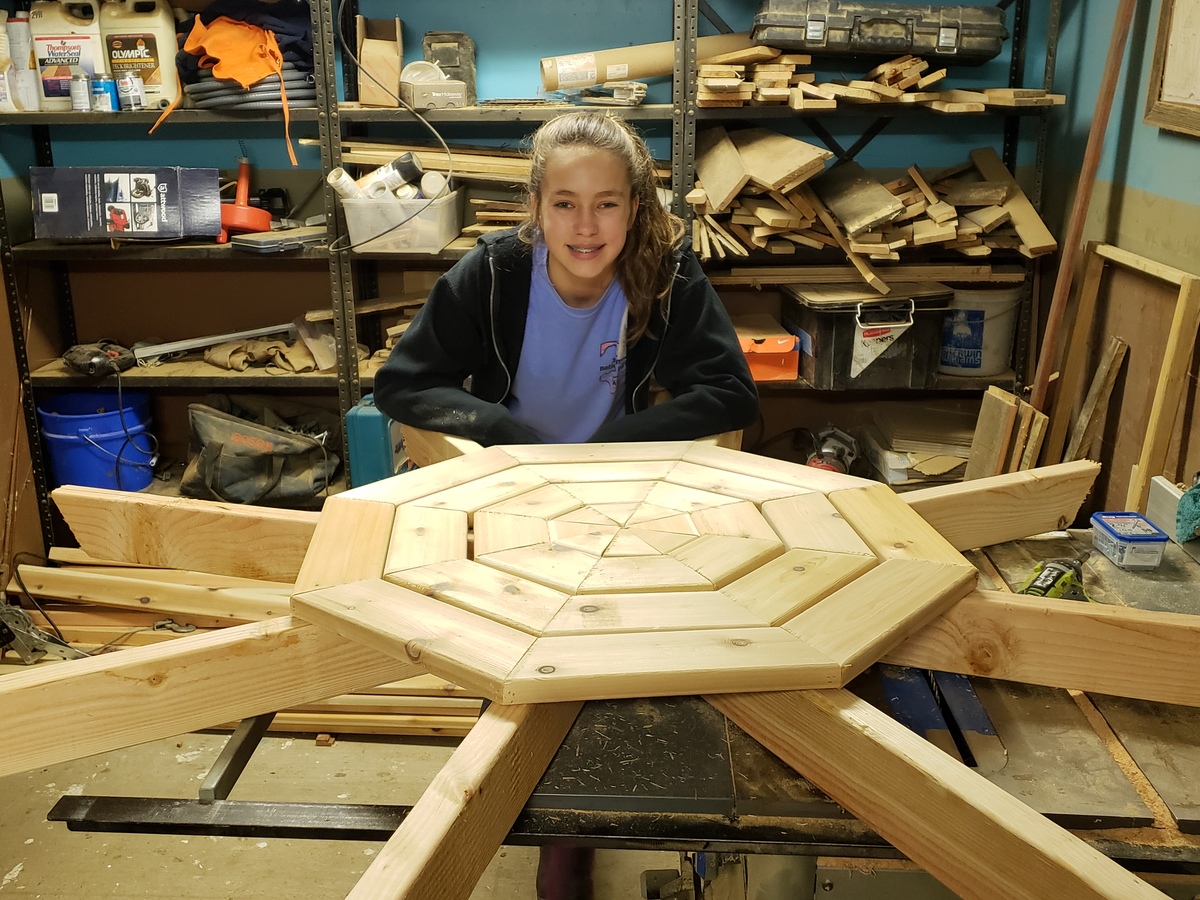
My 11 year old daughter and I built this table in a weekend for a fundraising auction for her school. We changed out 2x6 for 5/4x4 Cedar. We also fixed nailers on the underside so no screws show. The table was a fun project to work together on and for Taylar to learn to use power tools. BTW the table raised $700.00 for her school, I would say that is awesome. Thanks Anna for the plans!!

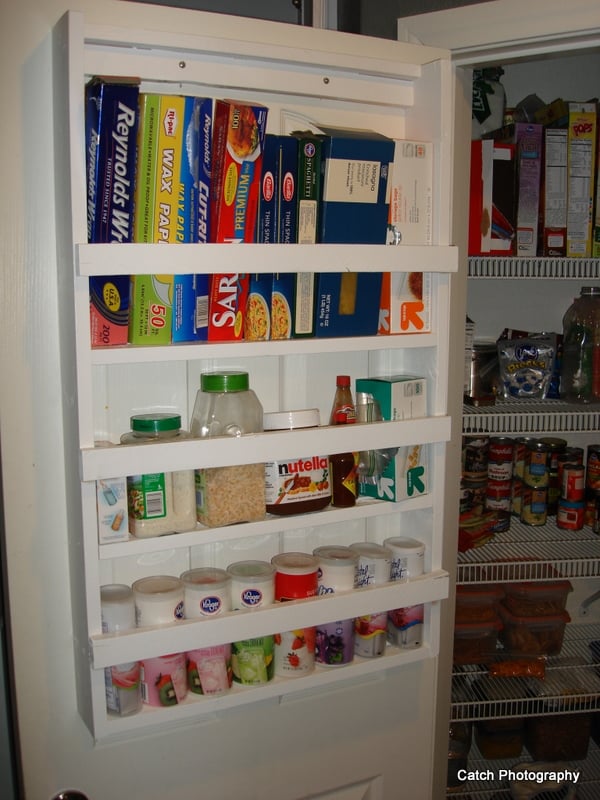
I am kind of a visual organizational neat freak and I have been annoyed by all the little things taking up good shelf space in my pantry for a long time now. This just kept getting pushed down the list ya know, not a major project. Anyway, grabbed an extra board at the store the other day and knocked this one out. I LOVE it. I made it short because I want to build a trash bag holder for the bottom half of the door. We'll see how long it takes me. I did use a 1x4 instead of Ana's plan which uses a 1x6. I only needed small things to put in here.
Tue, 09/20/2011 - 09:41
Ah, well dang it, now I have no excuses! LOL. This is on my list of things to do as well--yours looks great!
Wed, 09/21/2011 - 09:31
I love it! Great price,too!
I especially love how the design corals all those pesky little things that always seem to get pushed all the way to the back of my cabinets and drawers.
I'm definitely putting this on my list of things to build!
Cindy from Indiana

Thu, 09/22/2011 - 08:19
I just got an anchor that looked like it had a little more 'umph' to it. It is called a Cobra Tripple Grip. It looked like it had a section that popped open a little more once the screw went in. I thought that might hold it a little more securely. I feel no movement when I jiggle it at all.
Sun, 01/15/2012 - 08:29
Very nice project.
Just came along looking for a storage shelf and I saw your door shelf. Going to build one of these for sure, sick of the little wire ones we have falling down every other day.
Sun, 01/22/2012 - 19:28
Thanks for the idea. I had to purchase one instead of make one because I live in an apartment.
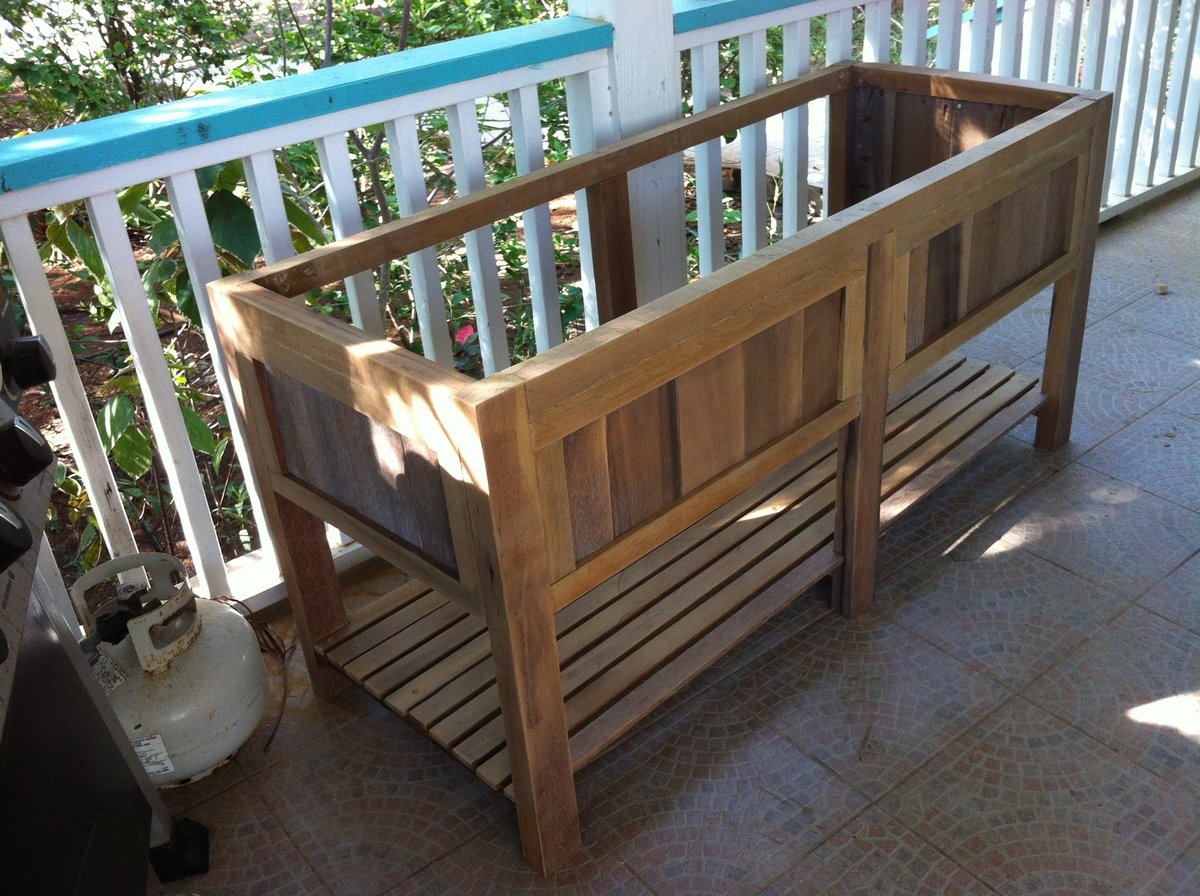
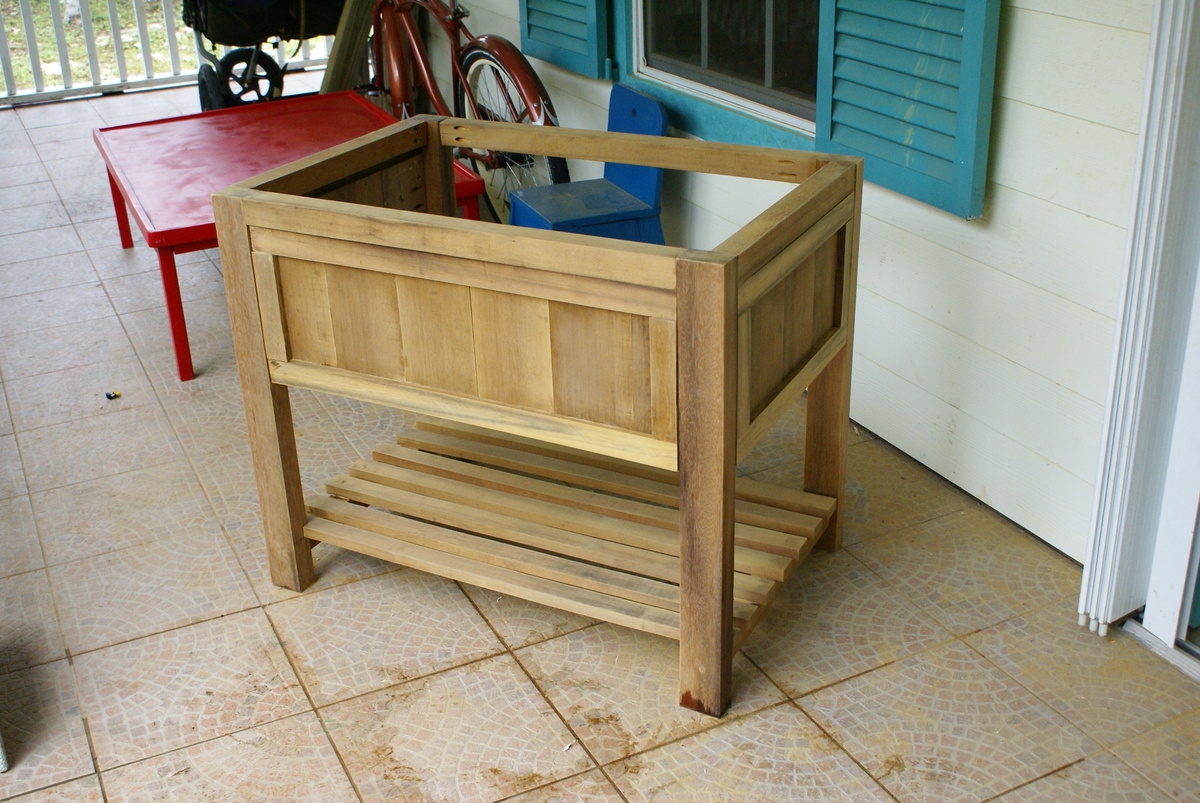
I've been working on these bathroom vanities for a family building a home. These are made of gorgeous Greenheart lumber. I have only worked with pine and spruce up to this point, but this wood is truly stunning. It has been quite the adjustment to work with, and I've broken my share of bits and screws :)
All of these together took me about a week to complete. Had I been working with a softer wood it would have taken no time hardly, but the hardwood....that's a whole other ballgame to me!
They will be adding 2'' thick concrete counter-tops on these when they get installed. I love the simplicity of their look!

Tue, 10/01/2013 - 07:35
These vanities are beautiful. It would be really neat if you could add pictures when they are installed with the counter tops! I am contemplating replacing a vanity with a DIY one, and I love seeing how other people have made things beautiful with their own 2 hands.
In reply to They are beautiful! by NimbleShopper
Tue, 10/01/2013 - 14:35
I will most definitely add the pics with the counters. I can't wait to see them myself :)


Comments
Ana White Admin
Thu, 11/17/2022 - 08:13
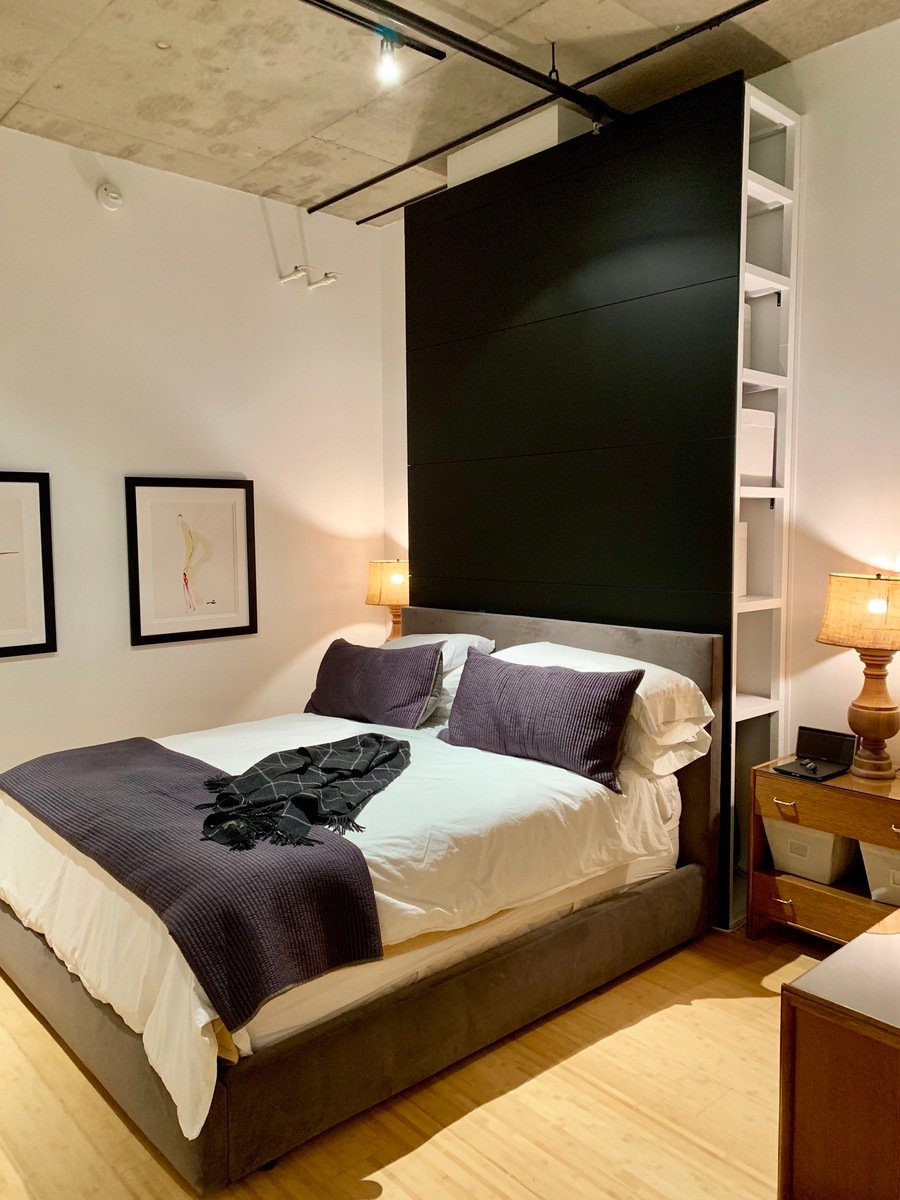
Beautiful bed!
WOW, this looks amazing and I love the color choice! Thanks for sharing.