Community Brag Posts

Laundry Pedestal

Submitted by shellyward on Thu, 01/22/2015 - 10:03

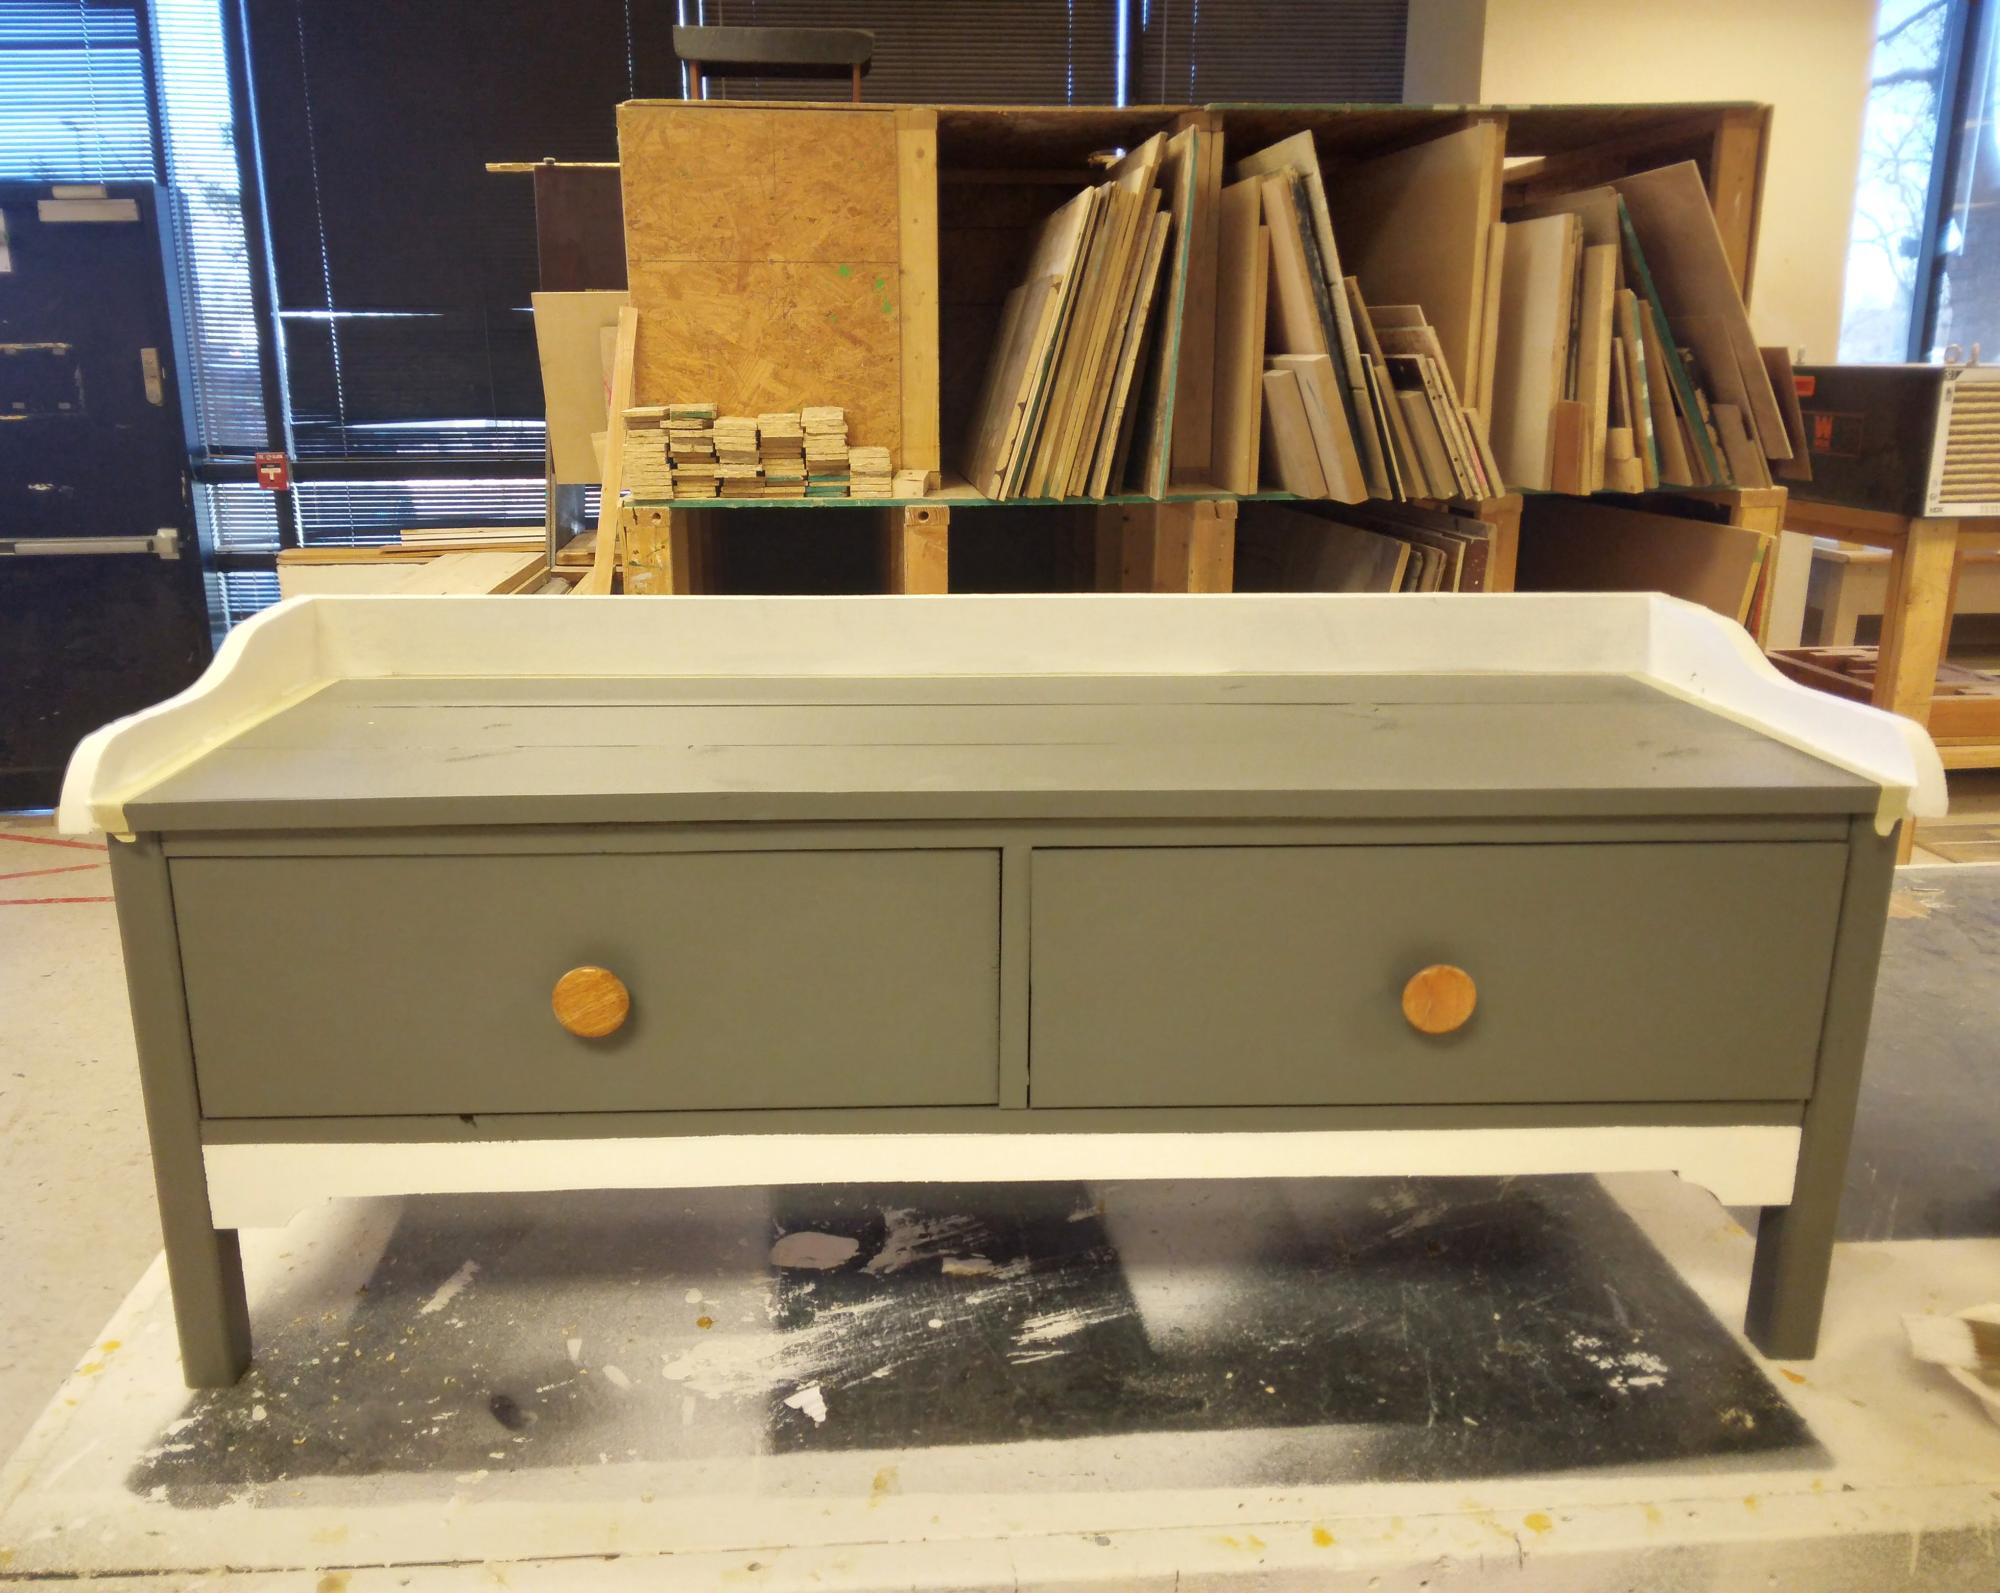
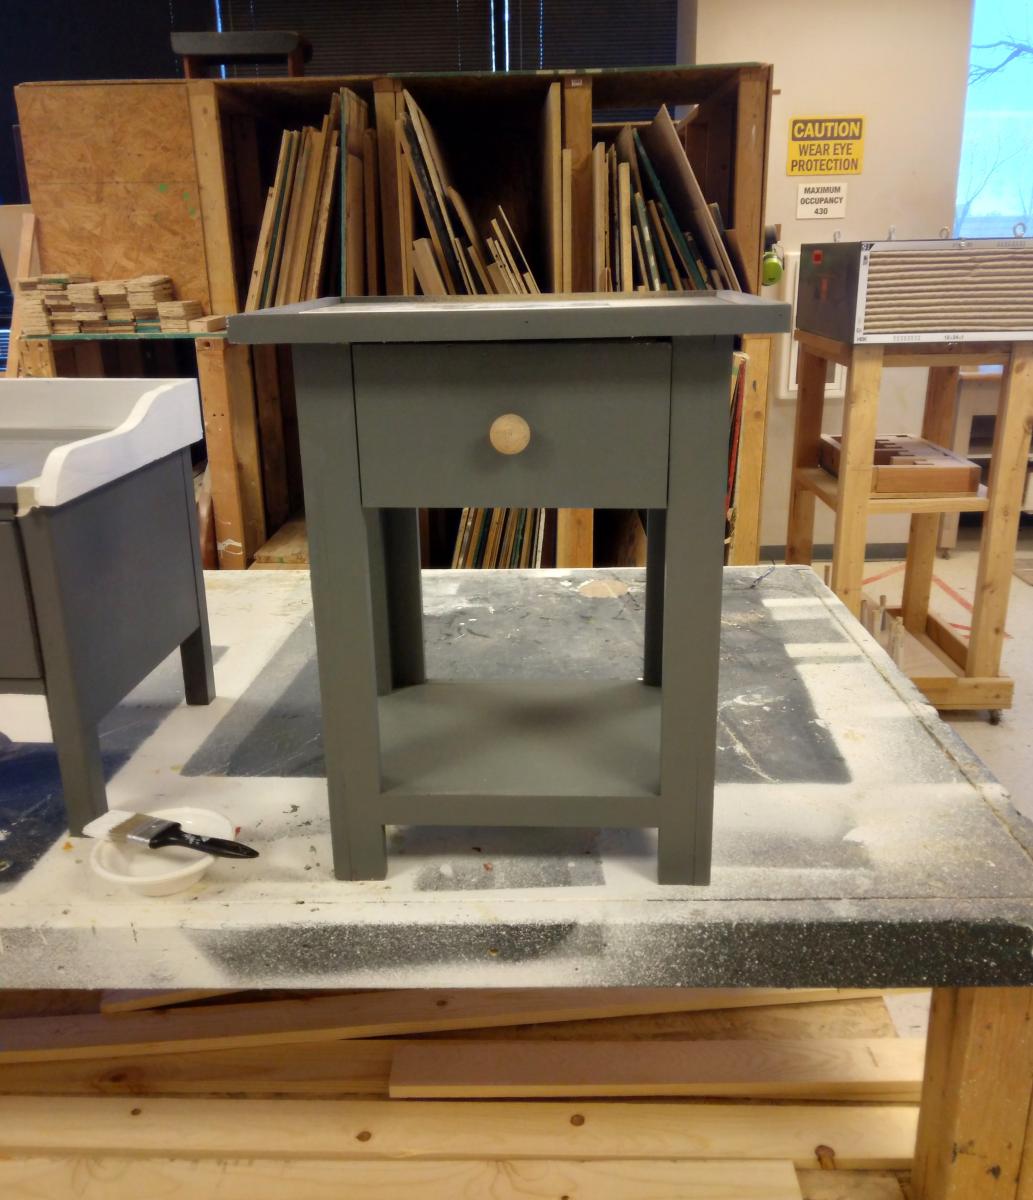
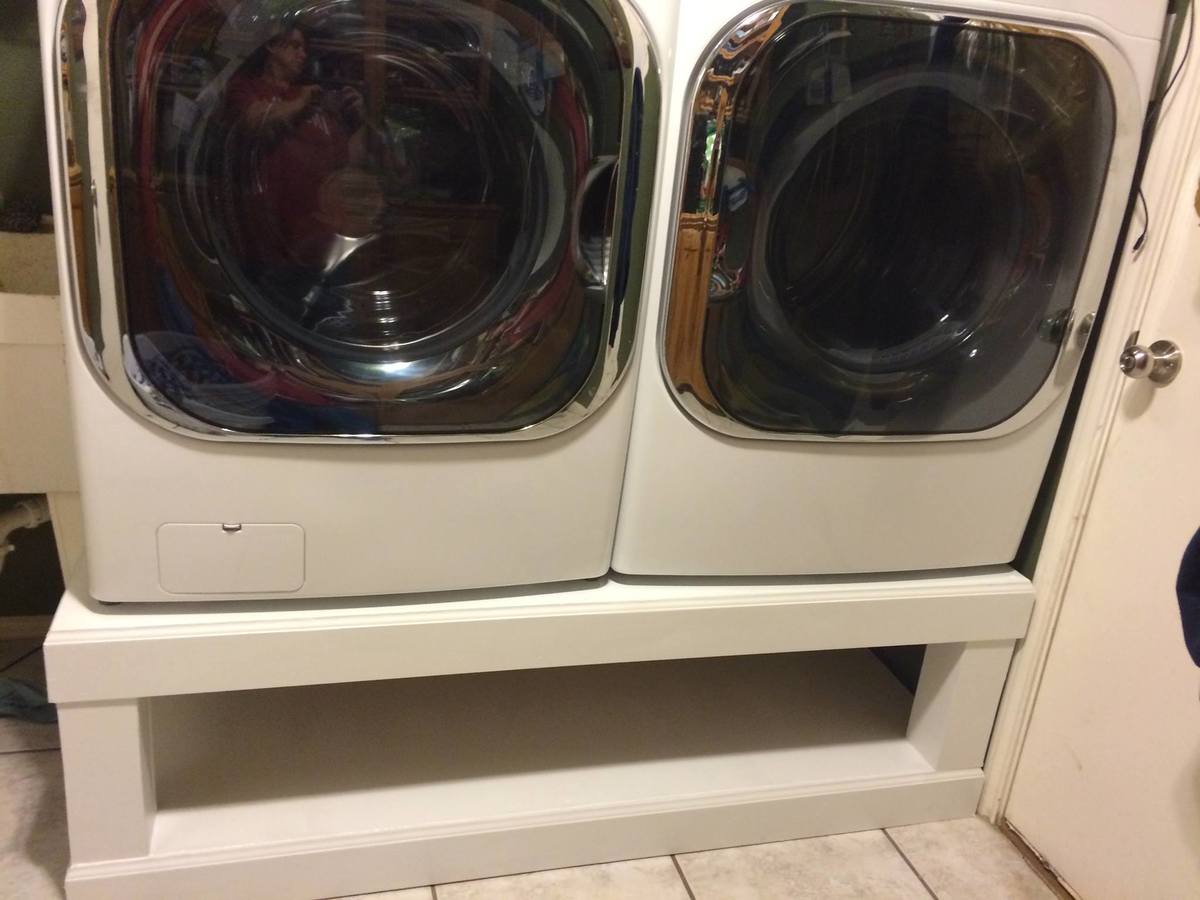
Had to buy a new washer and dryer several months ago and wanted the front loaders.  I was unwilling to pay $600 for the pedestals at the hardware store so I had been dealing with them on the floor until I found this plan.  Built these and absolutely LOVE them.  No more killing my back getting laundry done.  These sit higher than the ones from the hardware store so even better!!! I keep 3 laundry baskets underneath.

Estimated Cost
$100
Estimated Time Investment
Day Project (6-9 Hours)
Finish Used
white paint
Recommended Skill Level
Beginner

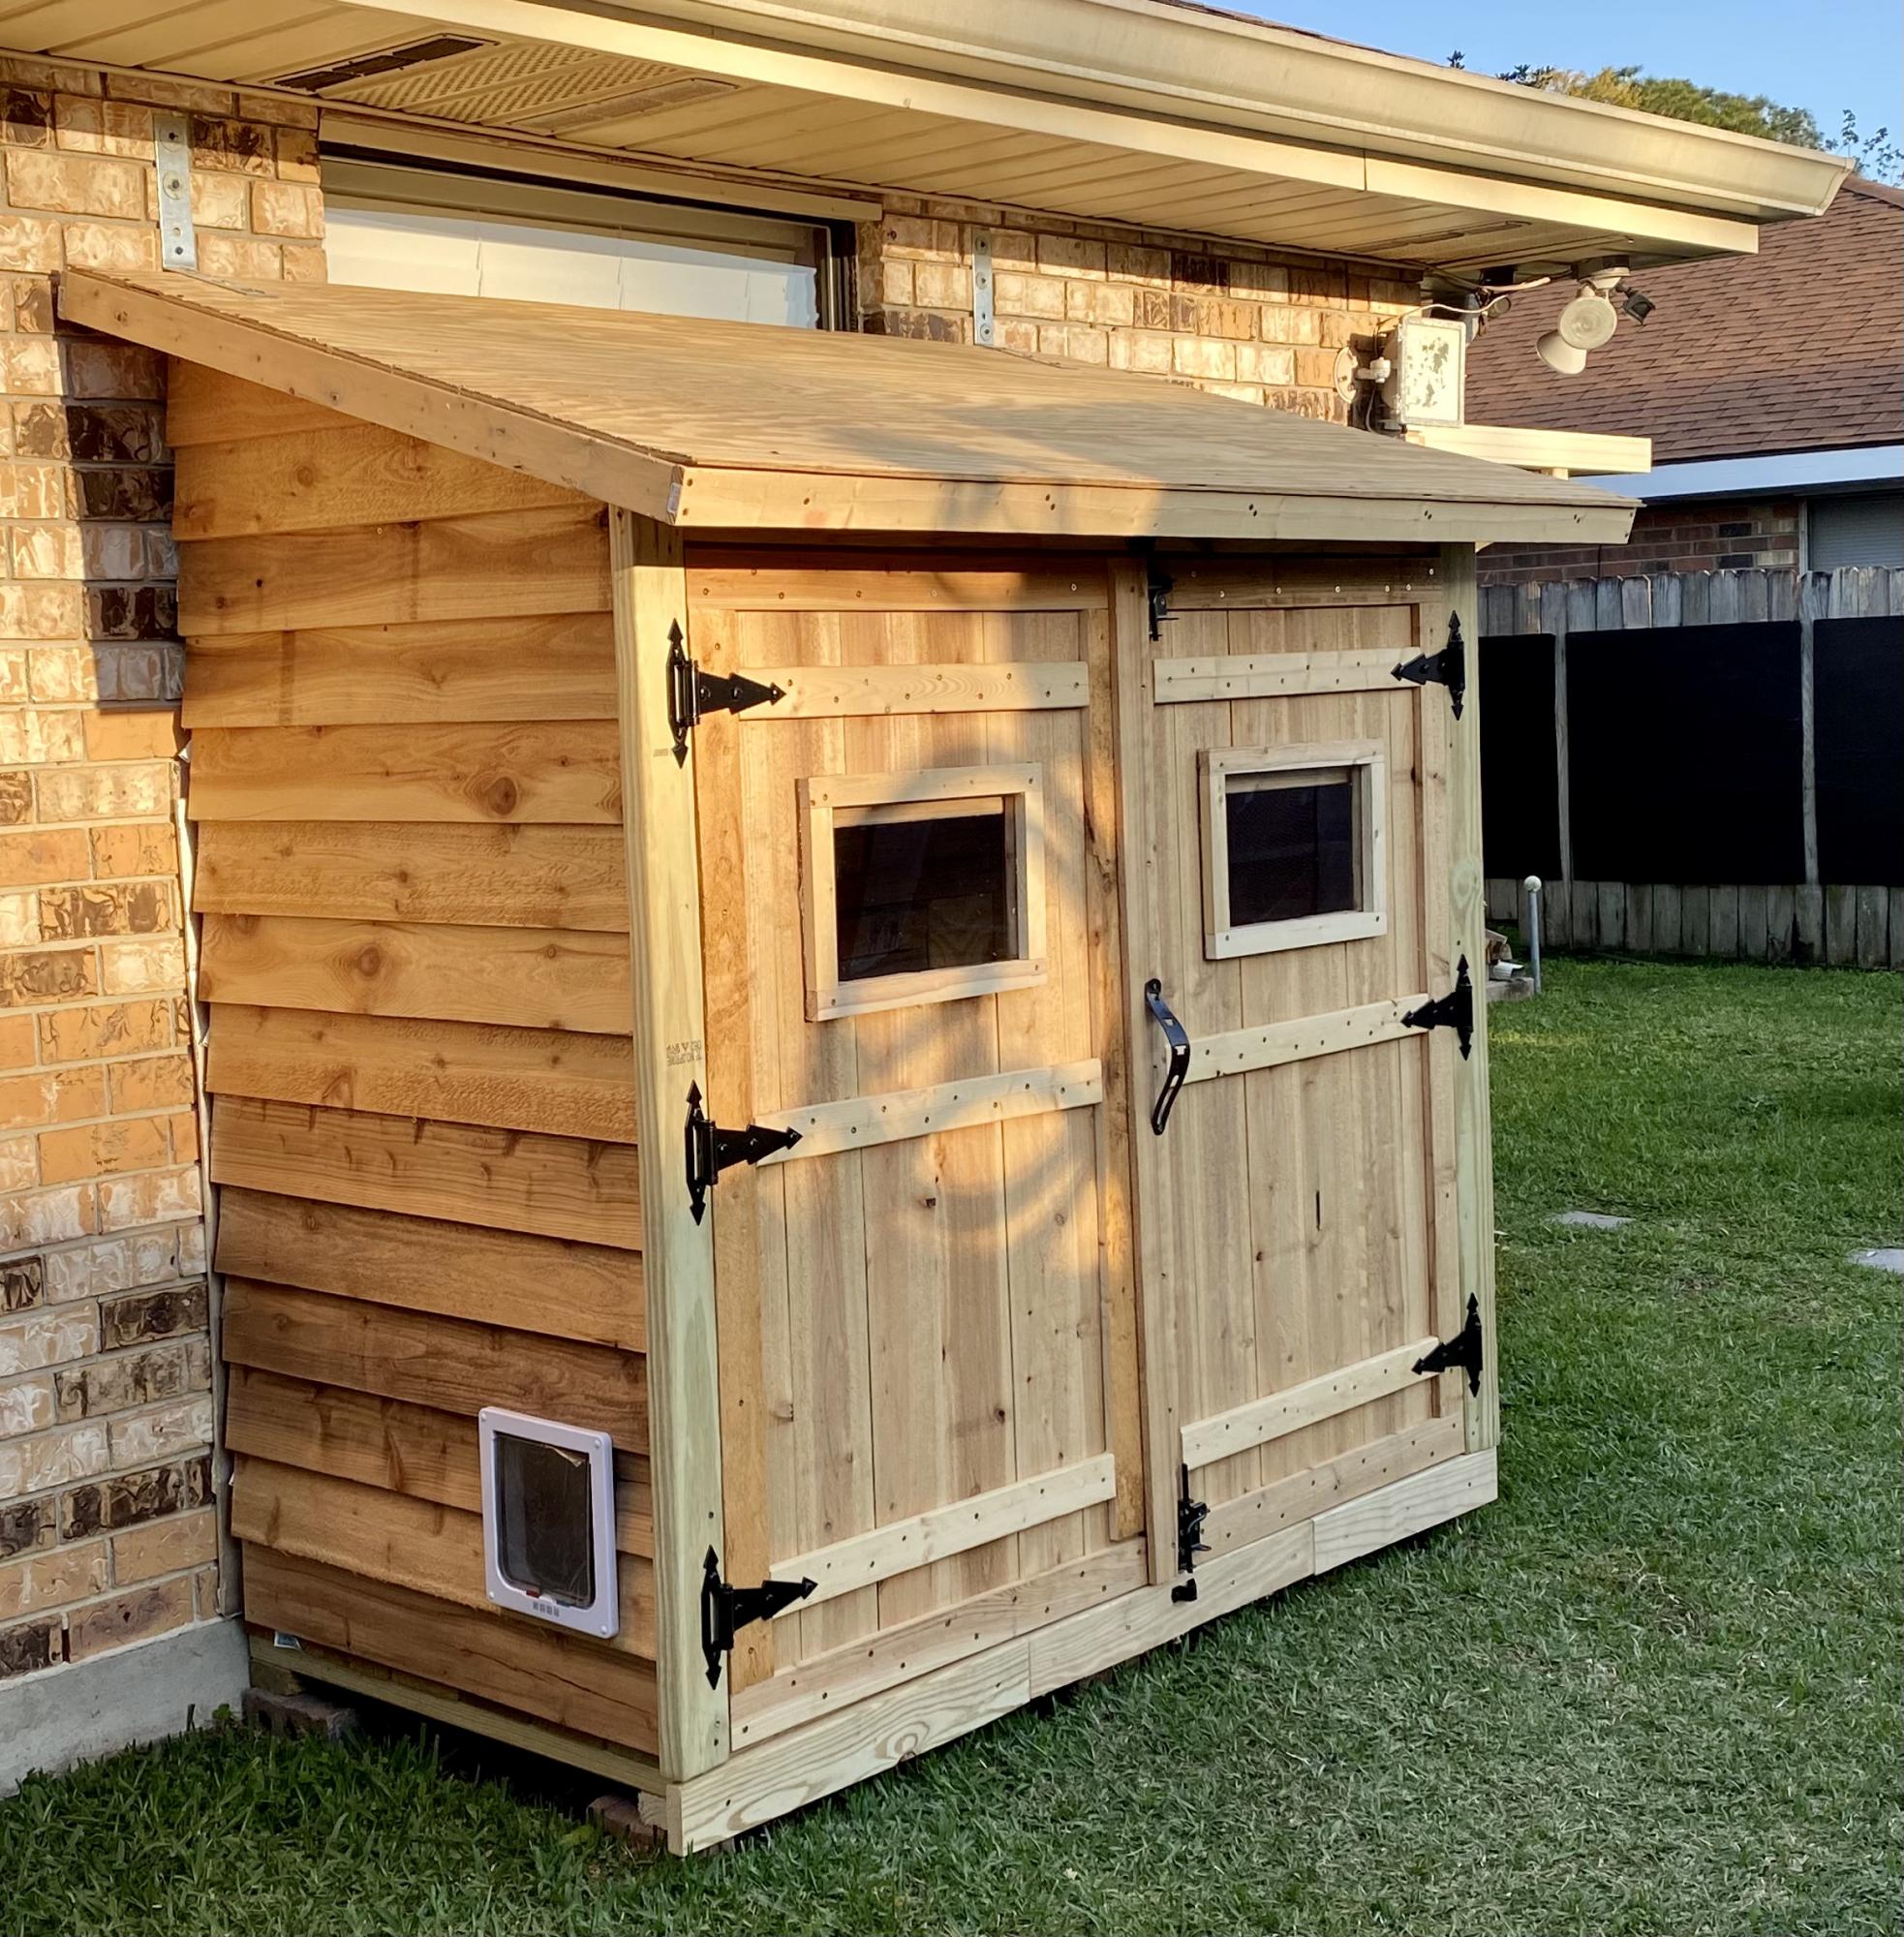
Kitty Outhouse

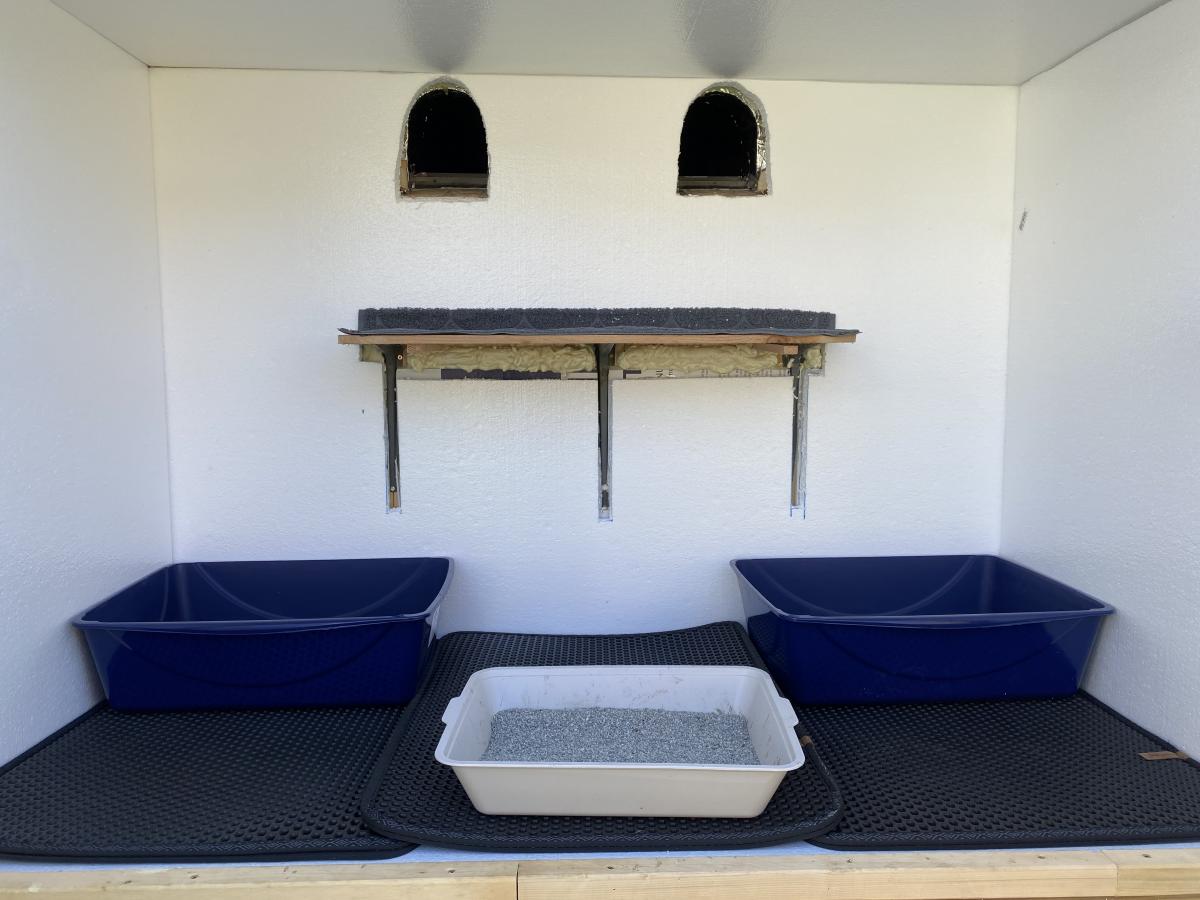
My first Ana White project. Built Ana’s awesome small cedar shed as an outhouse for our many cats. The have access to it from inside the house. Great way to keep litter boxes and the mess out of the house. It is stand alone, and attached to the house, in front of a bedroom window. There are two ‘entrances’ as well as two, one-way, escape hatches, if a cat in the outhouse is interrupted by another cat (I.e. a male cat comes in and the female feels trapped) they can exit to the outside (one way so no critters can come inside!). Ana has easy to build plans, great site! I plan on making the square table just posted today for my newly refurbished deck. Keep in mind, my estimated costs and time reflect a LOT of additional features on the inside. The shed itself, very easy, simple, inexpensive. Very little waste with Ana’s projects as well.

Built from Plan(s)
Estimated Cost
$500
Estimated Time Investment
Week Long Project (20 Hours or More)
Finish Used
No finish, at least not yet.
Recommended Skill Level
Intermediate

Comments

Half furniture/half art farmhouse table

Submitted by Anonymous (not verified) on Wed, 06/14/2017 - 12:29

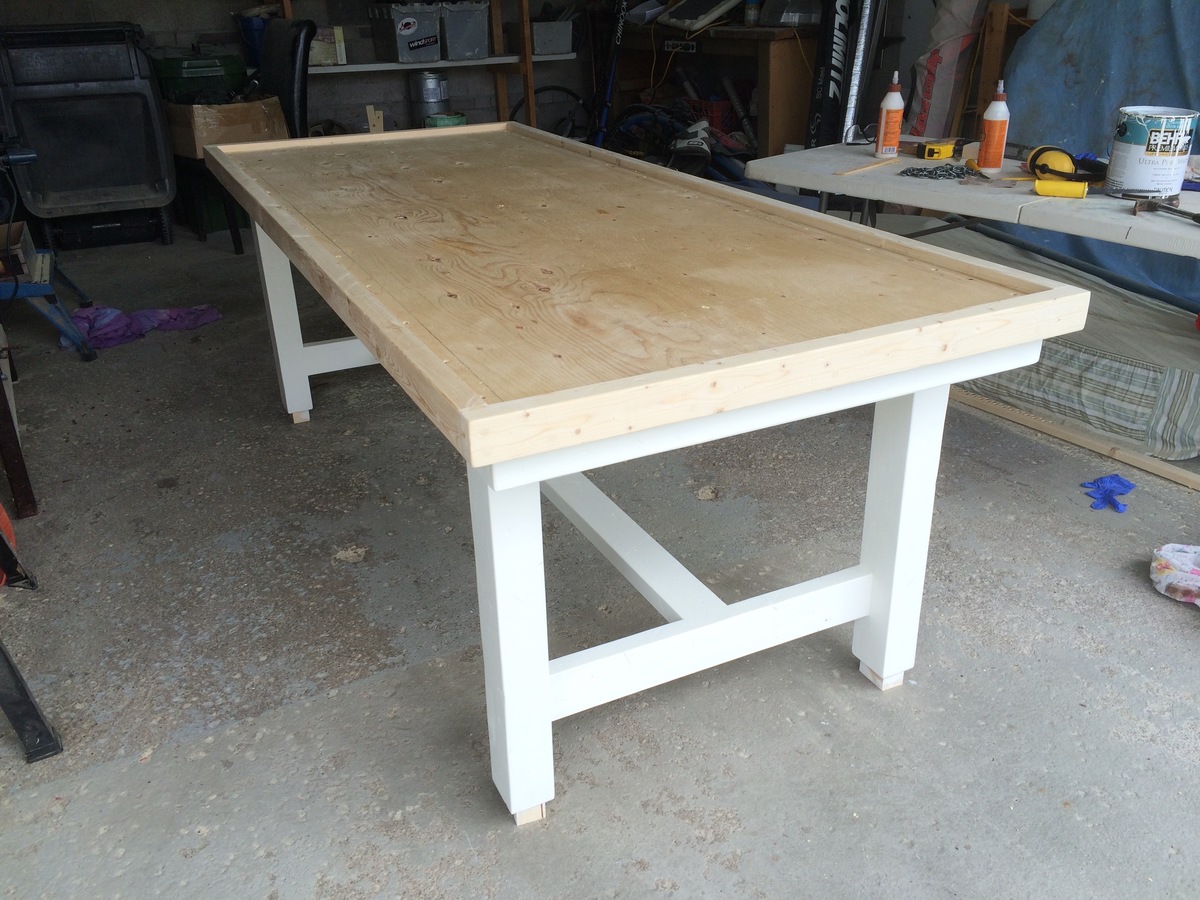
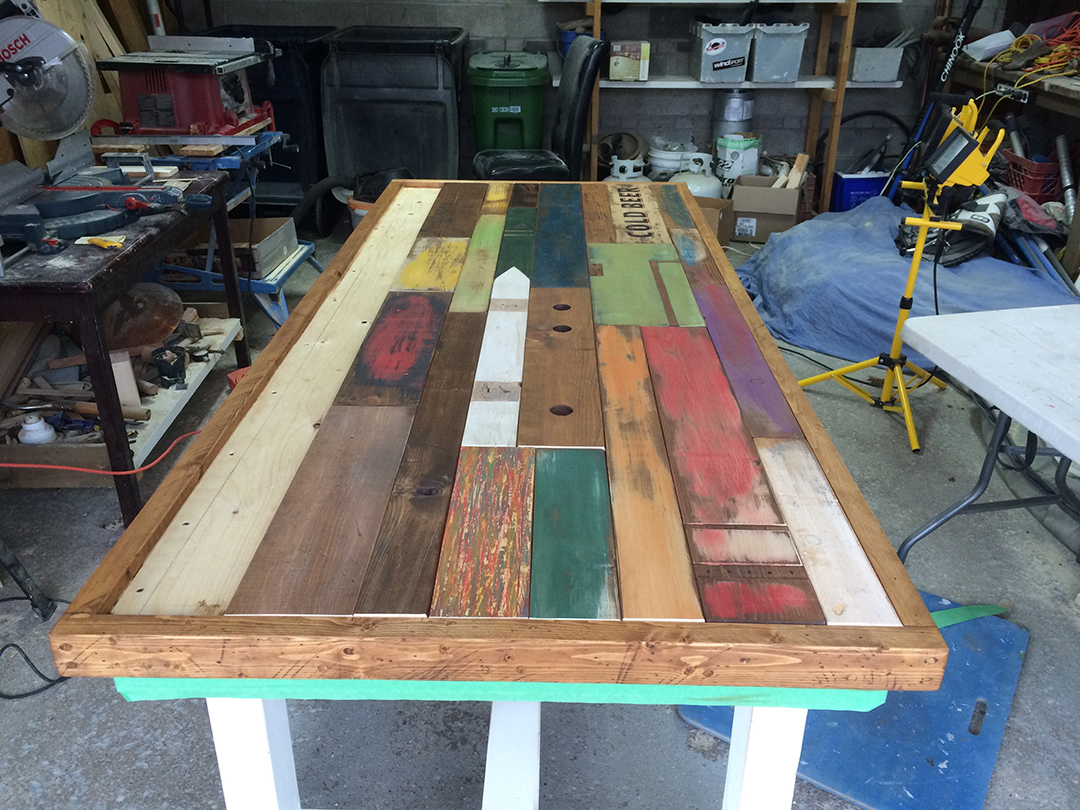
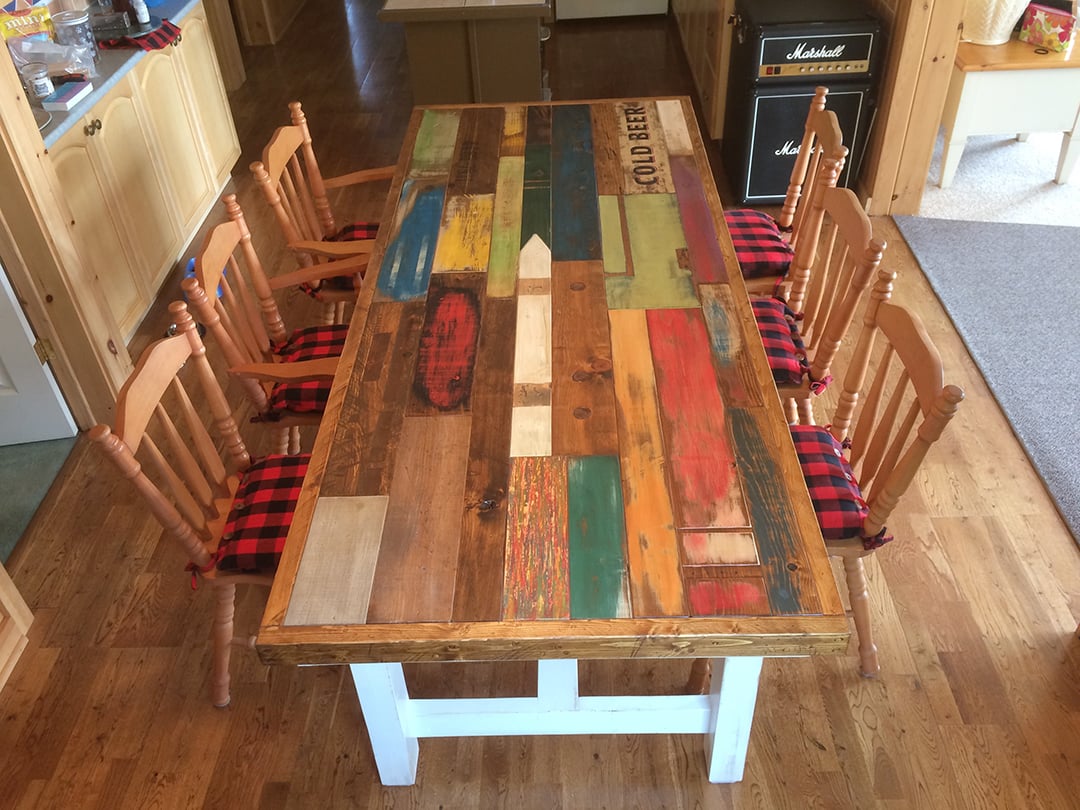
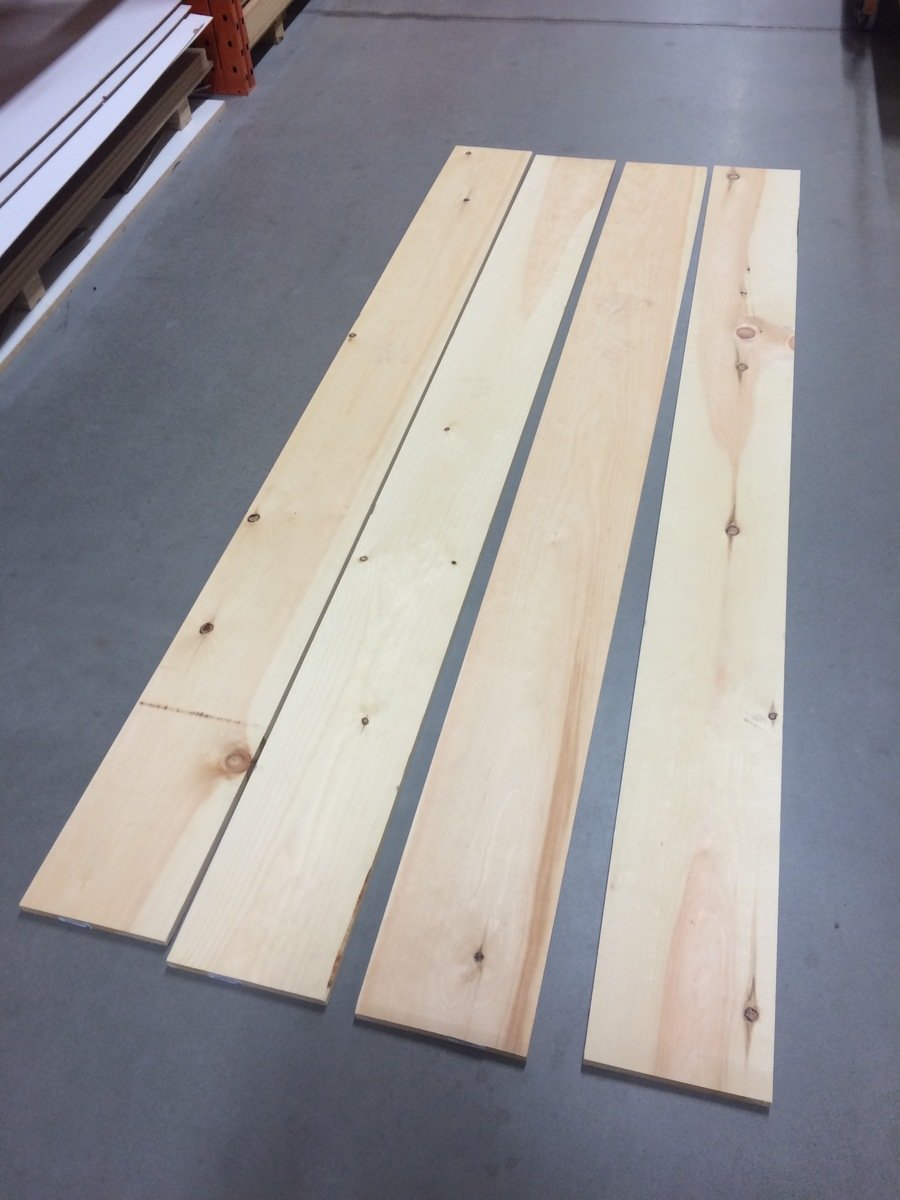
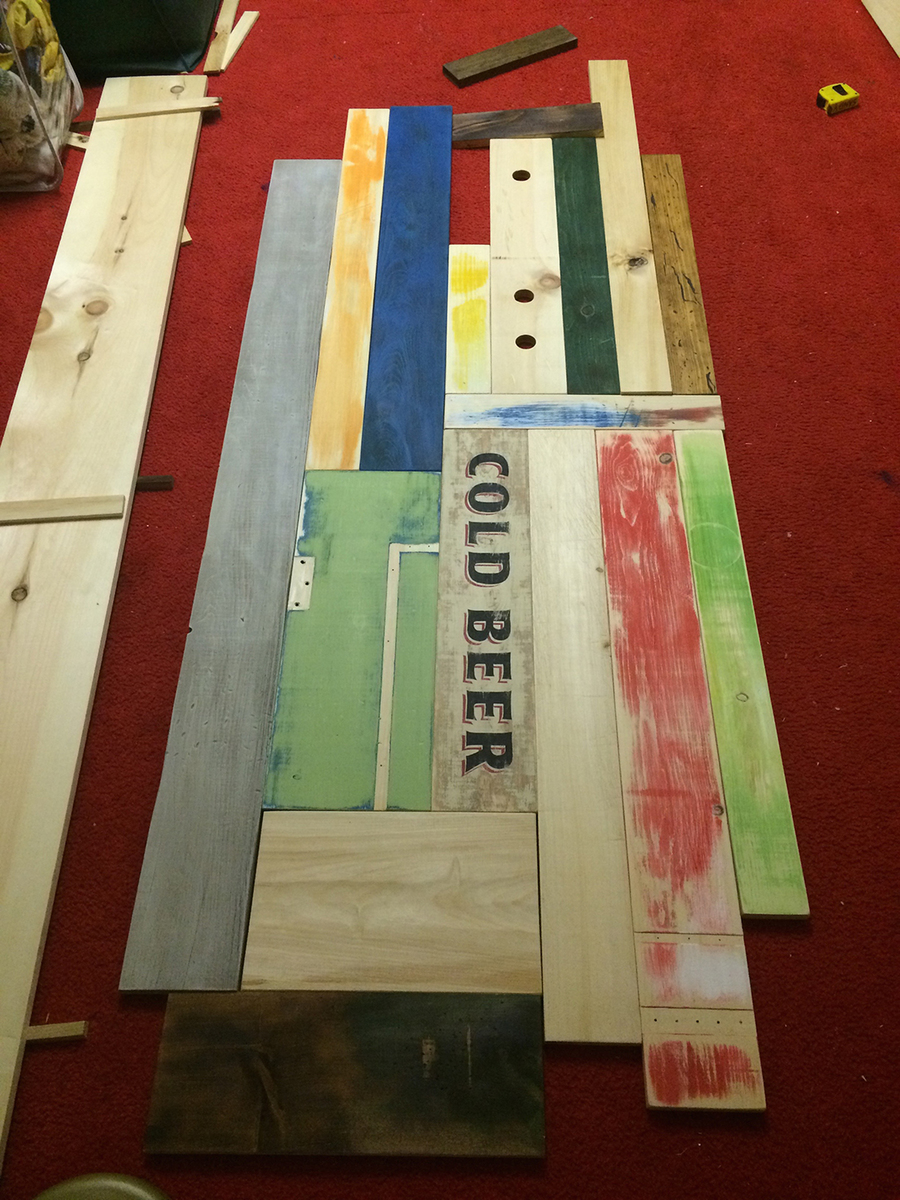
For the most part I followed the plans for the legs and base structure as suggested. In our area the 2x4s are sold with rounded corners. To avoid a very obvious seam on the legs, I used 2x6s which I screwed and glued together then cut back to 3x4 (1.5x2) x 4 to make the legs and cross beams a little beefier with little or no seem on the legs. As I decided to build the top from reclaimed wood I framed in the top with 2x4 ripped down to approx.. 2x3 with a sheet of plywood to support top boards. As I don’t have a planner to level any reclaimed top boards I could find, I decided to make my own faux reclaimed boards out of ¾’ x 9’ – 8’ planks. I distress the wood using a chain, rocks my table saw, hammer, nails, blowtorch and bow saw. In hindsight, I wish I had distressed a little more vigorously but everyday use will augment it over time. I continued to paint, distress and sand on the fly, using paints I had left from previous projects. In some cases, I mixed paints to get additional colour varierty. All boards were stained at the to colour bare areas which as a bonus added a slight yellow hue making the paint look older. I did some scraping and blowtorching of semi-dry paint and stain to get a variety of looks and textures. I dry fit the boards and reorganized the puzzle pieces to get a random but organized look – controlled chaos. Once I was close I glued and screwed the board down clamping as I went to keep the boards tight. This paid-off later as the tighter seams allow less food to fall in-between. I cut down the last row from over sized pieces to get a tight fit in the last row. I finished with 11 coats of poly to toughen up the pine and again to seal the seams from food. My wife suggested painting the legs off-white as our cottage already is max-ed out on natural wood. We will follow by painting the existing chairs the same off-white and adding a little distress for age. Cost was approx. $175 to 200. The plywood alone was $45, paint I had. Time was easily 50 hours as the artistic on the top, time although fun, was time consuming.

Anna’s website is great I have had many compliments on my table. I have pointed many people to the site for direction on their own projects. Thanks for the great plans.

Sandy

Estimated Cost
$175-200
Estimated Time Investment
Week Long Project (20 Hours or More)
Finish Used
Latex paint
Varathane Premium woodstain – Tuscan
Minwax® Polycrylic® Protective Finish – Satin
Recommended Skill Level
Intermediate

Shoe Bench

Submitted by CCrazyC on Wed, 03/09/2011 - 07:22

This is my first project from Ana's plans and we love it! I did alter the bottom shelf to be 2 long shoe shelves instead of cubbies and I made it 3 wide instead of 4. I've had friends comment on it and say that they want me to make them one. I need to make about 3 more benches for our entry and laundry room and love that I can do it myself with Ana's help!

Built from Plan(s)
Estimated Cost
$30-$40
Estimated Time Investment
Afternoon Project (3-6 Hours)
Finish Used
Stain and Polyurethane
Recommended Skill Level
Beginner

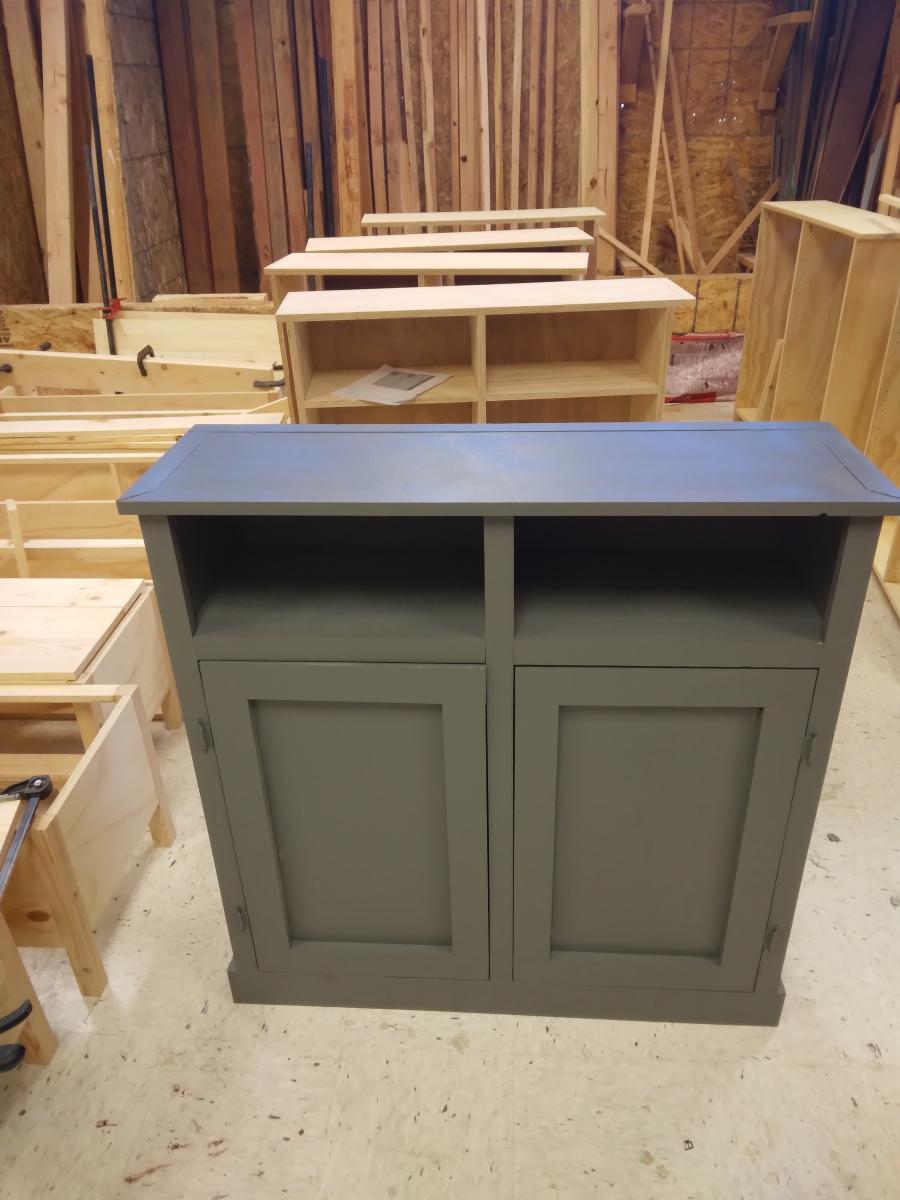
Drop-Down Door Hutch Desk

Submitted by danicarby on Thu, 05/14/2015 - 13:47

I designed this desk from another desk I built. With this one, I wanted the overall foot-print smaller but still something that was able to organize all our office stuff and be able to close everything to keep it clutter-free. We have a small apartment, and although this desk is about the size of an up-right piano, it works perfectly into our living space!

I made it out of raw hardwood (Ash) and because I knew just the wood alone would make this desk heavy/bulky to move I made the top hutch removable. It's held in place by wood pegs (dominos). All the shelves are adjustable and the drawers are full-extension (something I've never had - wahoo)! The drop-down door is help up by 2 pull-out boards on each side (my first desk had chains). I spend a lot of money on this desk because I knew it was a chance in a lifetime to make and wanted it to be perfect and something that would last generations.

I built the main carcass off of plans/measurements I designed, but then all the insides, drawers, shelves, doors, etc where made as I built (because just a millimeter difference in building changes everything)!

If you want more pictures/descriptions of the building process I wrote about it in a 4-part series on my blog.

Estimated Cost
$1,000 for all wood & supplies
Estimated Time Investment
Week Long Project (20 Hours or More)
Finish Used
To achieve the ash gray color I used "General Finishes" brand water-based stains (equal mixtures of Walnut, Antique Oak & Whitewash) with 1/2 ratio of Pre-Stain Conditioner (bought from Woodcraft). I did 2-3 coats stain, lightly sanded and sprayed 2 coats of Ceramithane clearcoat using HVLP sprayer (sanding with 550 grit paper in between).
Recommended Skill Level
Intermediate
Comments

Christmas Kitchen

Submitted by suzyqueque on Wed, 05/11/2016 - 11:33

Made a few mods.  Super fun...

Estimated Cost
150
Estimated Time Investment
Weekend Project (10-20 Hours)
Recommended Skill Level
Beginner

Comments

Outdoor Sectional

Submitted by Anonymous (not verified) on Mon, 07/27/2020 - 12:15

Modified the plans of the outdoor sofa and sectional piece to create this set, then added cushions from IKEA.

Finish Used
SuperDeck Cedar Tone Natural

Comments

Seasonal And Holiday

Wood Dog Kennel

Submitted by Anonymous (not verified) on Mon, 11/11/2024 - 16:24

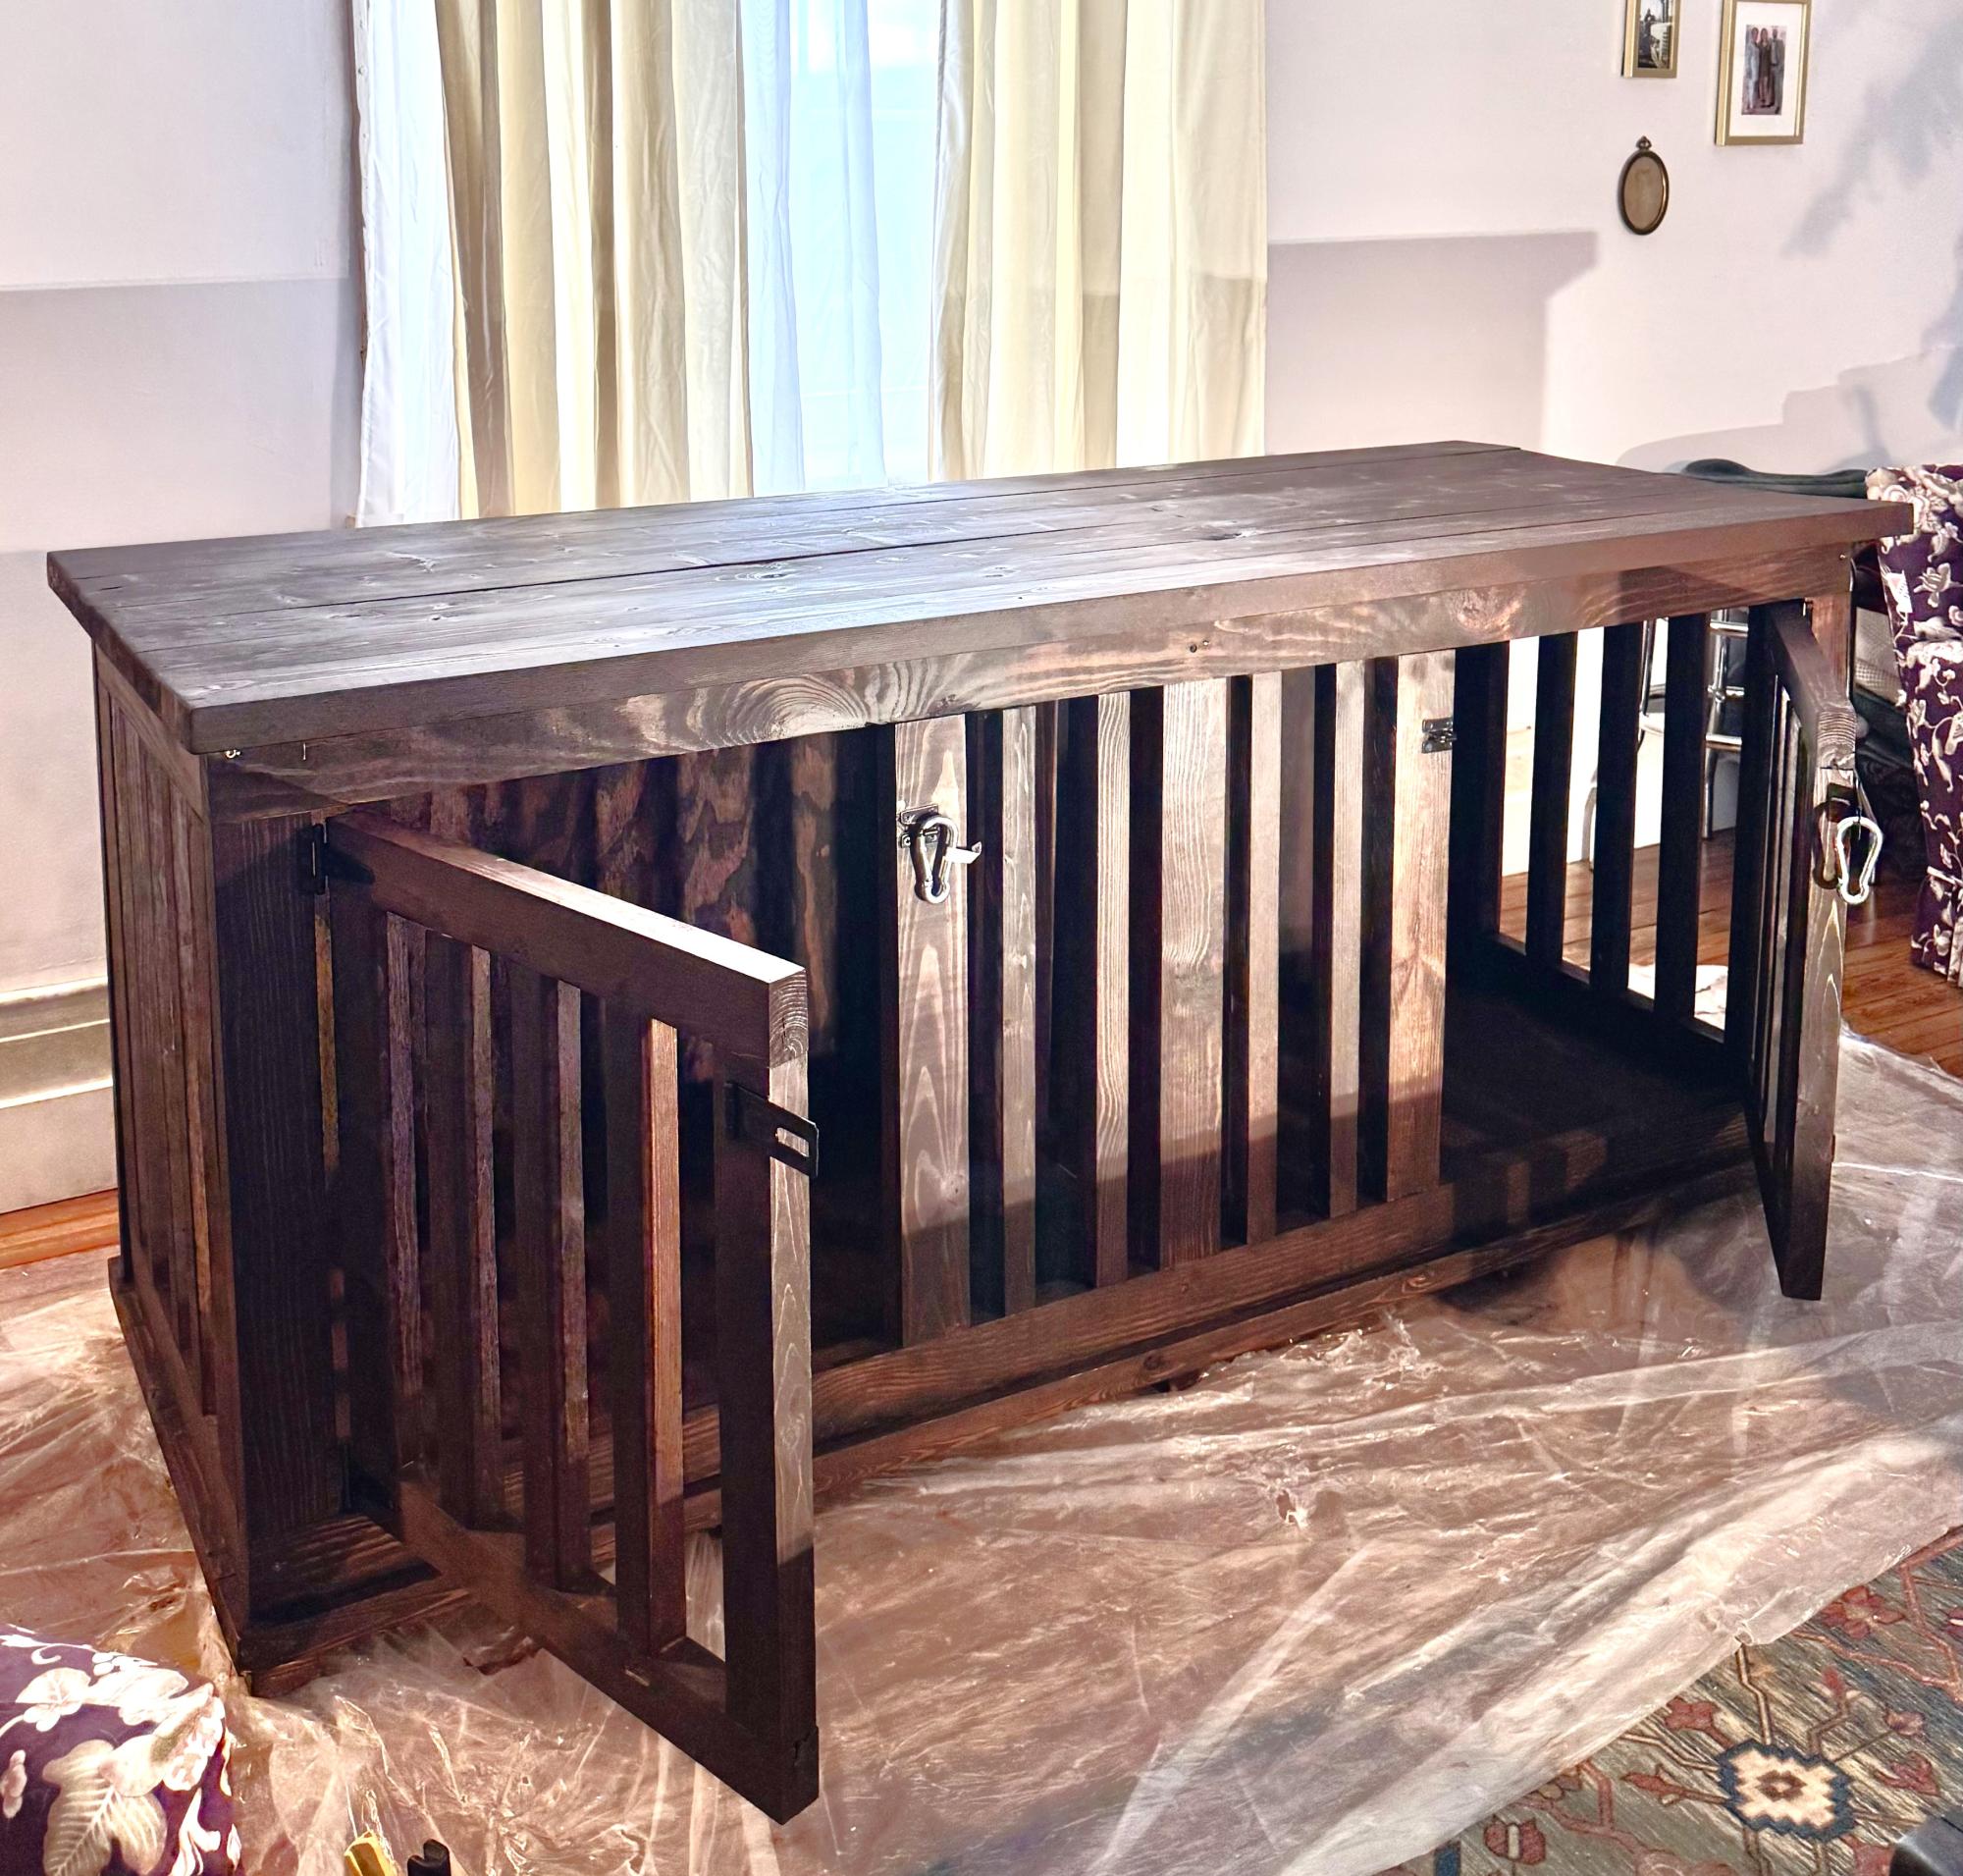
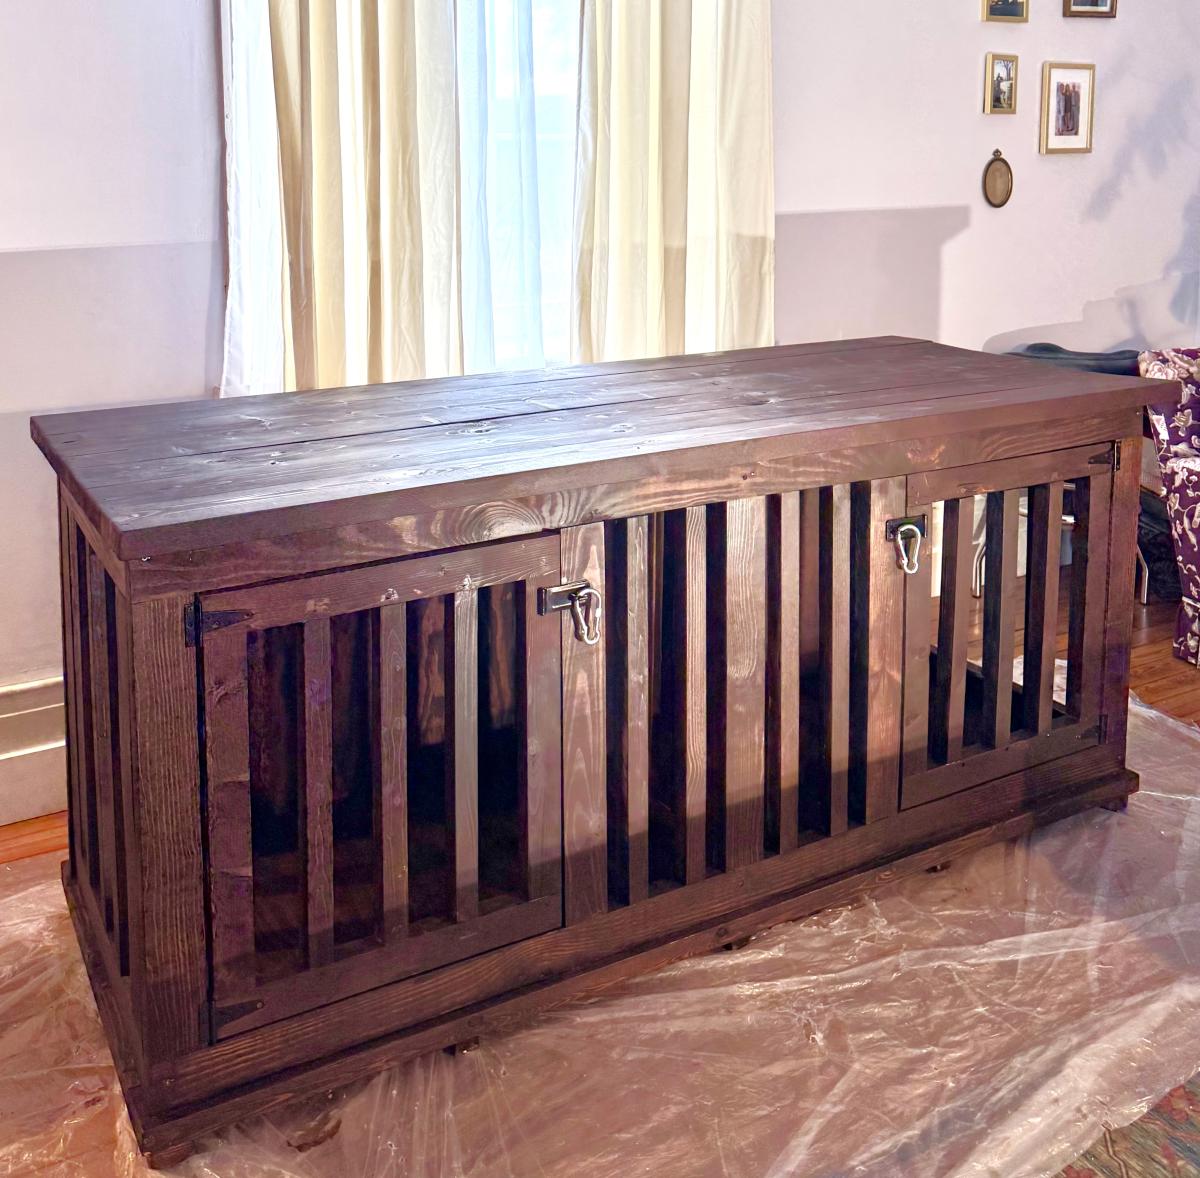
Loved this! I ripped extra 2x6s into 1-1/2”x1-1/2” pieces instead of using rebar. As we have two escape artists, I slightly modified from the original plan and built a base from 2x4s and 3/4” plywood to support the rest of the crate. Used spare cut-offs to make 5” long feet for a slightly elevated effect. Stained with Varathane in Dark Walnut. 

Comments

Seasonal And Holiday

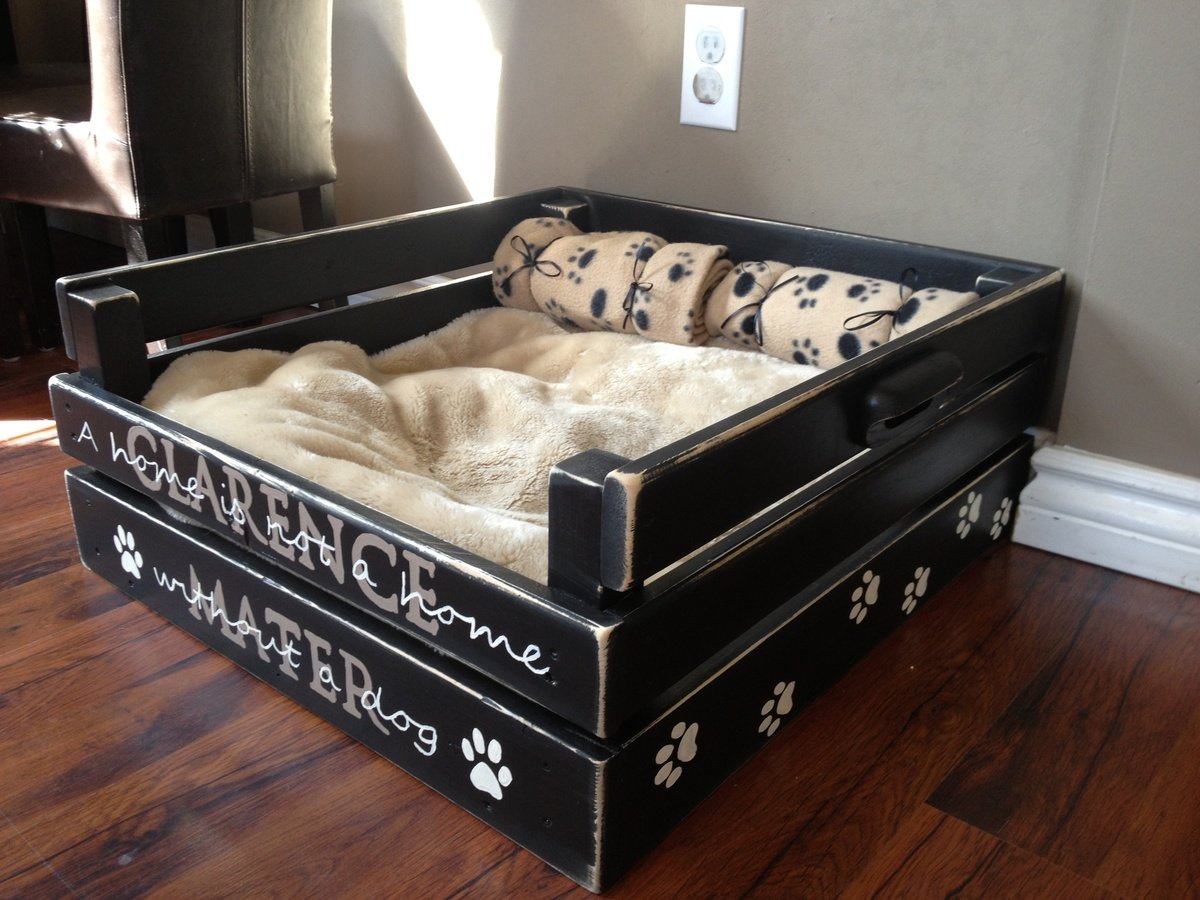
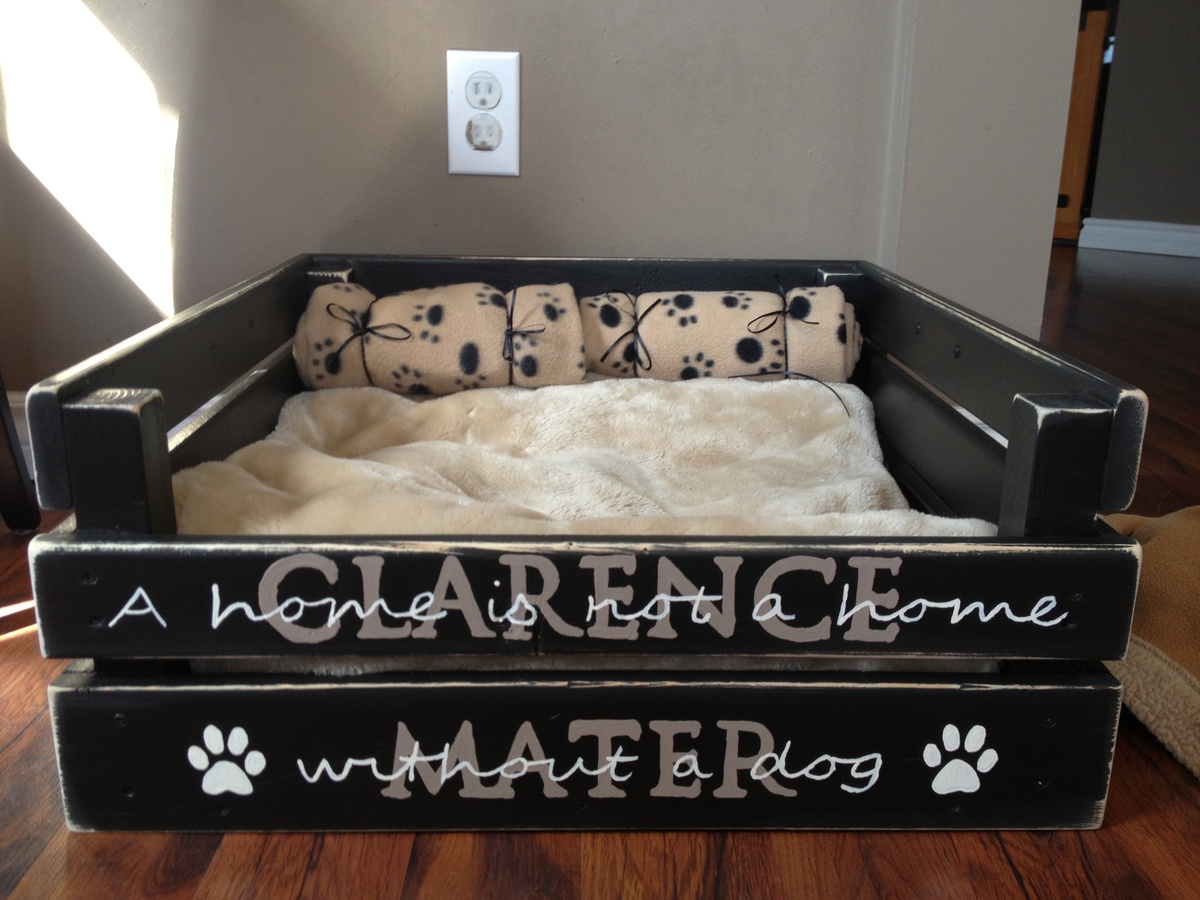
Dog Bed

Submitted by Veronica P on Thu, 01/22/2015 - 15:47

Here's a dog bed that my boys and I built about a year ago (our very first build). Pretty basic but our pups love it! 

Estimated Time Investment
Afternoon Project (3-6 Hours)
Recommended Skill Level
Starter Project

Comments

Candace Cappel-Mapes

Tue, 03/22/2016 - 11:46

I love this dog bed and wanted to make it for my daughters new puppy but the plans don't come up. Could you repost them? Or paste them in an email? It would be greatly appreciated.

DaPebble

Mon, 02/06/2017 - 06:53

This is an amazing bed, I attempted to download the plans to make for my pooch, but the plans were not in the PDF. Is there a way I can acquire them?


Thanks a ton.

Alavila13

Fri, 01/12/2018 - 20:45

This is such a beautiful dog bed. But I can’t download the plans. Help!!!  Any chance you can email them to me?  Thank you!!!

Karey Thompson

Thu, 01/18/2018 - 22:59

Hello, 

I love this design! I have tried everything I could think of to find the plans on building this bed for our two dogs to share. Our boxer thinks he’s a lap dog and is getting to heavy to sleep on my legs haha. How can I get plans for this bed?

Brittney0410

Sun, 03/11/2018 - 08:42

Absolutely love this bed for our pup, sadly the plan will download. Is there any way to get it emailed or re posted? Has anybody had any luck obtaining the plan that could send it my way? Email is [email protected]. thank you

Brittney0410

Sun, 03/11/2018 - 08:53

Absolutely love this plan for our pups dog bed, sadly it will not download. Has anybody had any luck retrieving it? Is it possible to get the plans he mailed to me? Email is [email protected]. Thanks so much for any help

Brittney0410

Sun, 03/11/2018 - 08:53

Absolutely love this plan for our pups dog bed, sadly it will not download. Has anybody had any luck retrieving it? Is it possible to get the plans he mailed to me? Email is [email protected]. Thanks so much for any help

Simple Bunk Beds - My First "Ana" Project!!

Submitted by margjack on Fri, 04/29/2011 - 07:17

I made the bunk beds from the simple bed plan, following tips from others who turned them into bunks. Instead of headboards on bottom and footboards on top, I used all headboards to add height, and made the posts a little longer so that an adult can sit up on the bottom bunk to read during bedtime. (the room has 9' ceilings) I used 2x4s glued and screwed together, as I could not find 4x4 non-pt posts. I made the ladder out of scrap 2x4s and the railings from scrap 1x3s. I did as suggested and attached the bottom header to the bottom of the top bed, which made it easy to attach. This bed is super sturdy! It will be painted one of these days!!

Estimated Cost
$200
Estimated Time Investment
Weekend Project (10-20 Hours)
Finish Used
None yet - will be painted!
Recommended Skill Level
Intermediate
Reclined Back Outdoor Sofa and Chair DIY

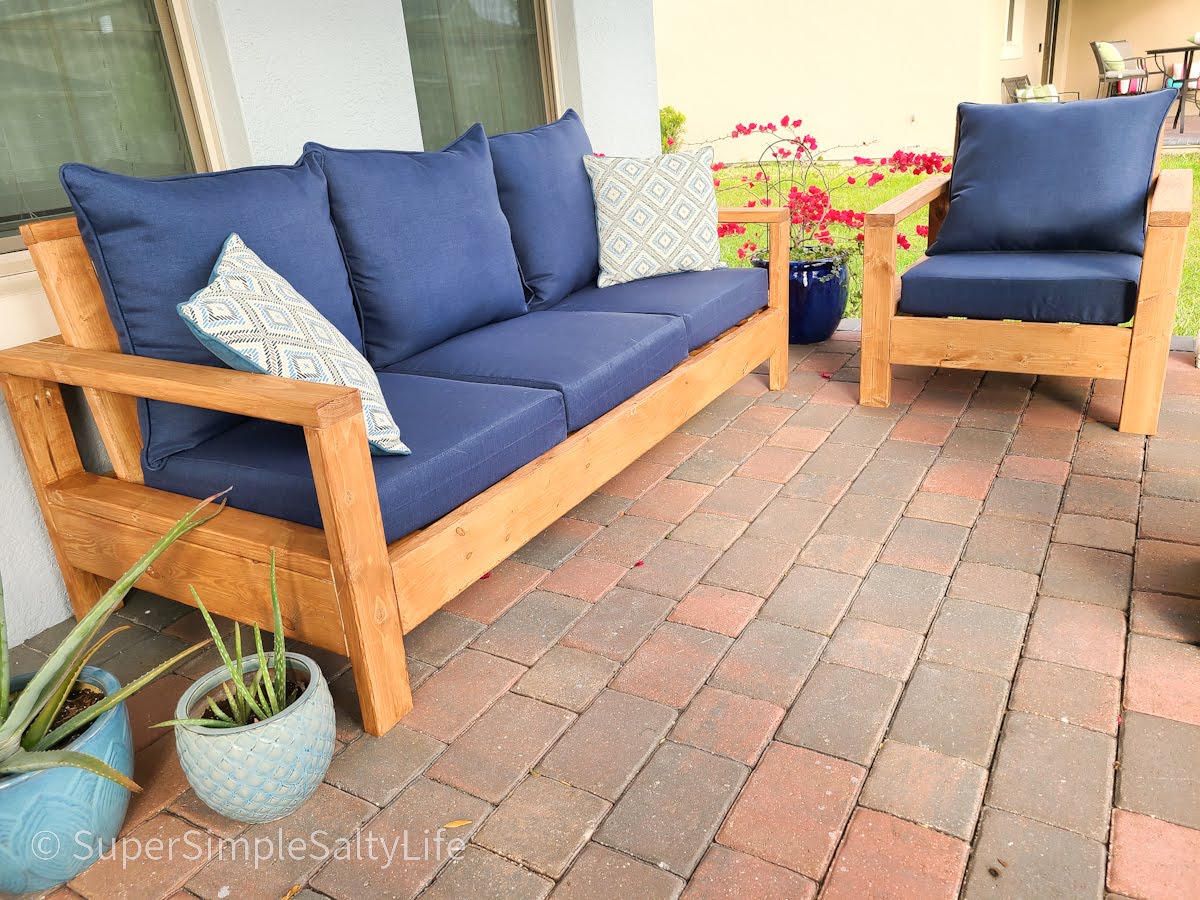
Submitted by Anonymous (not verified) on Sat, 04/09/2022 - 07:12

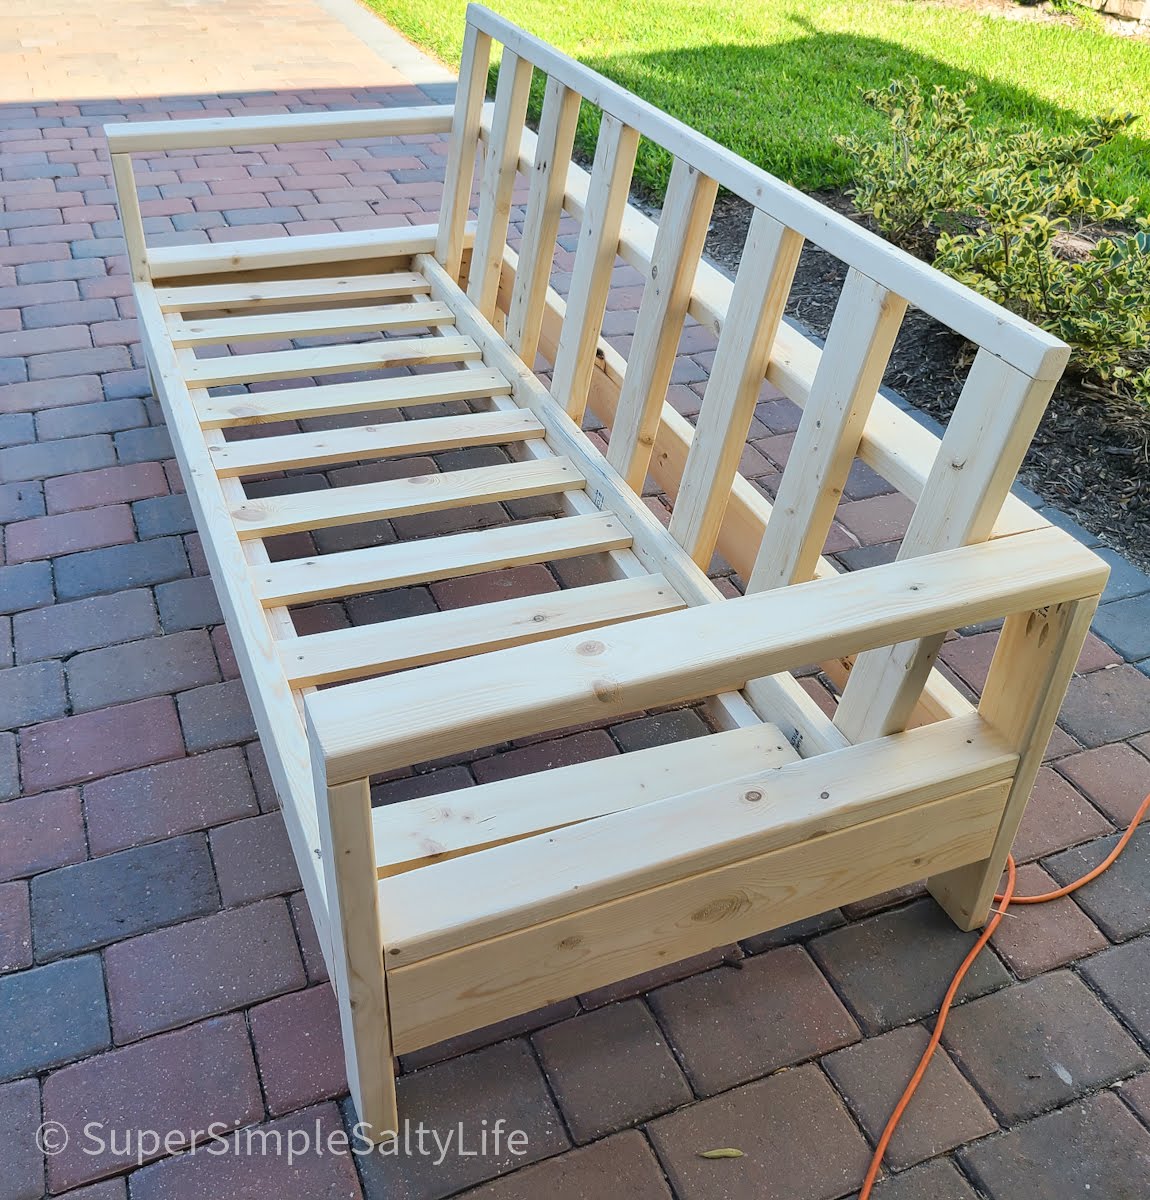
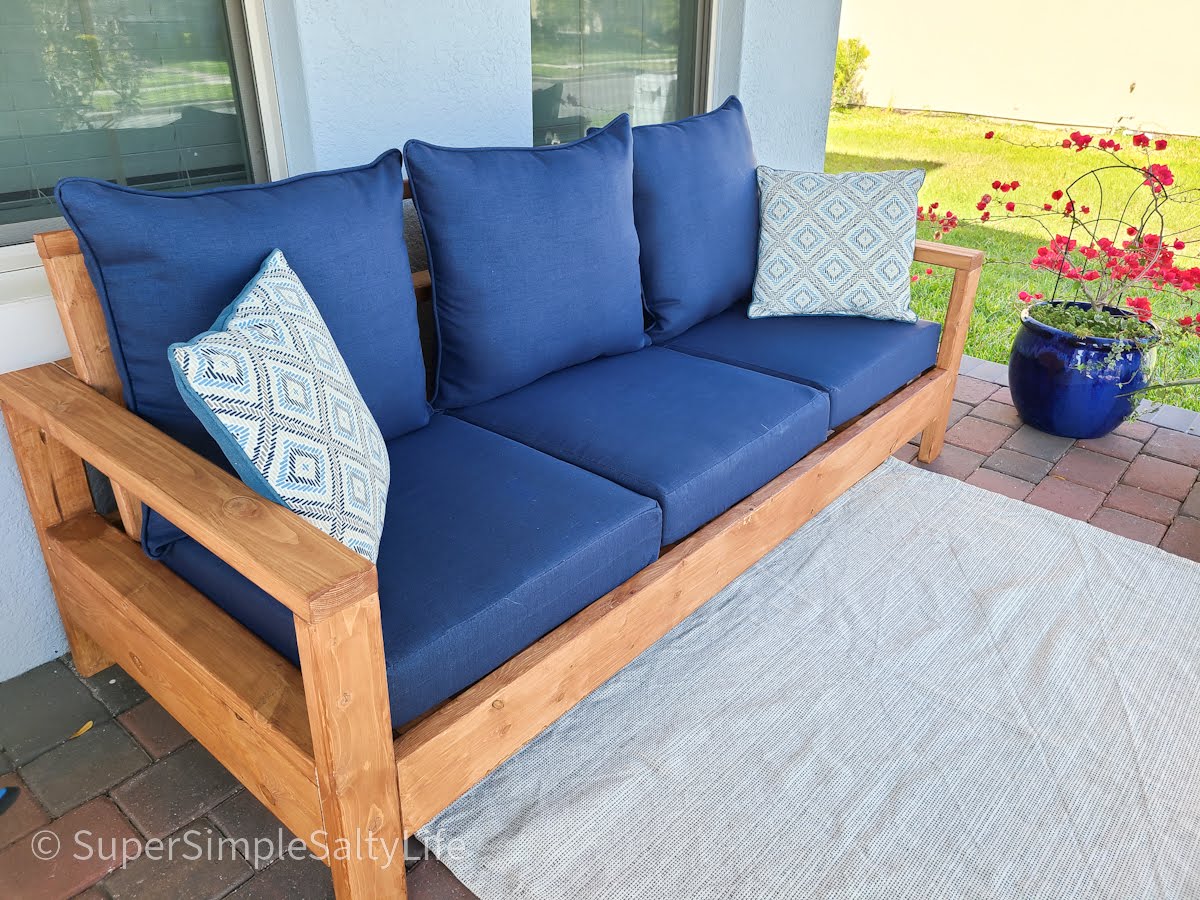
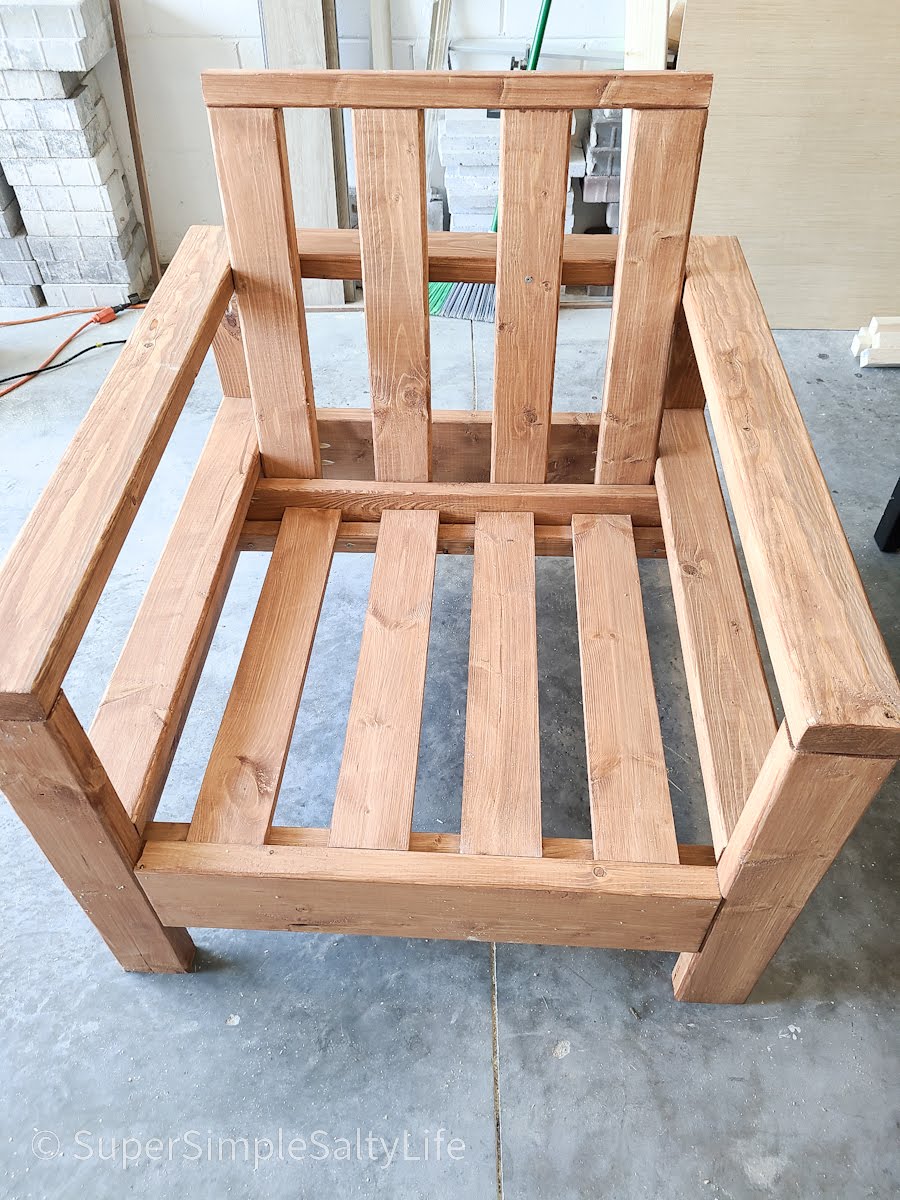
OK, I think this build may be my biggest project yet! It is definitely the heaviest. With the strong winds we can get here in Florida we needed substantial outdoor furniture.
I did make some modifications along the way measurement-wise so the sofa would fit my front porch better. All in all, this took 2 full days. I built the sofa first, stained it the next day and then decided (due to trying to get stain in all the nooks and crannies) to stain the chair pieces first before putting it together.
I am so happy with the results and so far, almost a year later, this furniture looks great and hasn't moved an inch in any of the thunderstorms we've had! Thank you Ana!!

Comments

Farmhouse Doggie Daybed

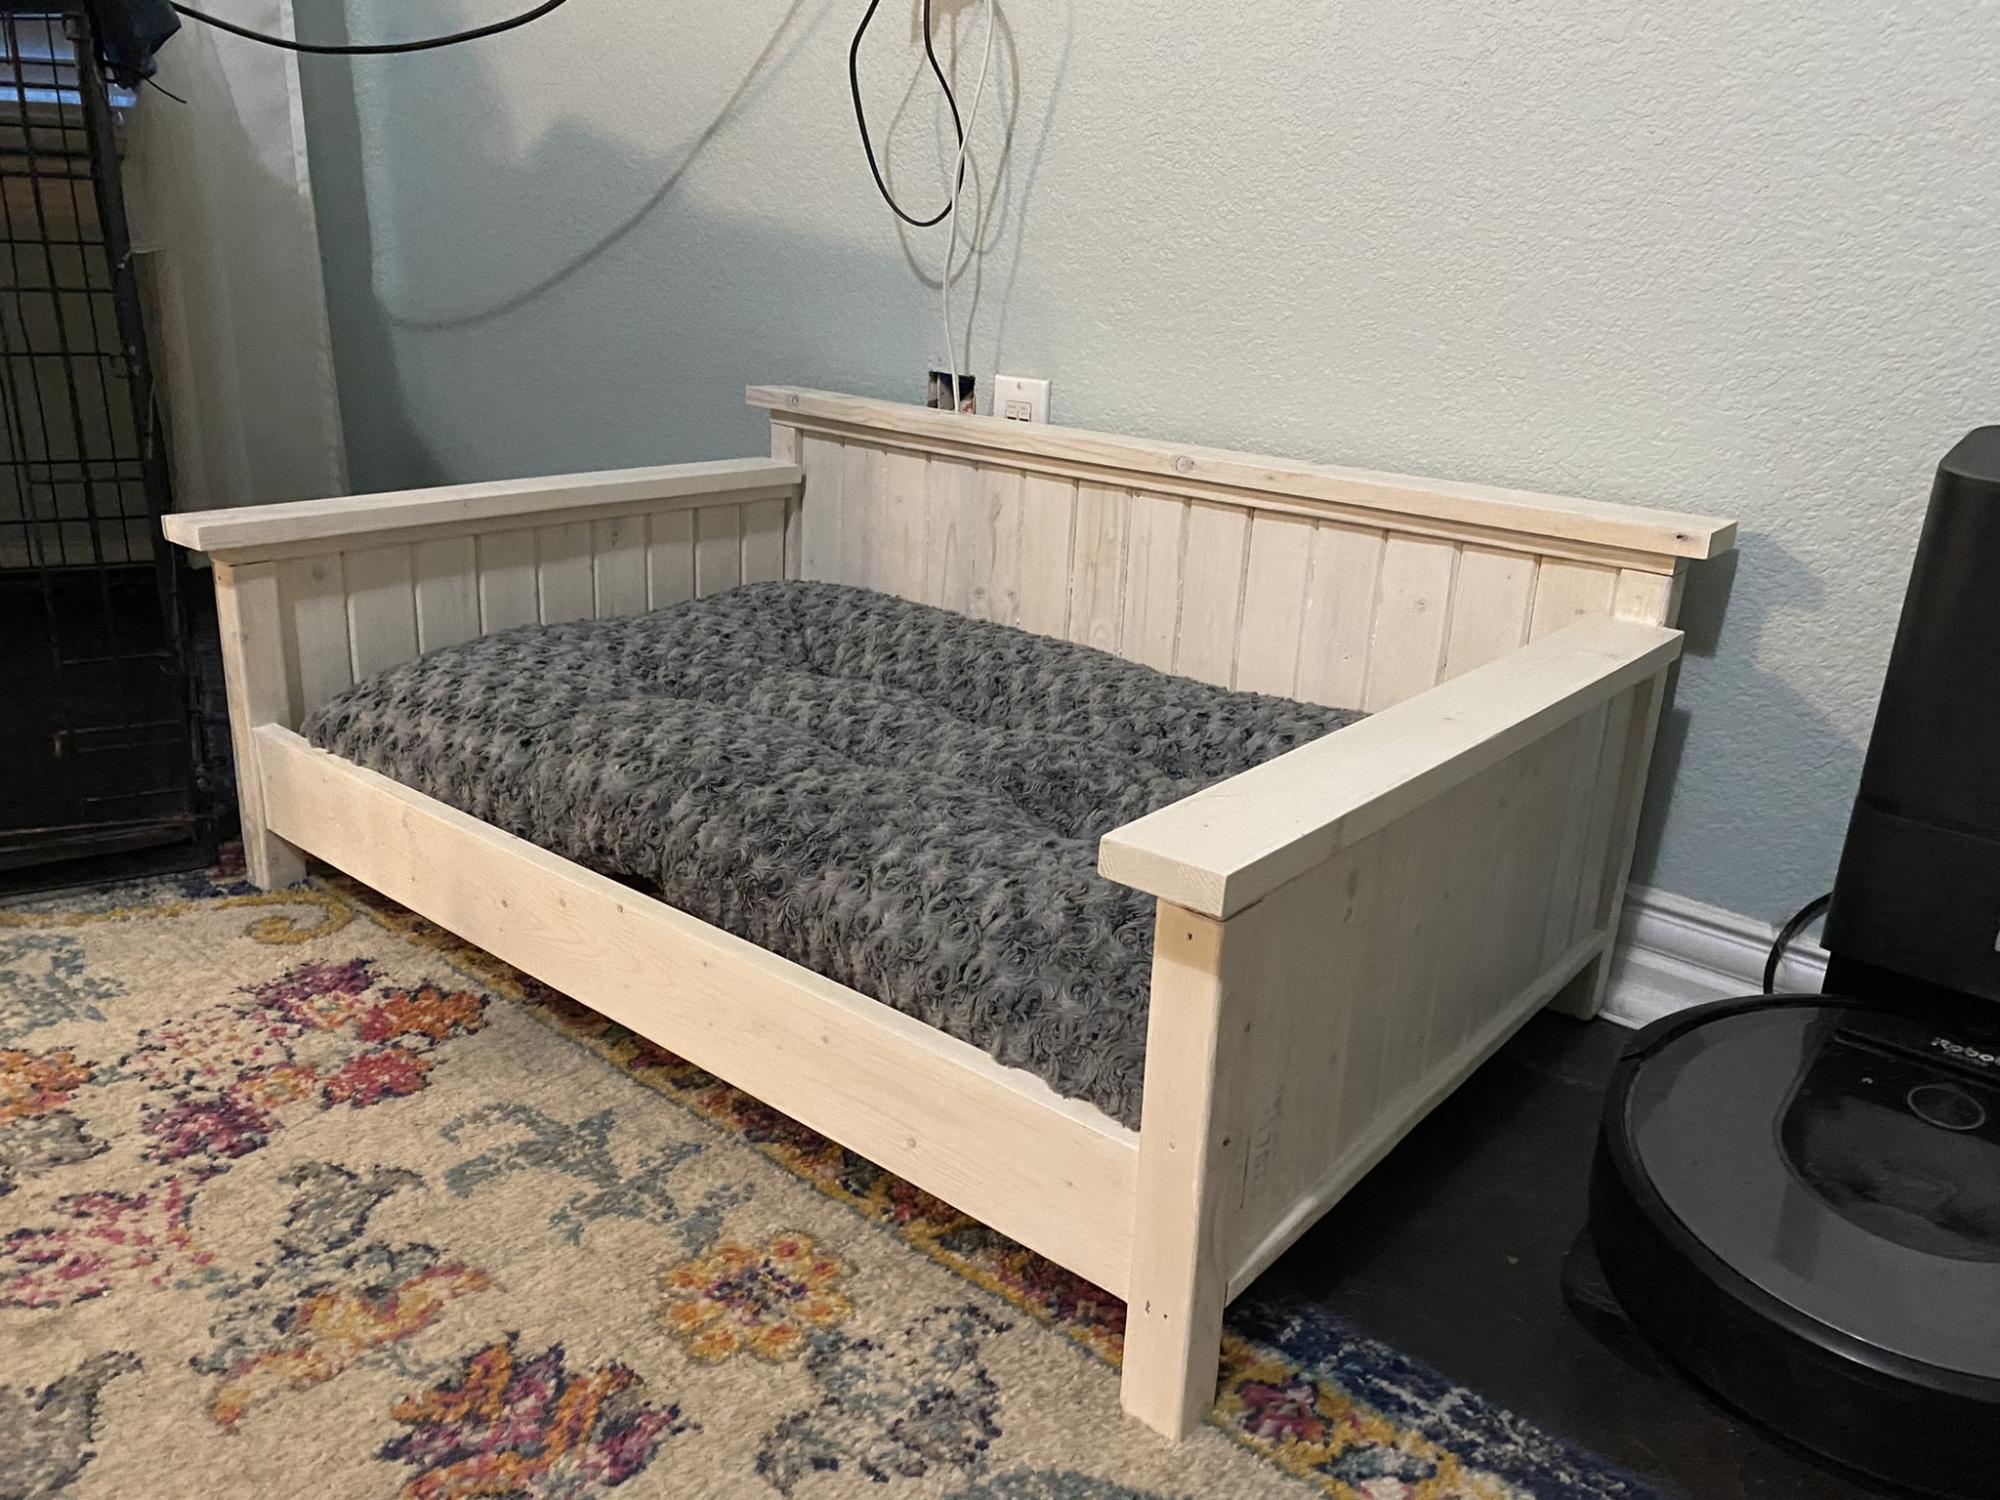
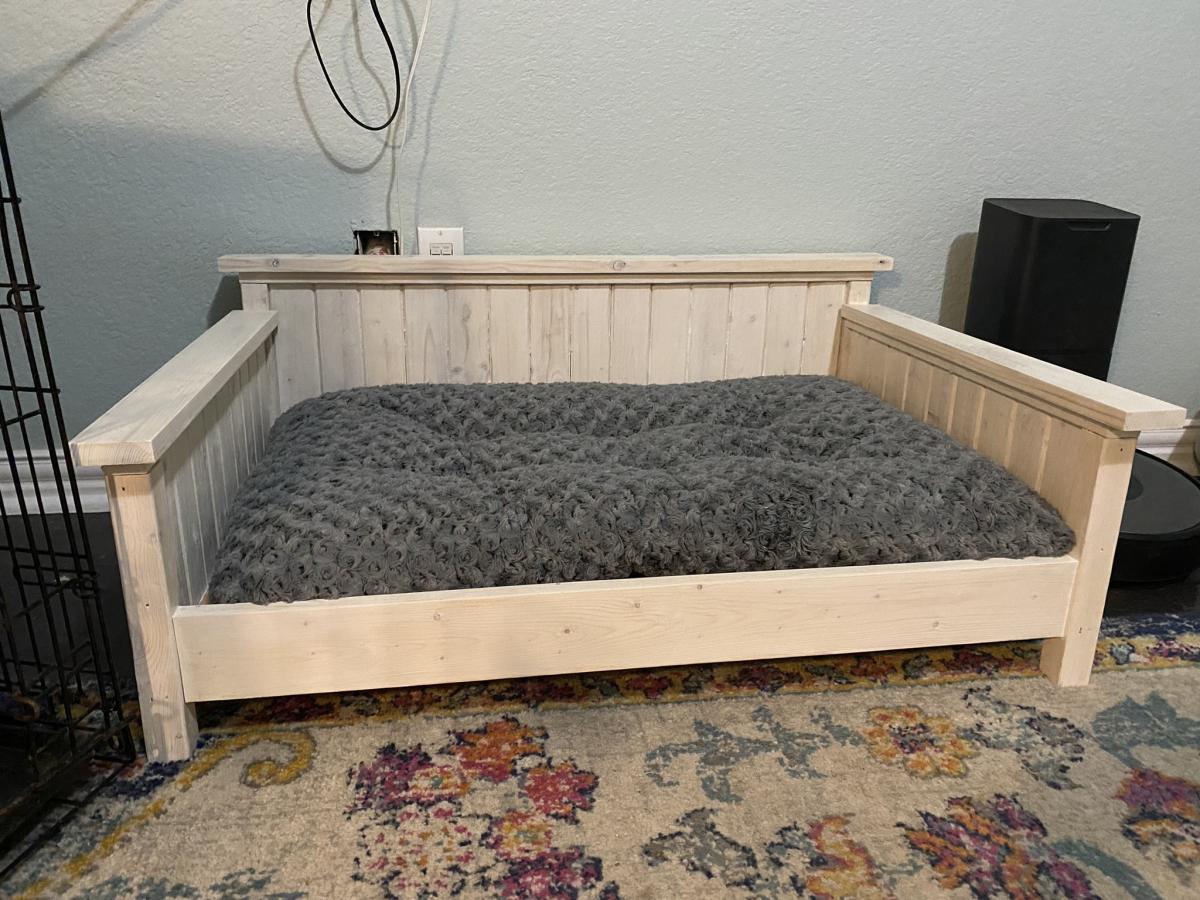
Submitted by jkjackson on Sun, 04/24/2022 - 18:42

This was adapted from the Farmhouse bed plans to match our king size farmhouse bed.

Comments

L shaped loft beds

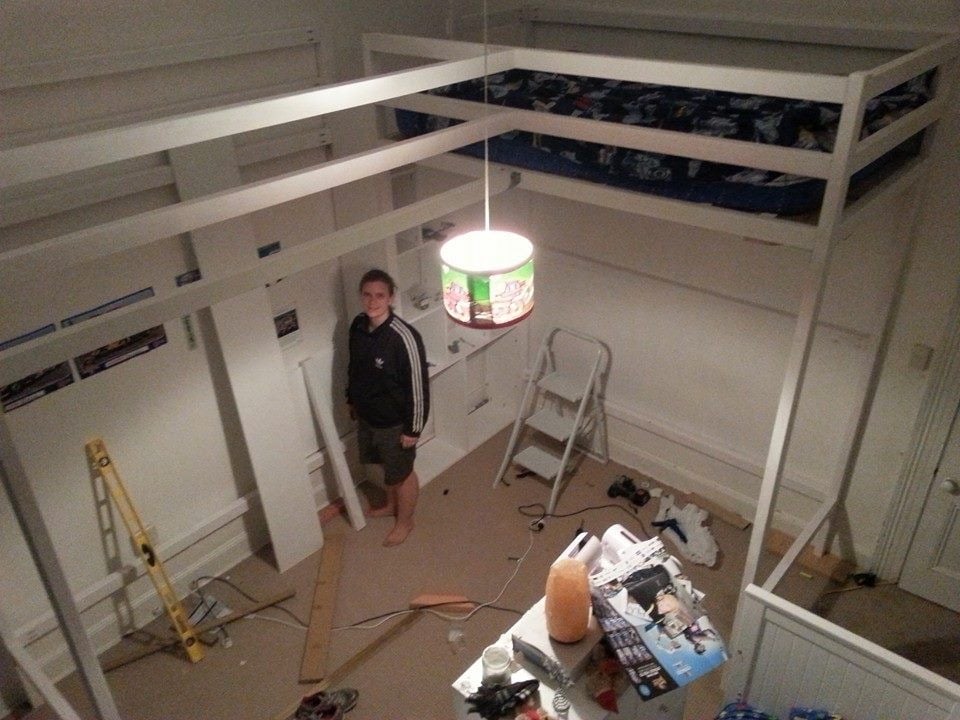
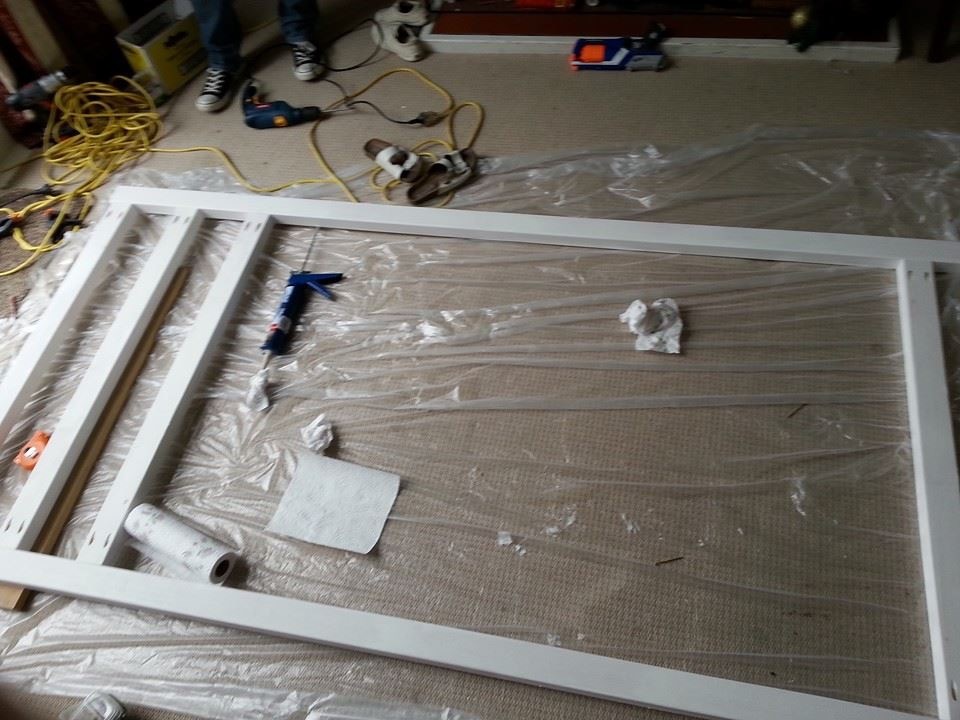
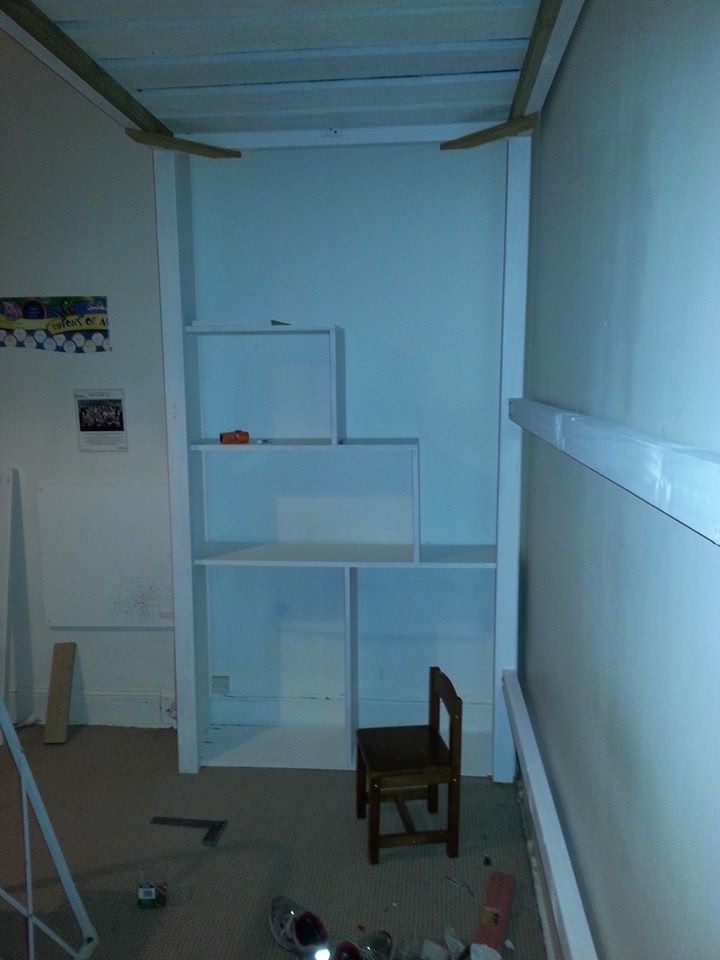
Submitted by AbiCurrie on Wed, 01/13/2016 - 00:49

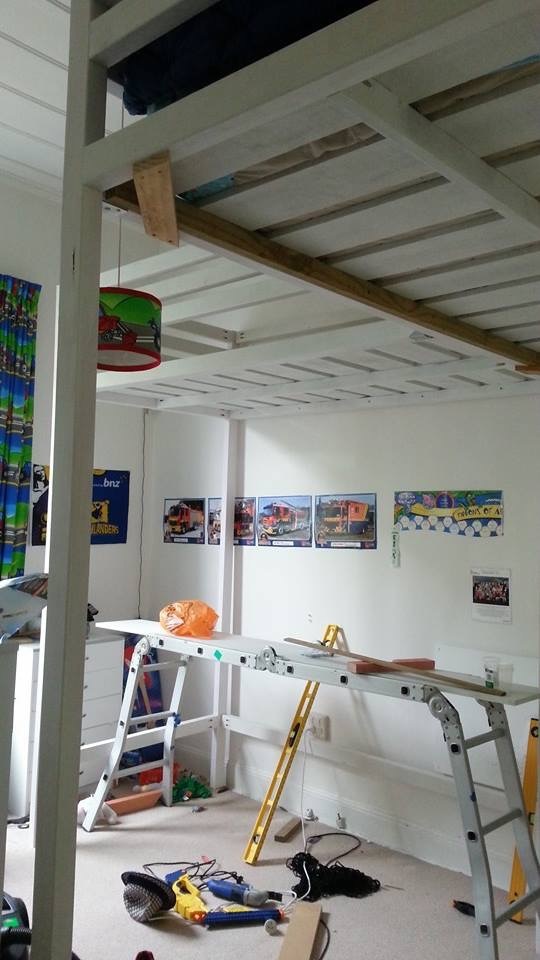
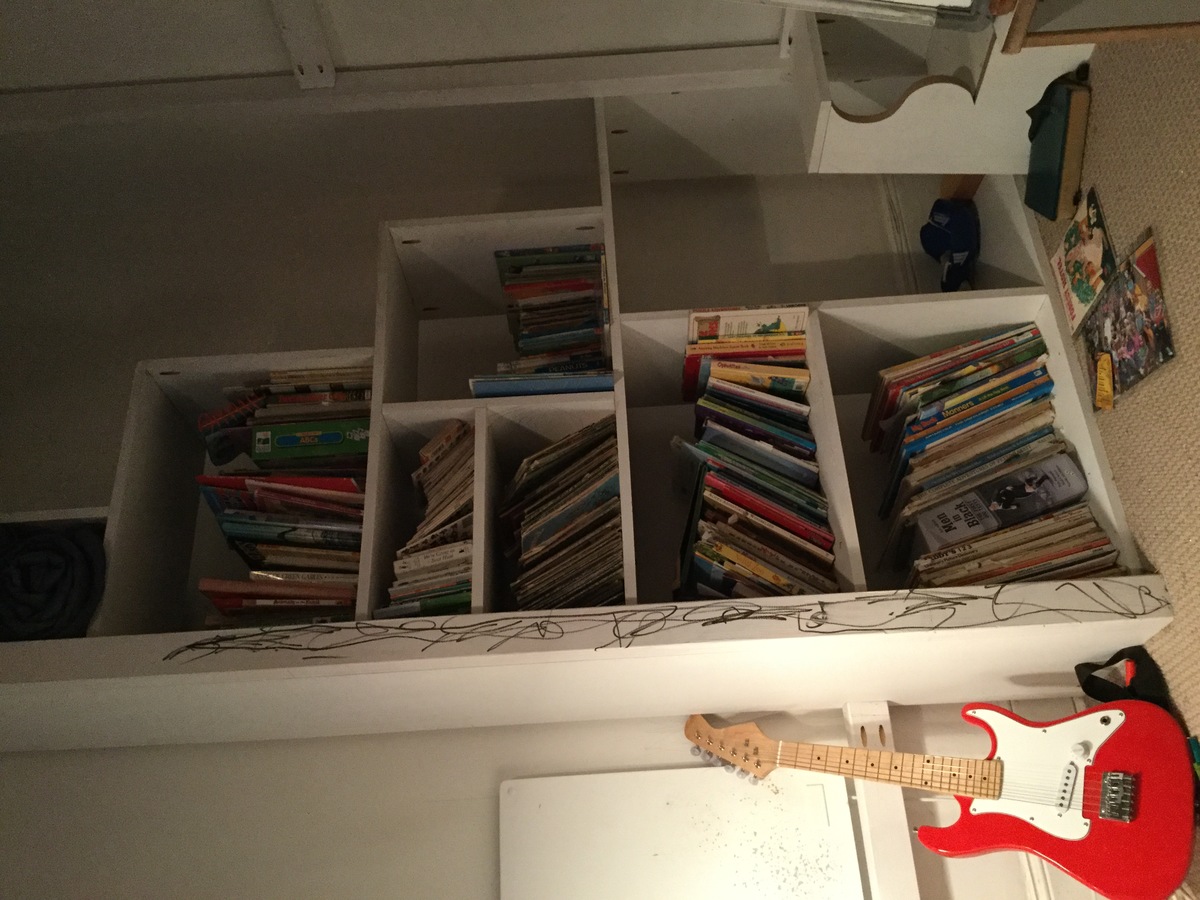
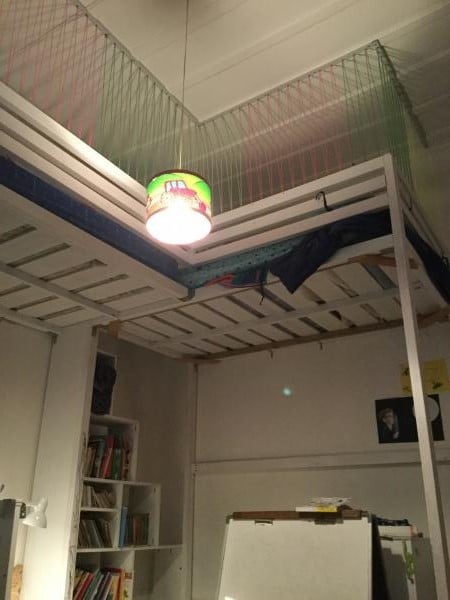
We have 12 foot studs in our house so I wanted to make use of the height of our ceiling to provide more space on the floor for the boys to play! With two boys sharing a room, the beds were going to take up a lot of valuable floor space. I found the bunk bed plans in Ana's book and decided to modify them to make loft beds. We had to do two so decided on an L shape so we could fit them into the room! Once we made the first bed we decided we should put only one set of stairs in to save space. The safest way we could think to do this was to place the stairs against the wall so the boys were less likely to fall. The stairs double as book shelves. The coloured rope was an added safety feature we thought up and gives me peace of mind! This was a fun, relatively easy build for two non-builders making their first big project. I bought a Kreg pocket hole jig for this project and it was a life saver. I can't imagine doing this build with out it!!! We completed it in about two to three days while my brother was down on holiday. It was fun and good brother sister bonding time! I am about to embark on phase two of the boys room, this time by myself , adding a storage dresser under one bed. I will modify Ana's laundry dresser plans to fit some plastic storage boxes. Then a day bed/sofa under the other bed using Ana's Alaska cabins day beds plan and finally (if I'm still standing) a shorter version of the craft table for the middle of the room! That's my year planned! Hope you enjoy the pictures, the beds are so big and high it's very hard to get a good photo. 

Estimated Cost
$300-400 NZD
Estimated Time Investment
Weekend Project (10-20 Hours)
Finish Used
Dulux - White paint matte finish. I painted all the wood before assembly, I highly recommend this. It needs another coat post build but I can confess I haven't gotten around to it yet!!!
Recommended Skill Level
Beginner

Farmhouse Bed with Storage and Bookshelf footboard

Submitted by rbgreene04 on Sat, 05/21/2016 - 15:50

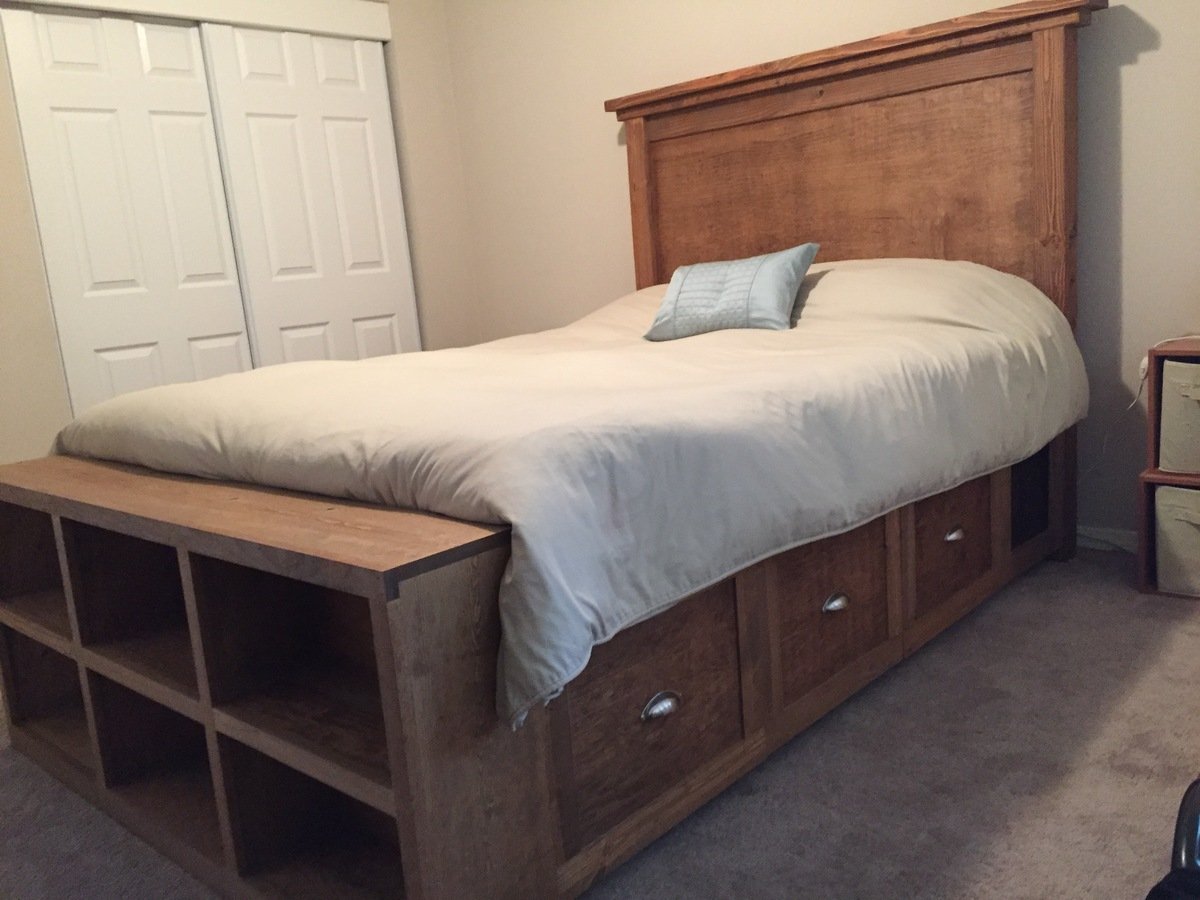
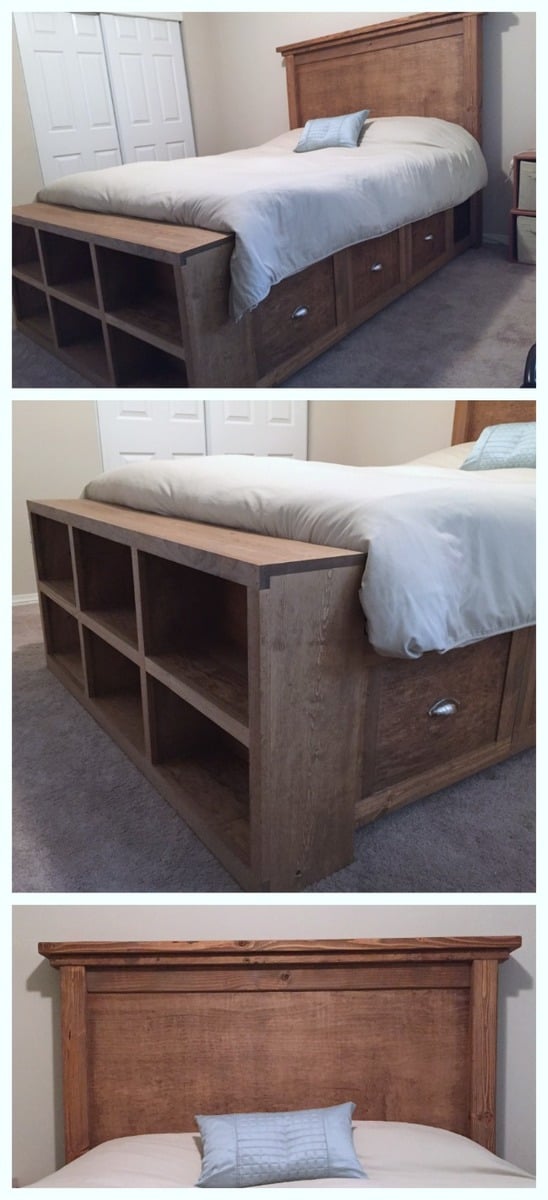
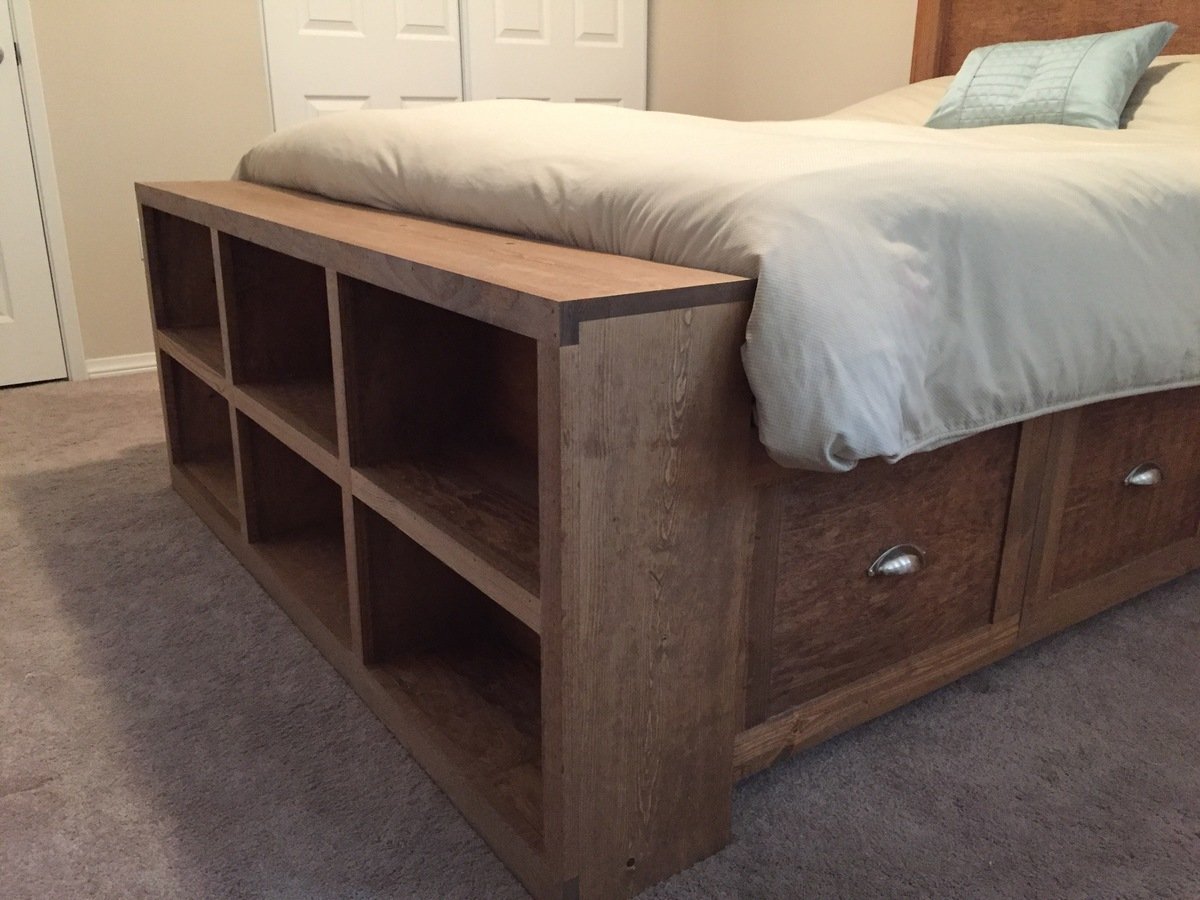
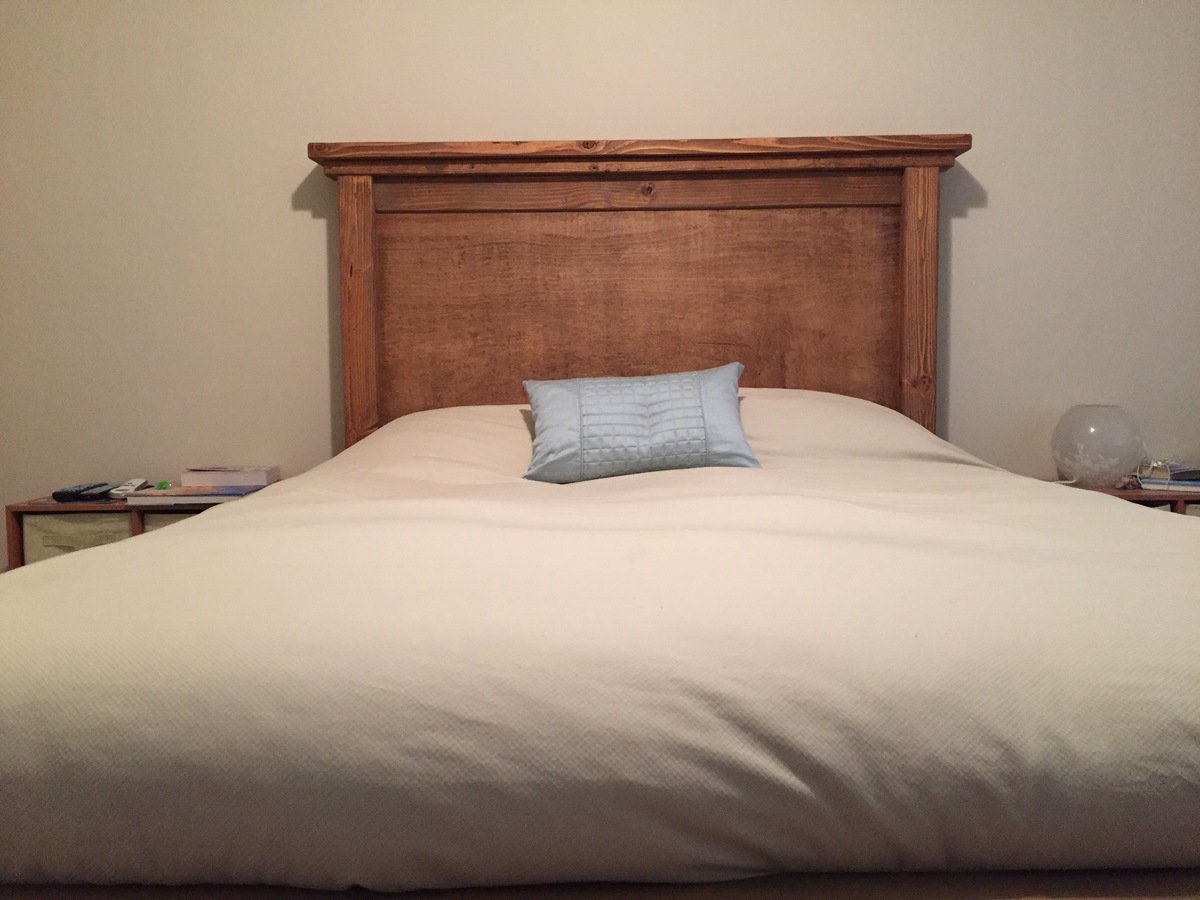
I altered the plans just a bit so that I could make use of the drawer closest to the headboard, while using bedside tables as well (not the ugly ones in the pictures, but some that only exist in my mind as of now). With the plan as is, I didn't think that first drawer would be able to open if you have a nightstand. So I left about a 17" gap that can be used as an open shelf for storage, and still had room for 3 drawers. I also wanted to include a bookshelf as the footboard to make it multifunctional. We have a ton of books and no place to store them (fear not, a large bookshelf/media center is coming soon!) I also altered the top of the headboard just a bit to give it more texture and visual appeal (hopefully, but beauty is in the eye of the beholder so I've been told). Lastly, I did not put the 1/4" plywood backing on the drawer carcasses. They were pretty sturdy as is, and only got more sturdy as they were attached to the headboard and footboard; I'm not worried about racking at all. Leaving the back off also allows me to pull the drawers out and access some hidden storage in between the two drawer carcasses. 

I wanted a simple finish, so I rubbed it with dark walnut Danish oil. Super simple finish and I think it'll hold up as the bed is not like a desk that needs poly or something. 

Estimated Cost
Cost? Great question! I build things, but don't keep track of receipts. Whoops! It's a major flaw of mine, and I'm working on it. I'd estimate just shy of $300.
Estimated Time Investment
Week Long Project (20 Hours or More)
Finish Used
I sanded to 120 and then lathered on Dark walnut Danish oil. I let it soak into the wood, and boy was the wood thirsty. Then reapplied after about 30 minutes and wiped off the excess, which there wasn't much excess--did I mention the wood was thirsty?
Recommended Skill Level
Intermediate
Comments

ciara5545

Sun, 08/28/2016 - 19:50

This bed turned out amazing.  I love the modifications and agree the first drawer will be more usable.

Bay Window Standalone Desk

Submitted by jonnymac on Sat, 07/19/2014 - 16:16

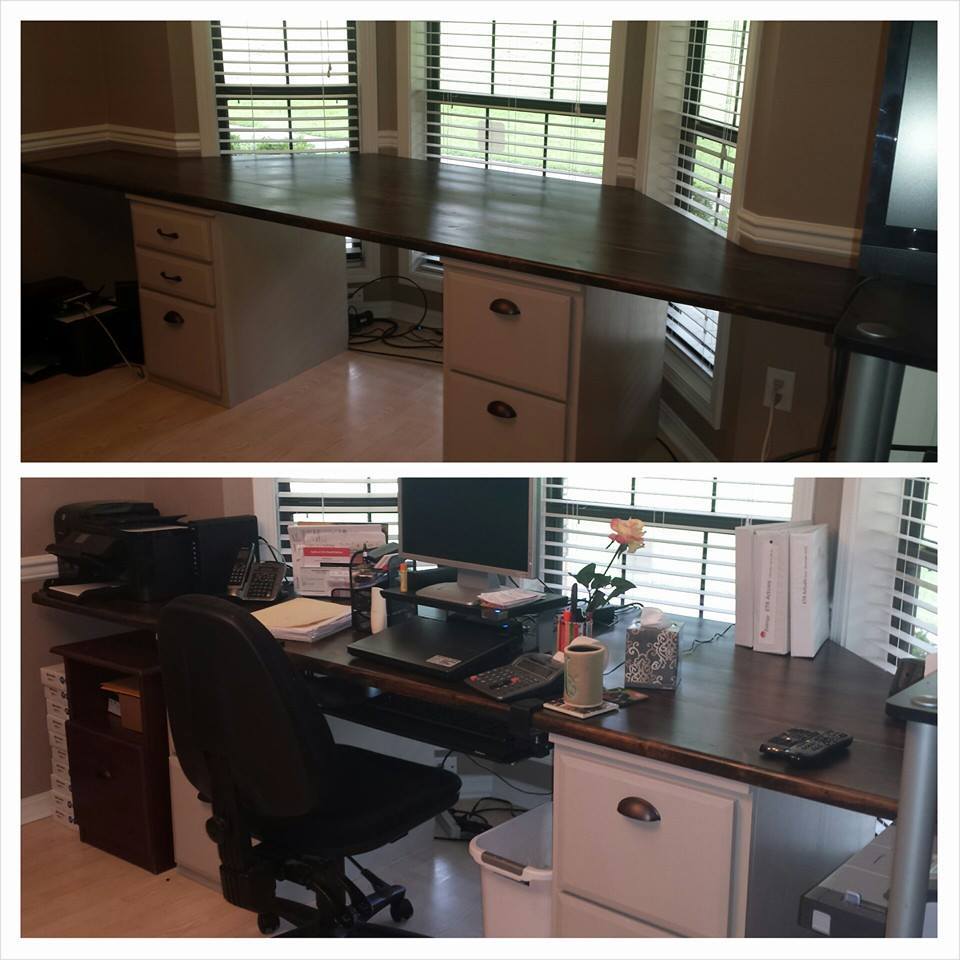
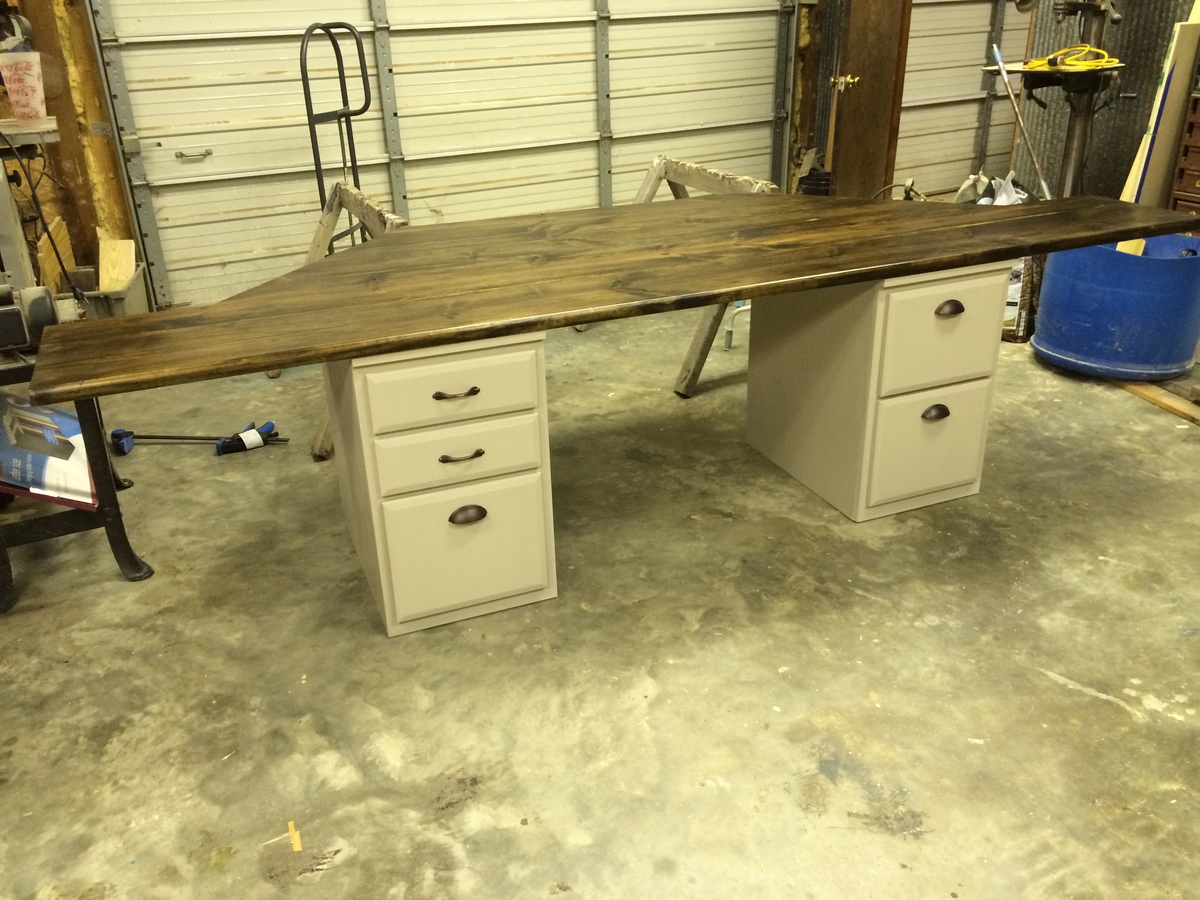
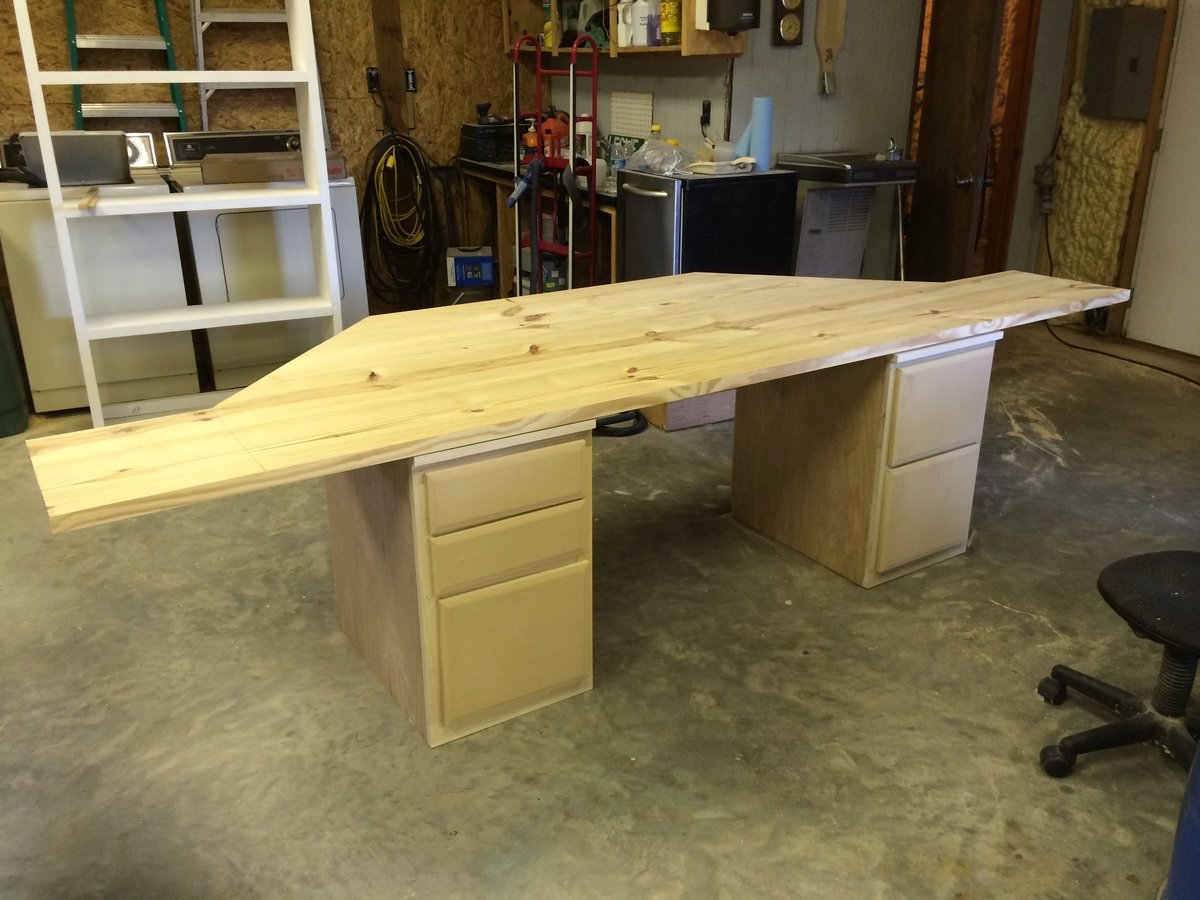
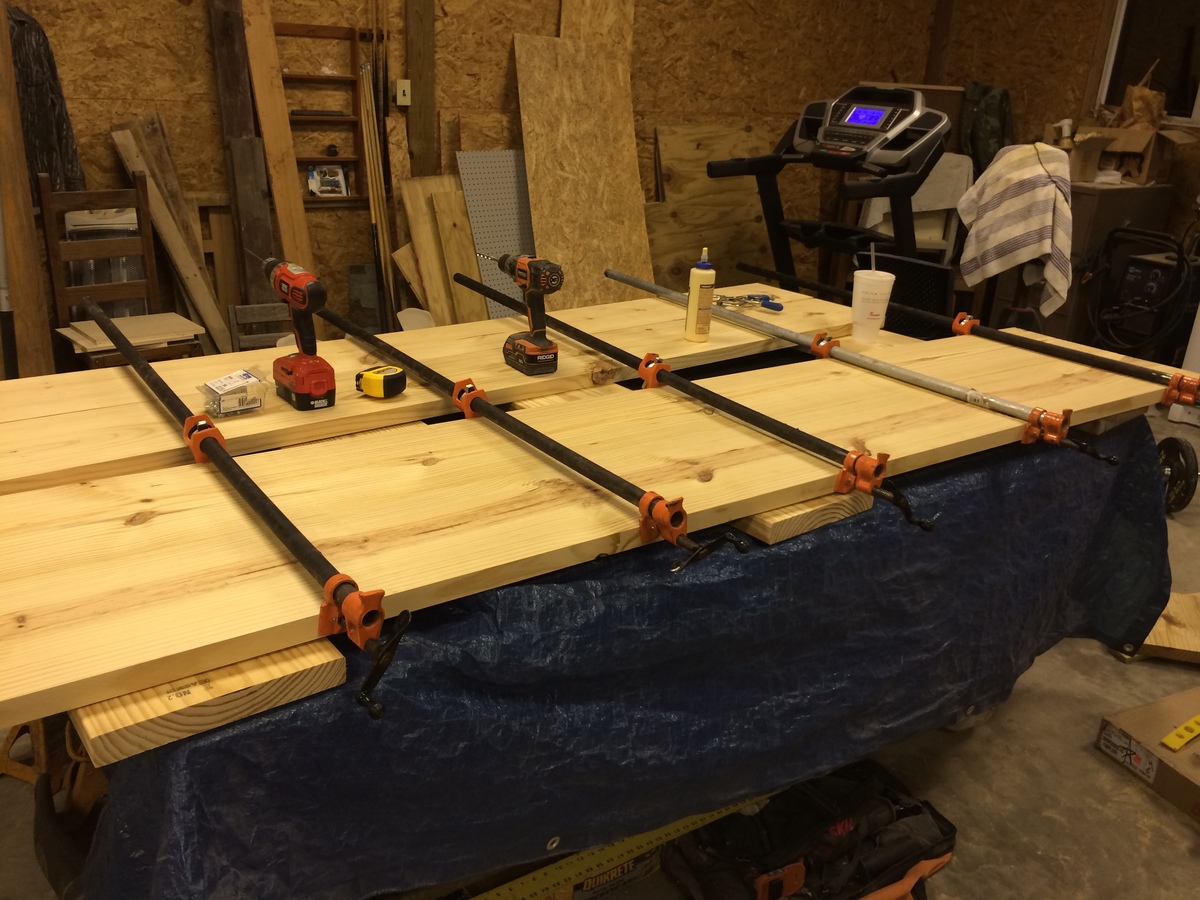
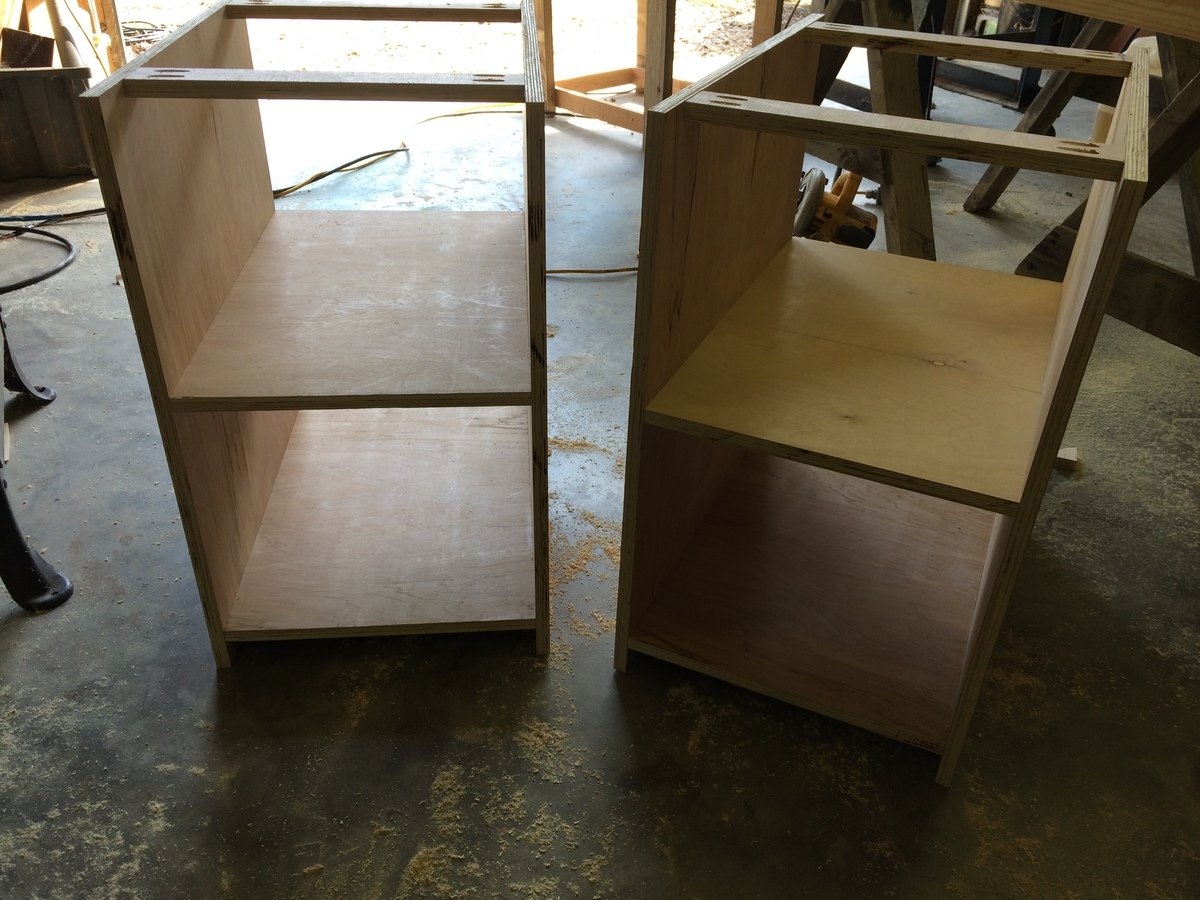
This is a bay window standalone desk. The desk has an enormous top and fits snugly into the bay window. It did not have to be attached to the wall. There are four pieces in total: the top, 2 base units and a support that spaces the desks at 36" and further secures the top.

The base unites are built from the File Base Classic Wall Storage System and the top is glued up 2x12s that were planed down and straight edged.

Estimated Cost
$175.00
Estimated Time Investment
Weekend Project (10-20 Hours)
Finish Used
The bottom was painted with Chalk paint from Lowes and the top is stained with one coat of Jacobean. Both top and bottom were sealed with a Minwax Protective top coat.

This was my first desk to build and learned a great deal. Looking forward to my next project!
Recommended Skill Level
Intermediate
Kitchen Storage Shelf

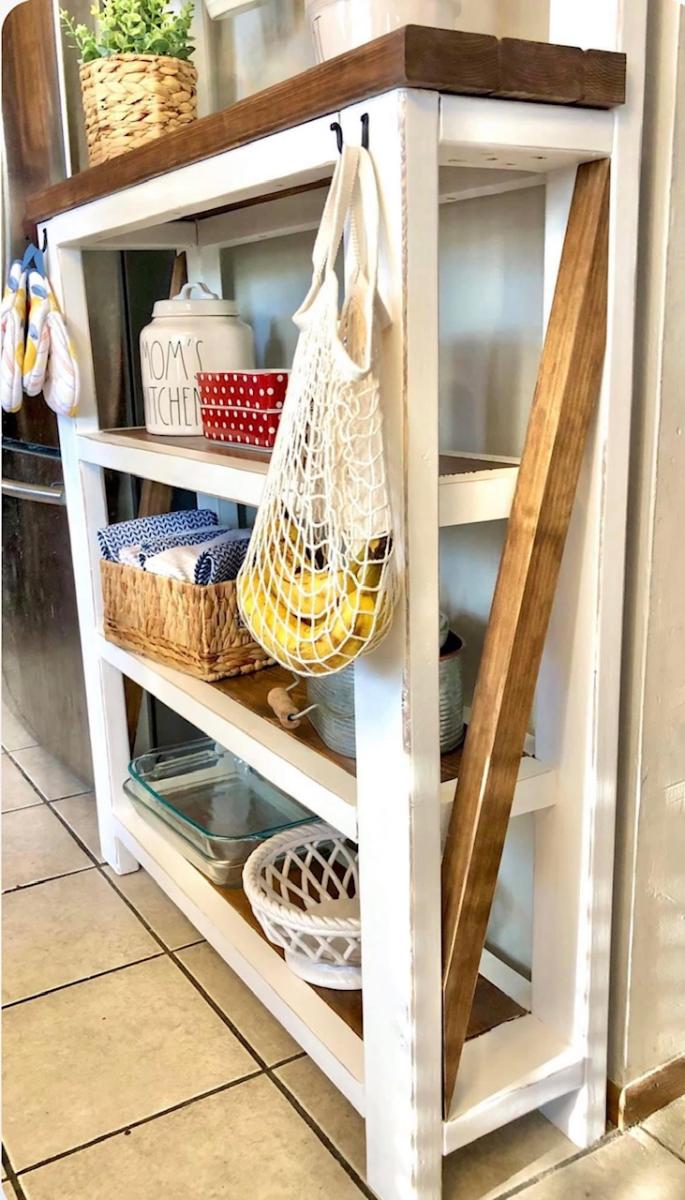
Thanks to you we were able to build my mom a shelf for her kitchen with a combination of two of your plans! My mom loved the top of the “Farmhouse Potting Bench” but also wanted shelves like the “Rustic X Console Table”. We combined the two and adjusted measurements to fit our wall space. We didn’t do a complete X on the side because we wanted it with one slant, but loved how it turned out over all! 

Kayla

Pergola Swing

Submitted by grarob1956 on Thu, 04/23/2020 - 17:59

I saw this project on YouTube under Arbor Pergola Swing. It did not mention any specific detailed plans or cut list but it was enough to get me started. I began with (2) 10' 6" x 6" post. buried each 24" and cemented. I cut the post tops at 83" from ground line. The rafter consist of (2) 10' 2"x 6". I used the leftovers of the 6" x 6" post tops in the middle of my rafters to hang the swing from with 1/2 " eye bolt. Then I used (9) 2" x 2 " x 8' and cut each at 36" to finish off the top and (2) 2x6x8 for the 4 rafter supports. I drew out the designs of the rafters and top ends free hand and at made a template for the cuts with s jigsaw.

The entire cost including hardware minus the swing was $170. My wife had purchased the swing last Fall at a clearance for $40 brand new.

Built from Plan(s)
Estimated Cost
$170.00
Estimated Time Investment
Weekend Project (10-20 Hours)
Finish Used
Valspar Duramax Special Walnut
Recommended Skill Level
Intermediate
Variation of Simple Bunk Bed Plans
Submitted by Anonymous (not verified) on Wed, 04/29/2020 - 08:40

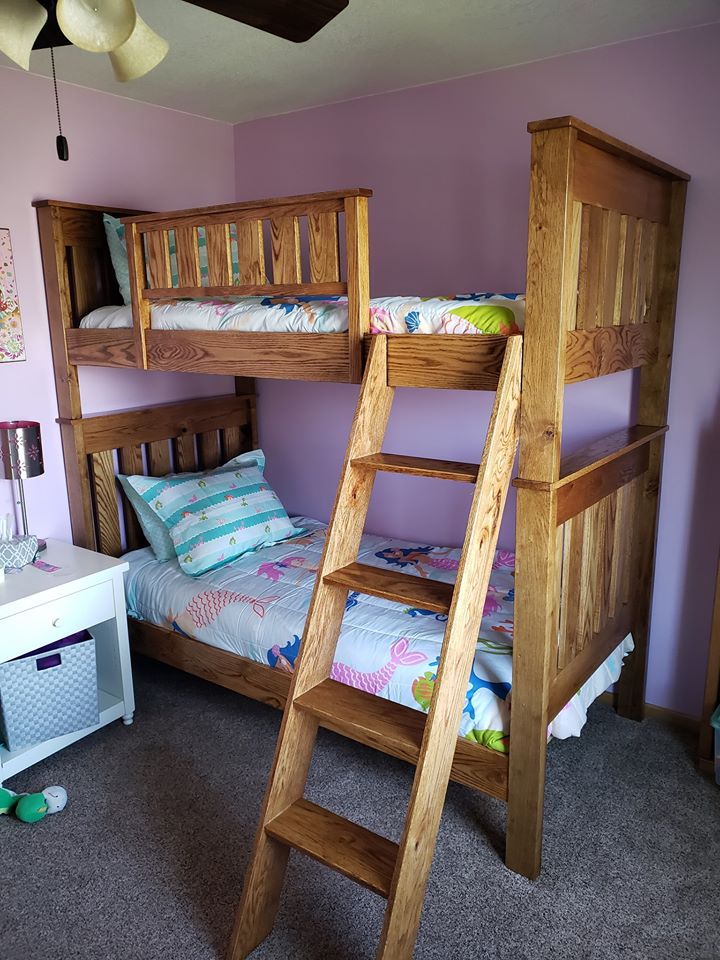
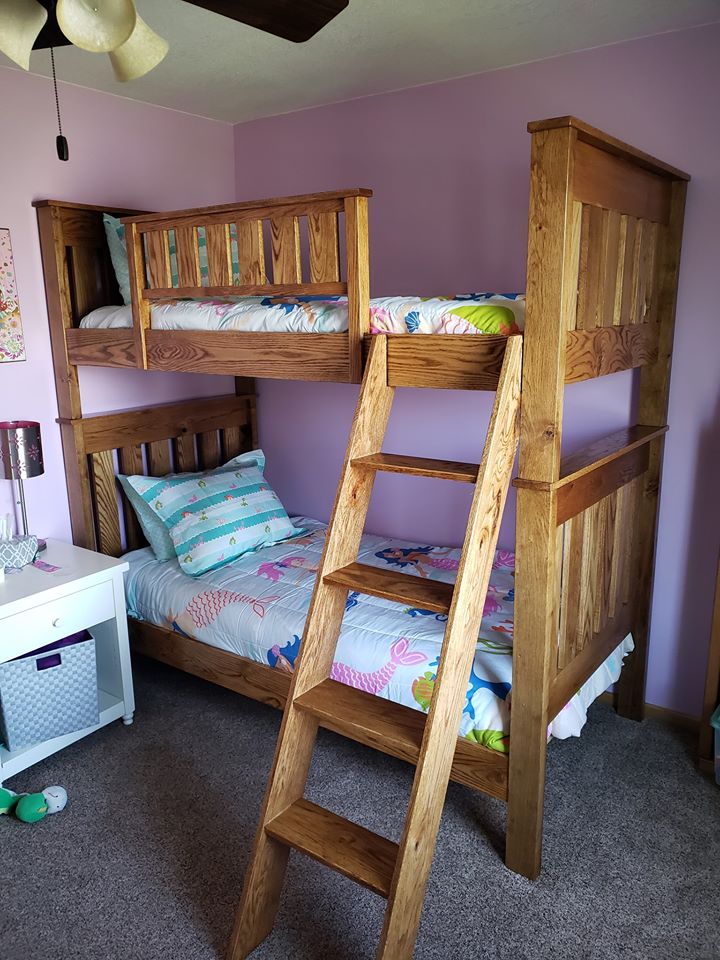
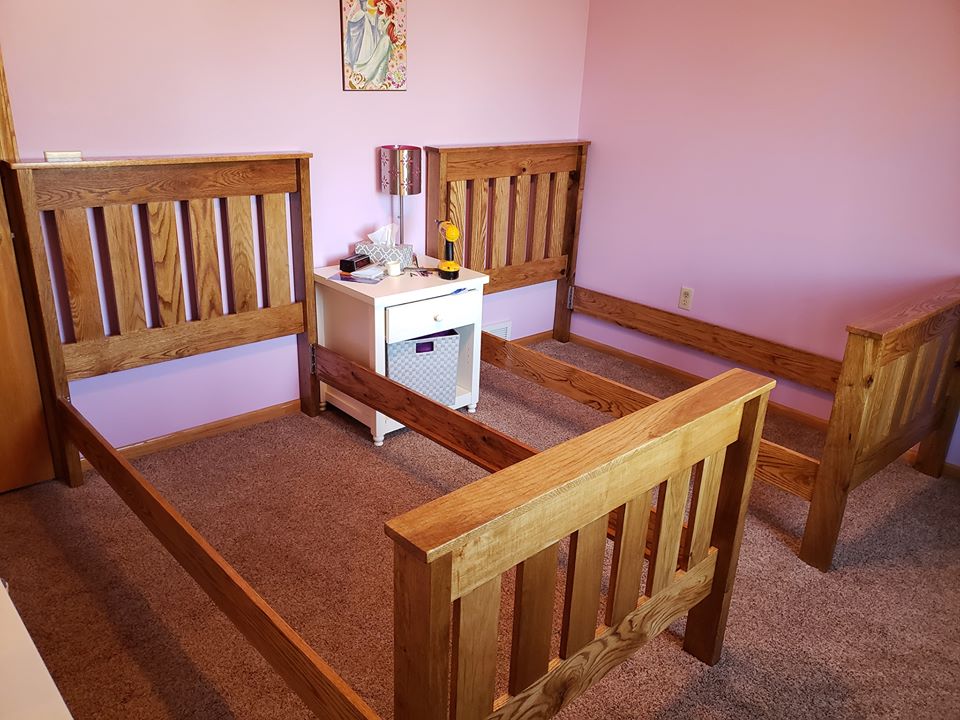
I used the Simple Bunk Bed plans as a rough guide for the sizing of this twin over twin bunk bed plans. Bed is made out of solid oak that I sourced locally for free and planed down the oak slabs. There are a number of variations, but the sizing helped tremendously in putting my plans together.

Estimated Time Investment
Week Long Project (20 Hours or More)
Finish Used
Minwax Golden Oak & Minwax Glossy Poly
Recommended Skill Level
Advanced