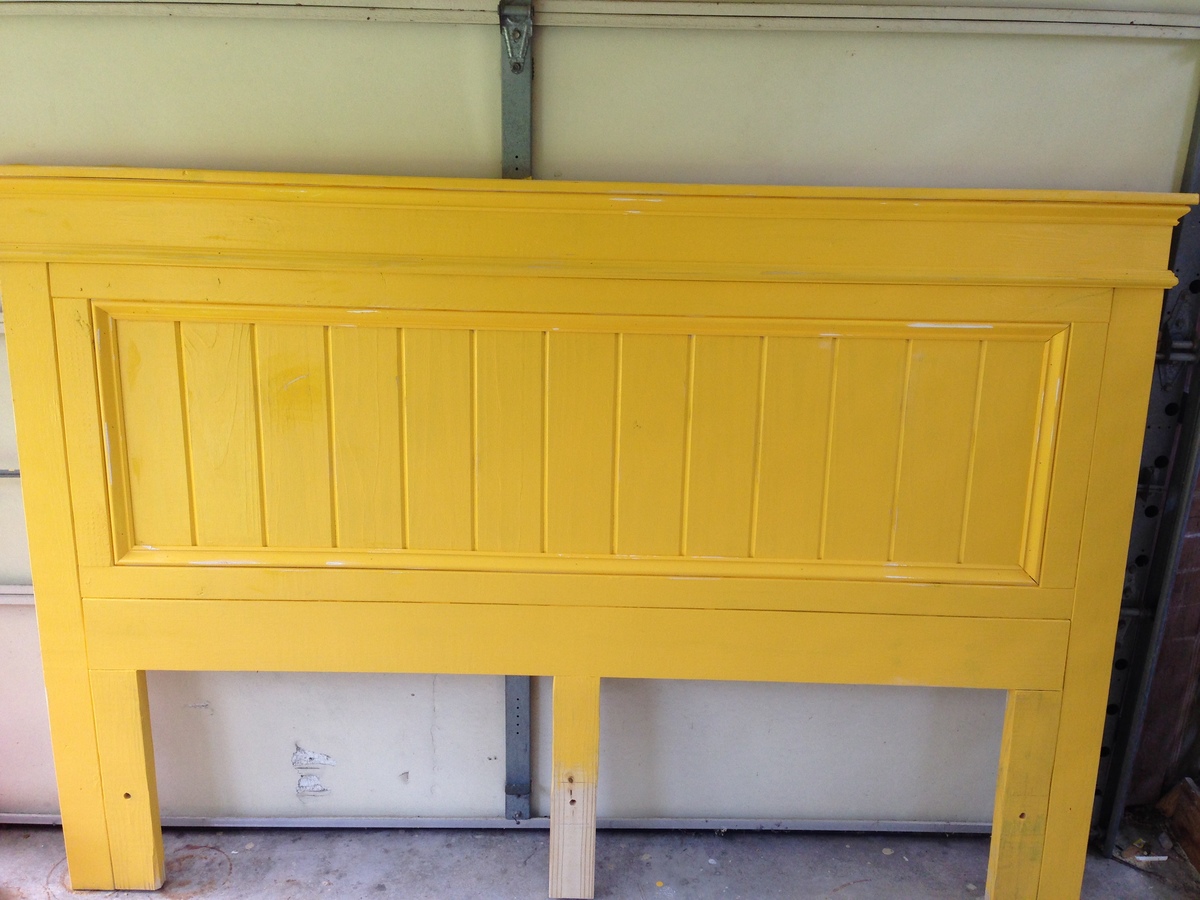
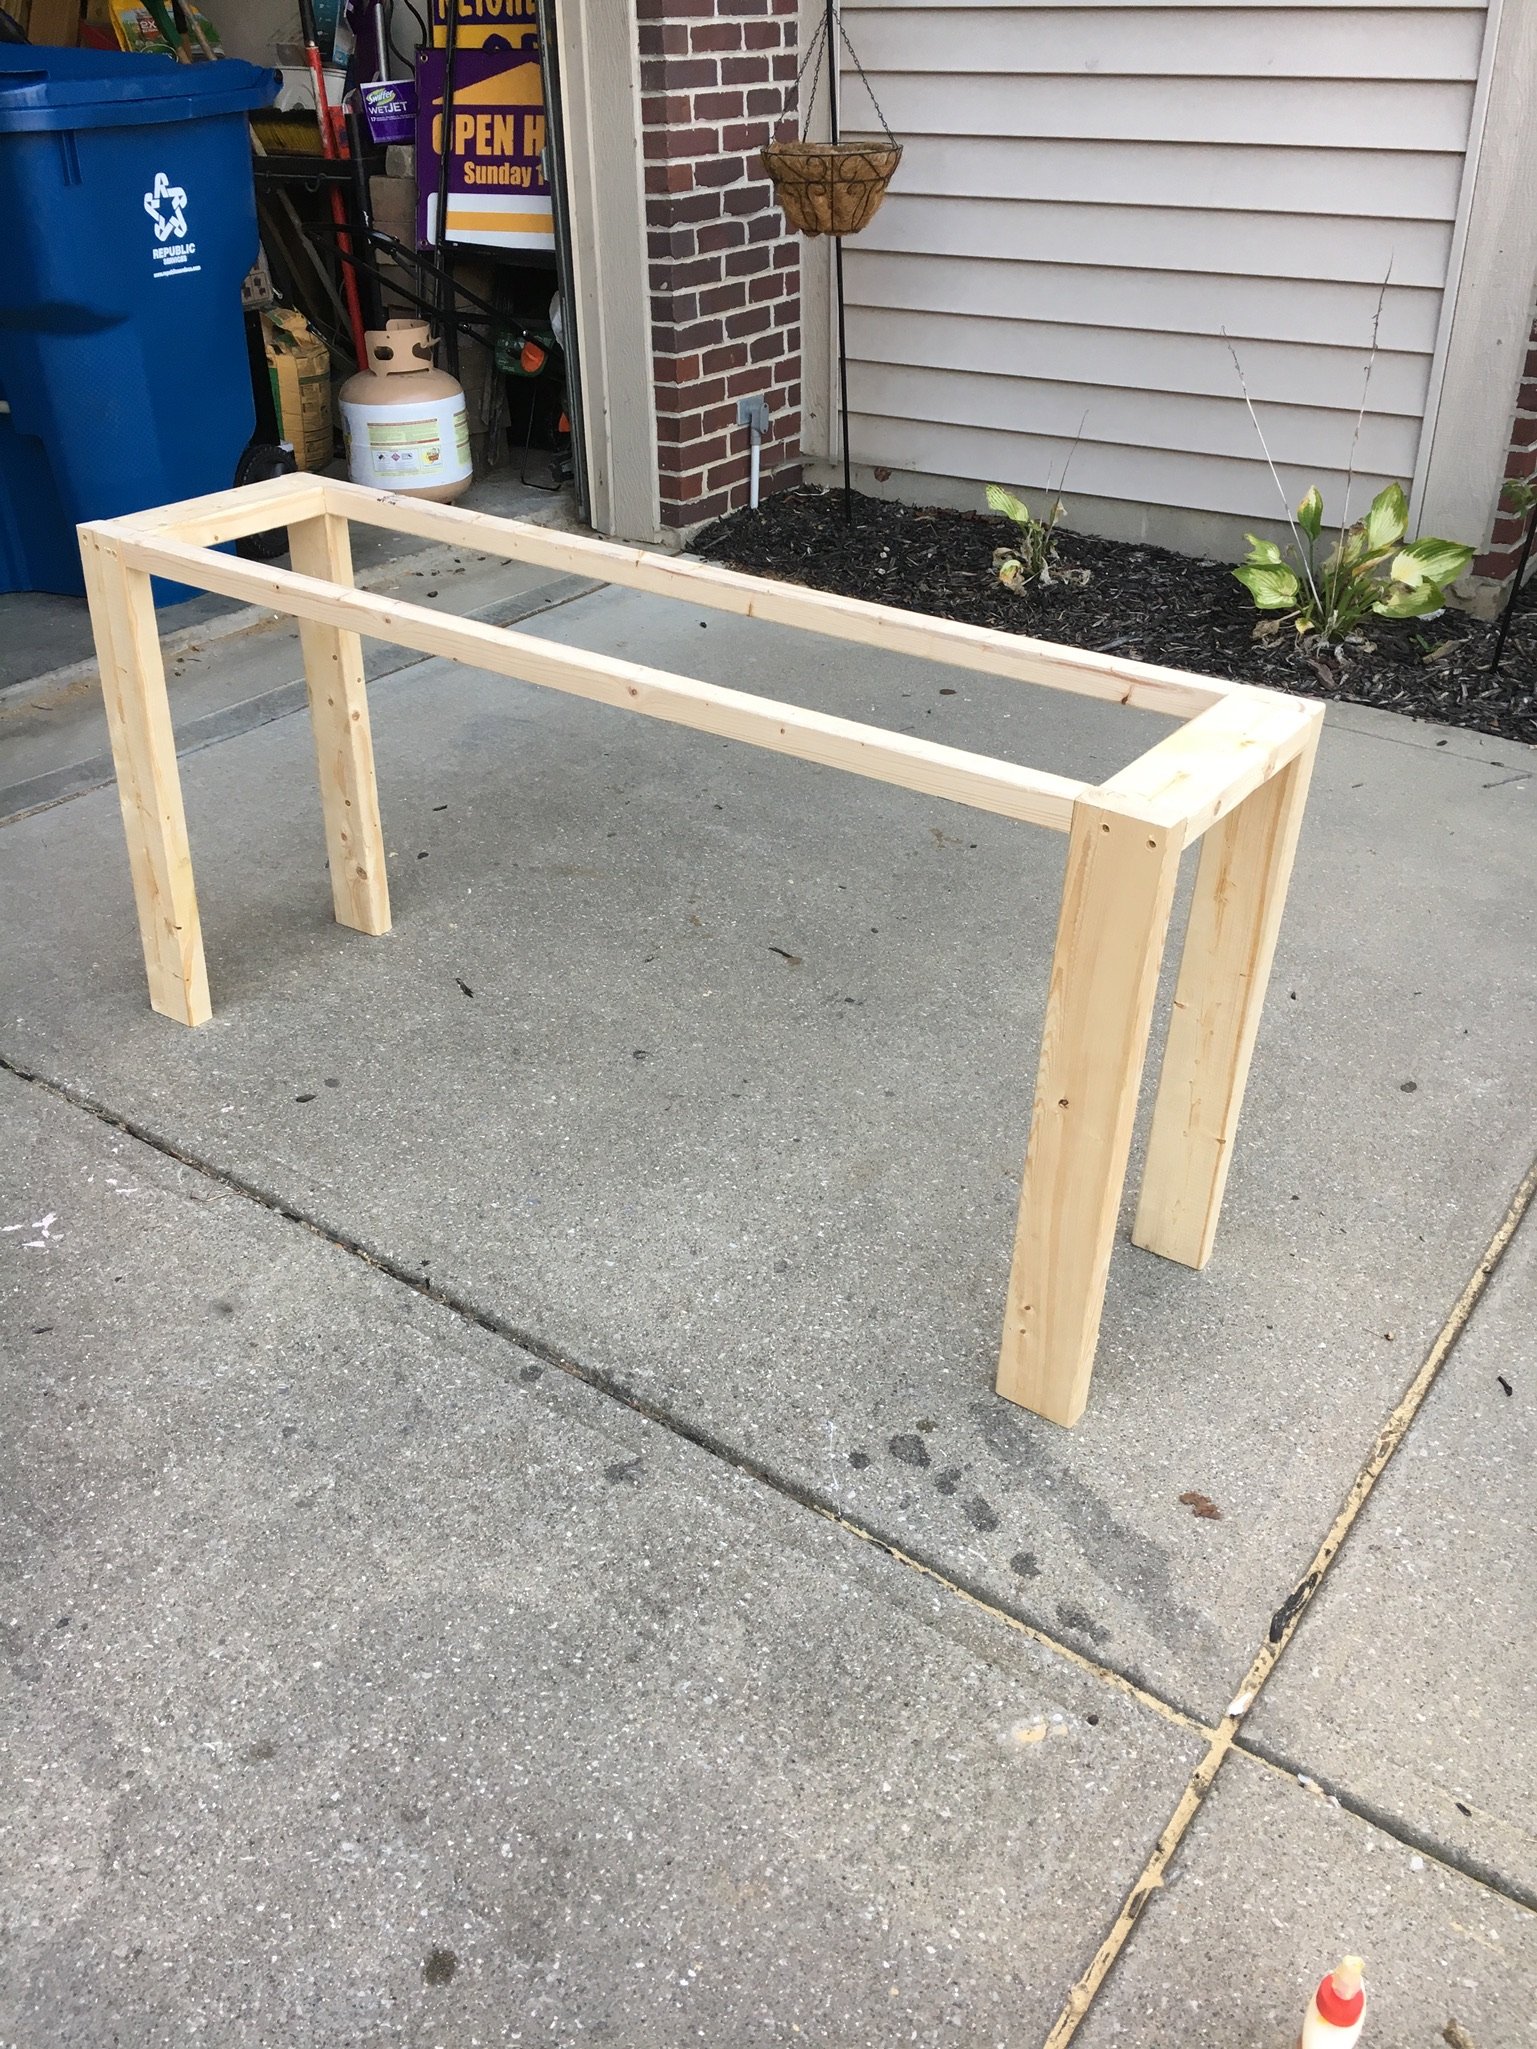
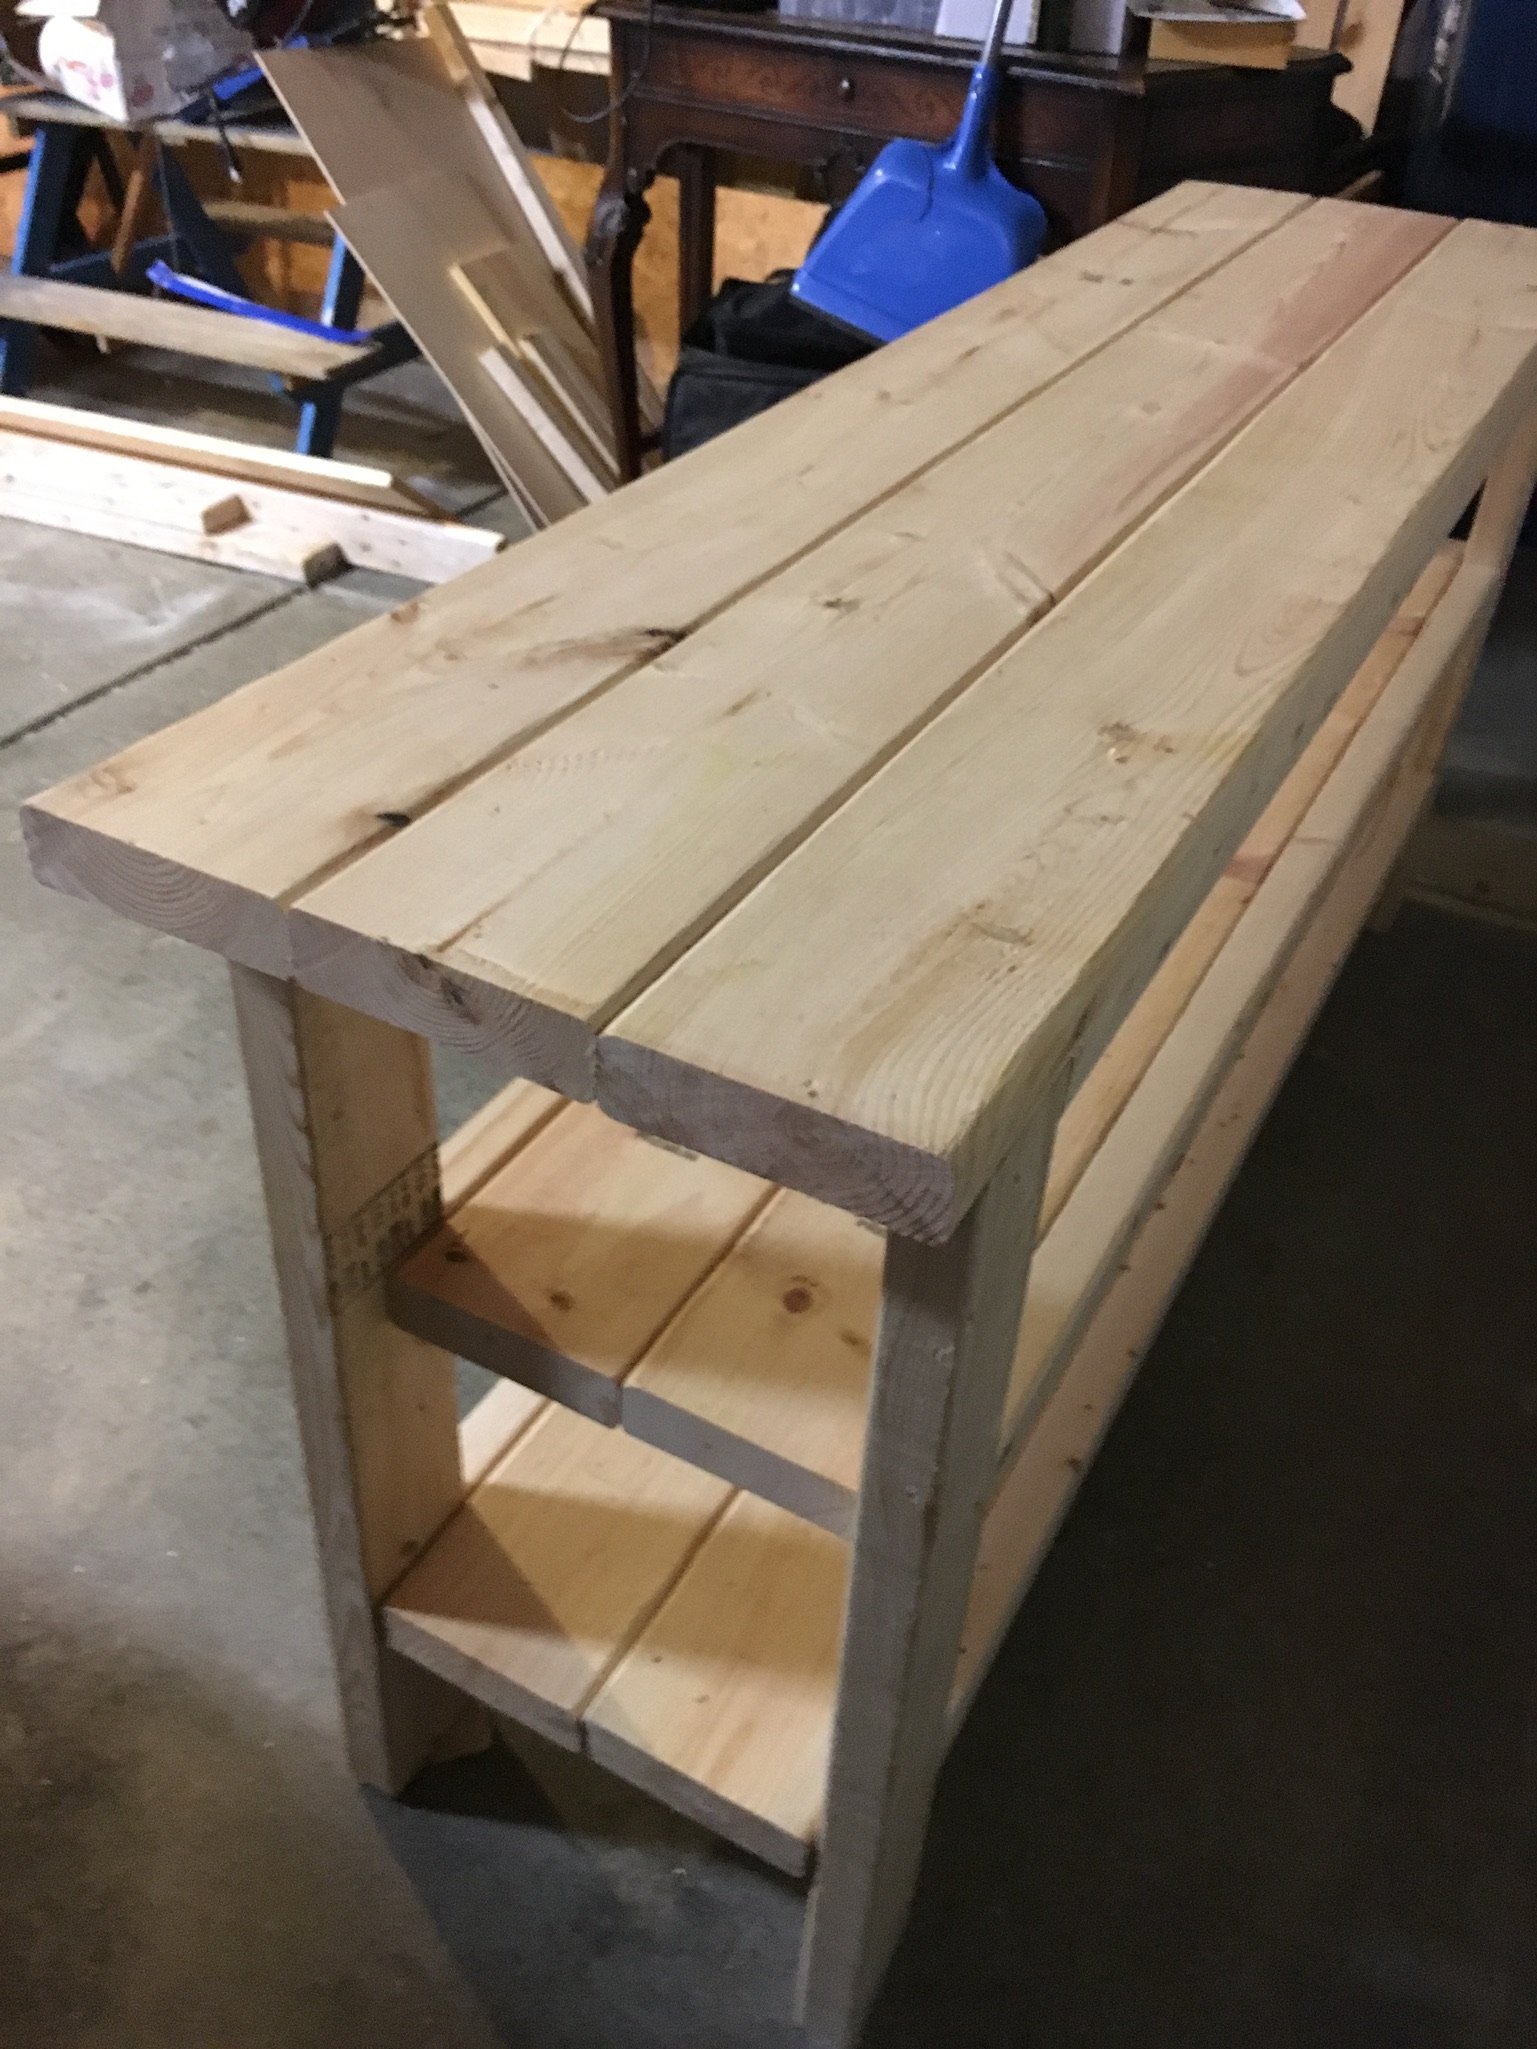
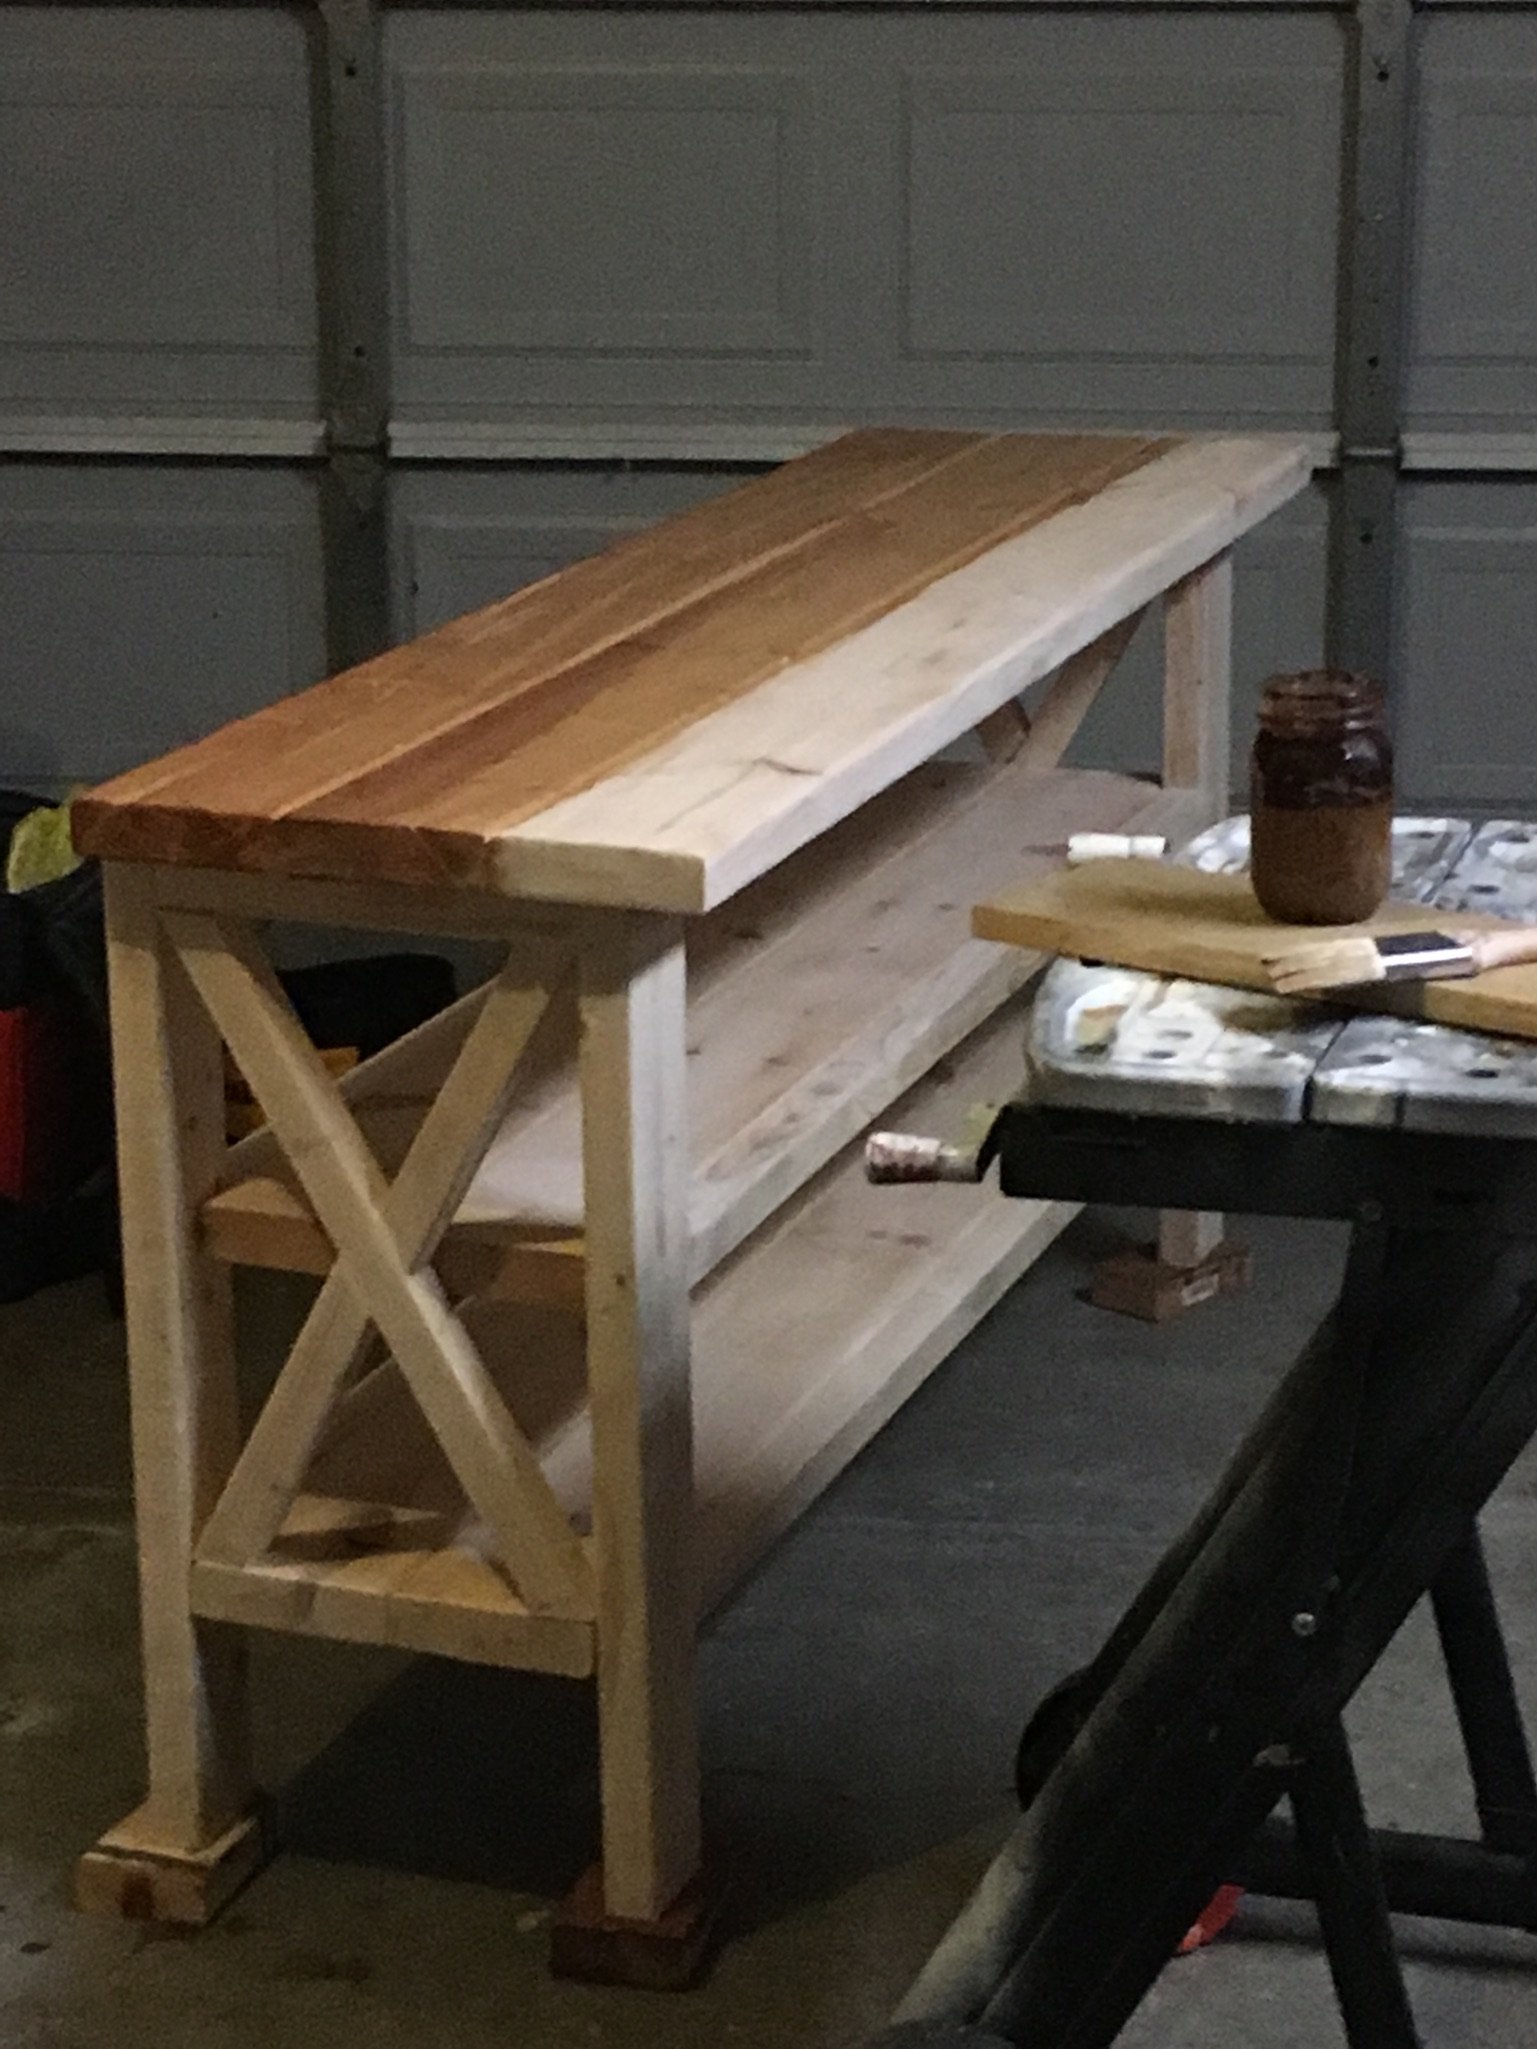
Simple Potting Bench Modified

Slight variation on Ana’s Potting Bench. I lowered the bottom shelf and added a middle shelf with wood from a gate we removed. I’ve received many compliments. Thanks, Ana!
Kathy Joy
Built from Plan(s)
Slight variation on Ana’s Potting Bench. I lowered the bottom shelf and added a middle shelf with wood from a gate we removed. I’ve received many compliments. Thanks, Ana!
Kathy Joy

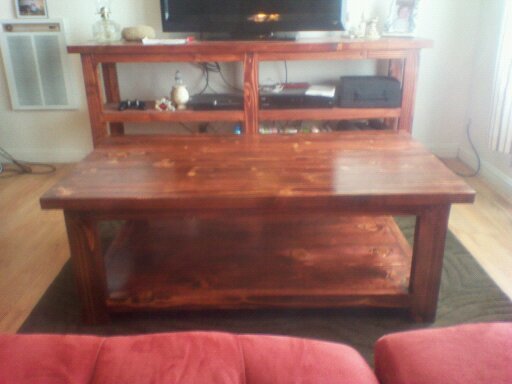
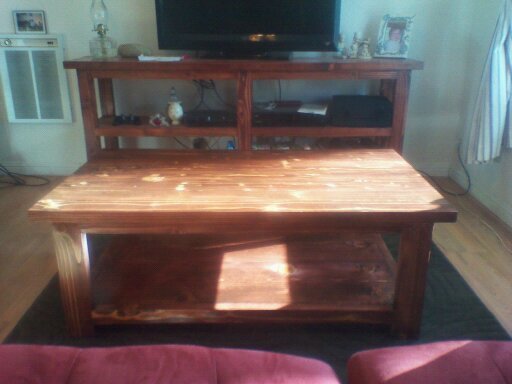
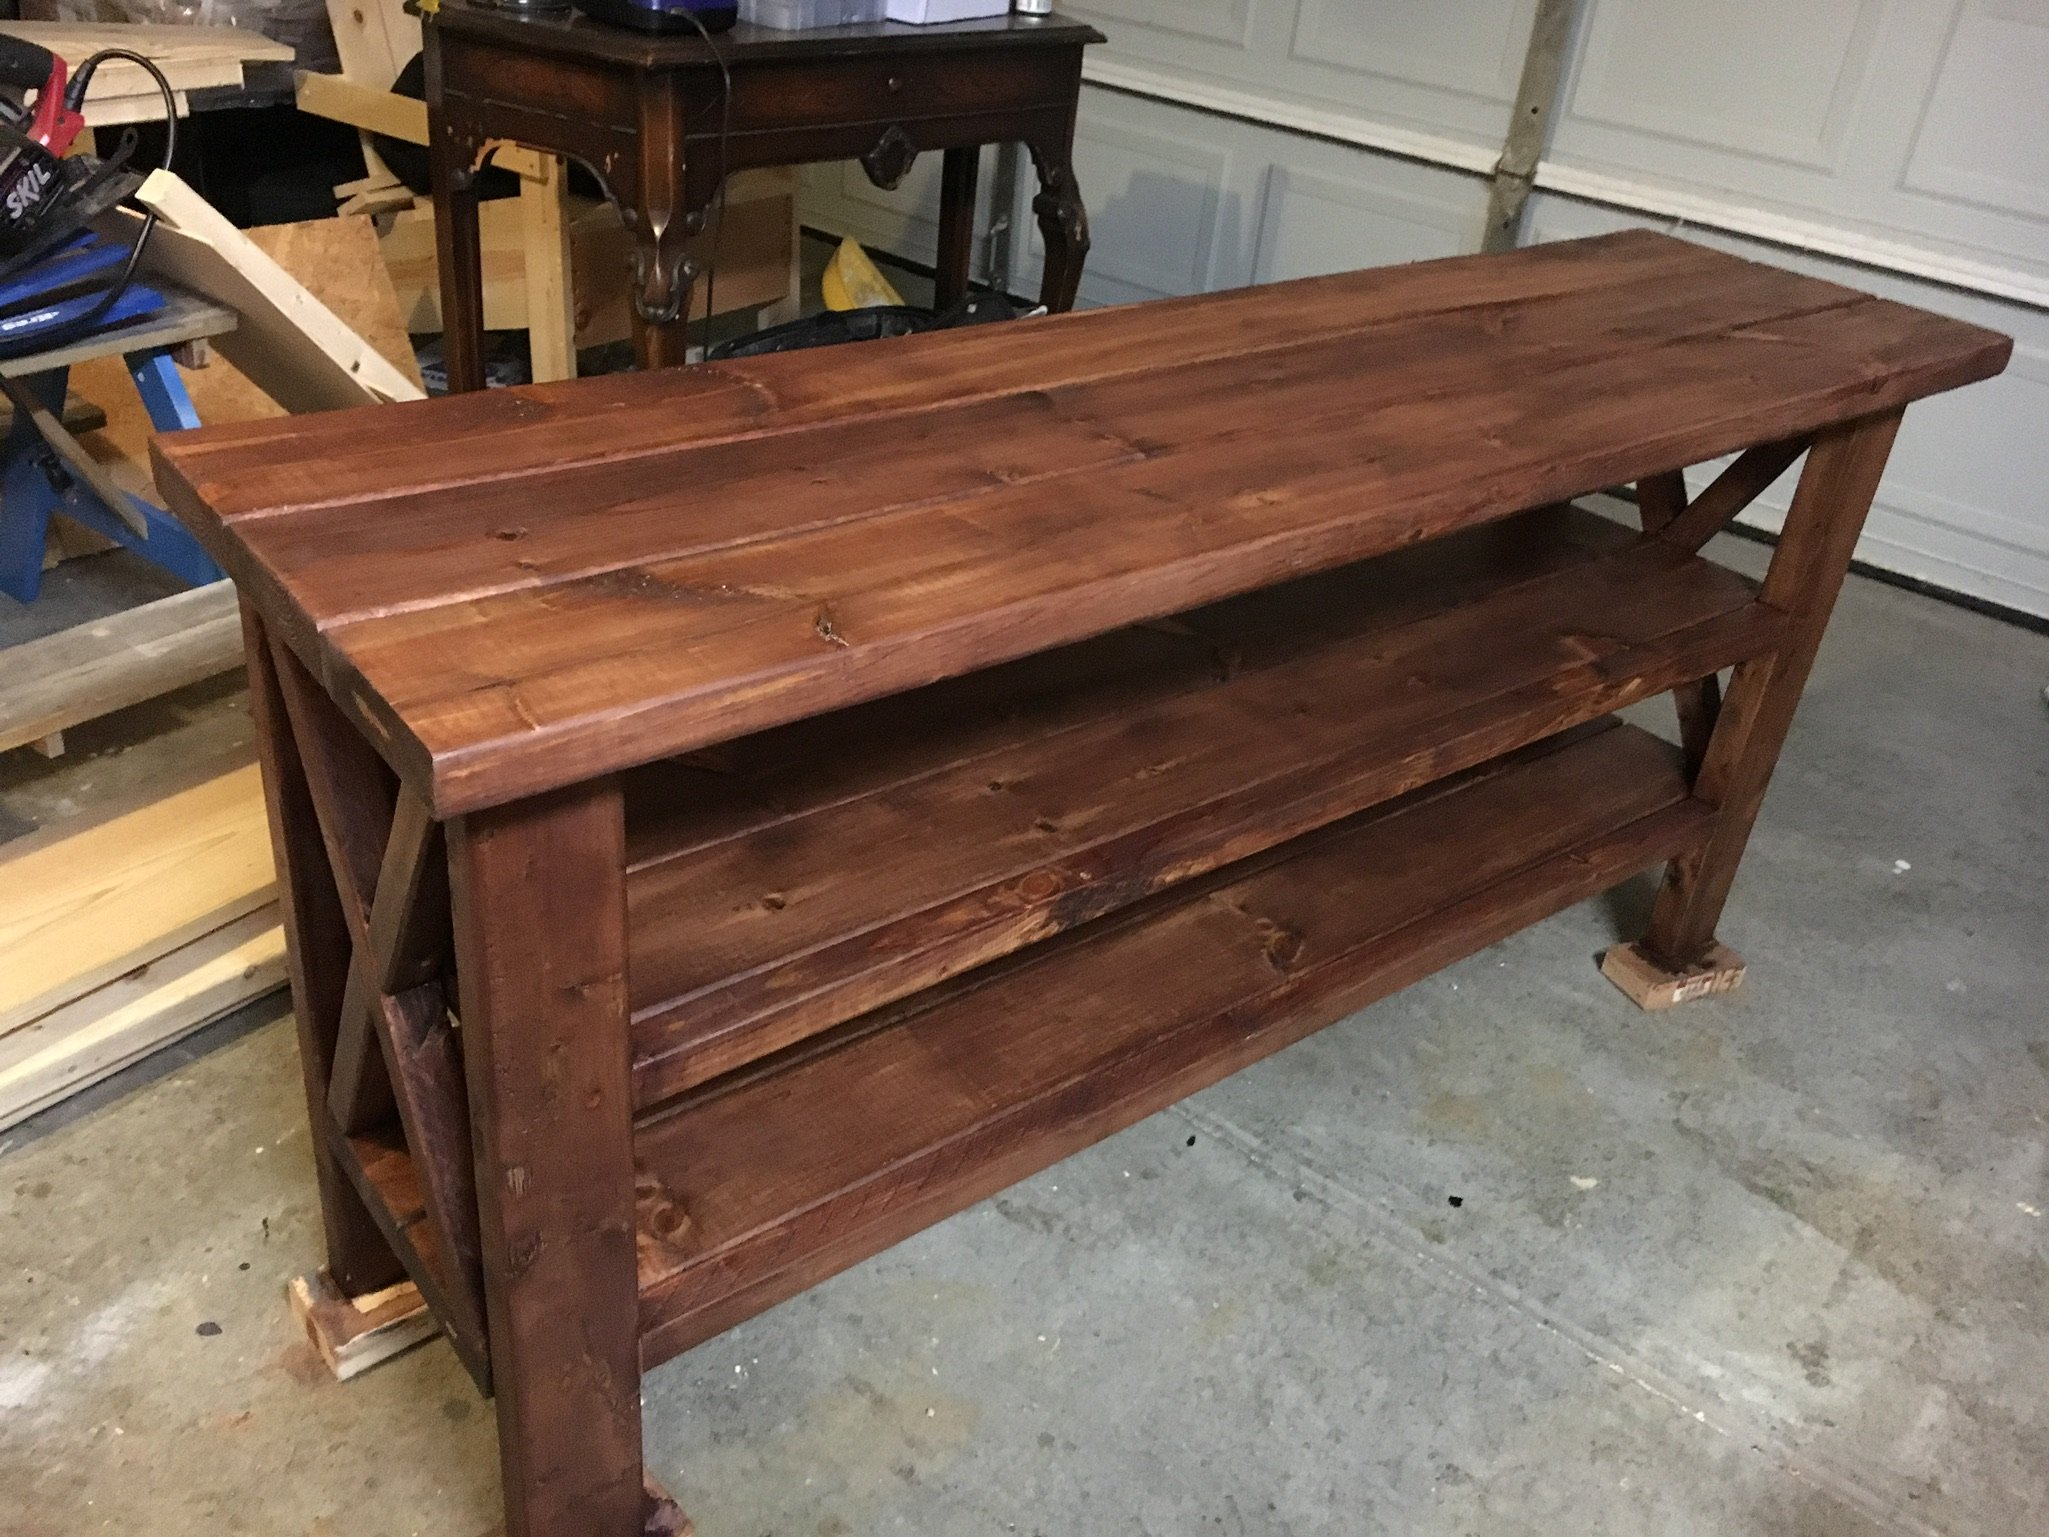
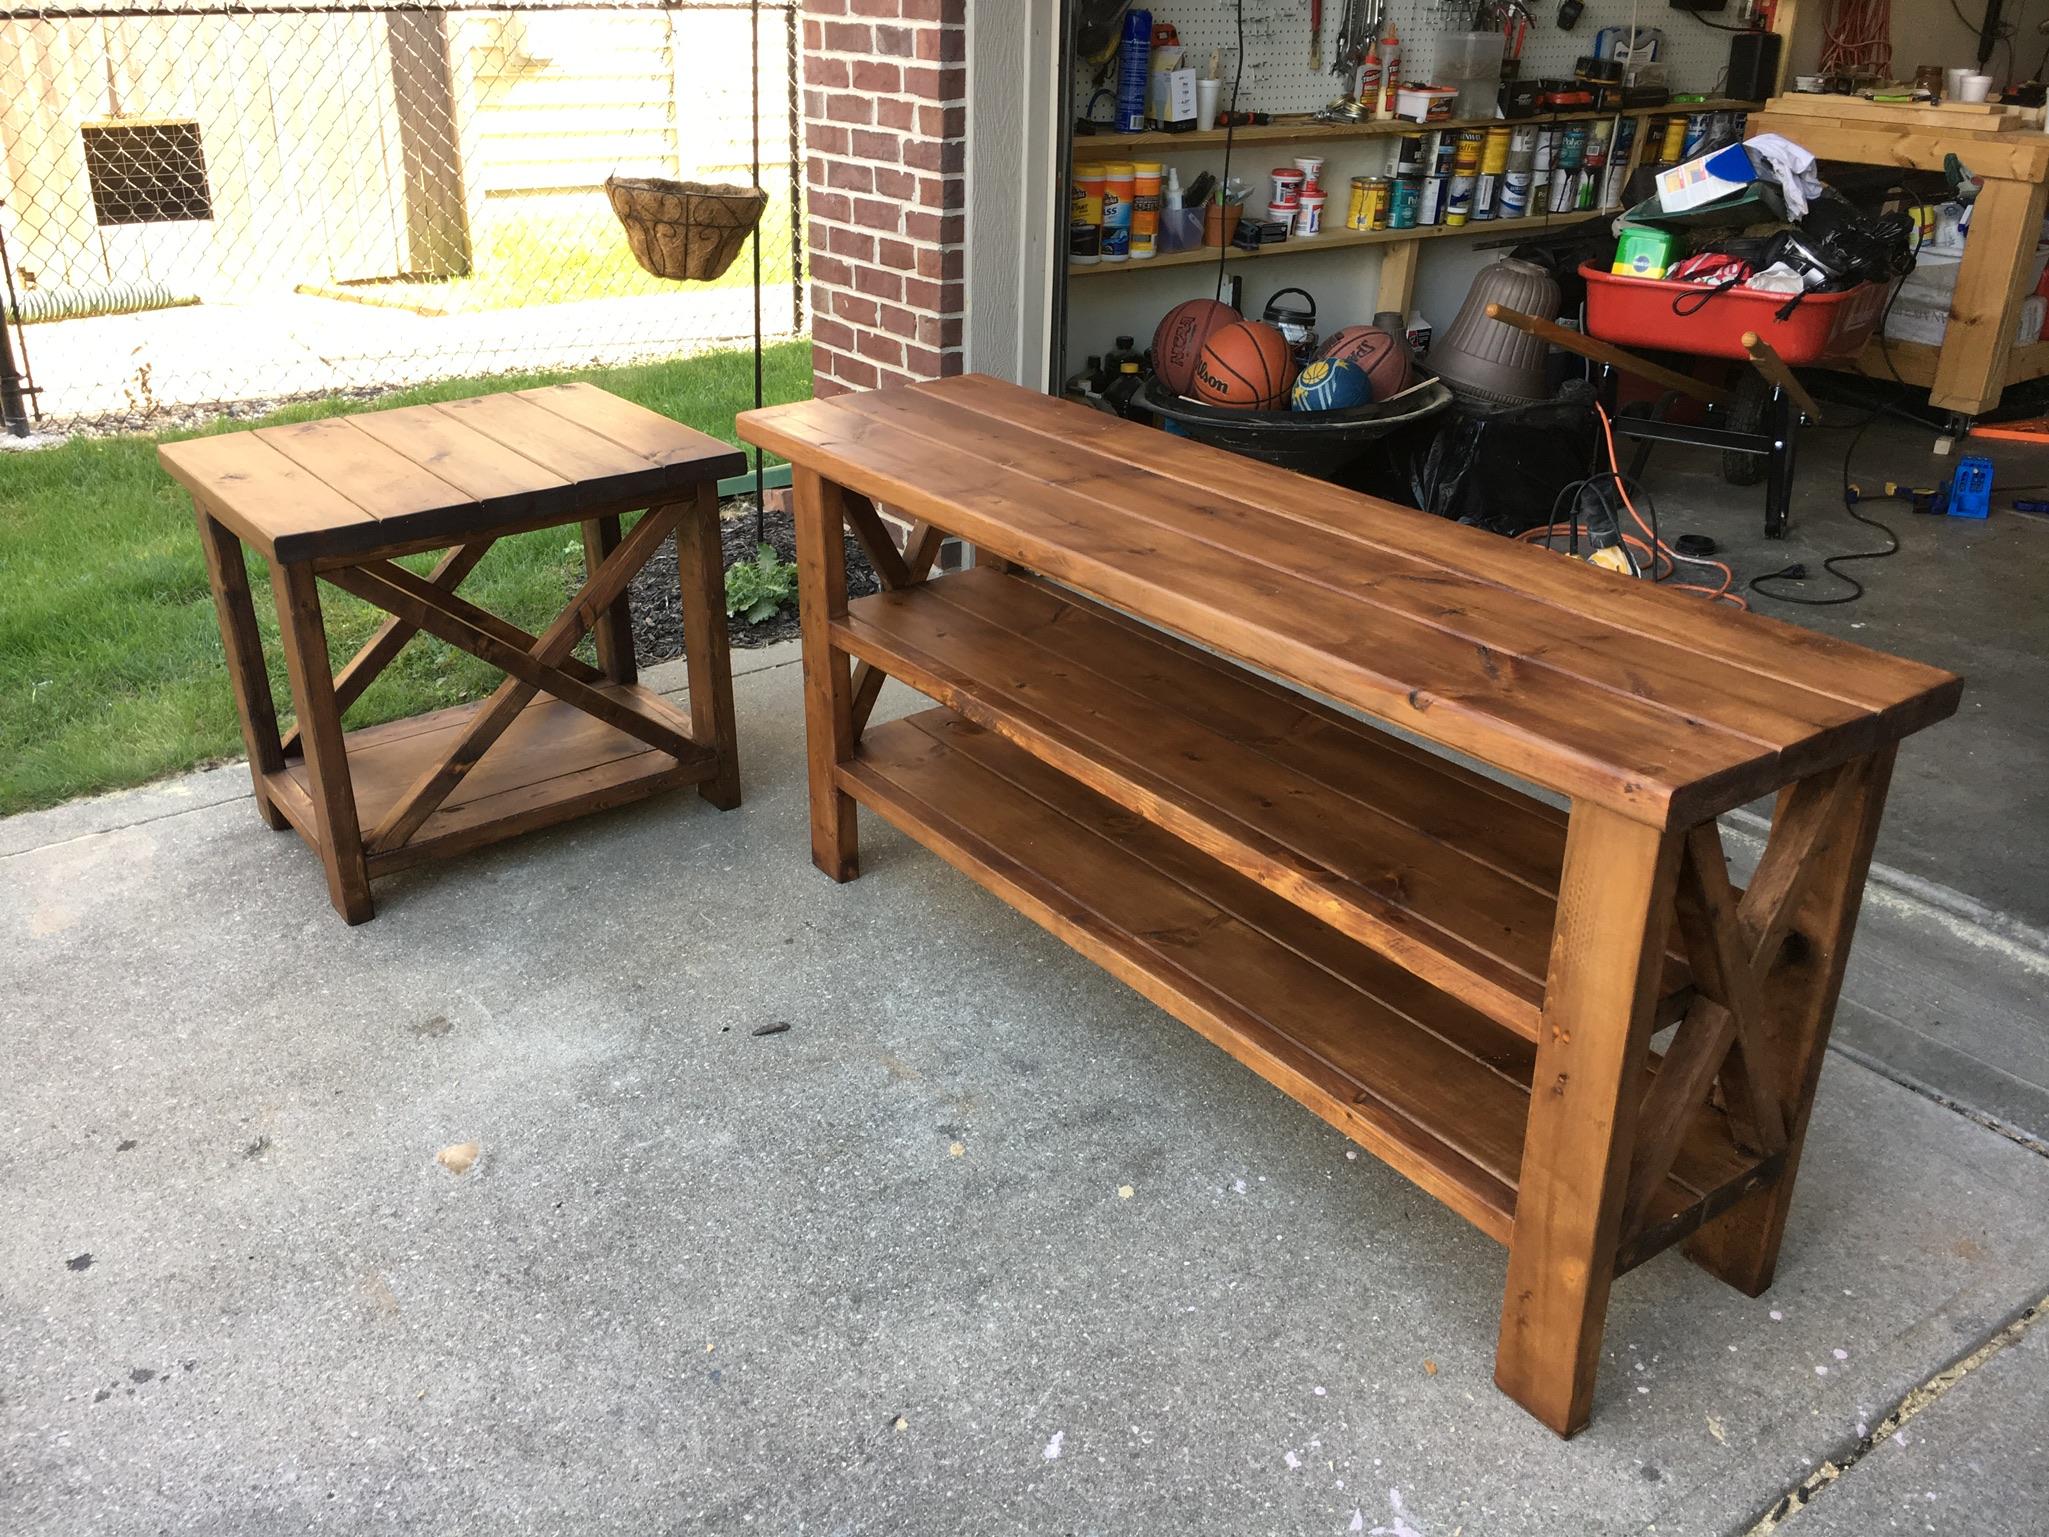
Built the Rustic X console table to use as my entertainment center it works perfect for my 42in flat screen, PS3, and dish receiver. I did not use the x's and stained it with red mahogany stain and gloss brushing lacquer.
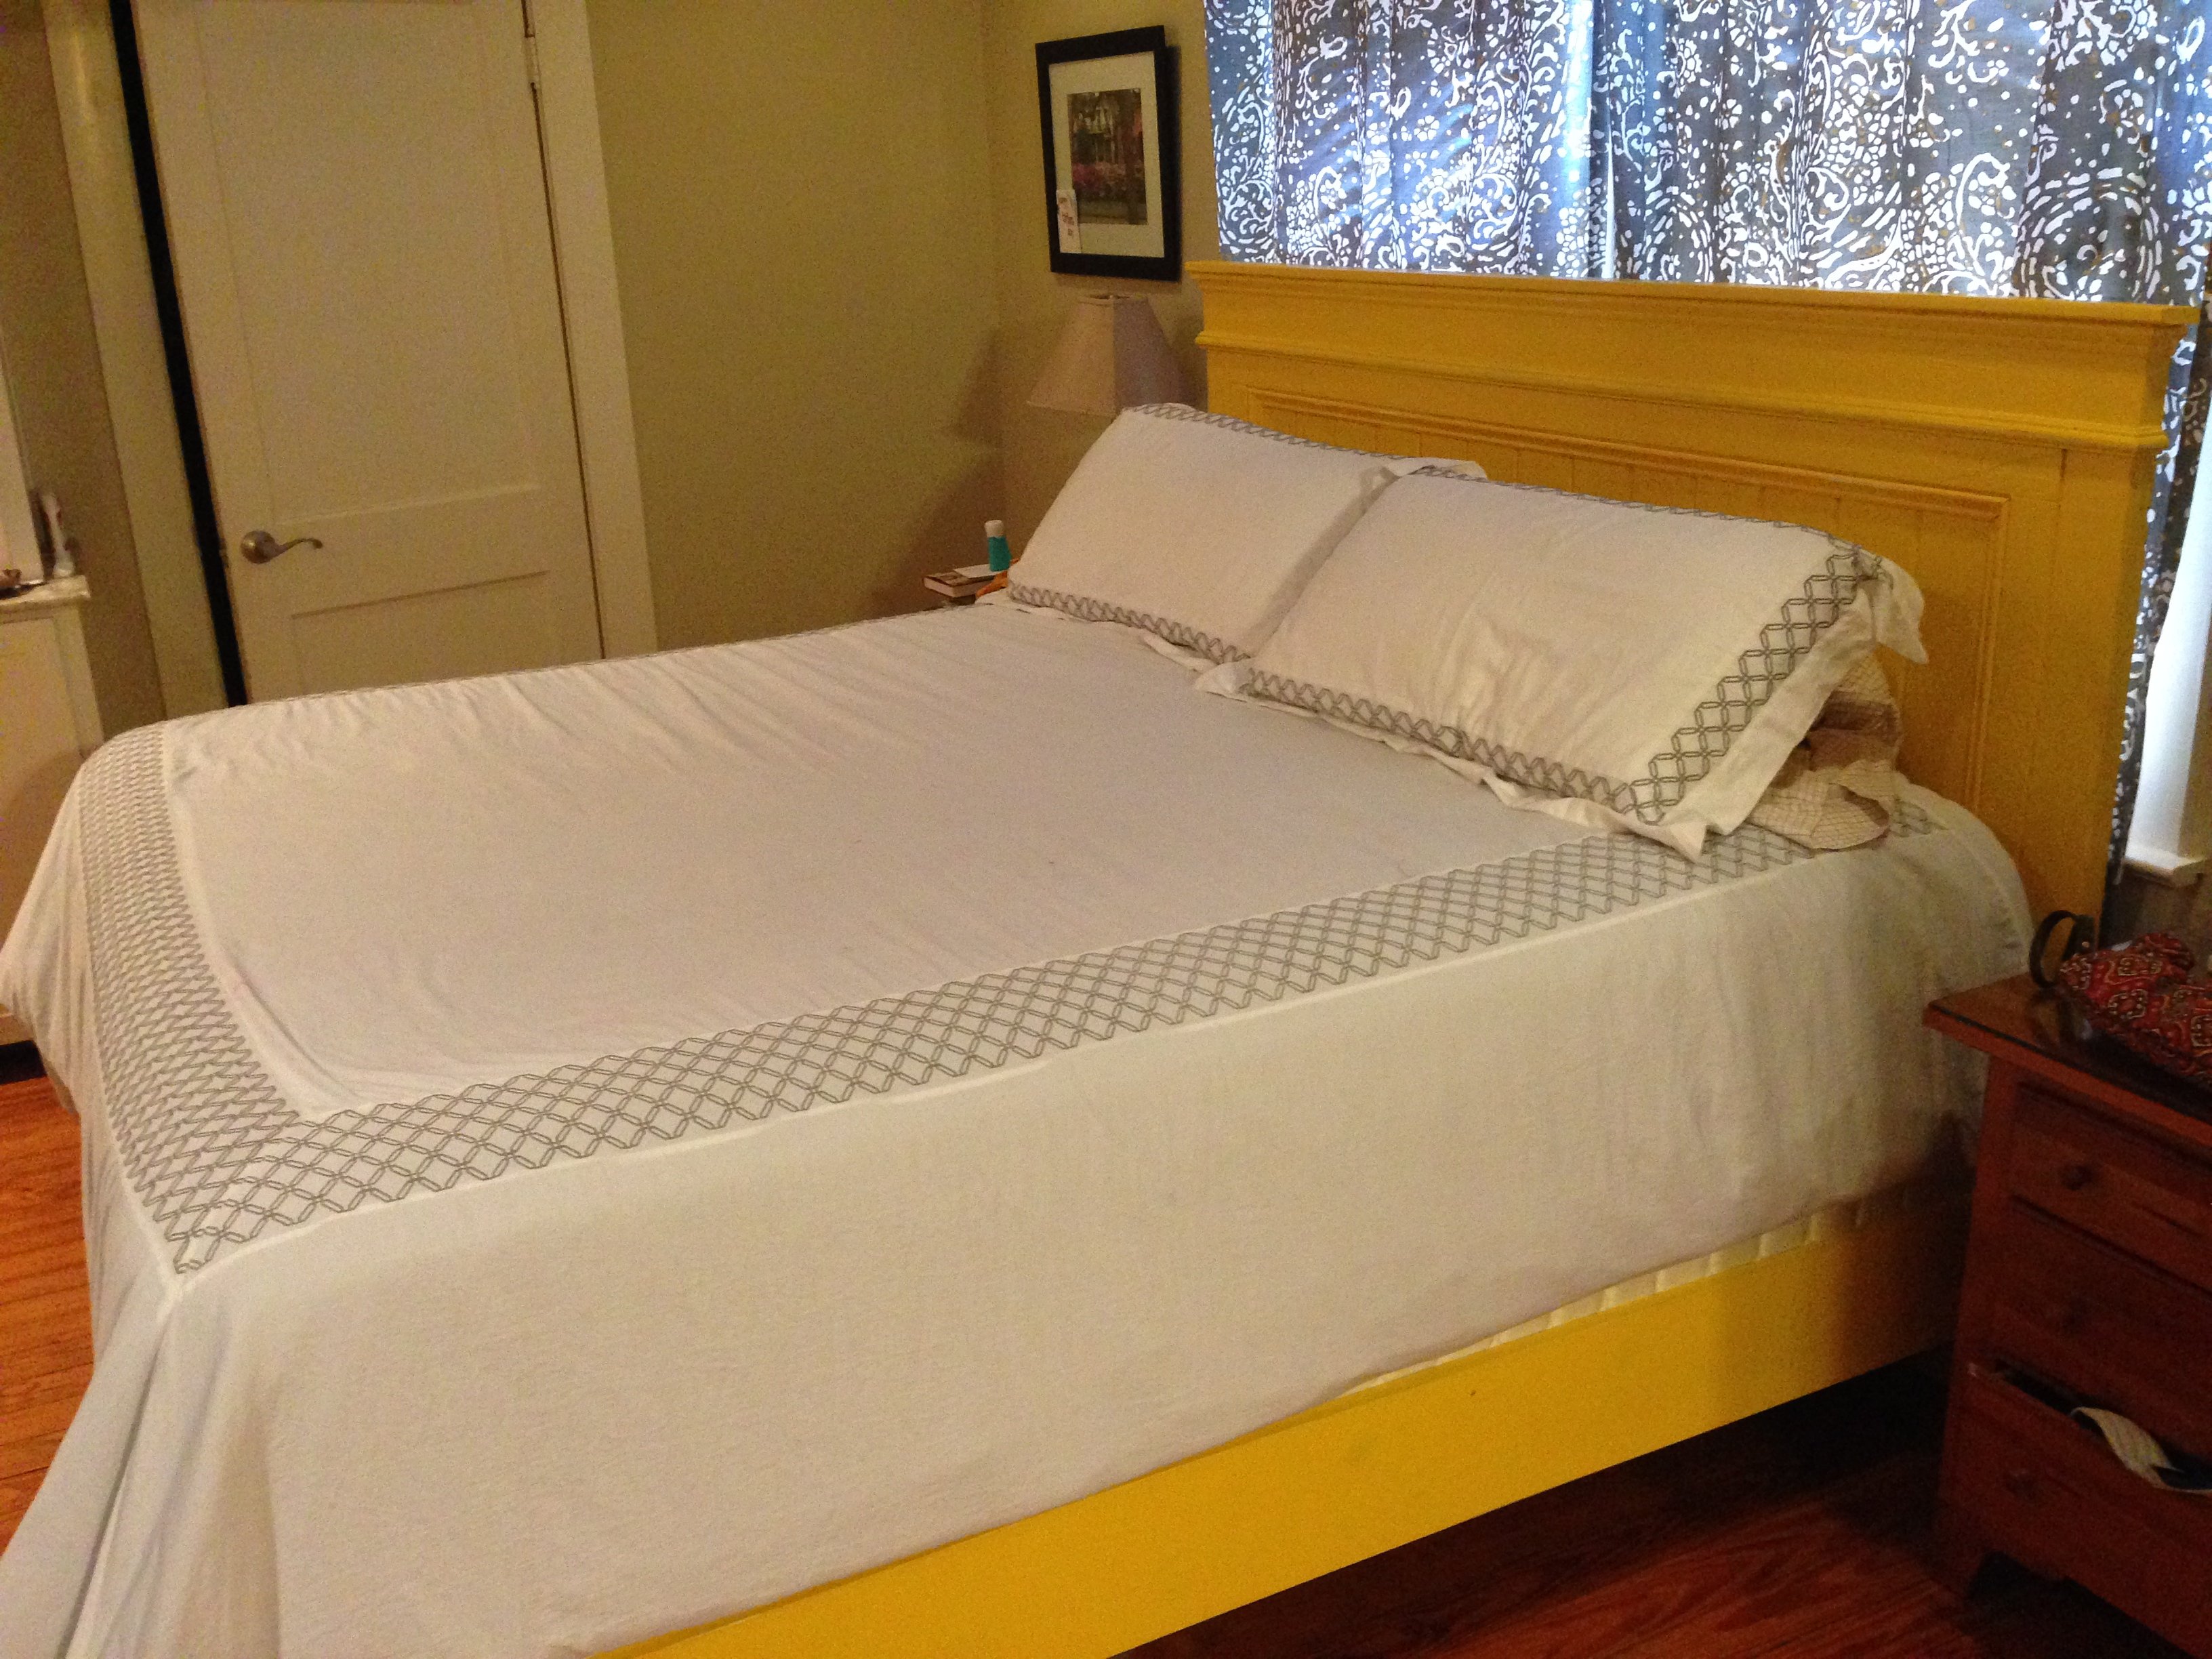
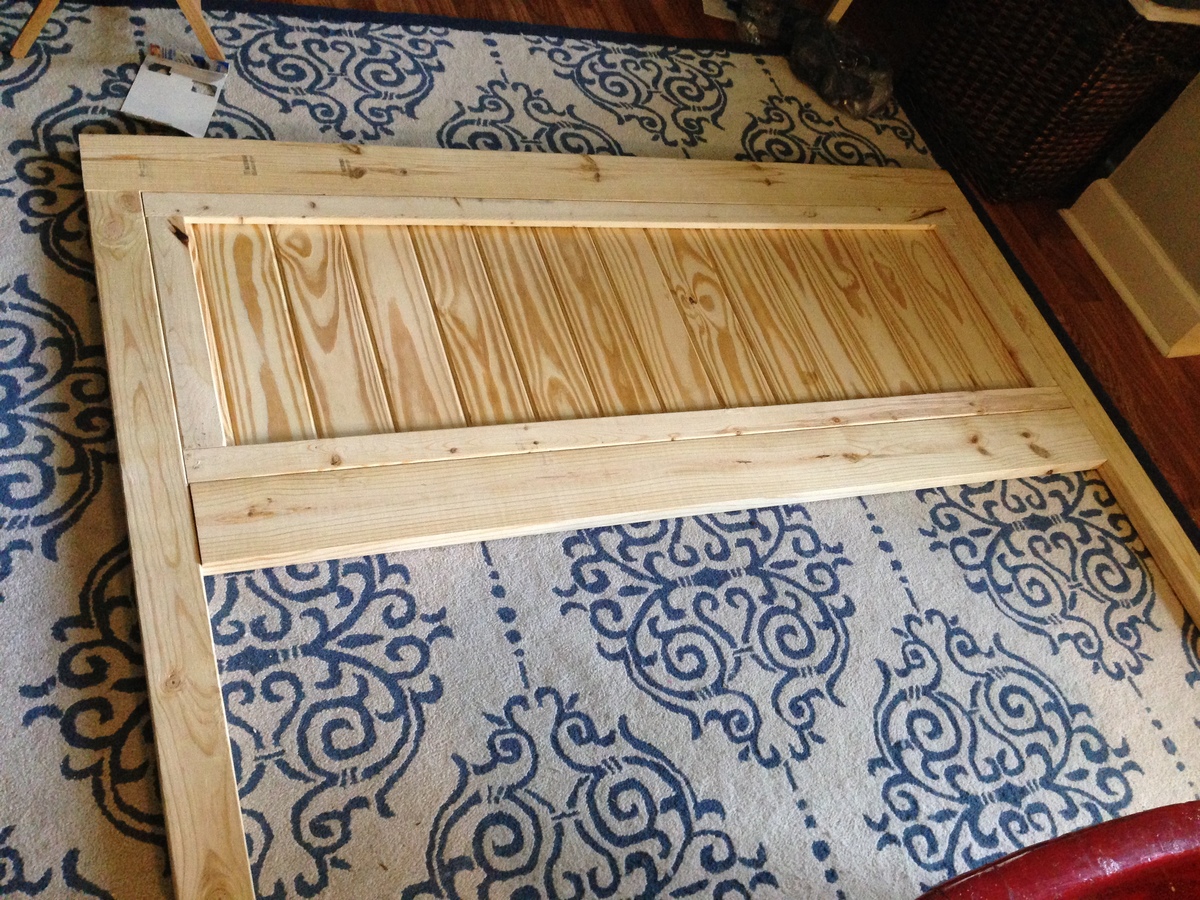
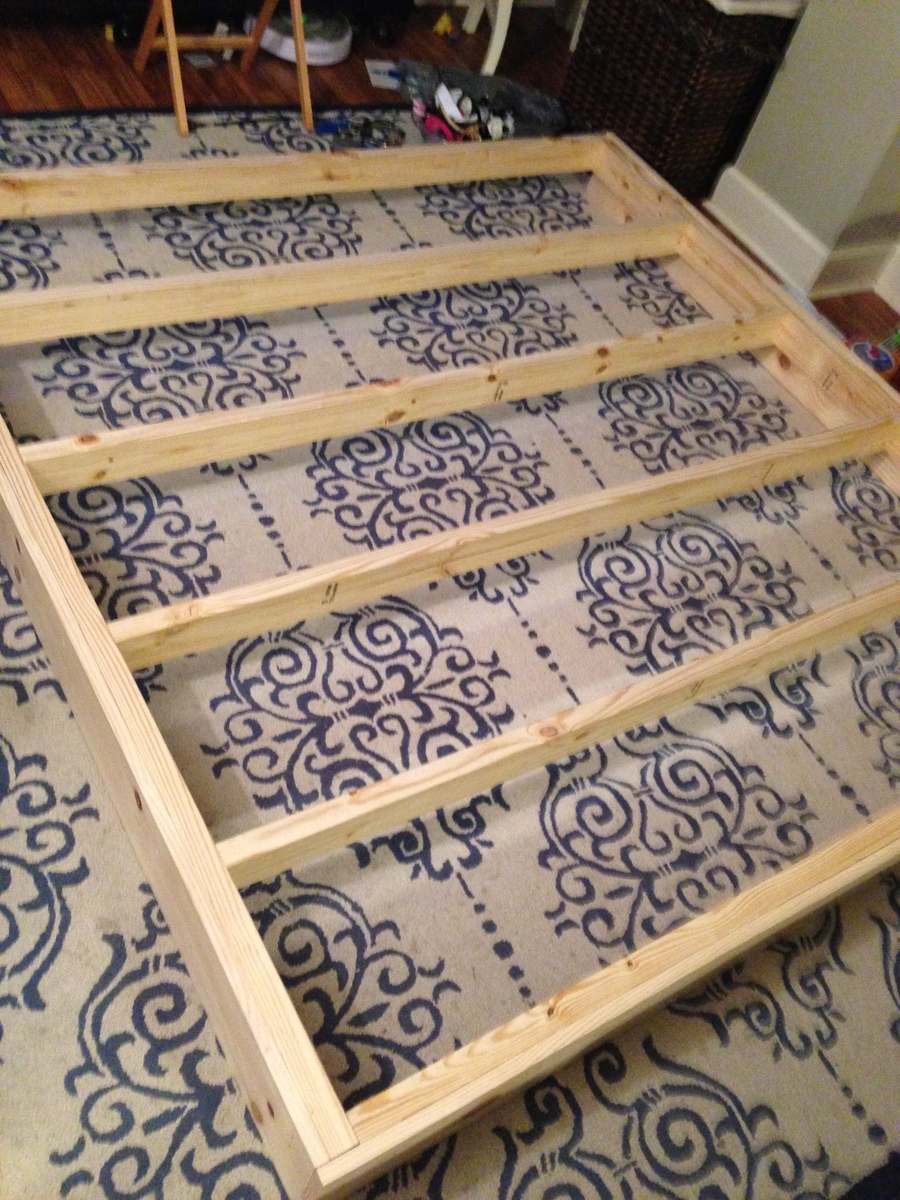
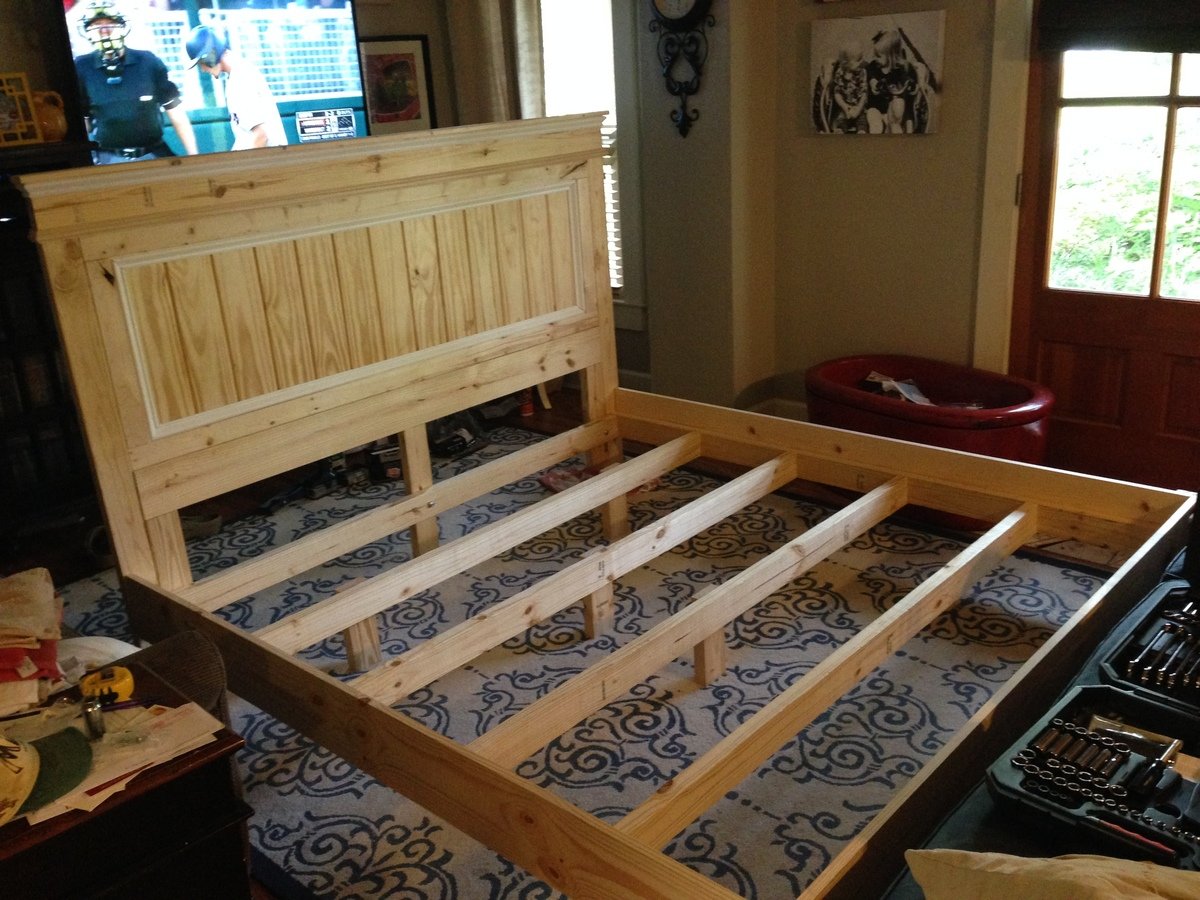
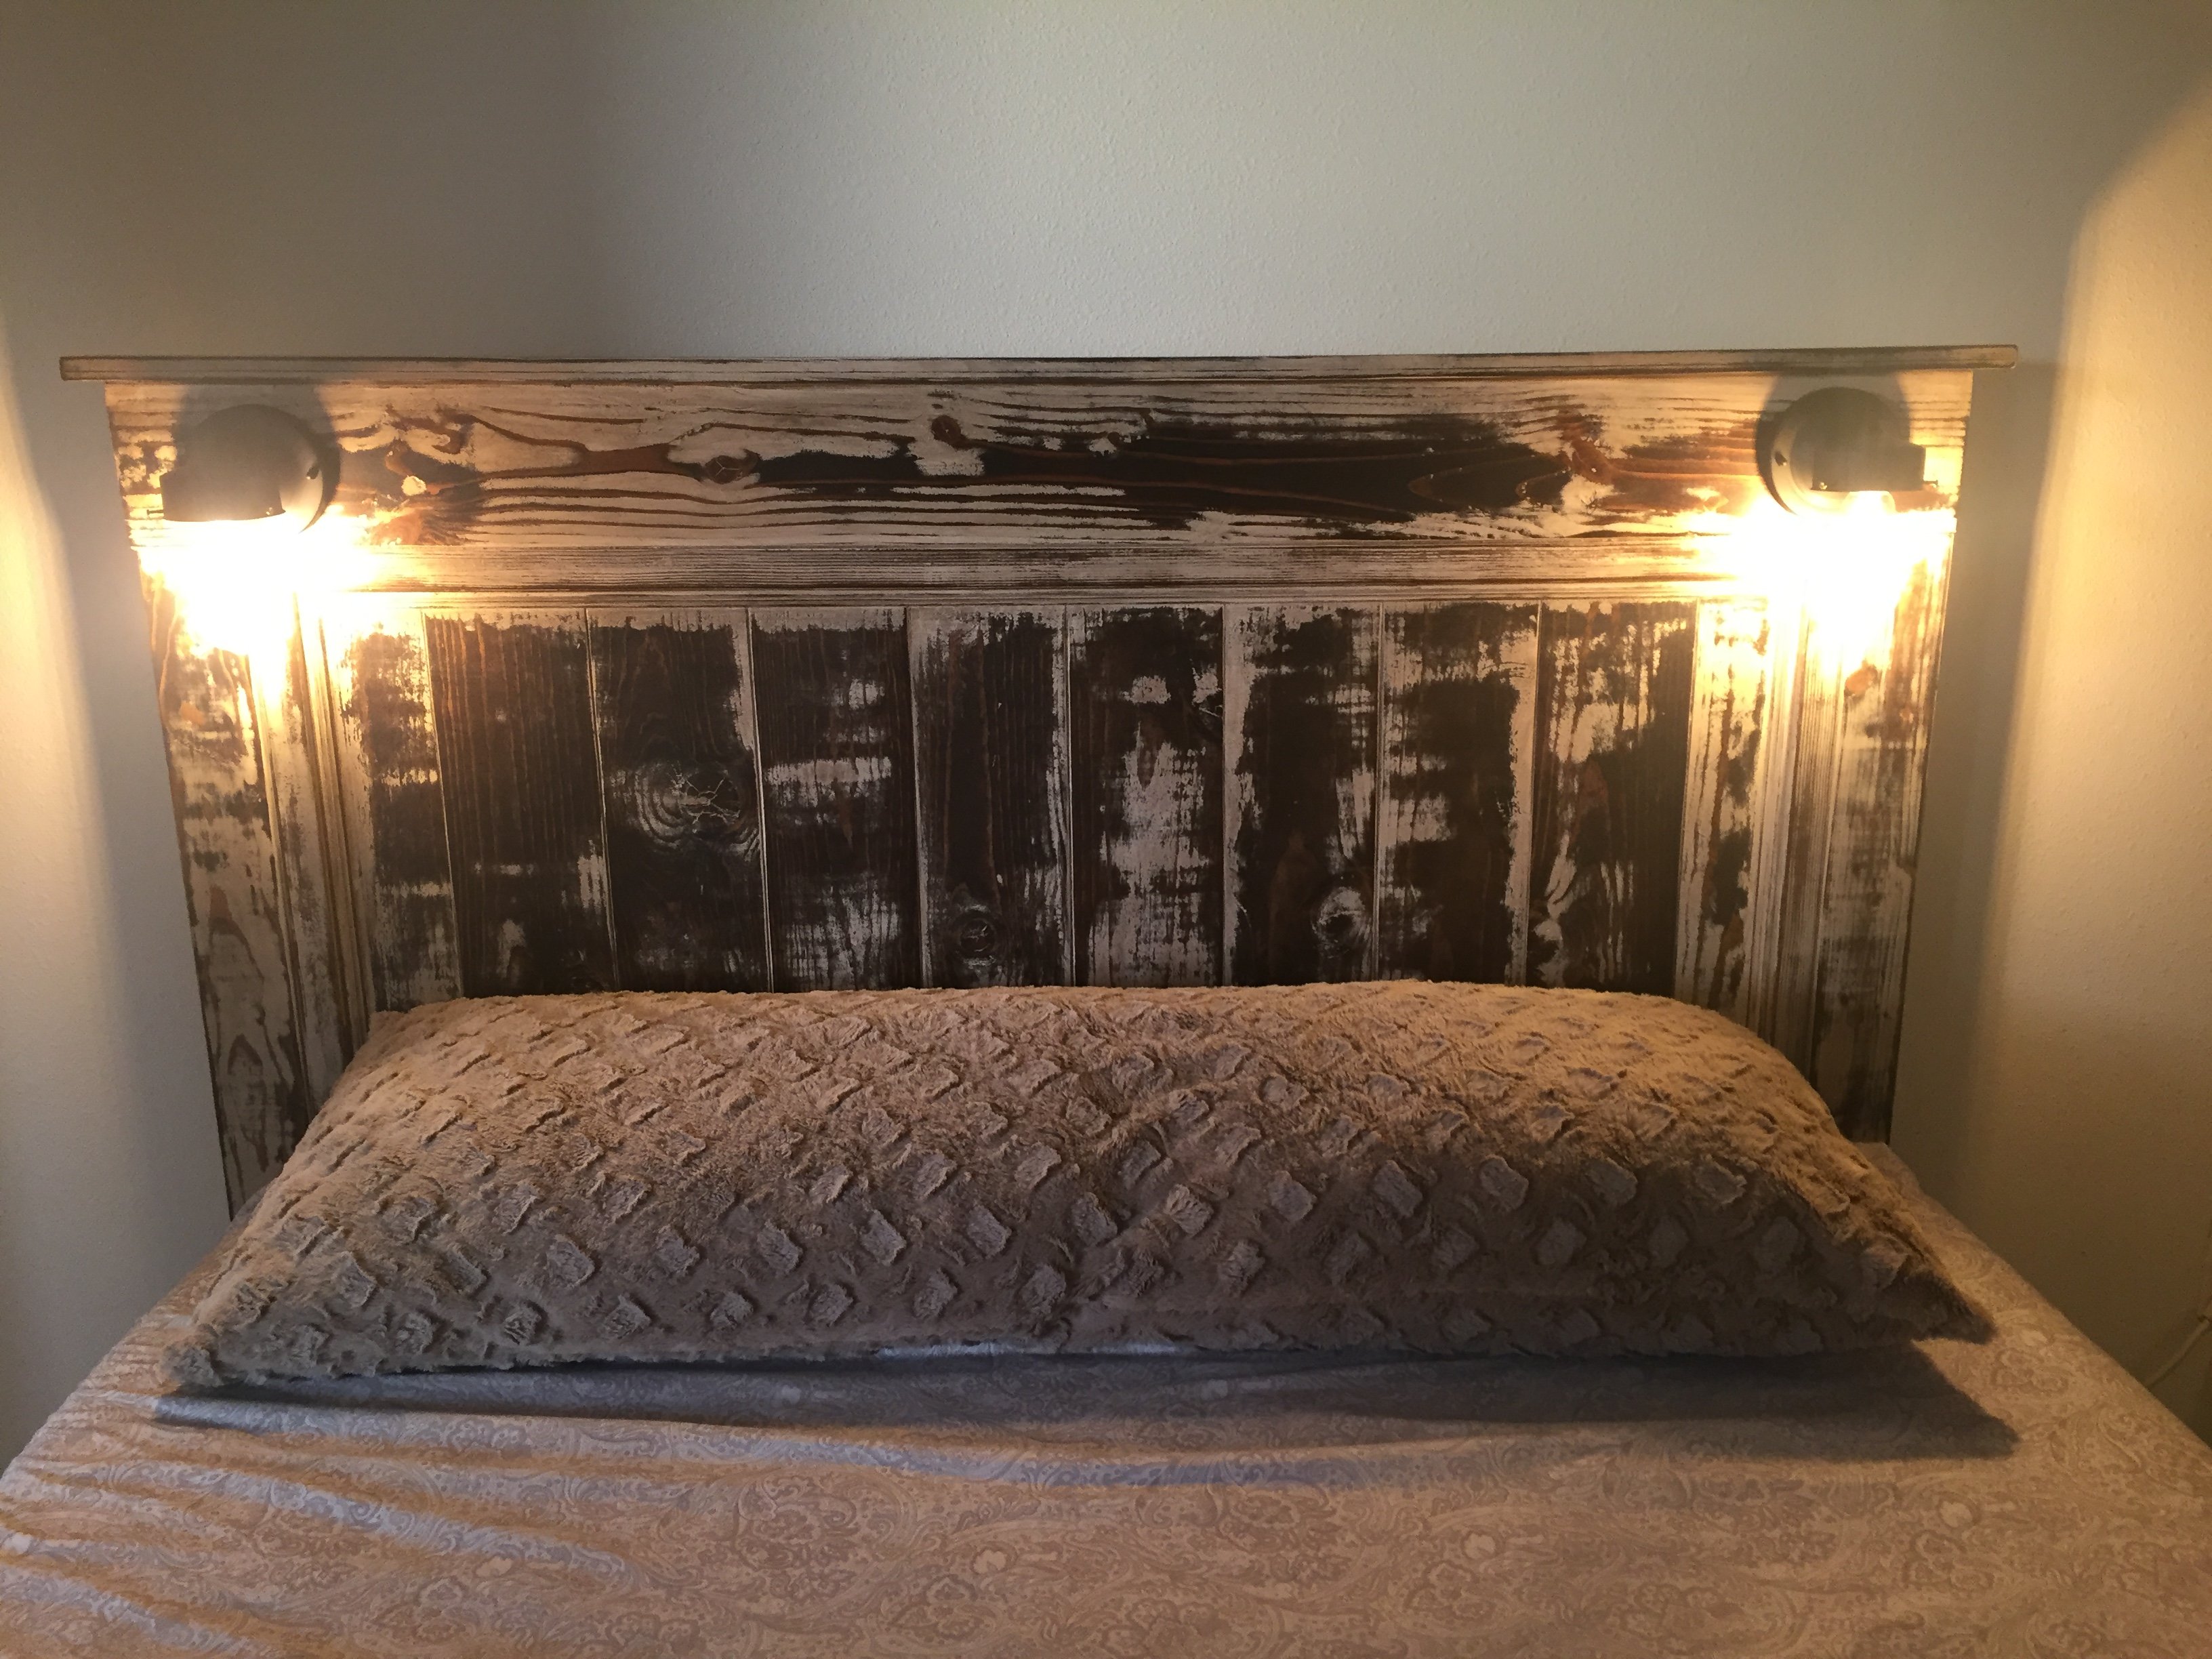
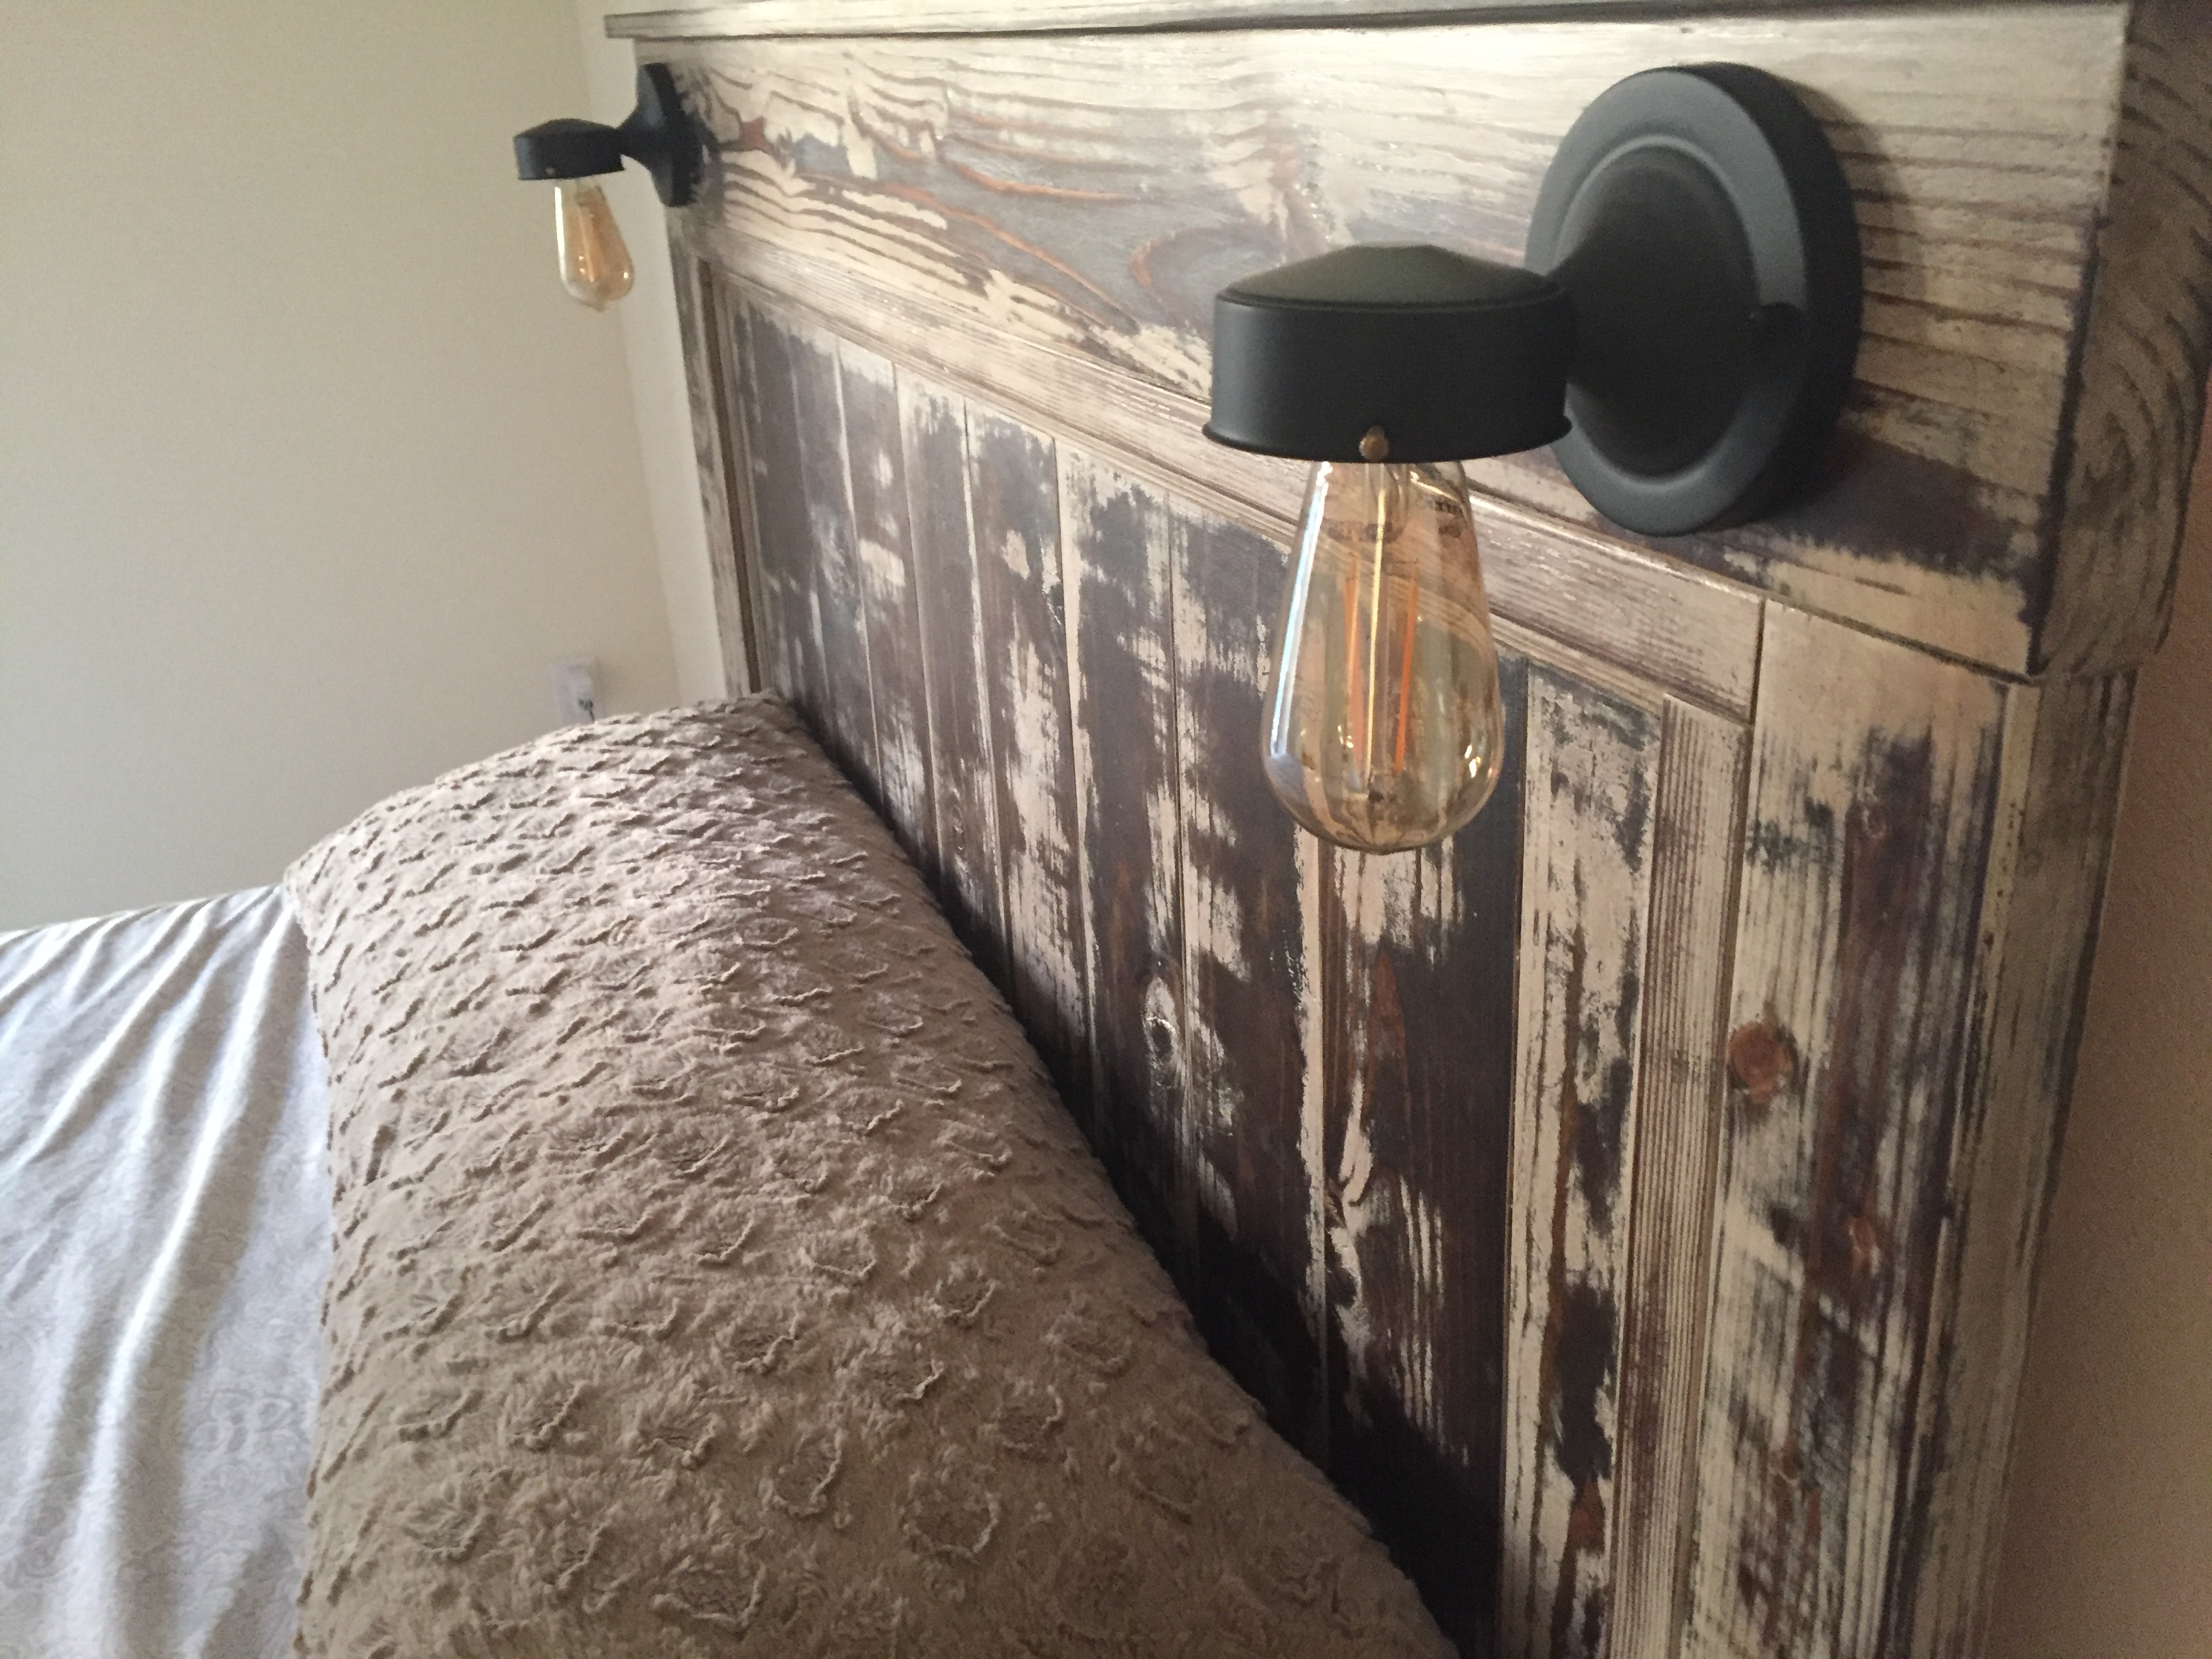
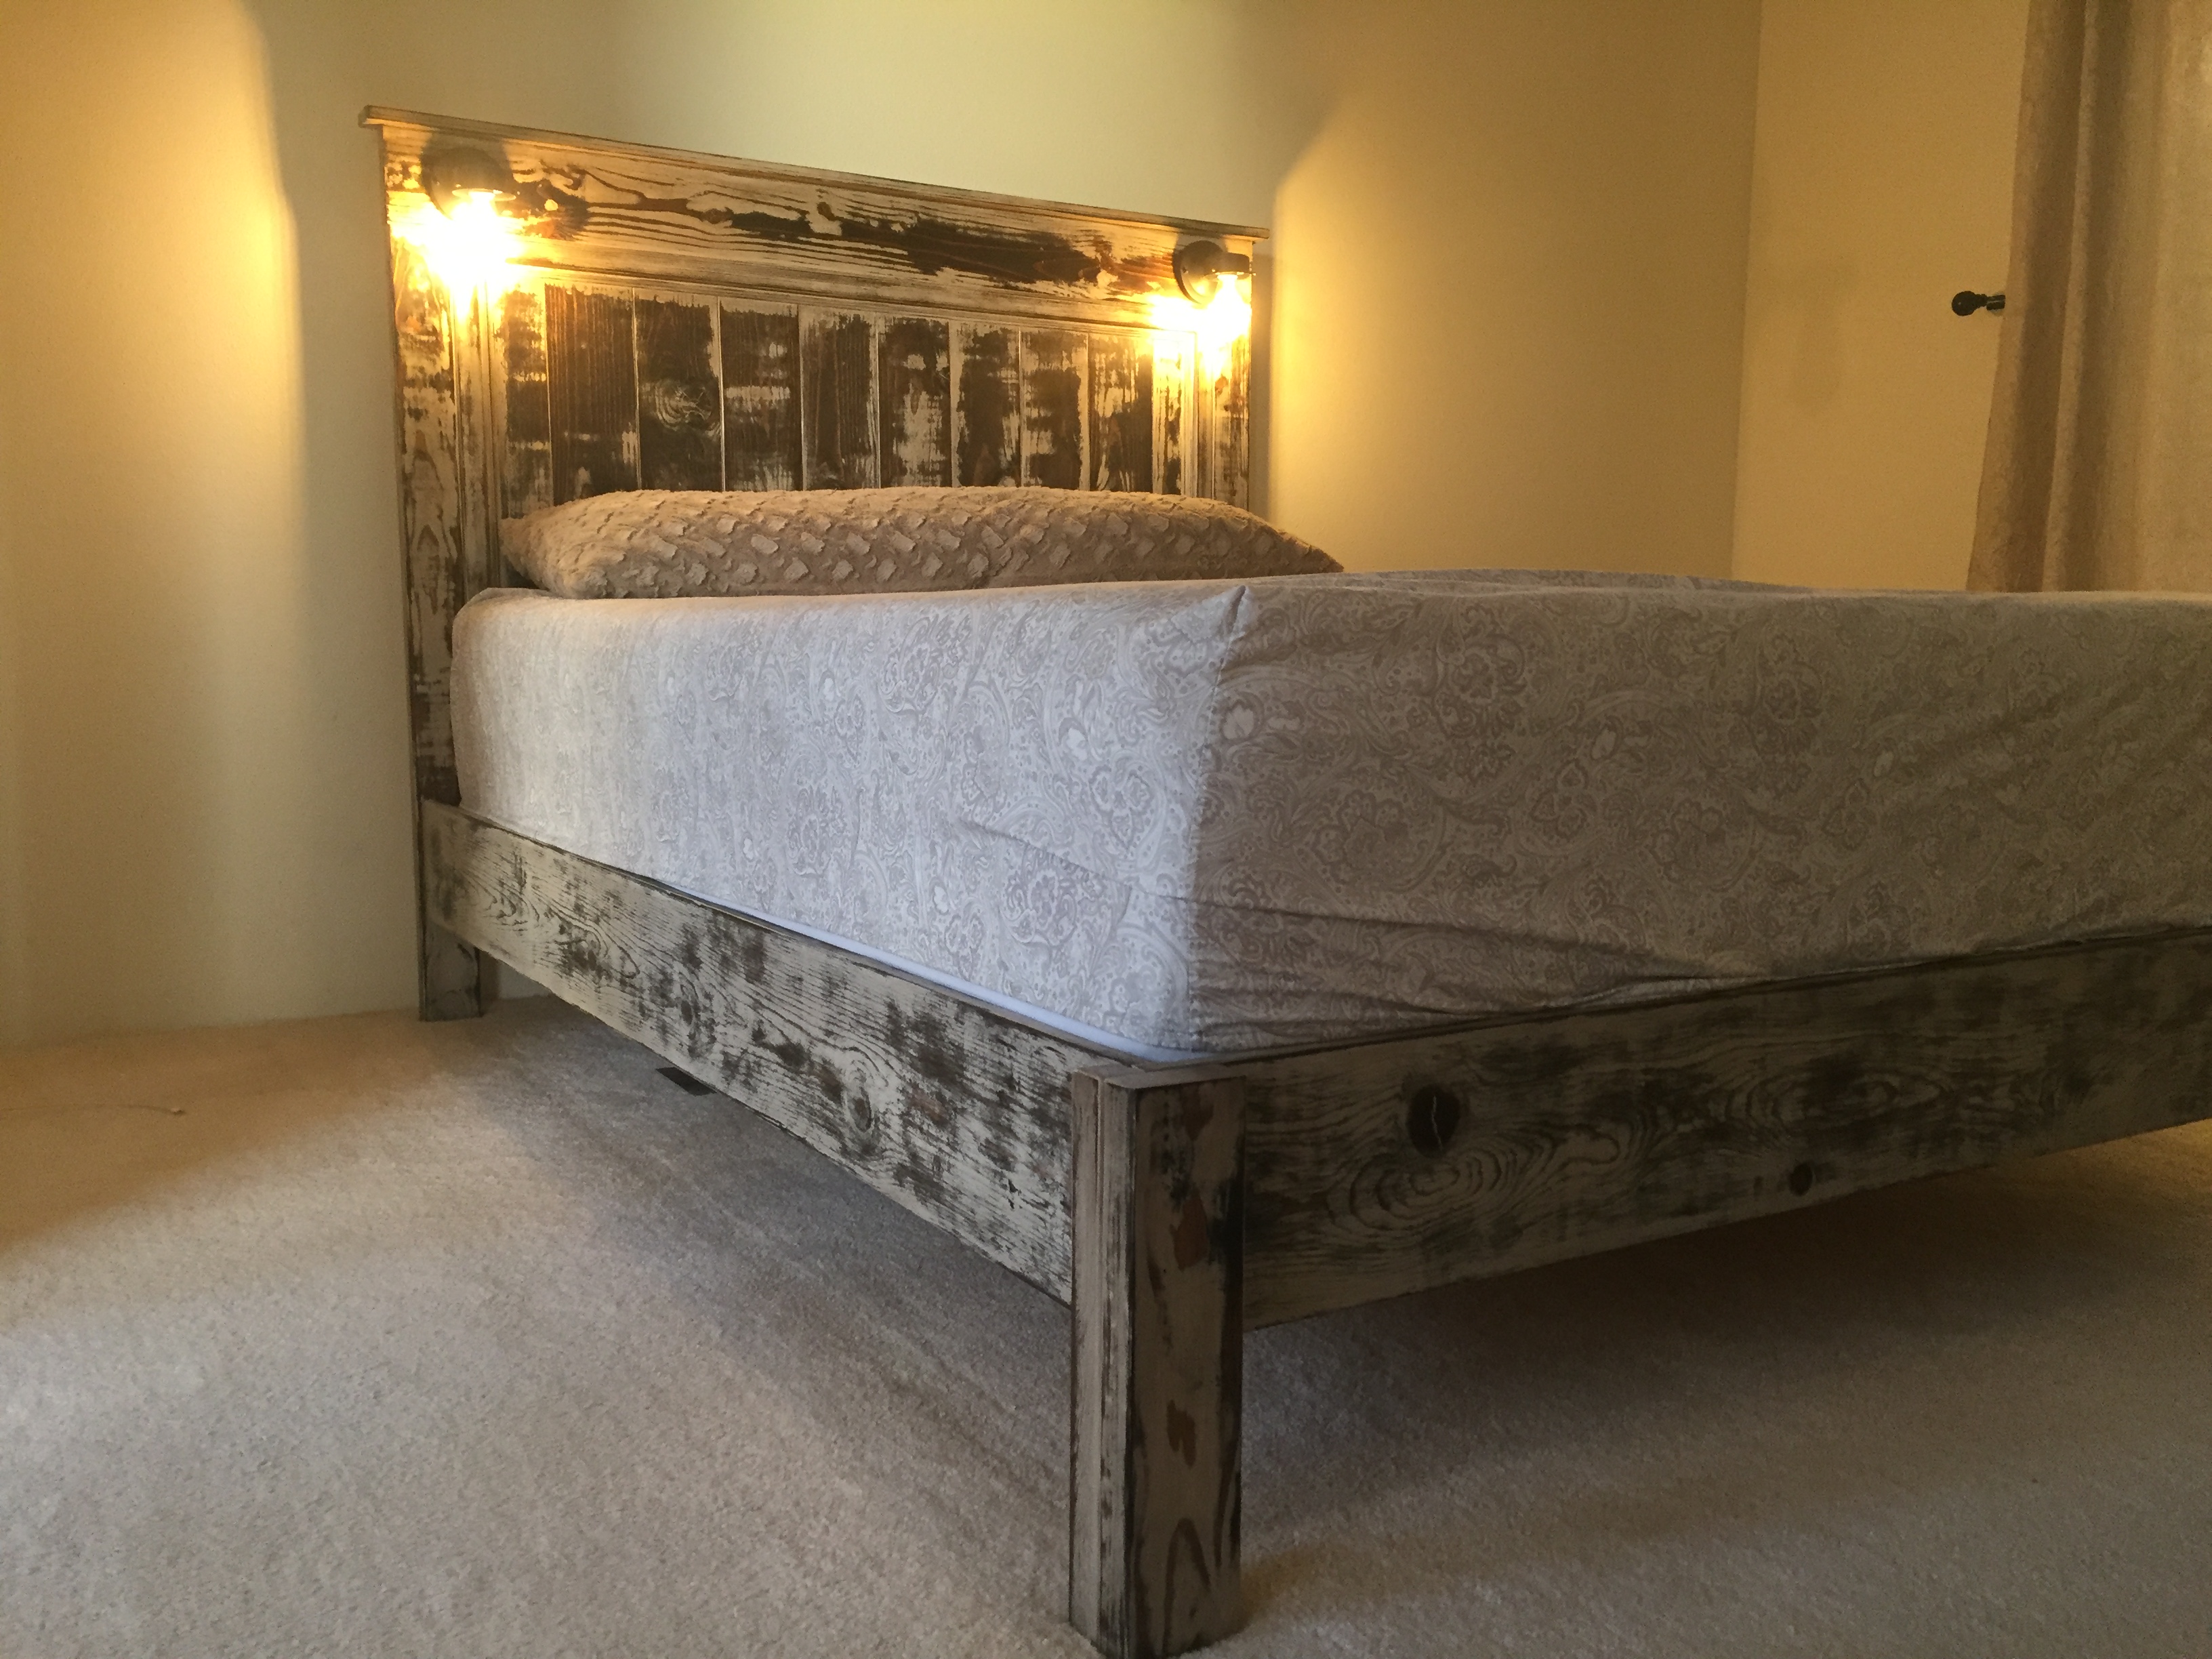
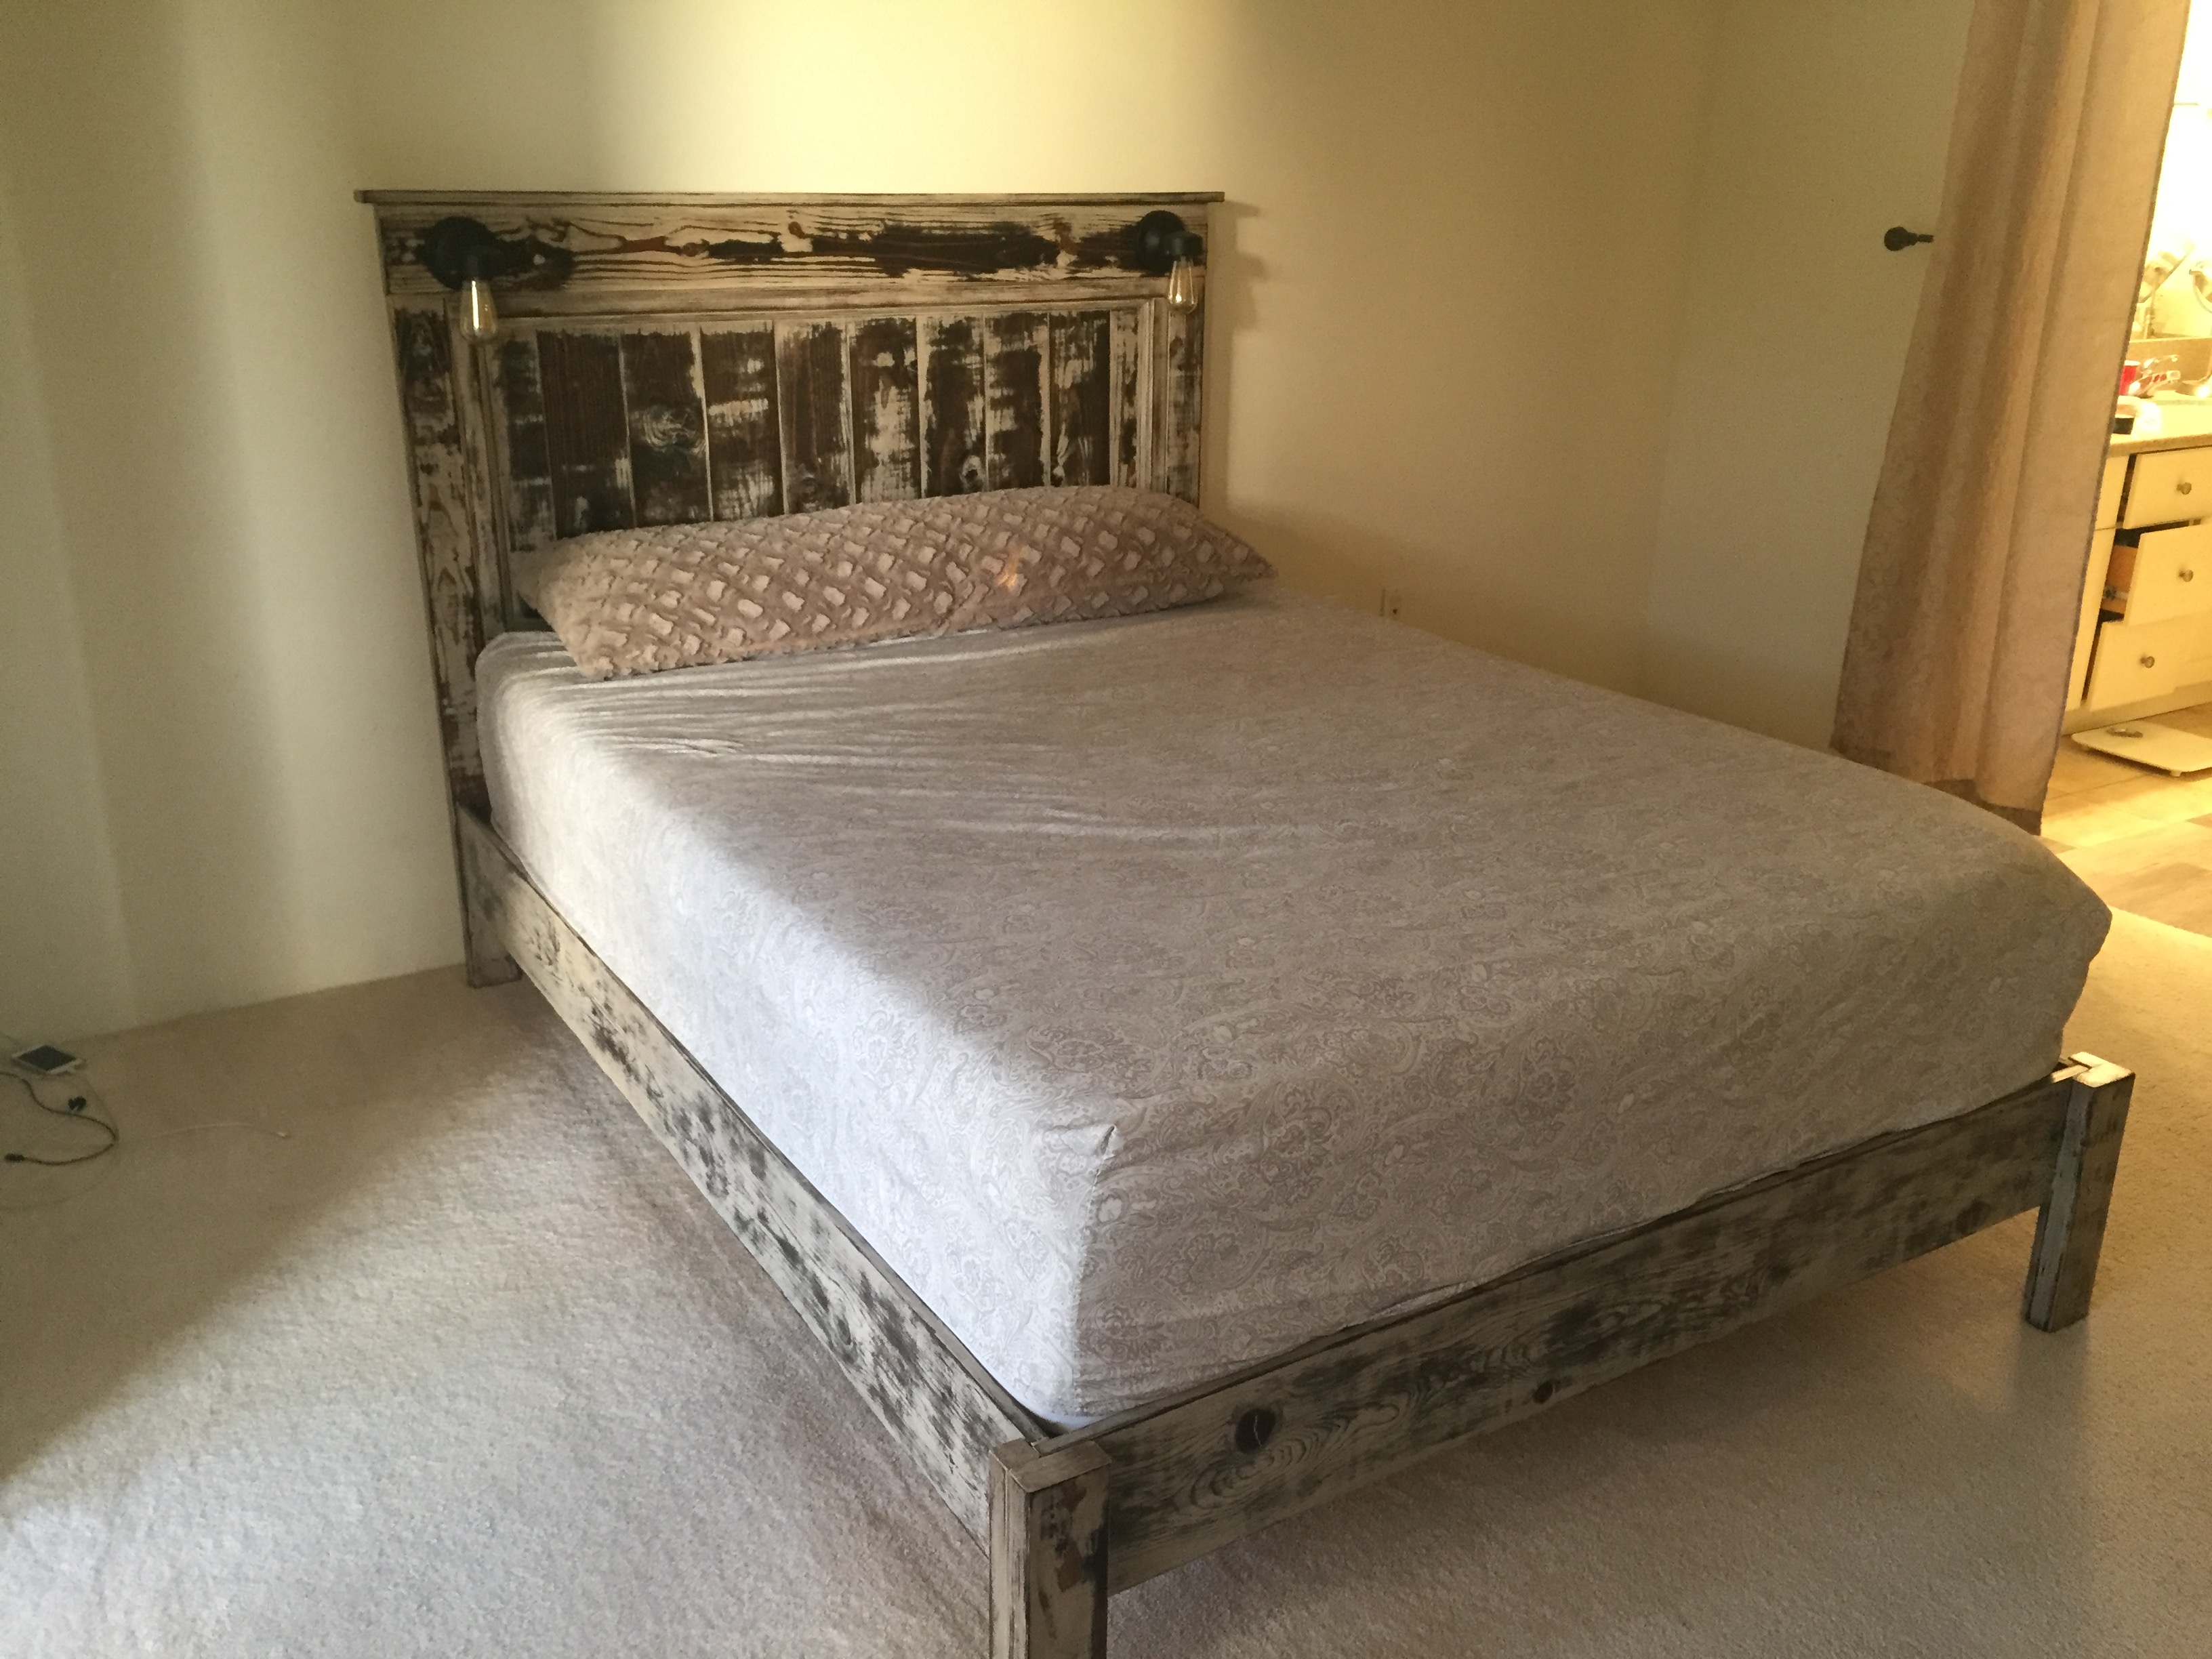
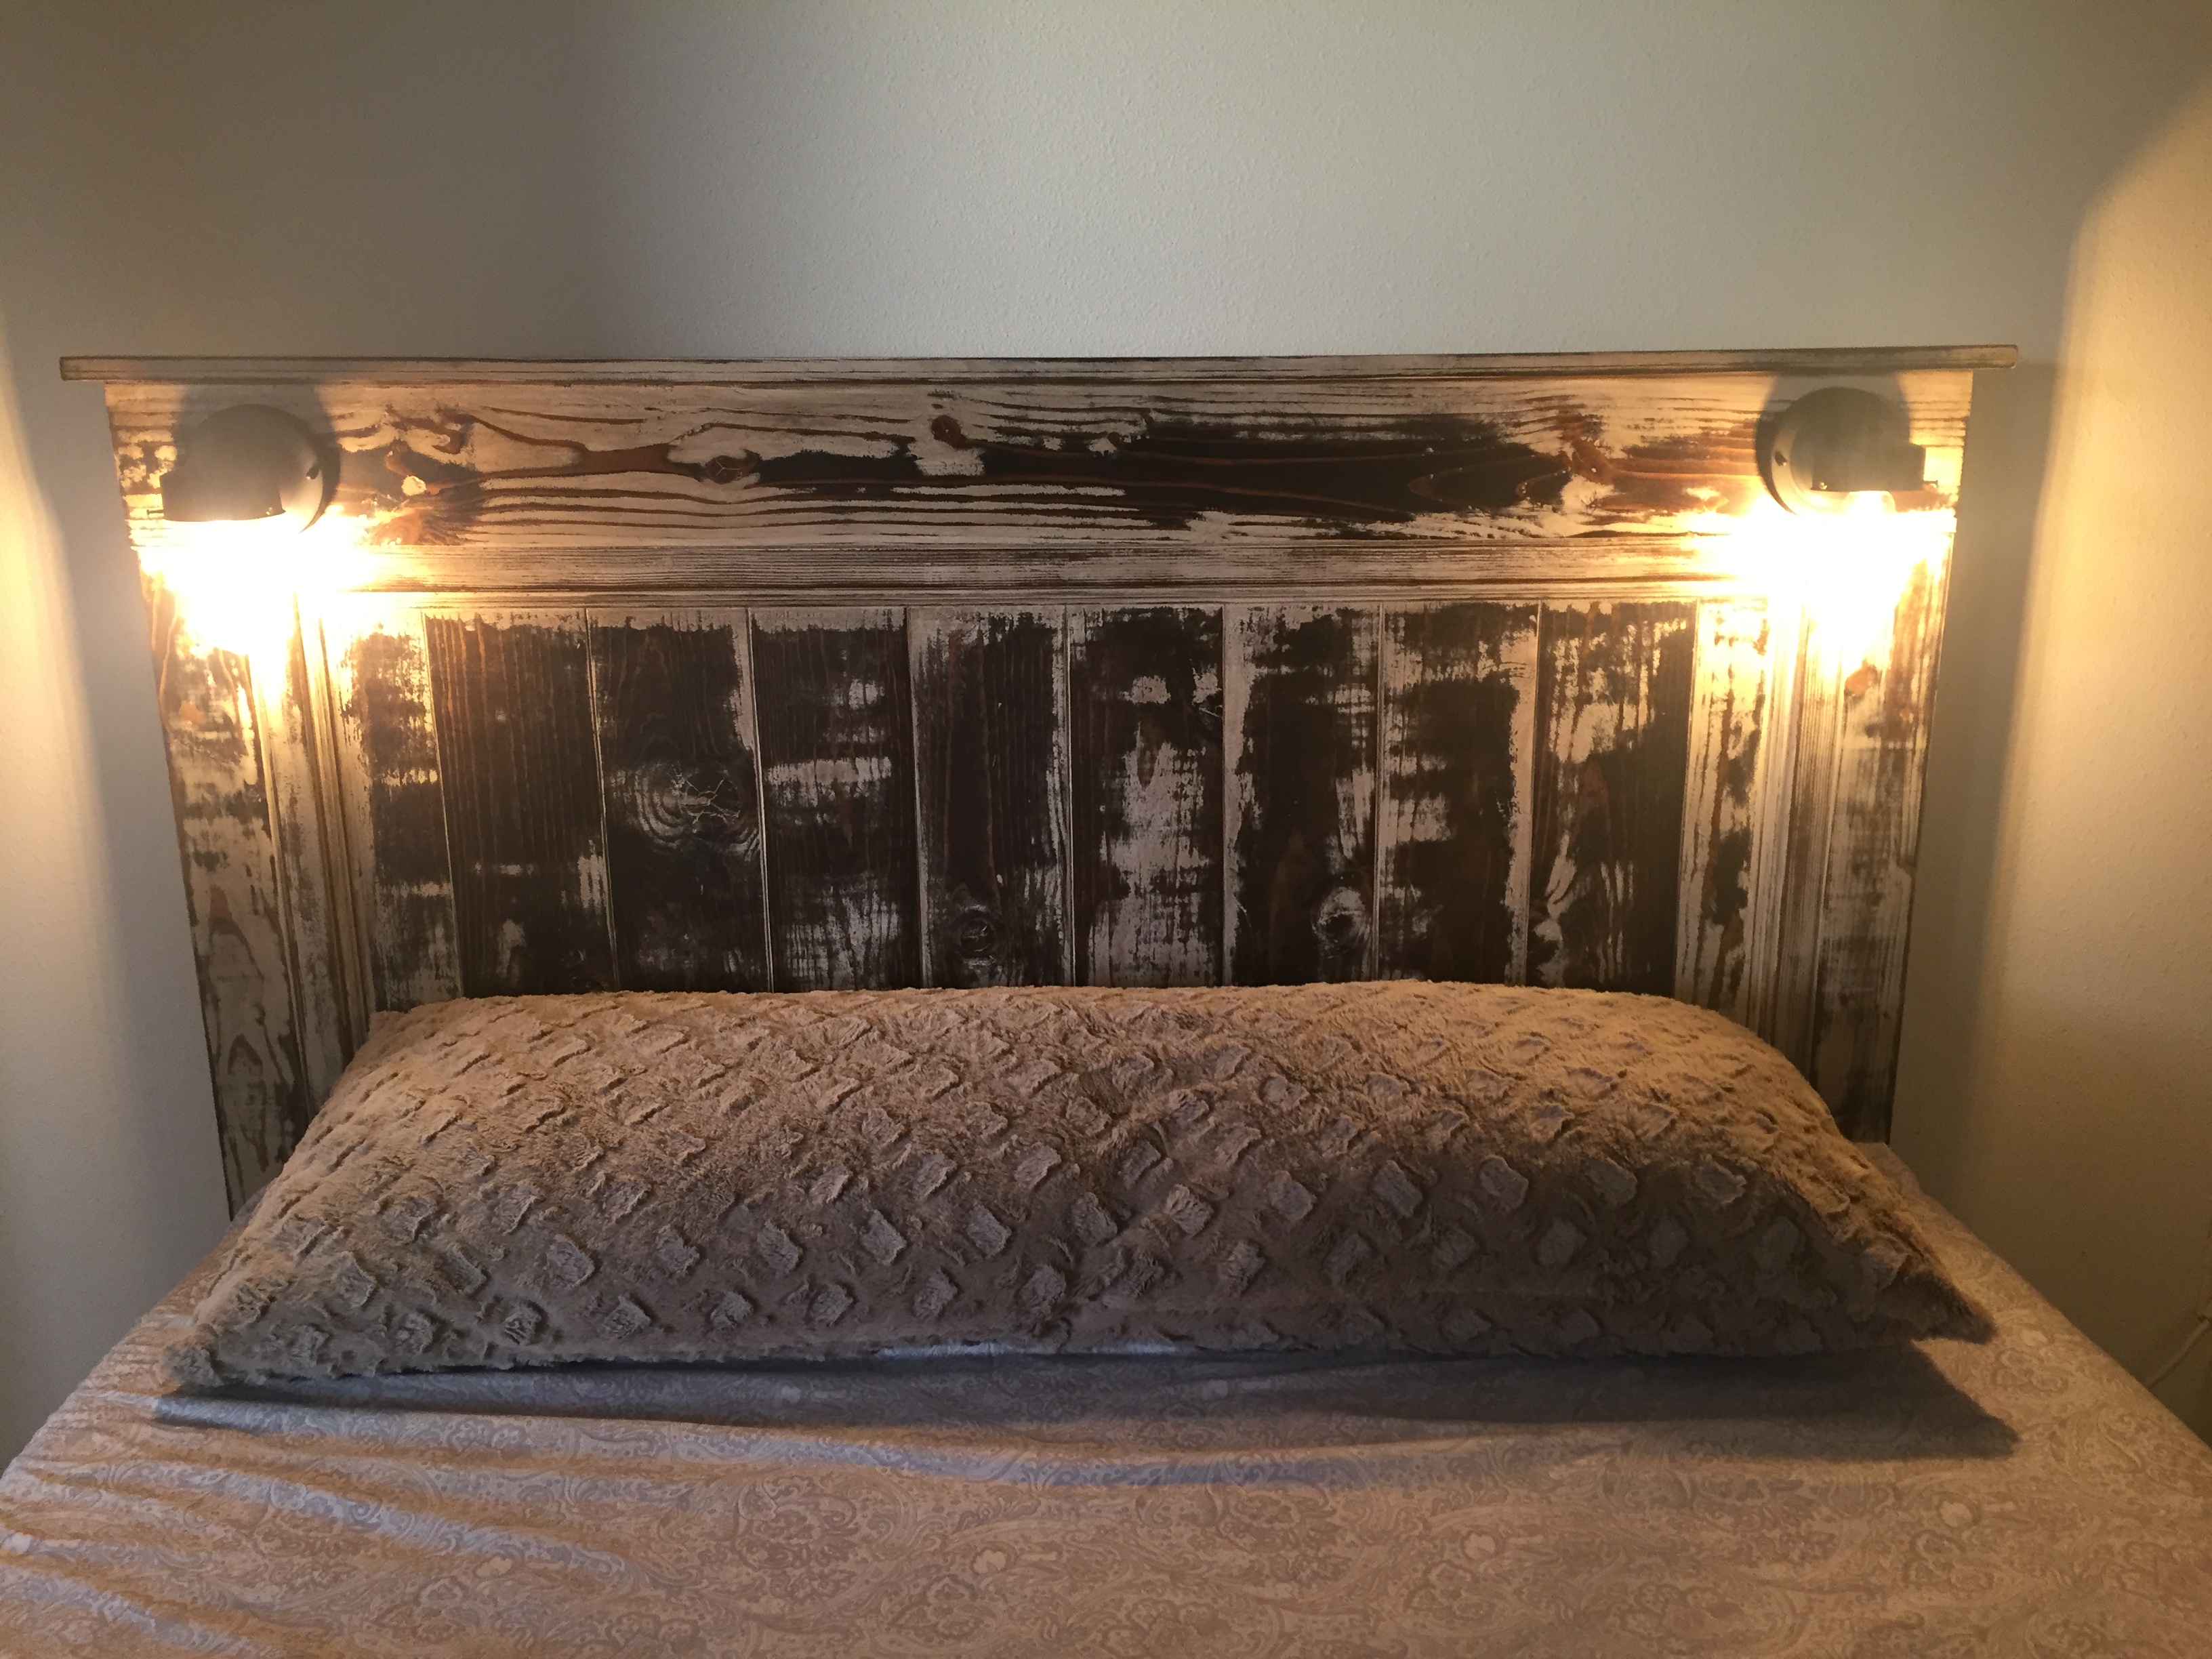
We've had our bed on a small metal frame for years with the hopes of someday finding a bed frame that we liked. With the family out of town, I decided to try and build one after getting this site from a friend (LSU Builder). The steps and materials were a HUGE help! I only had to make a small amount of changes from the original plans....most notably adding additional 2x4's to each headboard leg along with one in the middle. This created more space to connect the headboard to the body of the frame with the bolts. This was the first time I'd ever used a Kreg jig to create pocket holes. I will definitely use these for other projects as they seem to be extremely strong.
All in all, I will definitely be using the site for additional plans. I'm an intermediate "wood worker" and really enjoy tackling projects. Thanks!0

What a great project. This was a lot of fun to build, I built it on our patio in our apartment. I made some mistakes, but it was fun. Thank you for the plans. I hope you like the pics. Comments or questions welcomed!
Fri, 10/21/2016 - 14:30
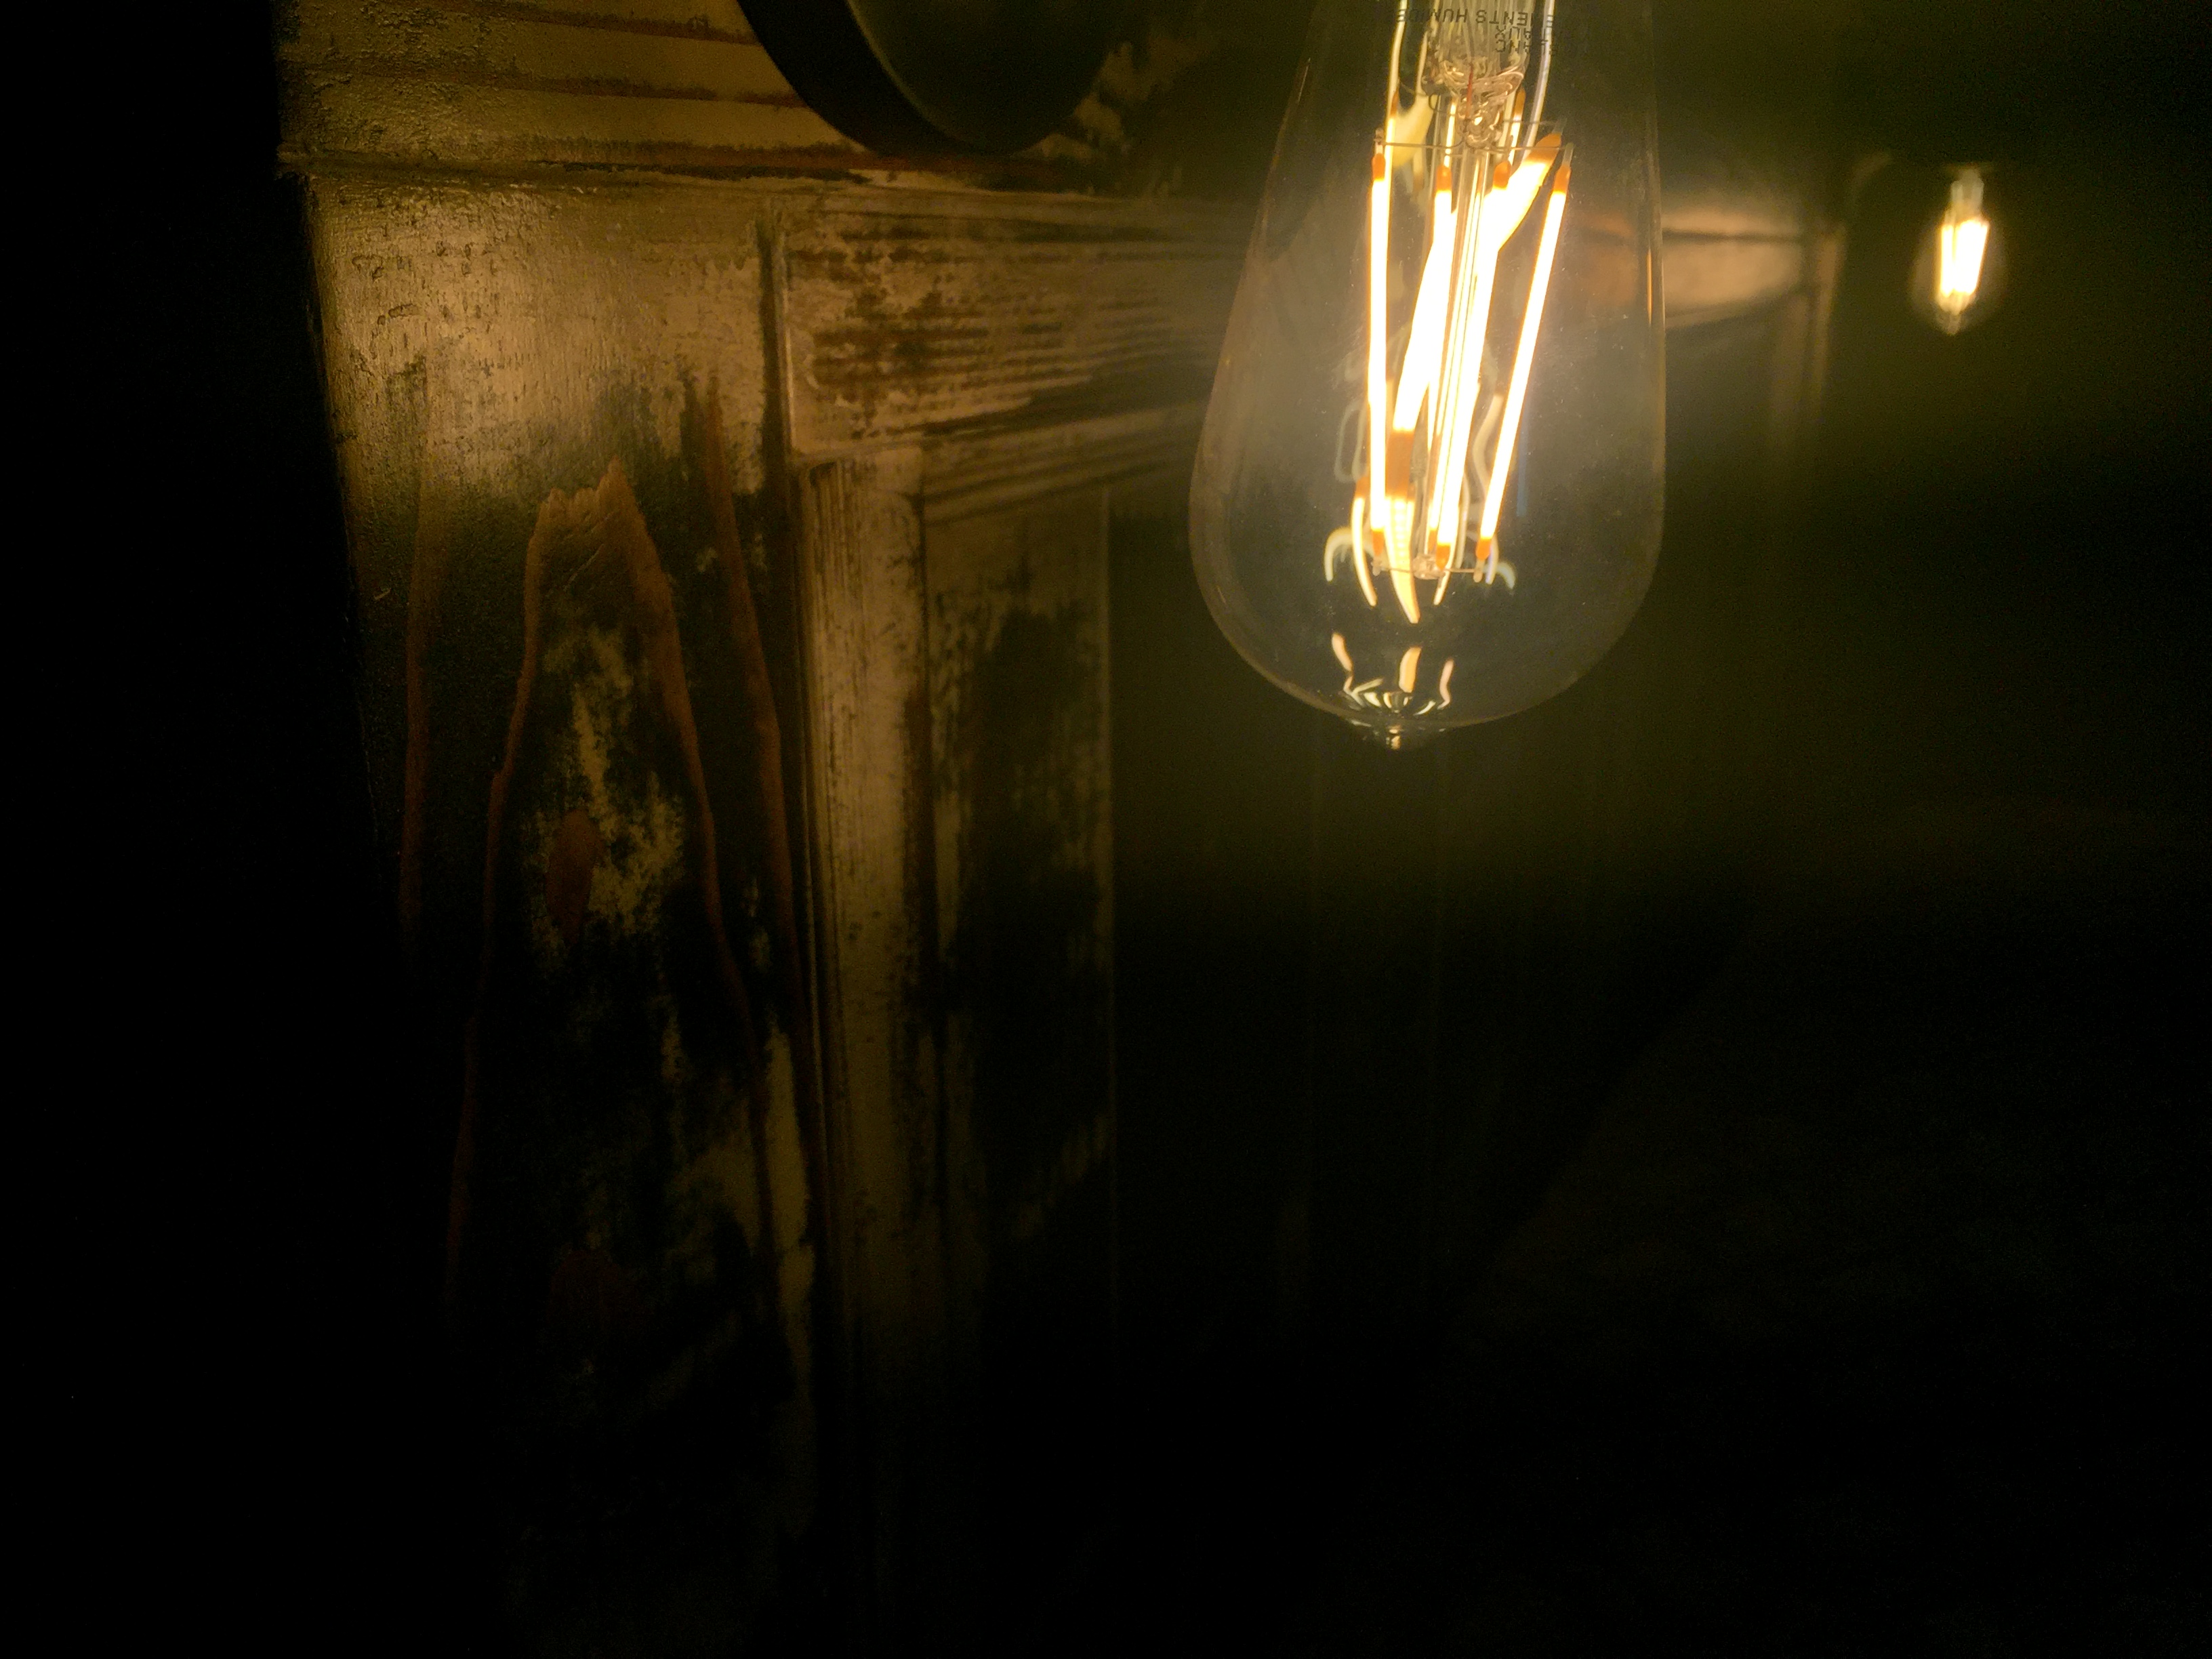
By the way the lights are actually LED bulbs and they give off little to no heat what so ever. I love that the lights are a warm light and not a white light. They are connected to the socket that is controlled by our light switch. My wife is very pleased.
As stated, this is my 3rd project ever and all 3 are from Anna's plans. Thank you so much for posting these. Come end of next year, all of our furniture will be hand made with my son and I and all are from Anna White. We are having a great time and putting our own spin on all of the items. This is so cool. Thanks for making this easy and doable. I never thought we would have this skill.
Thank you, again.
Fri, 10/21/2016 - 14:33
Sorry for the duplicate comment. I thought it didn't go through... :(
This was the first project we built from Ana White's website and one of our most successful projects to date. Between Ana's great plans and description, along with tips from other people on the site, it was so easy to modify and build this into exactly what we were looking for. Jennifer and I are both novice wood workers, but this site made building a wonderful project really easy. Thank you. Now Jennifer wants a bigger one for the bedroom.

I made you planter. Thanks very much. Unfortunately they don't sell in the UK. I enjoyed making them though.
Karen K UK
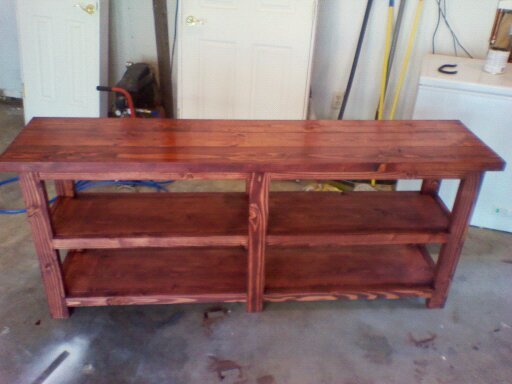
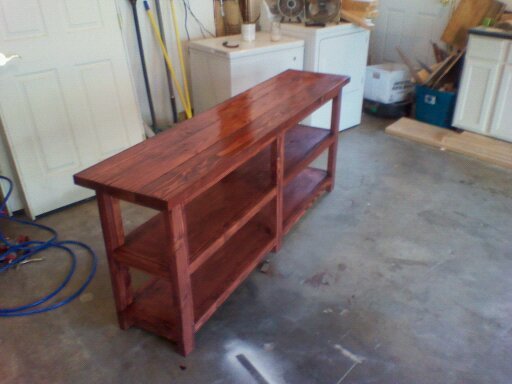
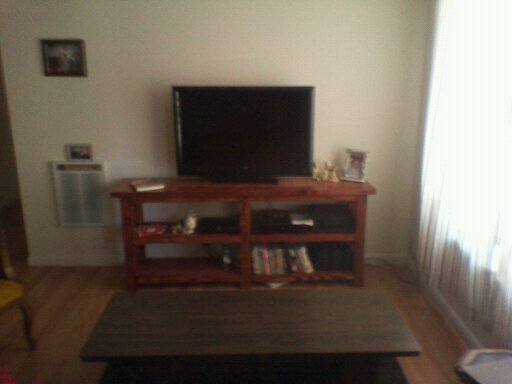
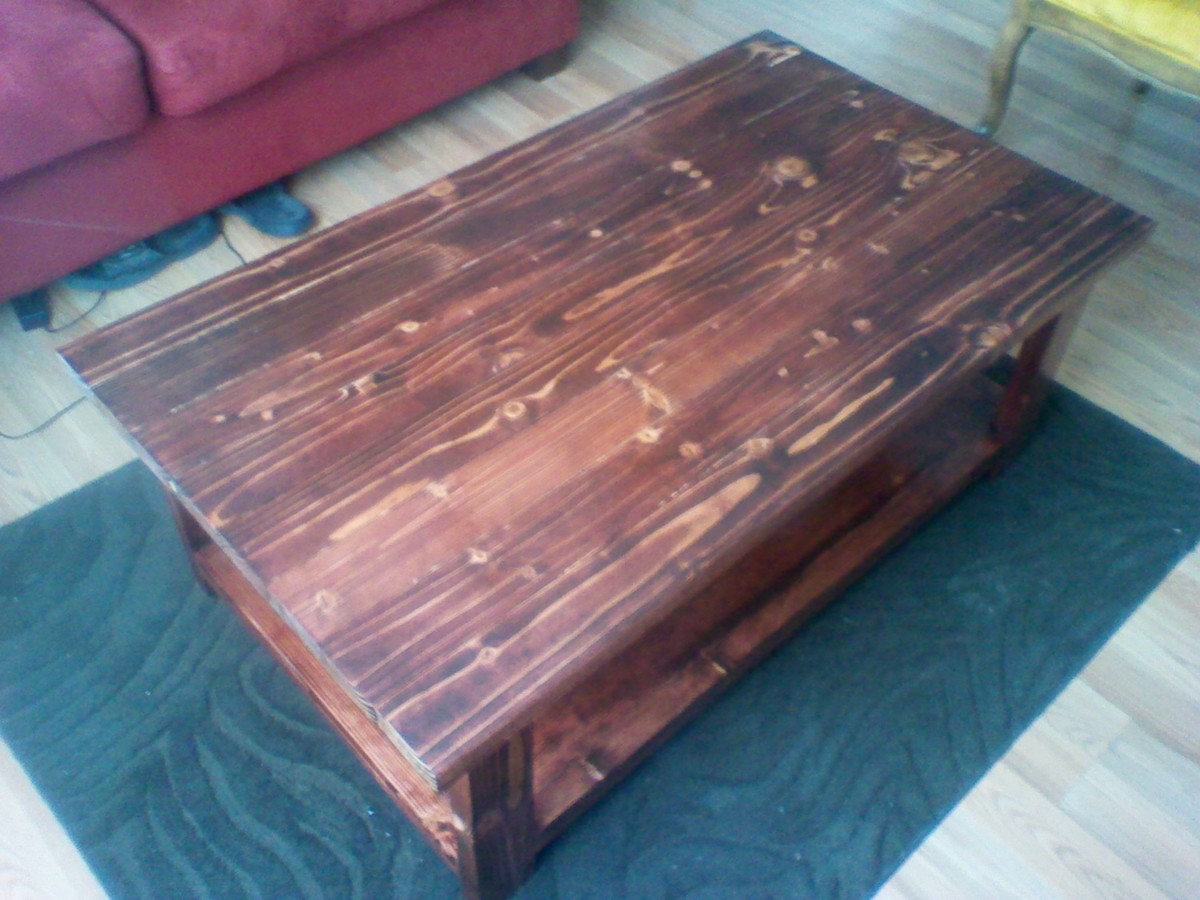
i used the a modified rustic x coffee table plan. i did not use the x and used kiln dried 2x4s for most everything except the bottom shelf i used 2 1x12x4 because they are $6.50 each compared to $20-25 each for 8ft and i cut the 2x2 out of the kiln dried 2x4s there was a fair amount of waste but the kiln dried 2x4s are much nicer to work with then green 2x6s.i stained in a red mahogany stain and gloss brushing lacquer. The top took 8 2x4s cut to just shy of 48" do i could get two from each piece. i shorted the table frame to match. if you are using green wood like i did on my first table the rustic x console table you will notice cracks forming in knots especially. using kiln dried lumber is recommended to ensure your project will last.

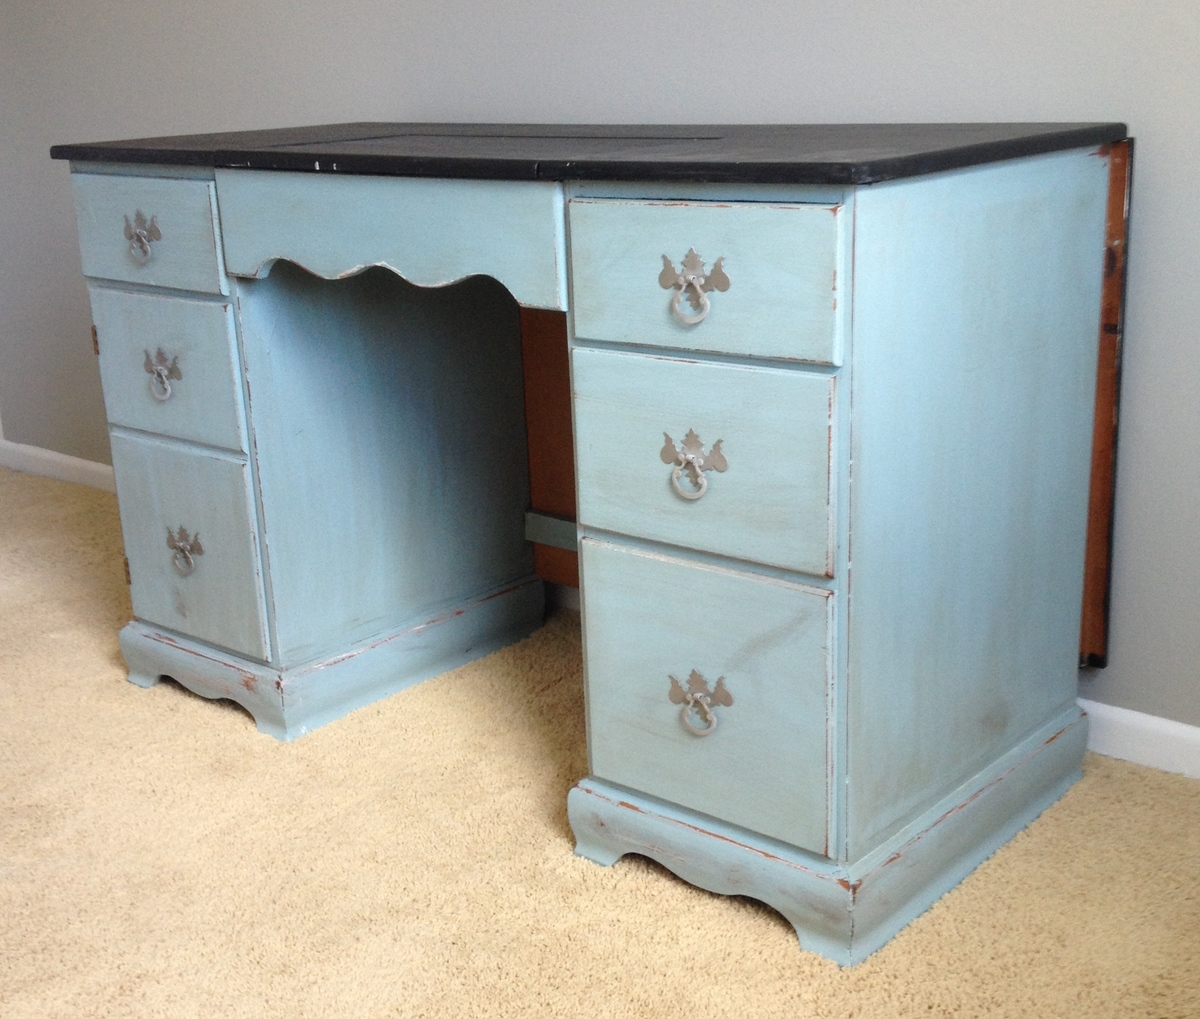
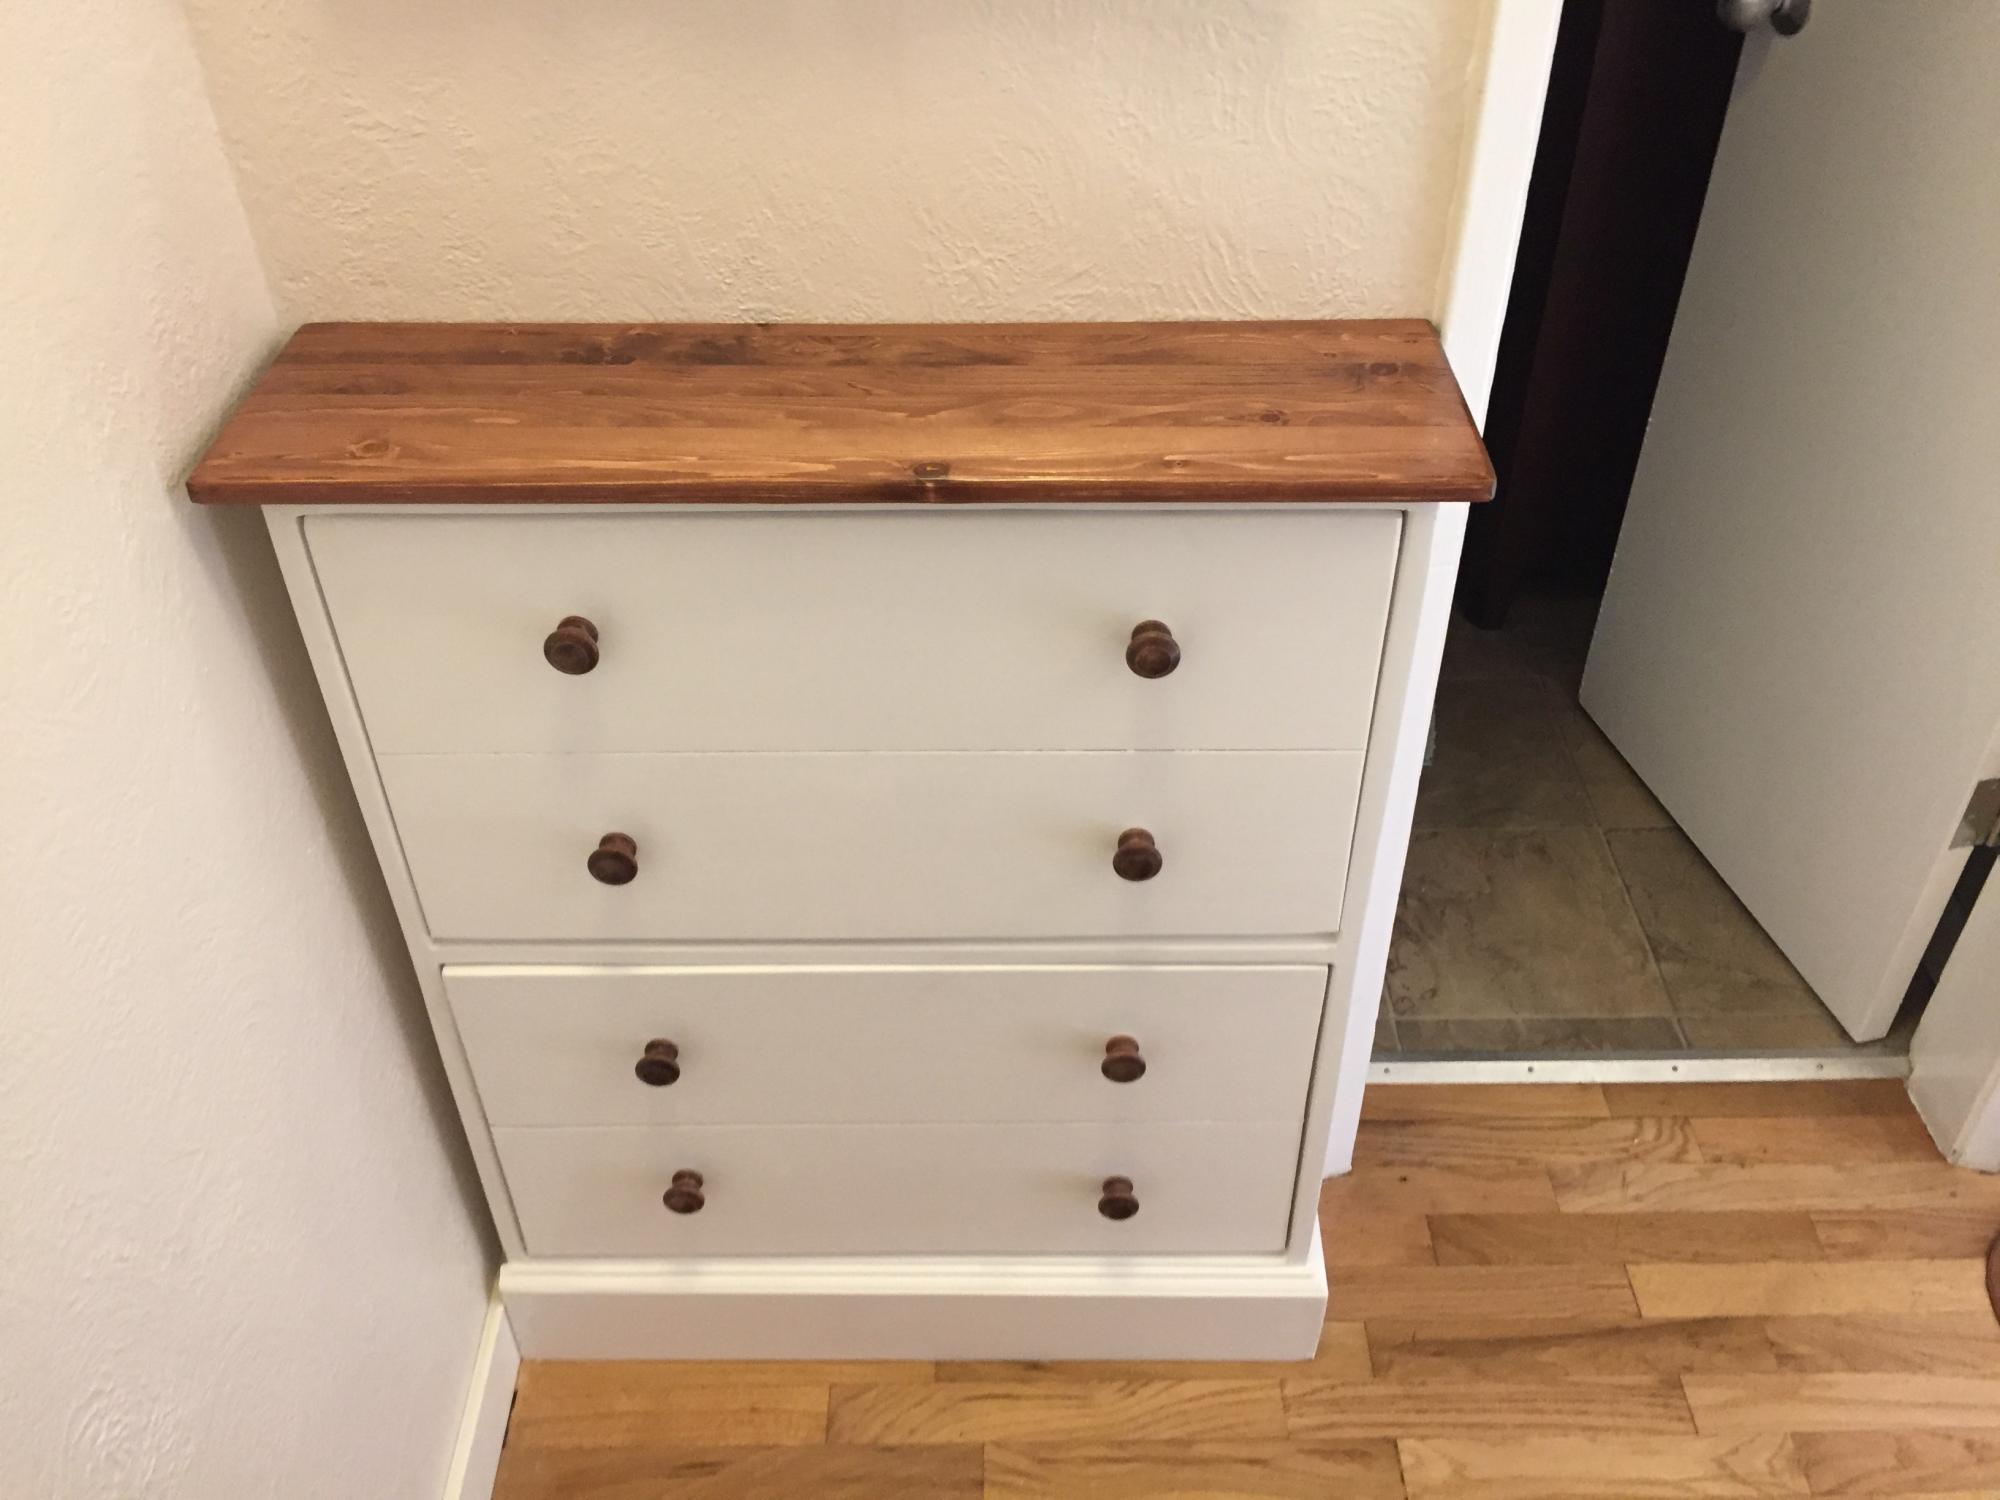
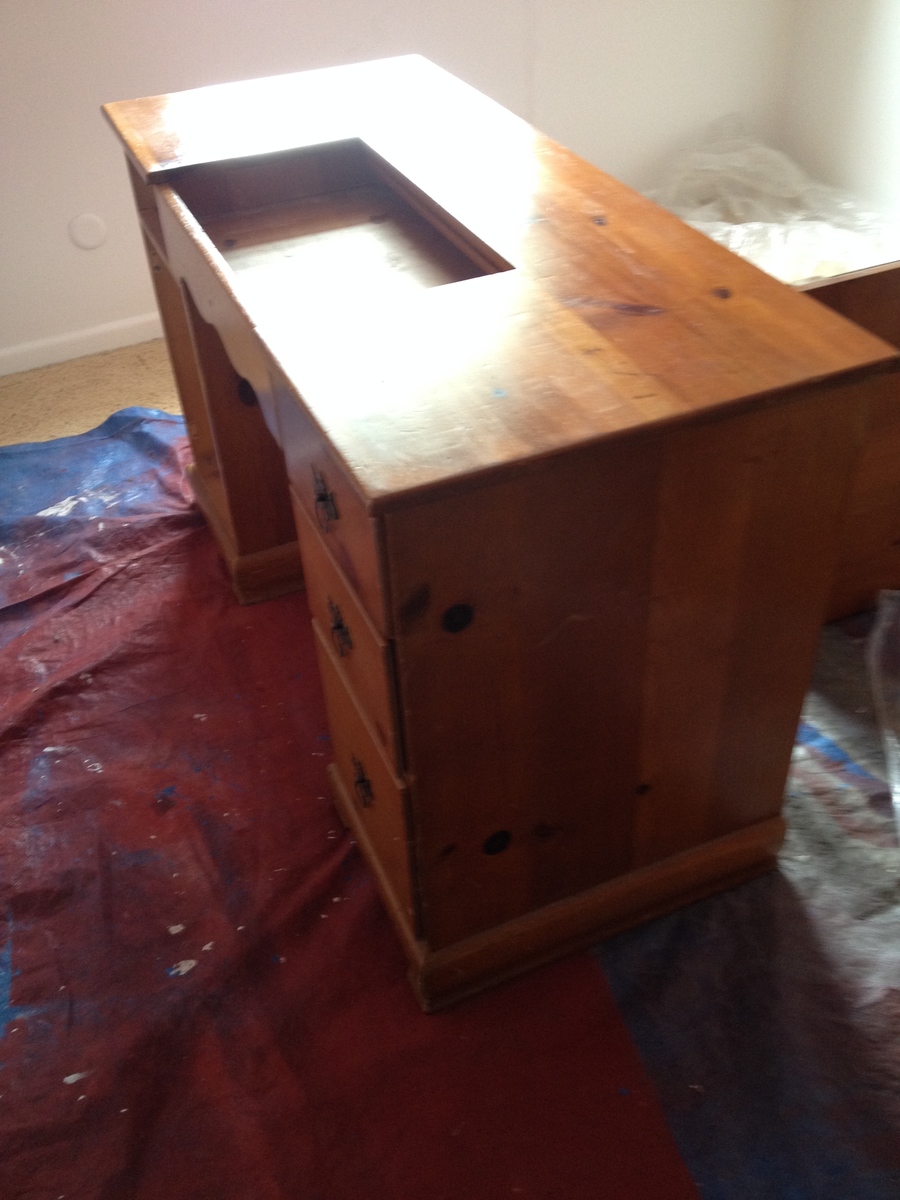
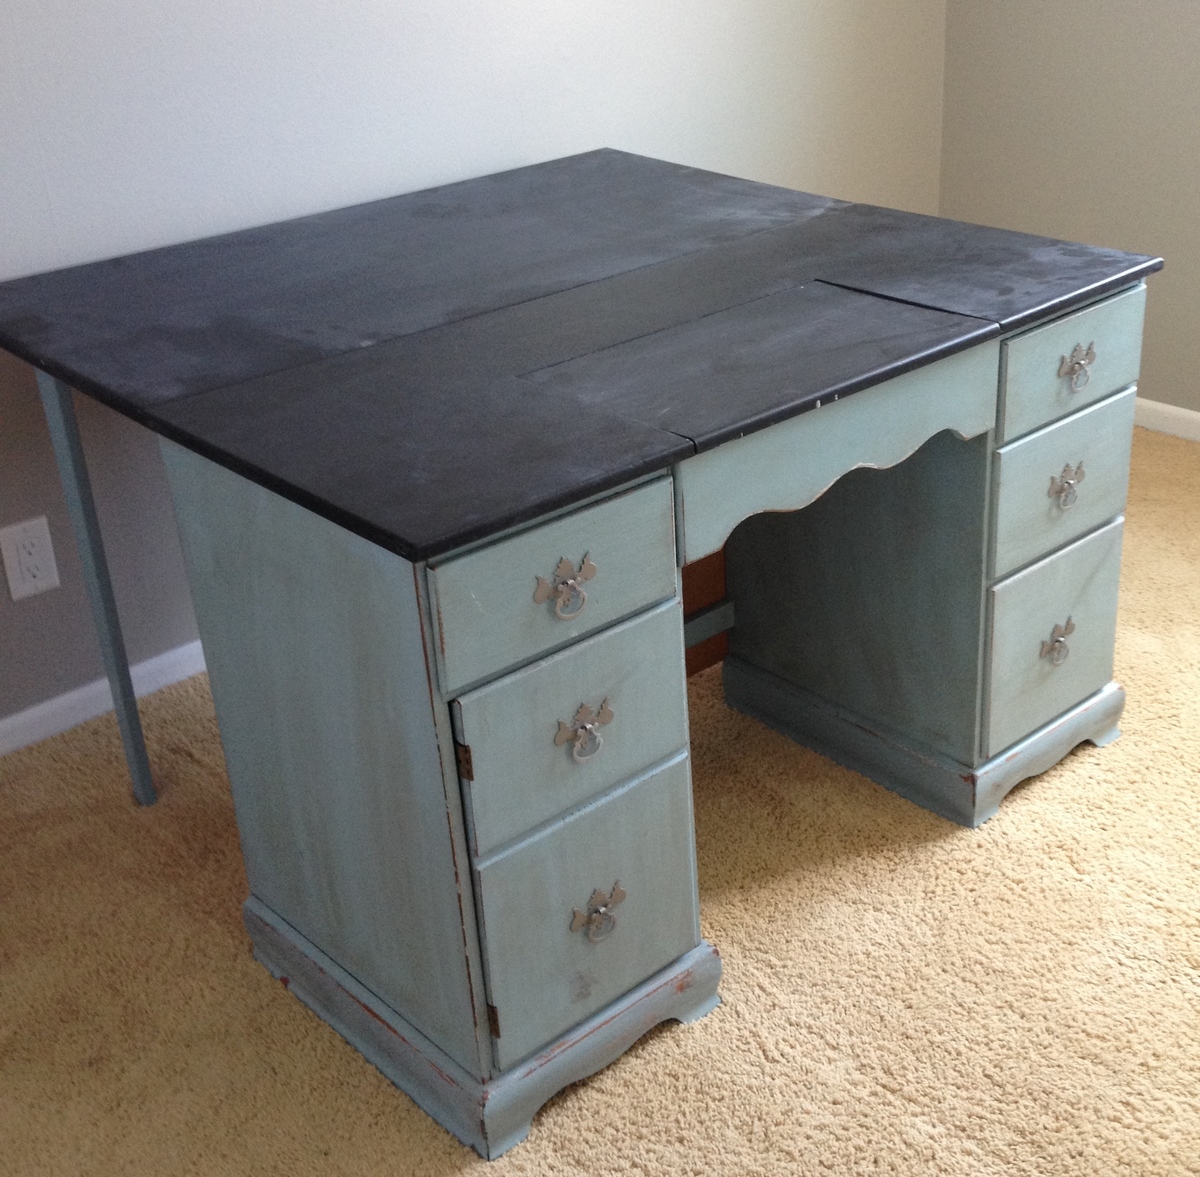
This desk was originally my great aunt's sewing desk. After 47 years it's been passed down to me. I decided to paint it blue with a chalkboard paint top. I antiqued it using my little sander and some Minwax Red Mahogany stain. I spray painted the drawer pulls to update them and finished everything with Minwax Furniture Wax on the blue and chalk on the chalkboard finish. Now I just need to get up and sew.
Made this tv stand for a friend. Took the idea from the x console but changed it a little.
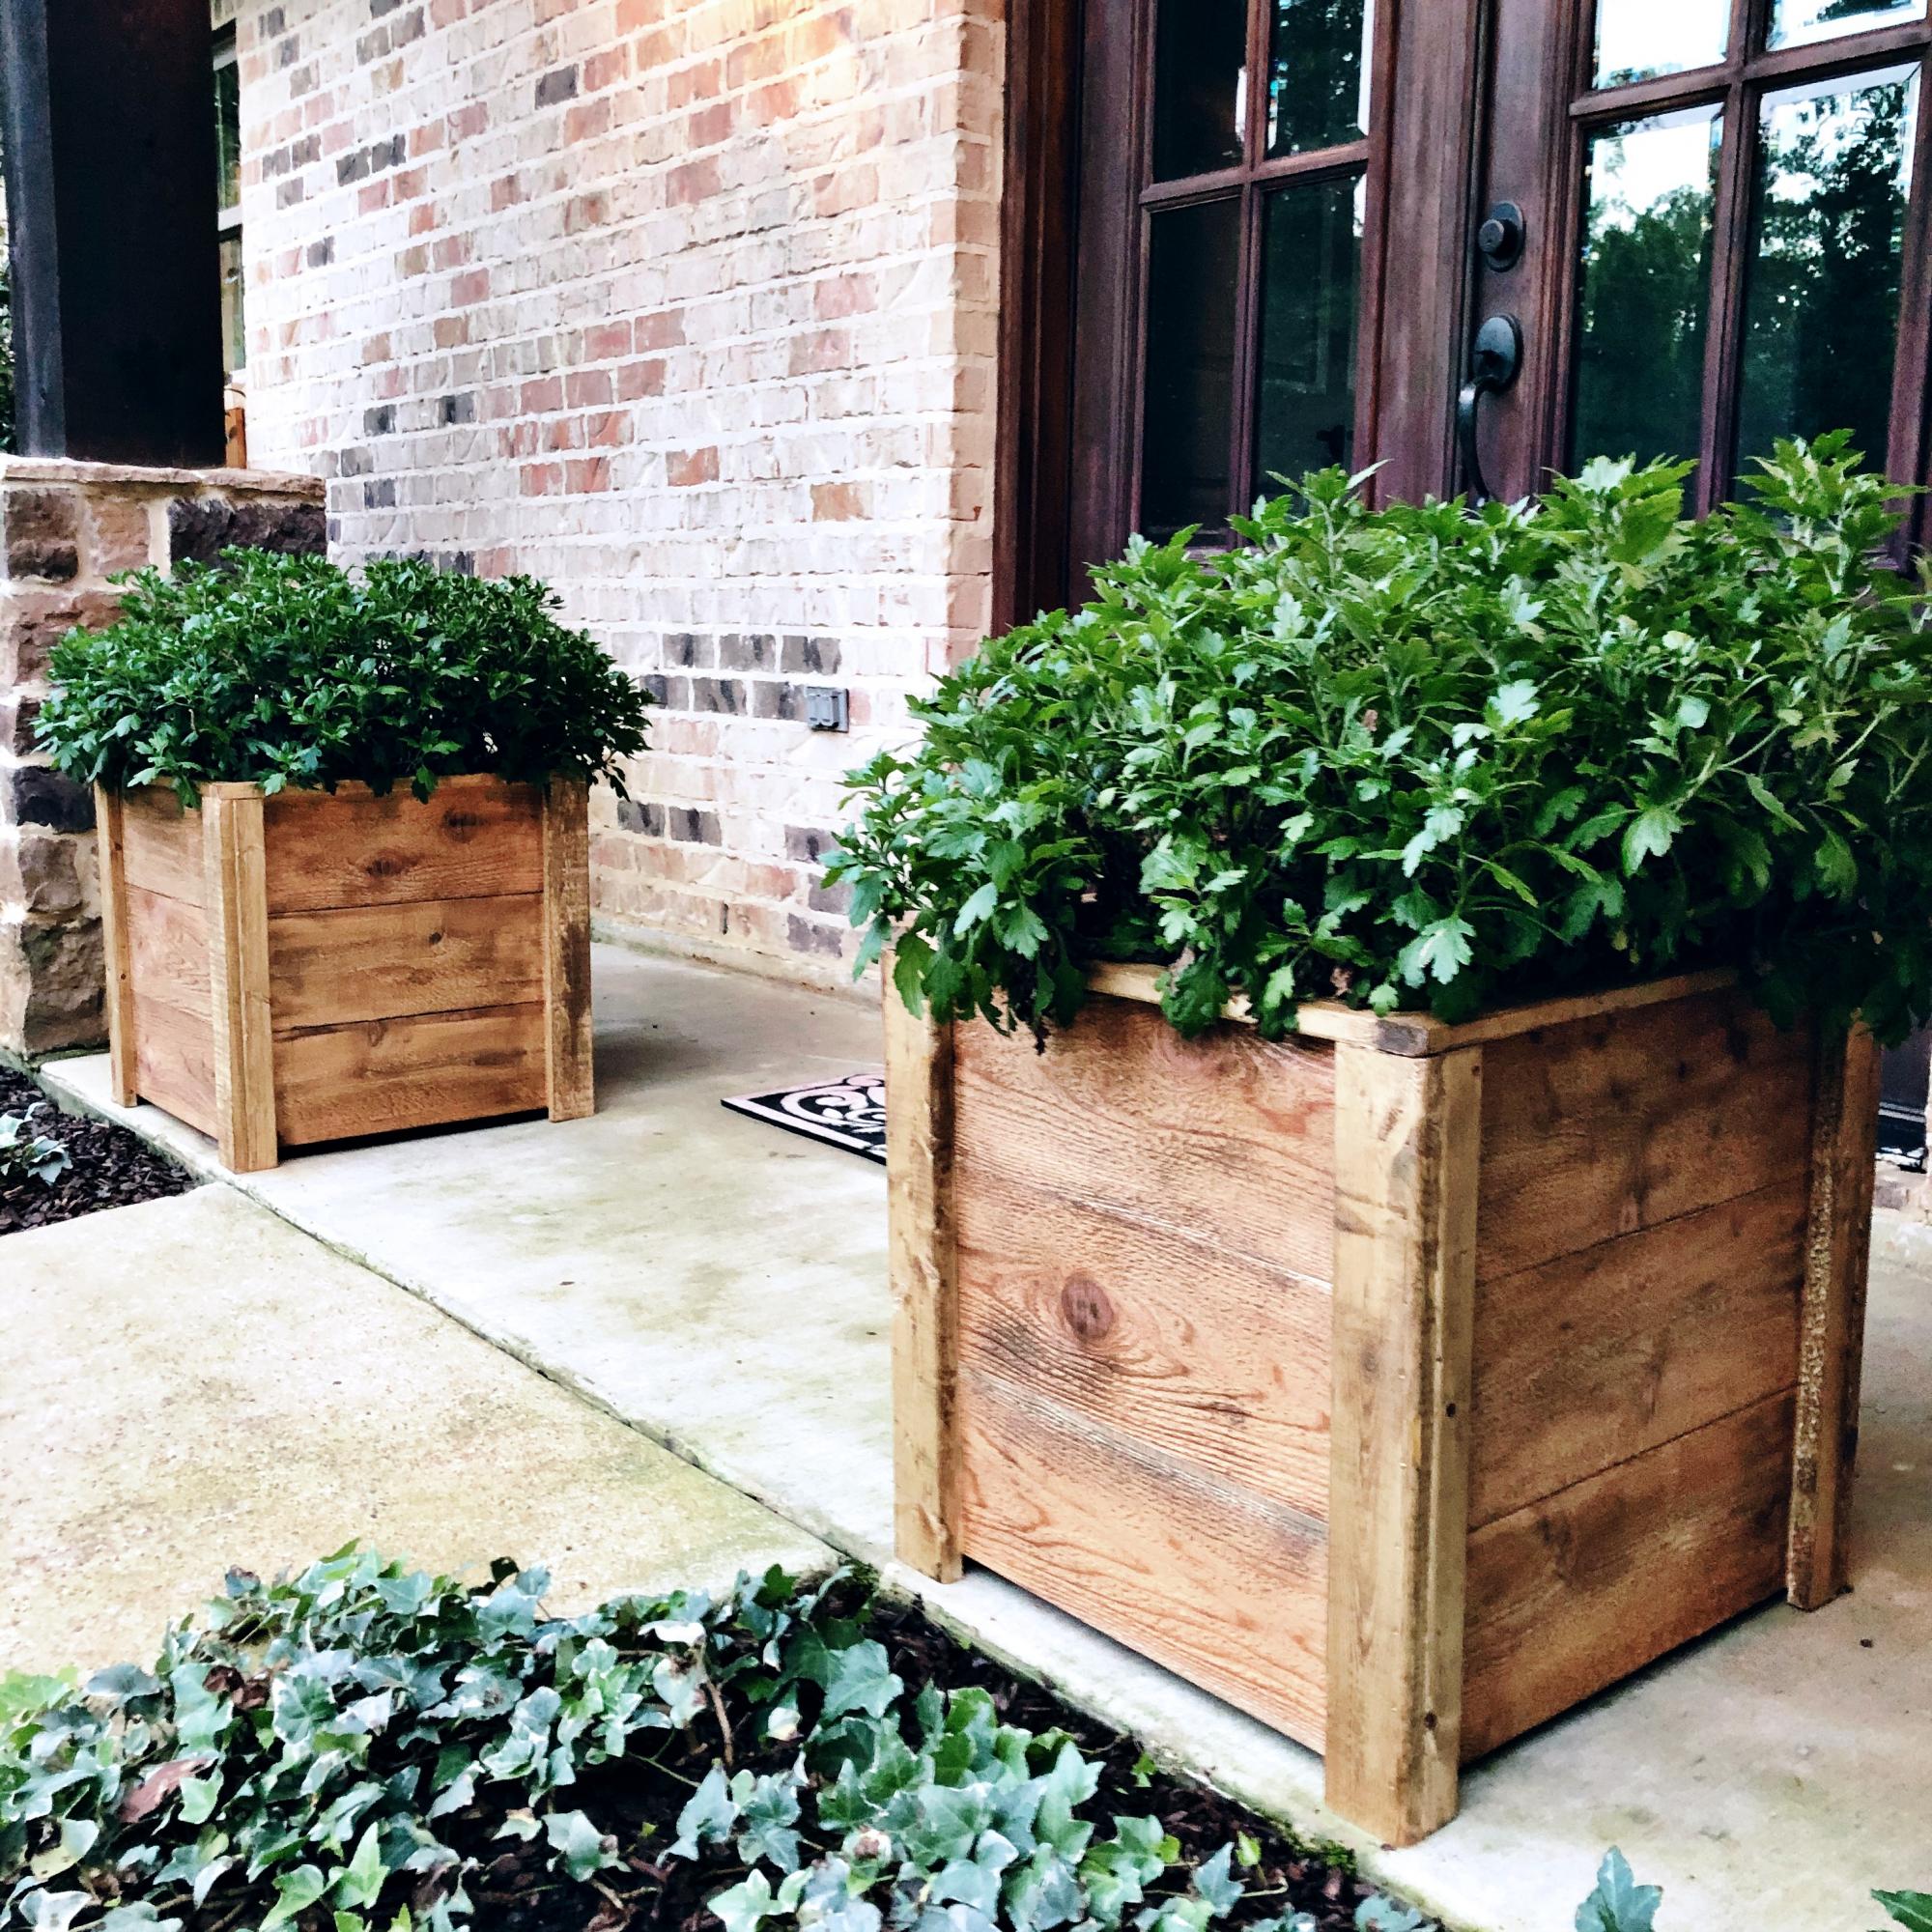
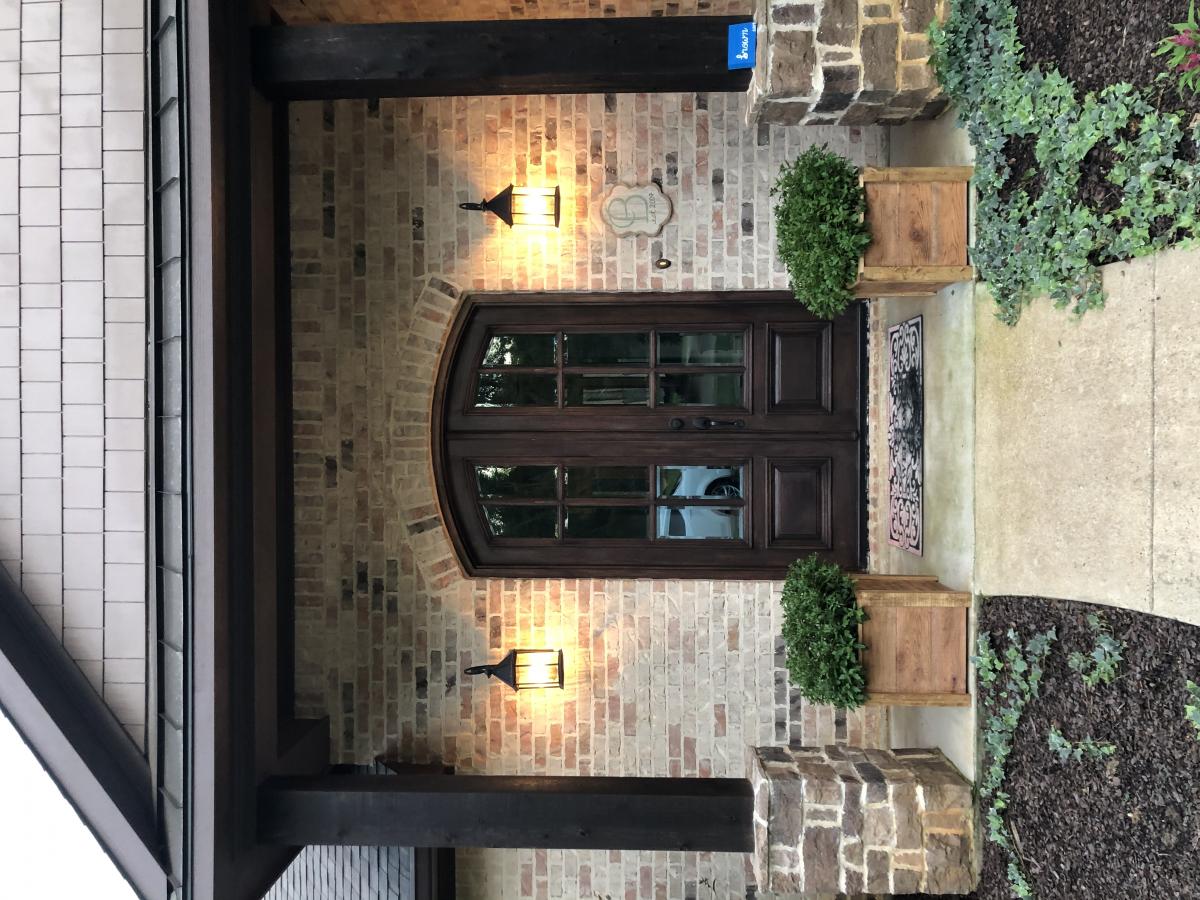
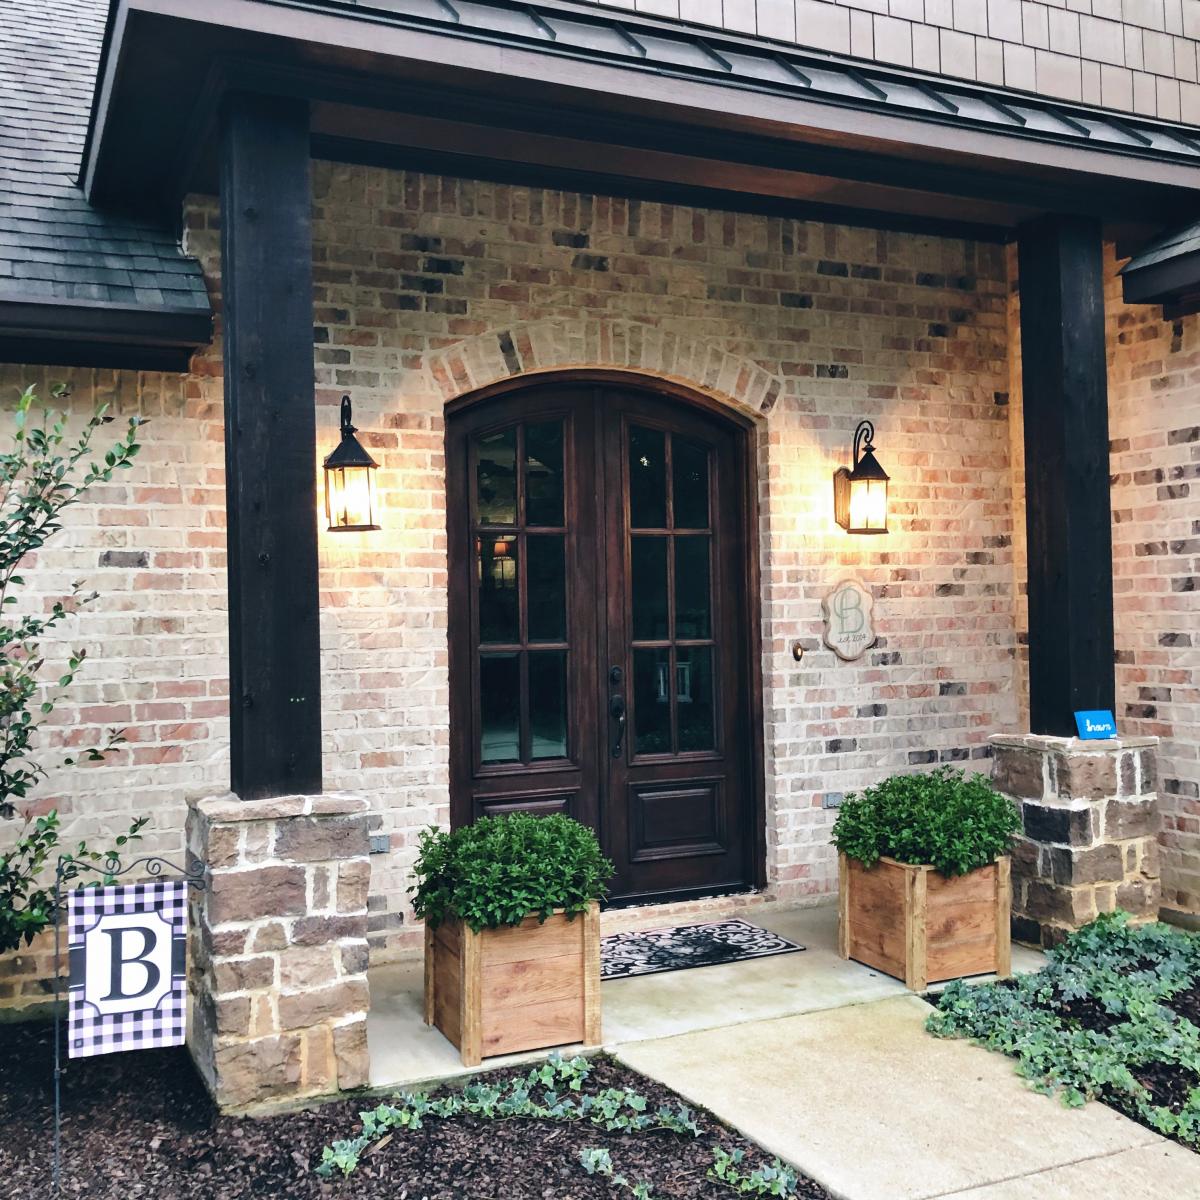
These were a quick weeknight build! And.... My very first “all by myself” build! I’m really proud of how they turned out and love how much style they add to my front porch!
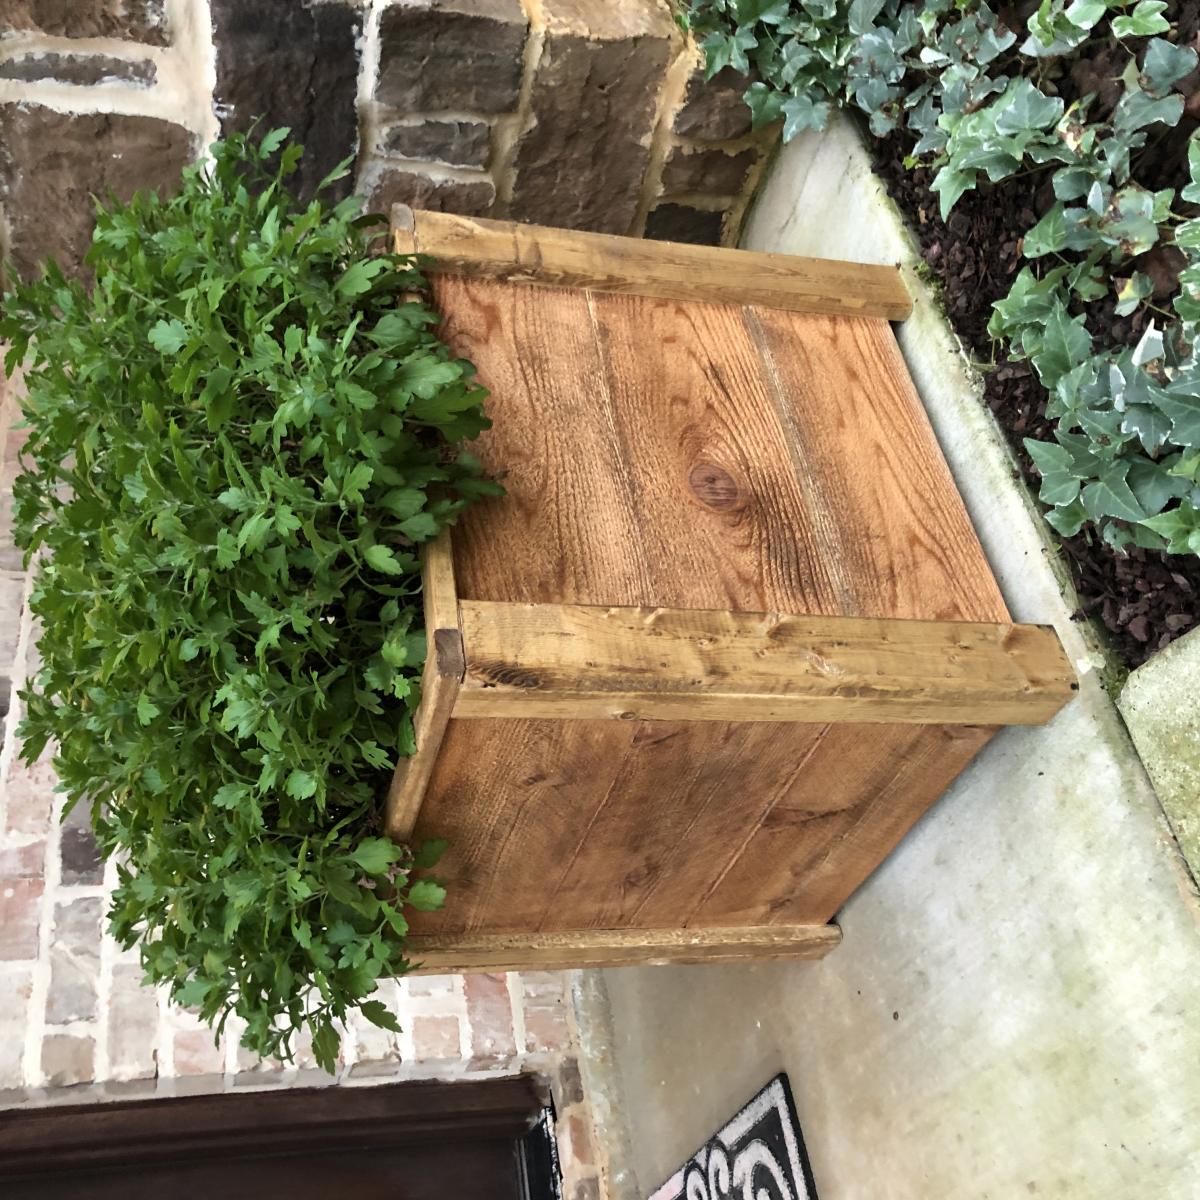


This was such a fun project! I’ve wanted to build a potting bench for years. I can’t imagine why it took so long take a shot at it, it’s such a simple build and only took a couple days.

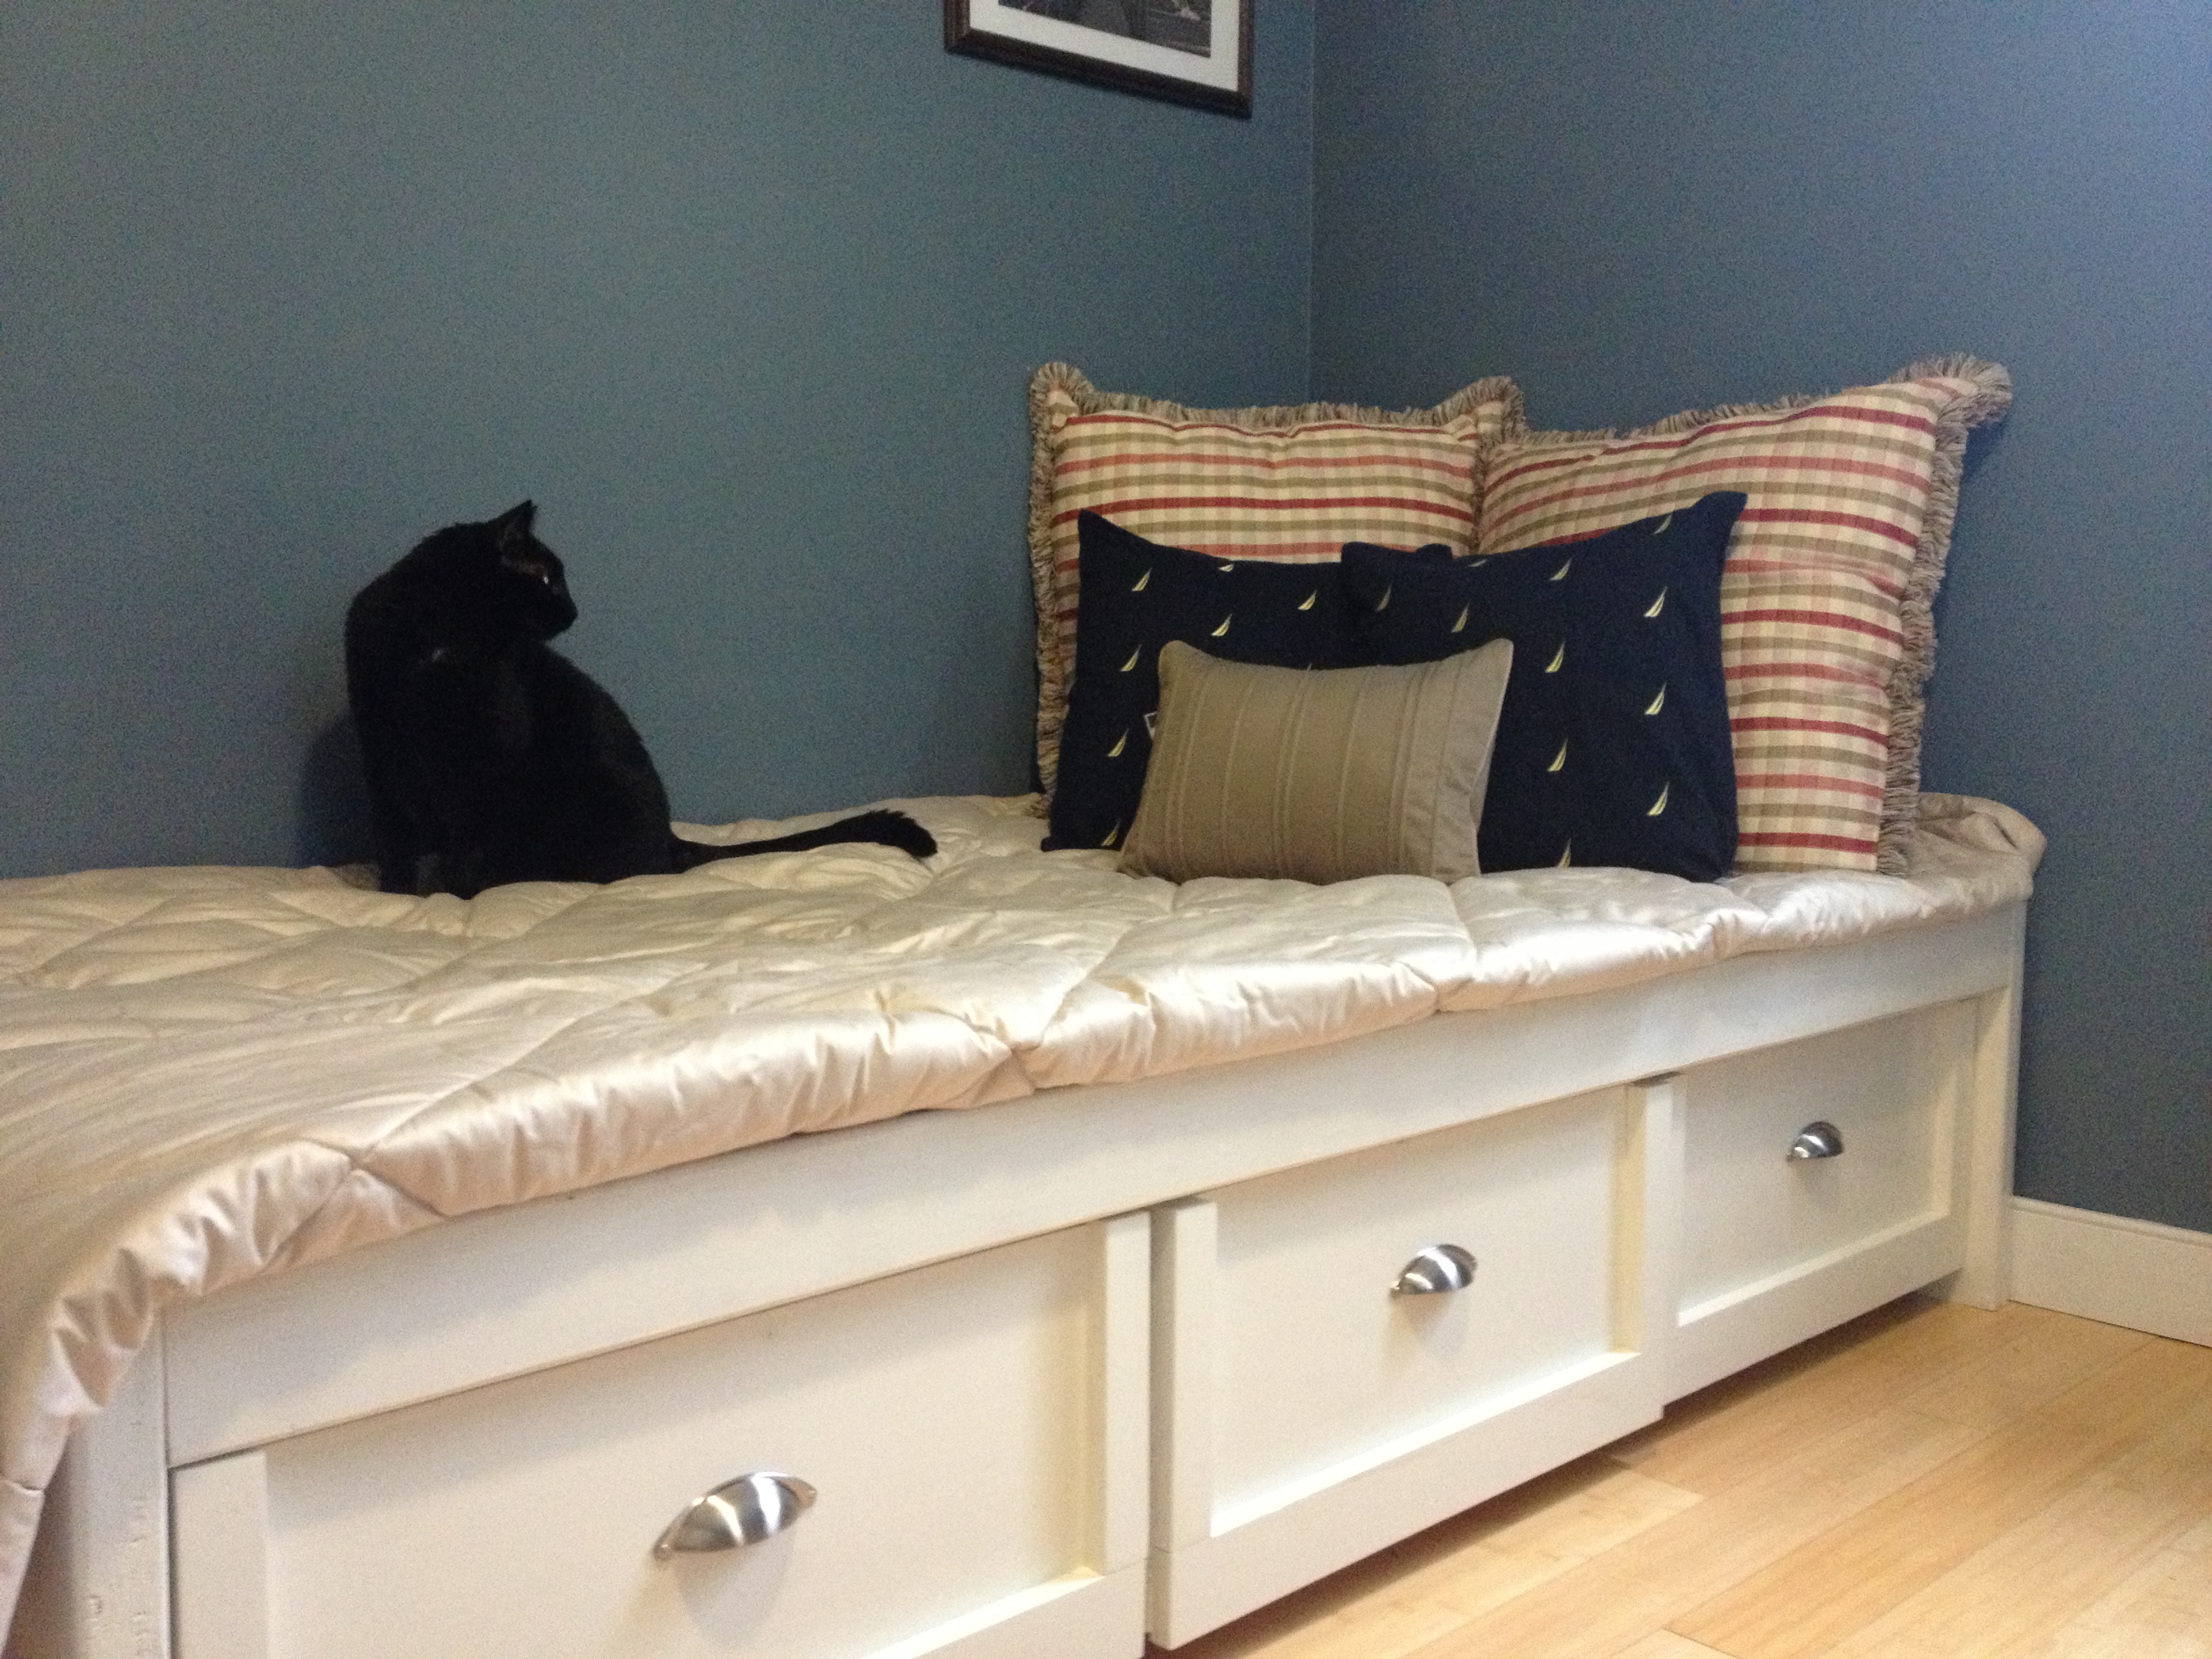
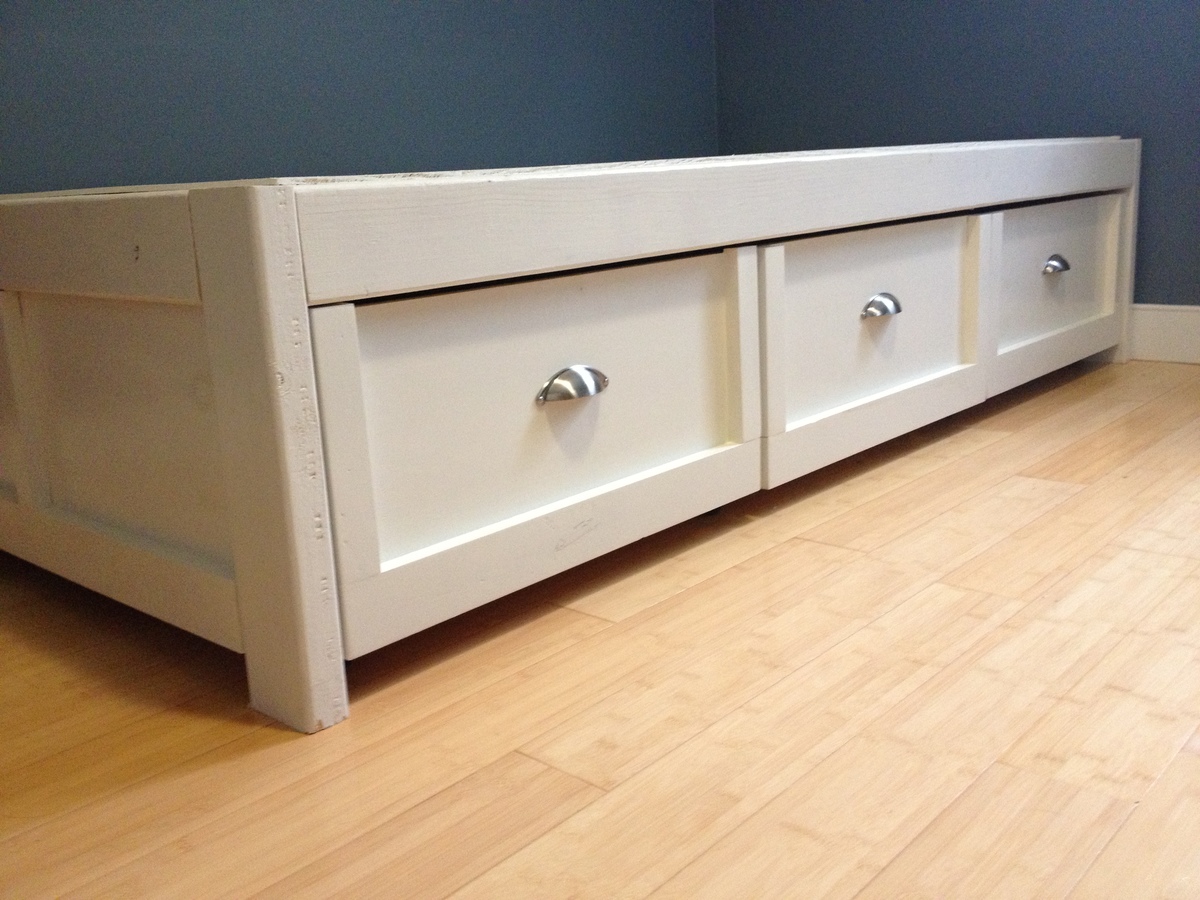
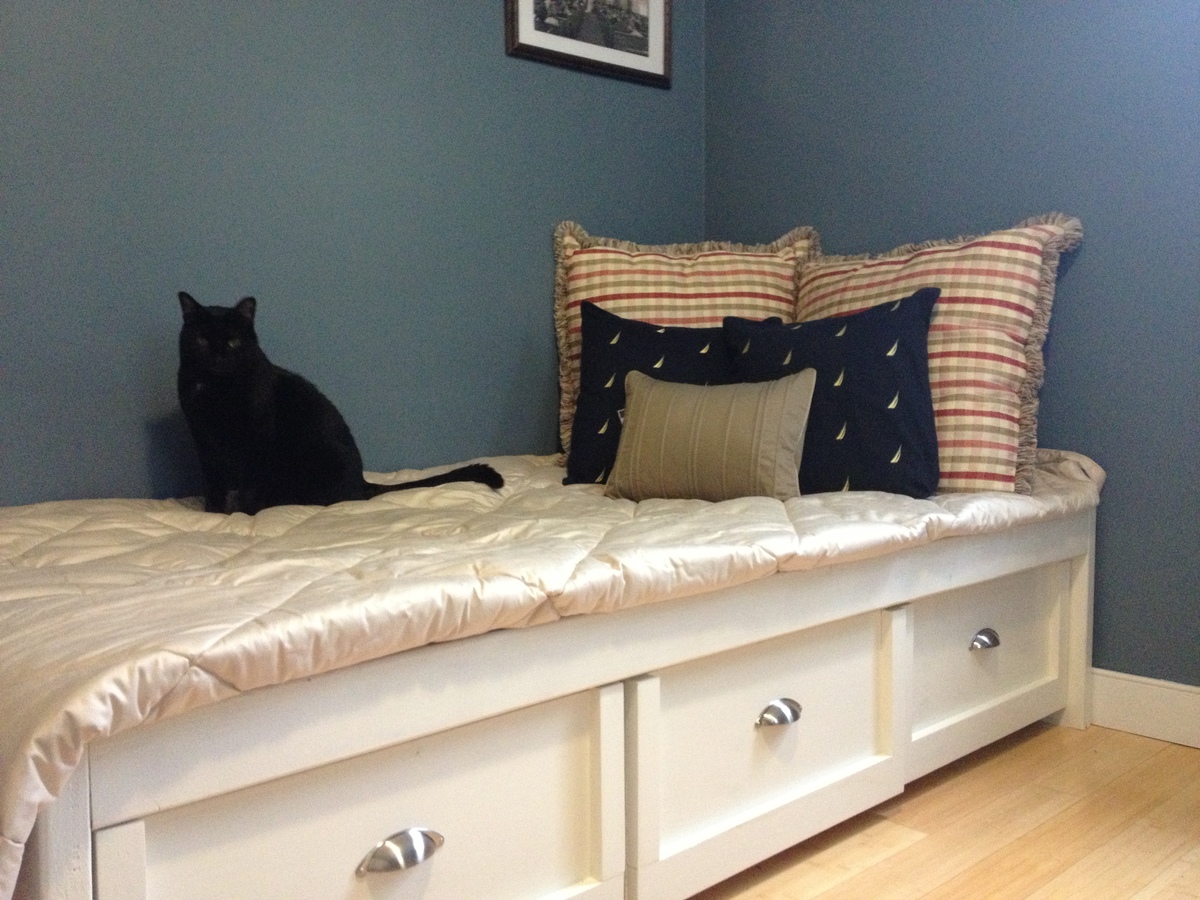
This was my and my husband's first project and it was easier than expected. There were slight imperfections with the drawers, but they were hidden by the faces and trim. It was our first time using a Kreg jig and we LOVED it!! We will be building furniture for Christmas presents this year, we are hooked!! The project took one weekend to build, and we spent around 4-5 hours a day.... remember we are newbies so we had to refer to the plan ... a lot! We went with the plywood top and it is sturdy and we can't wait to paint it and get it looking like a finished product. My husband was testing the daybed sans mattress.


Mon, 01/11/2016 - 23:06
Great job!!! I can't believe I didn't see this until now. Thanks so much for sharing, glad you liked the plans!
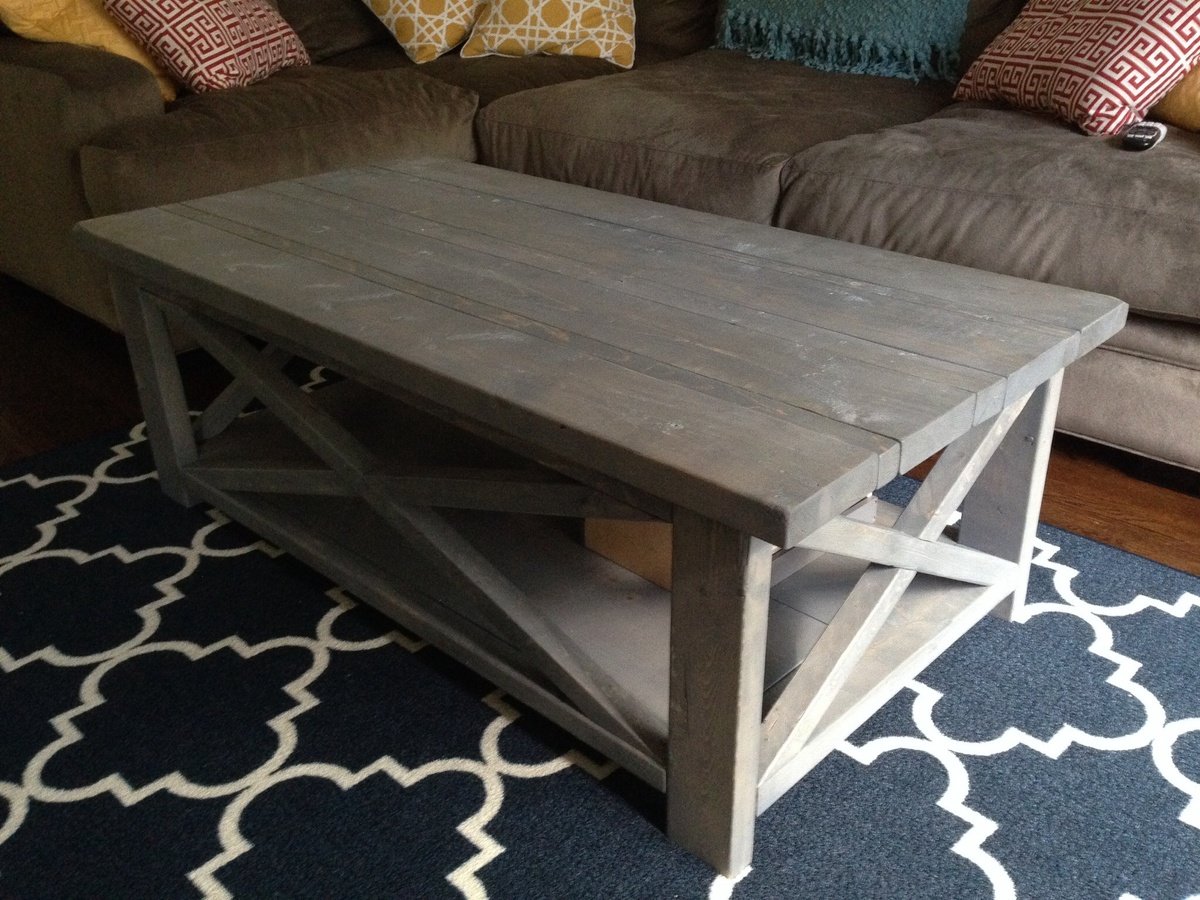
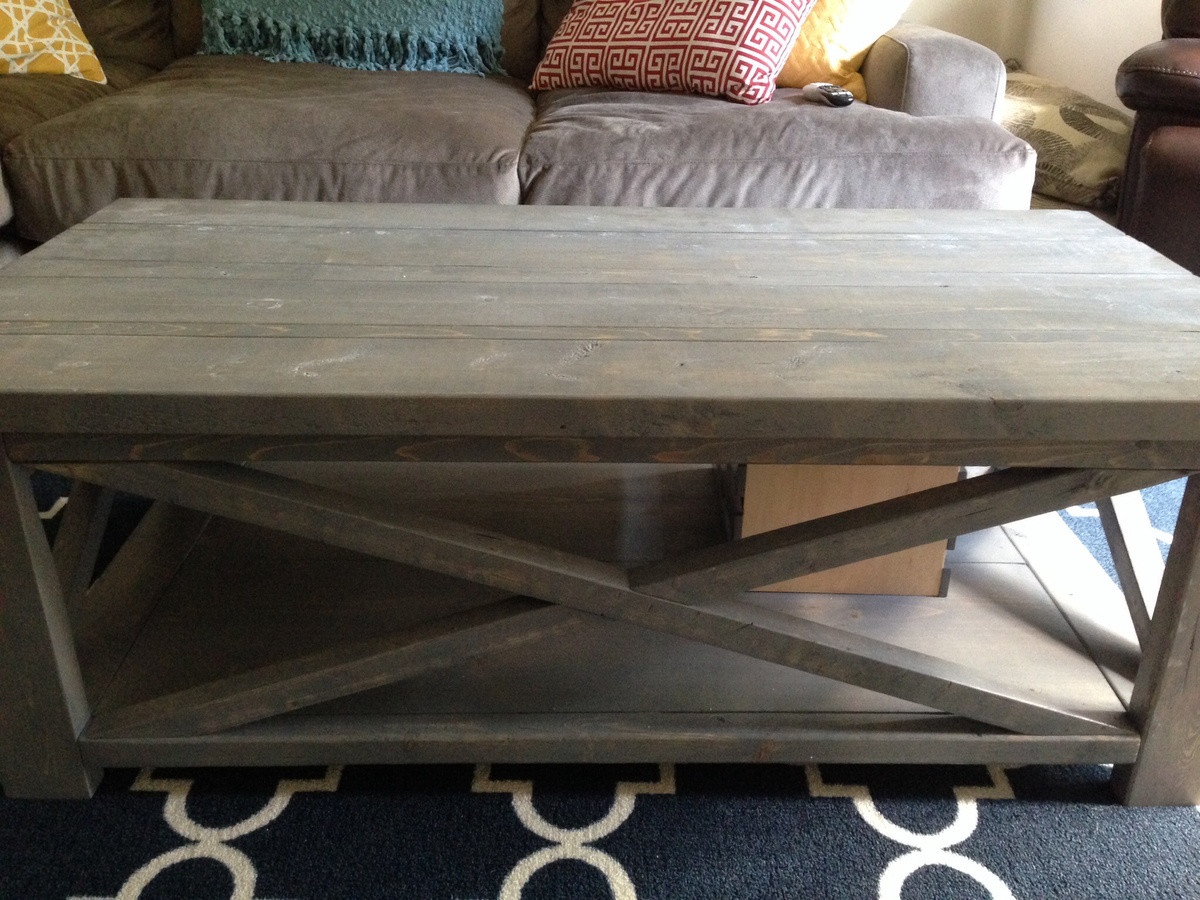
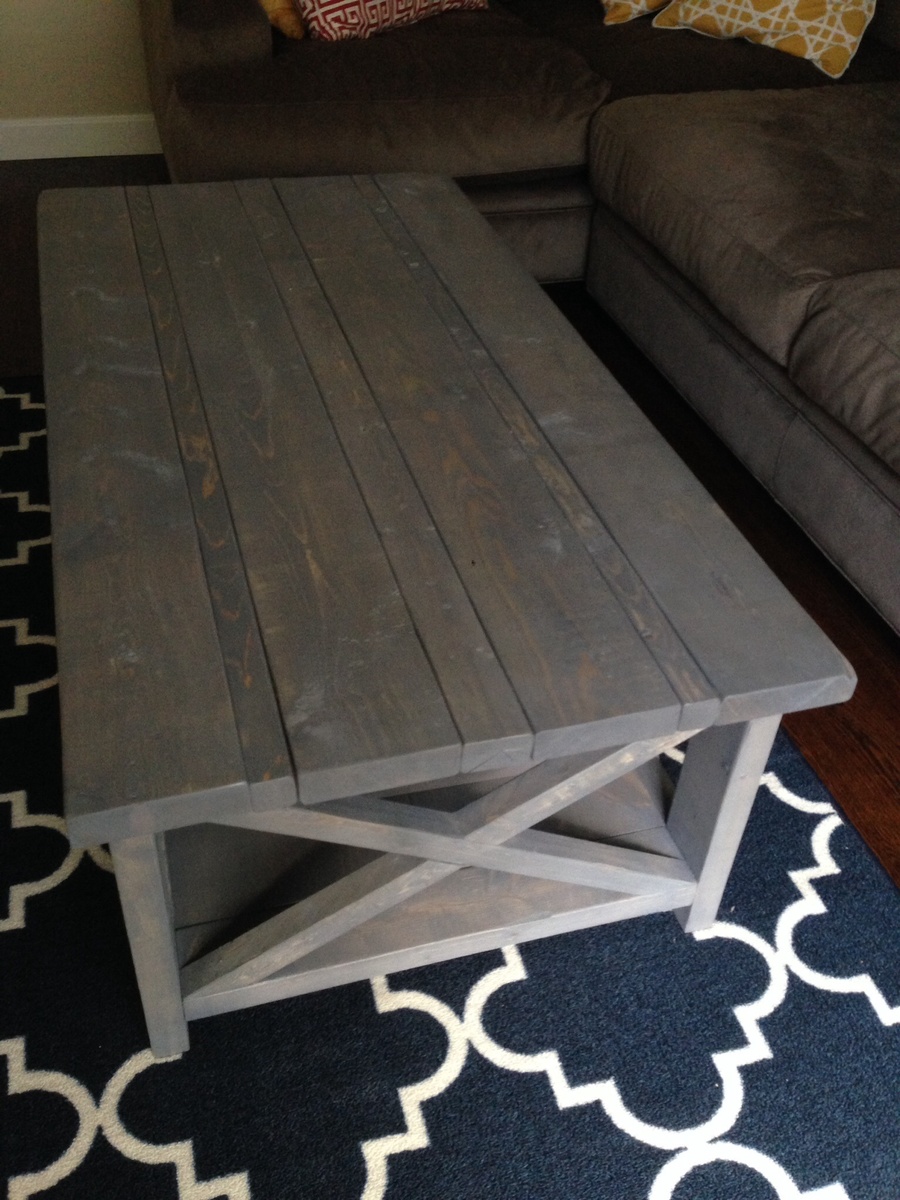
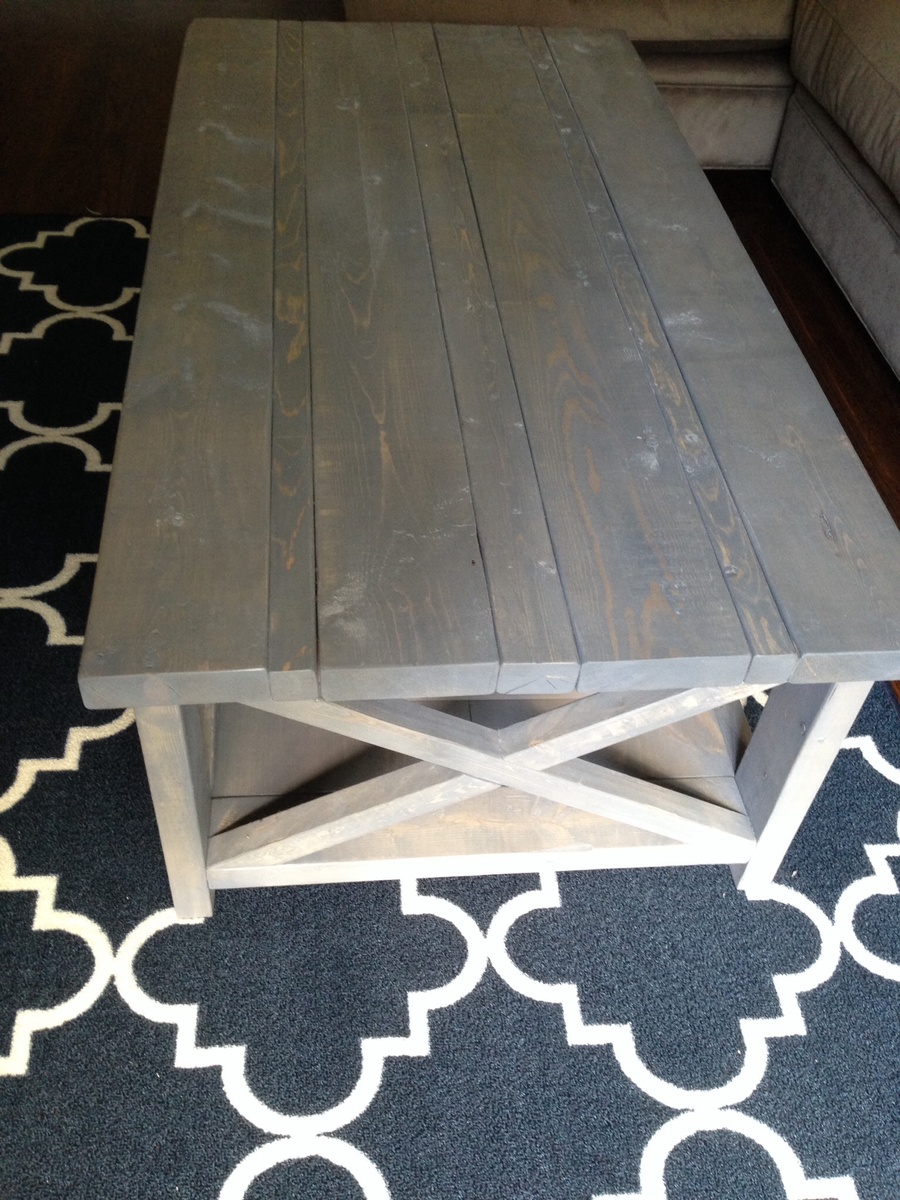
Easy and fun plan for a great looking coffee table. I changed the top a bit by adding two 2x2's and a 1x3 in the center, the five 2x6's looked a little plain to me. I also added an X in the front, I don't know why but really I really like it, almost gives it an open storage feel. The strain is "weathered gray" by rust oleum.
I built another record cabinet for a client. I actually made two since because the person wanted 12 drawers!
More details and photos on my blog if interested:
http://www.woodworkingfourdummies.com/blog/vinyl-record-cabinet
Cheers,
Ian
This is my third DIY project and it was a difficult one...I would recommended a beginner (like me) to do this alone. It took two weeks to get it done but I am impressed with how it turned out!
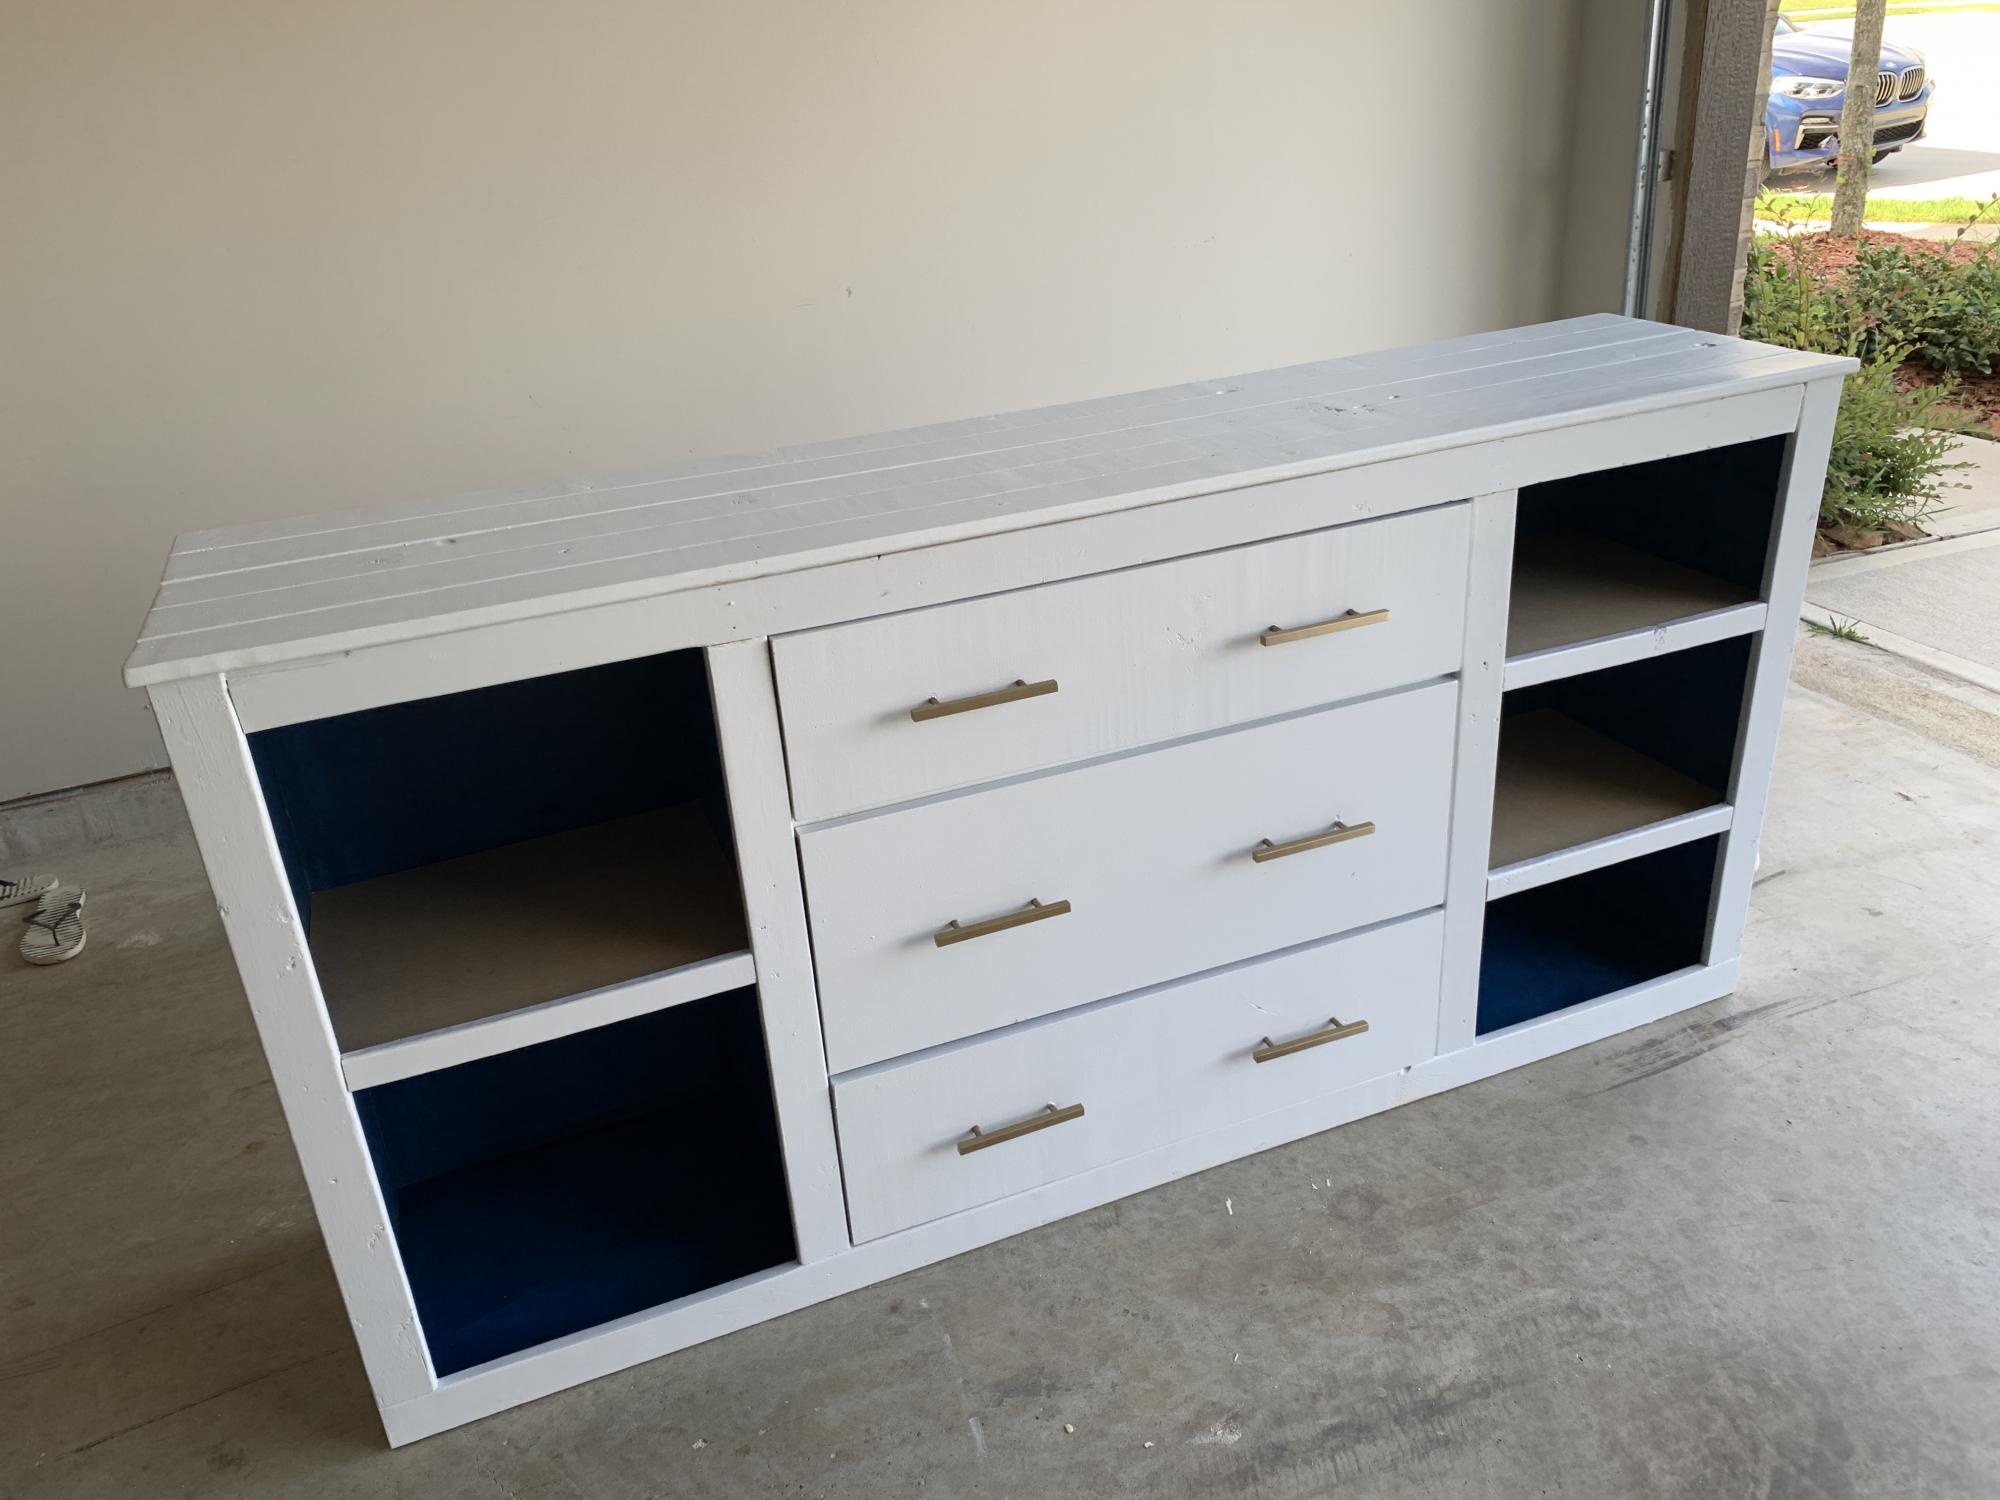
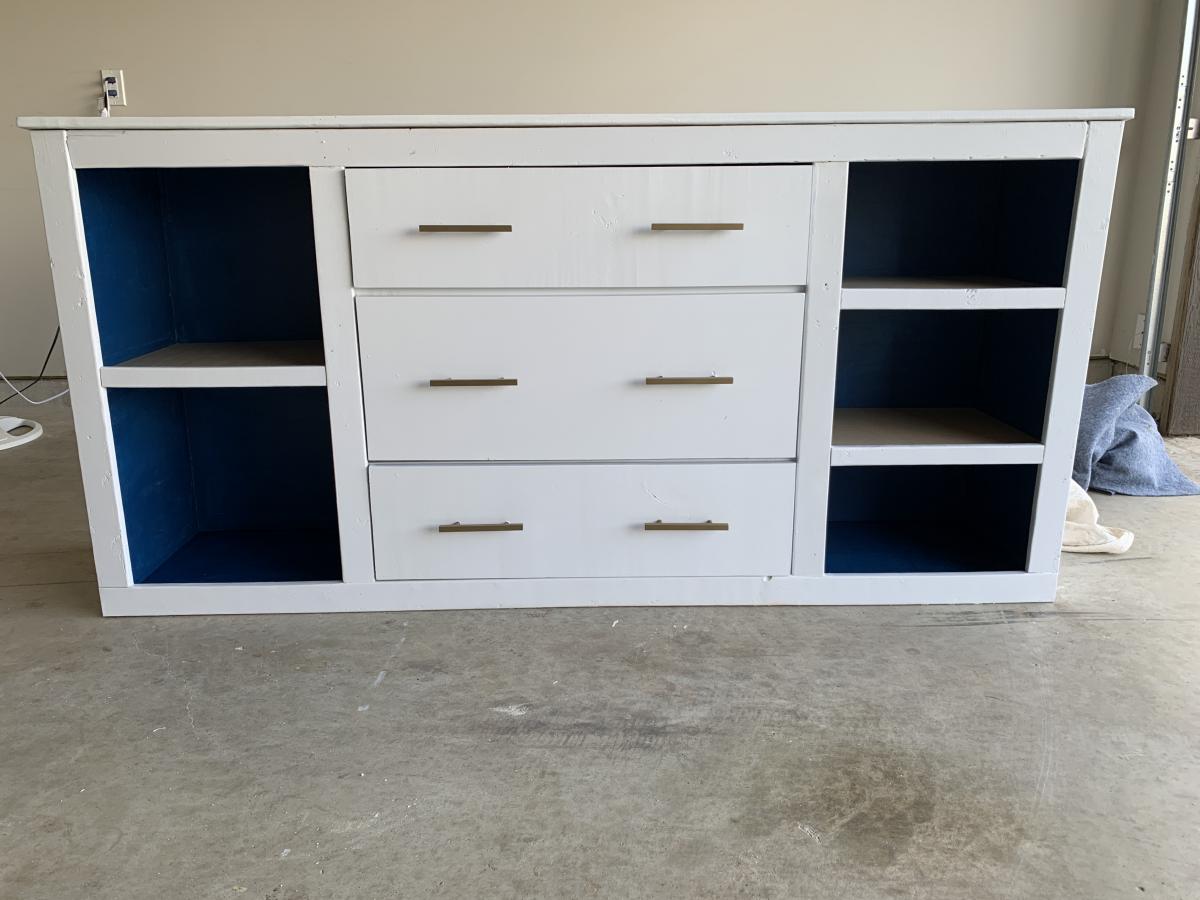
I needed storage for my office and decided to make this on a smaller scale. The doors did not work for me (and it may be because of the type of wood I used) so I decided to leave them off.

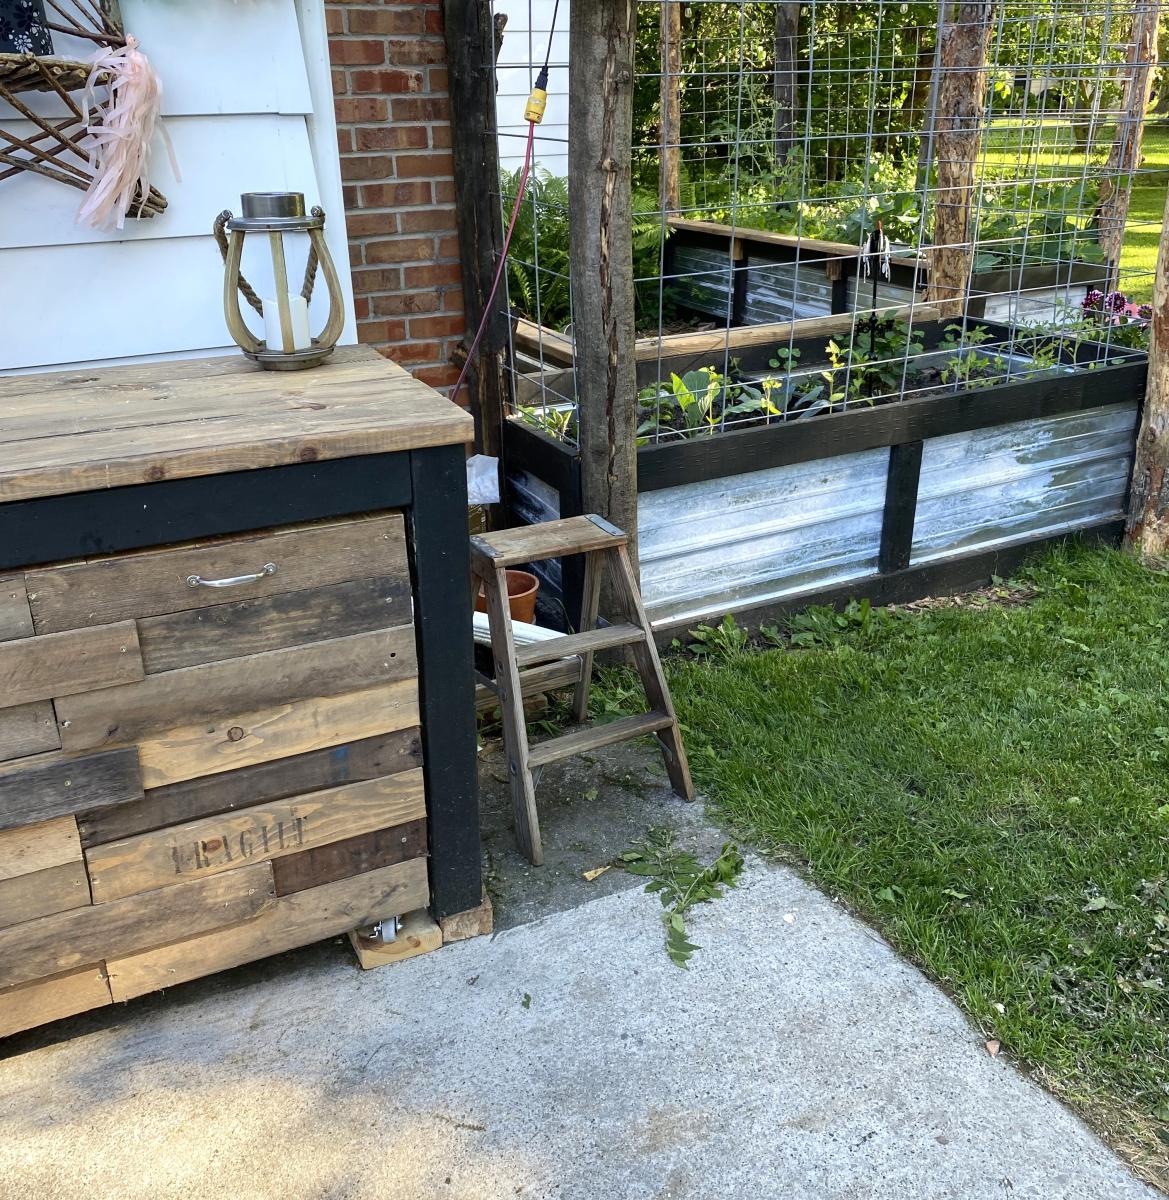
I made the grill table to match my chicken coop and my garden beds. Absolutely LOVE it!! (Ignore my cracked concrete (the table is level). The plans were easy to follow and it all came together great!! Thank you!
Kelly

Here is my version of the Cyndi Console Table. Made from poplar with oak backing. Took me about a week working on it in the evenings.
Wed, 02/11/2015 - 08:37
Love the look of this. Great job. What did you use for the drawer faces? 1 x 6?

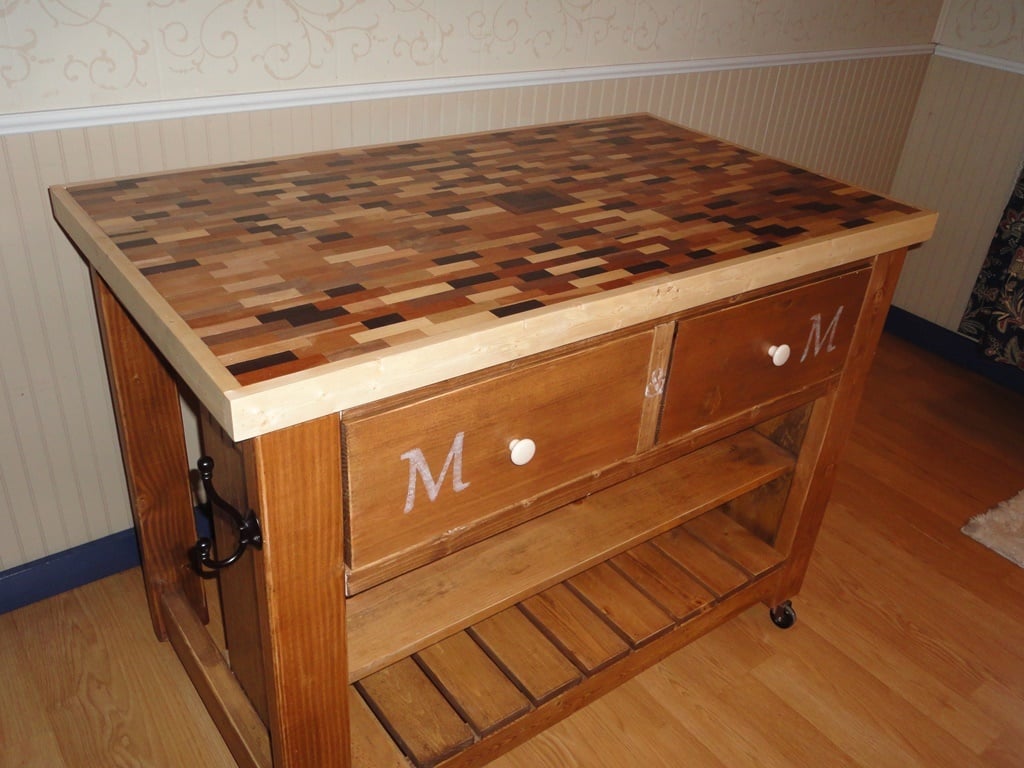
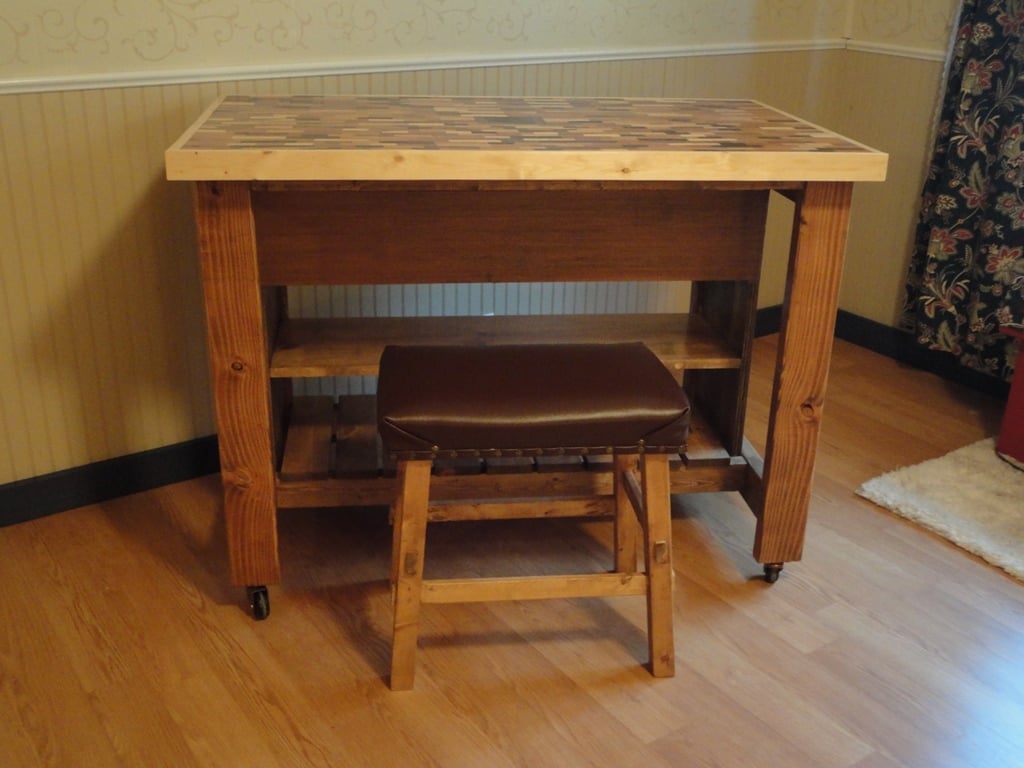
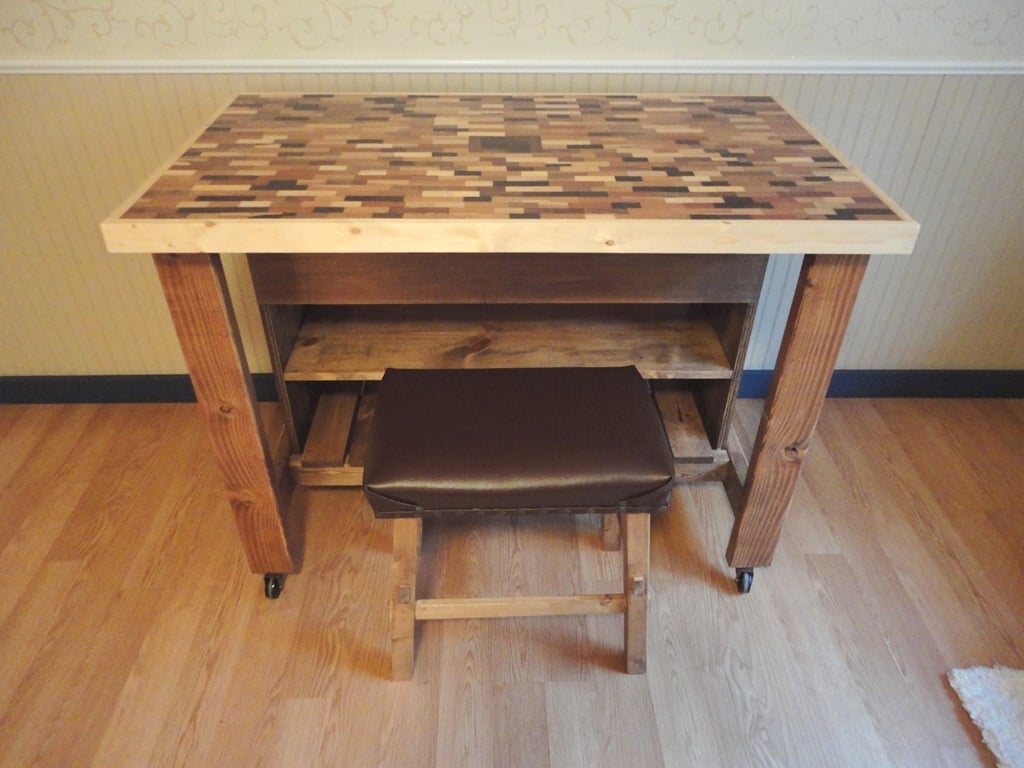
I made this rolling kitchen island out of pine using plans found on Ana White's website. For the top I wanted to do something different. I found a tub of wooden blocks in the storeroom; they belonged to my husband's grandfather.
The blocks were made out of all different kinds of wood. I used a plywood base and simply glued them on then added a pine edge. I love the way it looks!
The back is open halfway so that when it is pulled out it can be used as a desk or small table.
The stool is from Ana White as well.
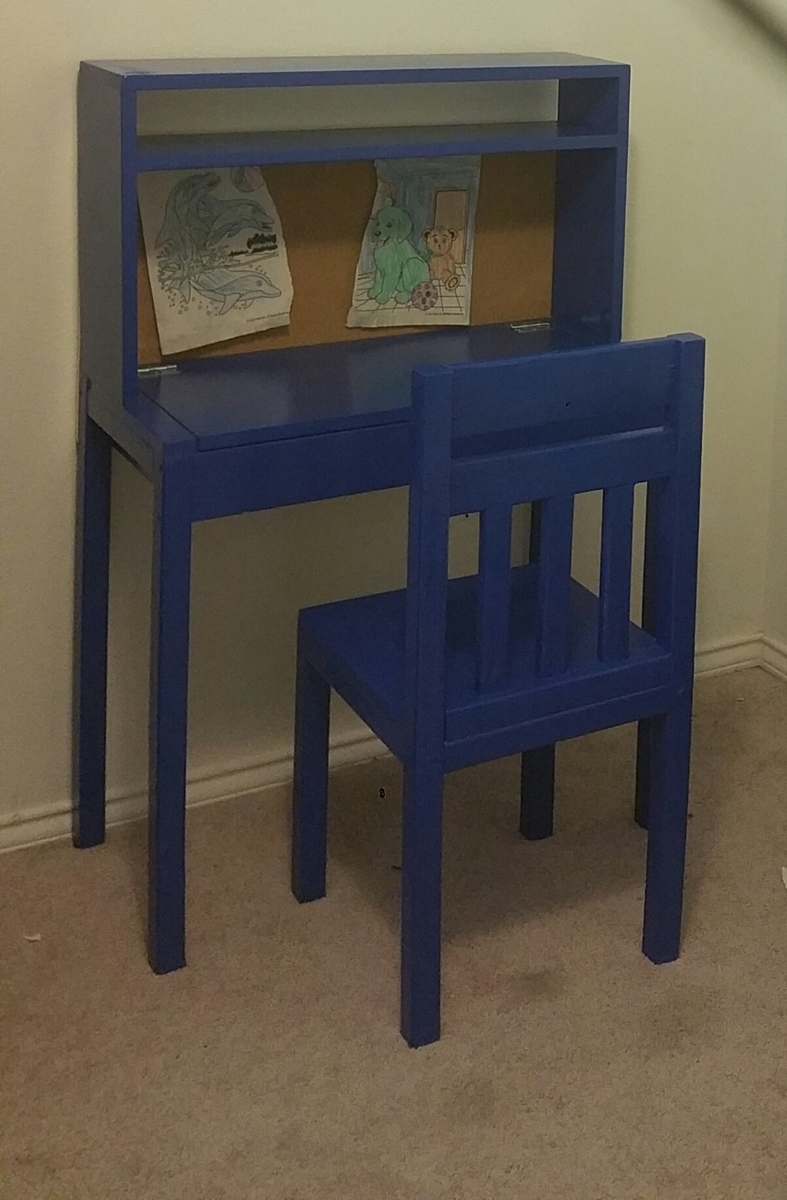
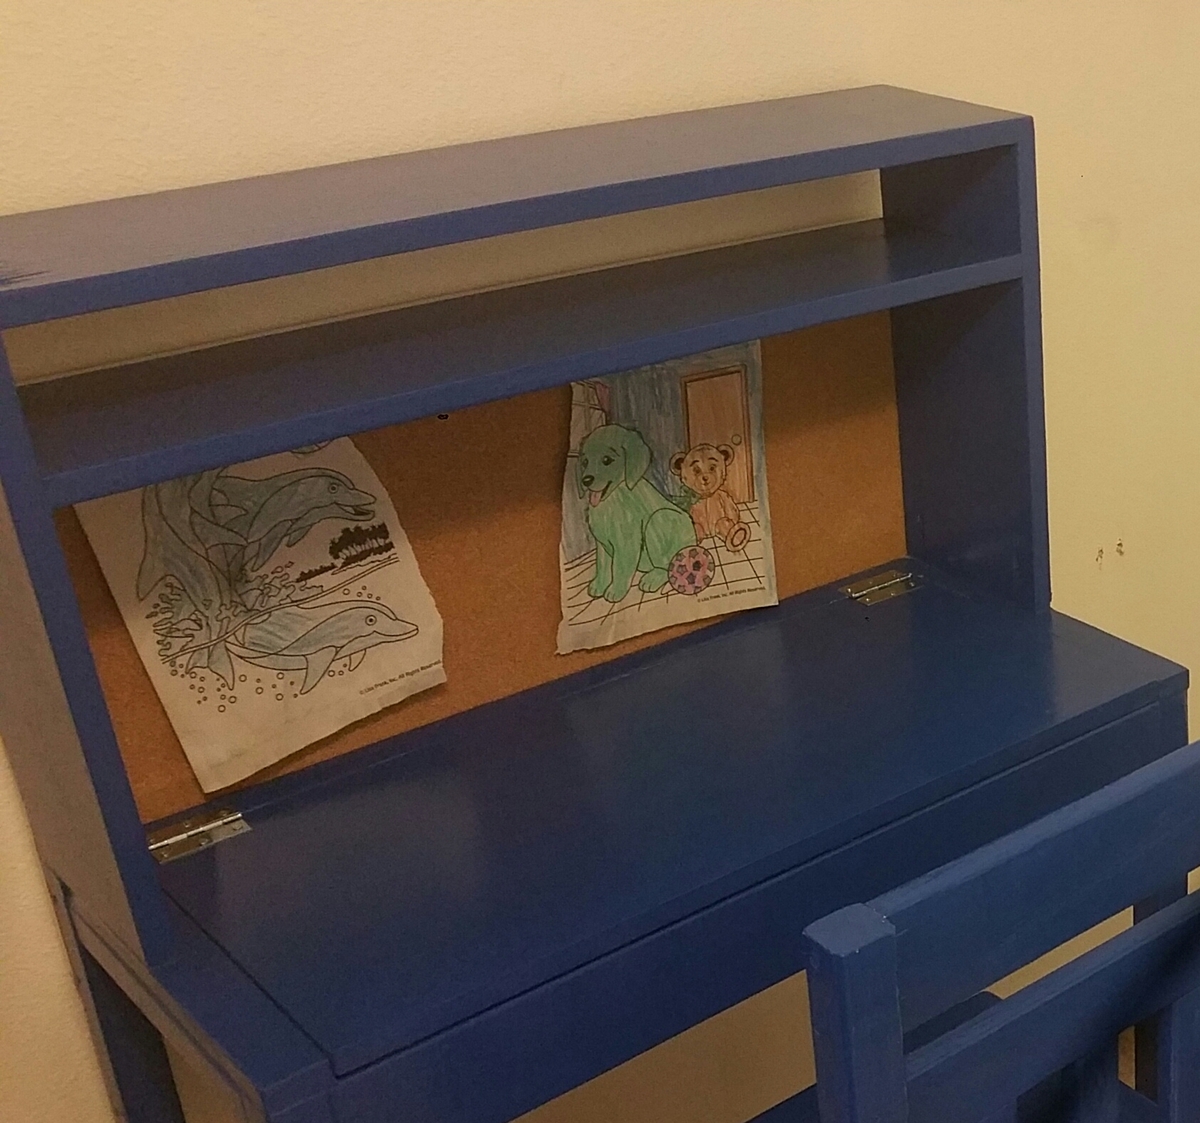
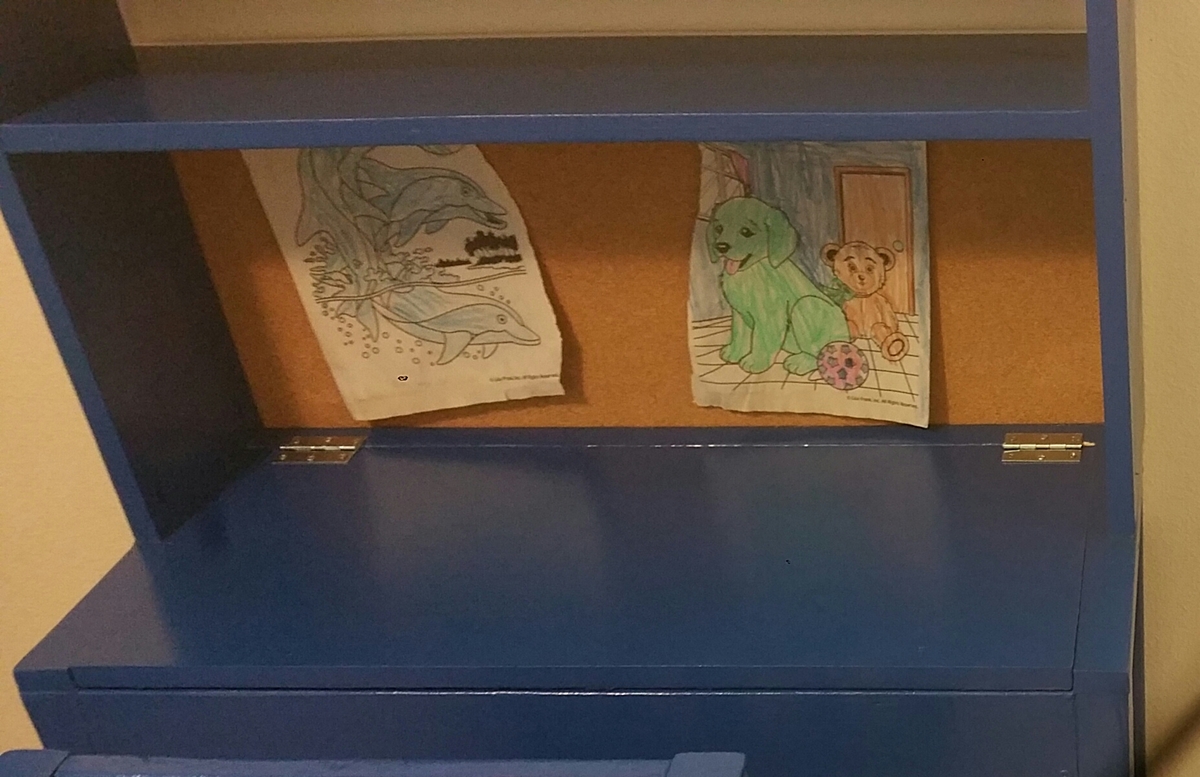
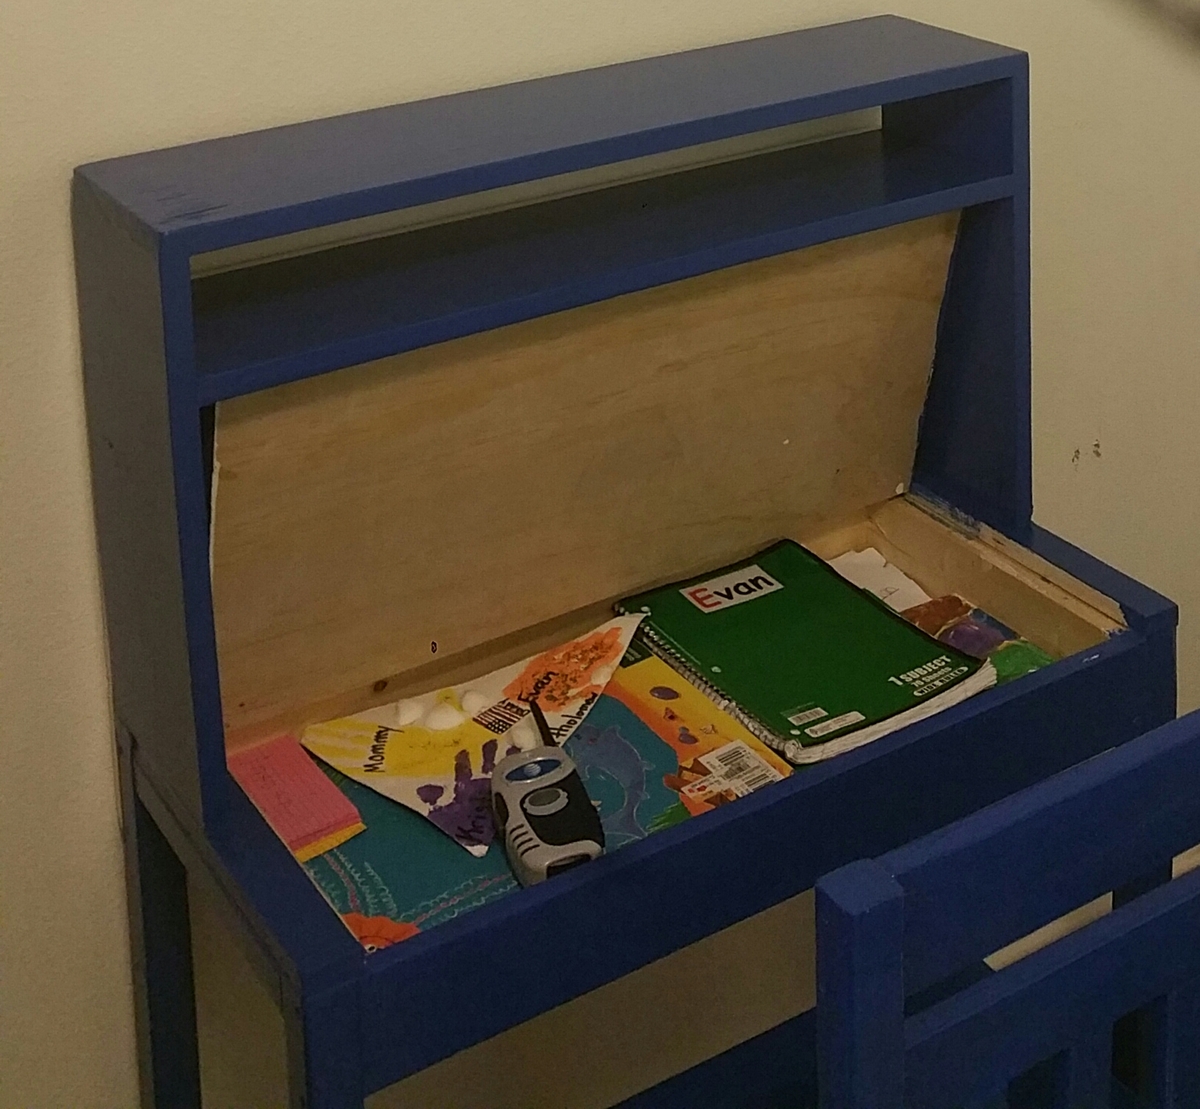
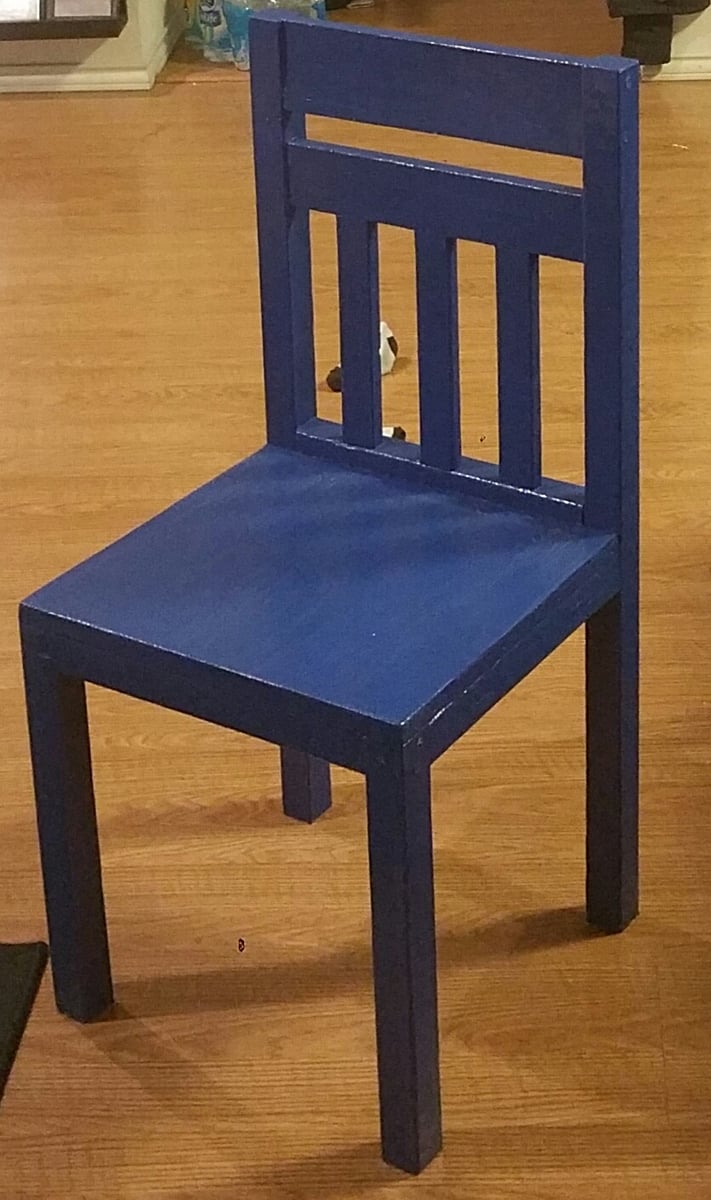
I wanted to build a desk for my son that had a compartment for storing his things. I also wanted it to have a place for him to pin his drawings up so I added a corkboard. I modified Ana's scrap lap desk plans and this is what I came up with. I also built him a matching chair. I think it turned out great!!

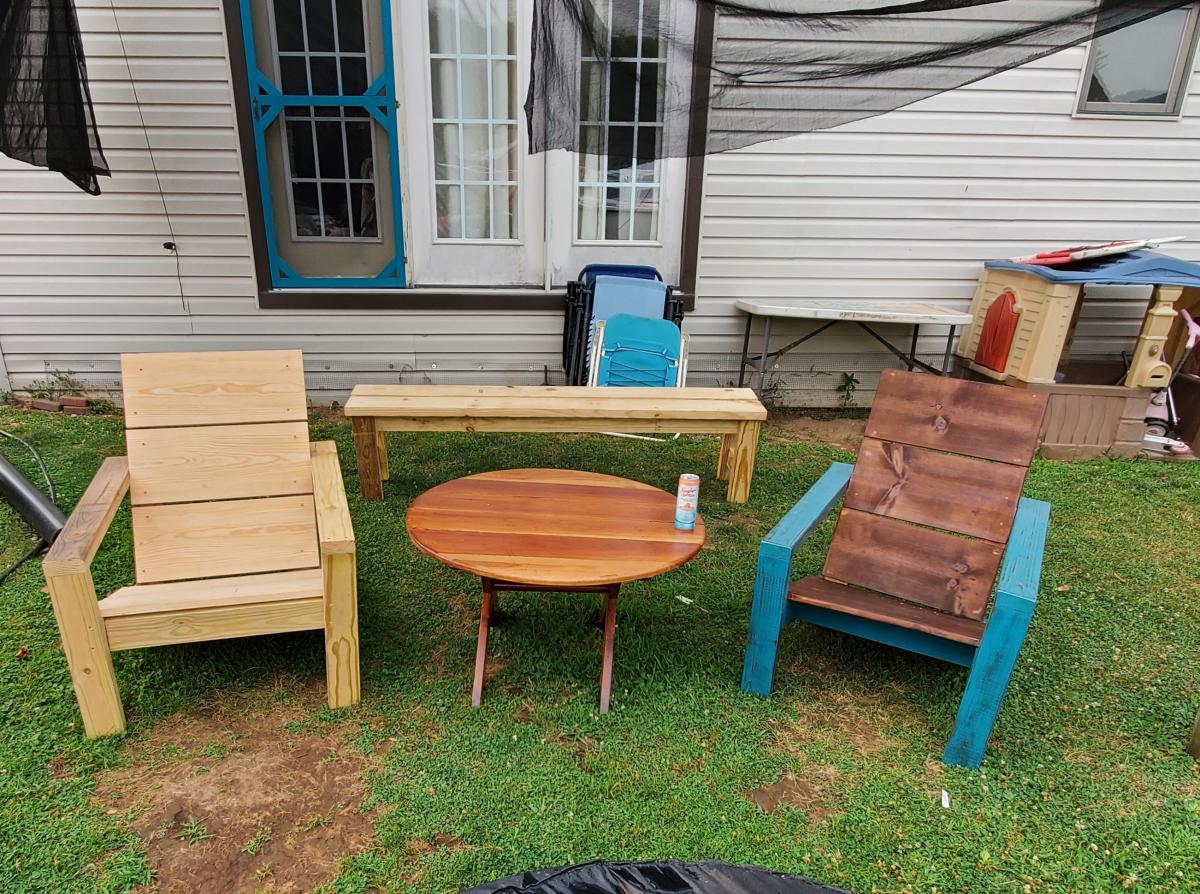
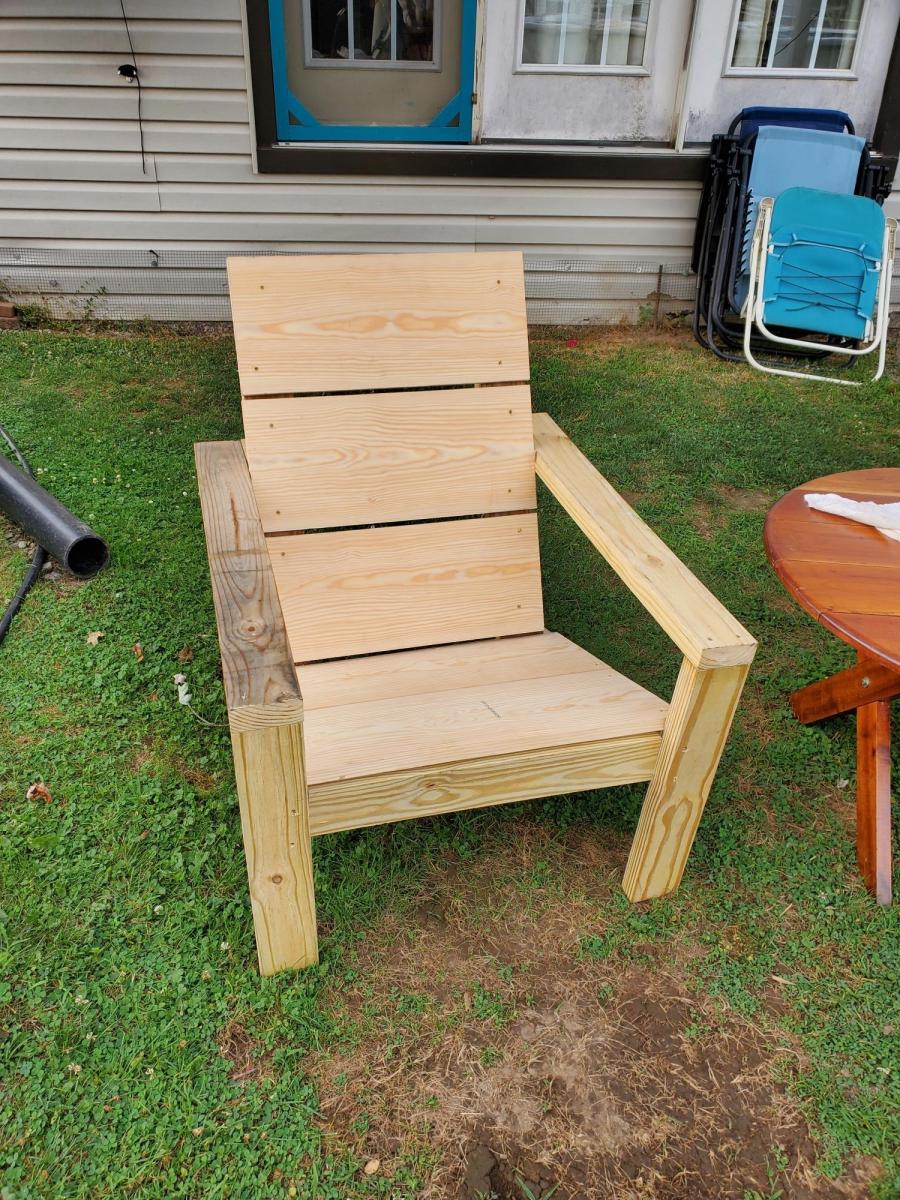
I LOVE this project!!!! Great directions! Amazing results. It makes a very comfortable, and sturdy chair. So far, I have made two. Three more to go. 😄
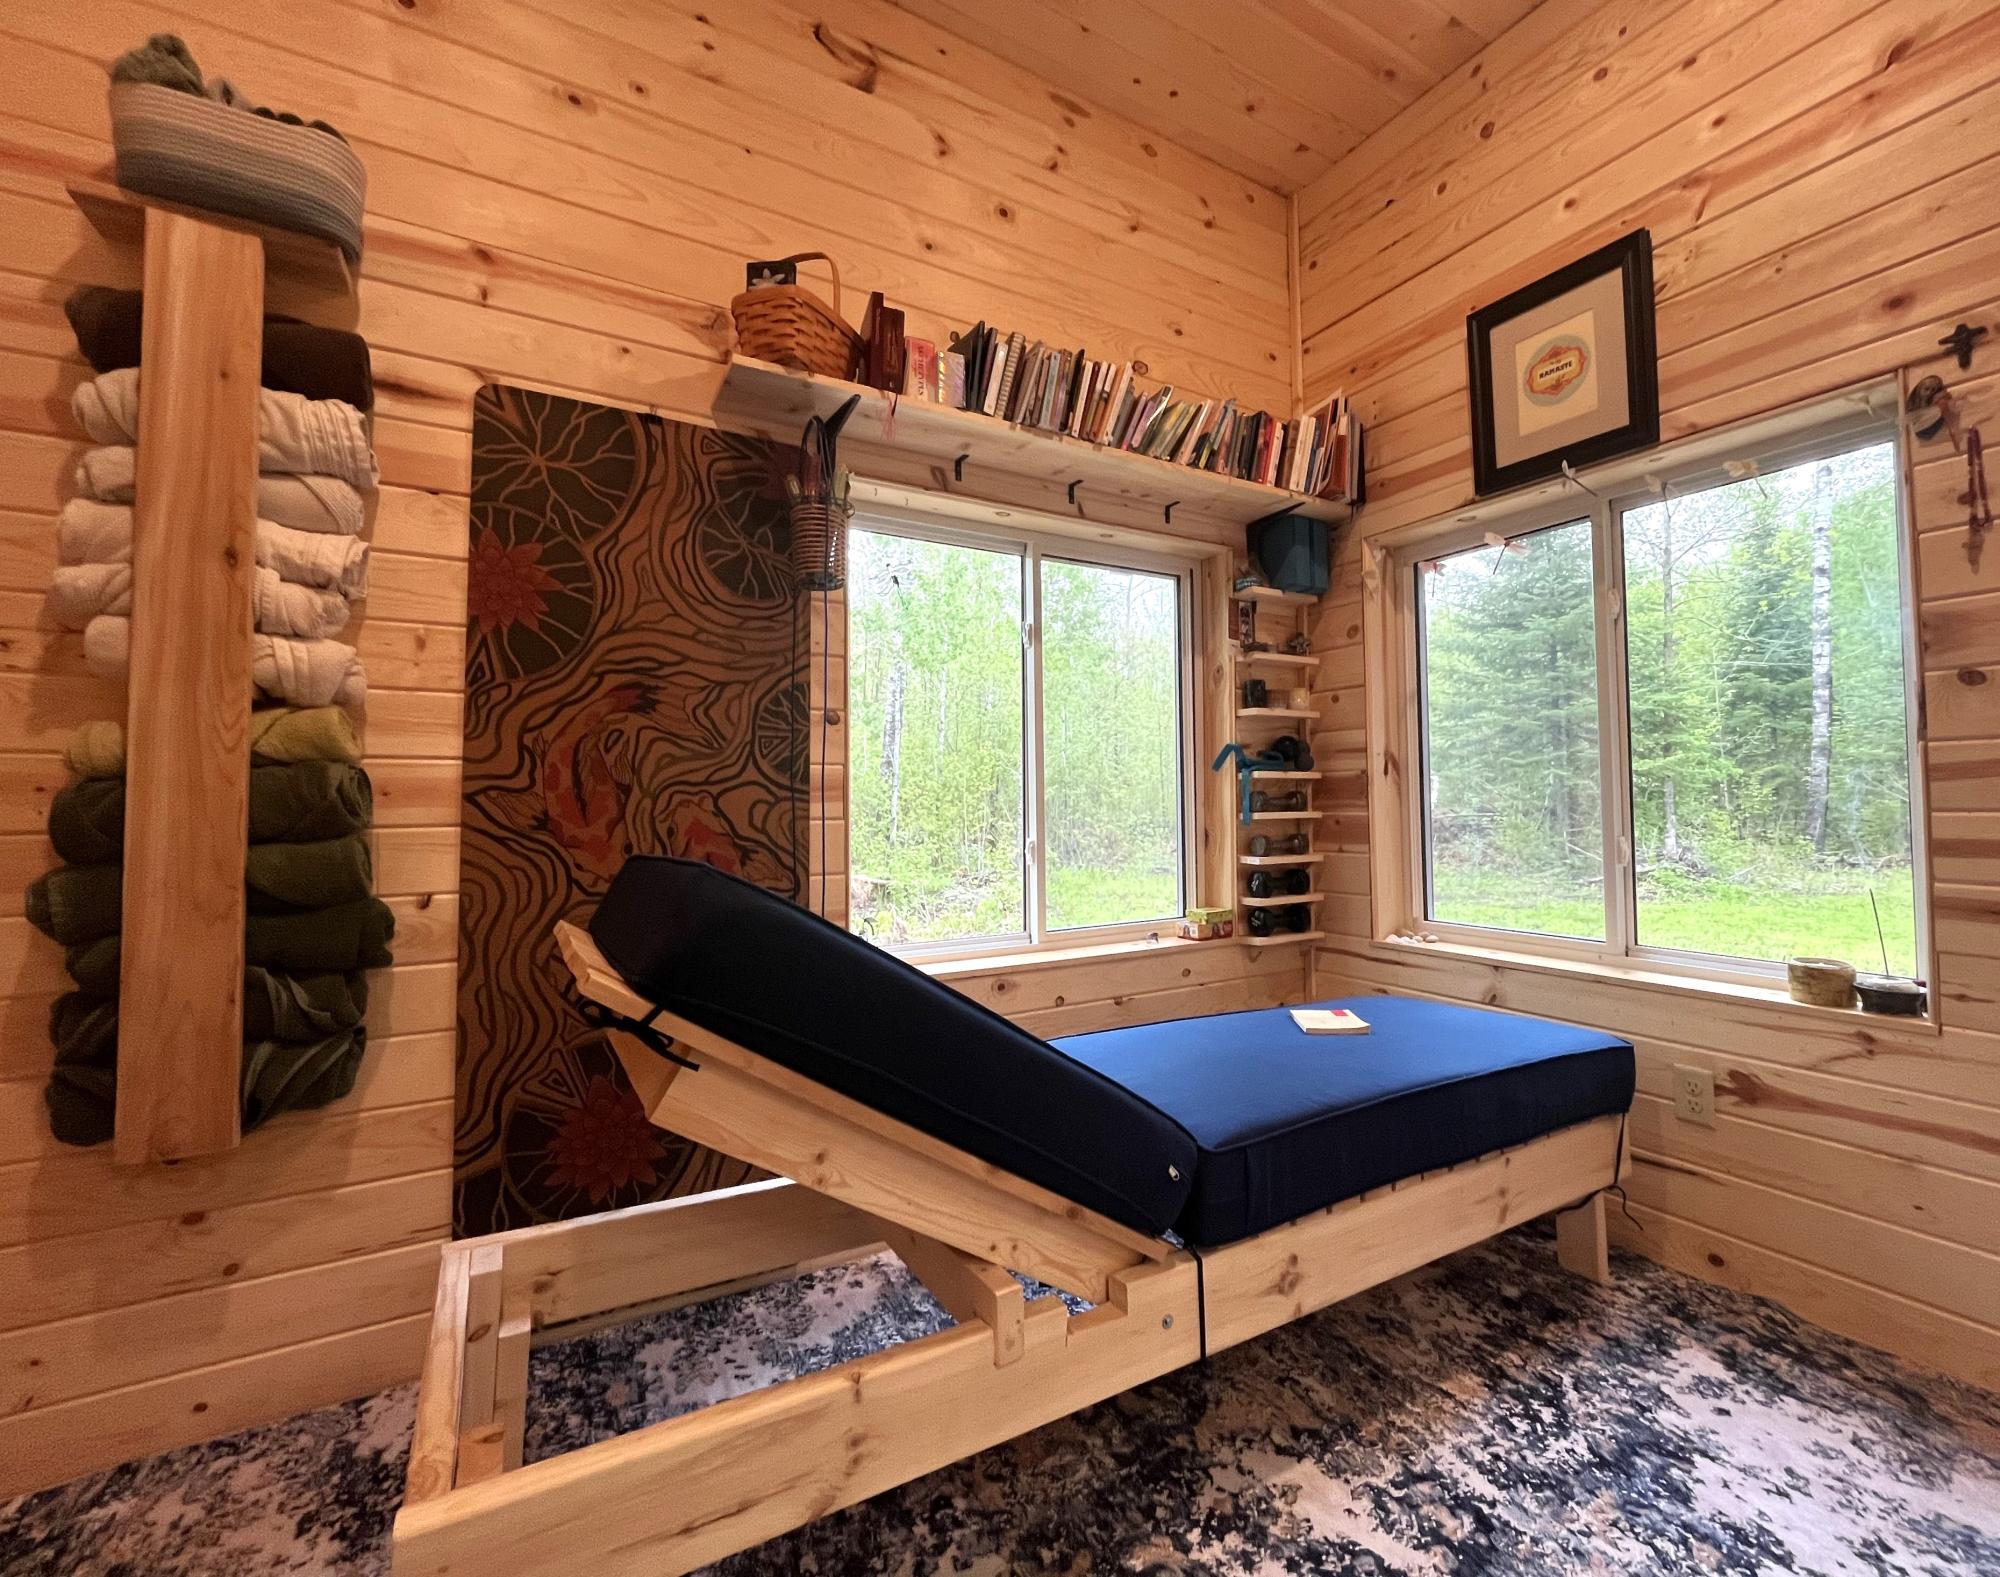
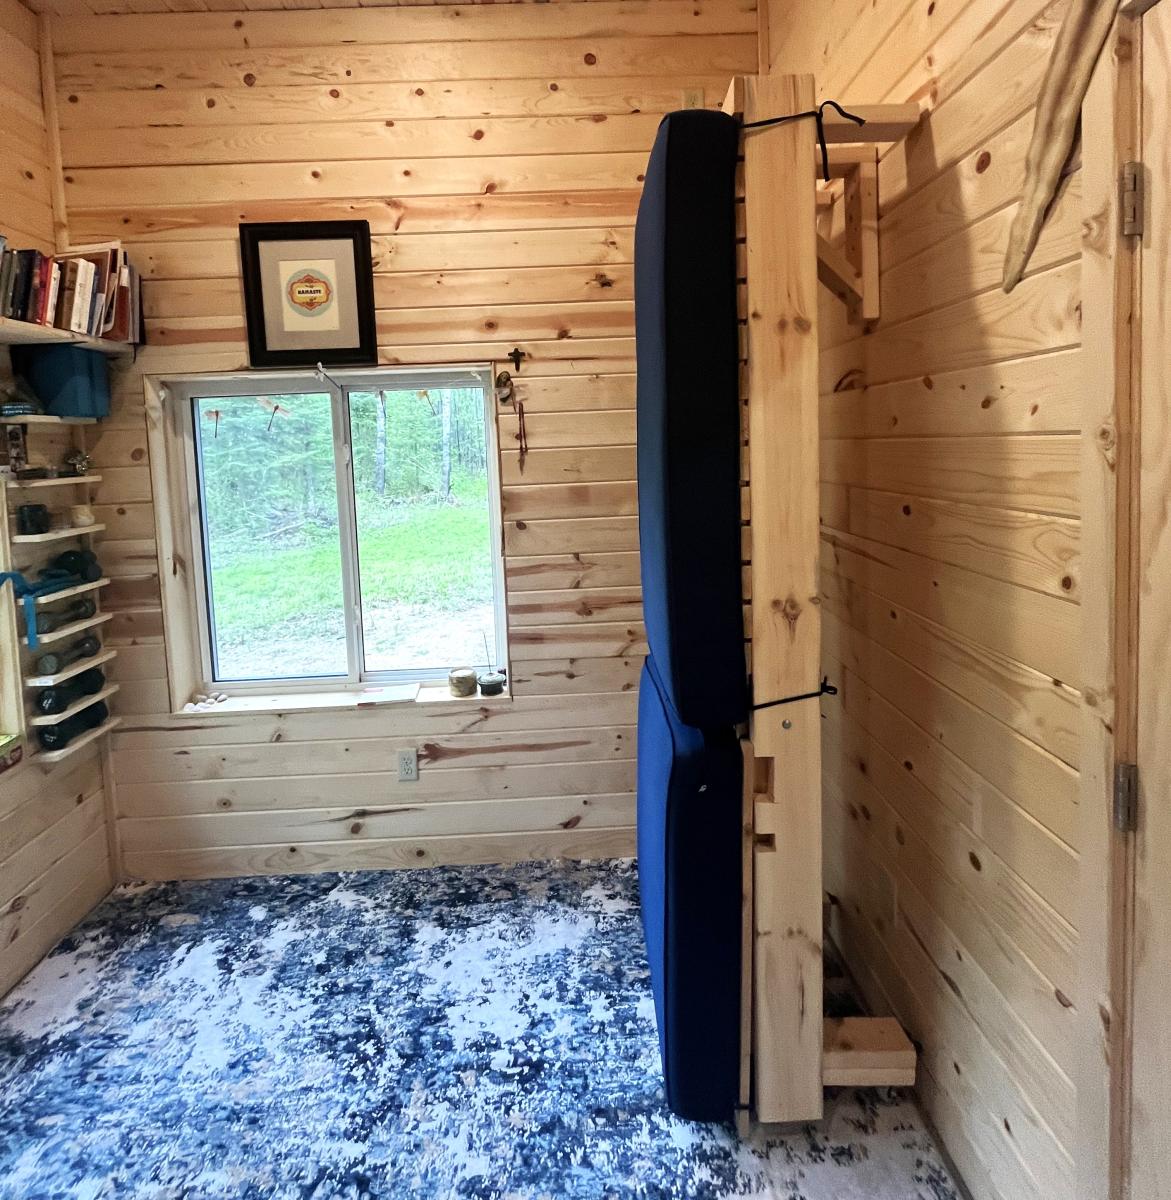
The 8’ chaise lounge… my first furniture build. Such a great plan to follow Ana! And since I need space for yoga I made a triangle brace to hang it on.
Laurie H