Community Brag Posts
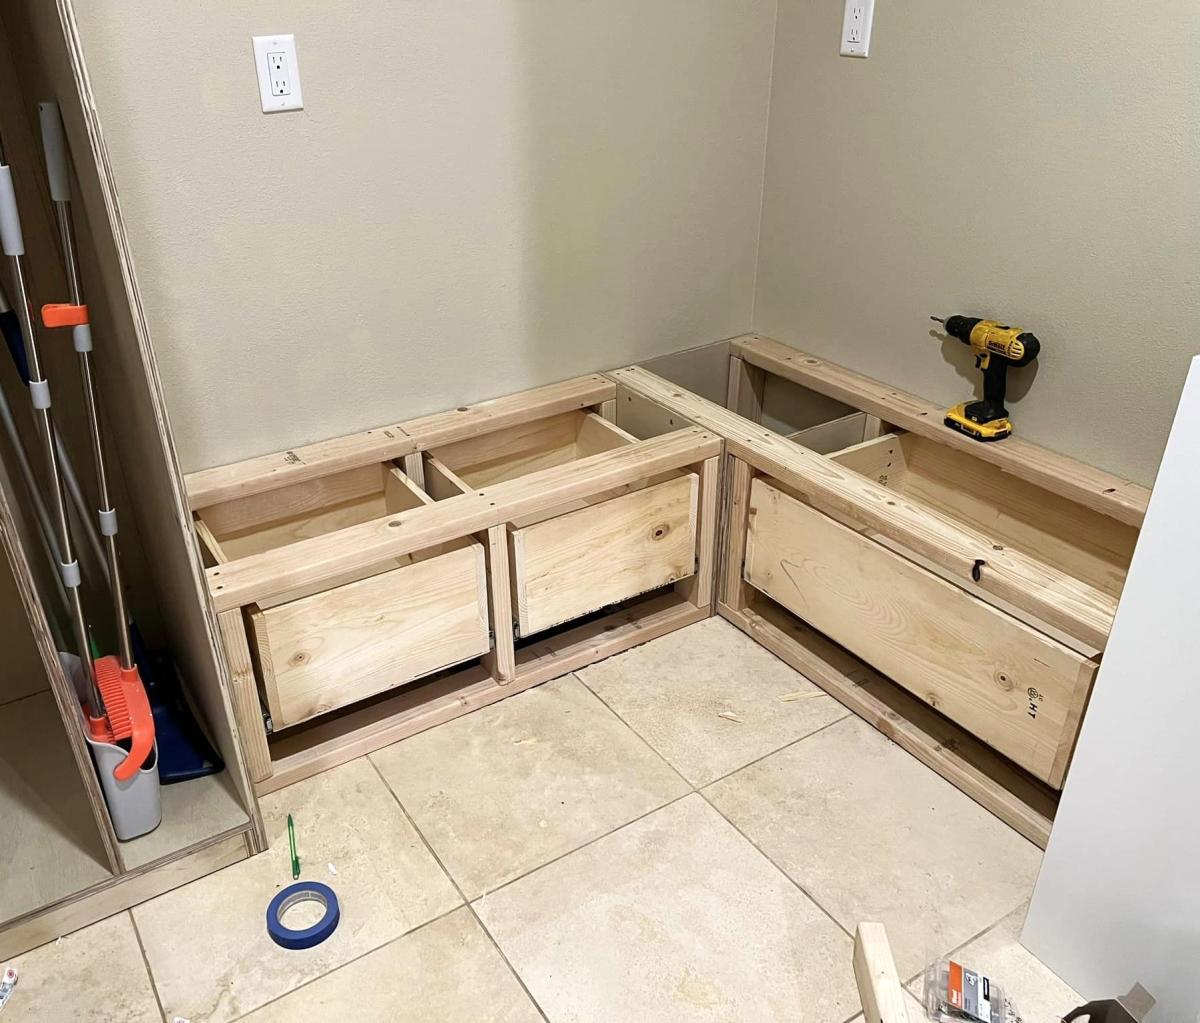
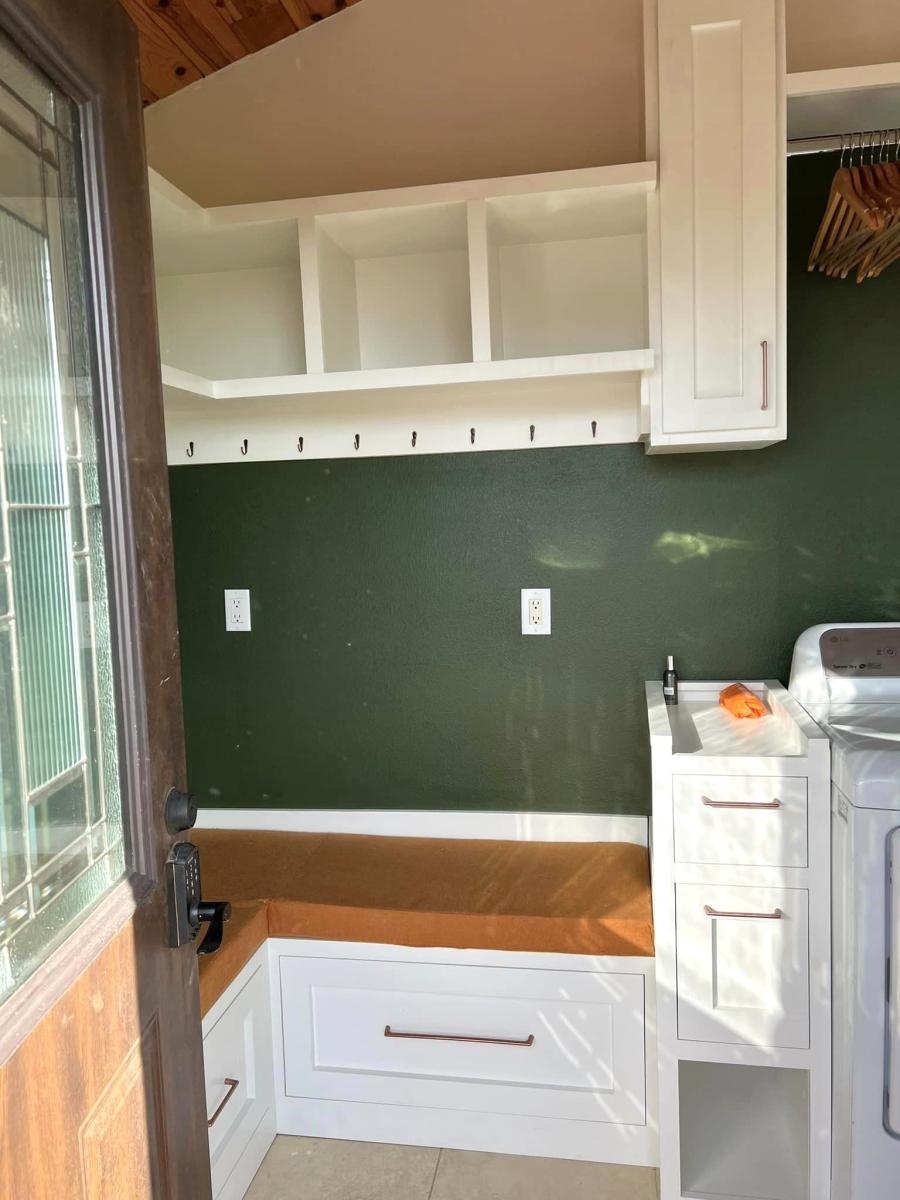
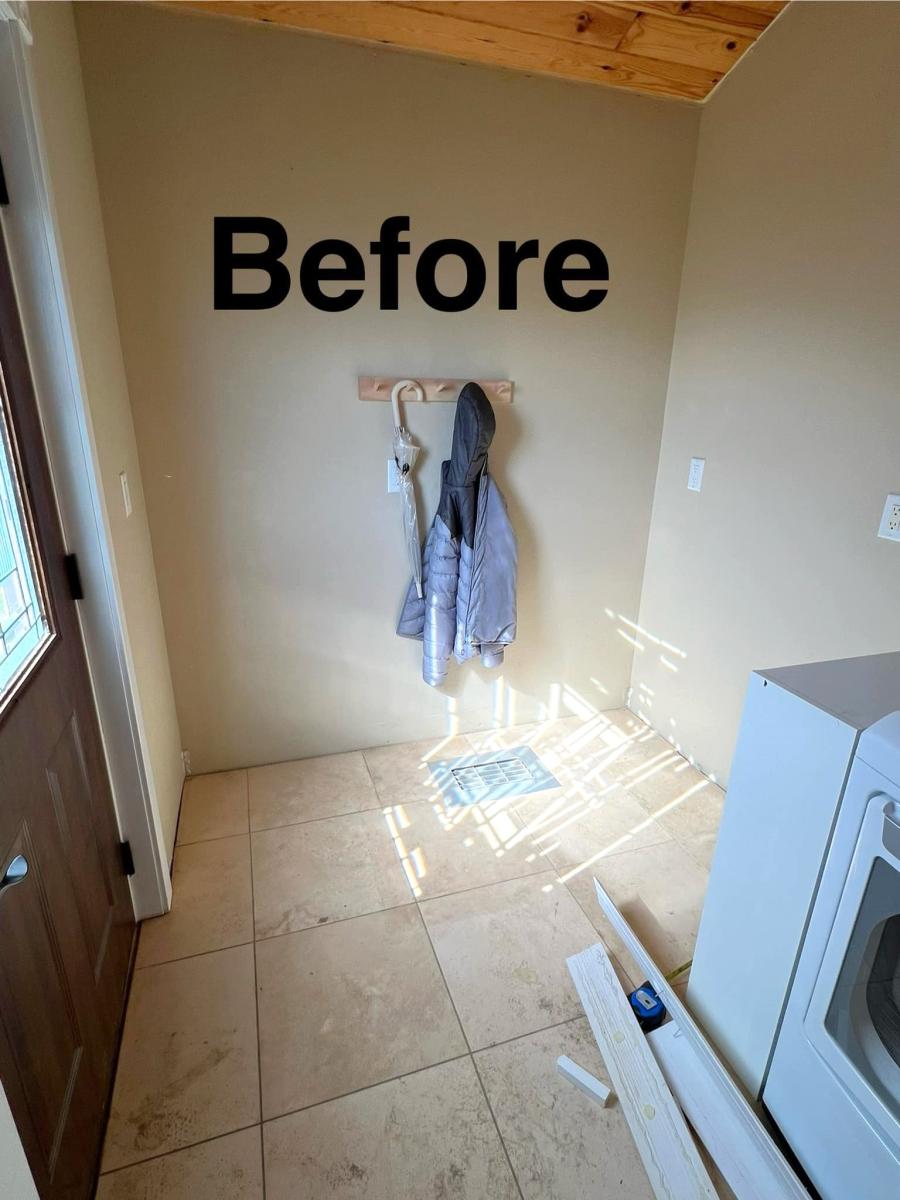
Laundry Room Storage and Organization
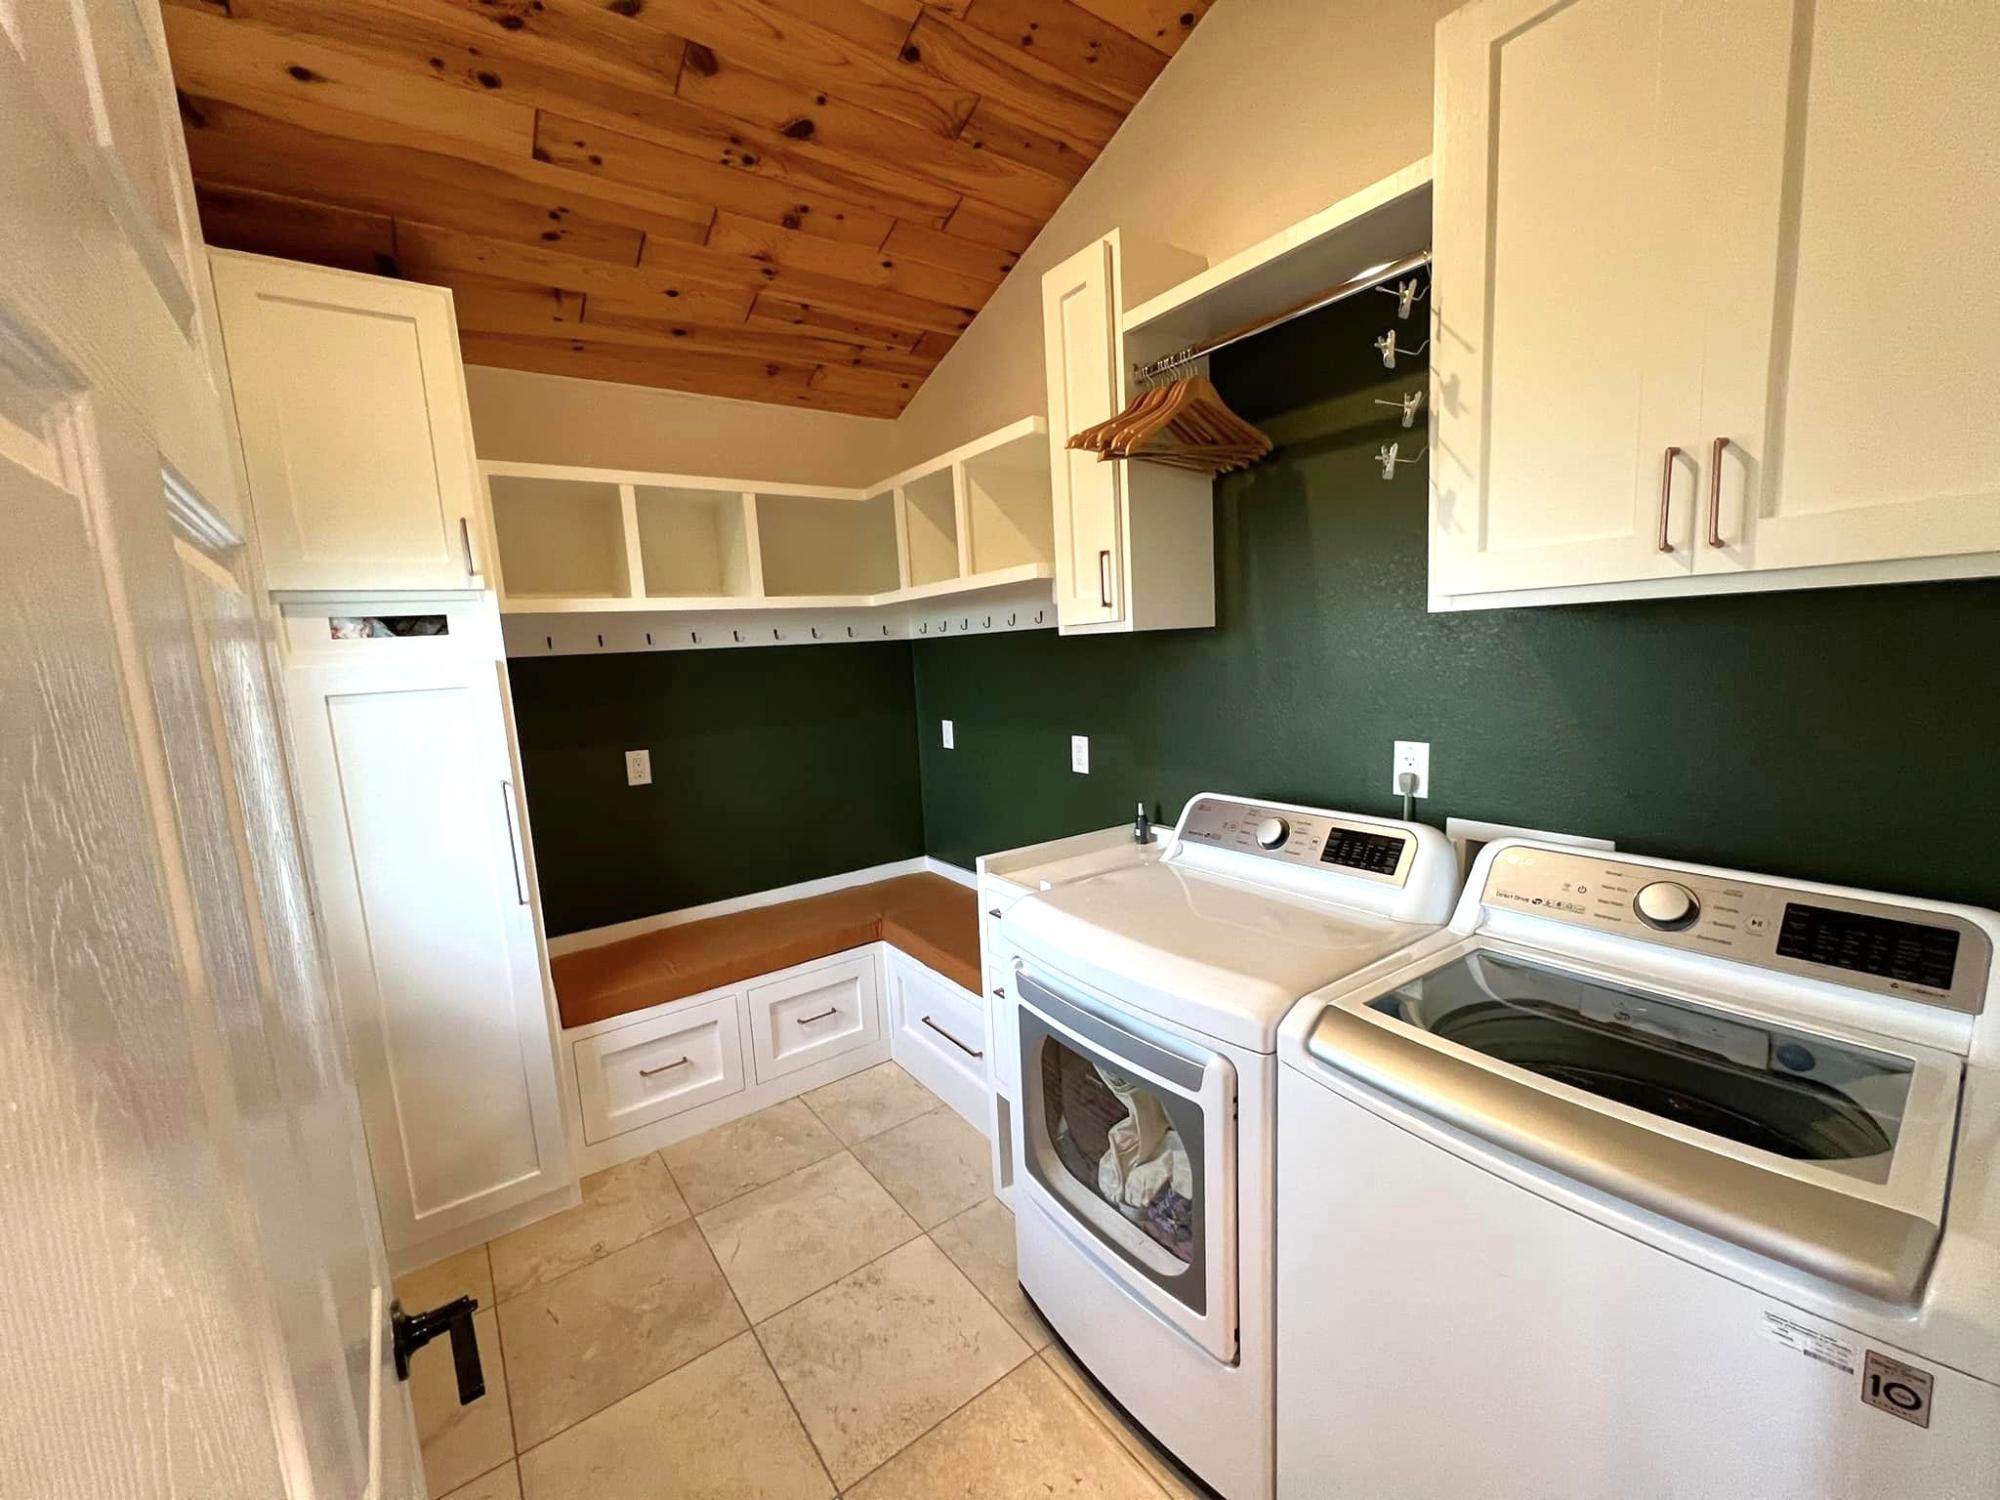
When looking for ideas/plans for designing my mudroom I came across Ana’s plans for the bench with drawers. I’ve NEVER built anything like it, or cabinetry, or anything like that type of stuff, but with her videos and plans I was able to design my own layout and make it all completely by hand and by myself. I’m in love with how it turned out!! Her designs/plans are so easy to follow and customize!! I can’t wait to do more in my house.
Mikishea Mauss on Facebook

Built from Plan(s)
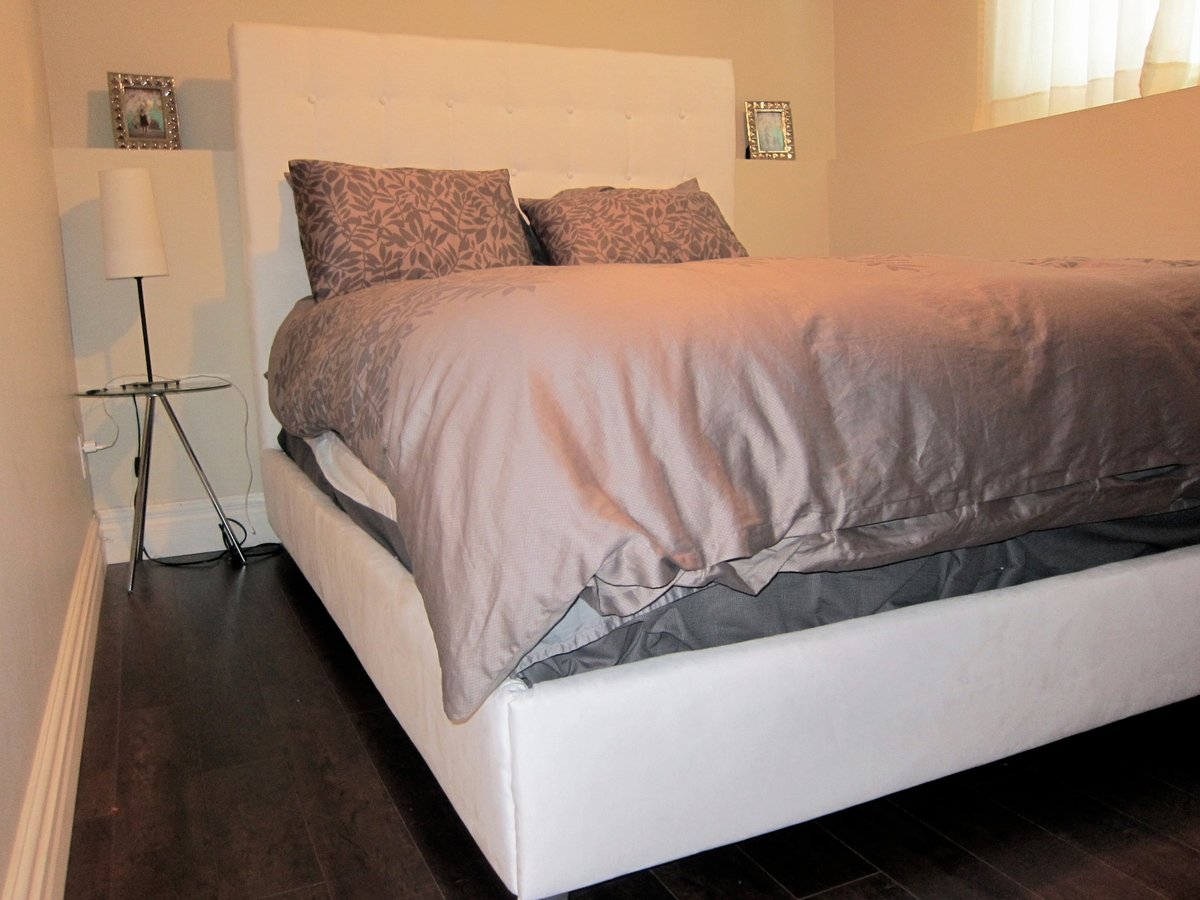
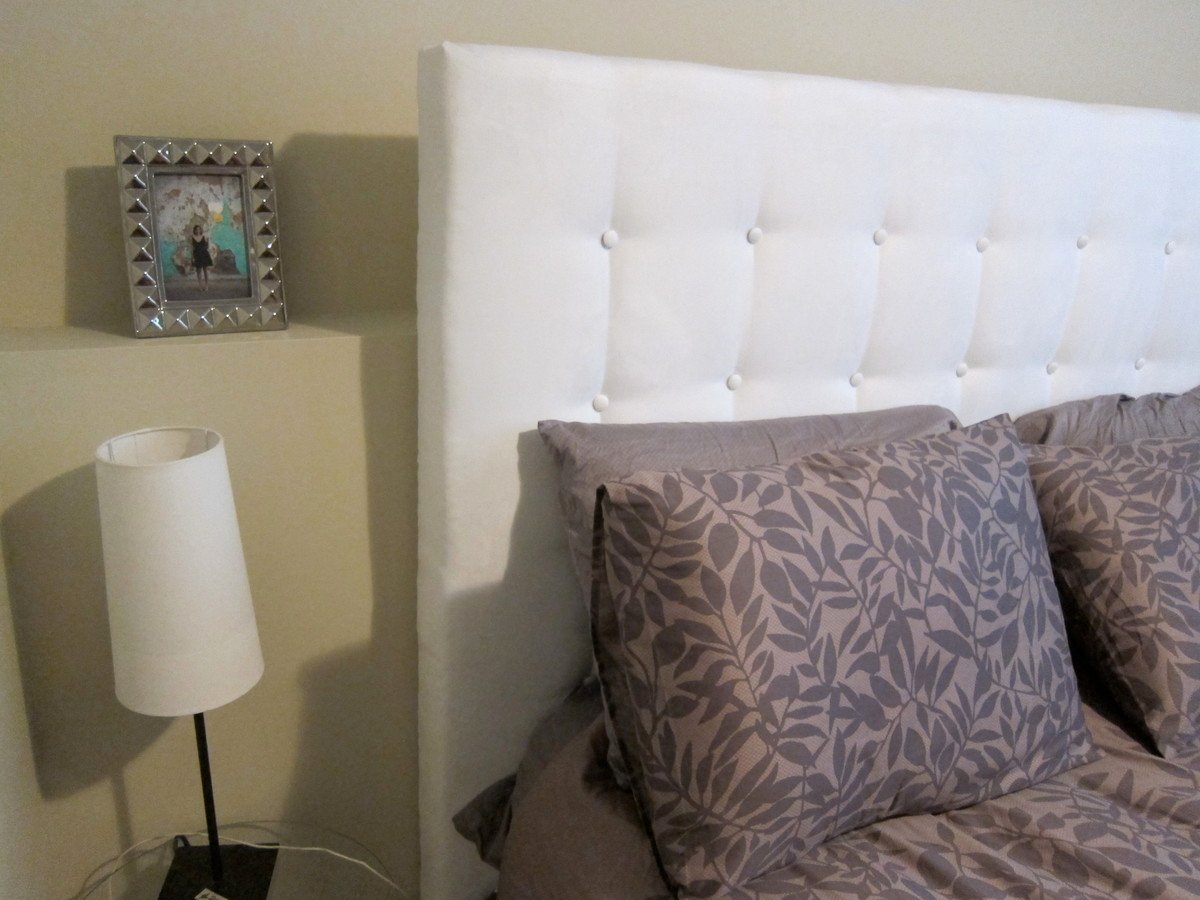
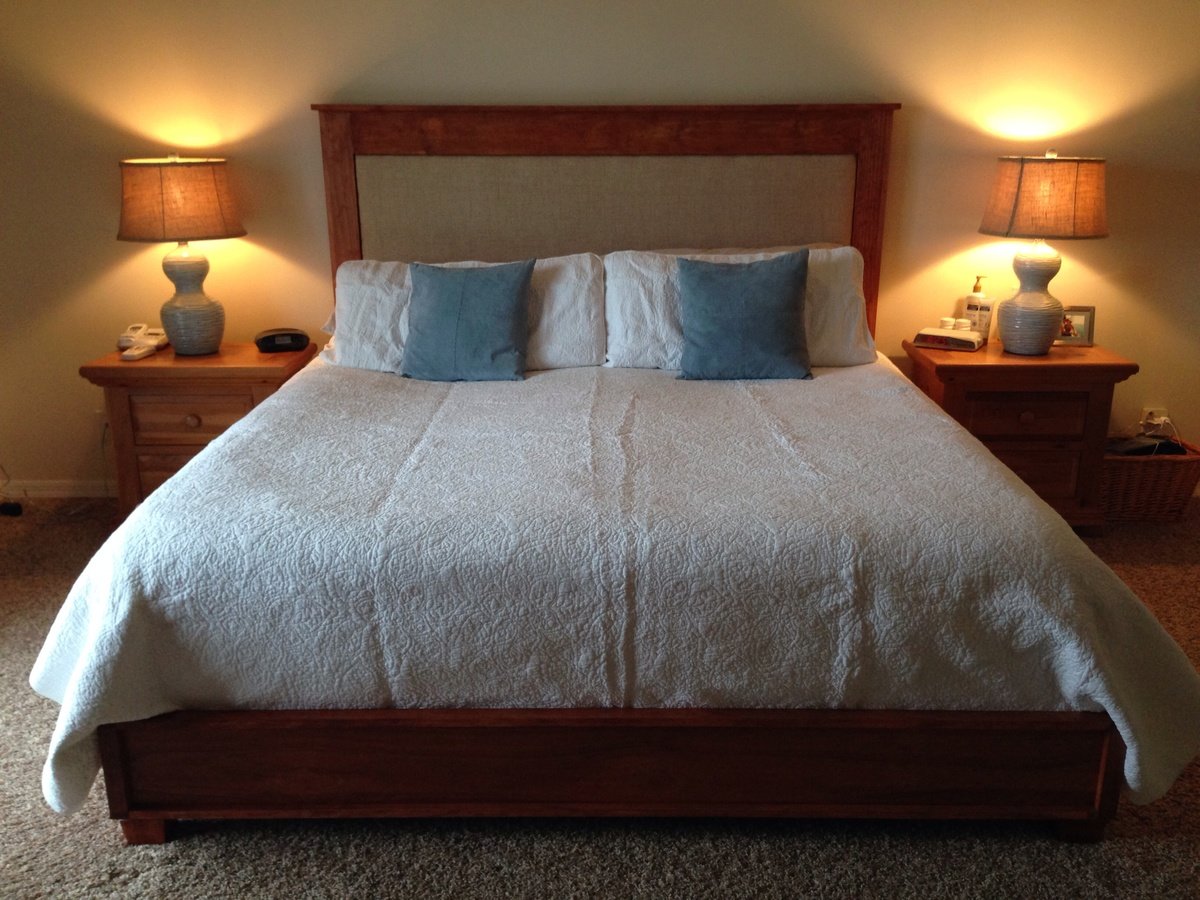
DIY Upholstered Bed

This is my first big build. I did make a small twin sized headboard a few years ago. But this time we built the entire bed frame along with the headboard. It took a loooong time but was totally worth it!

Built from Plan(s)
Estimated Cost
$350 - $400
Estimated Time Investment
Week Long Project (20 Hours or More)
Finish Used
fabric + batting + foam:)
Recommended Skill Level
Beginner
Comments

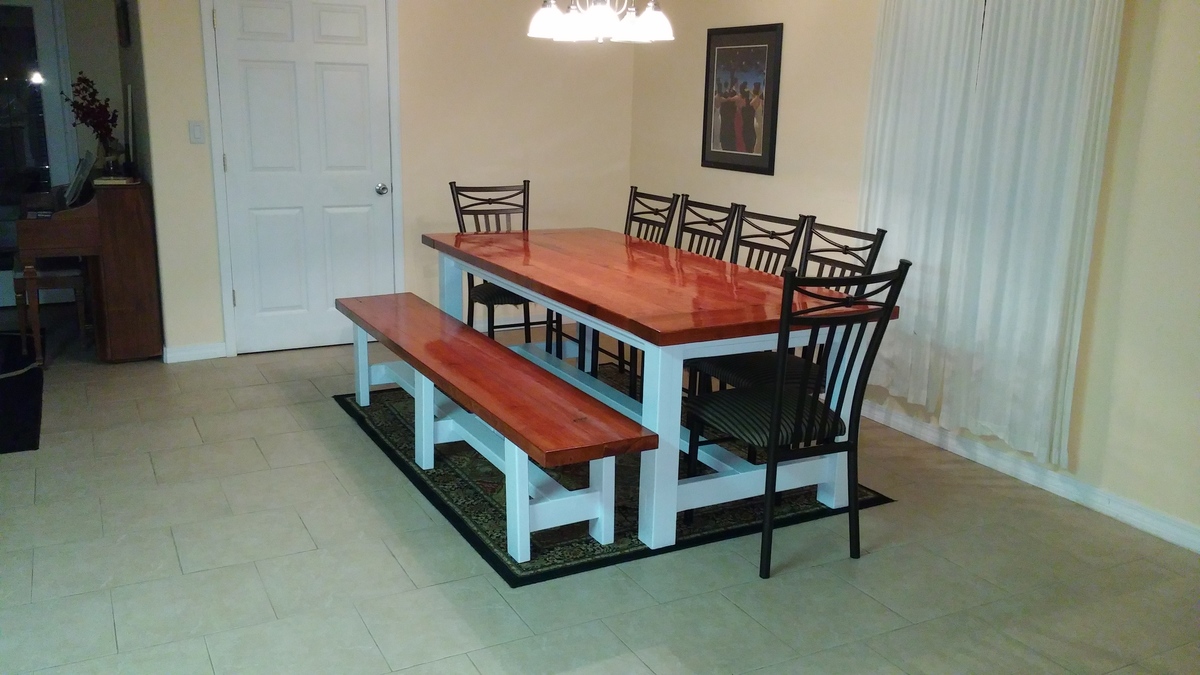
Rustic farmhouse table
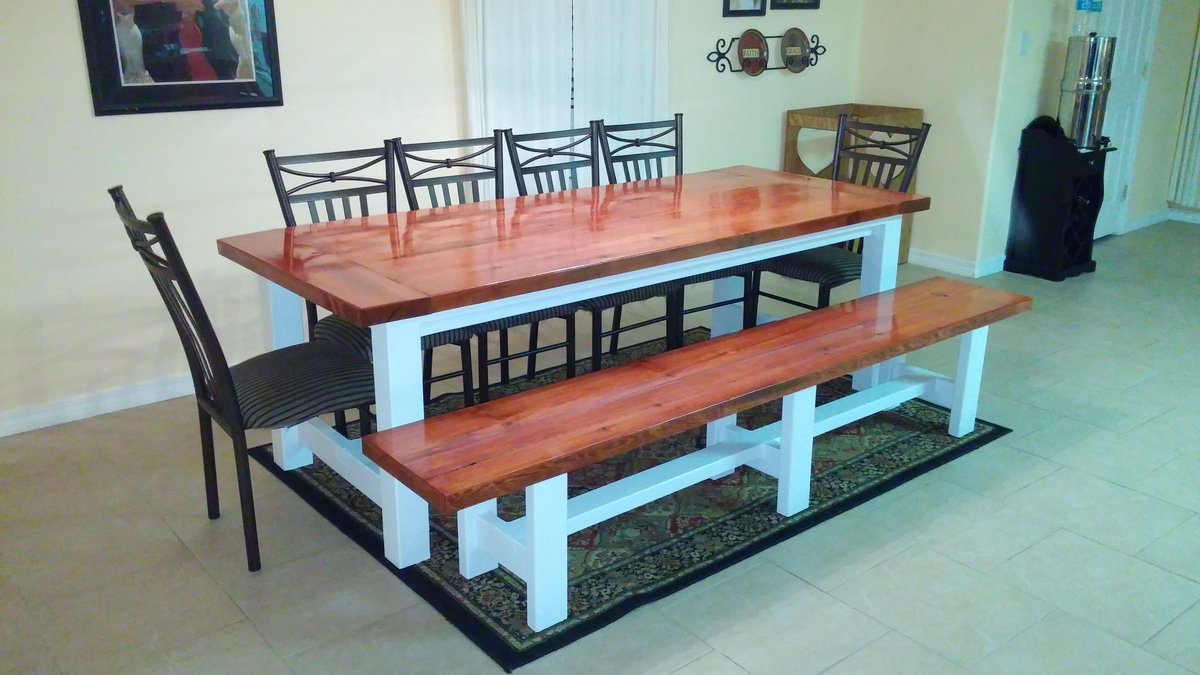
I built the Rustic Farmhouse table and I only had to make minor changes because I got the wood rough cut milled in my neighbor's backyard. I built the bench with the left over pieces without any plans, just tried to make it match the table. We love it and it is definitely a step up from what we had before! I just have to browse your chair plans now because these chairs in the picture are from our old table.
Built from Plan(s)
Estimated Cost
$95
Estimated Time Investment
Week Long Project (20 Hours or More)
Finish Used
Used a standard red stain and varnish on the table top/bench top and a semi gloss in the legs/skirting.
Recommended Skill Level
Intermediate
Comments
Wed, 08/13/2014 - 13:07
Paint color
Are you willing to divulge your exact paint color and stain? Is it white? Looks kind of bluish. Love the contrast. Great job.
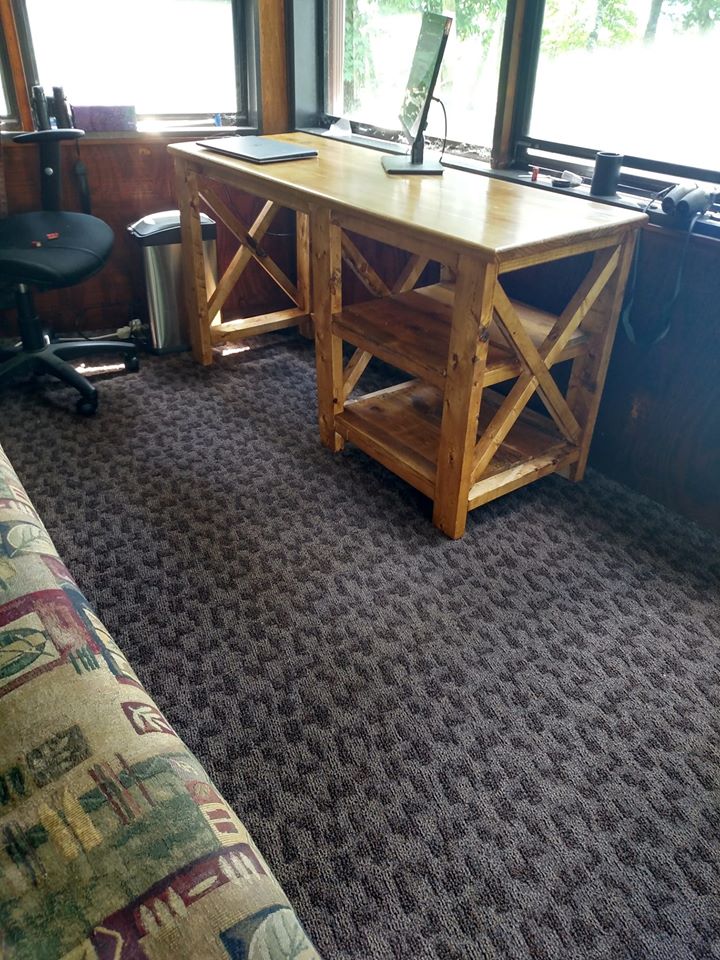
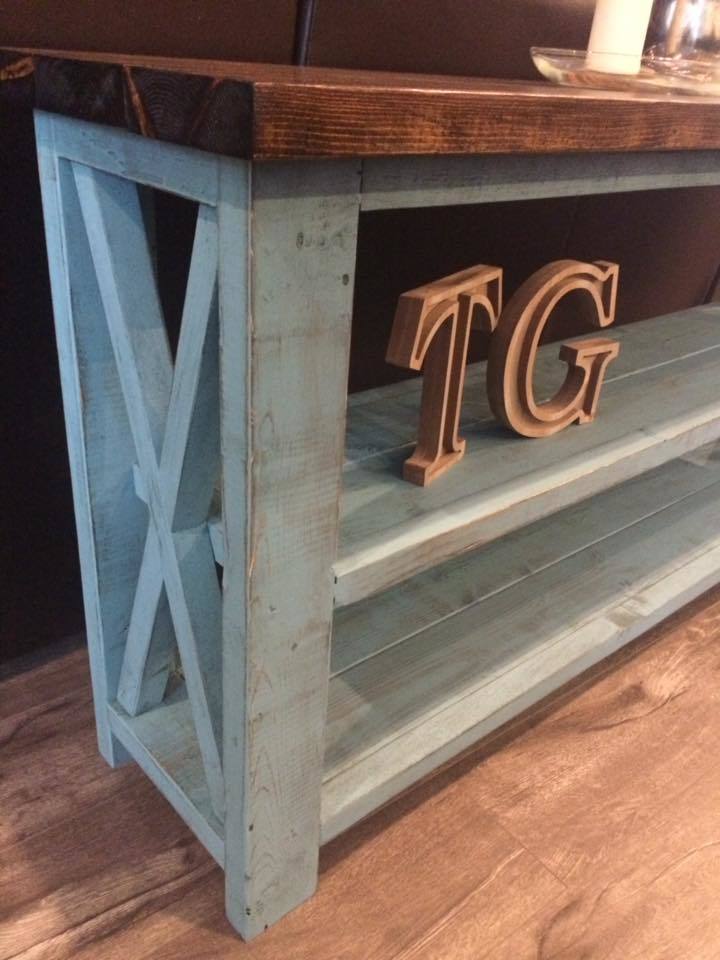
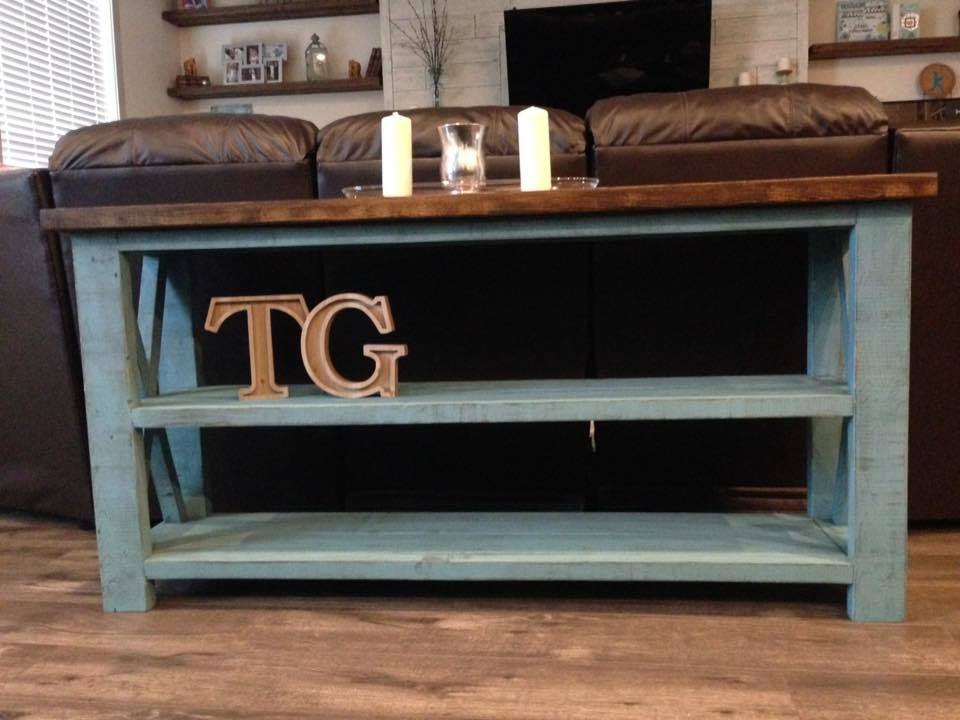
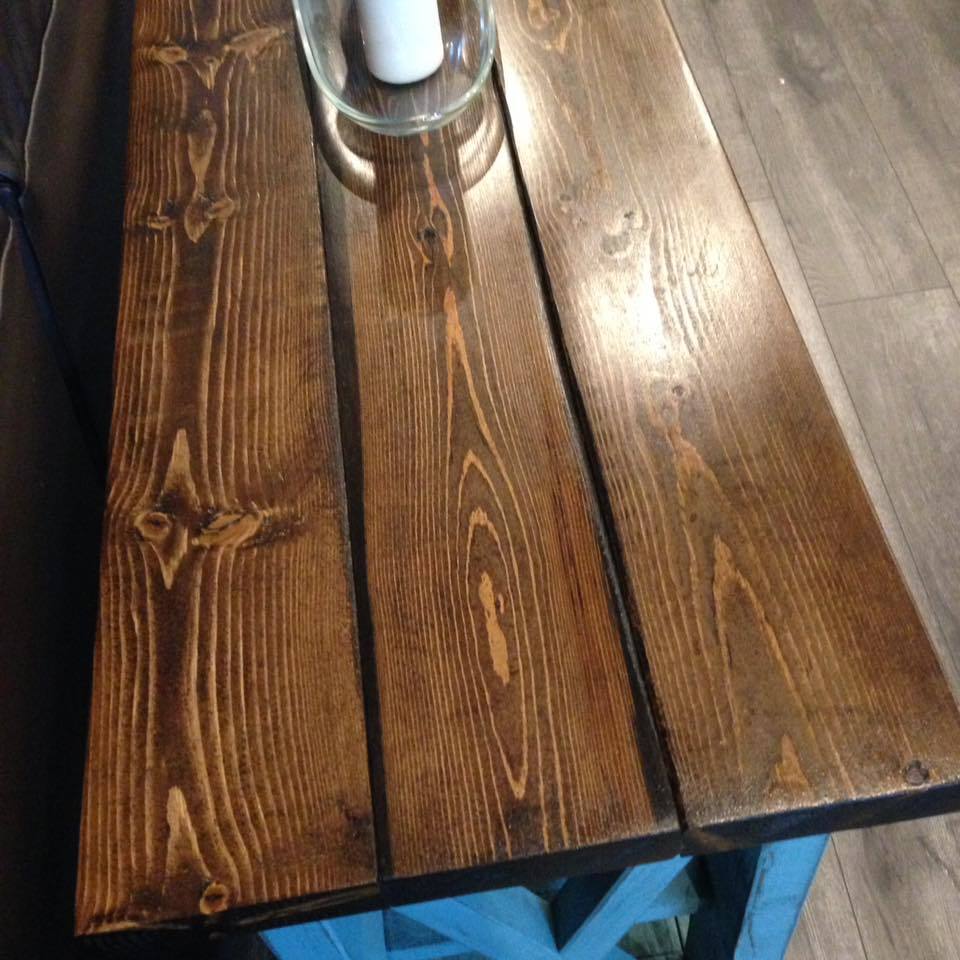
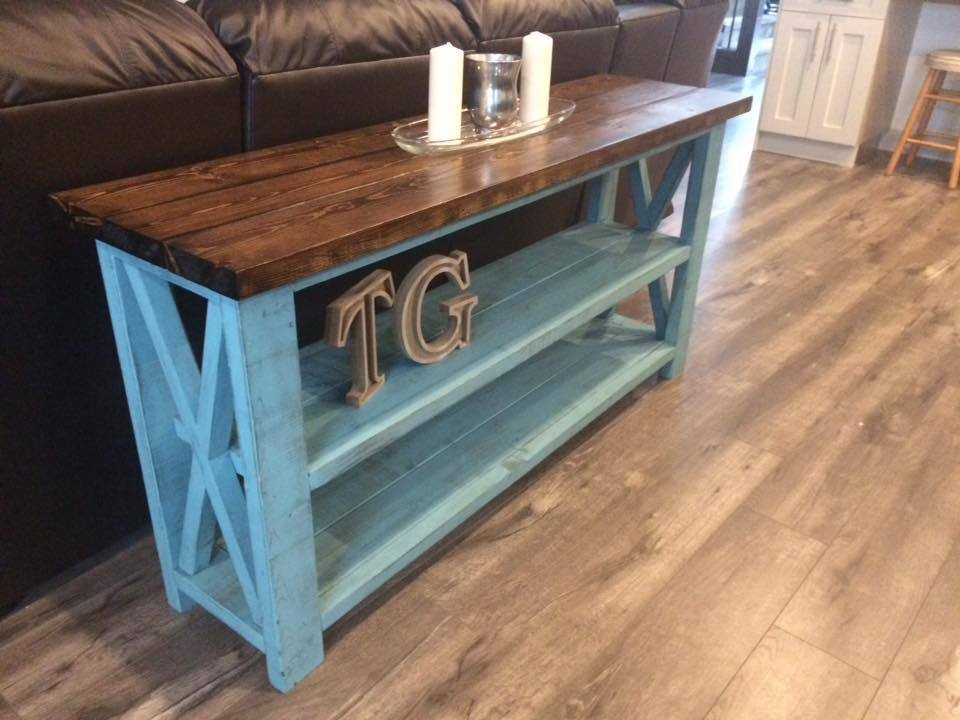
Rustic X Sofa Table
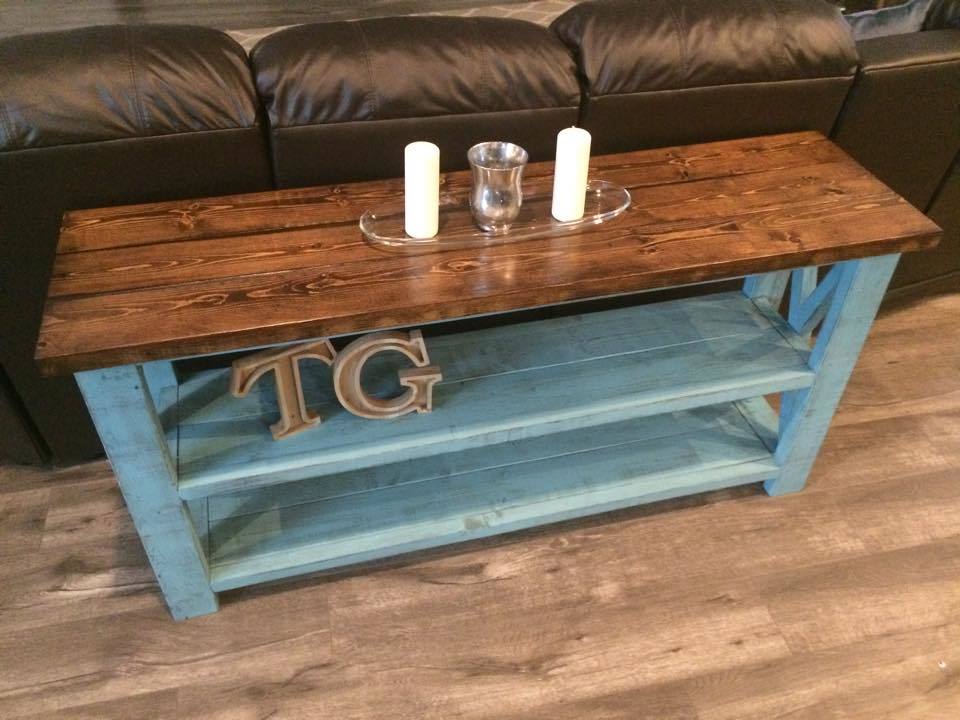
Slightly Modified from the Console table plan, but 2 toned Rustic X Console or Sofa Table with colored distressed finish
Built from Plan(s)
Estimated Cost
$60
Estimated Time Investment
Day Project (6-9 Hours)
Recommended Skill Level
Beginner
Beginner Farm Table and benches
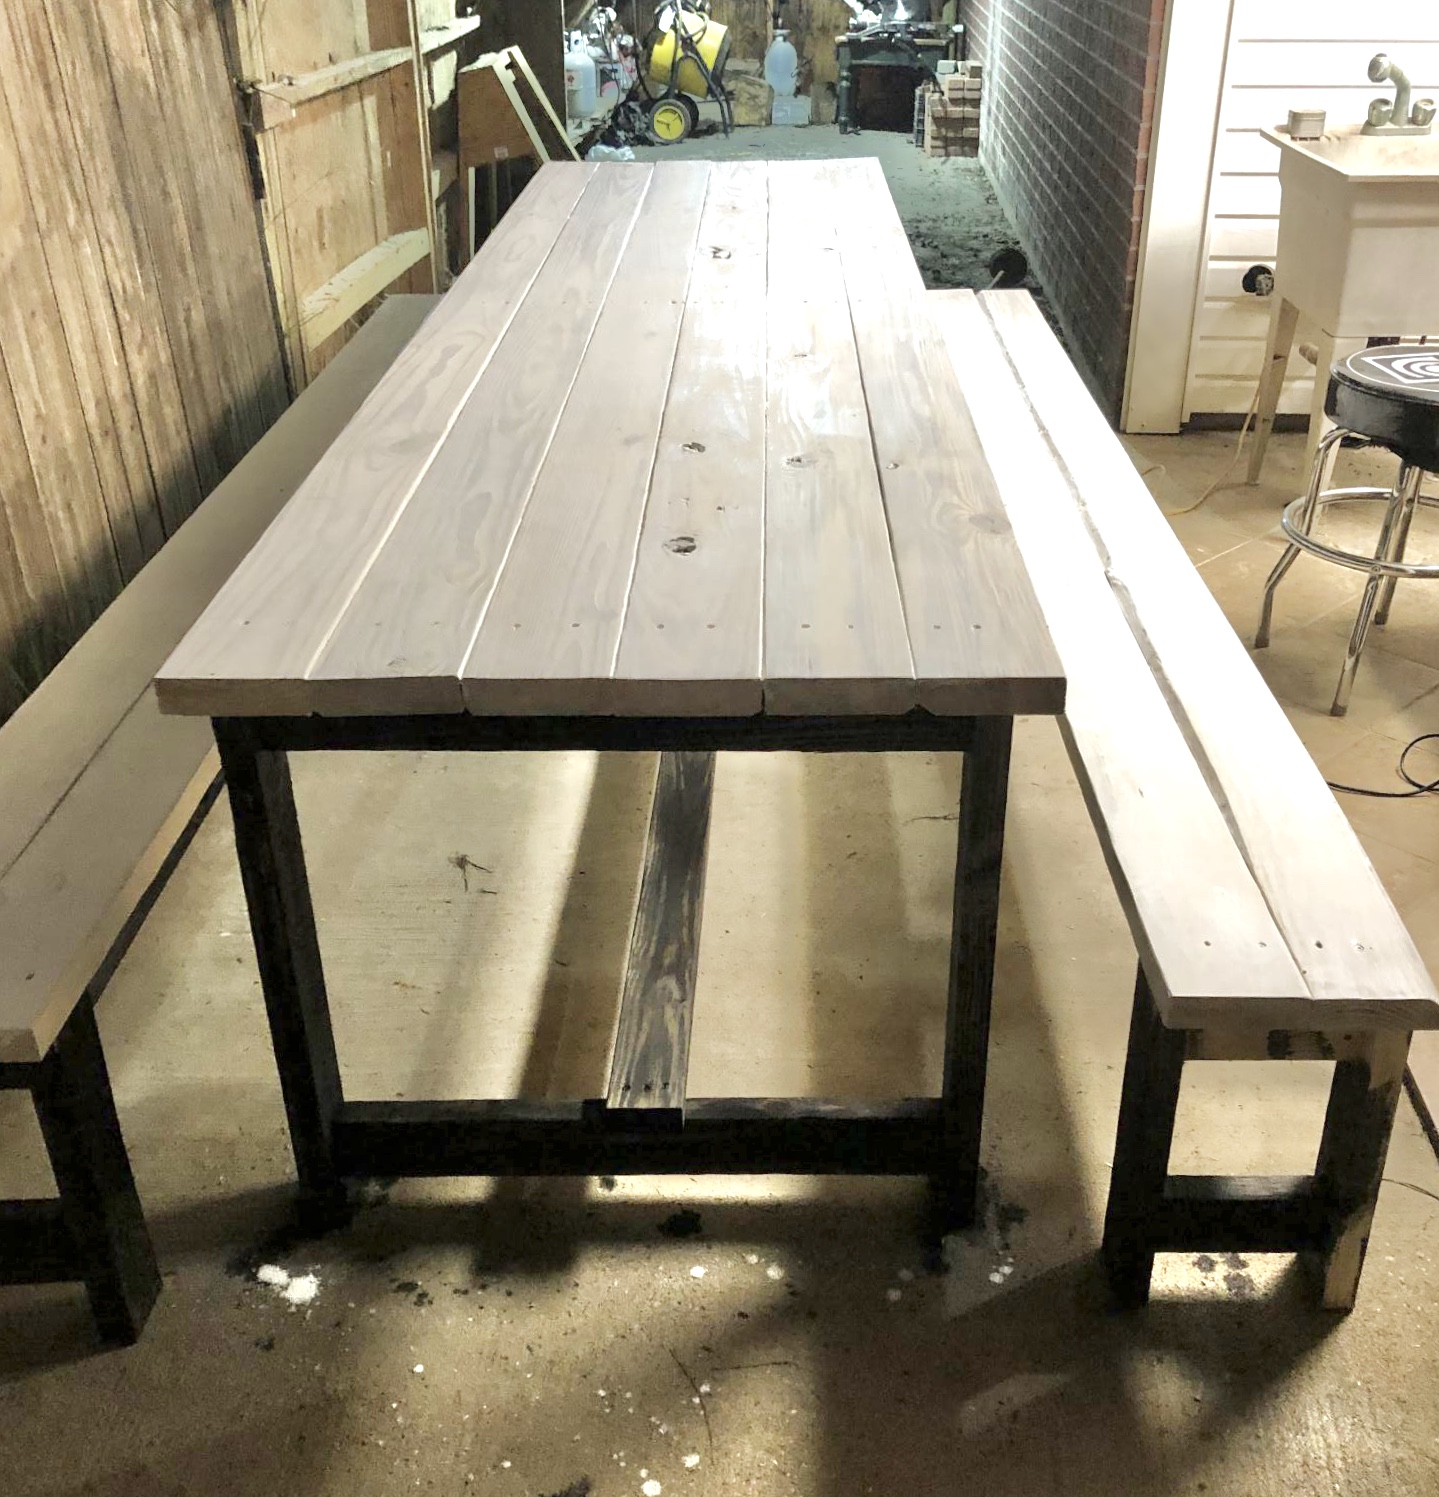
We built a larger version of the farmhouse table. It’s always been a dream to have a massive table for family dinners. I loved the look of the table and have wanted to attempt it for a couple of years. I finally got the courage up. We kept the legs the same size and just used 10 ft 2x6 and stretchers. It’s extremely solid and heavy! We are exhausted, it took all day! But we are so proud of ourselves. It’s definitely not perfect but it was our first and we love it!
Built from Plan(s)
Estimated Cost
150
Estimated Time Investment
Day Project (6-9 Hours)
Finish Used
Weathered burn effect stain For the legs and runners and an antique white for the top.
Recommended Skill Level
Starter Project
DIY Indoor Beverage Station
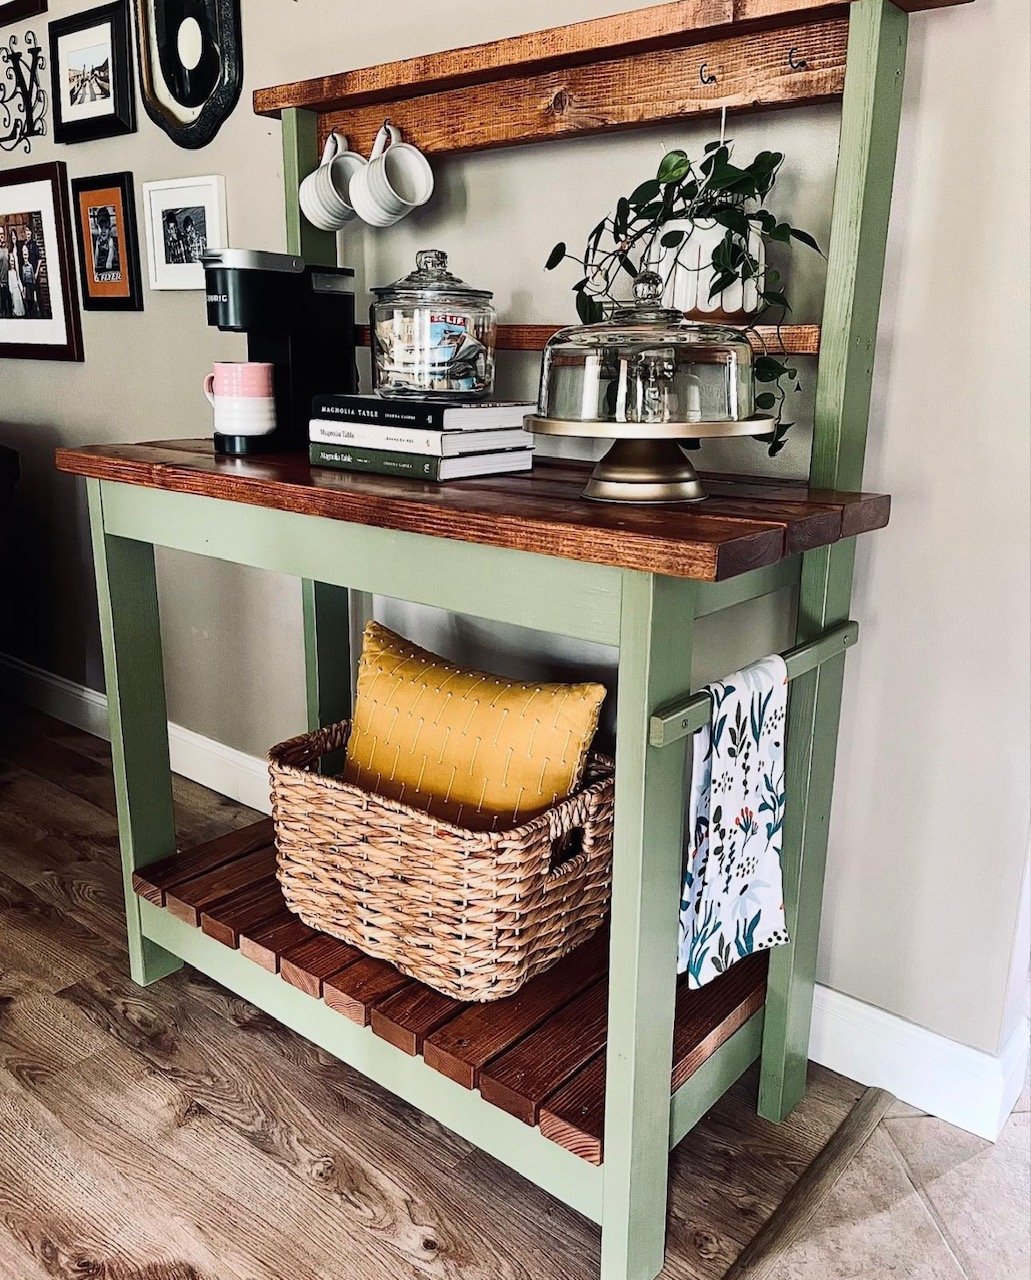
Beverage Station using the Farmhouse Potting Bench Plans by raising4kingsdesign on Instagram
Built from Plan(s)
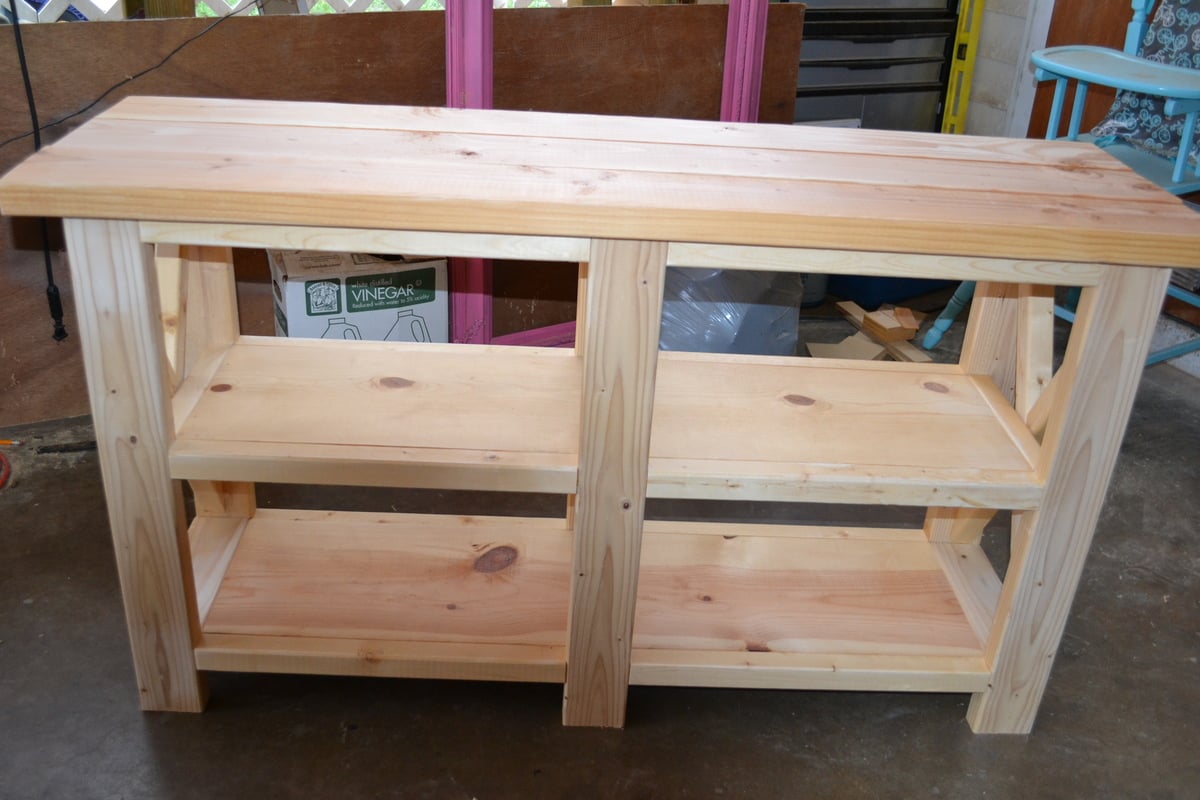
X Console Table

I built this a couple feet shorter than in the plans because it is for my neighbor's fish tank! It was fun to build and I'm in love with the finished product. She's going to paint or stain it herself. The pics were taken in my messy, projects-everywhere carport right before the neighbor hauled it off! Her son-in-law wants one now, and I will be building one for MYSELF right away as well! Thank you Ana!!!
Built from Plan(s)
Estimated Cost
75
Estimated Time Investment
Day Project (6-9 Hours)
Recommended Skill Level
Intermediate
Comments
Tue, 09/08/2020 - 16:56
looks great I'm hoping to…
looks great I'm hoping to build one myself this week =)
Rocking moses basket stand
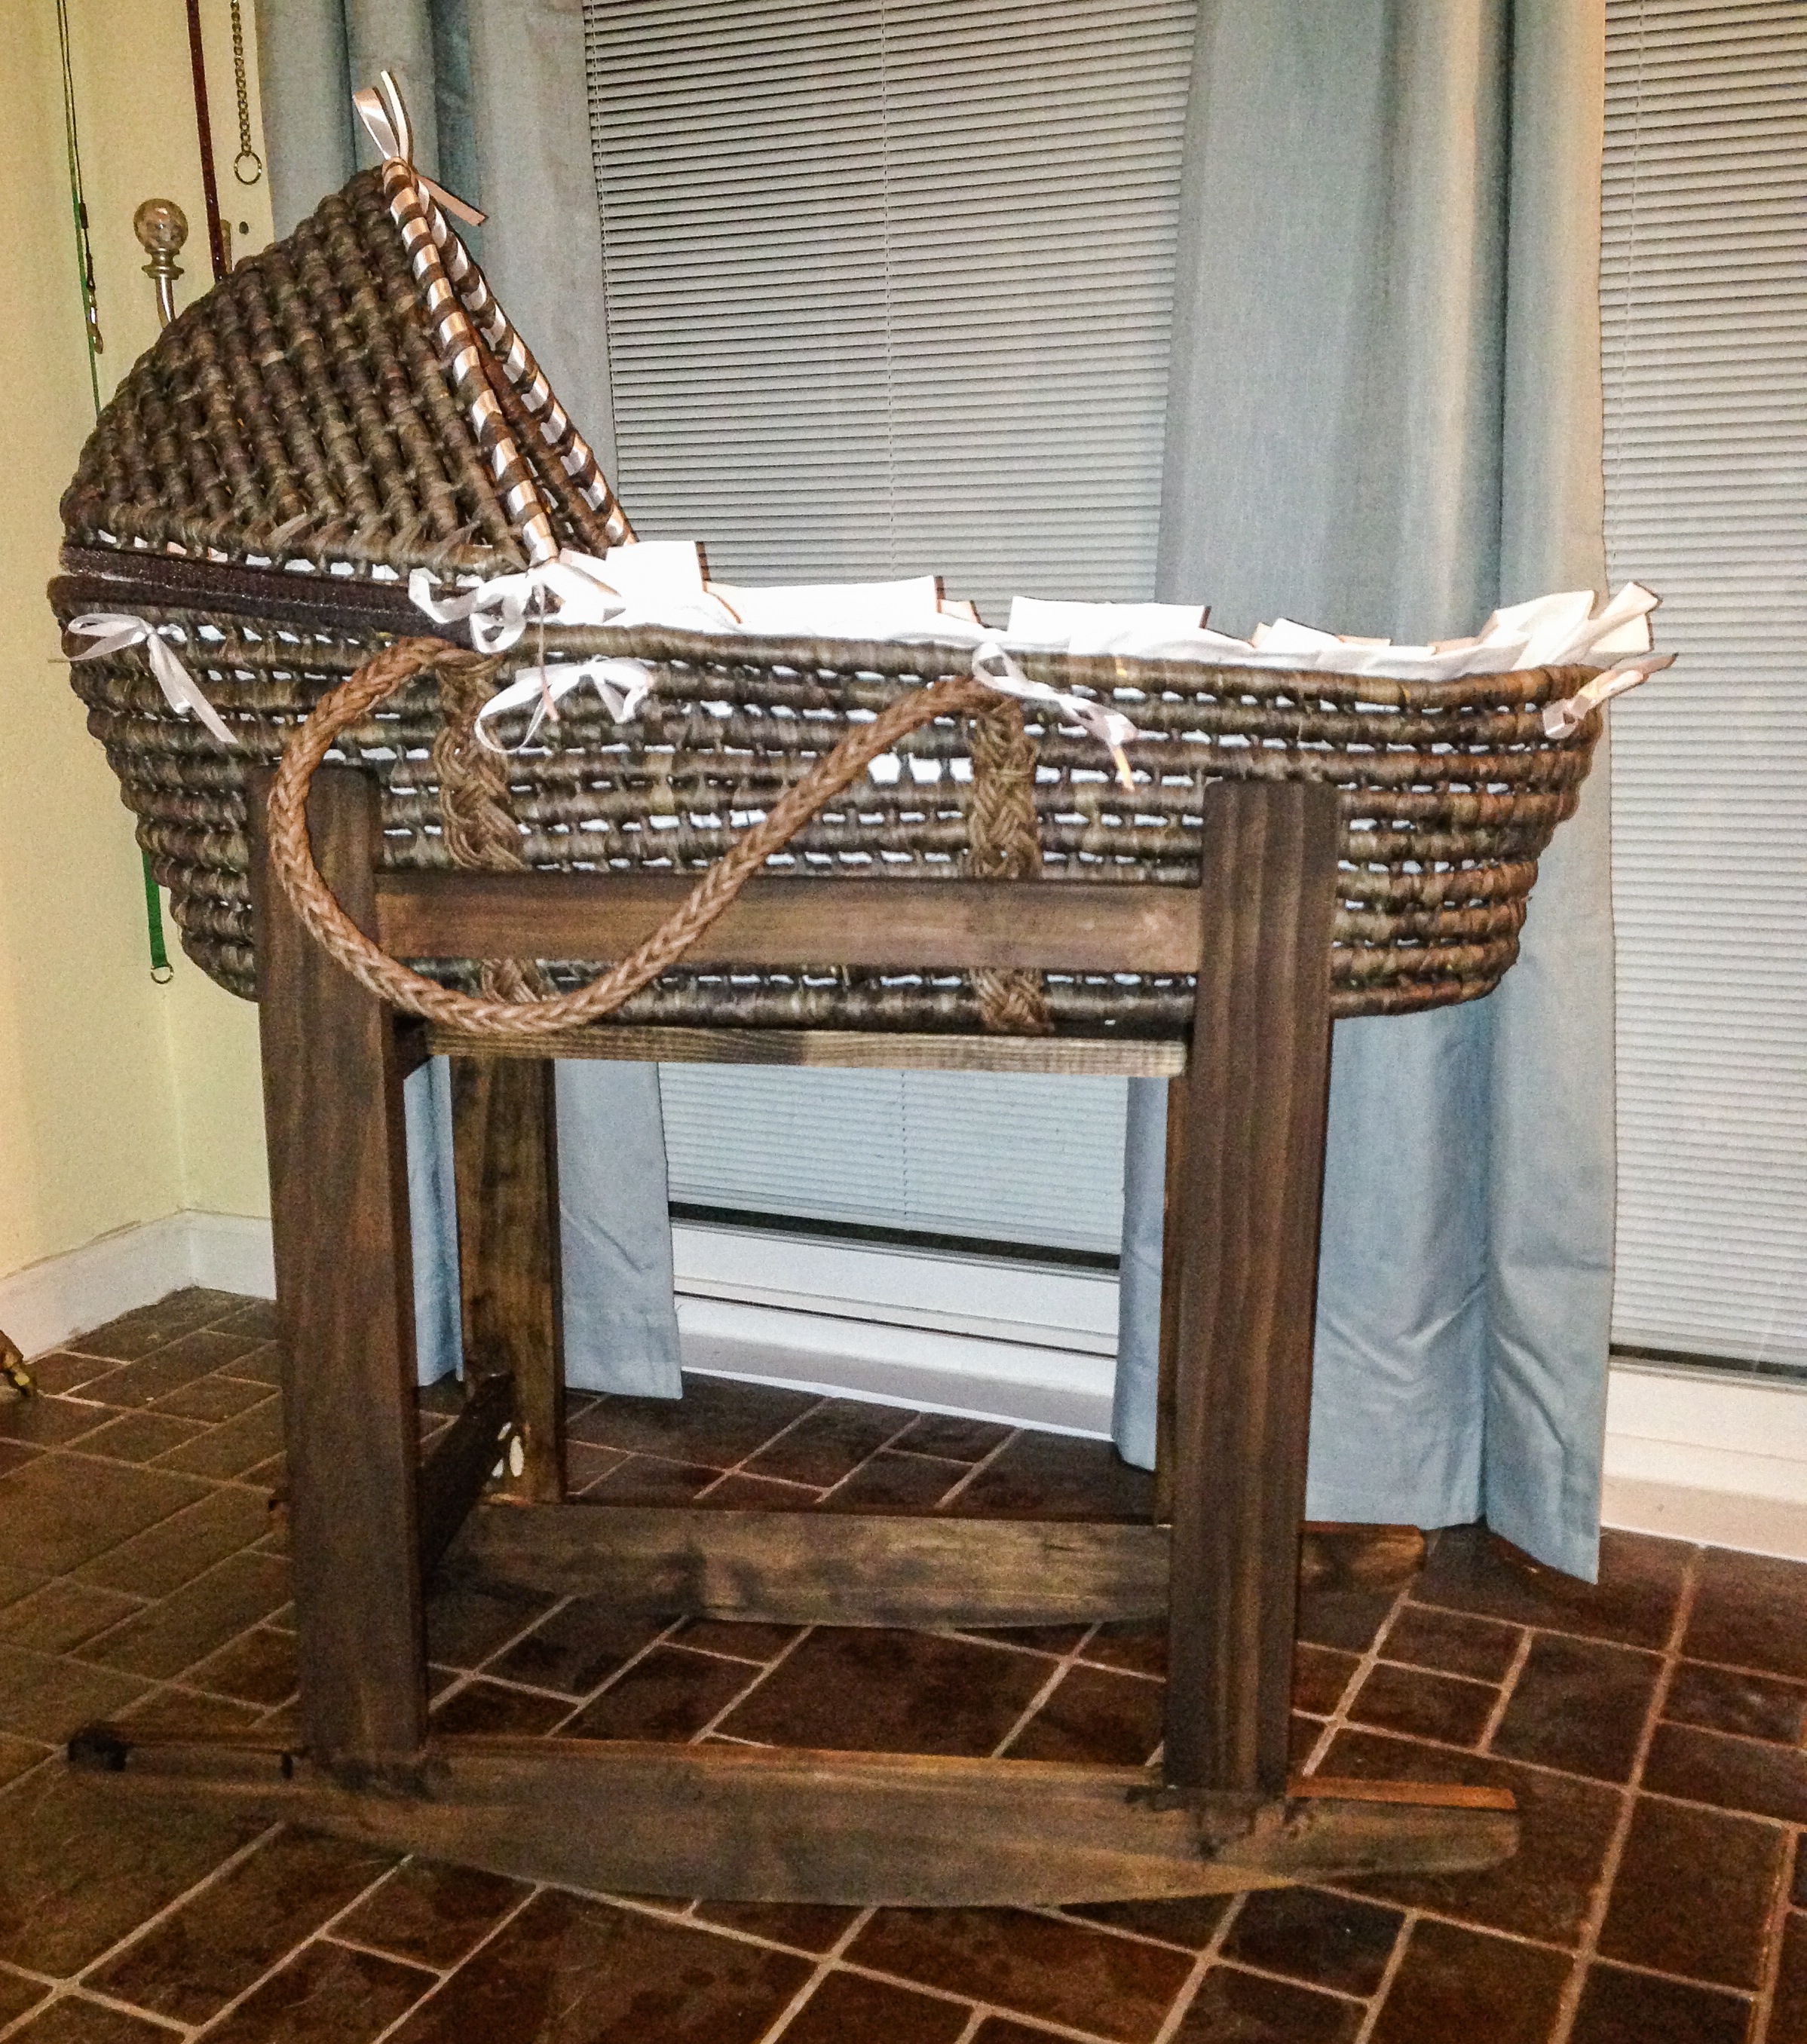
This is the third project I've built from Ana's blog, and my husband and I just LOVE it!!It was very easy to build, even six-months pregnant. I lucked out in that I had everything I needed for this project on hand with the exception of one 1x3 (and the basket, of course), making it a super affordable and much nicer-looking alternative to purchasing a portable bassinet.
I used pine for this build. The only modification I made to Ana's original plan were the rockers. I couldn't find the pattern for her rockers, so I took a rocking chair we had, laid it on it's side and traced its rockers onto a large piece of craft paper. I just used the sander to round off the corners on the top so that the legs would be easy to attach.
I built this in an evening and my husband was able to stain it that night as well. (He's not great with stain, so I had to clean it up a bit after this picture was taken and before the poly was put on.) Had I started earlier in the day, this would have easily been a one-day project including our trip to the store for the 1x3.
Estimated Cost
$7 (Plus $30 for the basket)
Estimated Time Investment
Afternoon Project (3-6 Hours)
Finish Used
Minwax stain in kona
Recommended Skill Level
Intermediate
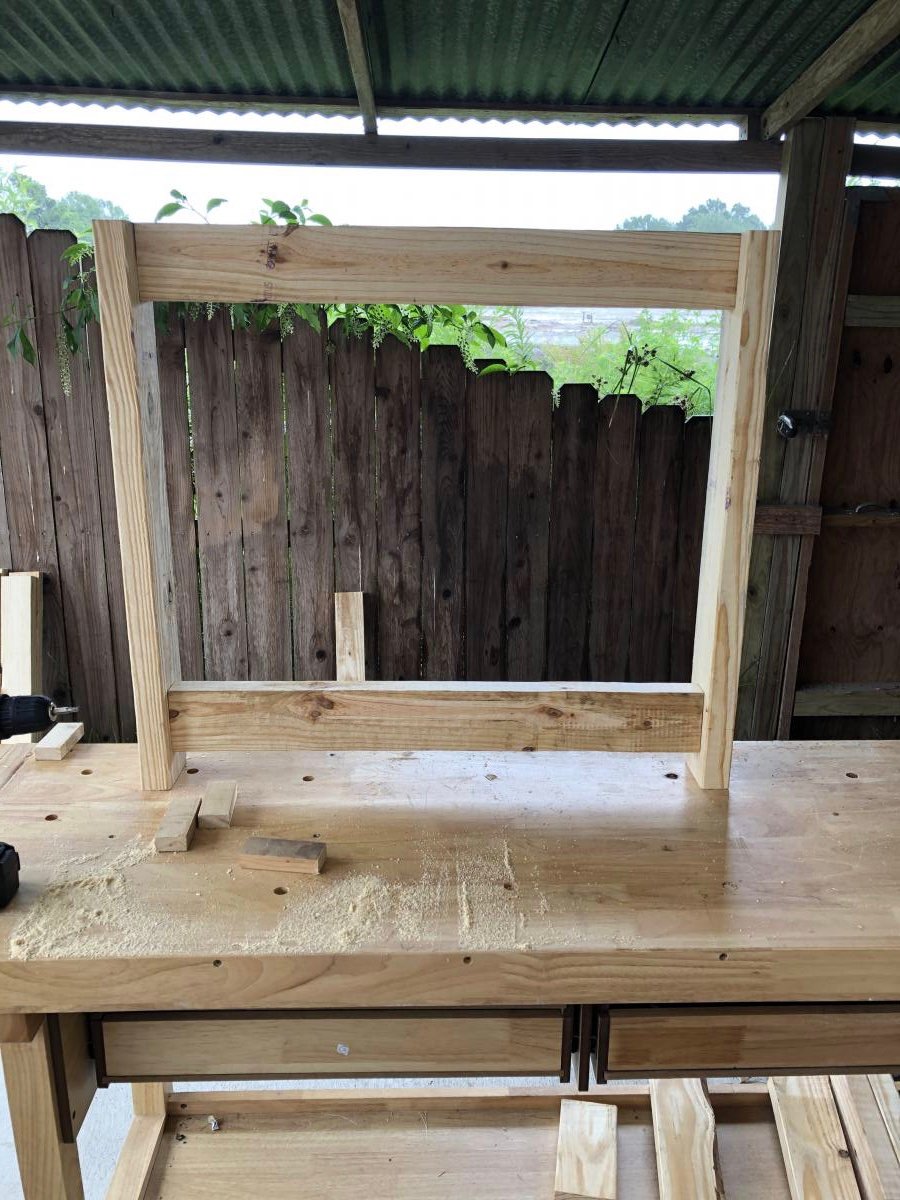
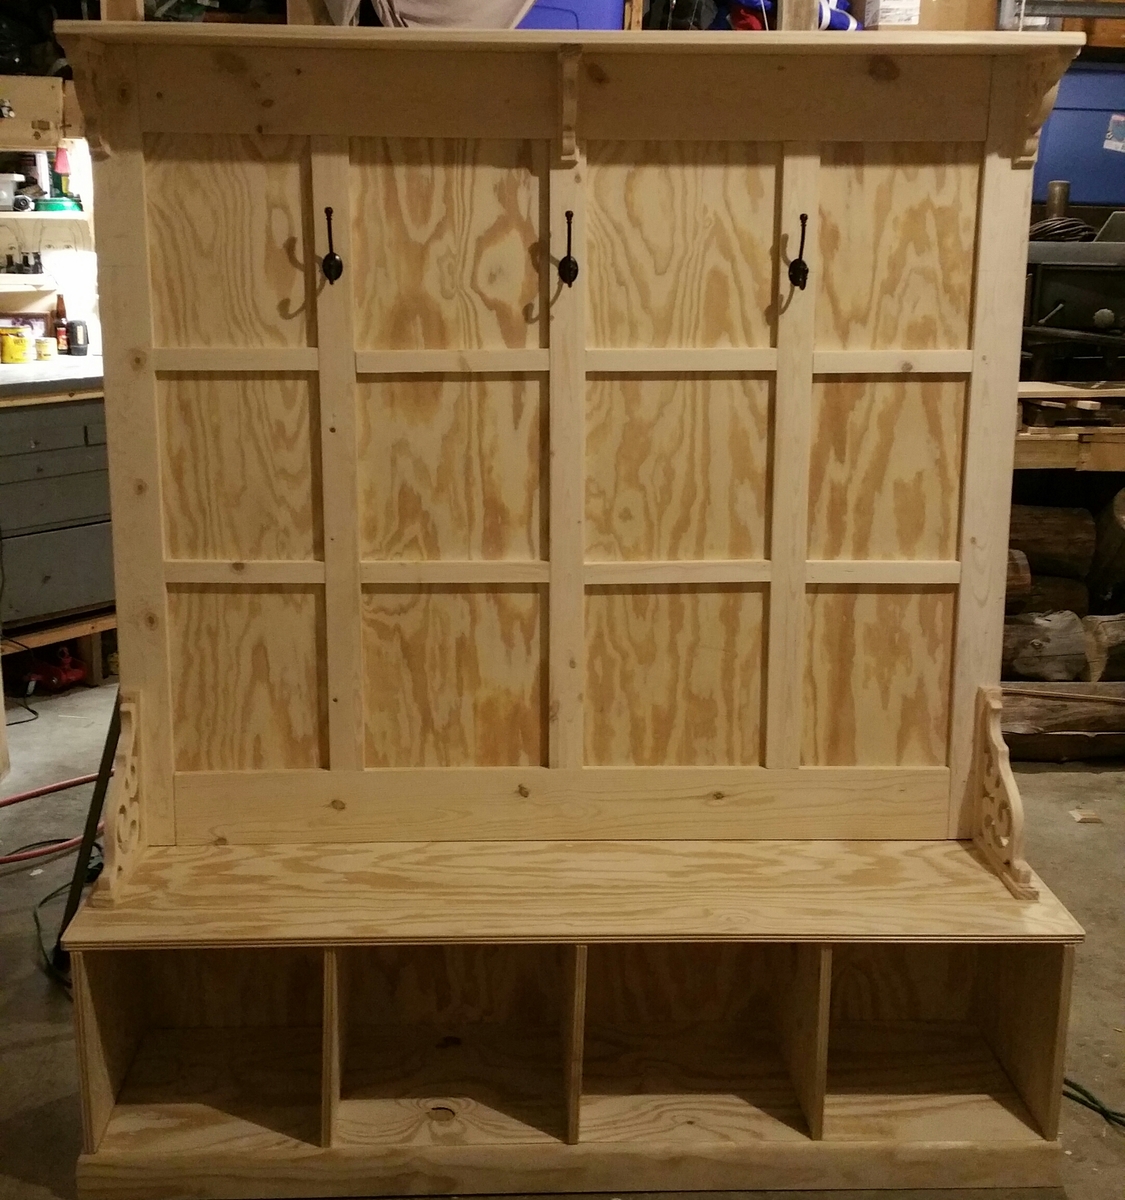
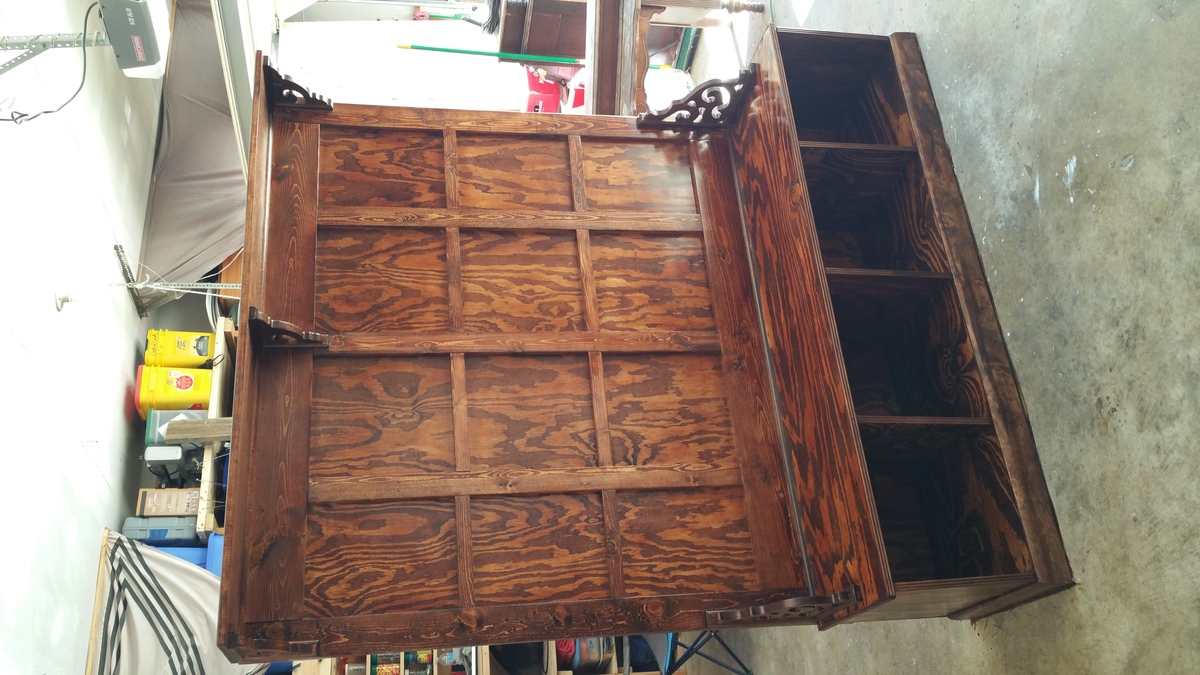
Our Beautiful Wall Tree
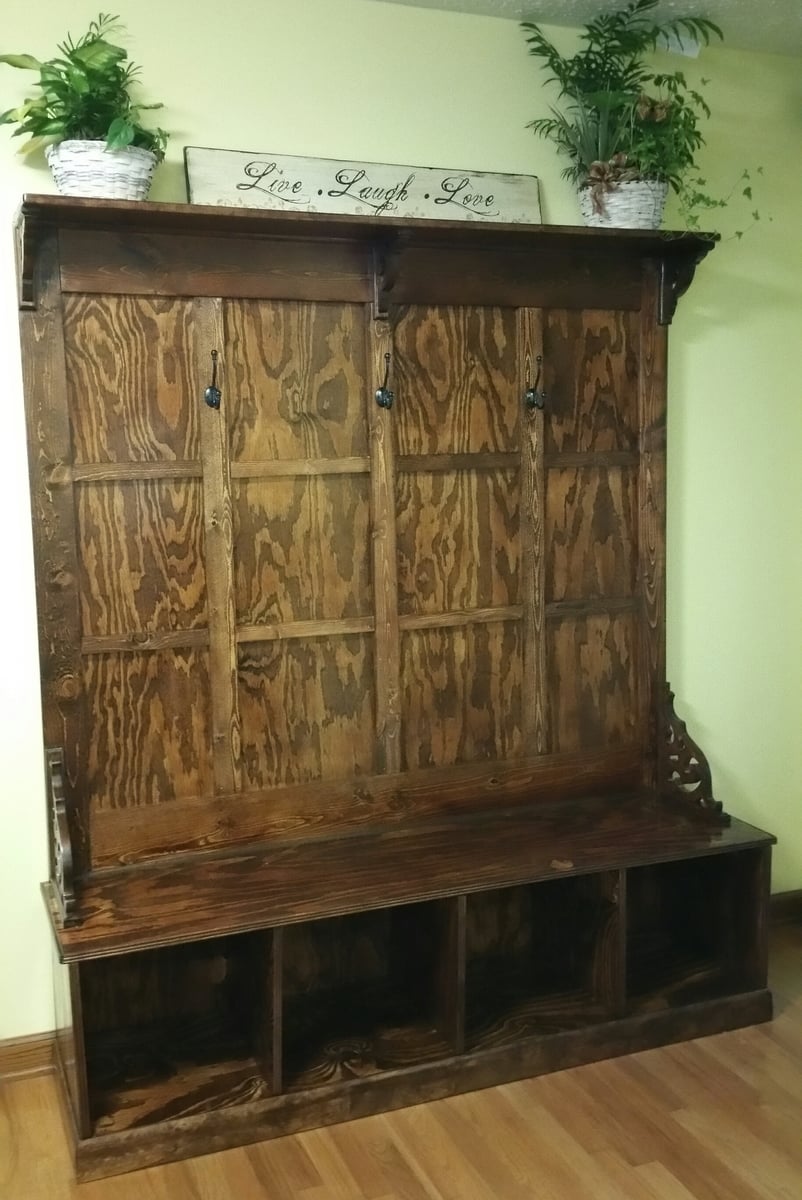
My husband and I did this as a weekend project. We had been looking for a bench like this for quite some time but they were either cheaply made or way too expensive. My husband went through the plans and decided he could do it. We added a shelf to it and also made it larger to fit the area we were putting it in. The great thing about the plans is that you are able to easily modify them to create what you are looking for.
Estimated Cost
$250
Estimated Time Investment
Weekend Project (10-20 Hours)
Finish Used
We did a mix of 1:1 stains that we had on had then used a satin clear finish.
Recommended Skill Level
Intermediate
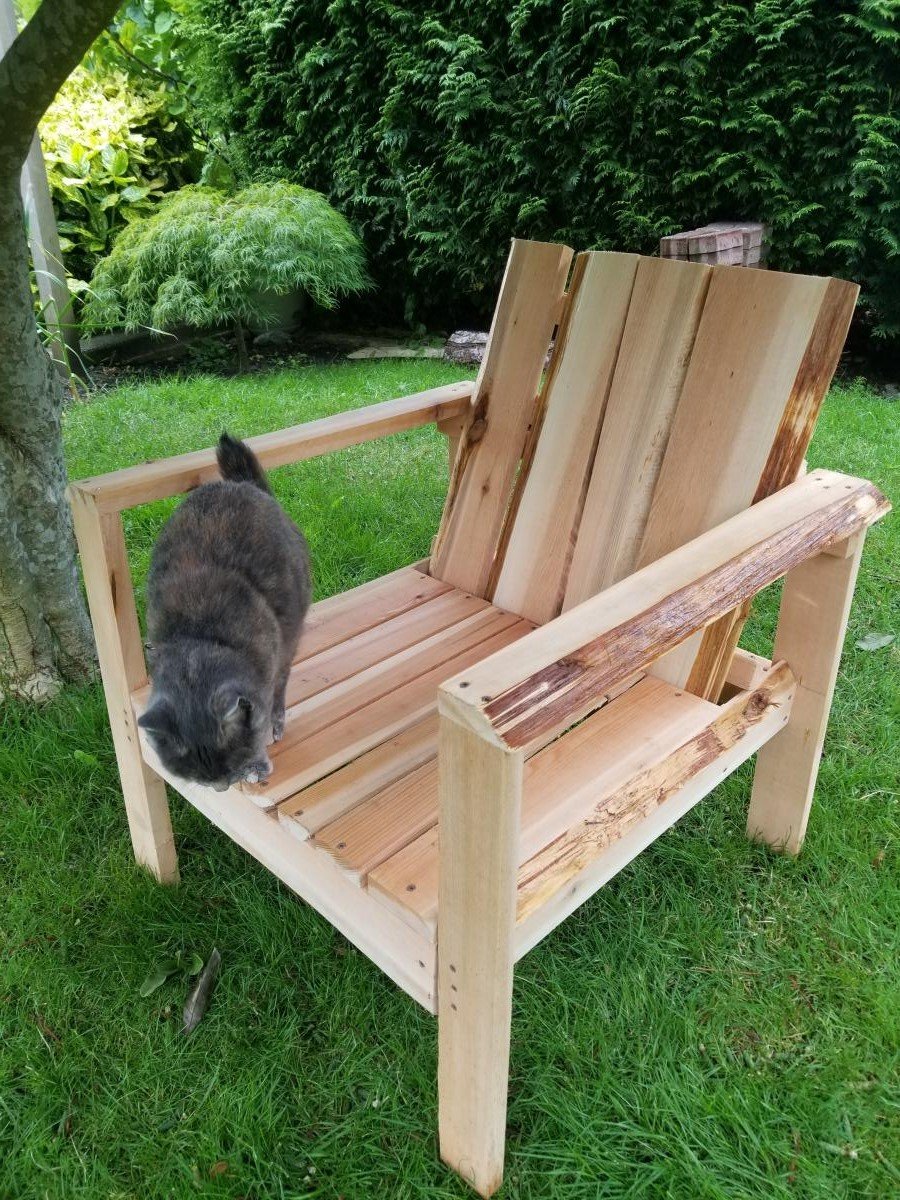
Live-Edge Cedar Chair
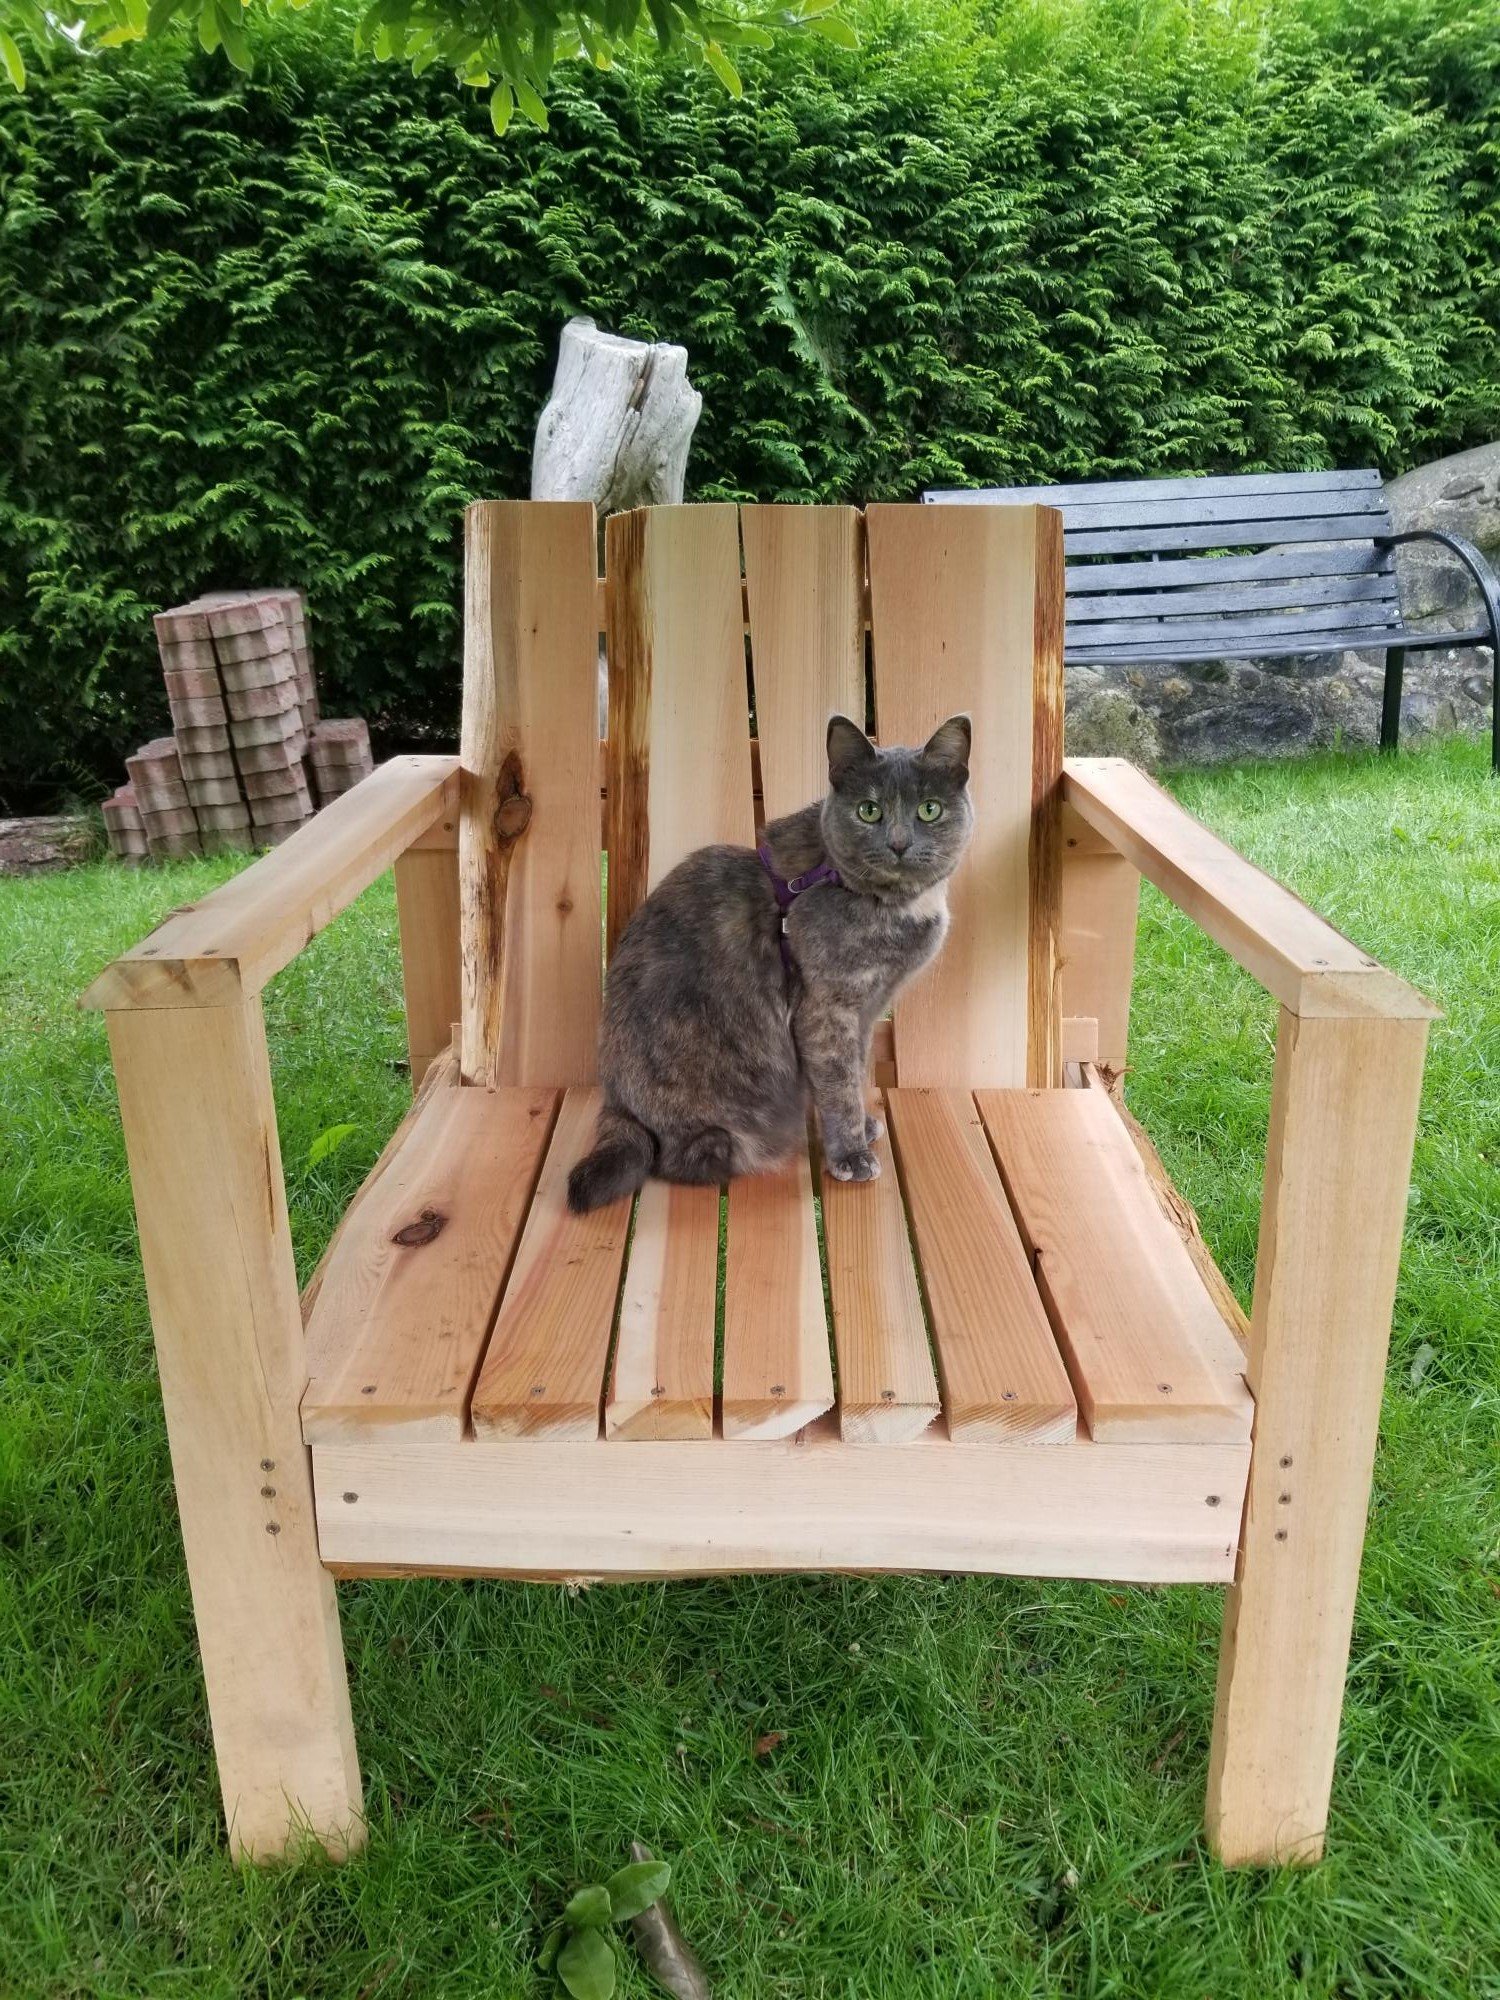
This chair came together beautifully and is really an impressive piece. I managed to finish it in about 8 hours start to finish. I used the "original plans" that are linked in the description in order to avoid pocket holes (which are out of my skill range for now). In step 2, there is an option to place the back support on the inside of the legs instead of the outside for lesser of an incline. I followed this and would strongly recommend it. The chair is sturdy, wide, and comfortable even without a cushion. Thank you for the detailed plans!
Built from Plan(s)
Estimated Cost
<$5 - cedar is off-cuts from a mill
Estimated Time Investment
Day Project (6-9 Hours)
Finish Used
None yet
Recommended Skill Level
Beginner
DIY Cedar Box Planter with Rope Handles
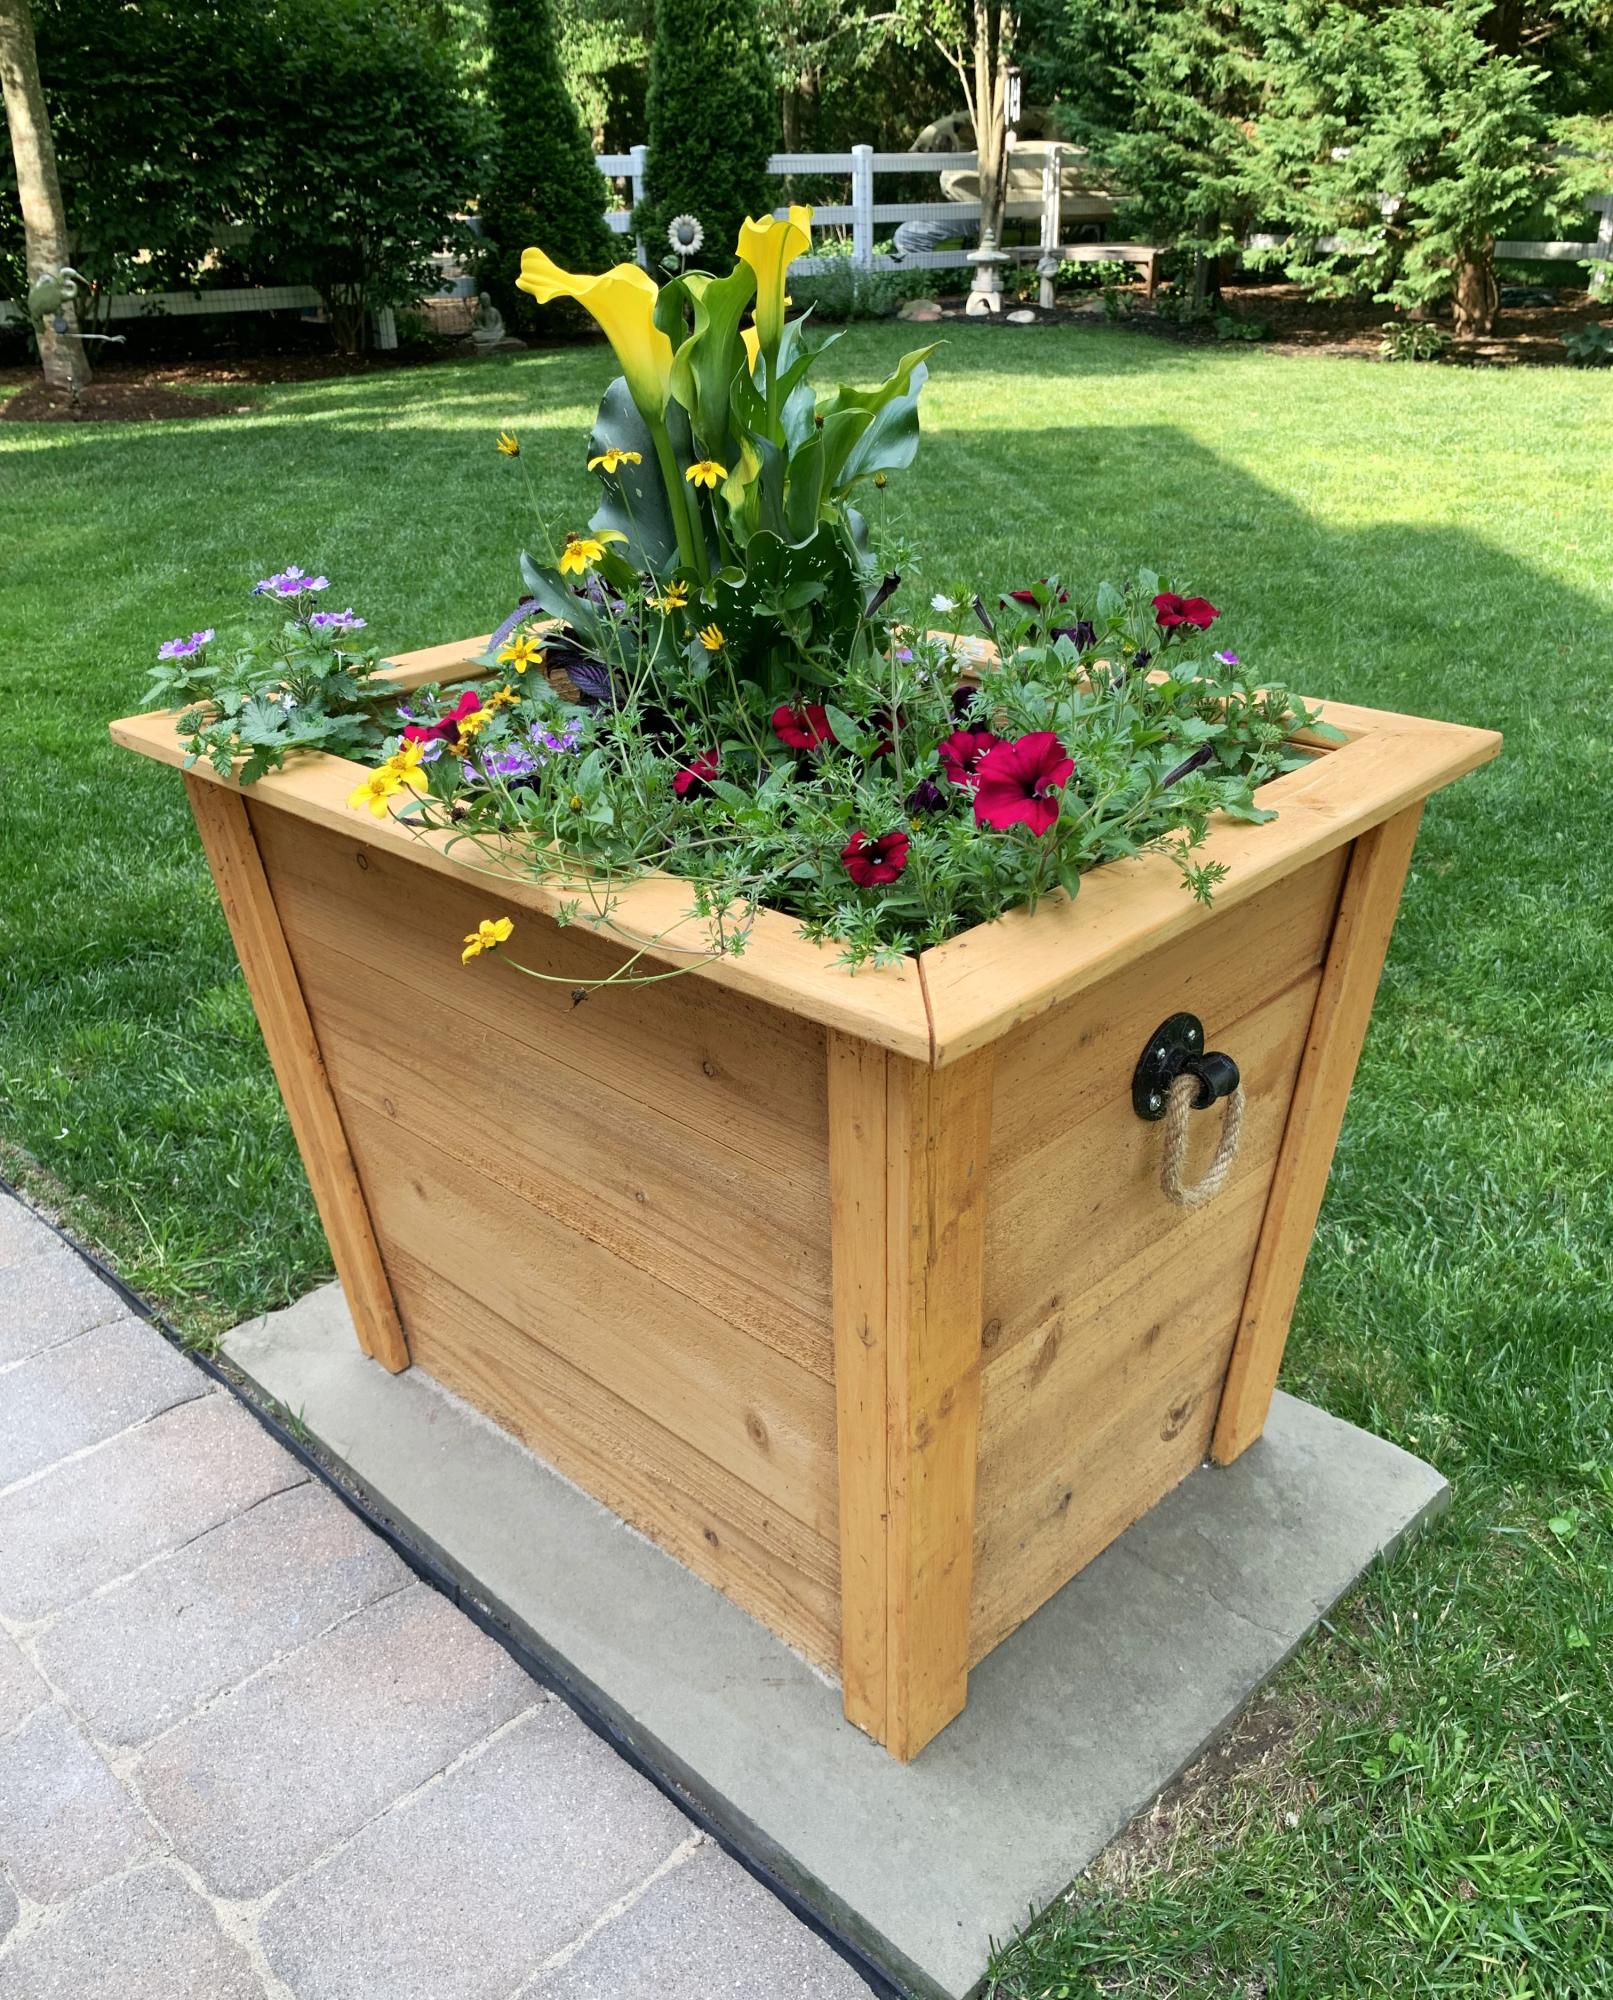
Loved the plan for this planters.
Audrey Noble
Built from Plan(s)
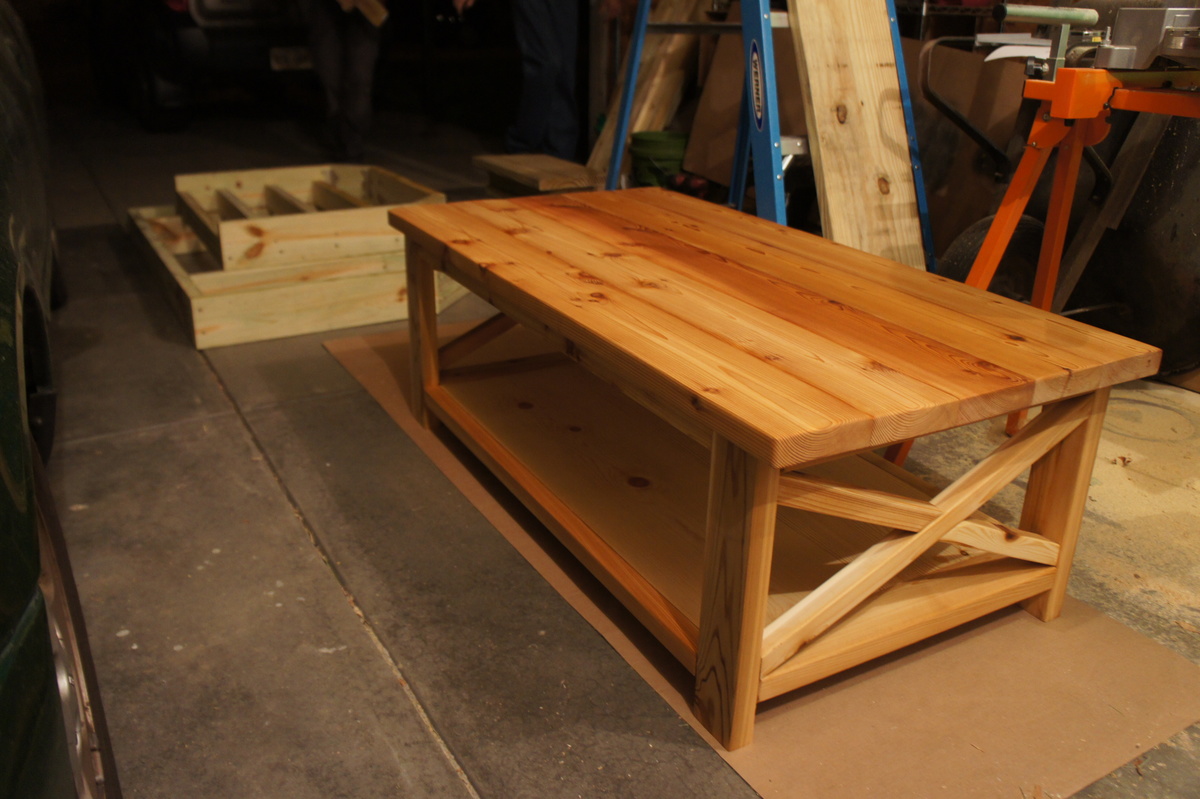
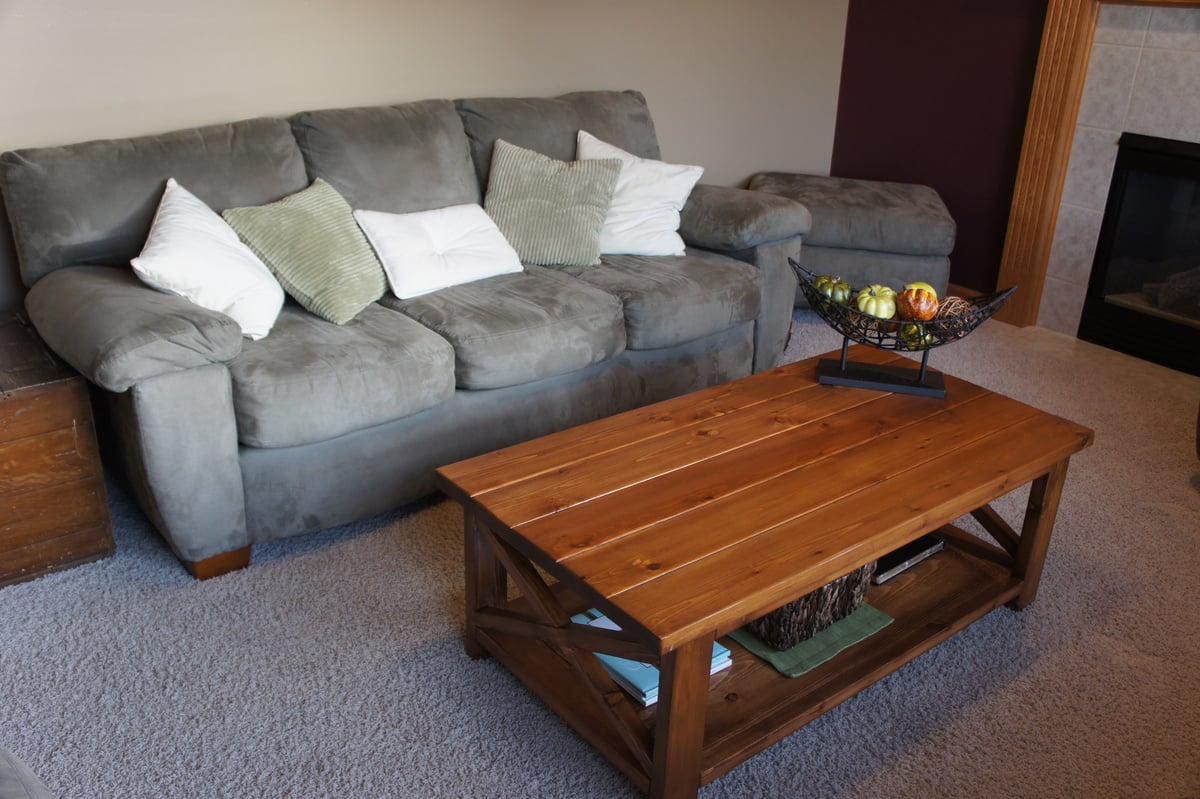
X Coffee Table
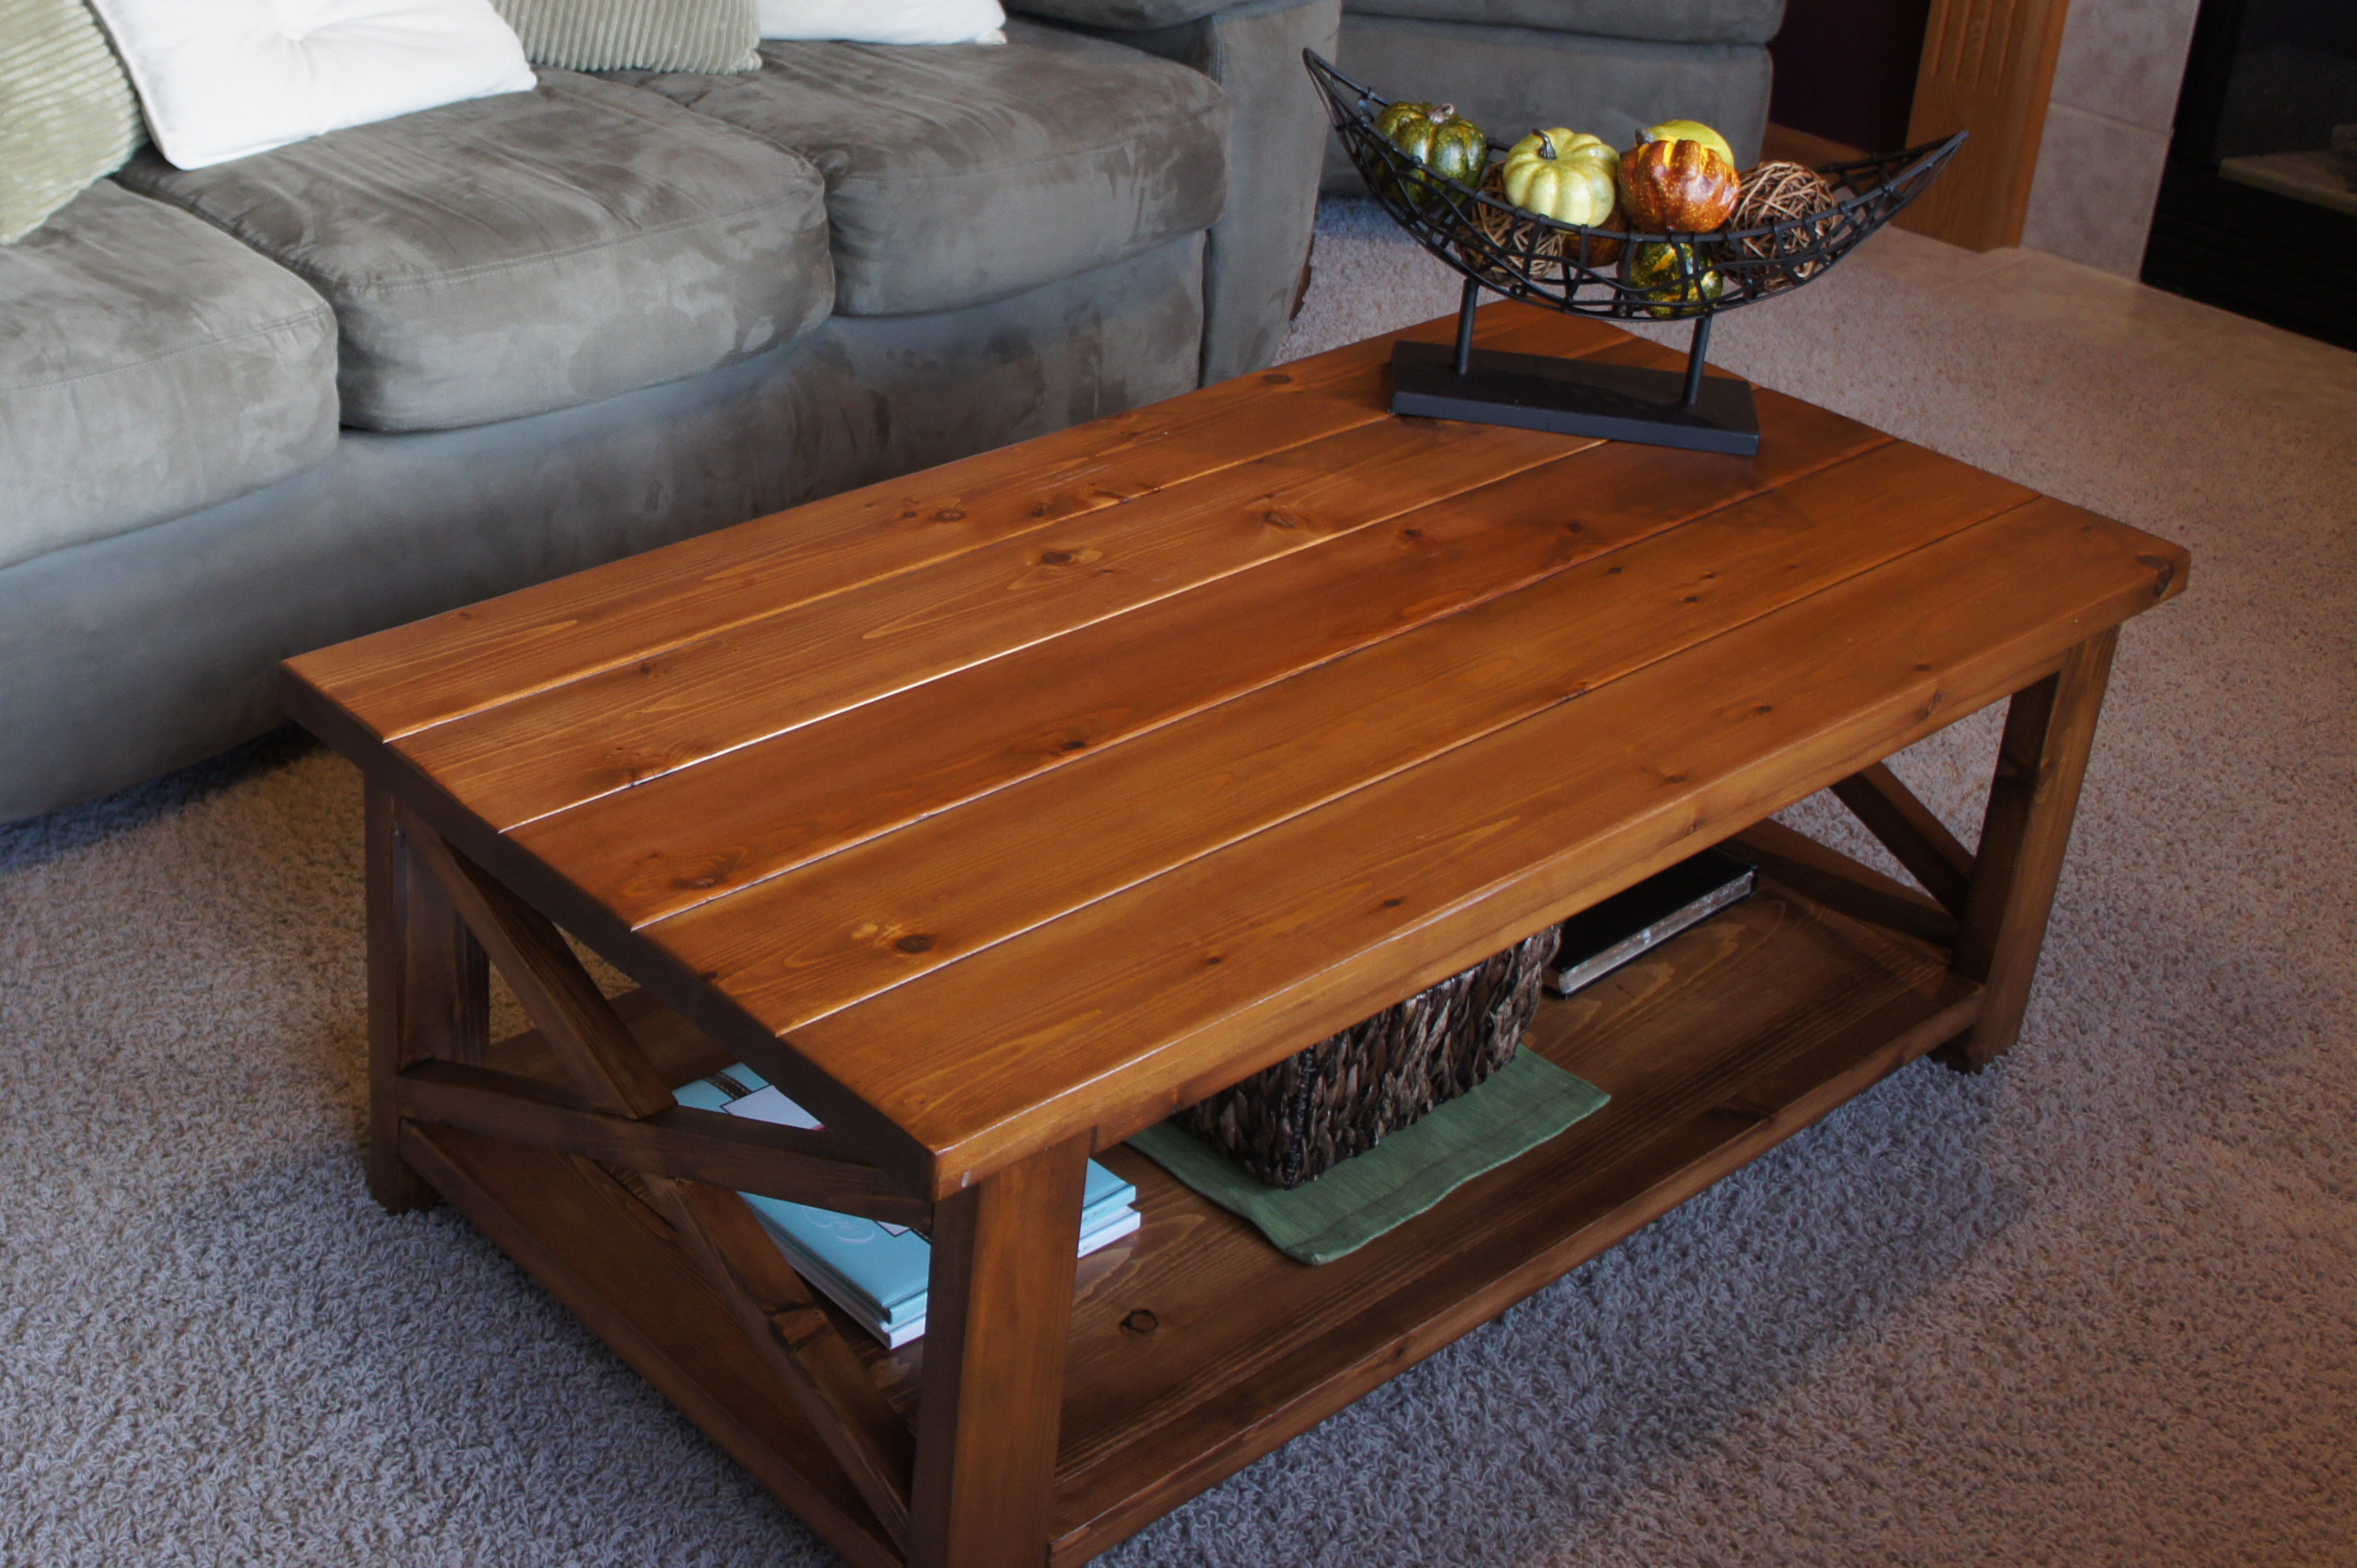
This is the Rustic X Coffee Table without the rustic finish. I used cedar wood with Early American stain. This was my first furniture project and I am so happy I did it. We needed a coffee table badly and I couldn't fathom spending several hundred on a good one. This one saved money and I appreciate it so much more. Because I used cedar the cost of the project was about $100. I used pine on the 1X12s on the bottom shelf and once stained it looks just fine. I did not stain the under side of the table top so as to maintain the smell of cedar.


Built from Plan(s)
Estimated Cost
$100
Estimated Time Investment
Weekend Project (10-20 Hours)
Finish Used
Stain: Varathane - Early American
I started with Varathane Wood Conditioner, then applied one coat of stain, wiping with a cloth after application. To finish I applied two coats of Minwax polyurethane.
I started with Varathane Wood Conditioner, then applied one coat of stain, wiping with a cloth after application. To finish I applied two coats of Minwax polyurethane.
Recommended Skill Level
Intermediate
Comments
Fri, 01/05/2018 - 23:10
Question...
The table look great! Thinking about building one myself soon? Have you noticed any warping or cracking of the wood since you built this?
King chestwick headboard and platform bed
After 16 years of marriage our bed literally fell apart. Rather than agreeing to buy a new bedroom set, my husband said I should just build a new bed. It turned out even better than I ever thought it would. I got the platform bed plans from addicted2decorating's blog. Thanks Ana and Shanty sisters for another great plan! I had to modify for the king size and mounted it to the wall because it was HEAVY. I used metal French cleats from HD.
Built from Plan(s)
Estimated Cost
$133
Estimated Time Investment
Weekend Project (10-20 Hours)
Finish Used
Varathane ultimate stain light walnut and varathane fast drying polyurethane
Recommended Skill Level
Beginner
Two toned toddler bed
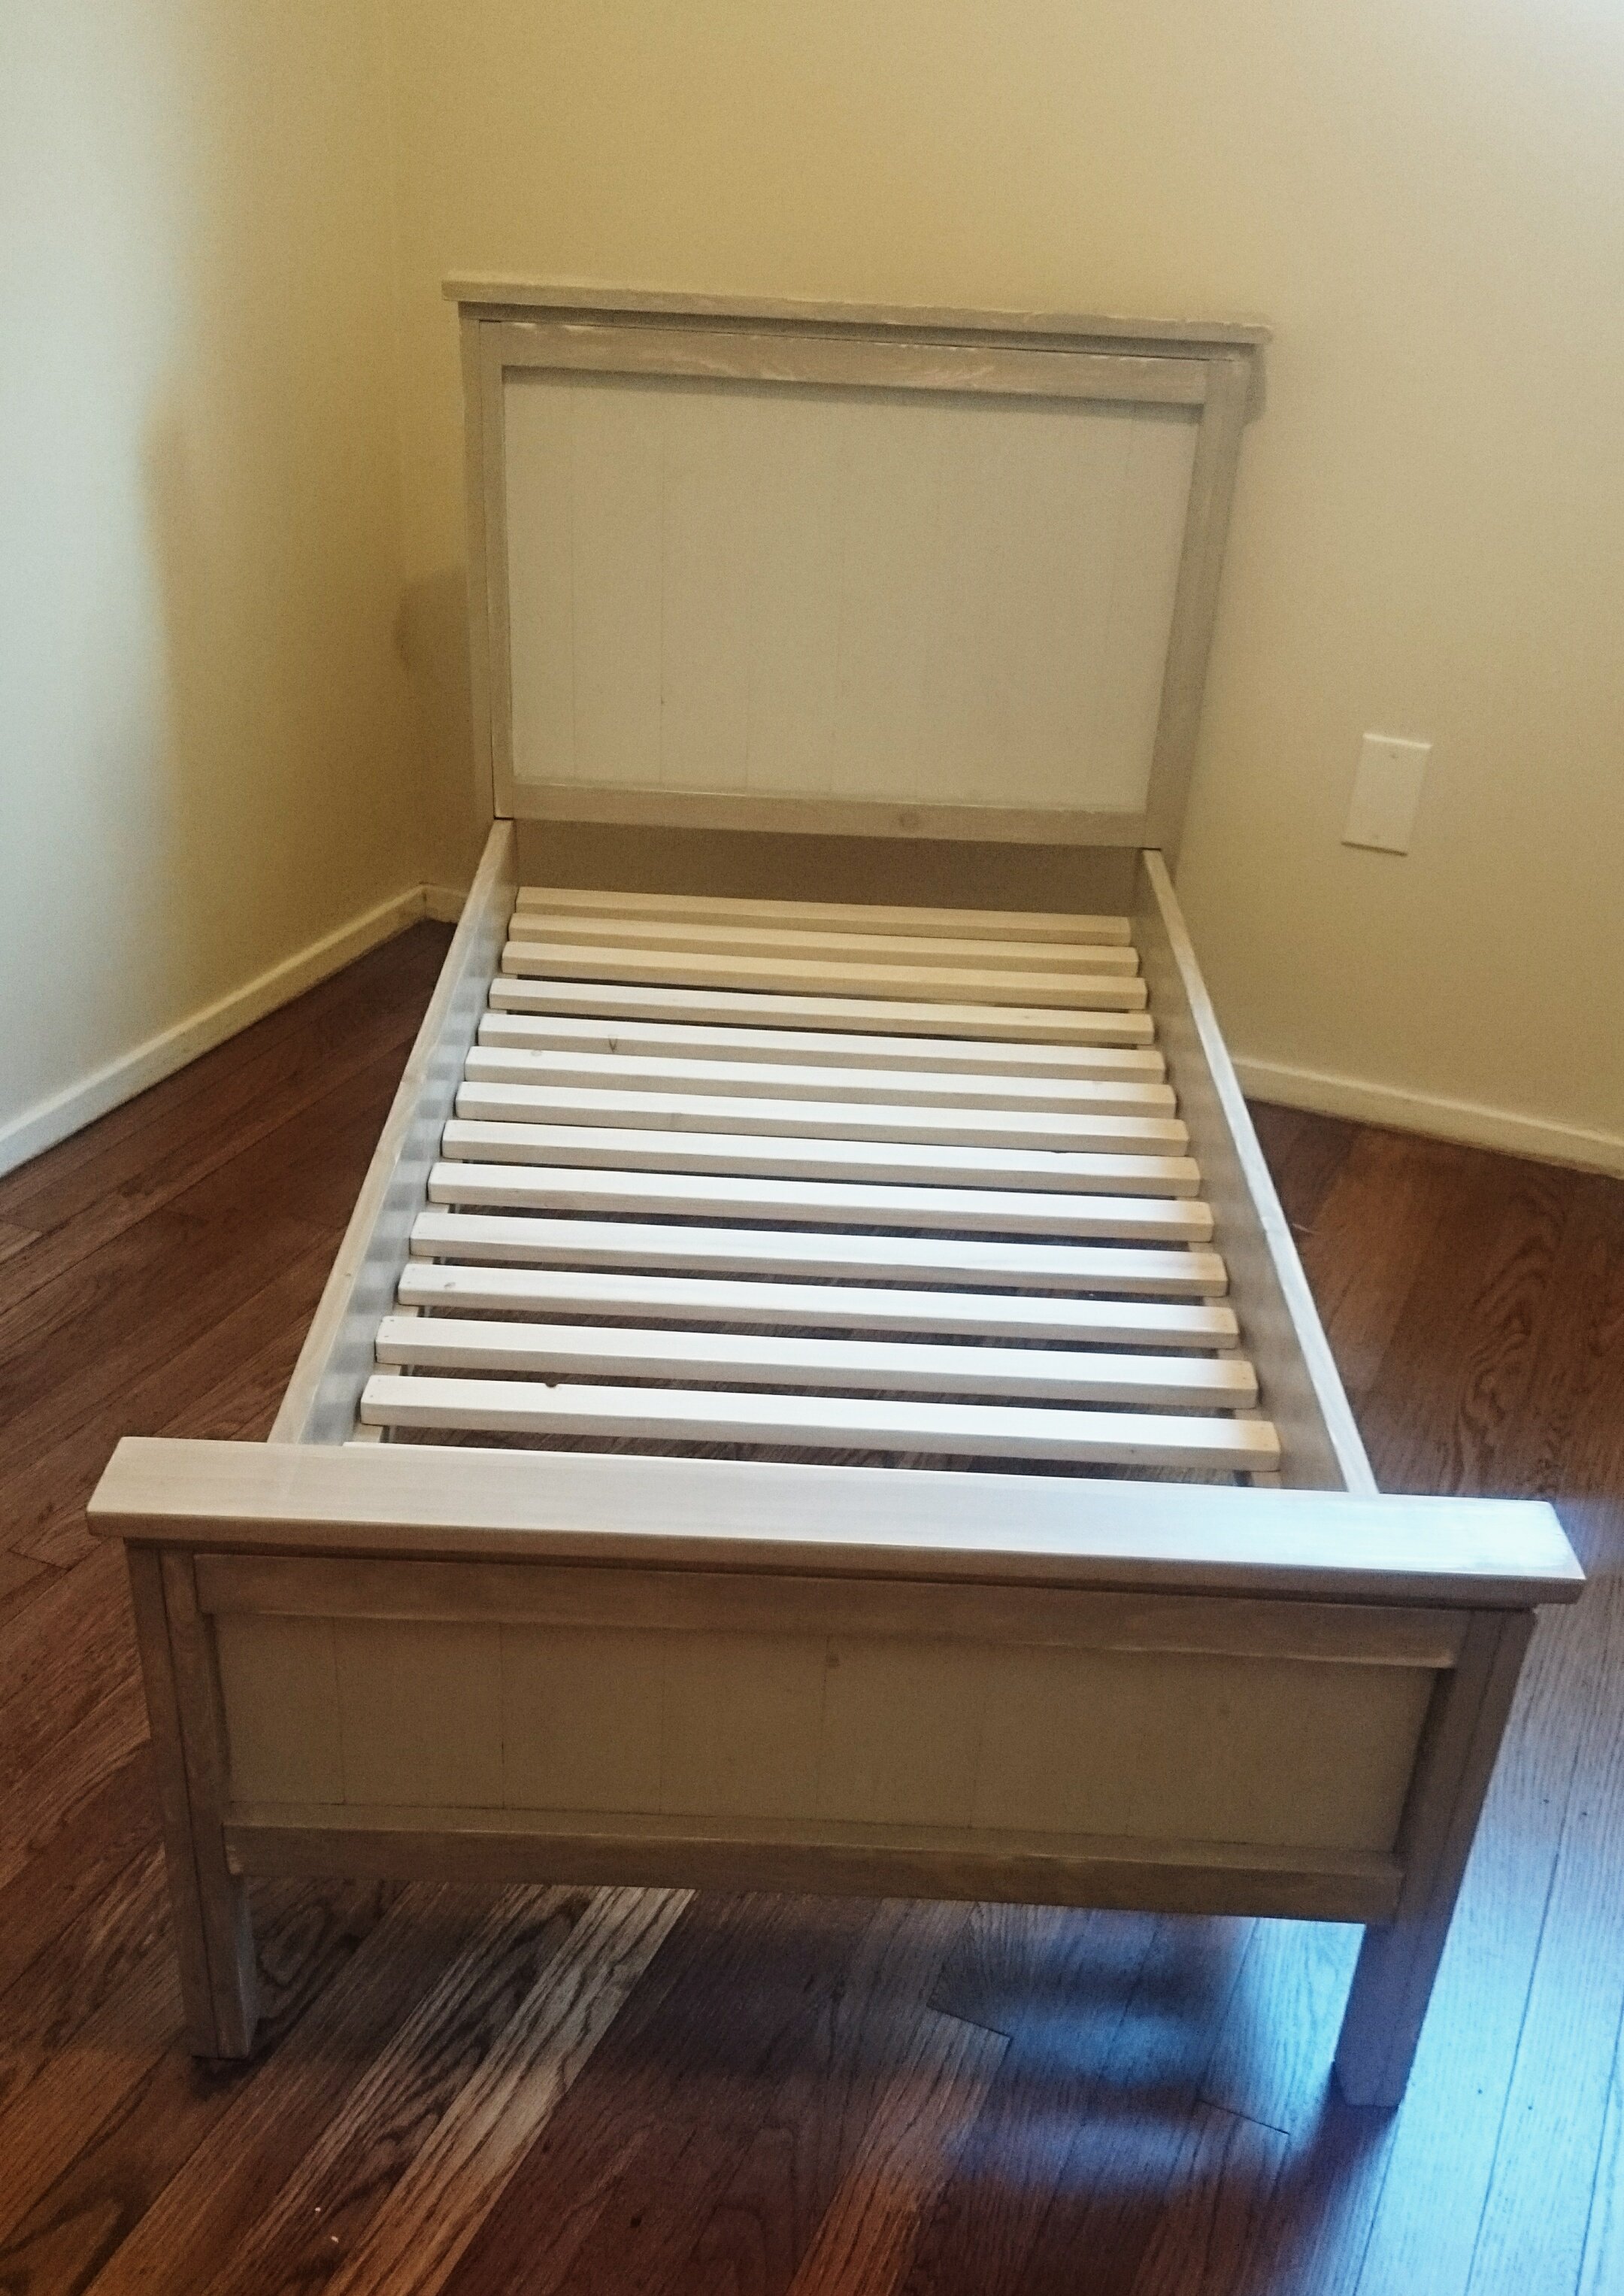
This was the first building project I have ever done. it was easy and fun. The end product is sturdy and looks stylish. I'm very happy with it.
Built from Plan(s)
Estimated Cost
$60
Estimated Time Investment
Week Long Project (20 Hours or More)
Finish Used
Polycrylic
Recommended Skill Level
Beginner
Adjustable pipe stools
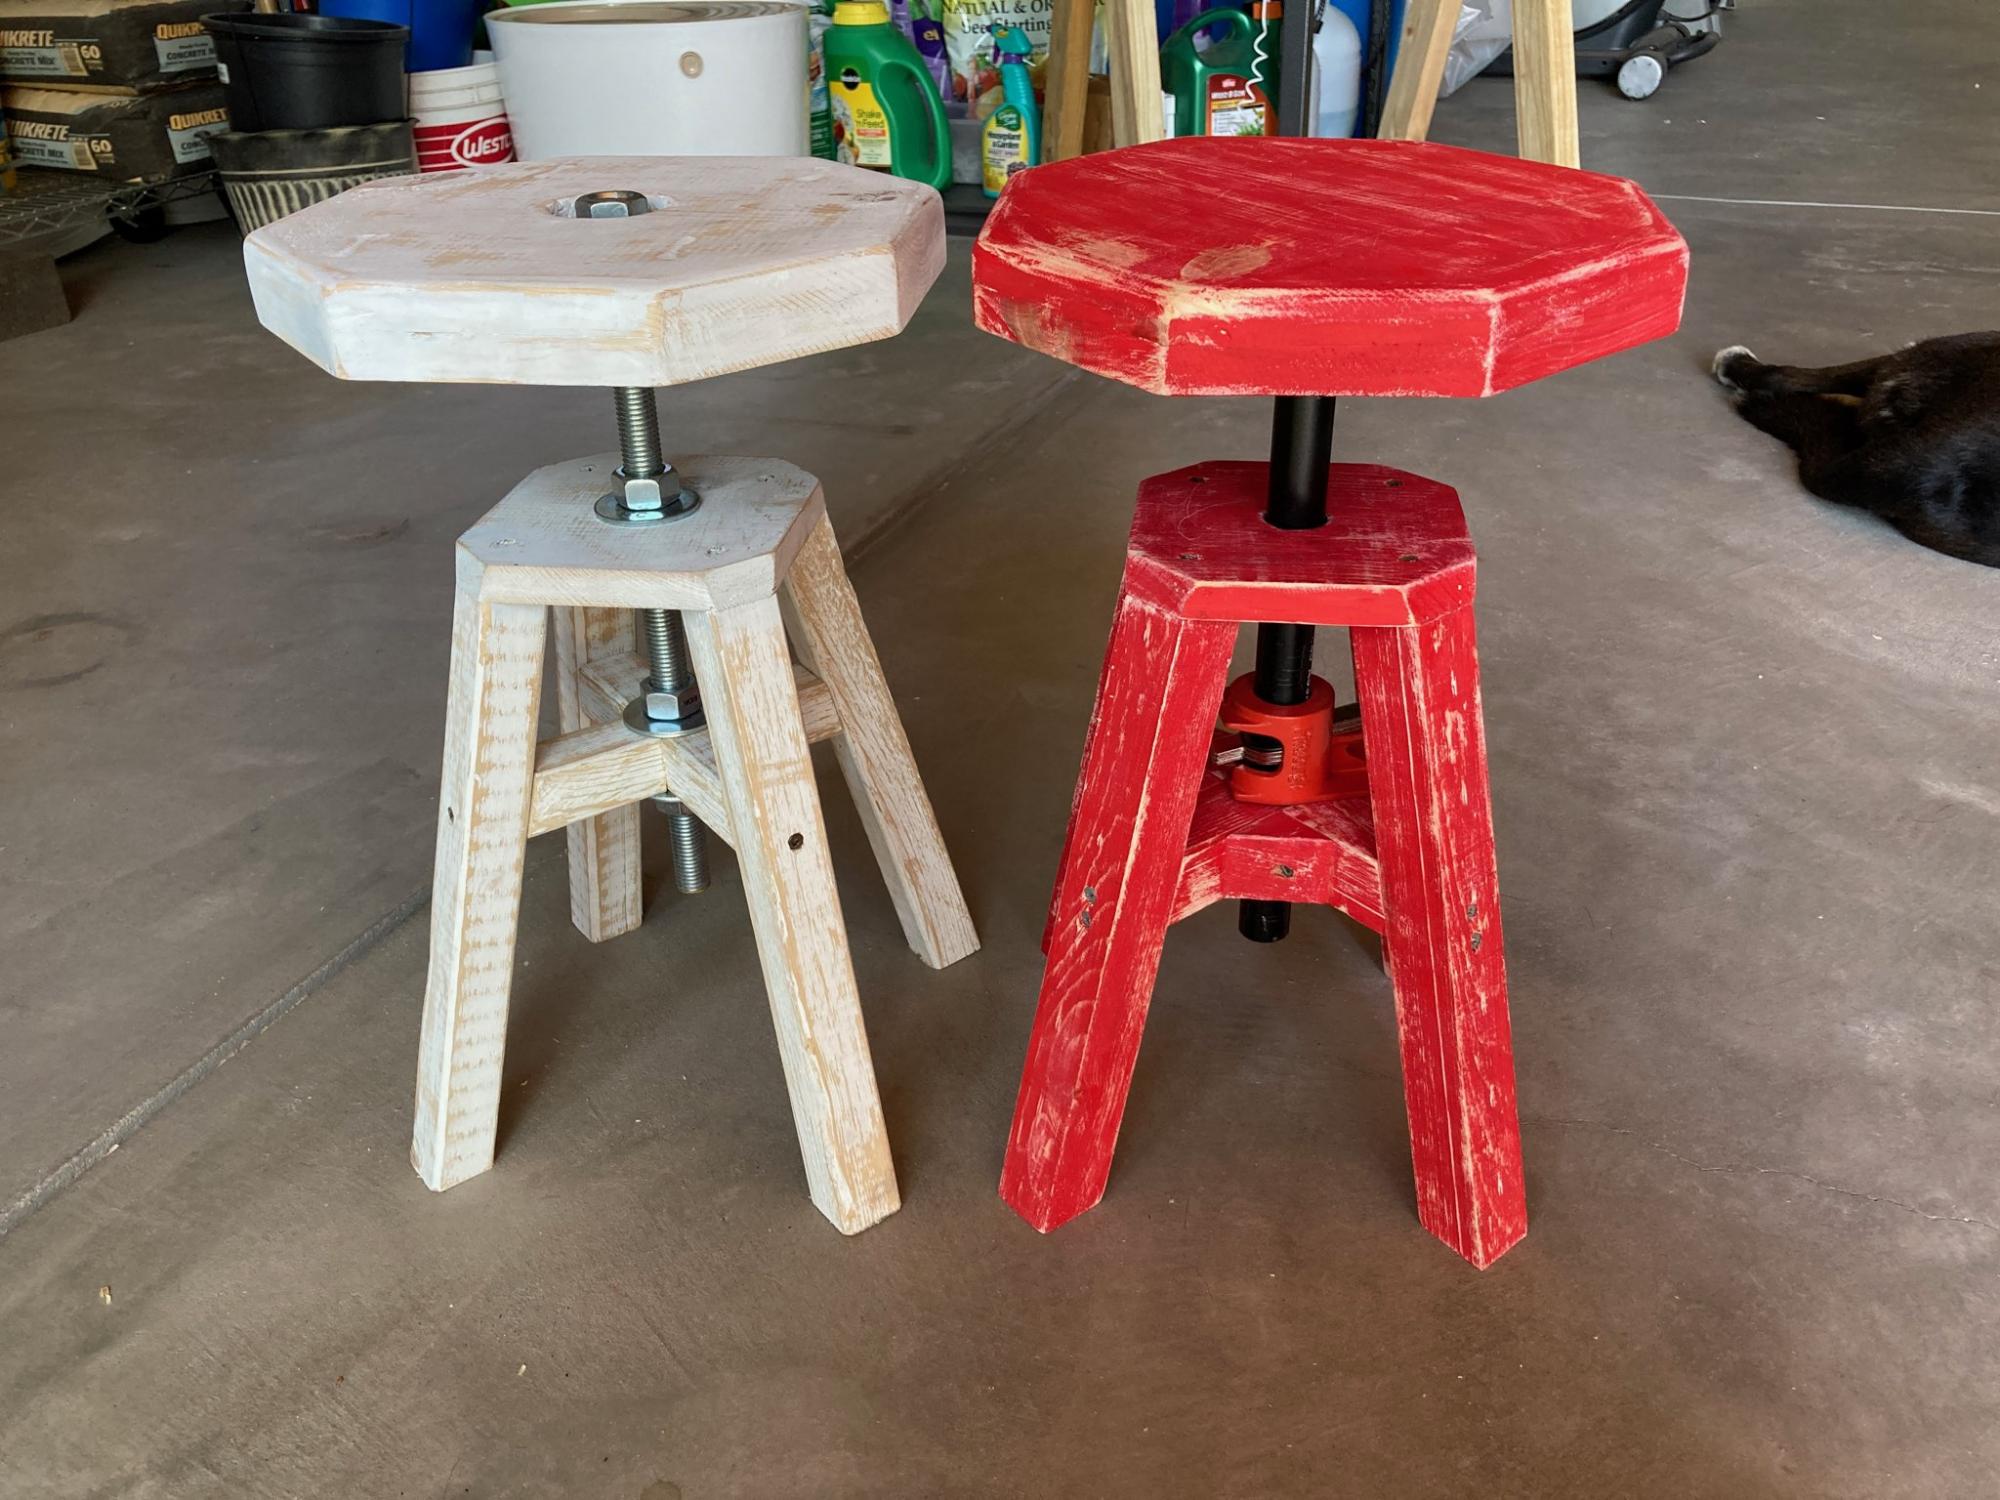
White chair was made first mostly based on the original plans, but my pipe flange broke immediately. So I just bolted the top on and then made red chair with a pipe and harbor freight pipe clamp instead of all-thread and nuts. It allows easy instant adjustment and a better fit with the pipe flange.
The reason I made the change is that pipe threading has a tapered angle, so when used with all-thread which is a strait cylinder, it doesn't make proper thread contact. On top of that, the only all thread I could find had a different threads per in (10 vs 14) than standard pipe and cross threaded my flange, causing it to break on the first use.
I used 3/4ths pipe because I was trying to avoid all possible problems from the first try (which used a 1/2 in pipe flange) and this took too much material out of my cross supports for my comfort. So I added 45 deg right triangle scrap to the corners to beef it up. Probs would be much cheaper and still work fine with 1/2 in pipe.
Finally both chairs have much shorter legs than suggested in the plans because I needed regular chair height stools, not bar stools. And they still get high enough to be usable at counter height (but not ideal).
Built from Plan(s)
Estimated Cost
35ish
Estimated Time Investment
Day Project (6-9 Hours)
Finish Used
One coat of random paint, sanded down a bit to look worn.
Recommended Skill Level
Intermediate
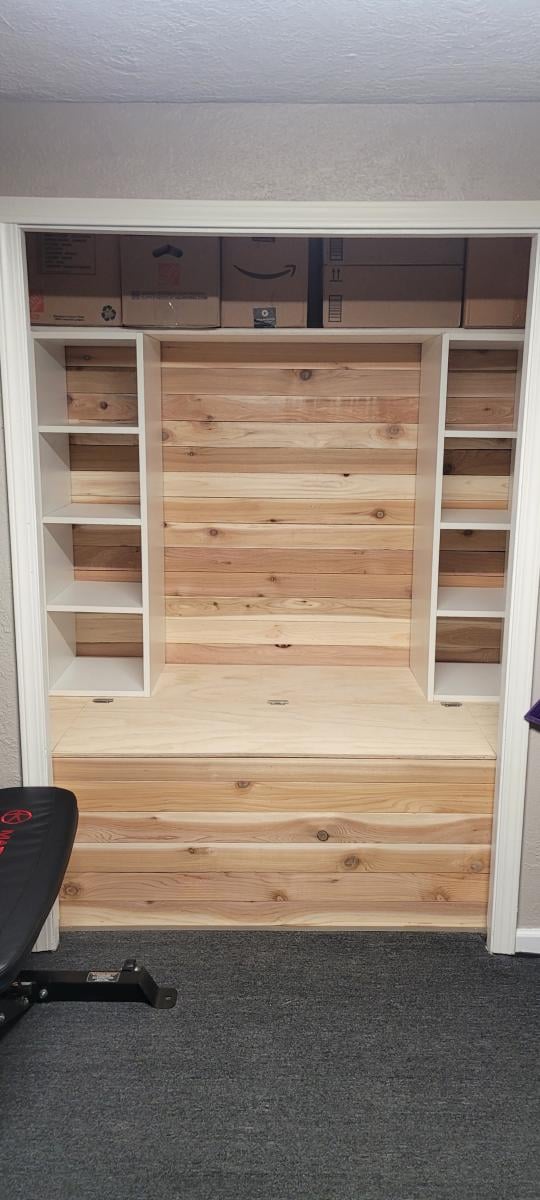
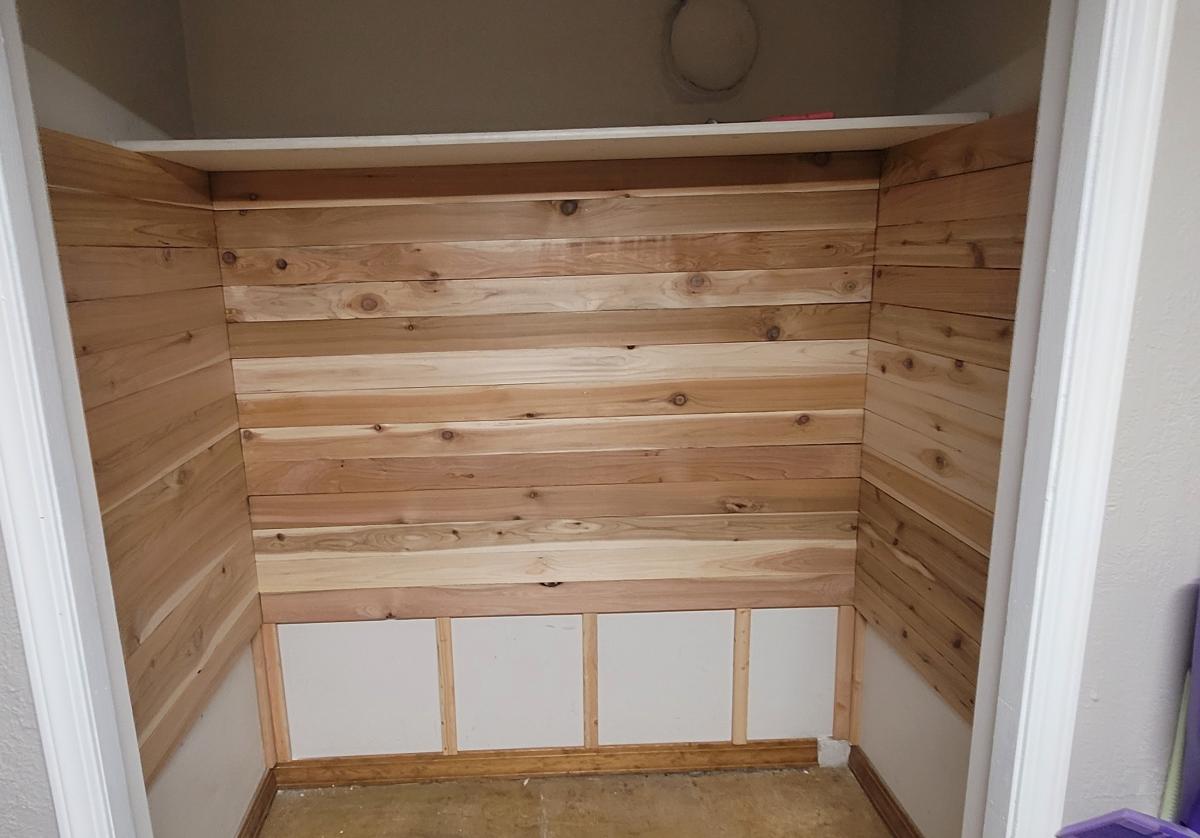
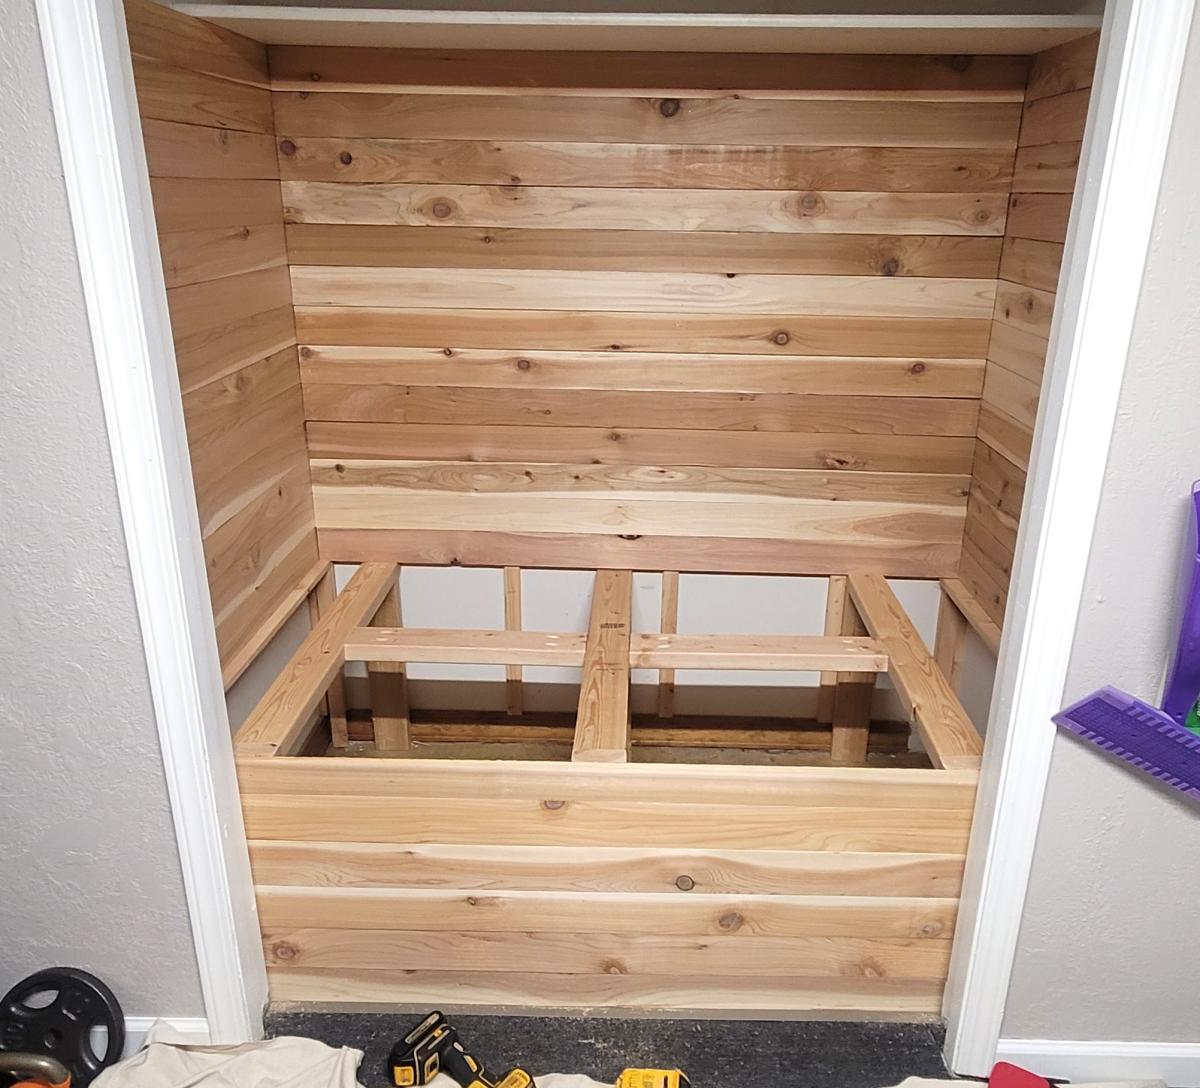
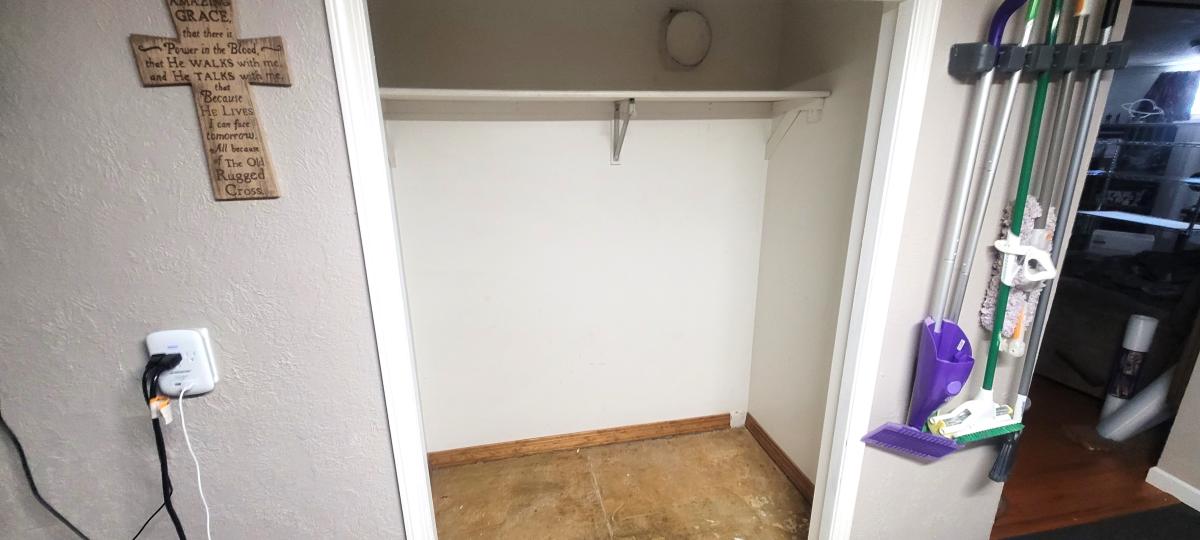
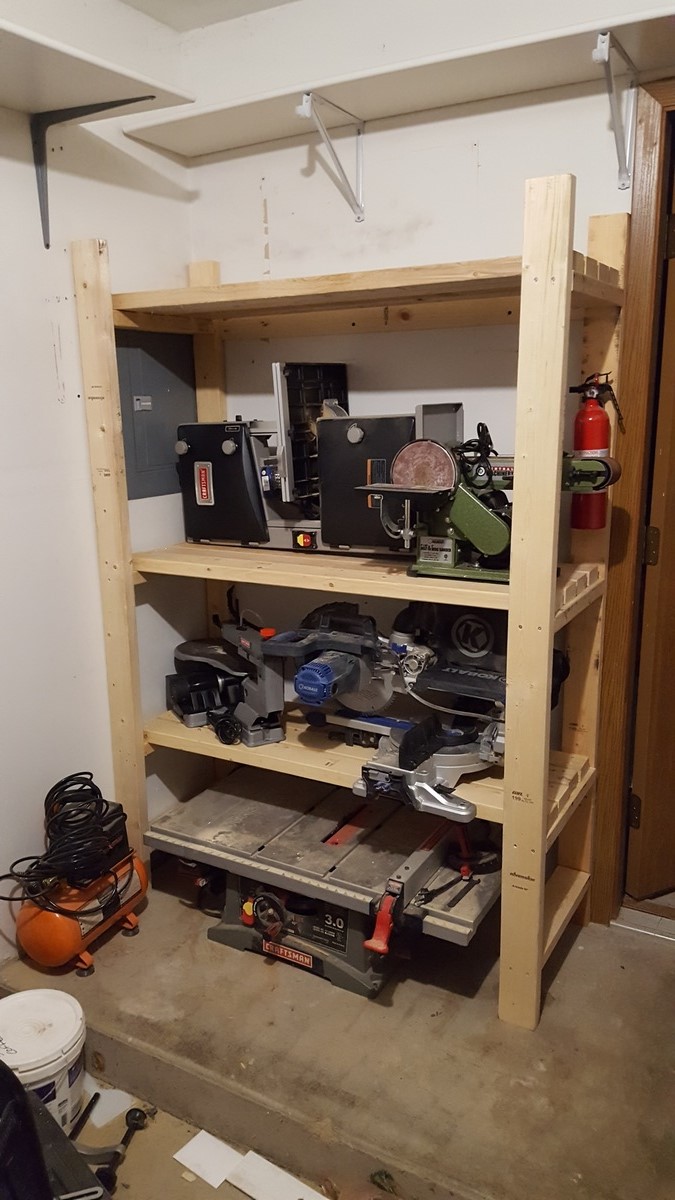
Basement Closet Upgrade

This is our basement closet. We wanted to make it more useful. We were inspired by the plans for the closet makeover.
Crystal L.
Built from Plan(s)
Seasonal And Holiday
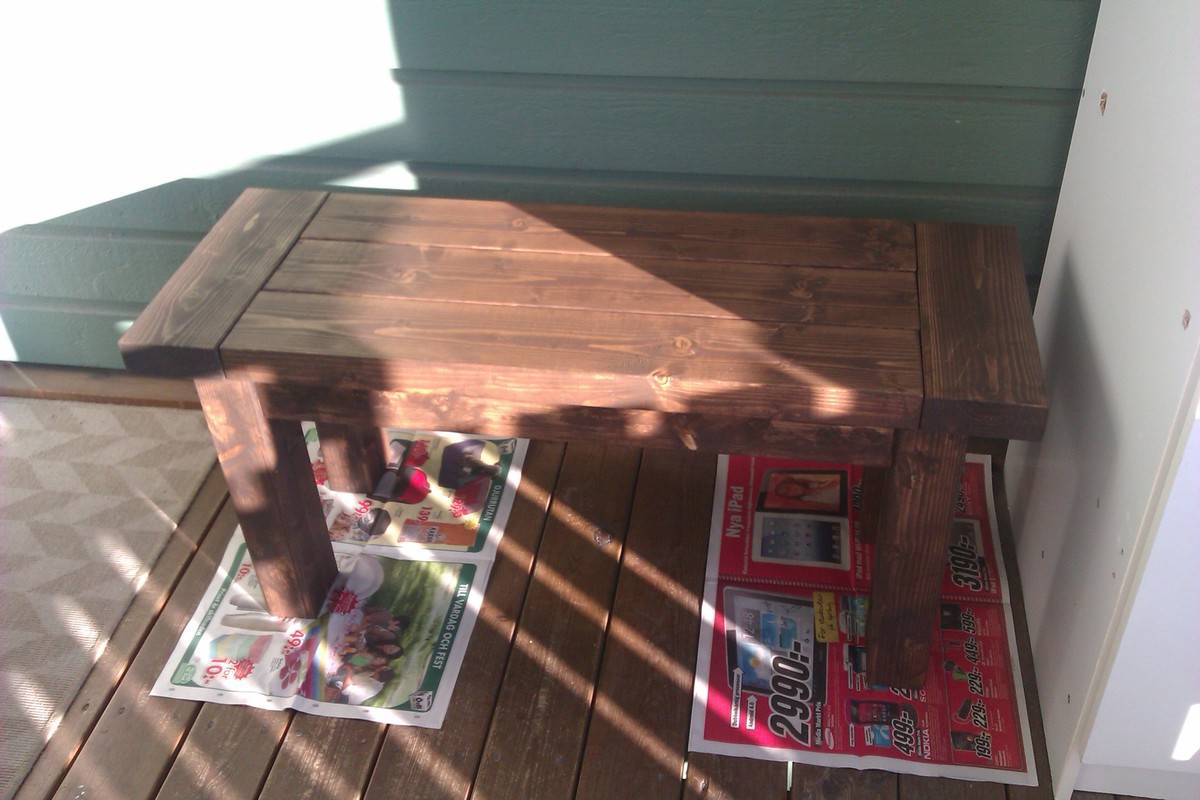
Farmhouse Bench
A 1m version of the farmhouse bench. We needed a shorter one for the hallway and realized that the only way would be if we built it ourselves. My bf and I built this together and it's really sturdy. Some adaption to the plan was made since it's shorter. It's very useful and we all love it. It's used each and every day.
Built from Plan(s)
Estimated Cost
200 SEK
Estimated Time Investment
Afternoon Project (3-6 Hours)
Finish Used
Stain.
Recommended Skill Level
Starter Project
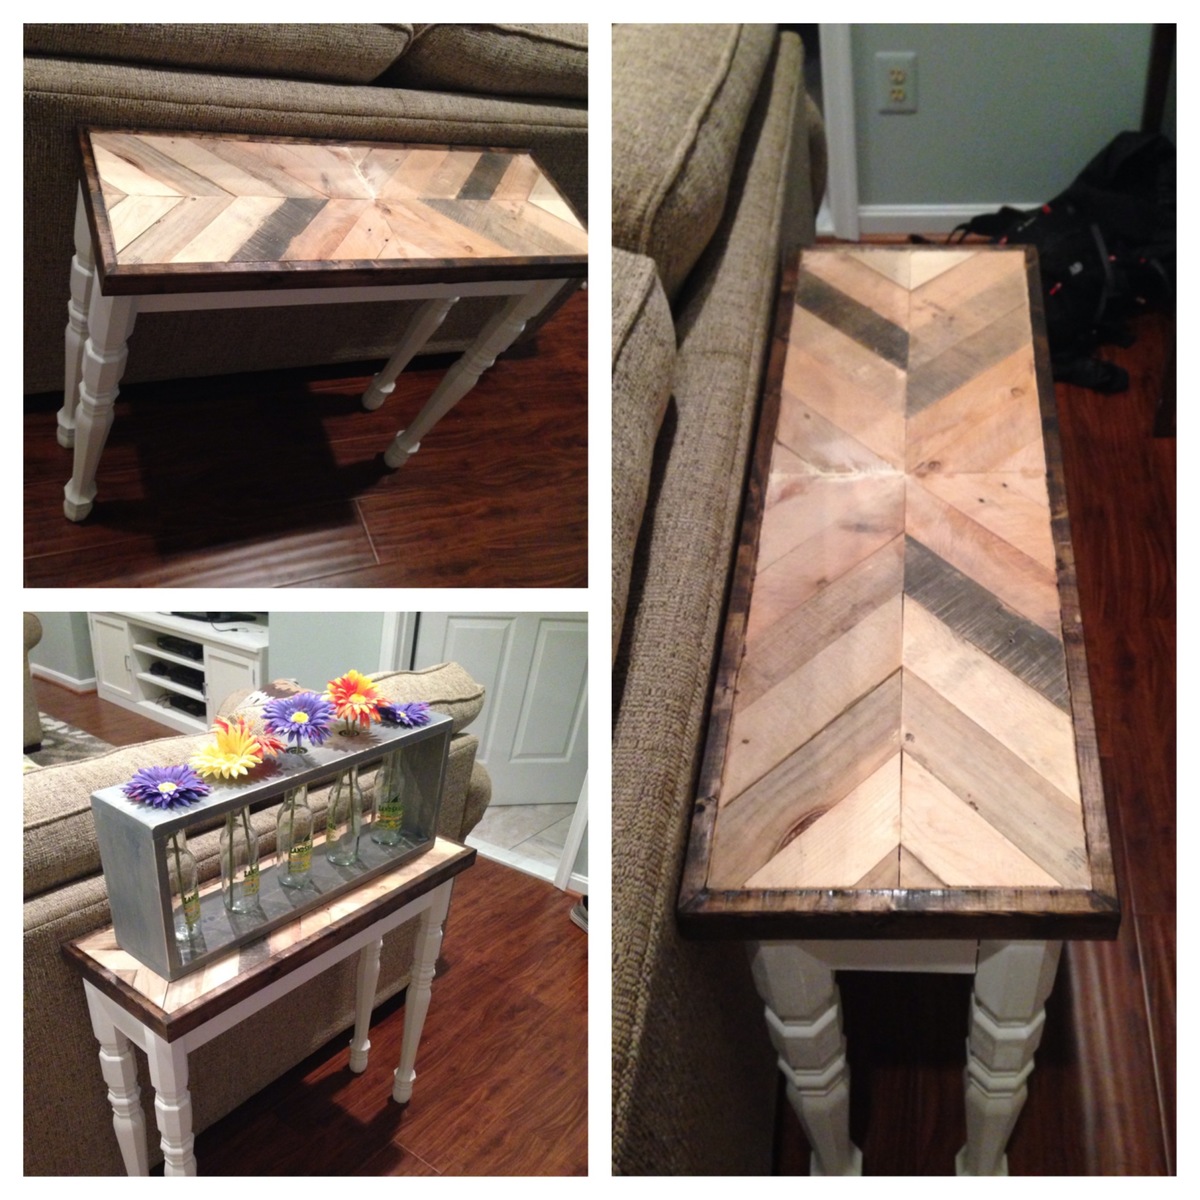
Hallway table

I made this hallway table for my gf's bday. It is really simply apart from taking apart pallets and squaring them off. The project only costs about $40-50, which most of the cost came from the purchasing of the table legs. I angled the pallet boards to be approximately 45 degrees. For this project, I used a table saw to cut, pneumatic brad nailer, tite bond wood glue, kreg jig pocket hole and paint/stain.
Estimated Cost
$40-50
Estimated Time Investment
Afternoon Project (3-6 Hours)
Recommended Skill Level
Starter Project
Loft Bed
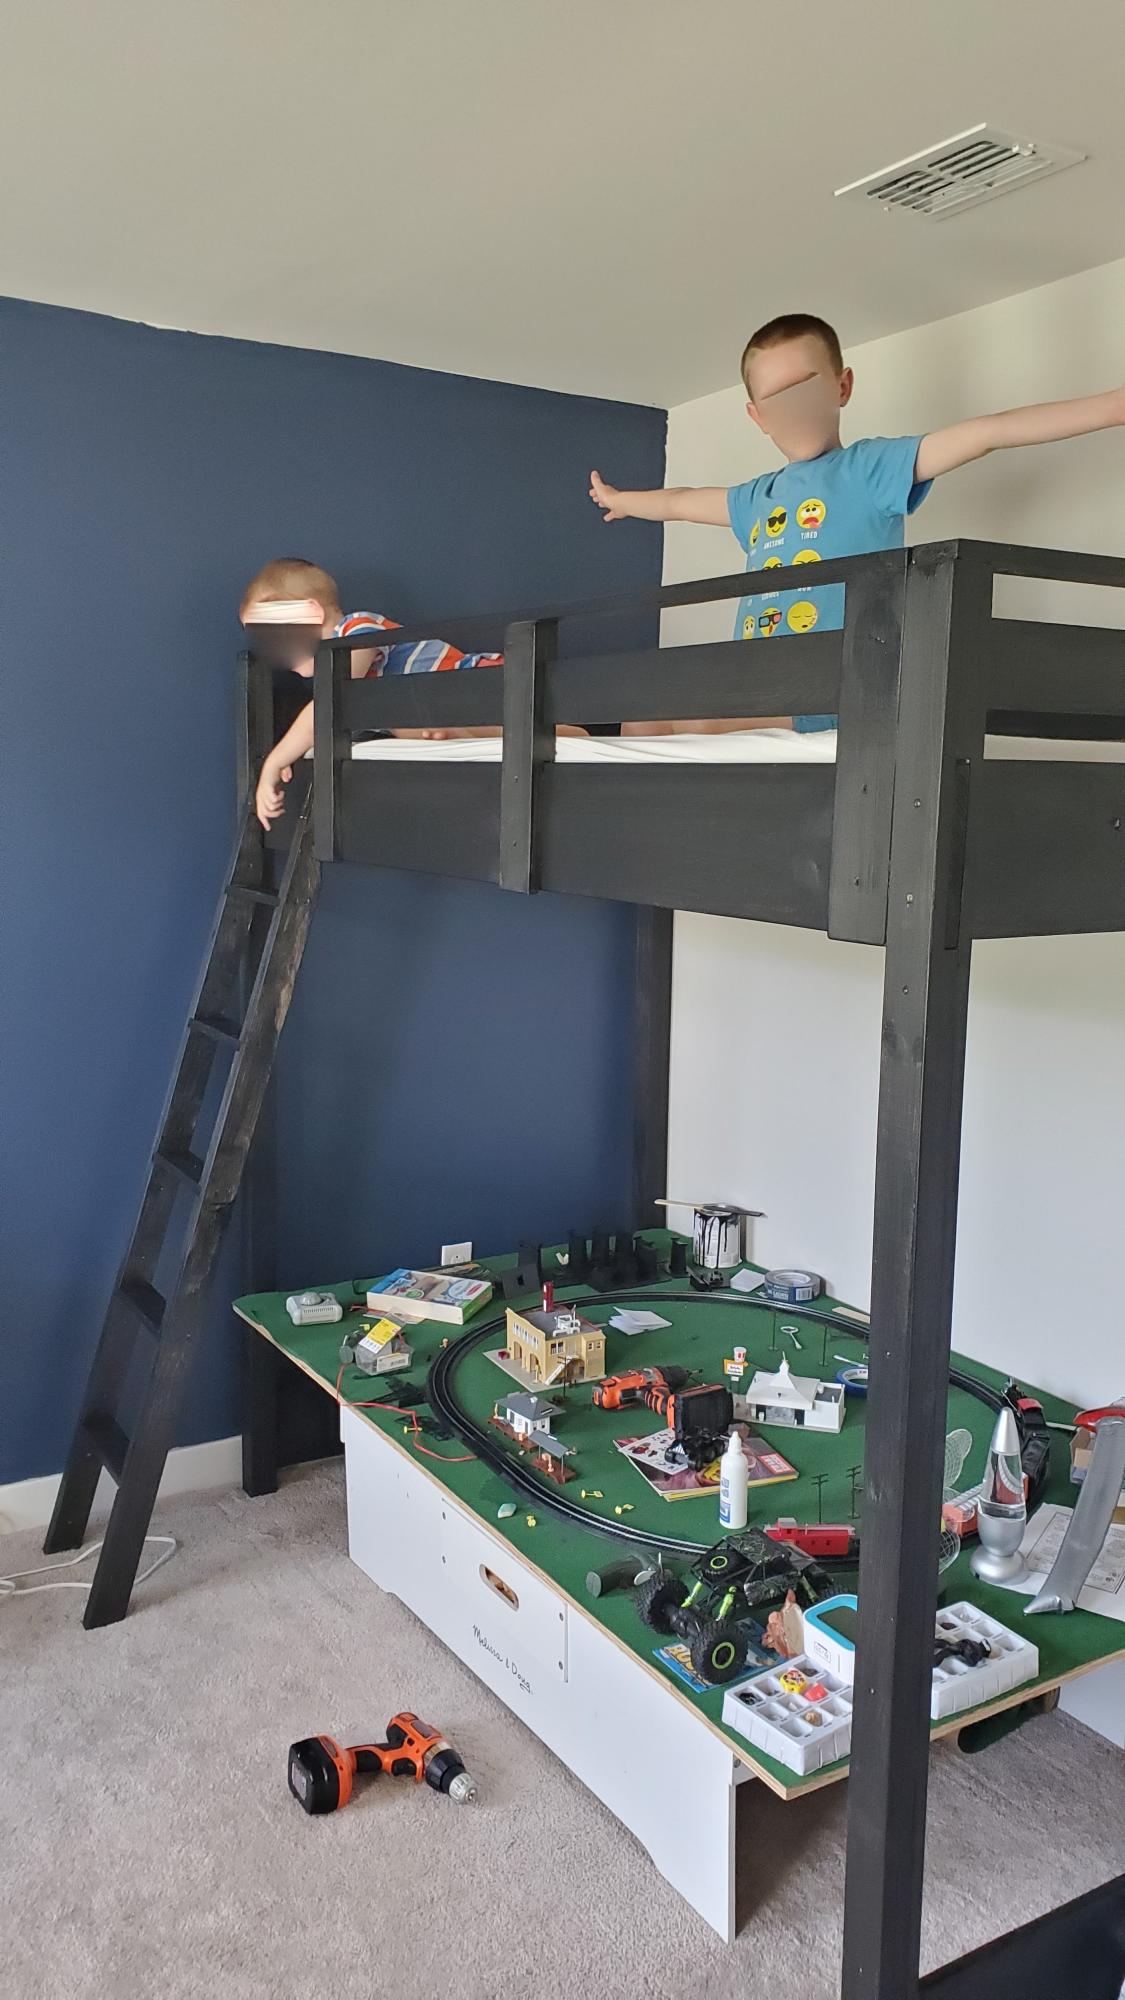
Built my first loft bed using these plans! The plans are comprehensive and easy to follow. Excuse the mess under the bed, but that is why we needed the extra space :-)
We also need to touch-up the paint a bit.
Estimated Cost
$200
Estimated Time Investment
Weekend Project (10-20 Hours)
Finish Used
Black furniture paint
Recommended Skill Level
Beginner