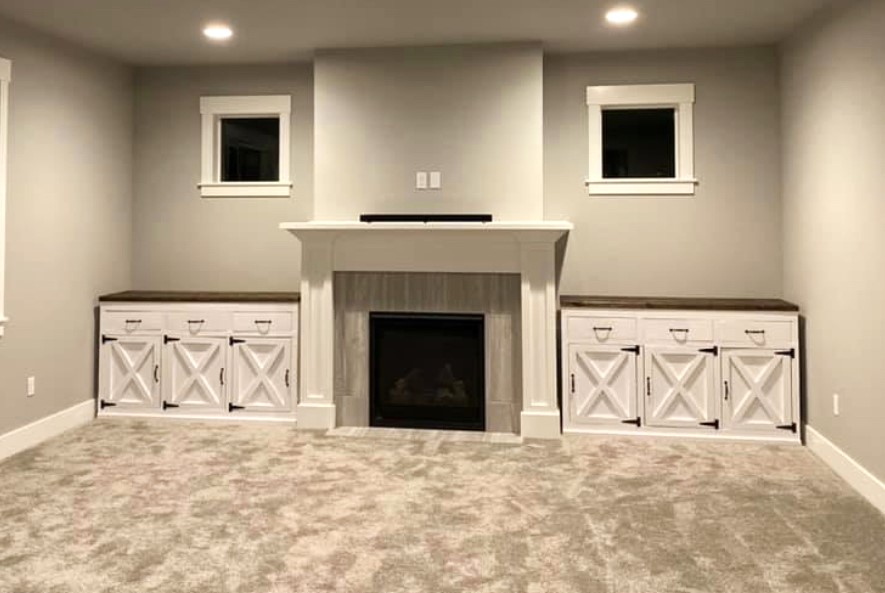
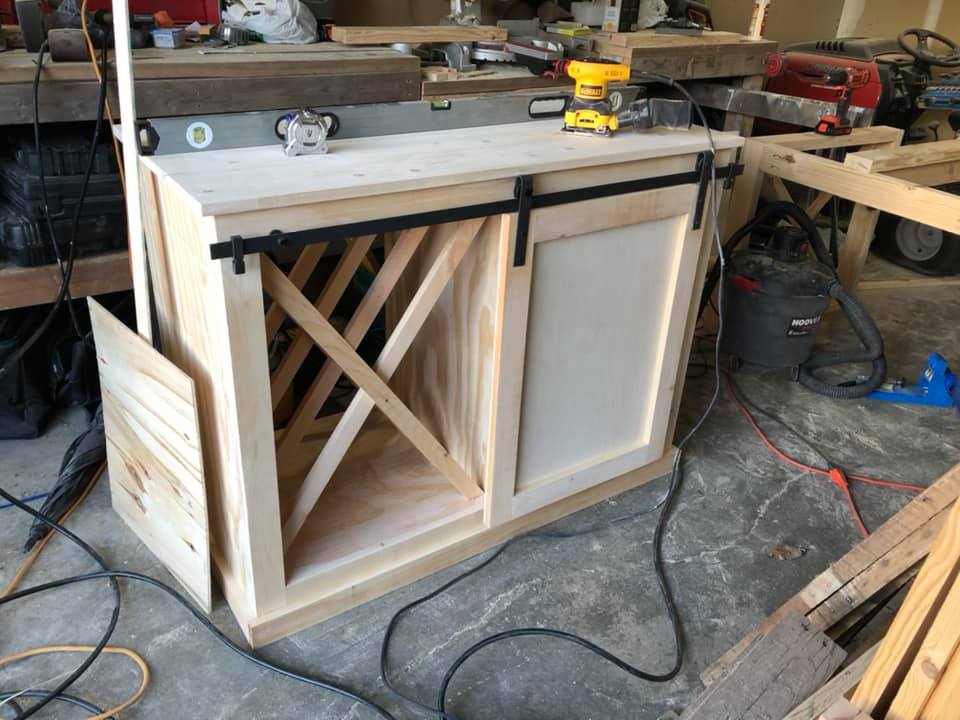
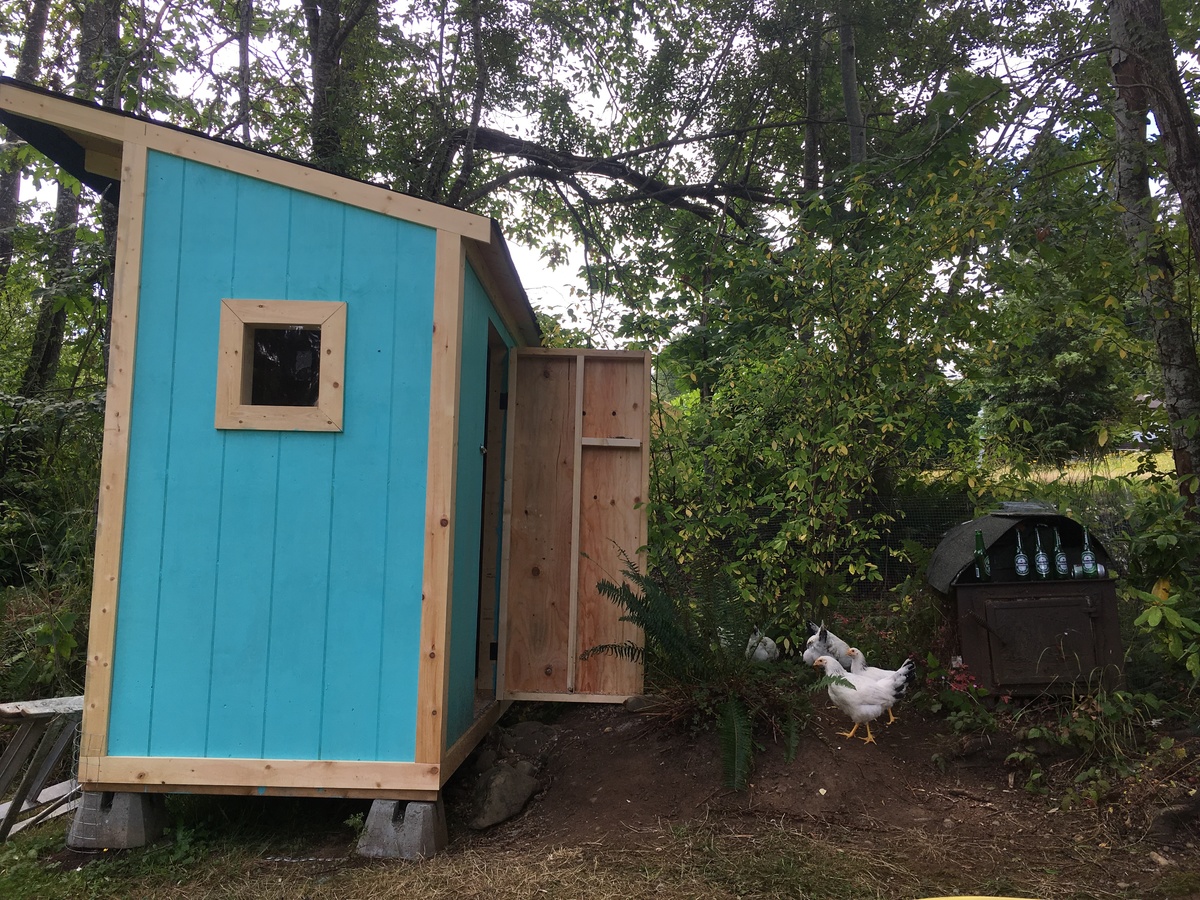
Shanty Sideboard

My wife and I are very happy with this piece. It was challenging but not too difficult. The plans were very easy to follow.
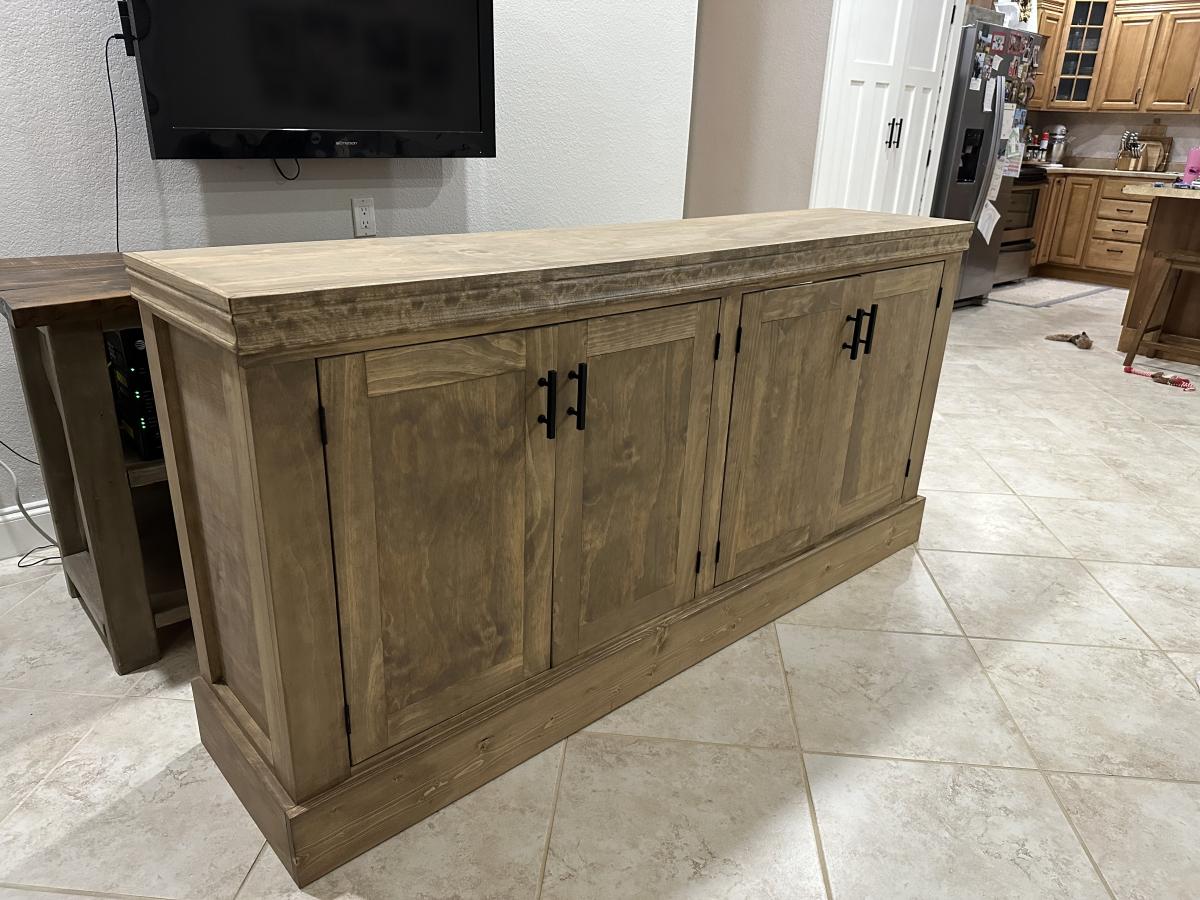
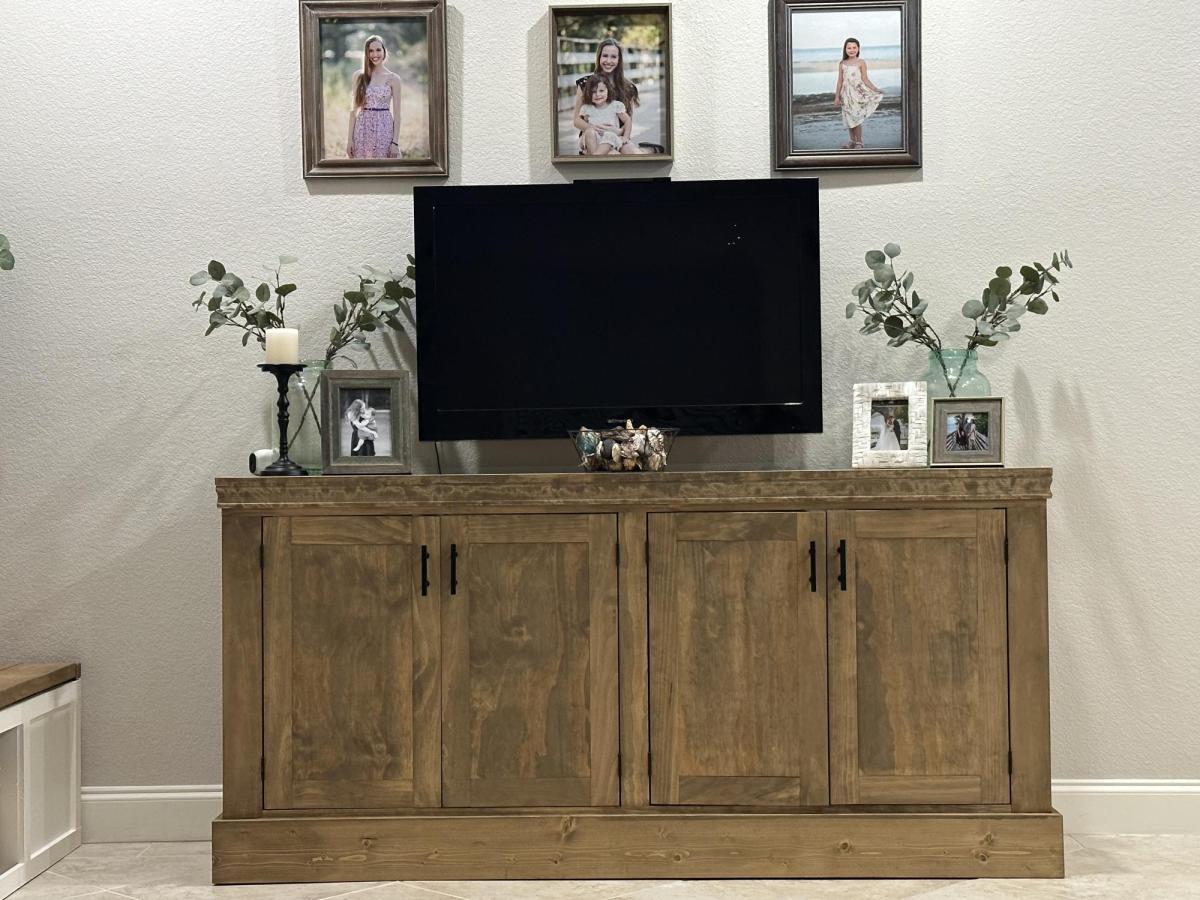
Built from Plan(s)
My wife and I are very happy with this piece. It was challenging but not too difficult. The plans were very easy to follow.
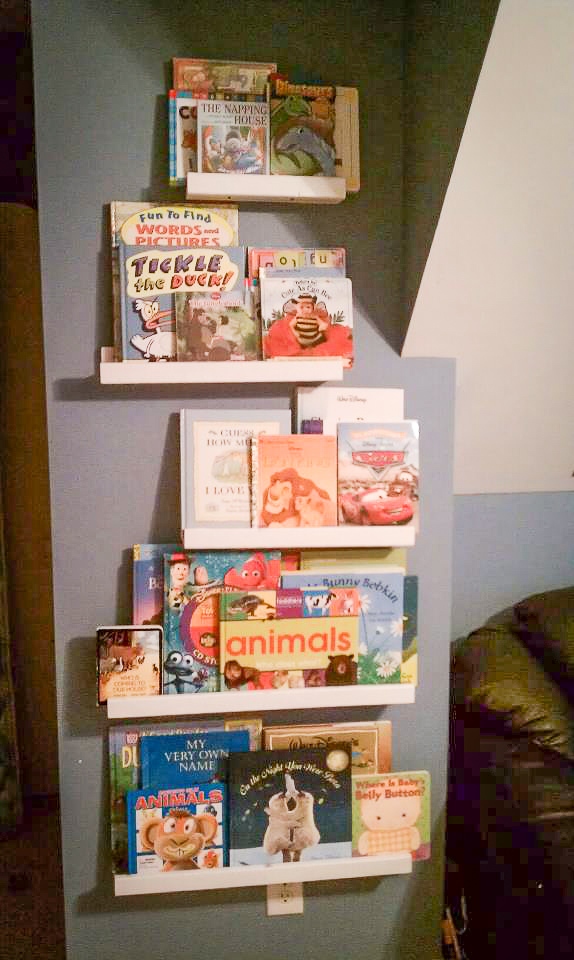
This project only cost me about $5 which is unbelievable. I had a small wall that was useless in the playroom so Ana gave me the perfect idea with her 10 dollar ledges. I love them! I am new at the Kreg jig and I didn't know what screws to use or how deep to make the holes at first so i'm learning! My husband even liked them so much he wants me to make some for his garage(man-cave) which is a huge complement...

Chamfered the bottoms of some 4x4 douglas fir, and used 2x6 douglas fir for the top. Stained in Minwax Dark Walnut/Special Walnut.

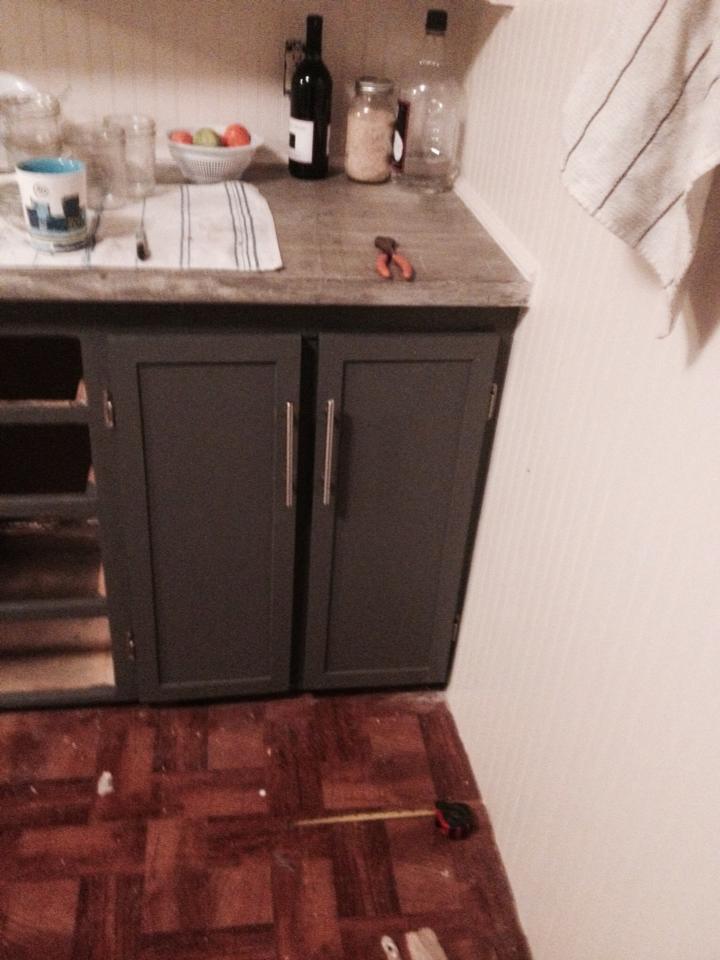
Pleas excuse the mess in the pictures. It is too cold to work in the garage up here in the northwest, so this project took over our entire kitchen and dining room. We built these frame and panel-style doors using Ana's plans from the mom-plex bathroom vanity! We are so excited because we spent about $100 including paint and have plenty of leftover materials for the drawers next week!
These are the original cabinets in our 75 year old house and they were in serious need of rehab. We even contemplated ripping them out and using Ana's cabinet plans to build new ones but after we removed the shelves, the carcass of the cabinets were still in good shape. We filled, sanded, painted and built these new amazing doors that I'm seriously losing my mind over. They are so beautiful and I don't think I could have ordered something better. Maybe better made but how sweet is it to save all that money by building them yourselves?
We'll post drawer pictures after we get those finished up and hopefully have a clean kitchen at that point. :)
Thanks Ana! Our home is becoming truly special with the skills we learned from you!
Made to fit perfect
Mon, 02/17/2020 - 19:49
Made to perfectly fit your space! Check this out! Check out Marney Marie on Facebook. Build custom to order!! Made in Oregon!!
Built by Shaun Damon Beck
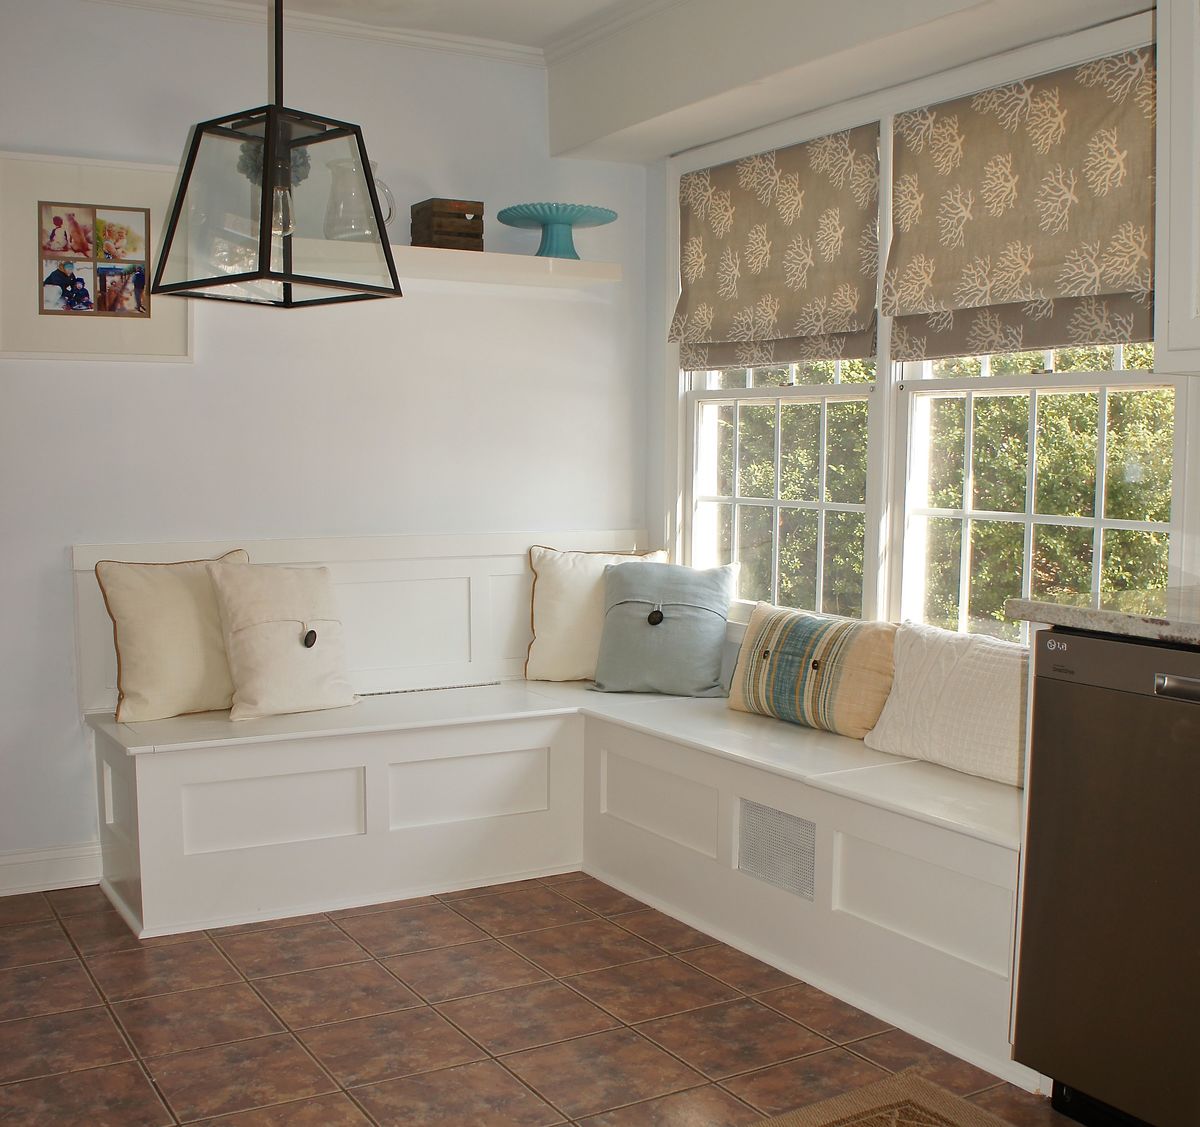
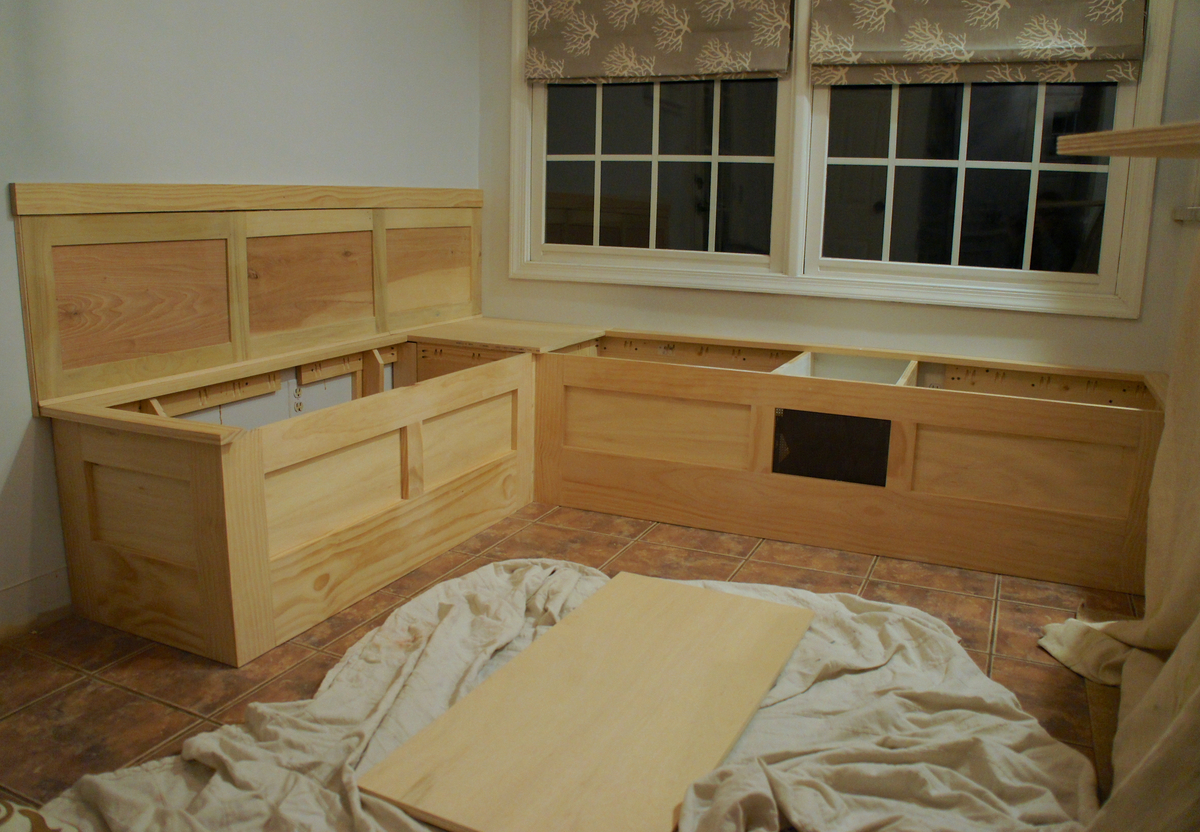
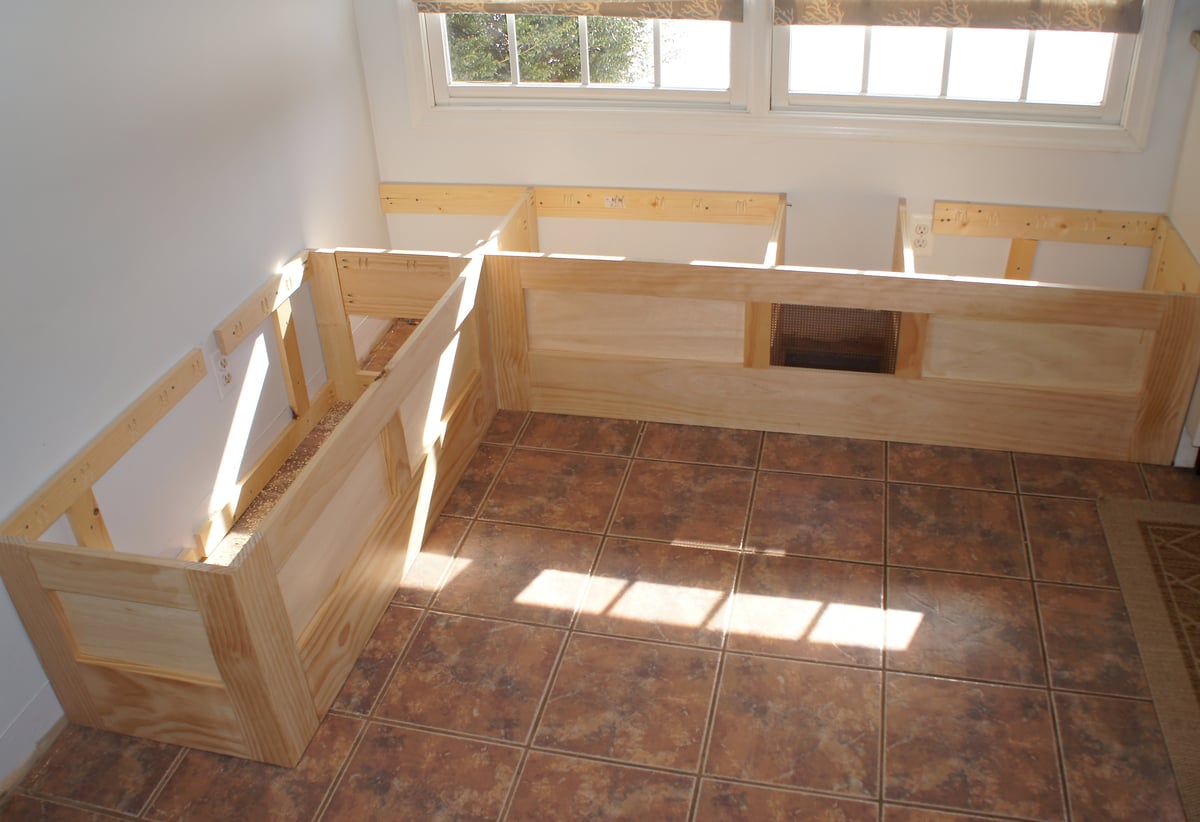
I wanted to make a built in storage bench for the breakfast nook in our eat-in kitchen, but wasn't entirely sure how to go about the process. After seeing Ana's "Mimi's Storage Bench" I thought the plan could be modified to fit our space, so I convinced my husband to give it a shot. We've done a fair amount of carpentry in our house, but this is the first piece of furniture that we have ever built. Thanks to Ana's plans and our new Kreg jig, it turned out better than I ever imagined. We absolutely love the new bench, where my toddler spends every morning eating his breakfast while staring out the window and giggling at the squirrels in our backyard.

Fri, 08/02/2019 - 21:25
What did you use in the area of the floor grate? I’m going to be doing a built in bench over a floor grate too. Thanks!
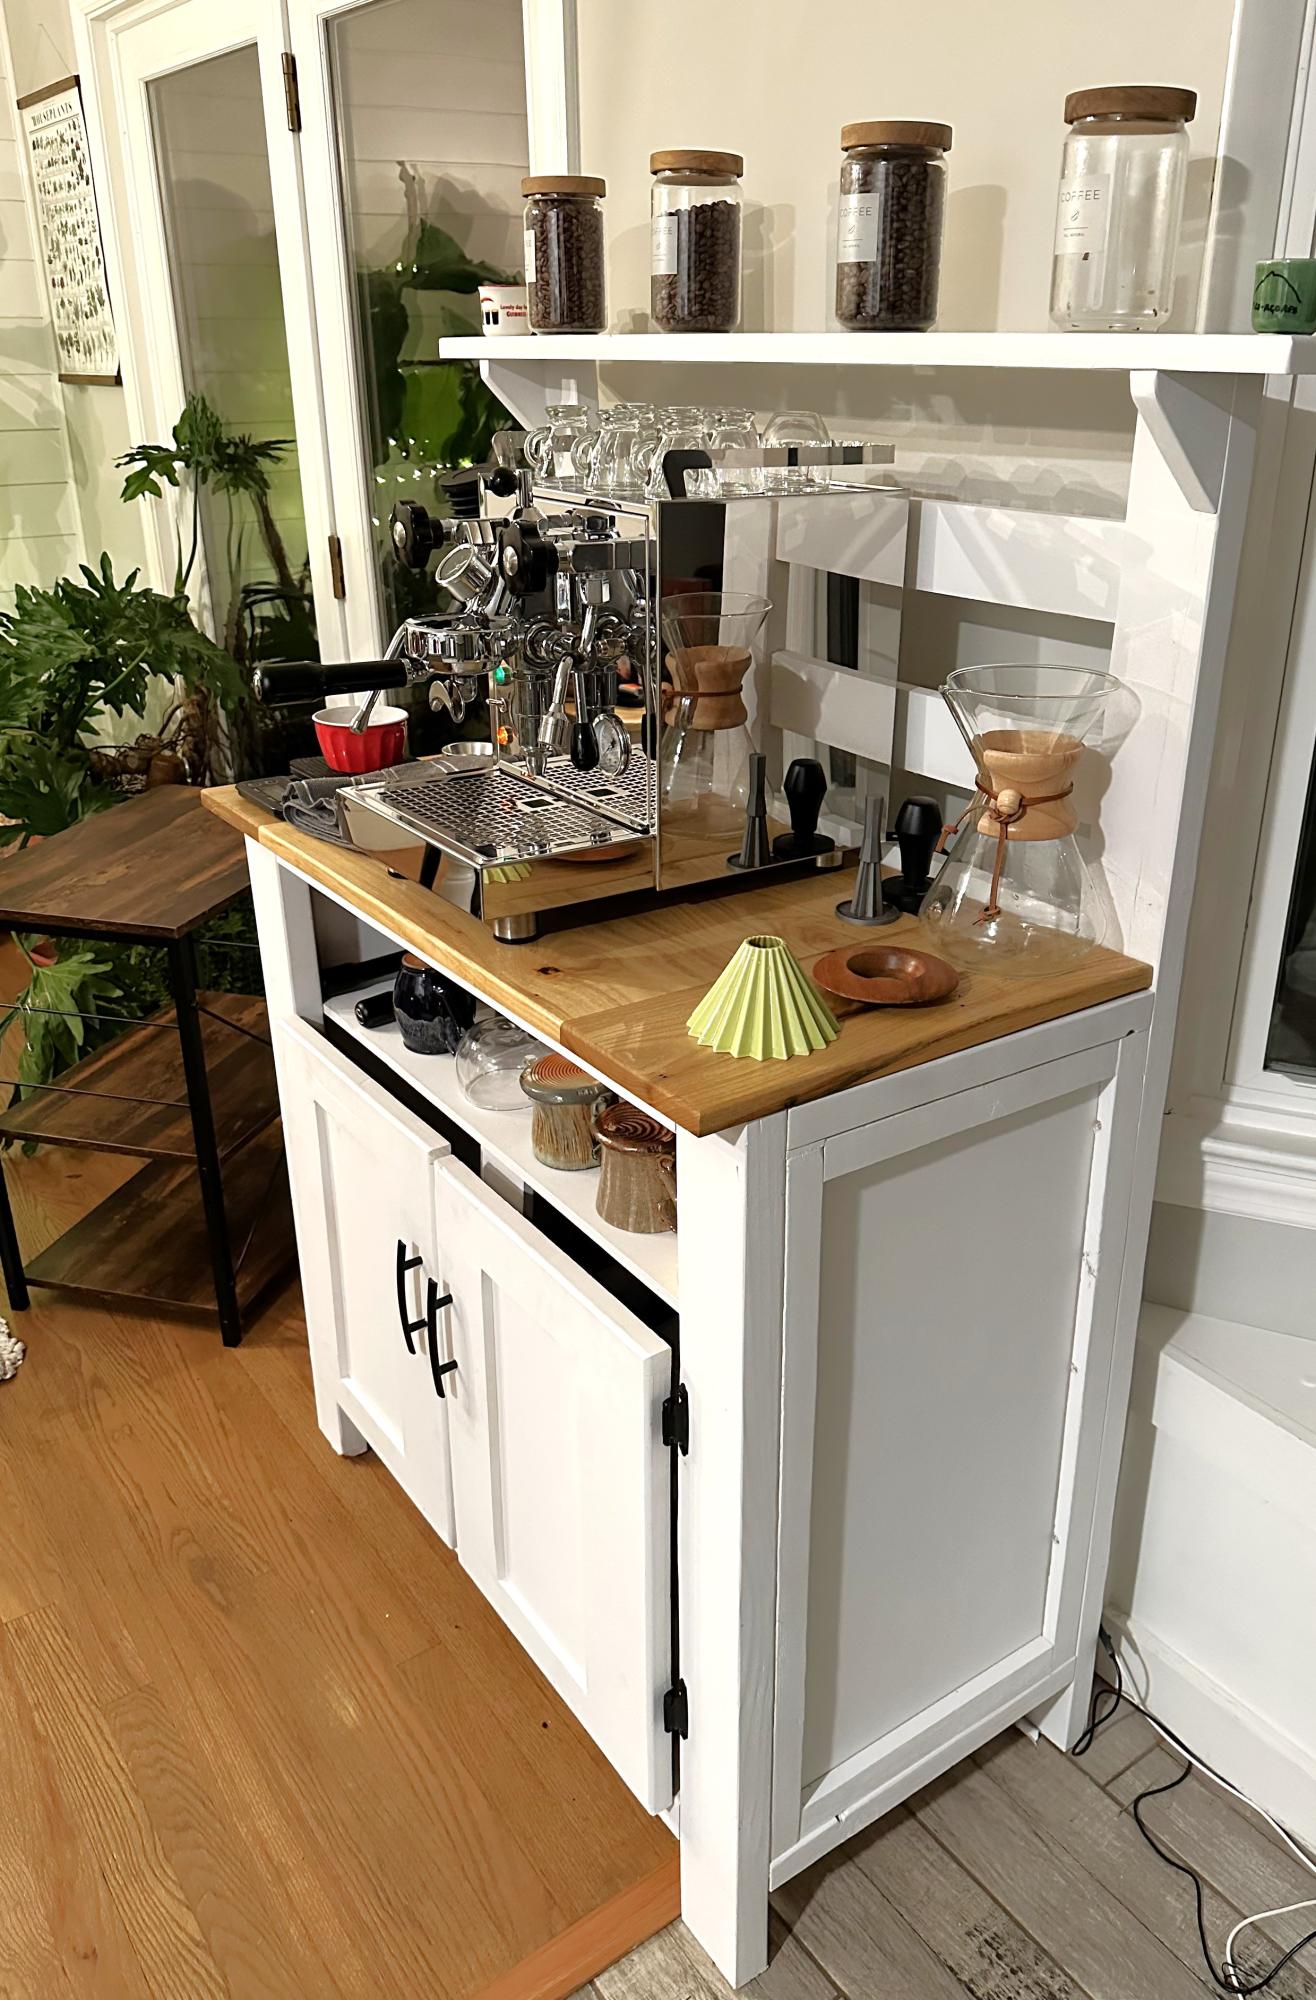
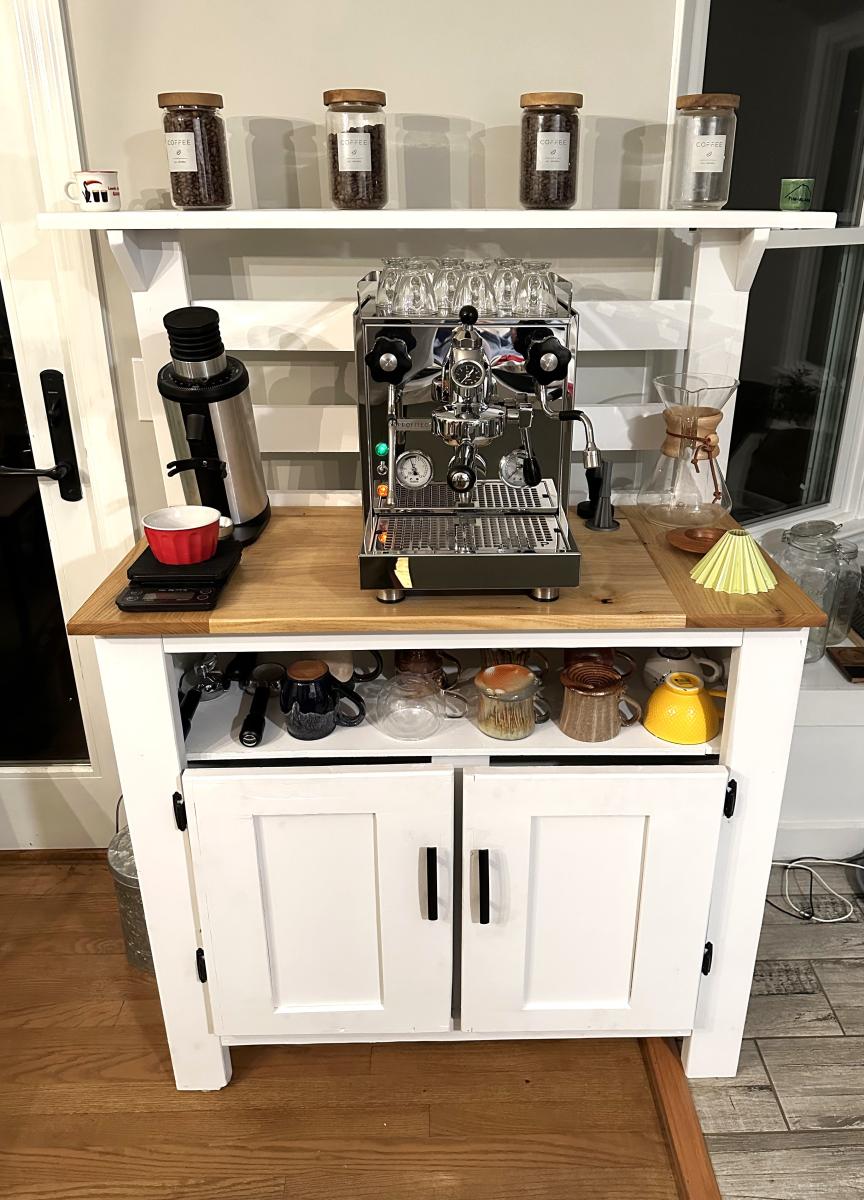
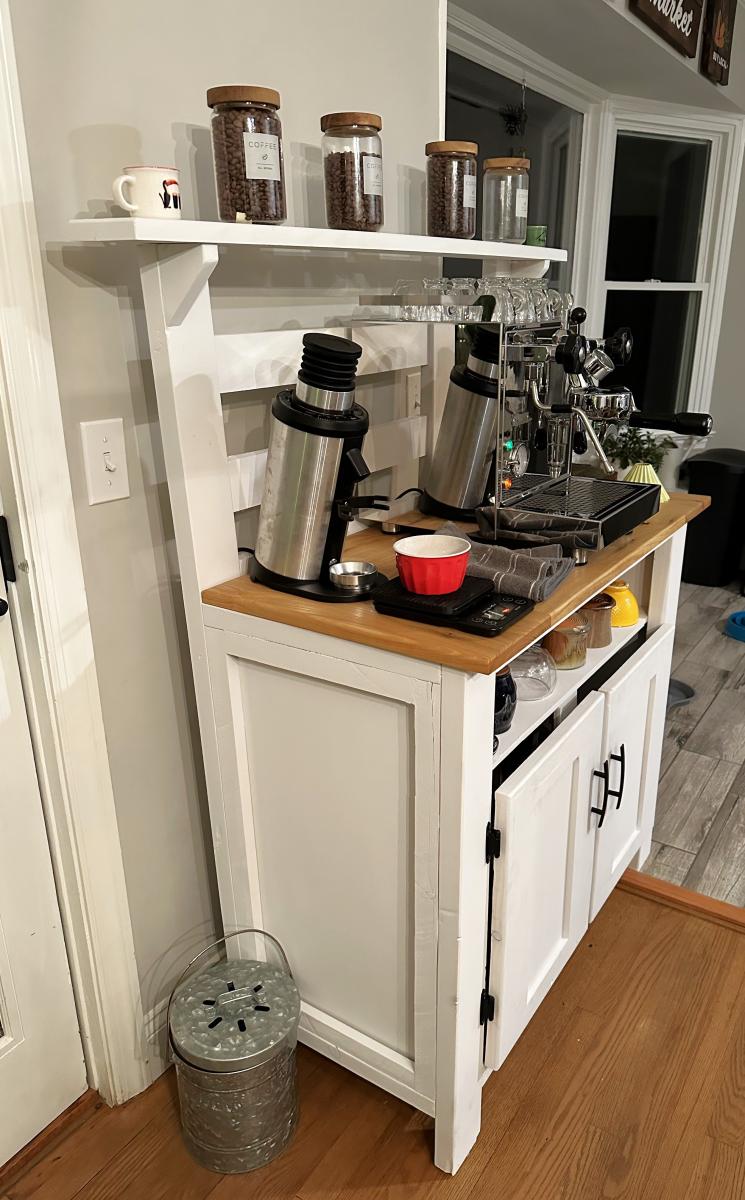
Had a bunch of scrap wood from other projects and random pieces we found in our barn after we moved into our new house so decided to make a new coffee bar to use it up. Modified the Potting Bench plans and pretty happy with how it turned out!
Nate B
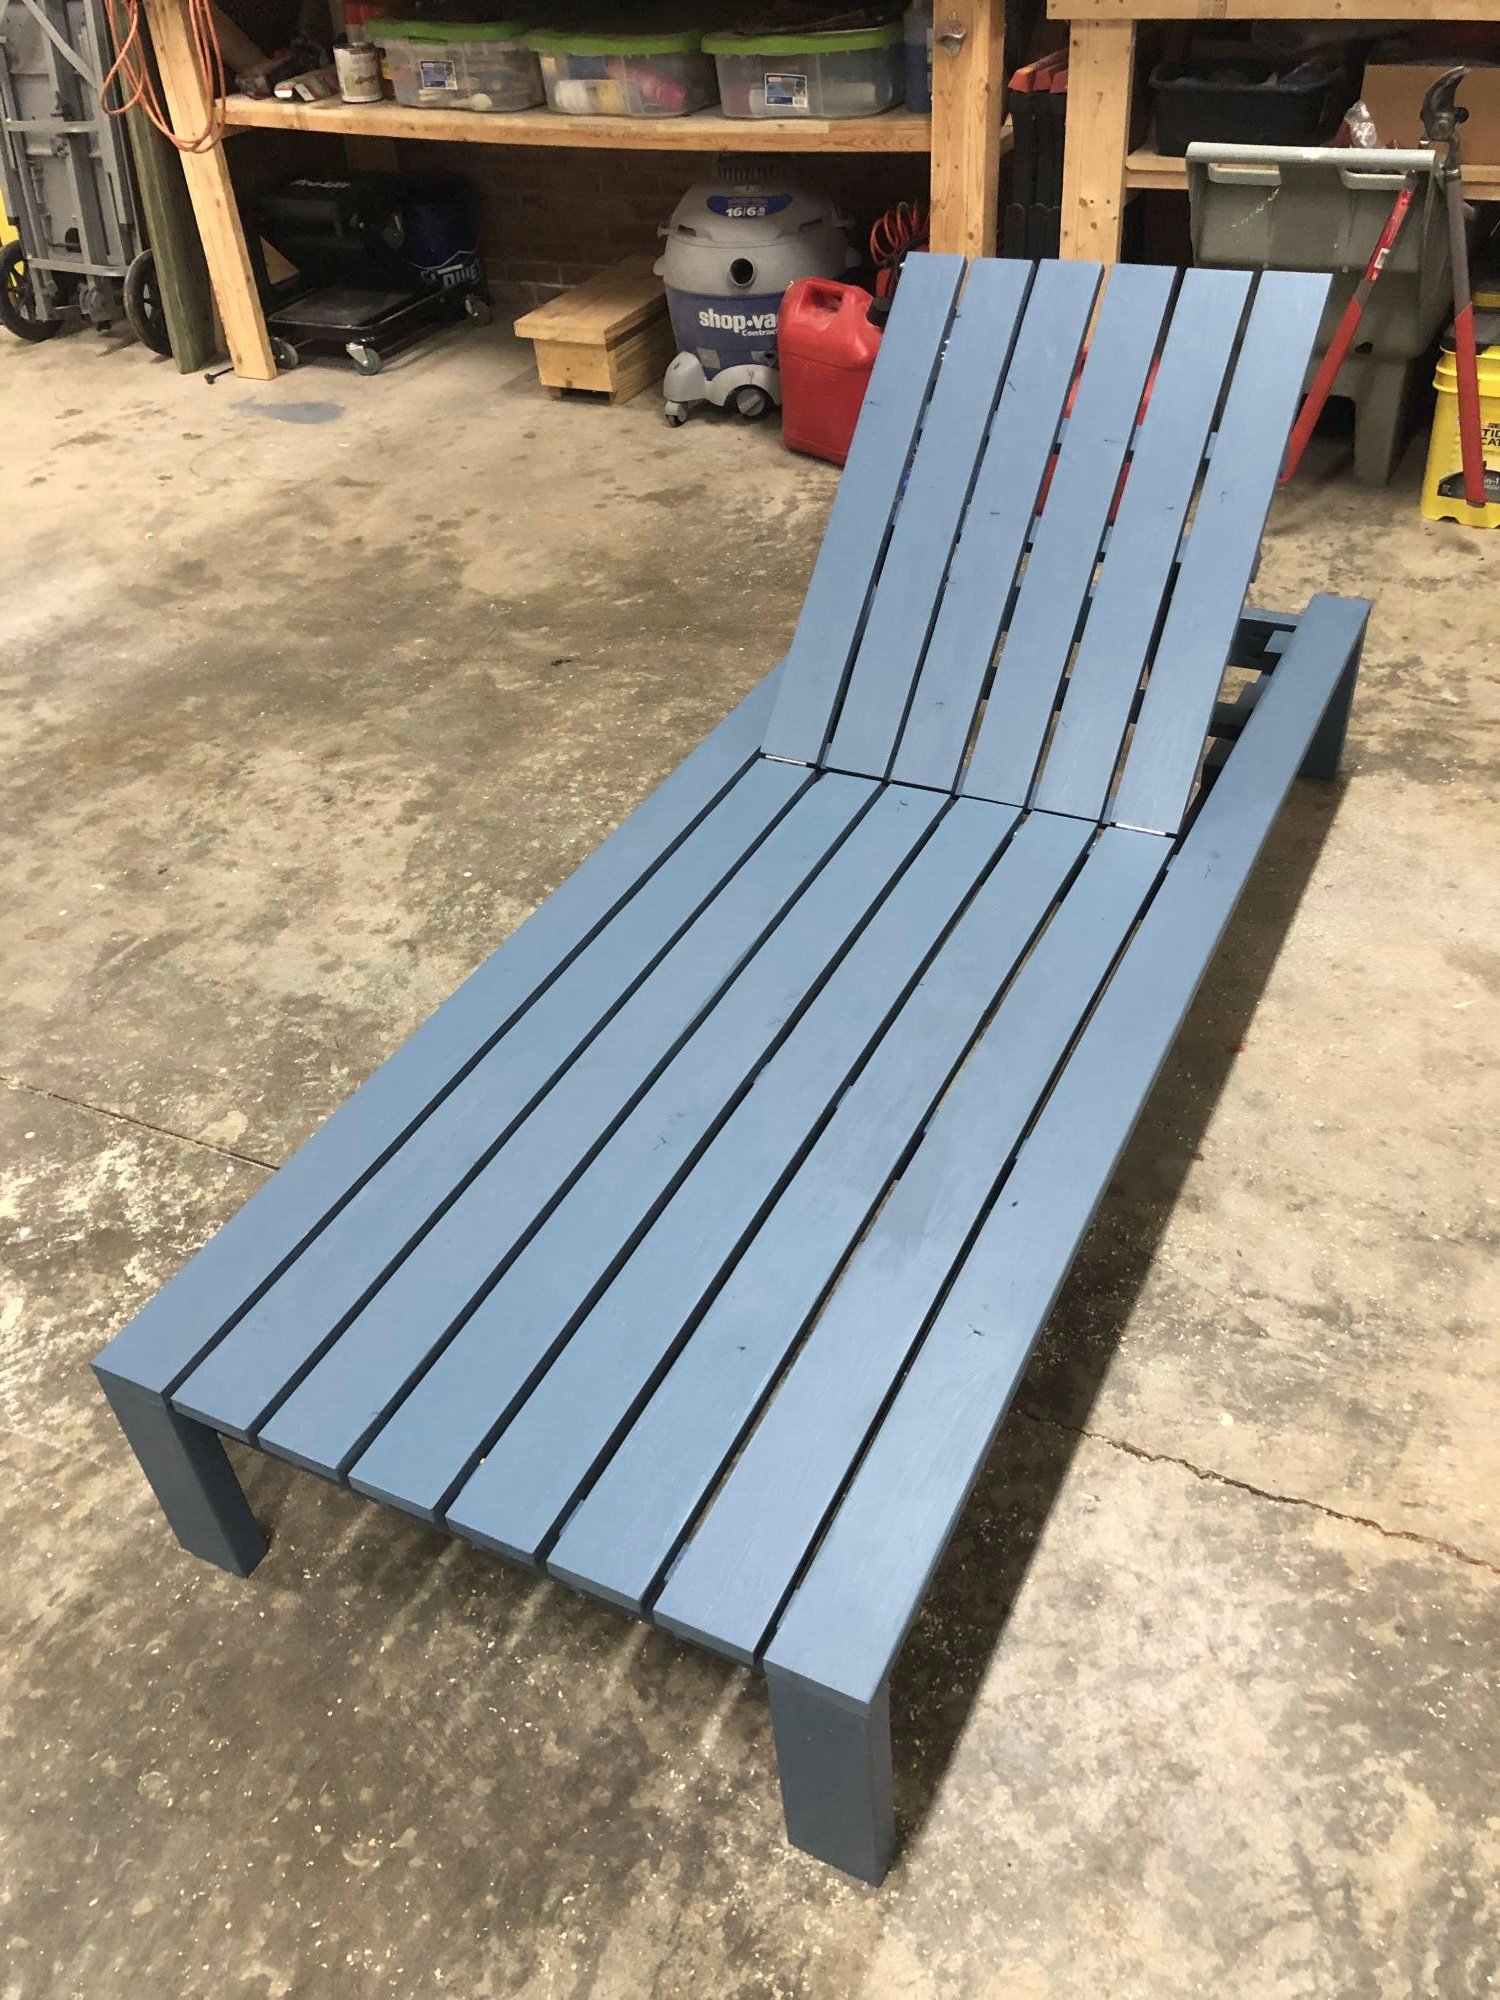
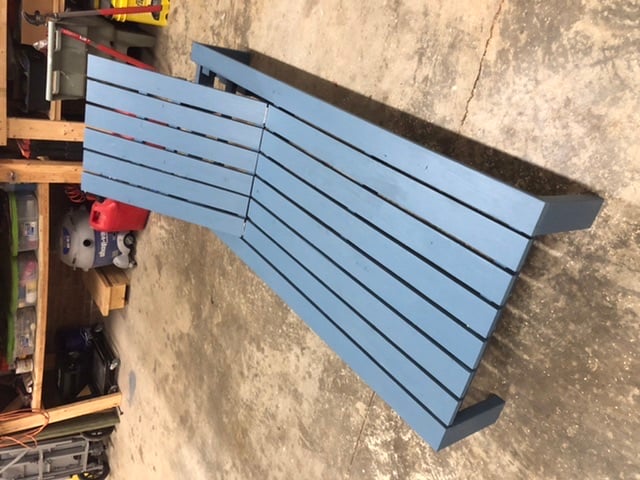
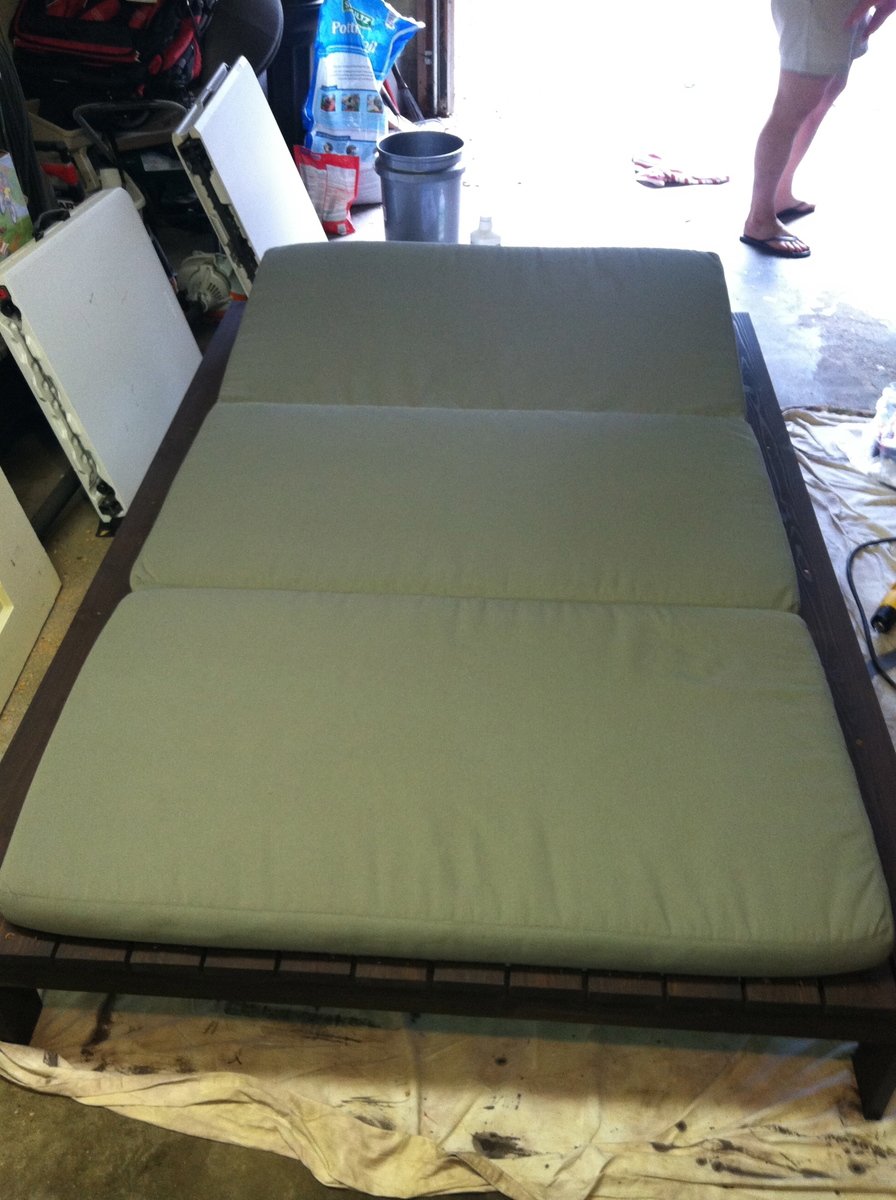
I followed Ana’s Modern Chaise build. The number of 2x4’s specified in the instructions is incorrect. You need 3 not 2. Other than that, a great plan.
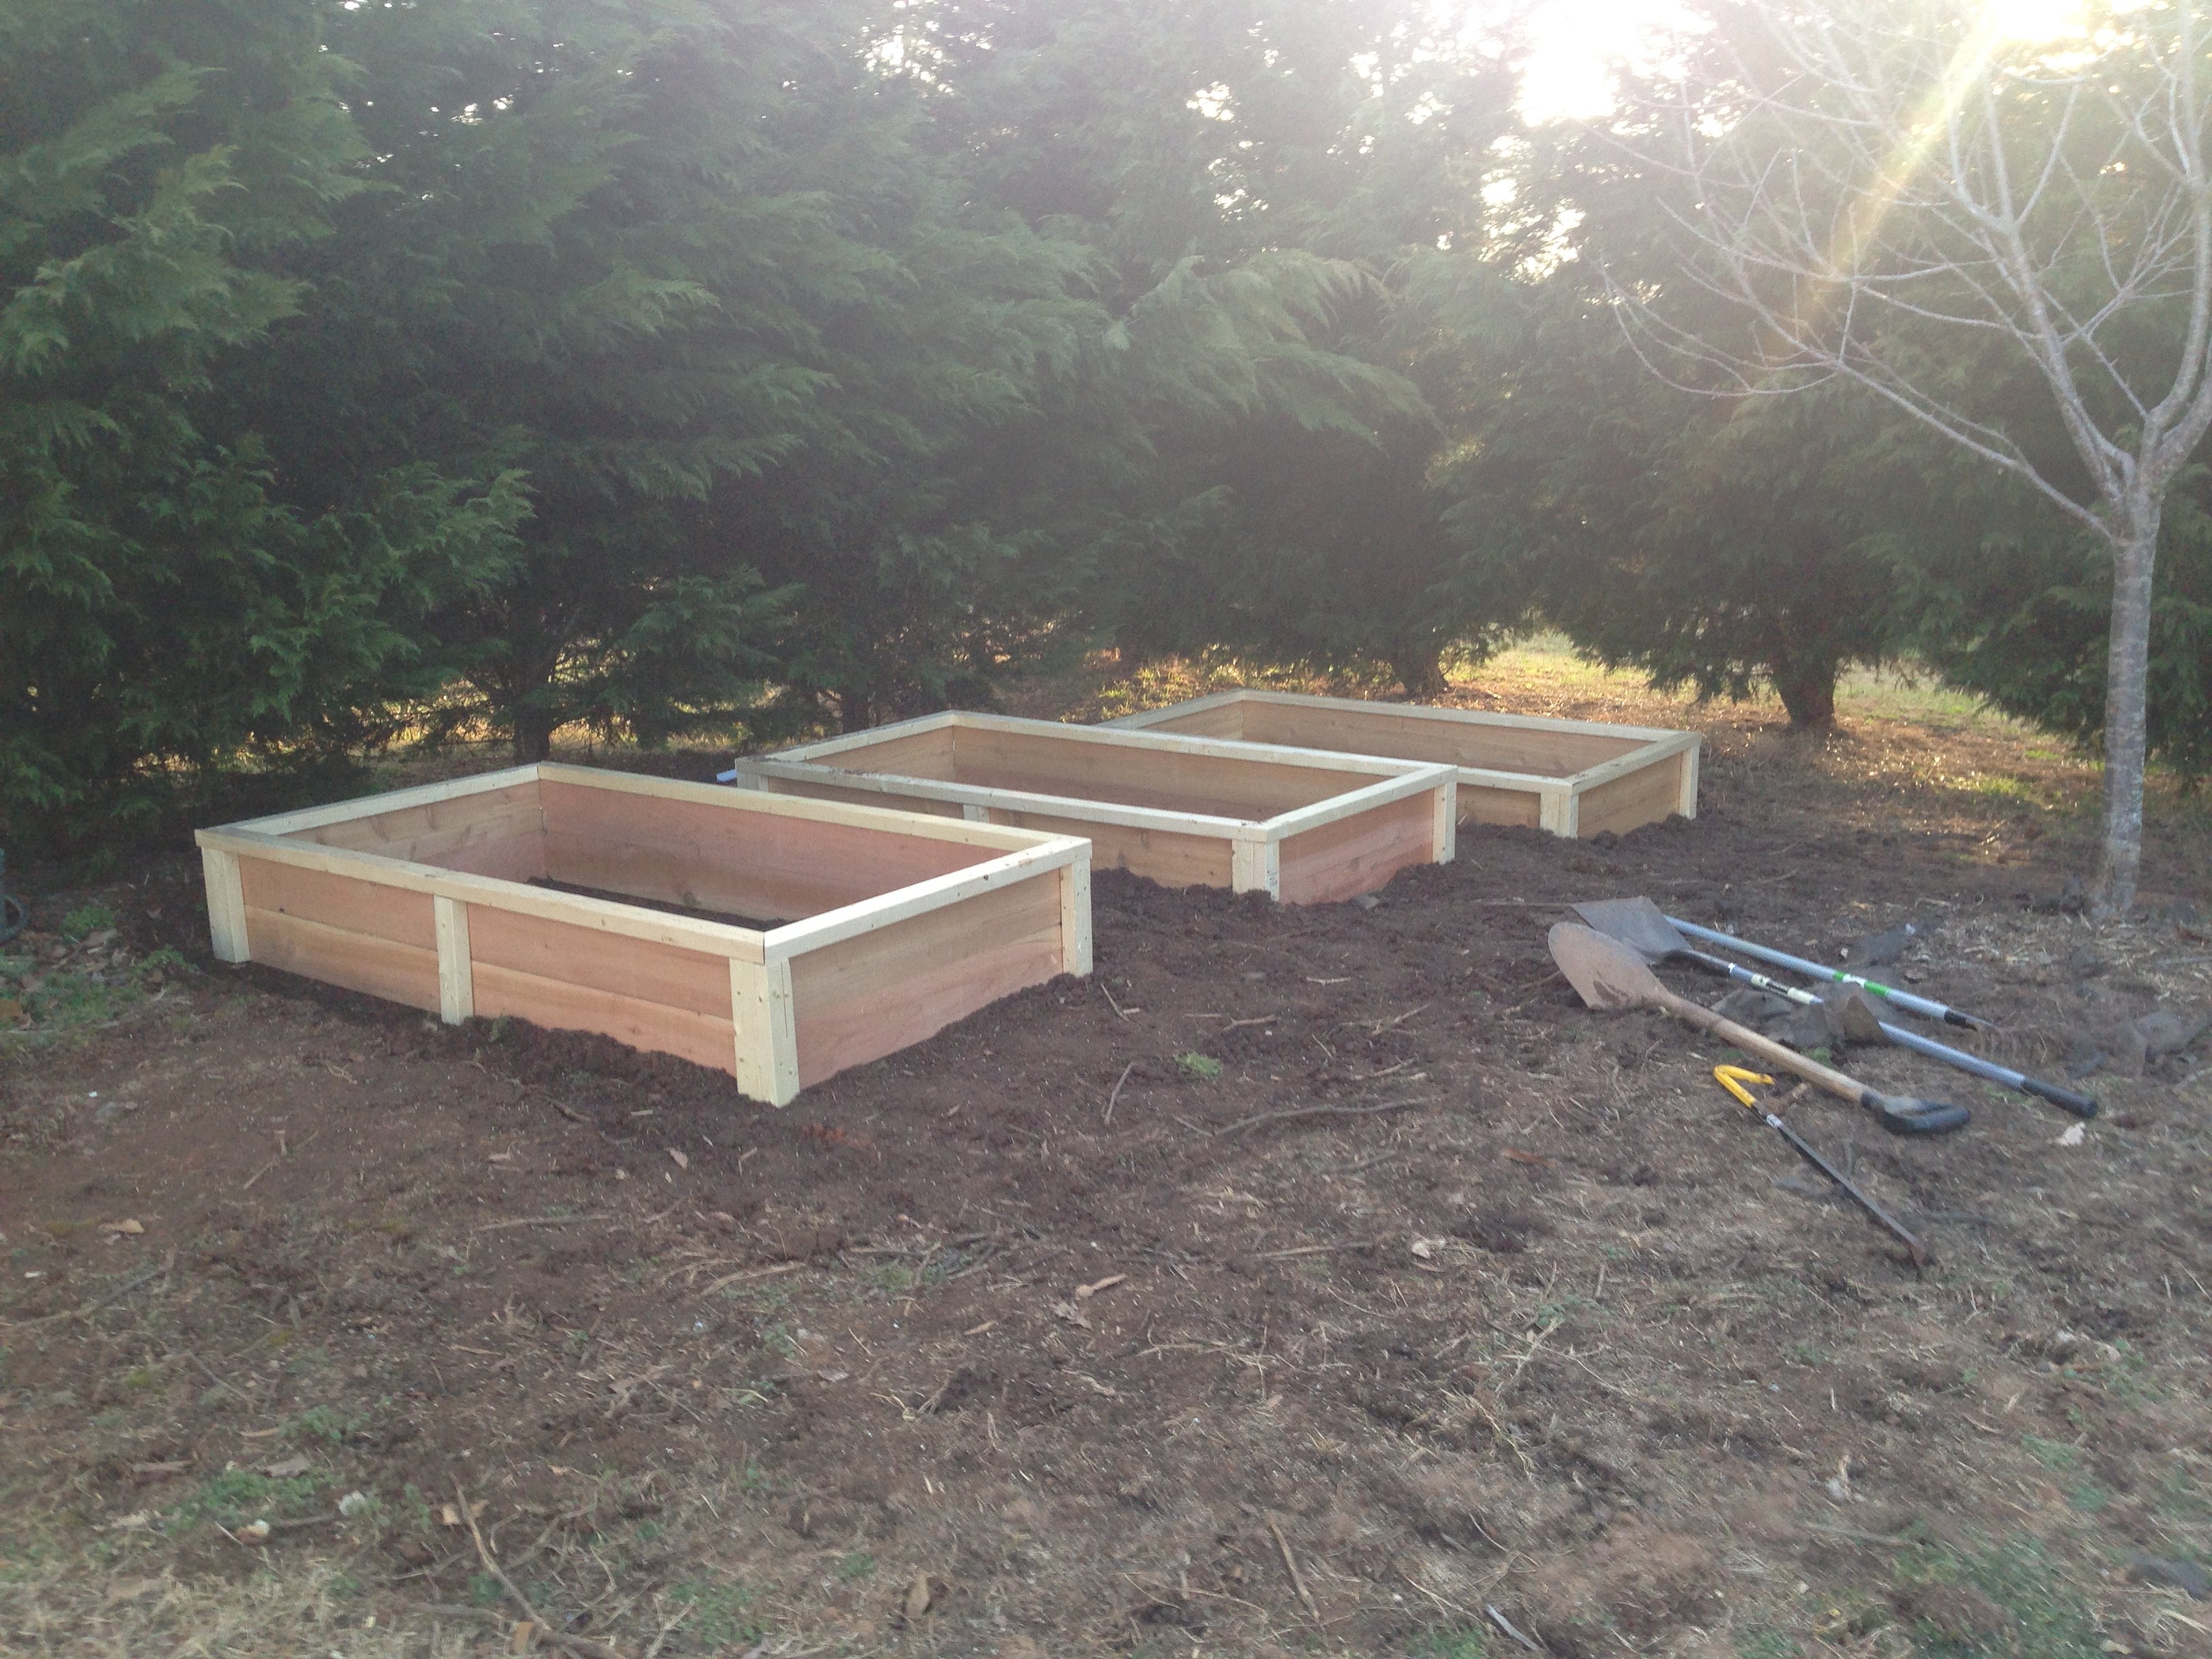
Using Ana's 10 dollar raised garden planter box idea, I made my own using the cedar fence boards and then used 2 x 3 x 8 studs for the L corner supports and mid center support along with top rail. This photo is the first 3, I will have a total of 6 boxes. Will post more as I progress.
A Christmas gift for my G- kid!!!!
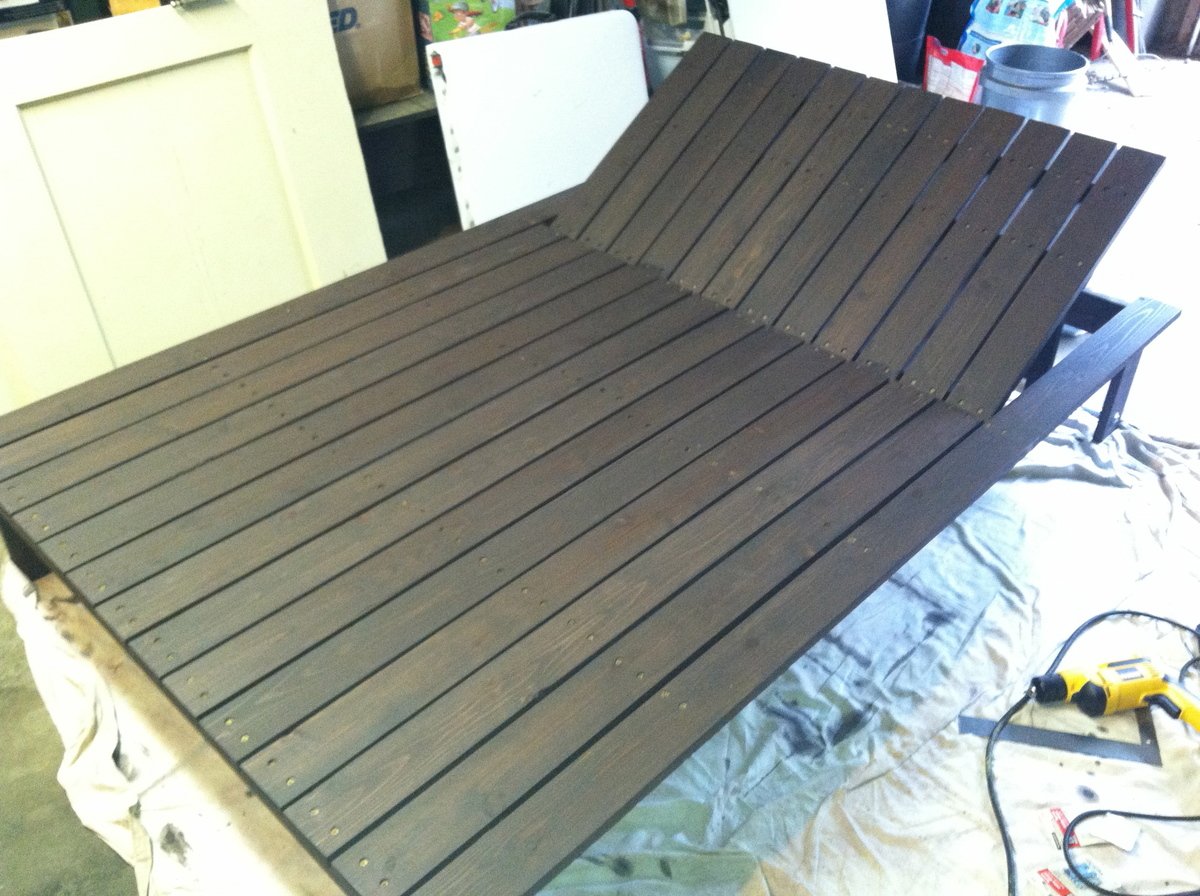
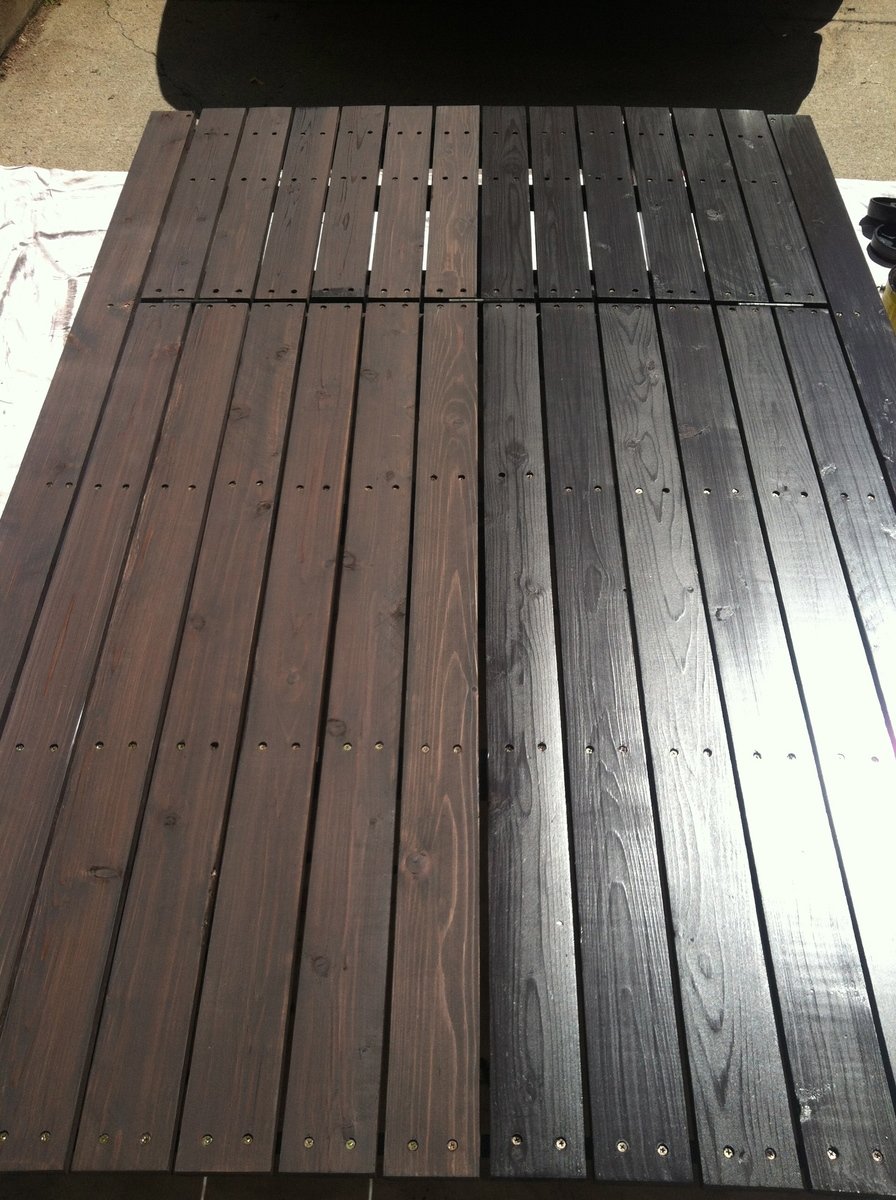
Finished it in about two weeks, but that was during my sons daily two hour nap window and two days of staining. Had to make a few adjustments so the pillow from West Elm would fit, because the plan calls for 11 slats on the deck when it should be 12. I added some wheels to the back and will add pull out drink tables soon. It was a fun project and my wife is thrilled.

Hi
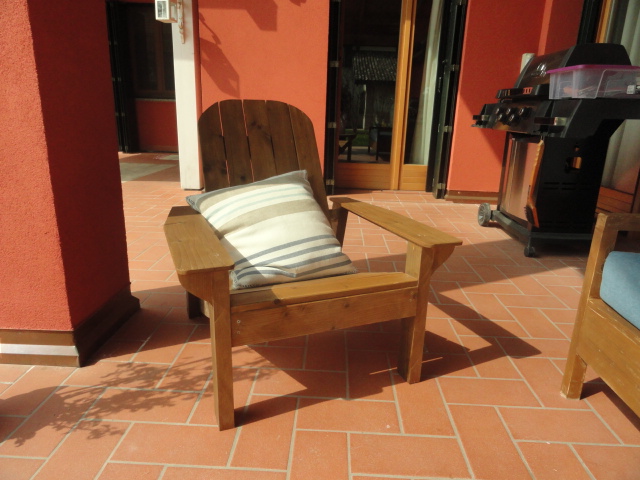
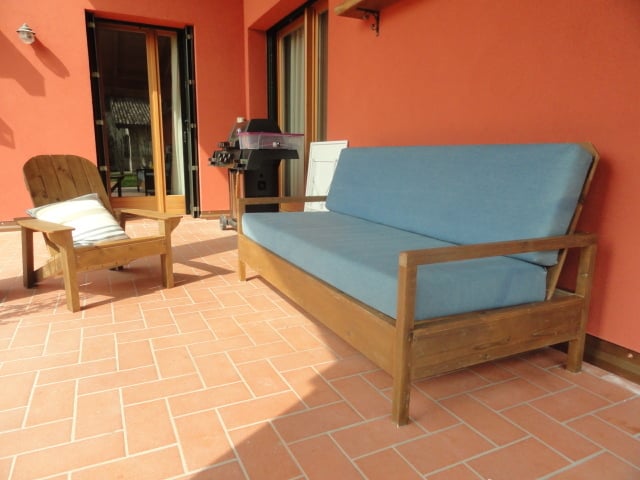
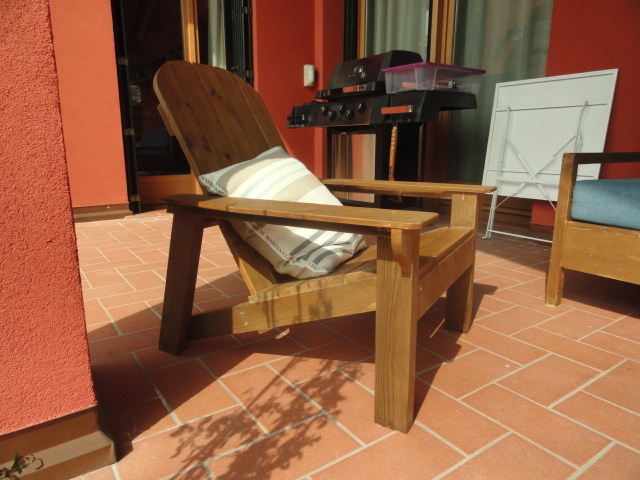
I am still working on my portico furnitures..but as we have changed the colour of our Home, I have decided to change the colour of sofa ( terrible decision) and than to build the adirondack chair for Home depot of Ana to be part of the ensemble.
Thanks Ana. I love it.
I used the same project just changing two small things ( a small support under the arms and making the arms more similar to the original adirondack chair. I used the oxydizing solution to paint and it is a great stuff!
ciao patty
p.s. I already posted the sofa is always Ana's project.
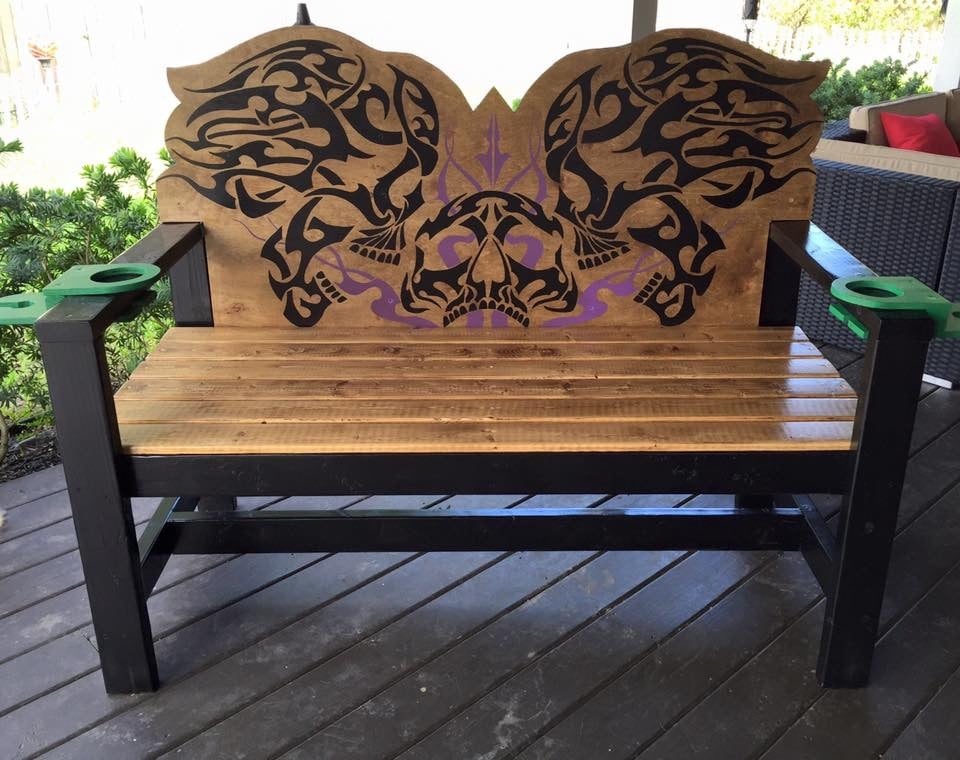
I used the Modern Park Bench plans. I made it a little narrower and taller to accommodate who I made it for as he is tall. I also used oak ply for the backing in order to showcase the skull art that he requested. The design was taken from his favorite shirt. Ply was ok since it is on a covered porch. Thank you Ana White for providing plans to use. Very much appreciated!
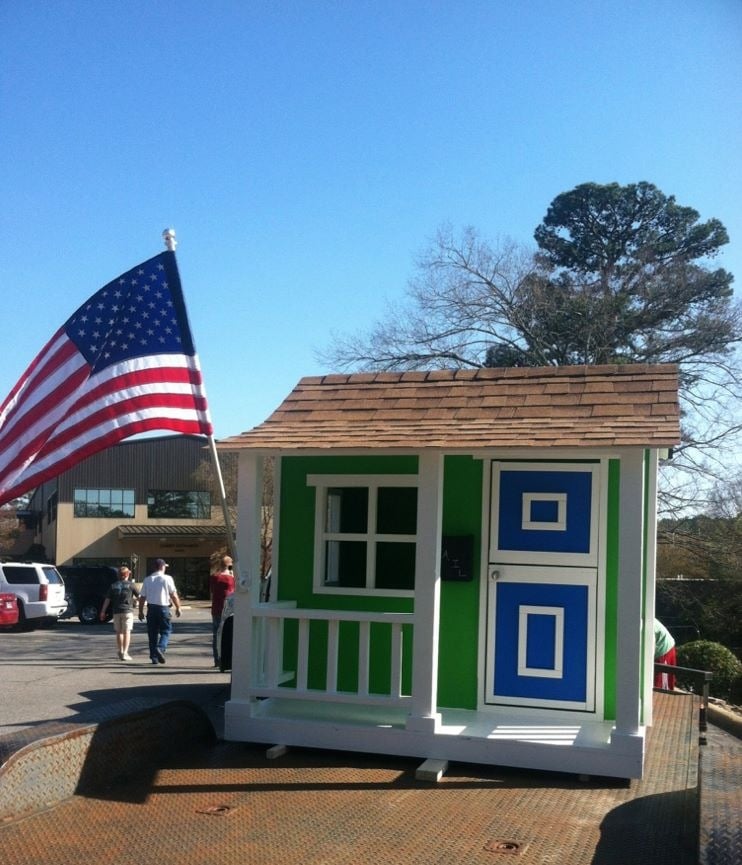
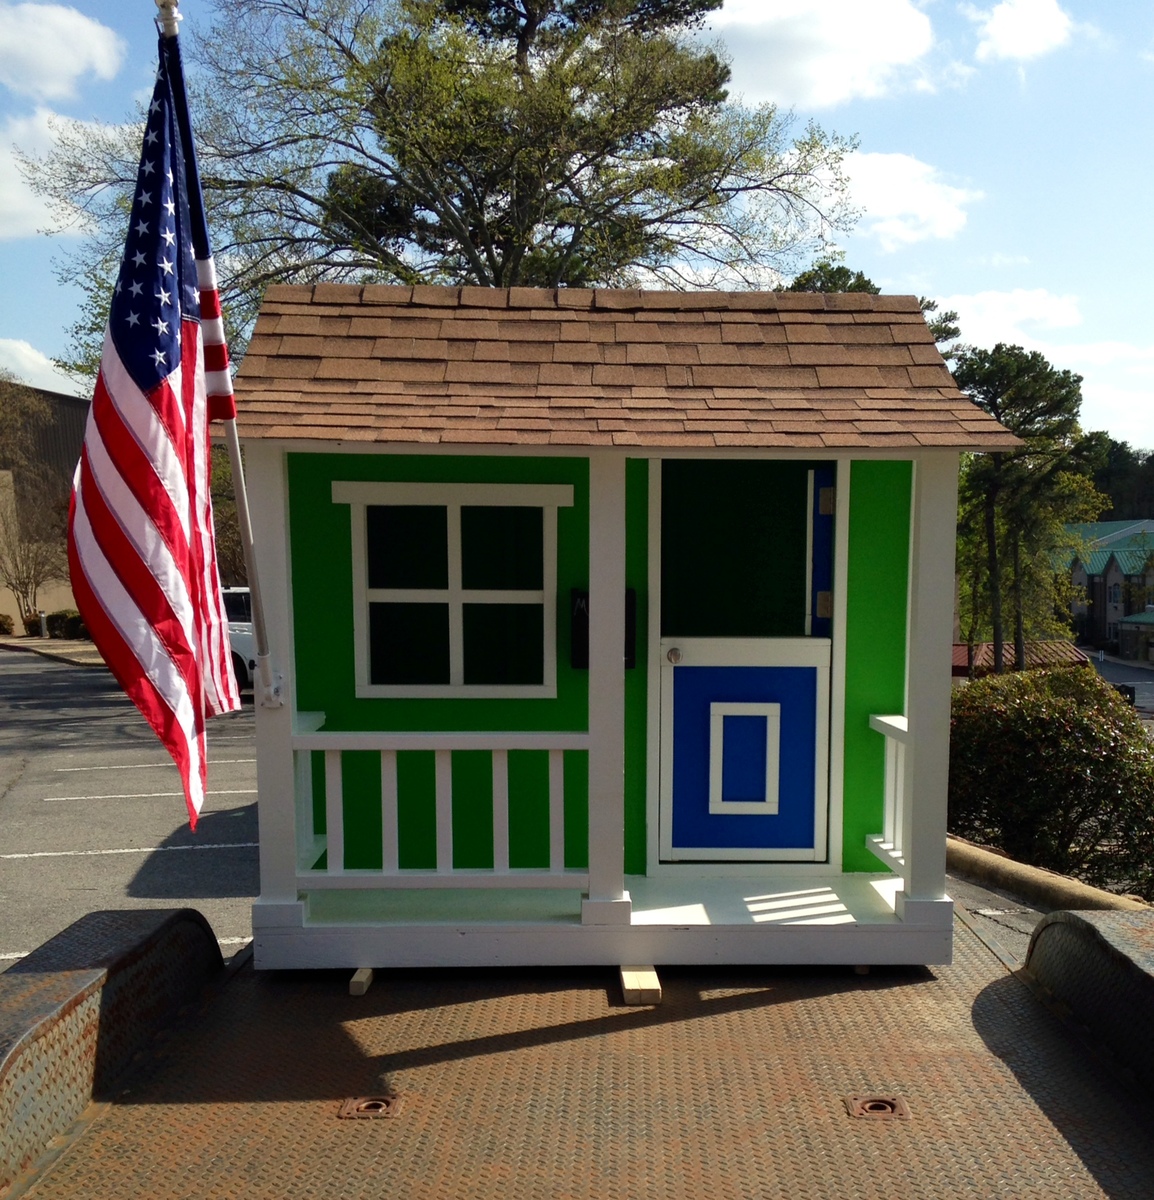
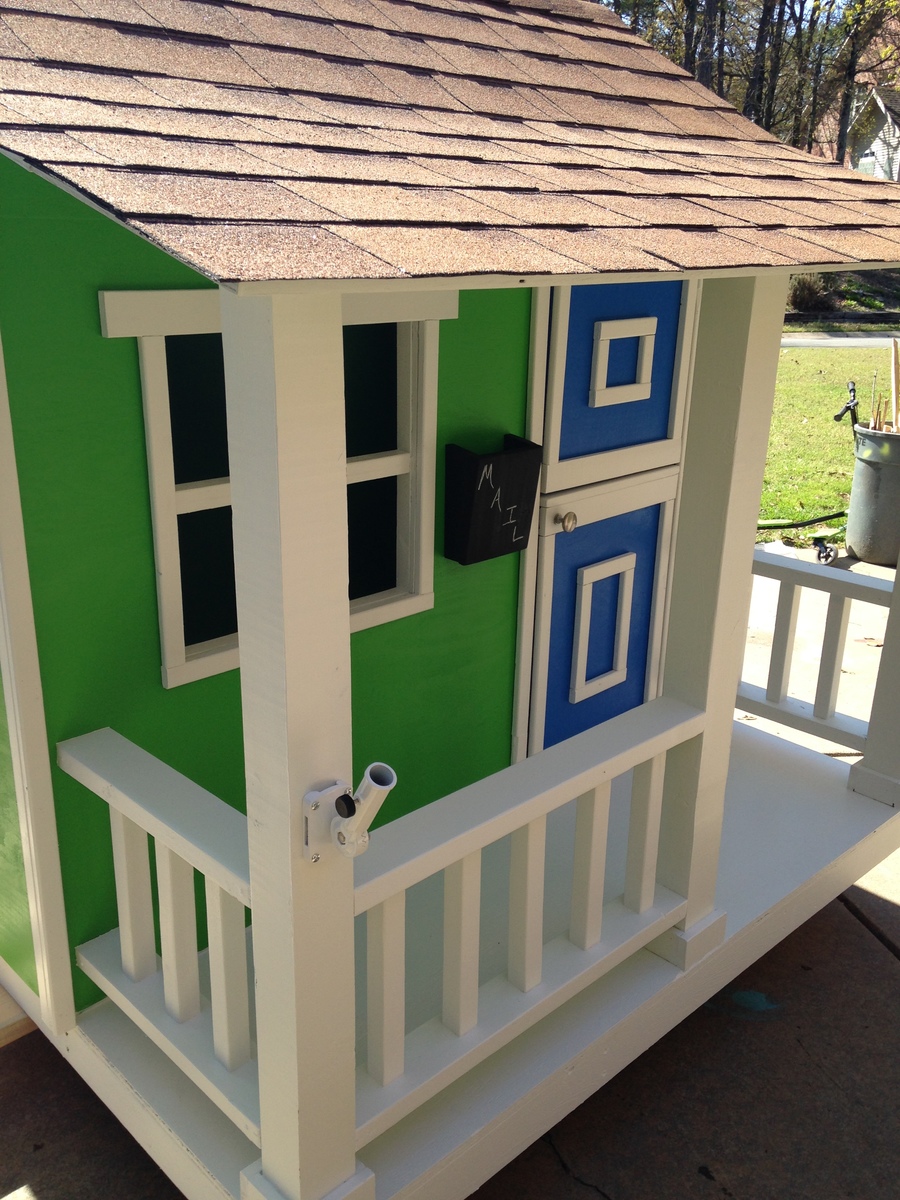
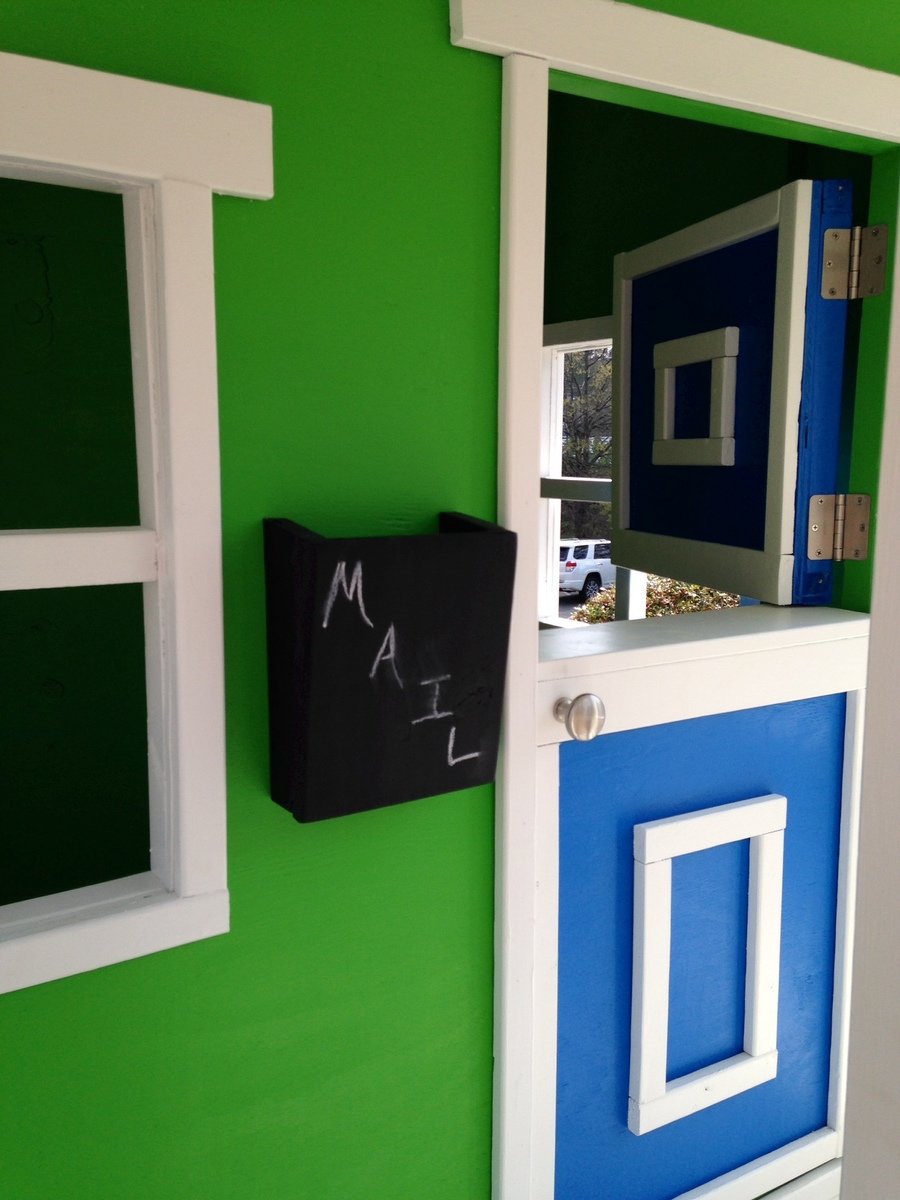
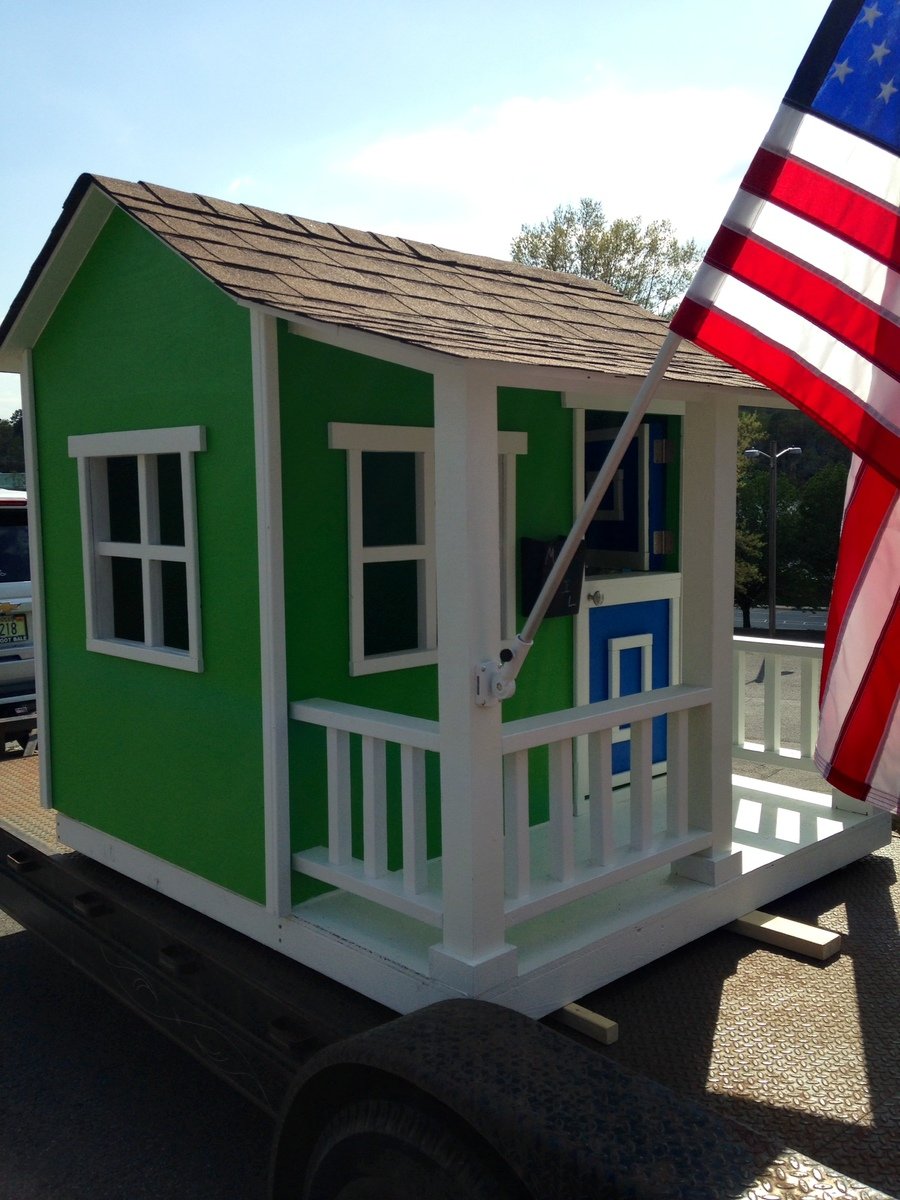
My son's school asked me to build a playhouse for their annual auction and after looking around online for a few days finally found a plan I liked. I modified it a little and did not do the cedar so we could paint it. Turned out great and more pictures on the blog, www.atouchofarkansas.com

Almost done :)
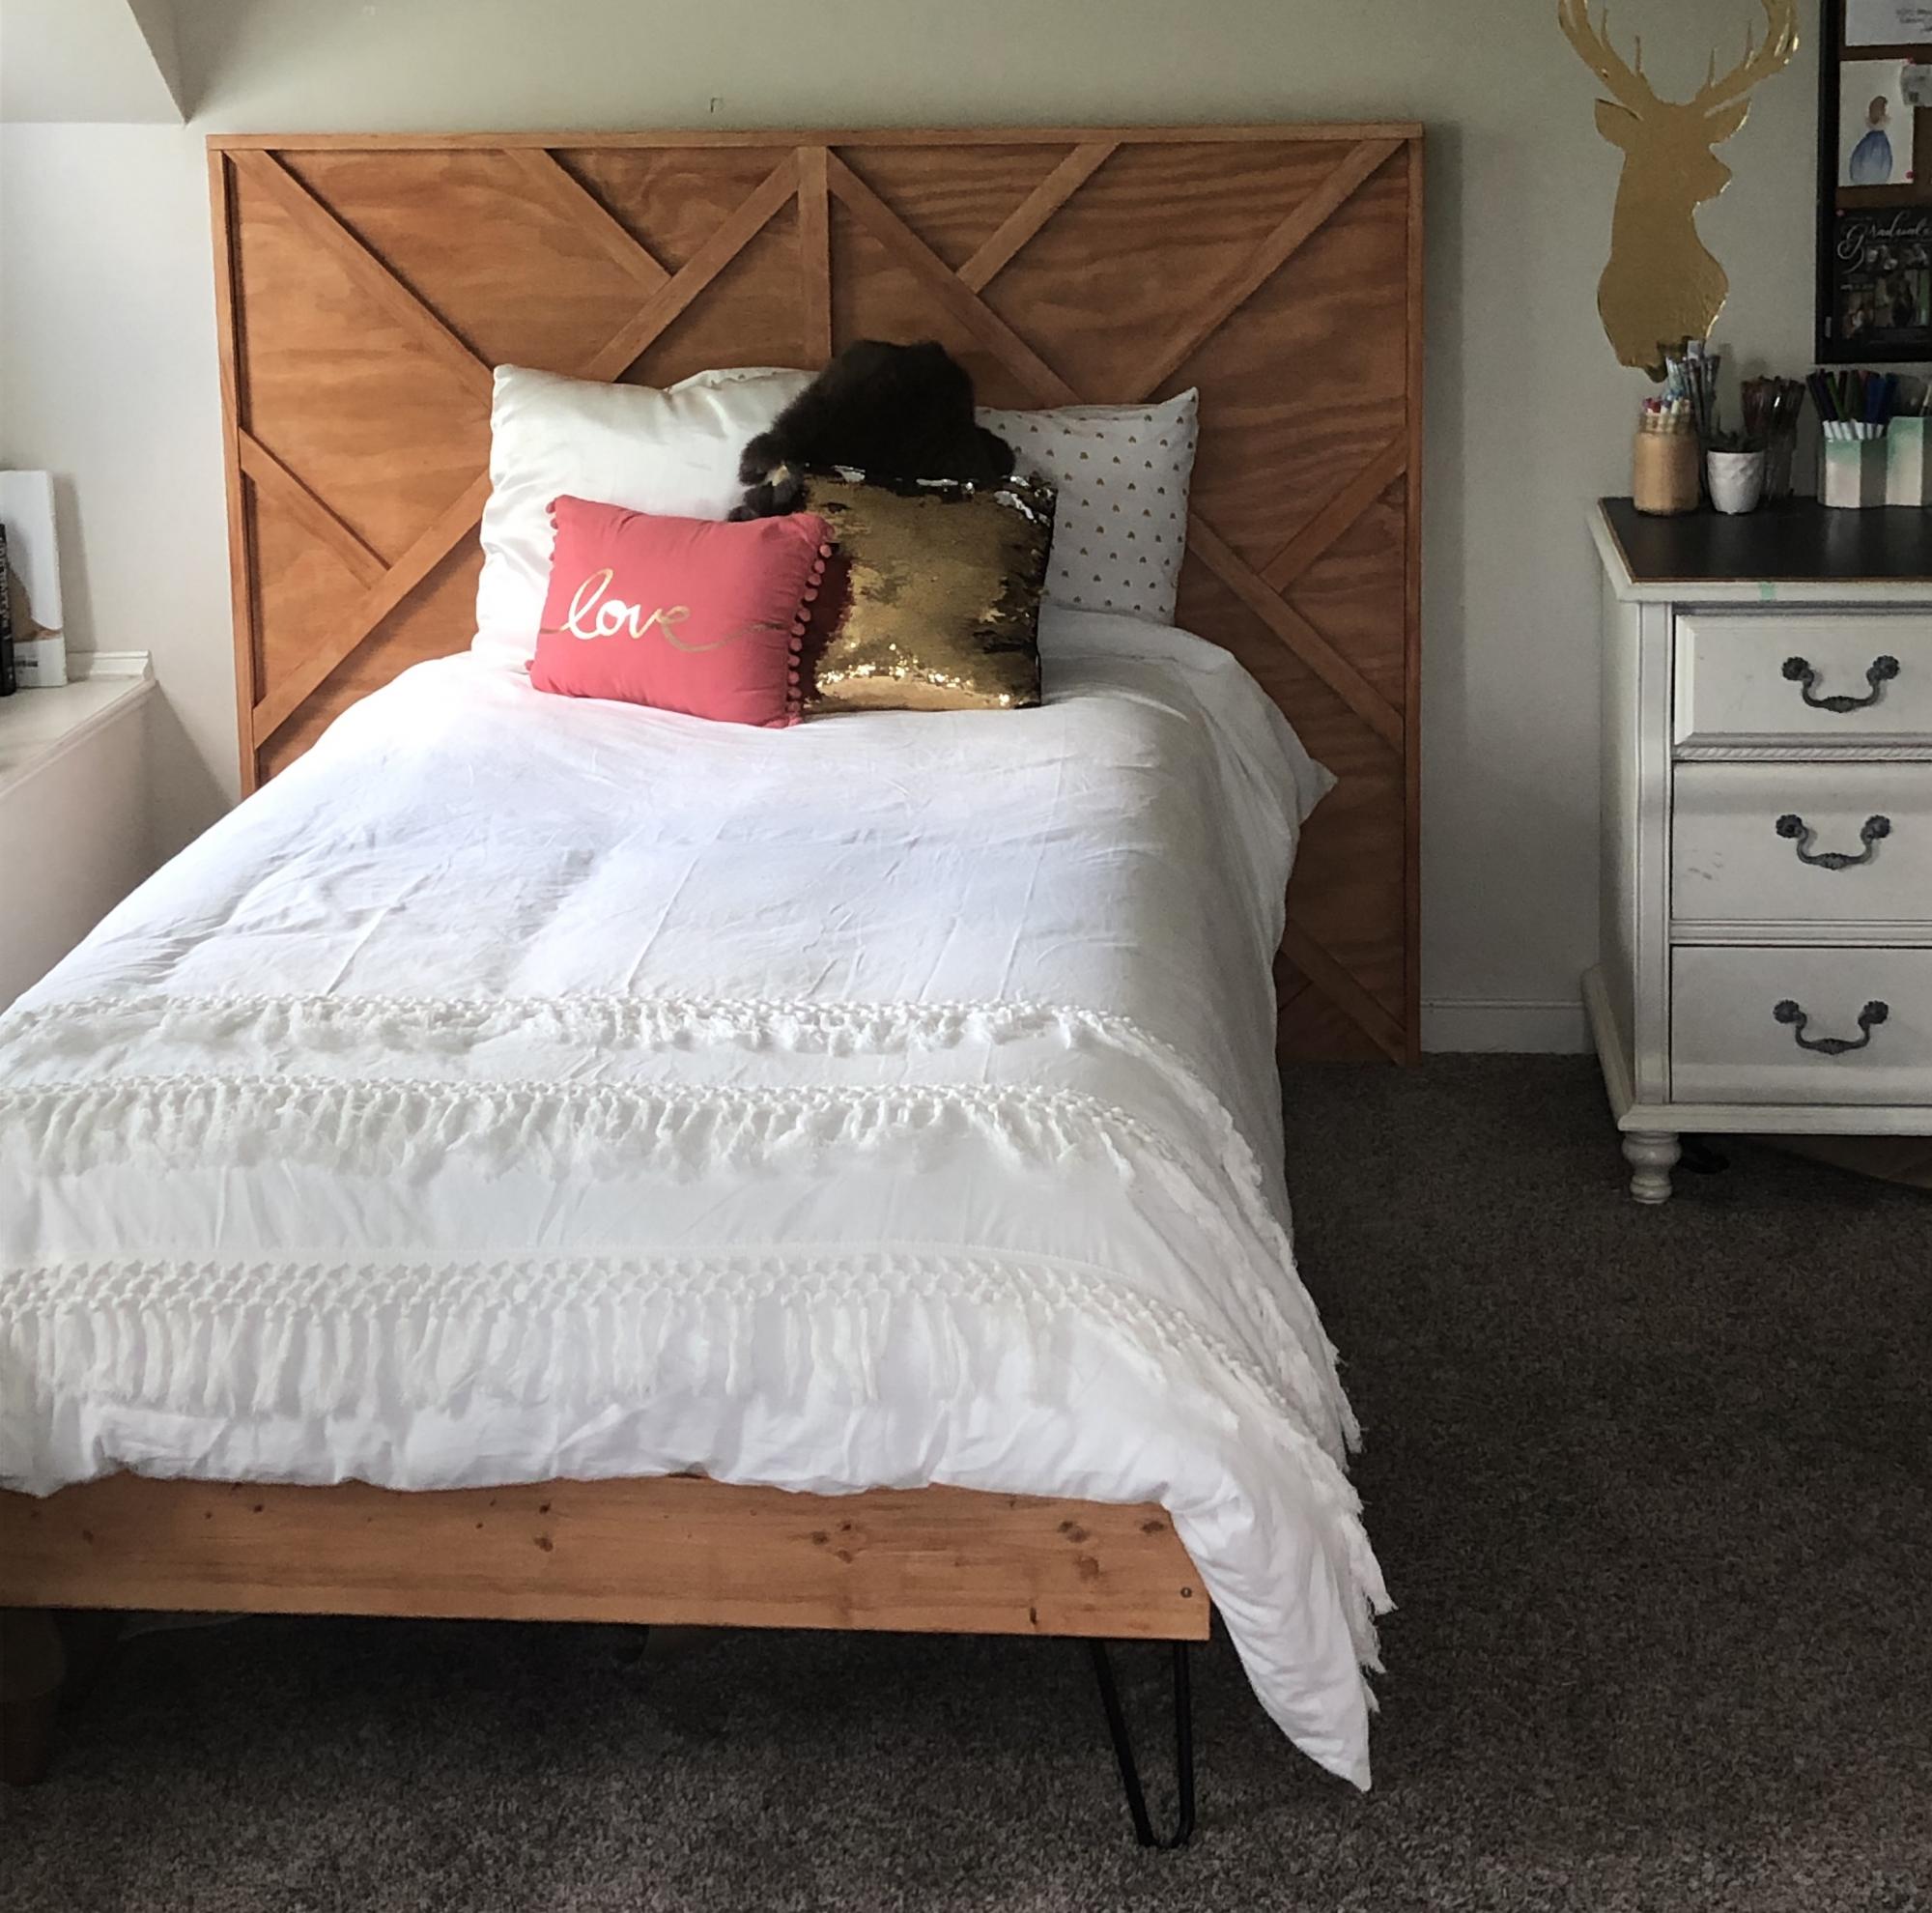
This was a fun build. I let my daughter design the slats on the headboard, and as long as all slats are either 90 or 45 degrees, the cuts and application are simple. Thanks, Ana!
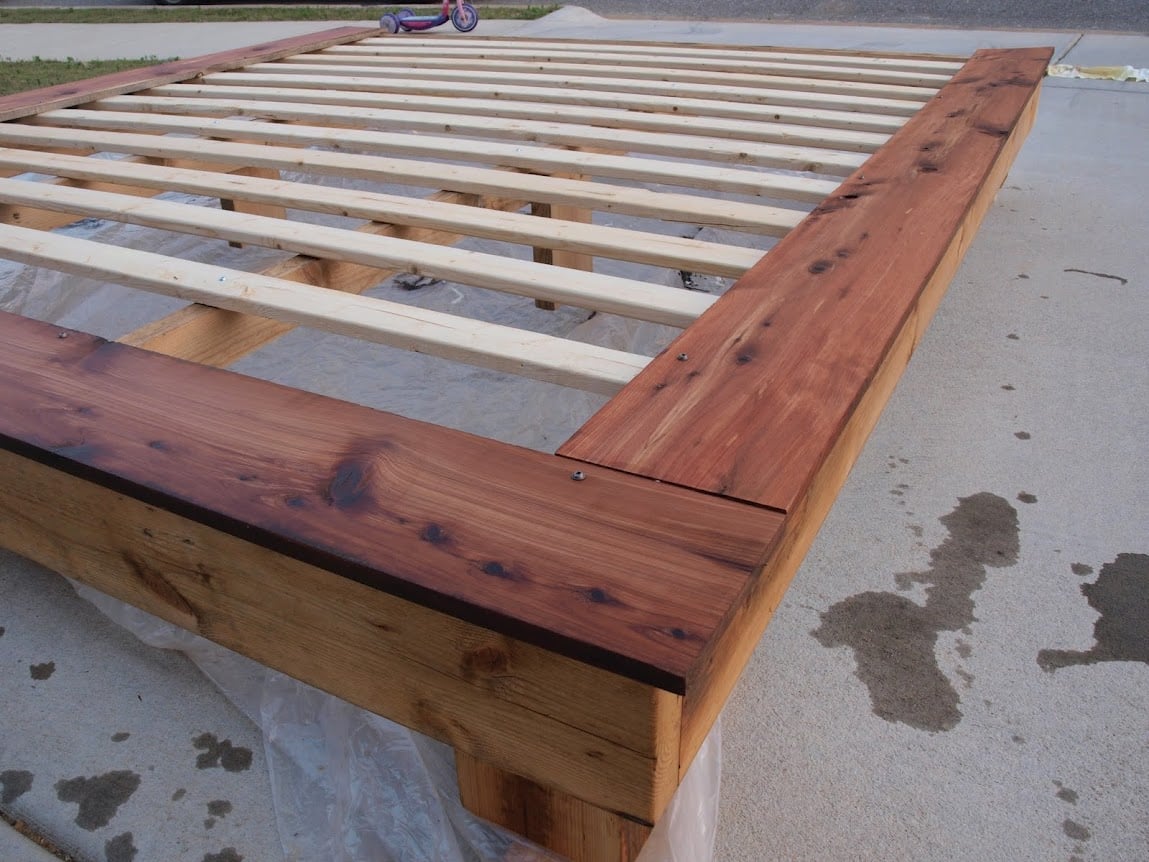
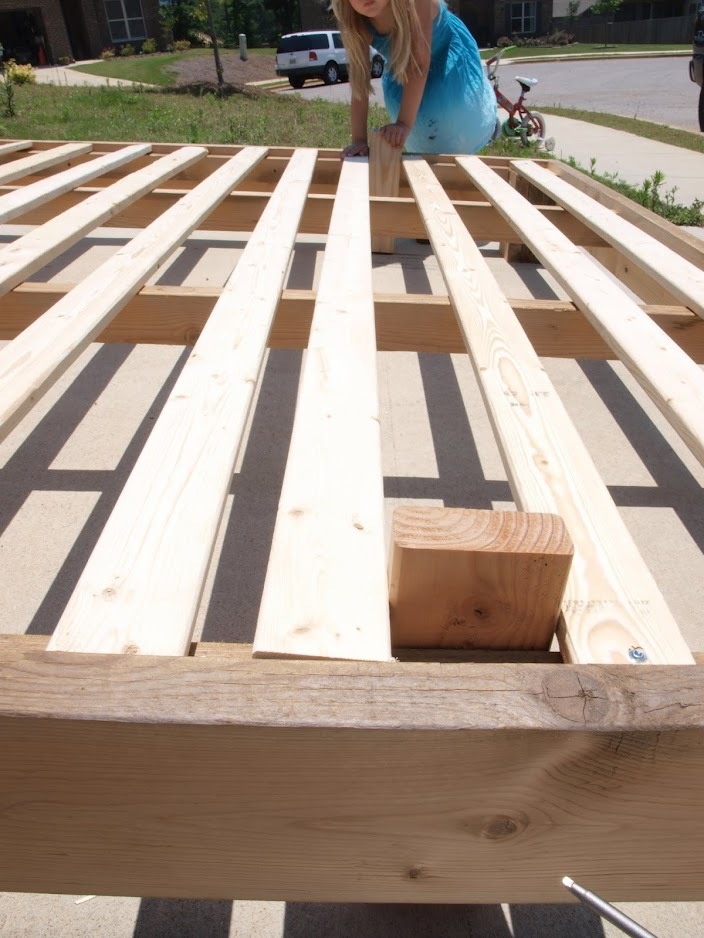
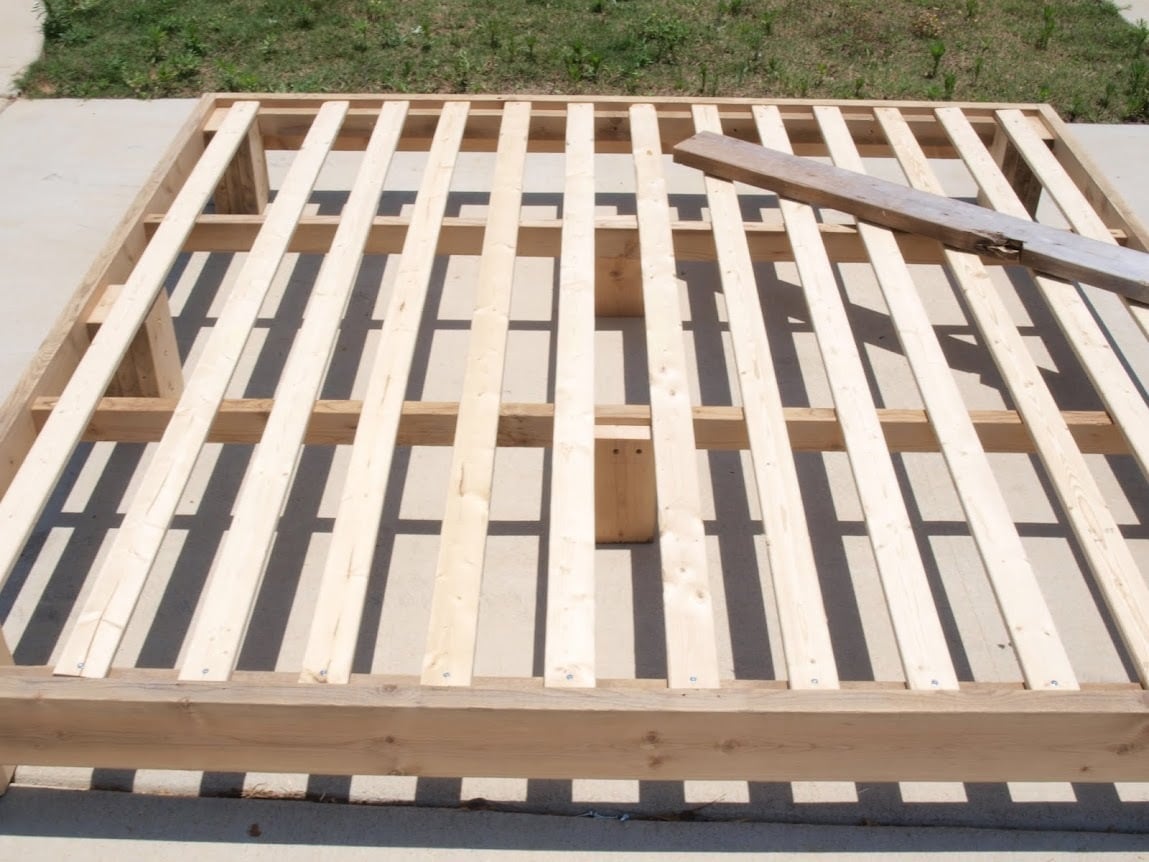
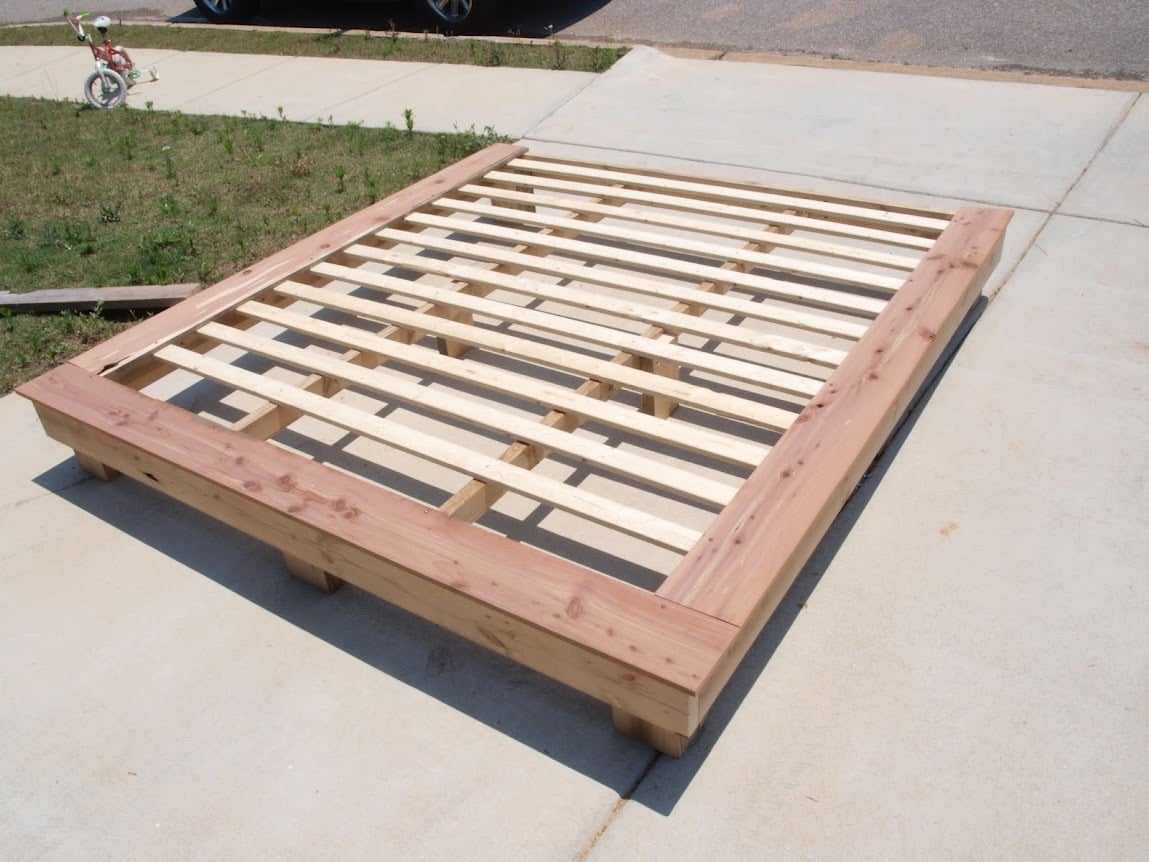
I based my bed off of the Fillman Platform Bed plans. Just bumped the dimensions up to fit my mattress and added the mid supports. The frame was built using 2x6 boards taken from a fallen barn. I ripped 2 2x6 boards down the center to make the the supports for the slats. My feet are 3 2x6's screwed together and then attached to the frame. Next time I will cut a notch out of the feet so that I can rest the bed on them and then try to find some old lag bolts to attach them to the bed. The frame was put together using a Kreg Jig. I put the Cedar boards on to dress the front and sides up some and to help keep the slats from showing when the sheets were tucked in. My finish is 1 coat of Linseed Oil and 2 coats of Teak Oil.
Let me know if you have any further questions on this build. As soon as I find some doors I will be building a head board for this bed.
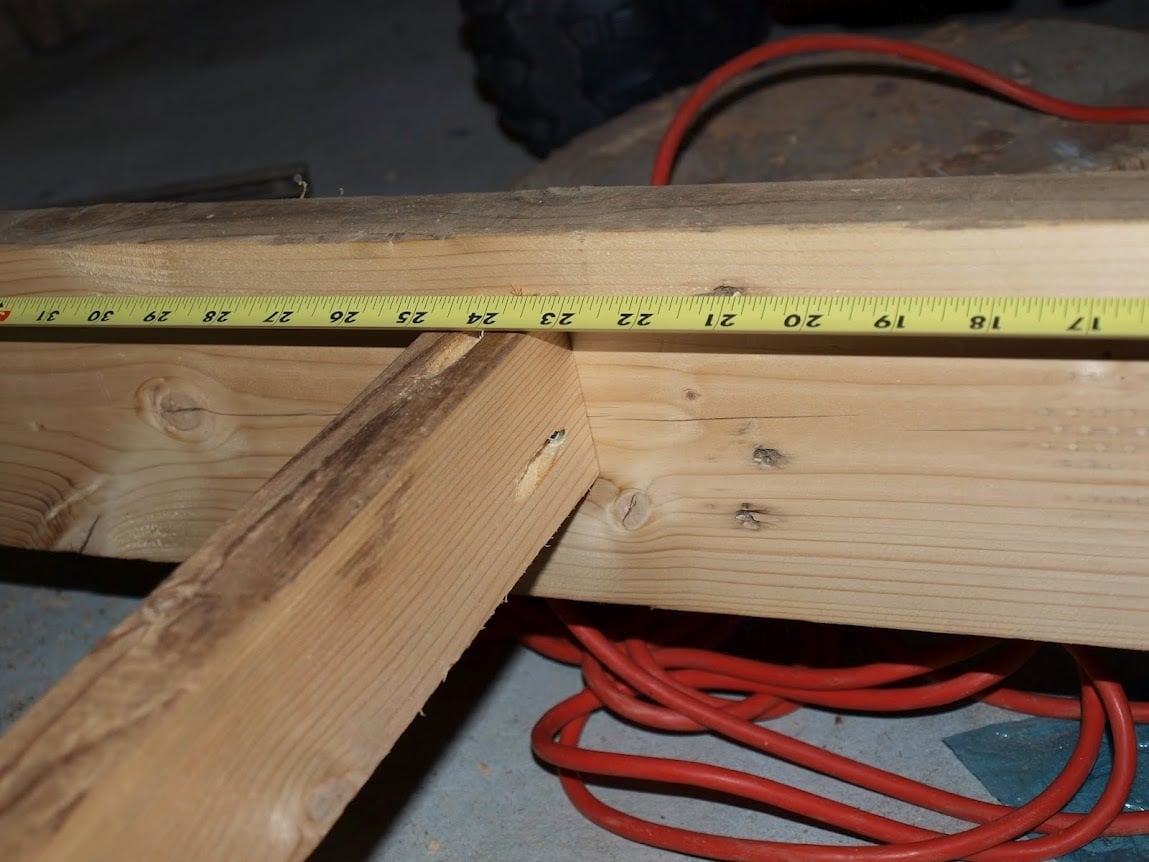
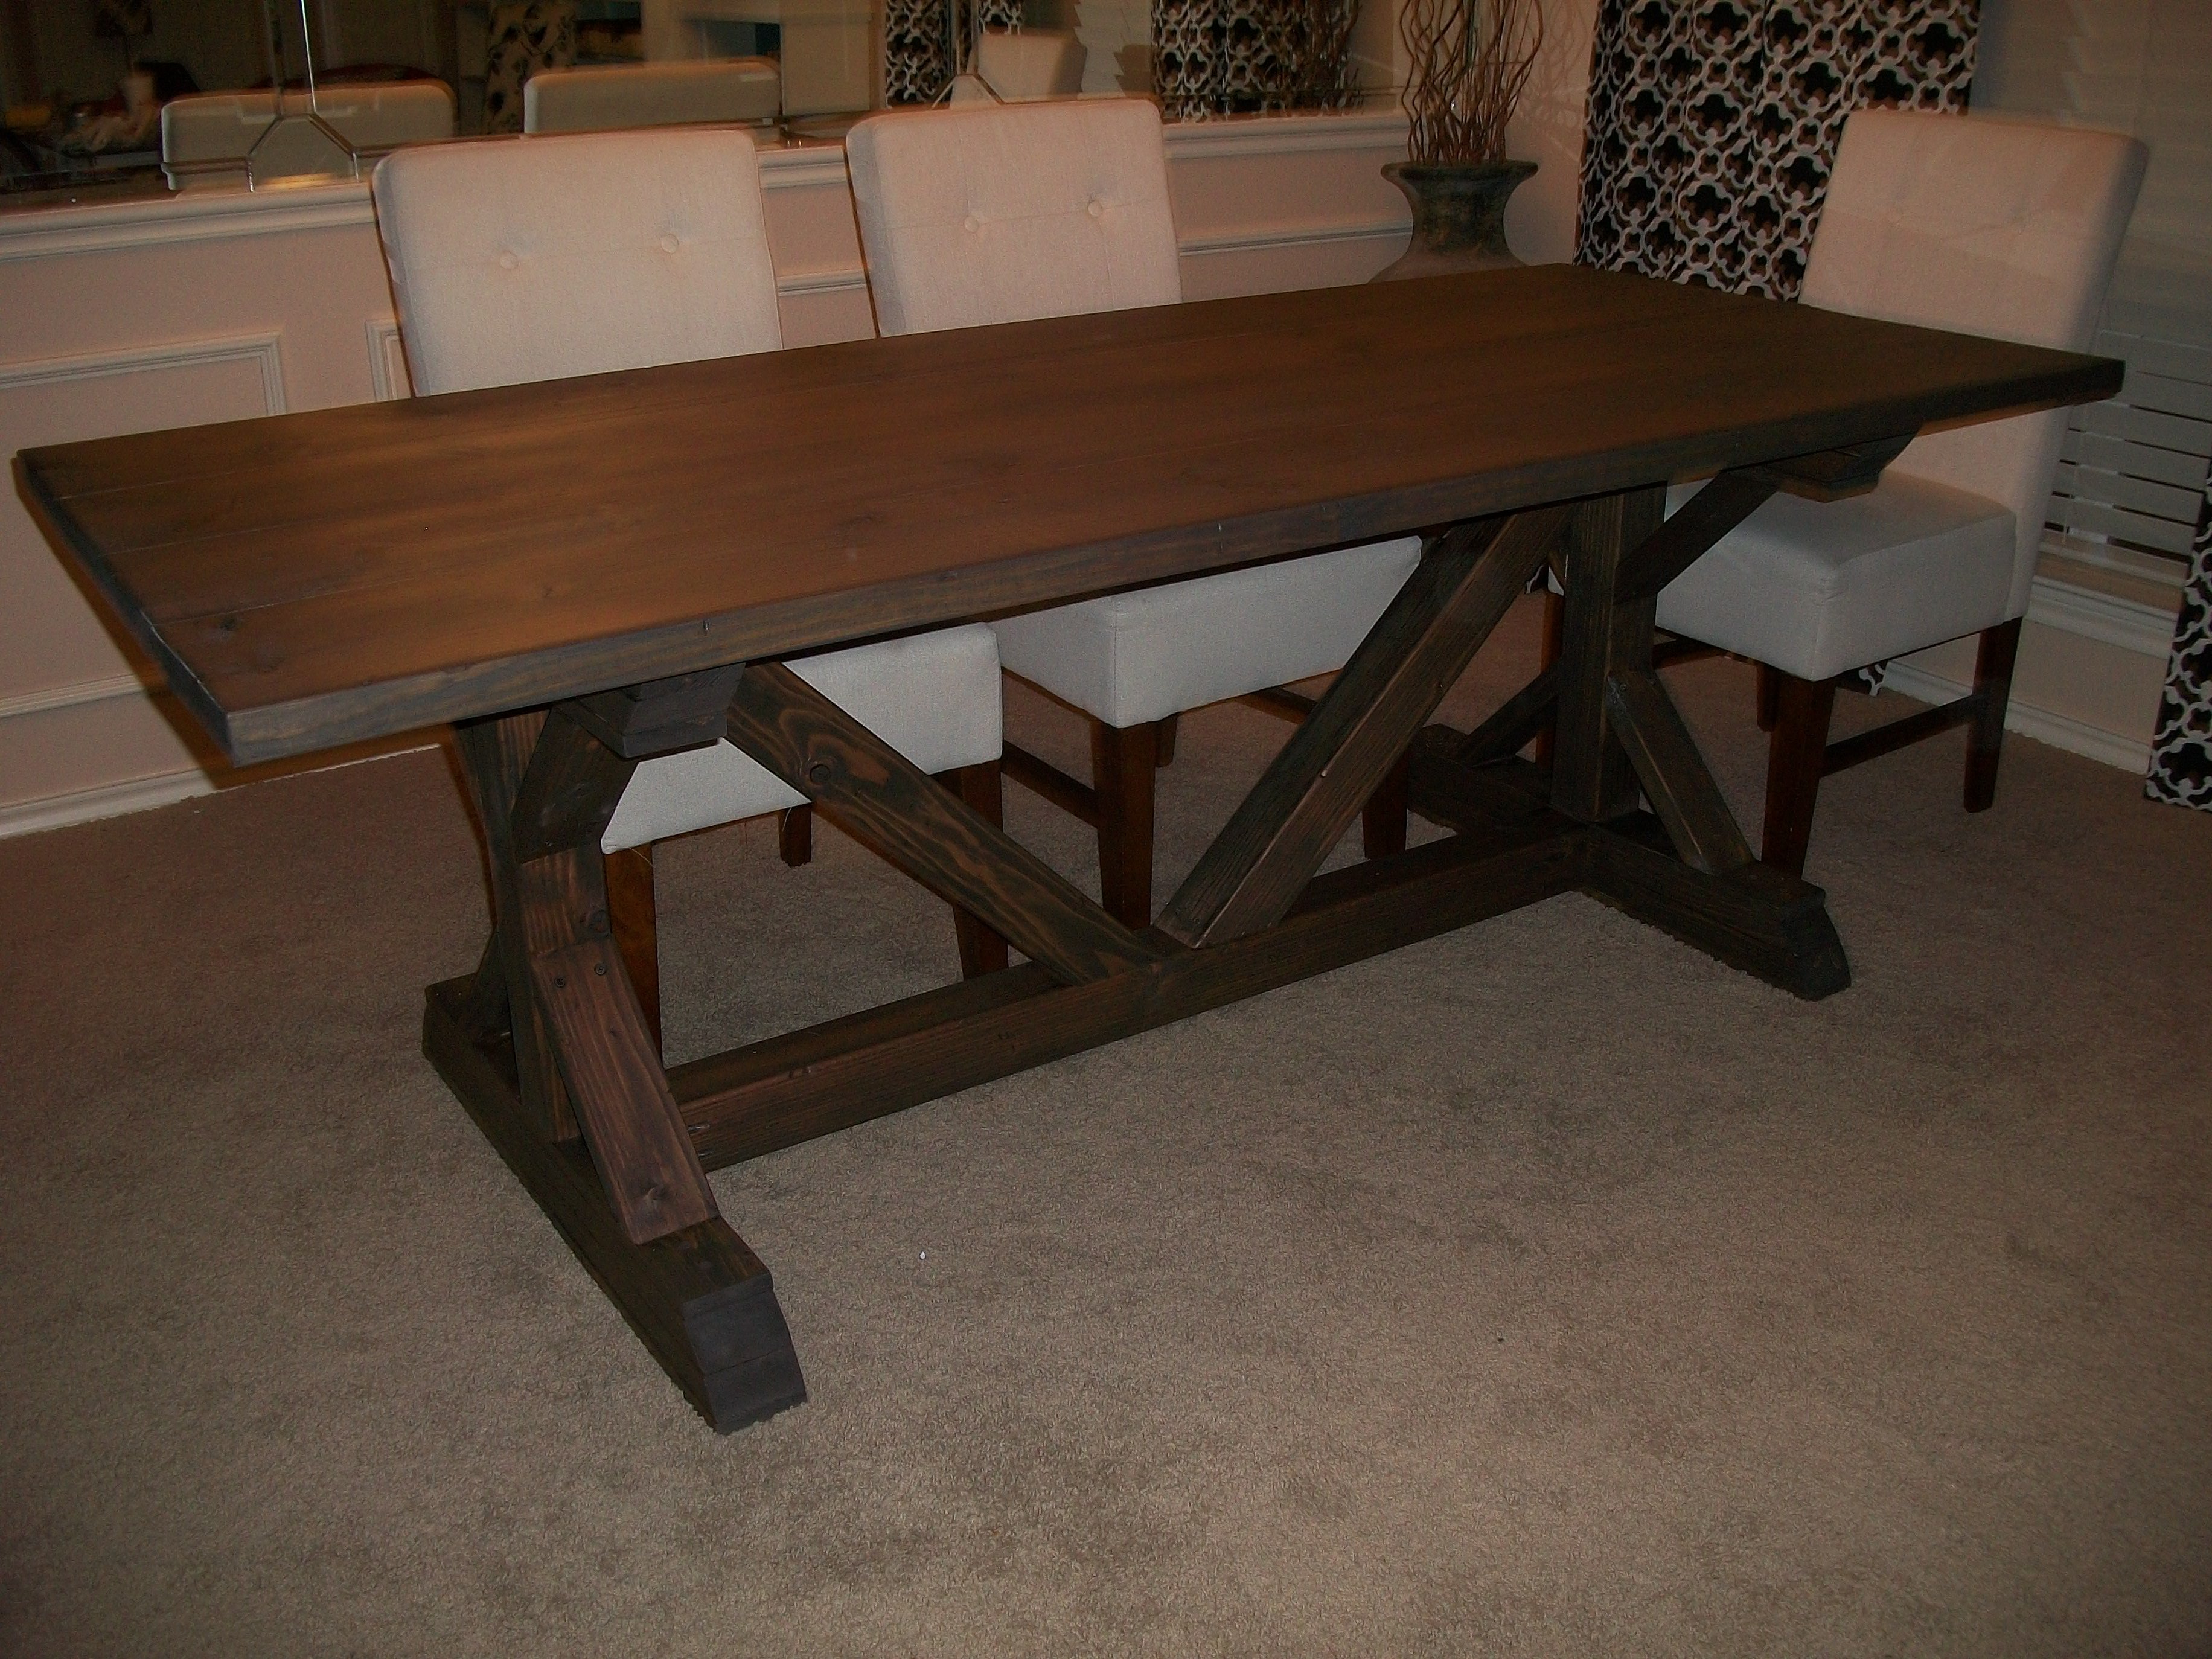
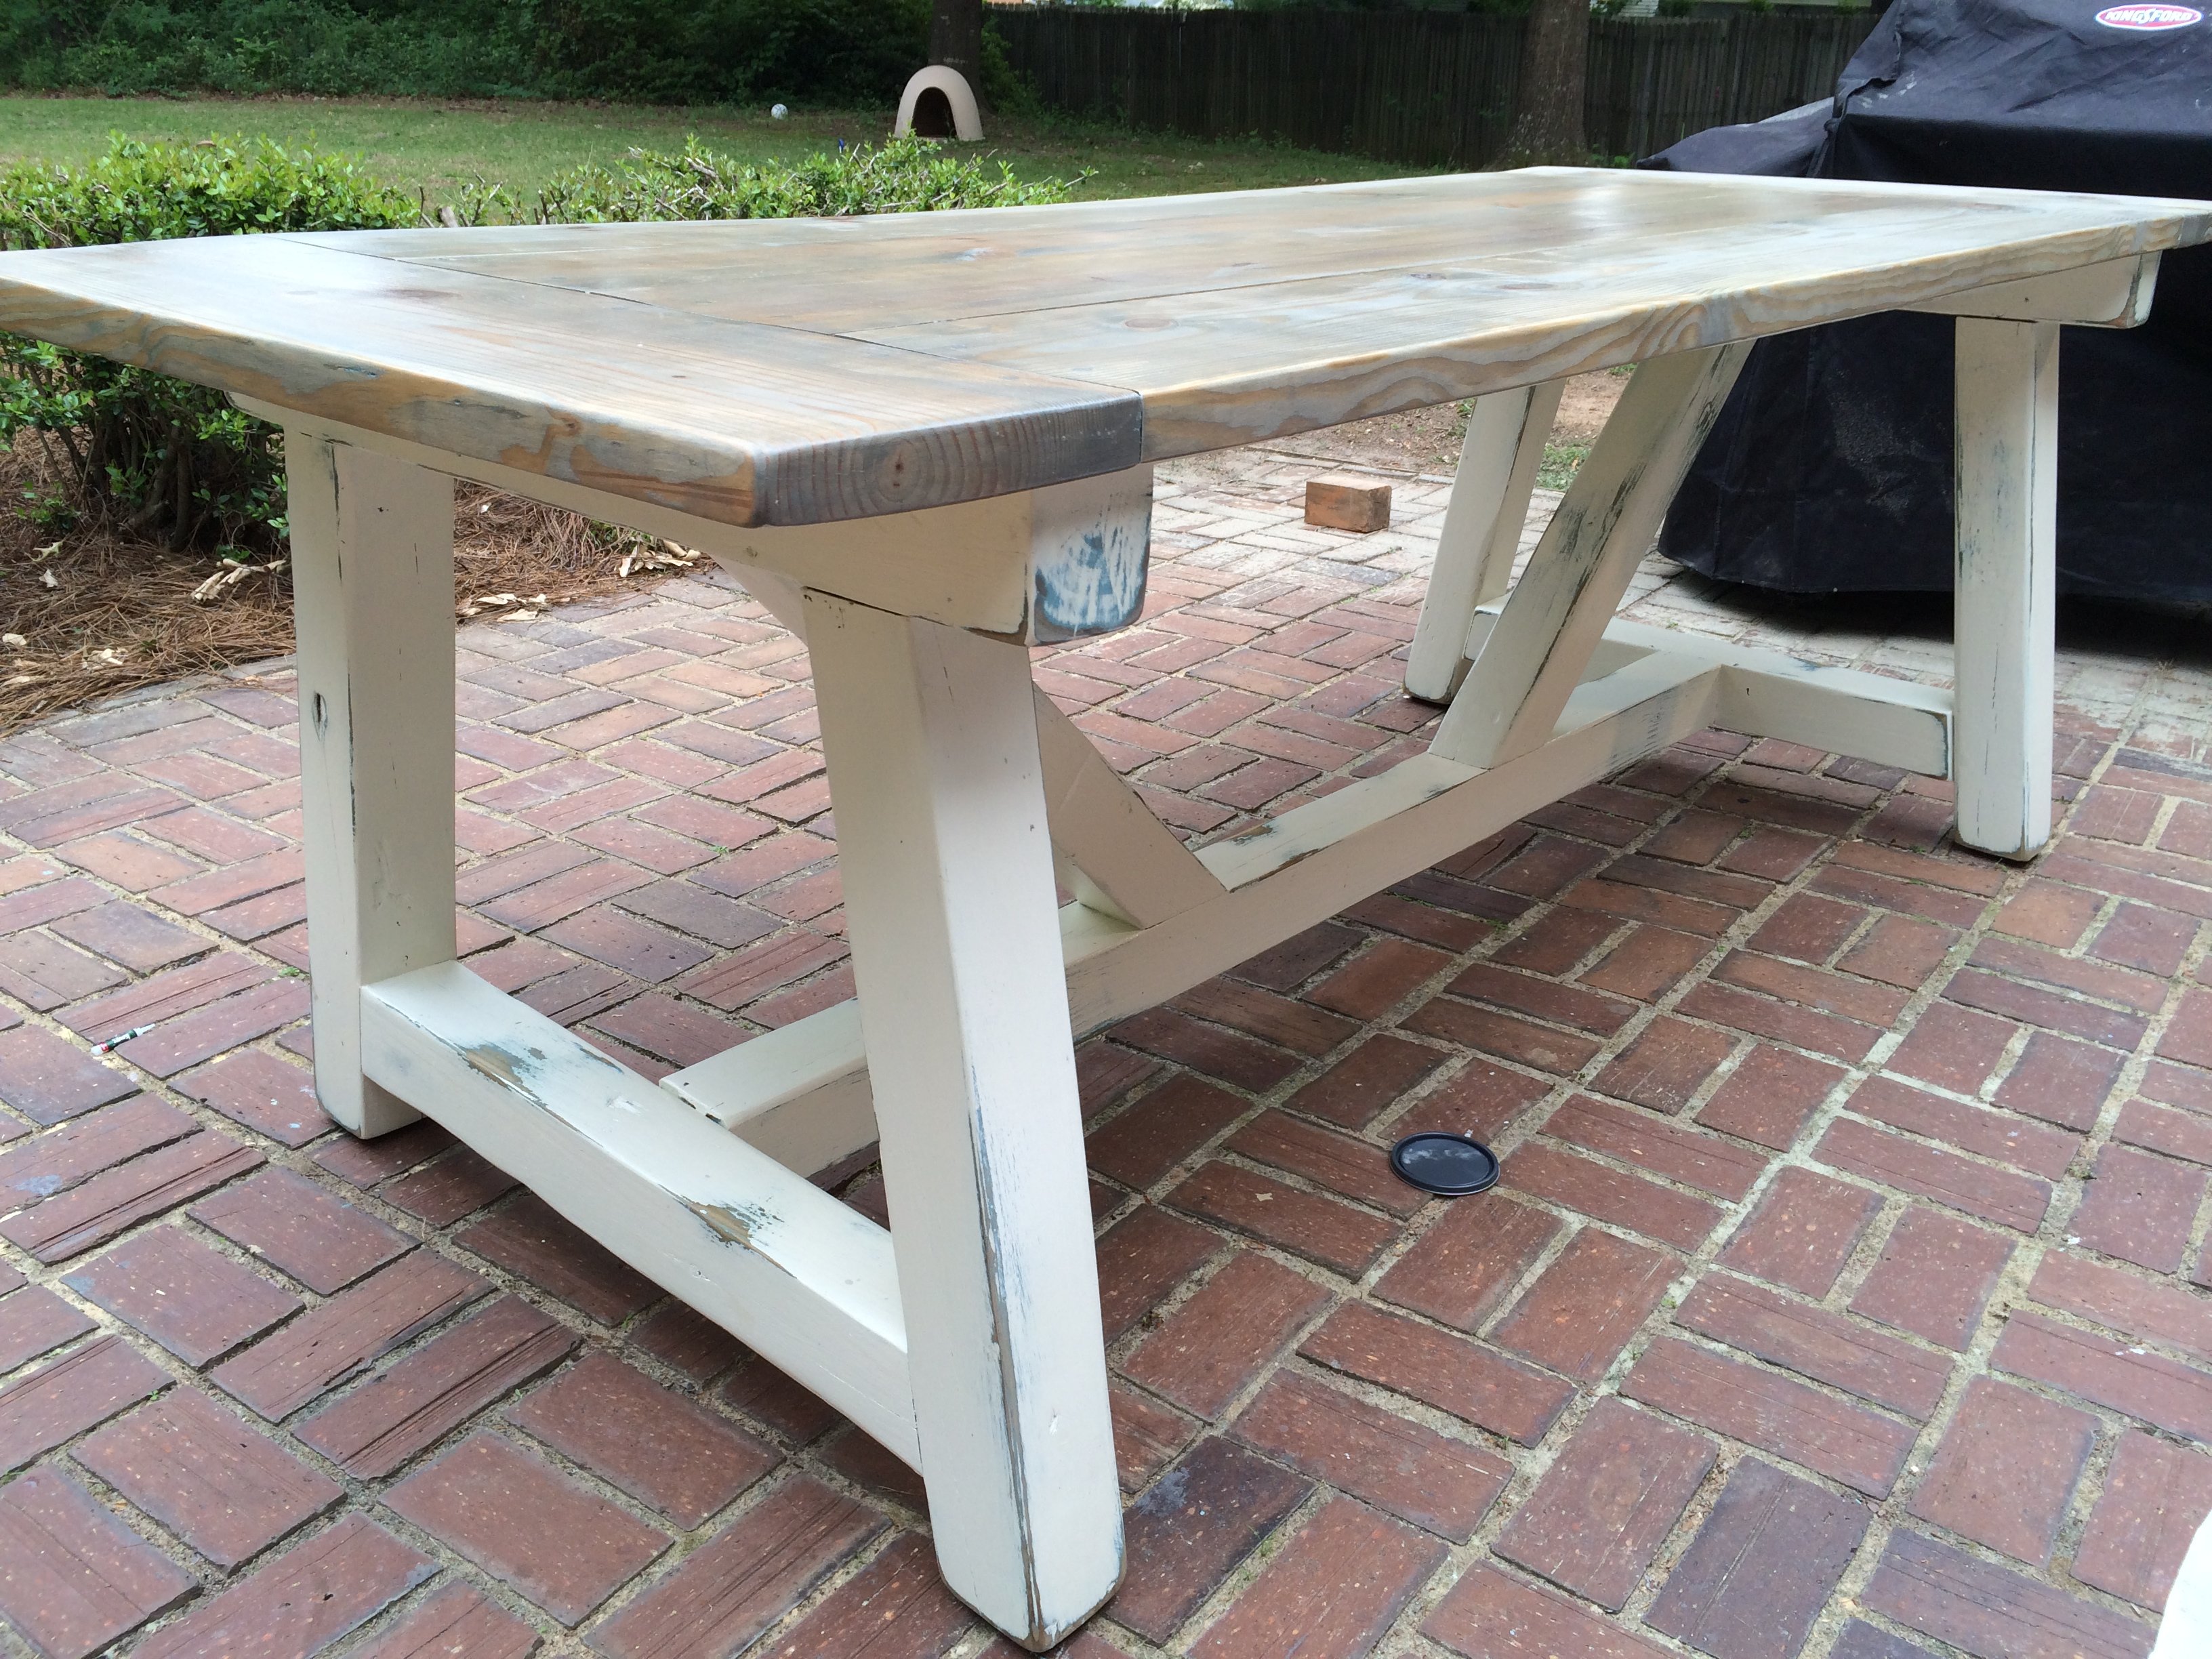
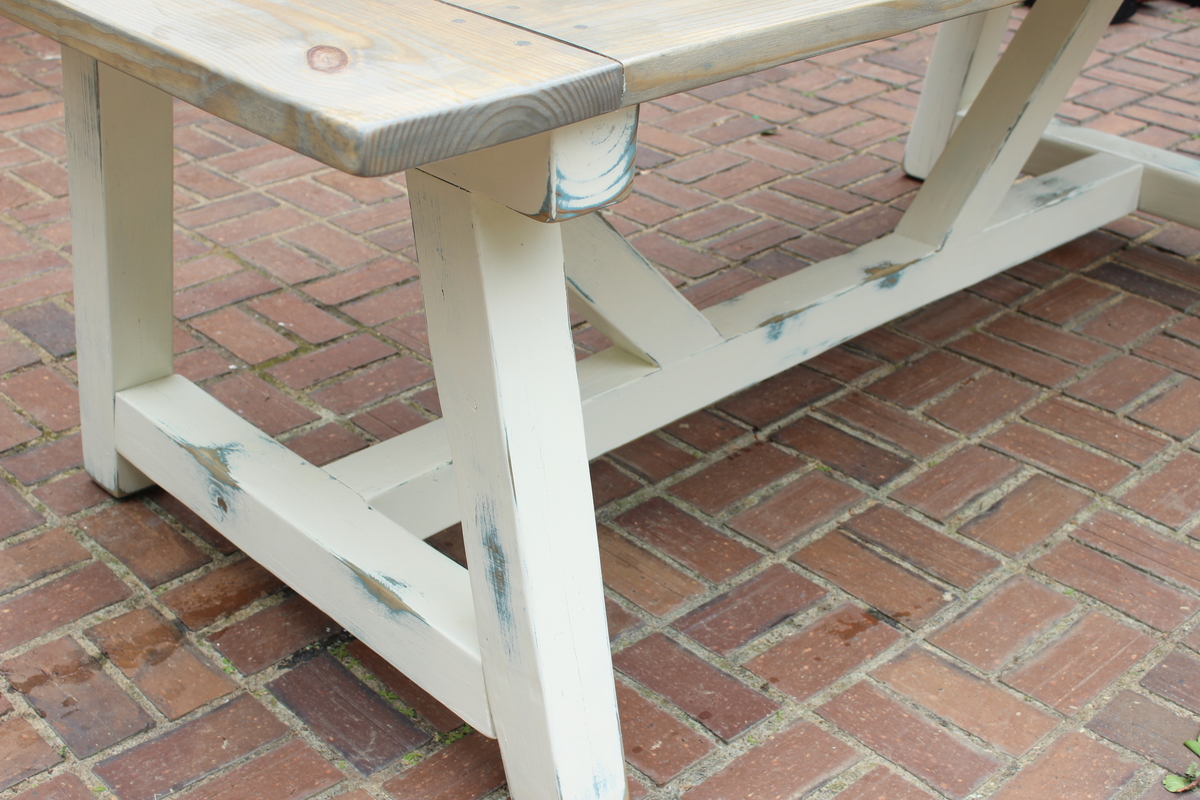
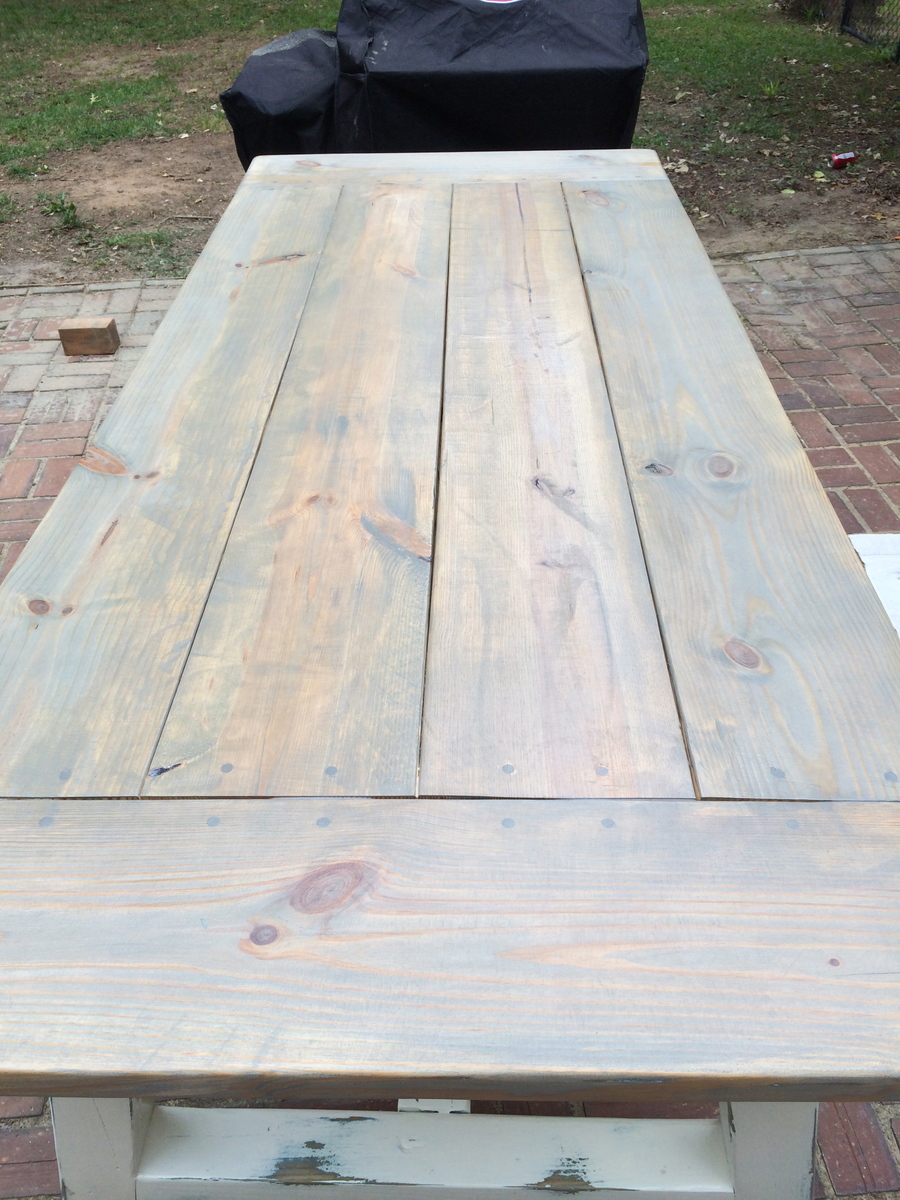
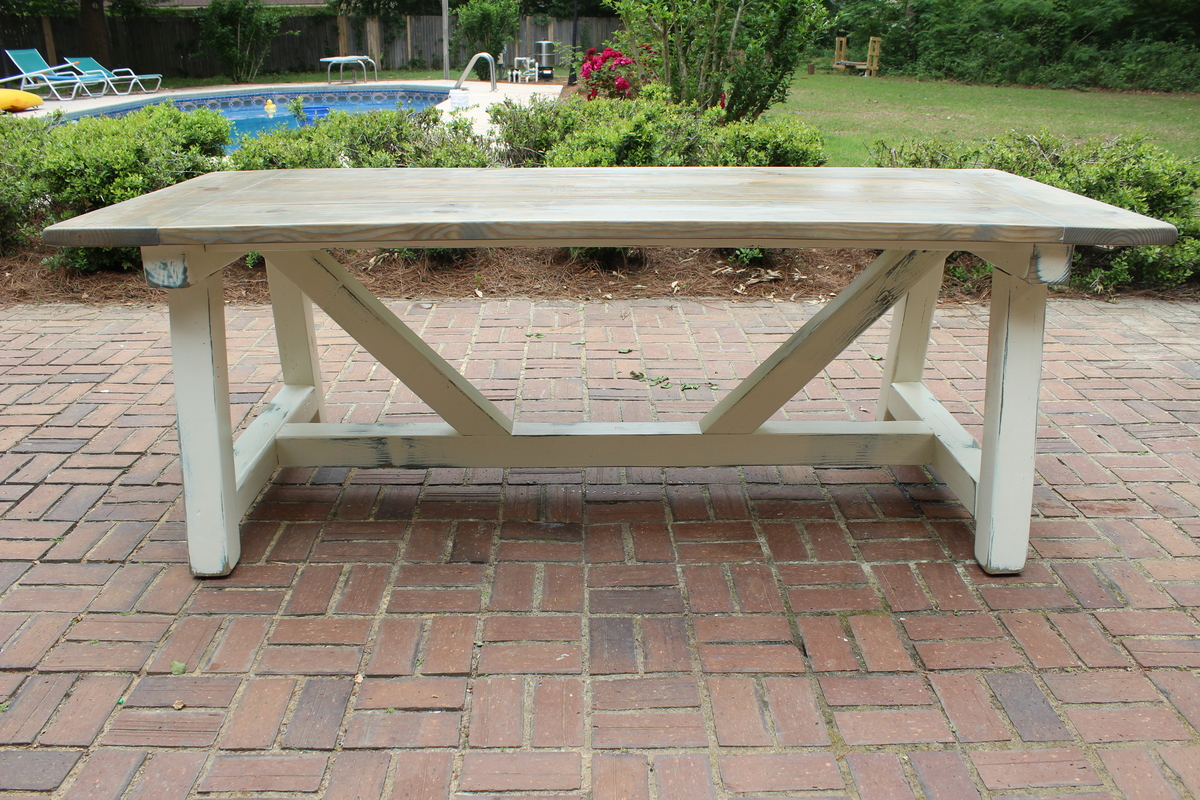
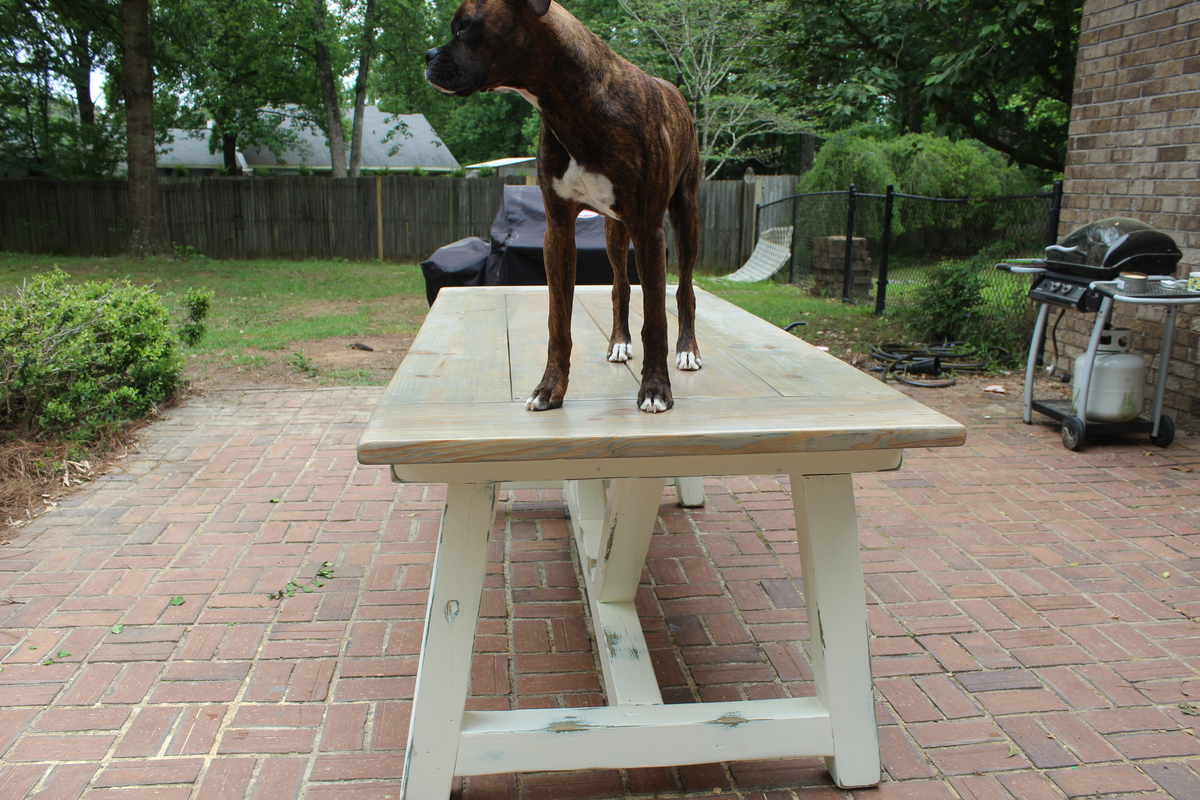
We used the wonderful Fancy X Farmhouse table plan with modifications. We needed the table to be shorter for our space, so we shortened it by 12" - this brought the angled pieces closer - we chose to do this instead of altering the angles. Also, we used 4 X 4 posts for the double 2 X 4's and also the cross pieces and angled pieces. I posted two blog posts about the process with lots of pictures, including how we rounded the ends per the plan. The finish is a equal mix of dark walnut and classic grey, finished with Trewax.
Great plan - we are so pleased with the results, and the price tag!!

Thu, 07/19/2012 - 07:35
I love it! The 4x4's were a nice change. So pretty in your space.
Thu, 07/19/2012 - 07:45
Thanks Whitney - we are lucky to have access to untreated 4 X 4's at our local orange store. I tend to buy an extra one every time as I am afraid they will stop carrying them!
In reply to Thank you! by Dananichols
Thu, 07/19/2012 - 08:21
lol we have them at my Blue too. Guess we are lucky!
Mon, 07/23/2012 - 15:12
I am a newby to wood working and am in love with this table. I have all the pieces cut for the sides, will also be changing the length and will make those cuts later. I am a little insecure on the nailing/screw directions...placement, size, where to hide?, etc. would love to know where yours are placed and what you used. (I did purchase a Kreg jig for pocket screws).
Thanx for any support you might have.
Mon, 07/23/2012 - 15:14
I am a newby to wood working and am in love with this table. I have all the pieces cut for the sides, will also be changing the length and will make those cuts later. I am a little insecure on the nailing/screw directions...placement, size, where to hide?, etc. would love to know where yours are placed and what you used. (I did purchase a Kreg jig for pocket screws).
Thanx for any support you might have.
Mon, 07/23/2012 - 18:31
Barbara -
I posted a link above to my blog - I have two posts about the table and lots of pictures, including pics of where I placed the screws. The only place I used the pocket screws (great purchase by the way, have used mine so much!) was to attach the 4 X 4 cross beams (you can use them on 2 X 4's as well if you are following the plan). Hop over and have a look - lots of pictures - and hopefully that will help with you questions!
Thanks - and have fun!
Dana
Mon, 07/30/2012 - 03:37
Dana,
This table is just gorgeous! My husband and I are building a house and have been looking to find the perfect table for weeks now. Just stumbled upon yours and fell in love! We are going to try and use your modifications to the original plan as well, thank you so much for sharing. Hope we can do this too!!!!!
Thanks!
Kristine
Sat, 10/27/2012 - 06:45
NEED one of these...
I've NEVER done a project like this and i'm not even near crafty but this is the first thing I see on Pintrest that made me even want to attempt doing it!
Is it wide enough that the cross beams don't annoy you when you are sitting?
Wed, 02/12/2014 - 11:20
Dana thanks to your informative blog detailing what you did for the rounded legs you have saved my project! I really did not want to resort to the the angled leg cuts. I just could not figure out the 30 & 45 degree cuts. I as well was originally trying to make them on the same piece. THANK YOU!
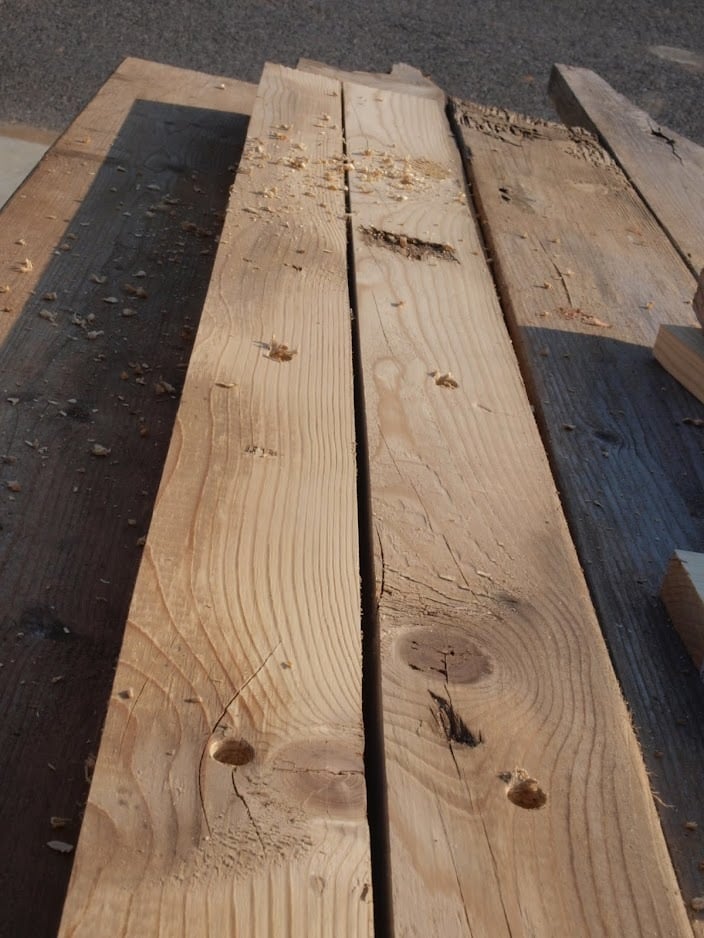
I came across some old 4x4s left over at my job so I decided to do something with them. I was in desperate need of an outdoor table. I found the plans for this table, grabbed the 4x4s I needed and went to work. The 4x4s where in really rough shape. It took me about 7 hours to sand them down to bare wood. In a way I was ok with how old they where because I didn't have to wait to stain them. One thing I would do if I could do it over again is stain, paint and protect the wood before I assembled the table. I had a hard time protecting the table top cracks. Down the road I may epoxy resin the top. I also have the wood ready for the matching 4x4 truss benches, so those are soon to come.

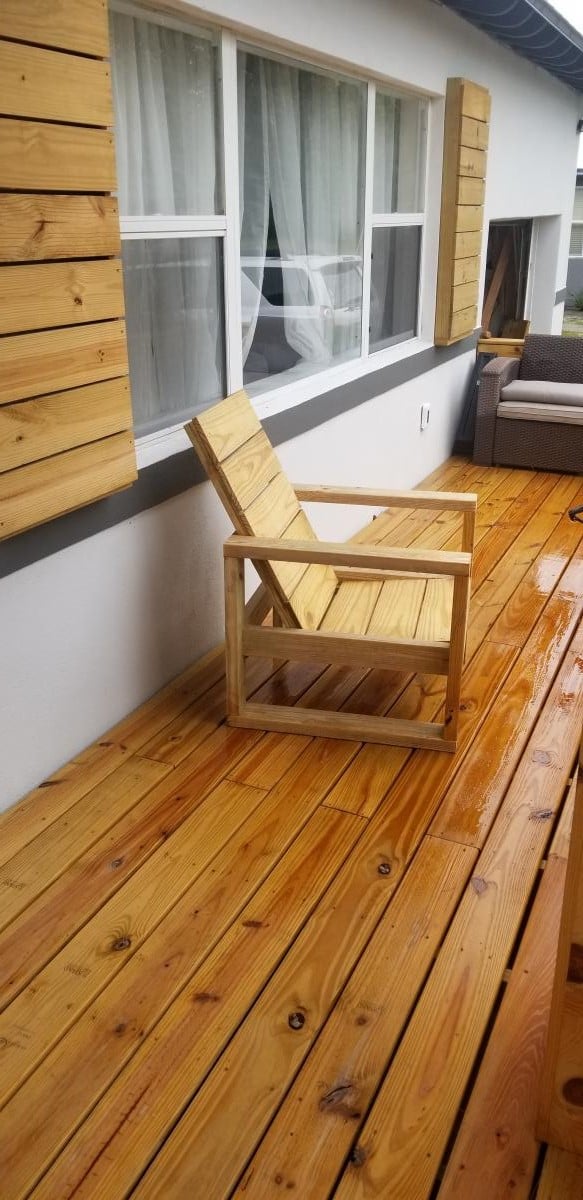
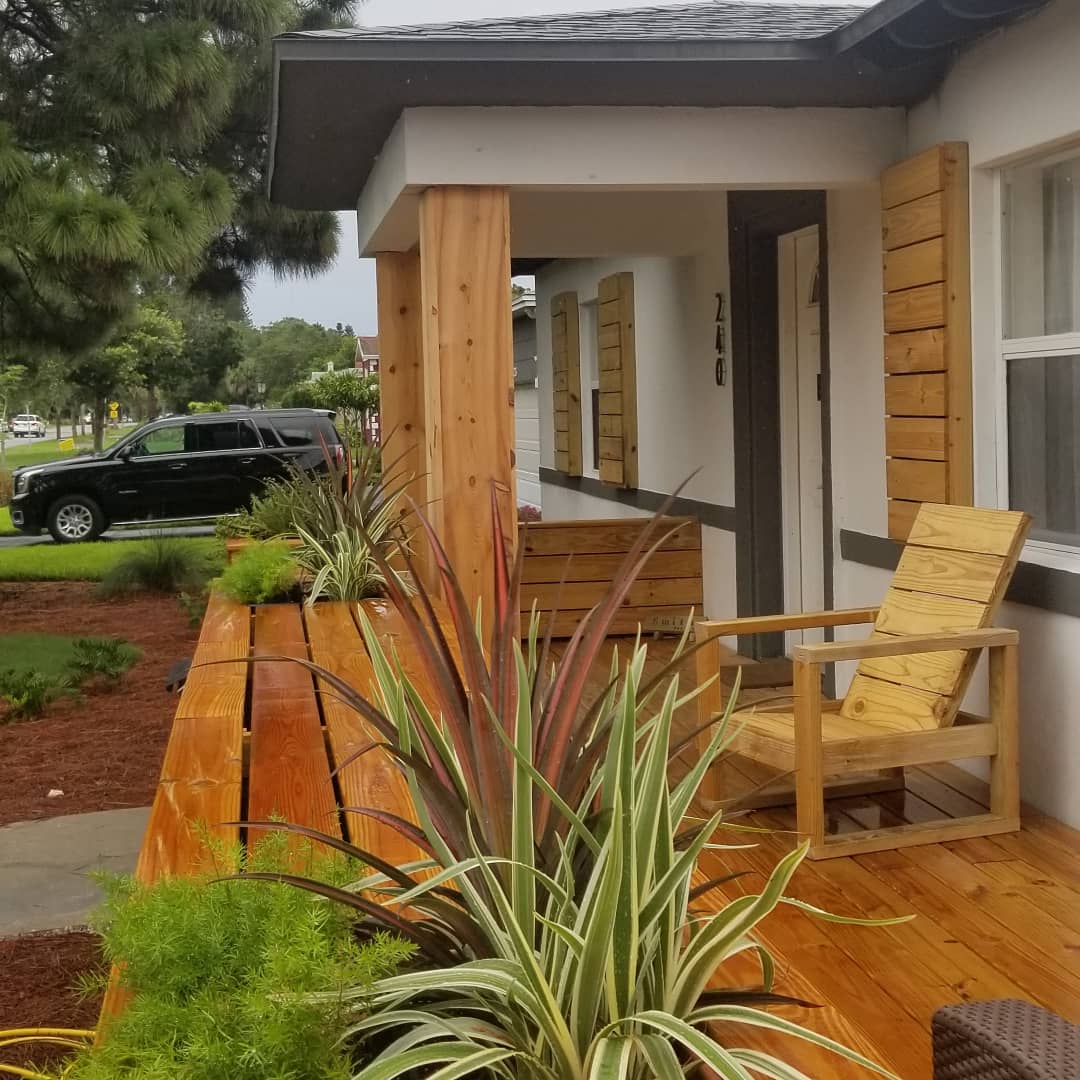
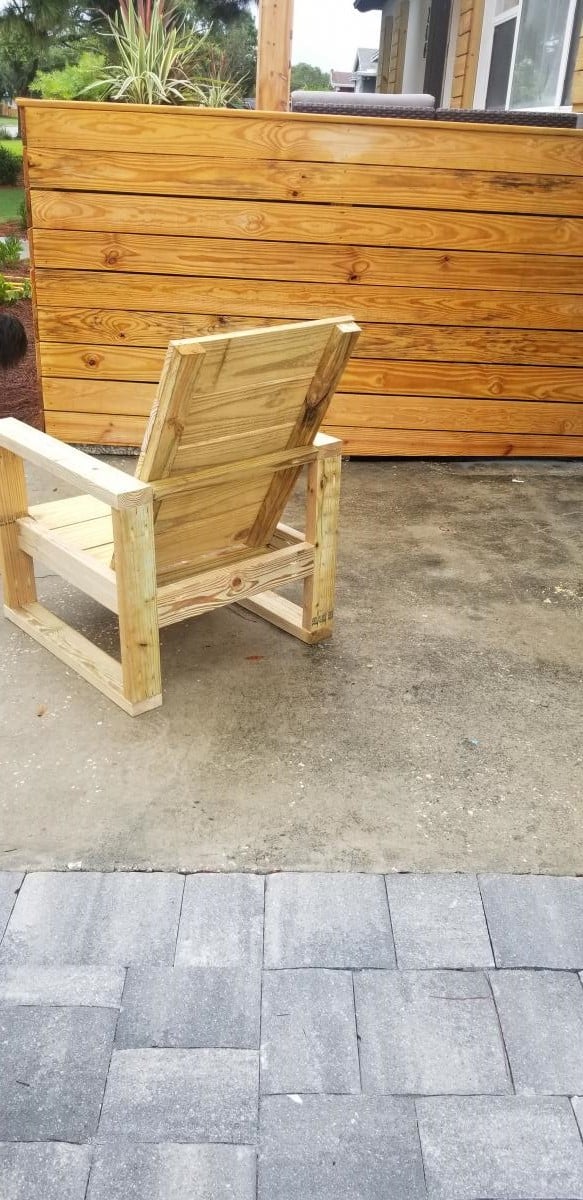
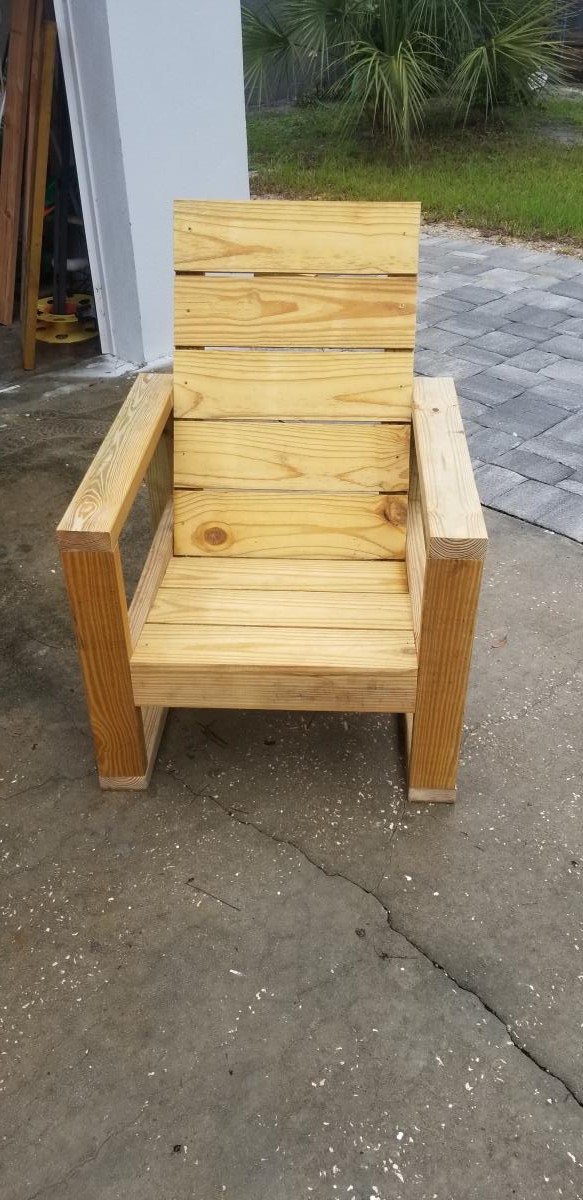
I built a set of these chairs based on Ana's simple modern outdoor chair. I wanted it to match my front porch which I built a few weeks ago. Thank you for the plans.


Comments
Ana White Admin
Mon, 09/18/2023 - 14:57
Absolutely gorgeous!
Thank you for sharing, love the finish choice!