Community Brag Posts

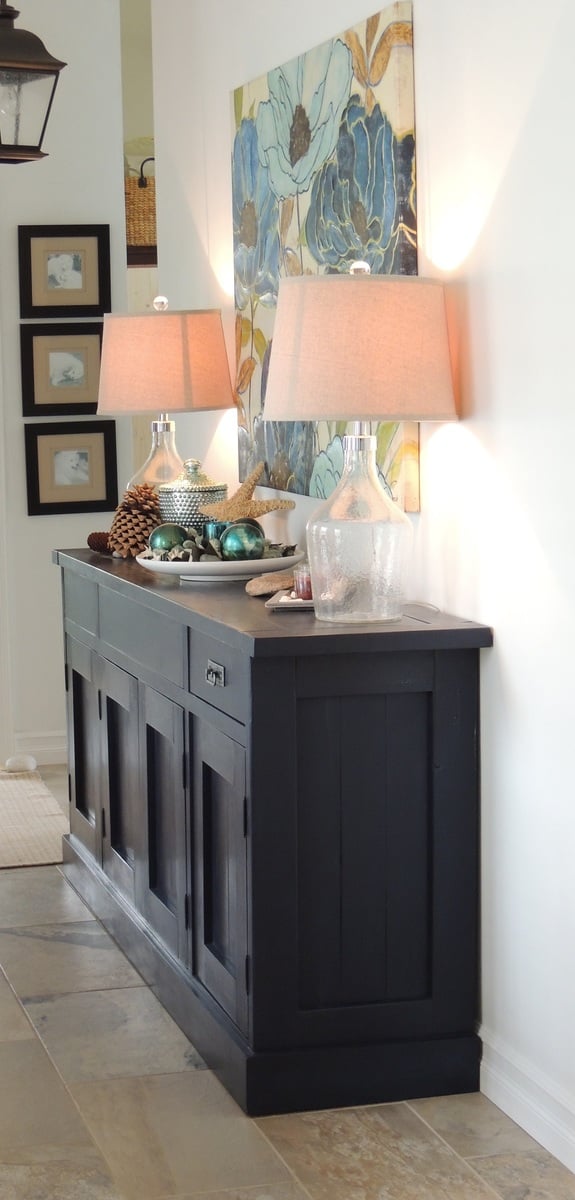
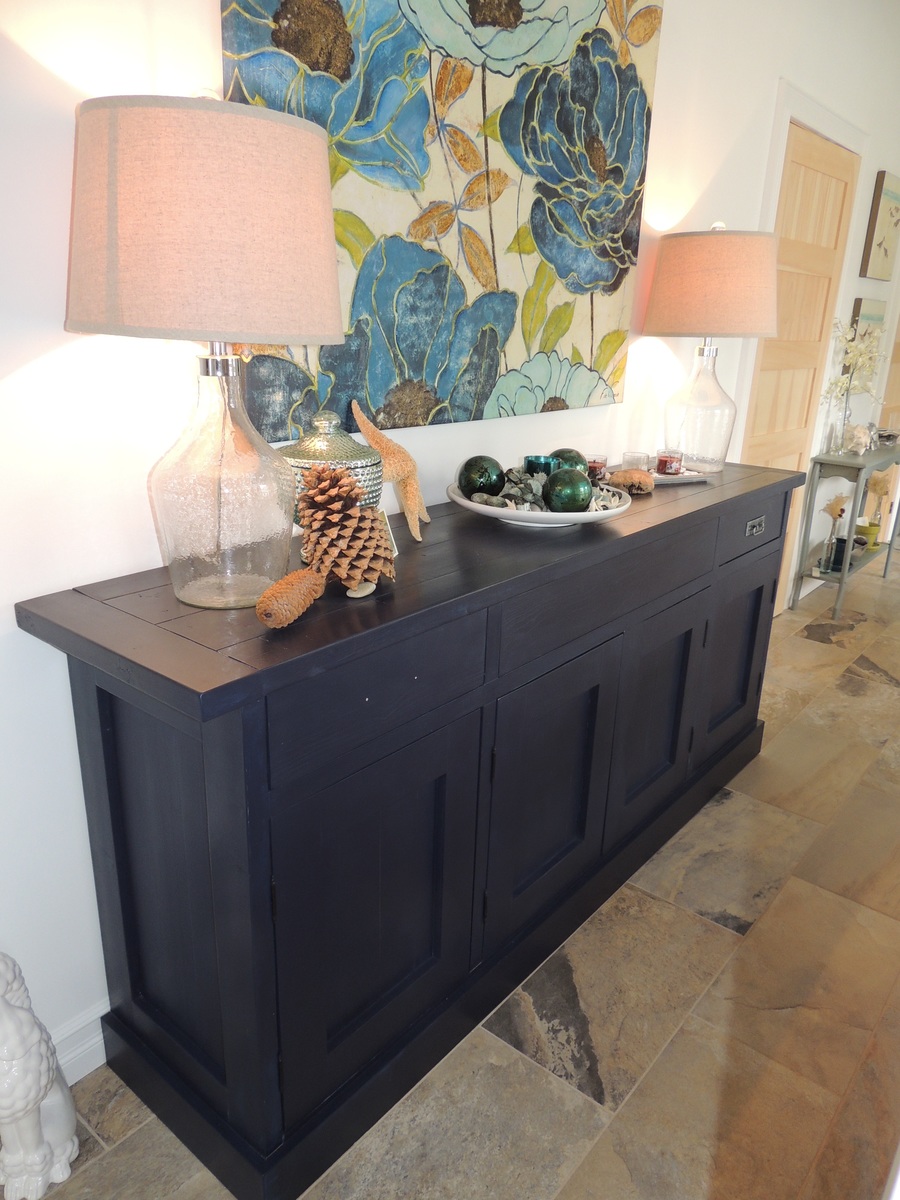
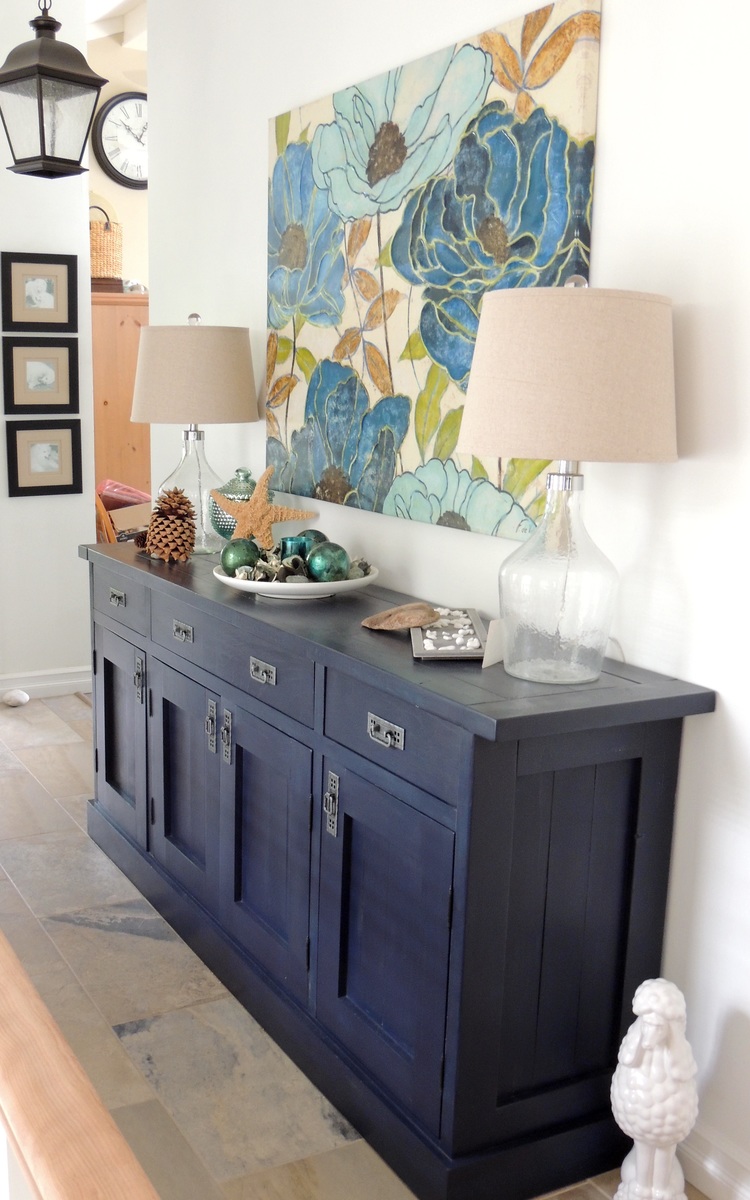
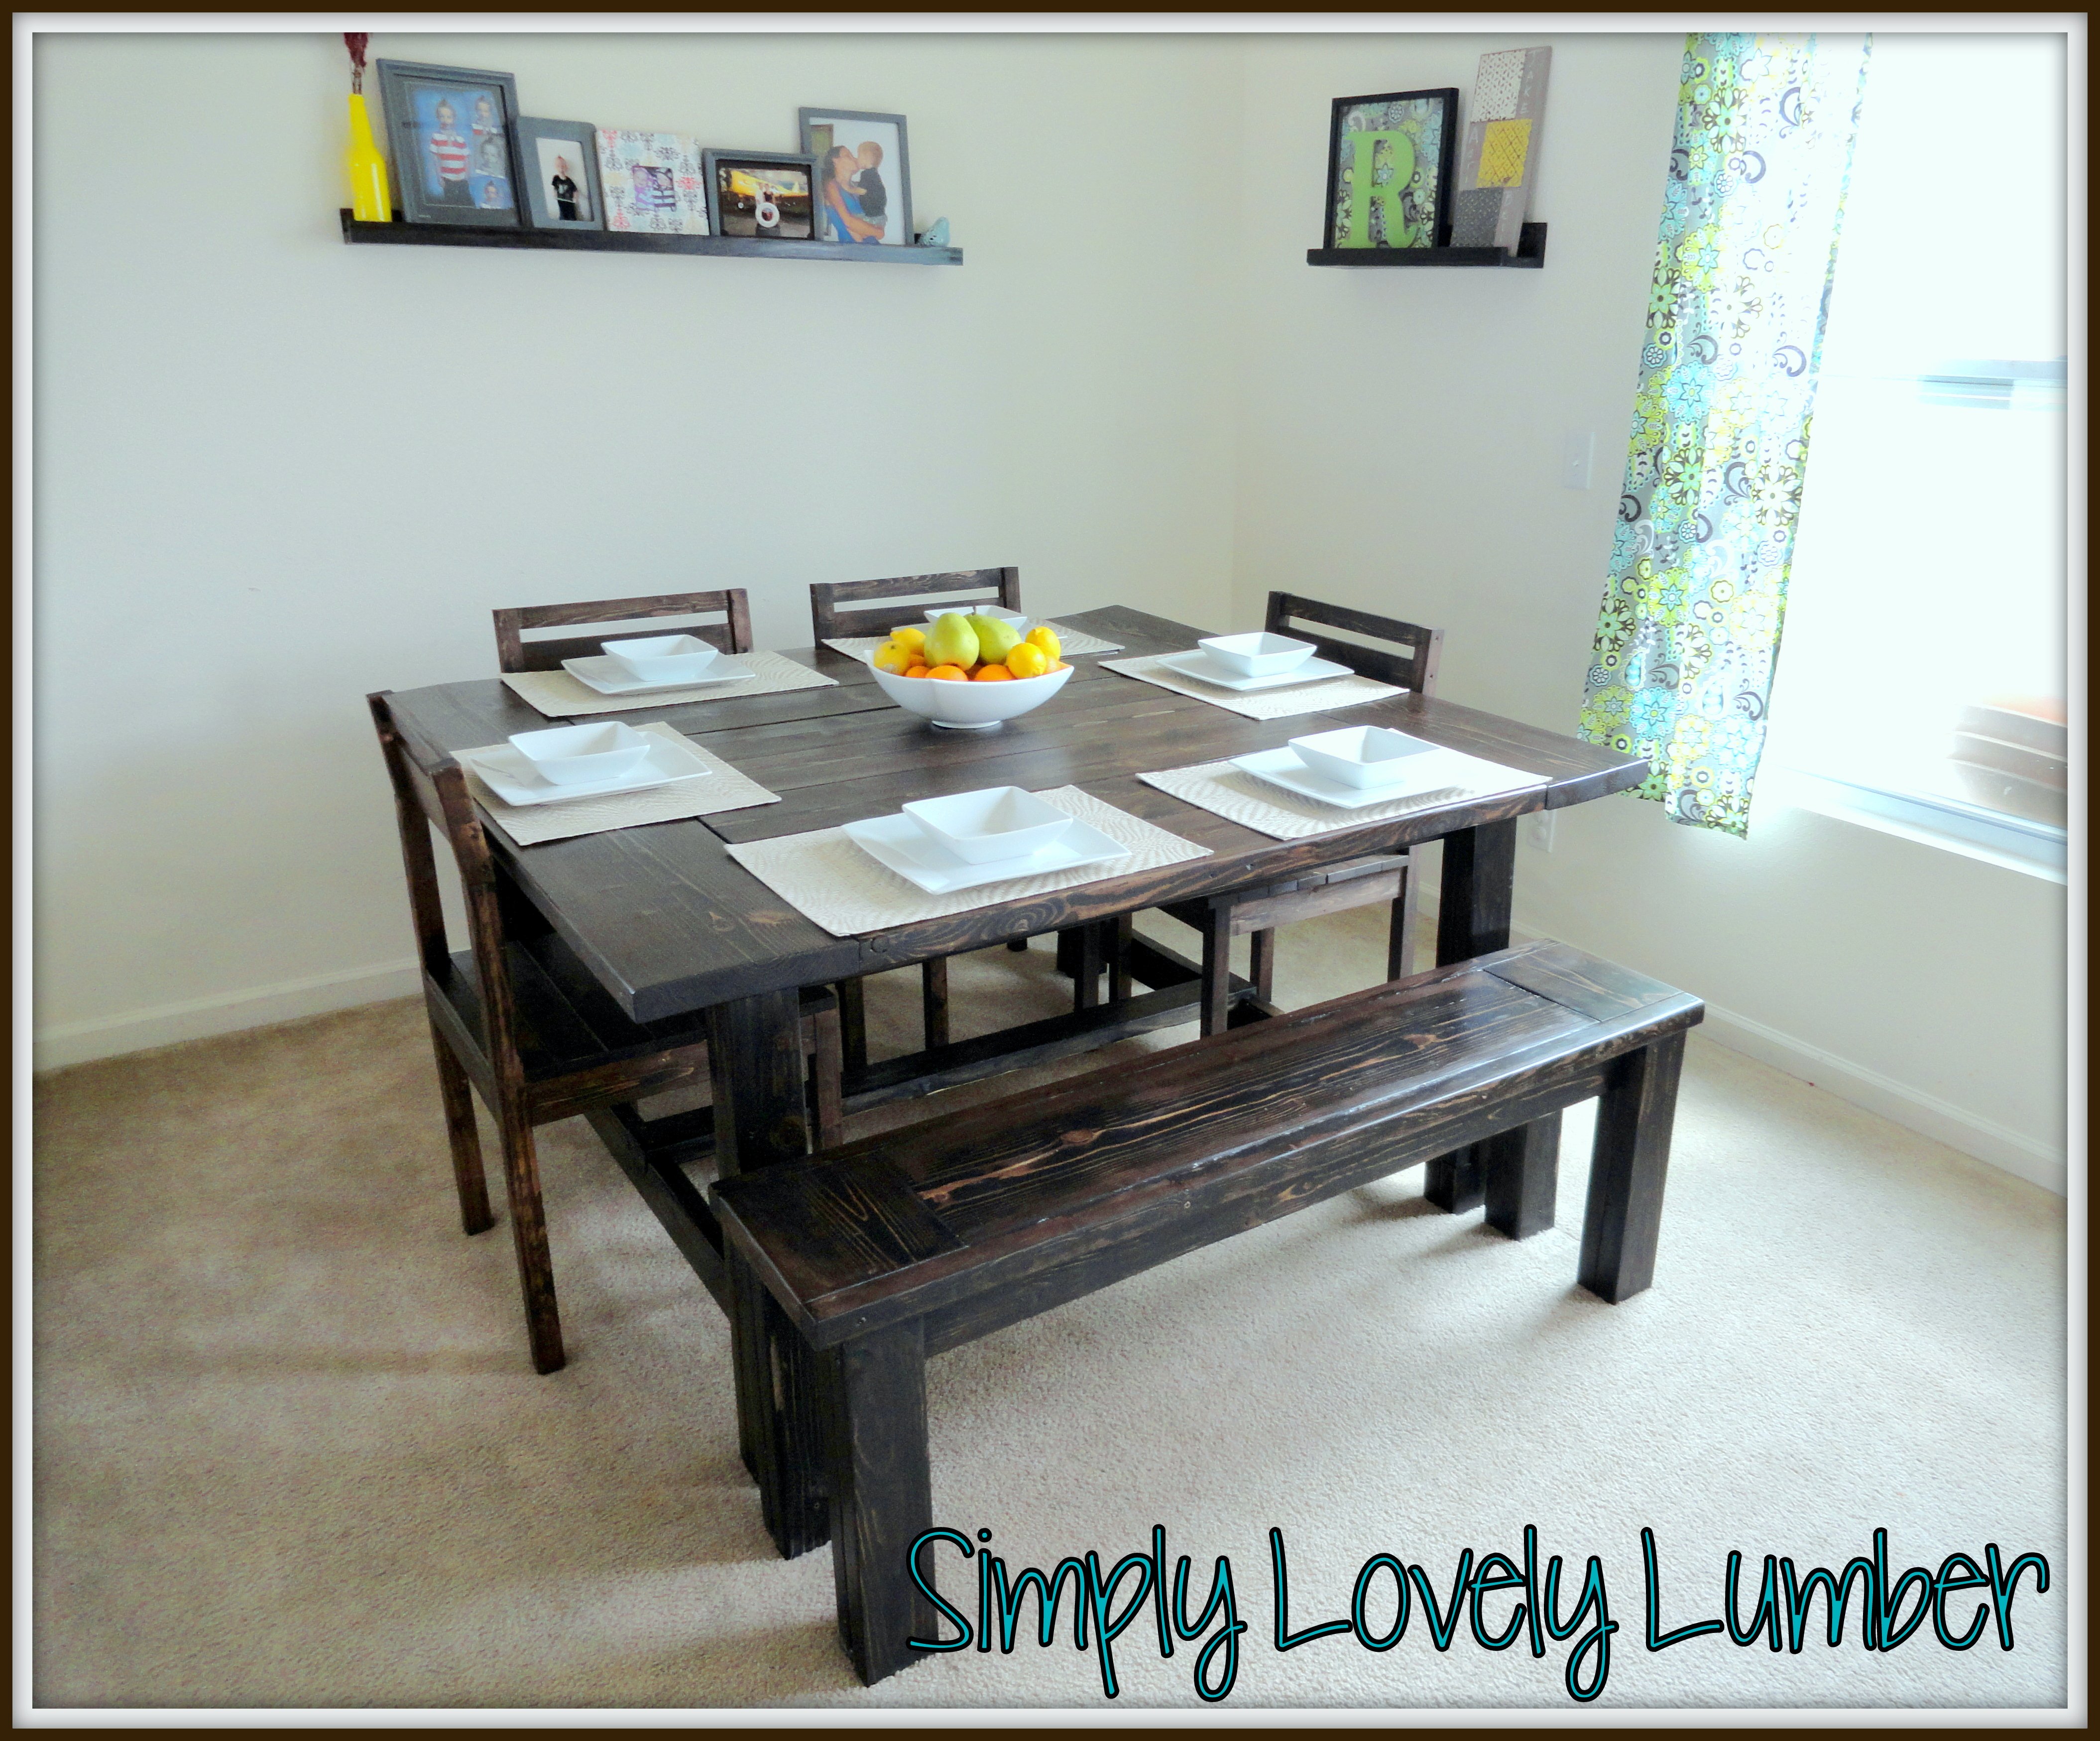
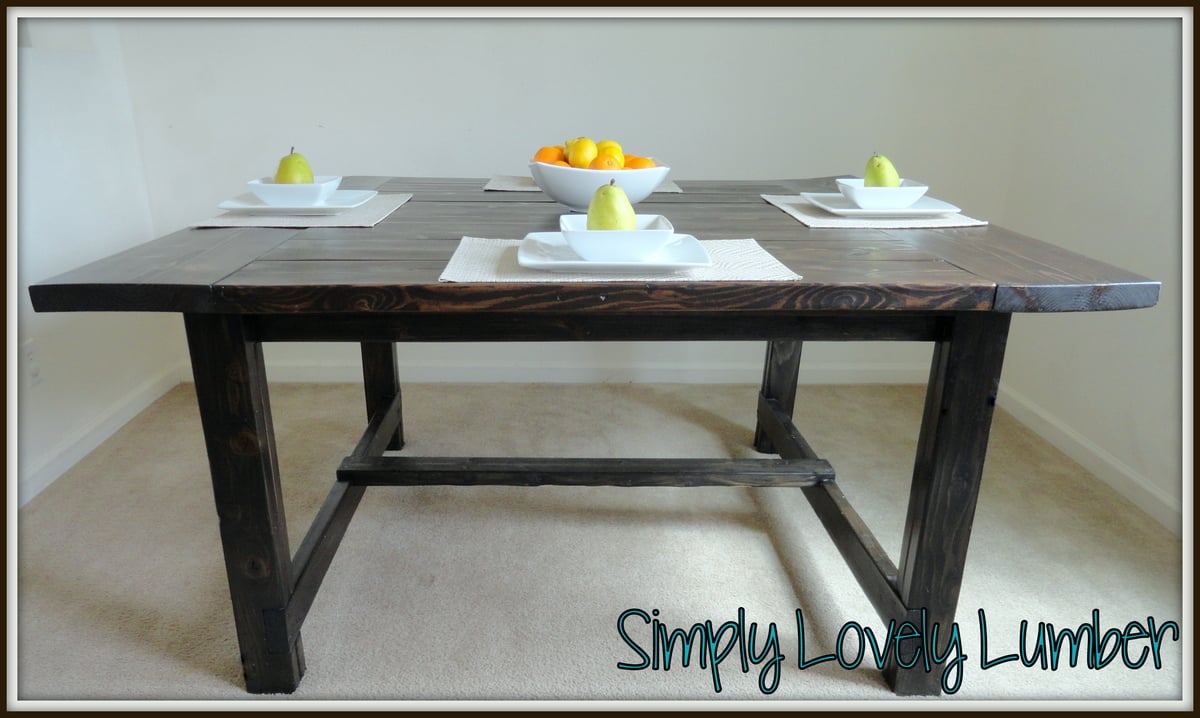
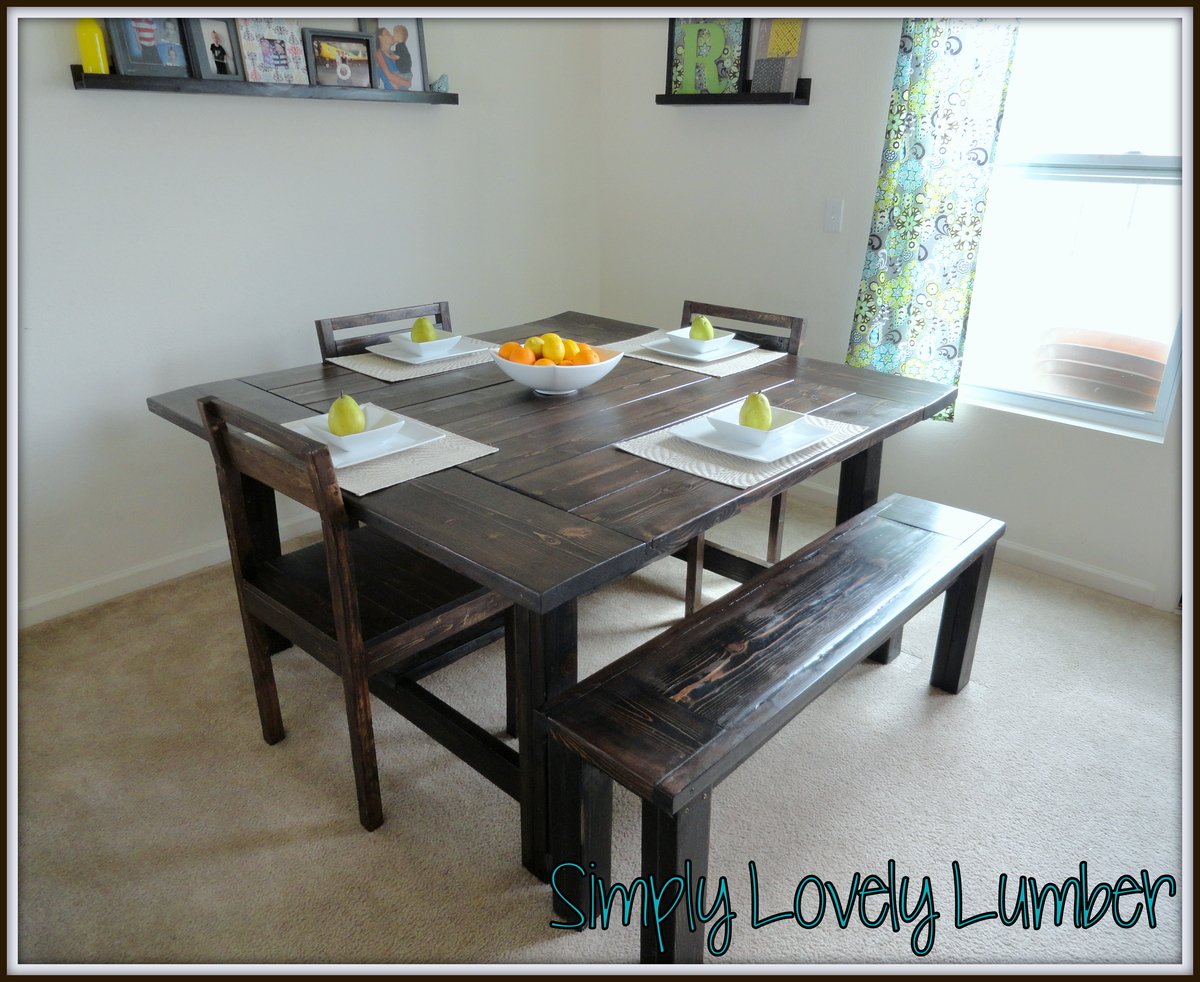
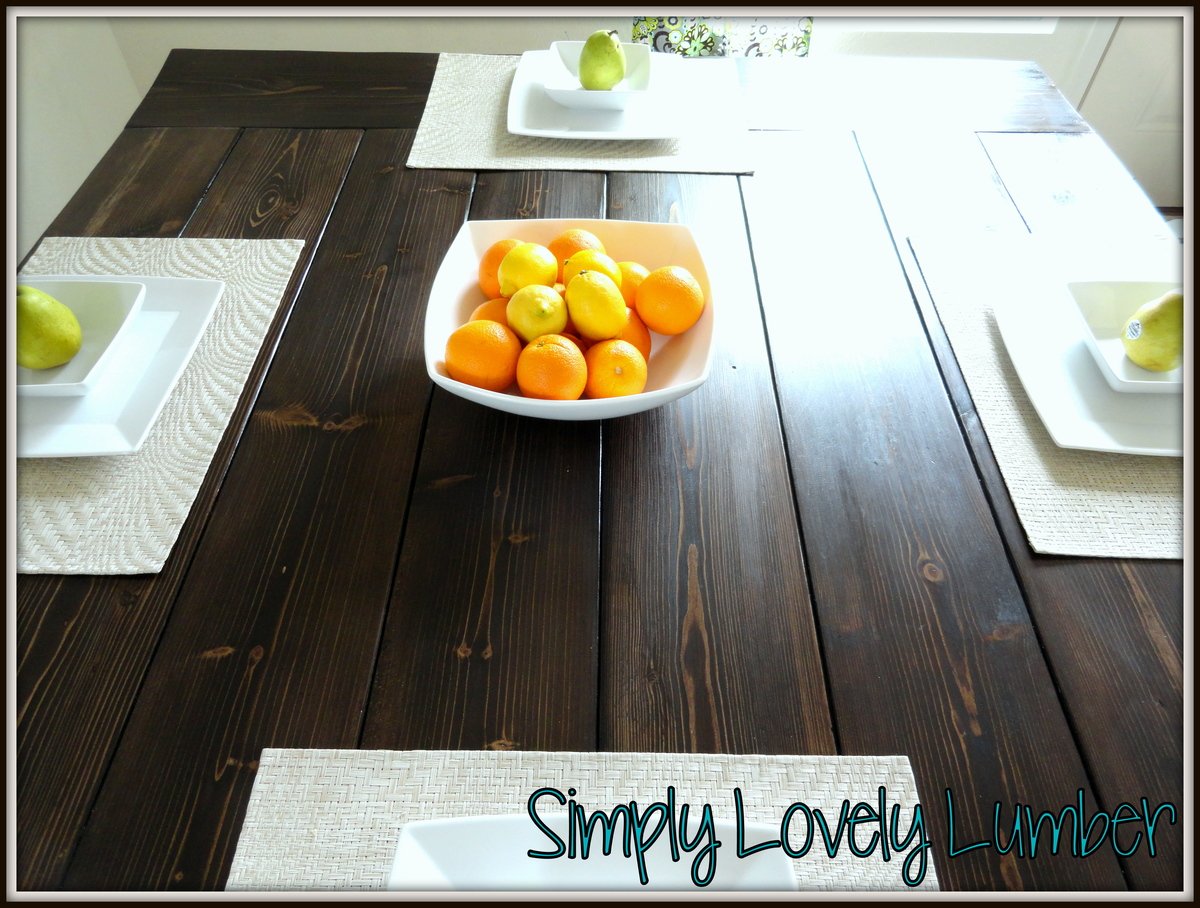
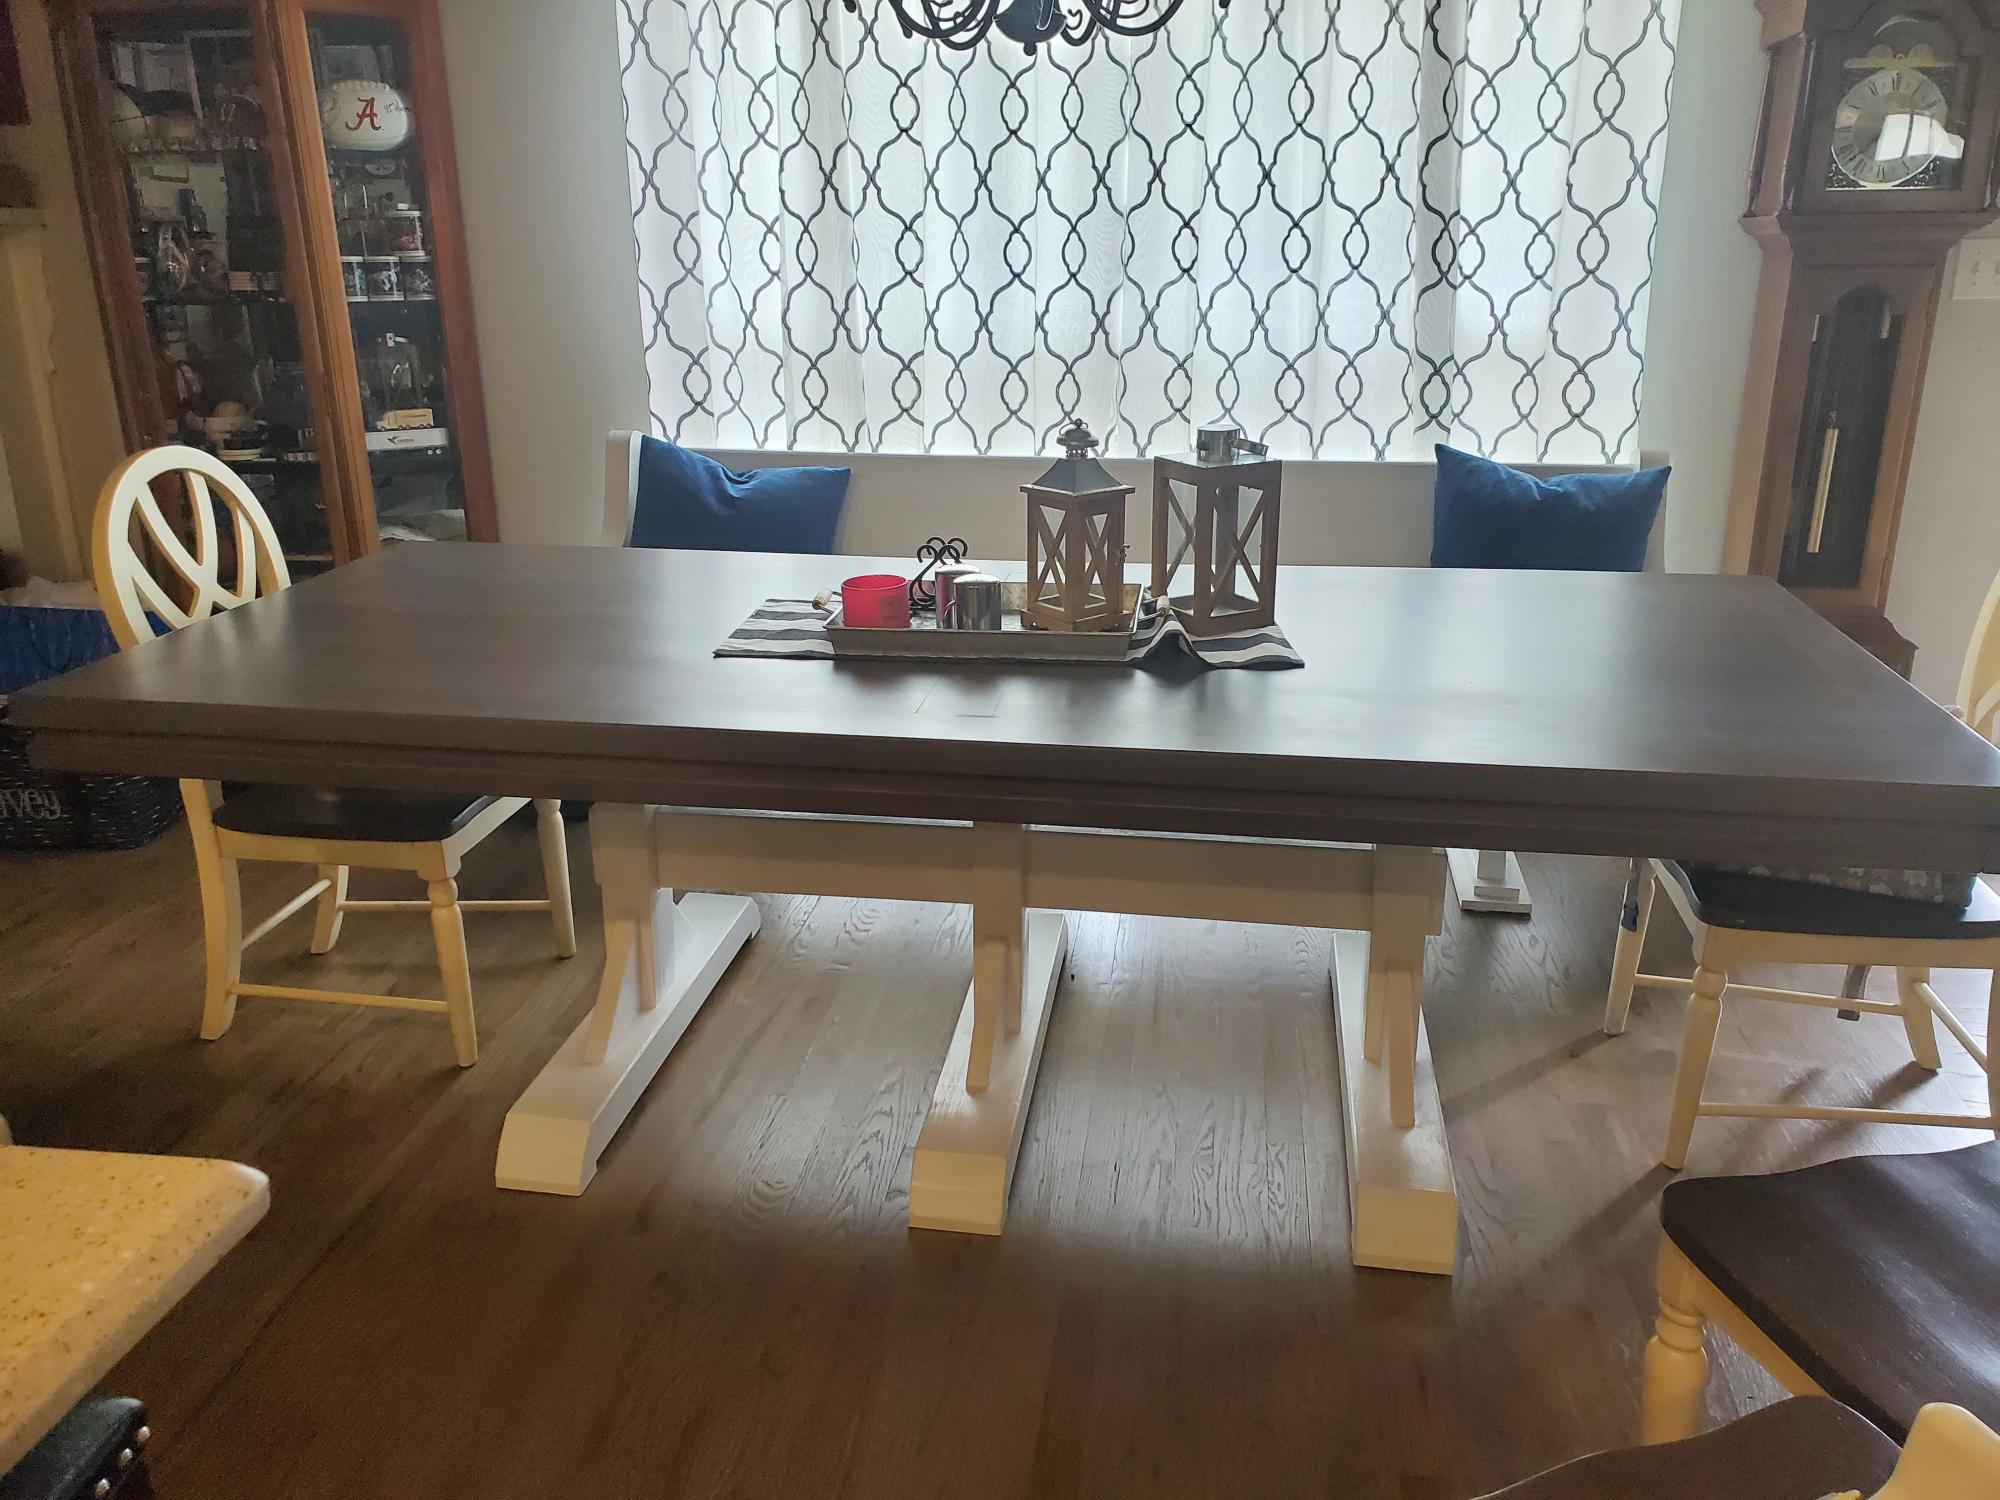
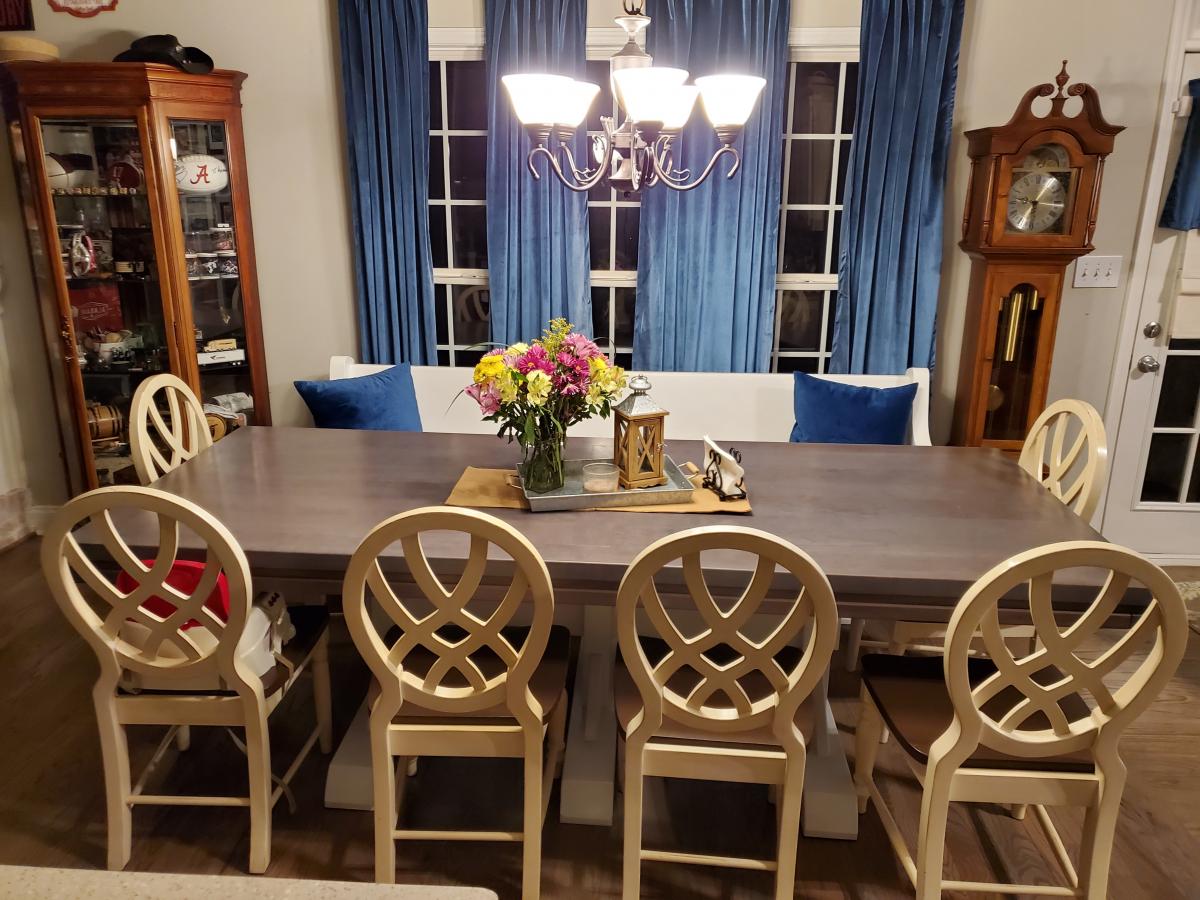
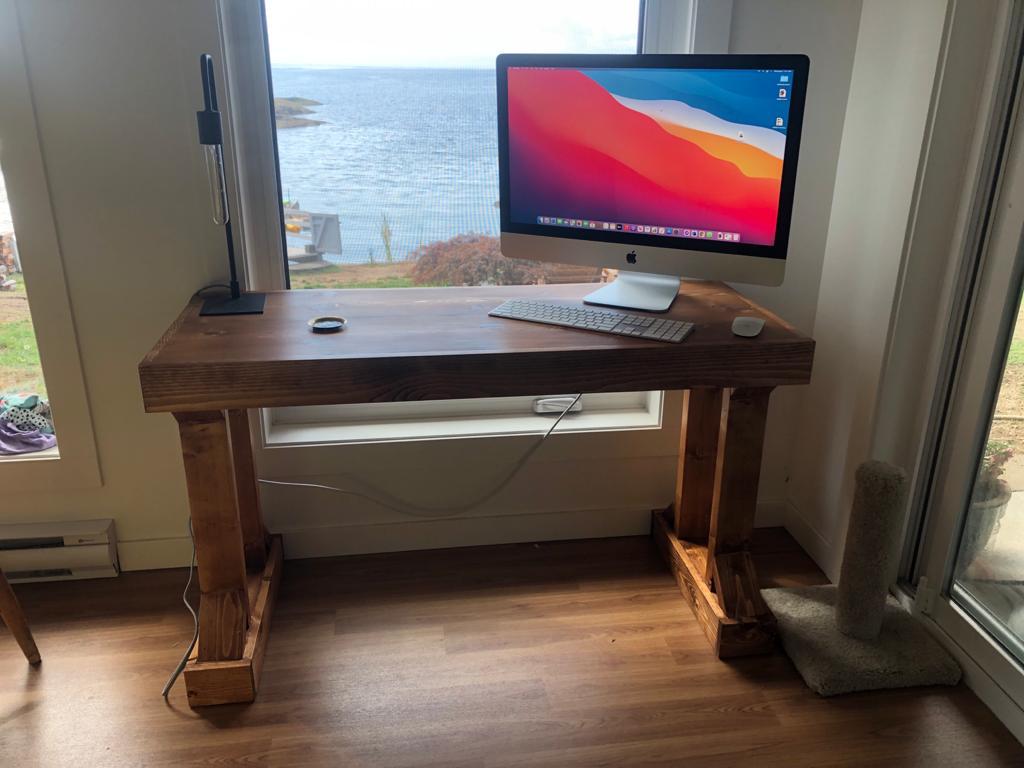
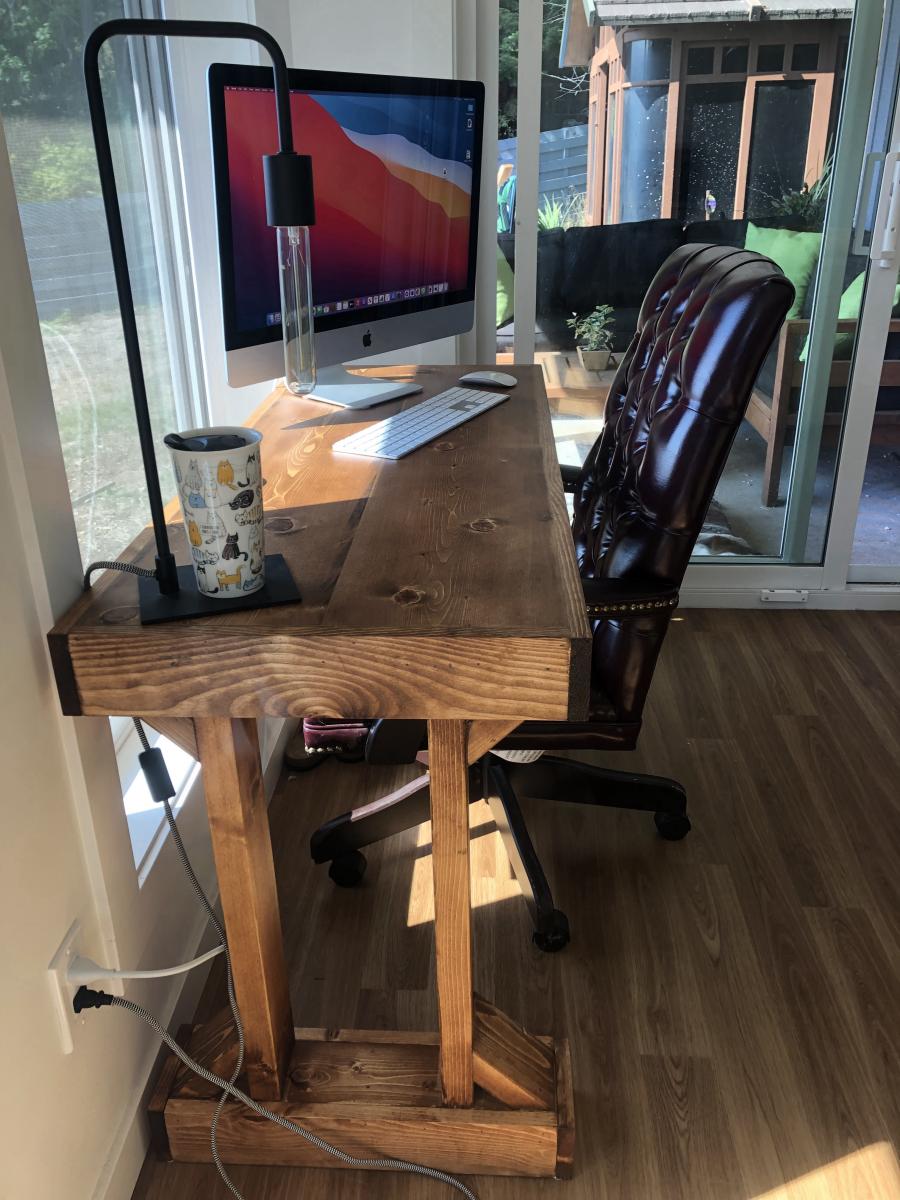
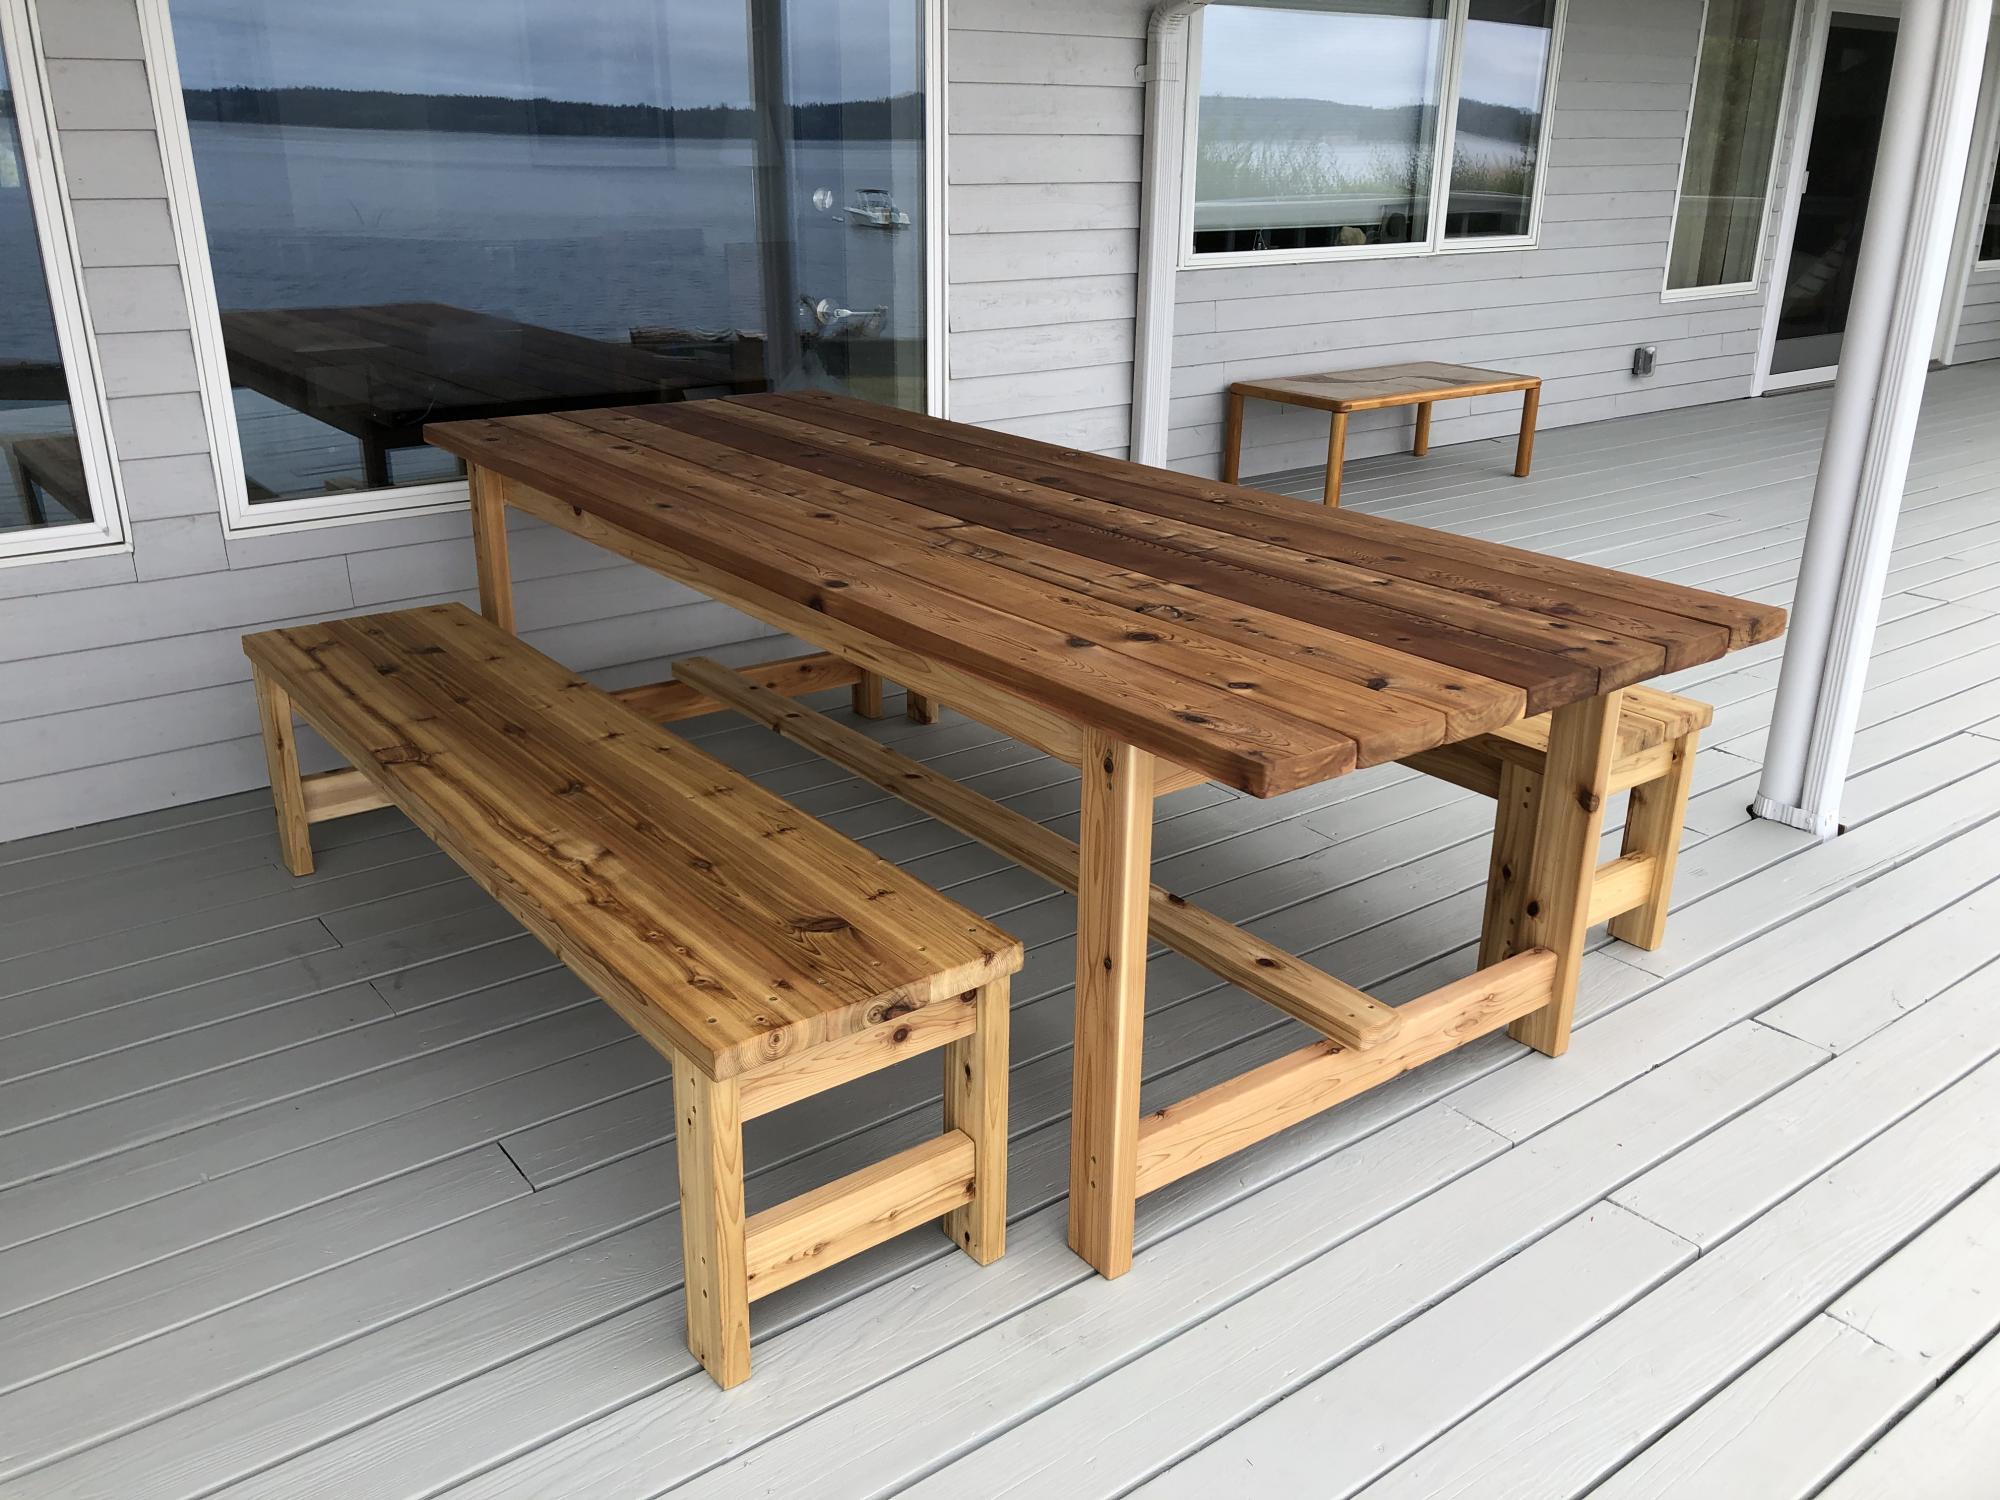
Fancy X Farmhouse Table

Submitted by mbnewman on Sun, 12/07/2014 - 05:31

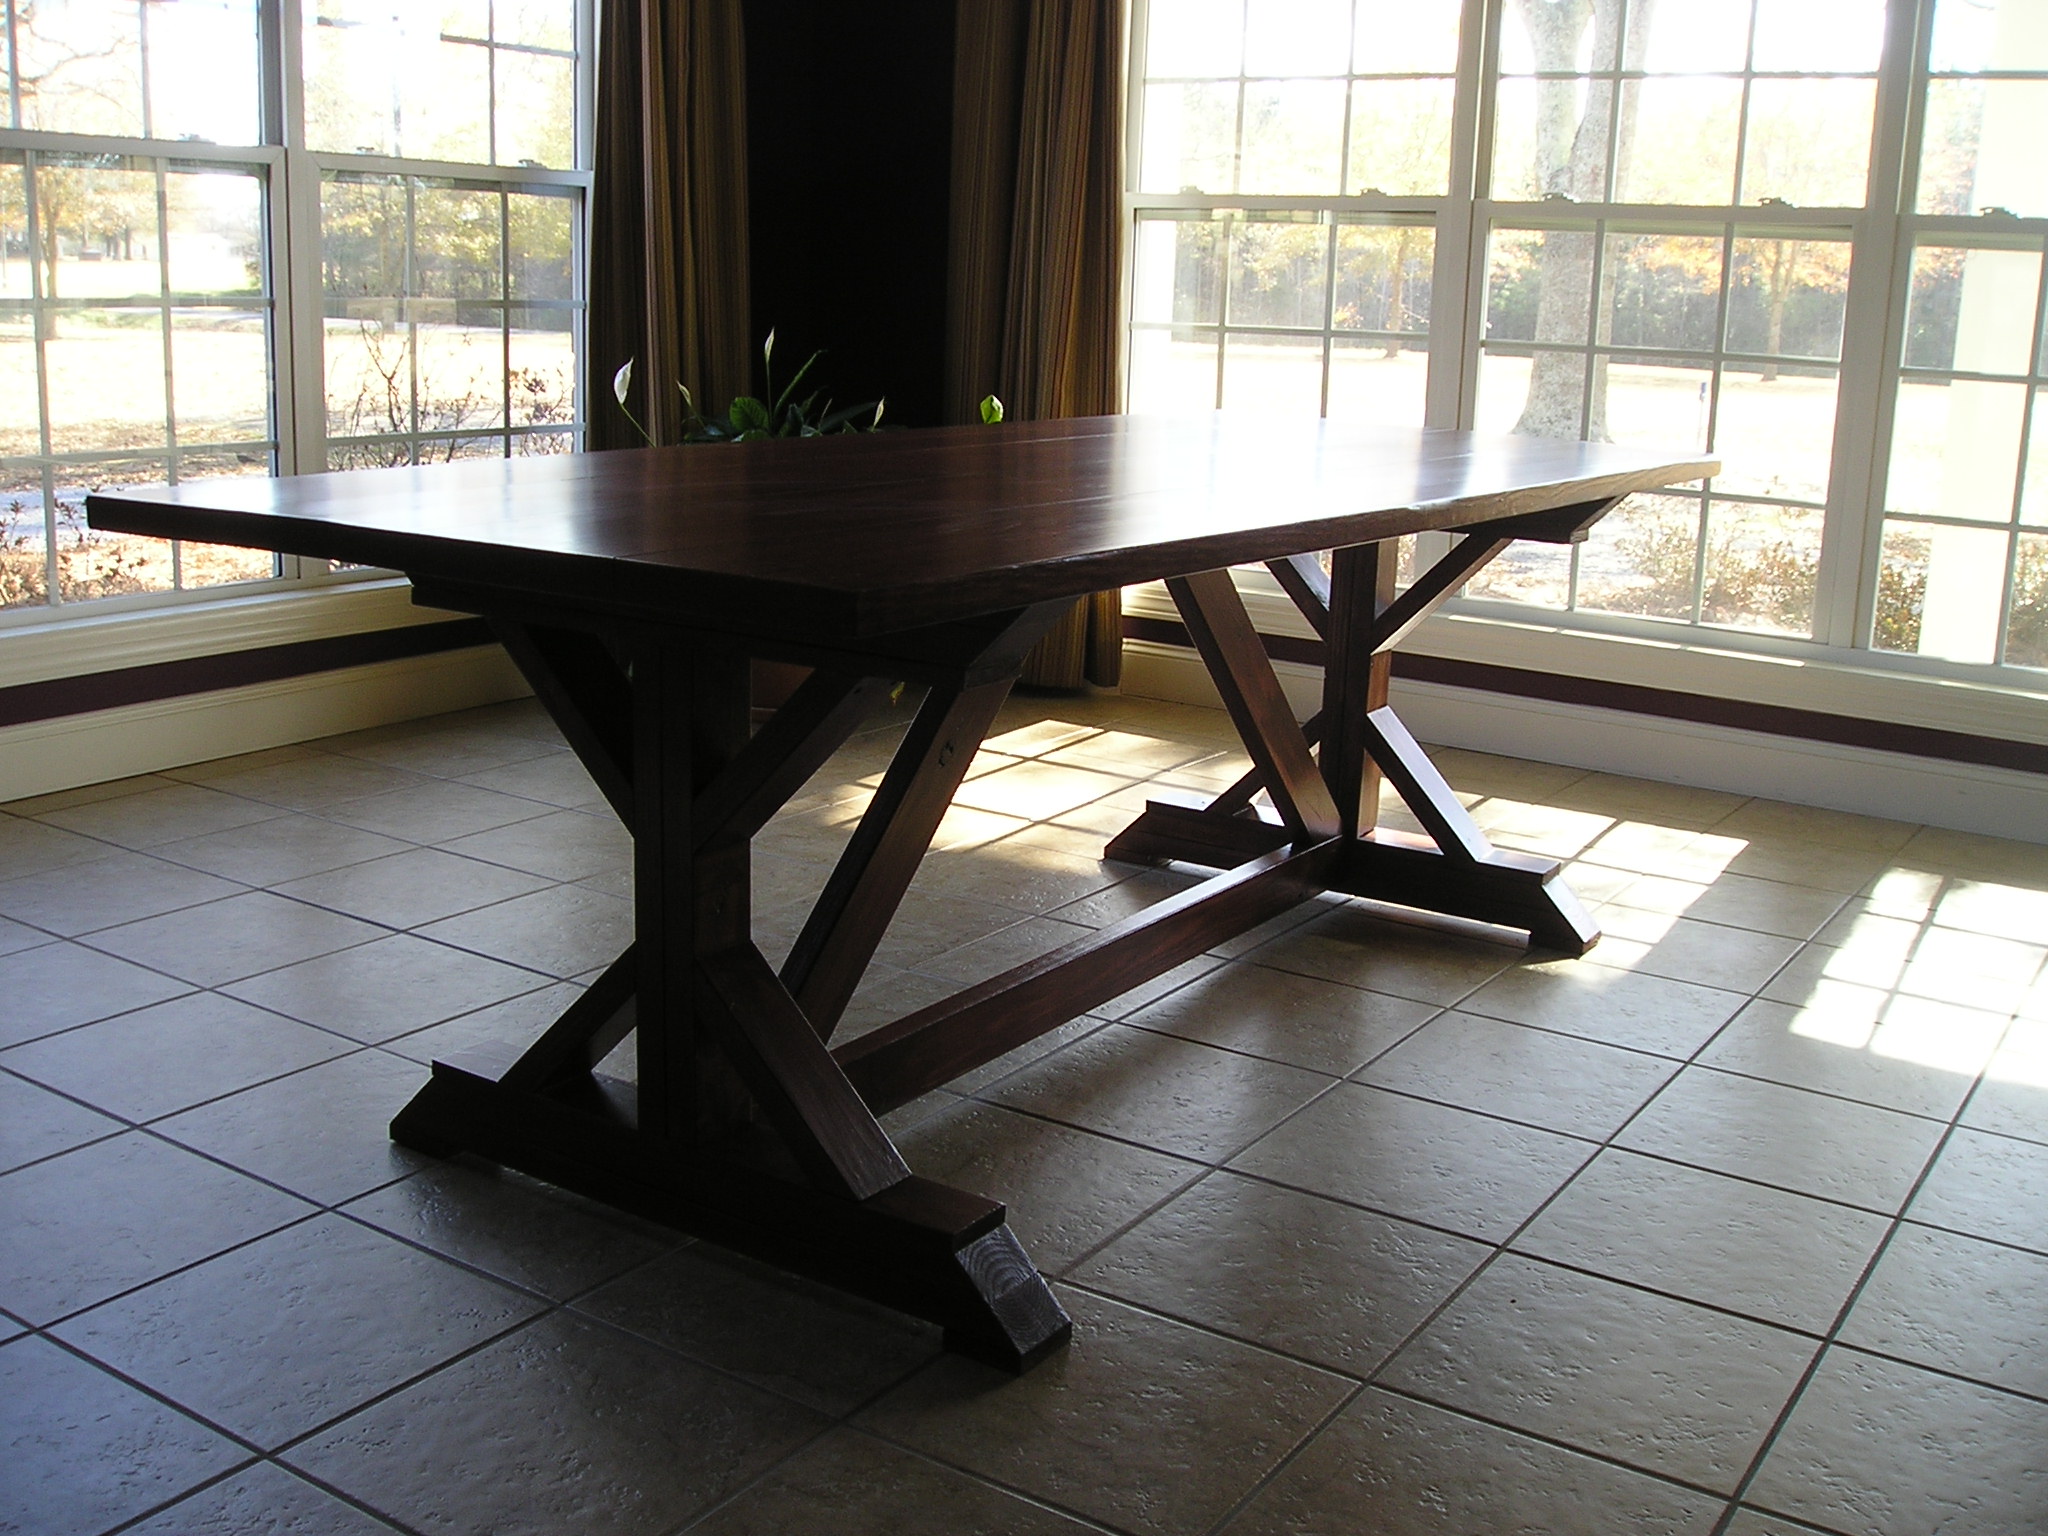
This project was so easy and it looks awesome!!!!

Built from Plan(s)
Estimated Cost
It only cost about $100!
Estimated Time Investment
Weekend Project (10-20 Hours)
Finish Used
We used all Minwax water-based products because I hate cleaning brushes with mineral spirits. The color I used was Rosewood with the satin Polycrylic finish.
Recommended Skill Level
Intermediate

Comments

Plant Stand

Submitted by Farmer Kim on Tue, 12/09/2014 - 14:46

I loved this plan when I first saw it.  I did make mine with metal that was 36 inches for the legs, it was the length available at my local hardware store and it also allows me to have plants on two levels and still be high enough for sunlight (unplanned bonus).

Estimated Time Investment
Afternoon Project (3-6 Hours)
Finish Used
Weathered Gray Stain
Recommended Skill Level
Starter Project

Greenhouse

Submitted by Anonymous (not verified) on Tue, 01/05/2021 - 08:08

We made some modifications to the greenhouse to include a bench with three levels, a working bench and a square foot garden. We also put it on concrete to keep all the weeds out from the bottom as well.

Built from Plan(s)
Estimated Cost
2500.00
Finish Used
We start our own seeds and plan to grow 15 different varieties of vegetables inside this greenhouse all year long.
Recommended Skill Level
Intermediate

Comments

Wood Wagon

Submitted by tnaudio on Thu, 12/18/2014 - 06:52

This is a variation of the wood wagon design http://ana-white.com/node/13430. I wanted old 2 year old to be able to use it in the lawn so I changed the wheels and steering over to a more traditional wagon wheel. We will be giving to him for Christmas. I had a lot of fun building this for my son. I hope he loves it.

Built from Plan(s)
Estimated Cost
75 dollars
Estimated Time Investment
Weekend Project (10-20 Hours)
Finish Used
Minwax Early American
Minwax Satin Polyurethane
Recommended Skill Level
Beginner

Comments

Joey Oc

Mon, 12/14/2015 - 12:41

Love the plans. I would, however, like to follow the modified plans to make it suitable for outdoor/grass areas. If any one could help me with that I'd be very grateful. 

Tack Box

Submitted by Evandgc on Tue, 12/30/2014 - 16:21

I made this box for my wifes christmas present. She has been riding horses for sometime and is planning on doing some shows. I built this box from Mimi's storage bench design, made it bigger, added a deeper box top and created the rest from looking at pictures online. Its all made of pine plywood and pine boards to keep it light. I added 4 castors to the bottom to make it easily moveable and hid them with the moulding around the bottom. Still has to be sanded and stained before it hits the barn. Its 39W X 24D X 29H. I used a piano hinge and routered the back to set the hing in. Added cove moulding around the bottom and to all the boxes around the front and side. Used a lot of pocket holes and finsh nails. Took me longer than it could have, because I planned everything as I went.  I will add more pictures when its finsihed. I would rate it intermediate to advanced depending on your skills with certain tools. 

Built from Plan(s)
Estimated Cost
Will all the hardware, wood materials, screws etc, I think it cost me around $250-$300
Estimated Time Investment
Week Long Project (20 Hours or More)
Finish Used
not finished yet
Recommended Skill Level
Intermediate

Comments

Gigantic planked sideboard

This was my second project and my first piece of furniture I built from Ana's plans. We have a vaulted ceiling in the hallway near my entry and needed a really big piece to fill up the large blank wall. I always hated the space but now I Love It. The Gigantic sideboard is perfect there. I finished it with milk paint and paste wax. If you inspect it closely it is not perfect but for my first piece... I love it and it's supposed to be rustic right!

Built from Plan(s)
Estimated Cost
I did not keep track of how much I spent but I'll say roughly 200 to 250 .
Estimated Time Investment
Week Long Project (20 Hours or More)
Finish Used
I first used wood conditioner then sanded, sanded, and sanded. For the paint I used General Finishes Coastal Blue and topped it with minwax paste wax.
Recommended Skill Level
Intermediate

Comments

Beer carriers

Submitted by Anonymous (not verified) on Thu, 04/20/2017 - 15:23

I love the vintage look with old license plates.  @theshopbycecilia

theShop-woodwork and design

Estimated Time Investment
An Hour or Two (0-2 Hours)
Recommended Skill Level
Starter Project

Rustic Adirondack Bench (love seat)

I loved the Rustic Adirondack Chair so much I felt I needed to make a bench in the same style. I had to be a little creative with the chair plans and modify them to make my bench work. I am absolutely thrilled with how it came out! I already have a friend who has requested a chair and bench (love seat) for his son's wedding gift!

Estimated Cost
Material costs for the wood was $85-ish. Wood prices are nuts right now!
Recommended Skill Level
Intermediate

Comments

mjackson41995@…

Fri, 08/20/2021 - 16:37

You can make the 1x10 in any length you want. I’m planning on making a loveseat too and The measurements I chose for the seating area will be 48” long (which is the size for 2 seat cushions).

The Step 1 in Ana’s plan, all measurements will be the same.

Step 2: The two 2x4 horizontal supports will be cut at 48”.

Step 3: the two 1x10 seat panels will be 3 inches longer than the horizontal supports. So you will cut the 1x10 seat panels at 51”.

Step 4: Instead of two, you will need THREE seat supports. So cut three 2x4’s @ 32 3/4”. The third seat support will go in the middle of the other seat supports, drilled to the horizontal back support.

Step 5: Attach your back bottom horizontal support which will be a 2x4 at 48”.

Step 6: Attach the 1x10 seat back panels. You will cut (3) 1x10 @ 48”.

Here is the cut list for the loveseat version of Ana’s Adirondack plan. These are the lengths I chose. So with this cut list your loveseat should be big enough for two 24x24” seat cushions. I plan to add cushions for extra comfort.

My cut list:
(2) 2x4 @ 31 3/4”
(2) 2x4 @ 19 1/2”
(2) 2x4 @ 33 1/4” Cut at 20 degrees as per Ana’s plan.
(3) 2x4 @ 48” Horizontal supports. One goes behind your calves.
The other connects the end frames/arm rests at the back.
(2) 1x10 @ 51” Seat panels.
(3) 2x4 @ 32 3/4” Vertical supports for the back panels.
(3) 1x10 @ 48” The back panels.

Milk- painted ash dog crate

Submitted by JoshMonroe on Sat, 03/23/2013 - 09:55

This project was based on your plans and dimensions, with a few modifications. I created more slats (41 in all!), and spaced them a bit differently. I also added a pull out tray on the bottom, lined with thick plastic, to ease cleanup if necessary. The crate was painted with soldier blue milk paint and finished with two coats of boiled linseed oil. Finished off with brass barrel bolts and hinges. Our schnauzer loves it!

Built from Plan(s)
Estimated Cost
$60
Estimated Time Investment
Weekend Project (10-20 Hours)
Finish Used
Boiled linseed oil over milk paint
Recommended Skill Level
Intermediate

Kitty Outhouse

My first Ana White project. Built Ana’s awesome small cedar shed as an outhouse for our many cats. The have access to it from inside the house. Great way to keep litter boxes and the mess out of the house. It is stand alone, and attached to the house, in front of a bedroom window. There are two ‘entrances’ as well as two, one-way, escape hatches, if a cat in the outhouse is interrupted by another cat (I.e. a male cat comes in and the female feels trapped) they can exit to the outside (one way so no critters can come inside!). Ana has easy to build plans, great site! I plan on making the square table just posted today for my newly refurbished deck. Keep in mind, my estimated costs and time reflect a LOT of additional features on the inside. The shed itself, very easy, simple, inexpensive. Very little waste with Ana’s projects as well.

Built from Plan(s)
Estimated Cost
$500
Estimated Time Investment
Week Long Project (20 Hours or More)
Finish Used
No finish, at least not yet.
Recommended Skill Level
Intermediate

Comments

Farmhouse Table Squared

Submitted by sraper2 on Sun, 04/07/2013 - 20:53

I used your plans for the table but changed the table dimensions to fit my space. My table is square and measures 58"x58". I also changed the chairs to have a straight back and then the top is is cut at a 6 degree angle. I love them so much!!!

Estimated Time Investment
Week Long Project (20 Hours or More)
Recommended Skill Level
Intermediate

Triple Pedestal Farmhouse Table

I did many 2020 (Covid projects) and this was my favorite. My wife has an 8' church pew that she wanted a farm table to go with it. The table ended up being 8'10" long. The most time was spent on sanding, painting and finishing. Enjoyed this project.

Built from Plan(s)
Estimated Time Investment
Weekend Project (10-20 Hours)
Finish Used
Satin Poly
Recommended Skill Level
Intermediate

Comments

Clara Table and Chair

Submitted by Kdew on Wed, 04/17/2013 - 14:26

I was searching for a table and chairs for my son's playroom, and I could not believe the prices! I had just purchased a new saw for some moulding projects around the house, and then I found this site. This table and chair was my first wood working project, and they turned out great! I followed the plans for the Clara table, but used a combination of the 4 dollar chair and modern angle chair. I loved how the chair turned out. I am currently working on the second. I used poplar instead of pine which increased the cost. I wanted a weathered finish, I ended up using water-based walnut stain over a white wash. I am so happy I found this site, my next project is patio furniture.

Estimated Time Investment
Afternoon Project (3-6 Hours)
Finish Used
Minwax white wash followed by Minwax water-based walnut
Recommended Skill Level
Beginner

Comments

Pudding or Jello Box Dispenser

Submitted by efmolly on Wed, 03/11/2015 - 13:01

I love to build, but I also love to bake. I happen to have several small boxes of pudding and jello mix that clutter up the shelves of my pantry. Using a single 1 x 4 pine board and some scrap 1 x 2's, I came up with a simple dispenser to keep the boxes organized and out of the way. A really simple project, good for a beginner. The link to my blog contains building plans and step-by-step tutorial. 

Estimated Cost
$5
Estimated Time Investment
An Hour or Two (0-2 Hours)
Finish Used
I left mine unfinished, but you could stain or paint this dispenser whatever color you could think of.
Recommended Skill Level
Beginner

Writing Desk - Modern farmhouse collection

Submitted by SofiaTaz on Wed, 09/08/2021 - 22:25

I love how this desk turned out. I haven't had corner brackets catch my eye yet, but I may still add them. This was the first real Brad Nailer project I have completed. It is stained in a dark walnut. Thanks again for another great plan and tutorial video!

Comments

Child Workbench

Submitted by jennavila on Tue, 04/30/2013 - 15:00

Super easy gift for a toddler

Recommended Skill Level
Beginner

Comments

Photo ledges (with crown molding)

This is a set of photo ledges built for a friend!


Website article: http://www.lanebroswoodshop.com/2015/02/photo-ledges.html

Video: https://www.youtube.com/watch?v=k6jwfhwJQ-g

Built from Plan(s)
Estimated Cost
$50 per
Estimated Time Investment
Day Project (6-9 Hours)
Finish Used
High Gloss White
Recommended Skill Level
Beginner

Comments

One arm sectional with table from scraps

Submitted by Anonymous (not verified) on Fri, 07/14/2017 - 00:28

We built the one arm sectional but 8 ft cedar was all we could buy. So with the scraps left over we built the coffee table to match. Couldn't be happier with it. 

Estimated Cost
$250 without cushions
Estimated Time Investment
Weekend Project (10-20 Hours)
Finish Used
None
Recommended Skill Level
Beginner

entry way shelf

Submitted by Anonymous (not verified) on Mon, 10/04/2021 - 14:49

Hey Ana! I just finished the Entry Way Shelf and will be staring on the bench soon. I love your projects and especially that they are free! I'm so cheap I have a hard time parting w/ my money when I don't know something will work out, but yours always do!! I can follow a blueprint and create things based on a model but I don't have the creativity to come up w/ them myself, I'm sure glad you can! LOL! Thanks SOOOO much for sharing and I continue to look forward to the next thing!
Thanks again!
Patrick

Comments

Amazing Farm Table and Benches

Submitted by Anonymous (not verified) on Mon, 10/04/2021 - 19:55

Built this deck dining table and benches from Lowes cedar, and the results way exceeded my expectations! The plans were so well written, it was easy to slightly modify (made both table and benches wider and longer) and the build was very simple. The clear directions helped give me the confidence to do this and we have got so many nice compliments. There was nothing this sturdy and simple even available to buy. I even built a coffee table and bar table after modifying the plans a bit. Thank you Ana!

Comments