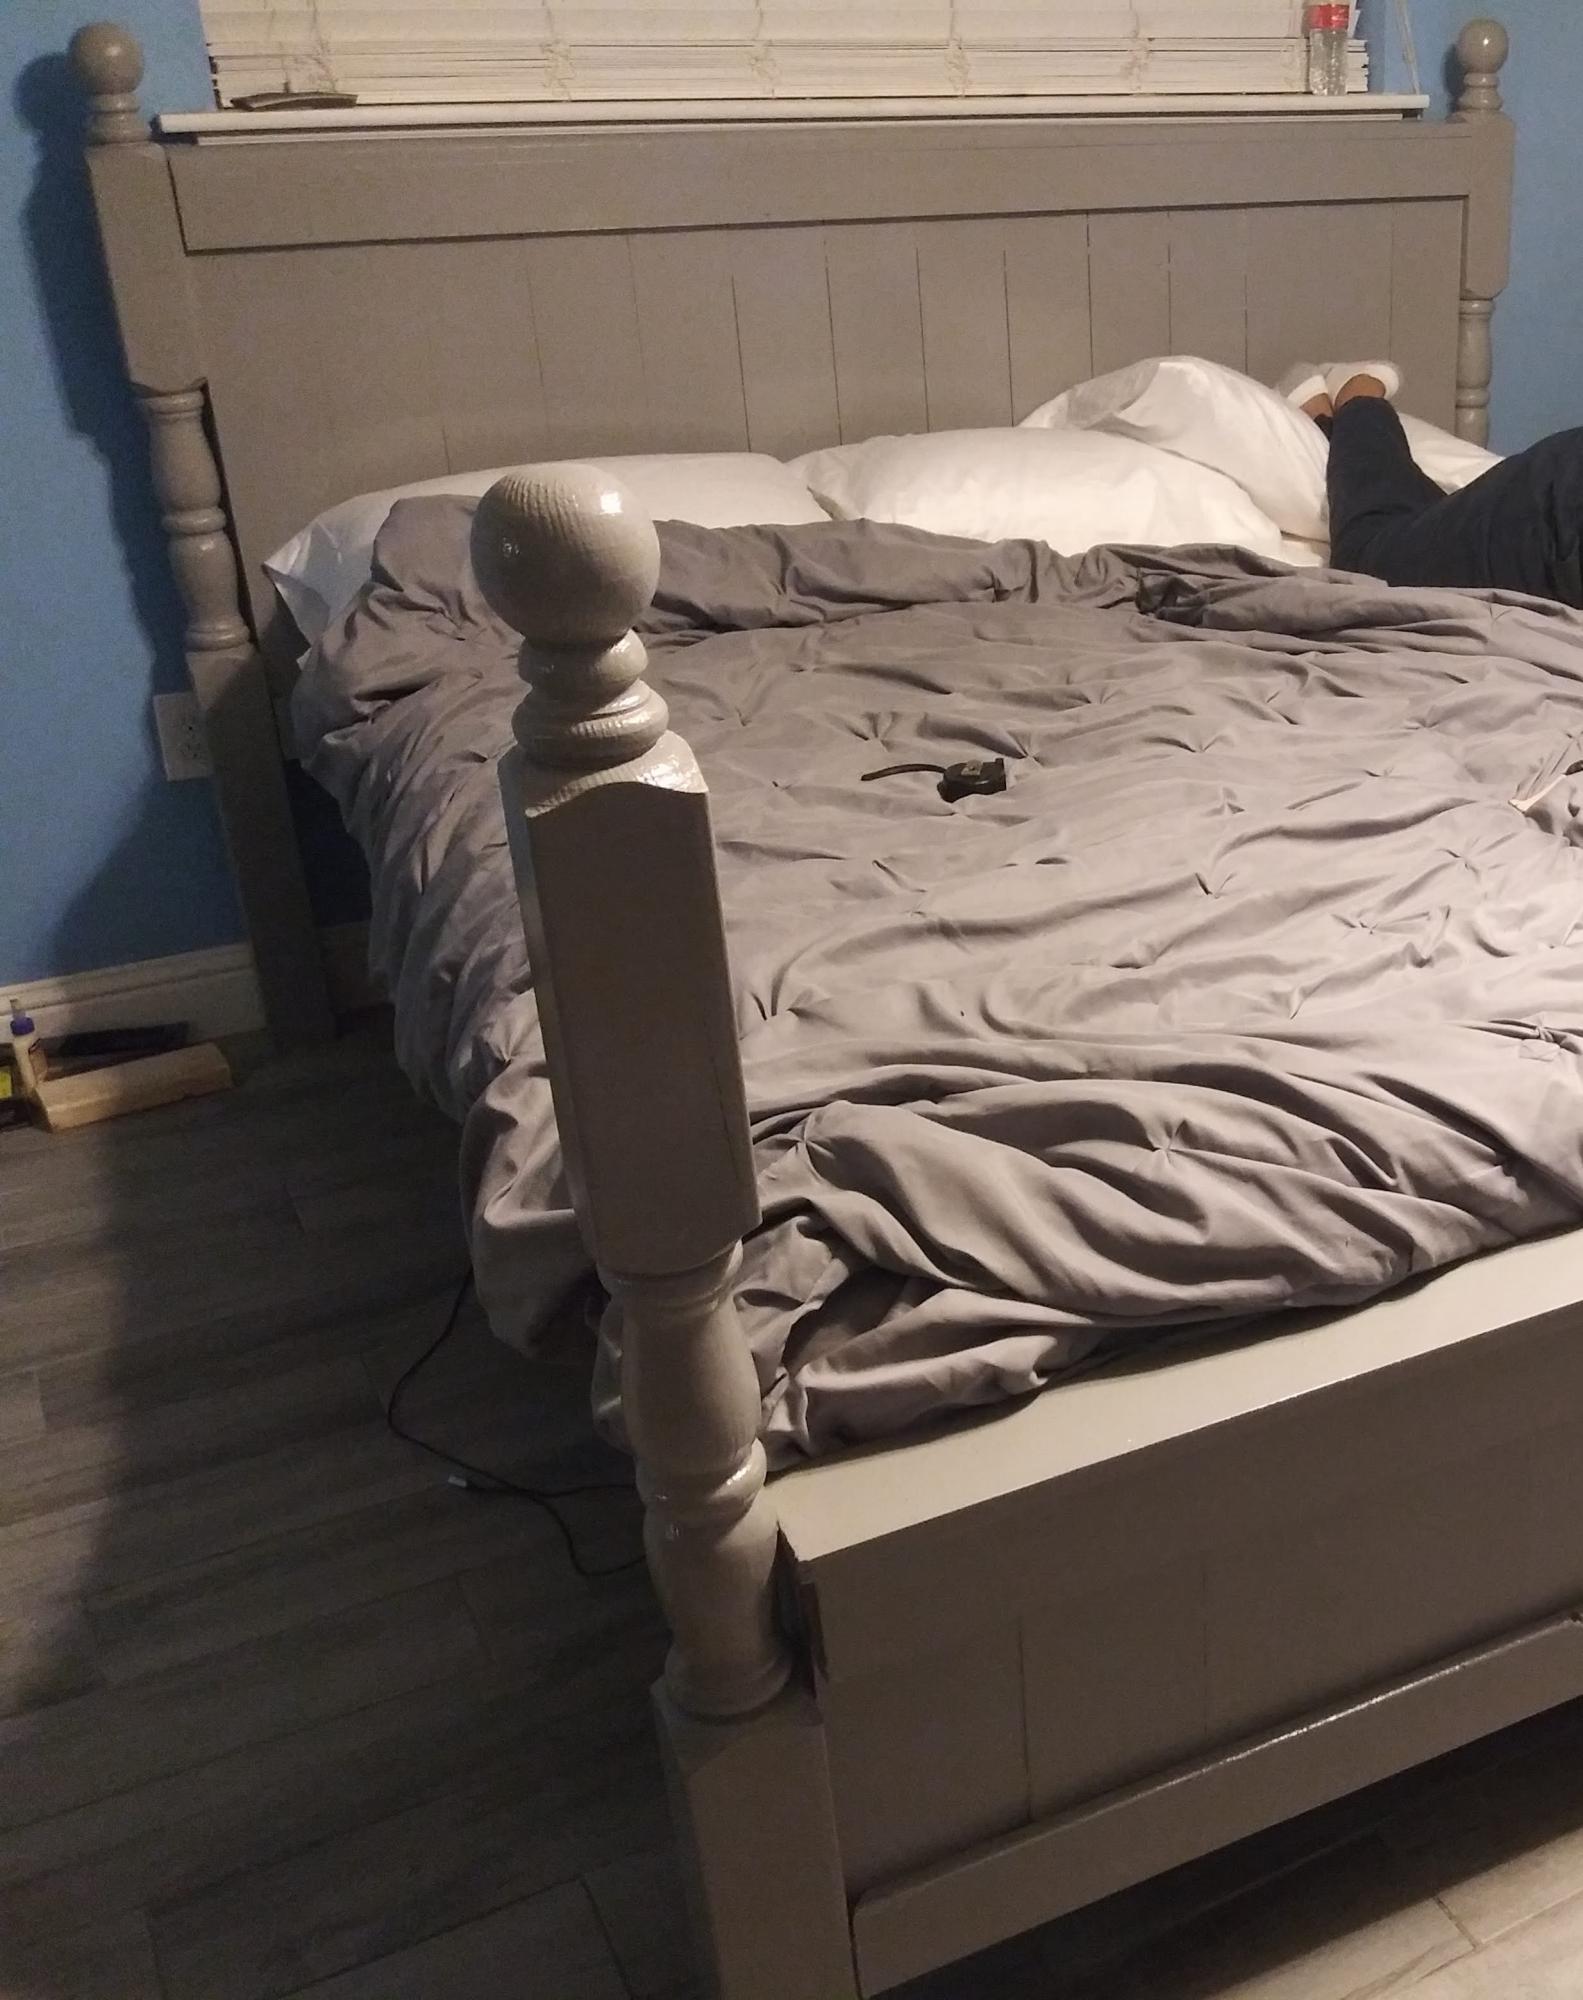
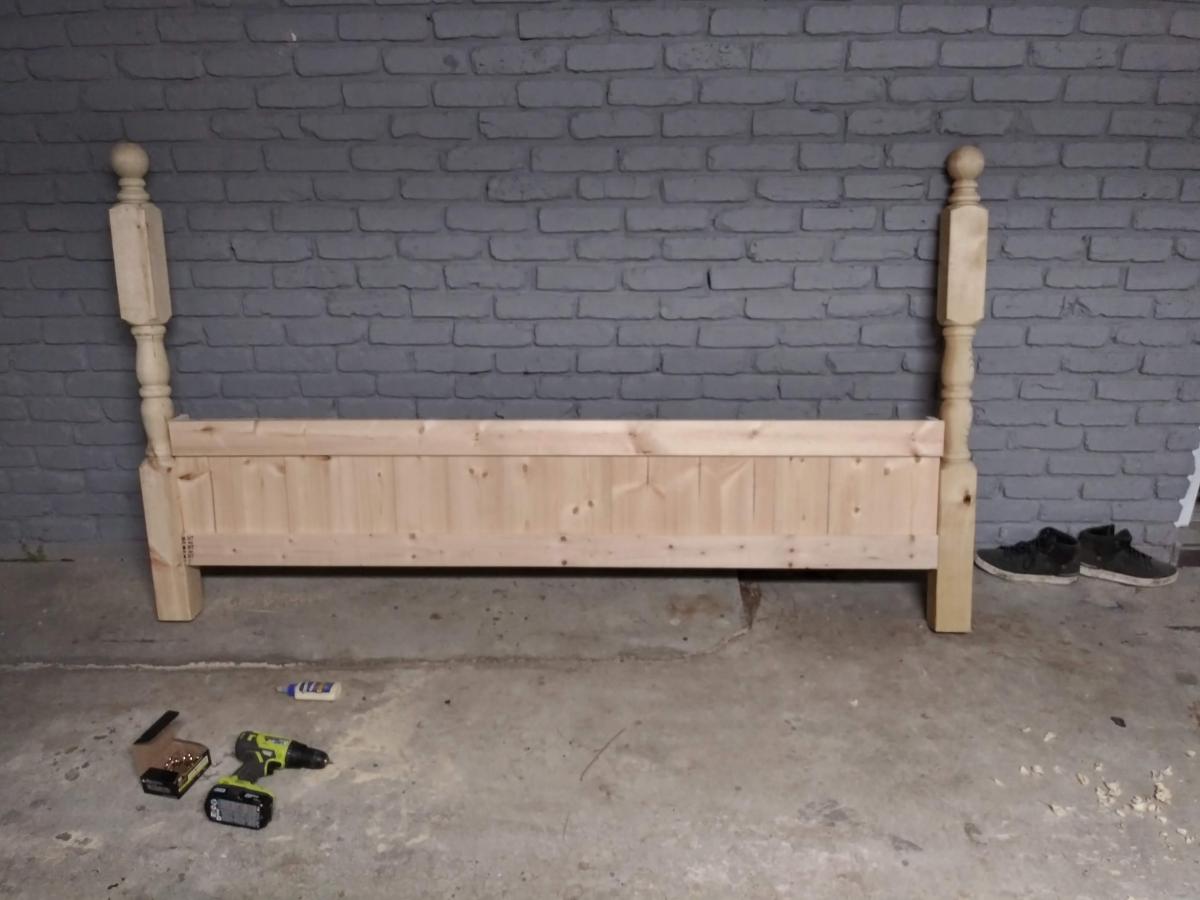
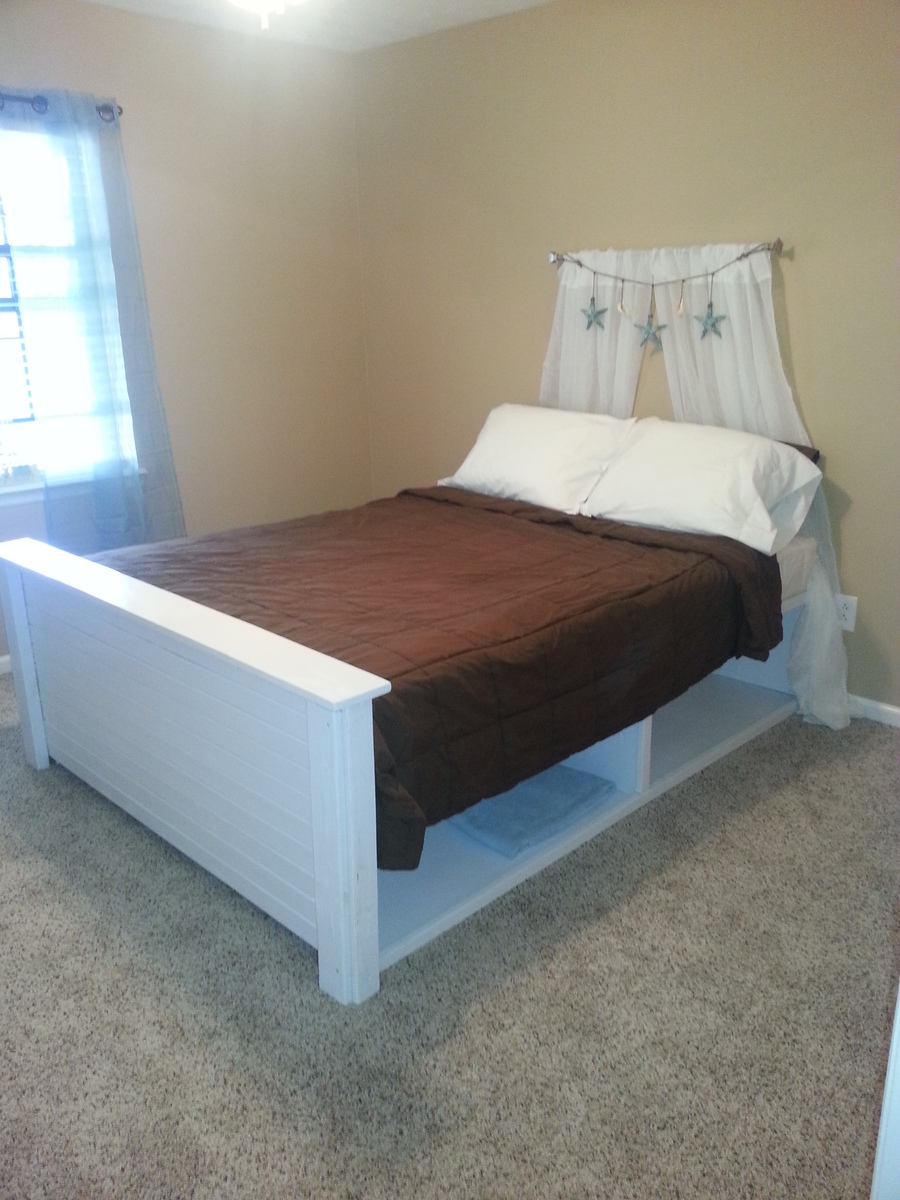
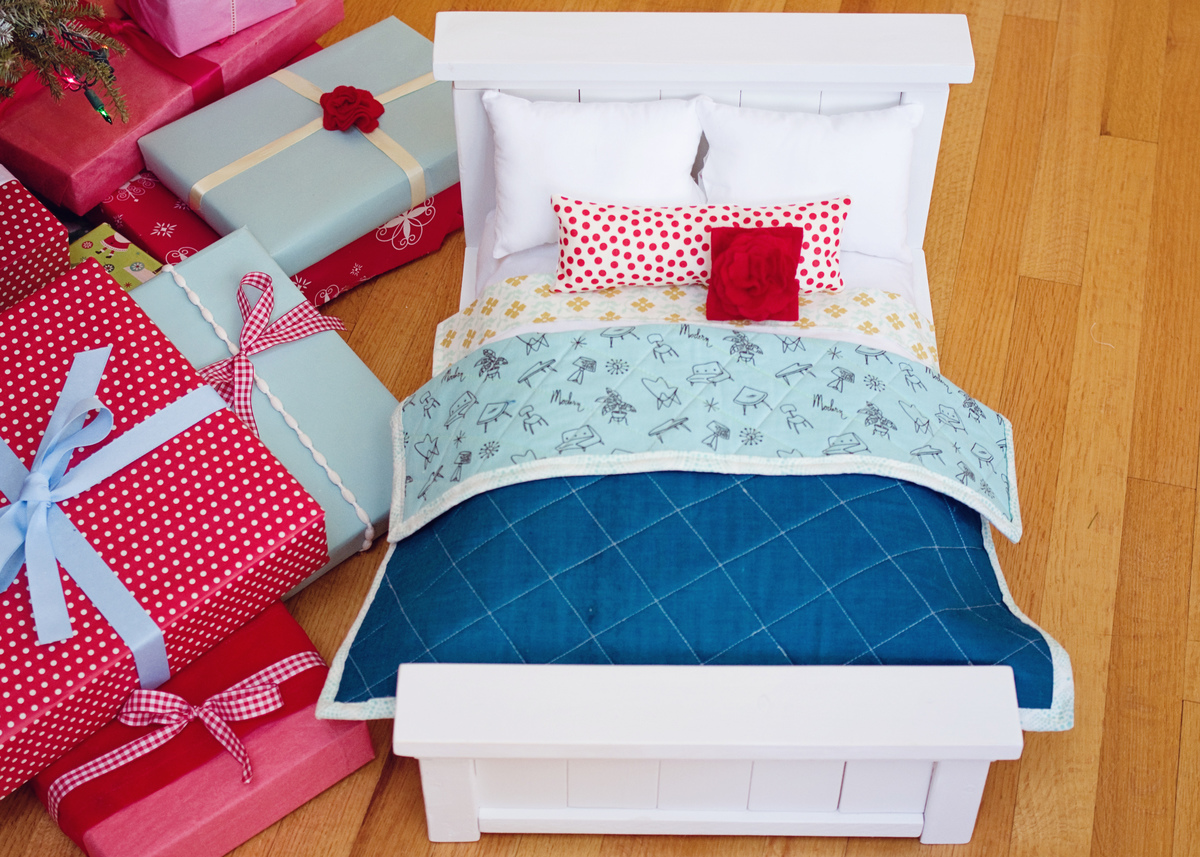
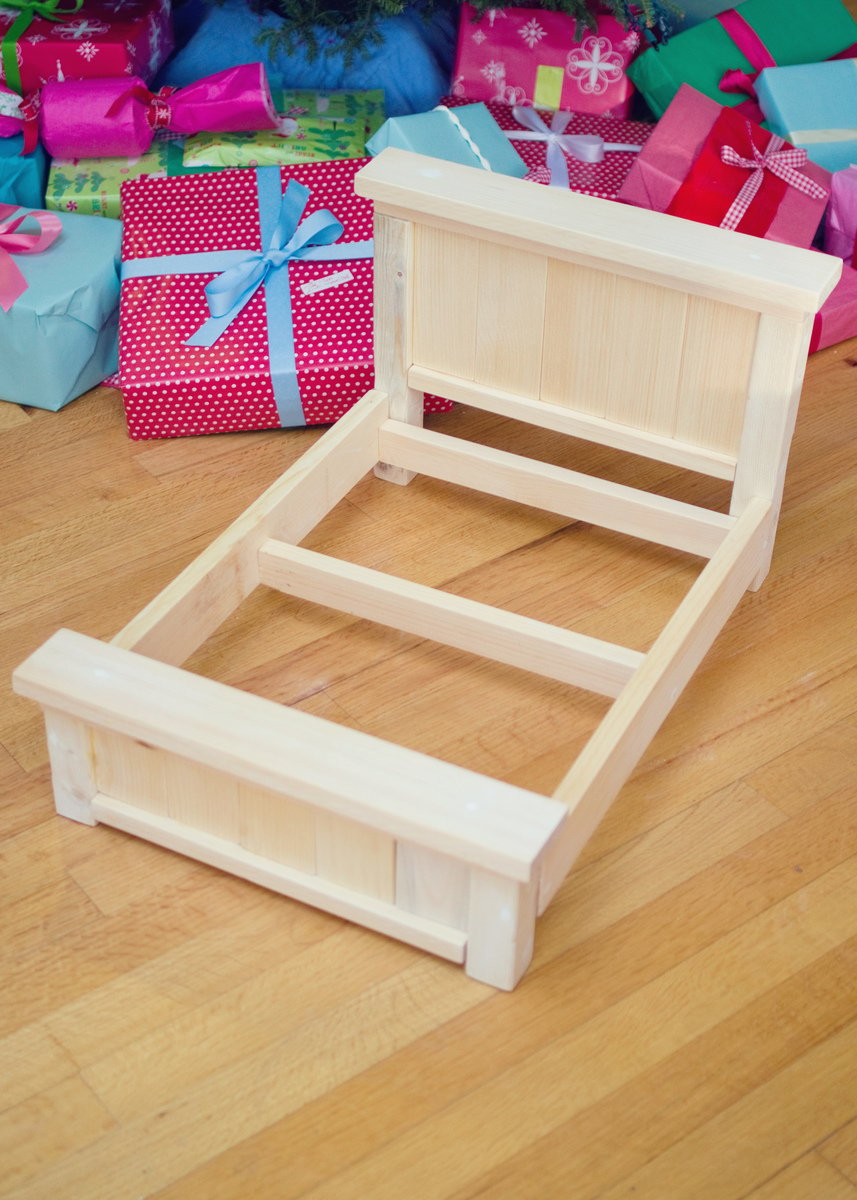
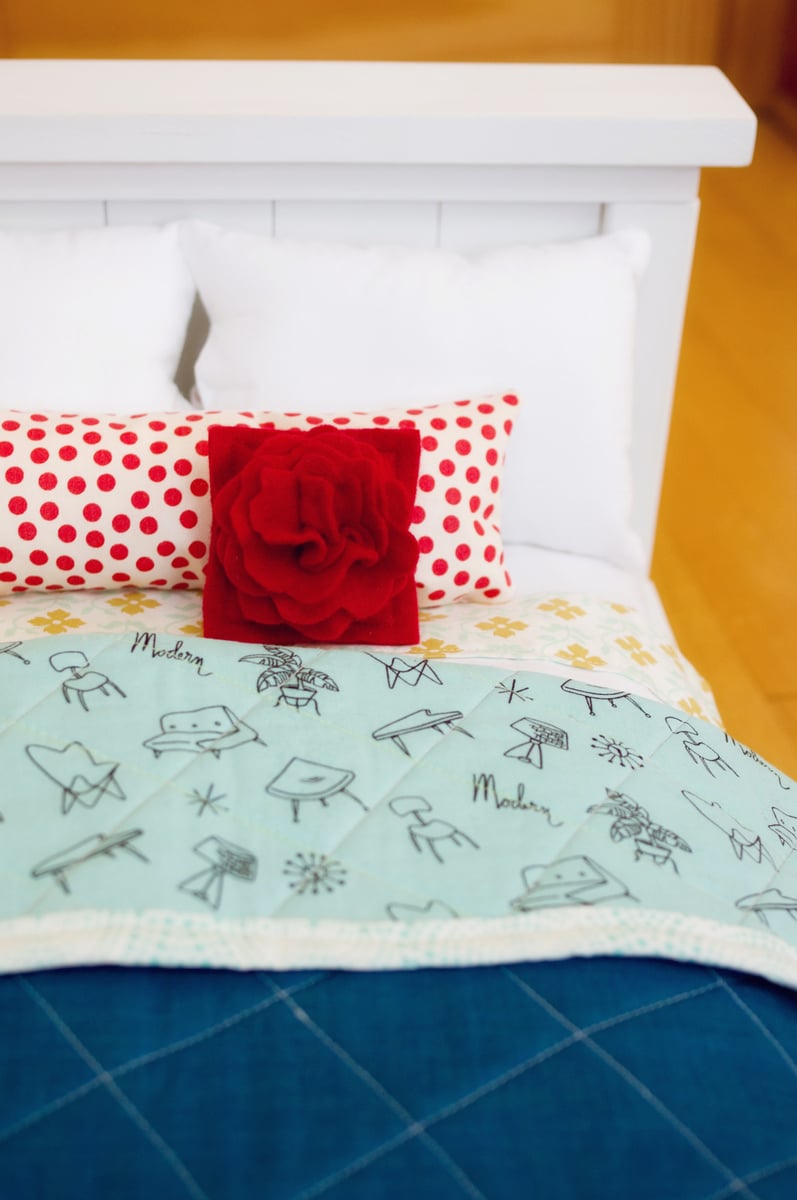
Farmhouse Bed - Taylor Family
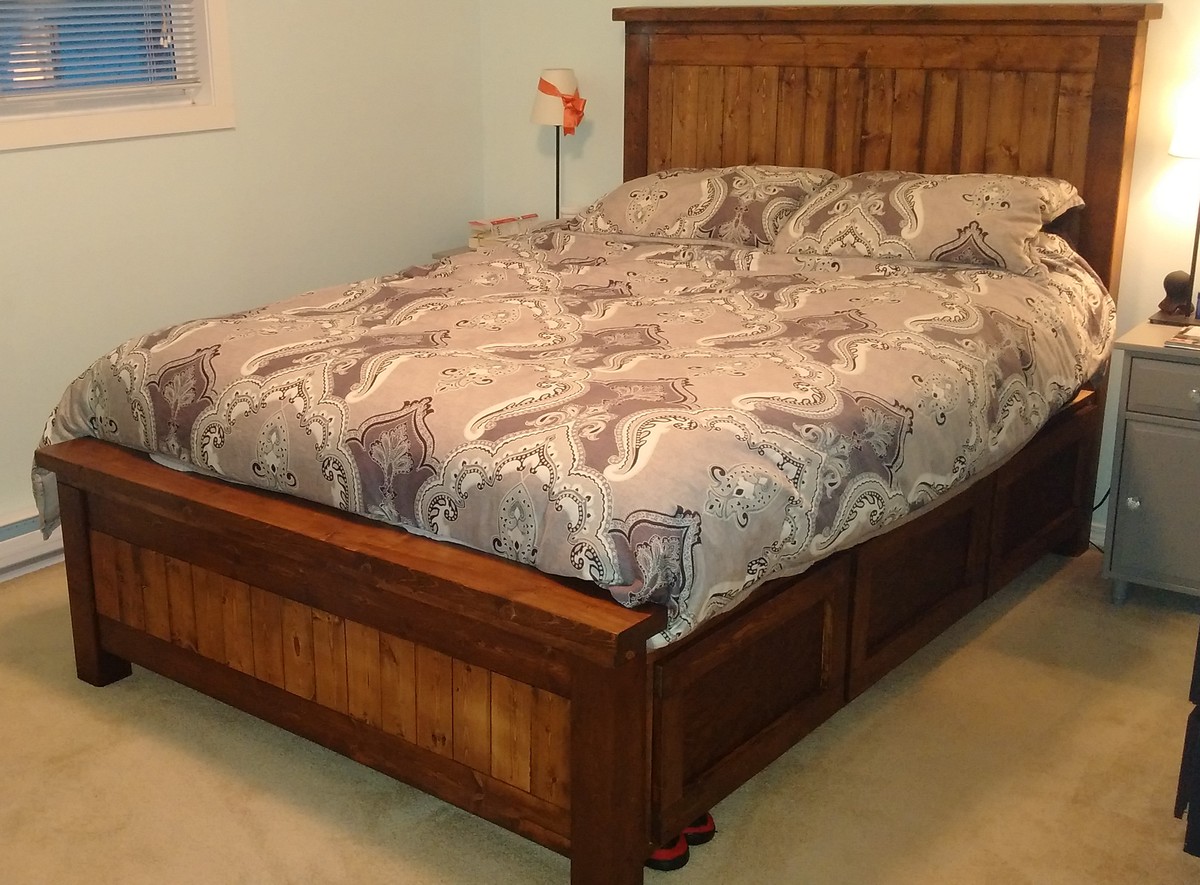
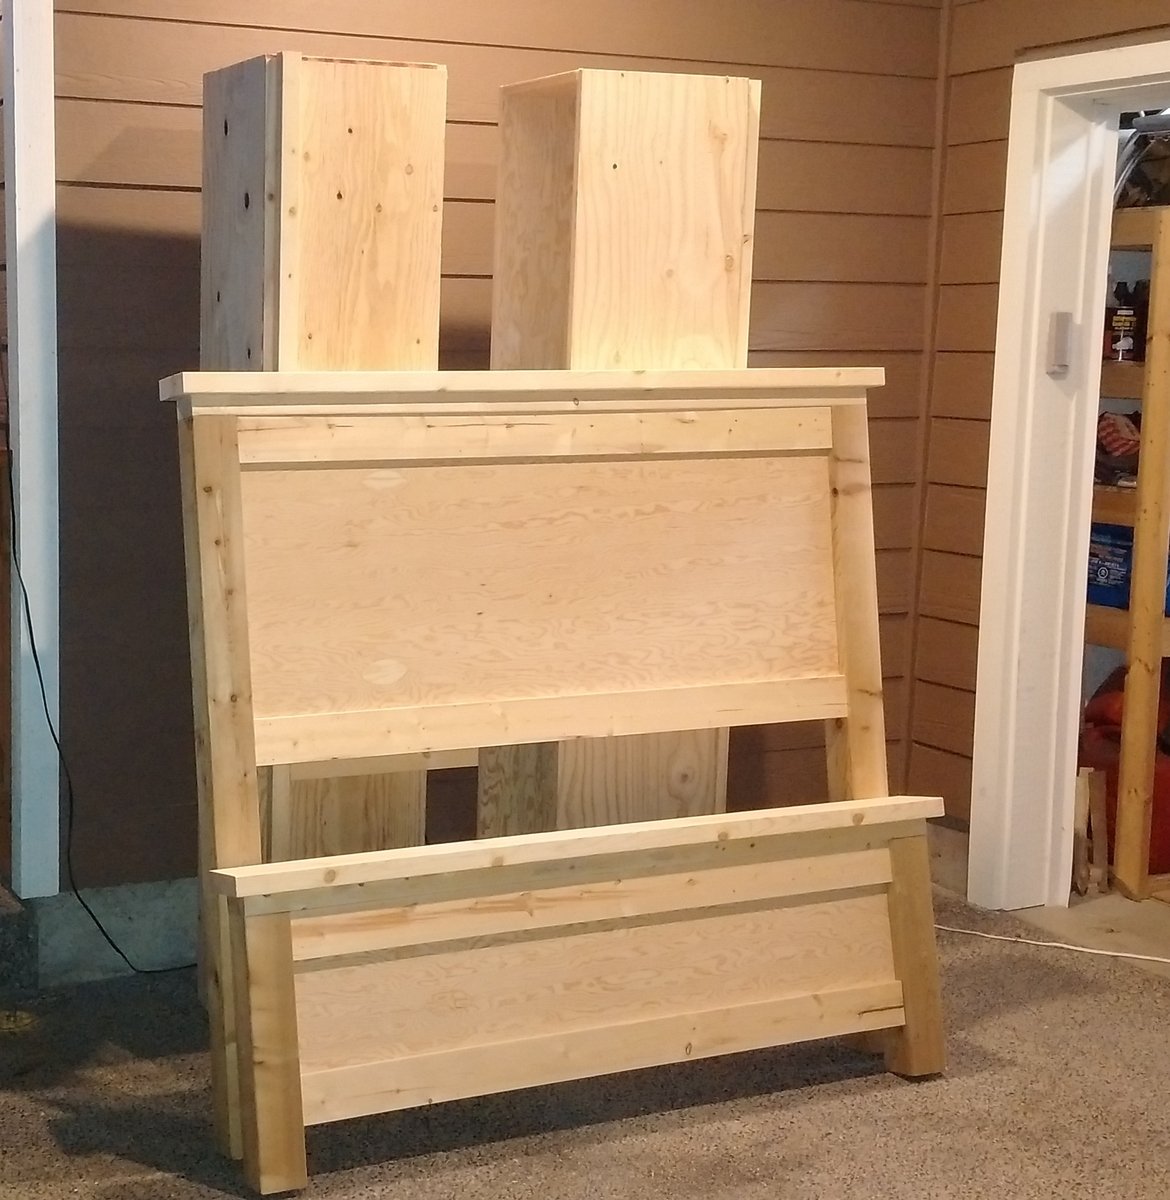
This was my Christmas present for my wife for 2014. Took about two days for me and my brother, with another 4 hours of staining and assembly. Could have been done quicker, but we took our time and enjoyed it! I have a good knowledge of tools, as does my brother, but I haven't done a woodworking project since Junior High School.
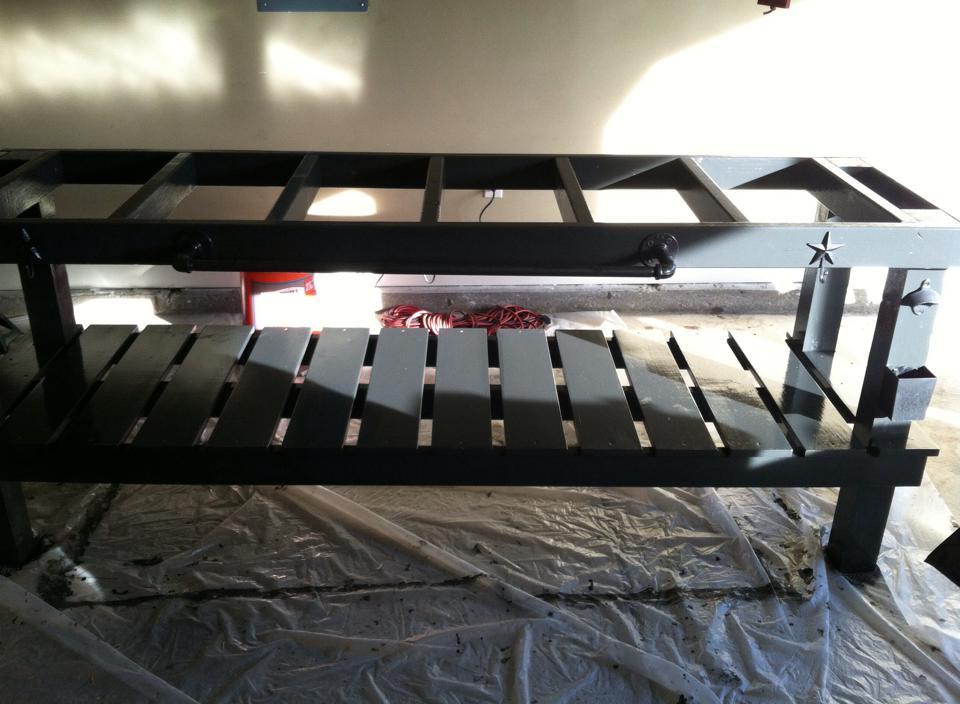
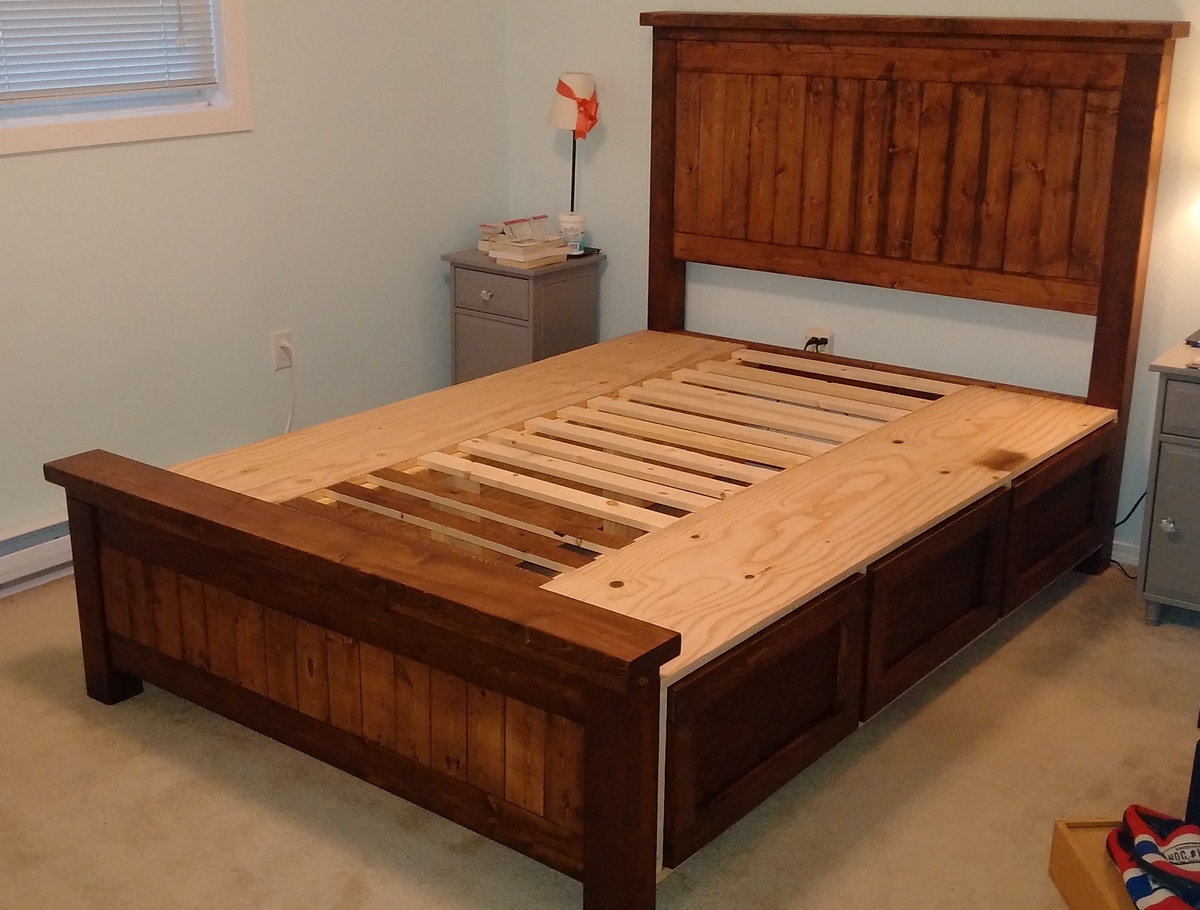
All in all, it was great and the result is perfect. I highly recommend using a pocket hole for the headboard attachment if doing the plywood - I didn't use one and it was tricky  . You can't see the plywood because I decieded to add slats to the headboard and footboard in the end (wanted to stain the wood, not paint it as planned originally).
Built from Plan(s)
Estimated Cost
$400
Estimated Time Investment
Weekend Project (10-20 Hours)
Finish Used
Used a dark walnut stain as the finish, however, in the end we will do an espresso colour. Final top coat using Minwax® Polycrylic® protective finish was applied as well.
Recommended Skill Level
Intermediate