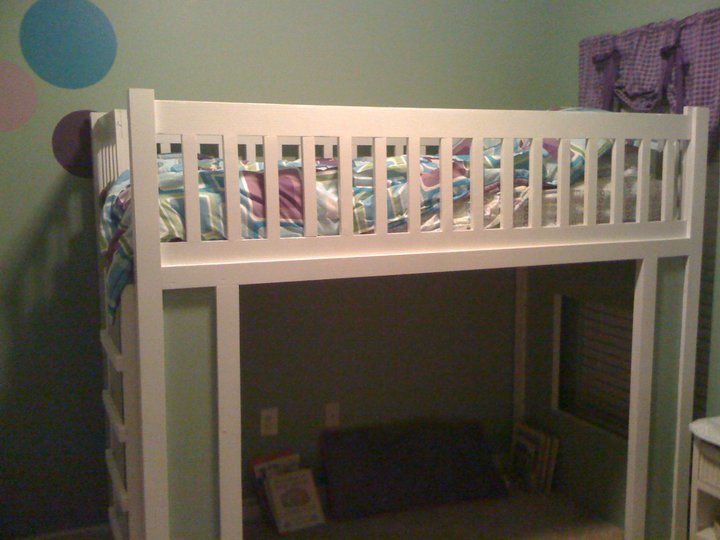
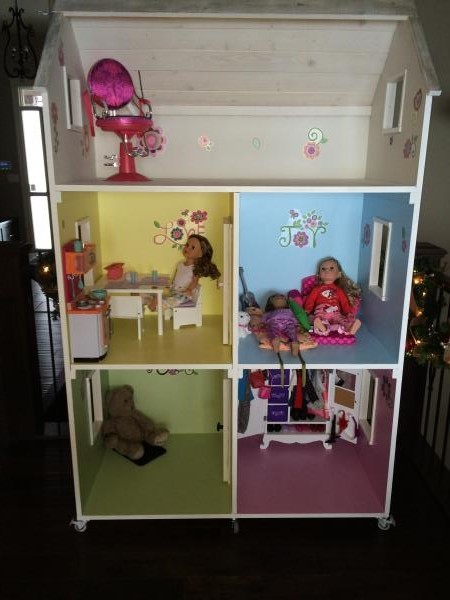
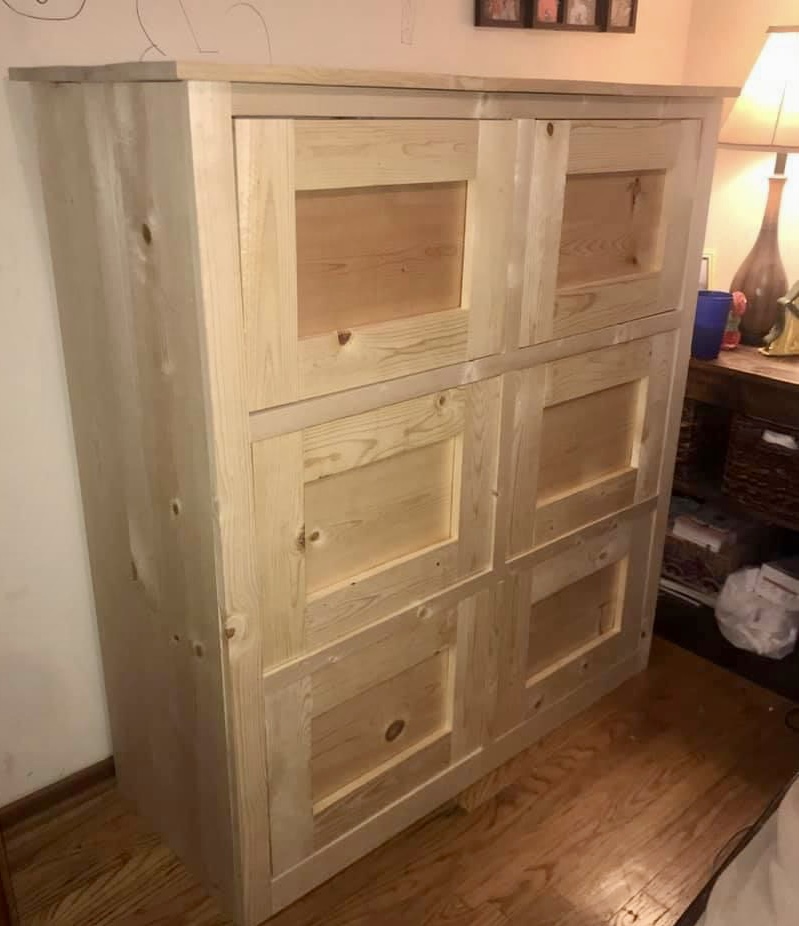
x-table and benches
Good plans and easy construction. Thanks!
So This project was a little harder than I anticipated, but thanks to Anas' Rhyan nightstand plans as well as Kimbers project on the "not so Rhyan nightstand" I was able to get these done. A special thanks to Kimbers for several consult emails as well as some tips on getting materials at cheaper prices!!
I often got cheap material in the scrap area of the orange box. There actually was some good stuff there if you go early and get it before the contractors do! 1/4 sheet of 3/4" birch plywood for 4.01$
For this project I used the rattle can. I've had it suggested to me for other projects but was never willing to try it. It worked really well. No brush strokes but the down side is that it hid nothing!!!
Such a worthwhile build. I had to adjust the angles for the center/ interior dividers since these sit behind the front board. That causes the angles to be different. I also used Luanne for the backing, installed locking wheels and handles.
Tue, 11/01/2016 - 20:12
Hello, I clicked the provided URL for the plans you adapted your build version from, but was wondering if you could include your plans. I prefer the look of yours versus the linked plans. I am assuming yours is one unit based on the handle placement and the fact that it is on wheels and am interested in how you accomplished this. Thanks so much!
I followed the X-table plans for the base and then went a little nutty on the table top. I also beefed up the bottom stretcher on the base as I felt it complemented the 4x4s used for the feet well. I left off the diagonal braces as I liked the contrast of the beefy legs and stretcher and the open airy appearance between the base and tabletop. There were several blogs/ideas on Pinterest about a Chevron style table top. I took pieces from all of them for my design. The table measures 99.75 inches long by 41 inches wide. I thought being a quarter inch under 100 was a bit quirky and did it merely for that reason. Oh and please forgive the photo bomb by my daughters. I could not take a picture without getting at least one of them in the frame. My oldest is being a little silly in the pic trying to show the detail of the Chevron design--or split Chevron as I'm calling it.
Sun, 04/29/2018 - 07:22
your table looms beautiful. I hope your finish holds up on this one.
Wooden chest built by Daniel!
Sun, 04/24/2022 - 20:40
My wife's old chest fell apart, so I took the hardware from the old one and a few cedar fence pickets.
This is the end result.
My wife and I picked this out as our first somewhat complex piece from Ana's site to make. Most of the table is made from left over 1x4s I had from a fence we made. I only needed 2 1x12s as we didn't make the drawers as deep.
Because I cut down the 1x4s for the legs (and didn't examine the plans in detail first) I made them 3 inches wide when the ones in the plan are only 2.5 inches wide. This made for a few adjustments, such as the middle two drawers being a bit narrower.
The fronts of the drawers are normal height, but the boxes are only 4 inches high inside (so they don't fill up with as much junk, lol).
The 1x12s were only 11 inches wide, so I laminated some 1x2s on the sides to make it wide enough.
I think it really turned out well and we're already planning some complimentary pieces for our living room.
Counting the left over wood from the fence it probably cost around $50 including the stain and polyurethane.
I made the legs rounded instead of cut like the plans showed. I also made the table top much larger, so I extended the legs and the table supports. The kids picked Tree Frog Green by Valspar. They loved helping paint!
The chairs are the Children's Storage Chairs.
I built this bookshelf for my girlfriend, Julia over the course of two weekends. The kreg jig helped a ton. Staining, using the rubbed on polyurethane finish, and sanding down--plus all the drying time required--took the most time. This is a very sturdy and finished-looking bookshelf plan. Overall, the projectturned out nicely.
This project evolved from us purchasing the wrong foam to go under 4 area rugs. After it didn’t work for the first rug, we had 3 more rolls of the stuff that we couldn’t take back to the store (we had waited too long to do a return). I originally had intended to buy an inexpensive sectional sofa for the downstairs family room, but with all this foam staring at me, I decided to put it to use and make sofa cushions. There was enough foam to do a whole sectional!
The sofa frame is based on Ana’s Outdoor 2x4 Sectional sofa. I adjusted the size, because the fabric I wanted to use was 54” wide, and that would fit nicely around a 22” deep x 4” thick cushion. Each cushion is 11 layers of the foam (seat cushions: 67 x 22 x 4, backs: 67 x 18 x 4). That length for the cushions fit exactly into the 8 yards of fabric available on the bolt. The next week I ended up going back for some more fabric for the corner cushion and an ottoman that's in work.
I had the frame assembled and was ready to add the final upper back pieces, when Hubby suggested we give it a slanted back. That required a little re-engineering and a couple of extra boards on the back and armless end. Instead of using 2x4s the full length for the seat, I had used some 1x2 furring strips reclaimed from another project. Also used some of those for the upright pieces for the backs. Added some 1x6 to top the arms and ½ x 3 ½” craft boards to the front to hide the cut 2x4 ends.
The cushions are covered in a polyester faux tooled suede (fabric from Hobby Lobby). The cushion covers are slightly loose on purpose, to give the nice worn squishy look that a real soft leather sofa cushion would have.
It’s surprisingly comfy and we love the look!
Tue, 06/05/2018 - 14:47
You are so resourceful! Love how this turned out! Thanks so much for sharing such detailed instructions, much appreciated!
My take on the Pottery Barn nightstand. With the exception of the drawer boxes it's all oak. I used red and white oak to provide some contrast.
Wed, 04/27/2022 - 18:39
This looks great. I really like the contrasting stains.
Just a personal preference, but I think I'd have put the outlets on the back or rear of the side. Dust, spills, etc can get into them (I learned this from having SAABs where the ignition is between the front seats on the floor).
I got all the wood from the dump. The best way to get a good glue up for the table top is joint the sides flat, and then hand plane the top for a smooth surface. Gorgeous table for nothing.
Mon, 10/07/2013 - 08:55
What did you do when you went to the dump to get the wood? I like the idea.
We made it a little shorter to act as a coffee/cocktail table on the deck. Comes in handy for homebrew too!
Thanks for the plans Ana!
I stuck to the design but changed the dimensions to suit the space and the boxes we intend to store. This made the shelves 7.5 feet high by 8.5 feet wide. The timber was supplied in 17’ lengths so this also meant very little wastage. The frame is composed of 2x4’s, the shelves are 4.5 x 1.5’s - as I wanted the shelves slightly shallower this meant I could get away with three boards for each shelf instead of 4 as on the plans.
For the short cross pieces I used woodglue and screws – to attach the long shelf pieces I just used screws. I predrilled holes in the first piece for each of the screws, but I didn’t drill a pilot hole in the next piece, the screws were self-tapping and didn’t need one.
The back wall is concrete block and I screwed each upright to the wall using wall plugs and screws. I’ve 2 young children and as the shelves are quite high I was afraid they might climb on them and tip them over otherwise. The attachment to the wall definitely makes the whole thing feel much sturdier – the structure is completely rigid.
The only real issue I encountered was that some of the boards were slightly twisted or warped – and I had to apply some force to keep everything square when I was gluing up. Overall I’m very happy with the end product, and found it reasonably easy to put together. Now its time to put the shelves to good use and start tidying up the garage!
Picnic table is built of non treated pine. 2x6 and 2x4 only. I did stain as I went with outdoor stain just so everything would be protected. I don’t have the exact amount of wood bought but I think it is around 11 2x6 and 6 2x4. I used plans off of YouTube from A Simple Design of Ocalala. https://m.youtube.com/watch?v=WlprN_rUiJg
This was our second project from the site.
We used the plans from the Queen Farmhouse Bed as a guide, and used information from the Two-Tone Kingzize Bed to finish it off.
Some differences we had were to used a single panel instead of multiple panels for the headboard and footboard. We then bordered that panel with 1x3's, and a 1x3 down the middle of the panels.
We also attached the box frame (we dont use boxsprings) a little higher than the plans. We attached these at 11.5 inches up. If you like high sitting beds, this will do it.
Great project. We havent sanded/stained it yet.
Tue, 07/03/2012 - 07:47
Thanks for the tip about attaching the frame higher. I prefer high-sitting beds (I'm tall, so I hate feeling like I'm falling onto the bed), so I'm happy to see I can make it higher up.
Sat, 10/13/2012 - 08:29
Love the single panels. Did you use one piece of wood for the panels? What size? Also, would love to see pictures of it with finish!
Not too bad for my first project without my dad to oversee! I did adjust the plan a bit for a more colorful option. I bought a 9' x 12' canvas drop cloth at Home Depot, cut a 3' wide strip, and used Dritz Stitch Witchery to finish the edges. I then mixed samples of Behr paint with fabric medium to paint stripes. So that I could wash the canvas if needed, I attached it with Velcro strips at the base of the tent.
I built this dining table with a concrete top and a base using the Rekourt Dining Table plans.
In reply to Gorgeous! by Ana White Admin
Tue, 09/08/2015 - 19:41
Thank you so much and thanks for the feature today!
I had a customer ask if I could make a chair , they sent me a picture and I used your,and another persons chairs as my pattern, I made a few adjustments for my liking. Turned out great, thanks for always sharing and inspiring your ideas
I built my girls' beds using two of Ana's plans. I used all whitewood boards for the construction. It took a few hours to build both beds and I love the result! I used my brad nailer and gorilla glue for both the headboard and bed base. I also used drywall screws (my fav) to attach the bottom bed pieces. You can see more details at http://www.shanty-2-chic.com/2011/01/beds-finished-well-almost.html !
Comments
yogijenn
Thu, 08/08/2013 - 08:54
bench leg angles
Planning to build a set like this for my new patio. The angles on the bench legs don't appear to be 45s. Could you share a few detail about them? Thanks!