Search Results

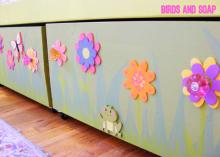
… of the pumpkin cutout. … Use glue and 1” staples to attach front of box to the sides of the box. … Apply glue along three edges of bottom of box. Place bottom of box inside front and sides. Staple in place along …
Read More
Project Plan

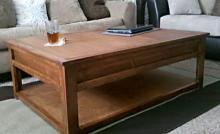
… so you don’t have to reset your jig multiple times. I designed this toy box a little different - more like how I build doors - to conserve space … to take steps to prevent little fingers from getting pinched from the toy box top. … If you want to add a top lip, you can do that too - for …
Read More
Project Plan

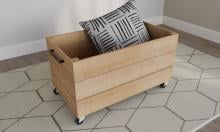
… beam ("H") should be at the 5" mark from the bottom. … Create the box supports using the diagram above, use pieces "G" & "I" … Attach the box support to one of the panels making sure to leave a 3/4" gap between the box support and the 2x2 ("D") Use 2" screws through the face of the …
Read More
Project Plan
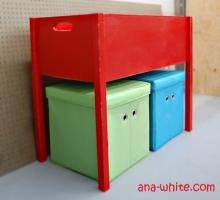
… and ask for help if you need it. Good luck! … Construct the first box attaching the 1x2x40” across the 1x12x40” boards. Glue and nail … boards at 5 ½” down from the top of the board edge. … Construct the box rectangles using wood glue and a nailer. Attach the 1x2x24” boards … for square, wipe any glue drips, and sand edges smooth. … Flip the box frame upside down and attach the 1/h4” thick plywood pieces to the …
Read More
Project Plan
… a half, and a few extra feet of 1x6s and 1x3s and 1x2s. … Build the Box Screw the box together as shown above with 2″ screws and glue. The measure across … you adjust for square. When the diagonals match, you’ve got a square box! … Put the Bottom on the Box This diagram really should be upside …
Read More
Project Plan
… just make sure you predrill all holes first with a countersink bit. … Box Now attach the sides to the bottom as shown above. Use glue. Again, … apart. Drywall screws have a straight shaft. … Ends Now attach the box to the ends as shown above through the pocket holes in the bottom. … jig saw. You can see exactly how that is done in this post. … Raised Toy Box …
Read More
Project Plan
… flush. Use glue and 1 ¼” finish nails. … Step 2. Attach bottom to box, keeping back edges flush, and keeping the overhang even on the … have same overhang. … Step 3: Finishing: At this point finish the box and top. Fill nail holes. Use matching or stainable filler if … and apply desired finish. … Step 4: Attach flat hinges to back of box and top, as shown in the diagram. H-style flat hinges are shown, any …
Read More
Project Plan

… flush. Use glue and 1 ¼” finish nails. … Step 2. Attach bottom to box, keeping outside edges flush. Use glue and 1 ¼” finish nails. … Step 3: Finishing: At this point finish the box and top. Fill nail holes if desired. Use matching or stainable … … Step 4: Attaching Hinges: Attach flat angle braces to top and box as shown in the diagram. To make attaching easier, mark on box and …
Read More
Project Plan
… Pin for Later! … Build the Box for the wooden train table - Mark the sides of the box and predrill holes. Attach the ends and center to the box as shown above. Use 2″ screws and glue or 1 1/4″ pocket hole screws …
Read More
Project Plan