Search Results
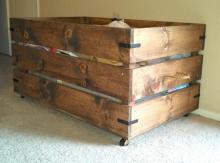
… can also make yours narrower by simply using a narrower width board … Box Begin by building the box as shown in the diagram above. Carefully measure out and mark the … by taking a diagonal measurement from outside corners and adjust box until the diagonal match (push longer measurement opposite corners …
Read More
Project Plan
… the top edge of the shelf to the top of the piece. … Sides, Drawer Box. Your nighstand should appear as above. If everything was done … plywood. If you choose to use 1x12s for the side pieces of the drawer box, make sure you make the back piece of plywood (E) 1/2" shorter, or … (H) to the bottom shelf, and the bottom of the sides of the drawer box. … Top, Back. Now add the back top countertop piece (I) as shown …
Read More
Project Plan
… above, using boards A and B. … Using boards C and D, build the drawer box as shown above. Leave a 3/4″ lip as shown above on the bottom edge … from the bottom of board C. This is shown above. … Fasten the drawer box to the legs as shown above. Make sure you nail through the fronts and the sides of the legs into the drawer box. Keep top edges flush. … Fasten board E as shown above, keeping top …
Read More
Project Plan
… the bottom shelf but the trim is needed on the top shelf. … Drawer Box Sides Attach the drawer box sides in place with 1 1/4″ finish nails and glue. … Drawer Guides … are flus to the inside of the legs, and not the inside of the drawer box? … Top Attach the top to the project, overhanging 1″ as shown above. …
Read More
Project Plan

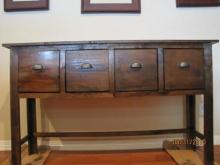
… What's the Big Secret? It's simple. We build the drawer box in place. Instead of measuring and building a drawer box and hoping it fits, we simply build it in place, measuring and … than too large. FAQ: What type of material do I use for the drawer box? You can use a variety of materials, the easiest is off the shelf 1x …
Read More
Blog Post
… nails and glue. … Now it's time to build the drawer boxes. Each box needs to be 1" less in width than the opening for the drawer (for … … Attach the drawer slide to the drawer boxes and insert the drawer box. Remember, the drawer will get a face, so the drawer box needs to be inset 3/4". Then cut your 1x8 drawer faces to fit the …
Read More
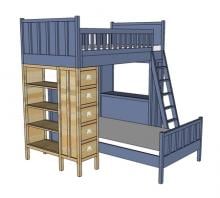
Project Plan

… of the cabinet. … Figuring the Drawer Size and Building the Drawer Box Measure the inside width between the 1x3s installed in the previous … make my drawer boxes an 1/8" smaller than called for. If the drawer box is too big, you have to make it smaller. That's why we just built … and glue. Filing Cabinet Drawer Modifications To convert a drawer box into a filing cabinet, do NOT add a bottom. Simply purchase 1/8" x …
Read More
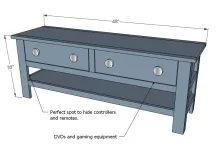
Project Plan
… precision. … 2 – 1×20 @ 24″ (Divider Sides) 2 – 1×20 @ 14″ (Drawer Box) 1 – 1×20 @ 46 1/2″ (Bottom Shelf) 1 – 1×20 @ 48″ (Top) 2 – 1×20 @ … can add structure and stability and give you a better aligned drawer box. … Top and Bottom Shelf Carefully mark out the top and bottom shelf … the drawers should be cut from leftover 1×20 stock from building the box, and will be inset to the sides (as in you will nail or screw …
Read More
Project Plan

… Adjust the dimensions of the drawer if necessary. Cut the drawer box part and assemble using pocket holes set for 3/4" stock and 1 1/4" … to allow 1/8" on each side of the drawer front). Slide the drawer box into the opening and shim the drawer front so it's evenly spaced in … great shims!). Drill a hole for the knob, remove drawer front, drawer box and install the knob. Reinstall the drawer and adjust spacing around …
Read More
Project Plan