Community Brag Posts

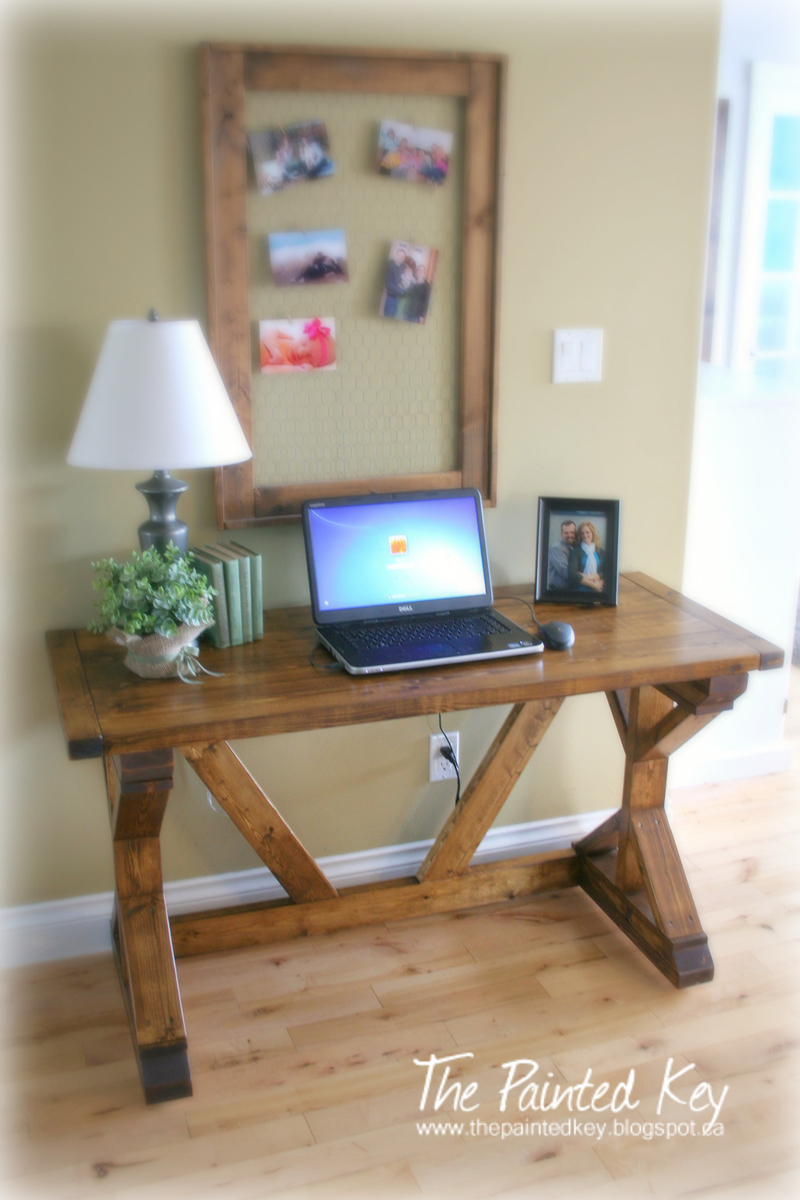
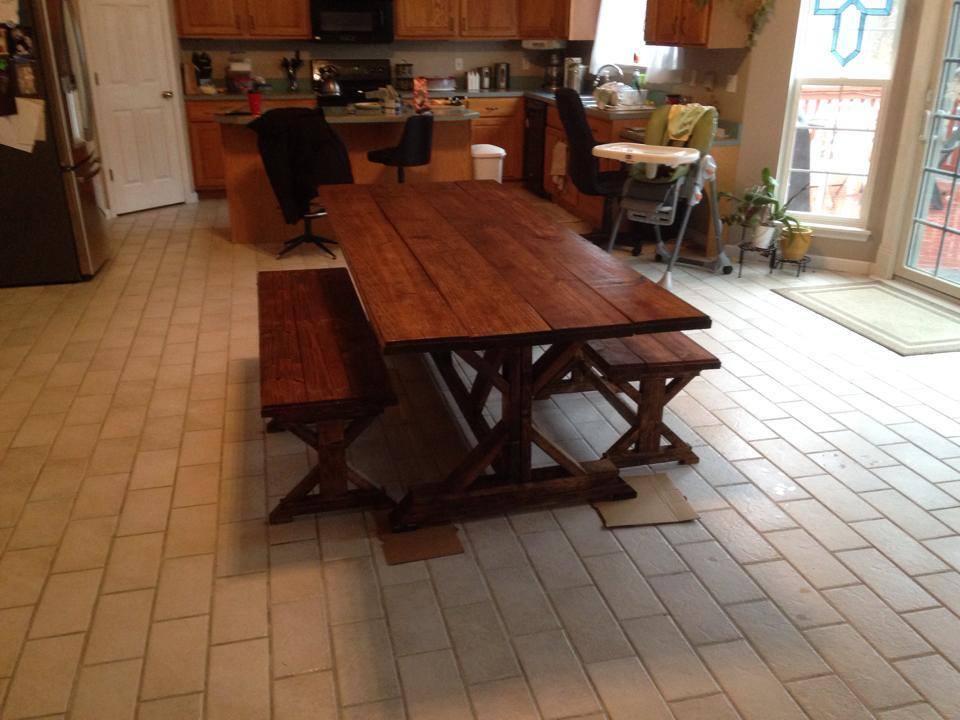
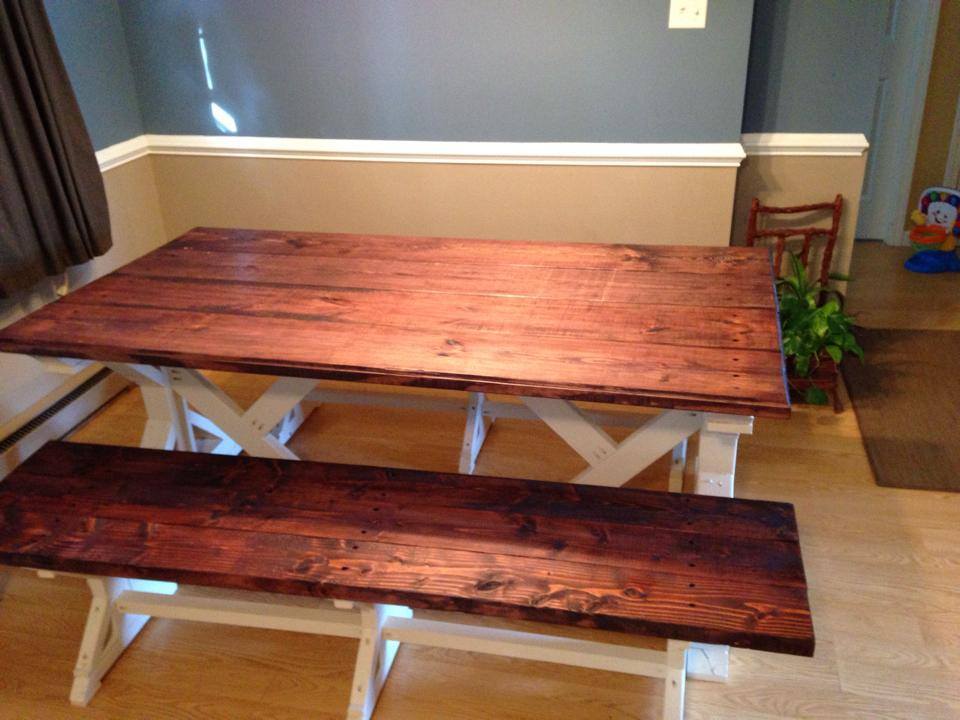
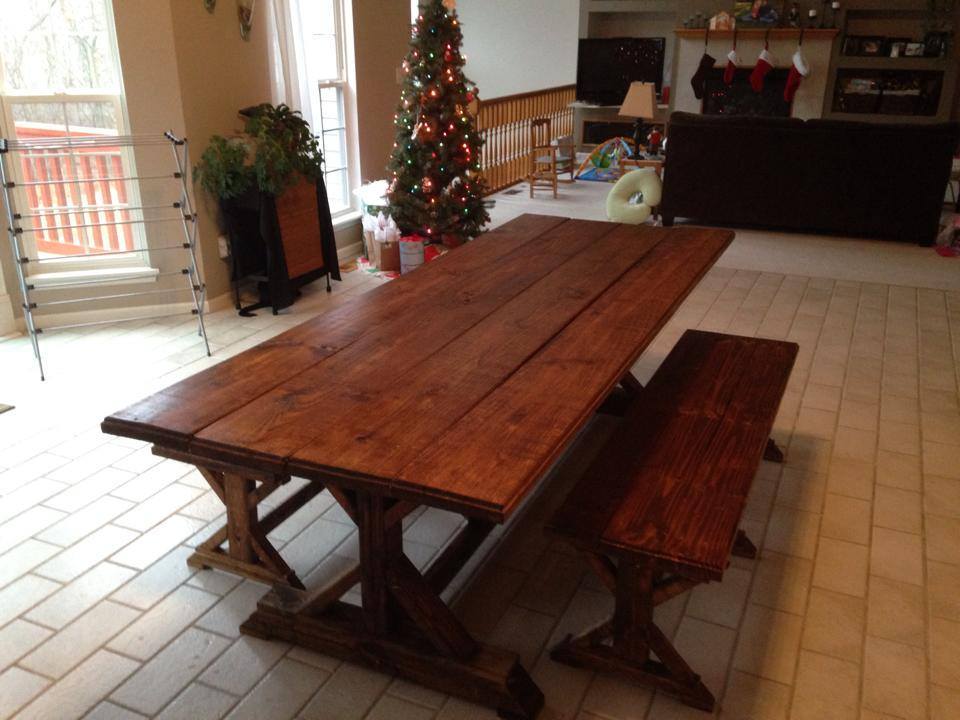
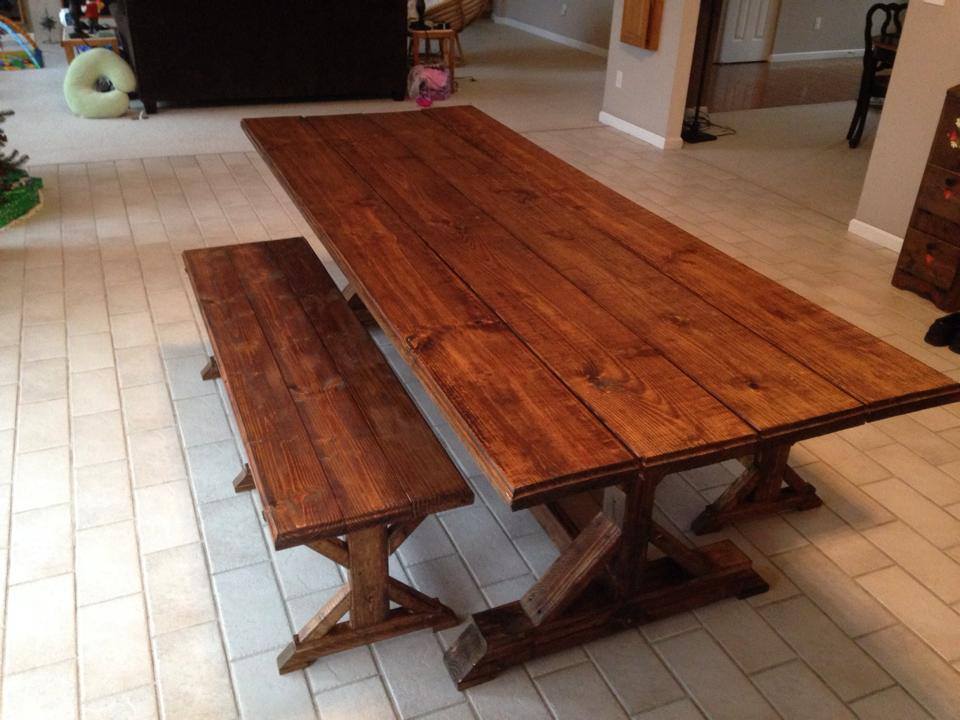
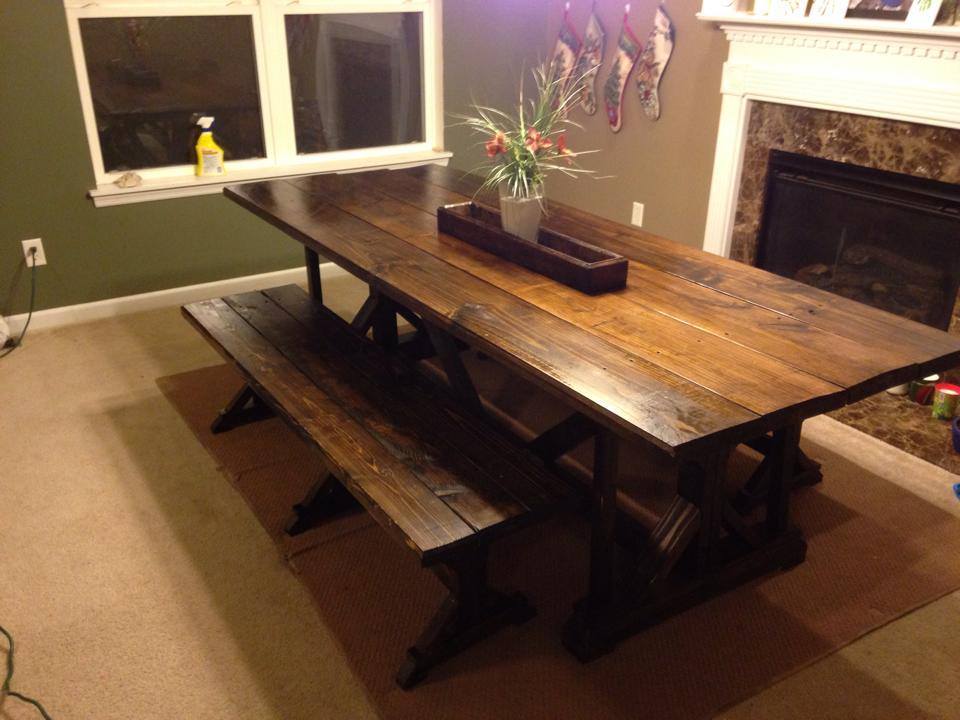
4x4 Truss Beam Table and Benches

Submitted by MakinDust on Sat, 01/18/2014 - 08:36

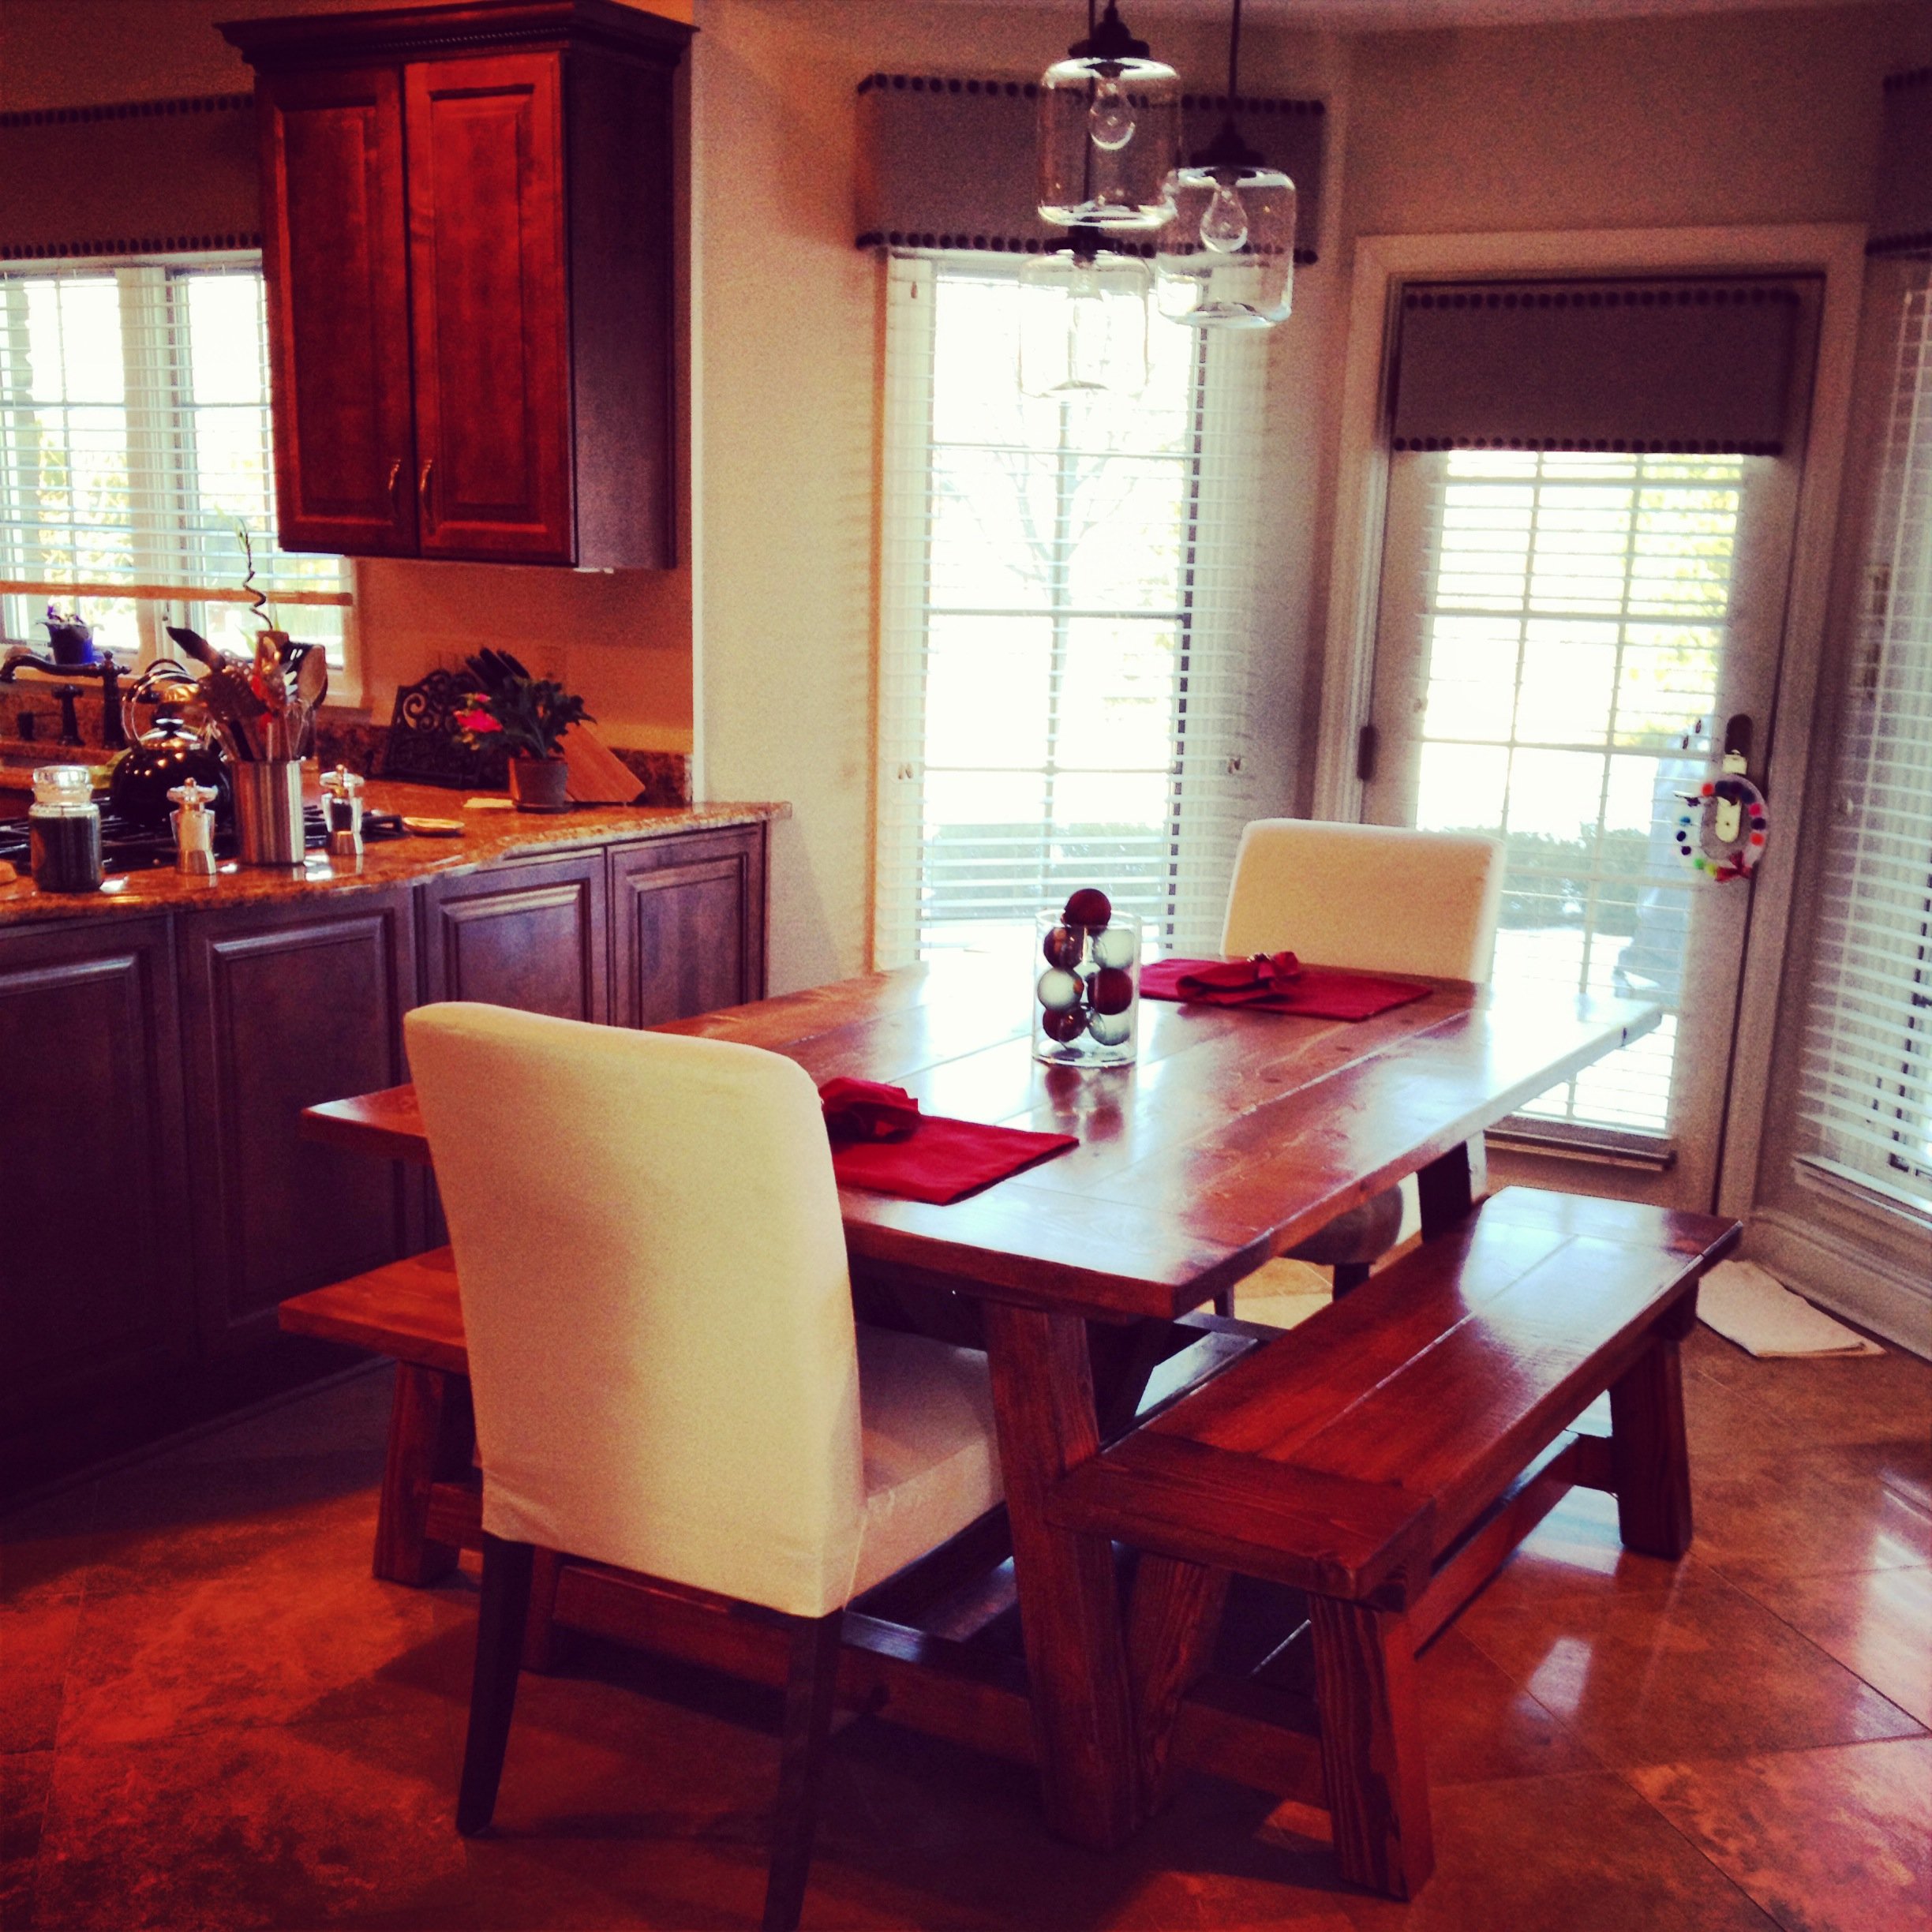
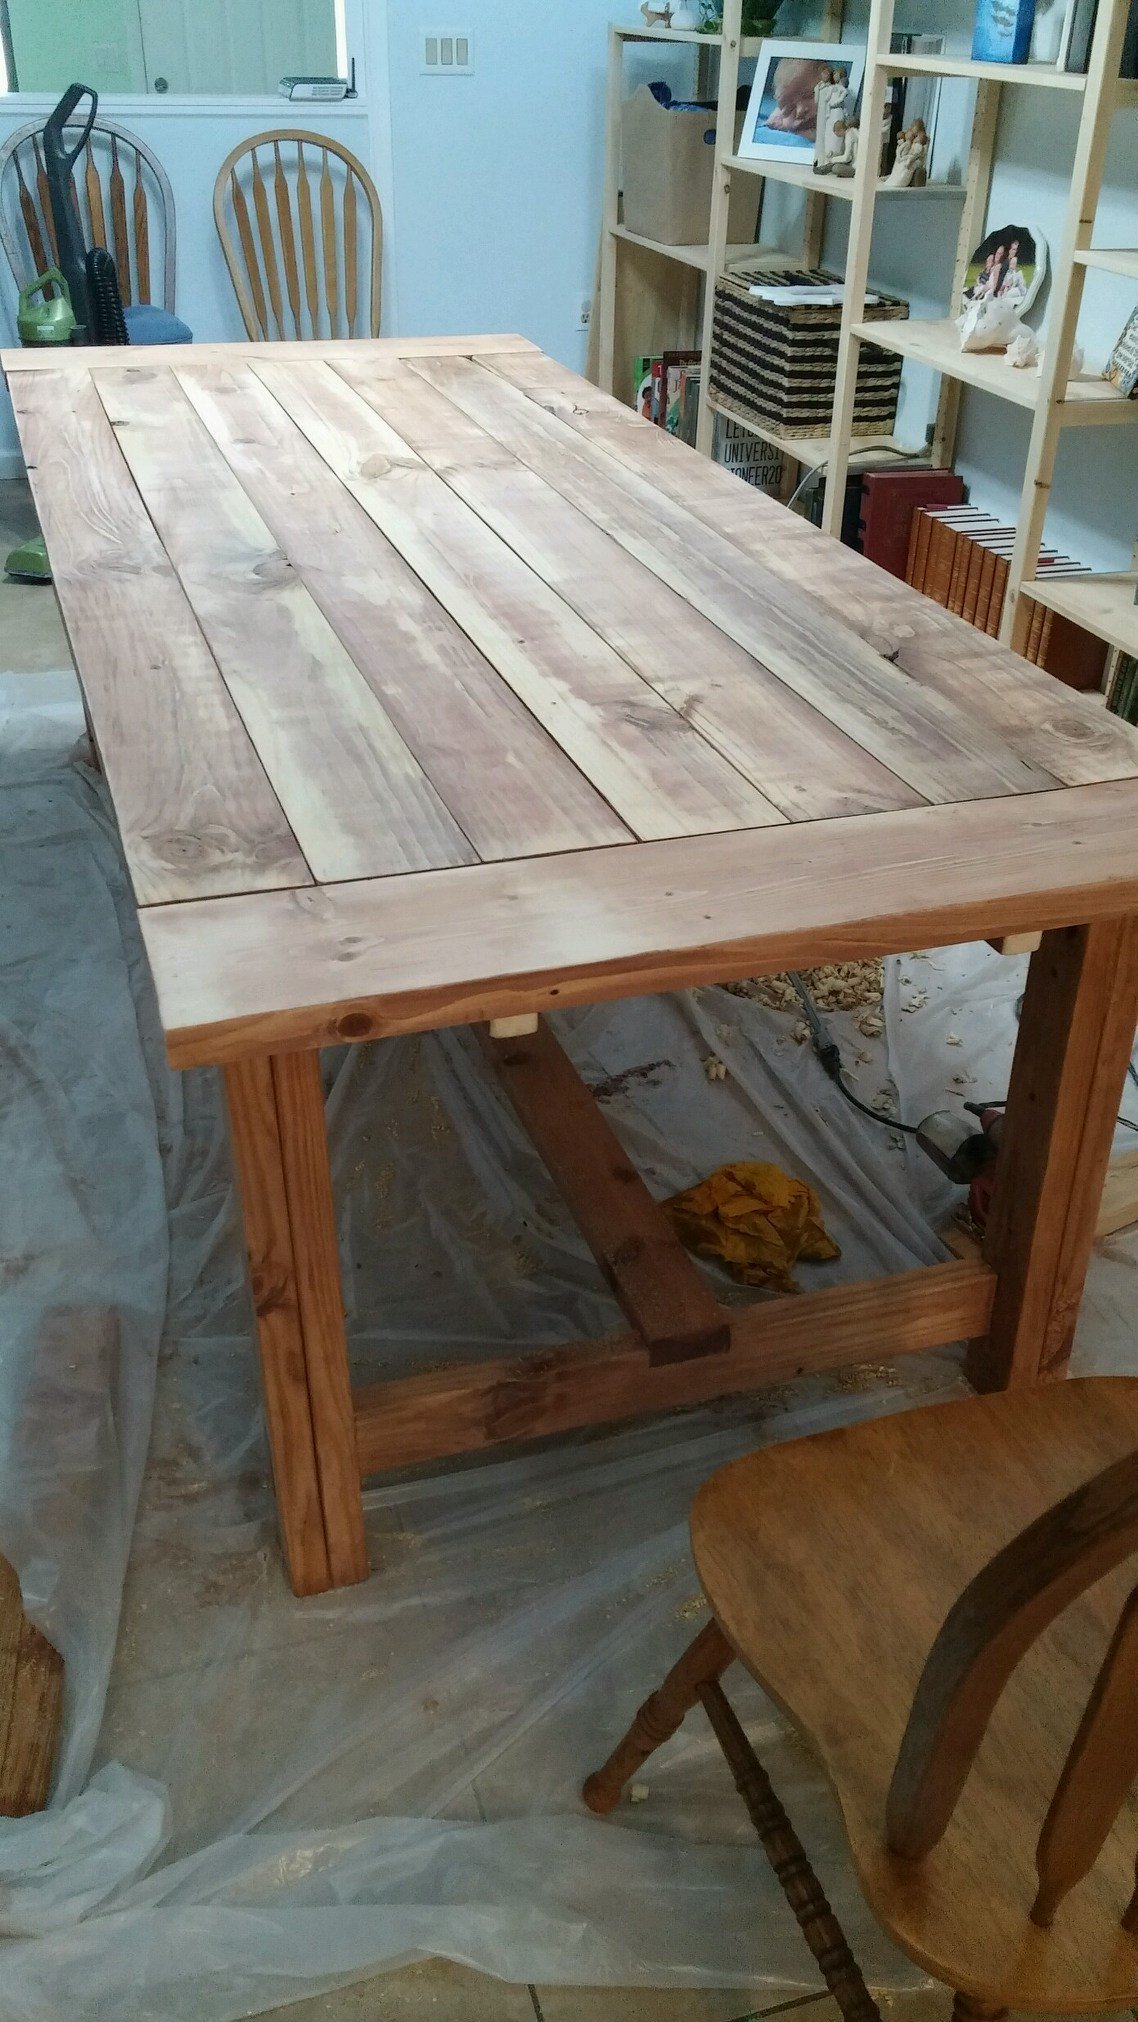
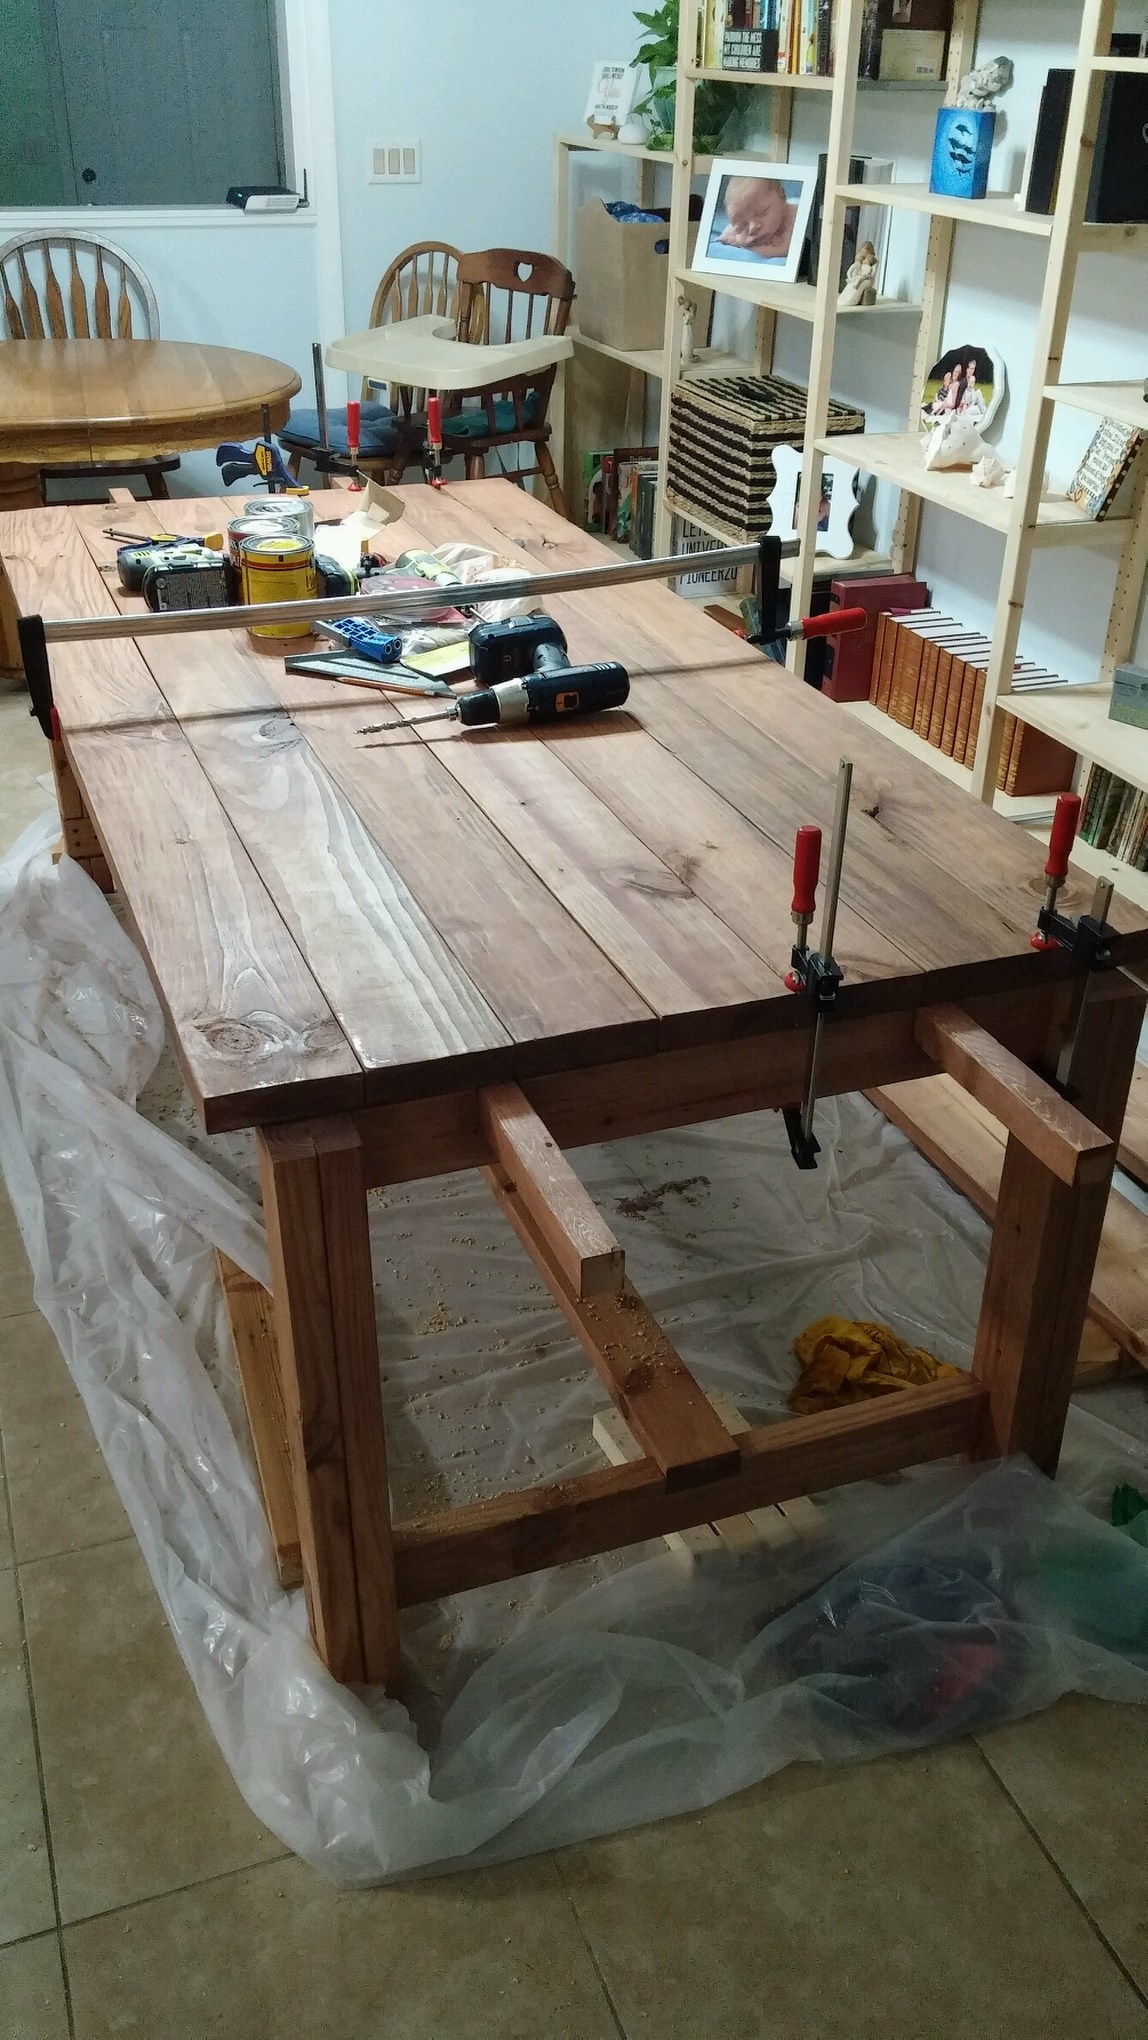
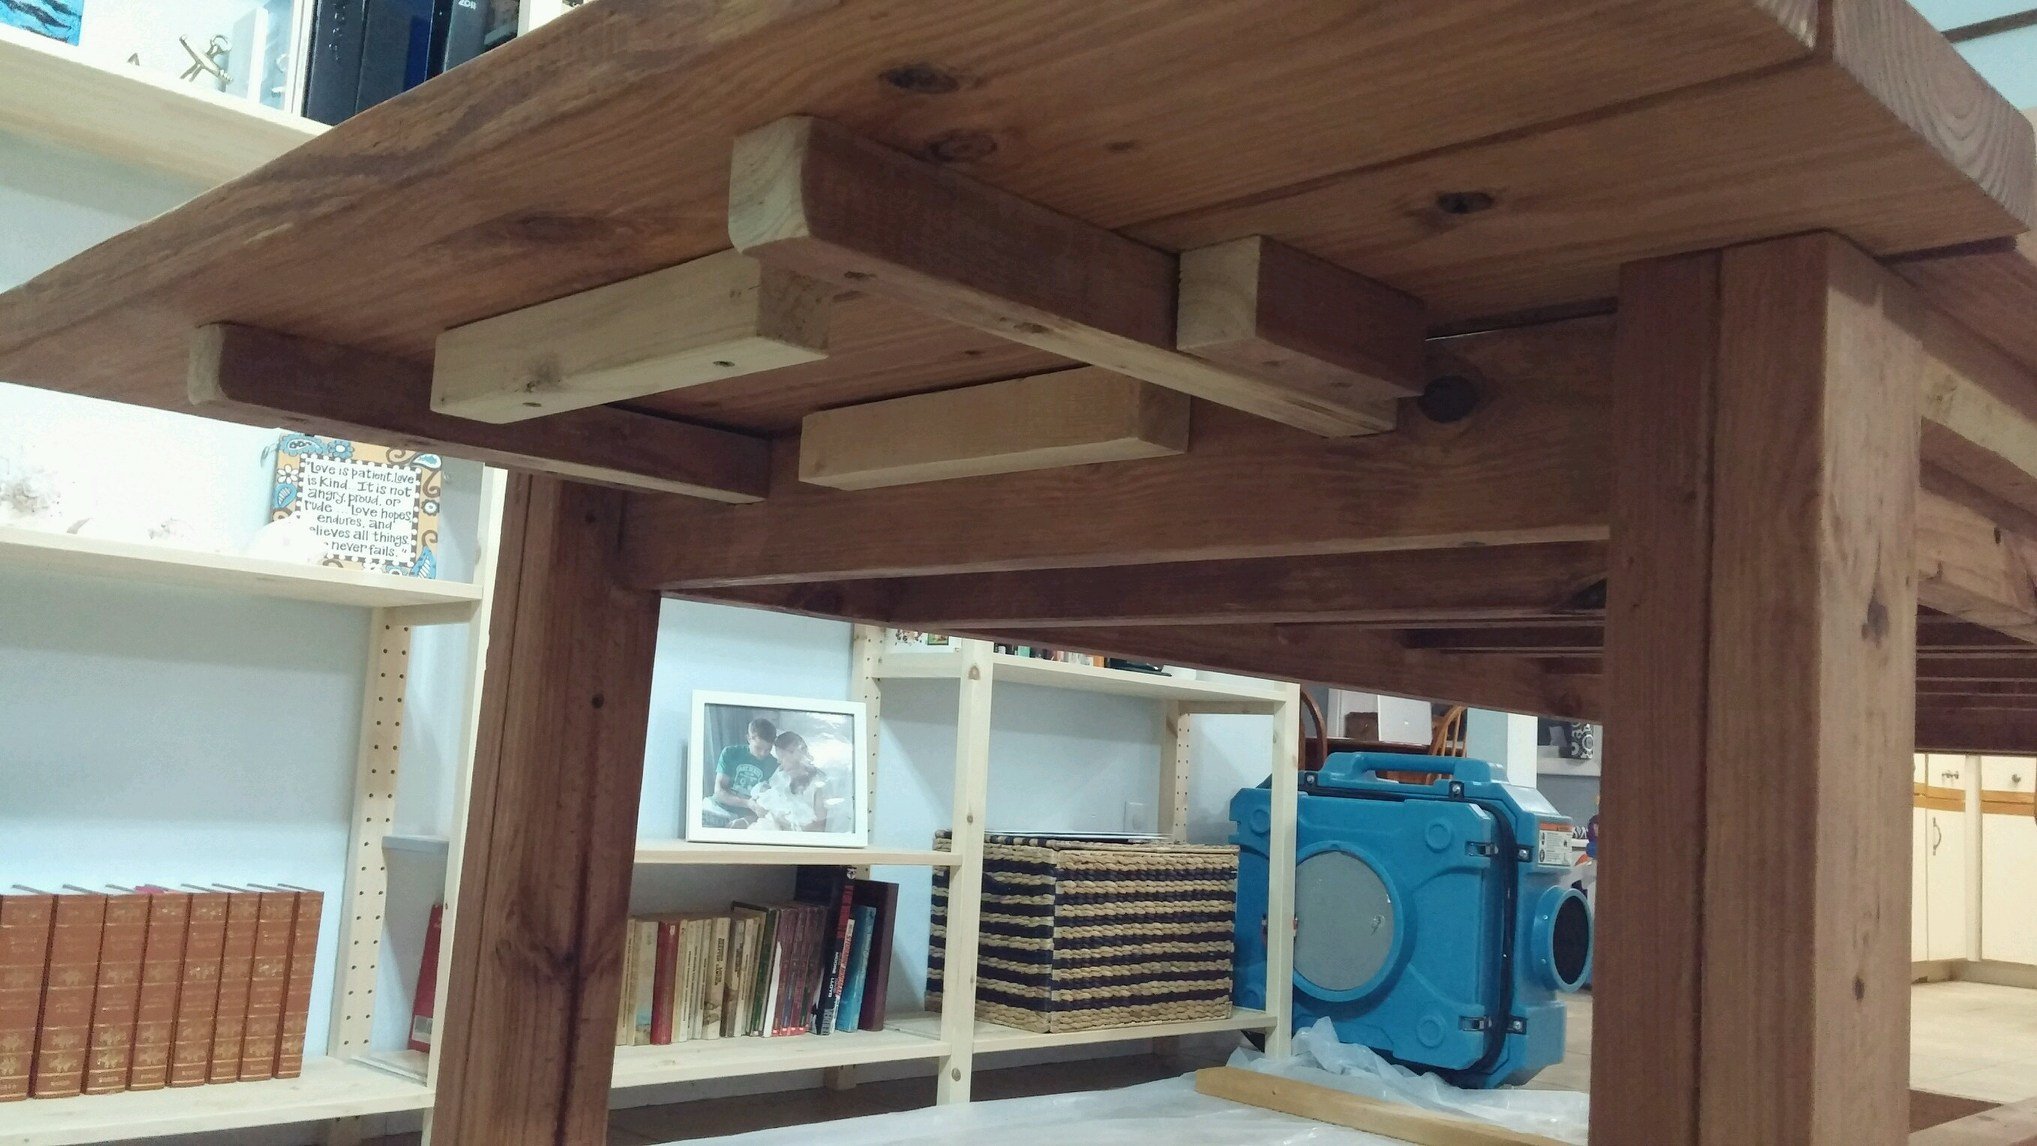
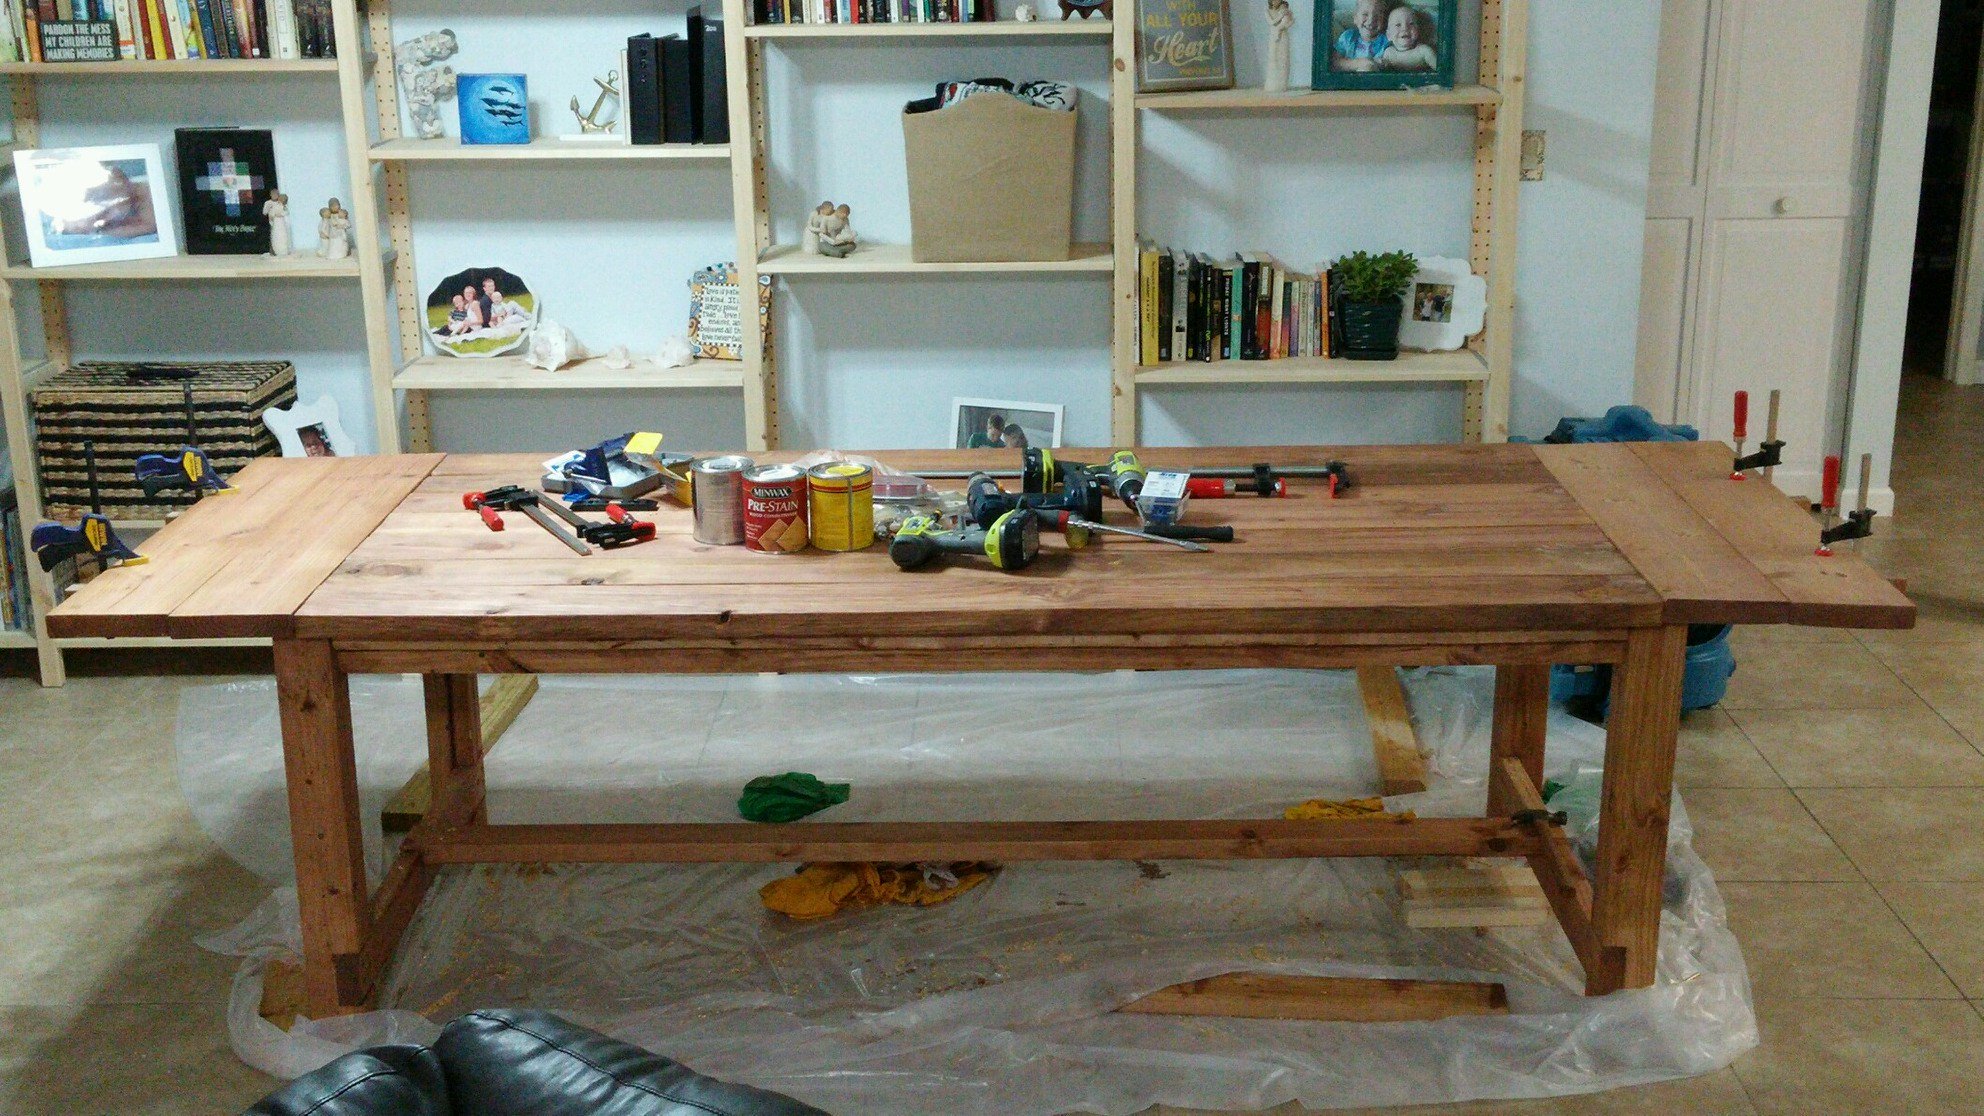
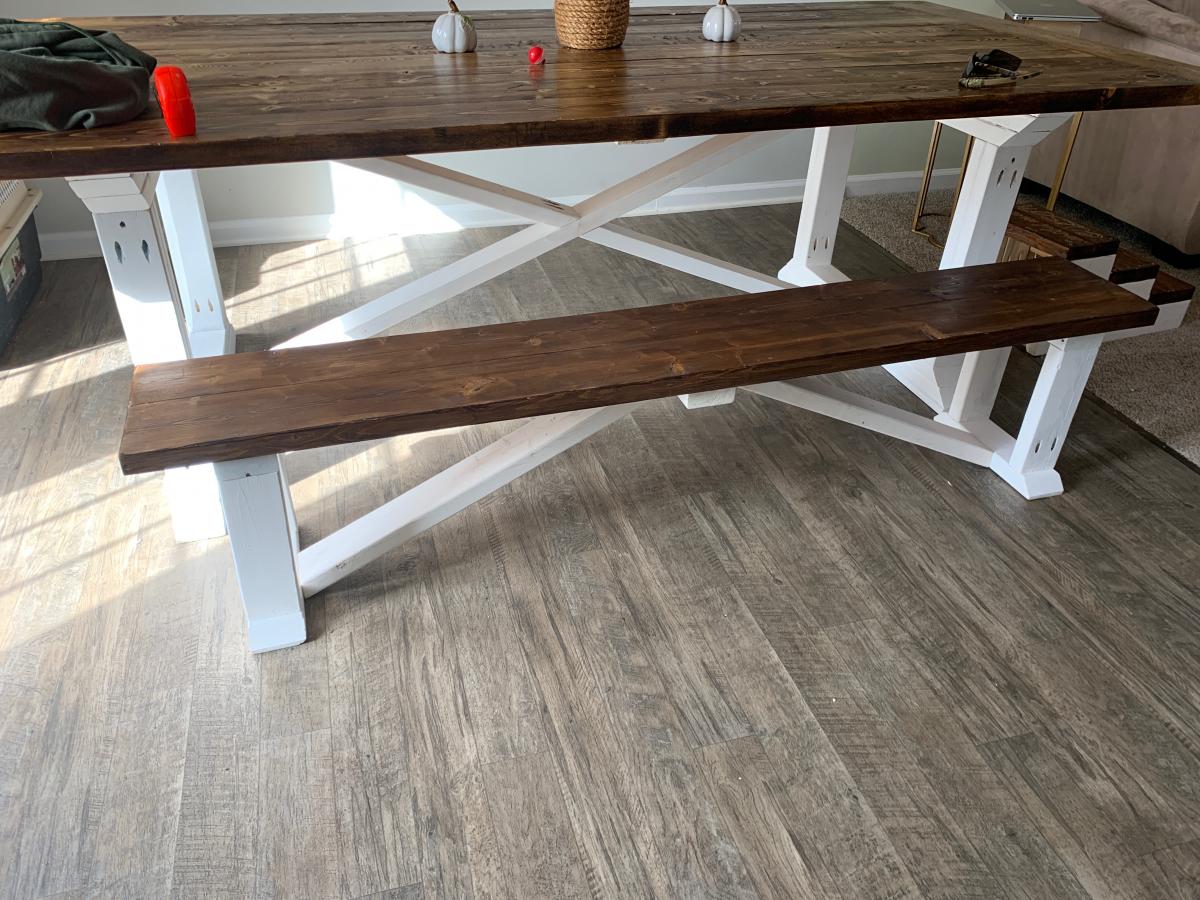
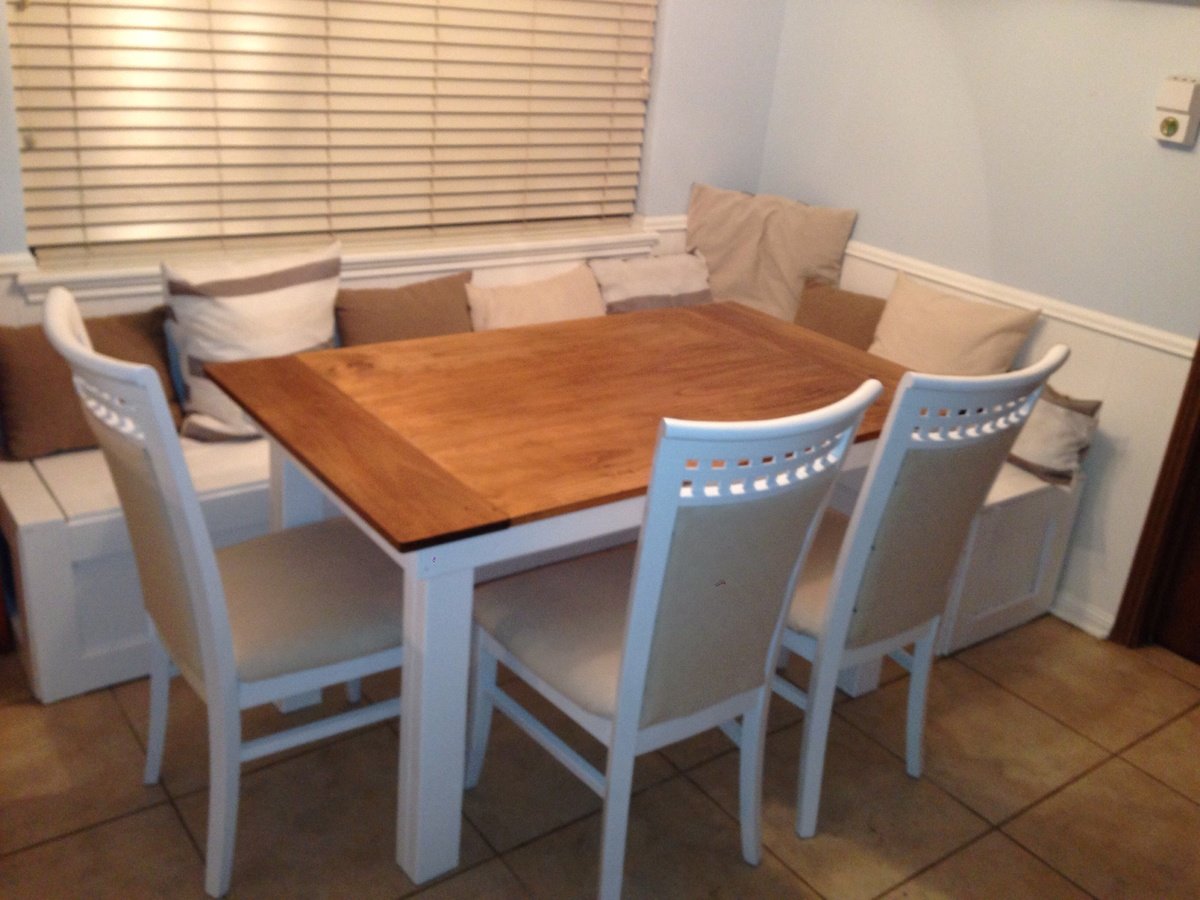
Table and benches were made to plan, except I shortened the overall length and added another 2x10 to the top to give it some additional width. The benches were also shortened slightly so the legs of the benches slide between the legs of the table; which allows the benches to be pushed further under the table when not in use. Avoid my rookie furniture making mistake and go to a specialty lumber store that sells wood that is already aged (dry). Most everything you find at the big box stores will still be wet and shrink/warp on you if not completely dry first.

Built from Plan(s)
Estimated Time Investment
Week Long Project (20 Hours or More)
Finish Used
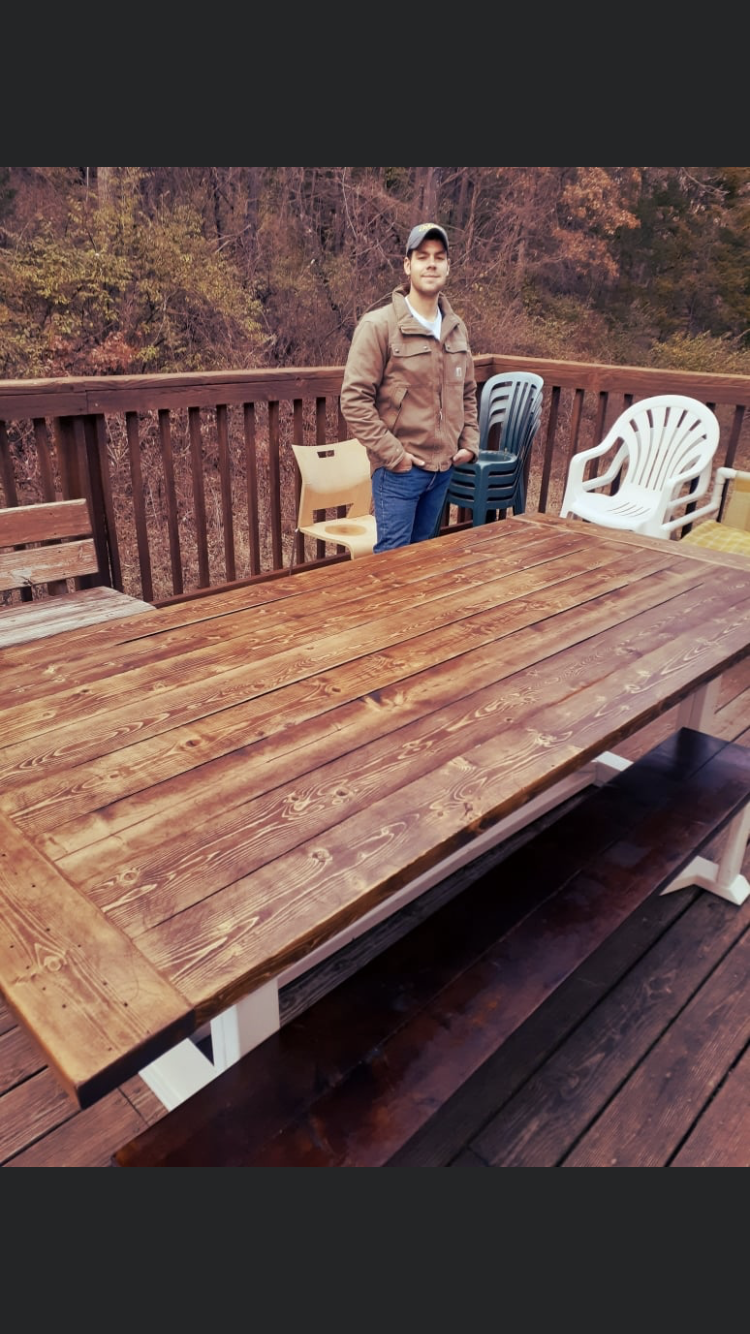
MinWax English Chestnut Stain and 3 coats of MinWax Satin Poly
Recommended Skill Level
Beginner

Comments

MakinDust

Tue, 05/20/2014 - 16:23

Appreciate the compliments. Sorry for the delayed response, but the final dimensions turned out 72" x 46". Let me know if you have any other questions.

No Closet... No Problem

Submitted by Anonymous (not verified) on Sun, 04/10/2016 - 17:40

No more IKEA for me!

Built from Plan(s)
Estimated Time Investment
Day Project (6-9 Hours)
Finish Used
Left natural
Recommended Skill Level
Beginner

DIY Double Queen Size Lounge

Submitted by Anonymous (not verified) on Sat, 08/26/2023 - 12:13

A friend asked me to build her a durable queen sized lounger for beside her pool. I used this platform style and added the multi-adjustable tilt. The lounger looks amazing and will double as a spare queen size bed for guests.

Mary Wikene

2 projects combined

Submitted by cmsklein on Wed, 04/04/2012 - 17:09

This replaced a huge formica countertop in our laundry room. The counter collected unfolded clothes on the top, and piles of shoes underneath. Also, we had a 4 hook shelf from Target holding all 3 of our kids bags and backpacks. My husband was against this, because "where would we put all the laundry?" Well, this is the solution and we both love it!

I measured this out and drew diagrams and then finally decided this was too big of a project to do for the first time. I did hire someone, but he said the measurements were right on.....he had never built something like this before. The outside of the door is painted with magnetic primer and holds magnets. So much more functional that the counter.

I know I didn't build this myself. I think I could have done it, if I could have a week to do this without interruption, but that was impossible and I needed this YESTERDAY (the 4 hook wall shelf fell out of the wall). But I wanted to share in case anyone else is having a space dilemma! We LOVE it!!!!

Estimated Cost
$1100 hired/ $200 self
Estimated Time Investment
Week Long Project (20 Hours or More)
Finish Used
paint sherwin williams
Recommended Skill Level
Intermediate

Comments

Guest (not verified)

Thu, 04/05/2012 - 12:10

What a great idea! Very well planned out! I would love to build something like this in our mudroom.

Guest (not verified)

Tue, 04/10/2012 - 16:33

Just what we need! Thank you! And I love the door covering the baskets and the magnetic paint - I hadn't thought of those! Thanks so much for sharing! It gives met the confidence to try it myself!

Grey wash bookshelf

Submitted by DutchDIY on Mon, 01/20/2014 - 06:09

Thanks Ana for your wonderfull website! even in The Netherlands your designs are shown.

Built from Plan(s)
Estimated Time Investment
Afternoon Project (3-6 Hours)
Finish Used
grey-wash paint
Recommended Skill Level
Beginner

Comments

Modified from Farmhouse Table

Submitted by Anonymous (not verified) on Tue, 04/12/2016 - 19:15

Modified the plans from the farmhouse table to add leaves in order to extend it another 15" total. Turned out well with the locking latches.

Estimated Cost
200-300
Estimated Time Investment
Weekend Project (10-20 Hours)
Recommended Skill Level
Beginner

Comments

Horse Tack Storage Shed

Submitted by Anonymous (not verified) on Wed, 08/30/2023 - 09:09

We have been in need of a place to store our horse tack for several years, and finally got around to it. We modified the small cedar shed with a little extra support and added saddle racks and bridle hooks. Super pleased with how it turned out!

Gabi Johnson

Built from Plan(s)

Comments

Seasonal And Holiday

Pet feeder

Submitted by Milhouse on Sat, 04/07/2012 - 23:07

I love my cat, and felt she needed a pretty feeding dish. I stole some old spindles from my sister's garage, cut them down and threw this plan together. It was actually harder than I expected because getting into tight little spaces with my drill to drill in the pocket holes was almost imposible. The wood split, nothing is square and the holes for the dishes are messy...but it doesn't really matter, it looks good from a distance and my cat doesn't judge. Not that I know of, anyway.

Estimated Cost
Free - made from scraps
Estimated Time Investment
An Hour or Two (0-2 Hours)
Finish Used
Flat white paint
Recommended Skill Level
Intermediate

Comments

Breakfast nook benches with table

We wanted to create more seating space and a cosier breakfast experience with this nook. We made the benches with hinges for storage. The table was customized to fit our space and we chose to change the legs rather than buying the $20 each legs. We love how it turned out!

Estimated Cost
$100
Estimated Time Investment
Weekend Project (10-20 Hours)
Finish Used
Early American on the tabletop and semi gloss white paint.
Recommended Skill Level
Beginner

Comments

Chalkboard frame

Submitted by Kate_14 on Sun, 12/29/2019 - 08:39

I built these in different sizes. I added hooks on one to hang keys. I nailed hardboard with chalkboard spraypaint on the back.

Built from Plan(s)
Recommended Skill Level
Beginner

FarmHouse Numbered Cubby

Submitted by PA PA B on Mon, 04/09/2012 - 19:19

My first brag post ...Fun to make

Estimated Cost
10.00
Estimated Time Investment
Afternoon Project (3-6 Hours)
Finish Used
barn paint
Recommended Skill Level
Beginner

My Fancy X Desk

My son had been asking if I could build him a desk for months, so I finally decided to get it done! I found this to be a fairly easy build and with some minor changes, will likely build additional ones in the future.

Built from Plan(s)
Estimated Time Investment
Weekend Project (10-20 Hours)
Finish Used
Minwax English Chestnut, Minwax Satin Wipe-on Poly
Recommended Skill Level
Beginner

my versio play vanity

I built this for my 7 year old niece. She out grew her cheap plastic one. Her mother asked for  white. I  decided to modify the kids play table and made own my own mirror frame. I used the 4$ stackable chair plan. Chair height 15in and table top 25in. The table sixe 24w x18deep.She has room to grow. I used l L brackets on the back keep the mirror in place. If she grows up you can take mirror off  and a have table she can use for anything. I had to finish it off with $10  battery powered vanity light from Amazon. I painted it all satin white, I used glitter I put in the paint for the mirror frame. My niece just loved it and so did her parents. 

Estimated Cost
$75
Estimated Time Investment
Week Long Project (20 Hours or More)
Finish Used
Primer, than satin white paint
Recommended Skill Level
Intermediate

My own weathered corner hutch :)

This was my first project. It took me a weekend to build and prime. Since I chose to use a crackle finish, waiting time between coats extended the total time to one full week. My husband and I were supposed to make this hutch together, but I became obsessed and did most of it alone! I adjusted the size a bit to make it larger, so I could fit big pieces on shelves and in cabinets. Thanks for the plan Ana!!

Built from Plan(s)
Estimated Time Investment
Week Long Project (20 Hours or More)
Finish Used
Weathered Crackle Finish done as follows:
1. Killz2 latex primer (highly recommended)
2. Valspar interior satin finish, "Frontier Road" (this is the color that shows in the cracks)
3. Valspar weathered crackle glaze (a suggested substitute that costs less is Elmer's glue)
4. Valspar interior flat finish, "Churchill Hotel Lace" (must be a flat paint, this is the dominant color of your piece)
5. Valspar clear protector (also highly recommended to protect the finish you worked very hard to create, when you paint the same piece of furniture 5 times in one week your sanity will agree!)
Recommended Skill Level
Starter Project

Comments

JoanneS

Fri, 04/13/2012 - 14:47

Wow, this is sooo beautiful! The finish is just awesome. My Hubby hates to paint, and he saw this multi-step finish and said you must have the patience of a saint! :) Congrats on such a stunning first project!

kmsdance (not verified)

Mon, 10/01/2012 - 23:33

Very Nice! What did you do to make it "bigger"...did you make it deeper or wider? Just curious, because I would like to try and make a bigger version as well. Did you still cut the shelves on each side at a 45 degree angle? Thanks!

Farmhouse Table

Submitted by Anonymous (not verified) on Thu, 04/21/2016 - 07:37

This was my first project!!
This plan took me about three weeks start to finish working off and on (multiple hours on weekend days). I widened the table to 48 inches (the dimensions for my table are approx 84" long x 48" wide. Used 4-2x10s and 1-2x12 for the table top and 1x8s for the bread board ends.

Estimated Cost
$100-$150 (I didn't have any of the items on hand or scrap) includes stains/paint/urethane, PH screws etc.
Estimated Time Investment
Week Long Project (20 Hours or More)
Finish Used
Stained with two coats of Minwax Early American and then one coat of Minwax English Chestnut (tried to match another furniture piece) coated top with 3 coats of Minwax Pro Spar Urethane in satin. The base is made with 4x4s for the legs and then 2x4s for the aprons and stretchers. Painted in Valspar Satin "Wet Pavement", 2 coats and clear coated with the satin Pro Spar Urethane, 3 coats.
Recommended Skill Level
Beginner

Rustic bench

Submitted by Anonymous (not verified) on Sat, 01/11/2020 - 11:38

Love this little bench! My bench is a little bigger than Ana's, and the seat is not as deep, but the plans were super easy to follow. It's just what I needed to finish out my living room!

Built from Plan(s)
Estimated Cost
$3
Estimated Time Investment
Afternoon Project (3-6 Hours)
Finish Used
Dark walnut stain
Recommended Skill Level
Beginner

Shoe Dresser - First Project!

Submitted by mashhawkes on Sun, 04/15/2012 - 13:33

I know that Ana says not to do this as your first project but I couldn't help myself! We needed shoe storage BAD!! This project was not bad but did take my husband and I about 3 weeks to build. It had nothing to do with the difficulty just scheduling conflicts. We needed somewhere to house all of my husbands shoes and something that would not take up much space because the only spot we had to put it in our bedroom was between the bathroom door and my husbands closet door. We used Ana's plan for the shoe dresser but did had to modify it to fit the 44" spot we had to work with. The 1x8's that we used were only 7 1/4 instead of 7 1/2 but my husbands size 12 shoes fit without a problem! I can't wait to start our next project! Thanks Ana!

Built from Plan(s)
Estimated Time Investment
Week Long Project (20 Hours or More)
Finish Used
English Chestnut stain with 3 coats of antique white. Distressed by hand using 220 grit sandpaper and then covered with 3 coats of satin polyurethane.
Recommended Skill Level
Intermediate

See-saw

Submitted by bhammond on Tue, 01/28/2014 - 21:03

This easy project made me the best Aunt ever! I made it for my nieces and nephews for Christmas. It was such a huge hit that one of them threw up all over it from laughing so hard. :)

The garage was freezing cold but they stayed there all evening once they discovered their gift.

Built from Plan(s)
Estimated Cost
35 including screws
Estimated Time Investment
Afternoon Project (3-6 Hours)
Recommended Skill Level
Starter Project

Lego Table

Submitted by Anonymous (not verified) on Tue, 04/26/2016 - 06:52

Very Easy project, the plans are straight forward. The kids love having a table to play lego's and we love being able to hide everything away. Very Nice Table. When the girls get older and the Plywood cover shows signs of wear from much use, I'll probably replace the cover with one made from pine 1x6's biscuit-joined to give a nice textured look, but still with the storage for games and stuff.

Estimated Cost
$225 CAD
Estimated Time Investment
Weekend Project (10-20 Hours)
Finish Used
CIL Crisp Linen Paint & Minwax Red Mahogany Stain with 3 coats of Minwax Polyurethane Topcoat.
Recommended Skill Level
Beginner
Back