Corner Cupboard
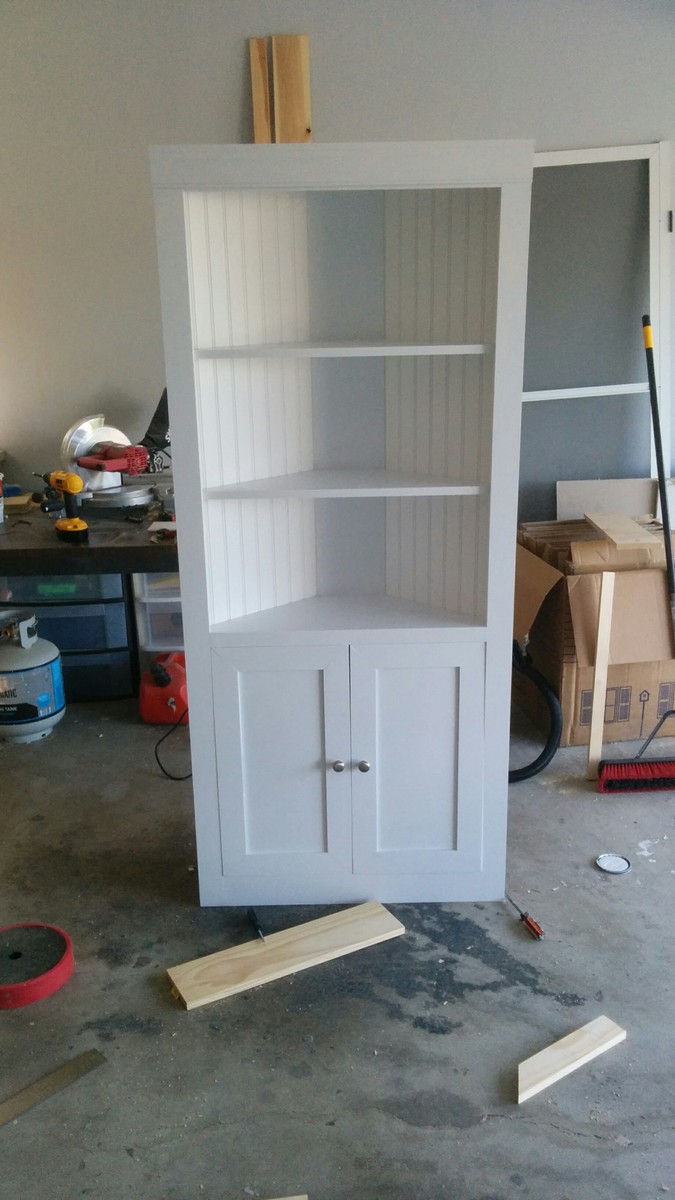
Estimated Cost
100$ before paint/hardware
Finish Used
White Paint
Recommended Skill Level
Intermediate
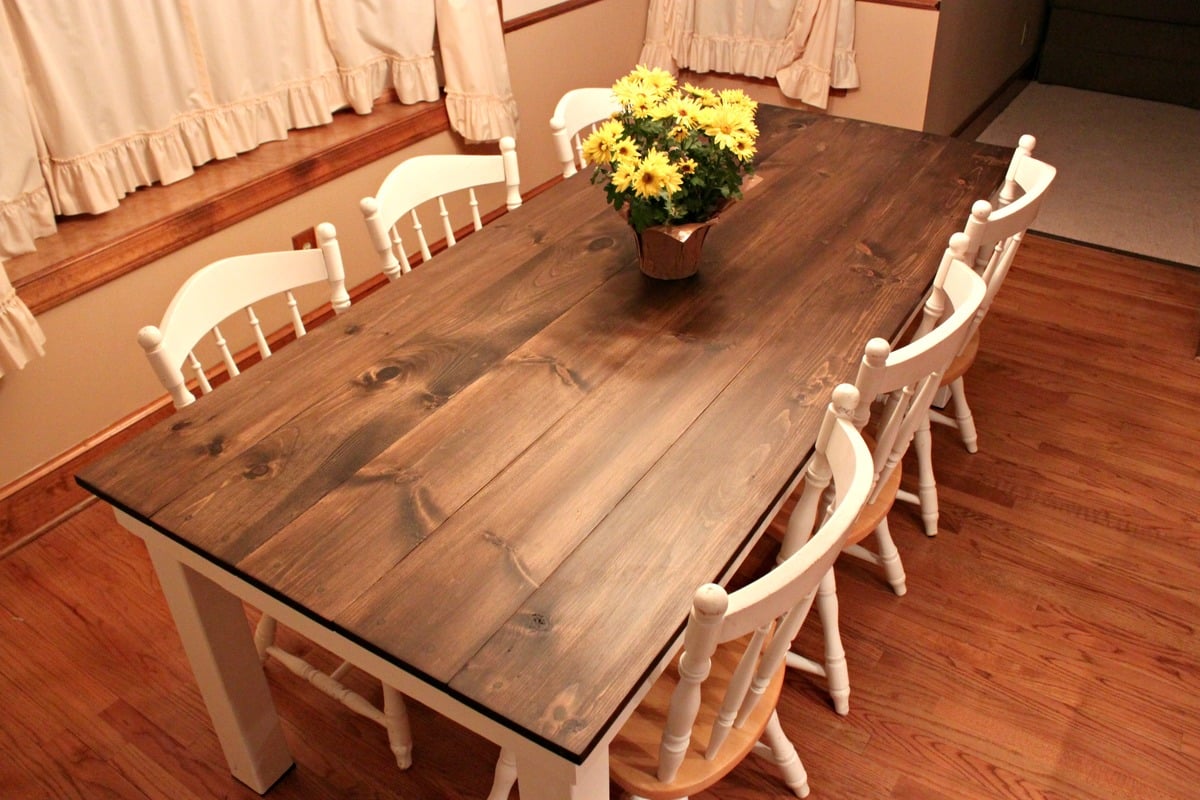
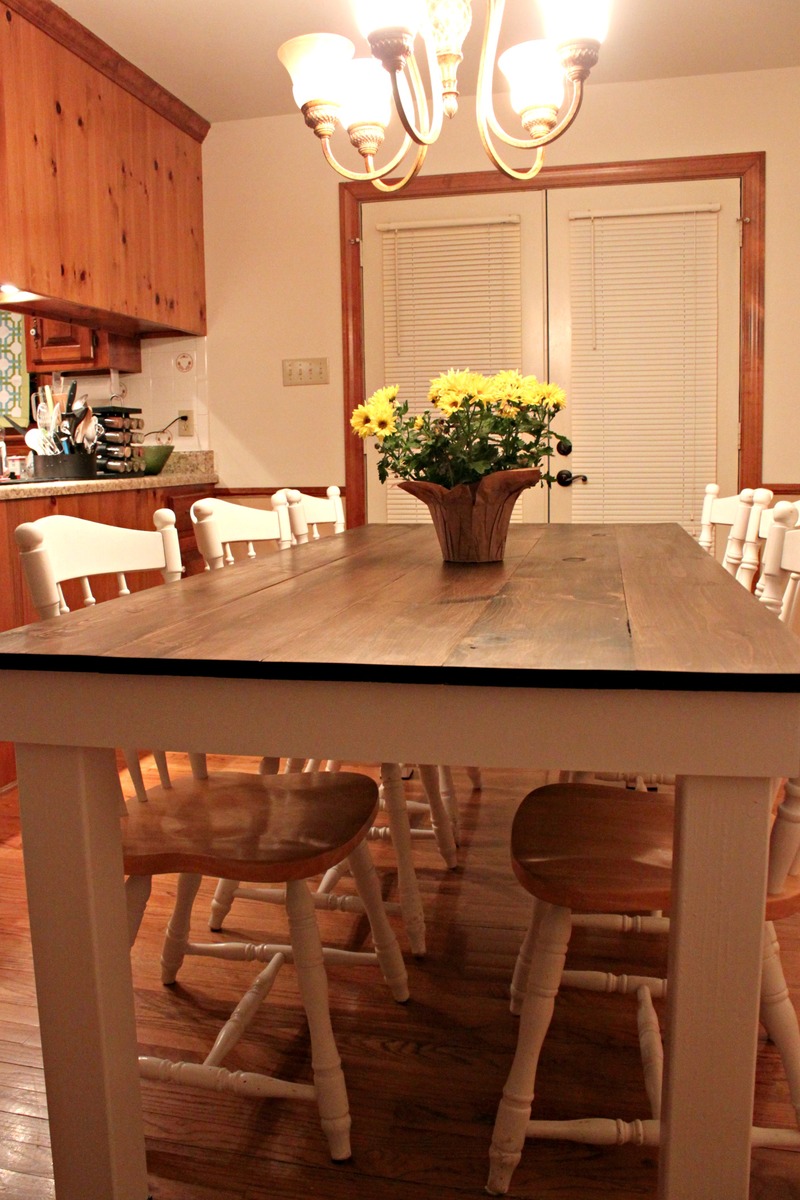
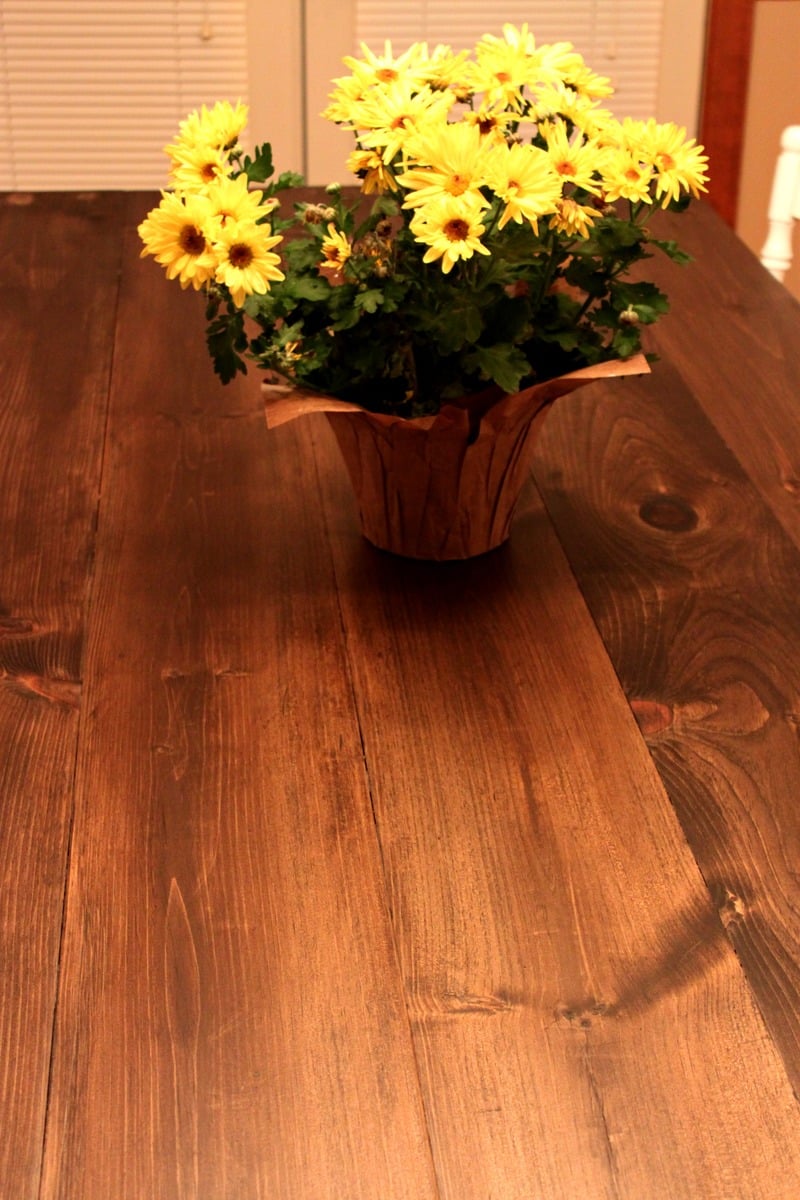
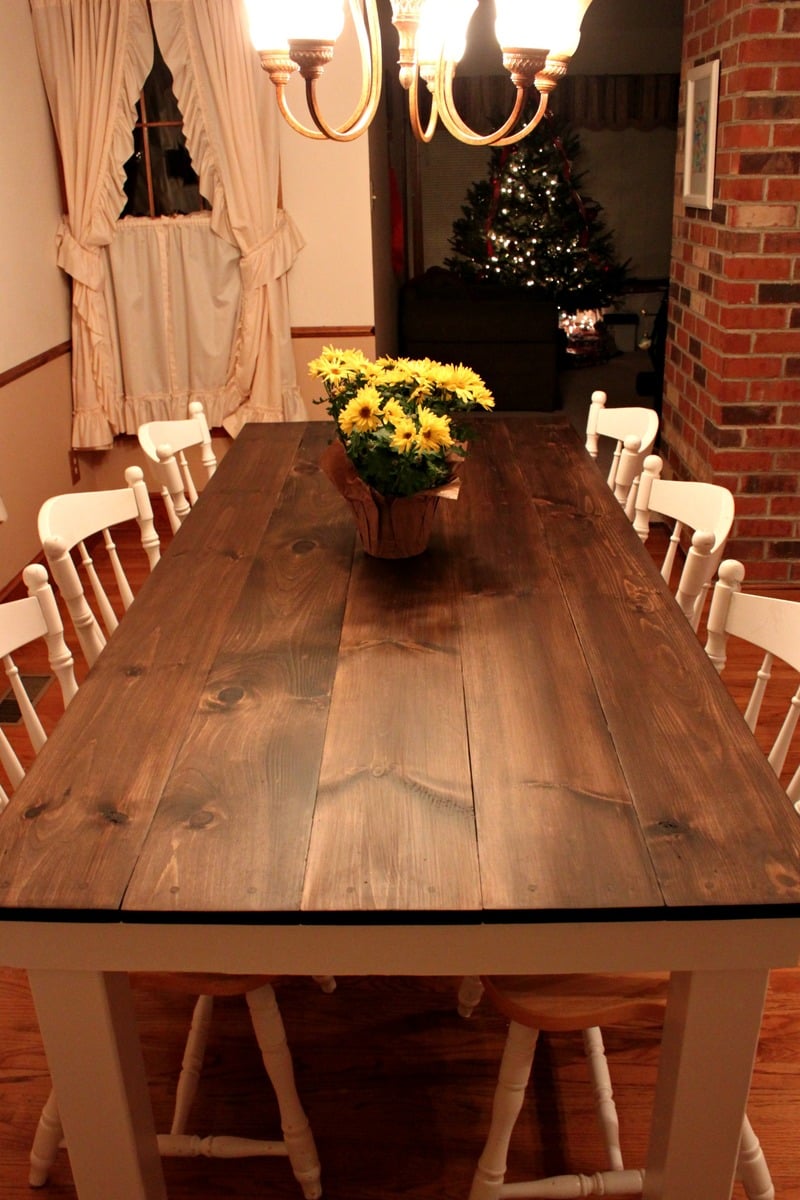
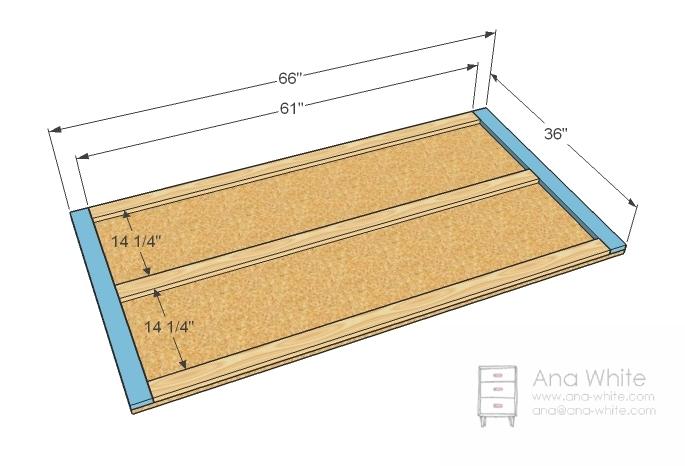
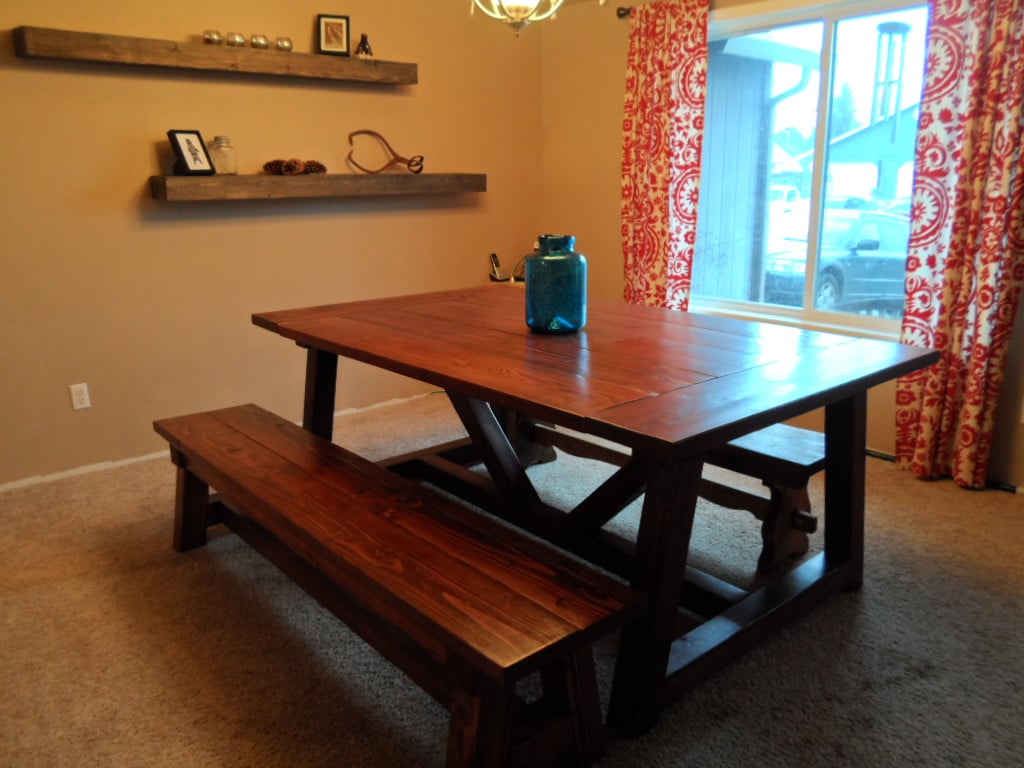
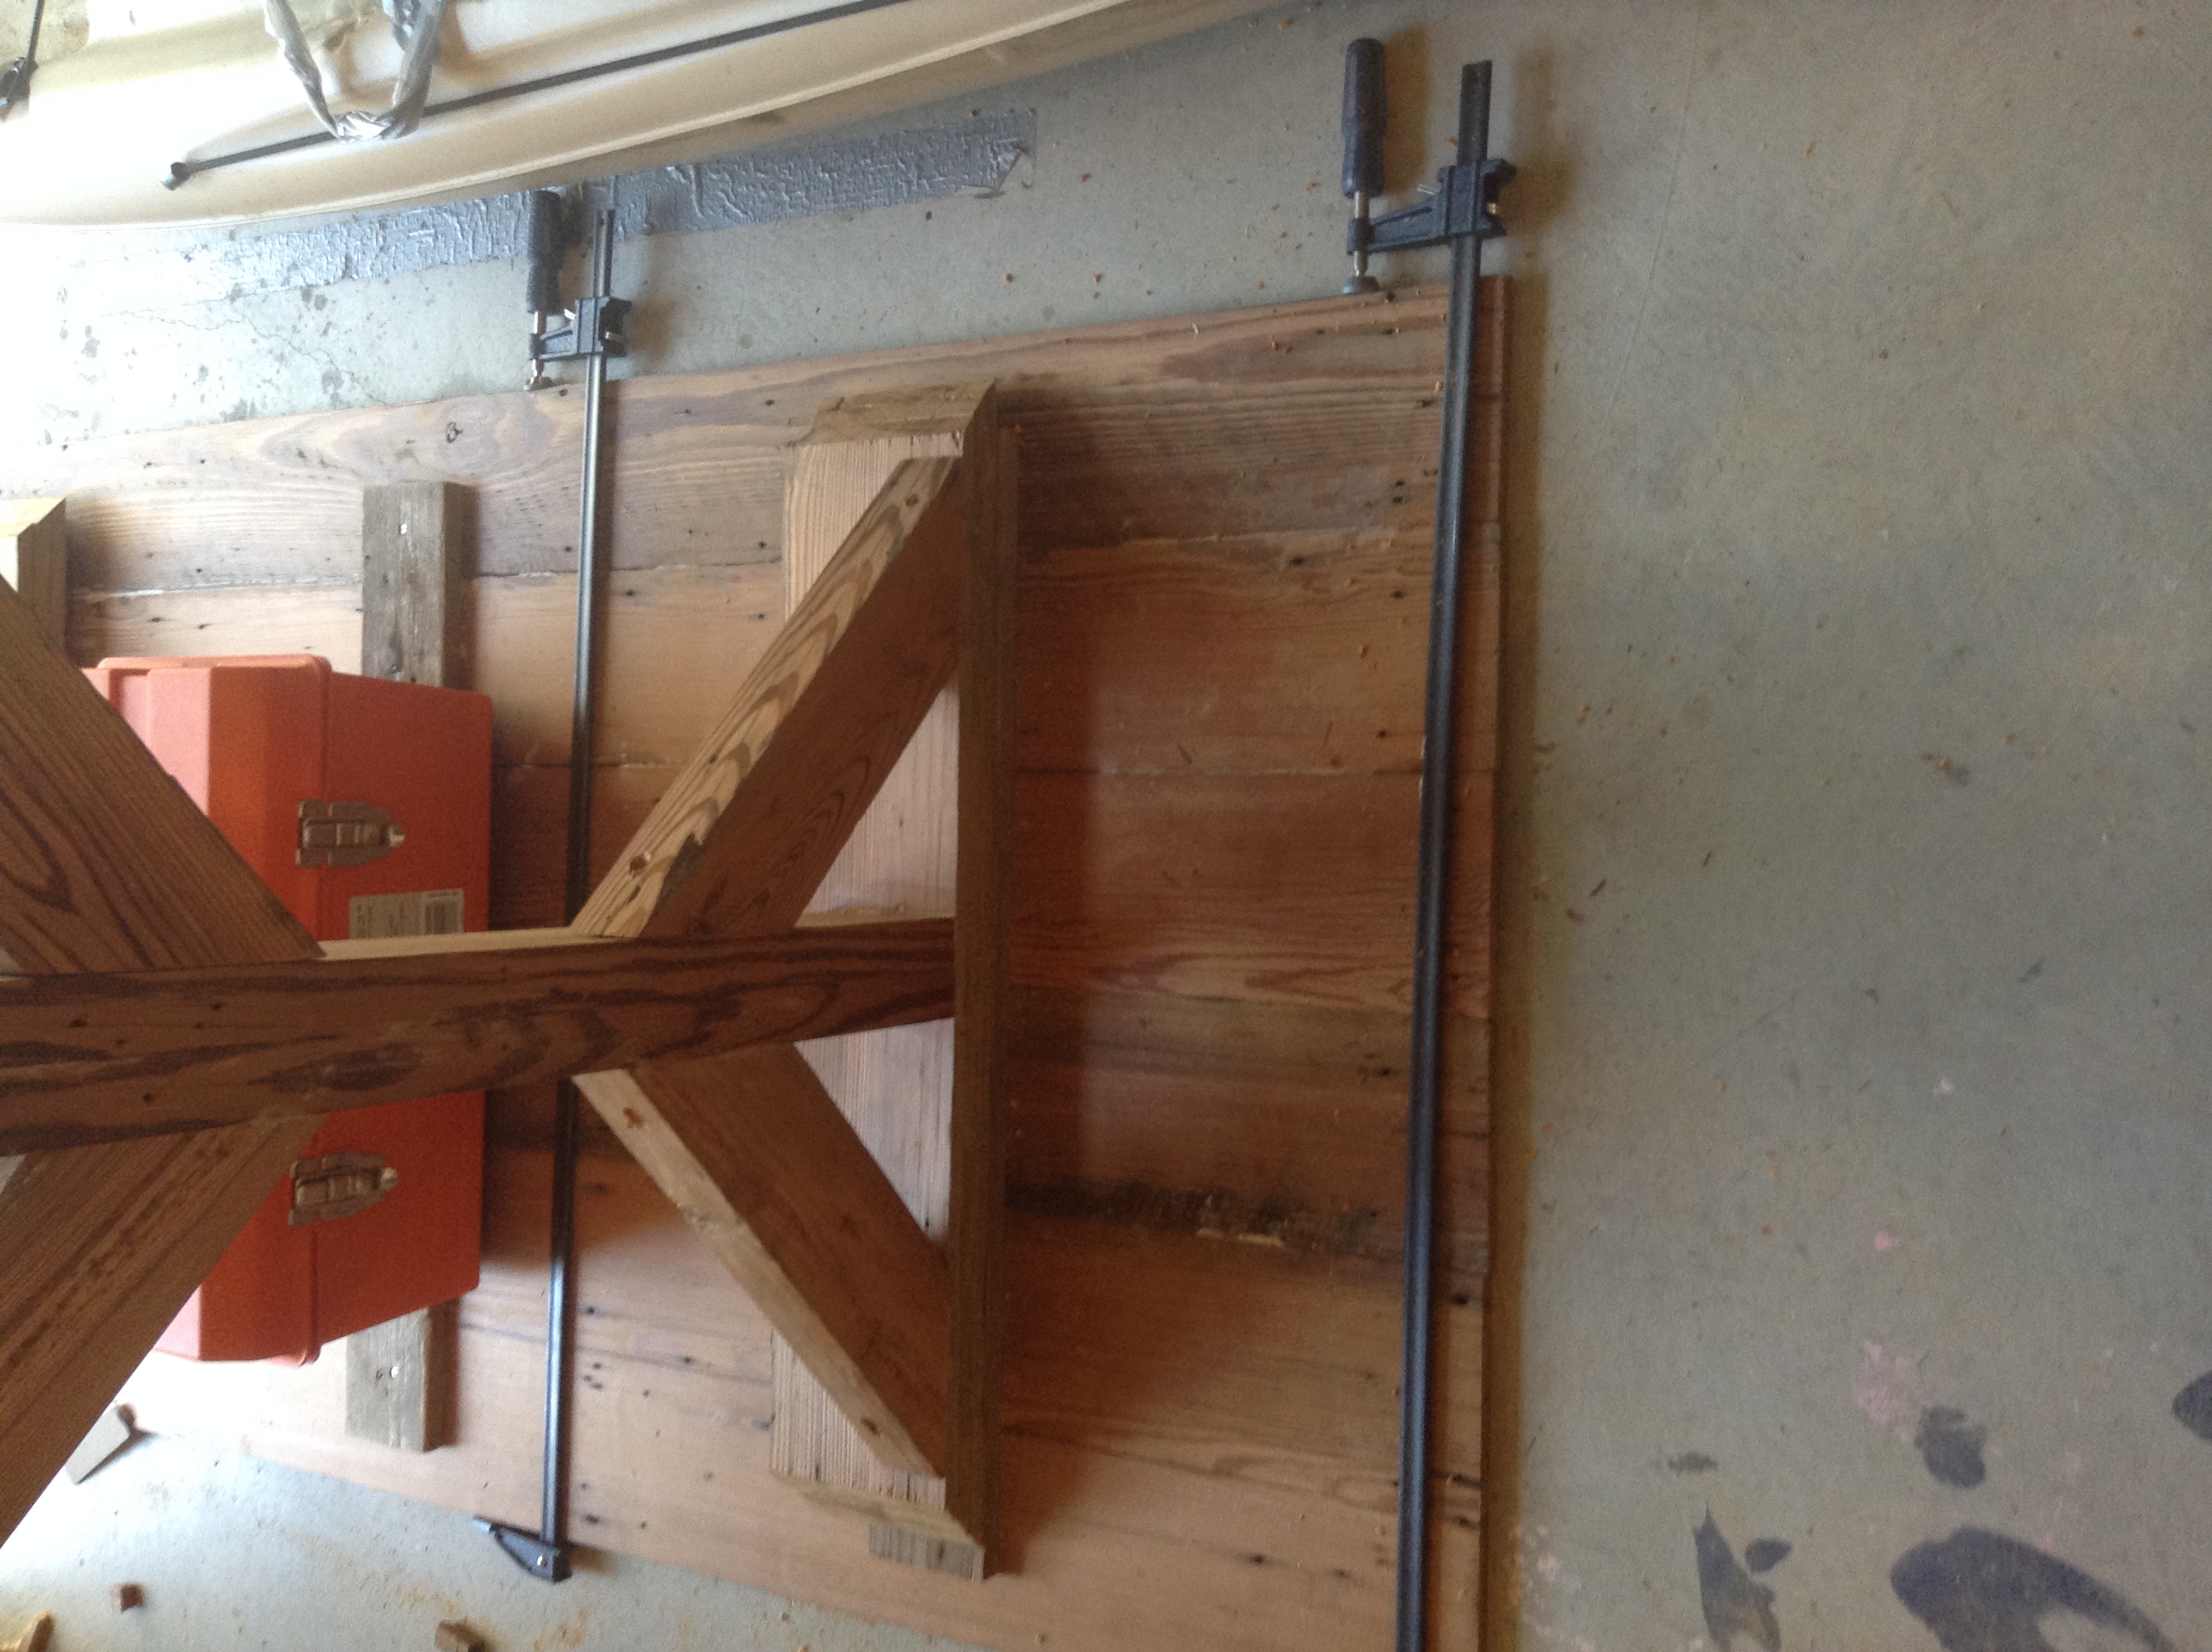
My husband and I love entertaining, but our small kitchen table was just not cutting it for both our space and our hosting abilities. We decided that instead of searching for the perfect table and spending a ton of money, we would just build our own table. We found that Ana's Rustic Table plans best matched what we were looking for, but my husband being the detailed person that he is didn’t just want to take her measurements and run with them. So we taped off the floor around our old table to decide how large we wanted our own table to be.
 We basically followed Ana White’s plans to a T.
  Until it got to the legs. Ana White used 2×4′s for her legs, but we decided we liked the look of chunkier 4×4 legs instead.
  We also did things in a different order, like attaching the legs to the apron before attaching the table top. This did make everything way easier when it came to painting, no tape needed.
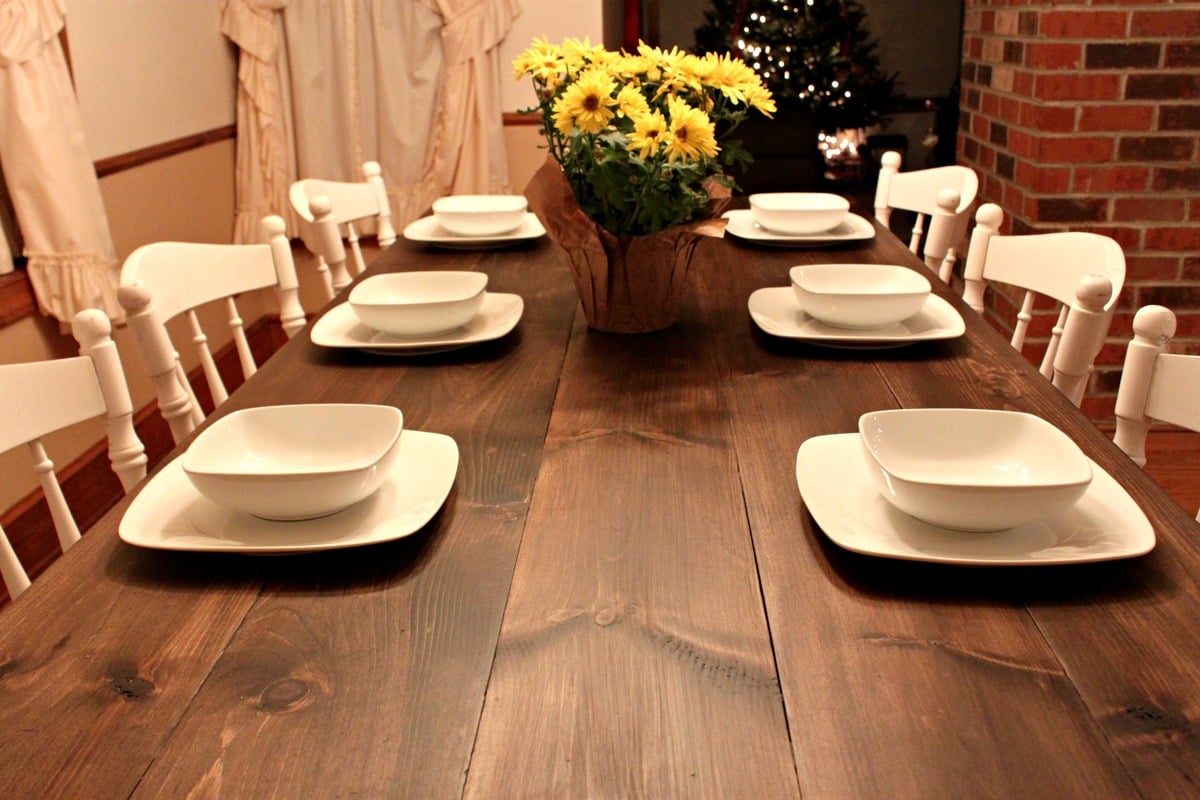
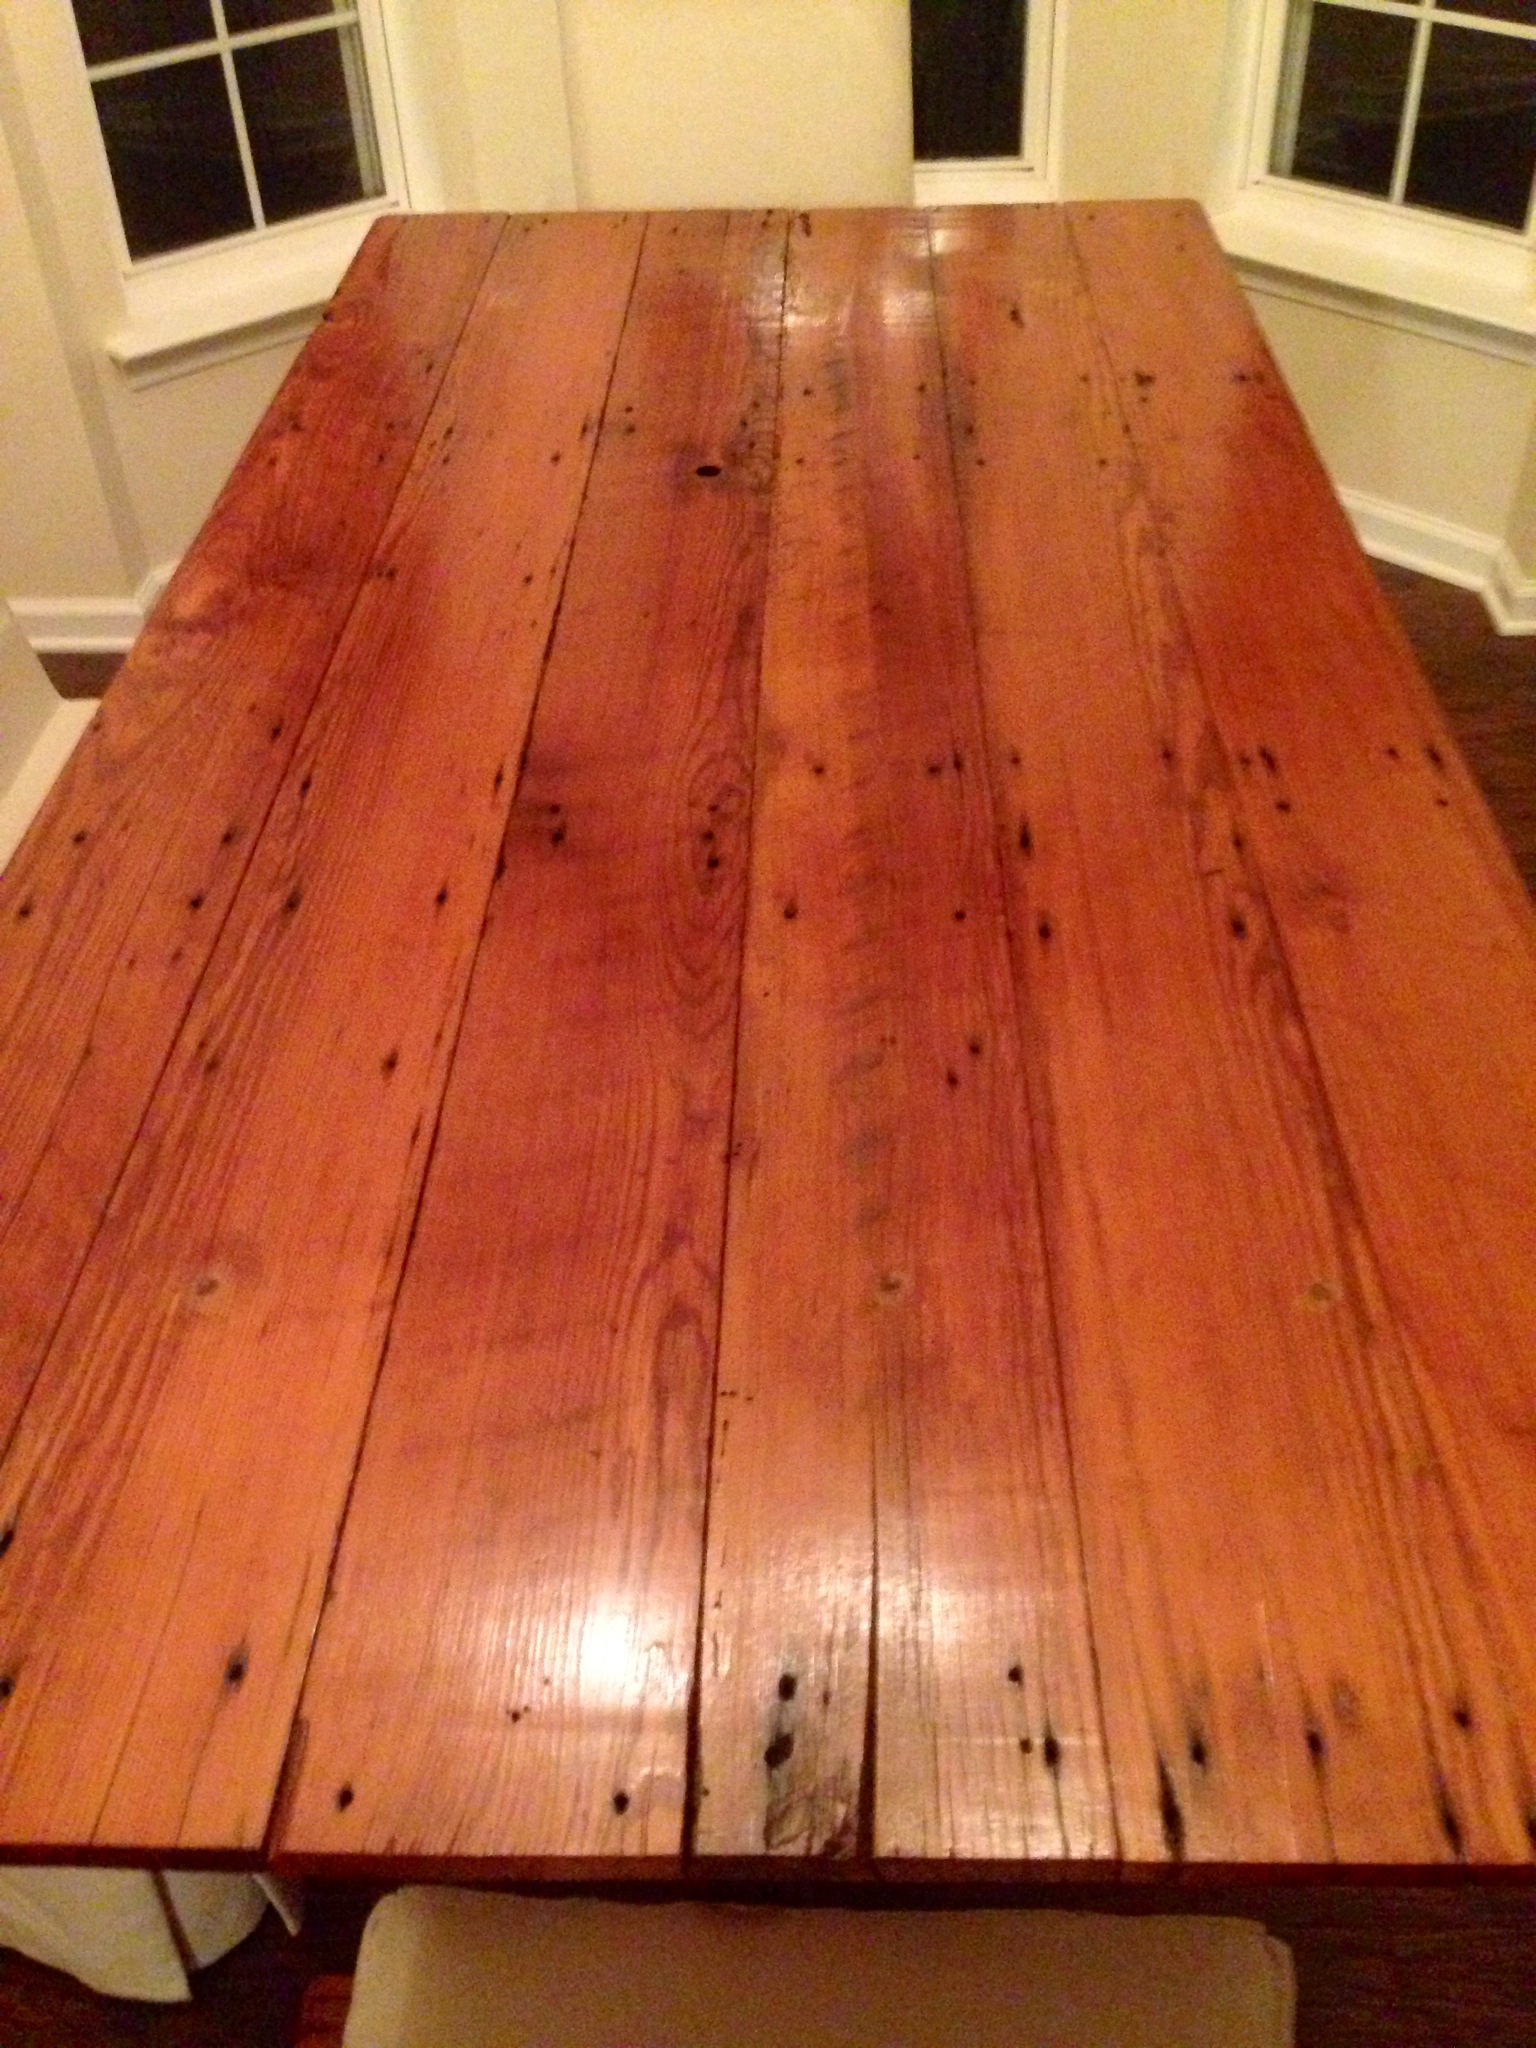
  We also stained the bottoms and sides of the tabletop boards before attaching them to the apron. After the top was attached I stained the top side and applied about 3-4 coats of Matte polyurethane. I like the matte finish because it doesn’t add any sheen and makes things look even more rustic; however, we’ll have to add a regular coat of poly as well because the matte is too soft for something that will see such rough use over the years.
  And now for what you’re all wondering about, how much did this project cost us?
Mon, 12/31/2012 - 09:43
Your table is gorgeous! You did an amazing job.
I am getting ready to attempt my first two projects, bookshelves and a buffet table. I had a couple of questions about how you got such a consistent stain.
1) The Stain - What kind of stain did you use? How many coats did it take? Did you use a conditioner first?
2) Wood filler - How did you get the wood filler to match the stained areas so well? What kind did you use?
Thanks for the advice! I was thinking I would have to paint the buffet but after seeing your table I think I may actually attempt the stain.
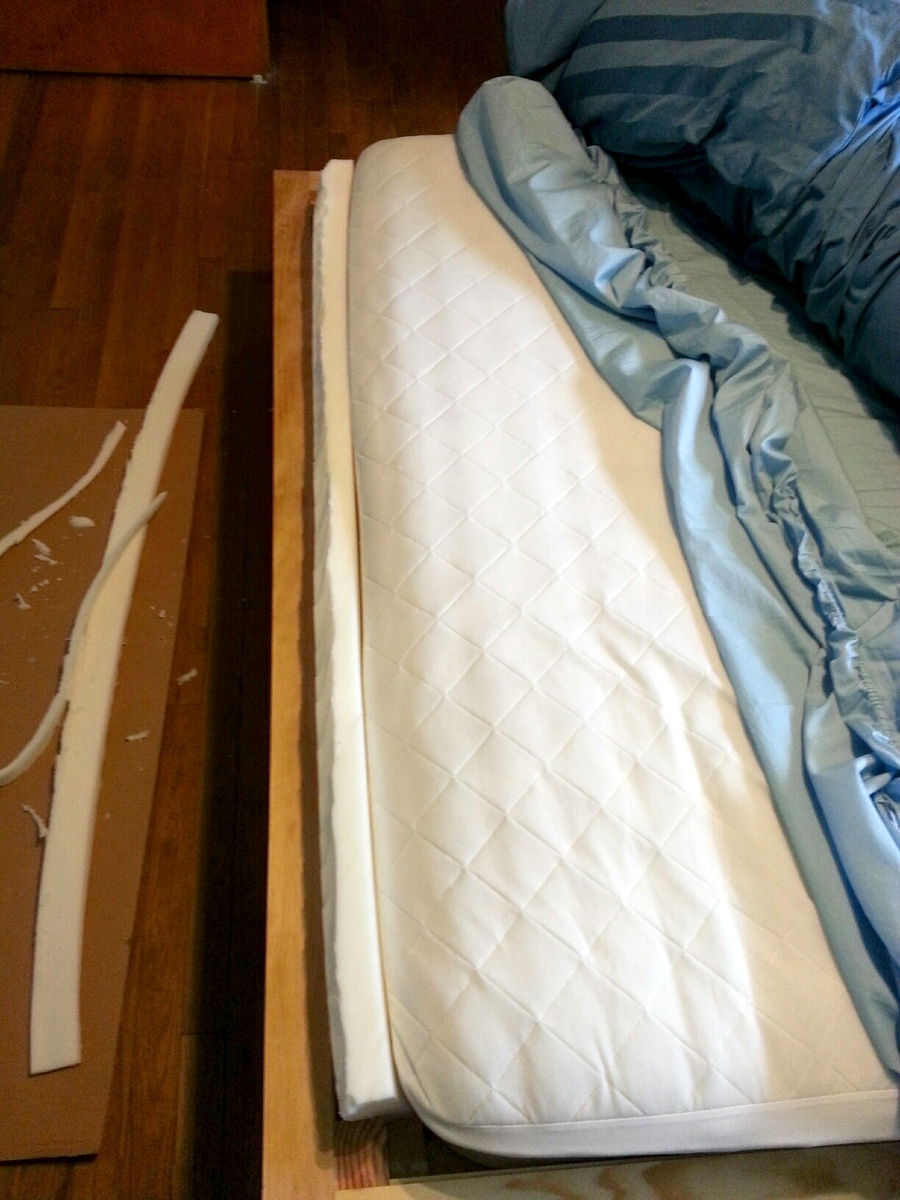
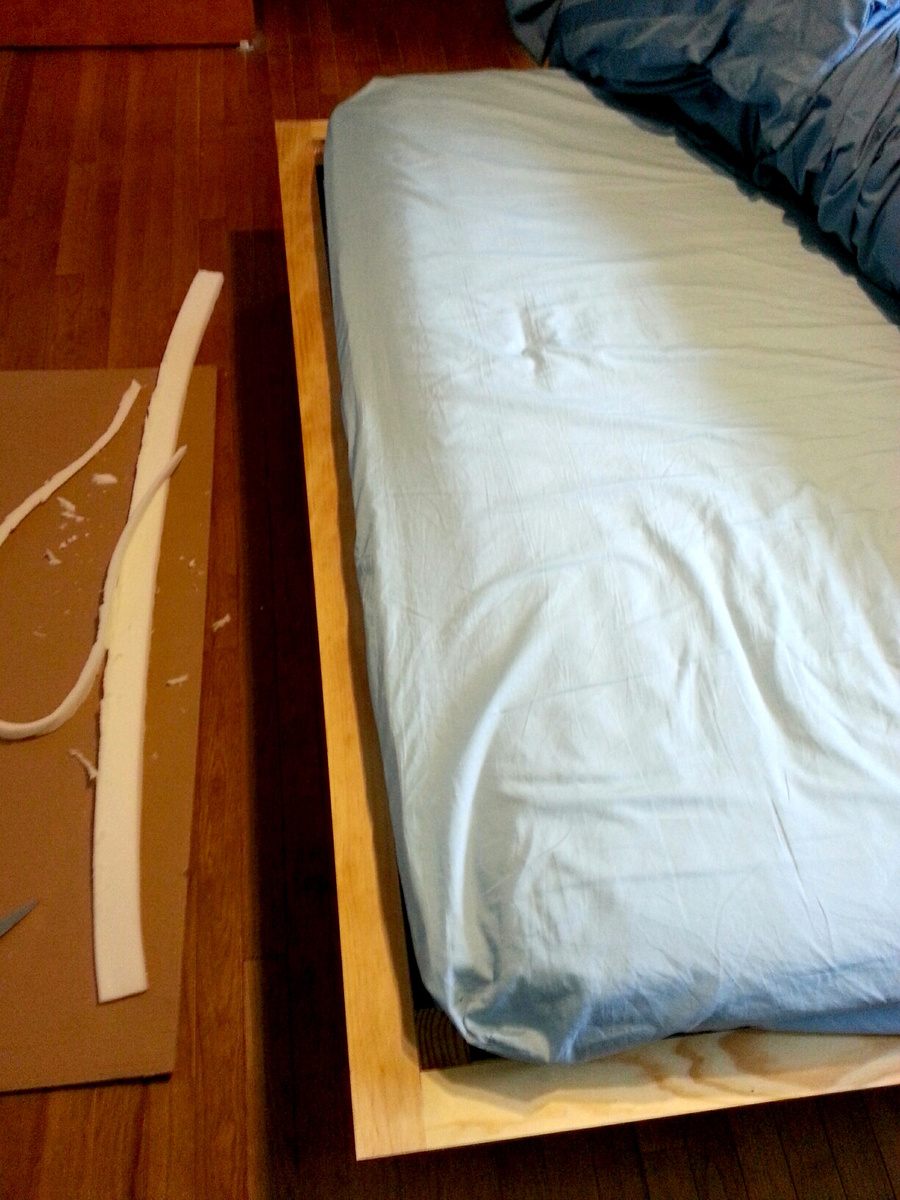
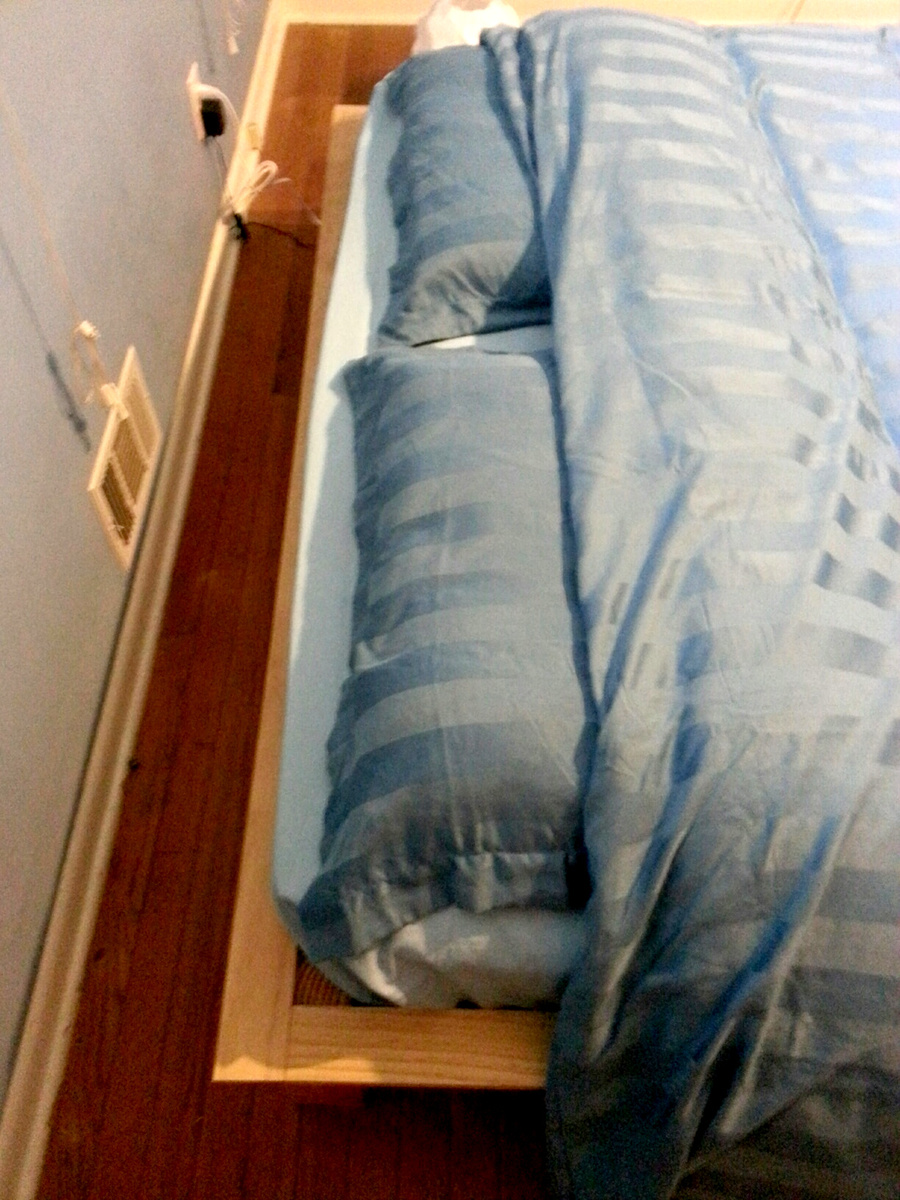
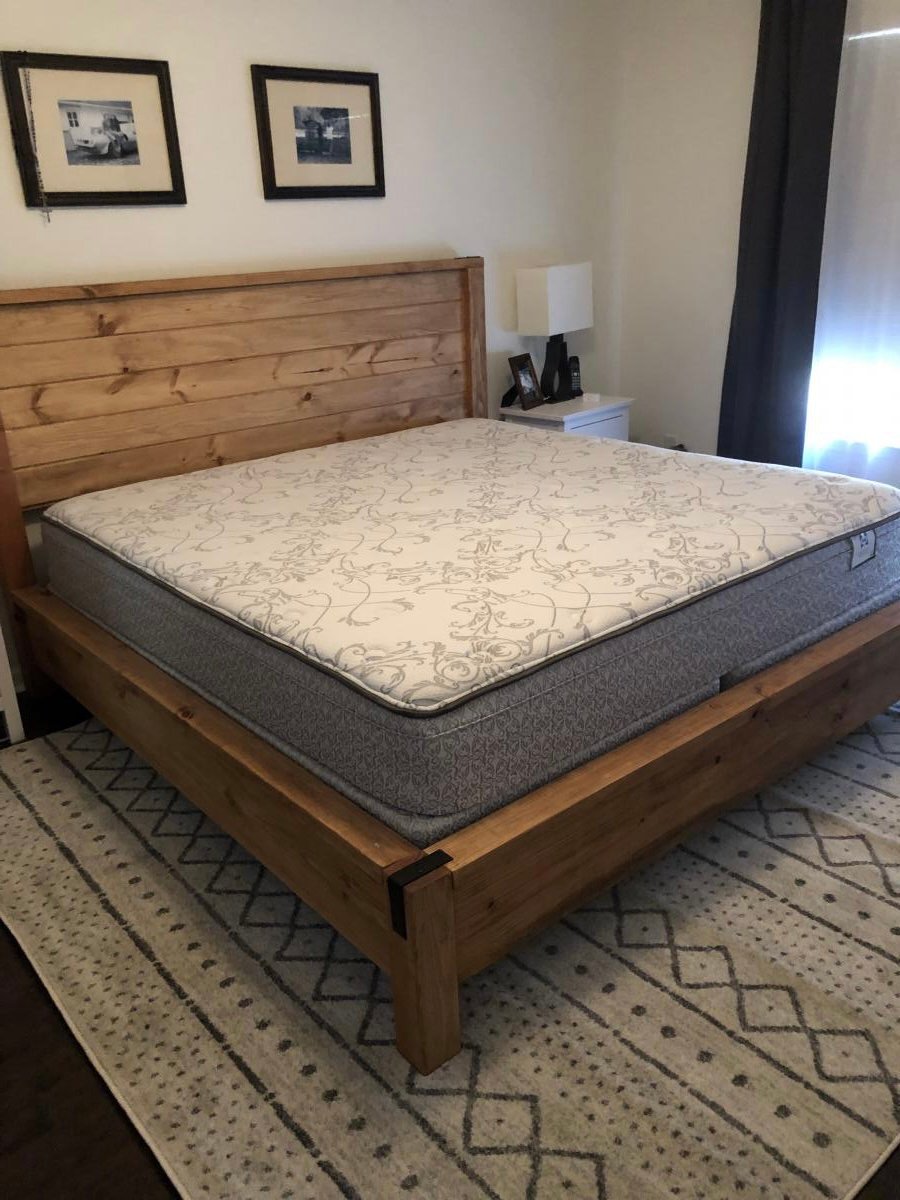
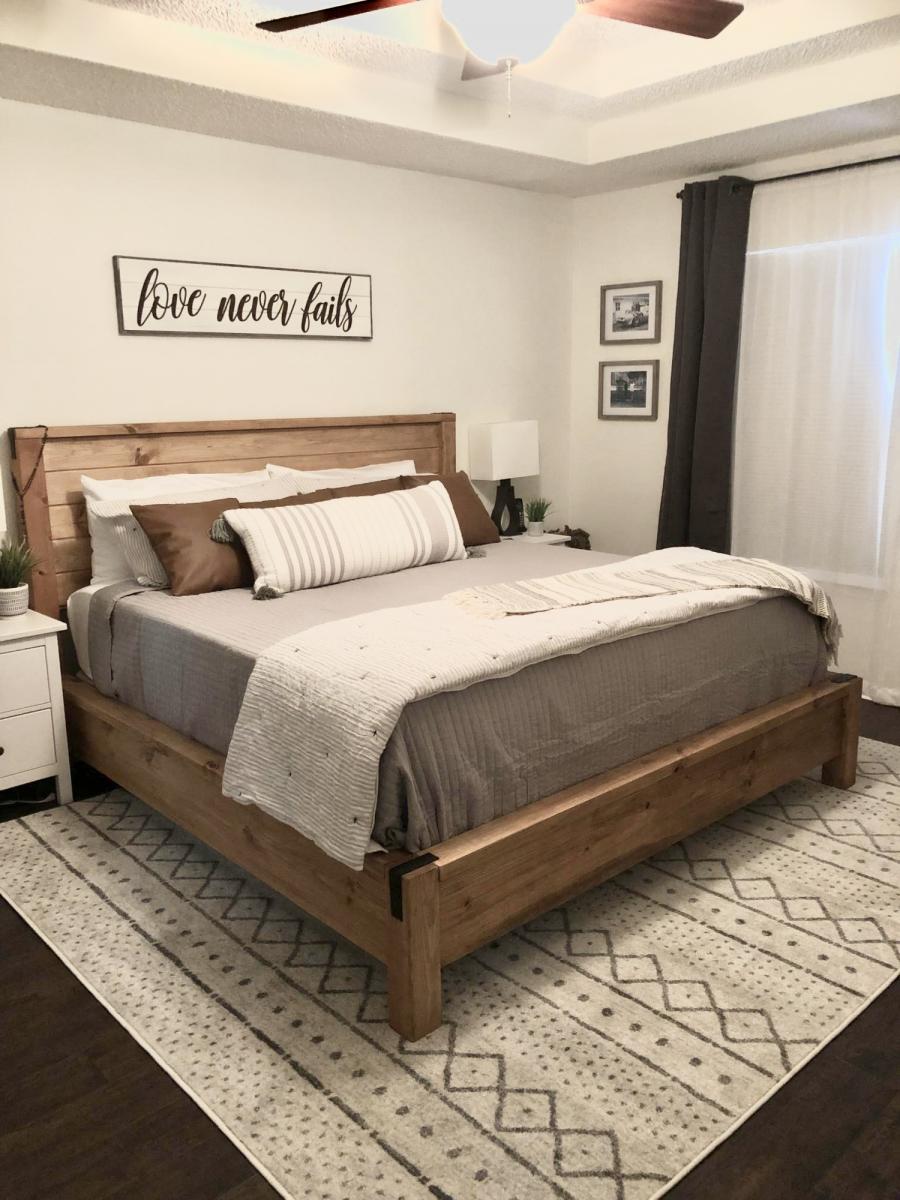
My hubby is 6'5'' tall. Since most matresses are 80 inches long, he mostly ends up with his feet hanging out of the bed (since you don't lay your head down at the very beginning of the mattress, right?). So I tried to solve this problem by making the bed 4'' longer than the plans suggested. I added 2'' of foam on each end of the bed, so now its 84'' long and my hubby fits perfectly!
Thanks for the great plans, I had a blast building my own bed!
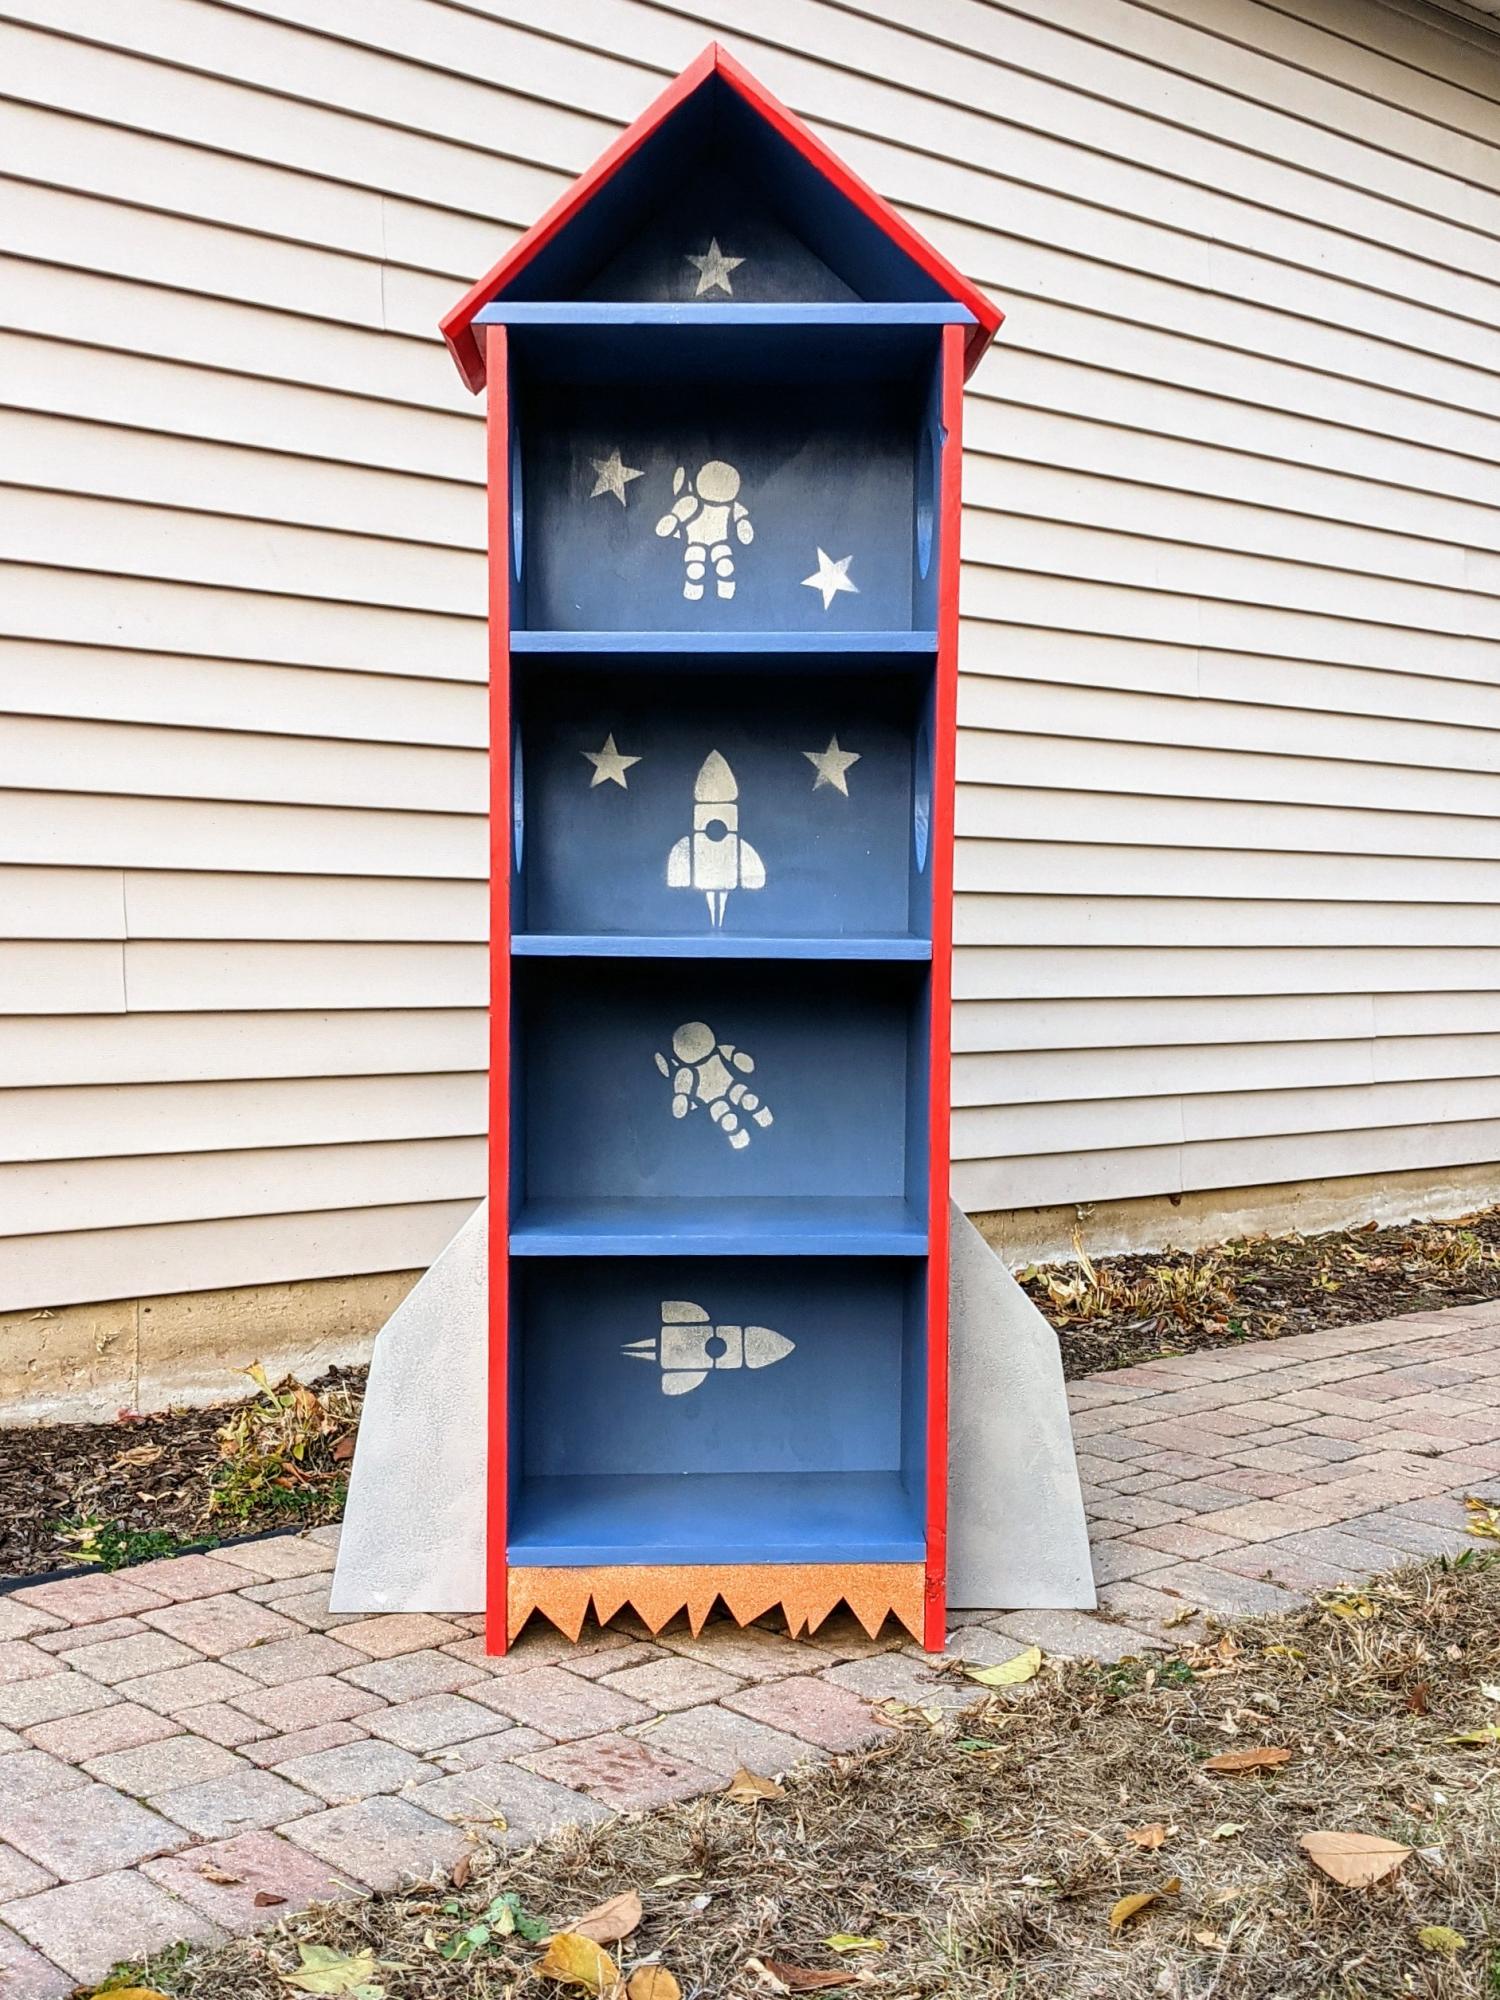
Pretty much followed the steps as outlined in the rocket bookcase plans. Googled astronaut and spaceship stencils and free hand drew those on construction paper. This bookcase is heading to my 3 year old son's room and he's pretty excited to fill it with toys and books.
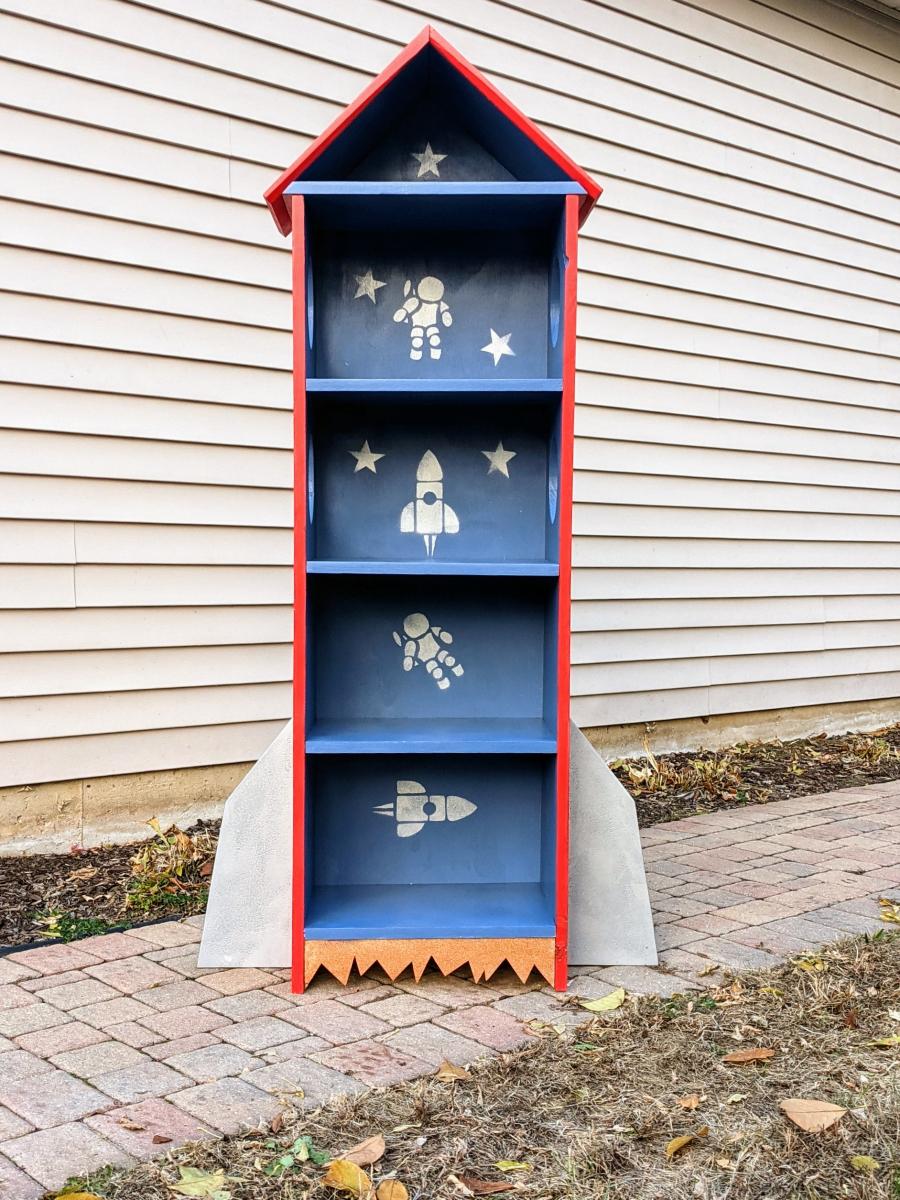
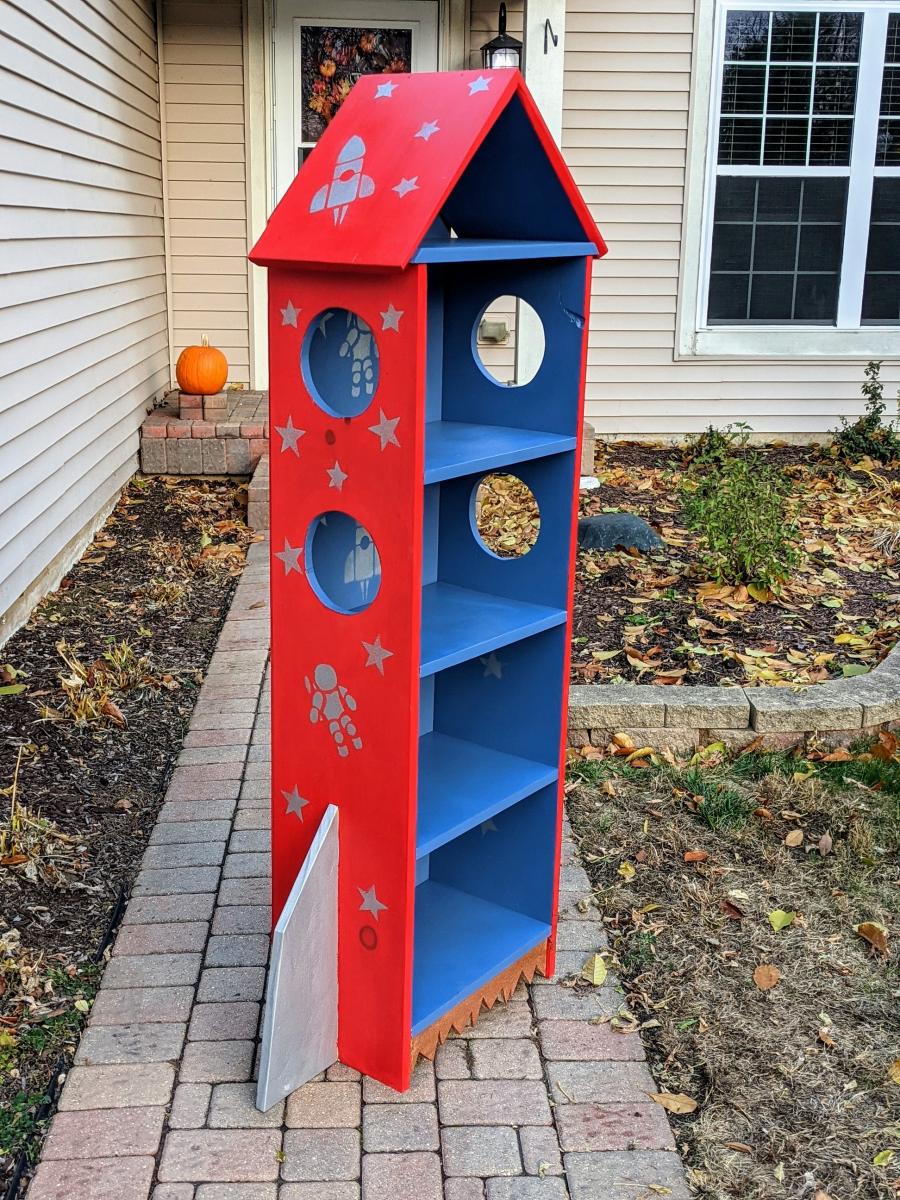
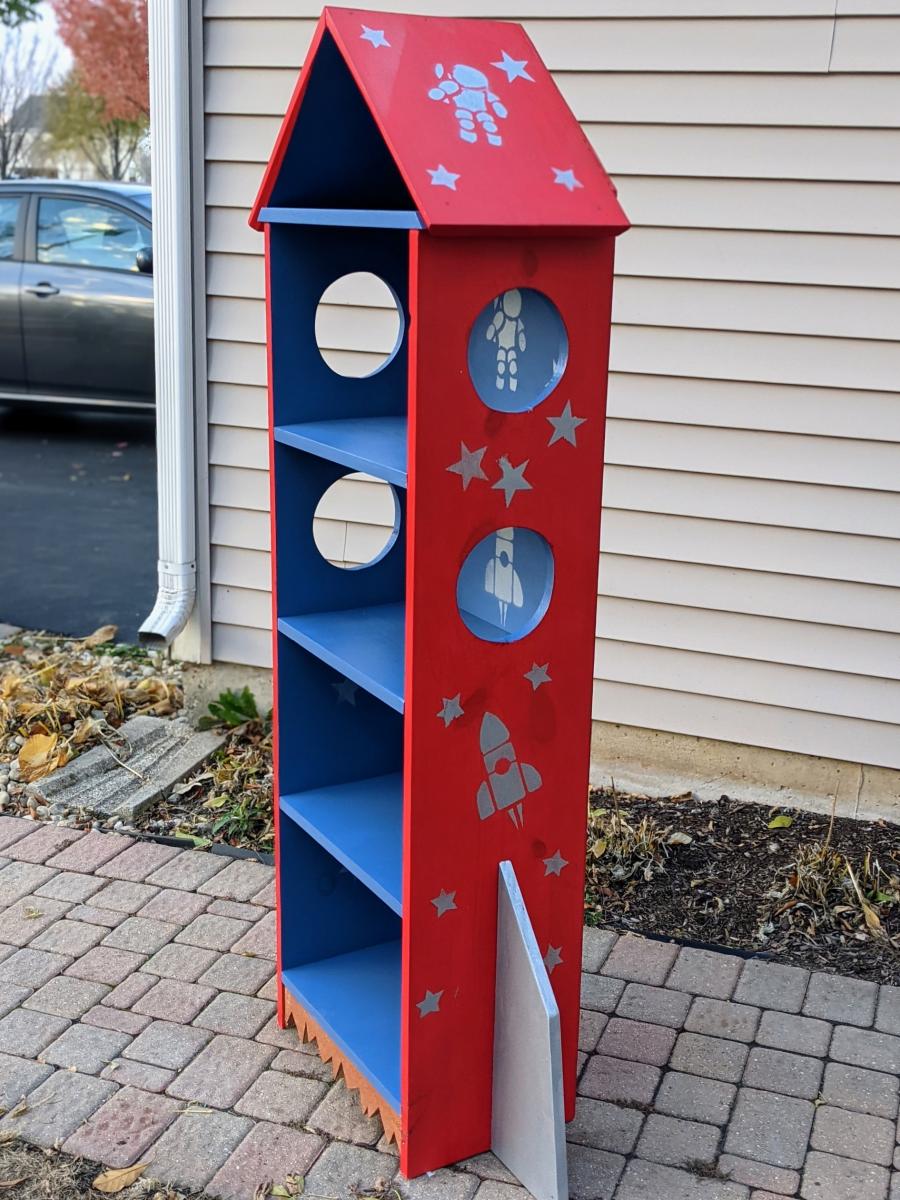
This was my first project that I've built and I feel really great about how it turned out!


Thu, 01/24/2013 - 14:25
Great job! Your bookshelf looks solid and the color is crisp against the darker wall. Love the frames too!
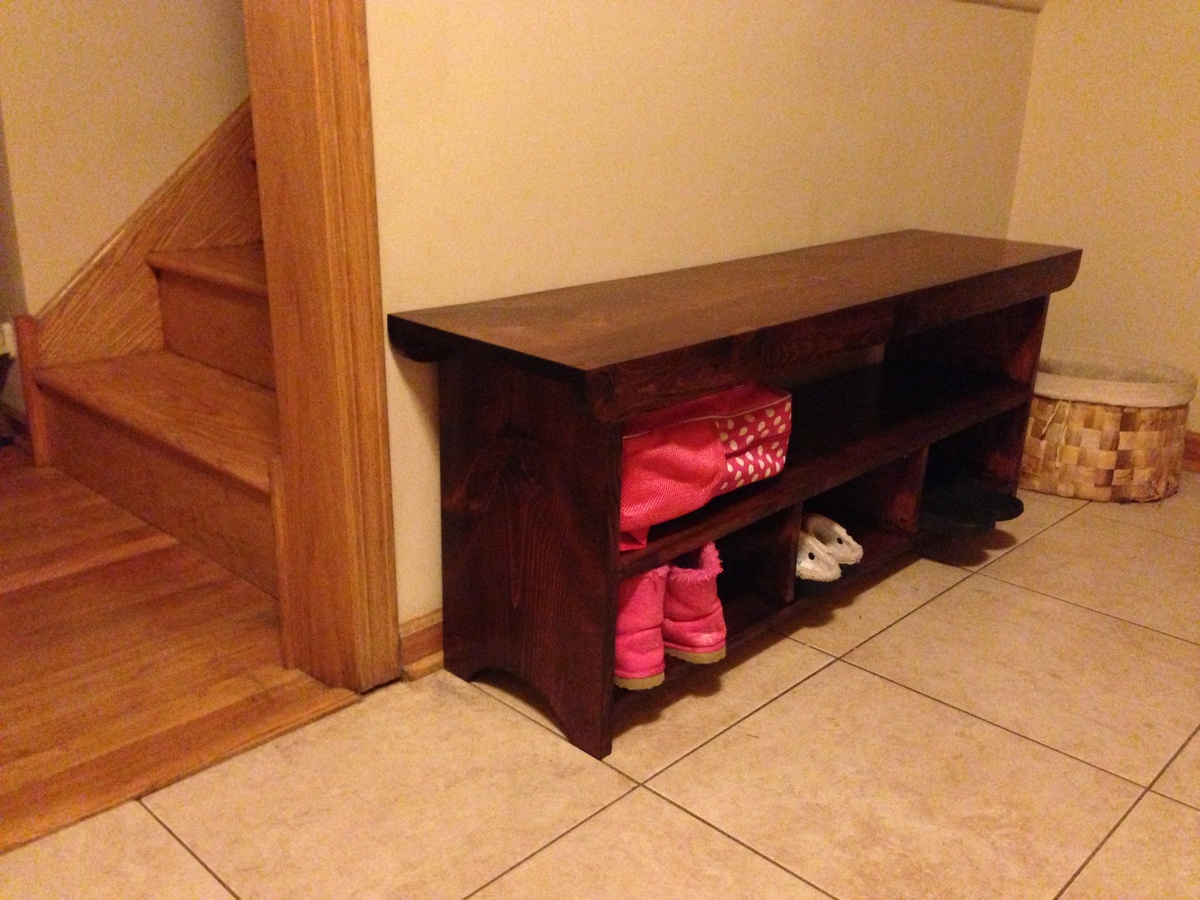
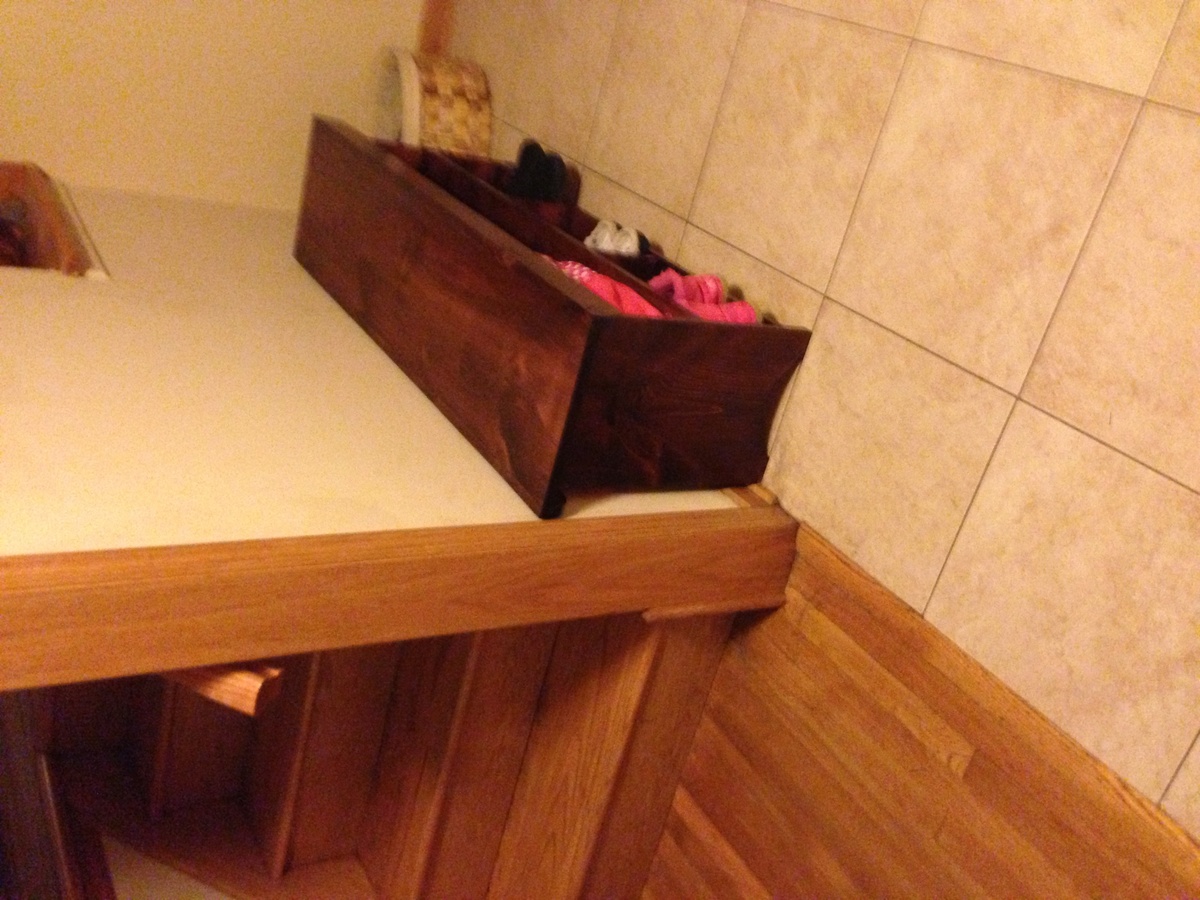
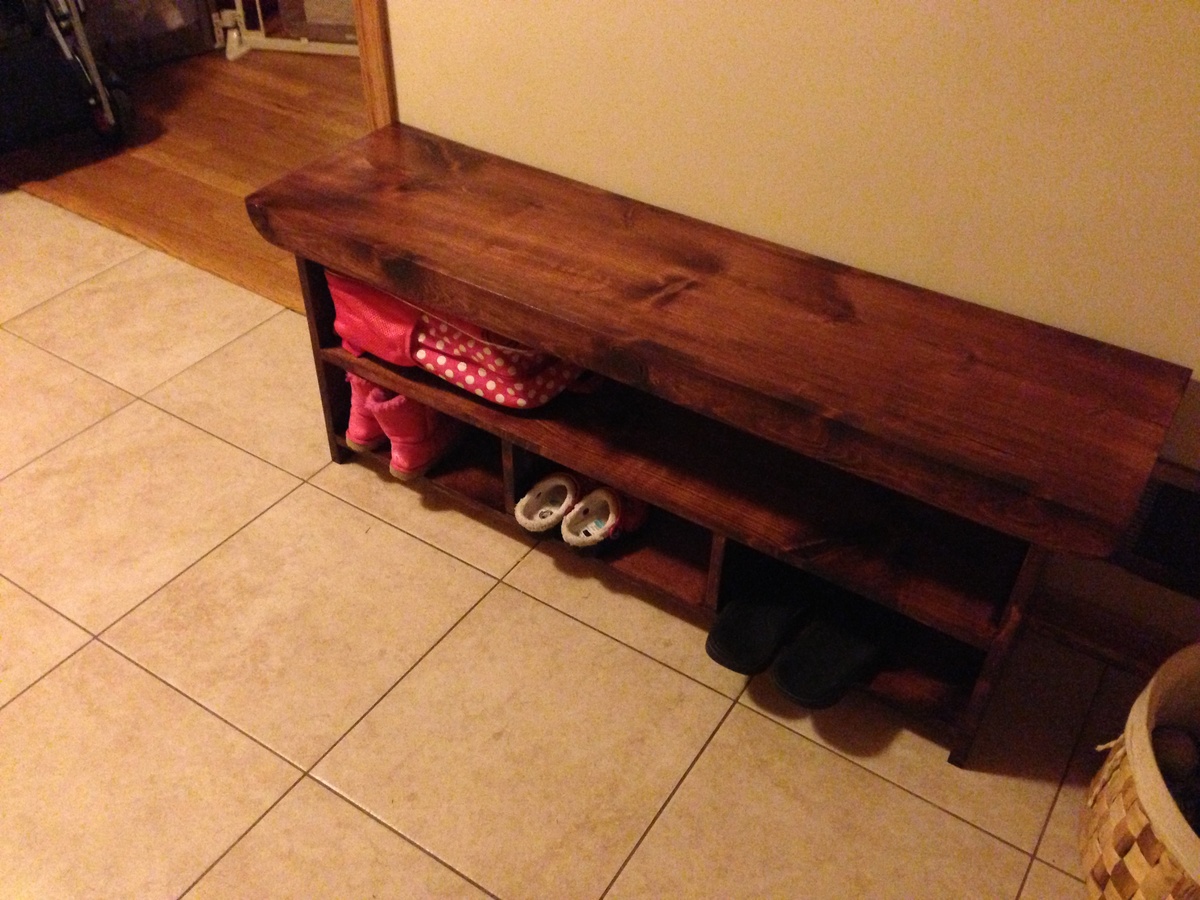
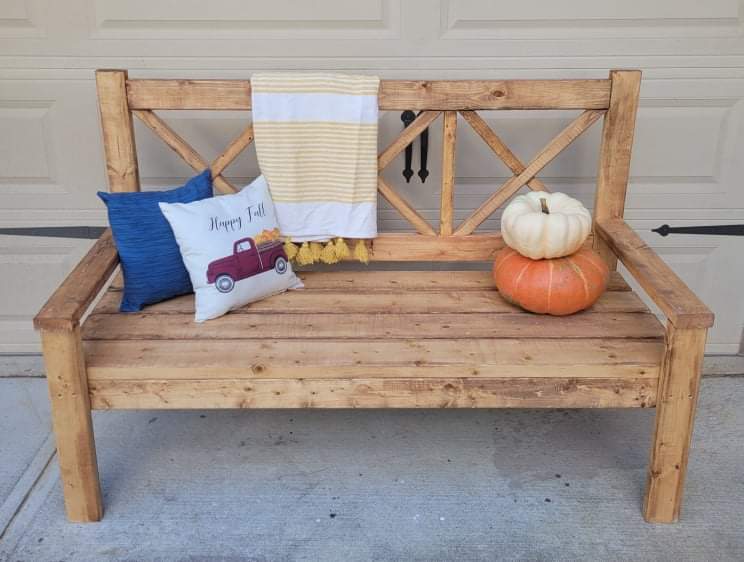
We needed a bench to hold shoes and bags on the foyer, and this plan fit the bill. I stretched the bench one foot so 3 kids could sit on it and to add one more cubby. I used pocket holes everywhere I could, so I had to modify the assembly order. We're excited to start using our new bench!

I used elements of both the Emme Twin Bed and Farmhouse Storage Bed to create this perfect bed for my daughter. Thank you so much for your fantastic plans Ana!
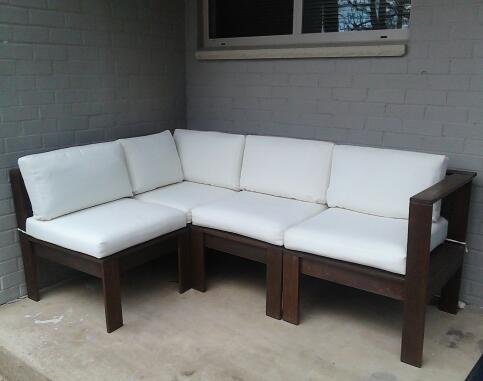
So glad these plans were posted so that I could build my own outdoor sectional. I built two armless and two corner/end pieces. I used cedar with American Walnut stain and clear/satin spar urethane. I purchased the cushions online. They only had 24x24"; so for the back cushions, I used a seam ripper to open the cushion, cut the foam and extra fabric, and re-sew.
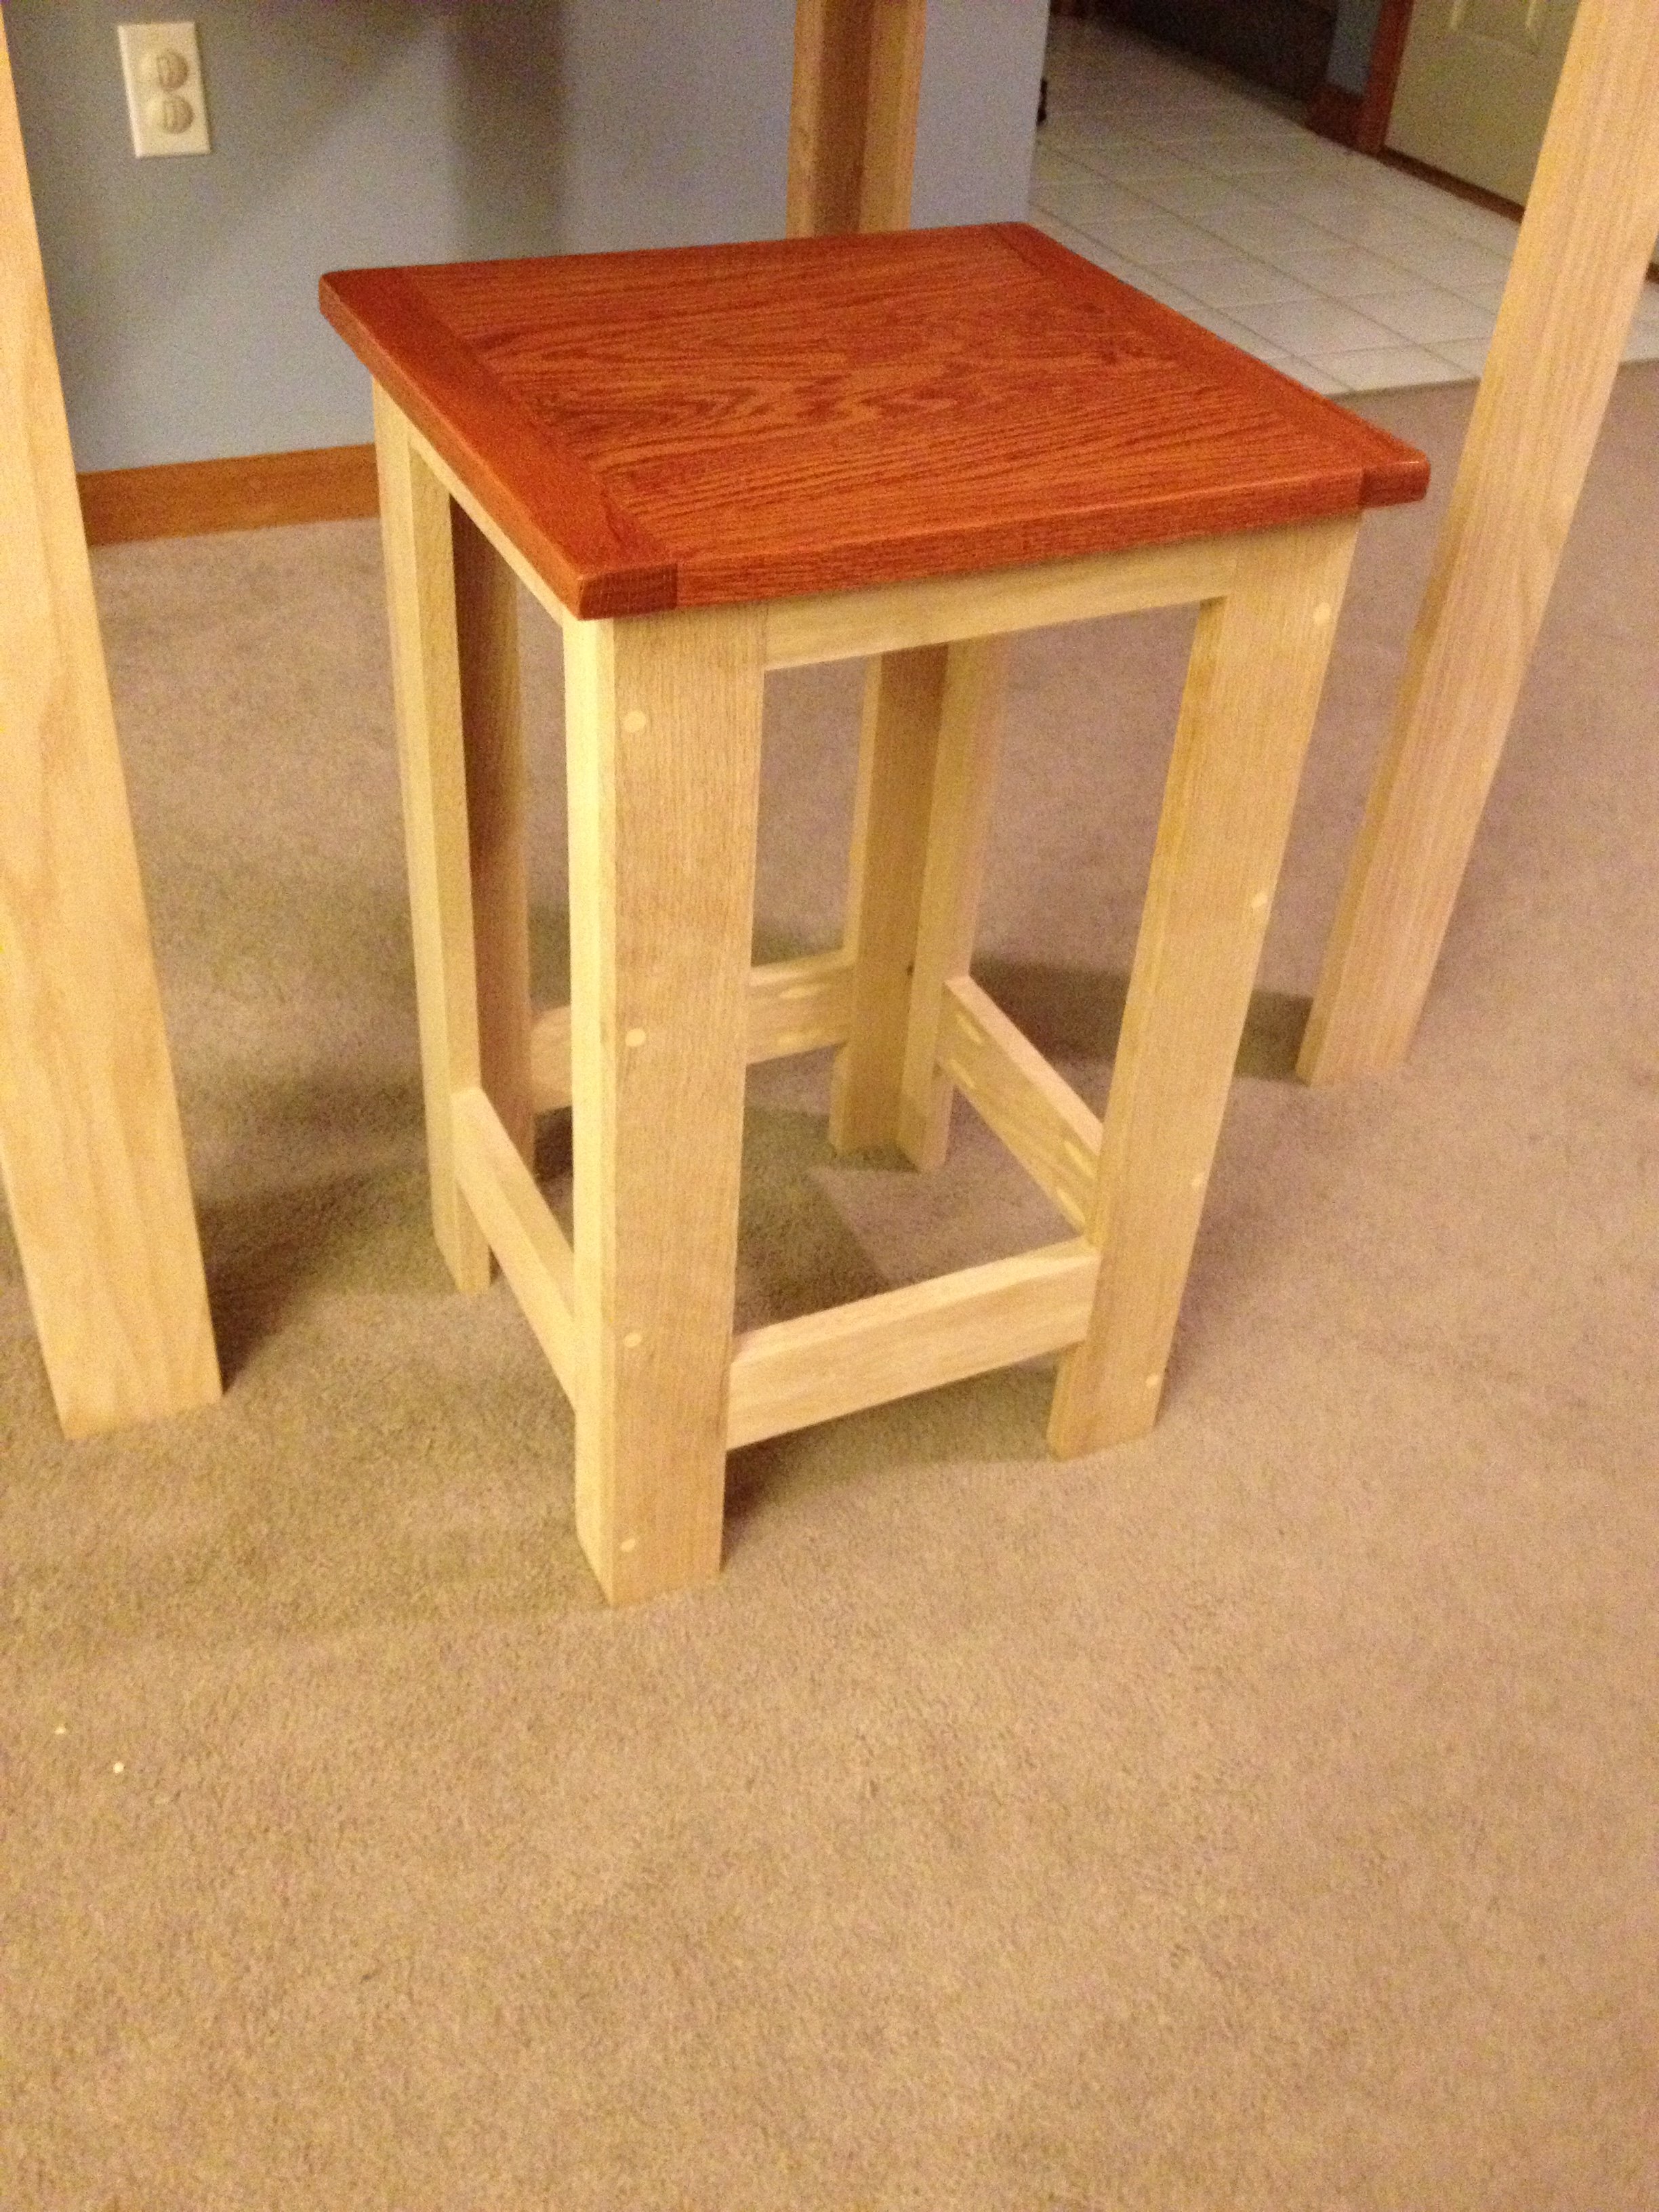
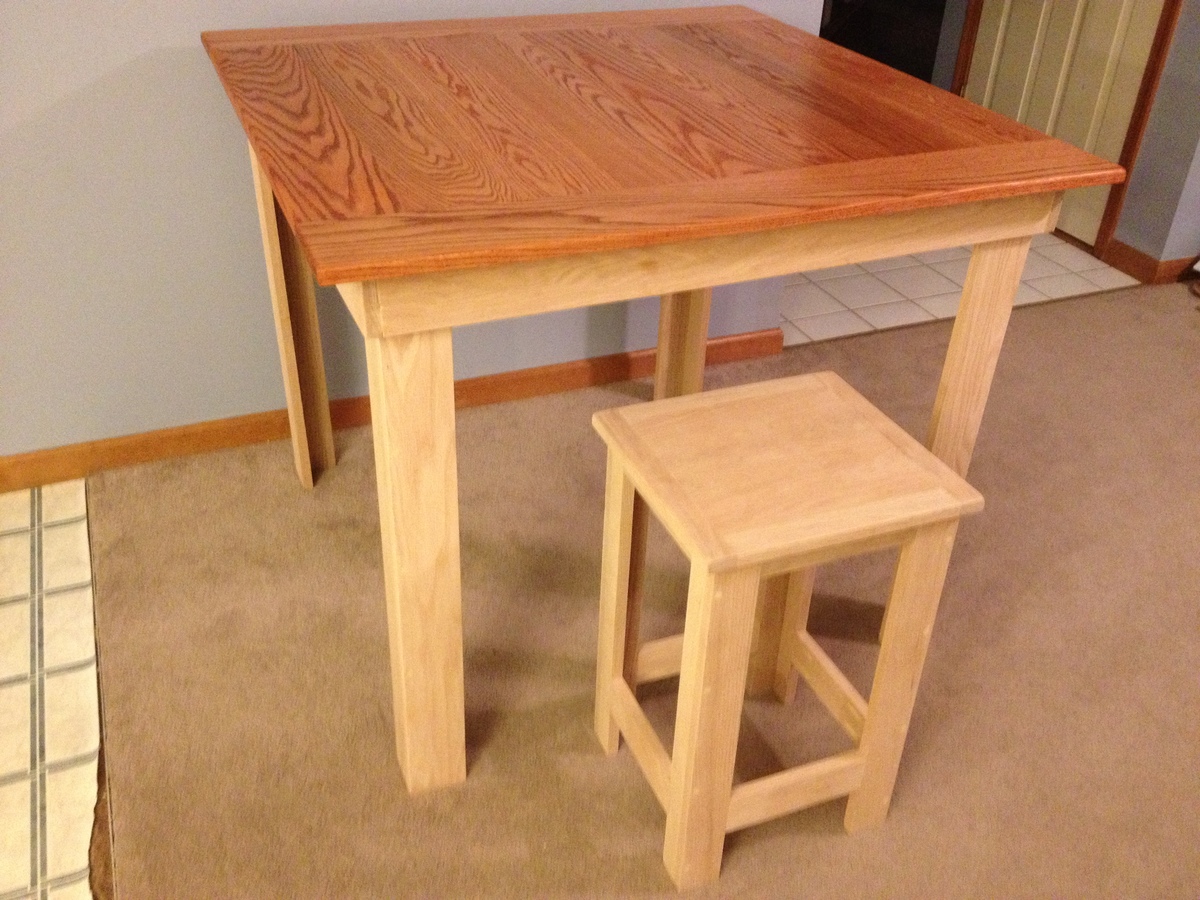
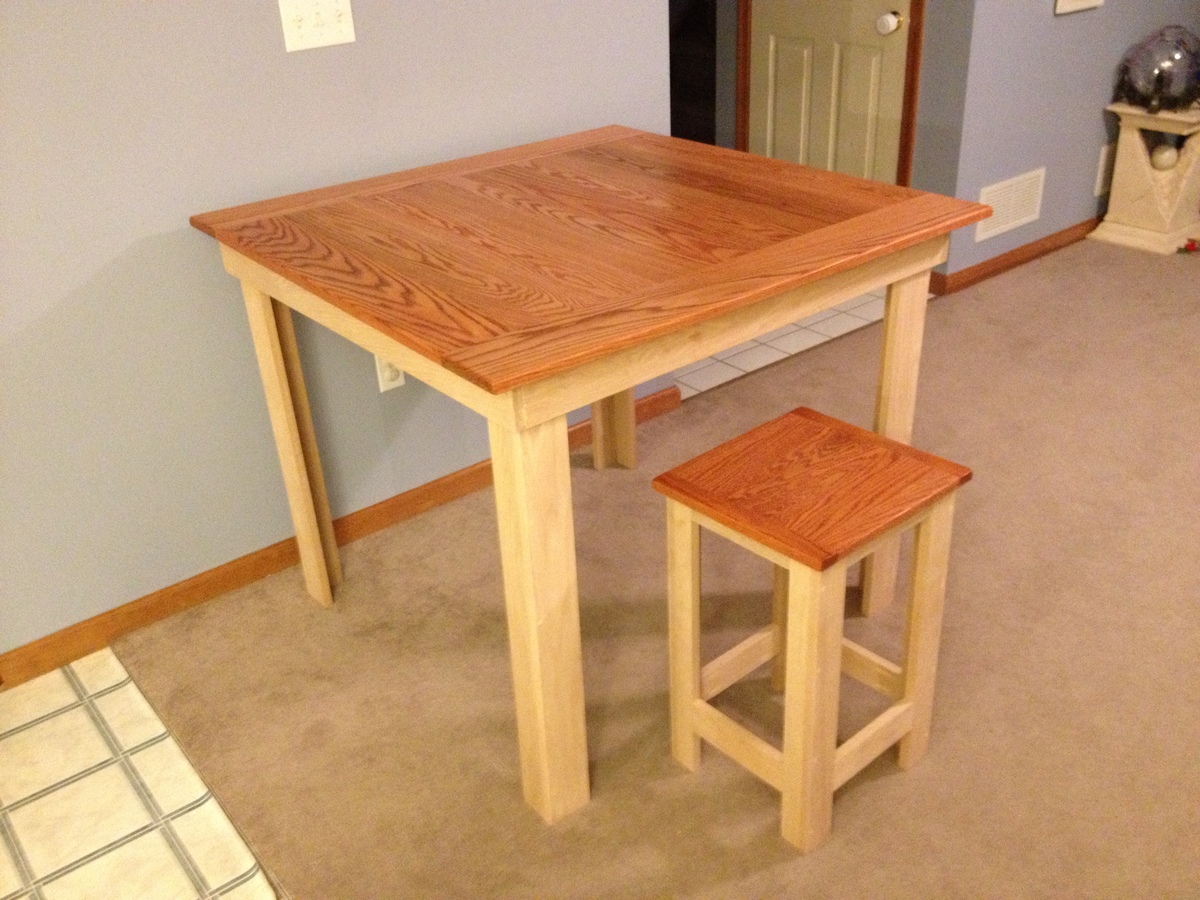
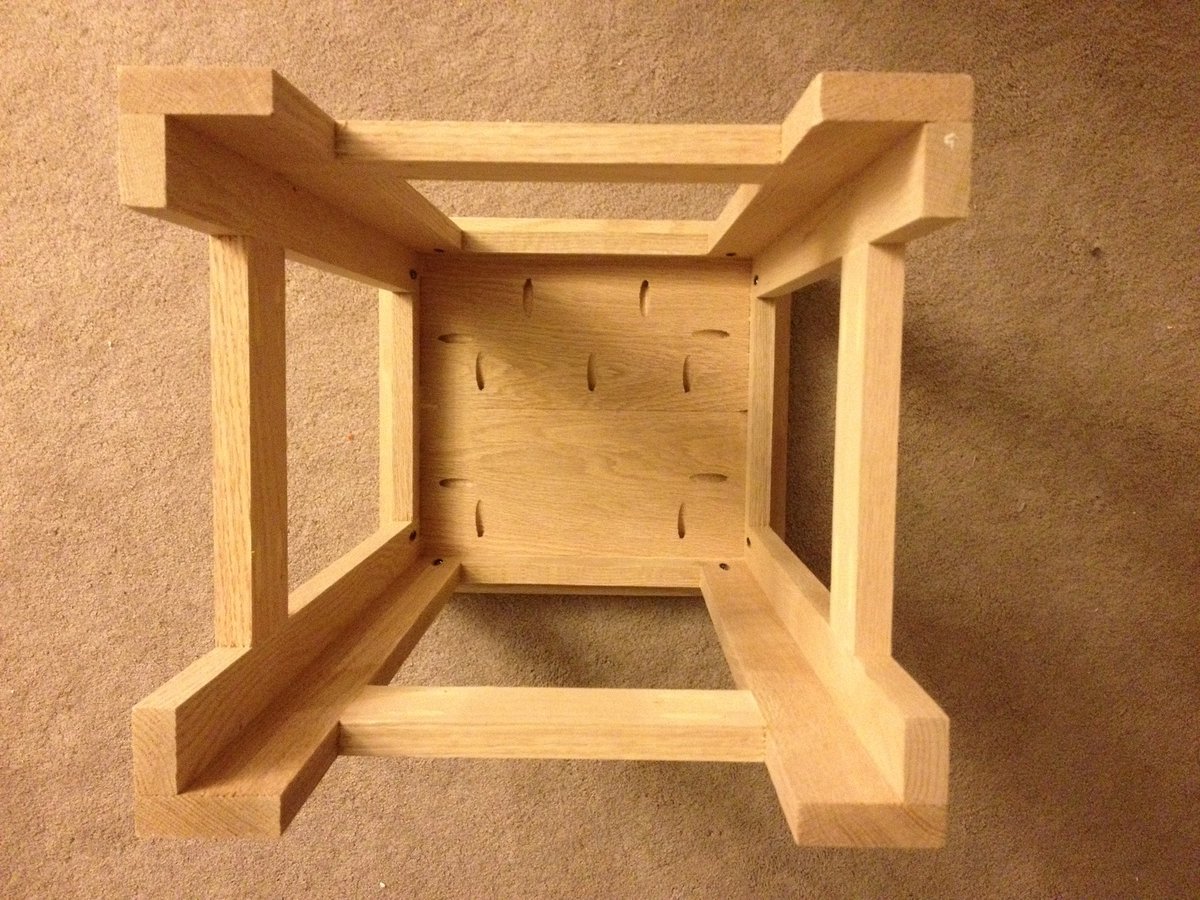
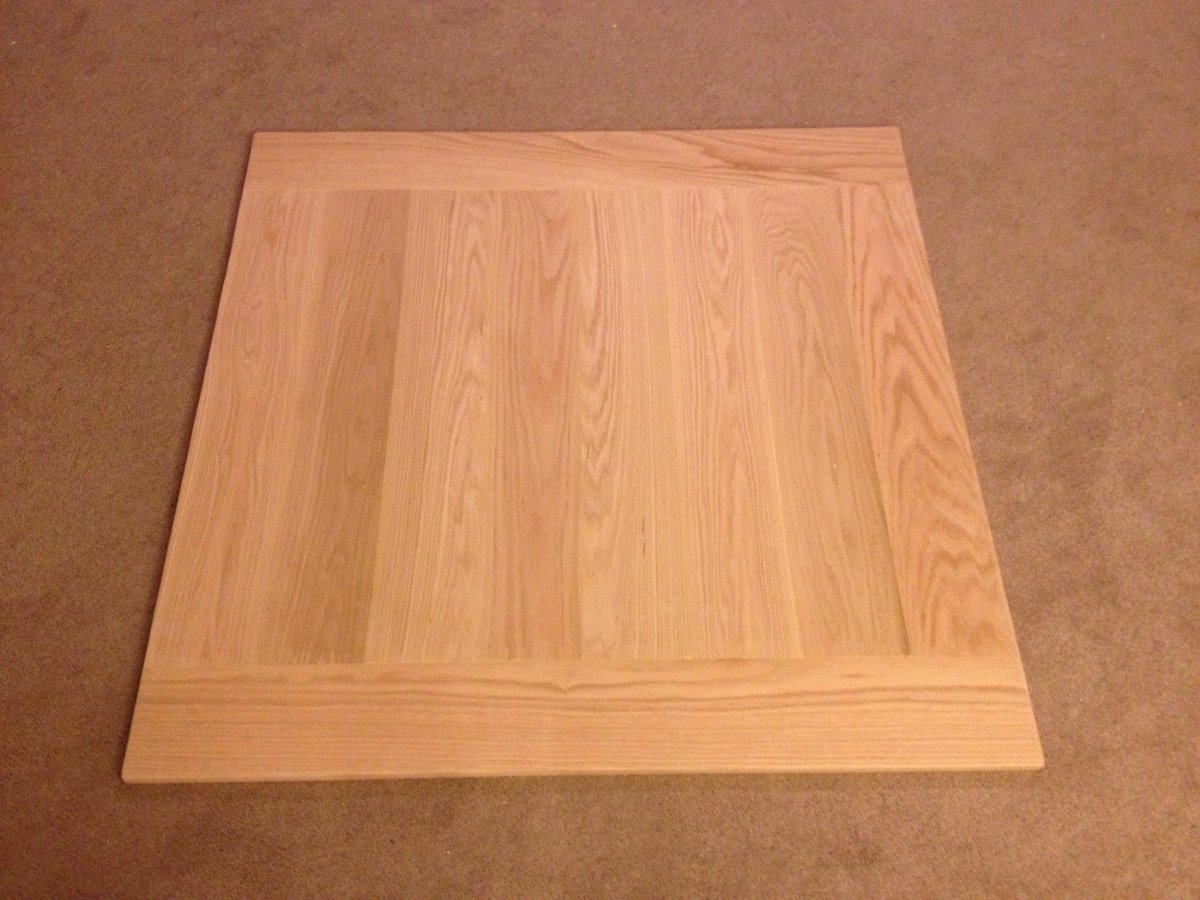
As stated in my table post, I just wasn't happy with what I was finding in the stores as nothing seamed sturdy nor made out of solid material. So I built a pub table and these stools to match.
I combined the stools from multiple projects and eventually just made my own measurements and mimicked the table construction that I made.
Although more expensive, I used Oak so it is sturdy and will take more than normal wear and tear (as I have three young boys under 10)

Made a few adjustments to the farmhouse toy box. Made it a little bigger and added Xs out of 1x2s around it to give it a little extra something! I'm using it as a storage coffee table and I couldn't be happier with it! So in love!
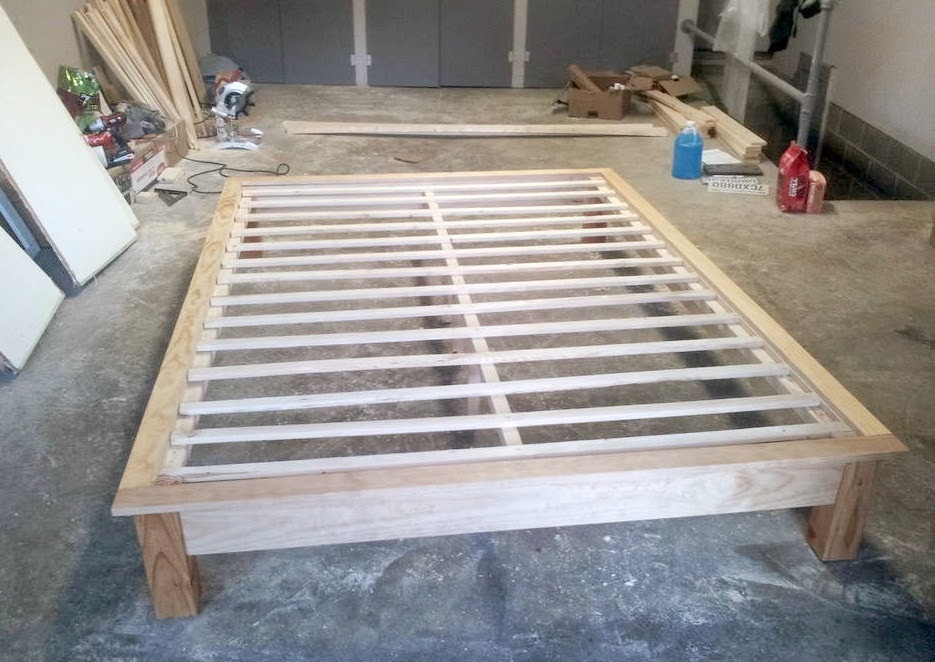
Made this bed from Ana's plans. Modified it with rail so I can add my box spring. Cost was approximately $160 for lumber, screws and stain. Absolutely loved the plans and easy to follow or modify if needed.
Tue, 02/23/2021 - 20:12
This is gorgeous! Is there anyway you could post your modifications? Very nice work!!!
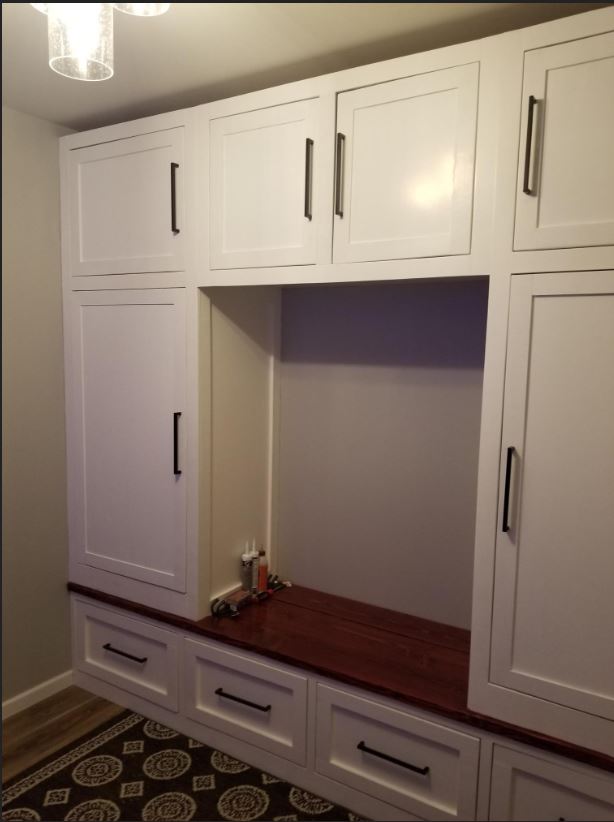
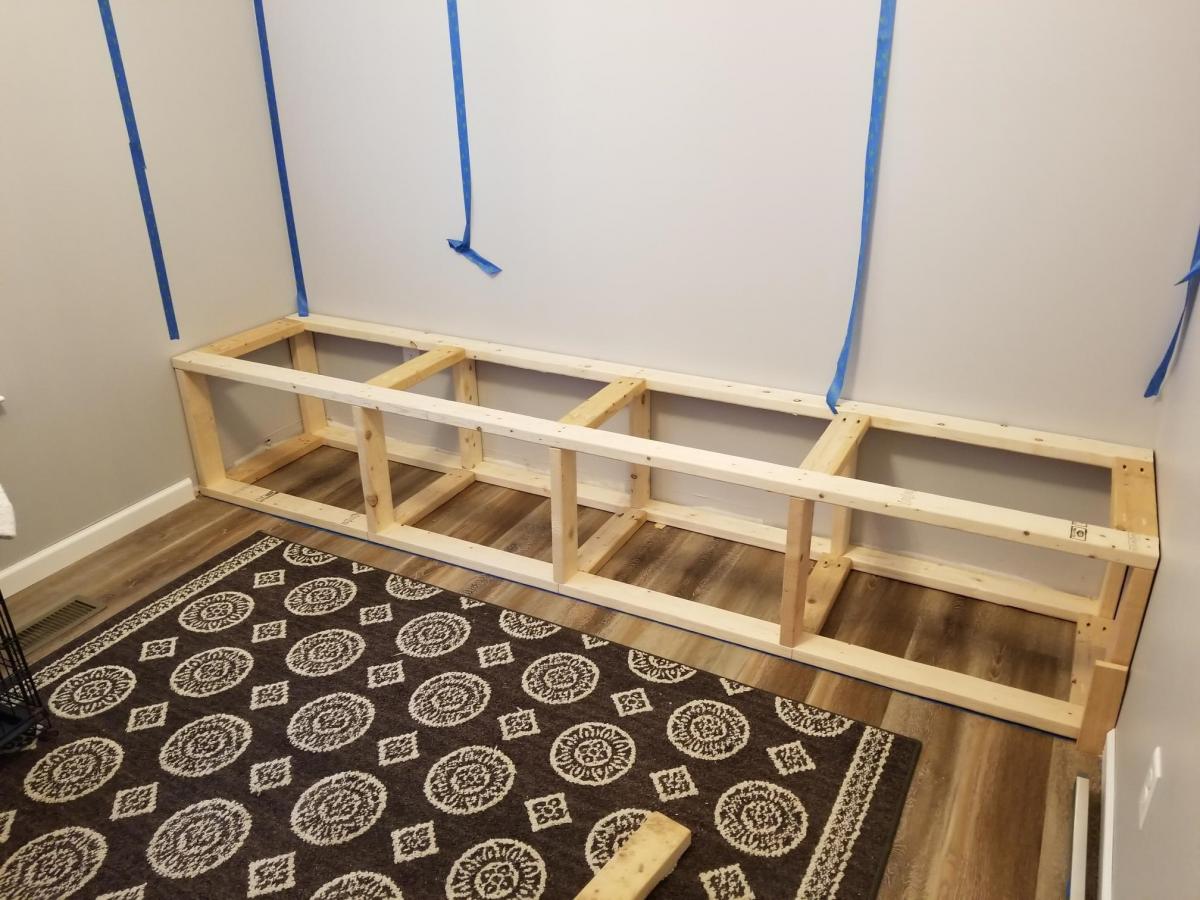
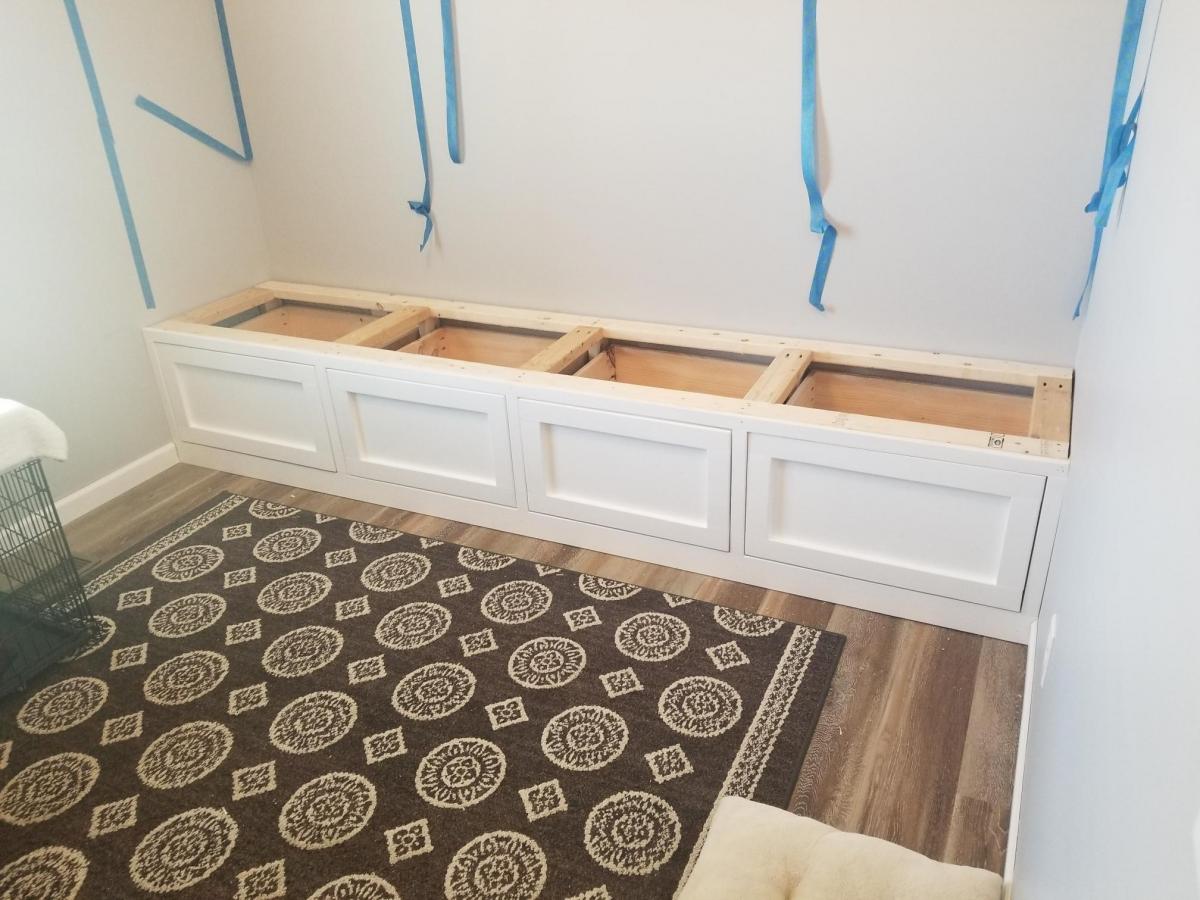
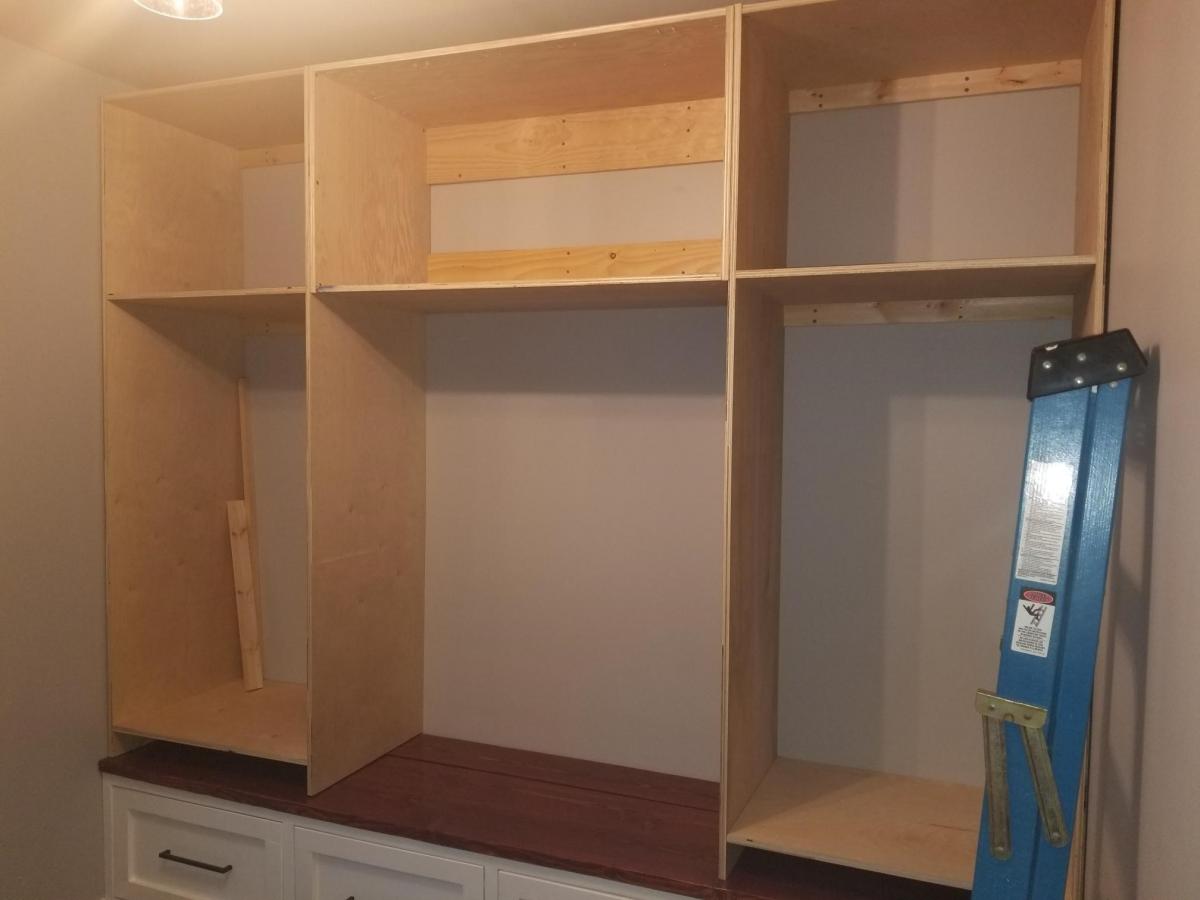
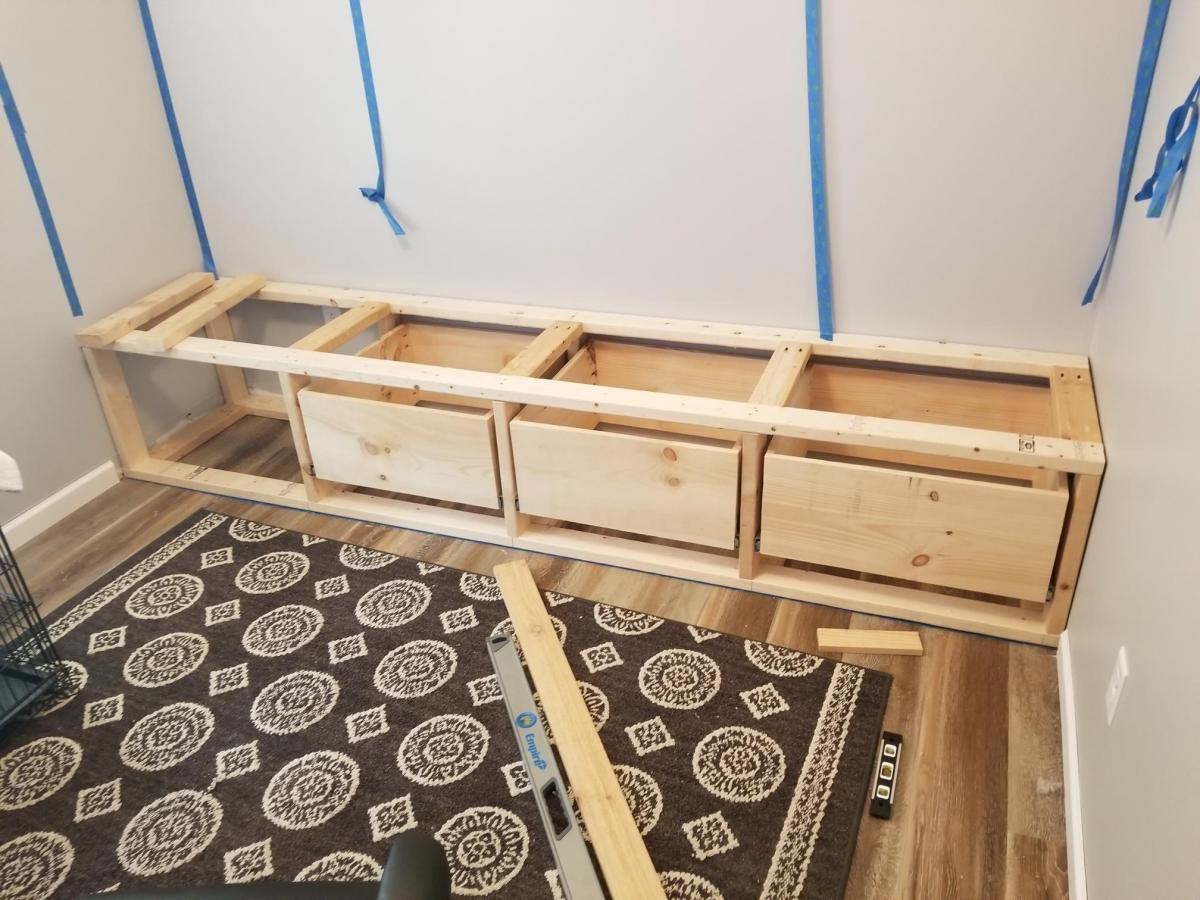
Built this new Mudroom / Office from some plans i found on your website and I absolutely love it! It has turned out better than I Expected and I learned soo many new things when planning and building this out!

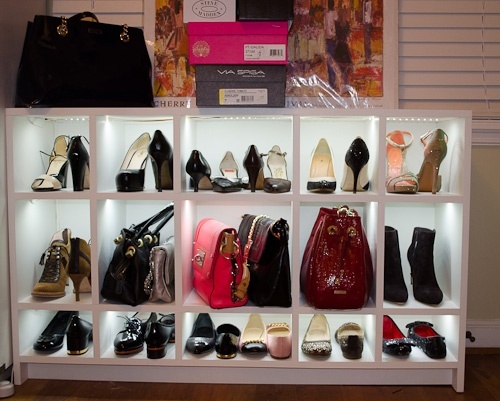
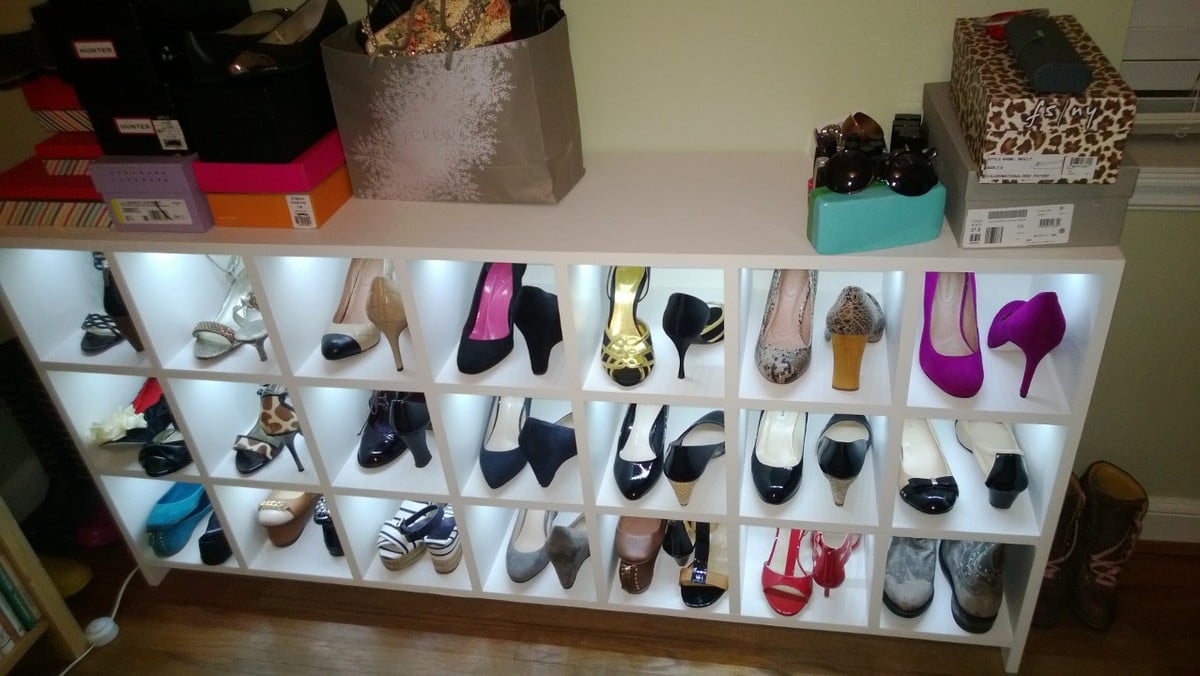
This is an adaption of the shoe shrine shelves. Since I didn't have a closet or other room than the bedroom to put these, I put them on their side. I modeled these off the shoe shrine shelves.
Each cubby is 11 3/4 deep x 8 x8 for the long version. The 2nd version I made was only 48 inches wide and did not divide well so I simply left the center cubby wider. I also made the 48" version to have different height shelves for purses in the middle and flats on the bottom.
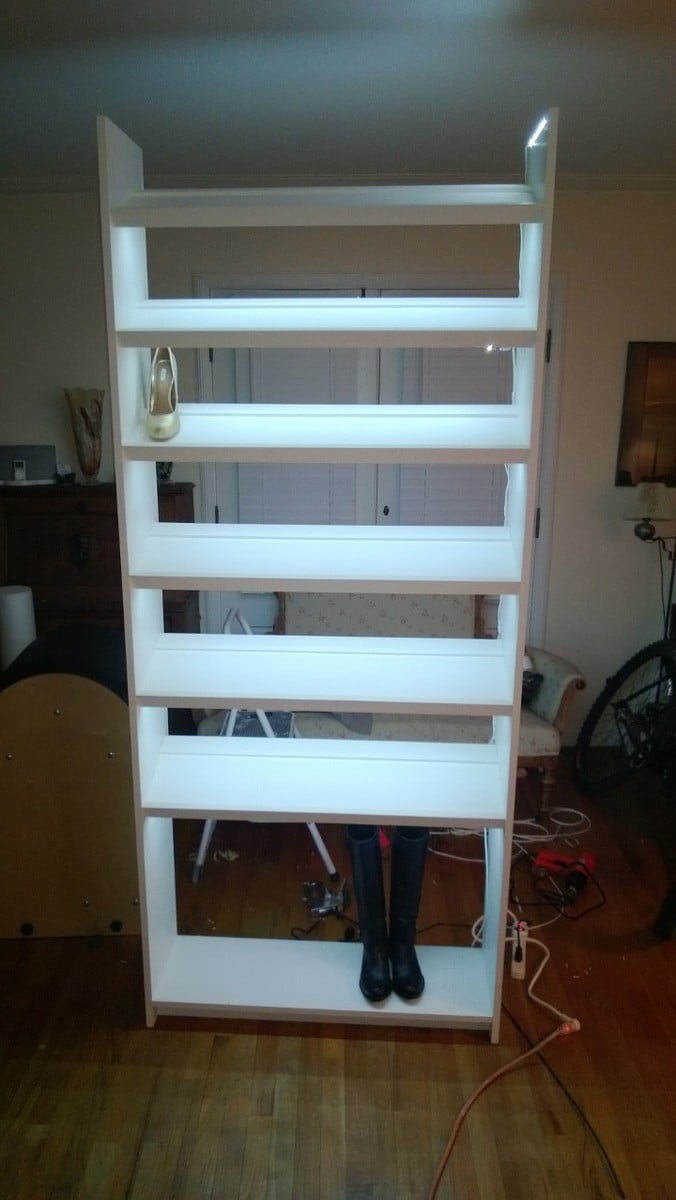
I basically flipped the shoe shrine's on their sides and added LED lights. This also inspired a tall version for a cubby we had upstairs.
I used a panel saw to cut the plywood and then assembled with a Kreg pocket hole jig for horizontal pieces and biscuits for the top and the dividers. I did not want to fill the holes or I would have used Kreg instead of the biscuits.
I used 3/4" paint grade plywood and a 1/4inch back panel.
LED lights came from LED wholesalers on amazon. This step requires electrical knowledge! Not much more than a wiring a light but do not attempt if you are not qualifed to do so. LED strings required a fine tip soldering iron, wire and heat shrink.

Fri, 03/22/2013 - 08:18
Great job! Your closet now looks like a fancy shoe boutique!
Fri, 03/22/2013 - 11:50
The LED's came after we designed them. I was like there is no light where these are going and its hard to see inside the cubbies. This is true for the bottom cubies which are only 5 inches tall. So for 30 bucks a cabinet it was a quick and easy addition that really made them pop. Only downside is it can make the room look like you are in Nordstom's :) so she doesn't leave the lights on regularly.
Thu, 09/18/2014 - 01:42
Very nicely done. Do you mind telling me more about which particular LED product you used and the process to wire them in? Did you mill out any part of the cabinet to set the lights? How are they activated? Thanks in advance. You can also email me at [email protected]. Much appreciated!
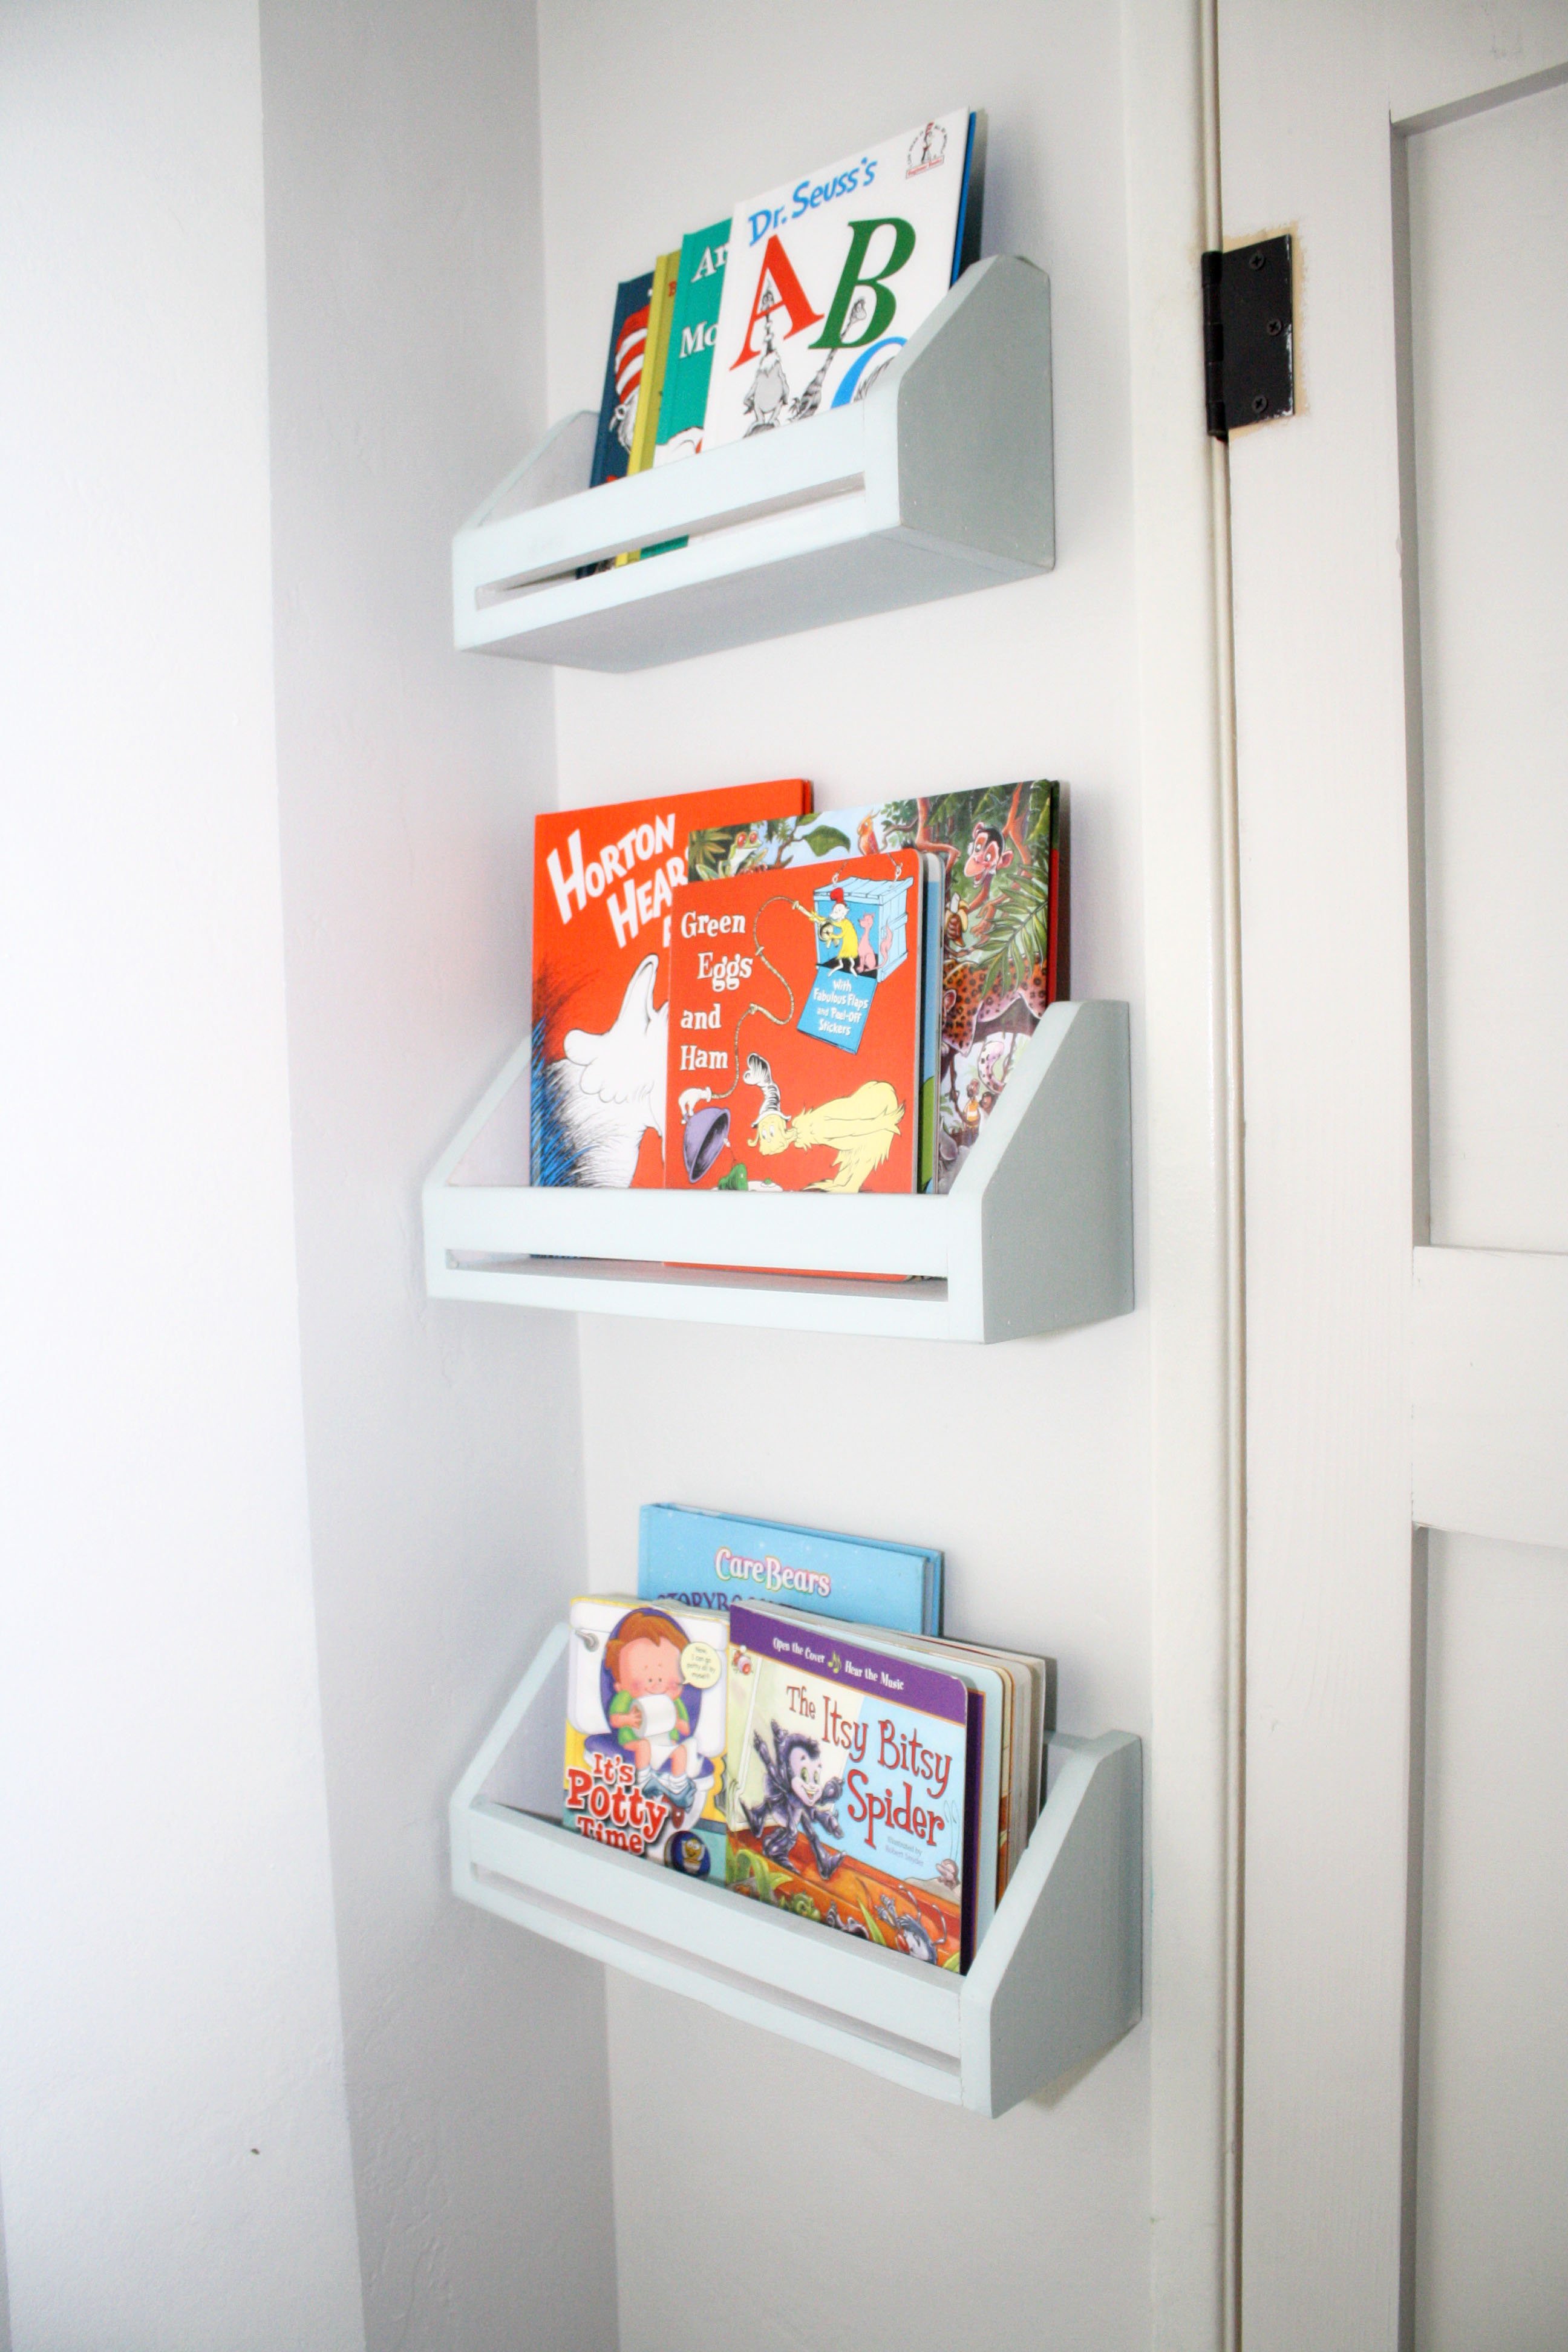
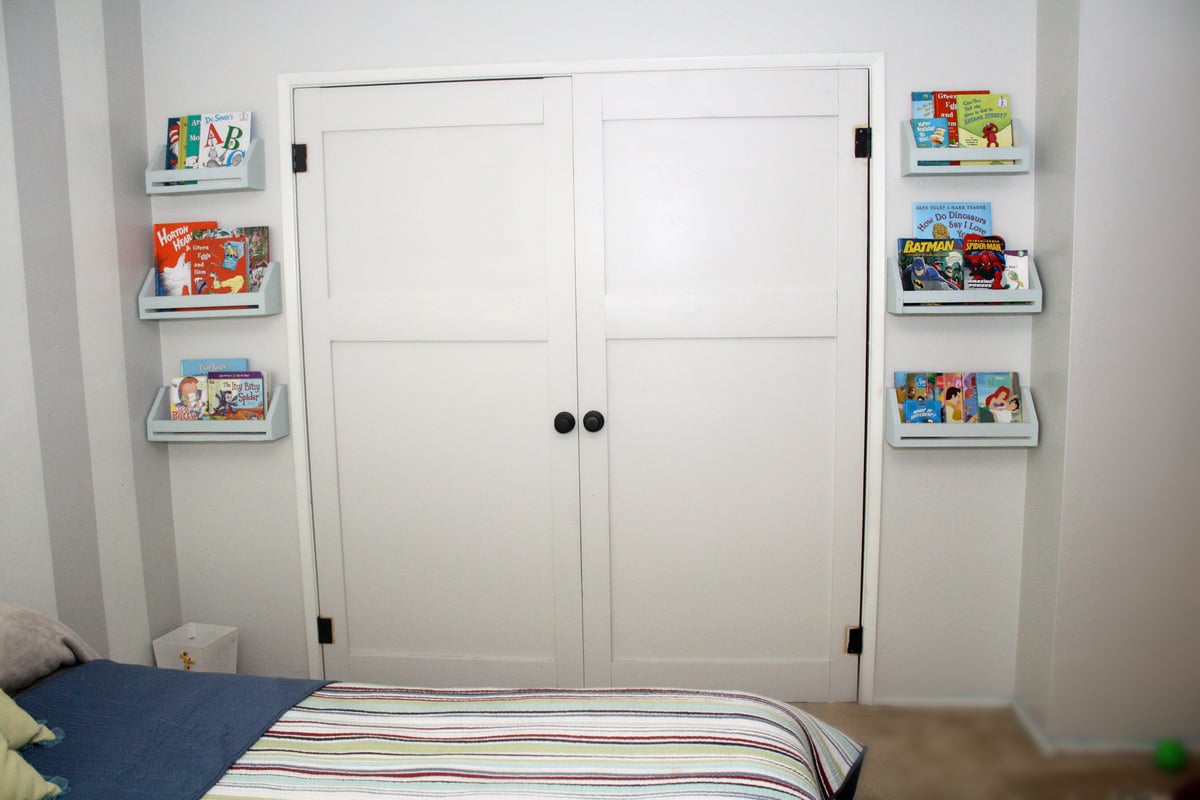
I have had these for a while but never finished with the painting, the most dreadful part...but found some chalk paint that I love, and will always use chalk paint to finish all my projects now.
Wed, 03/27/2013 - 23:38
Love these. Also love that you mixed up your own chalk paint. :) Shelving in my daughter's room is definitely a toss up between photo ledges and these now.

Thu, 03/28/2013 - 15:54
Thank you, can't wait to start on their new bed. ;0)
Love this plan and the table and bench turned out exactly as I hoped. I did it by myself except for a little heavy lifting from my sweetheart. I researched the finish online and I am so happy with the results.
Tue, 02/10/2015 - 08:19
We have been shopping for tables and cannot find anything we like for a good price. I keep going back to building one myself. Your table top looks great .. nice and flat. Did you follow the plans to a T, did you use a kreg jig?
Tue, 02/10/2015 - 22:13
I did change the dimensions of the top a little. I wanted a wider surface. I did use a kreg jig, it made it a breeze to build. I spent a lot of time on the finish, sanding, using steel wool, and several coats of polyurethane. Thank you for the compliment !
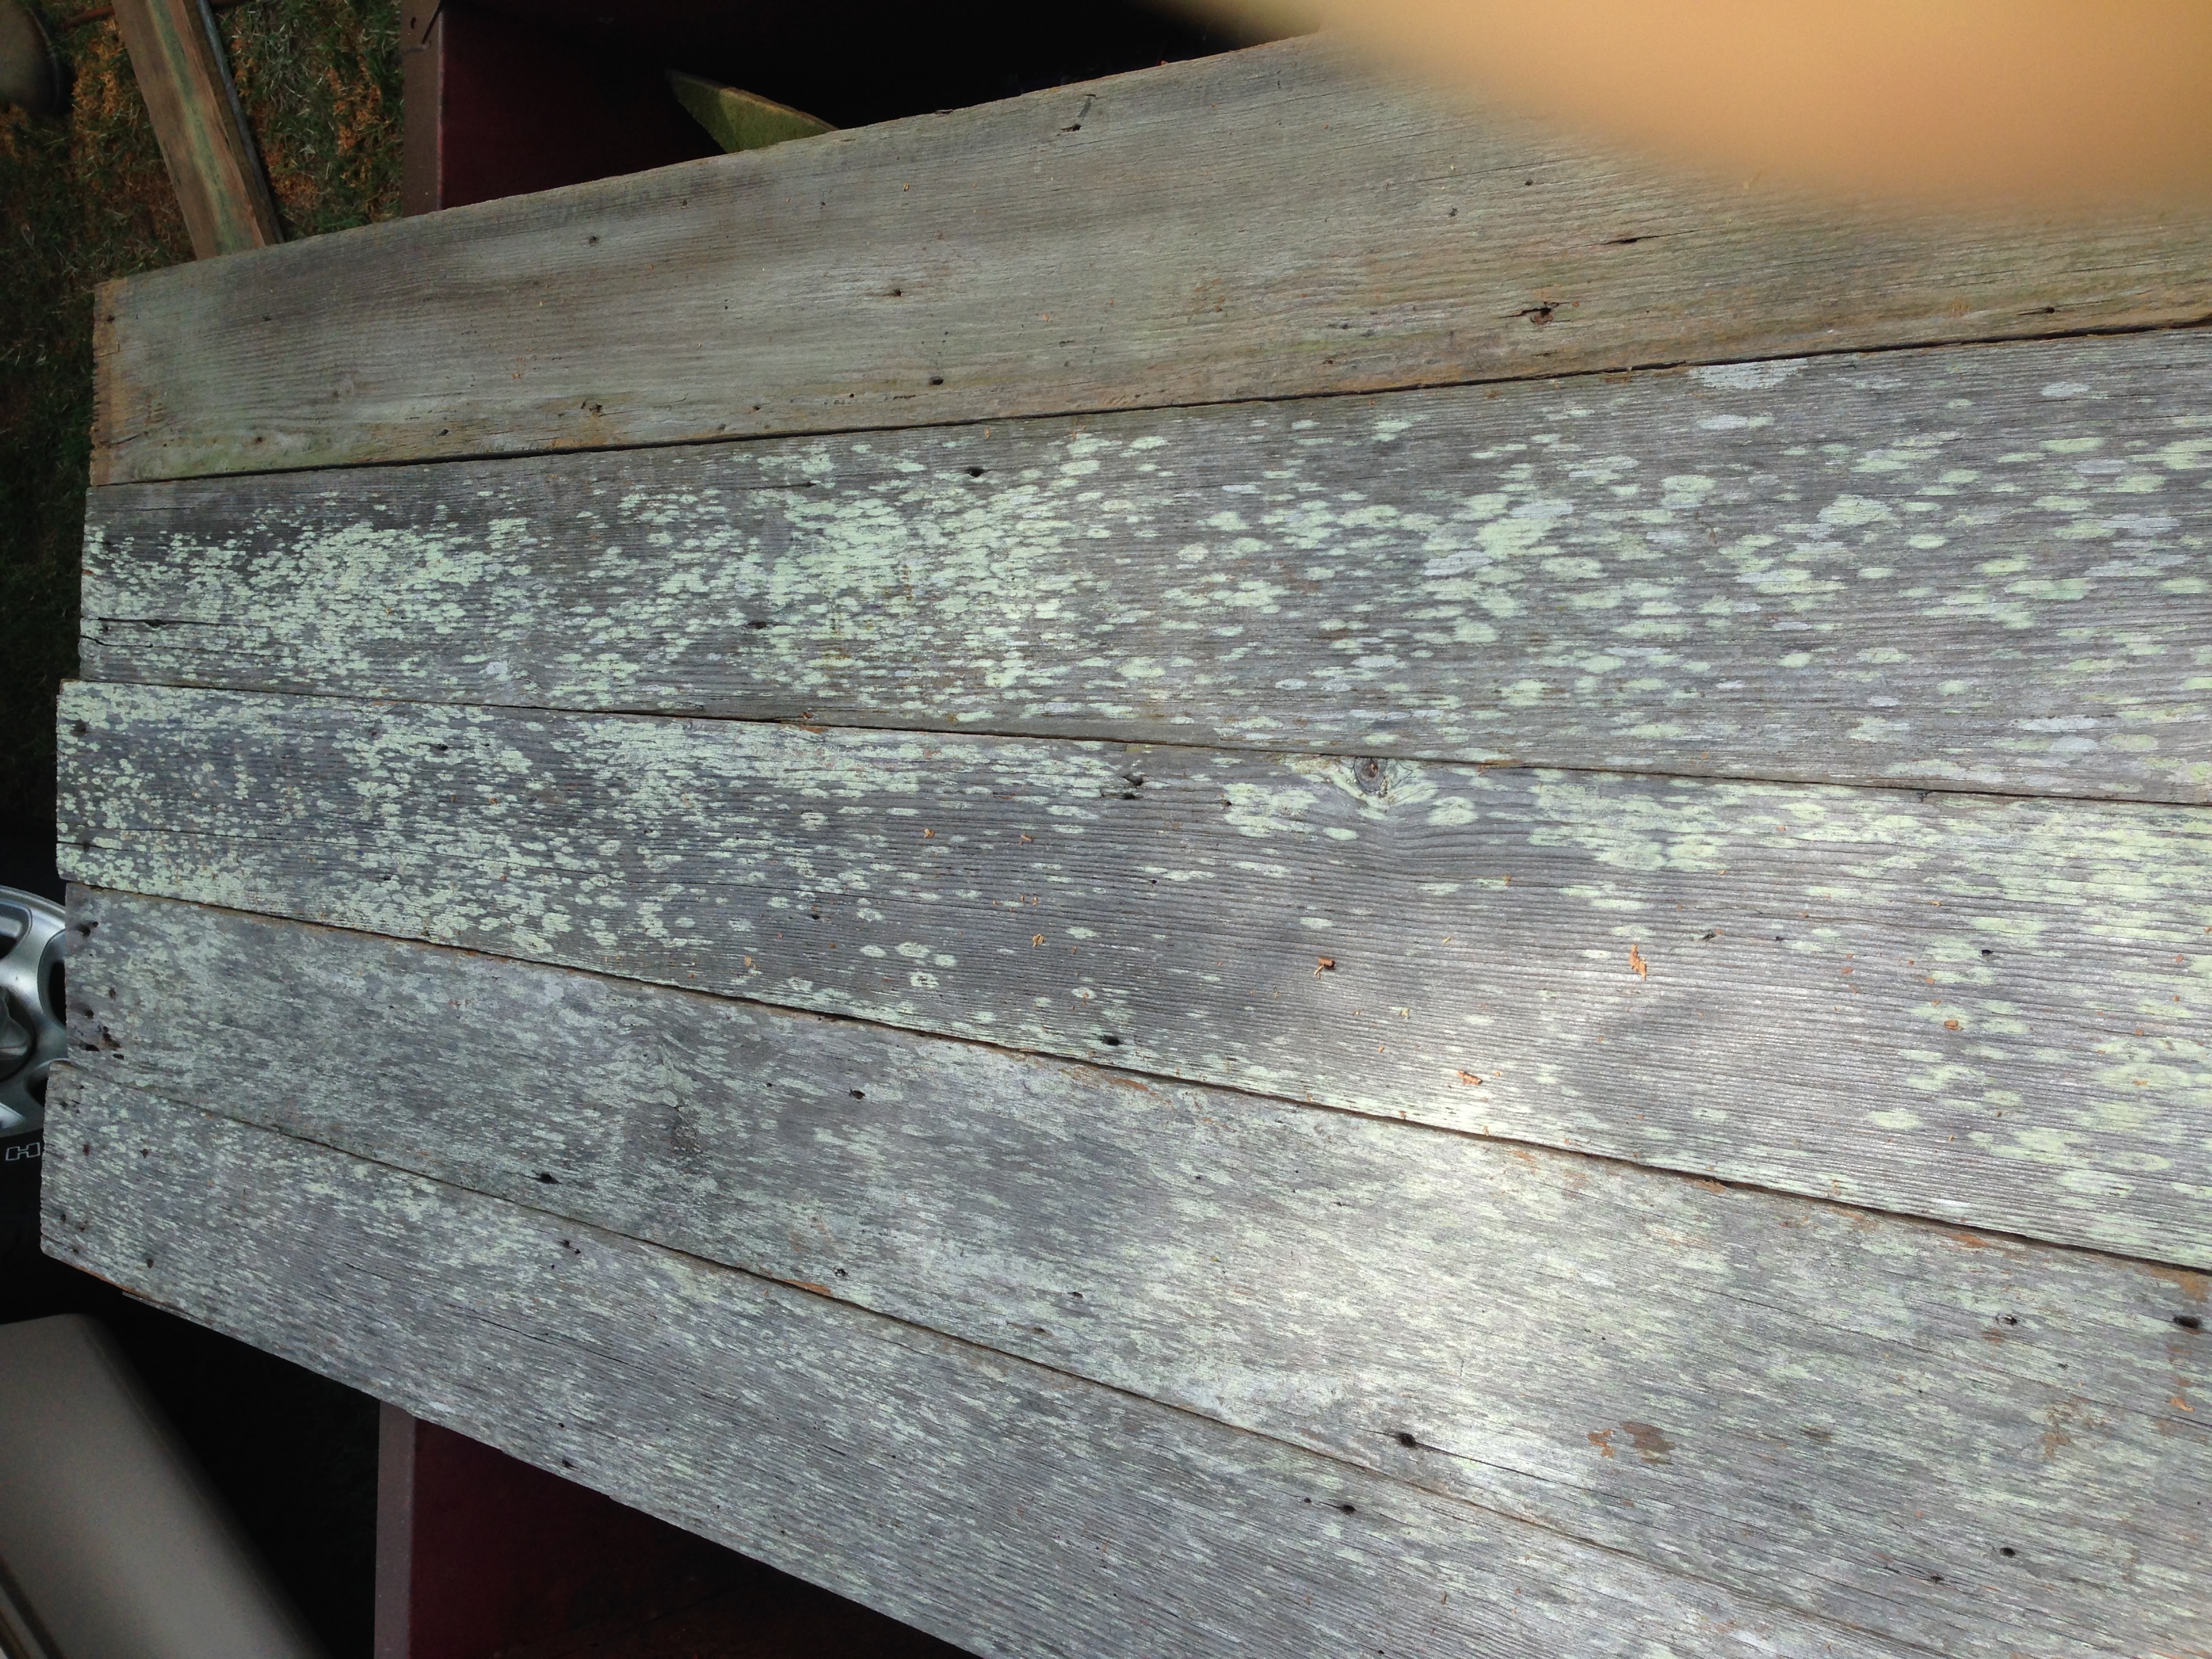
This was my first attempt at a farm table. I found the fancy x plan for inspiration. The length is 6ft. I had to modify all of the measurements. All of the boards came off my grandad's old barn. The posts are laminated together from guide posts from his corral. There is a lot of history and character to the table. I did have to make the bench to match it. I'll post pictures of that soon. Most importatnly, my wife loves it!!!! Happy wife, happy life!!!


Mon, 05/18/2015 - 12:00
Hello, awesome job on the table. Was wondering if you would mind sharing the table top dimensions. I have a smaller space and was thinking of modifying to make something in the 6ft range as well. Thanks
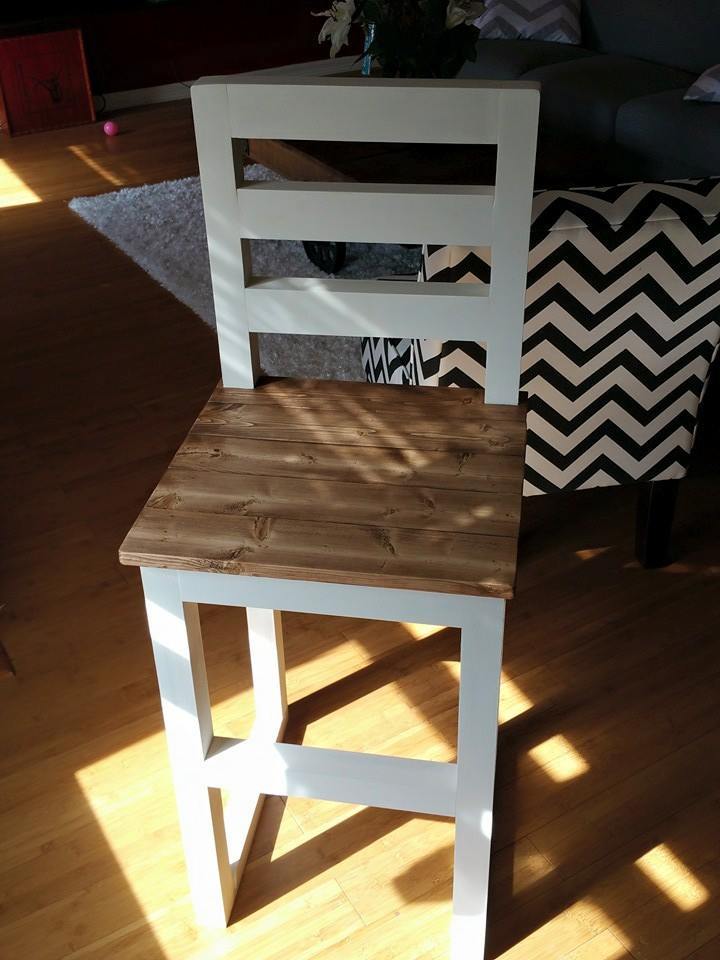
Love my new bar stool, now to build 3 more. I think it turned out great.
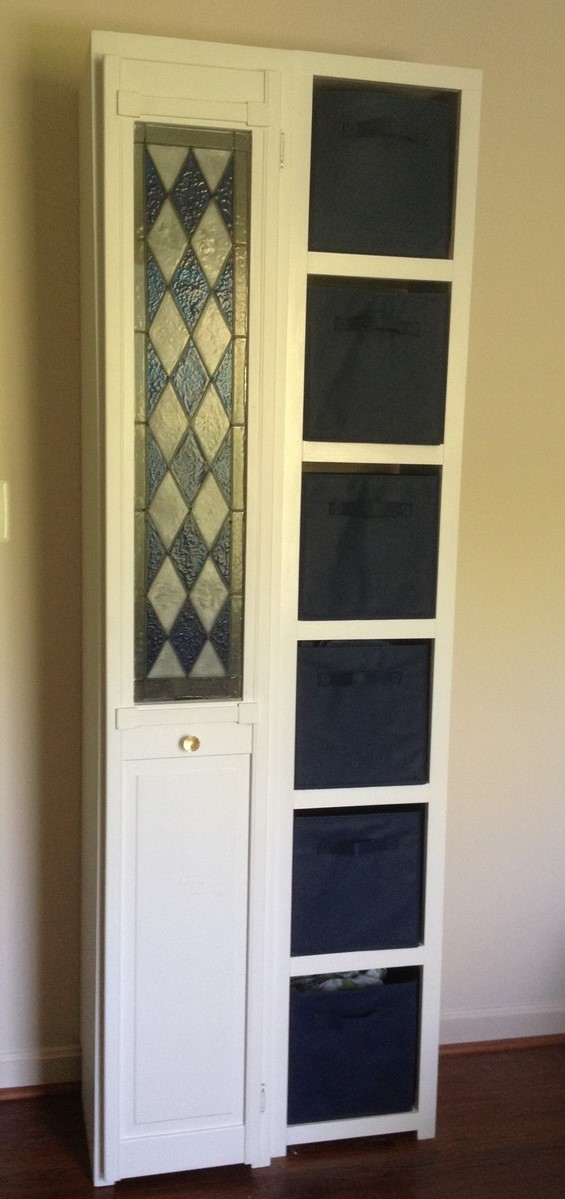
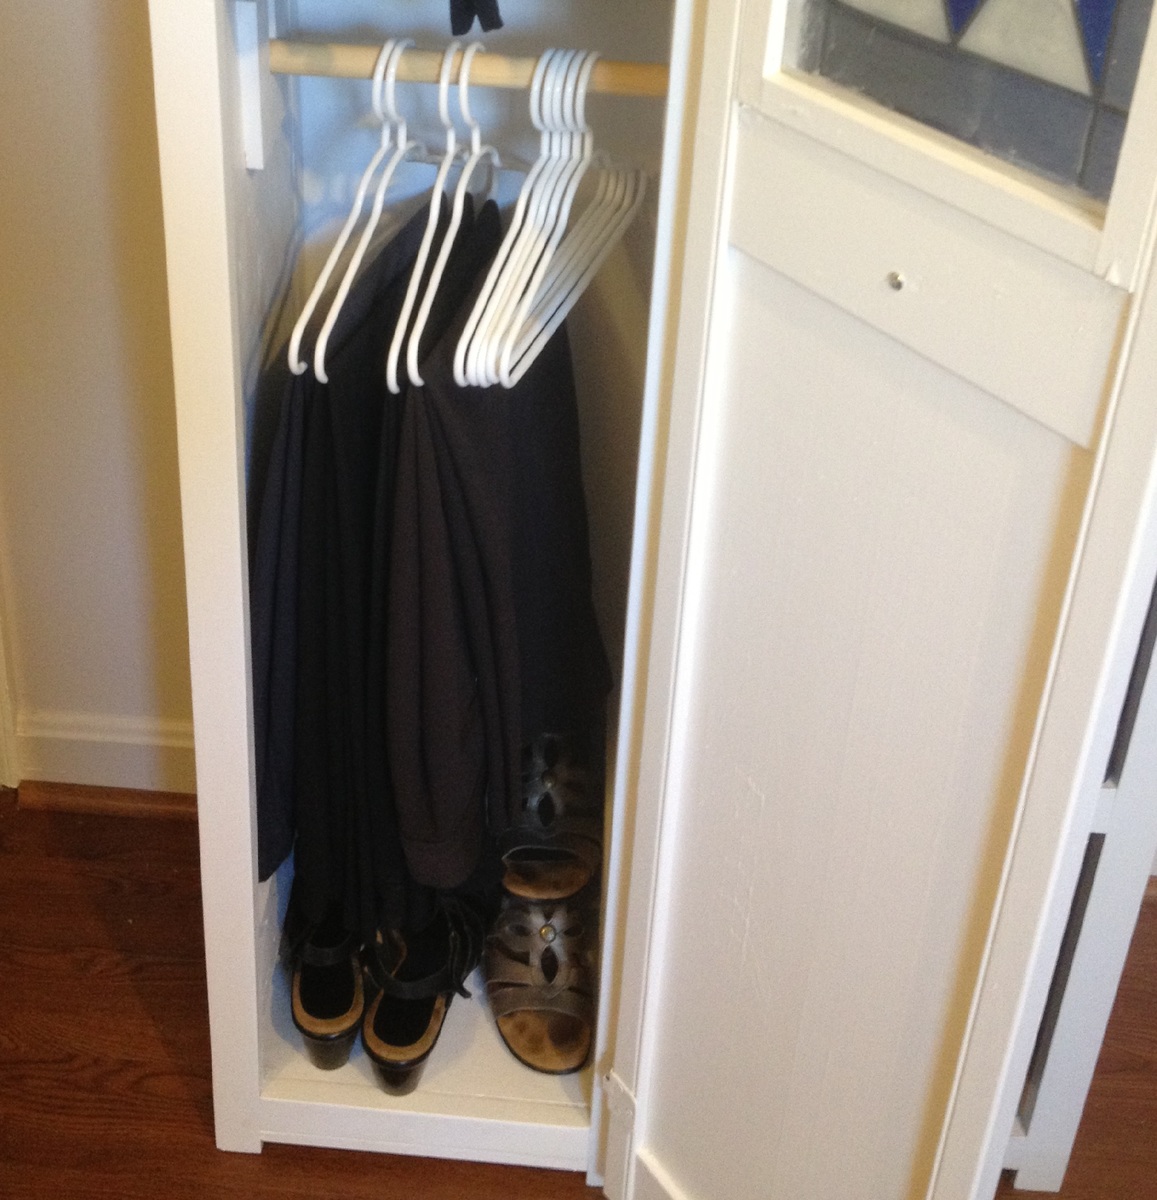
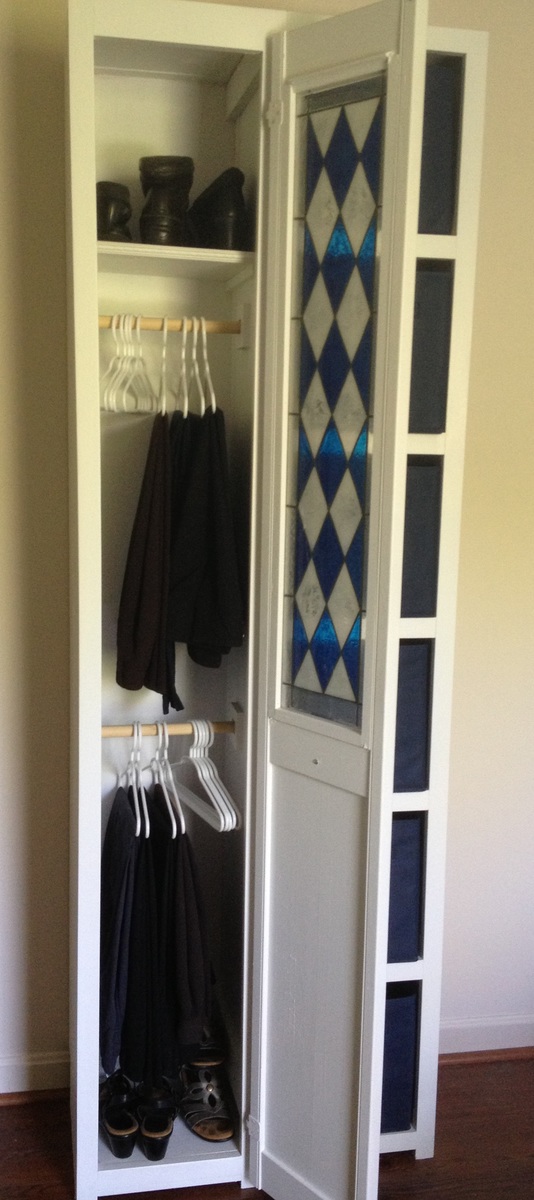
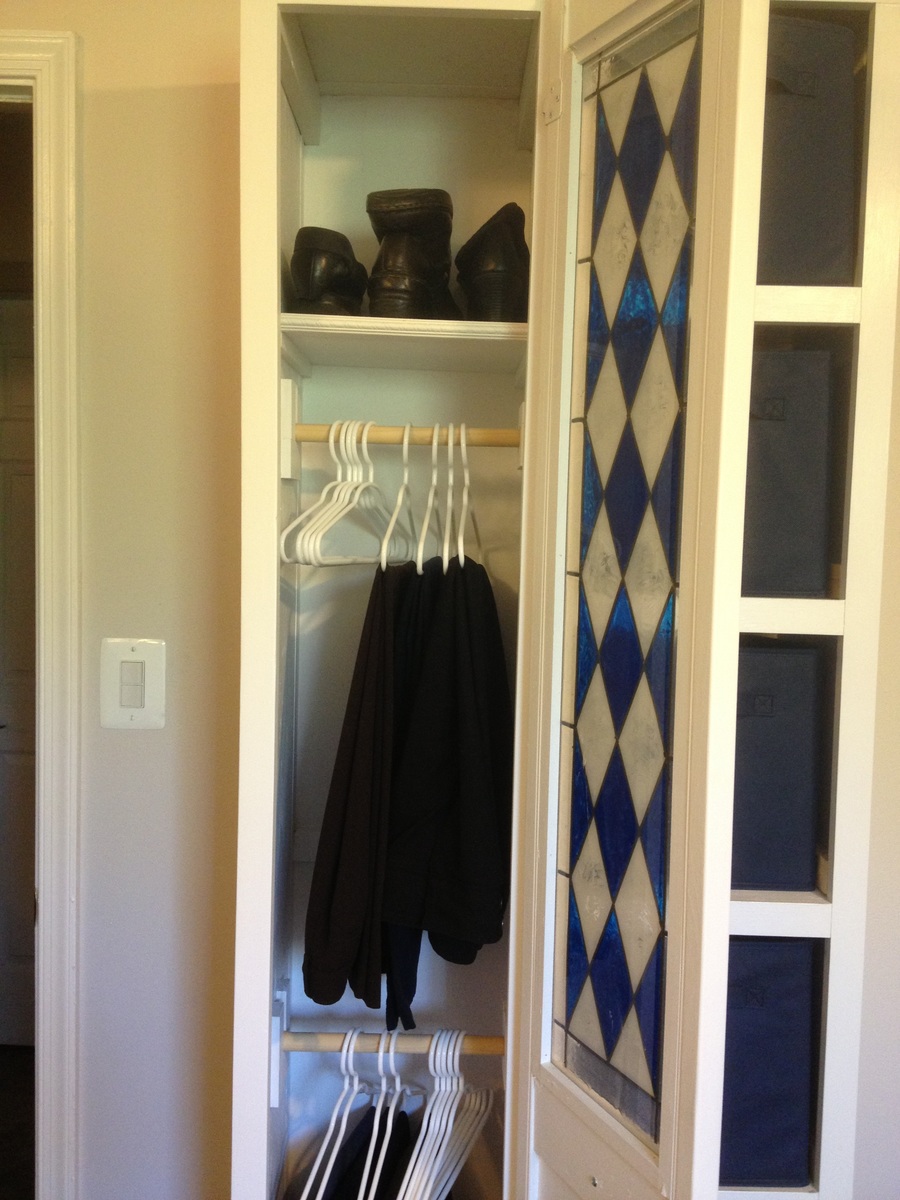
This closet tower is from the Craft Room Storage Tower plan, and made mostly with left overs from other projects. I wanted a shallow tower storage just deep enough to hang pants and slacks in, and to use a 12" wide door I already had in my garage. At Target I found some kid-size hangers that were just the right size - about 12" wide. Trouser hangers are about this same width, but they weren't available in-store so I went with what they had. The only things I bought for this project are the knob, hinges, some 1x2's, and the hangers. The sides are from a lengthwise half-sheet of C/D plywood, ripped down to 12" strips on the table saw, with 1x2 edge joined at the back to create a "toe kick" to clear the baseboard. The front is trimmed out in 1x2 with a scrap of 1x3 to trim the top. The removable closet poles are from a flagpole, and the ends are held in place with some 1/2" craft boards. The back is 1/4" plywood. The longest part of this project was the sanding, because the plywood wasn't the pretty kind - used lots of wood filler on the knots and as a grain filler, then sanded it a lot. This project took about 9 hrs total, (sanding took the longest), construction with the Kreg jig and nailgun was very quick, and then paint and adding the door and poles. The removable shelf was added as an afterthought and is a scrap of plywood, with some S4S to hold it up, and a 12" scrap of moulding across the front of the shelf. It is 82" tall, 13 1/2" wide, and 14 1/4" deep. It's a perfect pair with the 6-cube tower that I built from Ana's cube tower plans a couple of years ago.

Fri, 08/30/2013 - 17:56
This is such a clever build! :) Thank you for sharing in detail how you put this together. =D I love how tall this is and how little floor space it takes up, which is especially a big issue for smaller home dwellers like myself. =D

Sat, 08/31/2013 - 06:23
Yvonne, thanks so much for the nice comment! I just love tower storage, you get so much for such a small 'footprint' in the room. We've replaced our bulky dressers with towers, which makes the room look much more spacious. If you build some, I'd love to see pictures!
There are 2 other items not mentioned above, that I added during this build: I added the 1x3 at the top of the insides, to help keep the joined side boards tighter together at the top (at the time I was thinking the joint might try to pull apart if it got humid). The second thing (you can hardly see this in the photo) is a 12" piece of 1x2 attached across the back, spaced between the 2 closet poles. This was added to help keep the side pieces the same distance apart when attaching the back, and provided an additional place across to nail it. I thought it would help make it more rigid. This piece is used every day, and so far it has held up great. :)
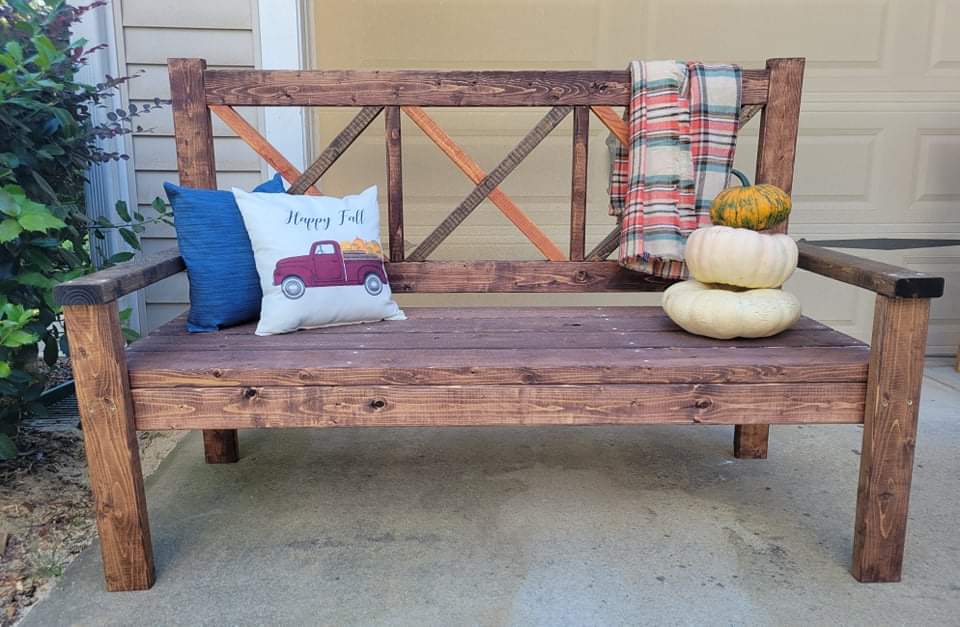
What a fun project, and great bench. We had someone ask us if we could make this for them, and we decided to make 2 while we were at it.....now we just need to find a spot big enough for the second one at our house. Loved this build, and look forward to sipping coffee on it on a cool morming.
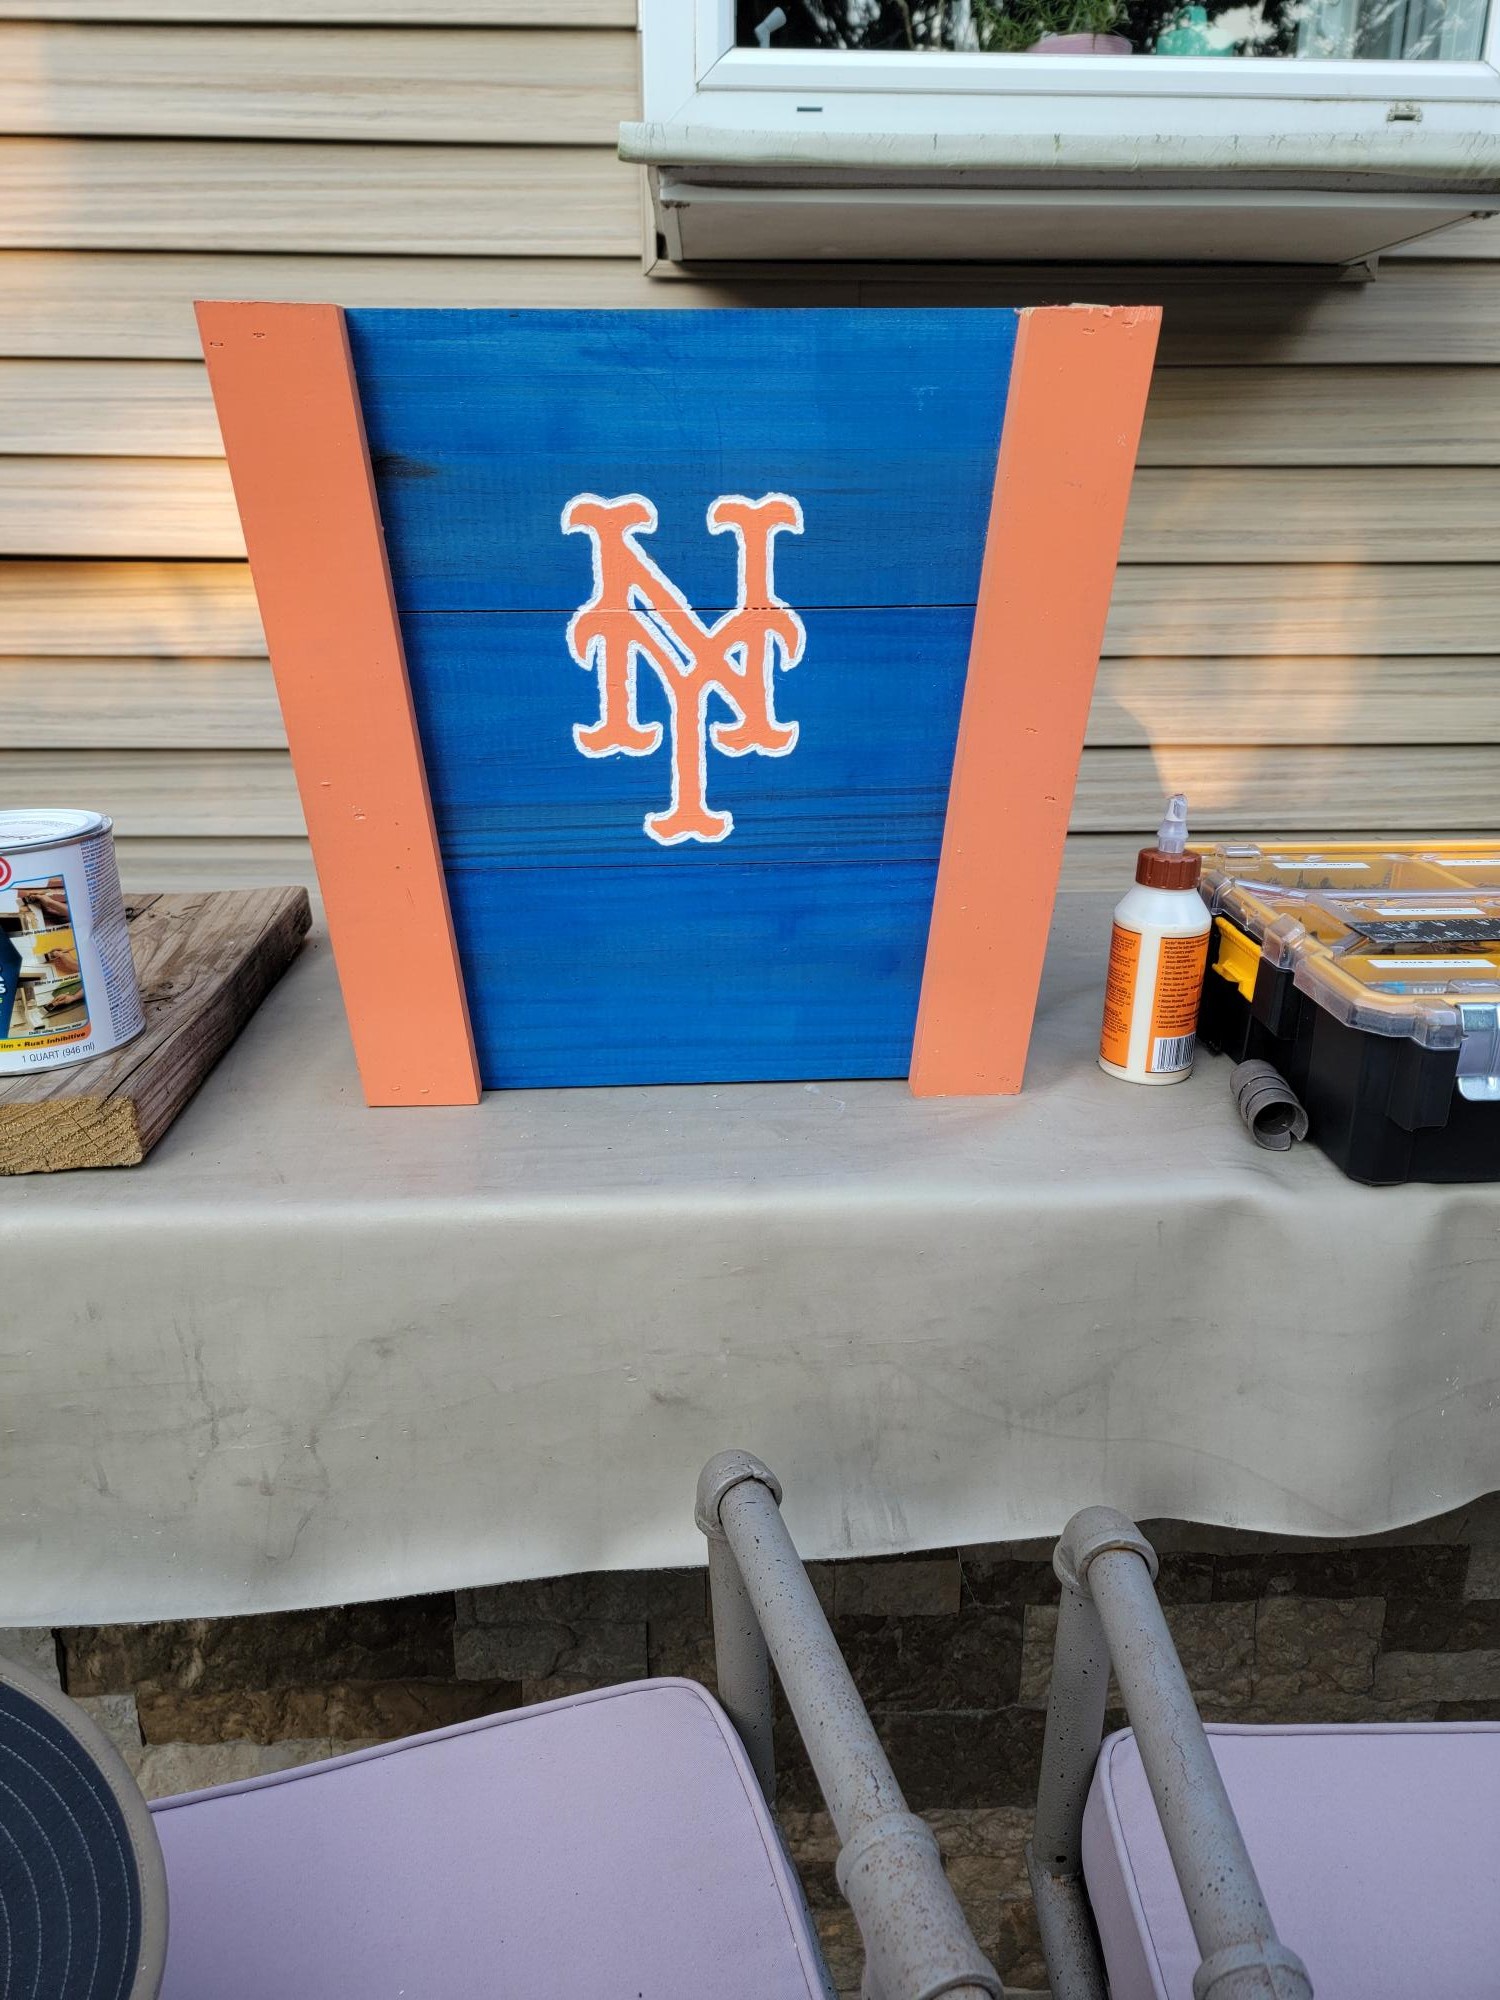
Started with the 3 plank plans from Anna's project, then dremeled the logo.
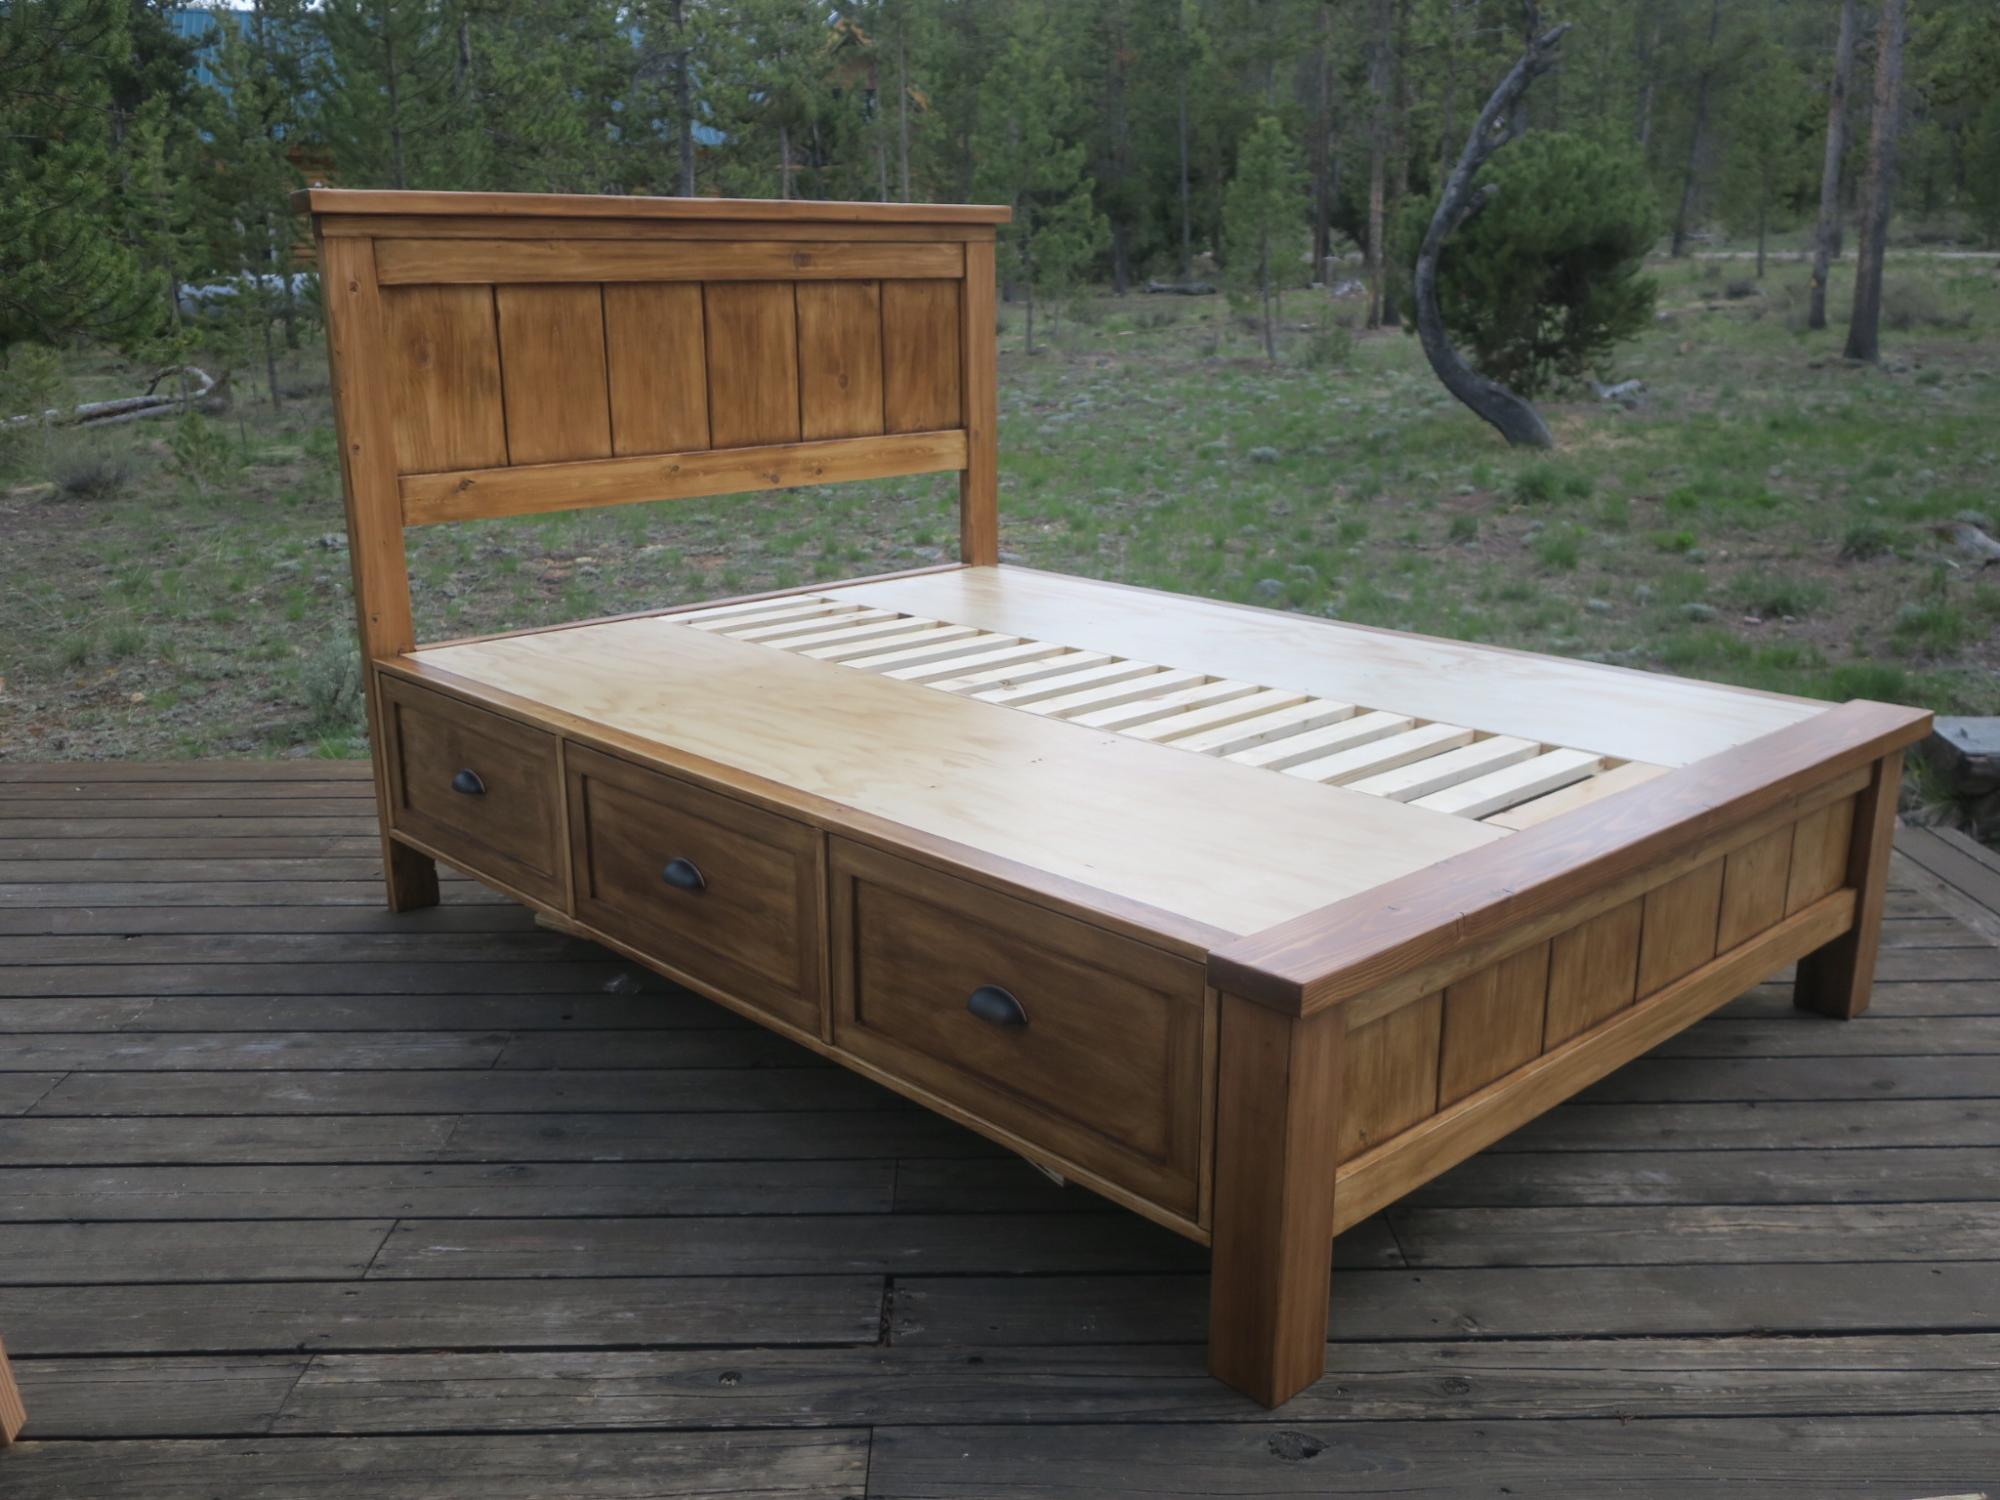
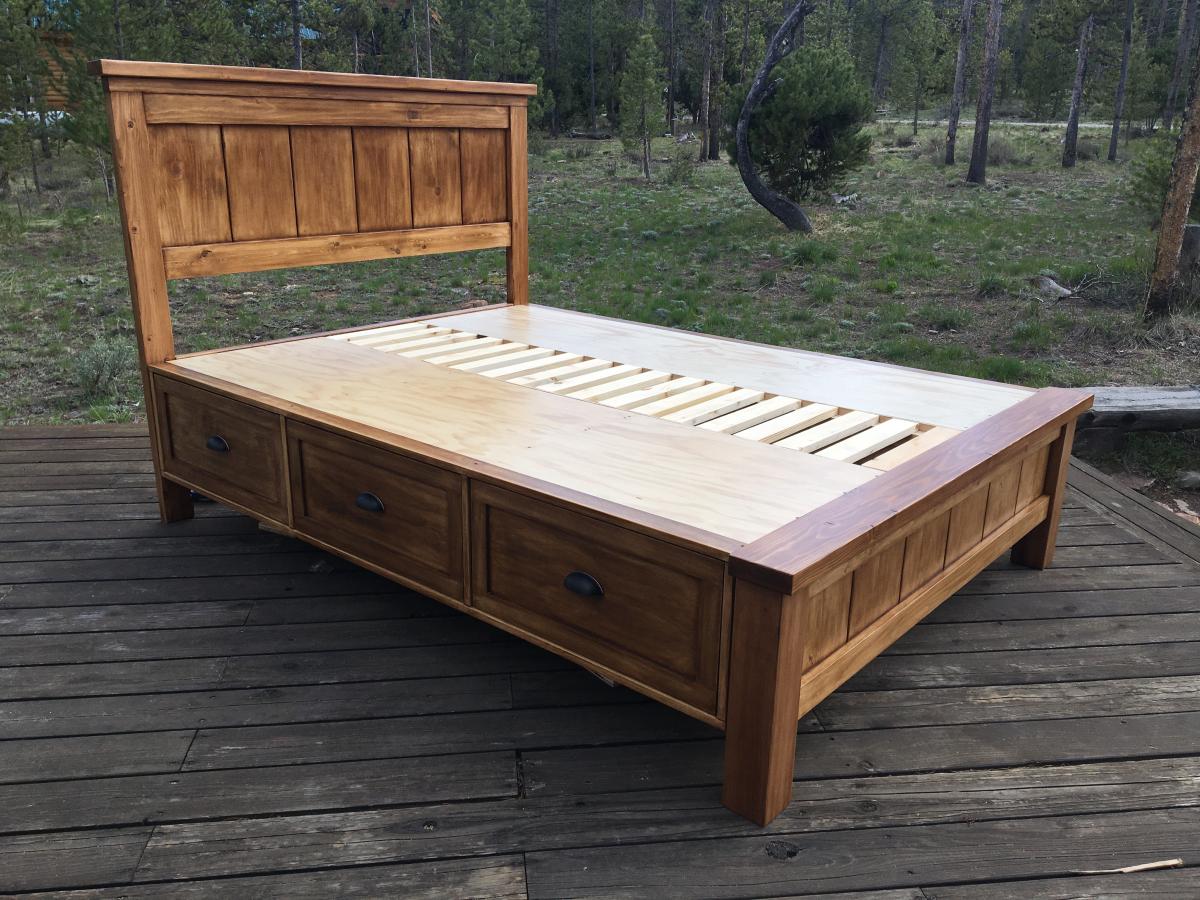
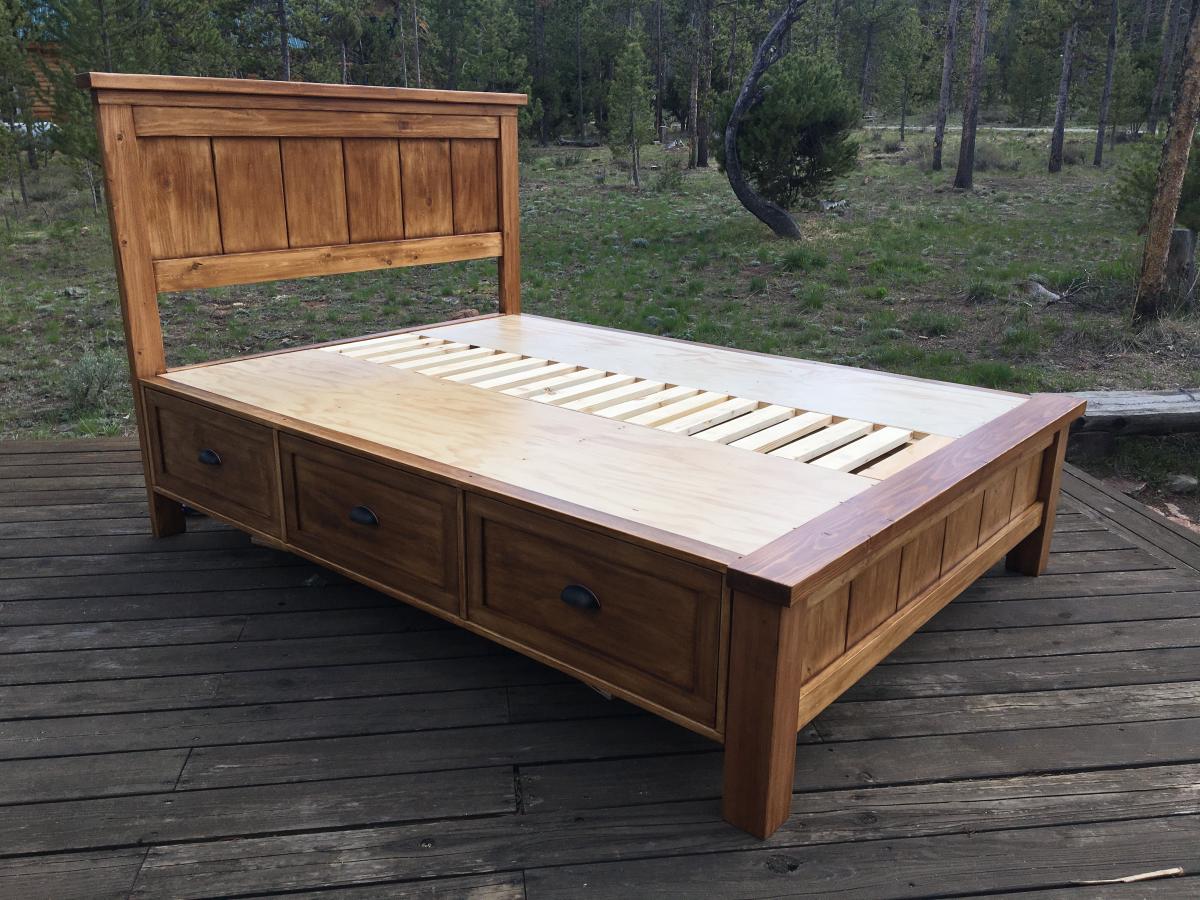
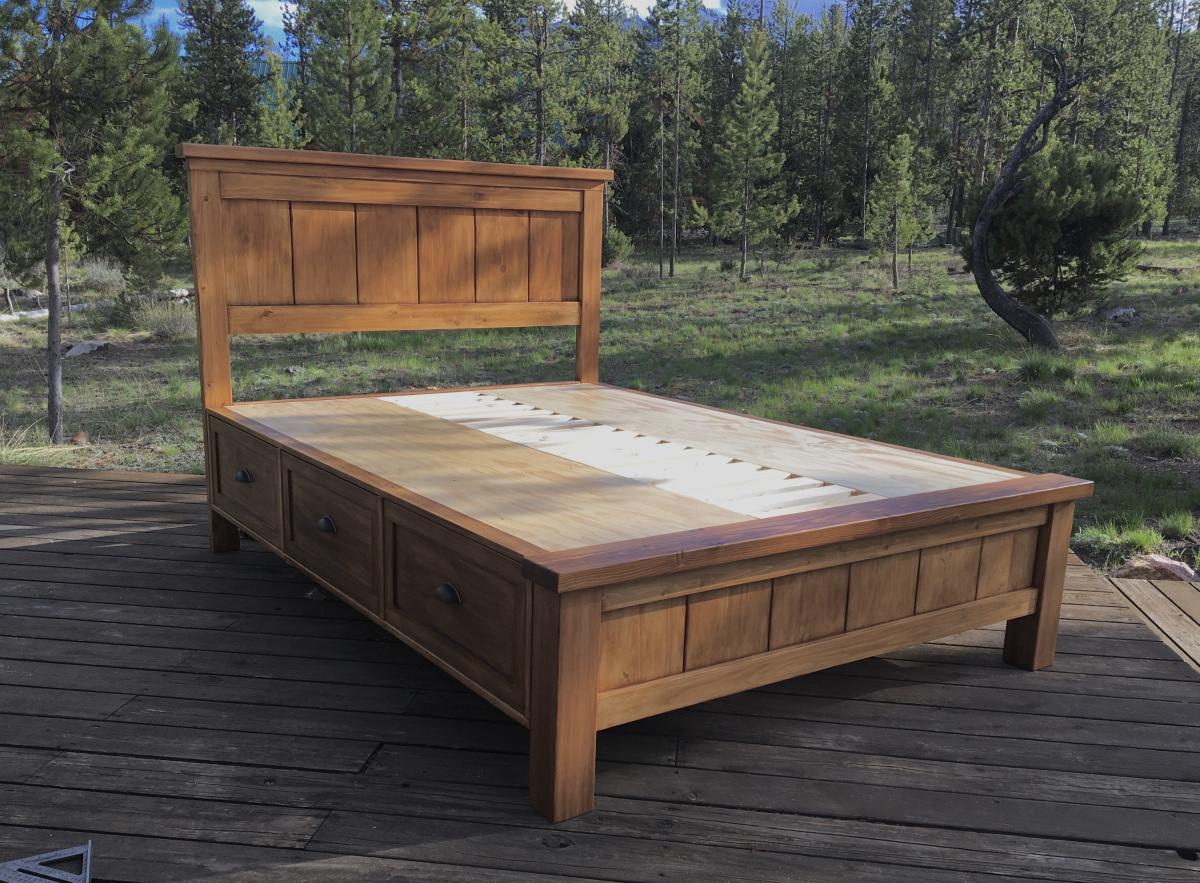
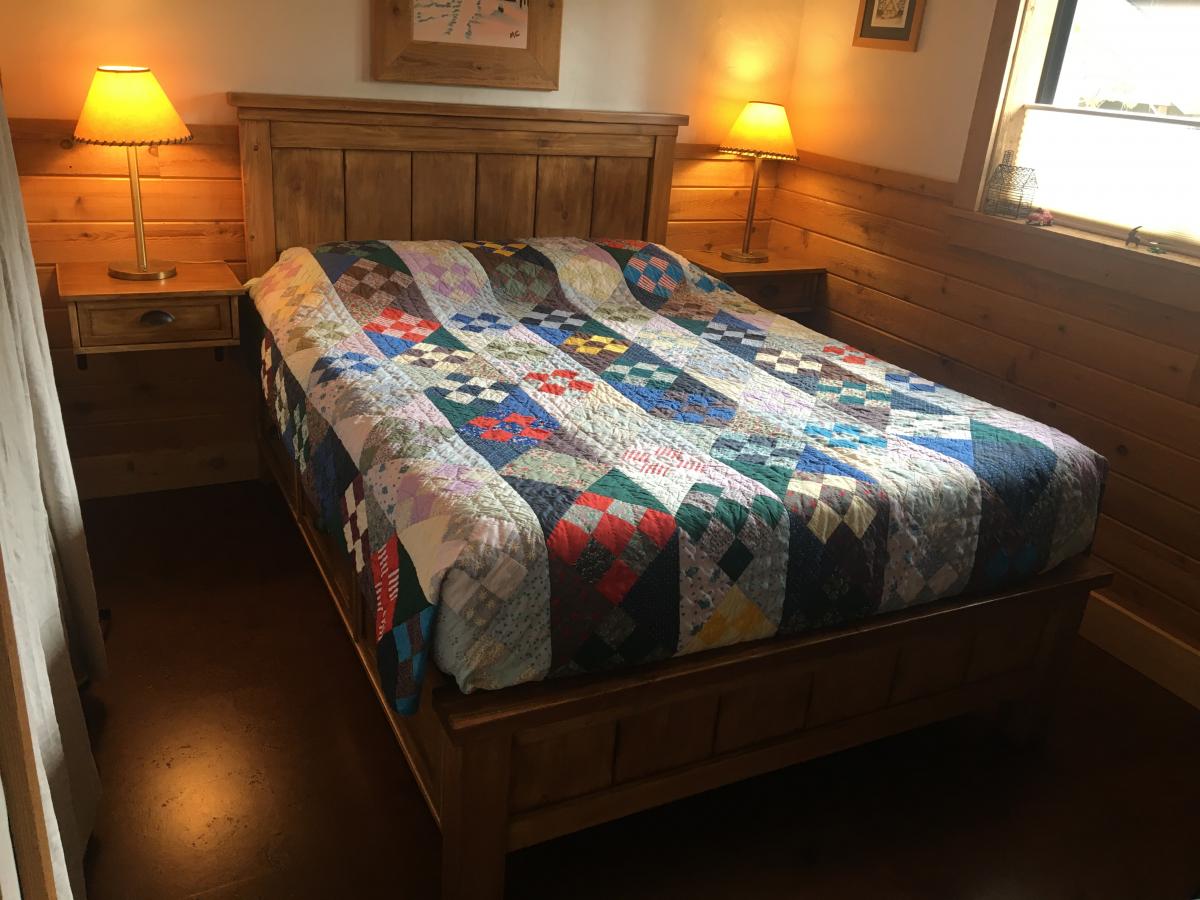
Hi, I’m Joe and love working on my cabin in Stanley Idaho. I needed a queen size bed on the ground floor but the room is small so I incorporated the footboard into into the platform to gain 6 inches of space in the room. It took a couple months working off and on but all fun. I also made the drawers deeper front to back to maximize storage. I did this at the peak of lumber prices and spent like $900 on lumber. It came out great, my Airbnb guests love it!

Wed, 10/06/2021 - 14:28
I could not get logged in to Ana-white.com on my phone where my pictures were, but now an logged in on my laptop. Is there any way to register this brag post on my account? This is Fitzanthony, [email protected]
Joe