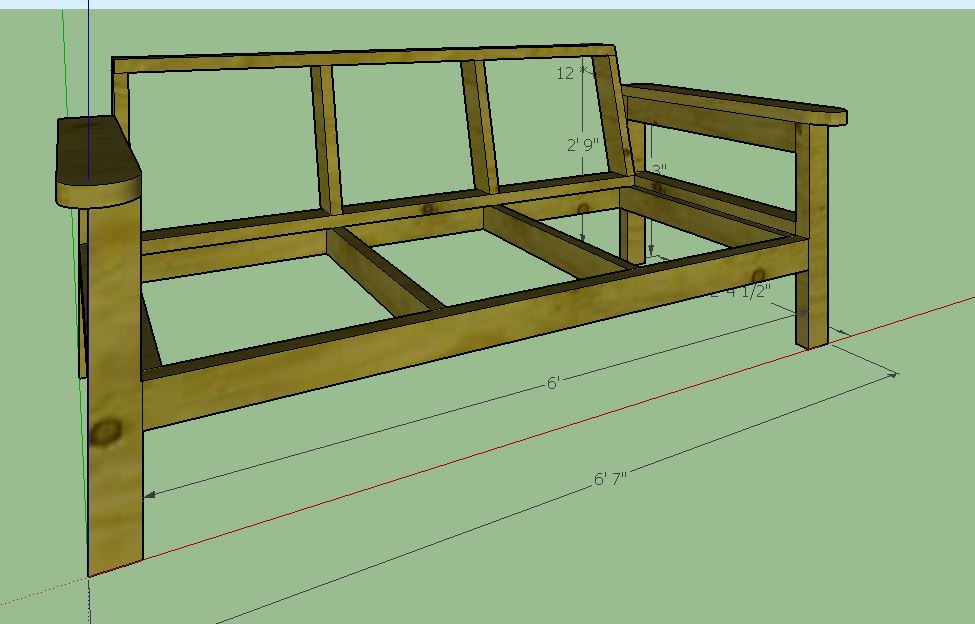
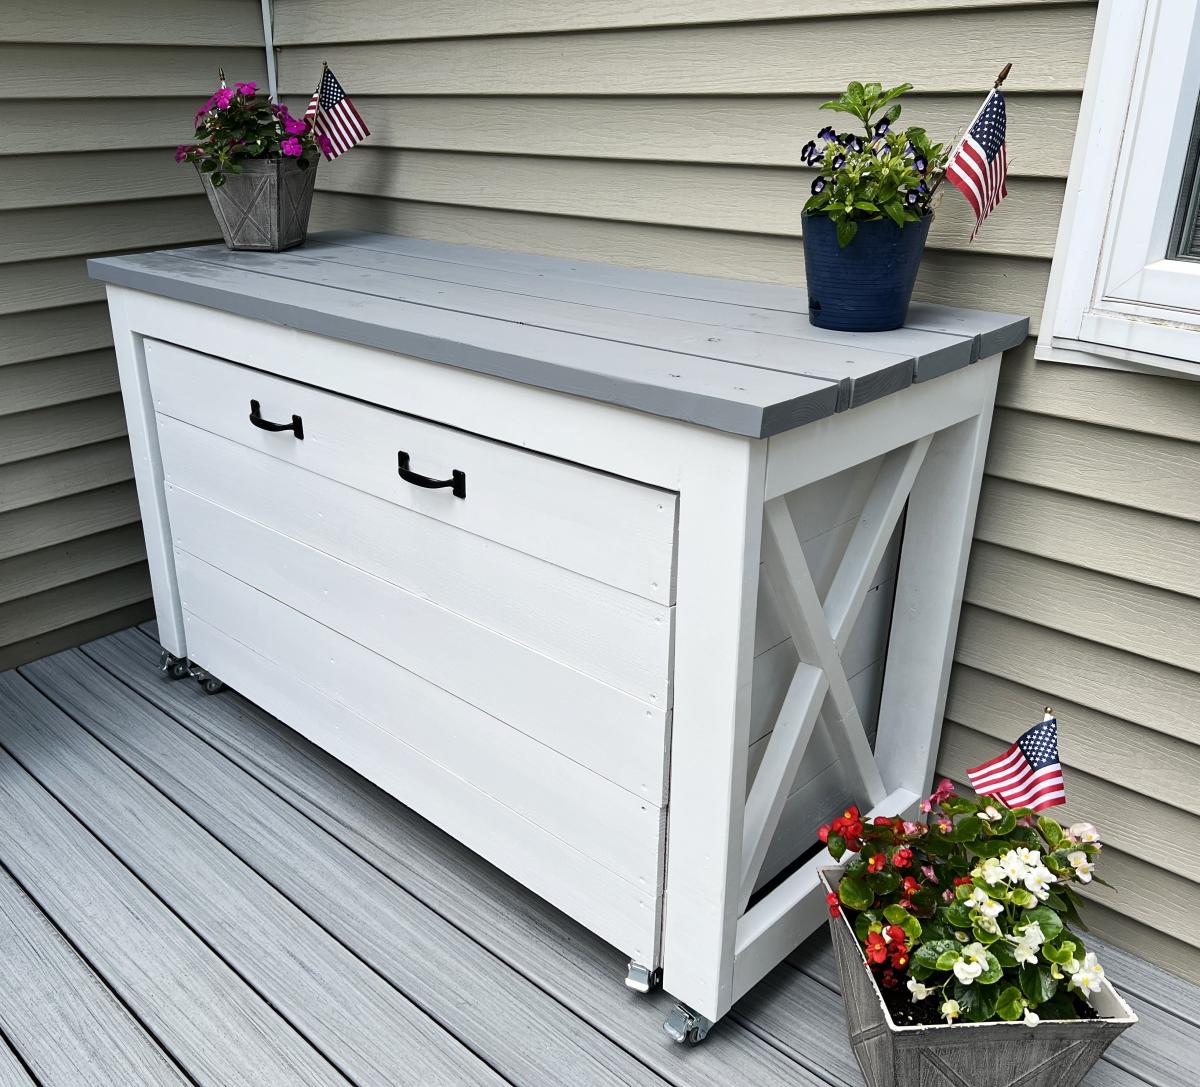
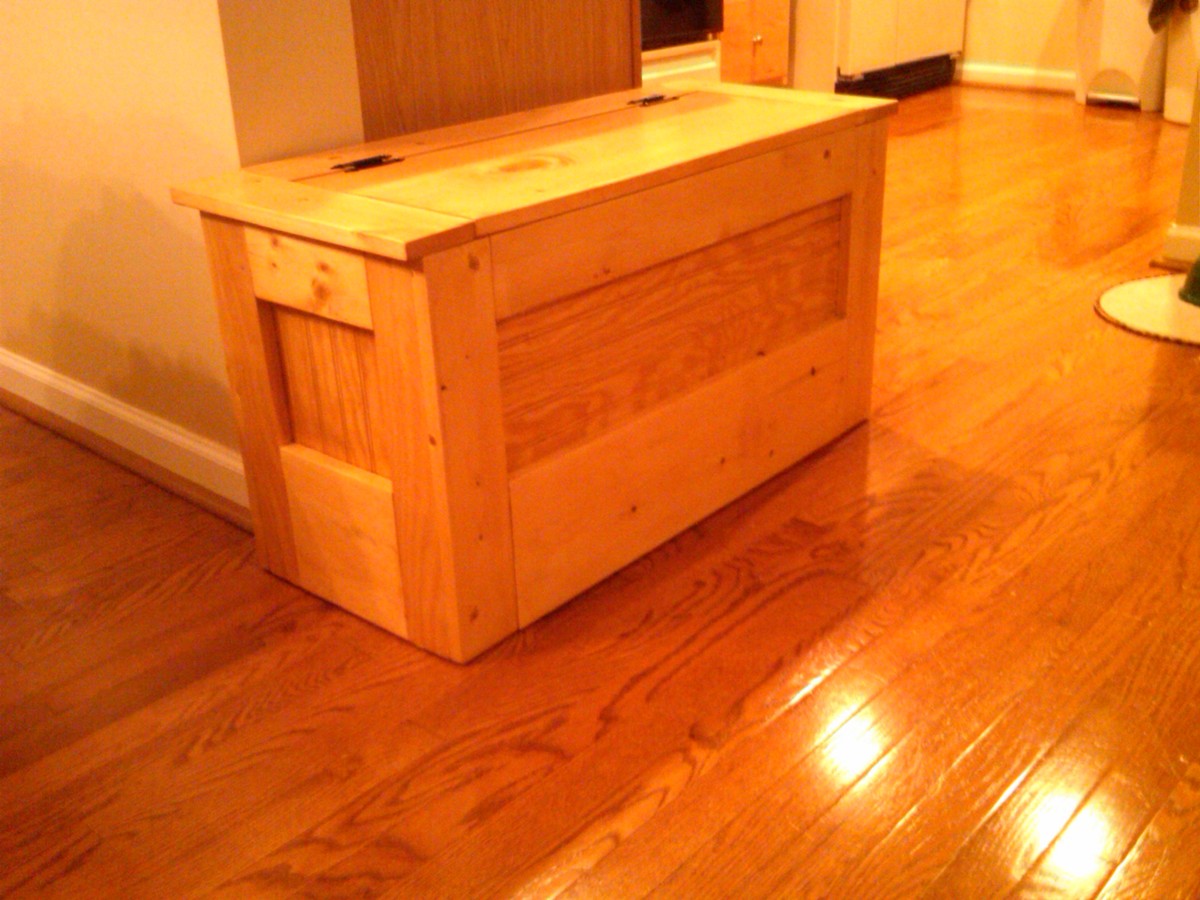
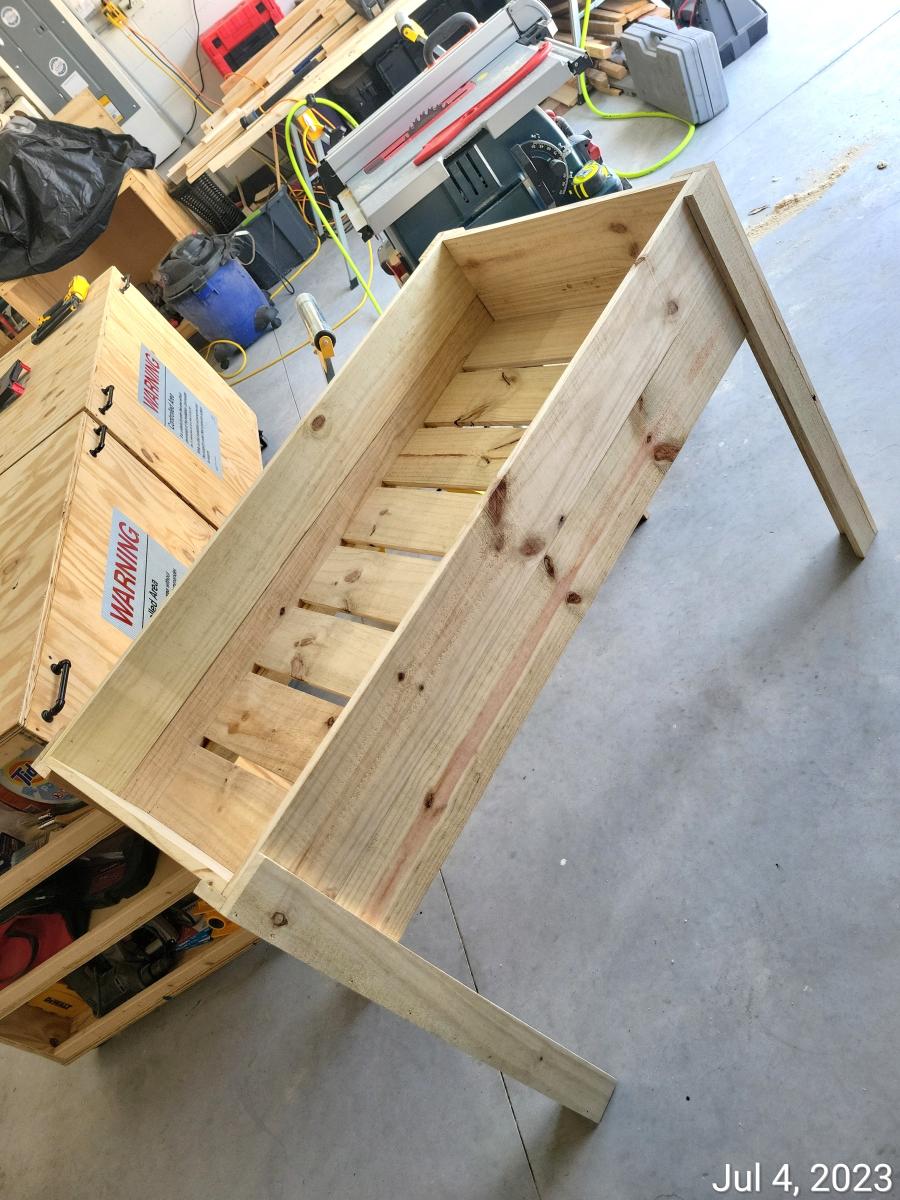
Nesting Grill Station
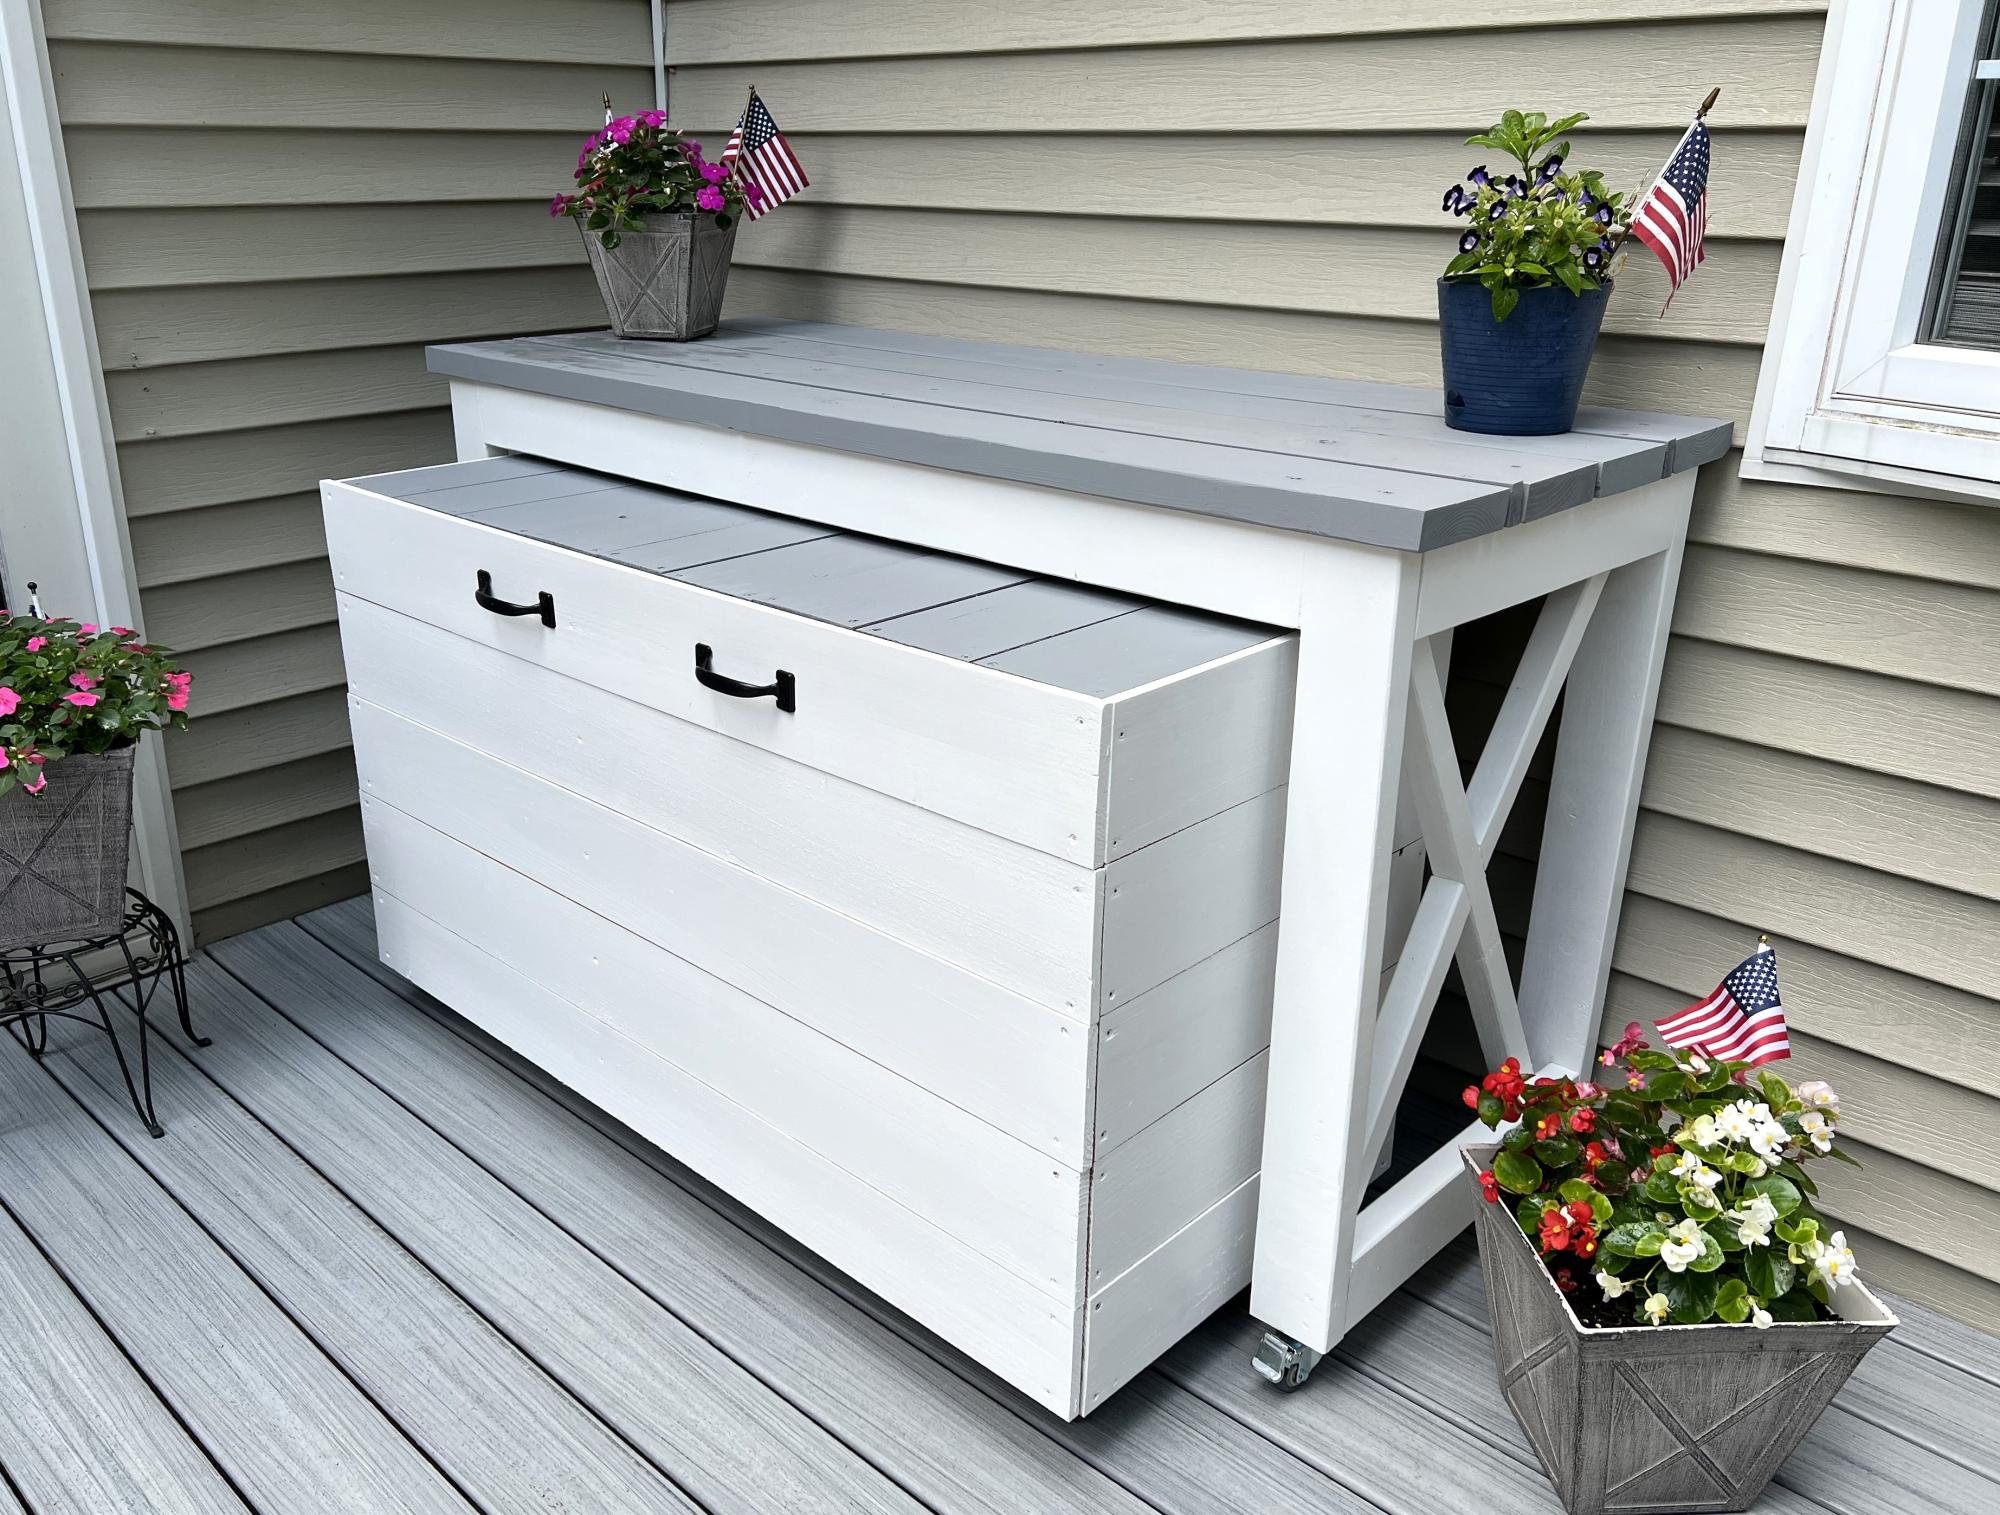
Built the nested grill station just in time for the 4th. So much fun building this, thanks Ana so much for the inspiration! Chris
Built from Plan(s)
Built the nested grill station just in time for the 4th. So much fun building this, thanks Ana so much for the inspiration! Chris
This was one heck of a project LOL! But I am so pleased with the results!!
Wed, 02/29/2012 - 13:34
It looks awesome. I really like the built in look!!!
Mon, 07/23/2012 - 19:37
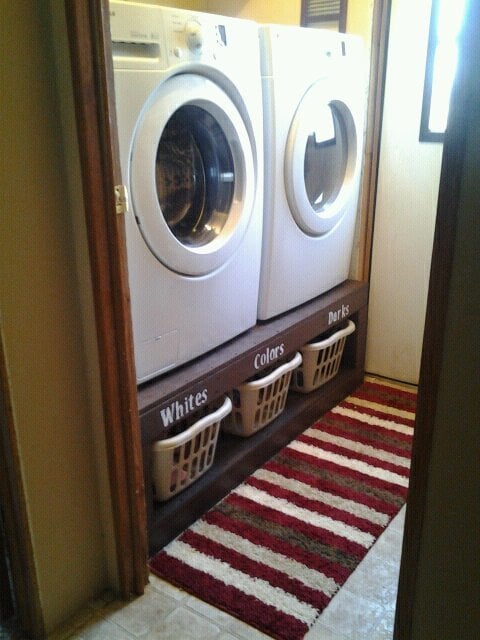
My husband just built us one of these for our laundry room, take a look!!
http://glamorousbride.blogspot.com/2012/07/making-most-of-your-space-la…
- Fotini
Mon, 07/23/2012 - 19:38
My husband just made us one of these!! Take a look :)
http://glamorousbride.blogspot.com/2012/07/making-most-of-your-space-la…
- Fotini
Mon, 09/03/2012 - 15:06
This excites me!! :) Such a great idea - practical, and yet pretty!
Sun, 09/23/2012 - 08:03
My washer will shake on the metal pedestals. Will it shake on this one?
Mon, 12/31/2012 - 19:01
My husband just finished one similar to this for me today-total cost about $65.....Thank you for the fabulous & frugal idea!!
Wed, 06/19/2013 - 11:33
Do you have the plans posted for the washer dryer pedestals?
Sat, 11/07/2015 - 07:47
Please help me find out where to get plan specifics, new here
Sat, 11/07/2015 - 10:54
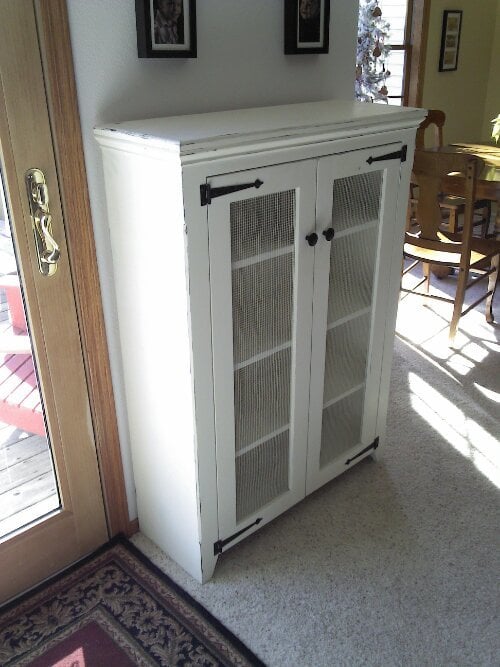
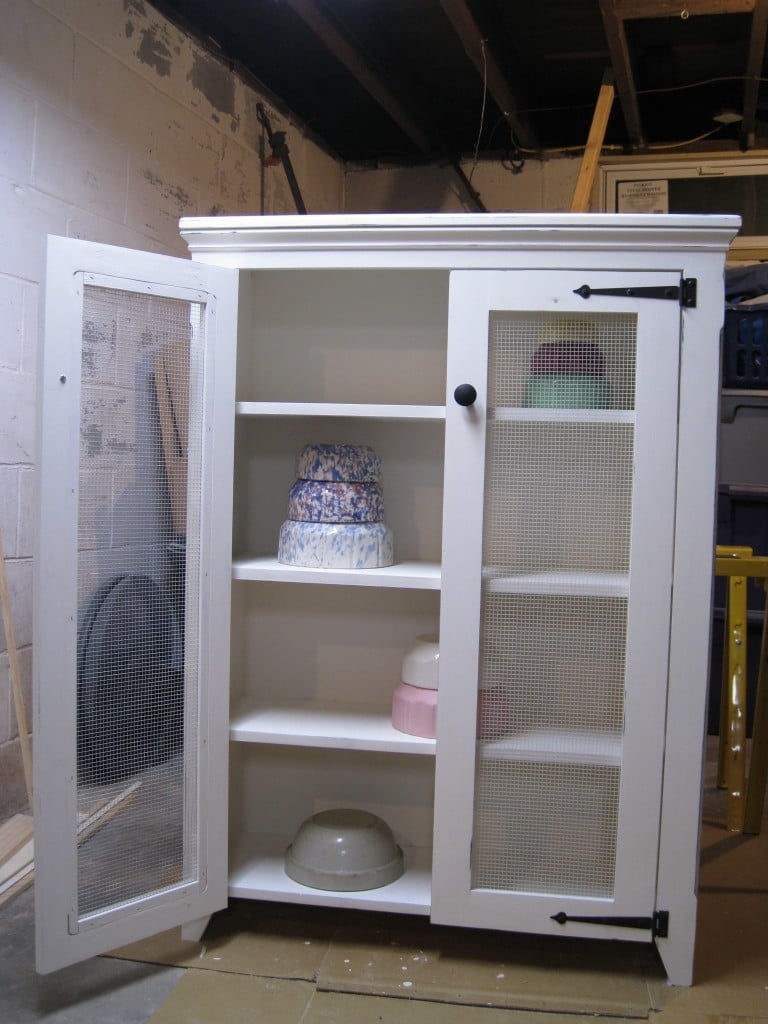
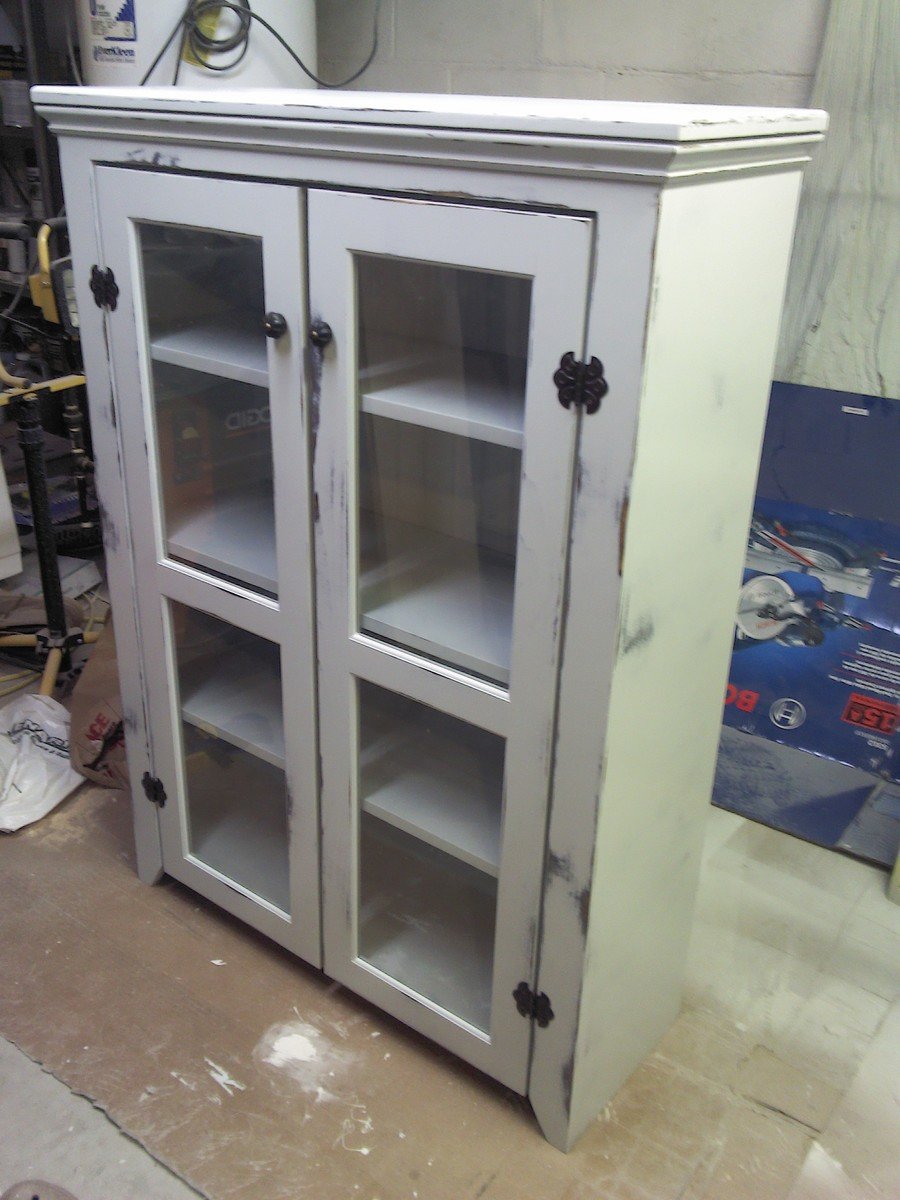
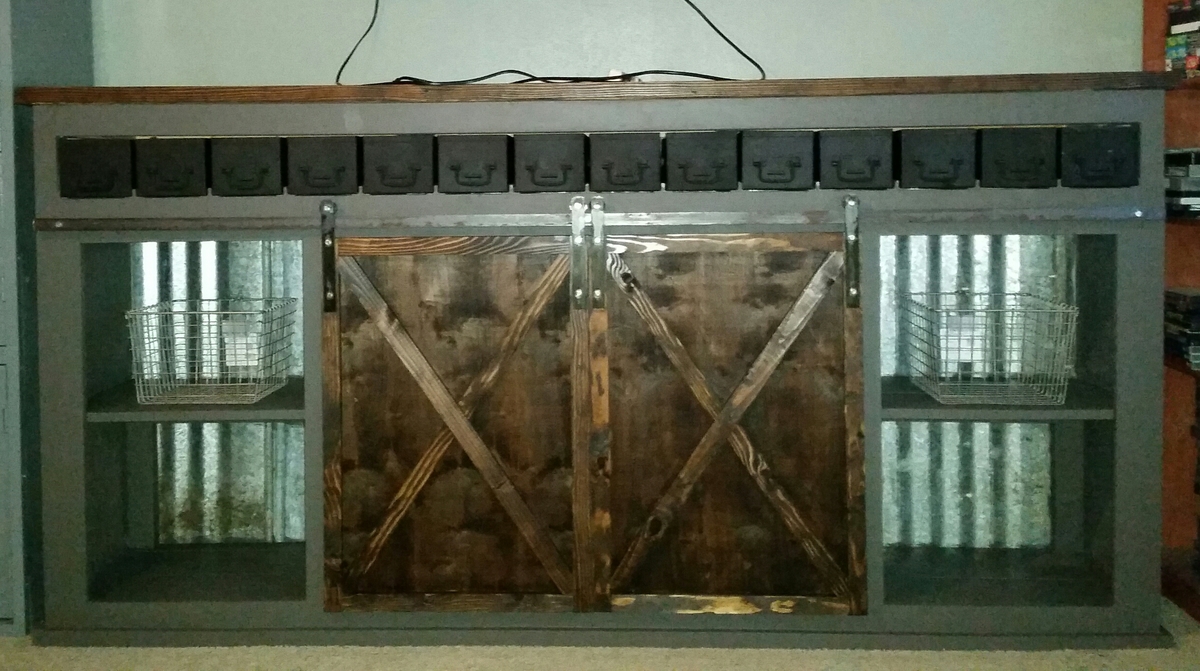
I have built several of these Jelly Cupboards since the plans came out. Everyone really likes them, and they are super fast and easy to build. The last one had glass doors that turned out pretty well. I like to use plywood beadboard on the back to give it a little more character. I also like to use 'hardware cloth' for the mesh type doors (found at farm stores). It usually has openings about 1/8" or less but not as tight as screen, which looks perfect.
Edit: For hardware part numbers and sources please see: http://grvland.com/wordpress/2012/02/07/jelly-cupboard-project/

Tue, 12/31/2013 - 00:51
Really lovely work! I scoured a couple of those pretty butterfly hinges by pure luck a while back, and I know where to find more...but those strap hinges! Where did you get them? I can't seem to find them for a decent price (Ohio).
Tue, 12/31/2013 - 07:15
The strap hinges are from Acorn Manufacturing. I had to order them because I could not find anything like them locally. For some reason I can not post links in the comments, but the sources are linked on my blog, grvland dot com (no spaces and a . obviously). Just search there for Jelly Cupboard and you will find the source links in the earlier of the two posts. I will also see if I can add a direct link above.

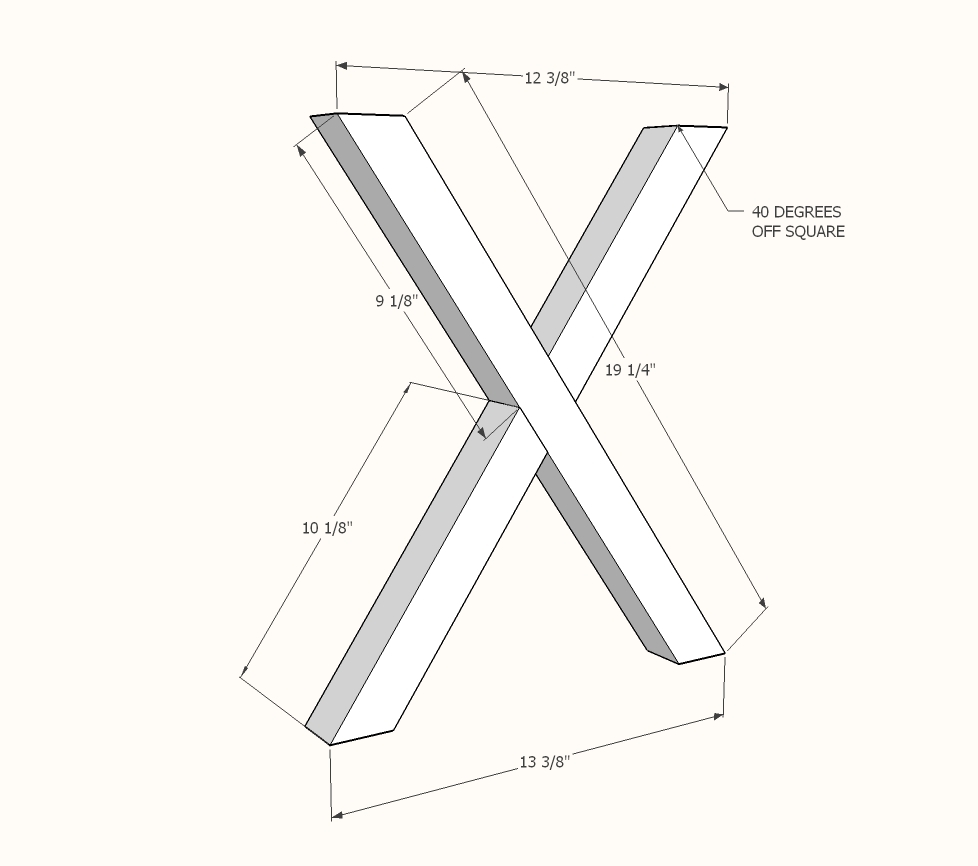
Turned out great! Problem with the plans: written instructions for legs say 35 degree angle but the diagram shows 40 degree angle. Which one should it be?

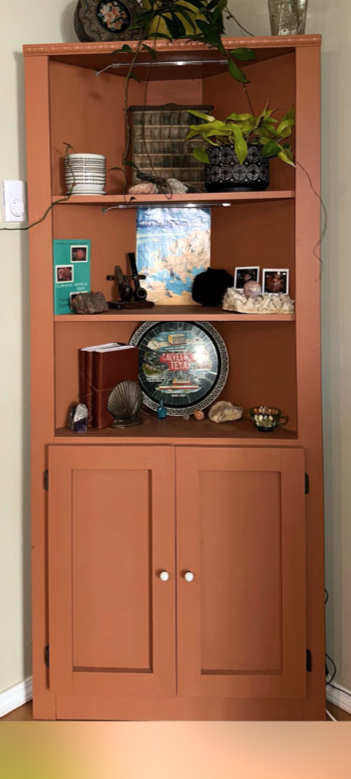
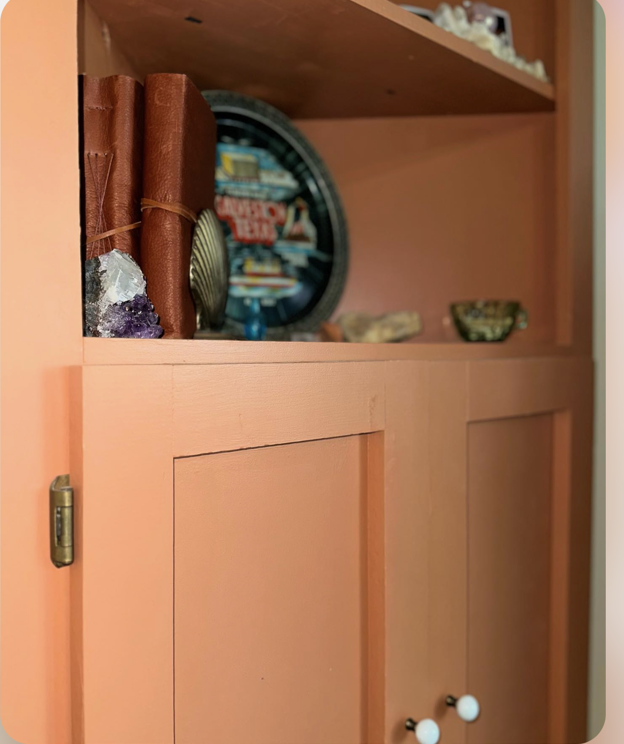
"Couldn't find a corner hutch that I liked so I decided to make my own and OMG I'M IN LOVE"
Jimi Hightower
I built just the bottom portion and chose to omit the molding. I lined the inside with contact paper so that items stored inside don't snag on the rough plywood on the other side of bead-board.
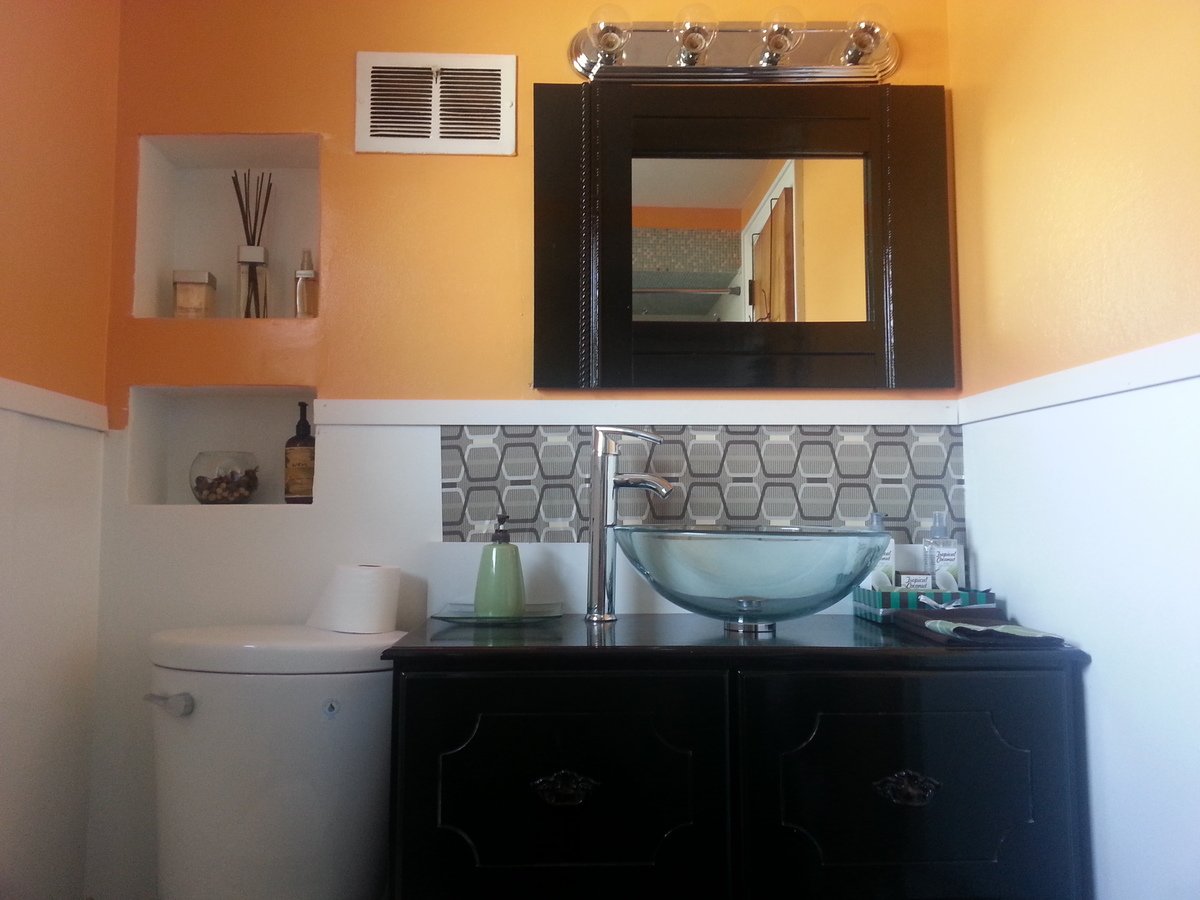
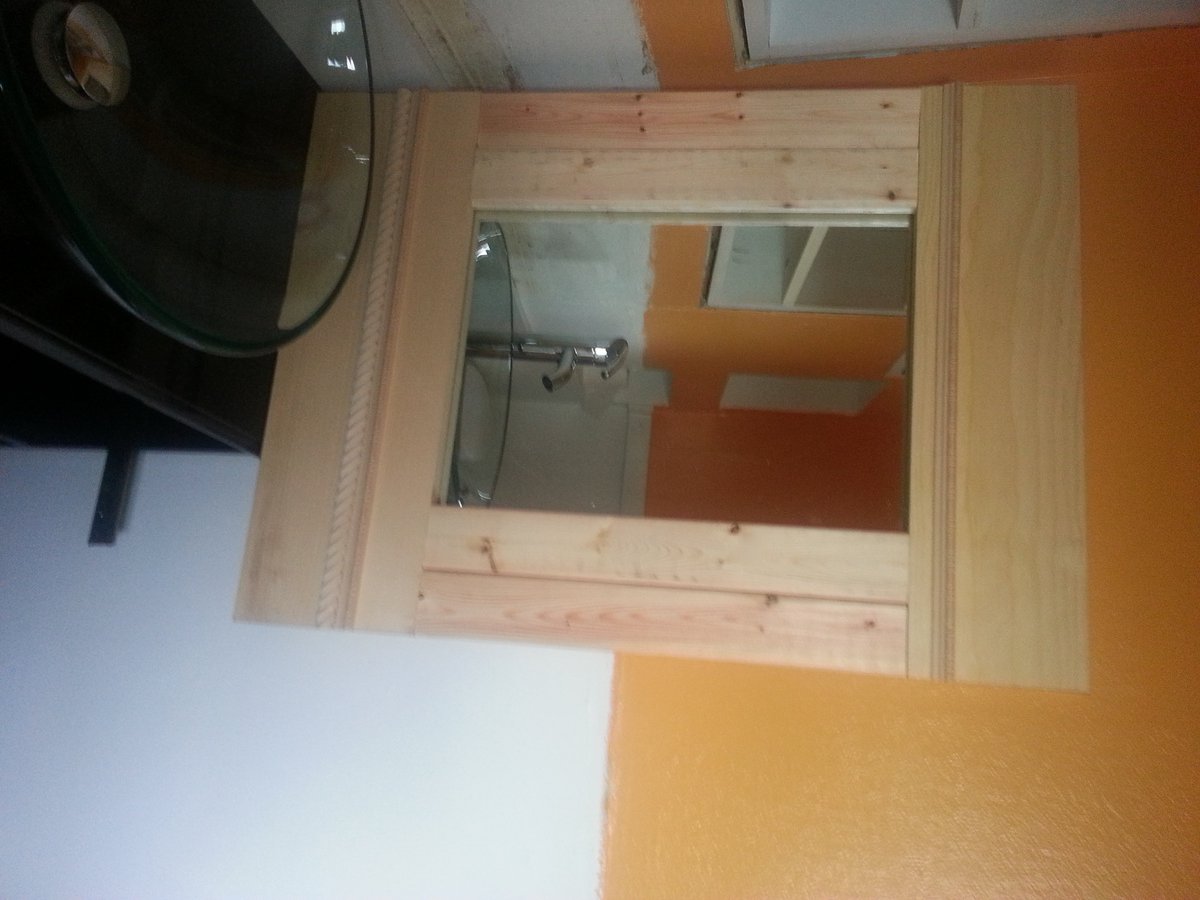
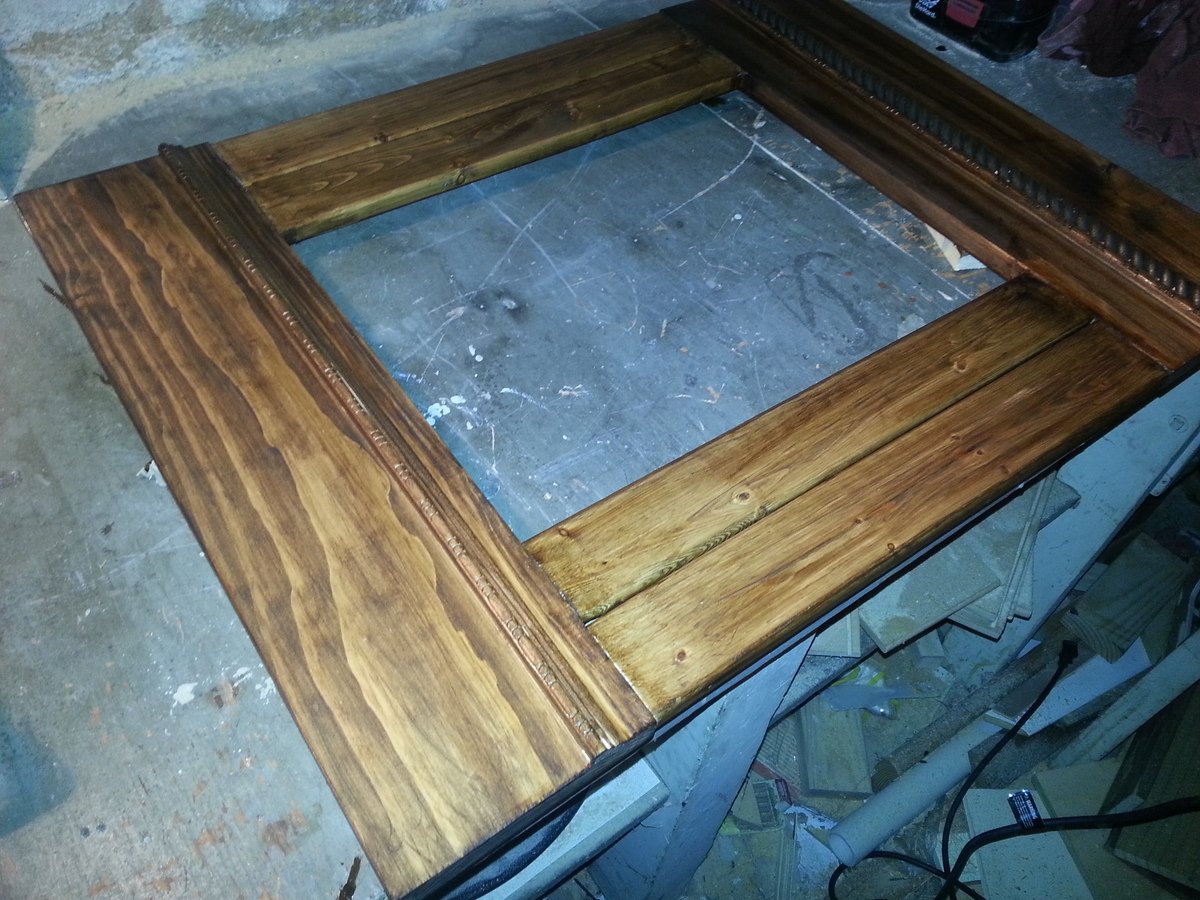
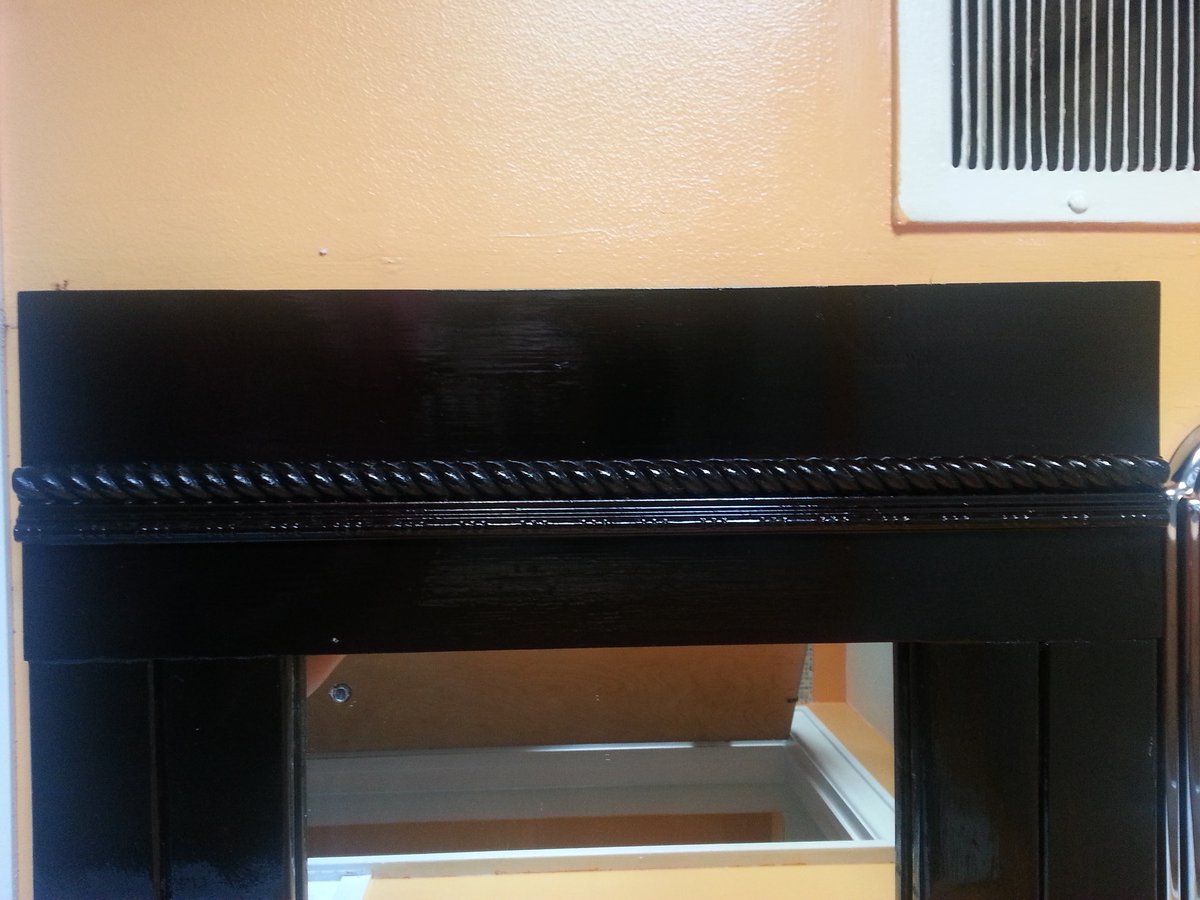
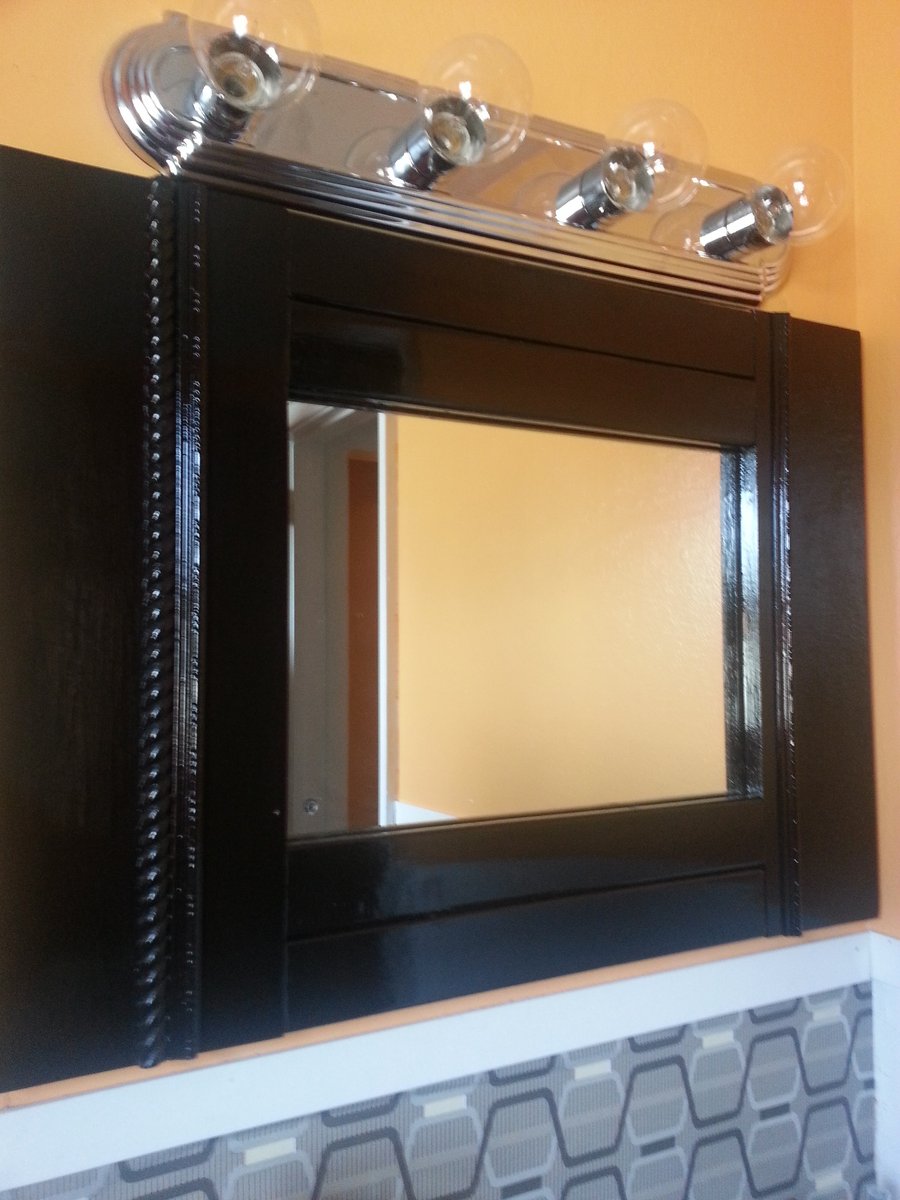
Initially I was simply going to replace the old medicine cabinet with a mirror but my husband insisted that he needed a medicine cabinet. So I built the cabinet. Then I built the mirror. I wanted the mirror to stand upright but the width of the hole left behind by the old cabinet was too wide. I then tried to have the right side of the cabinet remain open but then realized that the door would not open because of the height of the faucet. In the end I had no choice but to make the door horizontal.
Though it's not what I wanted and it is not centered like I would I liked it to be I think it still turned out fine. And the mirror looks fantastic! Better than the pics show.
Most of the wood used were scraps from other projects. Including the trim. The one thing I bought for the project was a mirror that turned out to be the wrong size. It was too large and I did not want to cut it so I used the mirror from the old medicine cabinet. It did have hole where the door handle was which I tried to fill. Now I just try not to look at it. lol
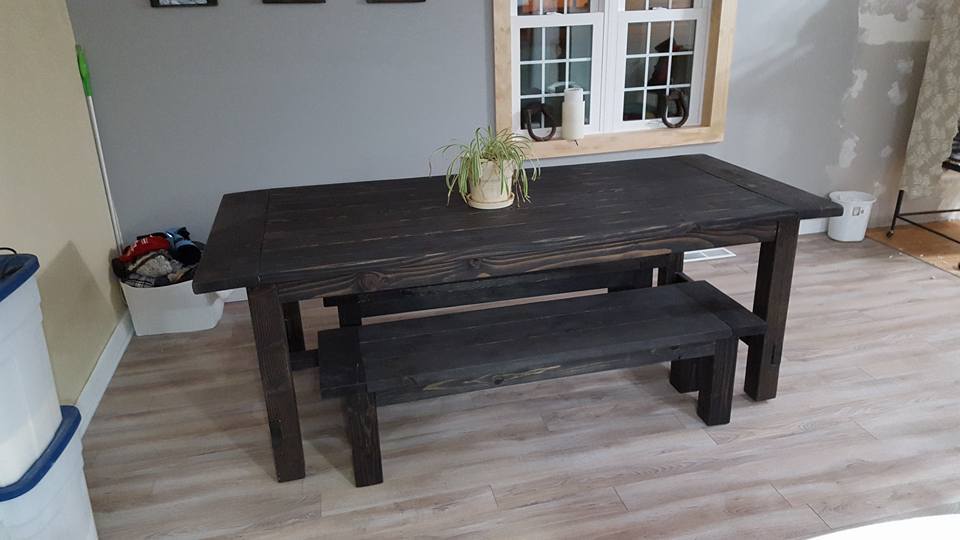
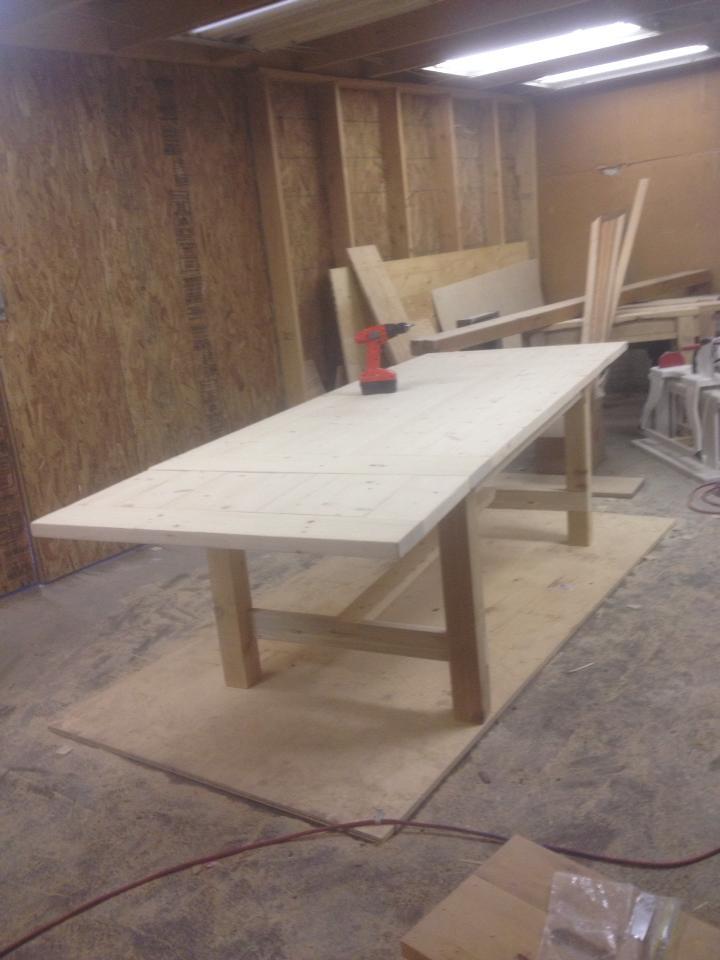
I stained the table and benches dark to match our cabinets.
I created matching benches based loosely on the table plans. The benches are made of 2x6 for the top and breadboards. I left out the stretcher on the benches as the 2x4 and 4x4 frame structure was more than sufficient.
The table was finished with a paste wax rather than poly. This gives it a smooth, water resistant finish without being overly glossy. The goal with this style, after all, is to make it look somewhat old. The wax does a great job.
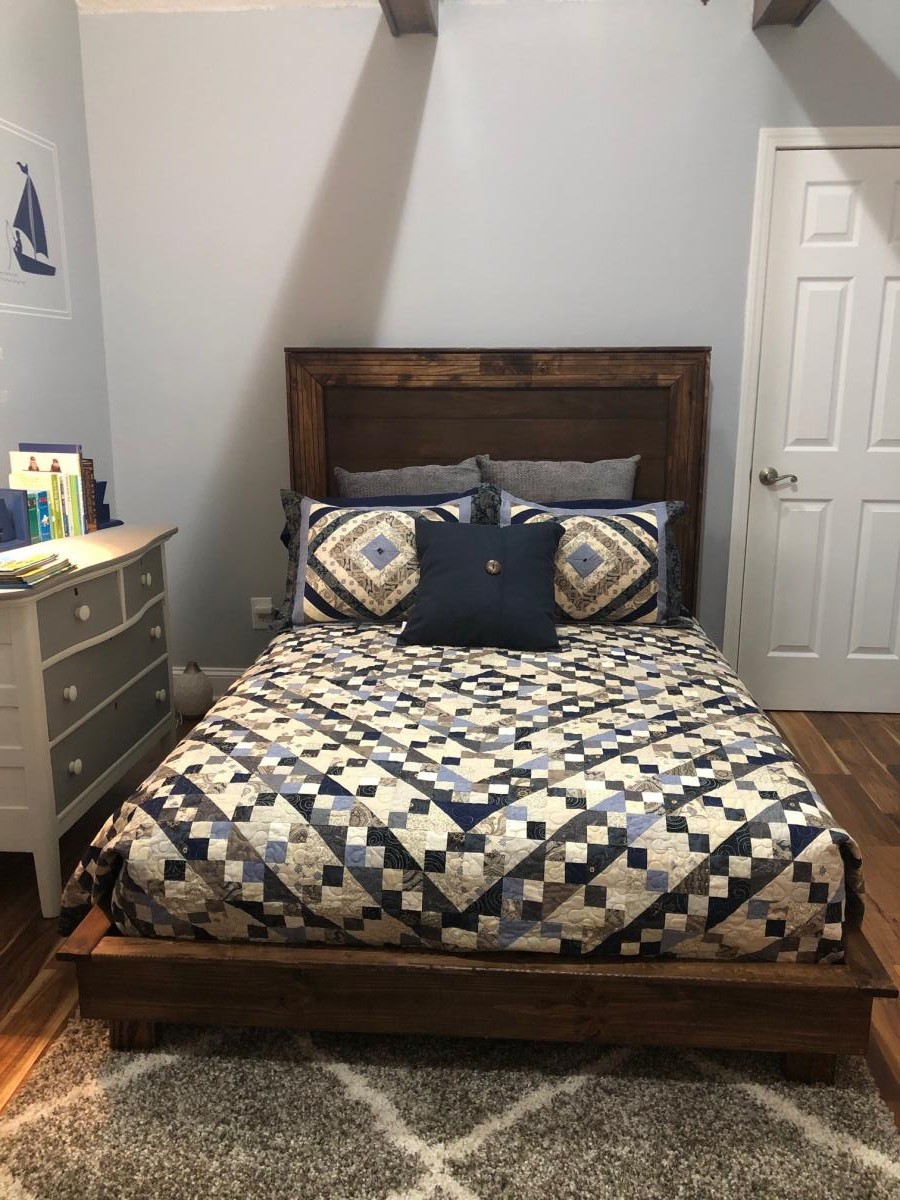
My husband followed these user-friendly DIY platform bed plans and was able to build and finish our son's big boy bed in 2 days. We used poplar wood for the headboard and pine for the frame. We are so in love with the results! Thanks, Ana, for sharing these awesome plans with the world!
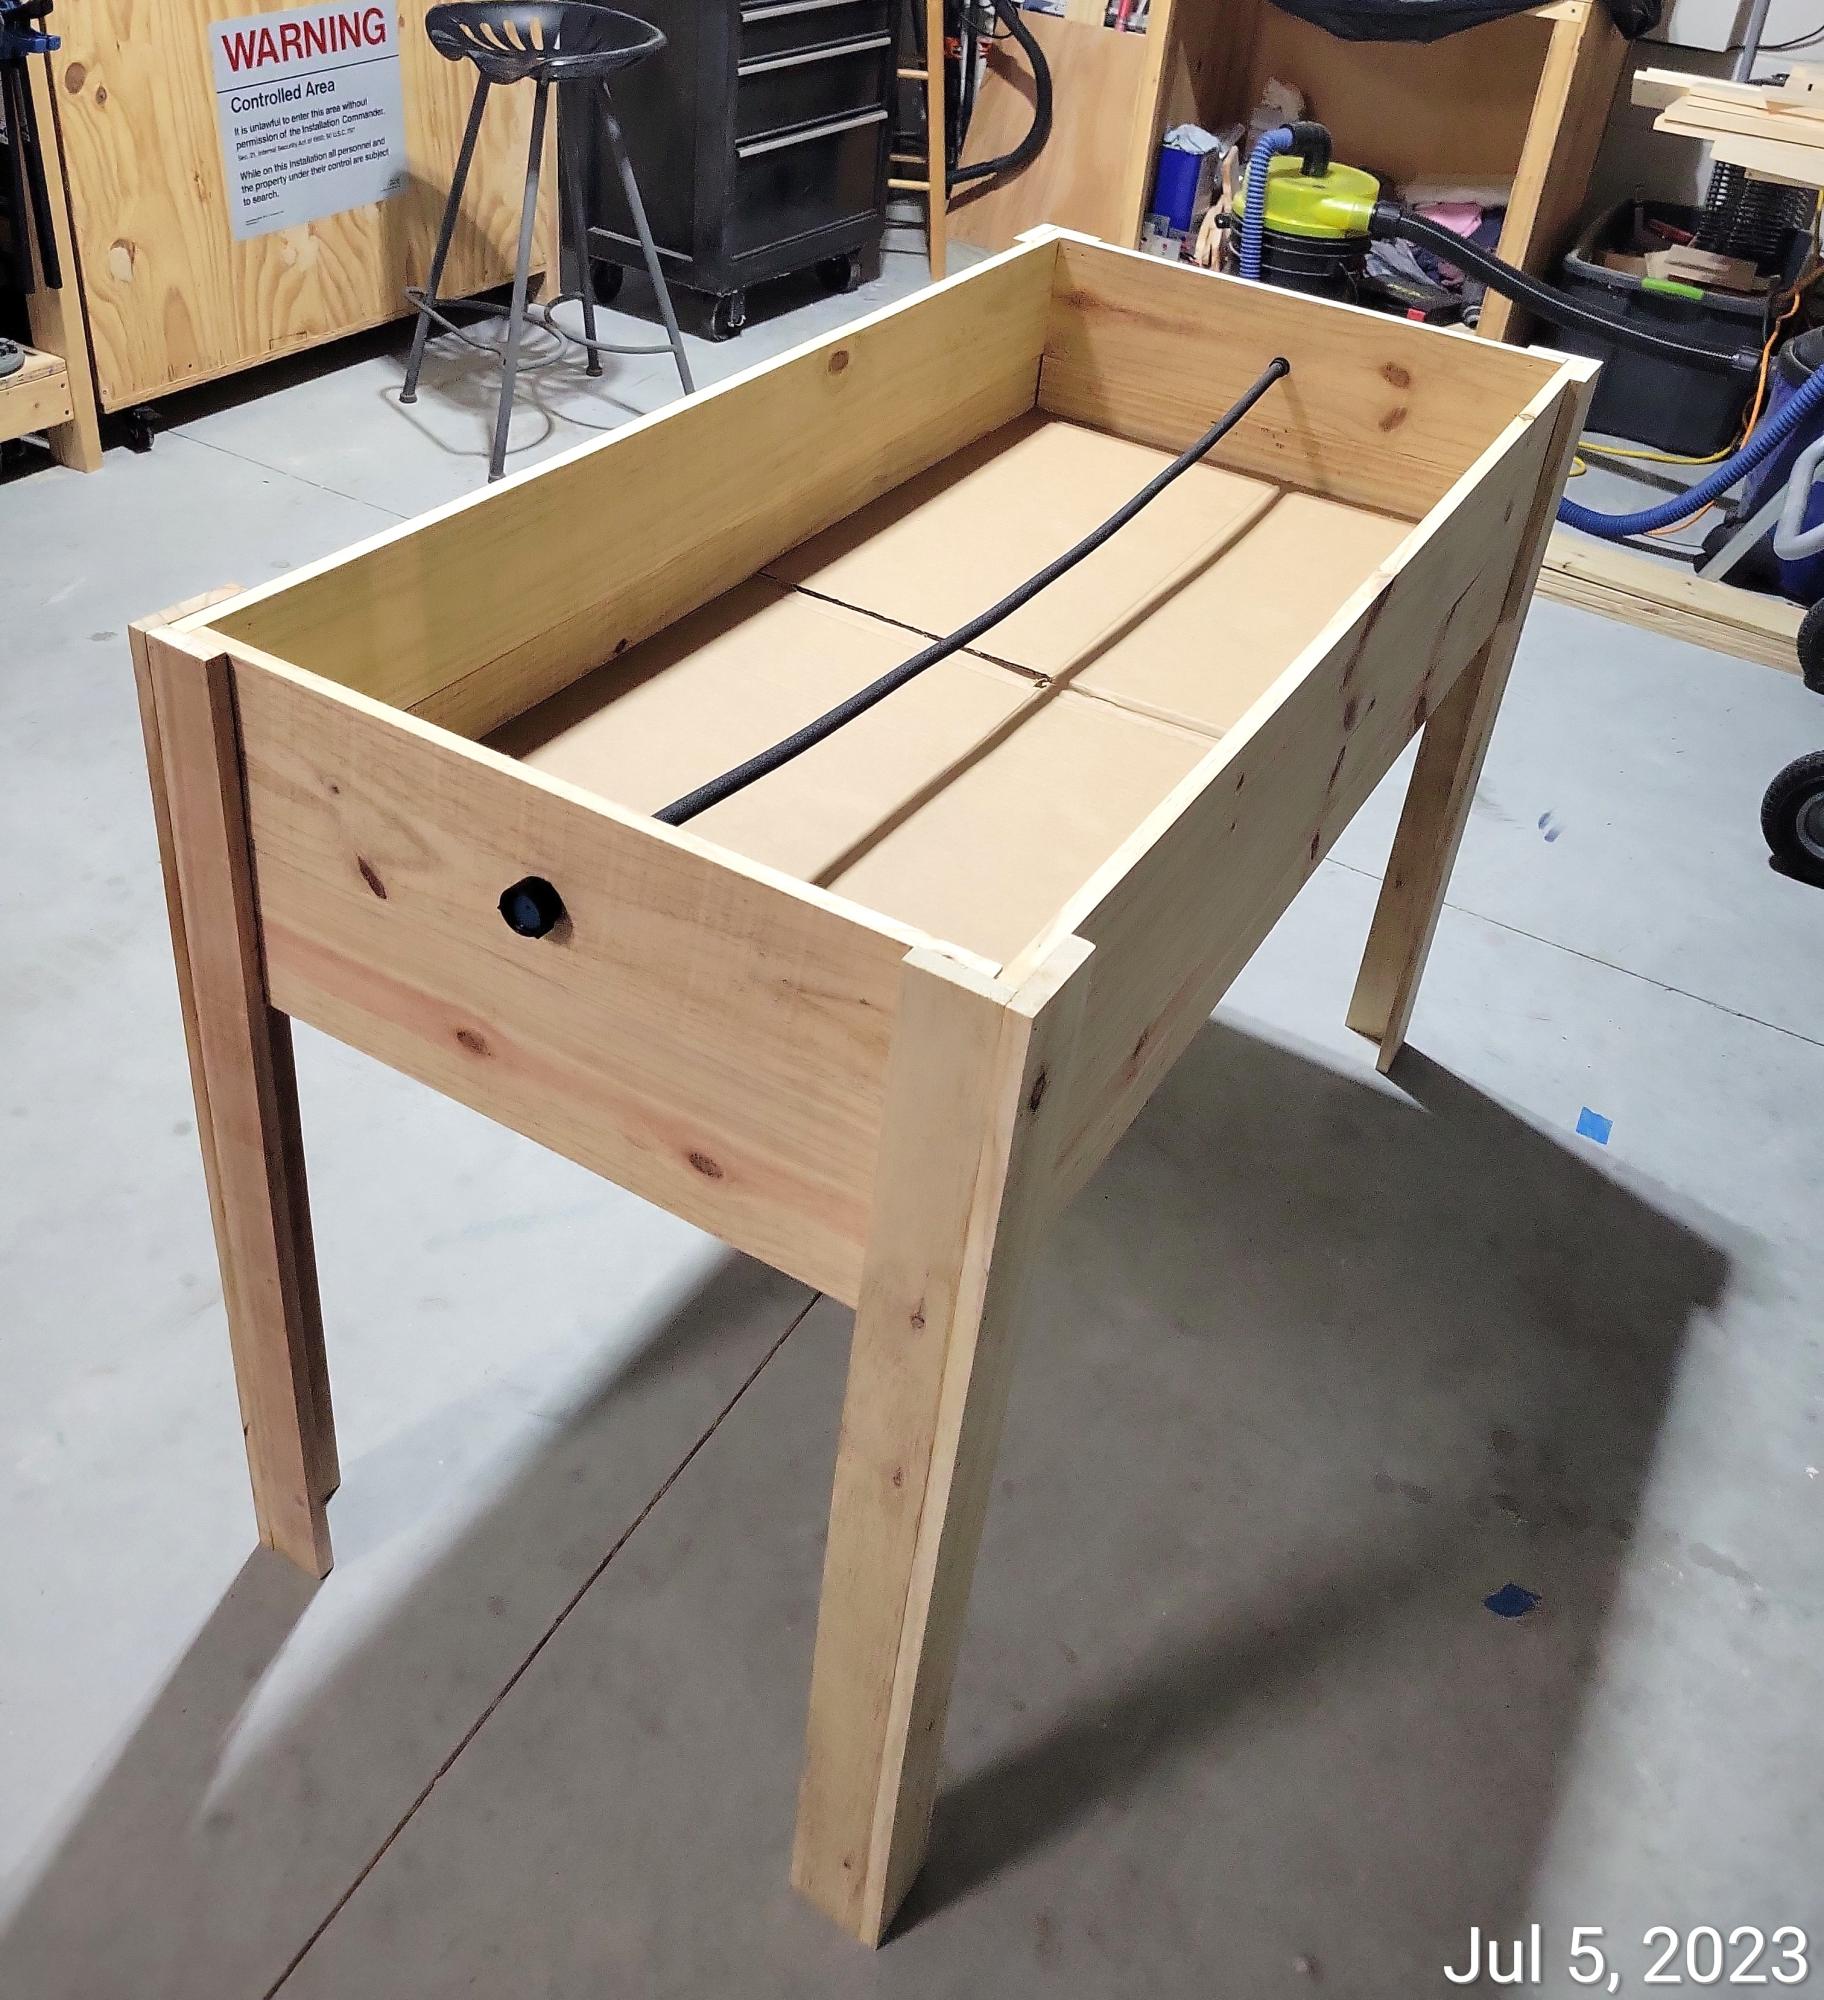
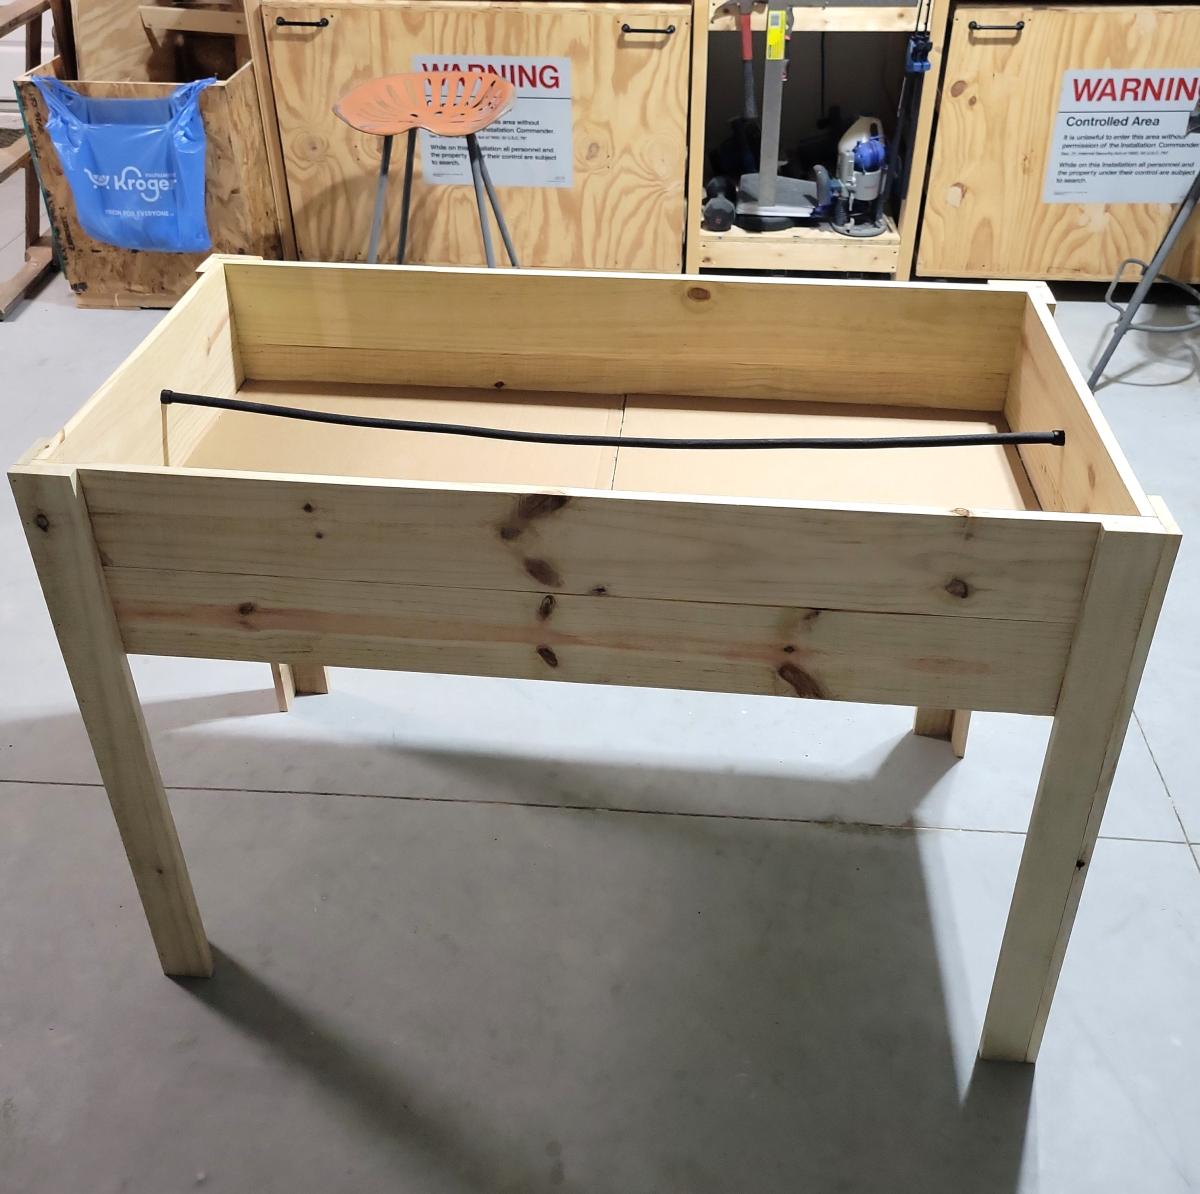
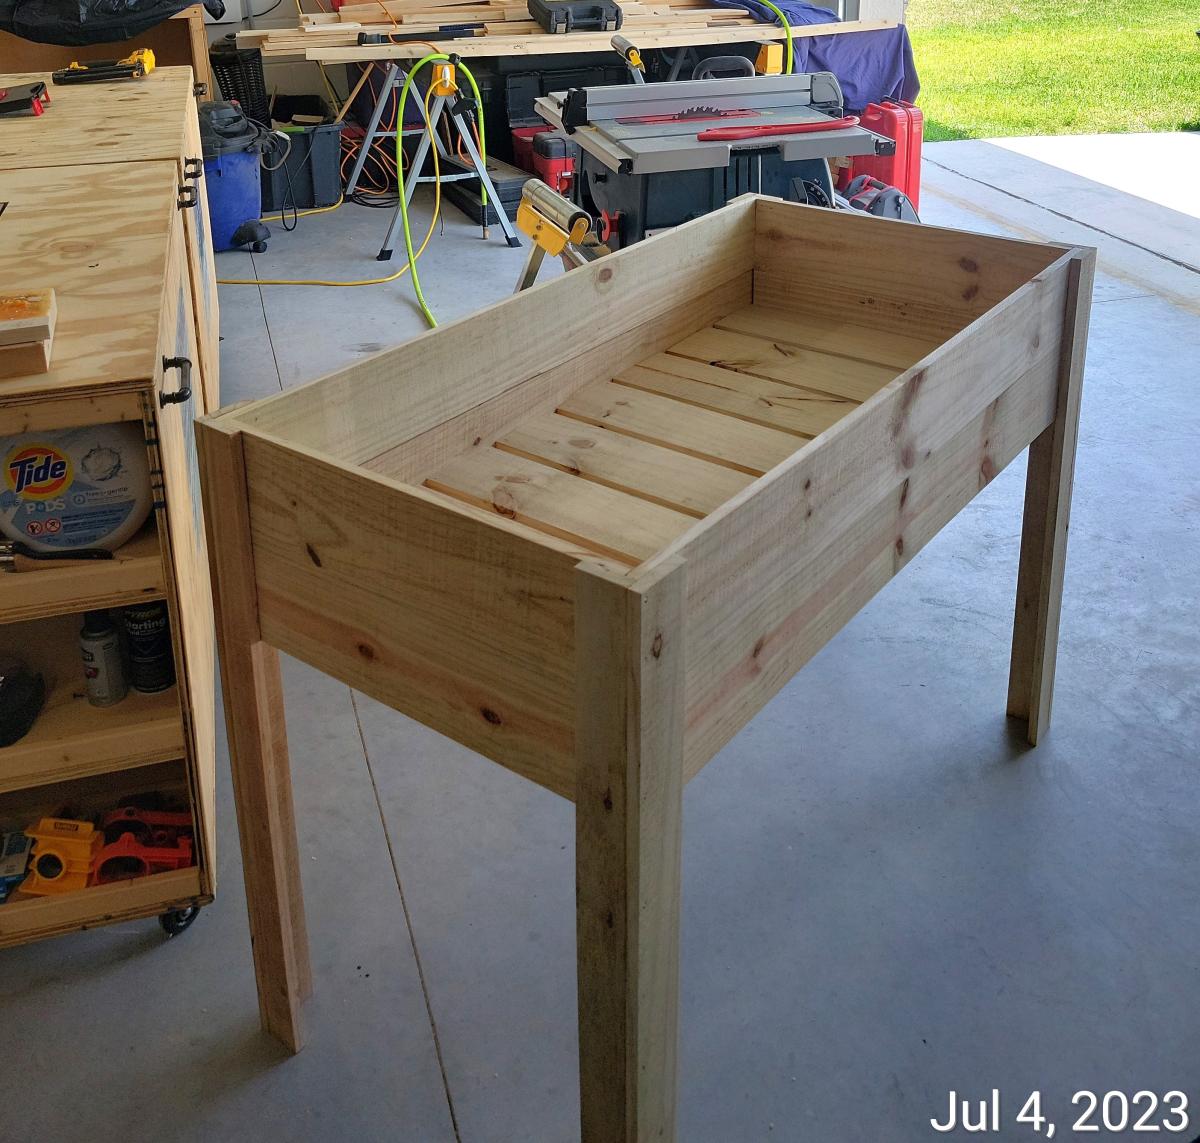
Raised planter with water hose.
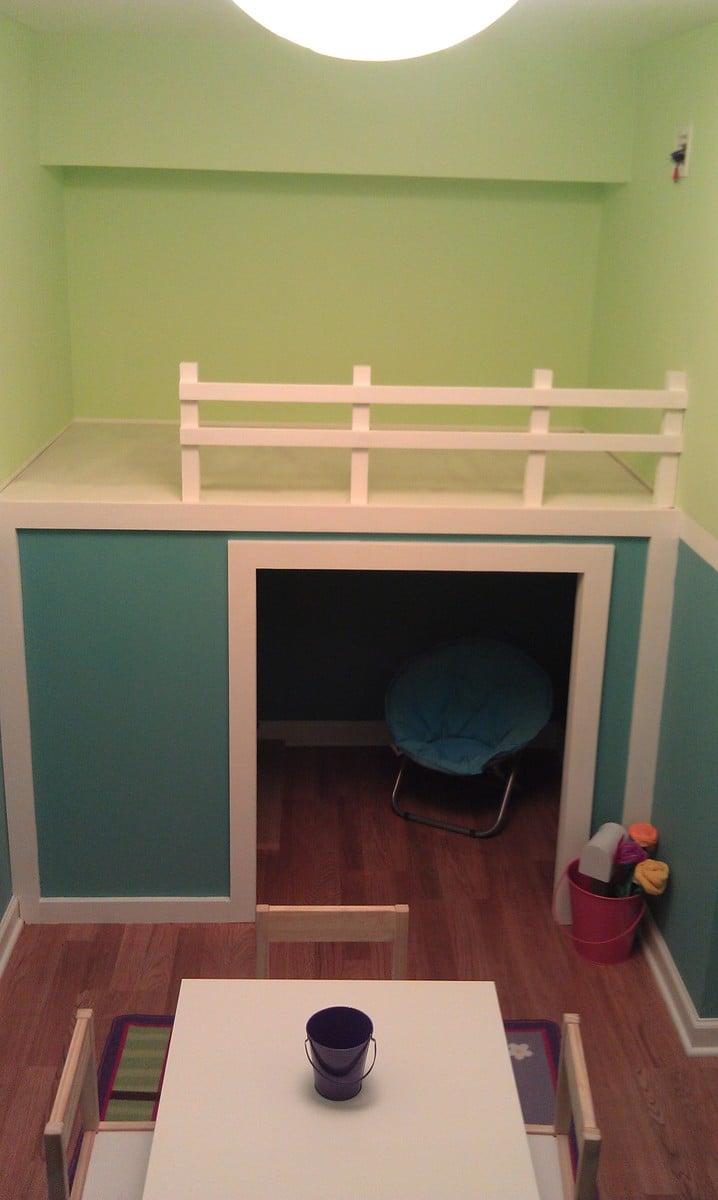
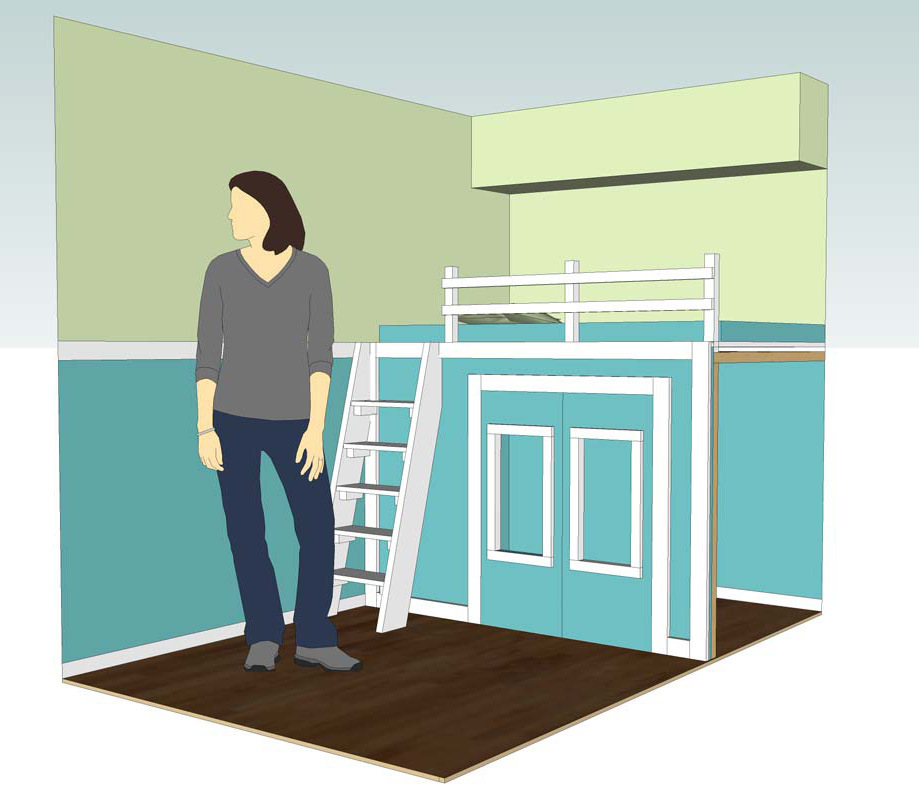
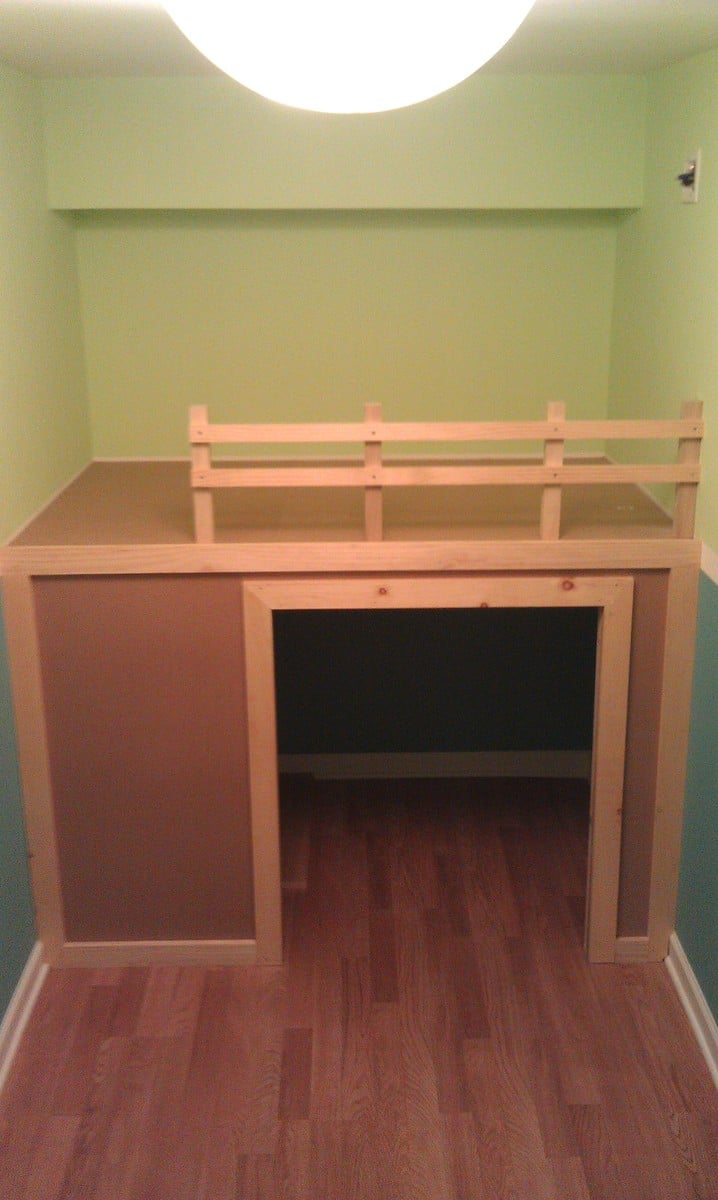
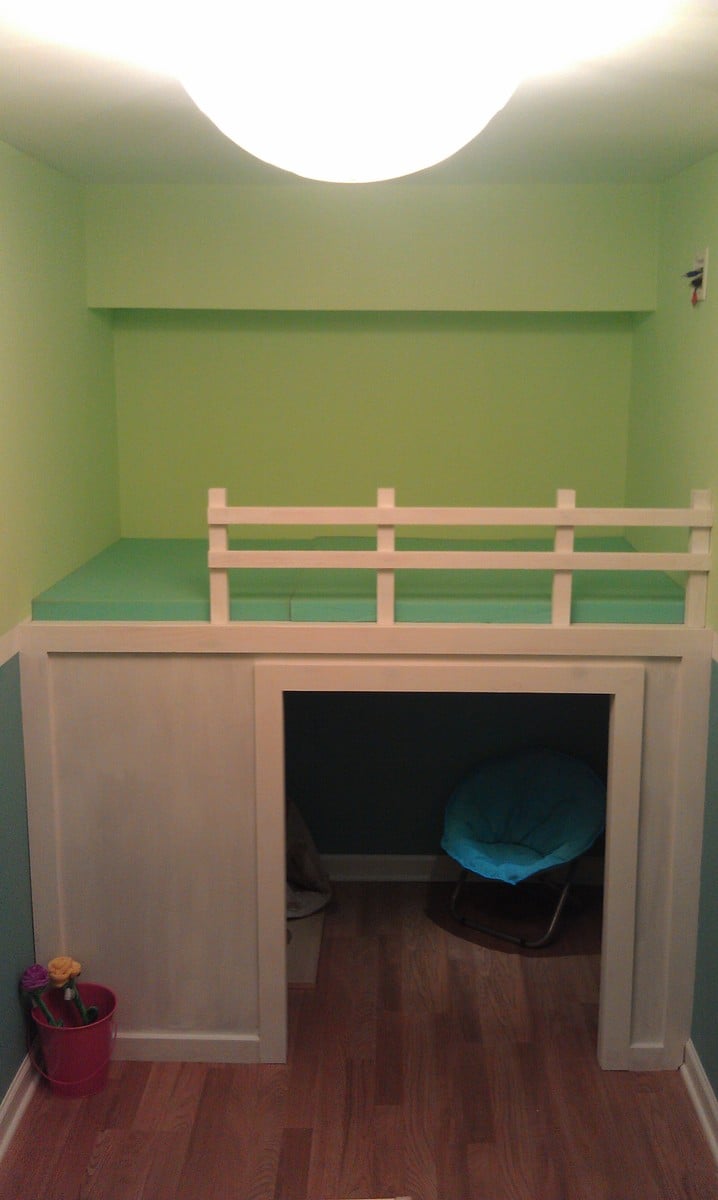
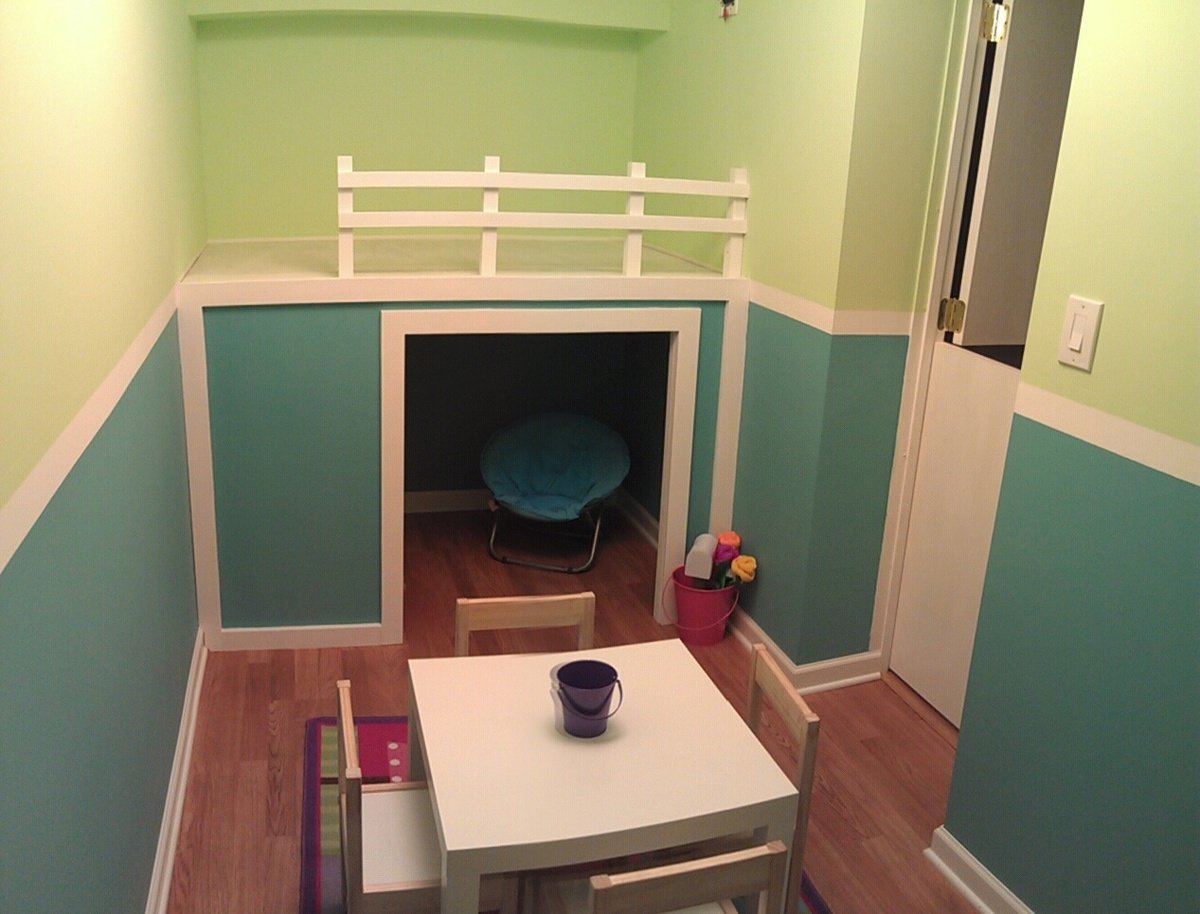
We had a small 6’x13’ storage room that we wanted to make into a playroom for our daughter. I saw the “Playhouse Loft Bed” project here and wanted to do something similar. With limited space I had to redesign the plans to make it fit. I eliminated the side walls from the plans and made cleats on the three walls to hold everything up. This actually saved a lot of money and time. As this was simply going to be a place for my daughter and friends to play and watch movies I did not worry about the size of the mattress. I simply went and had some foam cut that I am making a cover for. We are building a ladder that will go on the left side as well doors. It is dark inside so I was able to find motion operated puck lights that stay illuminated for 45 minutes at a time. So if she forgets to turn them off then they will go off by themselves to save batteries. This was a fun project. The most time consuming part was the planning. I did everything in Sketchup. This made it simple when it came time to build. The house itself went up fast. I spent the next few days filling holes, sanding, and of course painting. None of which too a long time but I was not in any rush. I also made a Dutch Door to go along with the room.
Thu, 03/01/2012 - 06:00
You did a great job! I see lots of fun places in that room for storage too.
I used cleats on my loft bed that's still in process... but mine is queen sized and into the corner. I am doing the measure as you go thing, so it's taking a long time.
It's like a little theater room! Toddler sized!
Mon, 03/05/2012 - 07:45
This has definitively been a fun project. There are still a ton of things I want to do for the rest of the room. My little girl goes in every morning to play.
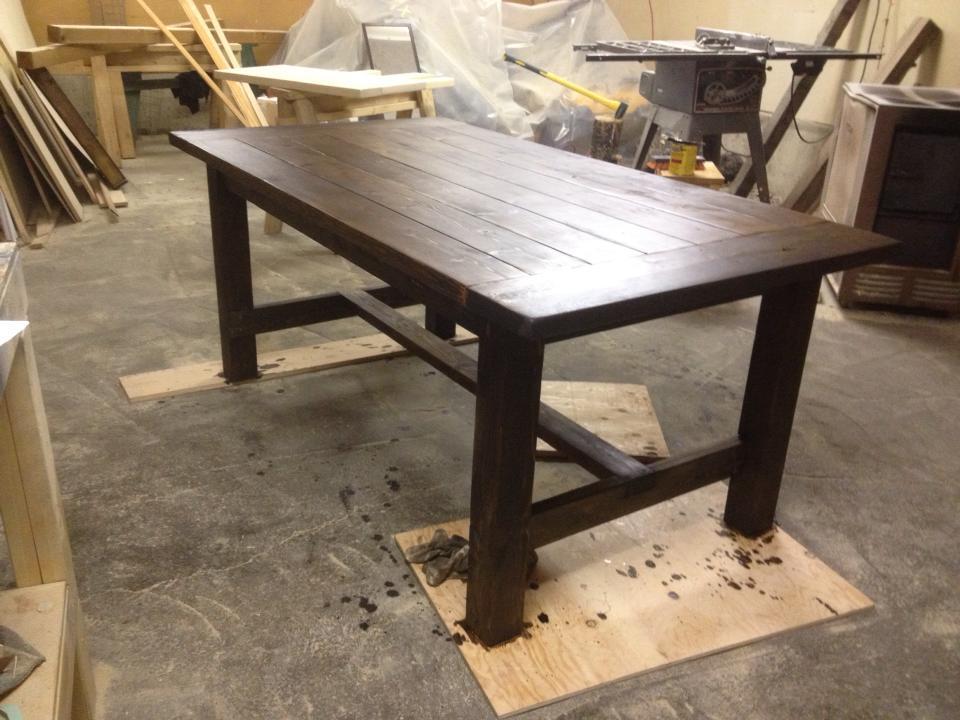
This was the second table I built - it was much improved on my first and was for my sister as a Christmas present. It has 4x4 legs that I notched out with a circular saw for the legs and a spruce top. I modified the length down to 6' for her house but added extensions on the end that make the table up to 9' long when fully extended.
Tue, 09/23/2014 - 13:42
How was the epoxy worked out in the cracks?
And separation or trouble?
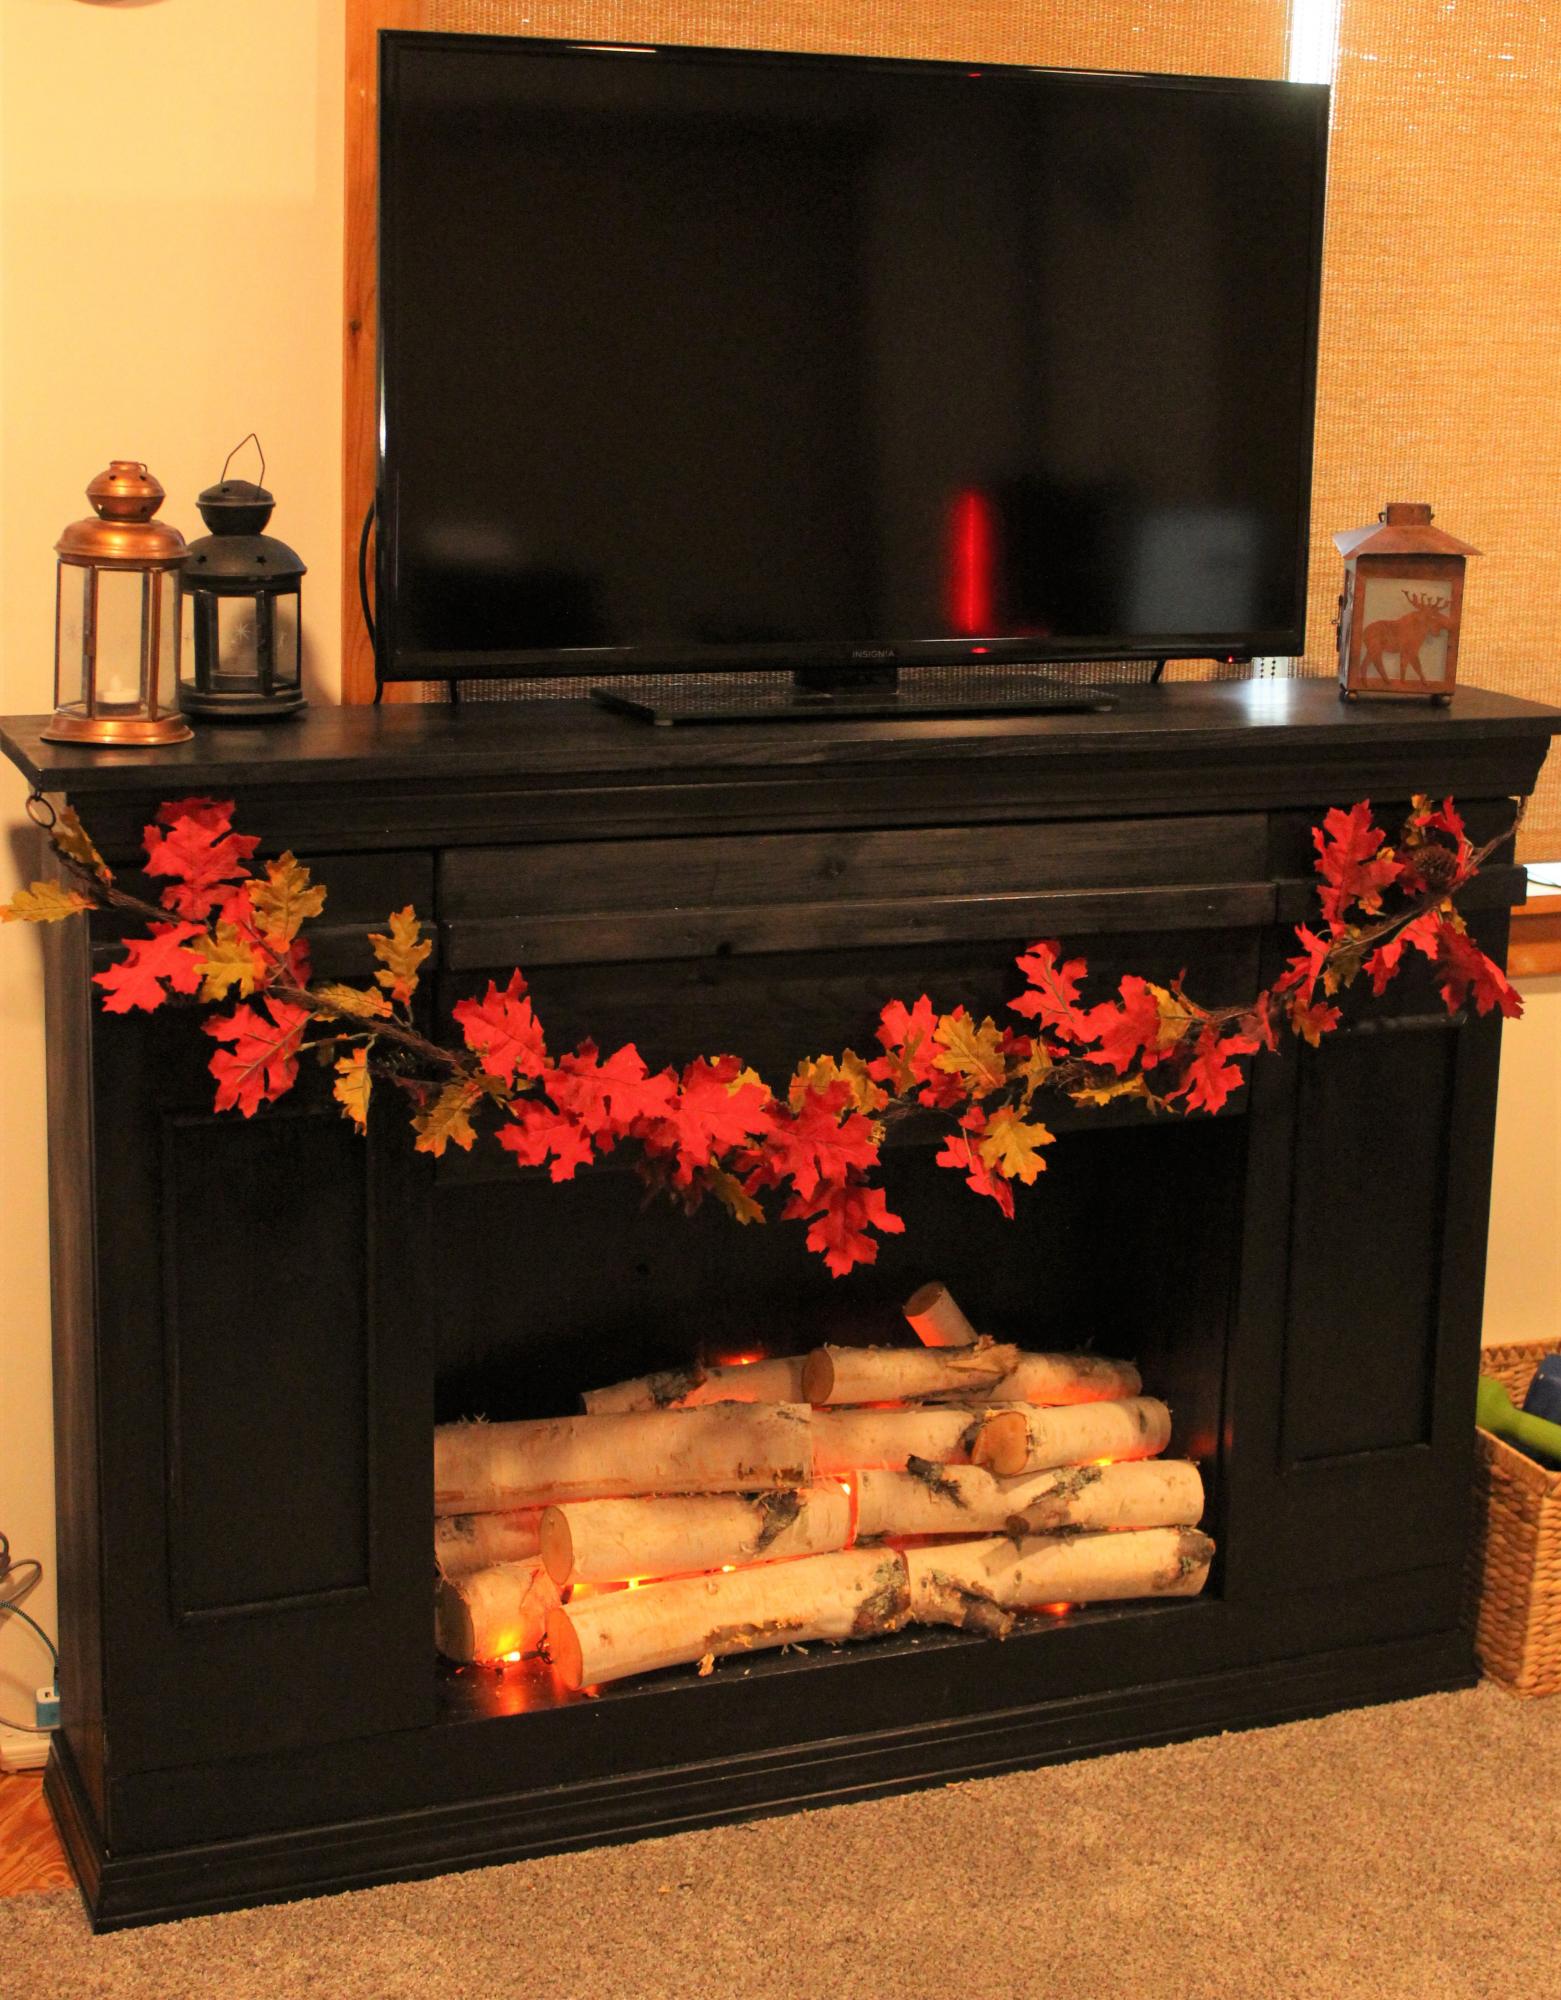
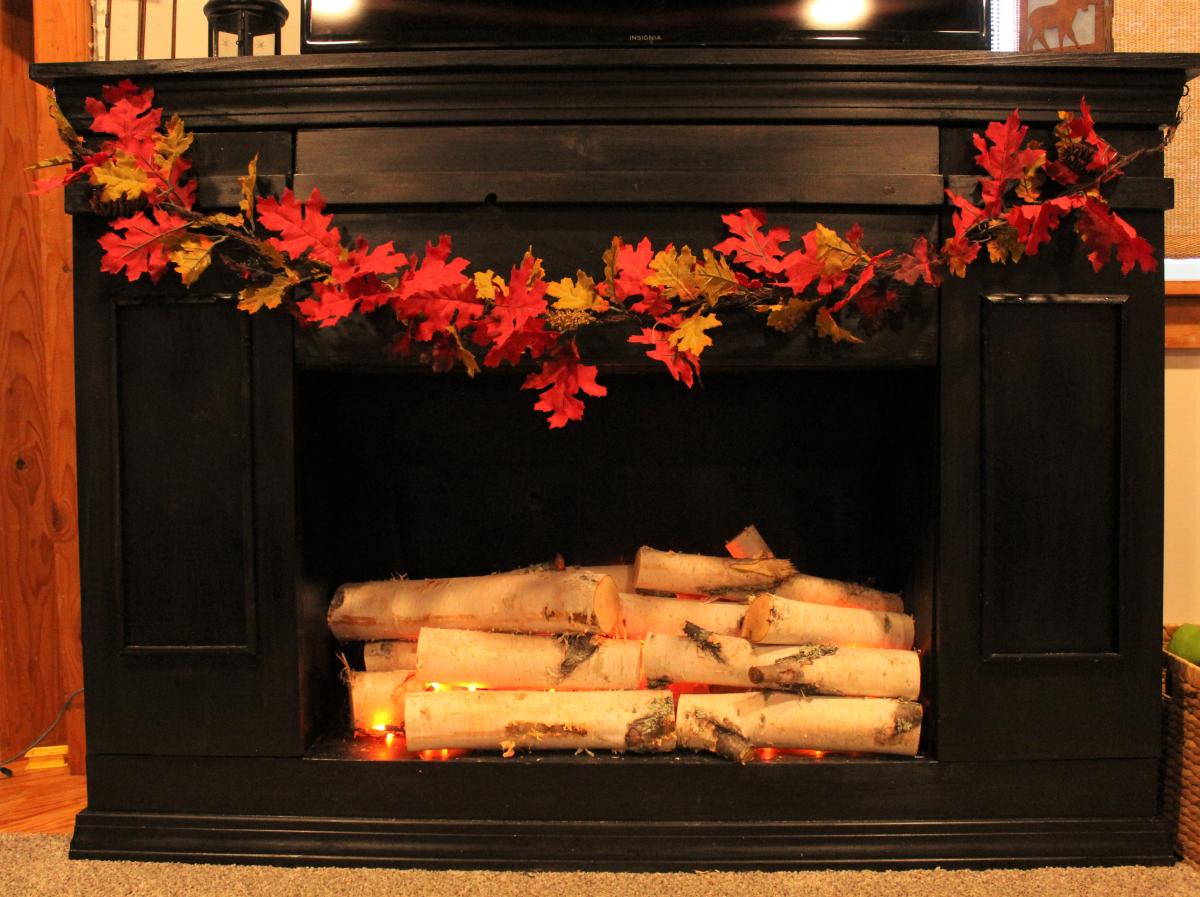
Went with a black, high gloss finish which I sanded down with 220 grit sandpaper to soften the look. Cut up a birch tree from the backyard, back-lit the logs with two strands of orange Halloween lights from the dollar store (we drilled a hole in the bottom back for the plug for the lights).
Added a remote extender so we don't have to open the front middle door in order to operate our streaming devices.
Love to be able to decorate this for the holidays--can hardly wait for Christmas!

Had tons of fun making this potting bench from Ana used a few different boards but, overall had a great time

I sometimes really struggle with making this bed, mostly because it's huge and heavy and not a one person assembly. For some reason I still insist on trying to go solo, and it never ever works out. I was in search of some method that would not only make assembly easier and possibly a one gal gig, but also add to the stability factor.
I decided to grab some metal brackets often used in putting together decks or fencing to use as cross braces for my box spring support. This made it much much easier!


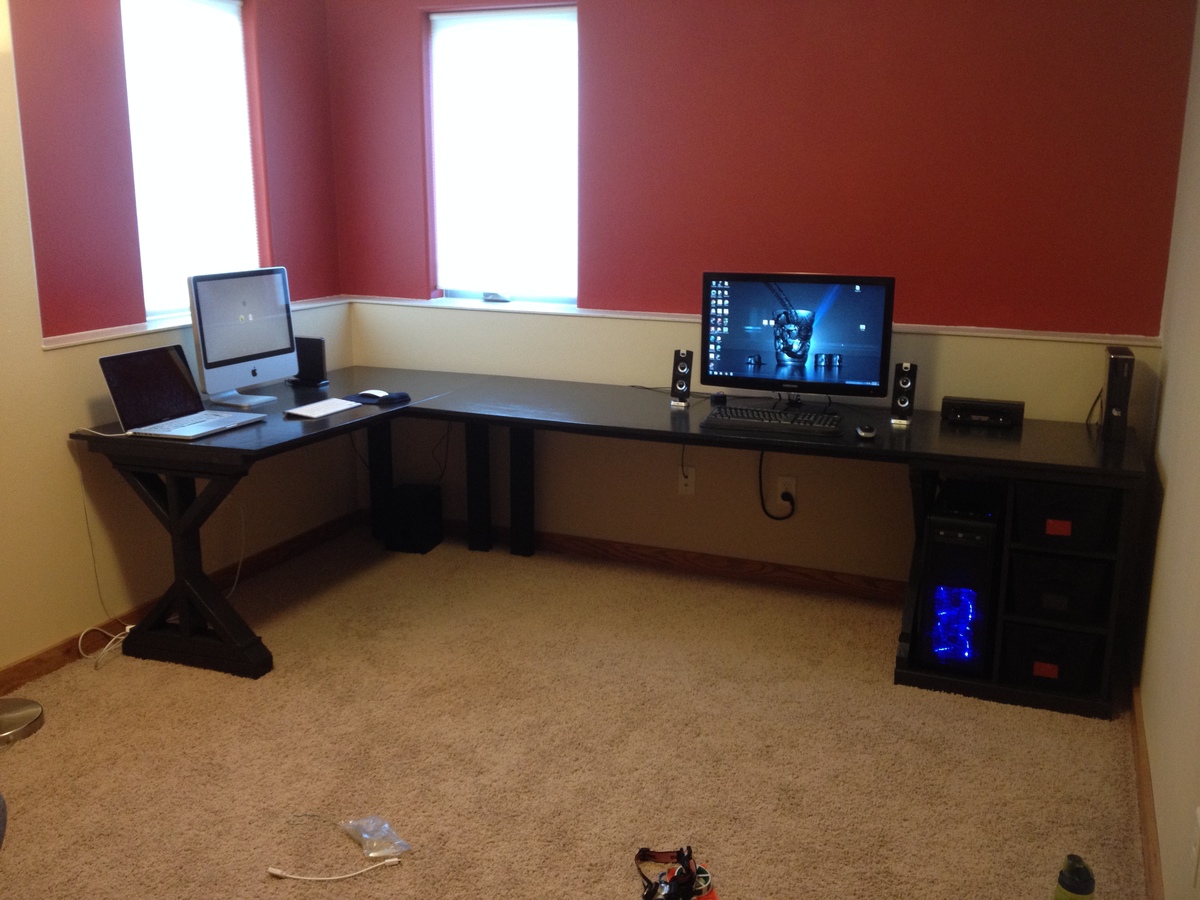
This desk was made using the "Fancy X Desk" and "Modular Office Base" plans. A CPU enclosure was added with a similar "X" design. The top is 3/4'' plywood with 1x2's and 2x2's providing the framing. A 1x4 runs down the back of the desk with a cord try to hide cables.

Mon, 06/08/2015 - 08:46
I am not able to find the plans you are referring to. Is there a way you can comment with direct link
Thu, 01/07/2016 - 15:16
HI, The desk is awesome and I thought I would make this my first attemt at building something.
But I am unable to find the instructions.
Please help.
Thank you.
Sun, 01/10/2016 - 08:46
Ok after reading the subject matter I realized that this is the merging of two different desks.
Can you post a photo of how you joined them.
The support for such a long desk is my concern, with out it having any middle support or at the the corner?
Thank you.
Sun, 01/10/2016 - 08:47
Ok after reading the subject matter I realized that this is the merging of two different desks.
Can you post a photo of how you joined them.
The support for such a long desk is my concern, with out it having any middle support or at the the corner?
Thank you.
Tue, 01/12/2016 - 14:52
Hi,
Could not find attached plans. I did see the same comments before too for the same project.
Fun project
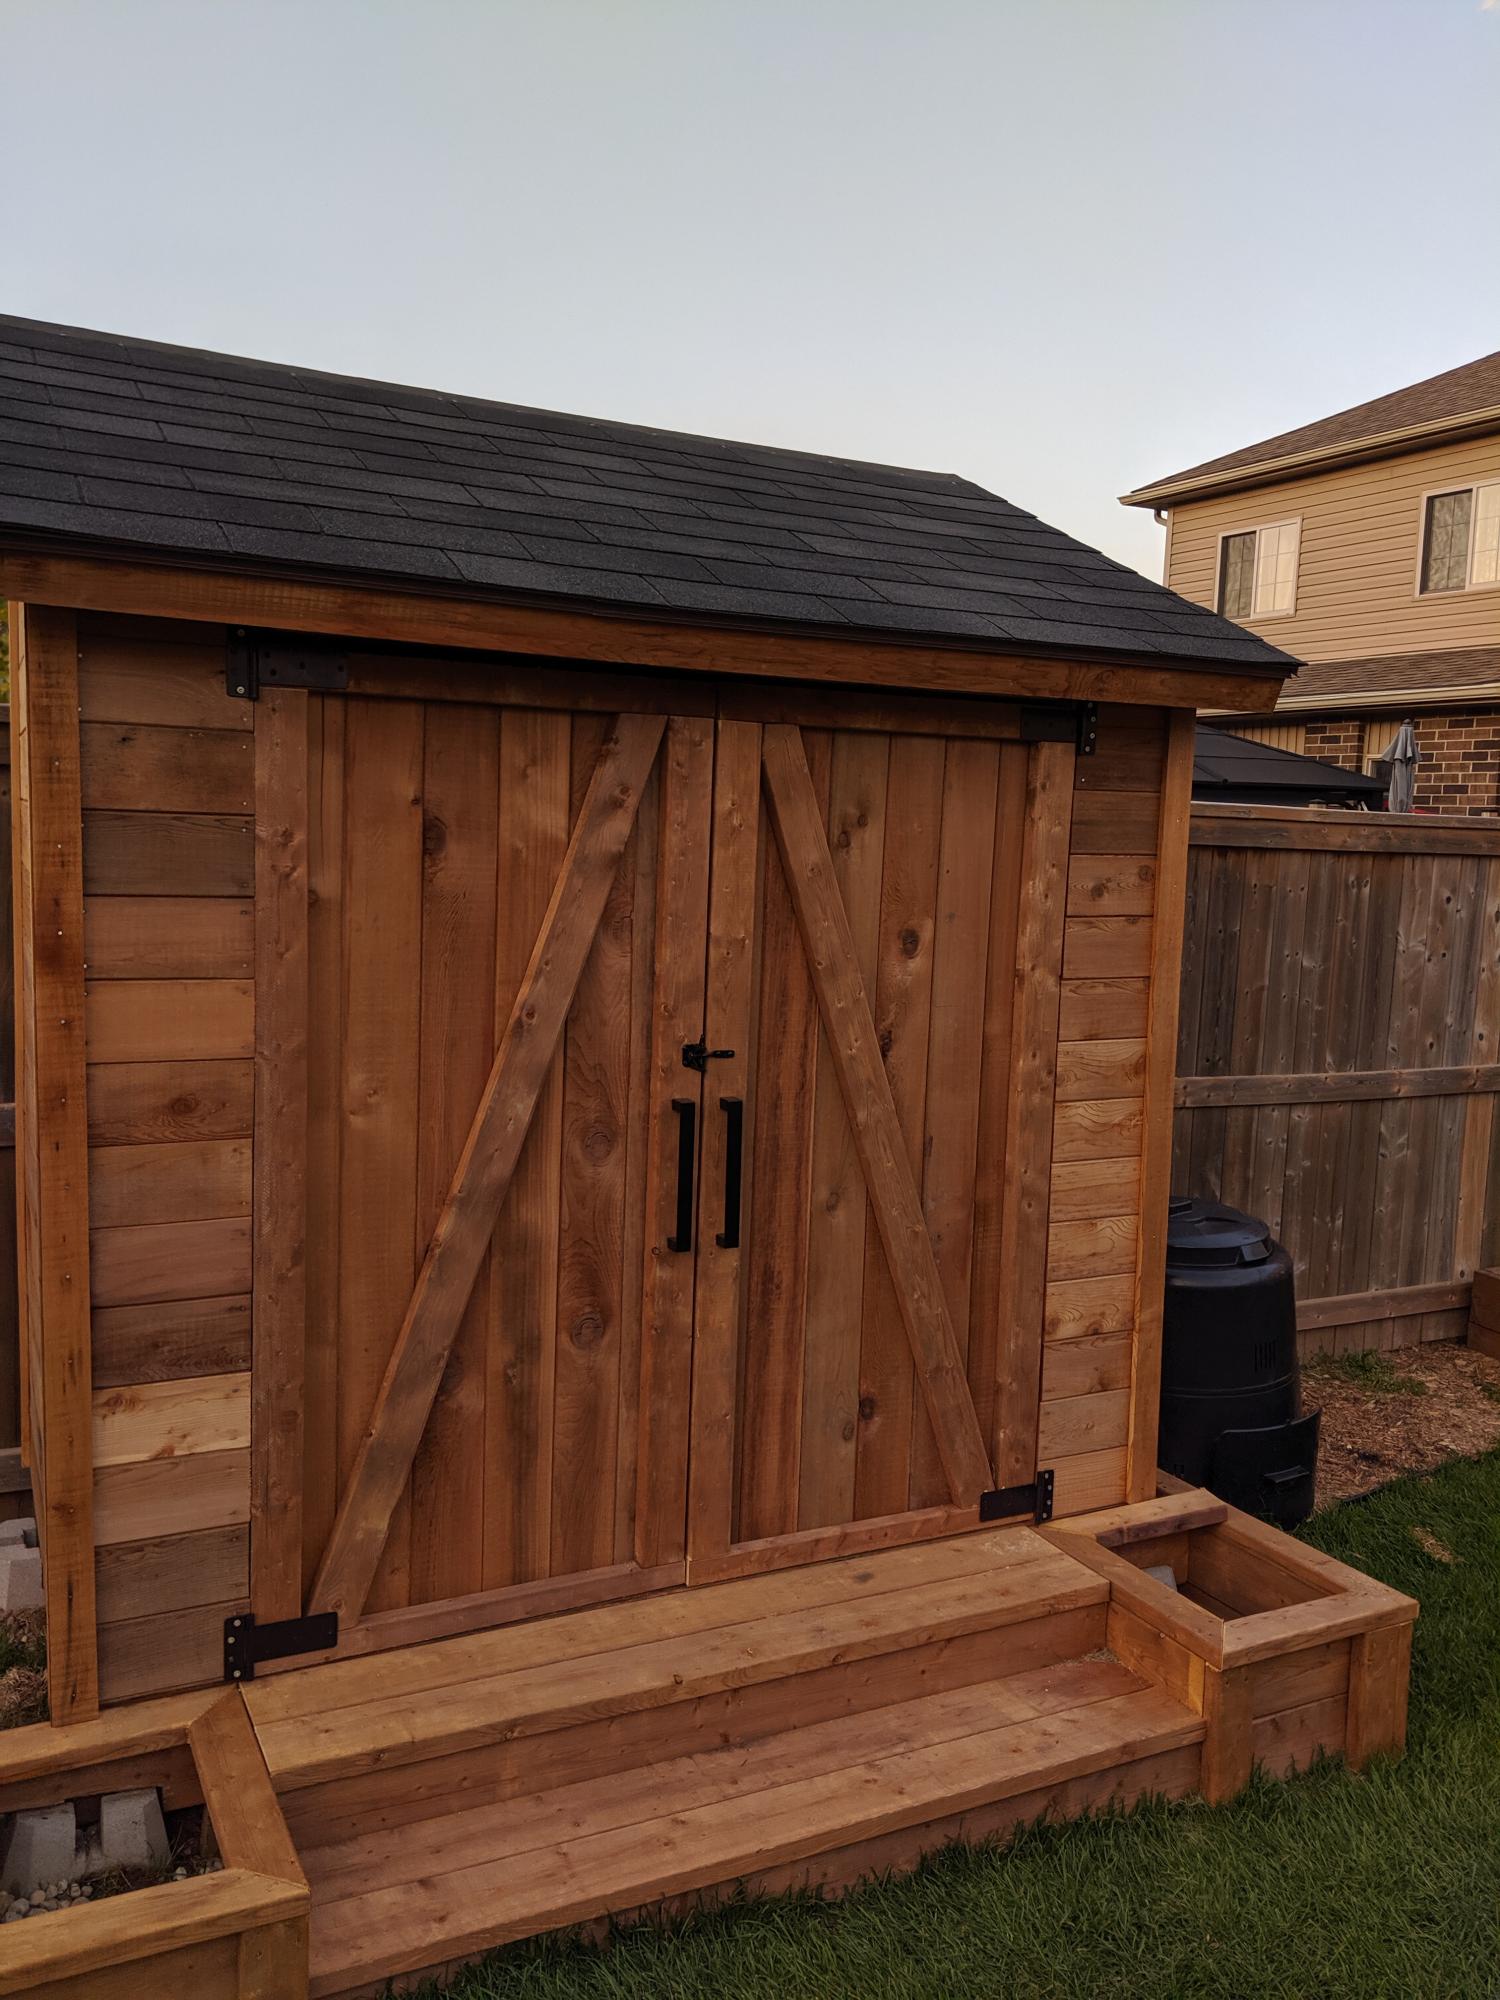
Cedar shed with planter box stairs. Both plans modified slightly to fit my needs. Siding is tongue and groove cedar. All other wood is brown pressure treat. Planter box stairs were sized and positioned to hide cement posts. Sorry for only one photo. Finally finished and ran out of time with good weather here in Canada. Will post more with weather permits. Thanks again for your plans. I've also built night stands and a farmhouse dining table.
Not sure if I linked the proper stairs plan. Was https://www.ana-white.com/woodworking-projects/outdoor-planter-steps-or…

Sat, 11/21/2020 - 18:14
This shed is beautiful! what were the end dimensions of your shed?