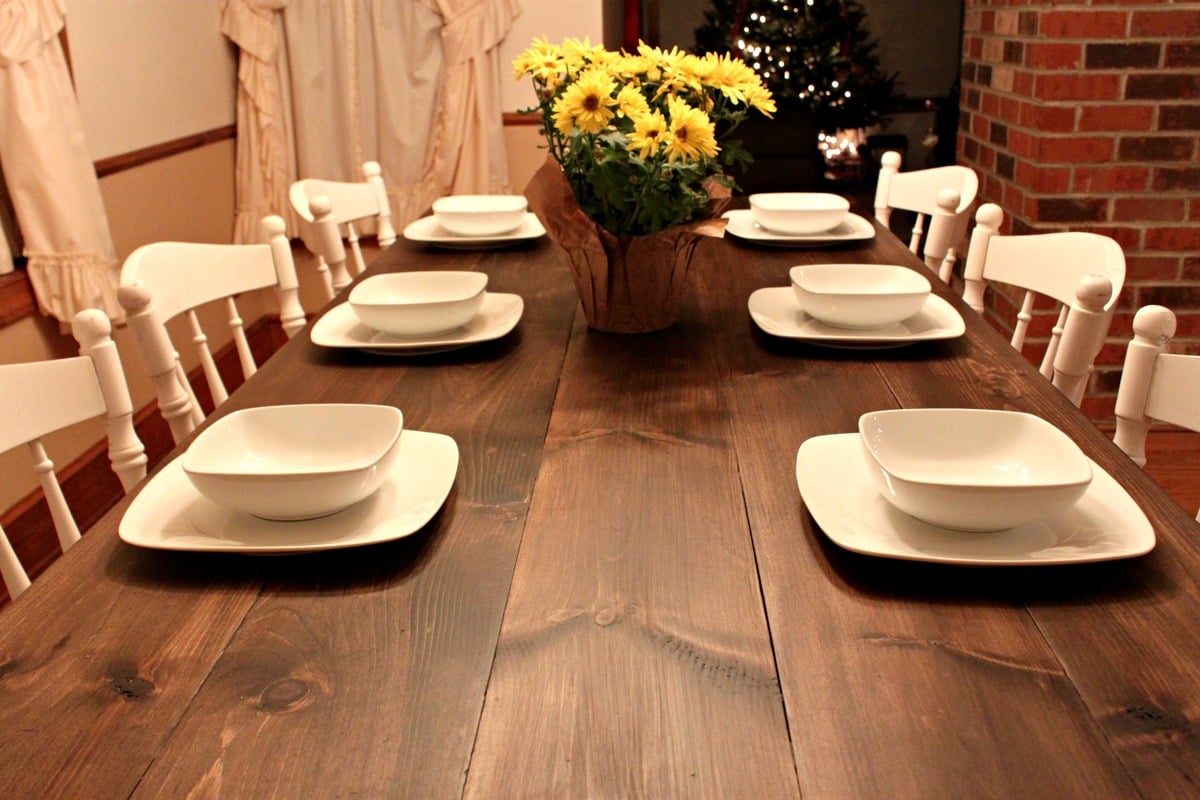
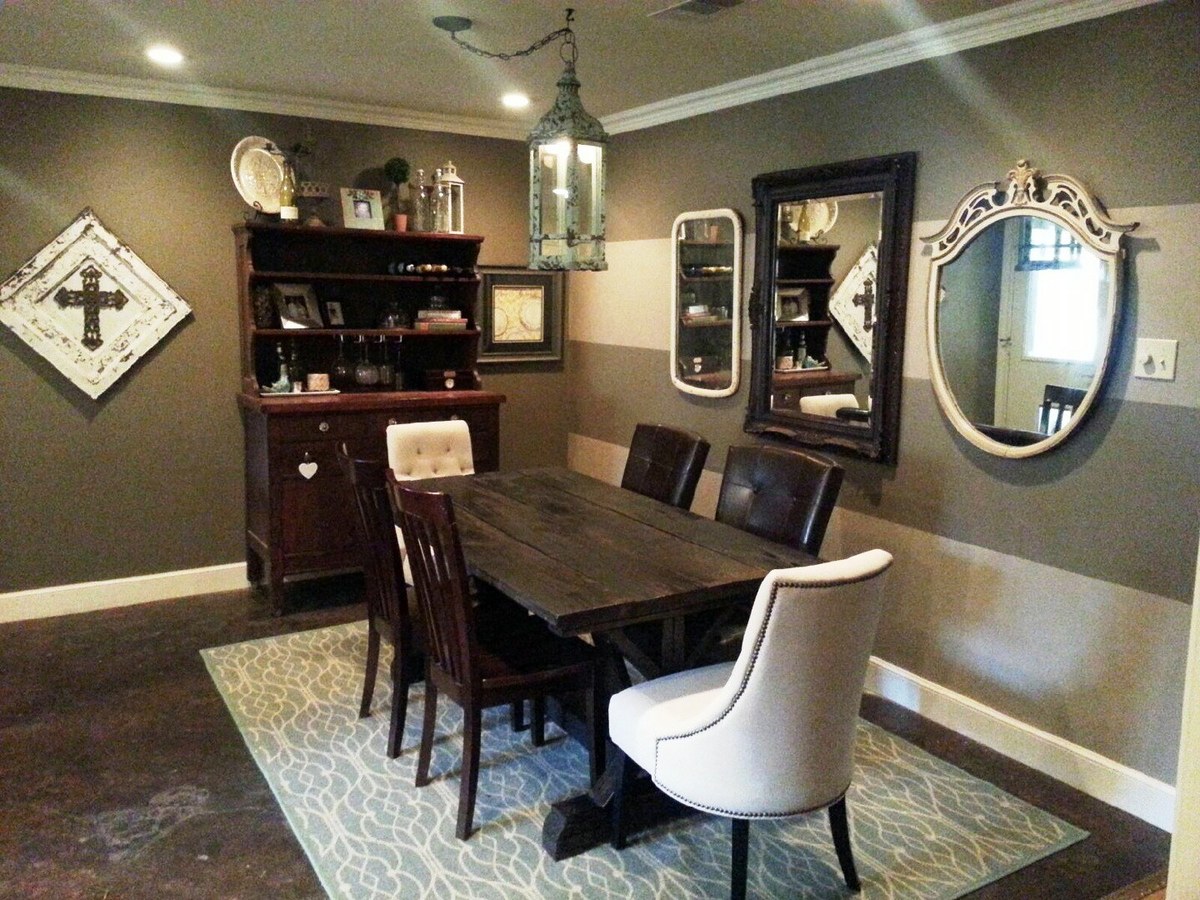
Community Brag Posts

Farmhouse Table

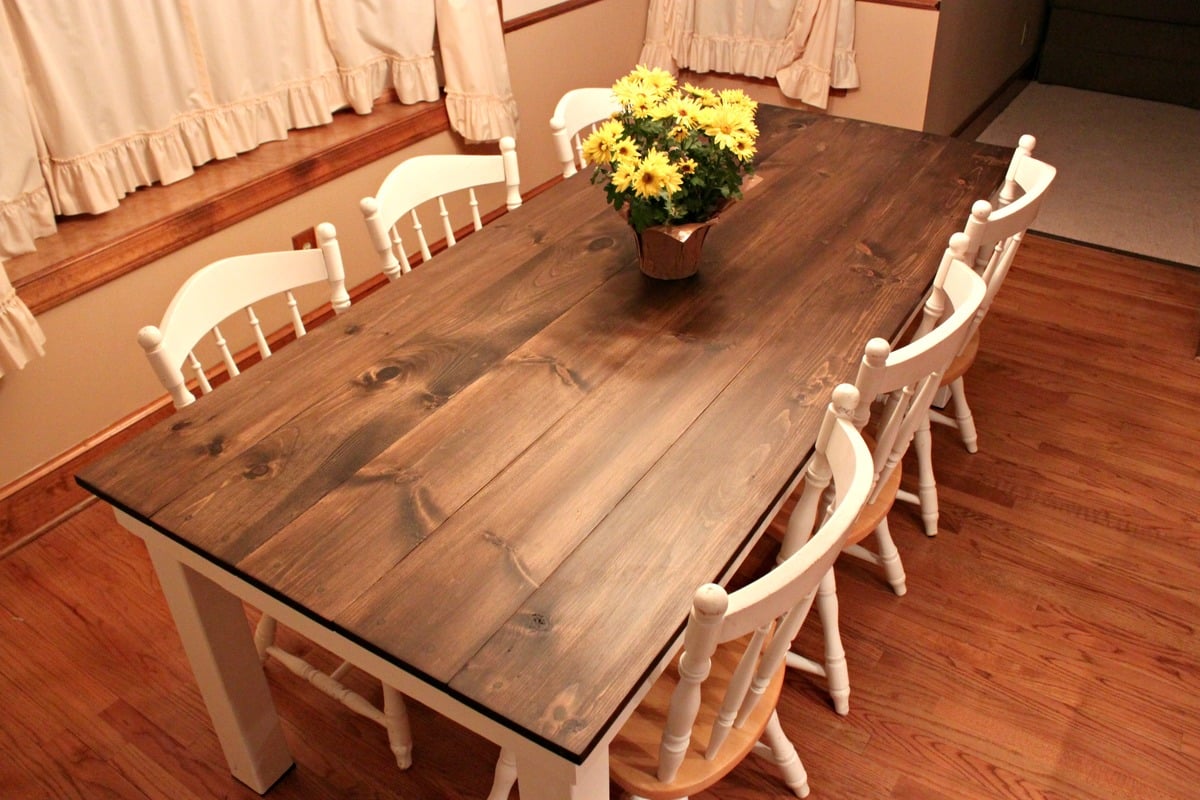
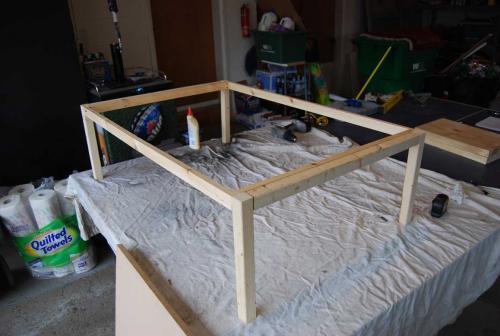
My husband and I love entertaining, but our small kitchen table was just not cutting it for both our space and our hosting abilities. We decided that instead of searching for the perfect table and spending a ton of money, we would just build our own table. We found that Ana's Rustic Table plans best matched what we were looking for, but my husband being the detailed person that he is didn’t just want to take her measurements and run with them. So we taped off the floor around our old table to decide how large we wanted our own table to be.

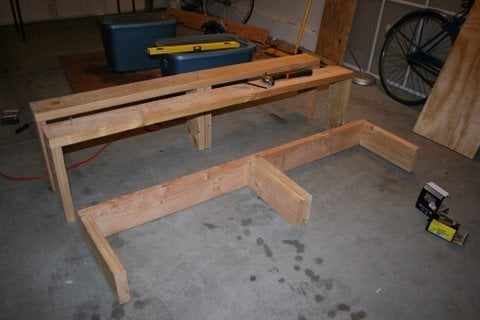
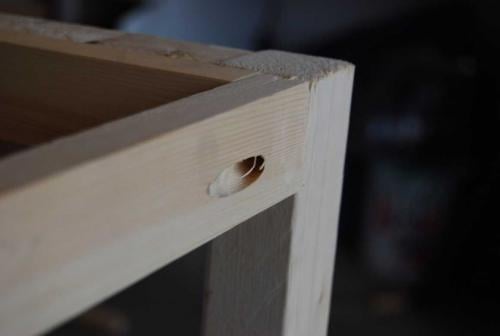
We basically followed Ana White’s plans to a T. 
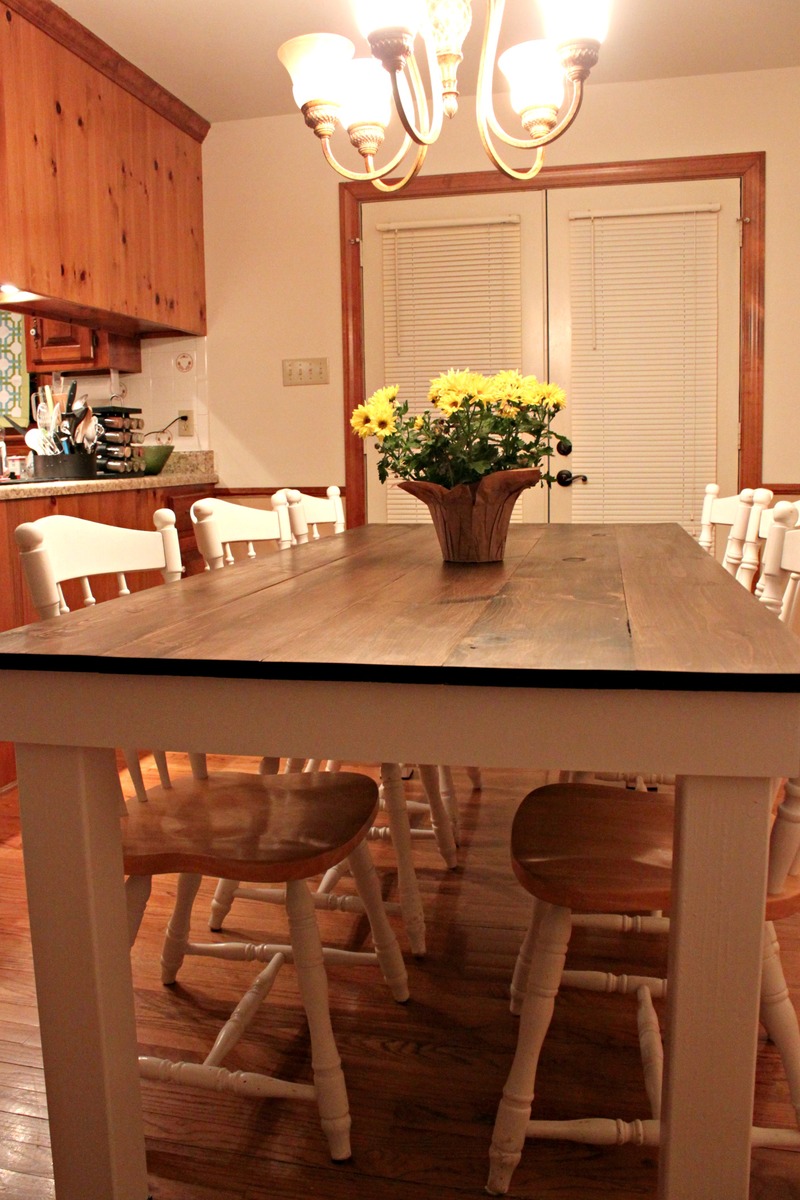
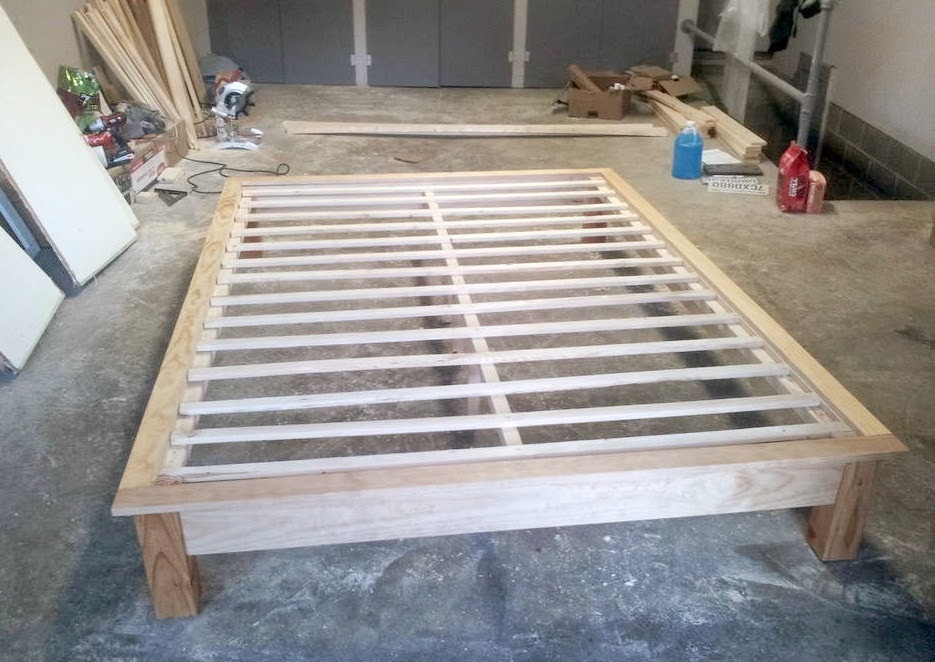
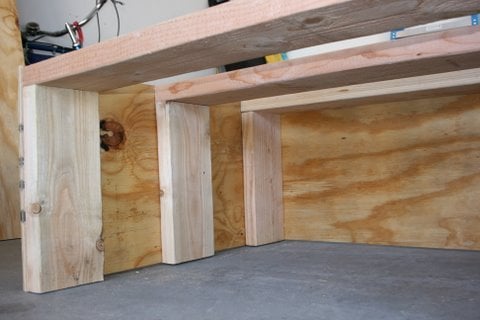
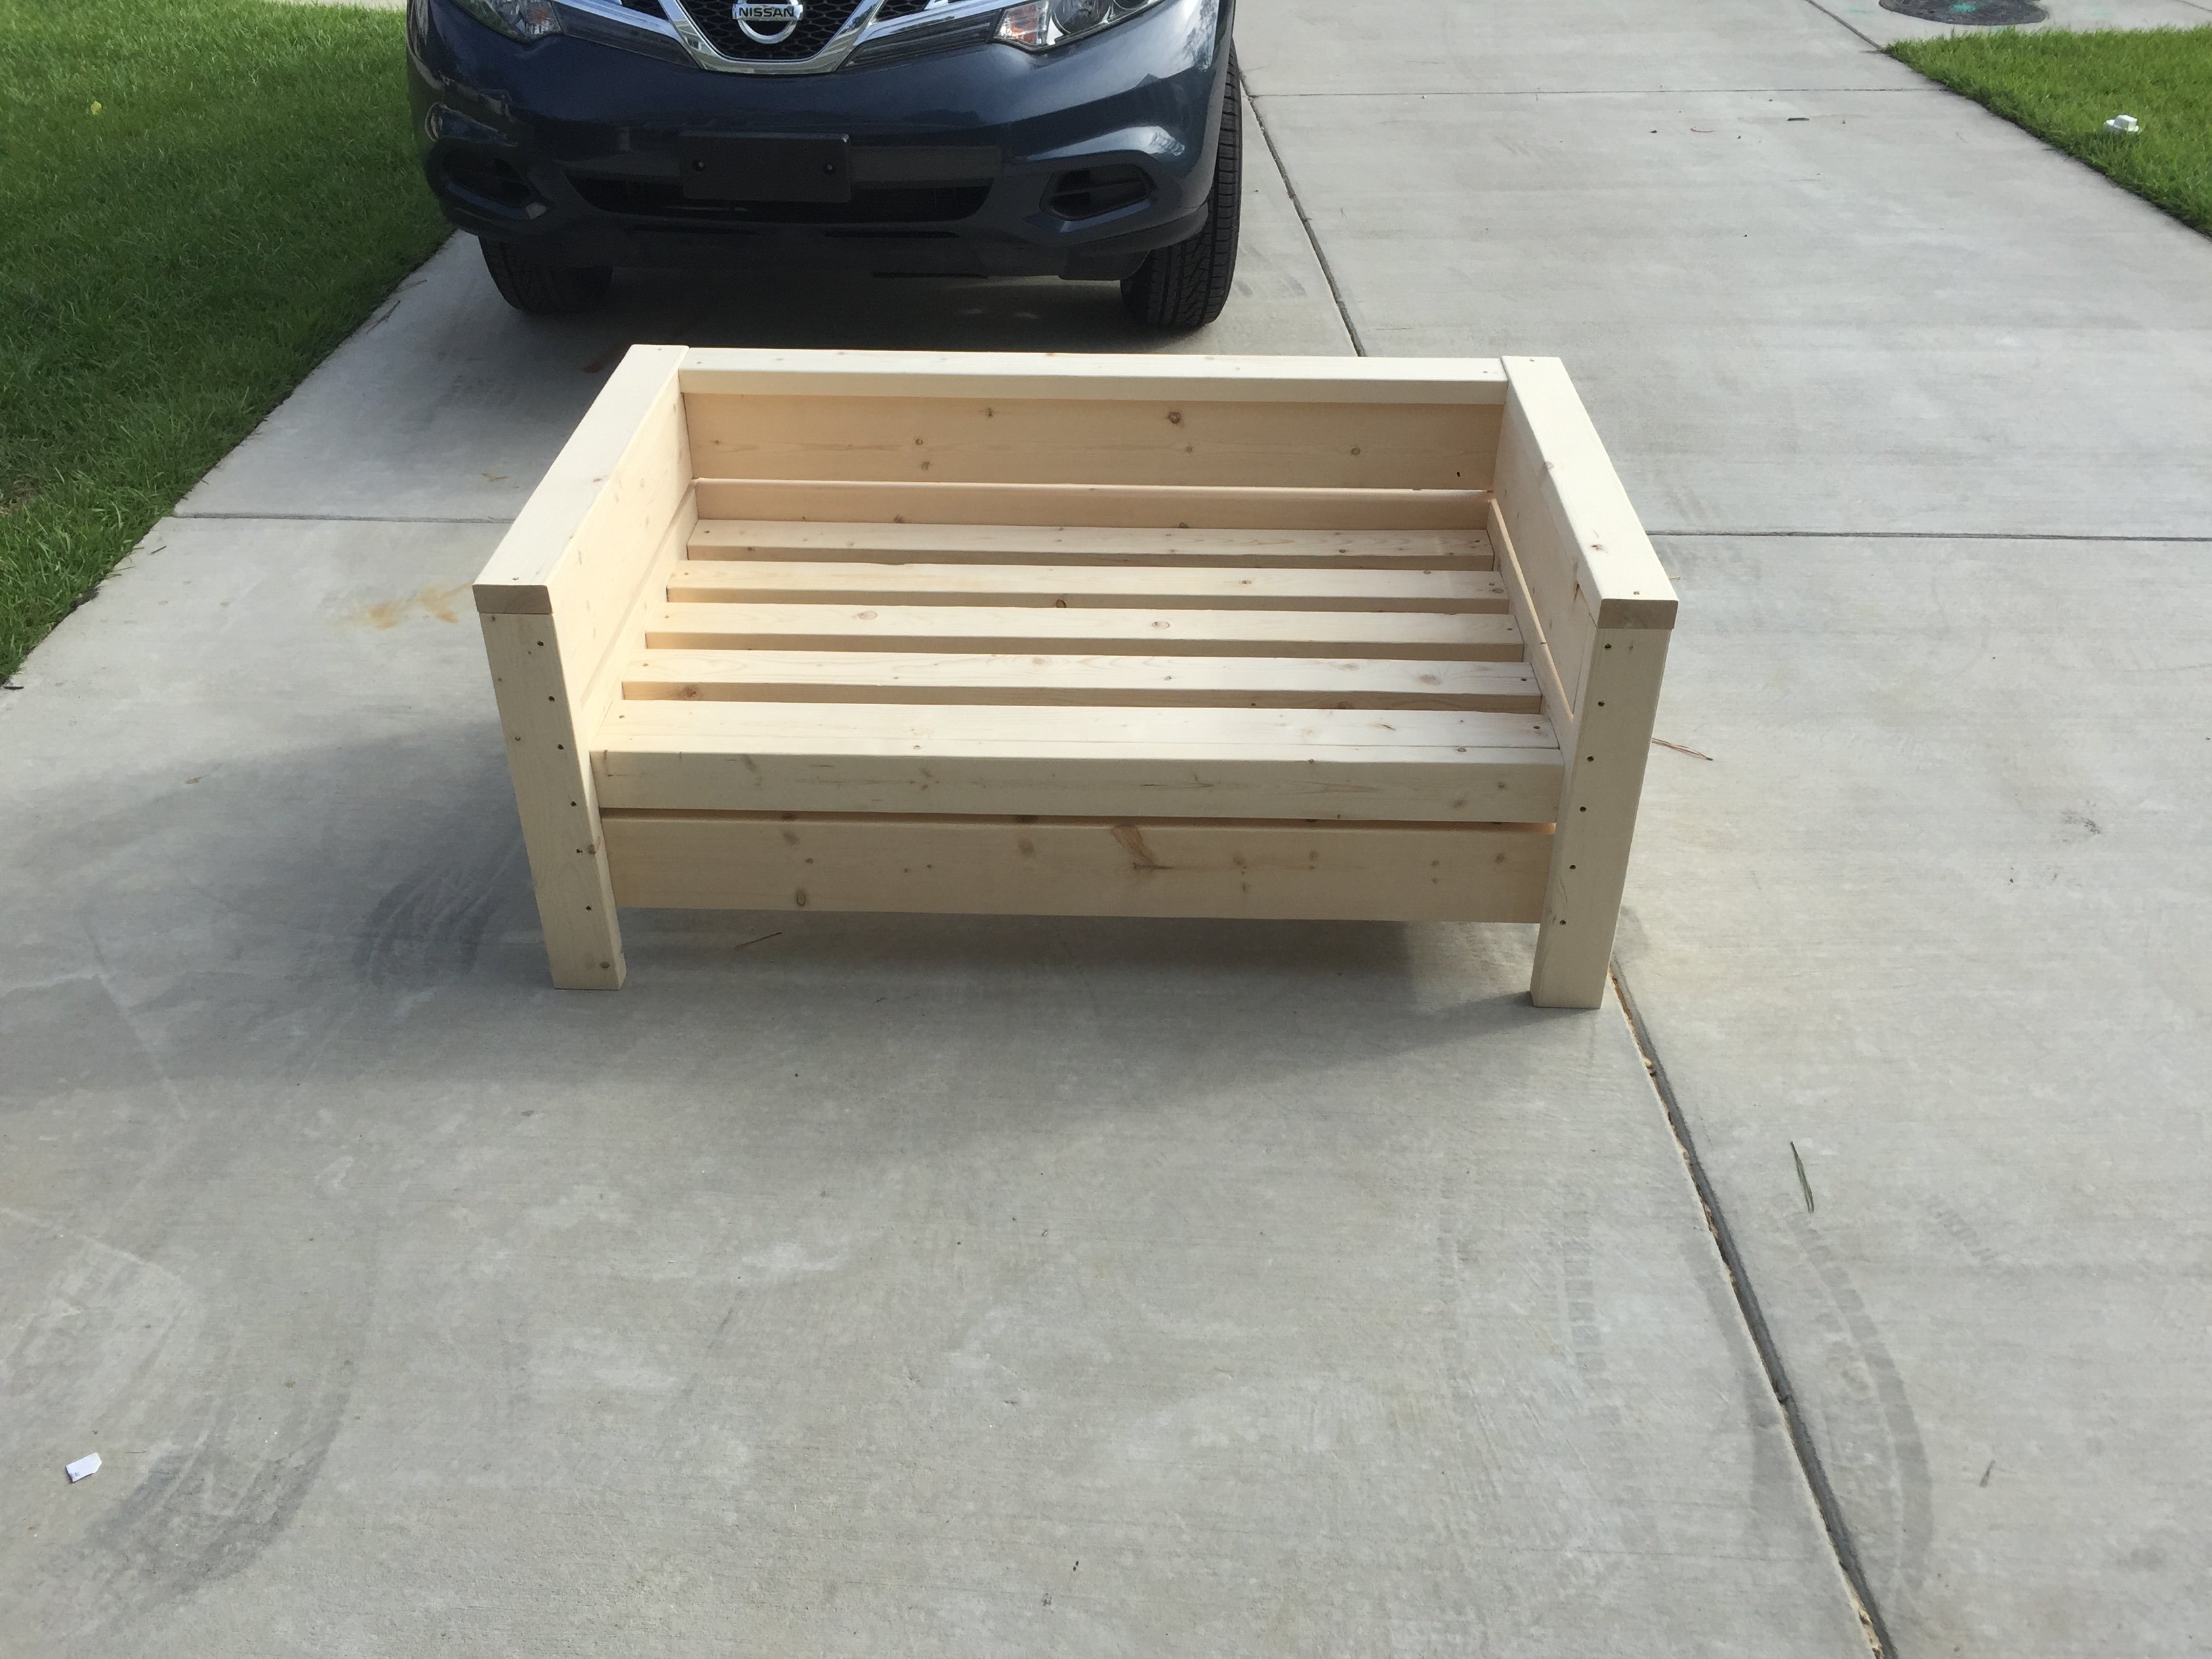
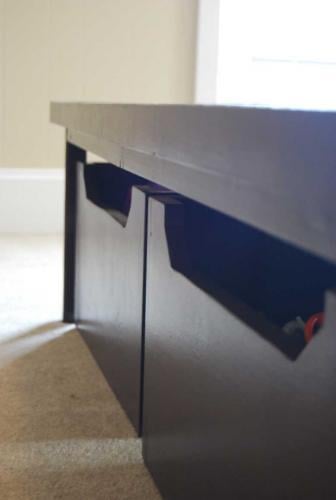
Until it got to the legs. Ana White used 2×4′s for her legs, but we decided we liked the look of chunkier 4×4 legs instead. We also did things in a different order, like attaching the legs to the apron before attaching the table top. This did make everything way easier when it came to painting, no tape needed. 
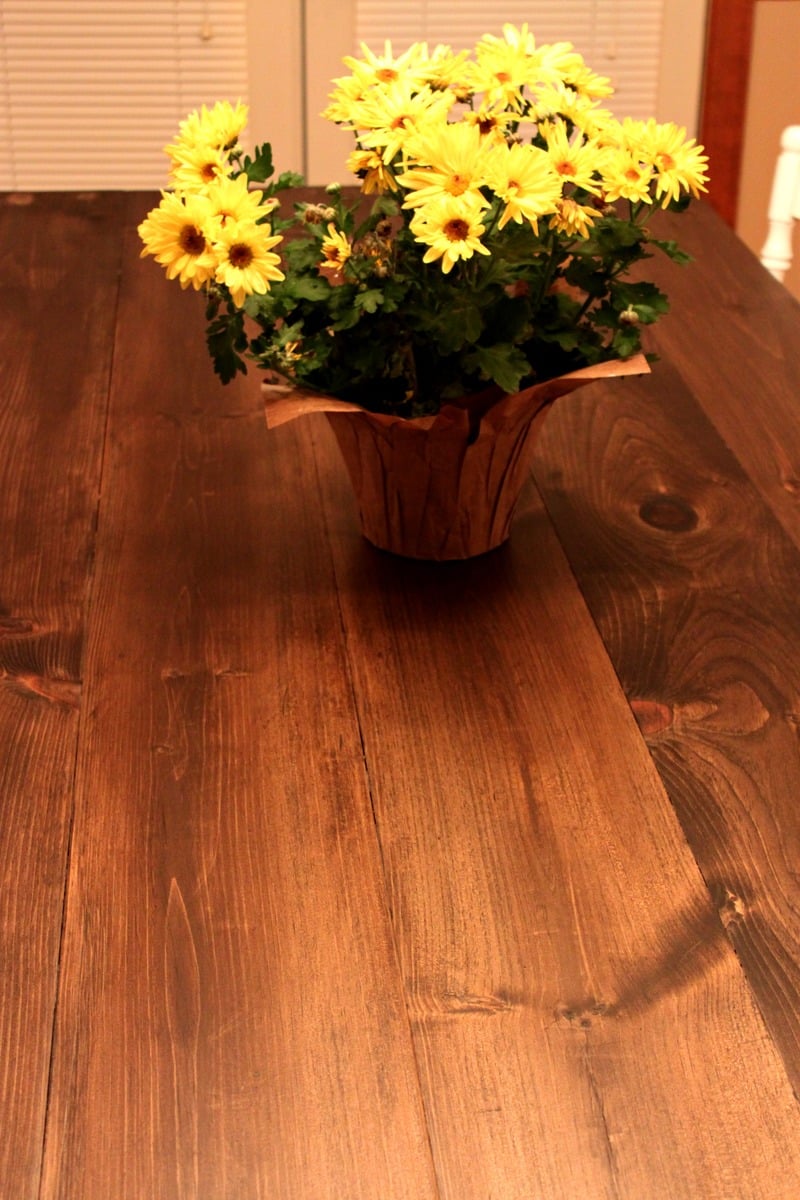
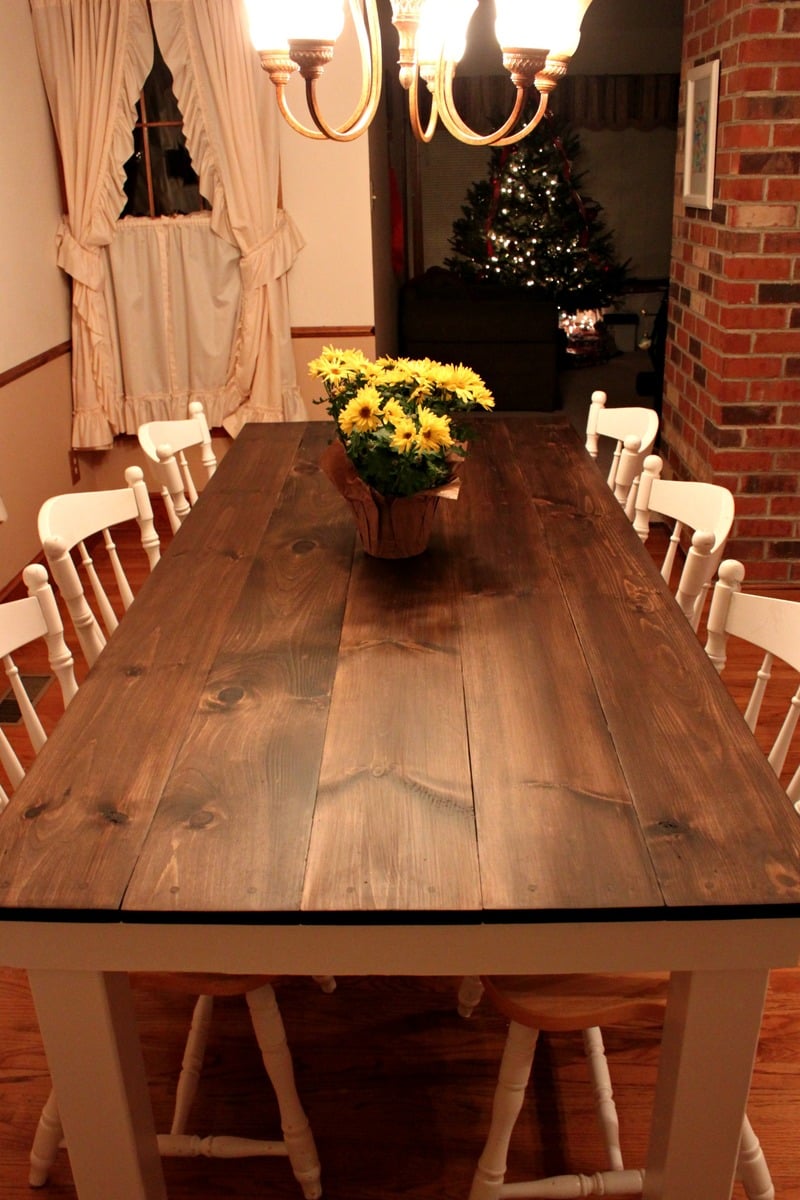
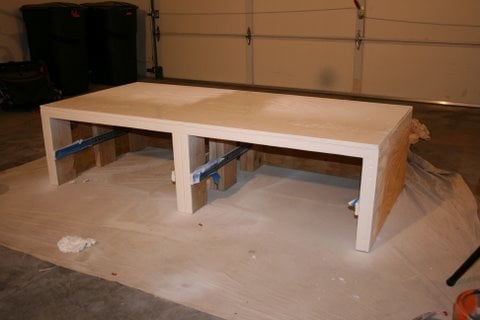
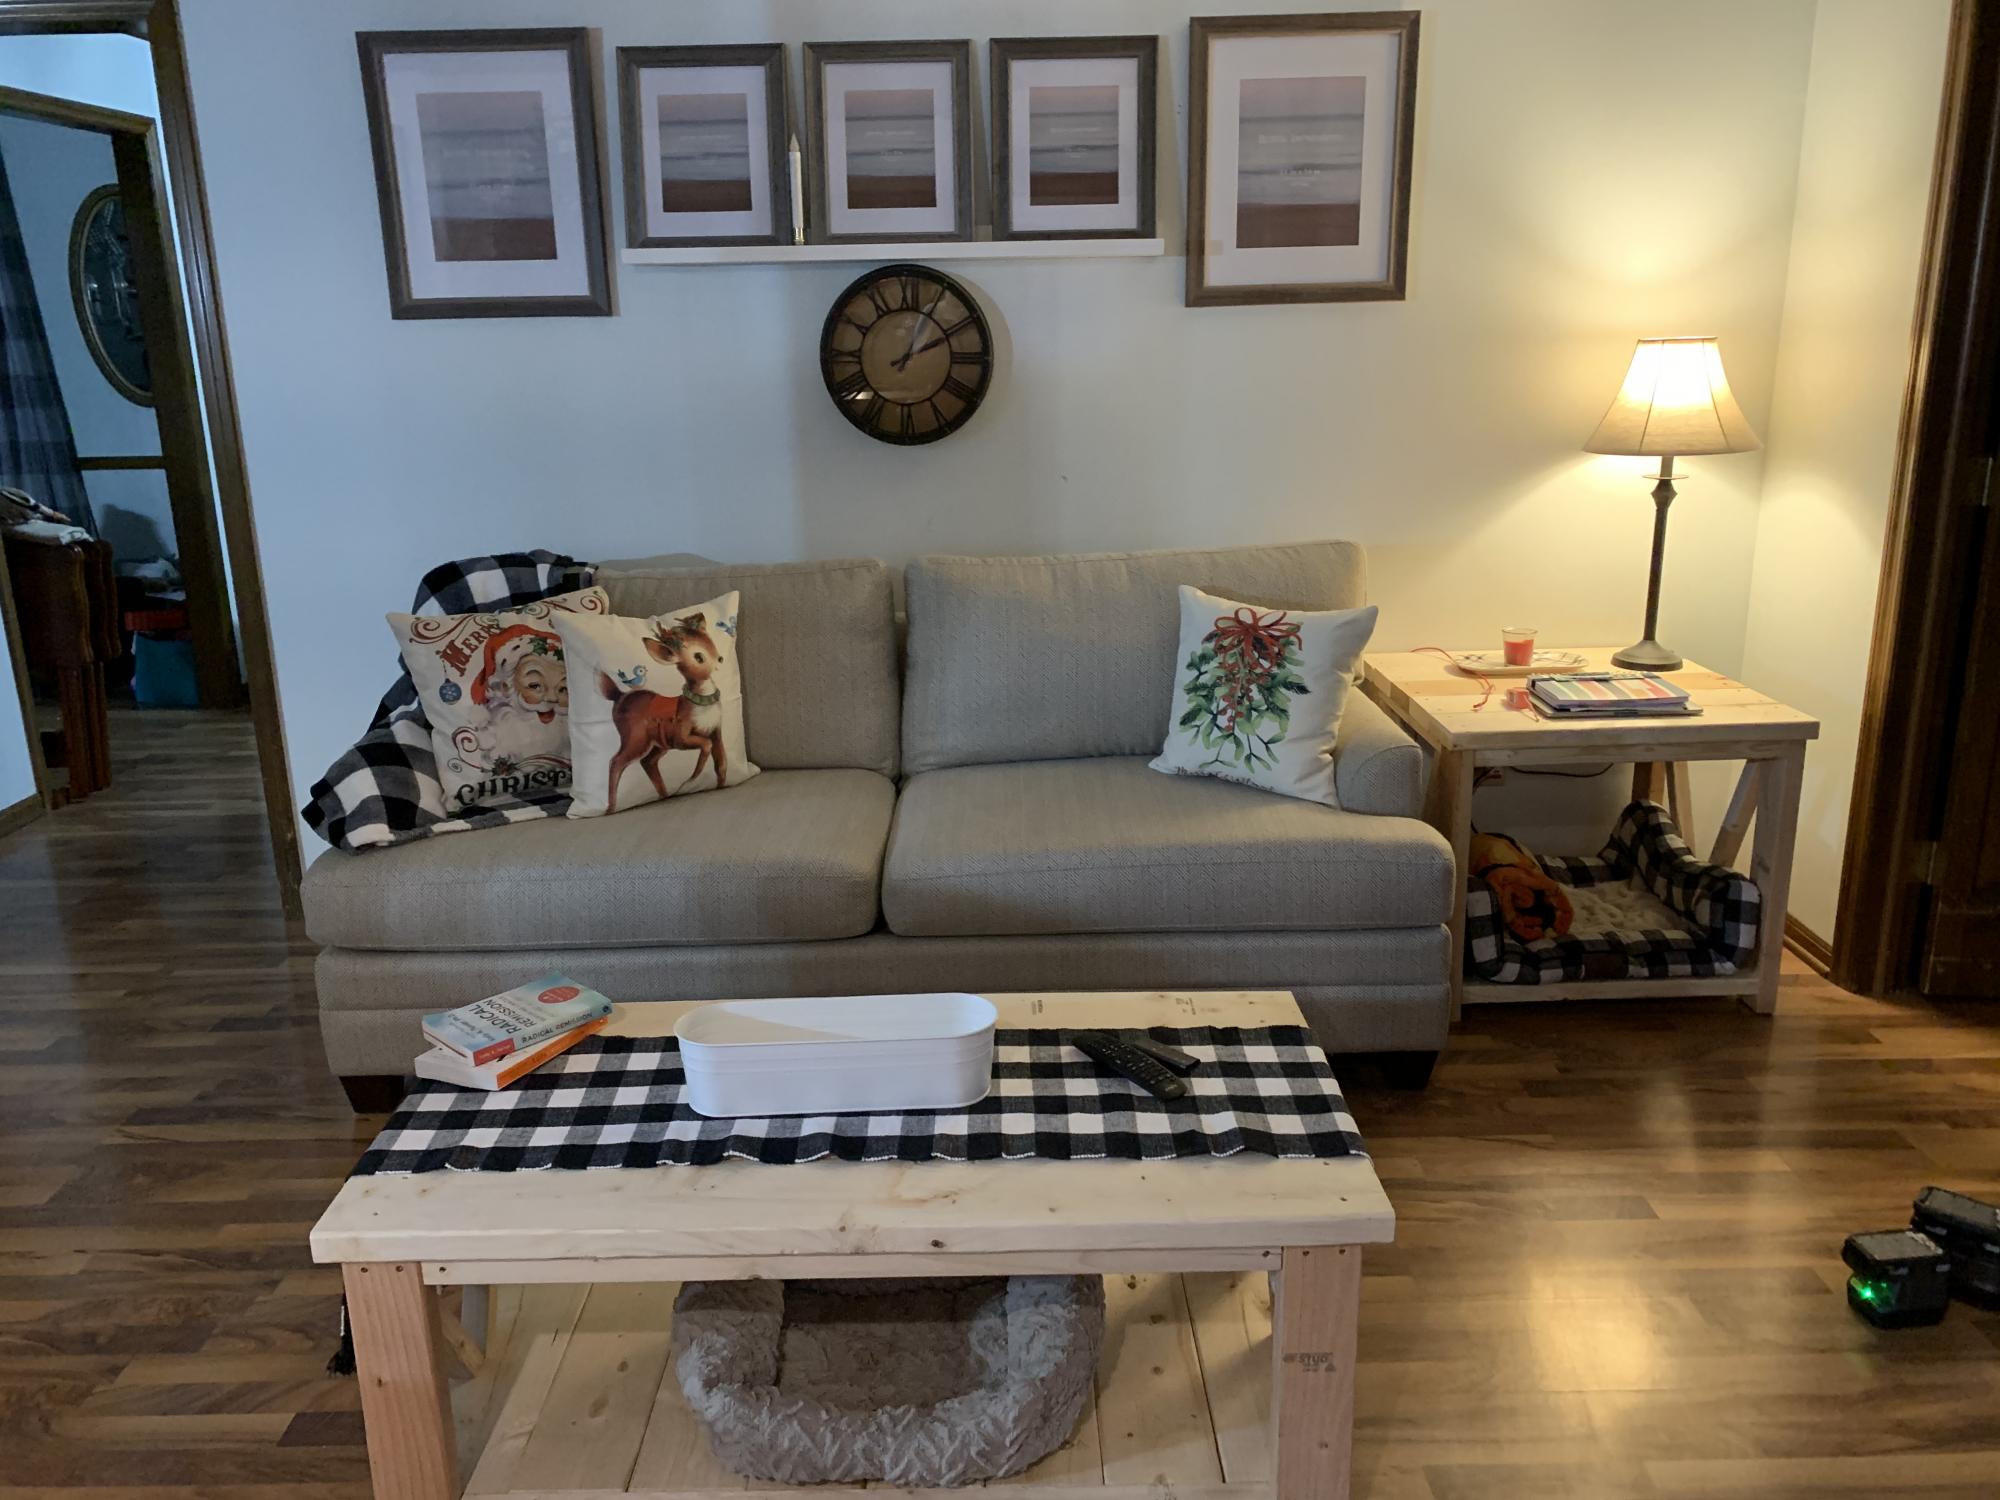
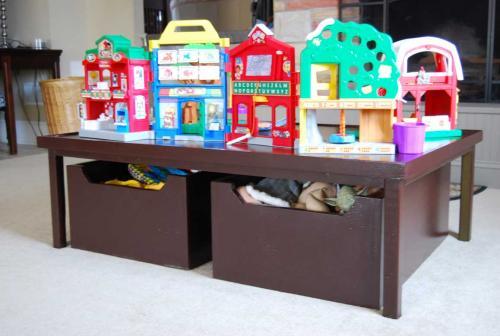
We also stained the bottoms and sides of the tabletop boards before attaching them to the apron. After the top was attached I stained the top side and applied about 3-4 coats of Matte polyurethane. I like the matte finish because it doesn’t add any sheen and makes things look even more rustic; however, we’ll have to add a regular coat of poly as well because the matte is too soft for something that will see such rough use over the years. And now for what you’re all wondering about, how much did this project cost us?

  • Wood – $86
  • Stain (Dark Walnut) – $7.77
  • Paint (Olympic Snow Storm) – $11.97
  • Polyurethane (Rustoleum Matte finish) – $11.93
  • If that is all we needed to buy then our total would have been: $117.67.
Built from Plan(s)
Estimated Cost
$300
Estimated Time Investment
Weekend Project (10-20 Hours)
Finish Used
Dark Walnut
Recommended Skill Level
Beginner

Comments

mistyclinton

Mon, 12/31/2012 - 09:43

Your table is gorgeous! You did an amazing job.

I am getting ready to attempt my first two projects, bookshelves and a buffet table. I had a couple of questions about how you got such a consistent stain.

1) The Stain - What kind of stain did you use? How many coats did it take? Did you use a conditioner first?

2) Wood filler - How did you get the wood filler to match the stained areas so well? What kind did you use?

Thanks for the advice! I was thinking I would have to paint the buffet but after seeing your table I think I may actually attempt the stain.

Extra Long Bed

Submitted by Lumi on Fri, 10/24/2014 - 16:36

My hubby is 6'5'' tall. Since most matresses are 80 inches long, he mostly ends up with his feet hanging out of the bed (since you don't lay your head down at the very beginning of the mattress, right?). So I tried to solve this problem by making the bed 4'' longer than the plans suggested. I added 2'' of foam on each end of the bed, so now its 84'' long and my hubby fits perfectly!

Thanks for the great plans, I had a blast building my own bed!

Estimated Time Investment
Weekend Project (10-20 Hours)
Recommended Skill Level
Beginner

Rocketship Bookcase

Submitted by Anonymous (not verified) on Sat, 10/31/2020 - 17:27

Pretty much followed the steps as outlined in the rocket bookcase plans. Googled astronaut and spaceship stencils and free hand drew those on construction paper. This bookcase is heading to my 3 year old son's room and he's pretty excited to fill it with toys and books.

Built from Plan(s)
Estimated Cost
$70
Estimated Time Investment
Day Project (6-9 Hours)
Finish Used
Semi gloss blue and red paint. A sparkling orange spray paint for the fire, metallic gray for the fins and stencils. Covered it with spray poly for a protective coat.
Recommended Skill Level
Intermediate

Comments

6 cube bookshelf

Submitted by lindsay on Thu, 01/24/2013 - 04:27

This was my first project that I've built and I feel really great about how it turned out!

Built from Plan(s)
Estimated Time Investment
Day Project (6-9 Hours)
Finish Used
White paint
Recommended Skill Level
Beginner

Comments

ACM

Thu, 01/24/2013 - 14:25

Great job! Your bookshelf looks solid and the color is crisp against the darker wall. Love the frames too!

Kid's Country Bench - stretched

Submitted by Bk32 on Sun, 01/27/2013 - 18:17

We needed a bench to hold shoes and bags on the foyer, and this plan fit the bill. I stretched the bench one foot so 3 kids could sit on it and to add one more cubby. I used pocket holes everywhere I could, so I had to modify the assembly order. We're excited to start using our new bench!

Built from Plan(s)
Estimated Time Investment
Weekend Project (10-20 Hours)
Finish Used
I started with minwax pretreatment and used minwax Red Mahogany stain. I finished with varathane tube water-based poly, since it didn't require sanding between coats.
Recommended Skill Level
Beginner

Combination of the Emme Twin Bed and Farmhouse Storage Bed

Submitted by Anonymous (not verified) on Tue, 03/07/2017 - 20:25

I used elements of both the Emme Twin Bed and Farmhouse Storage Bed to create this perfect bed for my daughter. Thank you so much for your fantastic plans Ana!

Estimated Time Investment
Weekend Project (10-20 Hours)
Finish Used
We used a soft pink paint/primer in an Eggshell finish. I applied two coats of paint and sanded between coats.
Recommended Skill Level
Beginner

Simple Modern Outdoor Sectional

Submitted by jdwarns on Mon, 12/08/2014 - 13:03

So glad these plans were posted so that I could build my own outdoor sectional.  I built two armless and two corner/end pieces.  I used cedar with American Walnut stain and clear/satin spar urethane.  I purchased the cushions online.  They only had 24x24"; so for the back cushions, I used a seam ripper to open the cushion, cut the foam and extra fabric, and re-sew.

Estimated Cost
500 including cushions
Estimated Time Investment
Week Long Project (20 Hours or More)
Finish Used
American Walnut water-based stain
Clear/Satin spar urethane
Recommended Skill Level
Beginner

Comments

Lawnmower Shed

Submitted by PipesTX on Wed, 01/07/2015 - 06:19

Modified the design to allow me to roll lawnmower directly in the end. Fun project.

Built from Plan(s)
Recommended Skill Level
Intermediate

Comments

Washer & Dryer Pedestal / Platform with Drawers

Submitted by dmccoy on Tue, 03/12/2013 - 10:26

Platform (Pedestal) with Drawers for front-loader Washer & Dryer. Cheaper than buying the manufacturer's plastic pedestals and more fun to build anyway! The drawers are also much wider and deeper than the manufacturer's pedestals. We can usually fit about 3 full loads of laundry in each drawer. (That's 6 loads of laundry before we have to start folding!) It's a very easy and basic DIY project. I made a 2nd one for my brother using these plans (sans the drawers). I gotta say, the drawers are SO nice to have though. But you could just leave the front open, without drawers, and slide some laundry baskets underneath for an even quicker project. We've been using this platform now for over 2 years and there is still no squeaking or rattling. The washer & dryer haven't moved from the vibration even in the slightest. They're exactly where I placed them on the pedestal 2 years ago. There's also zero problem with the weight of the washer either...it really is a strong frame. (After finishing, I jumped up and down on it!) A couple small tweaks I would make doing it over is raising the drawers a 1/2" in. off the floor to tuck a rug underneath (as is, they sit about 1/8" in. off the floor). Also, I would cut out a couple of square holes in the back panel to access those socks that fall behind (I can't access the sides of my W&D in our particular laundry room). Lastly, I would have painted with a quality paint (I just used a few cans of white spray paint to be quicker). Step-by-Step Plans and Materials List (PDF) and many more photos found at the Blog Link below...I'm certainly no professional "Plans Writer" so email if you have questions! Happy DIY-ing! Estimated Cost: ~$200 (2x6 lumber, plywood, drawer trim, nails, screws, paint)

Estimated Time Investment
Weekend Project (10-20 Hours)
Finish Used
White spray paint
Recommended Skill Level
Beginner

Comments

nikolegraves@h…

Wed, 03/13/2013 - 10:12

I have wanted to do the pedestal project for quite a while. I am so glad I held off though. Yours are fantastic! I would never have thought of drawers to hide the dirty laundry! Love it!

gmccoy20

Tue, 04/02/2013 - 11:06

Really appreciate the help with mine brotha! We really like them (even without the drawers) and are glad you had these plans to go off of for ours.

I'll be calling you for our next project!

strahmers8

Fri, 02/07/2014 - 17:05

Hello this looks great and for the amateur carpenter I am but one item I need clarified "the top measurement at 64" is .25" greater than the bottom at 63.75"

Please explain if I am missing something
Thanks

dwm22

Mon, 02/10/2014 - 15:33

Not sure what measurement you mean that's 63.75" since there's no "bottom" to the pedestals. Or do you mean 1/4" wider than the sides? The top panel should overhang both sides by 1/4" each so that when the side plywood is attached, it will be flush. Hopefully that helps? (If I'm understanding the question correctly)

jmkc

Mon, 02/24/2014 - 10:29

Could leave the back panel of plywood out so you could reach what may fall behind? Then you would just have to pull the drawers out?

heverest

Wed, 06/22/2016 - 16:35

Back panel is very very structural and provides lot of strength. If i wanted more access than the 5-7 inch of duct space behind the pedestal gives me, then i would replace the back panel with a long 2x6, that holds the three legs from going in different directions due to all that weight.

dmccoy

Mon, 12/12/2016 - 14:58

This is the one modification I could make if i could redo these plans...I would still put on the back panel of plywood as it stabilizes the pedestal, I would just have cut out a rectangle (behind each drawer) so that I could remove the drawers and stick my hand/arm through to grab fallen clothes or vacuum the lint.

dachiri

Mon, 12/18/2017 - 19:17

Rather than cut holes in the back, I just cut the back and side boards a little small and left a gap around the bottom the whole way around.  That way I can get a vaccuum hose in there or reach through and get lost items.  Because my washer and dryer seem to be deeper than yours (I needed at least 33" depth, so I went with 3'), that also worked out well in getting the most out of the boards.  I could do the top, back, and sides out of one single sheet of good 3/4" plywood just leaving those small gaps at the bottom for clean-up and retreival.

Jperera

Fri, 11/20/2015 - 05:23

Hello,

I downloaded the pdf but have exactly the same information that the website html, where can I find a solution step by step guide?

Thank you for all the interesting posts.

Modified Clubhouse Bunkbed

Submitted by Anonymous (not verified) on Sun, 06/04/2017 - 18:39

I used the plan from the Clubhouse bunk bed and modified to look similar to a Mathy-by-Boles Treehouse Bunkbed.

Built from Plan(s)
Estimated Cost
$450
Estimated Time Investment
Week Long Project (20 Hours or More)
Finish Used
Primer and kid friendly paint. oh yeah...sanding. Lots and lots of sanding!
Recommended Skill Level
Intermediate

DIY Closet shelving

Submitted by Ruiz1323 on Sat, 08/07/2021 - 10:22

Closet

Built from Plan(s)
Estimated Cost
180
Estimated Time Investment
Day Project (6-9 Hours)
Finish Used
Spray paint
Recommended Skill Level
Beginner

Comments

Cal-King Storage Bed

Submitted by Chris 1975 on Thu, 04/25/2013 - 12:03

I loved the bed by plan, and now love it more that I have built it.

Estimated Time Investment
Weekend Project (10-20 Hours)
Recommended Skill Level
Beginner

Triple Printer Console

Submitted by jbolson21 on Tue, 04/07/2015 - 16:07

We made this and a dresser just like it.  We wanted matching furniture.

Estimated Cost
$350
Estimated Time Investment
Week Long Project (20 Hours or More)
Finish Used
Danish Oil
Recommended Skill Level
Intermediate

Comments

Jewelry Box Retirement Gift

Submitted by JoanneS on Mon, 04/20/2015 - 17:19

This jewelry box is a gift for a friend at work who is retiring.   It is a variation of the Easy Jewelry Box, with the following modifications:

Hinged lift-up top with mirror

Overlay drawer fronts from ¼” craft wood (Gold stencil on top false drawer front, and drawer boxes are 1/8” shorter than the shelf from front to back, to ensure the fronts sit flat against the box front and drawer back doesn't touch the box back at all)

The bottom is 2 pieces thick, to allow space for the drawer overhang and attaching the bottom moulding.

Solid wood back (instead of plywood)

Top and bottom edged with mini stop moulding to make the overhangs, and added feet made from lattice

Removable drawer divider tray and 2 heights of removable dividers for the top, made from dentil, lattice and screen bead mouldings

I really took my time on this build to get everything just right with the build and the finish.   Probably spent about 6 hours spread out over the last few weekends. 


Built from Plan(s)
Estimated Cost
Cost: 1x8 and 1x2 Lumber and finishes were already on hand (left over from other projects) and I spent about $25 for the mirror, hardware, felt, mouldings, and craft board.
Estimated Time Investment
Day Project (6-9 Hours)
Finish Used
3 coats Clark & Kensington semi-gloss paint + primer in Crushed Peanut, sanded between coats. Stencil: 1 coat Americana Gloss enamel metallic in glorious gold. Soft wax on the shelf and drawer bottom.
Recommended Skill Level
Beginner

Comments

Linda7

Tue, 04/21/2015 - 18:57

This is your best one yet, Joanne. Love it! :-)

JoanneS

Wed, 04/22/2015 - 18:29

Hi Linda, thank you for the nice comment! This was a fun build, and I'm very glad to say the gift was a big hit! :)

Chair Build with Loveseat Modification

Submitted by Joshh81 on Sat, 09/02/2017 - 12:26

Built the 2 chairs according to the plans, and then modified it for a bench that's 48" (our cushions are 23.5 x 23.5). Worked really well!

Estimated Time Investment
Weekend Project (10-20 Hours)
Recommended Skill Level
Beginner

Comments

Seasonal And Holiday

Farmhouse Coffee Table and end tables

Submitted by Anonymous (not verified) on Fri, 10/08/2021 - 06:58

My dad and I built these amazing coffee and end tables during a Christmas last year. We modified the ends to for a “M” instead of the traditional farmhouse “X”. Our last name is Mayberry-so the M was fitting. Sadly, my father lost his battle to cancer and this was the last project we did-one that will forever hold precious memories! Thank you for the fabulous plans!

Comments

Rustic X Farmhouse Table

We were able to finish this table after work one afternoon and stain it the next day. (we have a 16 month old also, so you can do it! :) ) I wanted a similar style I had found at World Market that retailed for $700 we were able to complete this entire table for $100 including all hardware and stain. LOVE it so much and get SO many compliments on it. Thanks so much!

Shelby
The Dandy Lion

Estimated Time Investment
Day Project (6-9 Hours)
Finish Used
A satin poly with espresso stain in one
Recommended Skill Level
Intermediate

Low Activity Table

With three little kids we needed some place to put the loads of toys that we have.  The first time I saw this - I knew I had to build it!

This project was quite the task.  For me building is a breeze - it's the painting that is the process!!!


I started working on this on Sunday last week - it was built in about 3-4 hours.  Painting took forever, and three colors!


Love for you to check out my blog post with all the details, even my painting flub up.

Estimated Cost
$108...$70 in wood, $30 in Wheels, $8 in paint.
Estimated Time Investment
Afternoon Project (3-6 Hours)
Finish Used
Sanded...primed...sanded...random painting experience...ended with Rustolium Kola - Semi-gloss.
Recommended Skill Level
Intermediate

Pantry Shelves

Submitted by DIYAZMOM on Wed, 12/29/2021 - 09:03

We enclosed an unused wet bar and then I built the shelves to make it into a pantry.

Built from Plan(s)

Comments

My Parson Chair

Submitted by LeaG on Mon, 07/08/2013 - 17:55

I loved the Parson Chair plans on this site and wanted them for my dining room! I modified the plan simply by making the chair 2" narrower and the seat back 2" taller. I also made the slipcover removable (and with fringe), so that I could change it up as I wish.

Built from Plan(s)
Estimated Cost
$75 for two
Estimated Time Investment
Afternoon Project (3-6 Hours)
Recommended Skill Level
Beginner