Community Brag Posts

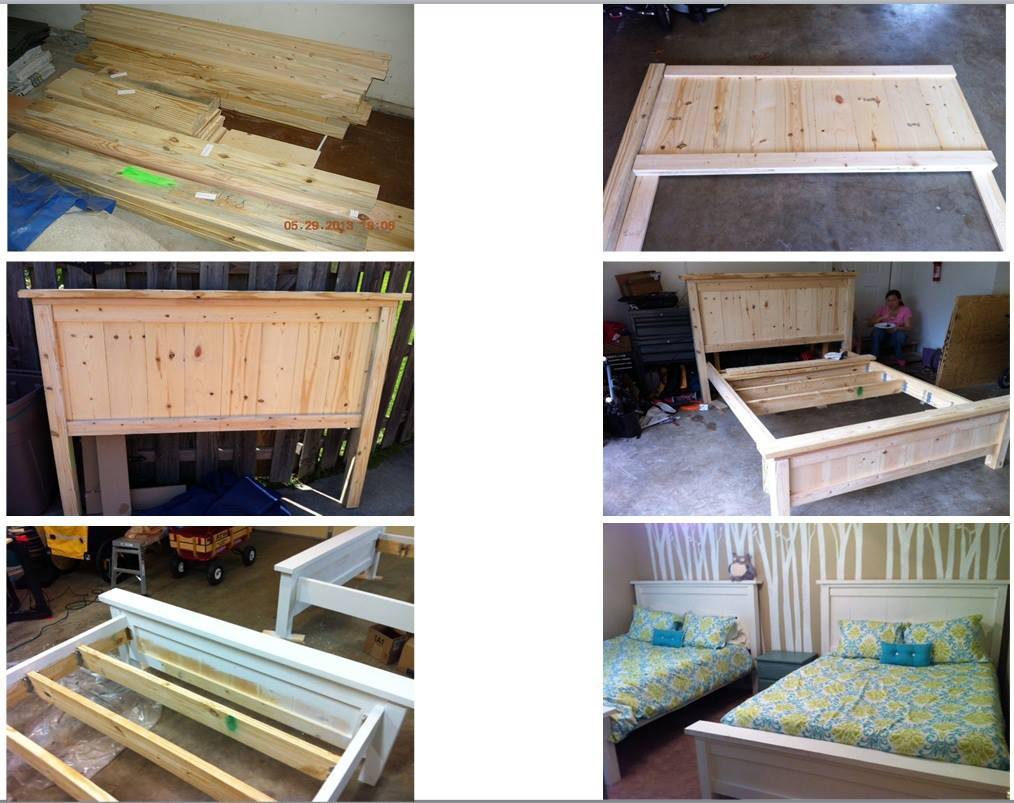
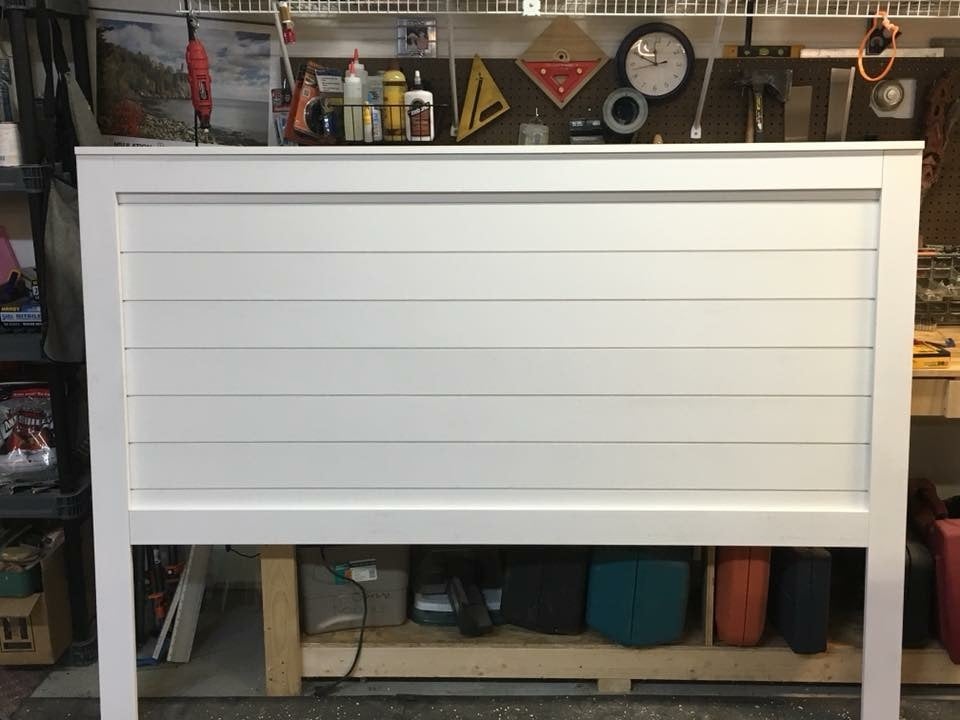
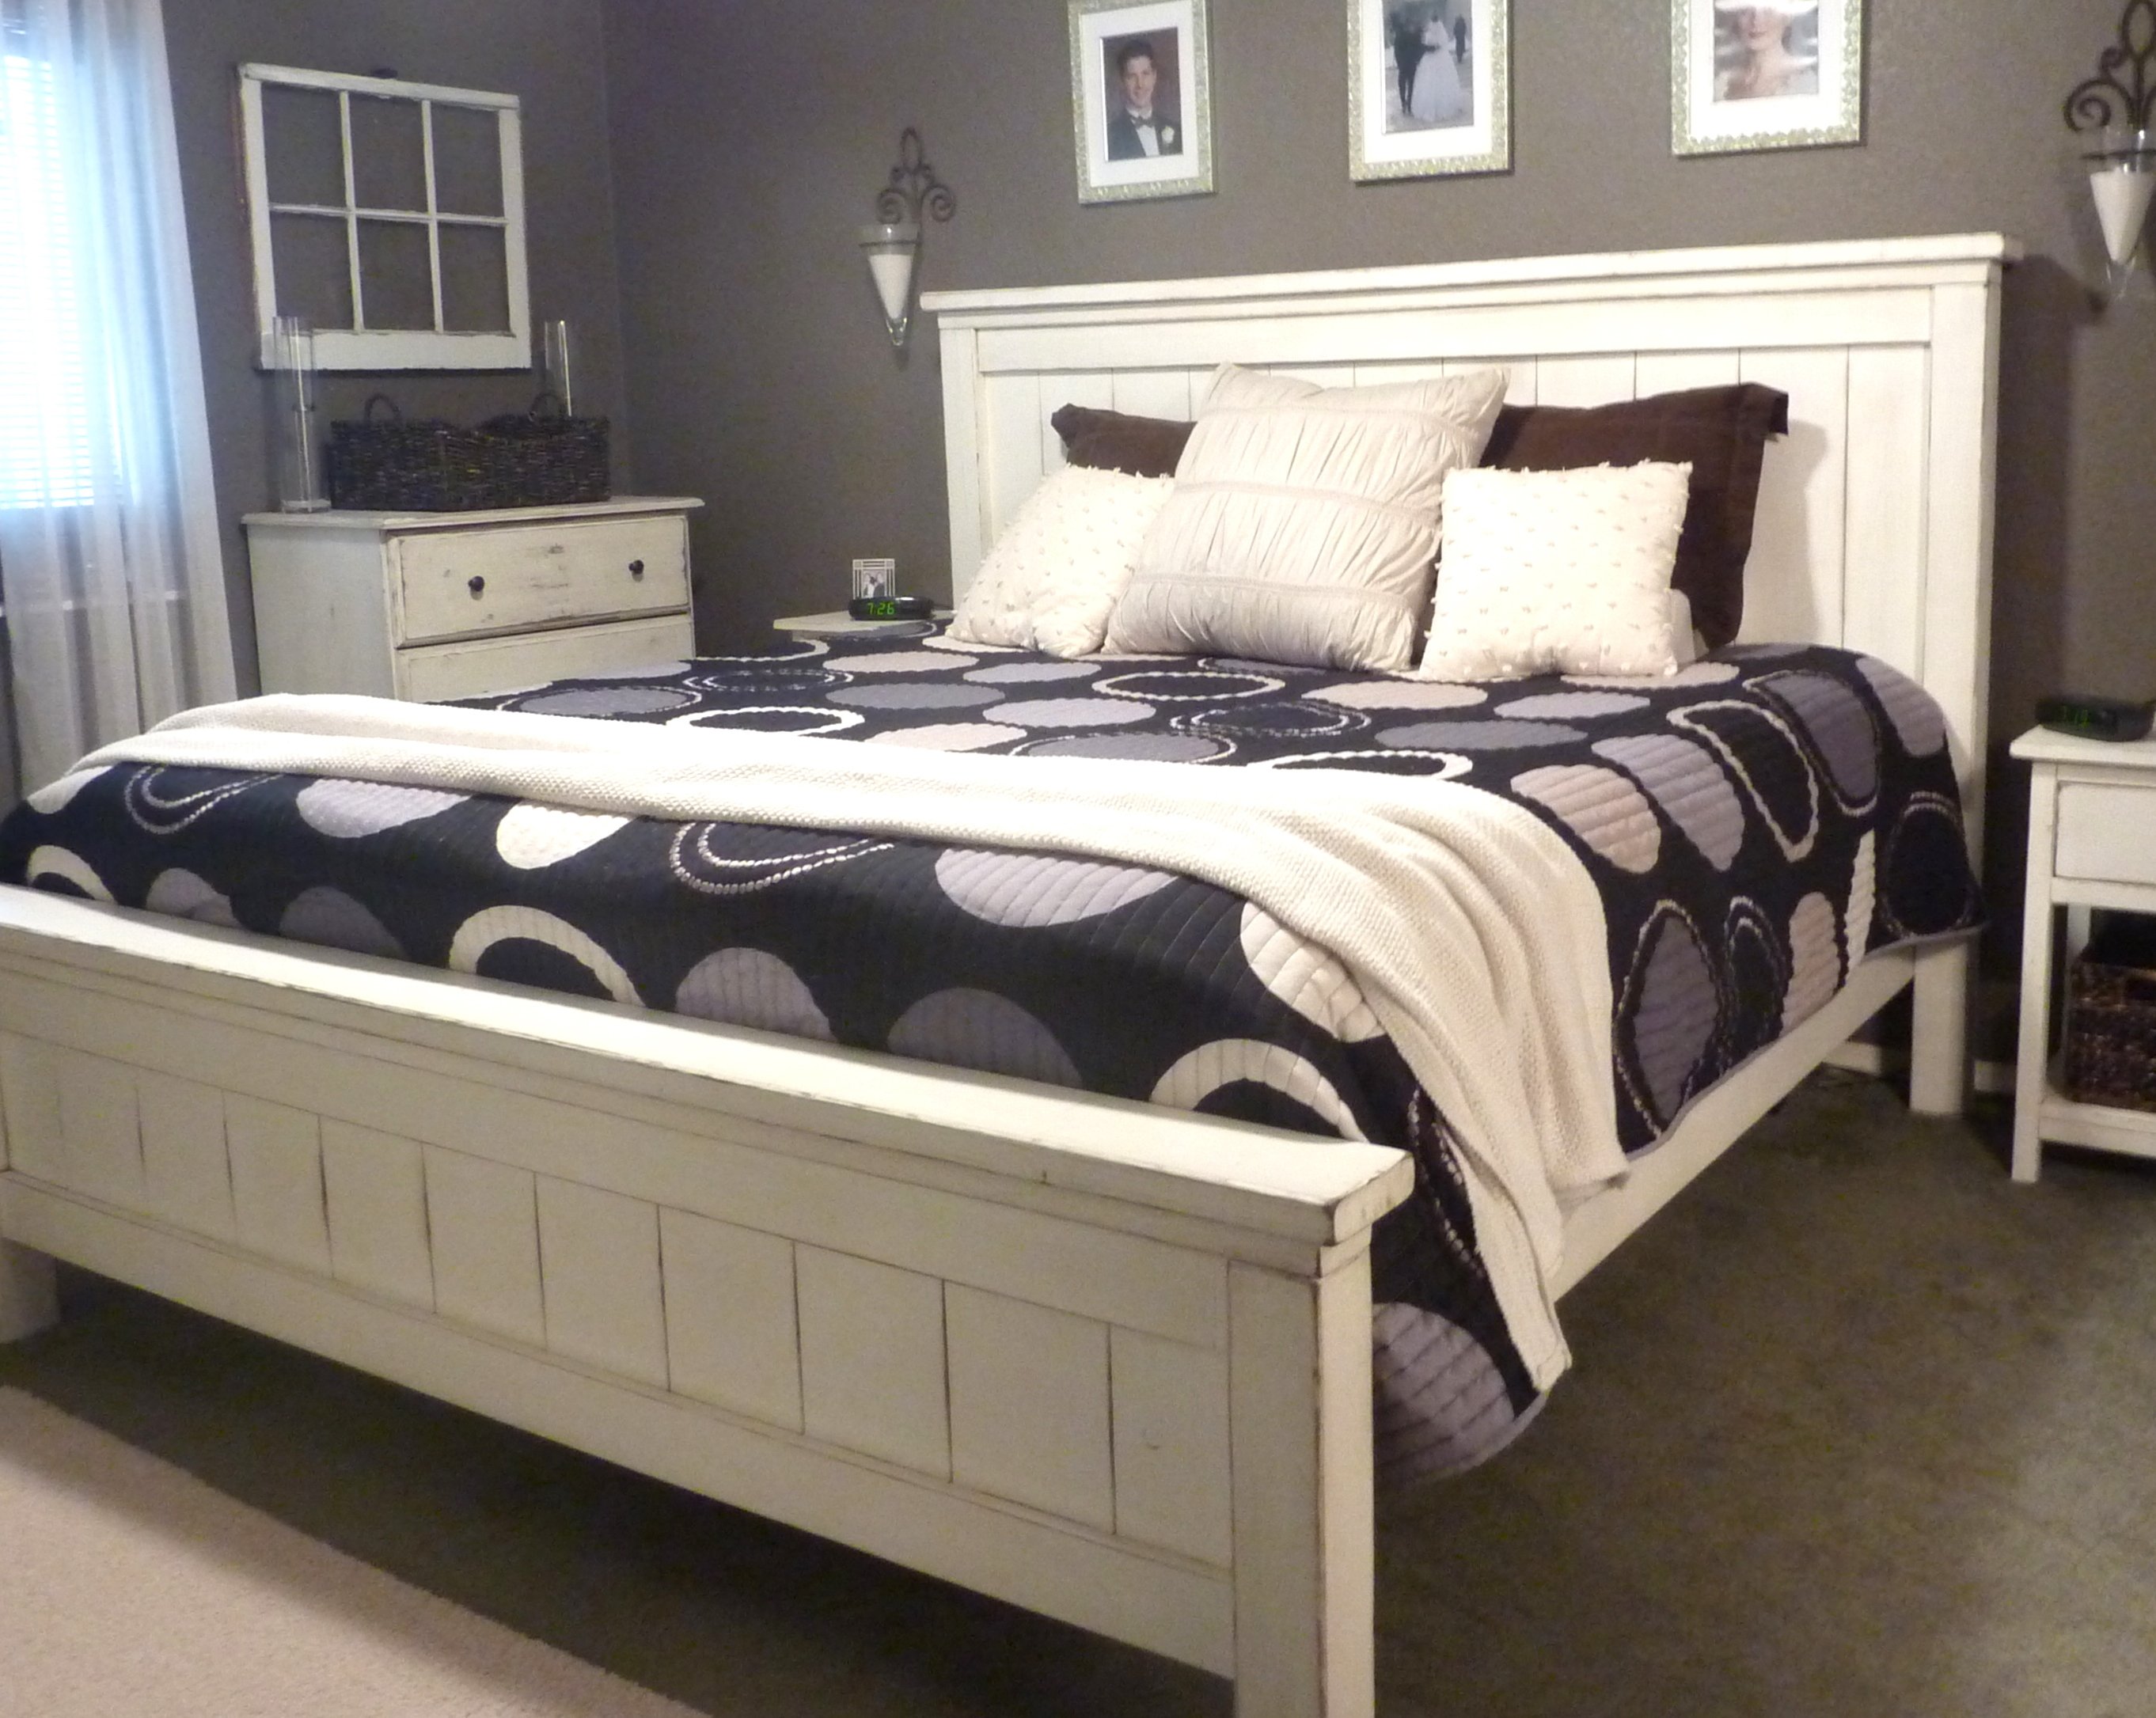
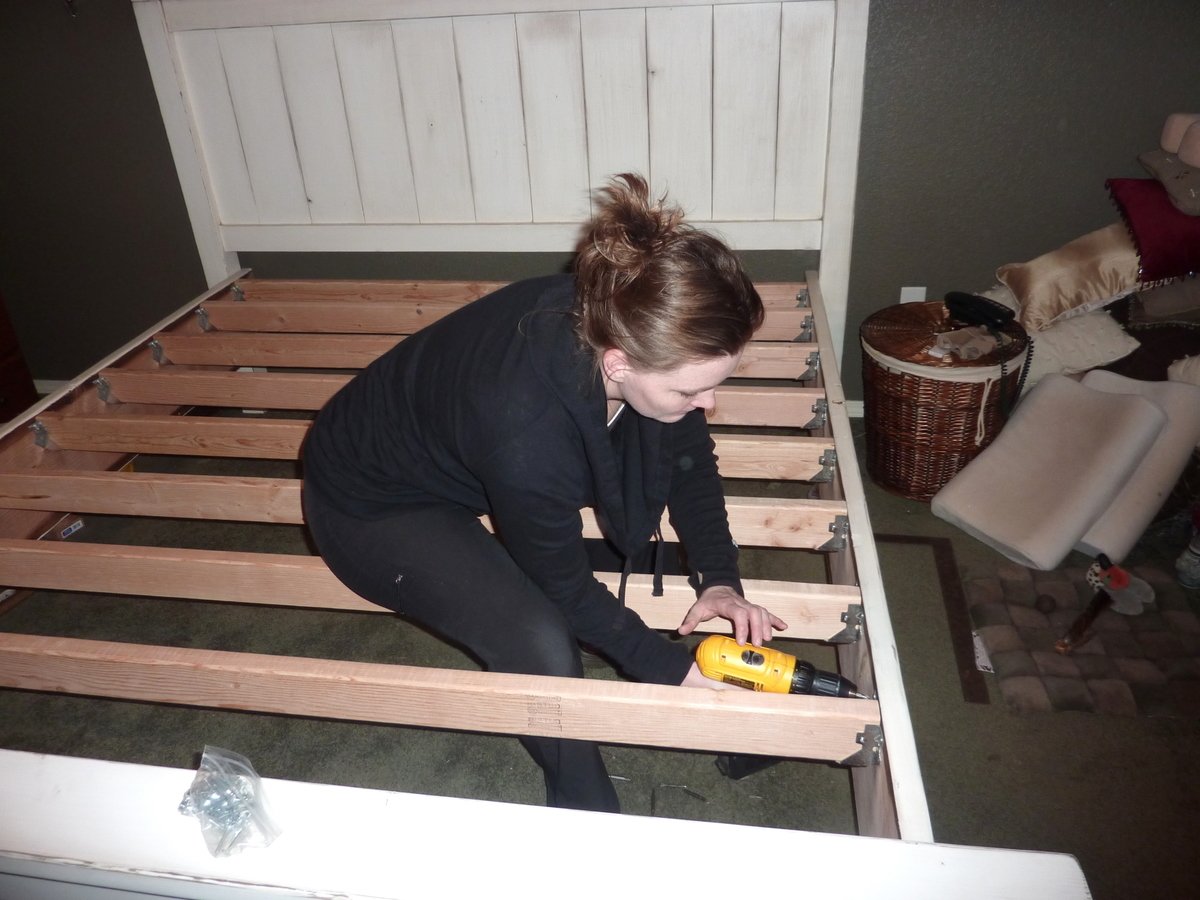
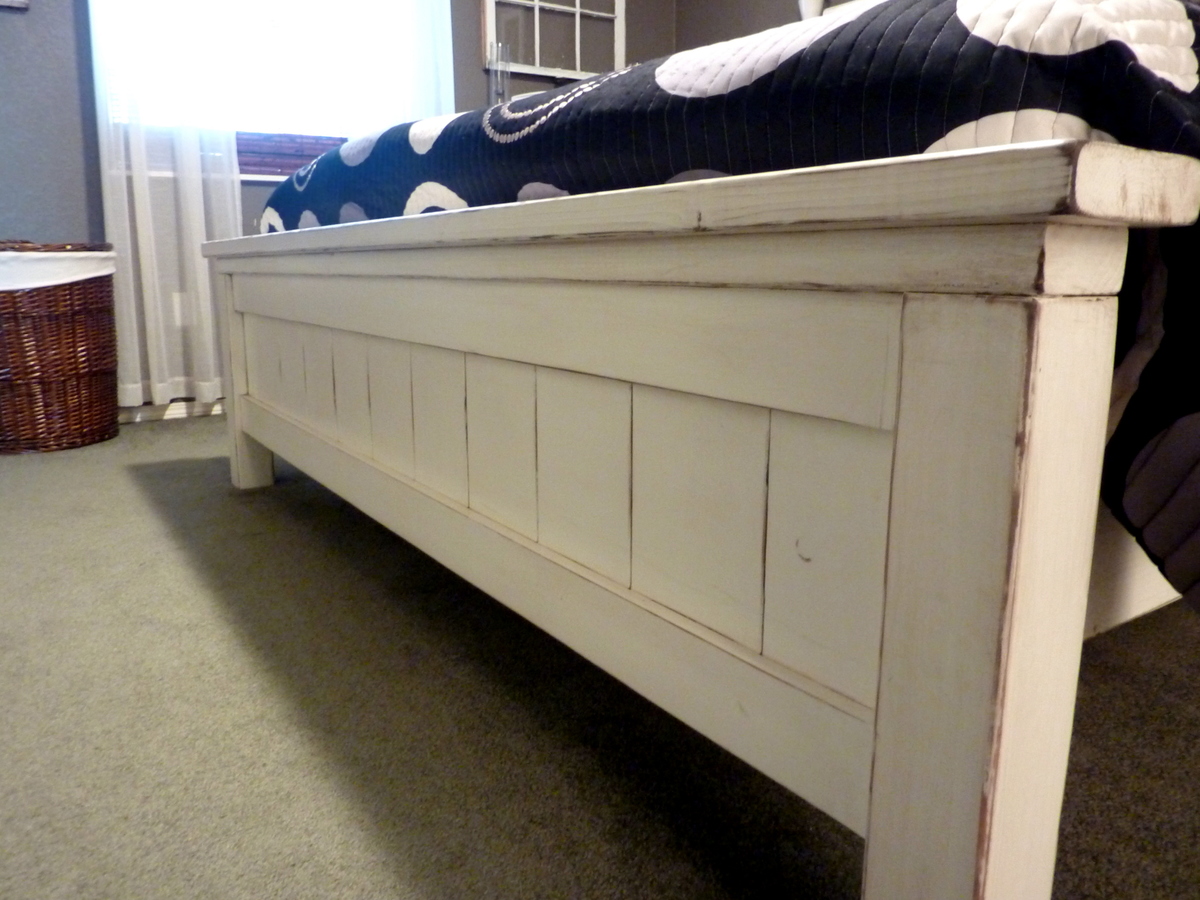
Built two queen sized farmhouse beds for my daughters.

Submitted by bh2469 on Sat, 07/13/2013 - 13:11

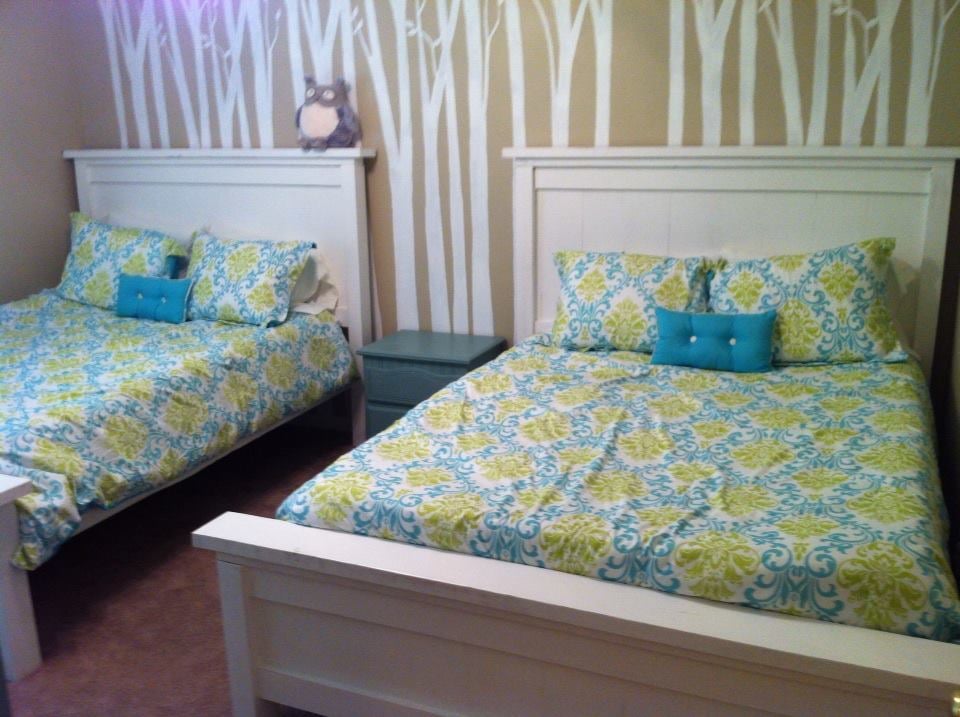
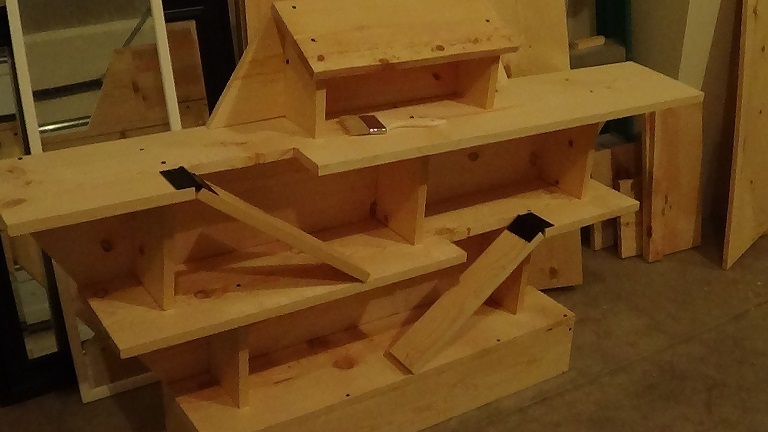
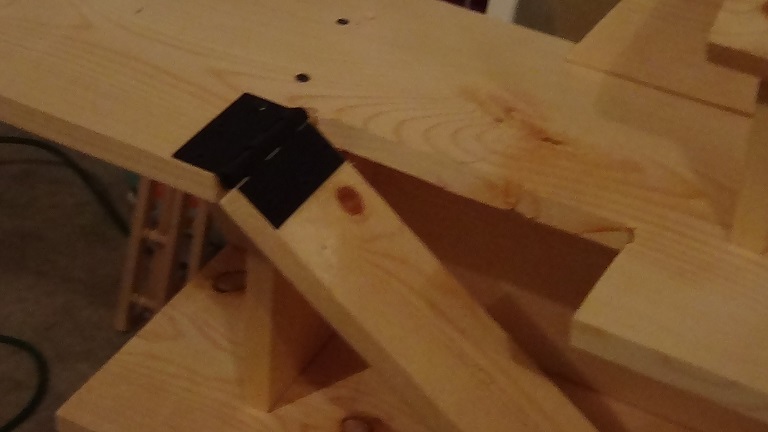
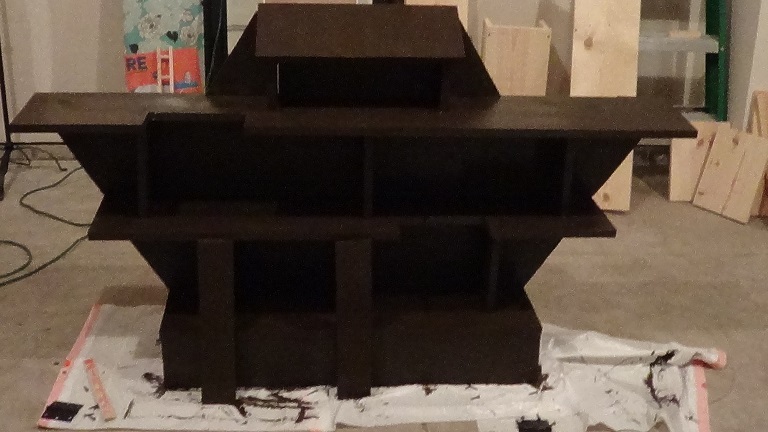
Decided to build beds for my two daughters. We went with two queen sized farmhouse beds that I hope they can keep with them for a very long time. I used joist hangers and attached the head board and foot board so that they could be disassembled easily for moves. The beds came out great and I painted them using Chalk Paint. The project took about three weekends to complete.

Built from Plan(s)
Estimated Cost
$500
Estimated Time Investment
Week Long Project (20 Hours or More)
Finish Used
Annie Sloan Chalk Paint
Recommended Skill Level
Beginner

Comments

Farmhouse Storage Bed with Geometric Pattern

Submitted by dmcarwin on Fri, 07/10/2015 - 10:15

I have always loved Ana's Farmhouse bed, so when she came out with the Farmhouse bed with storage drawers I knew it was the perfect solution for our small master bedroom. Ana's plans were awesome and made this an easy build. I wanted my bed to be a little unique so I tried a geometric pattern for the head board and foot board and I LOVE it! I also decided to make my slats removable for easy access to under the bed storage and this is one of my favorite features of the bed! I think my husband and I just found a new spot for hiding christmas presents! :) Check out my blog post for all the details and loads of photos!

Estimated Cost
I am thinking around $300 for the bed with materials and stain and poly.
Estimated Time Investment
Week Long Project (20 Hours or More)
Finish Used
I used Minwax pre wood conditioner and Mixwax Jacobean for the main bed and drawers. For the geometric inlay I used Minwax Natural Stain. I also did there coats of poly sanding with 400 grit in-between coats for a nice smooth finish.
Recommended Skill Level
Intermediate

Comments

Dining table

Submitted by Pembat on Mon, 01/29/2018 - 21:04

Awesome build! Great dining table! 

Estimated Cost
$50-100
Estimated Time Investment
Weekend Project (10-20 Hours)
Finish Used
Creme wax
Recommended Skill Level
Intermediate

Modern floating shelves - "check-box" design

I am so excited to show you my favorite project. Since I saw these types of shelves on Pinterest, I wanted them in my house. The difference was that they were made out of plywood, and the black frame was, I believe black tape. I asked my husband to build them for me, of course. He changed the project, so, instead of using black tape, he built some thin square frame, and instead of using plywood he made the "check" sign out of oak wood.
The entire process consists of:
-making the thin square frames
-building the templates for the "check" sign
-building the "check" sign
-sanding them to be as smooth as possible
-routing the slots (for the frames and for installing them on the wall) on the back of the shelves
The entire process is very well explained on our blog, and also in a short video

Comments

Doll Picnic Table

Submitted by dhrider33 on Sun, 05/22/2011 - 18:09

My 10 yr old son and 8 year old daughter really loved helping make this for their cousin. They've never been so excited to give a gift!

Built from Plan(s)
Estimated Cost
~ $15 ... although I had various scrap wood laying around from other projects
Estimated Time Investment
Afternoon Project (3-6 Hours)
Finish Used
Sanded / Primed / Painted
Recommended Skill Level
Beginner

Noah's Shelf

Submitted by LadyBird on Sun, 07/14/2013 - 20:49

My son is three and loves animals. His collection of animals keeps growing. They were originally sitting on his toy chest. This made things difficult because we could not use his toy chest storage. He liked having all his animals lined up. So I thought I would build him some shelves. But something cool and fun for a little boy with a growing animal collection. So I set out to build the Noah's ark. It didn't take me a hundred years but I kind of know how Noah felt because we messed up and had to rebuild. There was supposed to be sides with a drop down bridge so he could load his animals on to the arc. It was supposed to be attached by hinges and have a latch to hold it up. My husband and I are beginners at cutting wood and were unable to make the proper cuts. So we decided to go without sides. If anyone does this arc with the drop down side please let me know. I would love to see it like I originally imagined it. I first set out to make it 4 feet long but after building it and messing up some of our wood; I thought my son will need a bigger arc. The final product is 5feet long at the top and 3 feet at the base. I used 6 inch wide base because we have baseboards close to that wide. The shelf width is 10 inch. I would recommend attaching to a wall. I used some left over railings I had from another project. You can buy them at a hardware store. I was going to stain it but did not have the time. So we painted it. I used dowel rods for the roof and glued them on.

Estimated Cost
$50-$75
Estimated Time Investment
Weekend Project (10-20 Hours)
Finish Used
Satin dark brown paint
Recommended Skill Level
Beginner

Comments

boat table

Submitted by jeglover on Tue, 07/14/2015 - 21:59

Build this for my two sons with plans from the website.. Turned out good I think.  Modified to make it a touch bigger than the original design.

Built from Plan(s)
Estimated Cost
$40
Estimated Time Investment
Day Project (6-9 Hours)
Recommended Skill Level
Beginner

8 Foot Tall Hall Tree

Submitted by Fulton610 on Fri, 02/02/2018 - 14:23

Made the overall height 8 foot since my ceilings are 10 foot. Turned out really great and was a super cheap project compared to purchasing one. 

Built from Plan(s)
Estimated Cost
$250
Estimated Time Investment
Weekend Project (10-20 Hours)
Finish Used
Minwax Walnut
Recommended Skill Level
Intermediate

Fancy X desk

I made this desk with a few subtle changes so that it fit my space and added a second shelf. First time doing a two tone project. Love the way it came out. Minwax espresso stain on the top with a satin finish polyurethane. White paint with polycryllic on the base.

Built from Plan(s)

Comments

first thing Ive made from a pile of wood

well it's hard to see in this picture becuase the loveseat is in the way but I made 2 of the 2x4 cube shelves and then added my own twist to add desk to the end of the shelves to take up the space ( intended ) left by the shelves and have the desk come out to wrap around the corner... I am very pleased and learned alot as these arent perfect but I still love them ( and my decor is not so "thrown" on there .. my daughter helped move them in and she was anxious to get them filled ) I was just so excited to take pictures and share online lol ..

I would like to add that apparently ( as I said I am very new to building ) and newbies should know that the measurements on lumber is 1/4 - 1/2 of an inch shy of what it sells as... BIG learning curve there .. I assumed it was so my cuts were off and had to improvise.. which is why my shelves aren't a true 2x4 cubby kinda shelf.. I put 3 dividers on on the bottom and only 2 on the top..

Built from Plan(s)
Estimated Cost
after initial purchase of hardware and sand paper and stain , lumber costs were at 120 for whole thing
Estimated Time Investment
Afternoon Project (3-6 Hours)
Finish Used
minwax dark walnut
Recommended Skill Level
Starter Project

Adirondack chairs

I built two of these for my front porch. Love them!

Estimated Time Investment
Afternoon Project (3-6 Hours)
Finish Used
I stained them red oak, then sealed them with 5 coats of spar varnish so they would be protected outdoors.
Recommended Skill Level
Beginner

Comments

tevenden

Mon, 04/20/2020 - 10:03

On your chairs you made, the link is for an Adirondack but the picture has more flat seat than the plans. Please advise.

Adirondack chair

Great plan and project. I added a cup holder with left over lumber. Added some 45 angles to give it some dimension. Screwed and glued almost everything from the back to avoid any screws

Estimated Cost
$30
Estimated Time Investment
Afternoon Project (3-6 Hours)
Finish Used
Stain
Recommended Skill Level
Beginner

Comments

King Shiplap Headboard.

The Beauty Queen described a headboard with shiplap and sort of cottage style. I modified the Ana White plan to fit my needs and the wife’s taste. I used the preprimed shiplap and 1x material from the big box store so it was a little more expensive but still very reasonable. Then I made side tables. 

Estimated Cost
$100
Estimated Time Investment
Afternoon Project (3-6 Hours)
Finish Used
Marquee Semi-gloss enamel in antique white
Recommended Skill Level
Beginner

Planters- modified

Submitted by Anonymous (not verified) on Mon, 03/07/2022 - 06:14

Used your youtube instructions for the square planters and revised them to create these! Thank you so much for your video it helped me so much. I was trying to make a small backyard for my dog at my condo without breaking any rules not to have a fence. Gary loves it!

Comments

King Farmhouse Bed

Submitted by peaches76 on Sat, 05/28/2011 - 01:34

I had been dying to make this bed for awhile but first I needed to convince my husband that it really would be okay to let his sentimental old headboard go. He doesn't like change. Obviously I eventually won. This bed is absolutely bomb proof! I built it as a platform bed and plunked a brand new memory foam mattress on it. We love it!

Estimated Cost
$200
Estimated Time Investment
Weekend Project (10-20 Hours)
Finish Used
Primed. Painted in Behr Cotton Fluff - Satin finish. Sanded and stained with Minwax Dark Walnut stain. The stain was pretty dark but I wanted to use up what I had. I just kept plenty of paper towels and paint thinner nearby to thin it down to the shade I wanted.
Recommended Skill Level
Beginner

Truss End Tables

The main thing I learned on this build is to measure and make sure something will fit where its supposed to go! I had already edited the plans to be the width I wanted, but not the height. They were about 6 inches higher than my couch :D I had to pry them apart and re cut them!

Built from Plan(s)
Estimated Cost
$35.00
Estimated Time Investment
Afternoon Project (3-6 Hours)
Finish Used
Rustoleum Kona Stain
Recommended Skill Level
Beginner

$6 Scrap wood coffee table

Submitted by pmgriffith on Tue, 07/21/2015 - 09:23

Decided it was time to use up some scrap wood and build a coffee table.

Now I need to get wood to actually make the matching end tables.

1x8s and 1x4s for the top and 2x2s for the legs and underside braces

Hope this help to inspire others on how to use up their scrap wood

Estimated Cost
6 Bucks!
Estimated Time Investment
An Hour or Two (0-2 Hours)
Finish Used
'Fruitwood' hence the 6 bucks :)
Recommended Skill Level
Starter Project

Chunky Coffee Table with Turned Legs

Submitted by danicarby on Sun, 02/18/2018 - 06:53

I turned my legs (woot woot!) but you could buy legs that are 3x3" @ 18".  This was a simple build using pocketholes + glue joinery and using glue + nails for the shelf and tops.  To allow for seasonal expansion of wood I spaced the wood on shelf and top slightly because I built it in the dry winter.


I used a Dark Walnut stain first and went back over with a light coat ("dry brushing") of a sage green paint.  Lightly distressed edges.


I have more pictures and details on my website: http://www.theprojectlady.com/2018/02/diy-tutorial-chunky-coffee-table-…


Happy building everyone!  It's so rewarding, right!??

Estimated Cost
$50 for wood
$20 for finish
$5 for screws/nails
Estimated Time Investment
Day Project (6-9 Hours)
Finish Used
Dark Walnut Stain
Behr Premium Plus Indoor Paint
Recommended Skill Level
Beginner

Farmhouse Toy Box

Submitted by Anonymous (not verified) on Wed, 03/30/2022 - 09:25

I used aromatic cedar for my version, finished on the outside with brush-on lacquer. It is a bit smaller than specified in the plan. I added a removable box insert for small toys and trimmed the feet. The hinges are Rocker lid-stay hinges. These required some modification of the top, and a transom chain to prevent over-opening, so I would go with the hinge method shown in the original plan and add internal lid stays.

Comments

Library Cart turned Craft Cart

Submitted by kaleidiehl on Tue, 05/31/2011 - 19:57

I love the library cart idea, but needed something for my 4 yo and 7 yo crafter/artists to use to keep their supplies on hand and contained. I modified the cart to have 2 shelves (not angled). The top shelf is converted to a tray to keep supplies stable as the cart is moved around on its wheels. Stores in the closet and can be pulled out to use.

Built from Plan(s)
Estimated Cost
$35
Estimated Time Investment
Afternoon Project (3-6 Hours)
Finish Used
Outside:
Paint Brand: Walmart Brand
Color: Arctic White
Finish: Semi Gloss

Inside:
Paint Brand: Sherwin Williams
Color: Robin's Egg
Finish: Satin

Just used what I had available.
Recommended Skill Level
Beginner

FANCY X FARMHOUSE BENCH

Submitted by daddydrew on Fri, 07/19/2013 - 12:54

This was a quick morning project. It took an hour and a half to cut and build I have not done the finish yet but it won't take longer than an afternoon.I am available to do builds for people who like what they see and dont want to pay retail price for this stuff. check out my profile.
http://ana-white.com/users/daddydrew

Estimated Cost
35
Estimated Time Investment
An Hour or Two (0-2 Hours)
Finish Used
minwax expresso oil based stain
polycrylic protective clear coat
Recommended Skill Level
Intermediate

Comments

Newfey

Fri, 07/19/2013 - 13:43

You did a great job with the table, but I think you are way off on the time estimate. I just finished making the same table and two matching benches to go with it and there is no way that I could make the table in 2 hours.

melissafontes

Thu, 01/05/2017 - 15:44

How do you attach the table top.  Im no master craftsman but I have the table and tabletop built but the plans on the website dont say how to attach.  Im assuming pocketholes but I have no idea where or how to do it.  Can you lend any help on this?