Community Brag Posts

My First Project - 6 Cube Bookshelf

Submitted by katiemakes on Tue, 03/26/2013 - 02:10

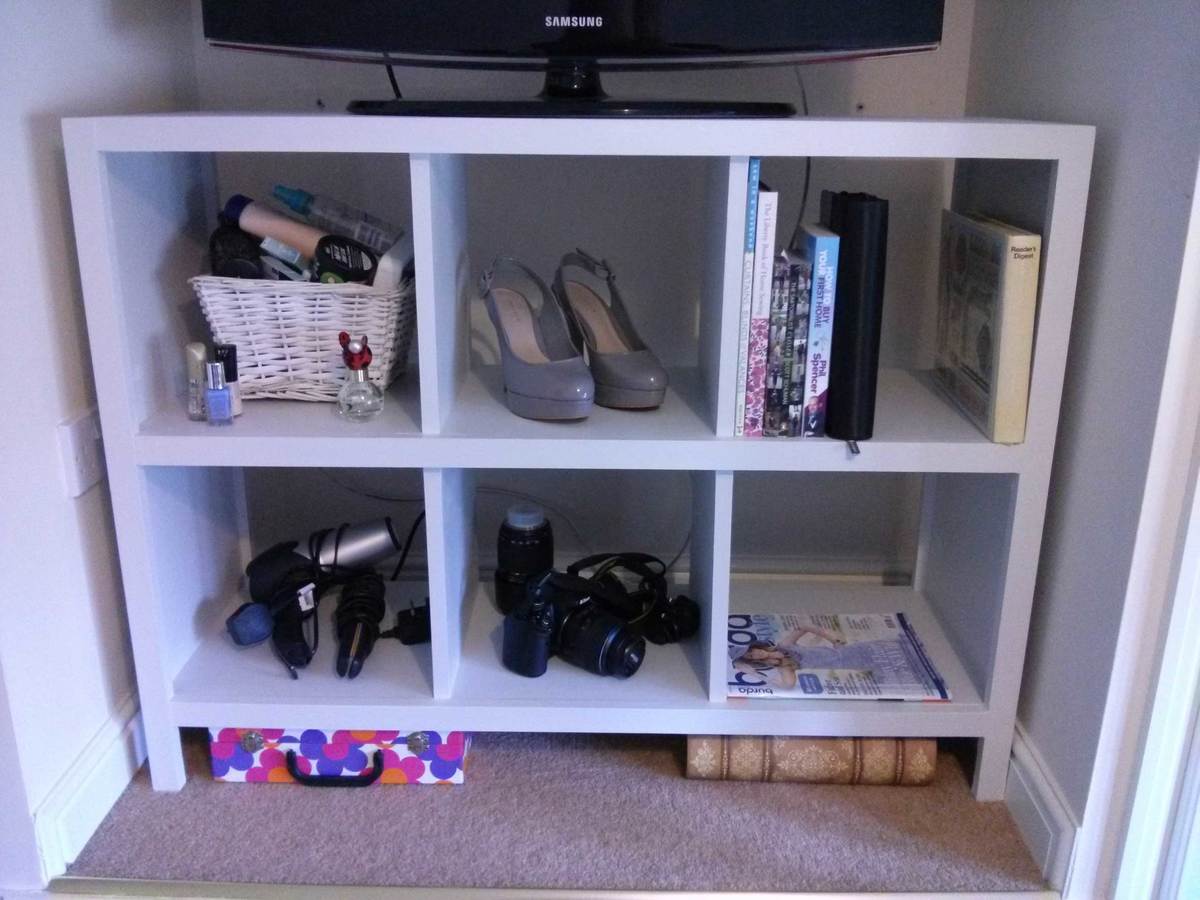
I desperately needed some storage in my workroom and finally decided to make this! It's from the 6 Cube Bookshelf plan and it works perfectly in this space I've got in my workroom.
I would've rather used real wood throughout, but this is my first proper project and to keep the cost down I used MDF for the main boards (all cut to size by my local B&Q, yay!) and planed whitewood 1x2s.
I definitely learnt a lot on this project, but most of the mistakes are hidden under the paint :-) and in the end I'm really pleased.
I wanted an off-white finish and, after a baffling time in the paint aisle, chose a very pale grey, it sits in the room perfectly! I'm hoping to make some fabric boxes for it, but not sure what colours I want yet.
Now for the next project...

Built from Plan(s)
Estimated Cost
£70
Estimated Time Investment
Weekend Project (10-20 Hours)
Finish Used
'Grey Tint' (from Homebase) matt emulsion over white primer, with matt clear water-based varnish.
Recommended Skill Level
Beginner

Comments

katiemakes

Tue, 03/26/2013 - 15:07

Thank you :) the fabric problem is made worse because I work in a fabric shop, so just have way too much choice!

Outdoor Dining Set

Submitted by ikeymedesu on Sun, 05/30/2021 - 20:00

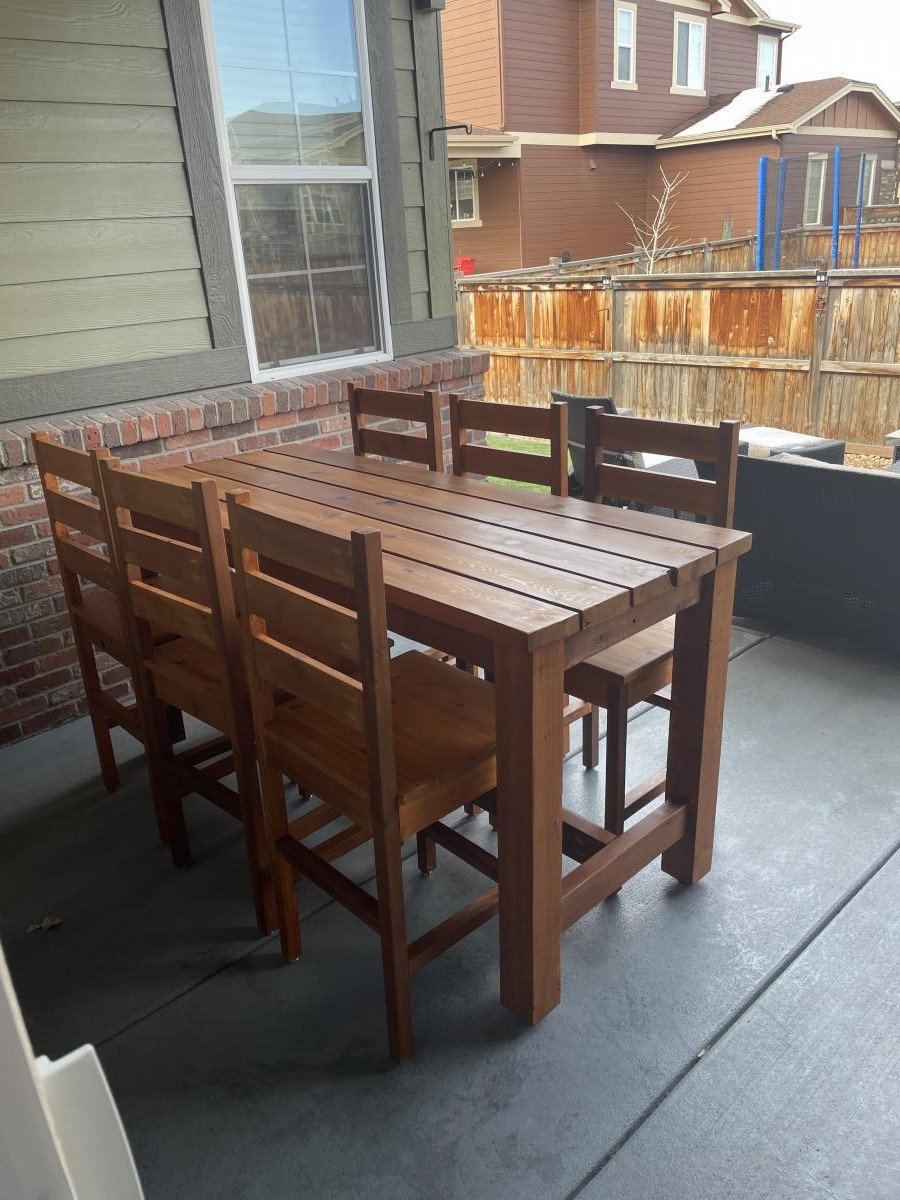
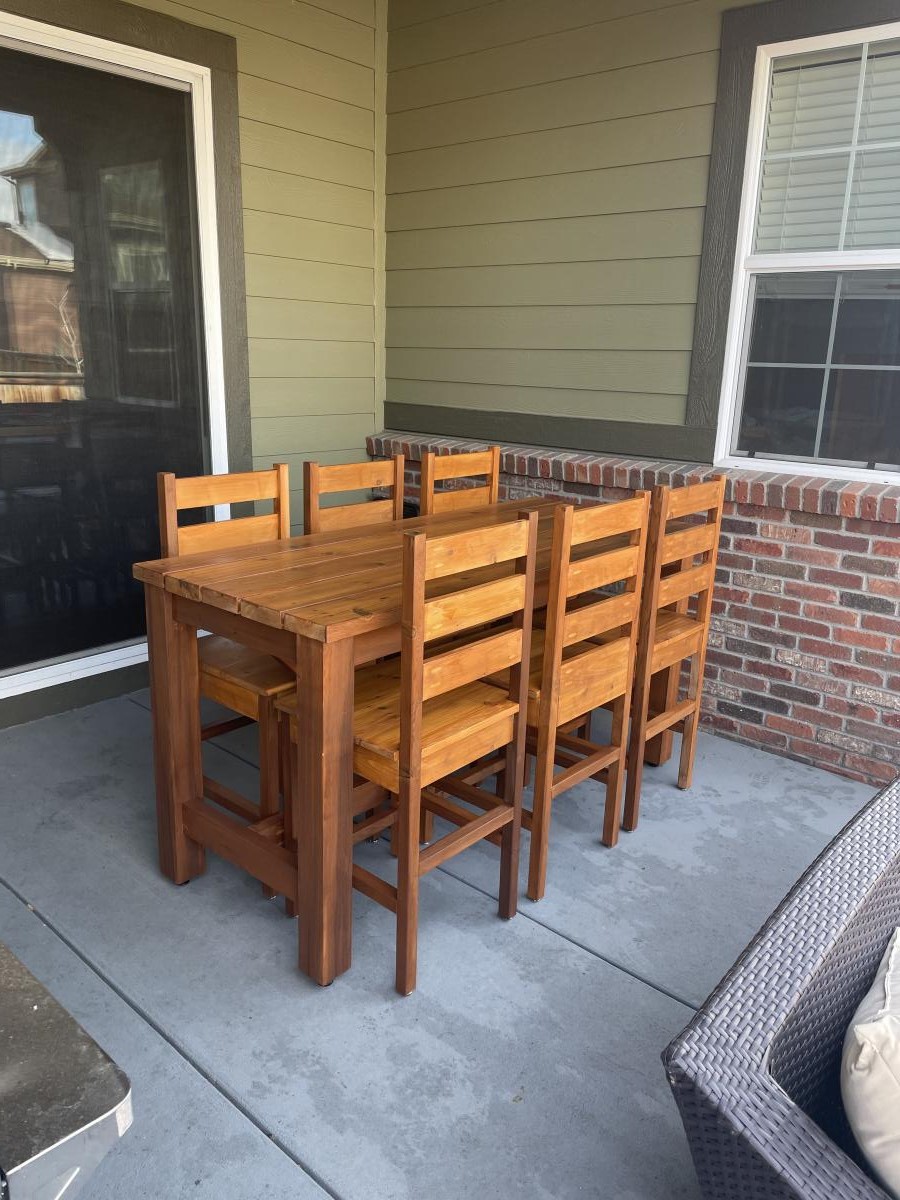
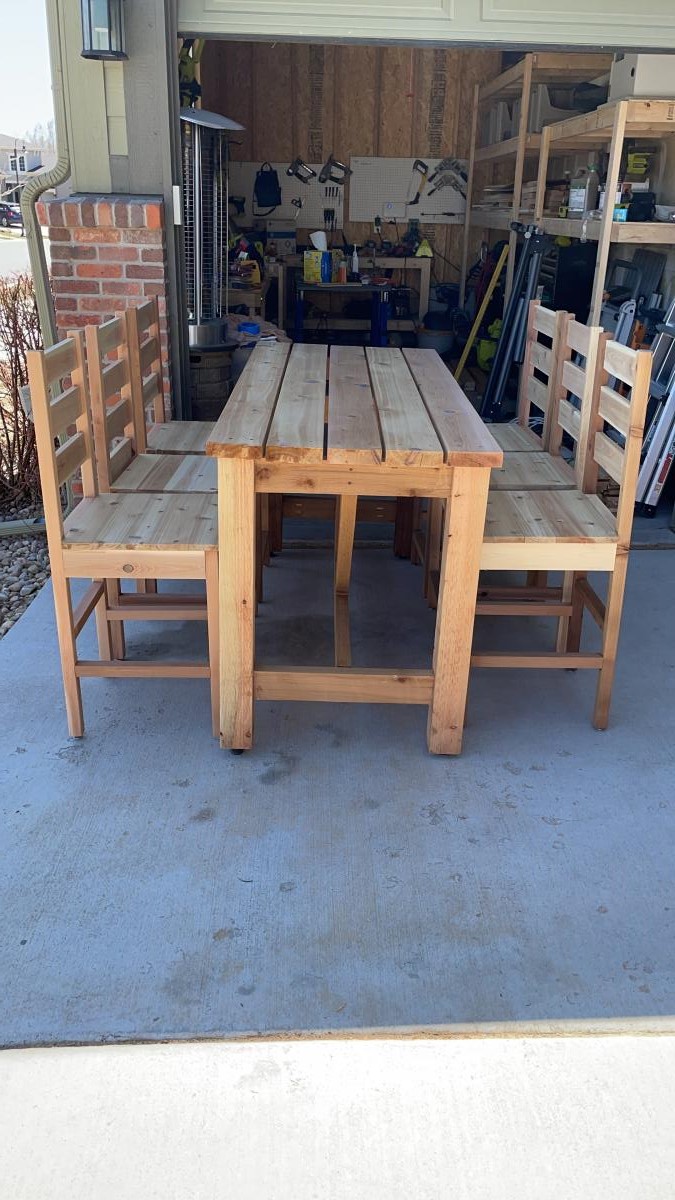
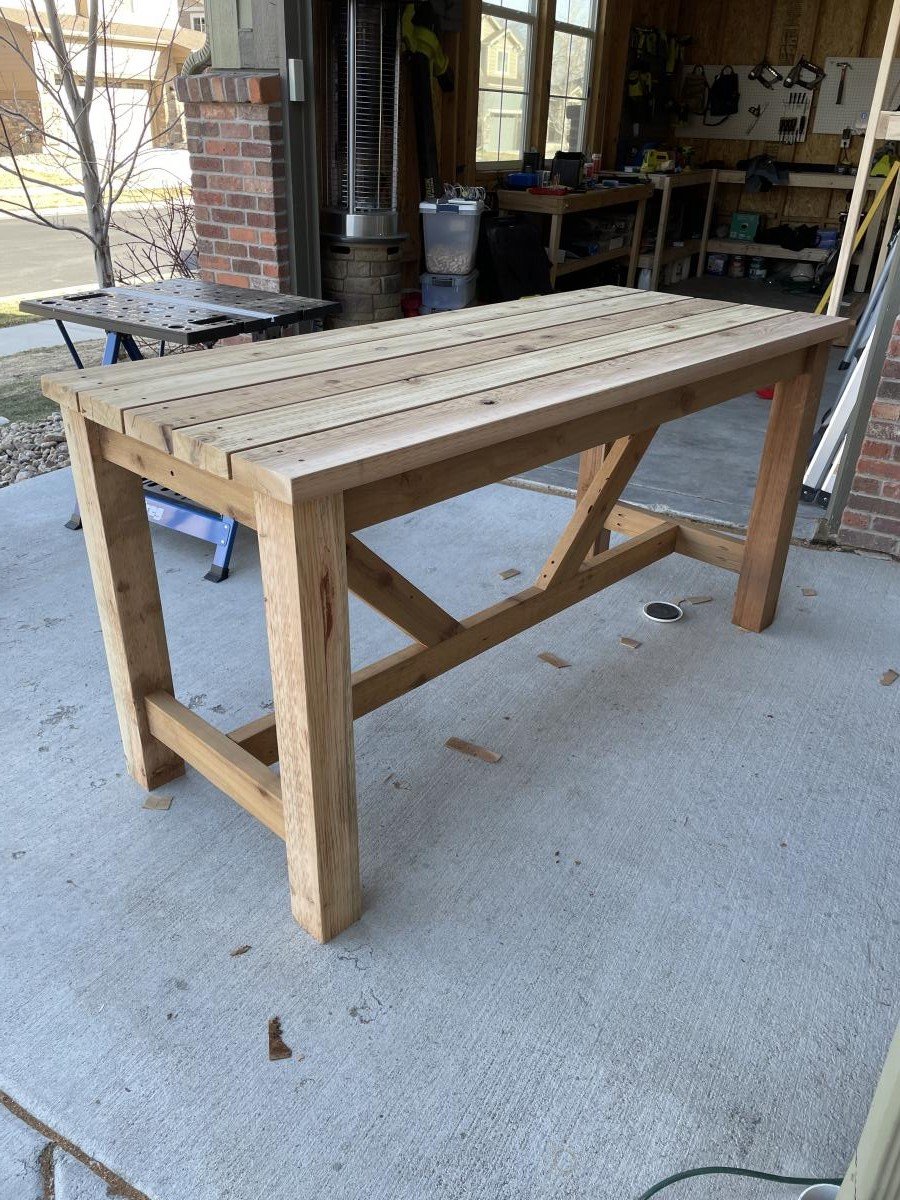
First part of the outdoor entertainment build was a 6-person dining set. Learned a lot from this build, and it was a great project to build confidence and get back into woodworking. This set is a tank - heavy, durable, yet comfortable and beautiful. We look forward to many gatherings with friends and family, just quiet dinners with the two of use and the pups.

Estimated Cost
700
Estimated Time Investment
Weekend Project (10-20 Hours)
Finish Used
Sanded down to 80 on all framing pieces and to 150 on the tabletop and parts of the chairs that make contact with the body. Used Behr Premium Cedar Naturaltone Transparent Waterproofing Exterior Wood Finish.
Recommended Skill Level
Intermediate

Comments

Seasonal And Holiday

Chicken Shed

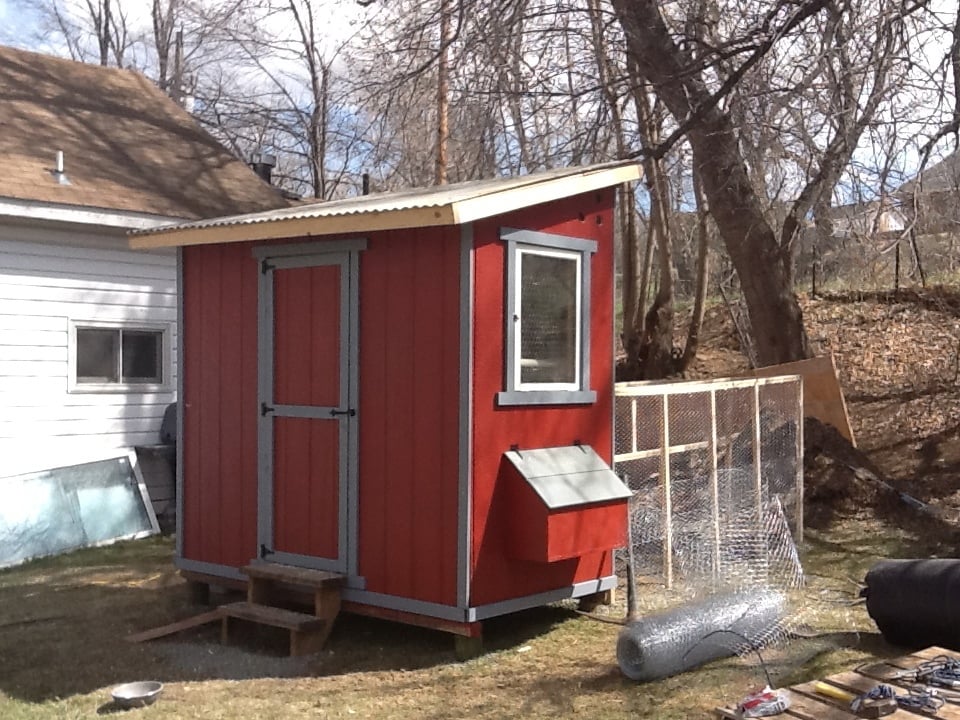
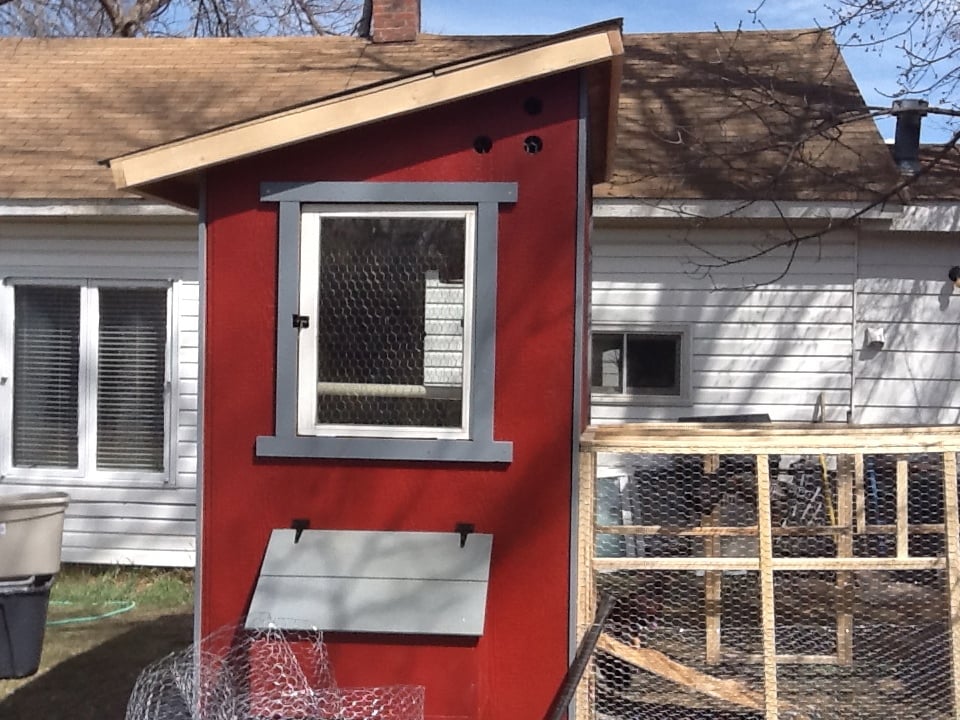
I used the chicken shed plans to create the coop, with a modification to include two nesting boxes, one on each side.

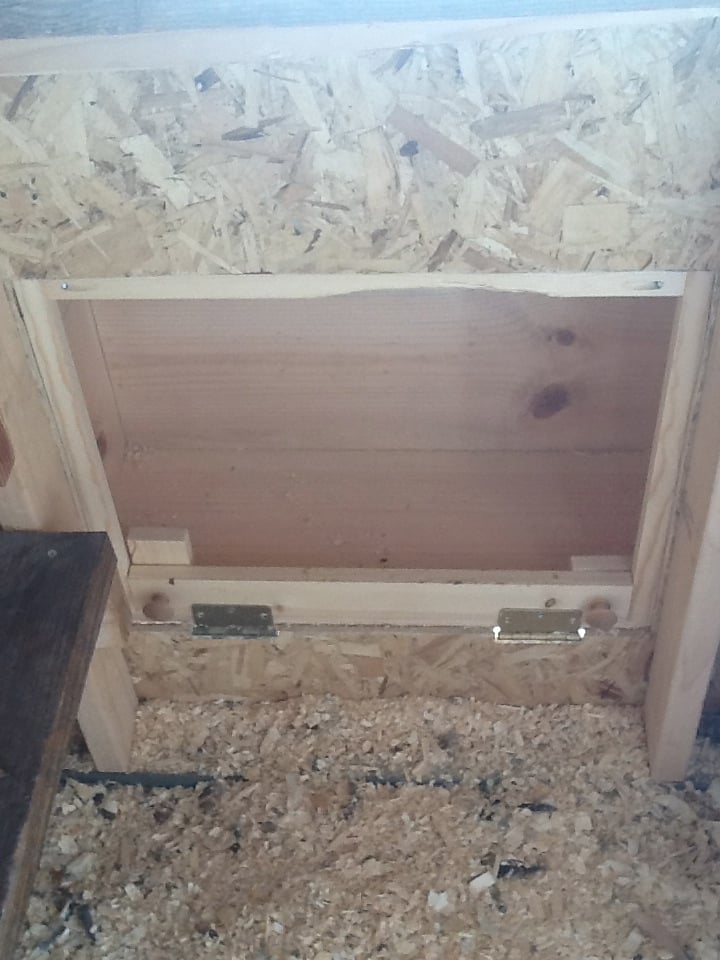
I slightly modified the nesting boxes, using a U shaped frame and added hinges for the front to swing down and the pine shavings to be swept out.

For the siding, we found it easiest to do the tack and trace method. We tacked each full sheet of siding in place and traced the cuts for the window, roof line, doors, and nesting boxes. We then took them down, darkened the lines, cut 'em, and re-hung them. It made it a million times easier, IMHO.

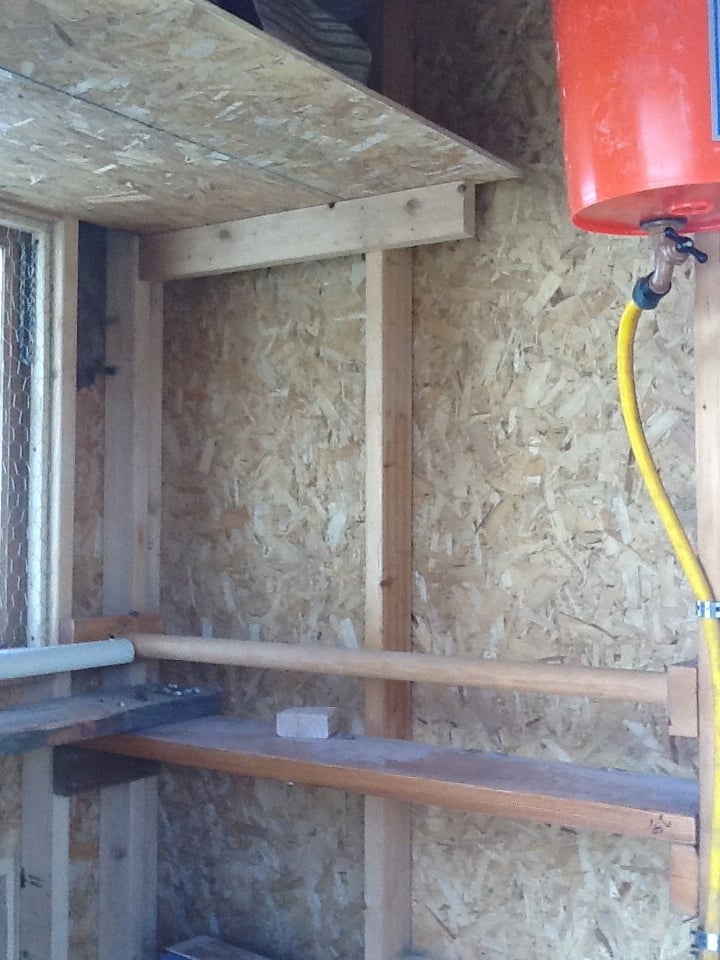
For the inside, I designed several roosting bars with poop platforms. The water is a gravity fed chicken nipple/pvc setup, which I found online.

The food stations, also gravity fed, are (new) sewer pipes with wye connectors.

I used the roof and siding scraps to make shelves for storage inside.

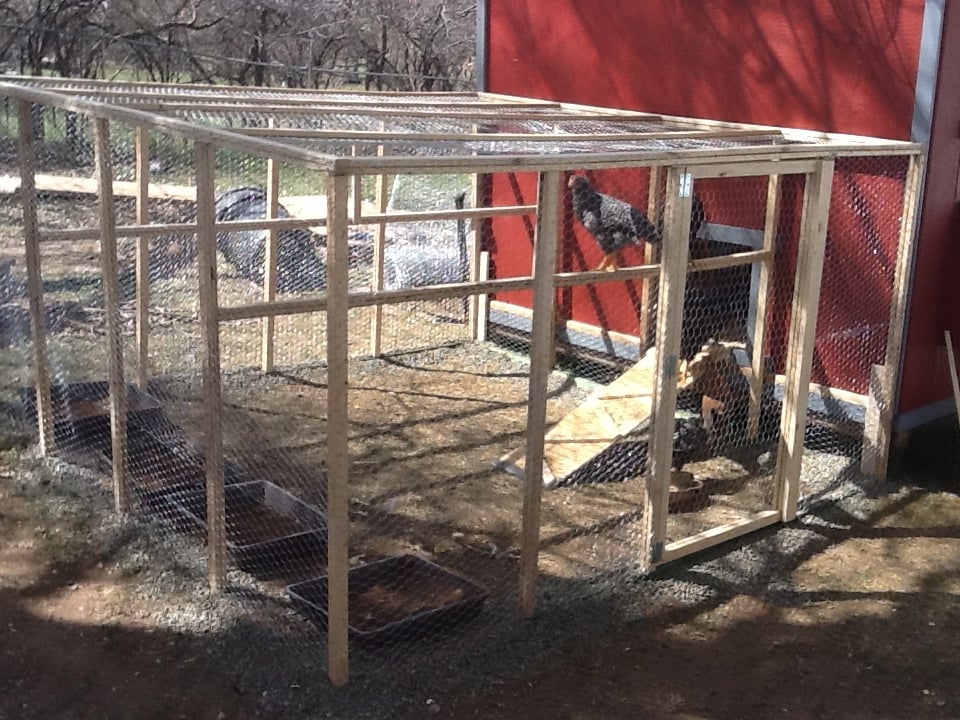
By sourcing reclaimed materials, I built the coop, run, interior, feeding stations (5), and waterer for $550. I only bought 27 pieces of new lumber (15 2x4's and the 12 8 foot long 1x3's)

Even the paint was free! (We have a drop and swap at the haz mat recycling center run by the county. We have gotten 100's of dollars of free paint, stain, and varnish there. I even used a can of free spar varnish to seal the inside of the coop)

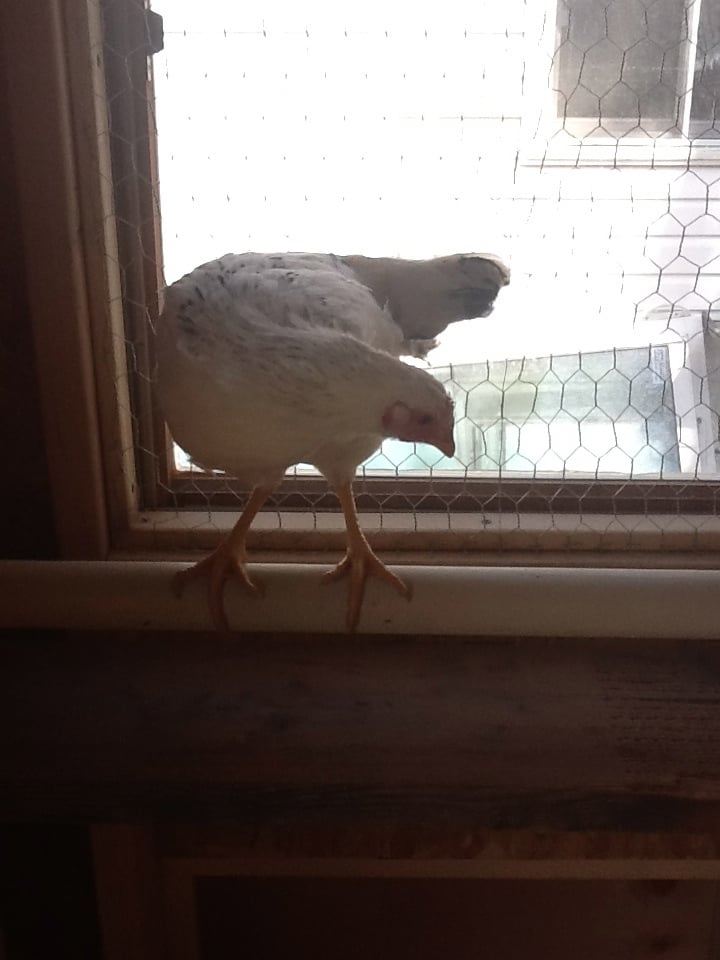
There are still a few pieces of trim to be cut and painted, but the girls are inside eating, drinking, and merry!

I did find that at the Home Depot, if you buy chicken wire, it costs way more then 150 feet x 36 inch "stucco netting". The stucco netting was $54 for 150 feet, and chicken wire is $76 for the same amount. It is the exact same wire.

I built the run out of resourced 1x2 furring strips. They were a pain to work with, very prone to breaking when not supported, but with the entire run costing $25 for wood and $54 (with half a roll left over) for chicken wire, I can handle some extra time and effort.

If anyone has any questions for me, feel free to contact me! I'd love to help!
Built from Plan(s)
Estimated Cost
550
Estimated Time Investment
Week Long Project (20 Hours or More)
Finish Used
Free paint !

I know several counties in CO have drop and swap places. Maybe your county does, too!

We got three cans of exterior rust colored paint and mixed them all together to make one color. This only works if the colors are pretty similar. It prevents one side from looking different then another.

The trim was a full gallon of blue-grey. Free and never even used.
Recommended Skill Level
Intermediate

Comments

xman1x

Mon, 02/06/2023 - 08:12

Hi! Do you still have this coop? It's been about a decade now and wondering how it has held up, if you have any suggestions, or additional pictures of the inside. Thank you!

Chicken Run with Turkey House

Submitted by vendo on Wed, 10/13/2021 - 10:03

My daughter helped me build this enclosure. We used Ana's chicken run plan, but just made it taller so we could walk in easily. We added an overhang to store food and pellets under, for the supports we used Ana's easy shelves angle support plan, and finally we used the playhouse base plan for the base of turkeys house. All plans used are linked below. We ran the chicken wire out under the structure and still need to bring in some large rocks or pavers, but so far no issues with predators. Turkey was getting too big to fit in the smaller coop, so we decided to have fun with his house and used cedar fence pickets and some treated 2x4's, built a box and jig sawed the shape of a turkey. As you can see in the first photo the ladder for turkey wasn't big enough, all the other chickens were in his house, lol. So I beefed up the ladder and he happily can put himself up at night now:) Overall a super successful project, I wasn't sure what to do with the top and just at that point, the neighbor walked over and offered the metal, talk about a huge win and the perfect solution! We attached the run to the previous smaller structure and now they have so much more room and are laying like crazy:) Finally, I think this would make a great dog kennel as well...

Corner Desk for Craft Room Sewing - DIY

Submitted by Anonymous (not verified) on Mon, 10/23/2017 - 11:02


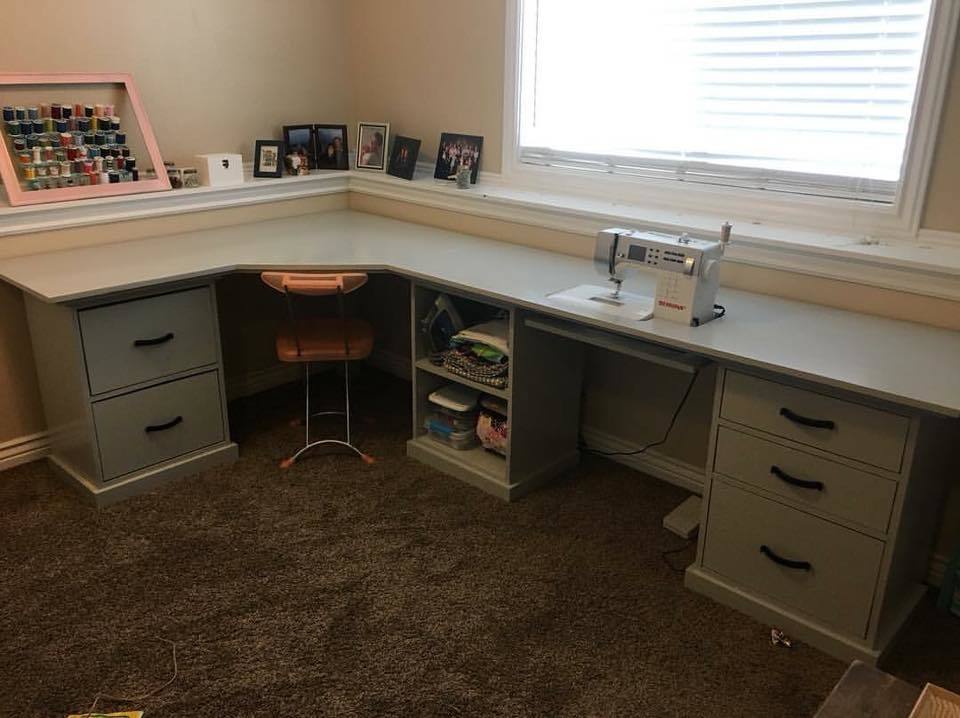
We made this sewing/craft table by combining plans from the modular office. It was a big job but SO worth it! We love your plans and use them all the time!

Submitted by Candace Ann Williams

Comments

melkaye

Wed, 02/19/2020 - 13:49

Could you tell me how much extra did you add on to the one side? And how did you fit your sewing machine in there? 

Ice cream cart

Submitted by Markb25 on Mon, 11/22/2021 - 23:52

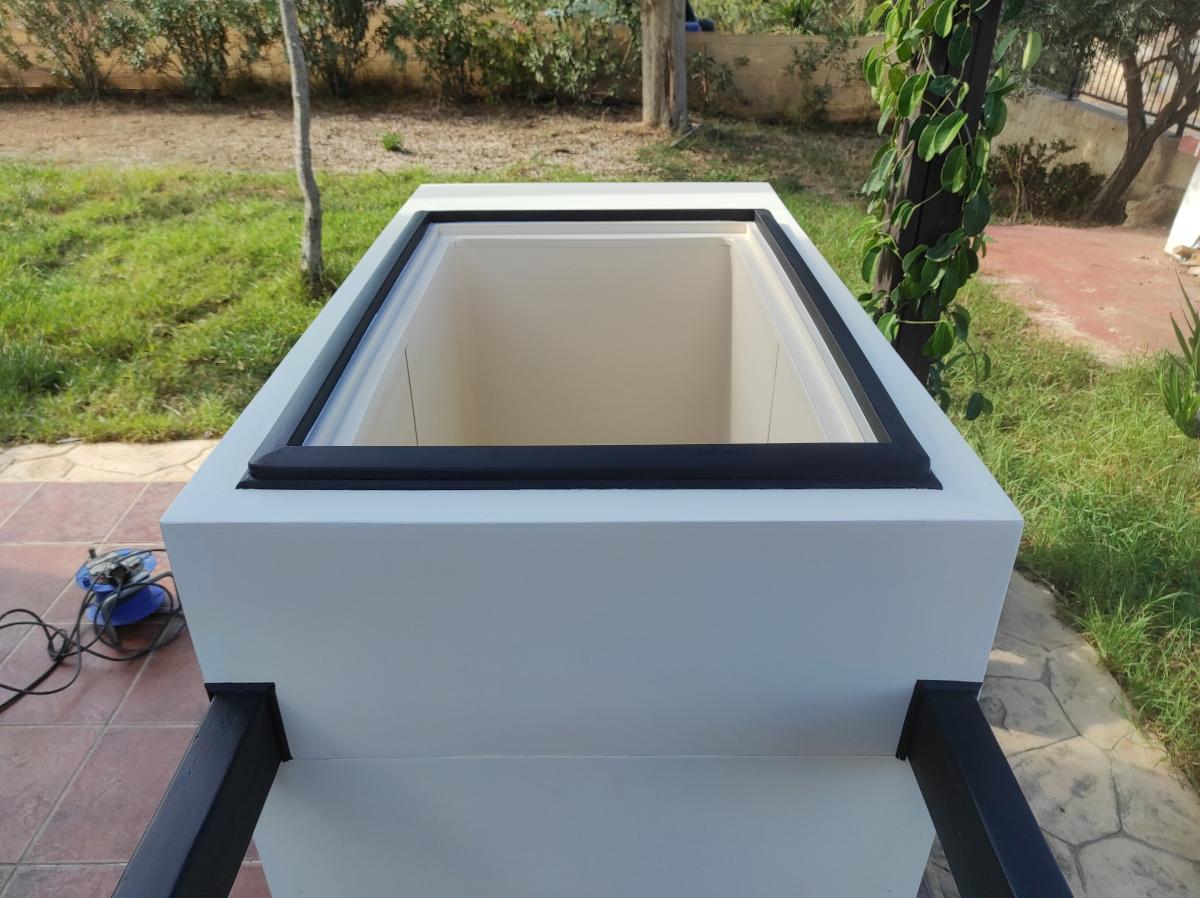
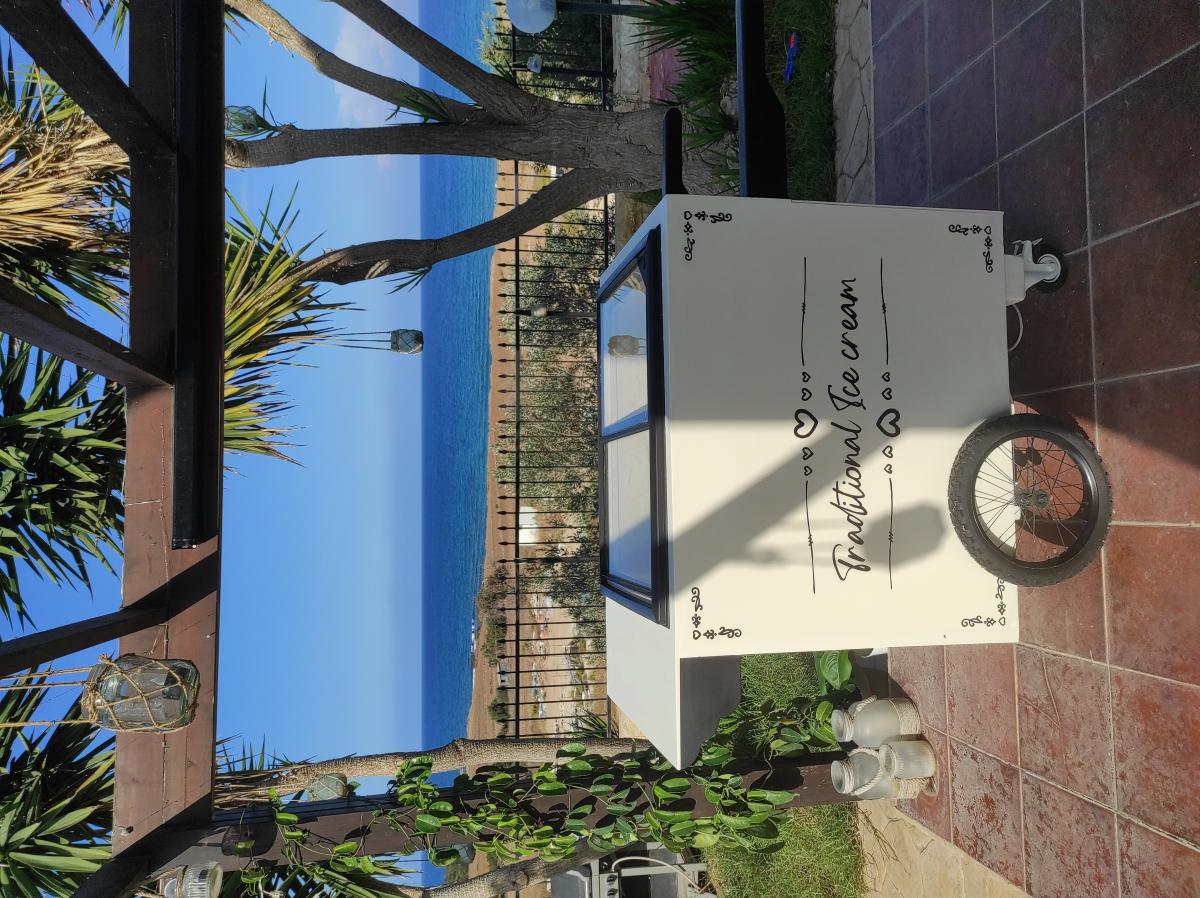
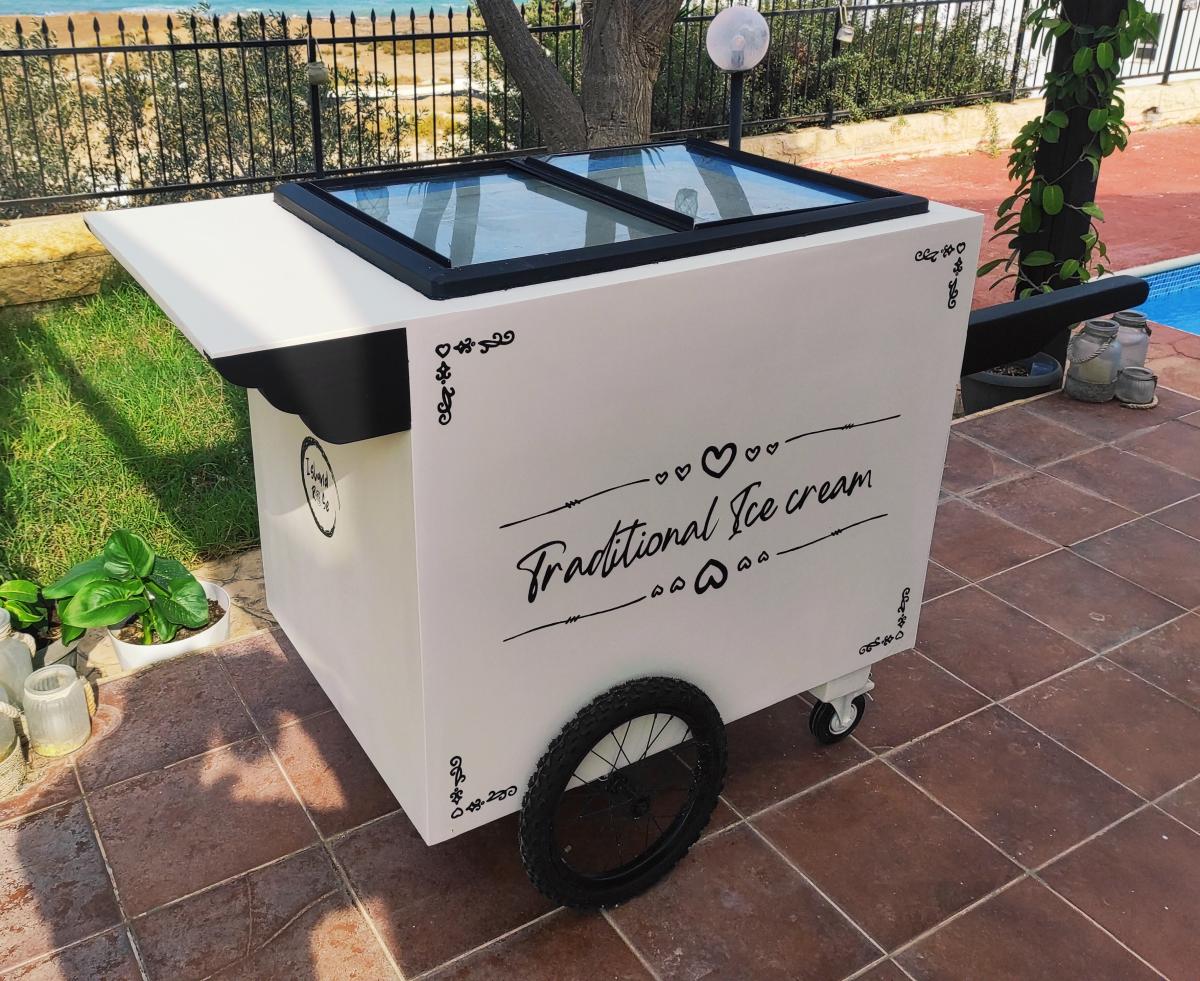
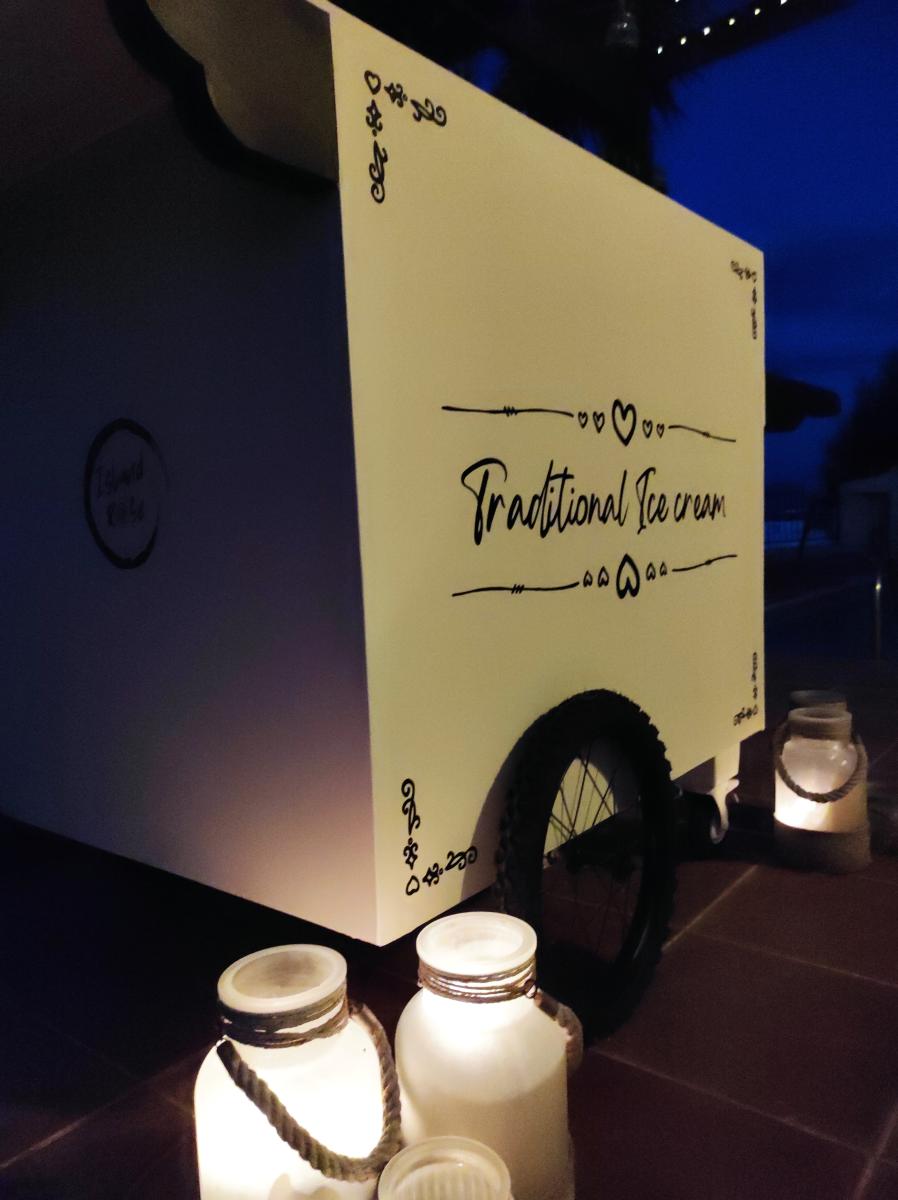
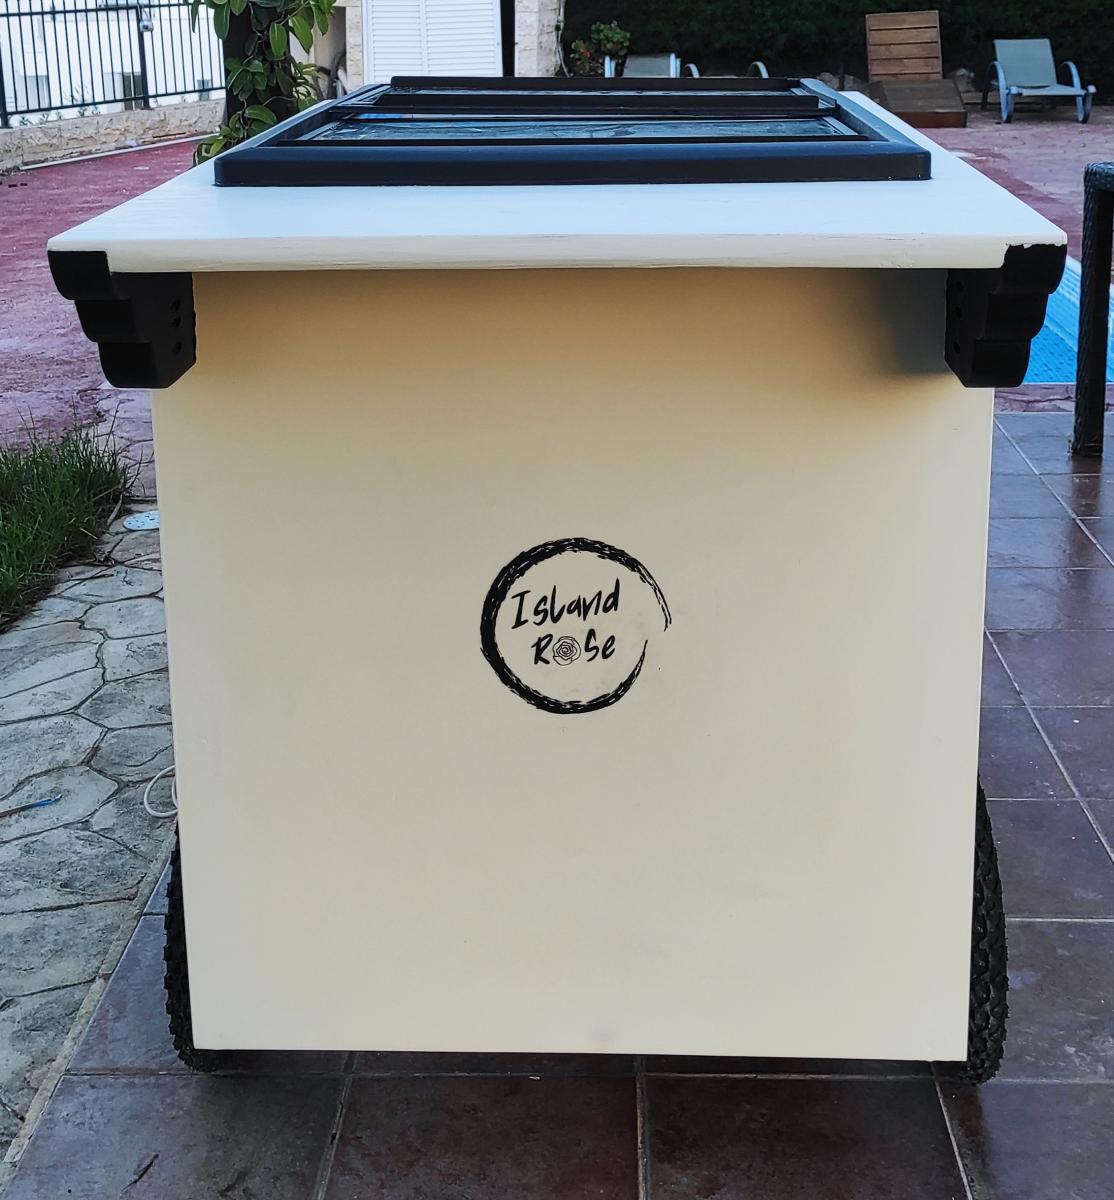
A friend wanted a tatty old chest freezer turning into a traditional looking ice cream cart for her business. The freezer itself was way to heavy and not really fit for purpose but, after a week of tinkering about with a couple of design changes here and there to accommodate the weight, I don't think I've done too bad a job.

The internal frame is Nordic fir, half lapped at the joints and secured in place with 38mm oak dowels, the cladding is 6mm birch ply finished with paint from the French chic Al fresco range, the writing proved a little challenging on the the eyes and my hands aren't as steady as they used to be but she's happy.

Comments

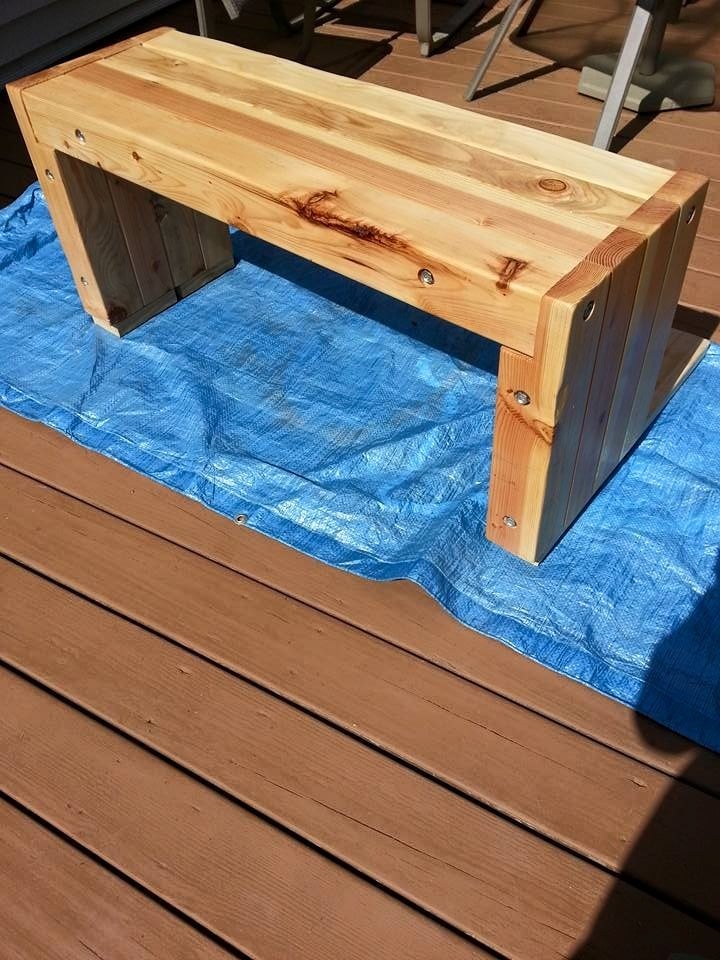
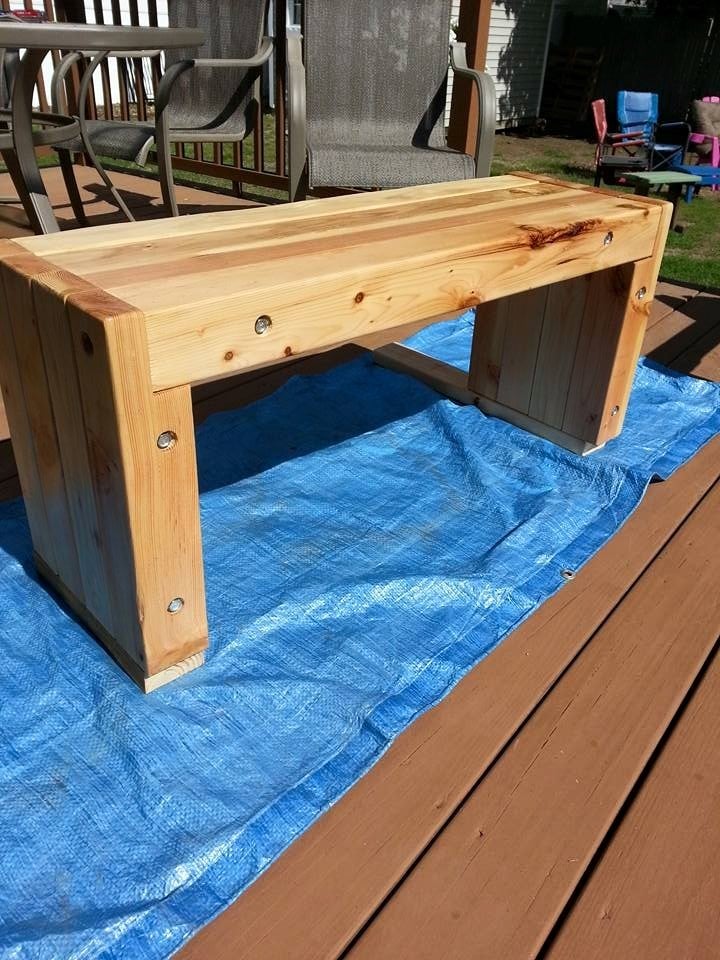
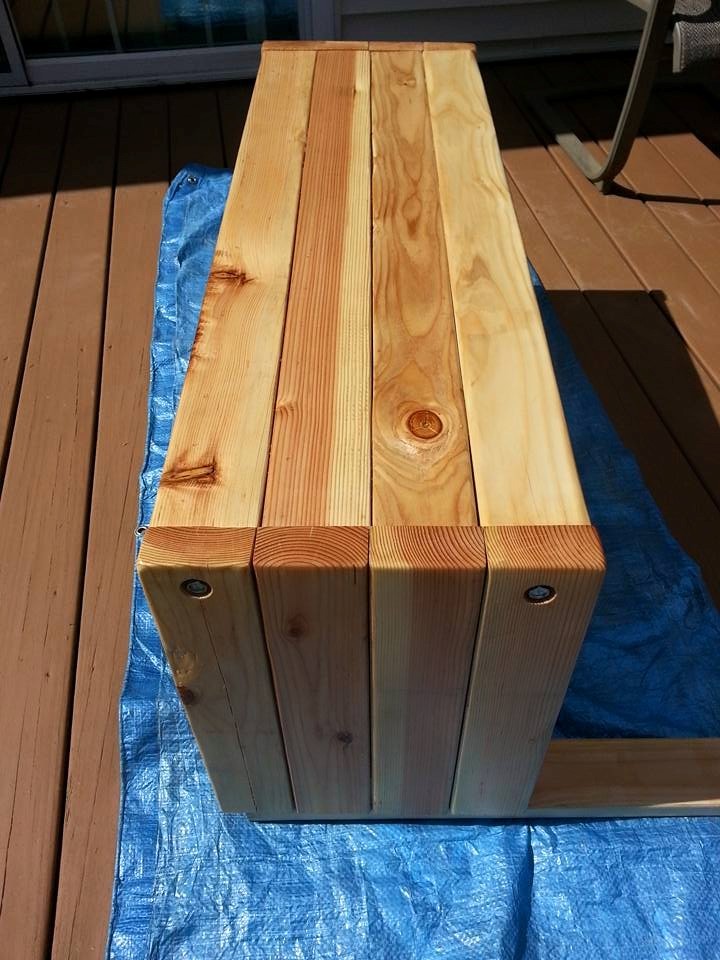
Rustic 4x4 Bench

Submitted by AlexO on Thu, 05/21/2015 - 08:27

Modified the Cherished Bliss plan a bit to include Carriage bolts instead of pocket holes and I notched the top of the legs to make a shelf for the top.

Legs were cut at 18" and the top is 40". The two center 4x4's are connected with two internal (and smaller diameter) carriage bolts and glued together. The end 4x4's are glued and then a 1/2 x 6" carriage bolt with a pre-drilled "Head" hole (using 1" paddle bit).

Very easy to make but this baby is heavy!!!

Estimated Cost
$50-$75
Estimated Time Investment
Afternoon Project (3-6 Hours)
Finish Used
Clear Watco Dutch Oil and Varathane 3x Poly.
Recommended Skill Level
Beginner

Comments

Double Chair

Submitted by cjlaw on Fri, 06/05/2015 - 09:56

I made a few changes. I added walls and a hinge to the table to allow for a cooler to fit inside. I also decided to paint mine. The was a fun project and I love how it turned out.

Estimated Time Investment
Day Project (6-9 Hours)
Recommended Skill Level
Beginner

Comments

trishbacon

Mon, 06/08/2015 - 09:20

How did you go about adding walls and a bottom to the middle? I was thinking about doing this, it seems that the seat slats would need to be shorter to accommodate this, is that what you did? Any information would be very helpful. Looks great!

cveres03

Wed, 07/01/2015 - 05:08

I wanted to add an ice chest to mine as well. Was thinking to close the sides but leave the facade. slip in a couple cross boards at the bottom and that should suffice. Add some hinges on the back end and you should be set.... that's my thought process for how i may make my next one. Would love to know how they did this

Swing and arbor

Weekend swing project

Recommended Skill Level
Beginner

Comments

Ana White

Tue, 05/07/2019 - 10:42

We don't currently have this plan available, although I'd be happy to draw it with the author's permission.

I have linked a few plans above that could be used to create this plan.  Just make sure you bury the arbor uprights underground on concrete pier posts or similar (like building a fence)

The playhouse project!

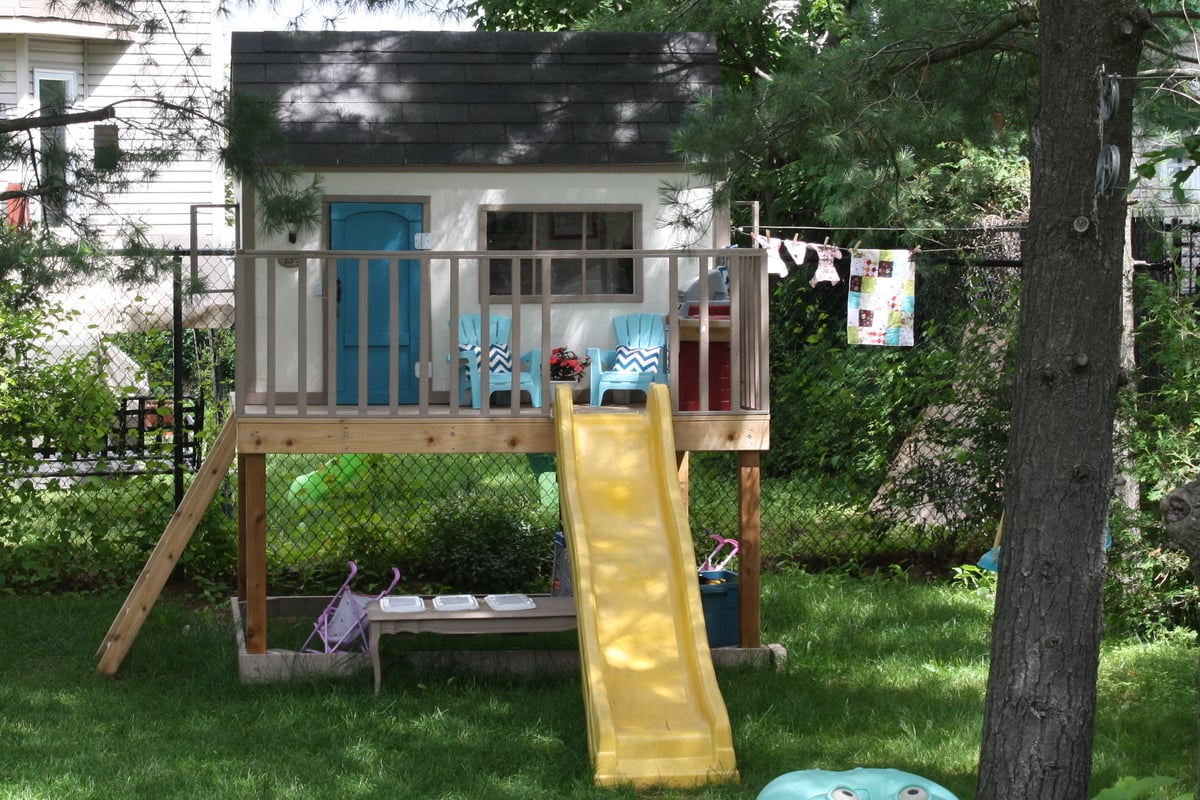
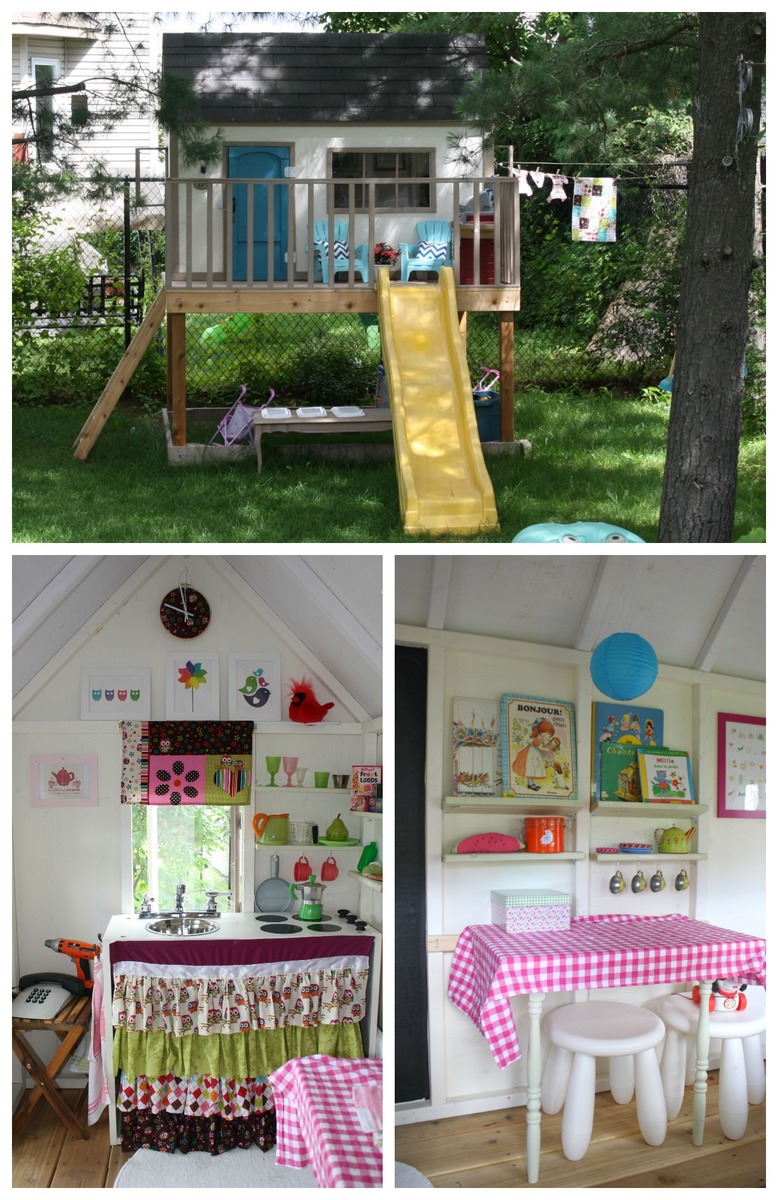
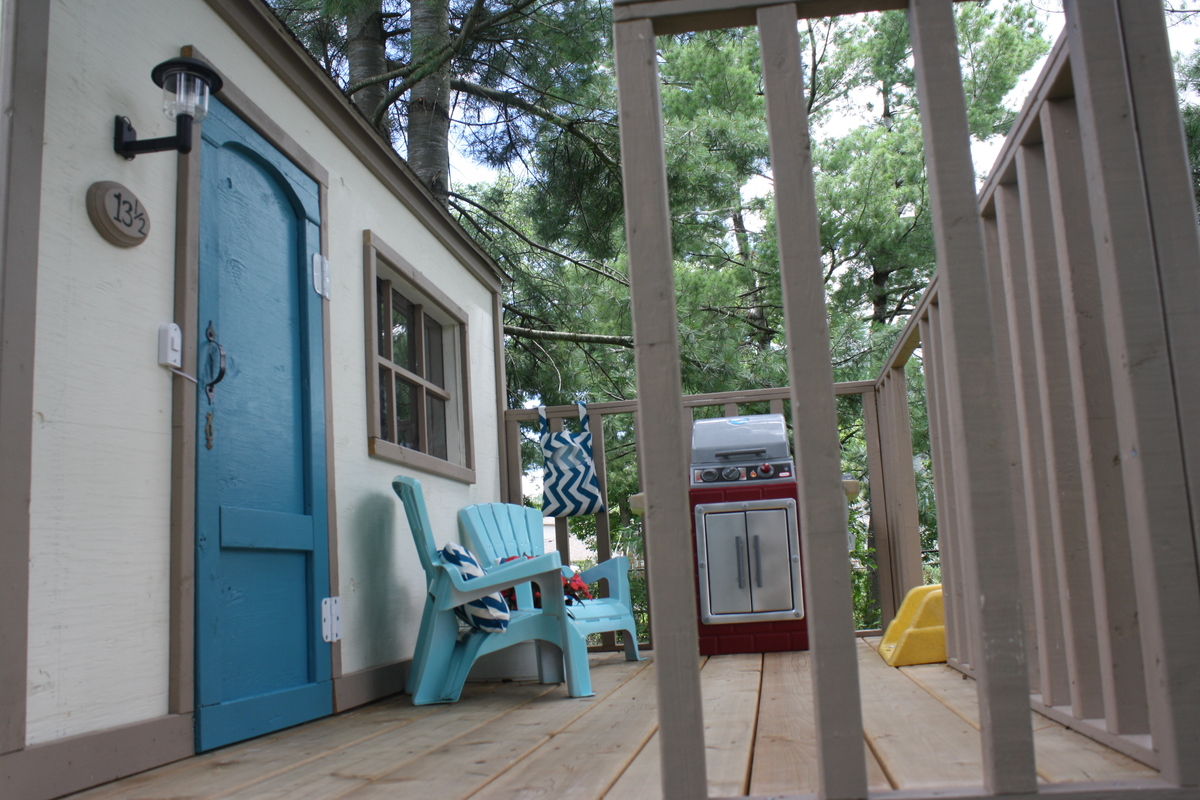
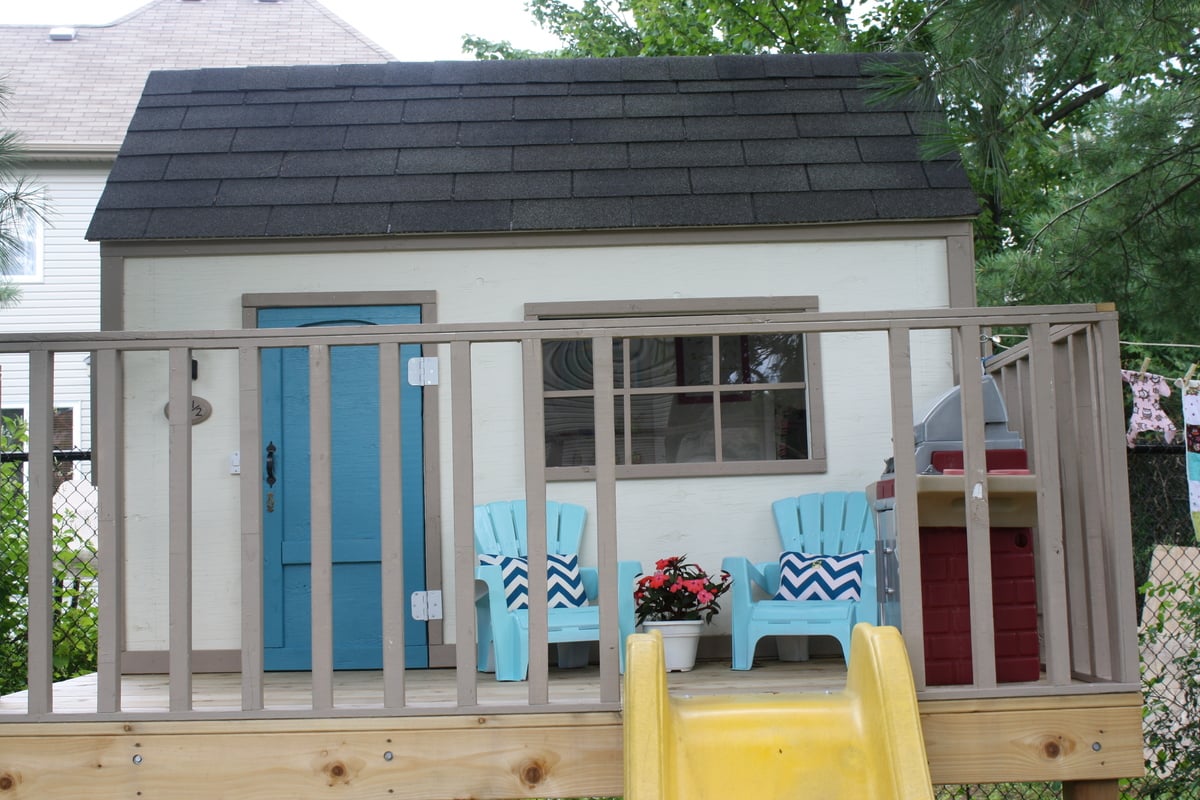
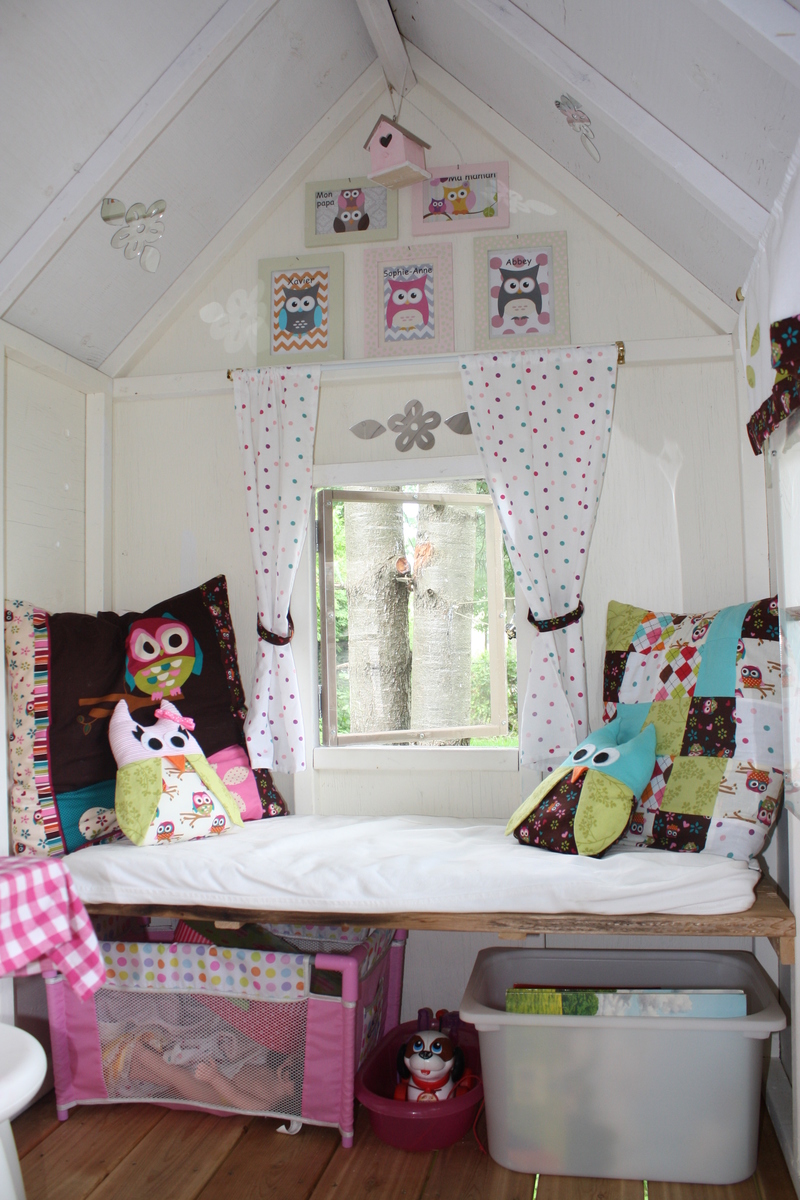
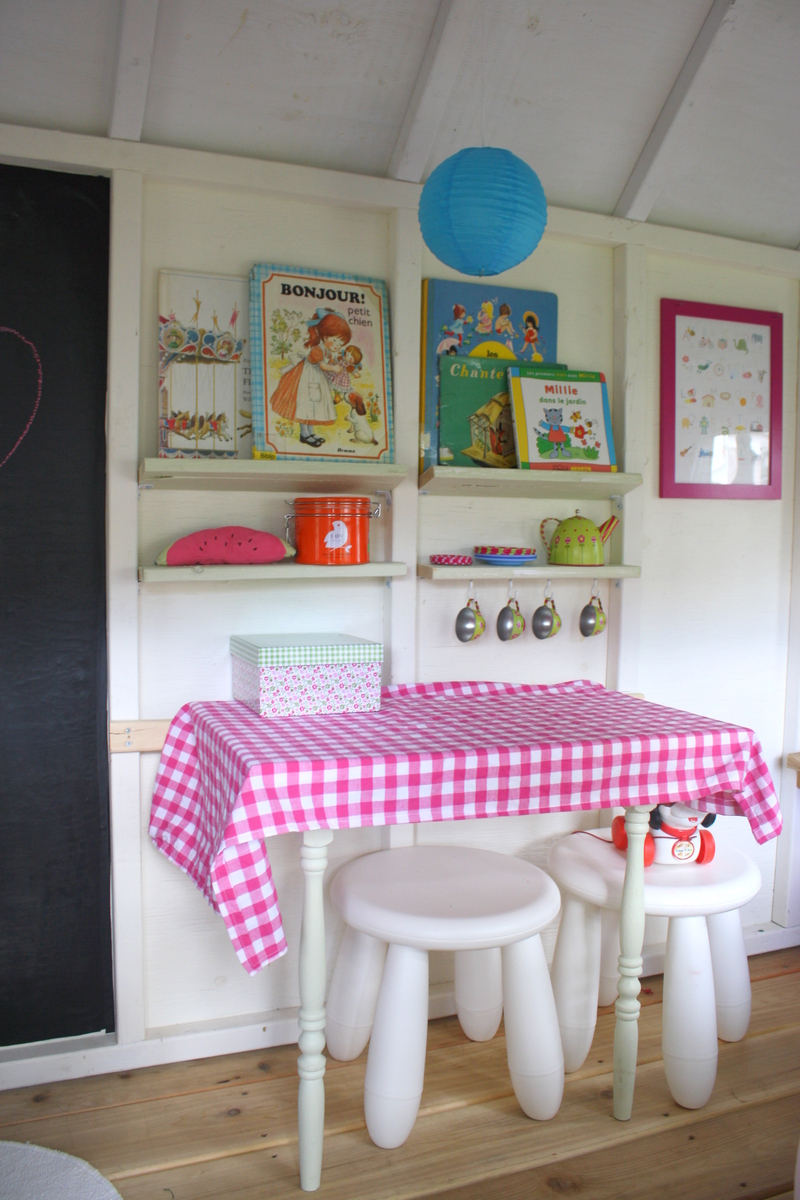
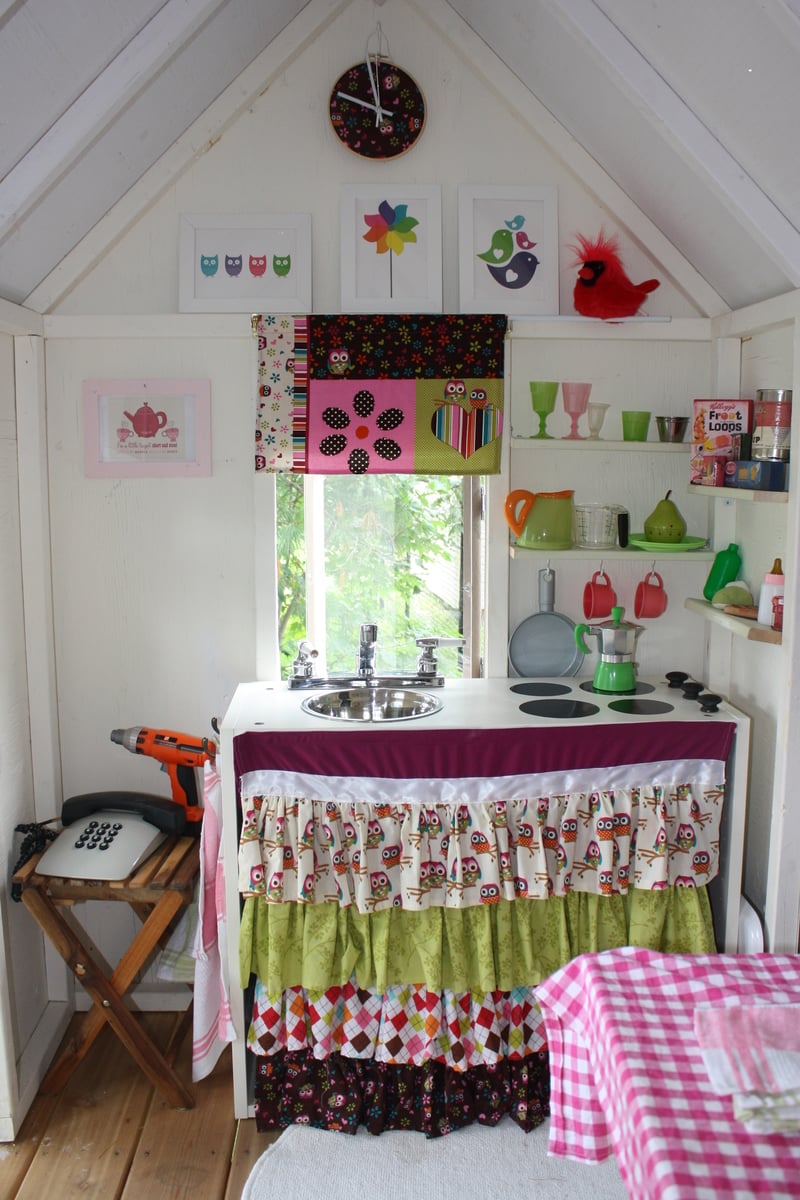
We started this project a few months ago. My husband made most of the construction, and I decorated the inside. We added many little details, including a clothesline, windows with plexiglass, a BBQ, a little kitchen, a doorbell, a solar light, a slide, shelves, a table, a bench, etc. The kids loooooove their new house. The whole project took many many hours, but I am really happy with the results. Thank you so much Ana for the plans!!

Estimated Cost
900 $
Estimated Time Investment
Week Long Project (20 Hours or More)
Finish Used
primer and extorior paint
Recommended Skill Level
Intermediate

Comments

Theresa W

Sun, 07/14/2013 - 17:24

It is beautiful. I can only imagine how excited your kids are to play in this gorgeous space made just for them. Well Done!

LadyBird

Sun, 07/14/2013 - 21:10

Looks like your child has everything they need. Including a phone! I love the bench seat and the pillows with the window. So cool. You put a lot of work into this. Well done.

denaschance2

Thu, 04/03/2014 - 08:23

Love, love it! Couple of questions... how did you attach the walls to the decking and how far apart? How tall is the railing? I'm curious to know the sturdiness of the project overall and my SIL has concerns about the 3/4 roof sheeting over 1/4 walls. Comments please. My son-in-law and I have just started this project.

Mudroom Bench

Submitted by Anonymous (not verified) on Fri, 09/23/2022 - 15:43

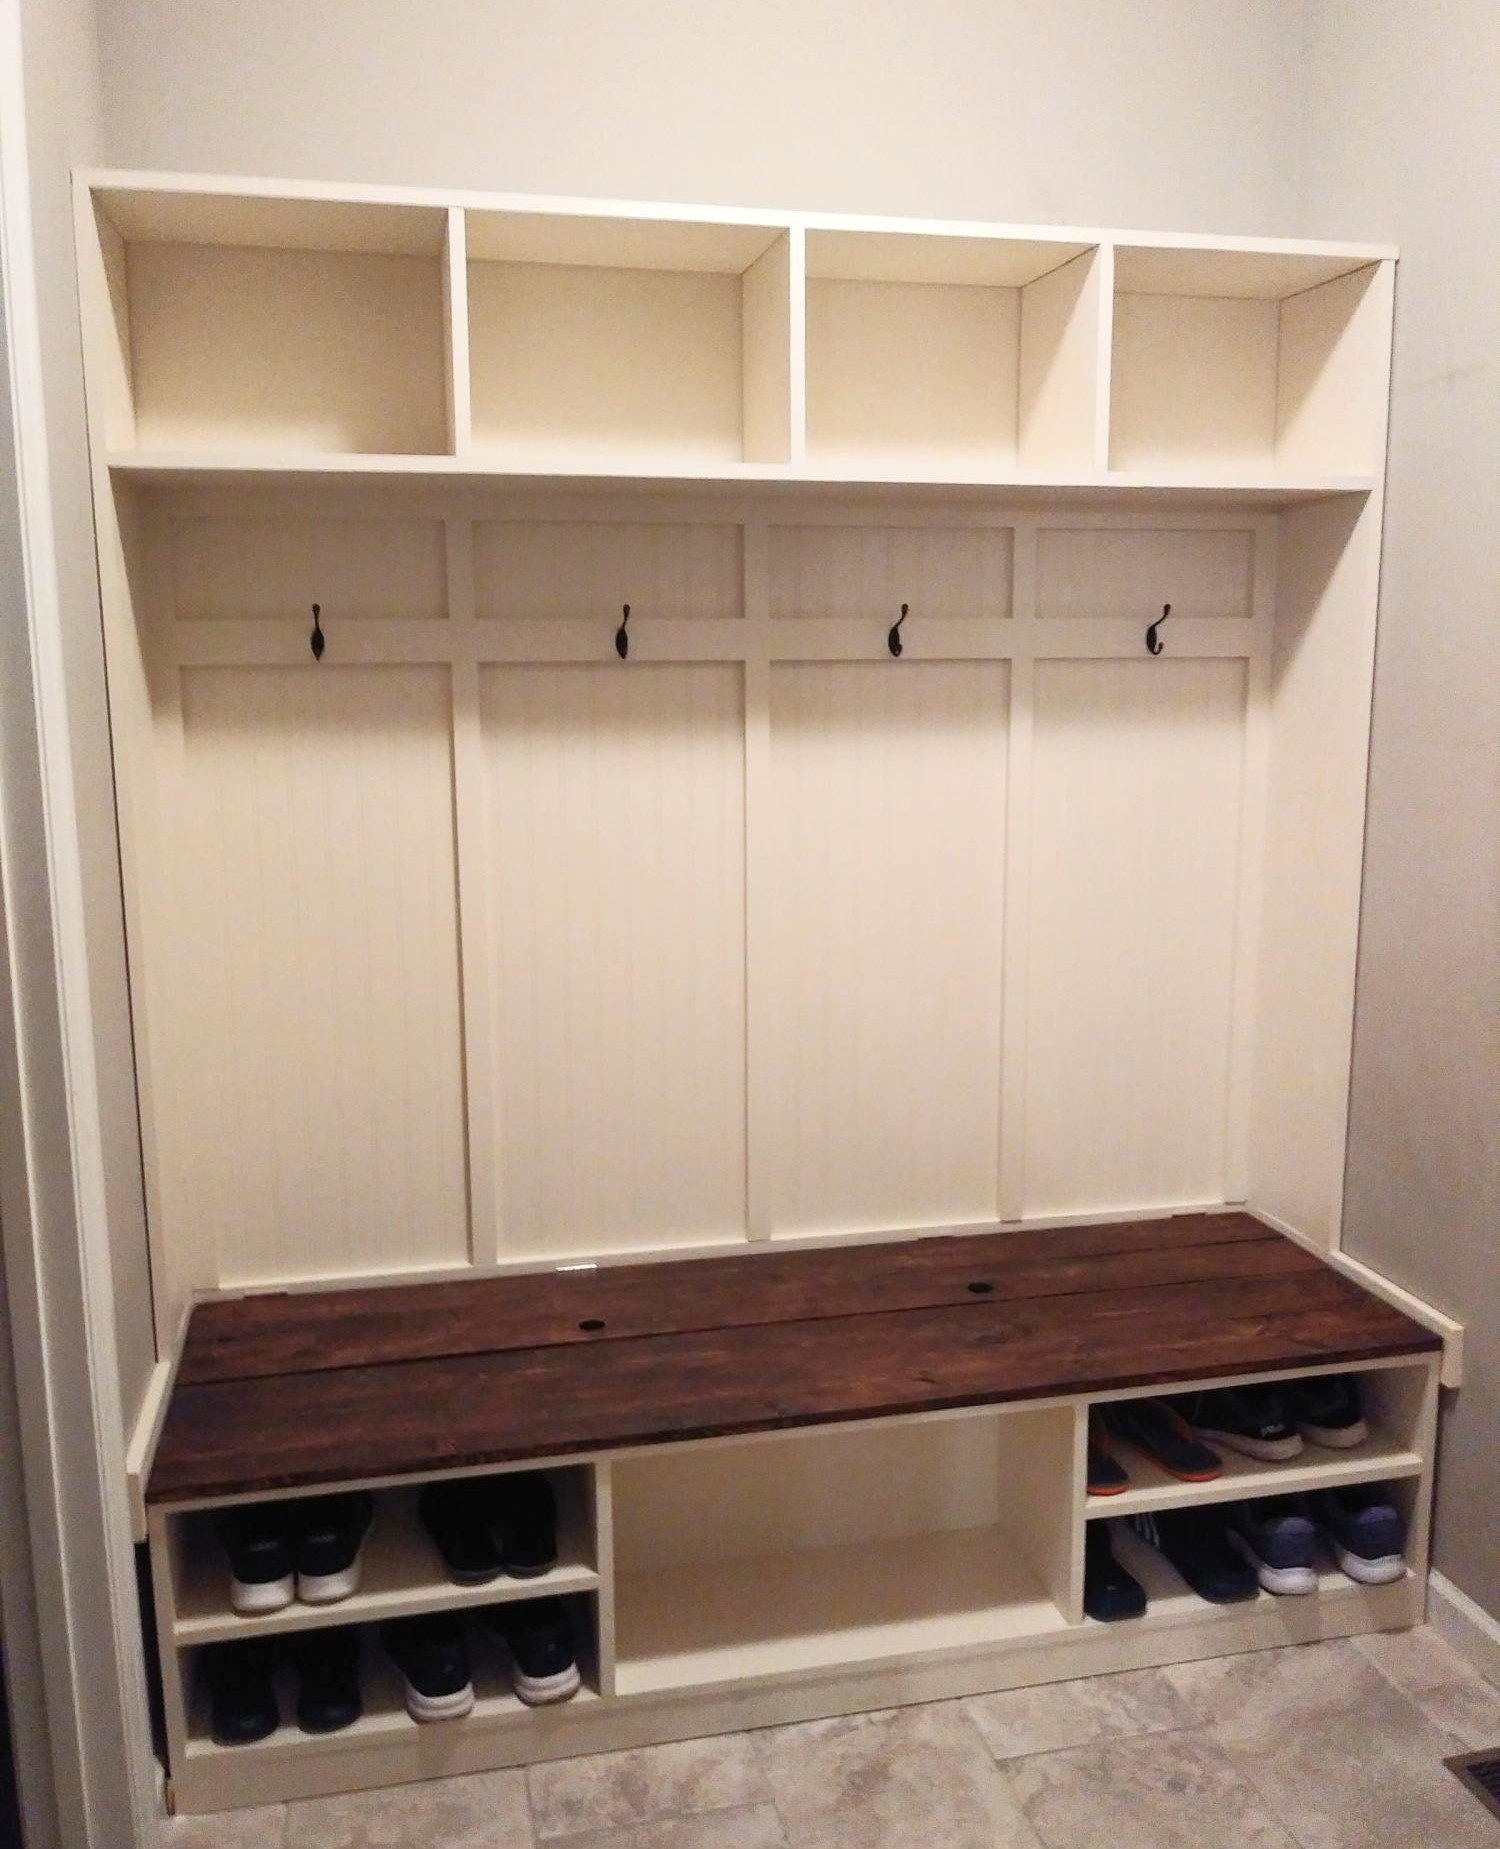
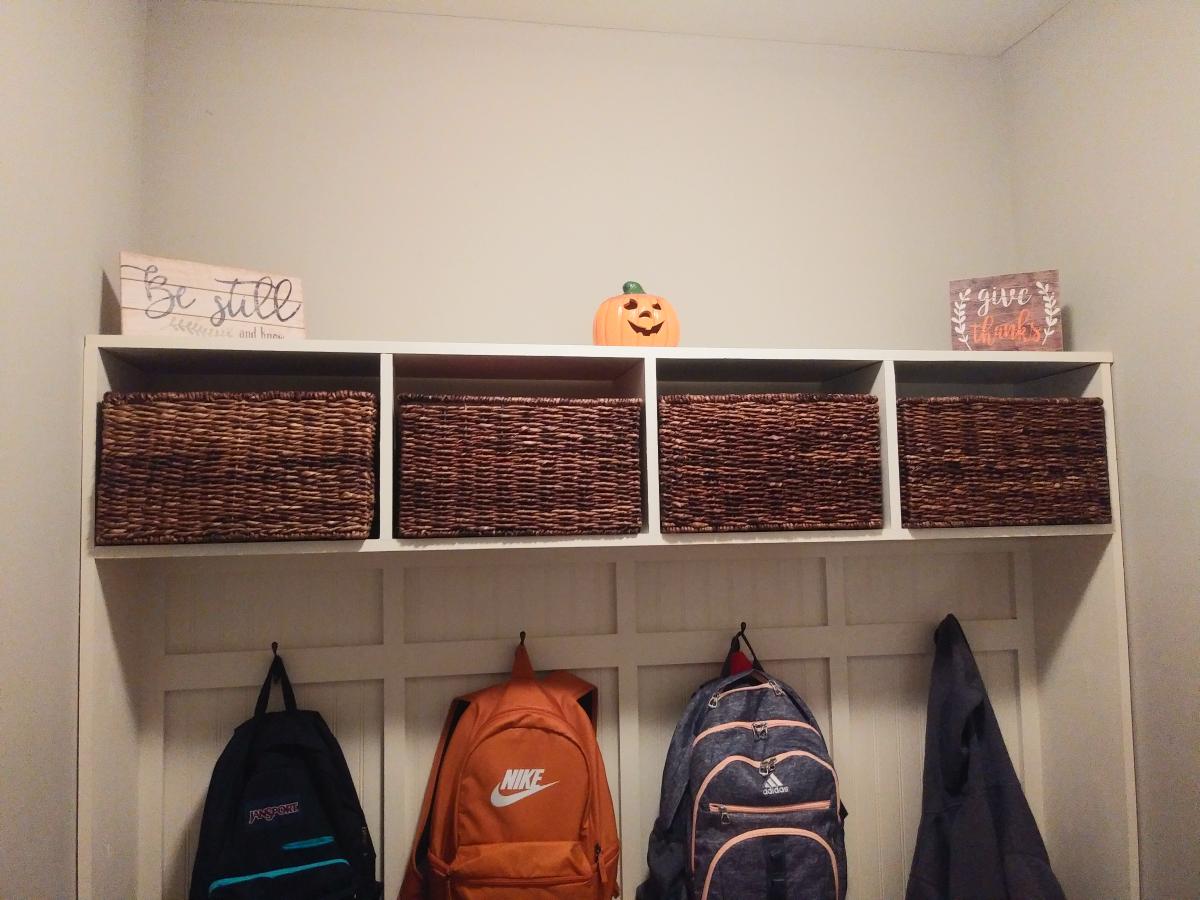
This mudroom bench is my favorite Ana White build! Everyone has a place for shoes, backpacks and boots can be stored in the bench. We added baskets to keep gloves, hats and other small items organized.

Comments

patio living room - modified from modern chair plan

Submitted by herbsuprb1 on Wed, 06/12/2019 - 09:09

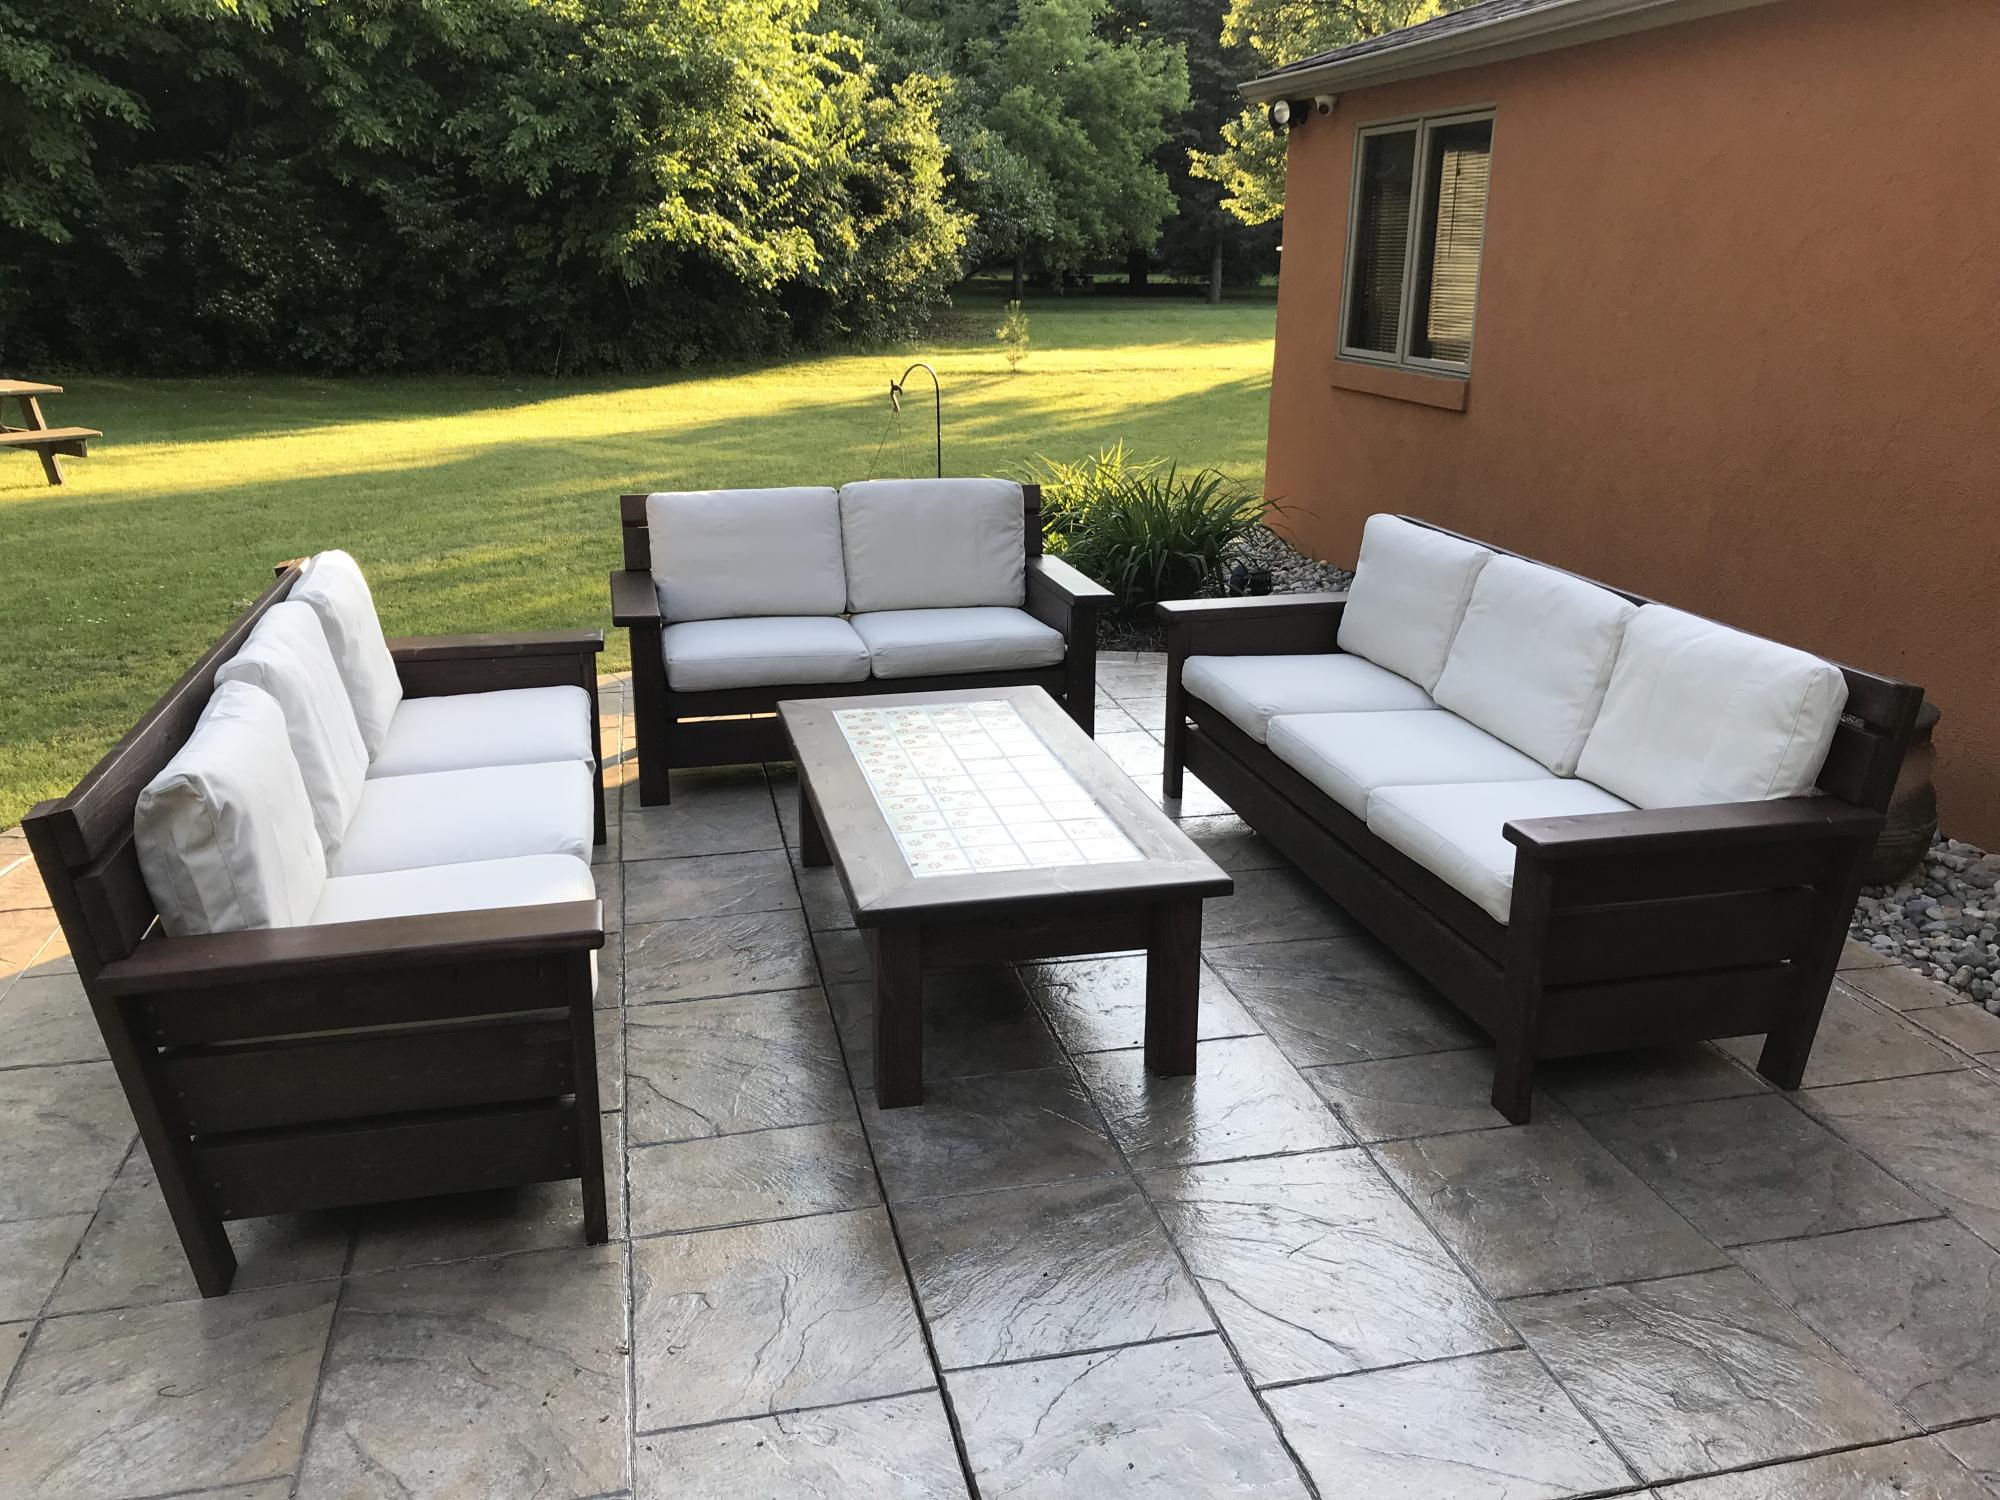
I created two sofas, a love seat and a table by modifying the modern chair.  I added a back extension, tipped the back back 10 degrees, and angled the seat platform down a few degrees.  Considered doing Adirondack arms, but my wife preferred the rectangular shape.  The table is a variation of the 2x4 patio table (base construction similar), but we substituted pine 4x4 legs for the 2x4s, and implemented a 2x6 "picture frame" around Mexican tile on top.

I used pocket screws to attach the arms to the sides, and also to hide screws on the table "picture frame".

All-in-all, I would say this is an elegant-looking patio set that should last quite a while.  Very solid, very heavy to move around (my only complaint).

We plan to add some colorful throw pillows.


Estimated Cost
This project was created from a Menard's metal siding trim "shipping crate" that they refused to take back on return - so the many 16 foot 2x6s came to me for free. With hardware, stain, sanding pads and the pocket screw jig, I would guess I have about $300 there. The cushions were somewhat expensive, but are built to last - got those from Ikea - "Duvholmen" and "Folsom" haha - 24 1/4" x 24 1/4" cushions, 24 1/4" x 16" back pillows. Those were about $65 (per SEAT) .. so 8 for this project ($520). The cushions only come in this light tan, or medium/dark grey.
Estimated Time Investment
Week Long Project (20 Hours or More)
Finish Used
Behr semi transparent outdoor stain (Padre Brown). First sofa was assembled then stained (mistake). The other pieces were cut, sanded 60/120 and stained. Arms were additionally sanded with a 320 grit prior to staining. Stained all pieces two coats with small roller, then brushed over. Assembly after staining produced a cleaner look on the stained finish.
Recommended Skill Level
Beginner

Comments

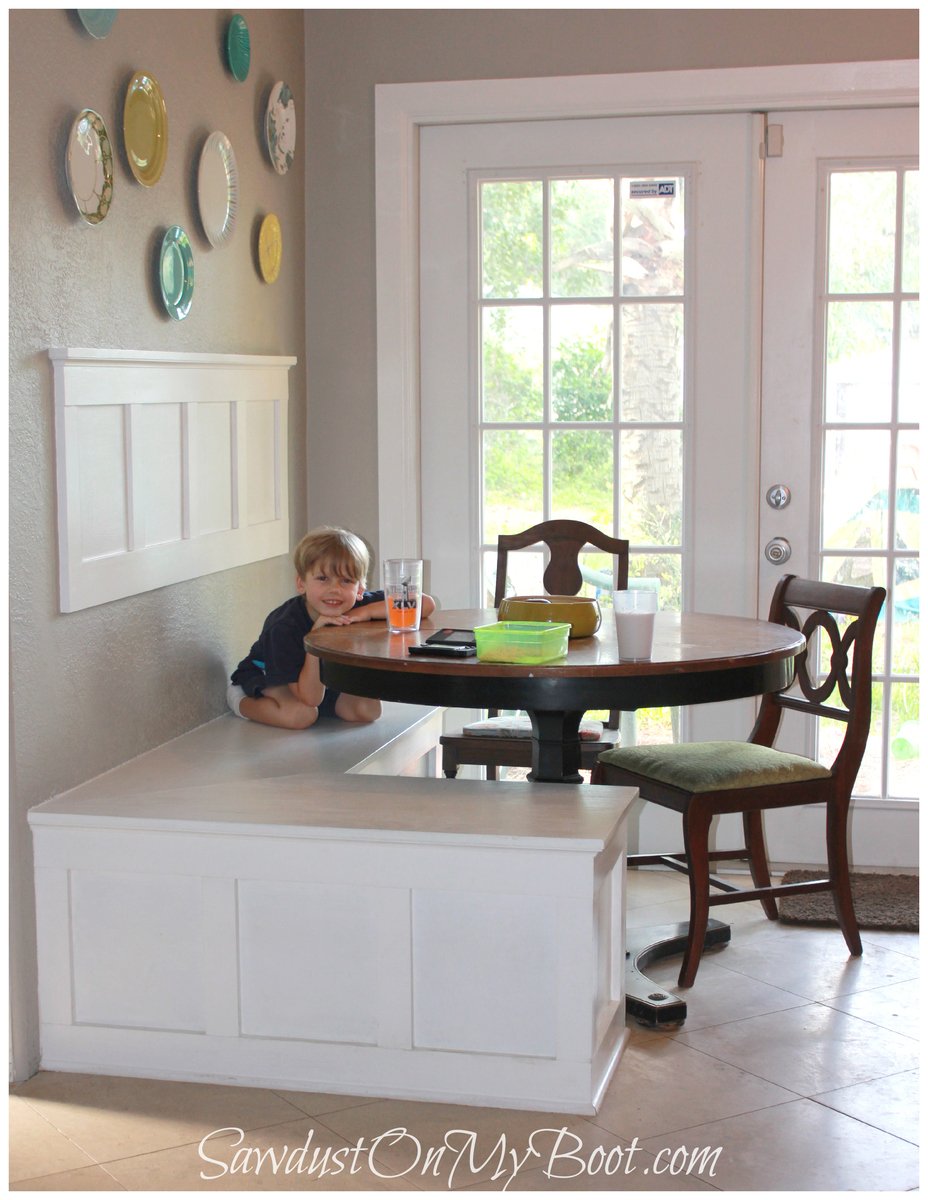
Board & Batten Banquette

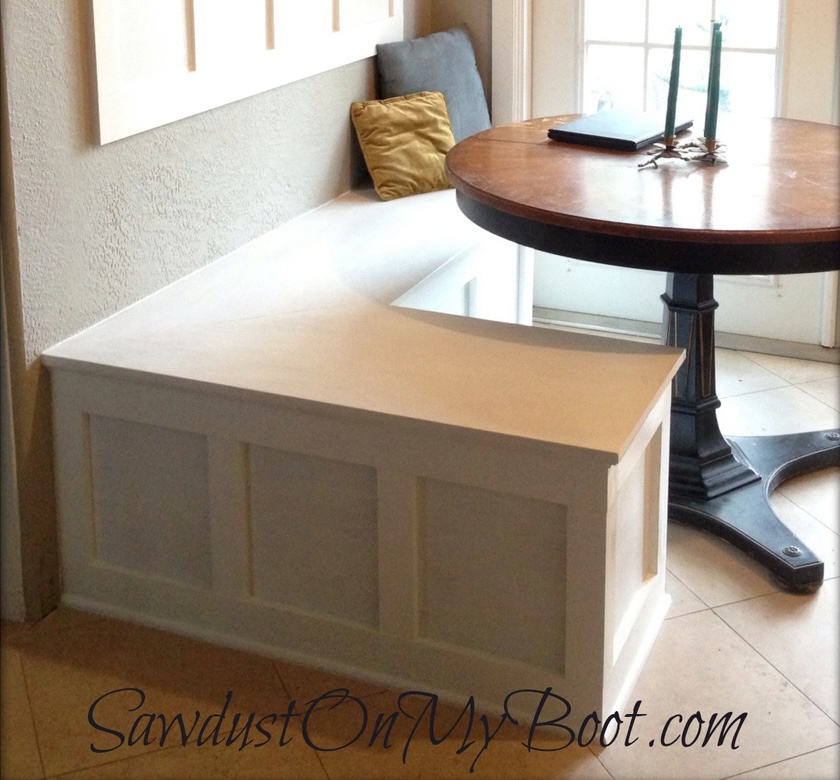
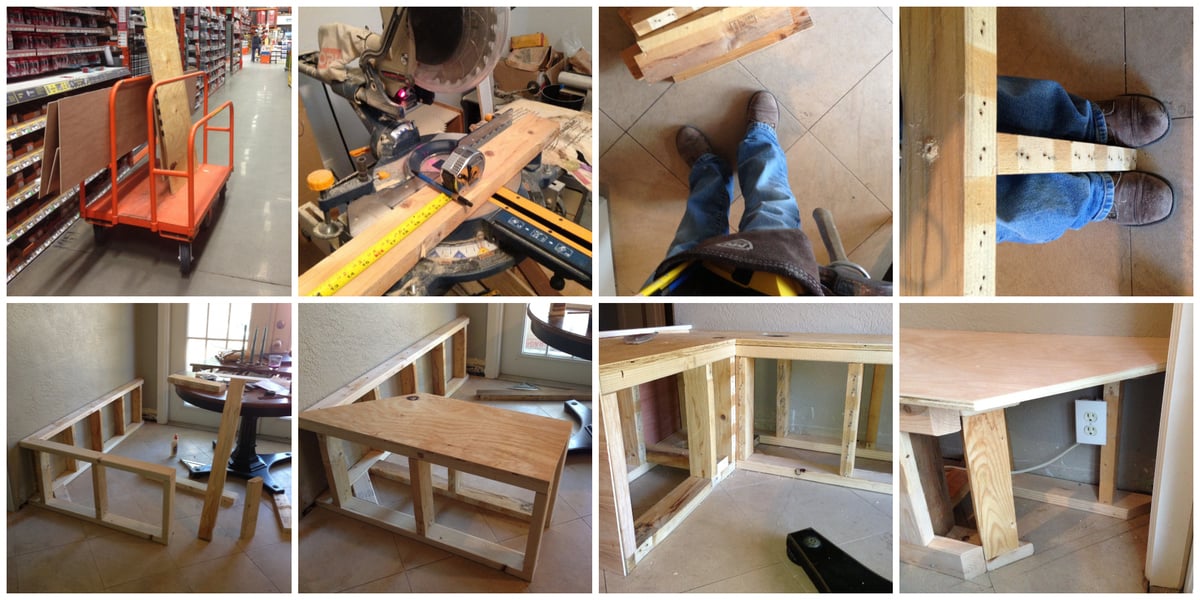
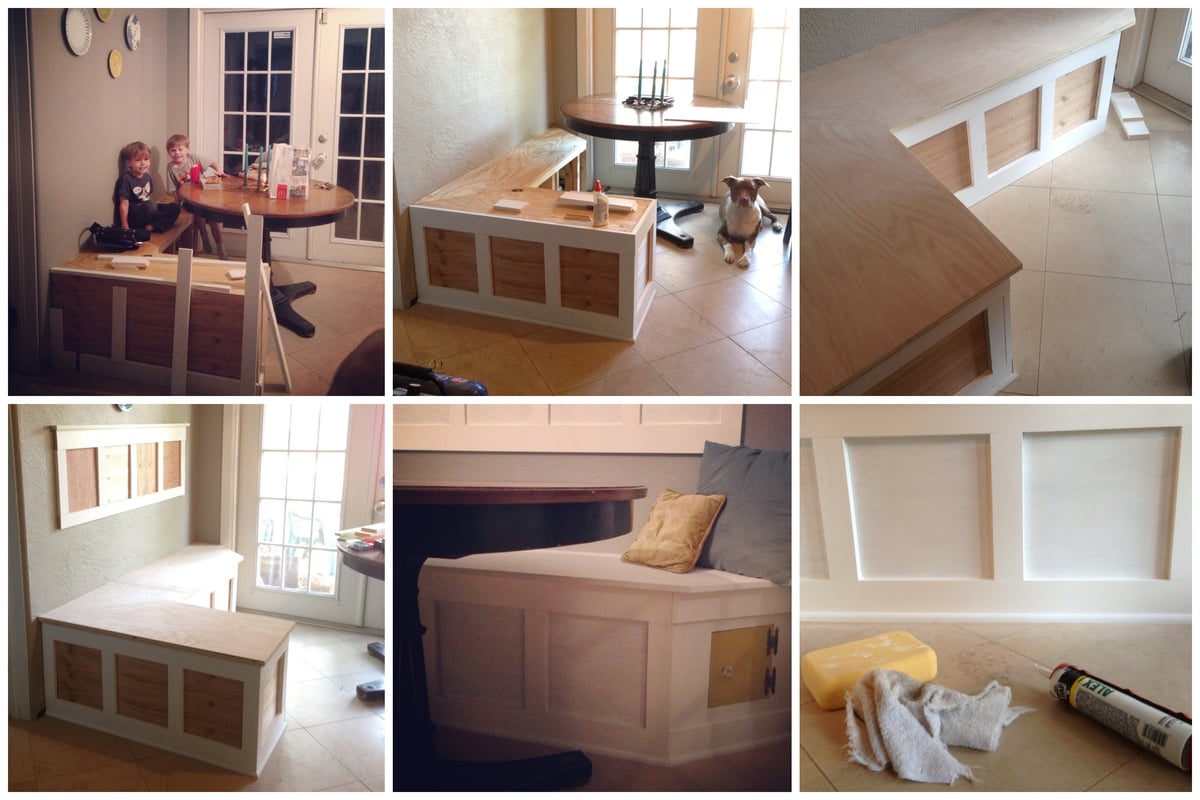
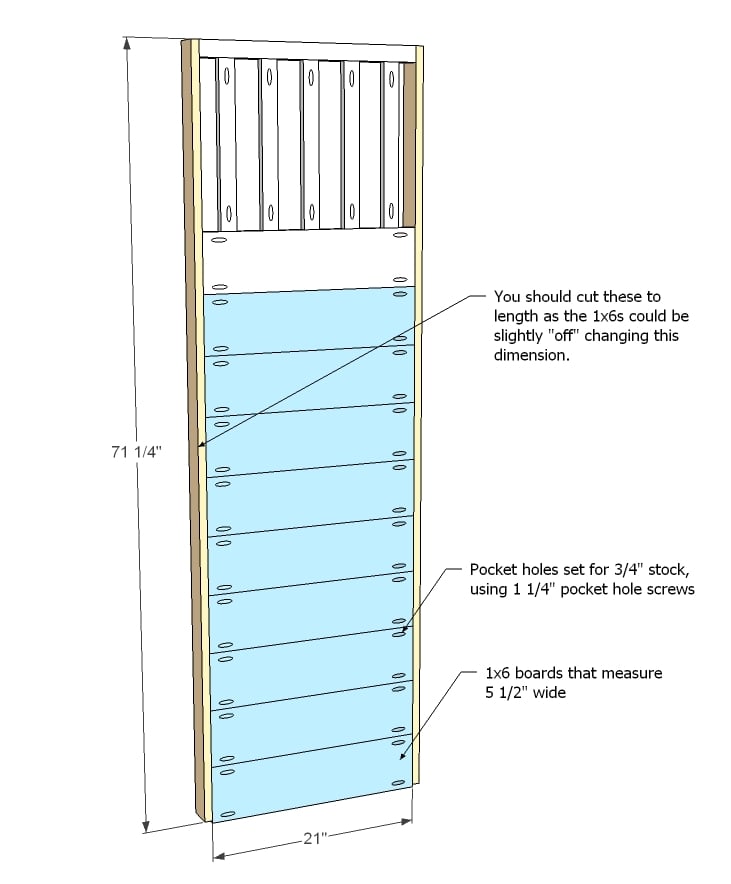
My family needed a seating area for our tiny kitchen and a built-in banquette solved our spatial design problem perfectly! I basically built it like a short and wide freestanding wall with a board & batten design and plywood top for seating. More details on my website post...

Estimated Time Investment
Weekend Project (10-20 Hours)
Finish Used
board & batten with latex paint
Recommended Skill Level
Intermediate

Comments

Farmhouse King Bed

Submitted by gahan22 on Tue, 02/02/2016 - 10:36

This was our first ana white build. Bed build took one Saturday - to finish up took another week or so working nights - most of our time spent on getting the color we wanted and sanding and finishing. Building the 2x4 frame took more time than anticipated as well. We are super happy with how it turned out.

Estimated Cost
$250 for lumber, stain and lumber for bed frame. We used lag screws on the side and 2x4 hangers for the frame which increased costs.
Estimated Time Investment
Week Long Project (20 Hours or More)
Finish Used
Stain is two coats minwax dark mahogany plus classic grey over the top - wiped off and finished with minwax satin poly.
Recommended Skill Level
Starter Project

Entertainment Center

Submitted by azca33 on Mon, 01/09/2012 - 18:48

My wife and I decided it was time to give our new TV a home. We began looking on ana-white.com and saw a beautiful black entertainment center. That is where I received my inspiration. It is a very similar design however, I decided to change the color and add inset doorsand drawers.

Everywhere we looked for an entertainment center, it was either too pricey, or the measurements were not right. I decided to come up with a plan for an entertainment center that would fit perfectly into our little niche.

Estimated Cost
650-700
Estimated Time Investment
Week Long Project (20 Hours or More)
Finish Used
Dark Walnut Stain/White Latex Paint
Recommended Skill Level
Intermediate

Comments

Jana Thomas (not verified)

Mon, 01/23/2012 - 12:28

I LOVE your entertainment center....exactly what we are working on as we speak. Ours will be a little larger (12 foot wide) after adding on two end shelves to hold lots of DVD's!! I know I want the white color, but could you give a little more information on the distressing and finishing? We've never done that before. Thanks!

azca33

Mon, 01/23/2012 - 17:59

Hey Jana,

What I did was kind of a pain. To give the entertainment center the distressed looked, I stained all the areas that we were going to distress a dark walnut. After we allowed that to dry, we painted it with white latex paint. Since we were painting over a dark walnut stain, it took about 3 coats to completely cover the color. After 24 hours of drying we sanded it with 100 grit sand paper on all the areas we wanted distressed. You will want to lightly sand it until the dark walnut color comes through. Avoiding sanding too hard as you will sand through the stain.

We still have some distressing that we would like to do on it, but we need to get a wire sponge for that, and just haven't gotten around to it. The sand paper works really well on corners, but not so much on the face of the wood. We haven't sealed it completely since we still have some areas to distress, but will use a water-based sealer.

Let me know if you have any other questions.

davidmac (not verified)

Tue, 01/24/2012 - 14:15

It looks great. How did you attach the side units to the middle unit? Are the drawer fronts just solid 12" x 12" with the decorate trim attached to front? I can't tell if the portion where the handle is attached is recessed or not. And lastly, are those 1" x 3" trim pieces around the drawers?

azca33

Tue, 01/24/2012 - 16:46

Hey Davidmac,

The trim is all 1x3 solid pine, including the trim around the drawers. The drawers measure out to 10x10. I built the drawer faces the same way I built the cabinet doors. I used 1x3 trim and dado'd a 1/4" groove to inset a 1/4" piece of plywood. I then added molding to give the drawers and cabinet doors a more detailed look, so it is recessed where the handle is attached.

The side units are attached by 1 1/4" screws that are hidden behind the trim. Easy access to remove for any future moves.

Jeff (not verified)

Sat, 01/28/2012 - 22:15

Are there actual plans for this? I just see it in another brag post. but no actual laid out plans.

Guest (not verified)

Sun, 02/19/2012 - 19:22

Where can I find plans for this. Beautiful.

azca33

Fri, 03/23/2012 - 09:24

Unfortunately, there isn't a set of plans for this entertainment center on the site. I looked at the Entertainment Center for Kristen Lotz and built my own plans according to her pictures, with a few adjustments. If you have any questions, I will be more than happy to help you out.

Kristen Lotz (not verified)

Tue, 05/29/2012 - 17:32

I just checked in onto this site for the first time in awhile and I saw your entertainment center. I knew you must have gotten inspiration from ours... I love how yours turned out! I love the white, I love the distressing, and I love the inset doors and drawers with all the details. It turned out absolutely beautiful. Good job!

azca33

Mon, 06/11/2012 - 12:21

Thanks Kristen and thank you for the inspiration. When I saw yours on ana-white, I knew that is what I wanted in my living room. I also thought it was genius to put the DVD Player etc... up higher so the kids can't play with it. We are really happy with it.

kristenlotz

Mon, 12/31/2012 - 14:20

I finally got around to making the plans for our entertainment center (well, actually my husband did it). It is very similar to yours except the inset doors and drawers, the door and drawer trim and the finish colors. Hopefully that helps those looking for plans for this beautiful entertainment center. I love finding brag posts of similar entertainment centers because they are absolutely beautiful at a fraction of the cost of buying one. And we love telling people that we built it!
http://www.jrlwoodworking.com/2012/12/furniture-plans-custom-entertainm…

Andrea Miller (not verified)

Mon, 01/07/2013 - 12:26

Did you do an under coat or did you just add stain to the sanded areas? Love the look.

Repurposed Rocking Chairs to Adirondacks!

Submitted by Anonymous (not verified) on Sat, 06/03/2023 - 06:31

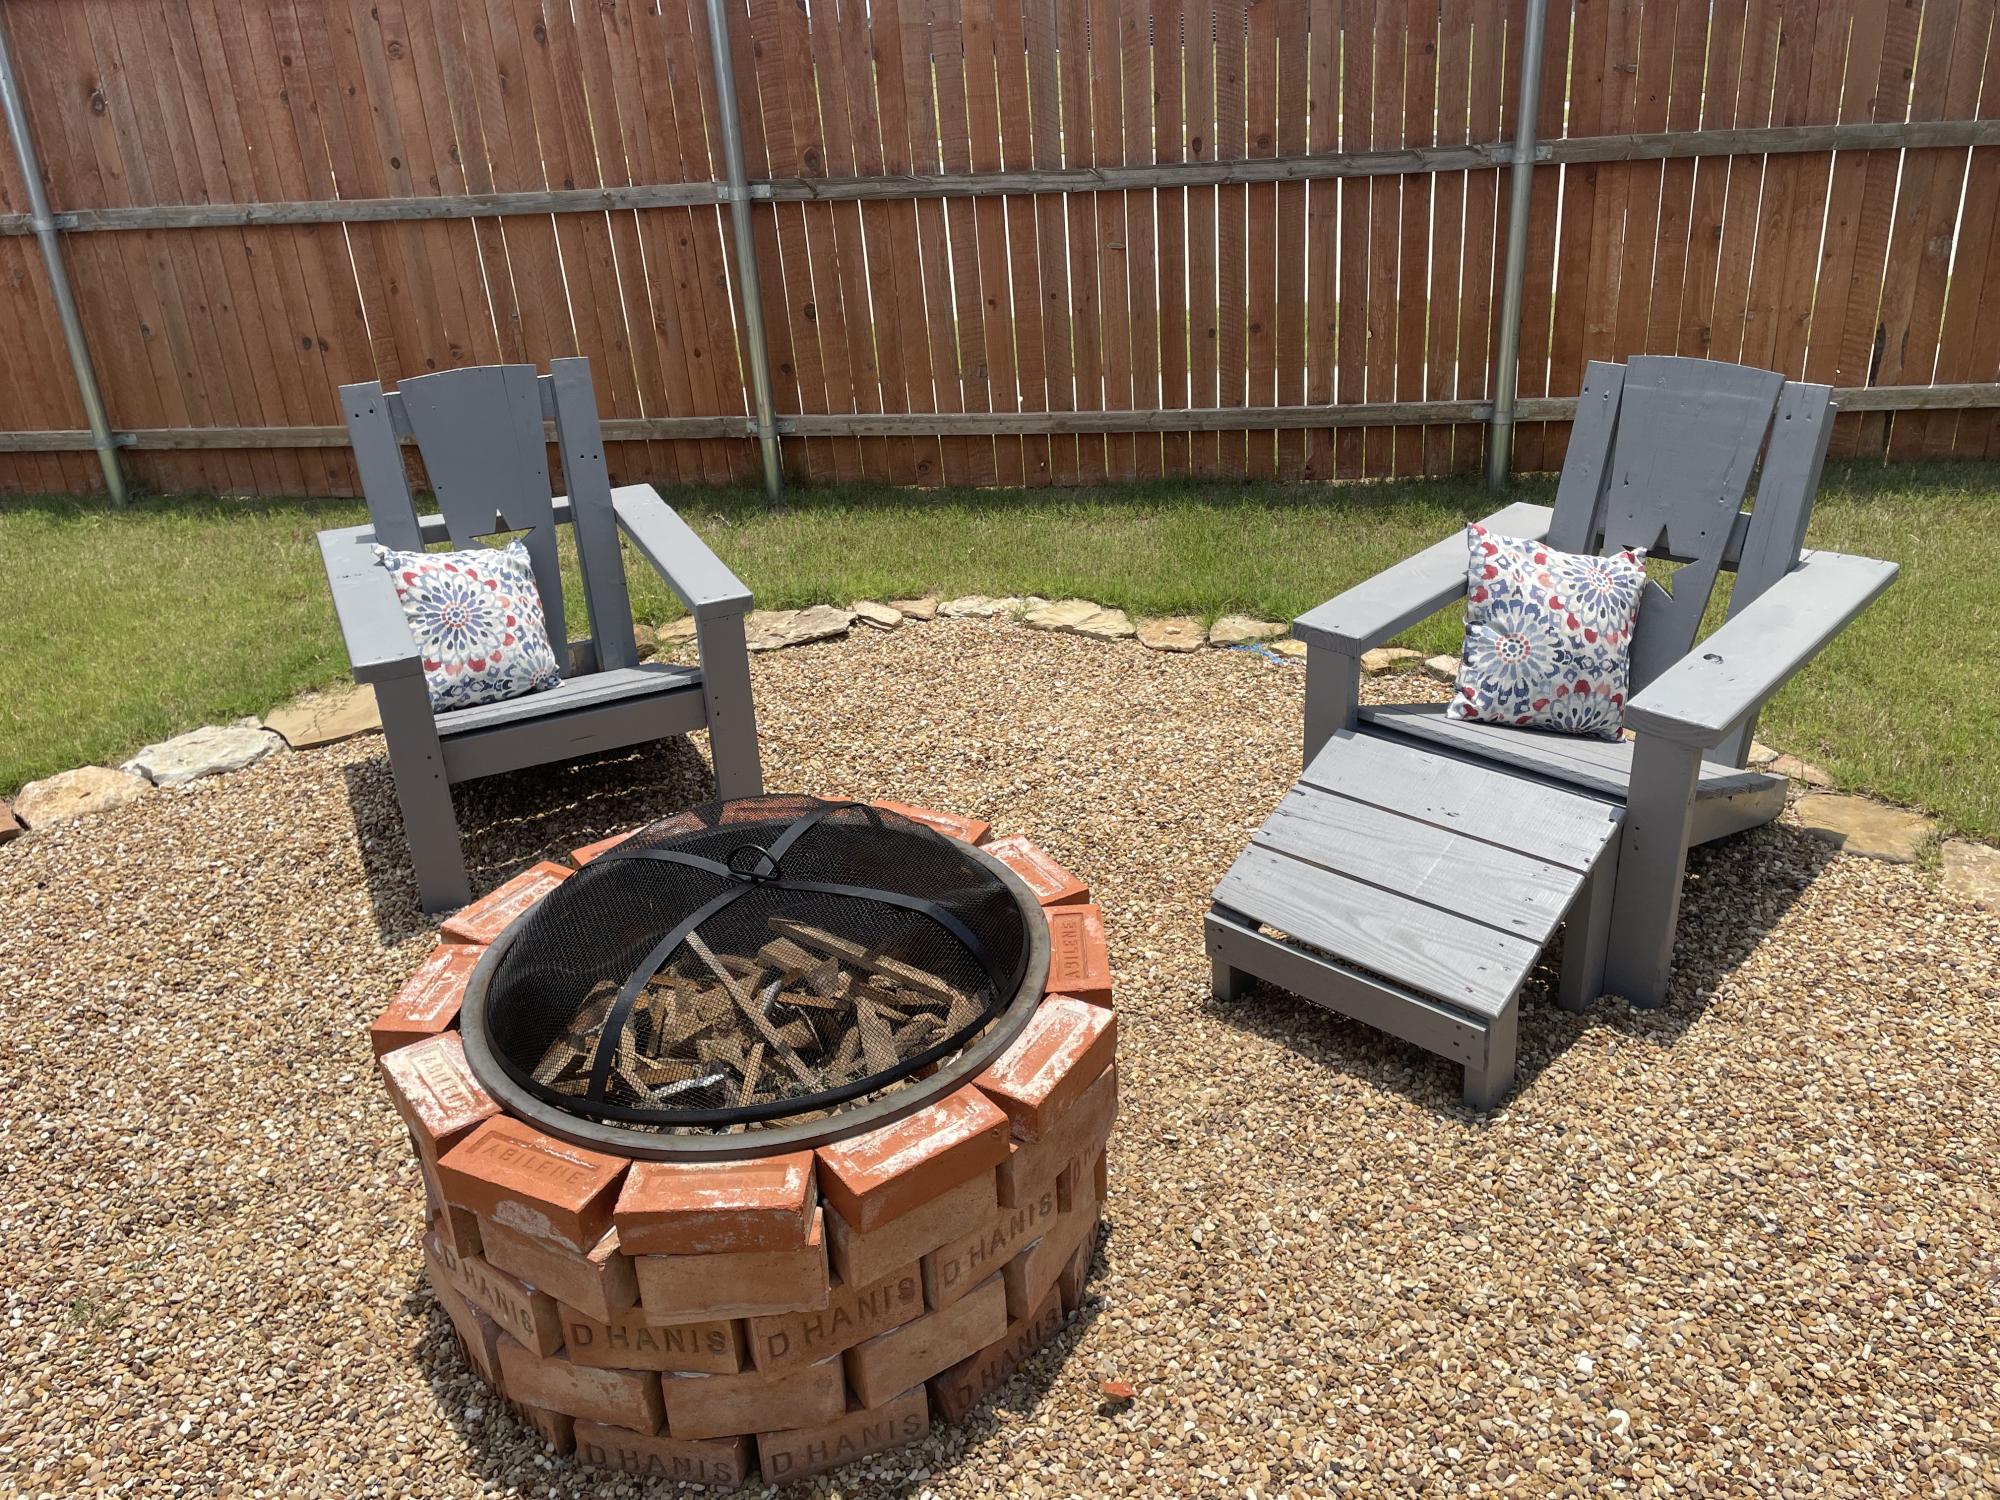
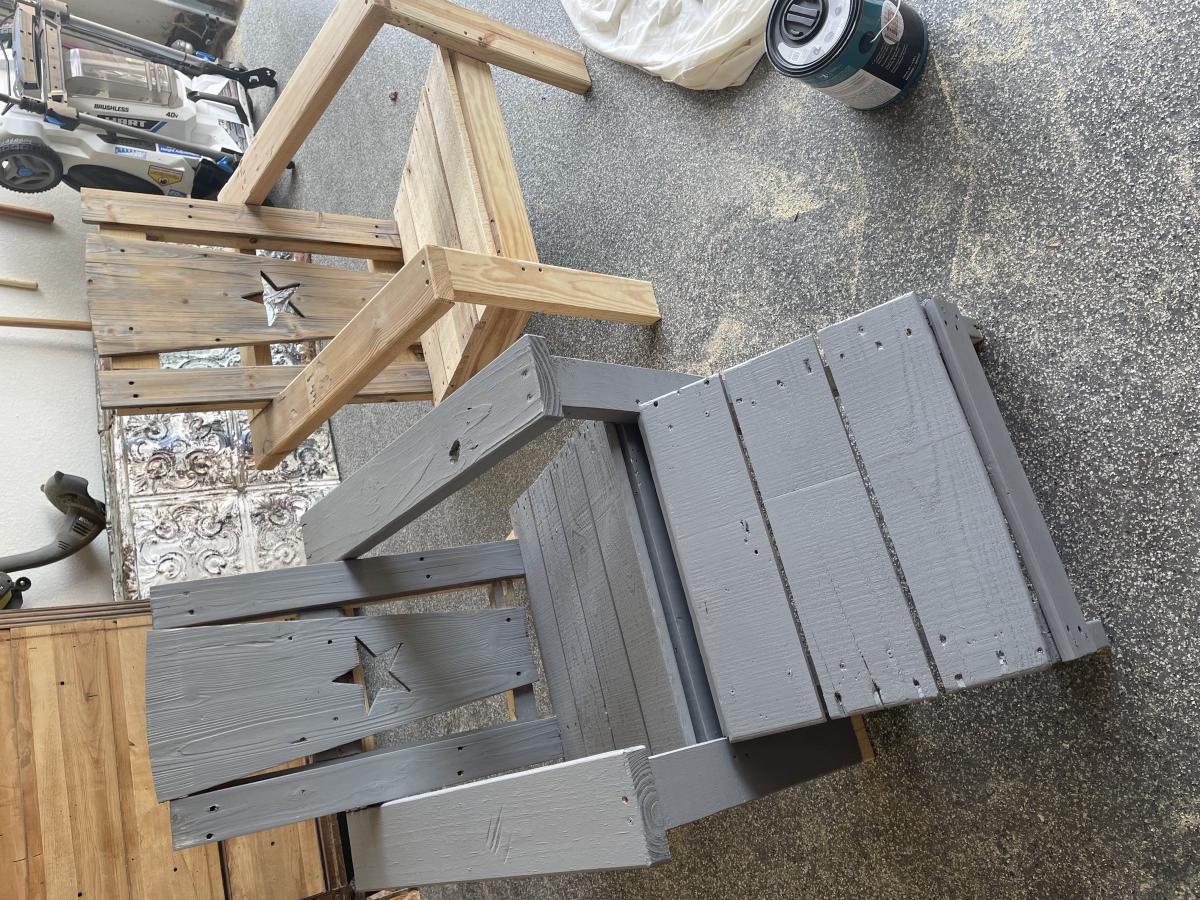
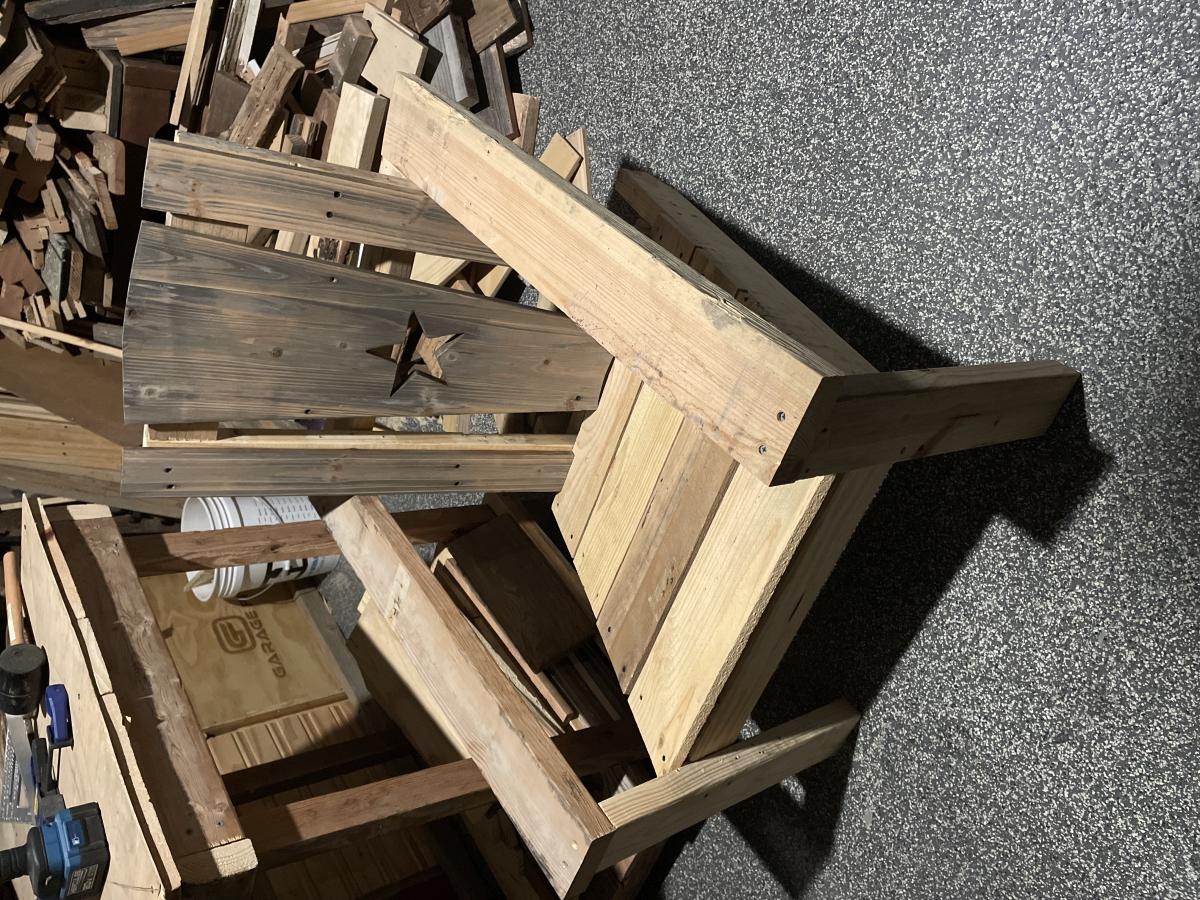
I've done a couple of things from plans on this site but this turned out awesome. We had some old weathered rocking chairs that I dismantled and was able to use some of the wood for these Adirondack chairs.

Could have gone with a dark stain but the gray really worked well on this. Pretty simple build and very sturdy chairs. I loved this project and will certainly be making more of these.

Comments

My First Project

Submitted by Anonymous (not verified) on Mon, 06/19/2023 - 15:34

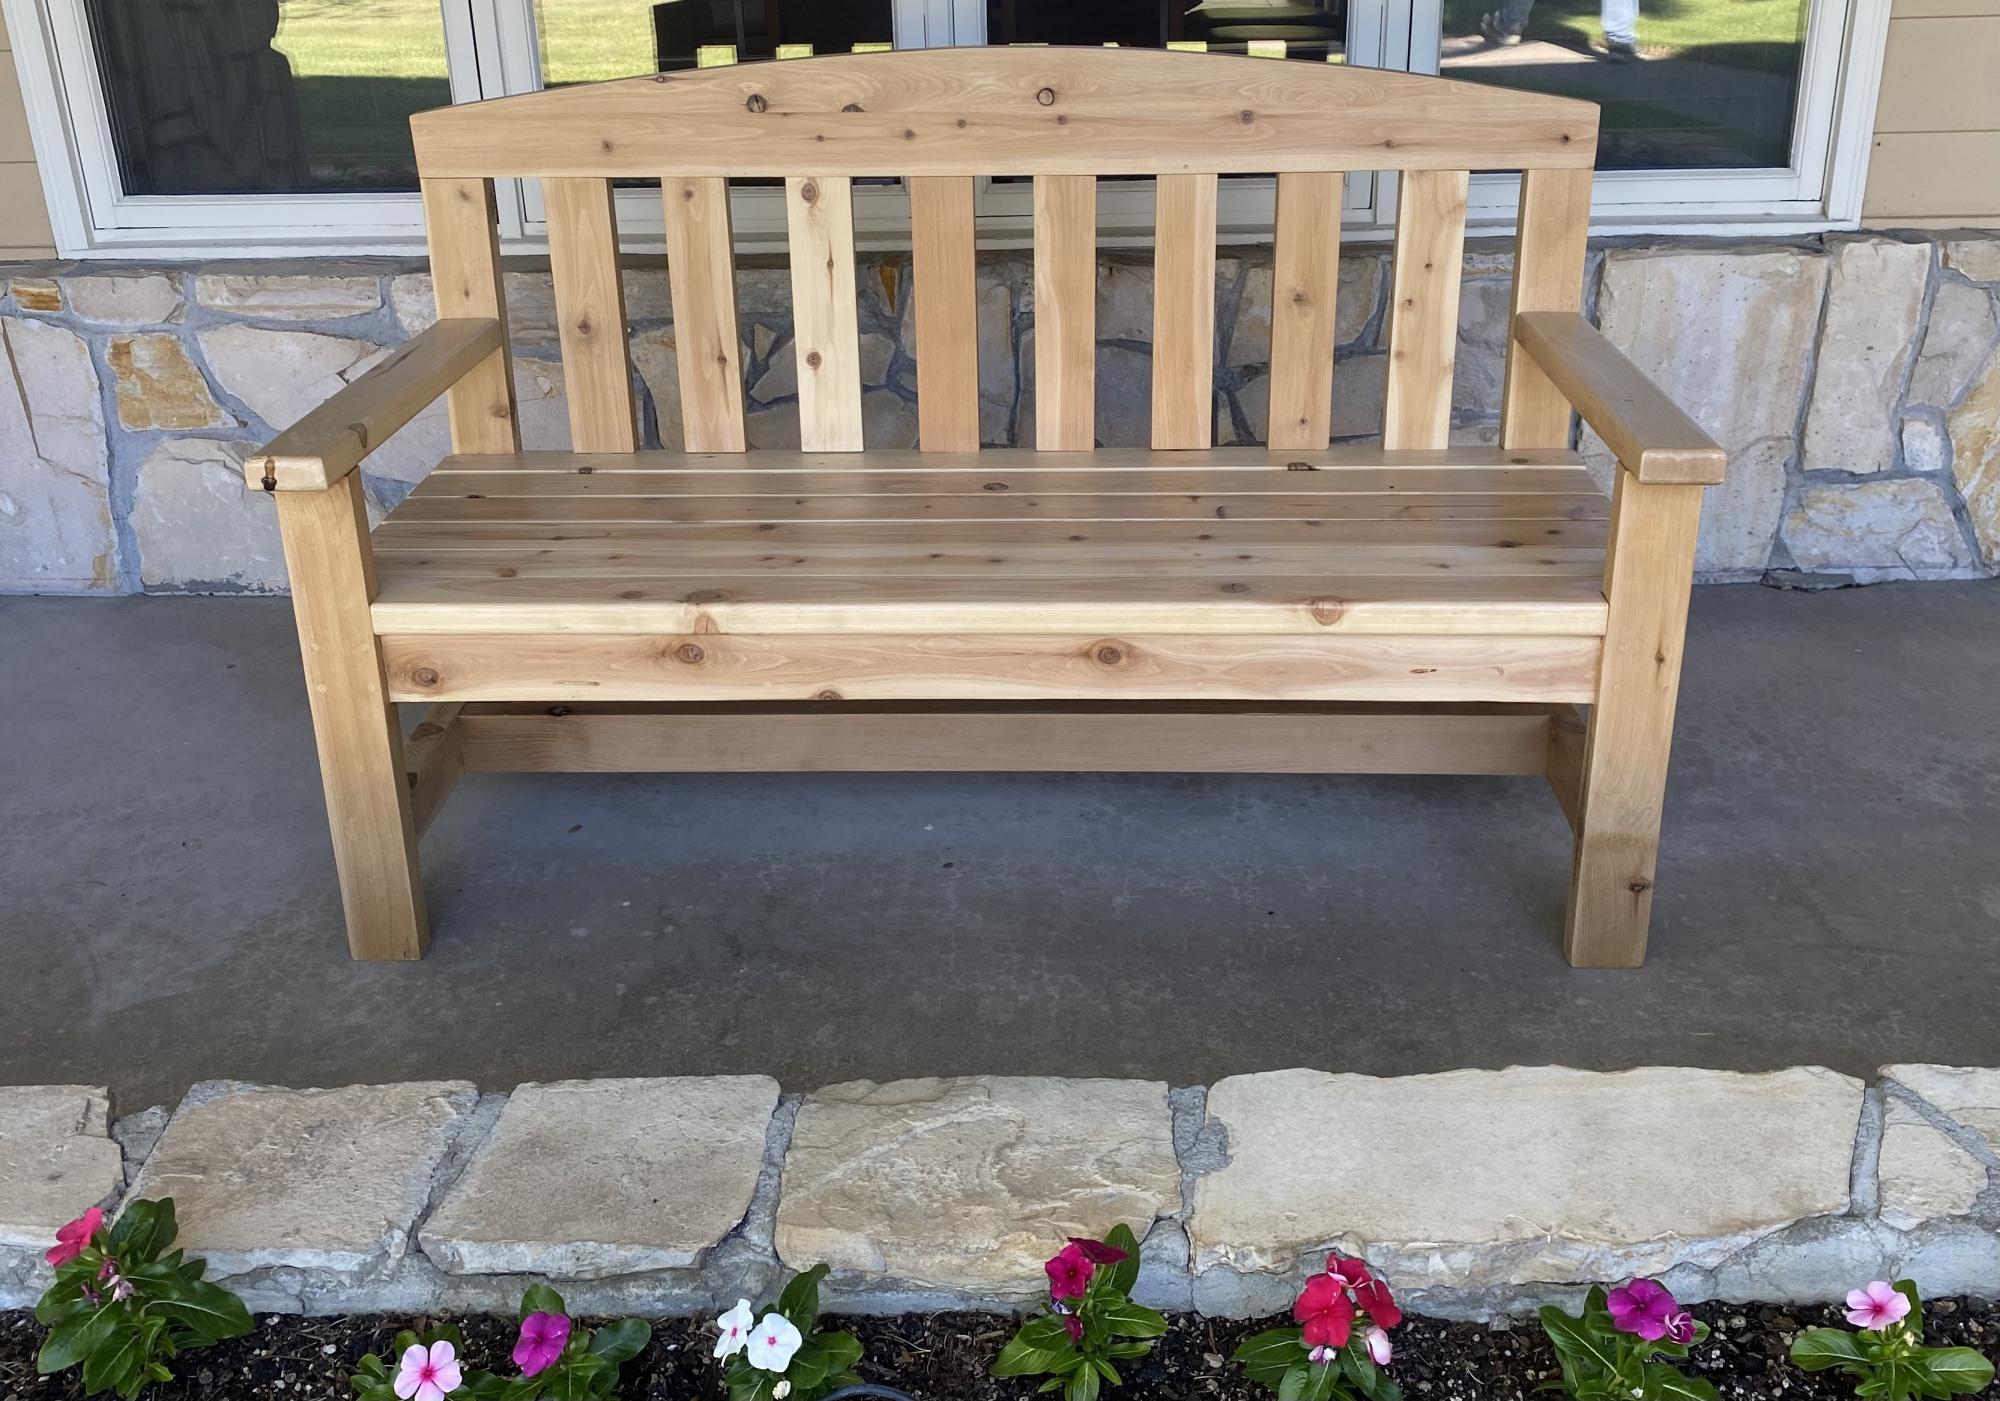
I took a woodworking course through the community college and built this cedar bench for my front porch. I learned so much throughout this process and am proud of how it came out. I am now building up my own arsenal of tools and supplies. I can’t wait to choose my next project!

Plans from myoutdoorplans.com/2x4benchplans

Comments

Adirondack Chairs

Submitted by Anonymous (not verified) on Mon, 06/26/2023 - 12:25

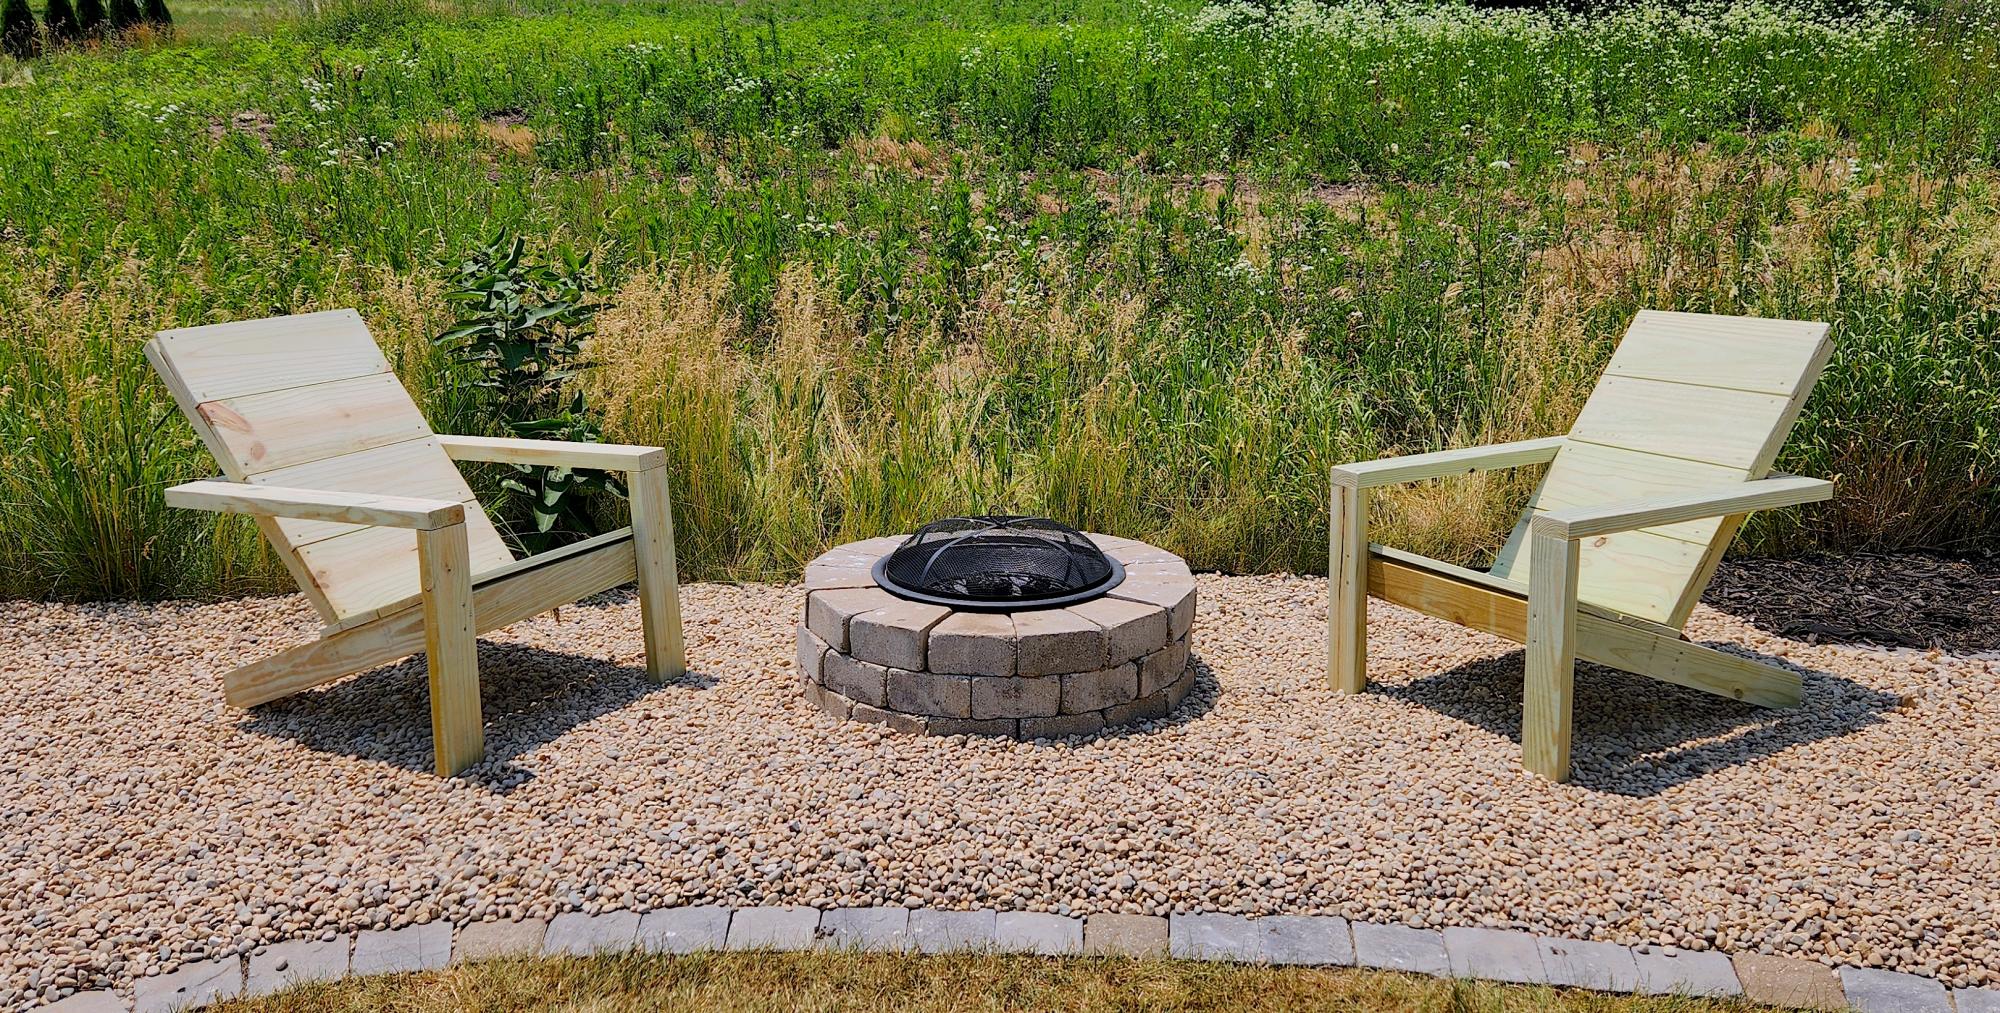
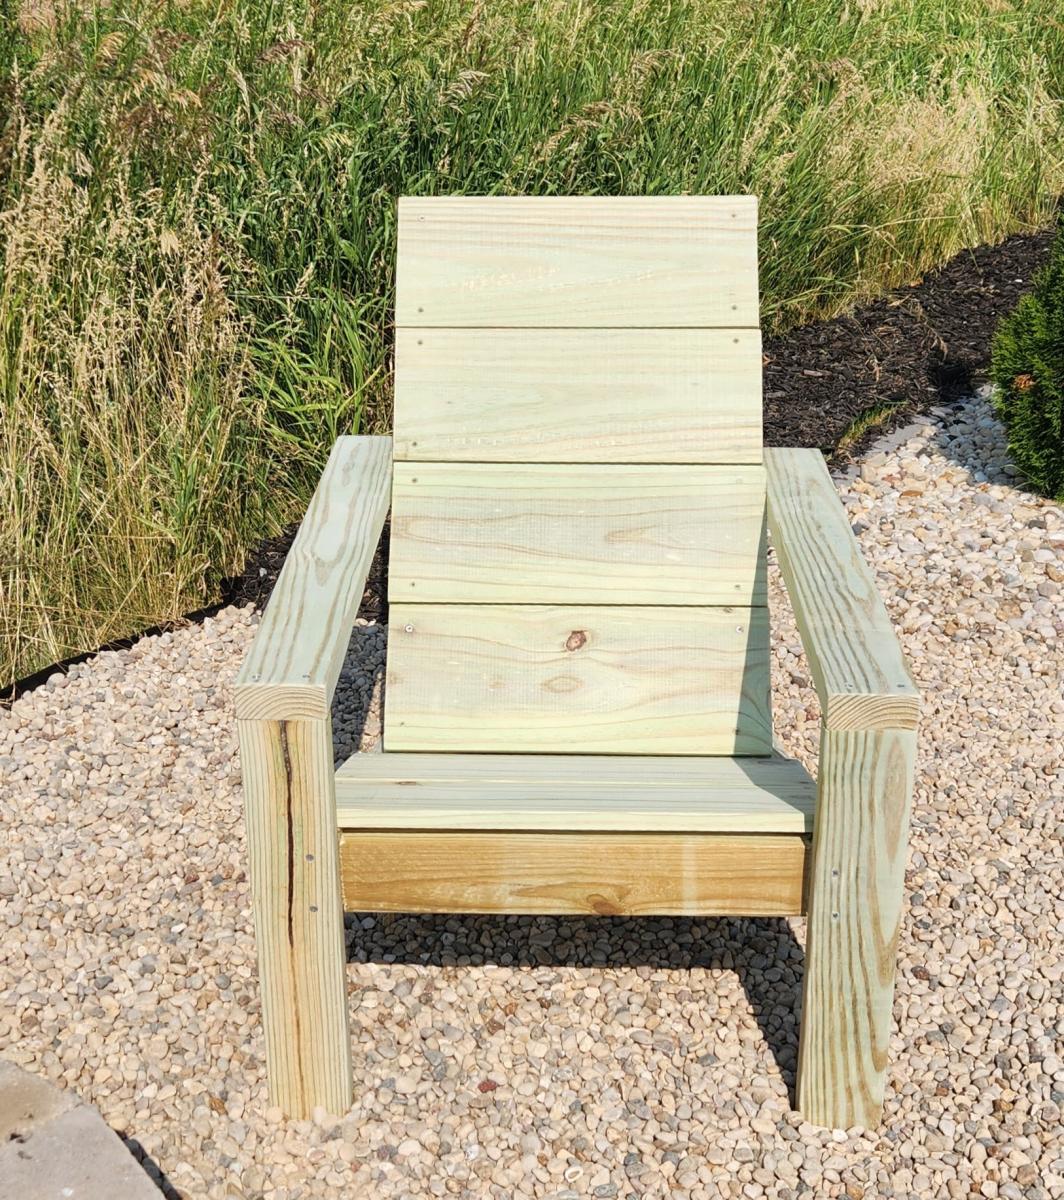
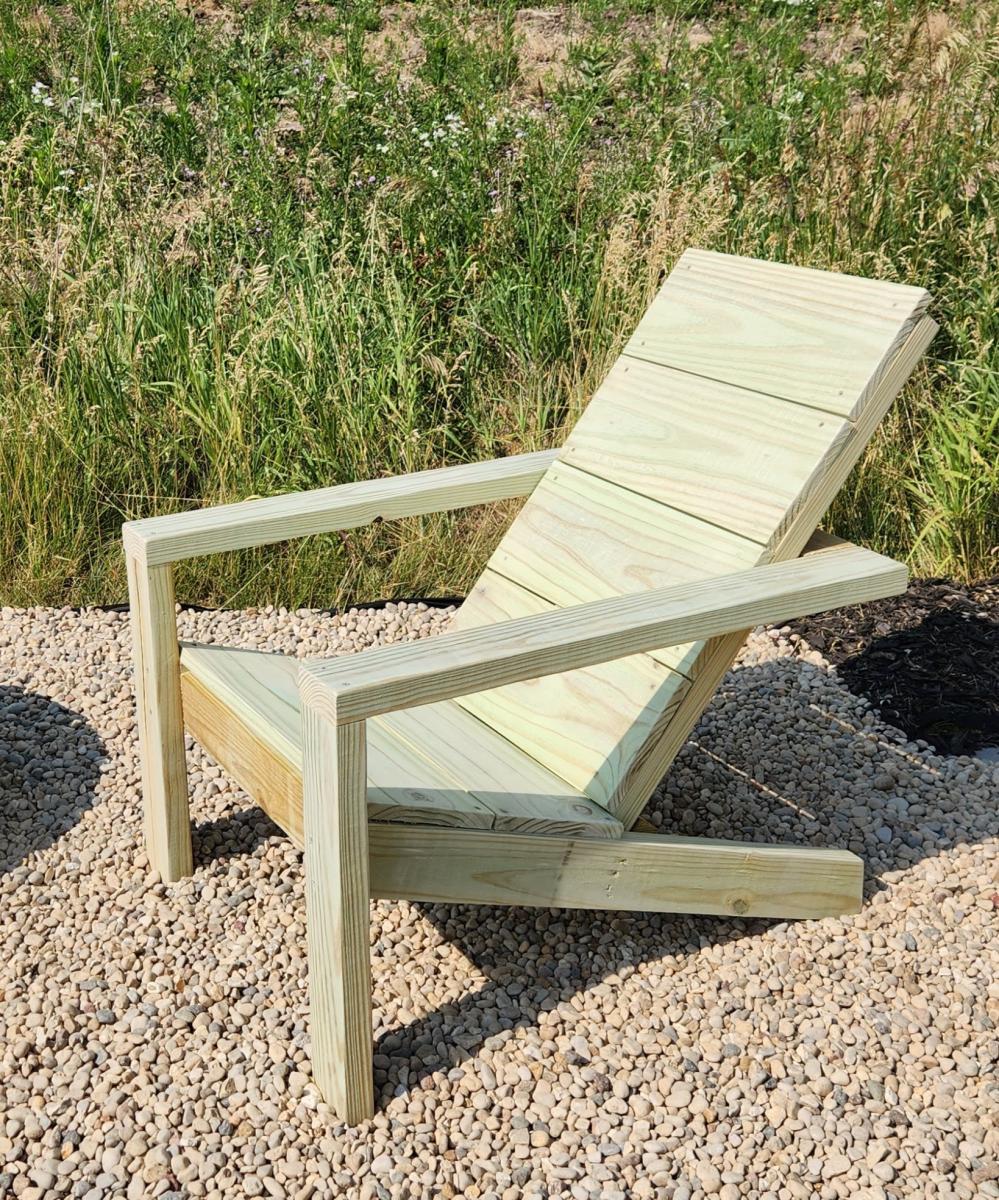
I used treated lumber for my project. One chair took me 2 to 3 hours from start to finish and the 2nd chair went a lot faster! The plans were so easy to follow, Thanks Ana!

- Built by Kara

Comments

Fire-pit Life

Submitted by Anonymous (not verified) on Mon, 10/28/2019 - 18:38

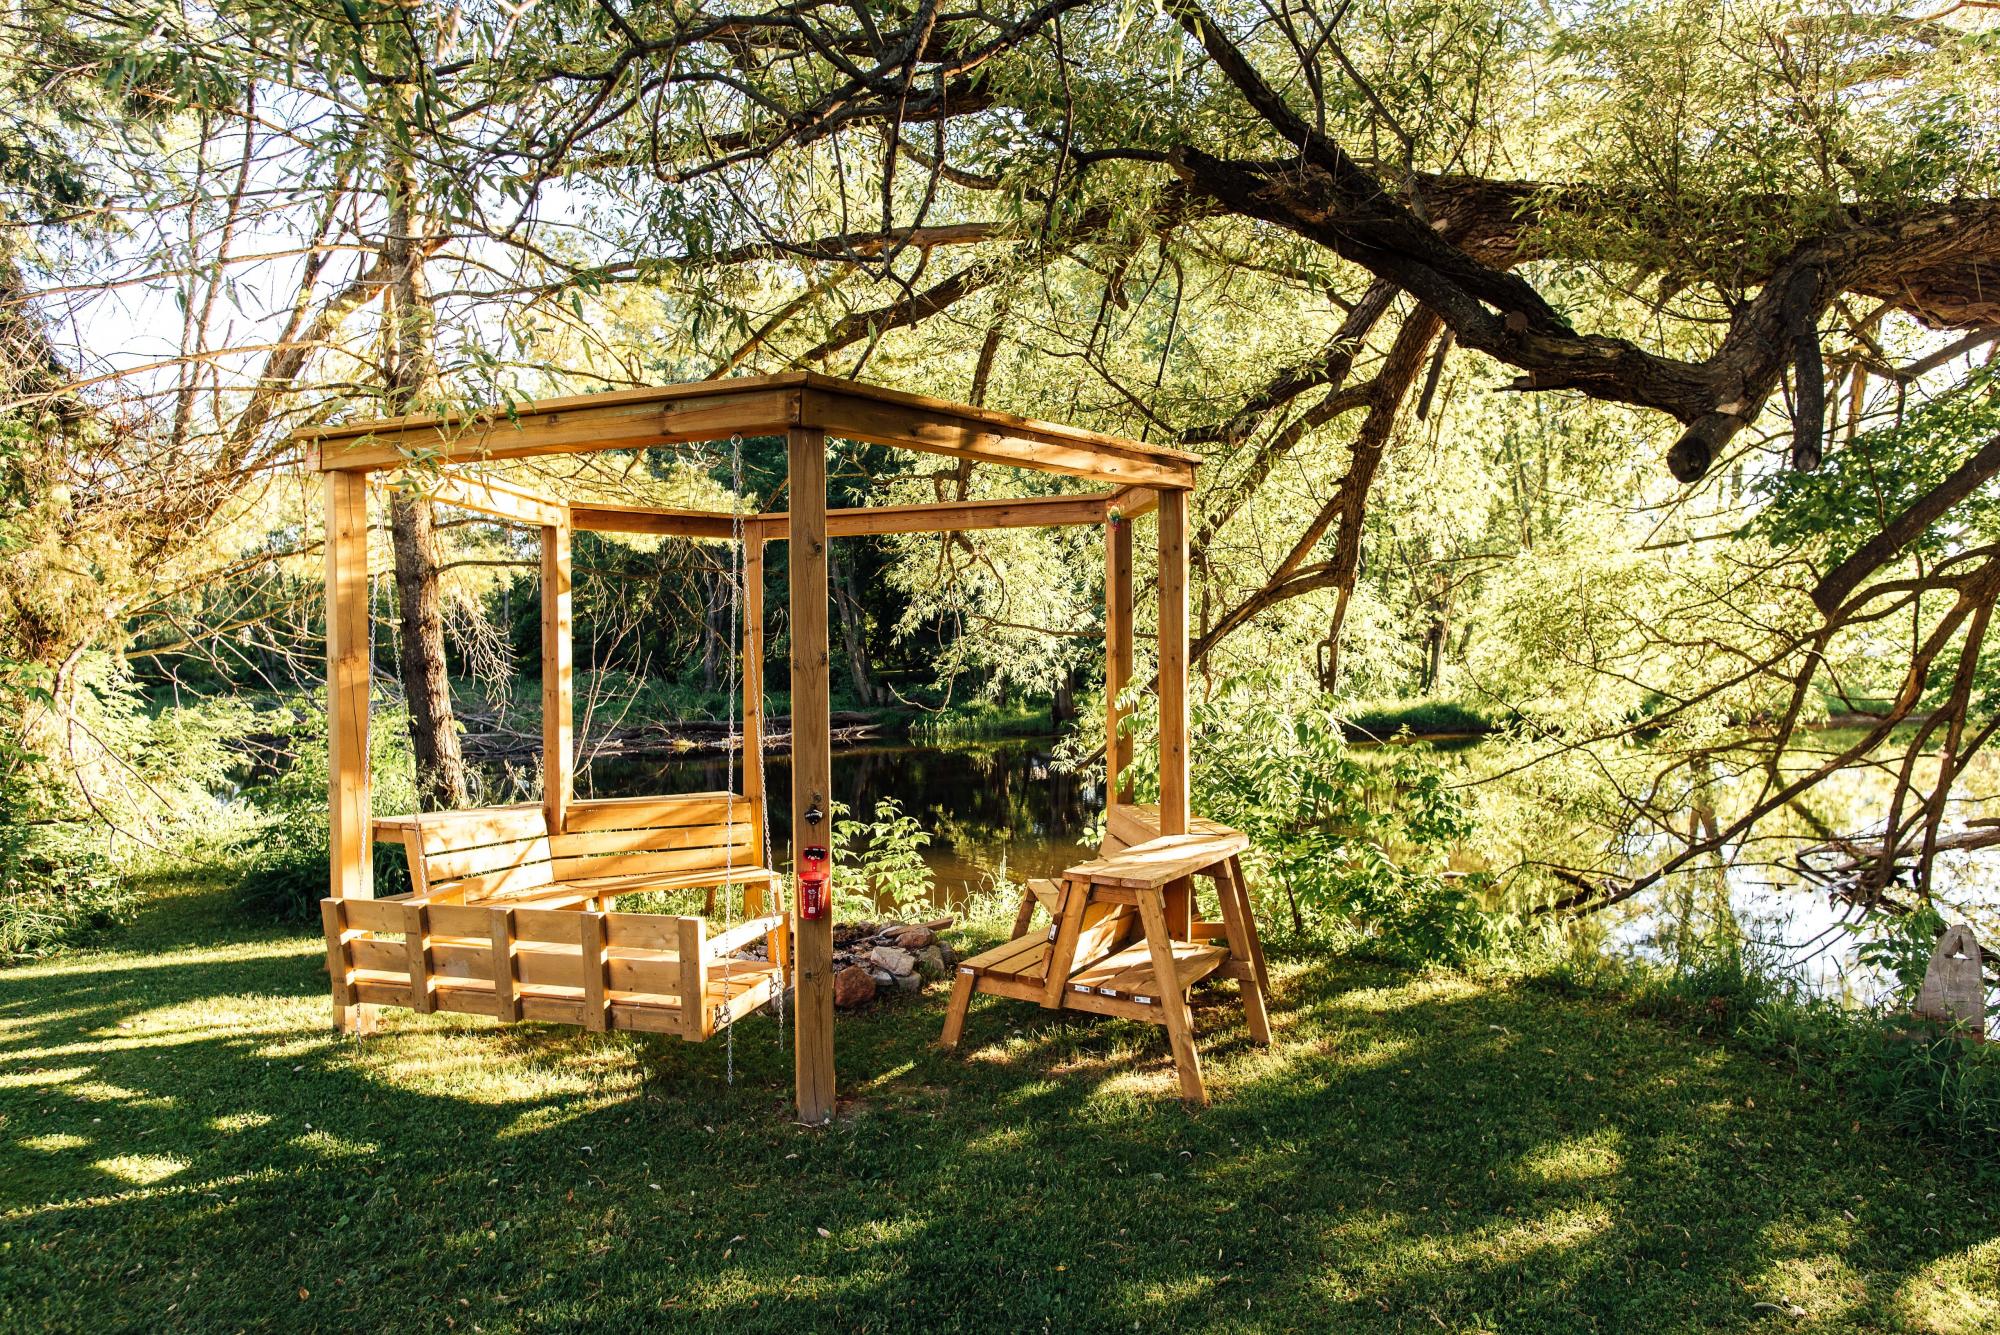
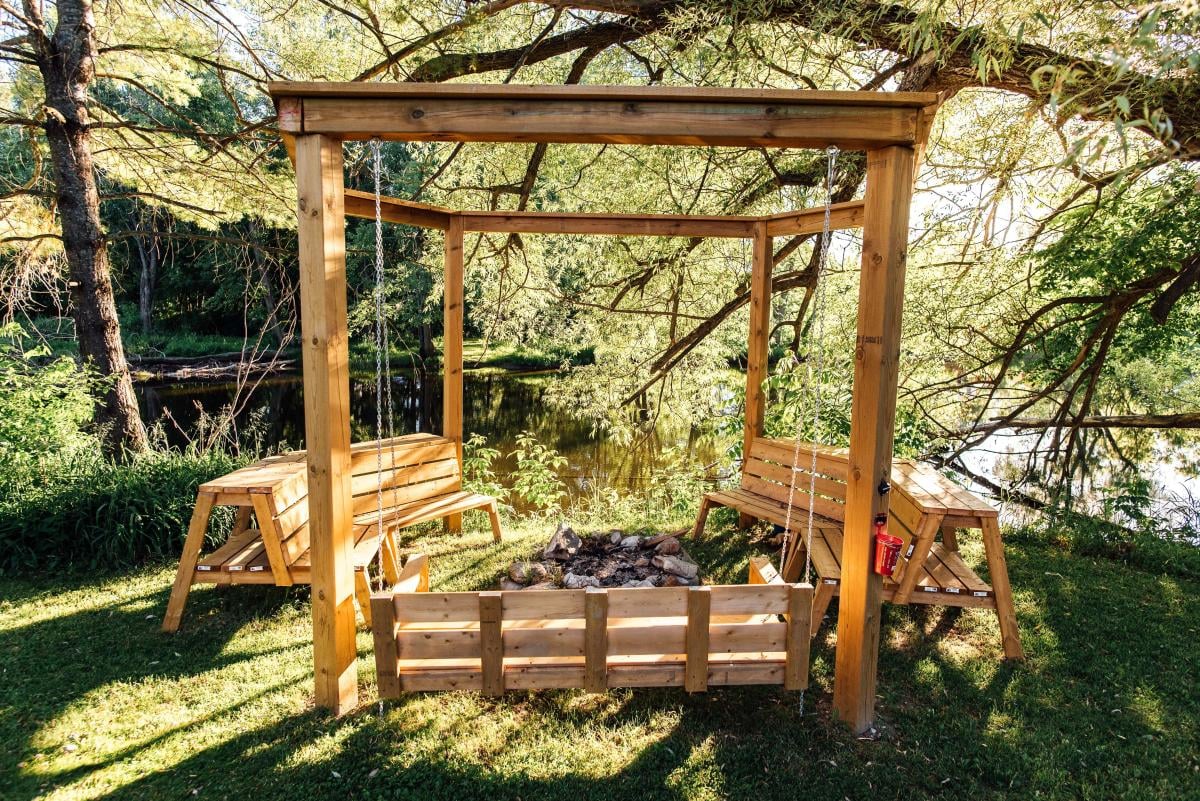
Fortunate enough to live on a beautiful river, my wife and I decided we were done bringing the folding chairs out for each weekly bon fire. Our three girls love s’mores and we wanted a great atmosphere with a place to easily grab wood and snacks in the dark while we enjoyed the outdoors. The combination of plans took us about a week to finish. The kids were away for the weekend and we rented an auger to drill the post holes. This proved to be the most difficult part of the project. It took nearly the whole weekend to dig out the unexpected granite and all the patience that we had in reserves. Once the posts were set, it was only a slightly uphill battle.
My wife made the bench in the time it took to return the auger and come home. The fire pit benches were also a pleasure to assemble and the most functional part of the project. I suspect the whole thing would have been faster if the large posts were easier to cut through. That treated lumber can eat saw blades! When setting the top posts it was also a two ladder and two person job. They were quite heavy and a little nerve wracking to set if you don’t love heights and a heavy load. We would do this project again in a heartbeat as it is a feature in our yard and makes for many enjoyable family and friend gatherings. The fire pit bench top is also great for hosting the entire bbq meal assortments to select from.

Estimated Cost
$1000
Estimated Time Investment
Week Long Project (20 Hours or More)
Finish Used
None, treated lumber, 3 years later and still looks brand new!
Recommended Skill Level
Intermediate
Seasonal And Holiday

Farmhouse Table w/ pocket holes

Submitted by JustJ on Sun, 11/17/2019 - 07:07

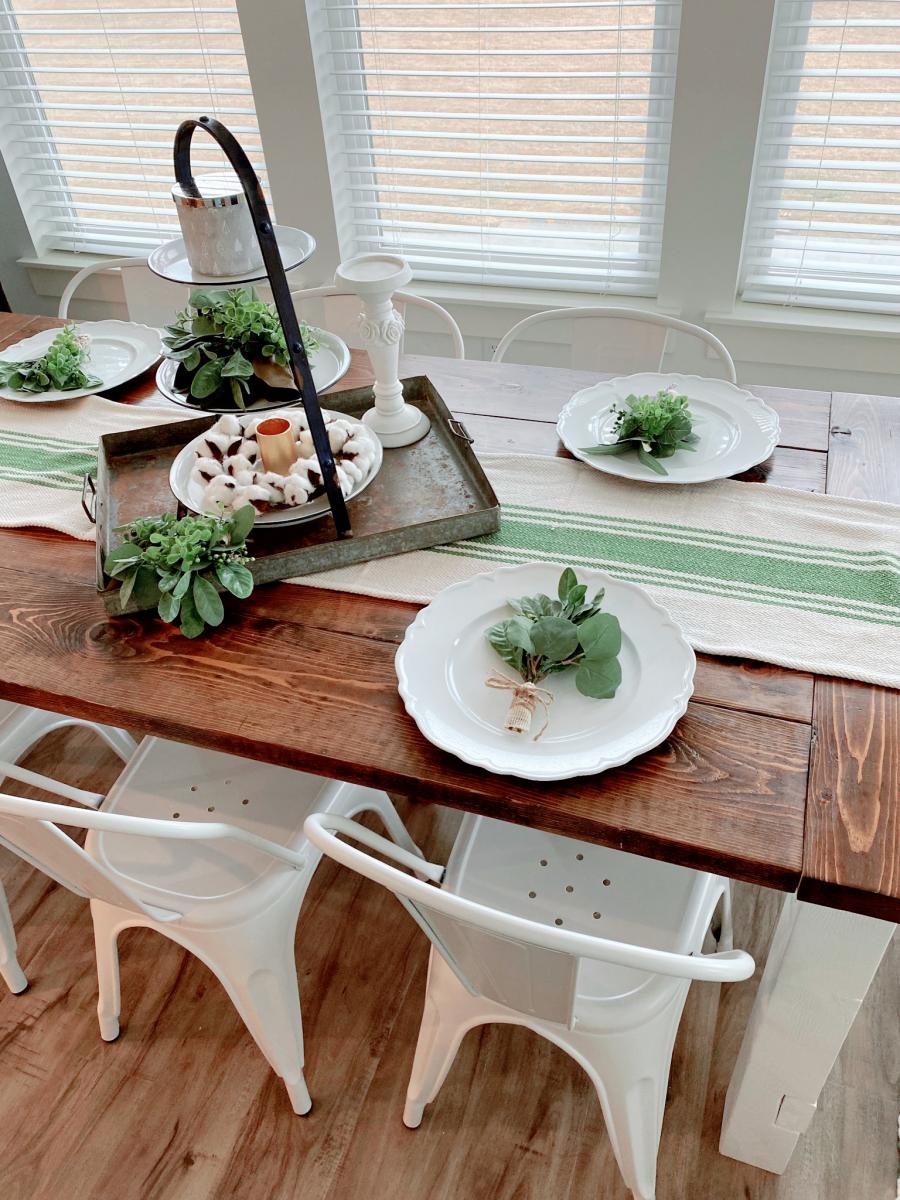
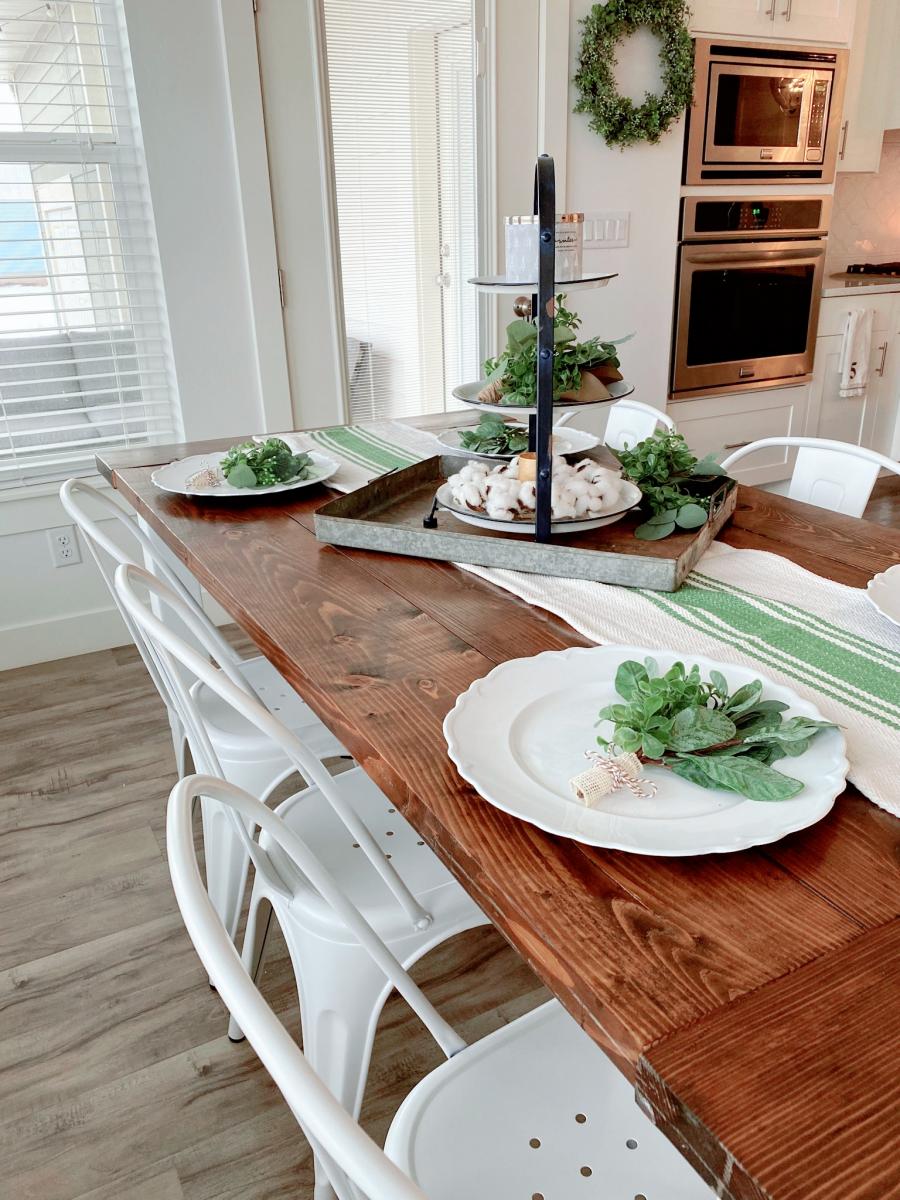
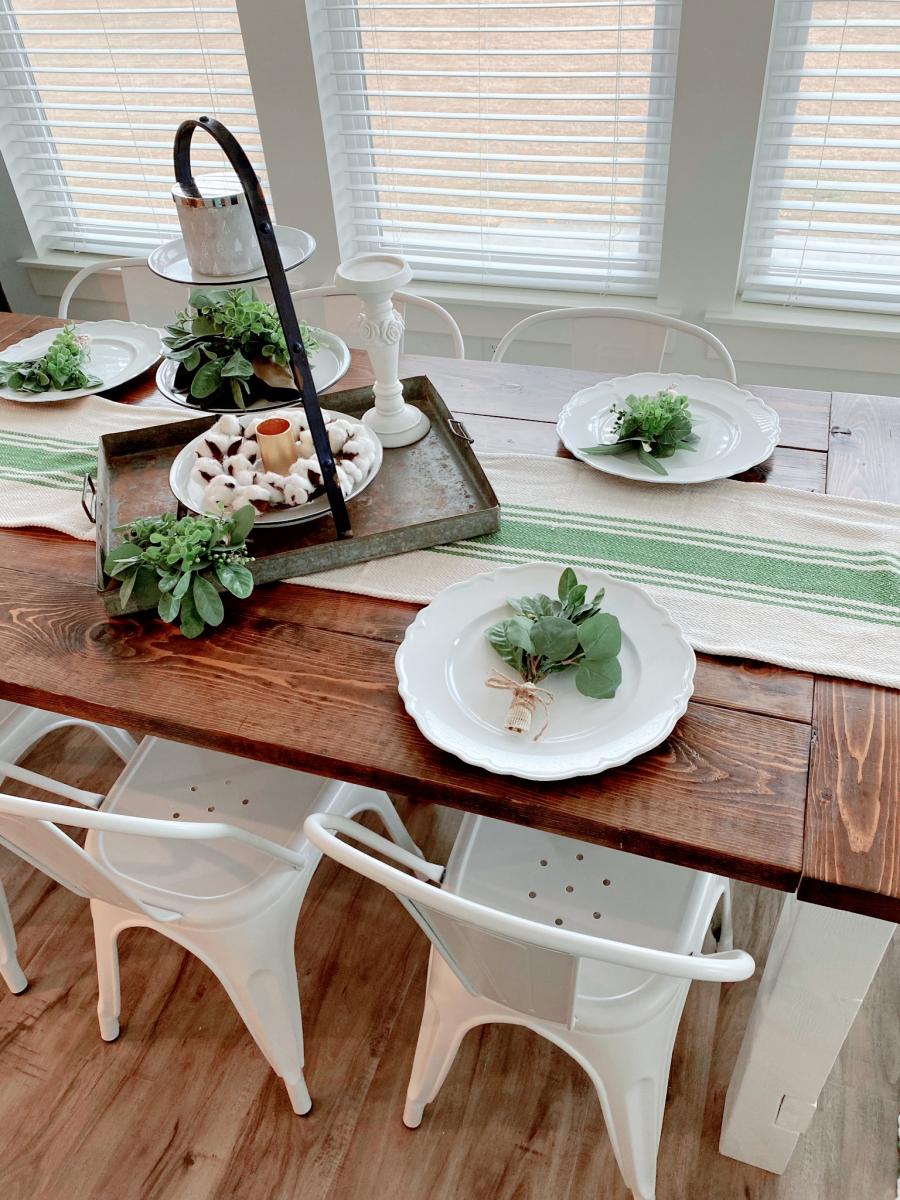
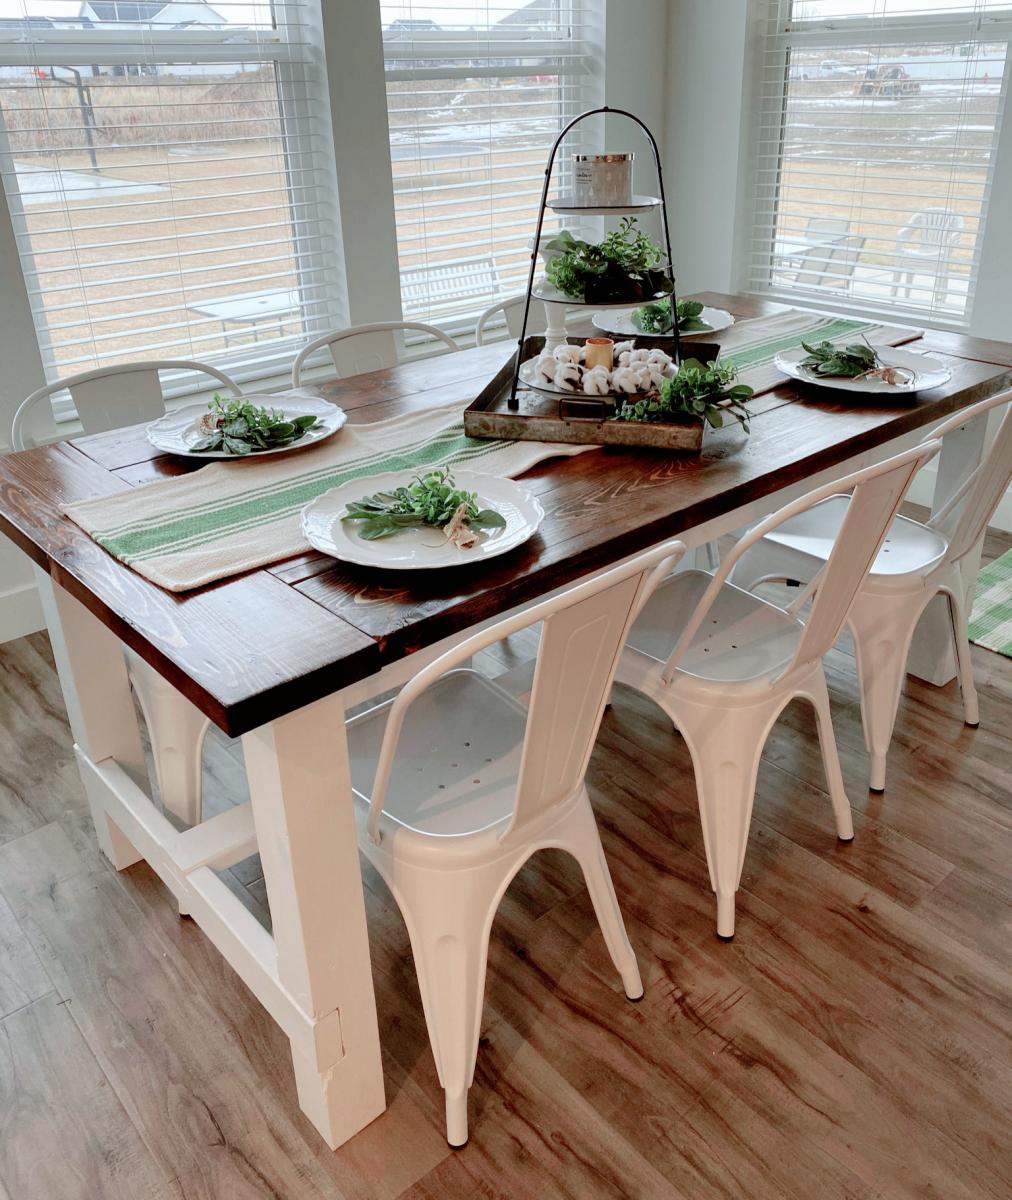
Pocket holes made it a breeze,  and so strong. Very heavy.  Recommend assembling top to base after you have placed it where you want it.  Modified slightly for length,  and only used 2x8, instead of 2x10 in center, for correct width.   

Estimated Cost
$100
Estimated Time Investment
Weekend Project (10-20 Hours)
Finish Used
Dark Walnut
Recommended Skill Level
Intermediate