Adirondack Chairs
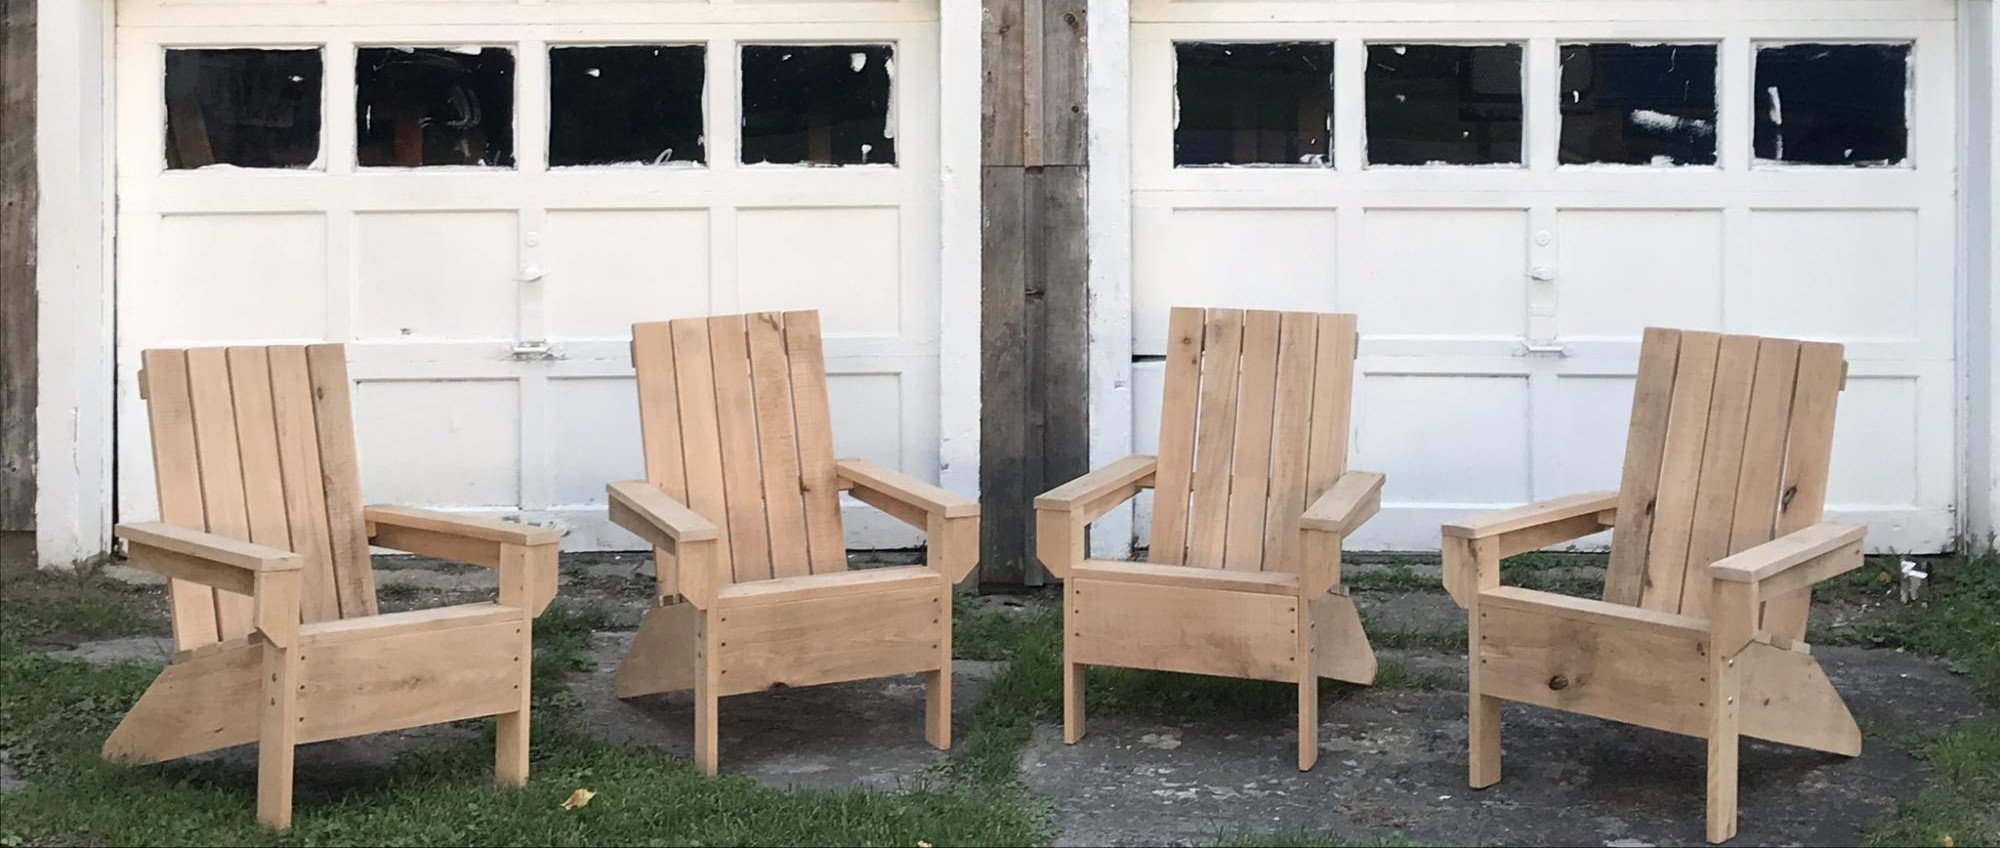
Needed some chairs, quick, for my daughter’s new fire pit. Used your design and the they love them.

Built from Plan(s)
Needed some chairs, quick, for my daughter’s new fire pit. Used your design and the they love them.
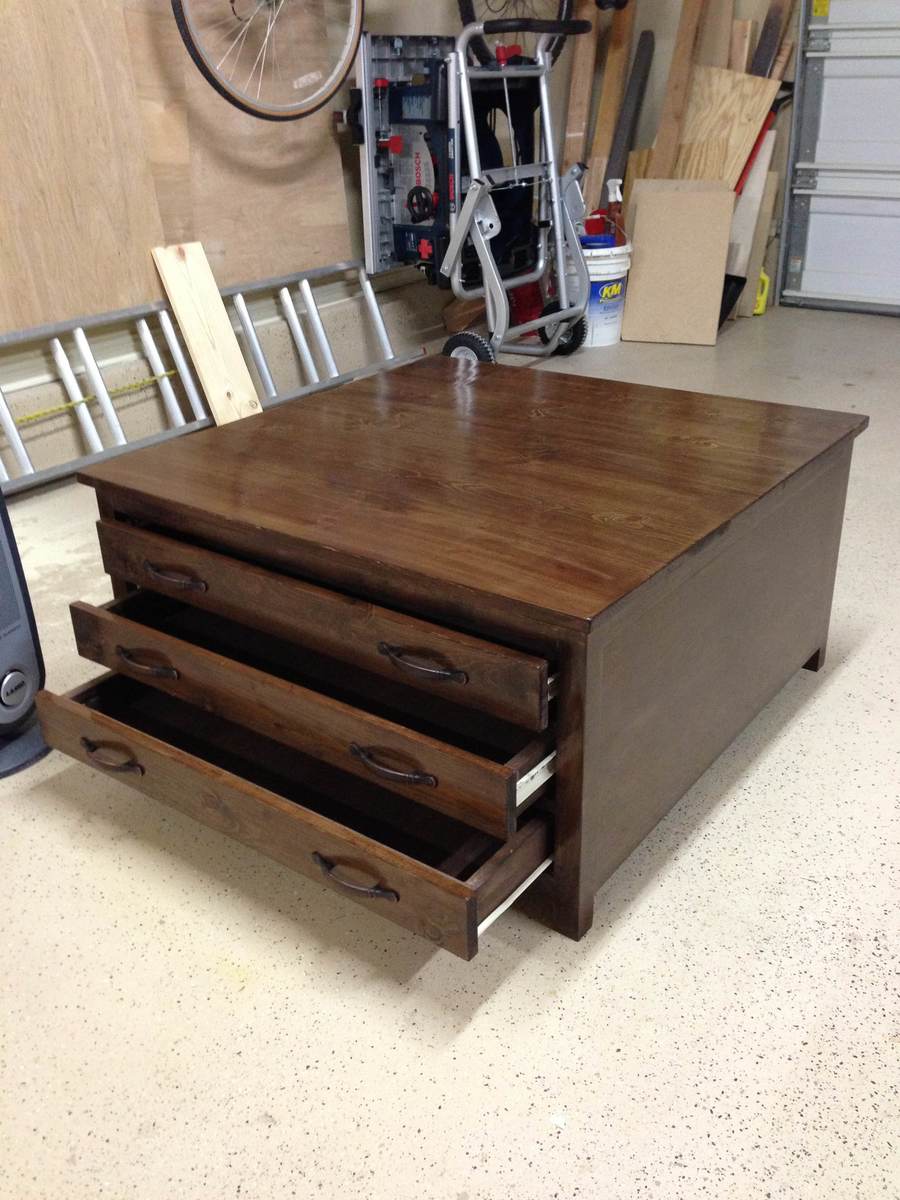
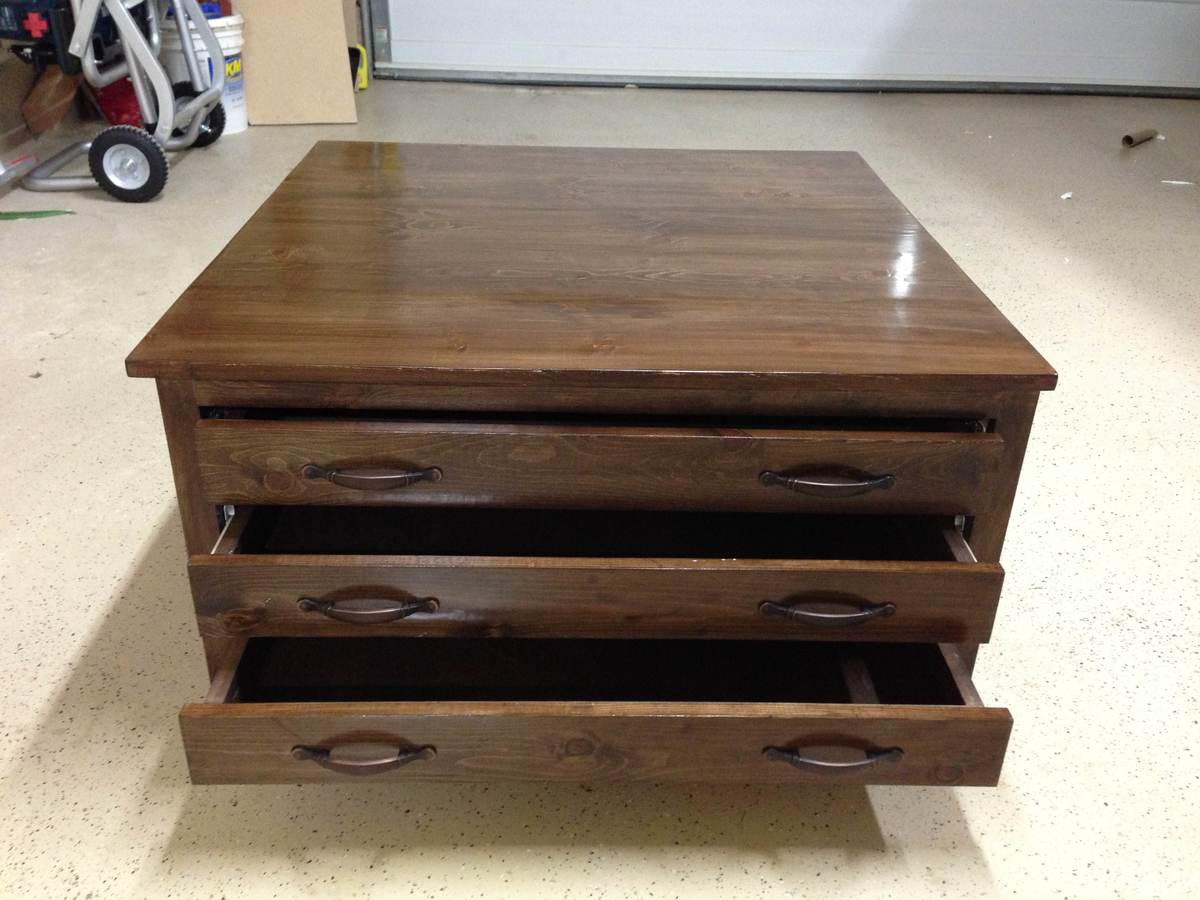
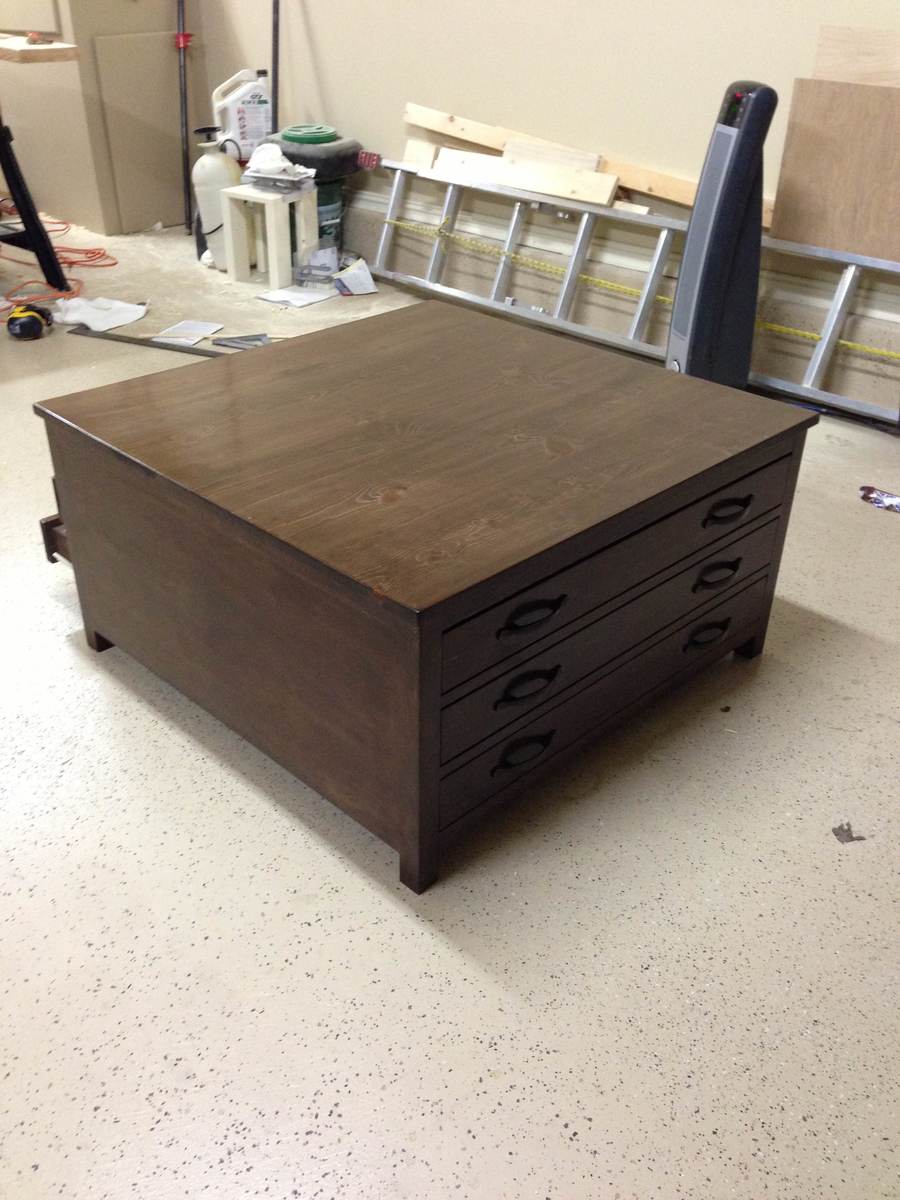
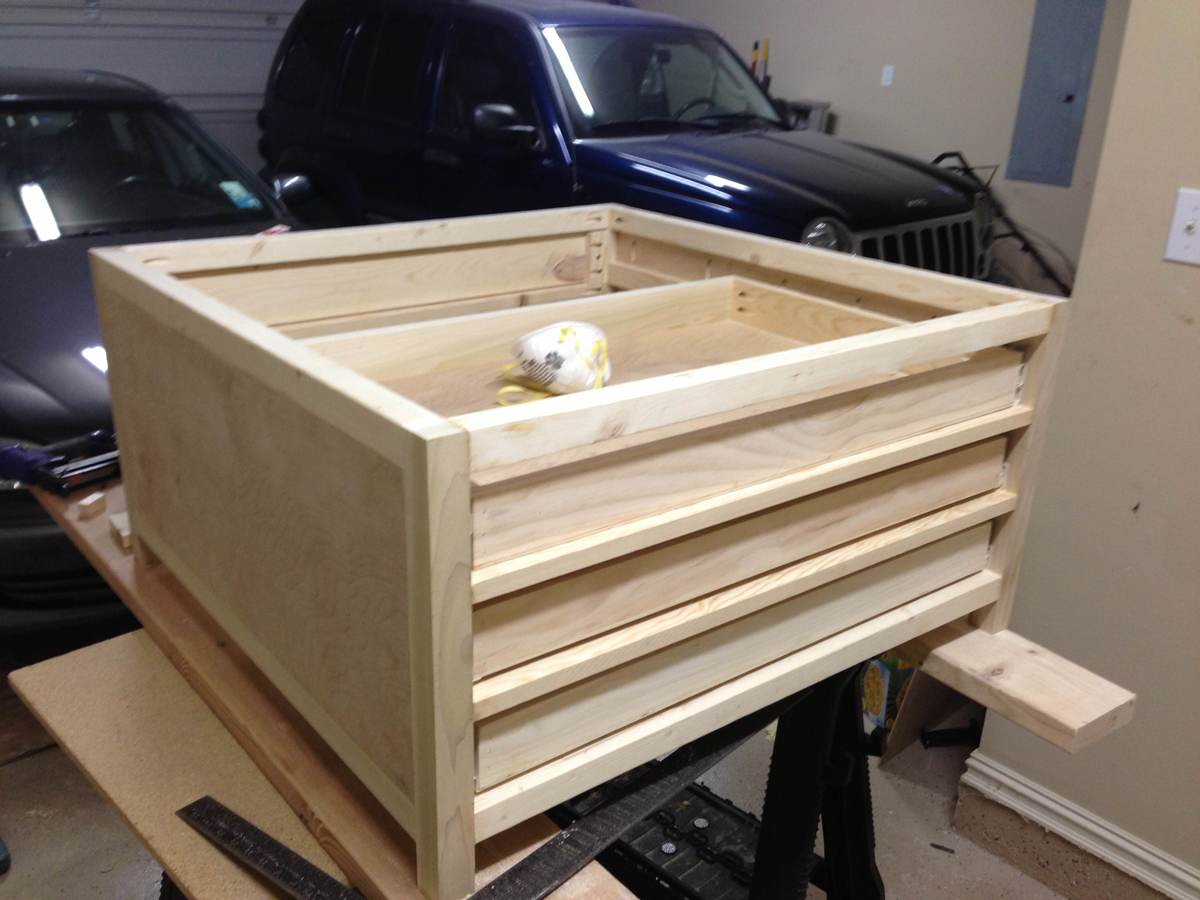
This was a fun little project. Followed the plans roughly. I made a few changes in the fact that I only added 3 drawers instead of six and instead of using the casters I made legs. When using cheap pine from lowes its rather difficult to get a frame that is completely square. This makes it quite the hassle to get the drawers to fit properly. If I had to do it over again I would use better wood and be very careful that the frame is 100% square. But overall a nice project.


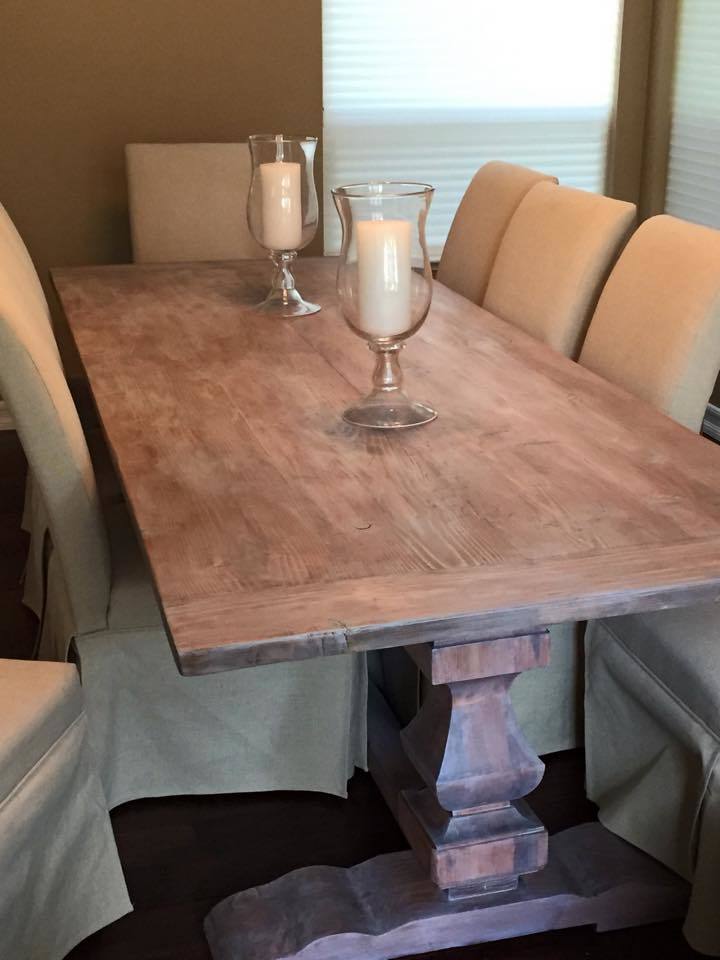
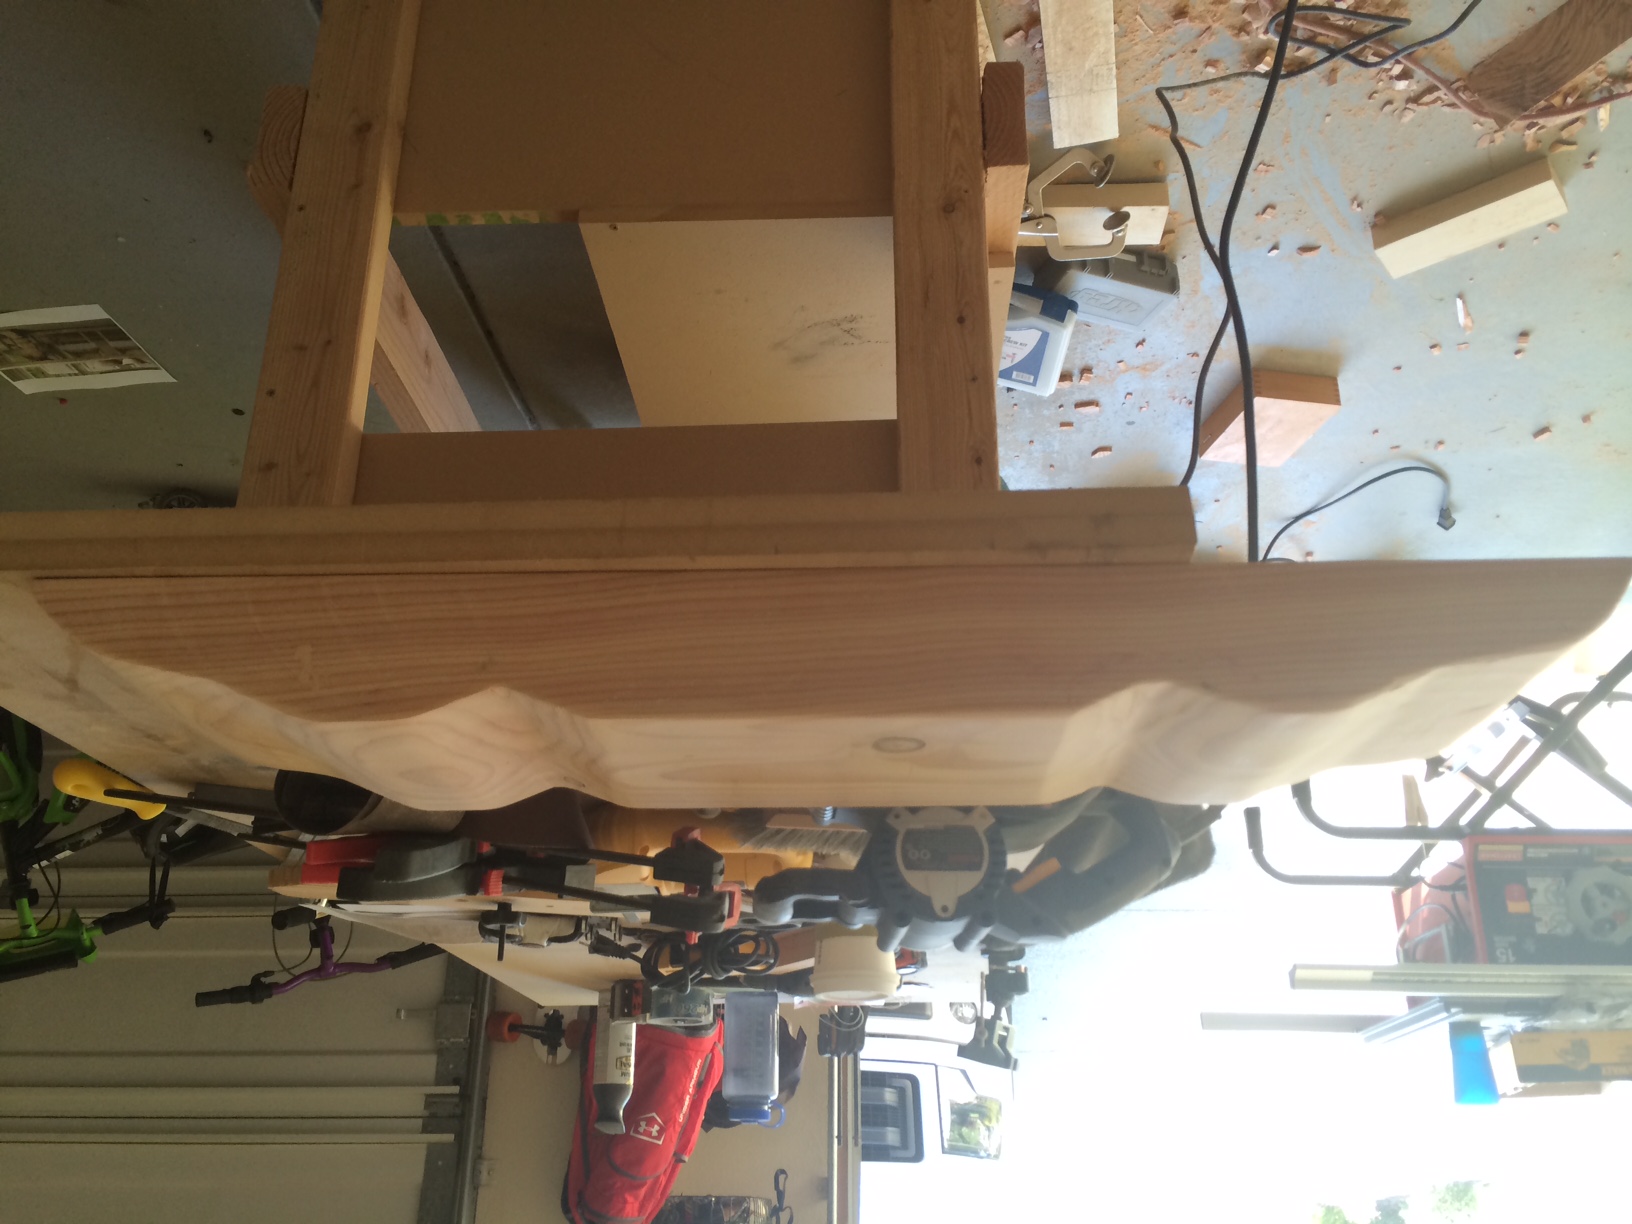
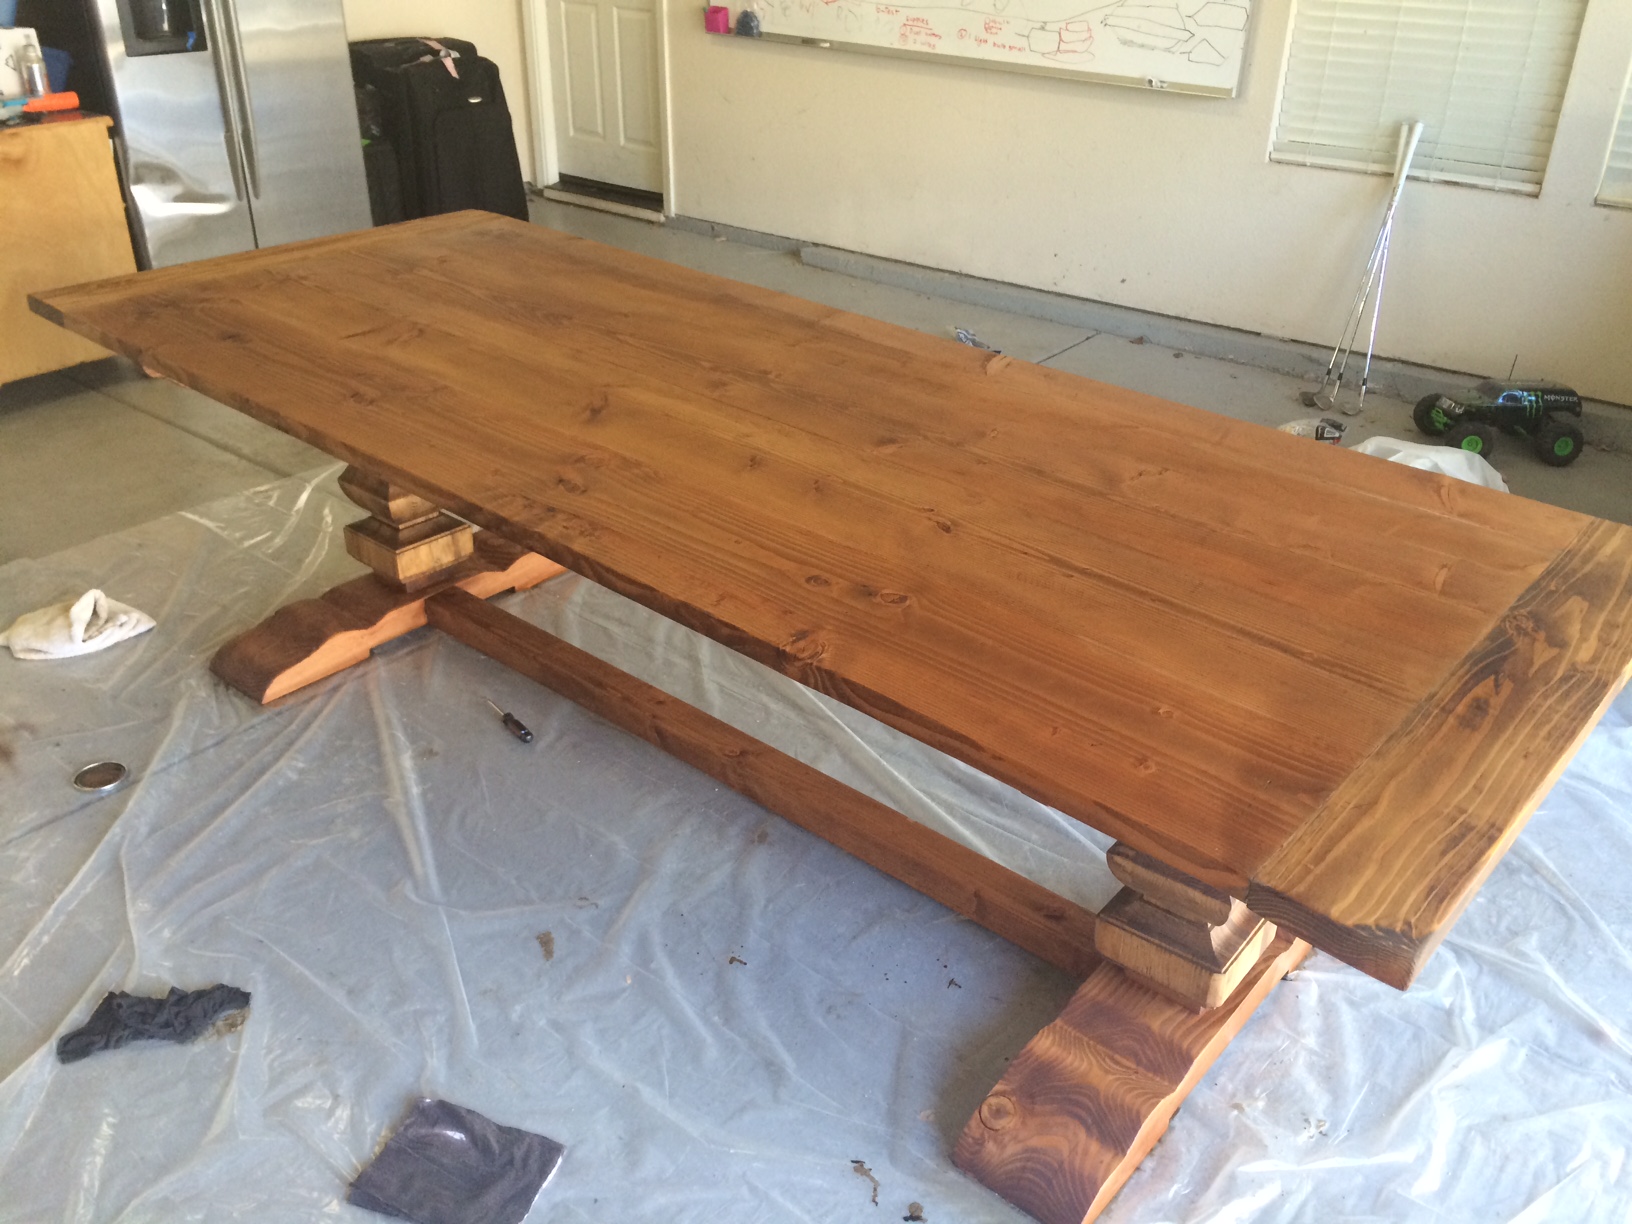
Was inspired to build this table after a visit to R.H. with my wife and realized a table this size and style would cost us about $3000.
So I decided to build myselft. With a little help from Ana's plans and my own modifications, I think I got pretty close to the Restoration Hardware Trestle Table.
I bought the pedestals at Osbornewood.com and asked them not to drill the leg holes and ordered it in pine. That was the most expensive part of the table, about $380 a piece. The rest of it is Douglas Fir.
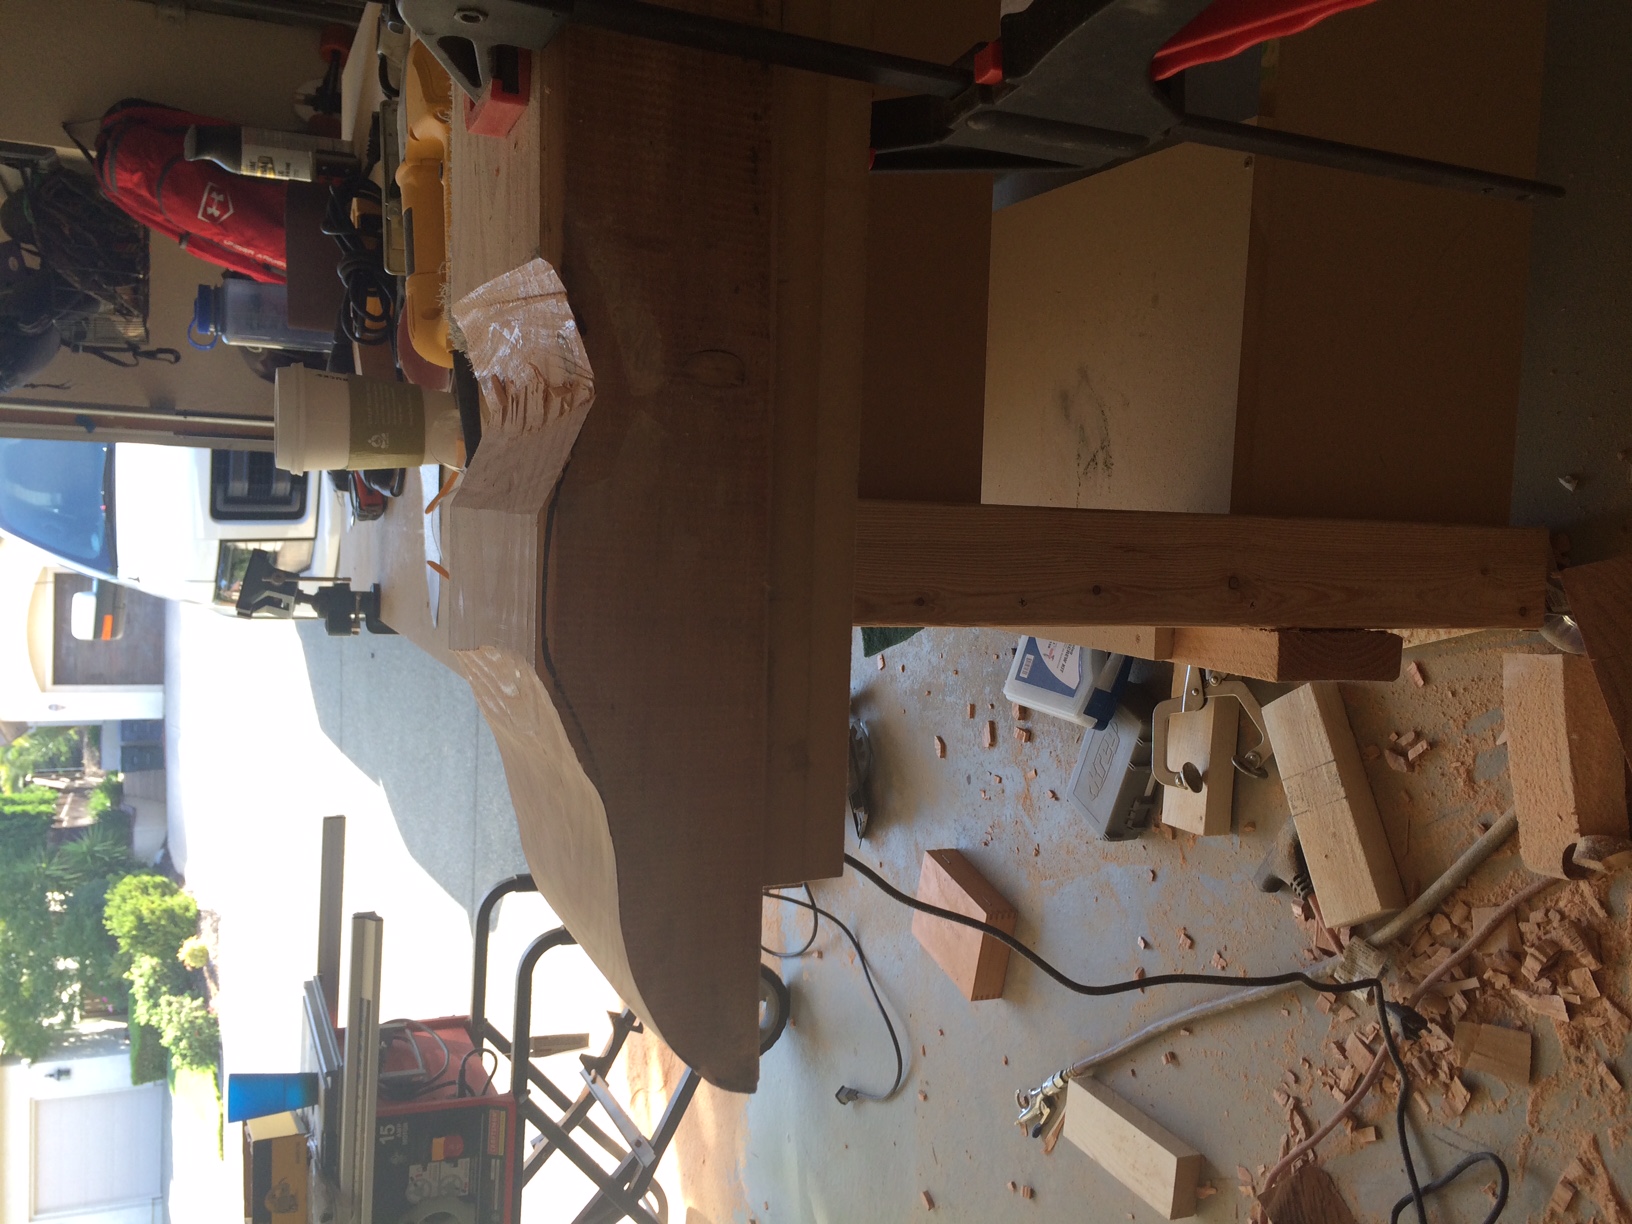
I created a template and shaped the feet myself out of 4X8 beams. I was able to use my jig saw and a Bosch 10" blade. I made the rough cut with it and then sanded the rest of the shape using my belt sander.
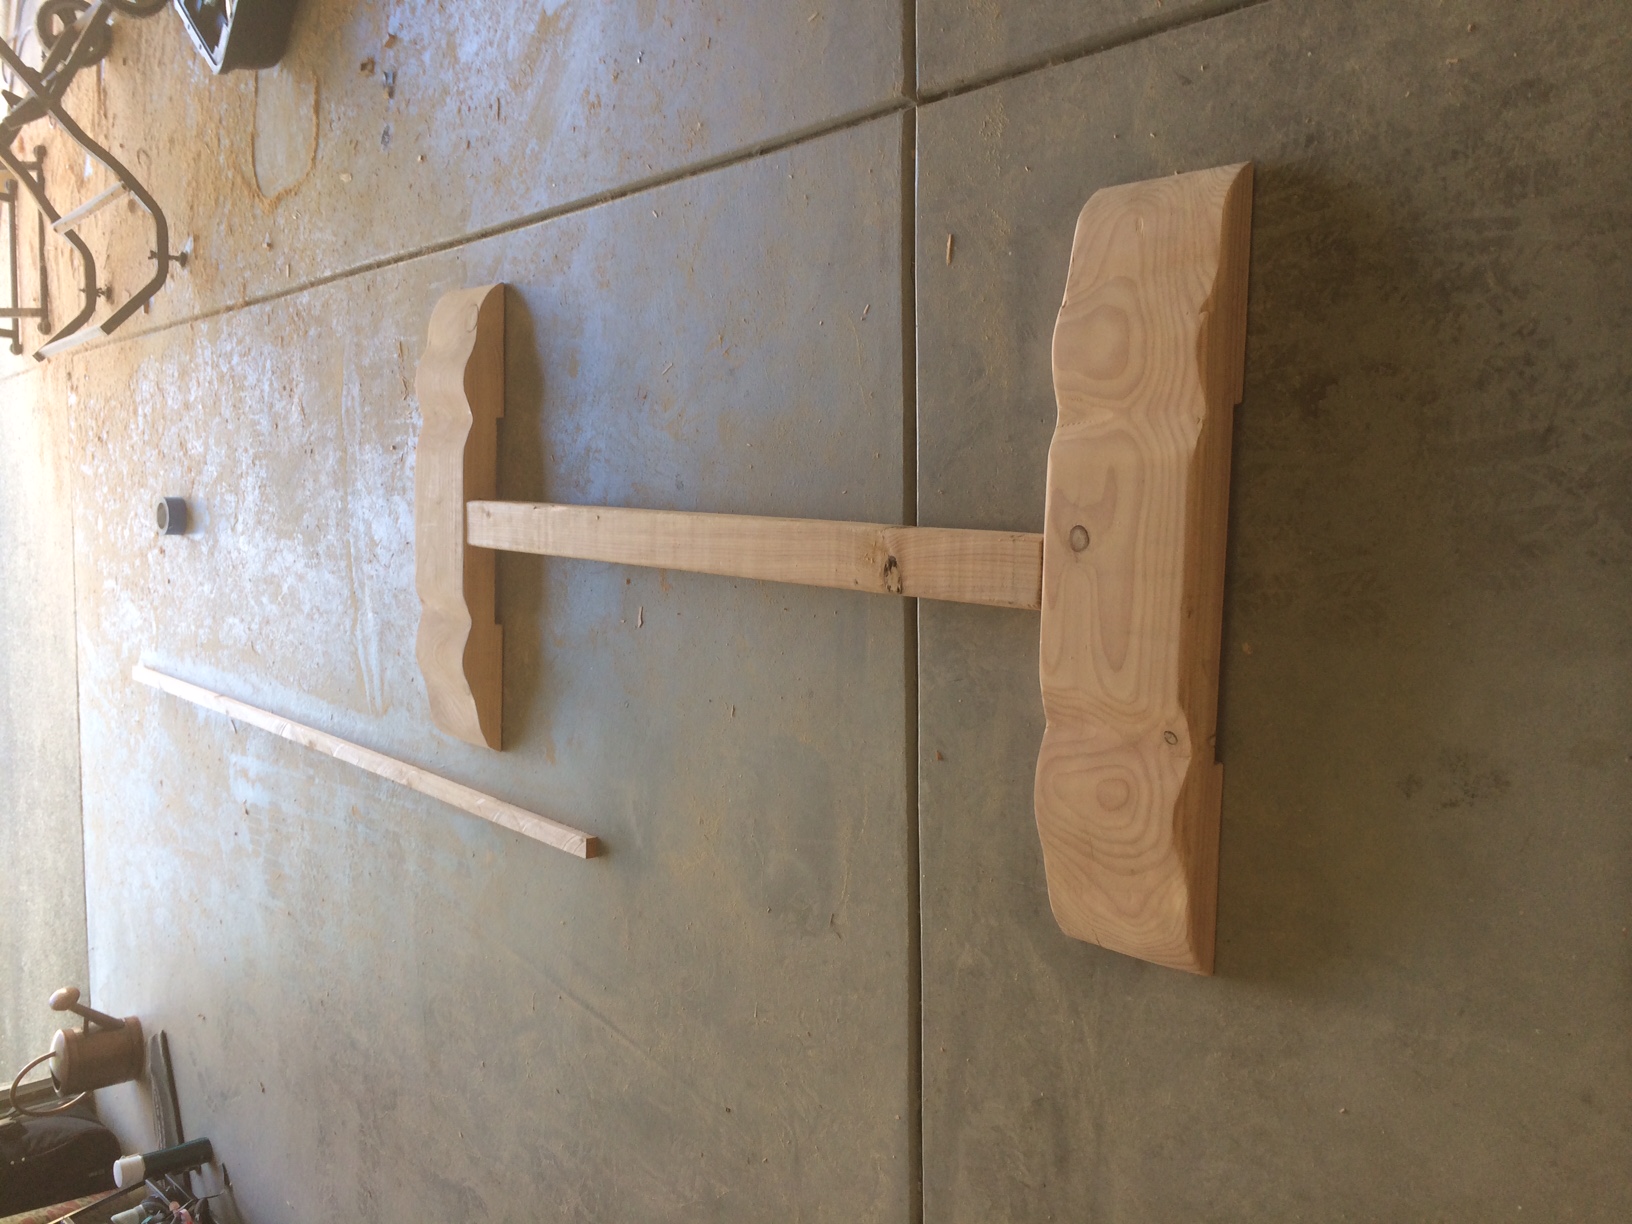
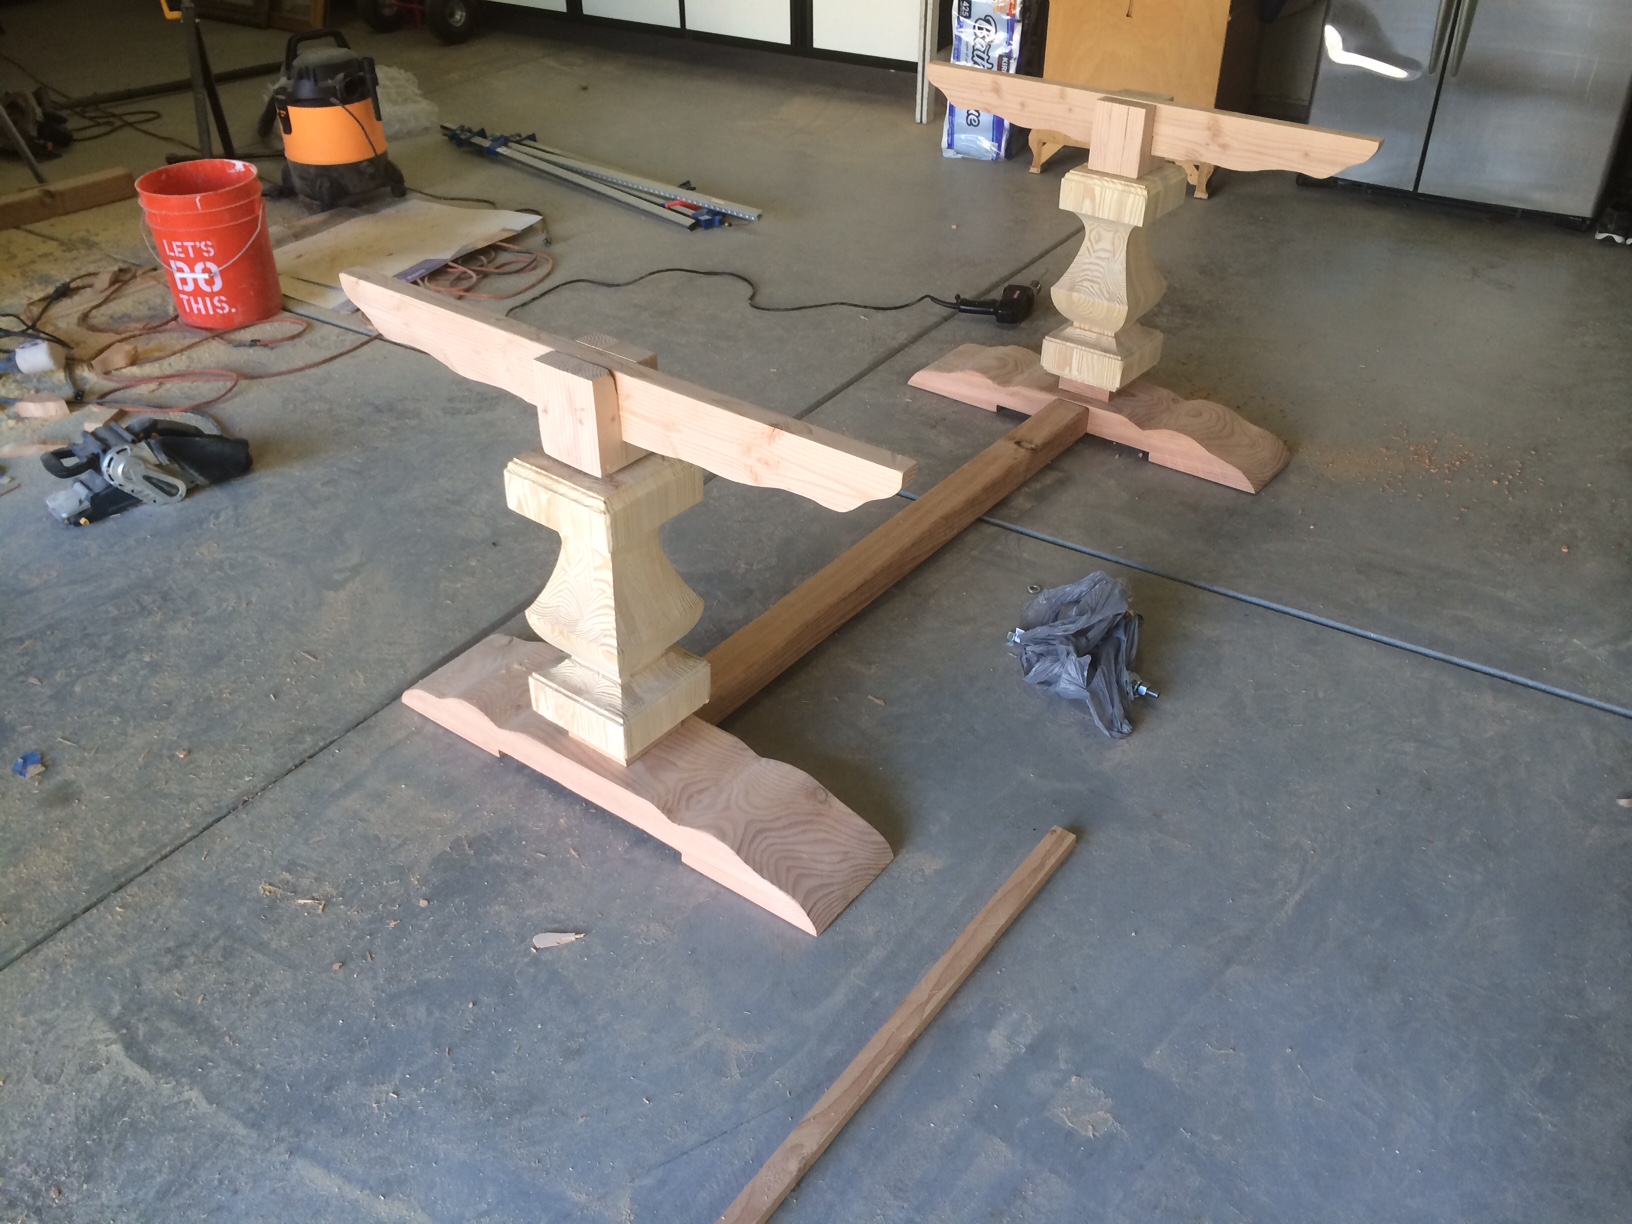
The pedestals have a hollow center and were too tall so I cut them down and created plugs and glued them into the pedestal. The bottom plug has a large threaded rod and is glued and bolted to the feet, and the top plug was used to create the horizontal supports for the table top. I too created a template for this and used a jigsaw to cut the shape.
I then used Minwax American English, then weathered oak, (Like in one of Ana's stain posts). I then wanted to give it that weathered/reclaimed wood look so I add a fair amount of the White Pickling stain. I wanted a little less of the red tones and more brown...I may sand and refinish it someday, but it is in the house for now and can't wait for our first dinner party.

Absolutely loved this build! And it has become so handy to have for all the storage it provides.
I adjusted the original plans.

This console table was a pretty easy build and looks great. We had the lumber store rip the boards to the size we needed. We used solid maple boards instead of plywood. We mitered the corners to avoid seeing end grain. Followed the plans pretty close. Used 6" hairpin legs from Amazon painted antique bronze to match handles. Very pleased!

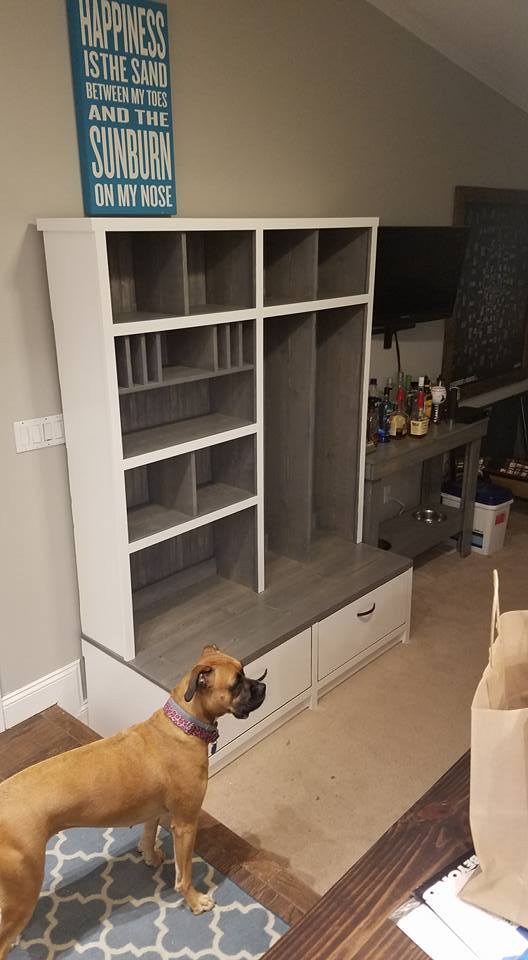
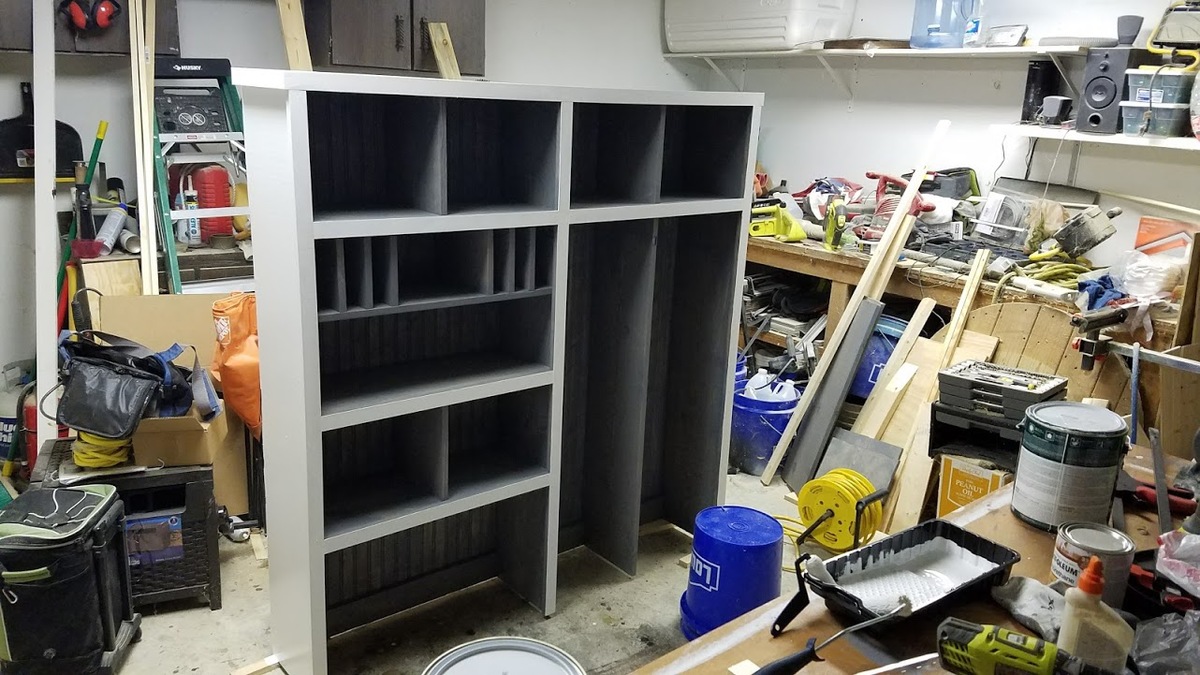
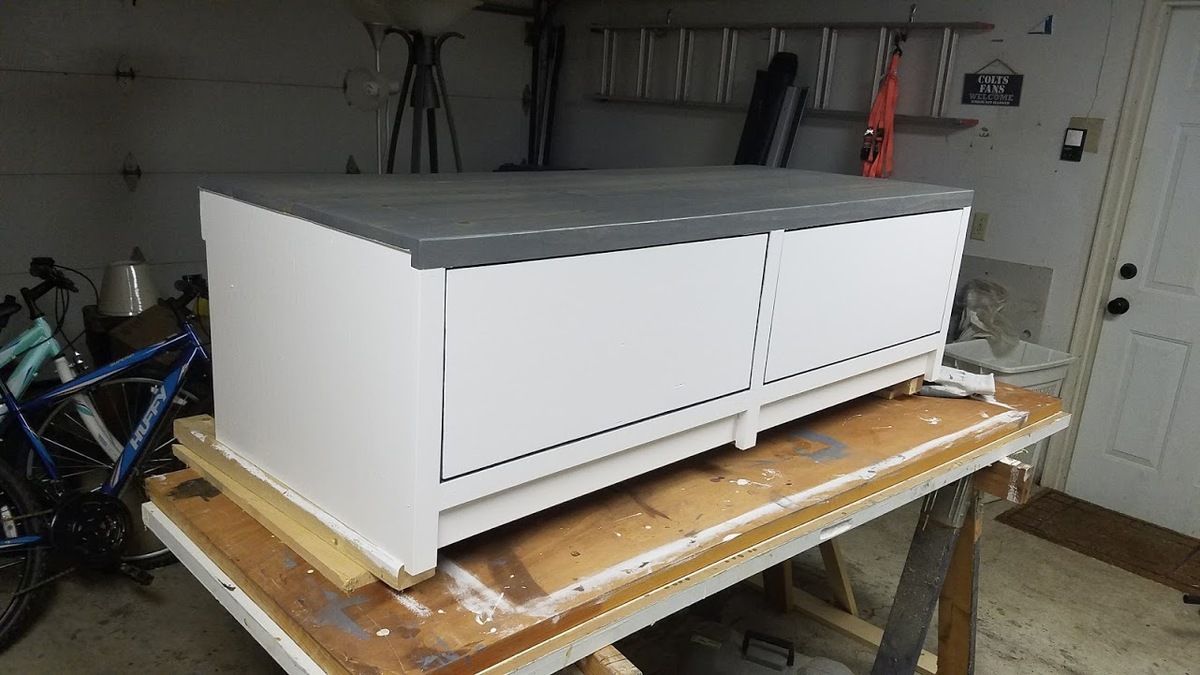
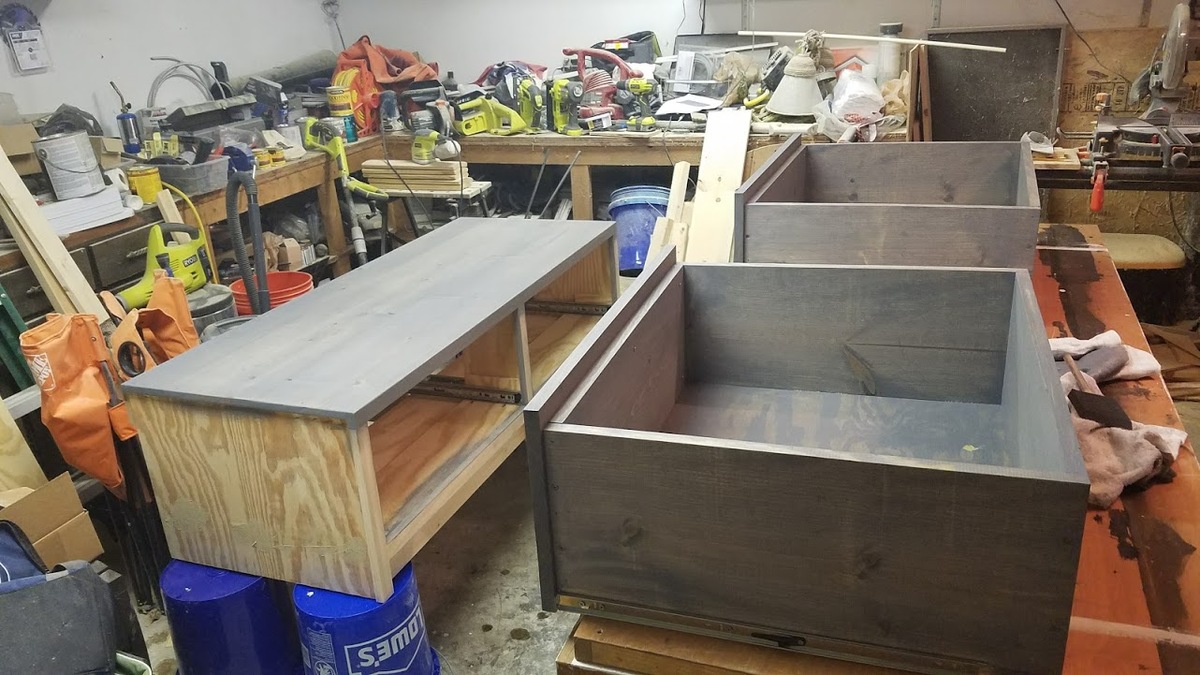
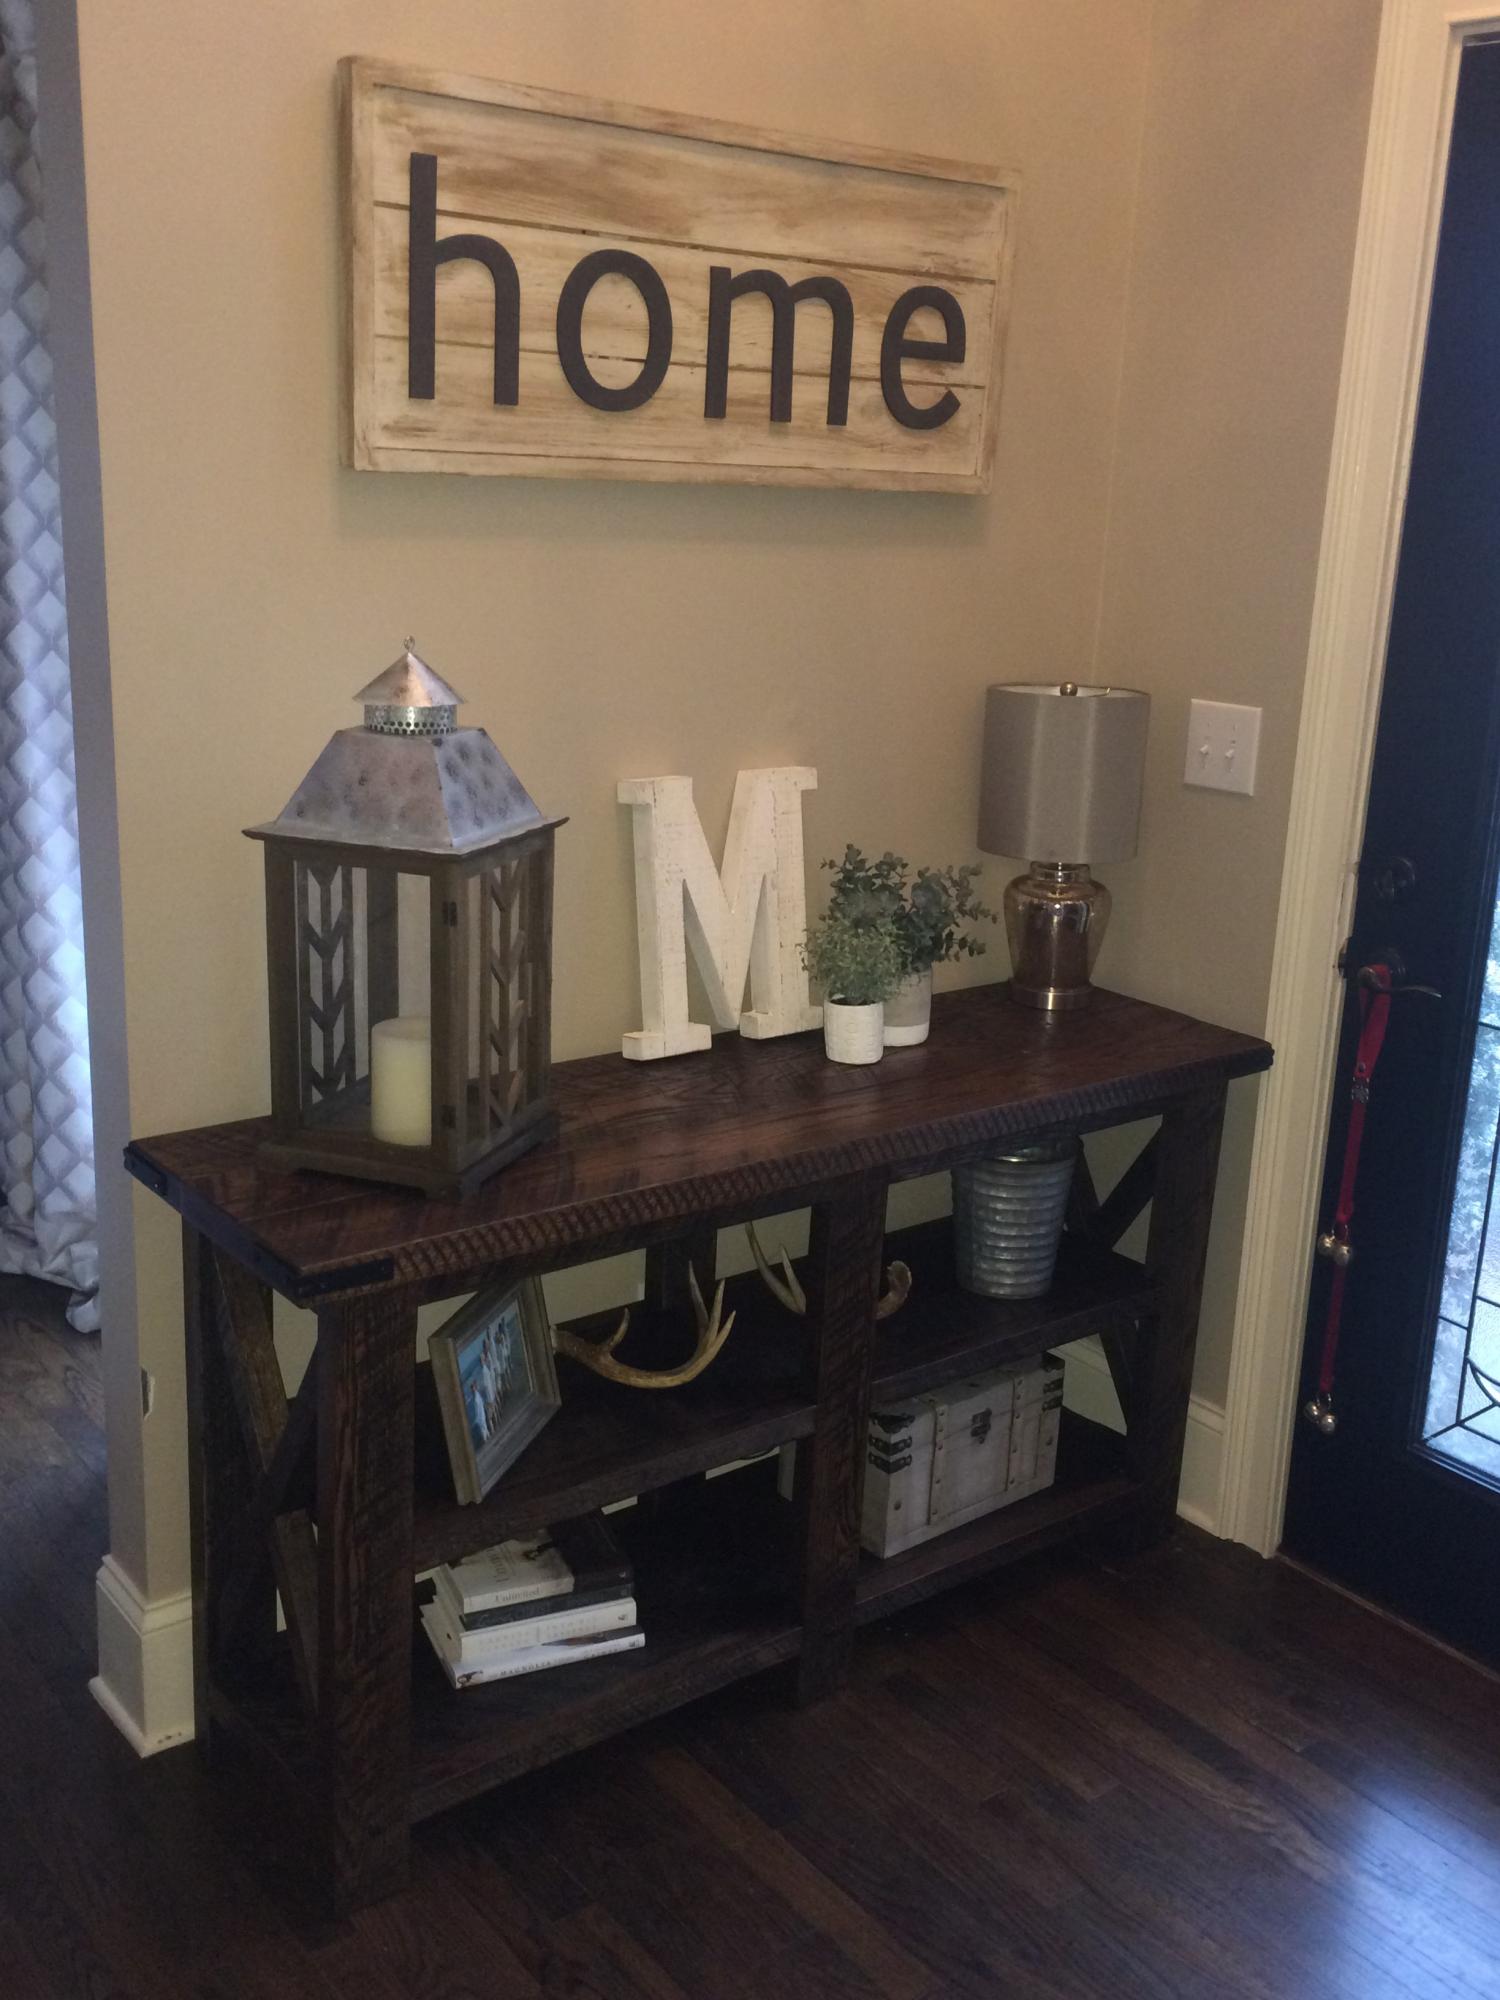
It was so much fun building this bench & shelf for my entry. I now have a terrific place to stash things and hang my coat and purse! I am planning to make boxes to fit some of the spaces in the bench.
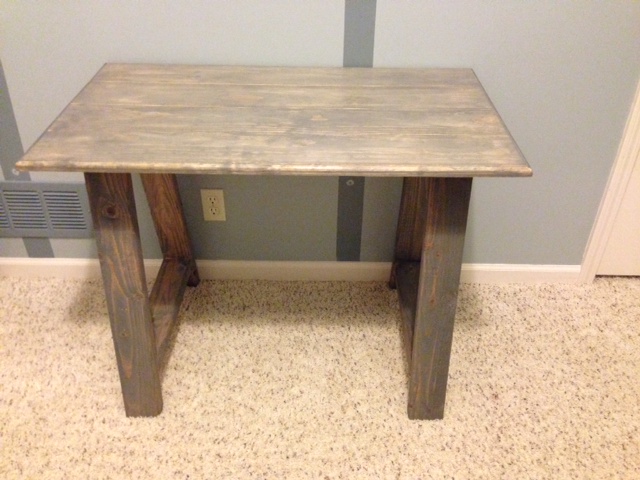
I used 1x6’s as opposed to 2x6’s for the base as well as the 19” pieces thus I cut the length of the legs to 27 3/8 the difference of 1 ½ inch from the plan. In addition, the plans did not specify as to the placement of the legs on to the 19” pieces and thus I attached the 17 ½ bottom shelf braces and then attached the legs to the top. I finished the project with MinWax Classic Gray stain which gave it an antique finish followed by a finishing wax.
My first project, something I took on with my kids. Lots of fun, errors, and lessons learned. Used an hvlp for stain and poly, so much faster and easier than brush or rag staining.
Thanks for the inspiration and instructions.

Handmade by novice
My husband bought me a Kreg jig for Christmas since I've been wanted to make some Ana White projects. Love how the first one turned out. Team project with hubby for our entry way.

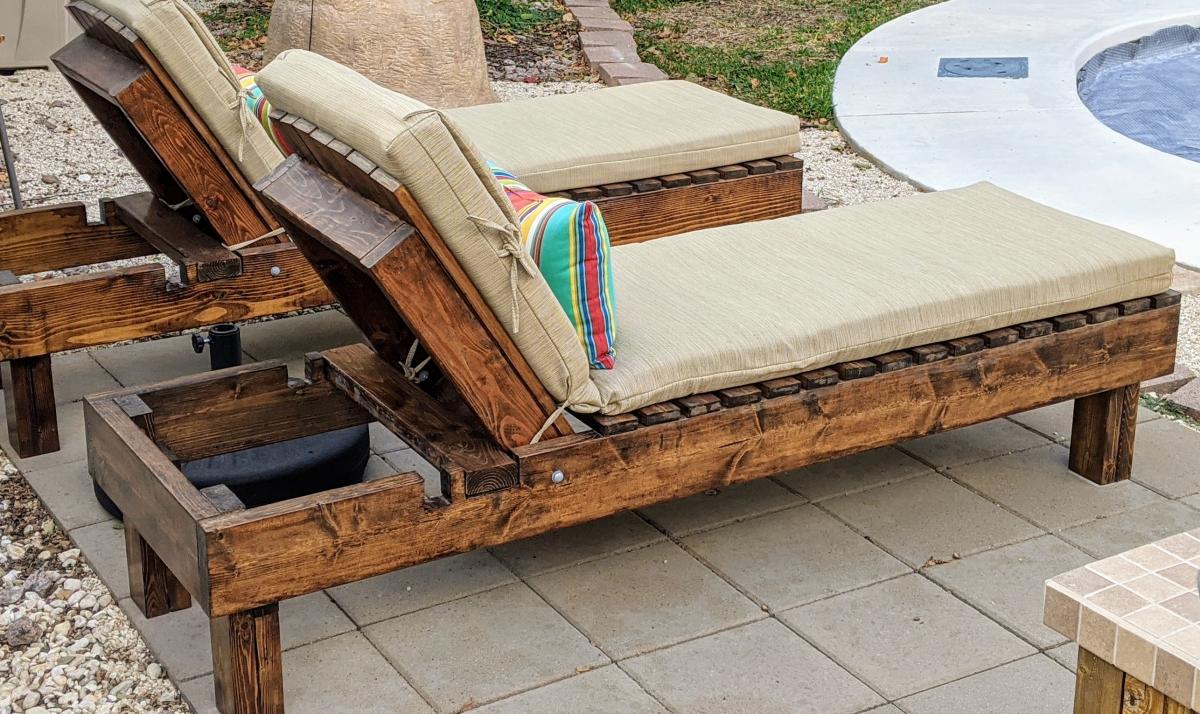
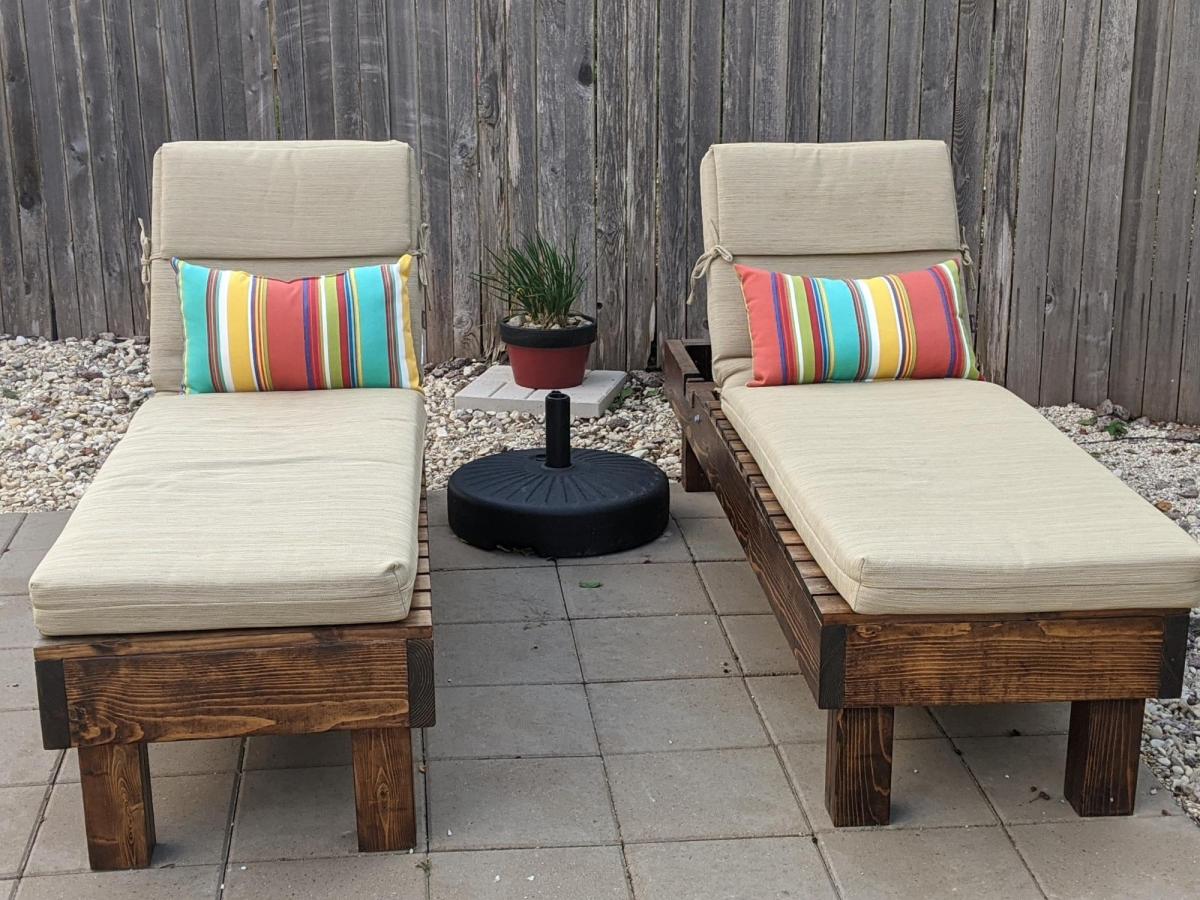
I didn't realize how expensive pool loungers were. Thank goodness for Ana White! I modified the size to 73 inches long and 22 inches wide so they would be a good fit for the cushions I got from lowes. Something to take into account is that the 2x4 won't be able to rest on the back legs when you use the 2x6 on the sides. There is no way to get it in. I didn't realize until I had built them but I just cut two pieces of 2x4 at 3 1/2 inches and placed it on top so I can rest the back all the way down. Love the end result!
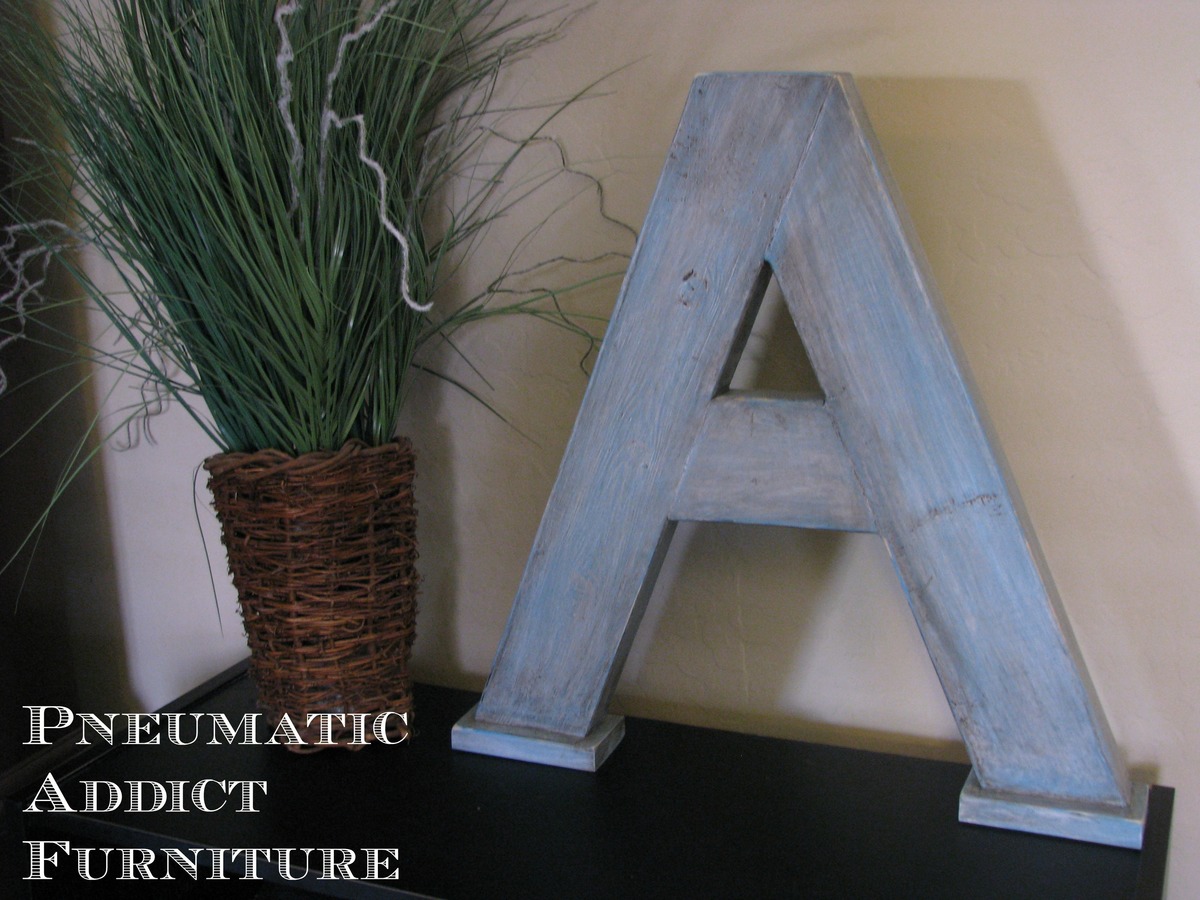
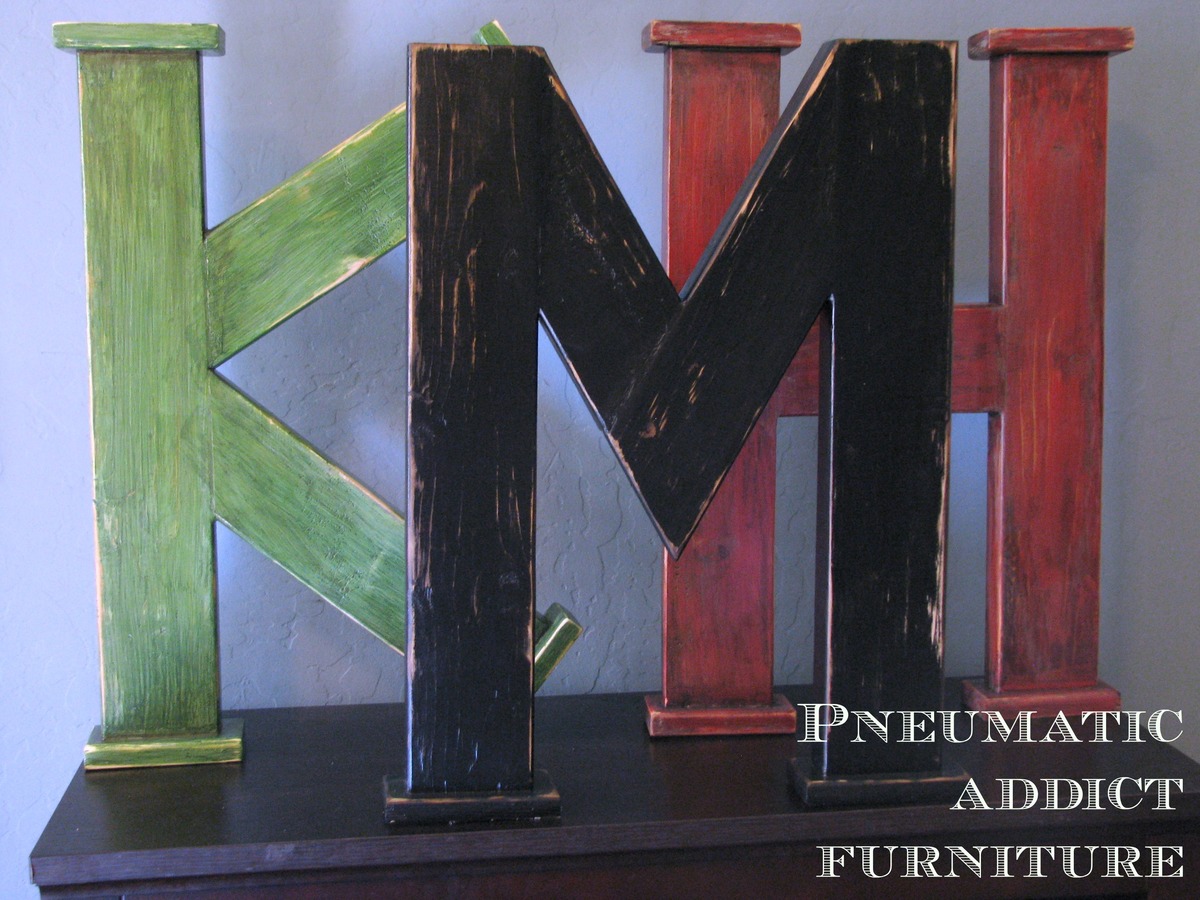
I've done a dozen or more of these letters now. Each letter has to be cut differently, but they are all made from 2x4s and pocket holed together using my Kreg Jig. I have also made some letters with curves (such as R, B, J, etc). I cut the curve out of a 2x10, left over stair stringer and then join it with some 2x4 for the rest of the piece. To make the base plates, I cut small blocks of 1x3 and rounded the edges with a palm sander. I used glue and finish nails to attach them. I have more projects like this on my blog http://pneumaticaddict.blogspot.com .

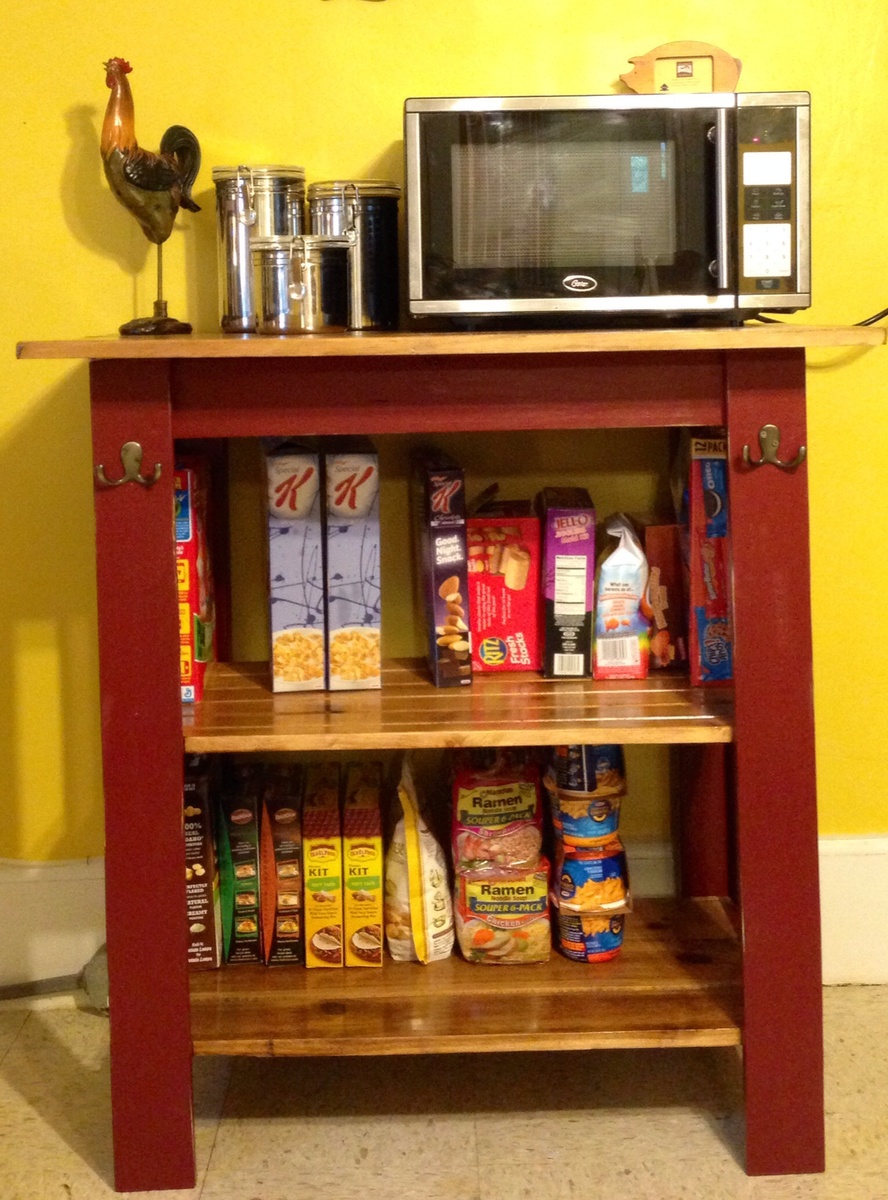
Added a shelf and made the console a microwave cart for my mom.

Fri, 11/14/2014 - 13:56
That's really nice! I love how it contrasts with your walls! And all from scrap even better...

For a few years, we used a normal wooden wall hanger (a normal wood wall hanger means a piece of pinewood plank screwed on the wall, which had 7 double hooks on it), we decided to find some new ideas. We found a nice idea, a pine beam that looks like it’s part of the structure, passing through the wall, on which a lot of wooden hooks are fitted.


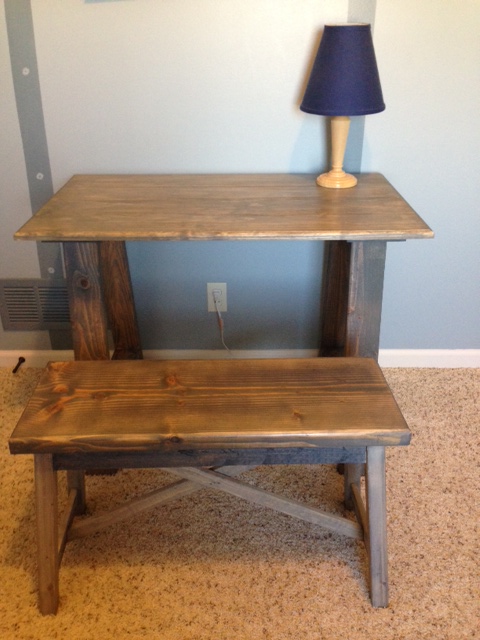
This was my first project.

Wed, 01/16/2013 - 17:47
Great work and result for your first project. Something as simple as this bench/table still results in a thing of beauty, especially if it is square and level when you are all done.
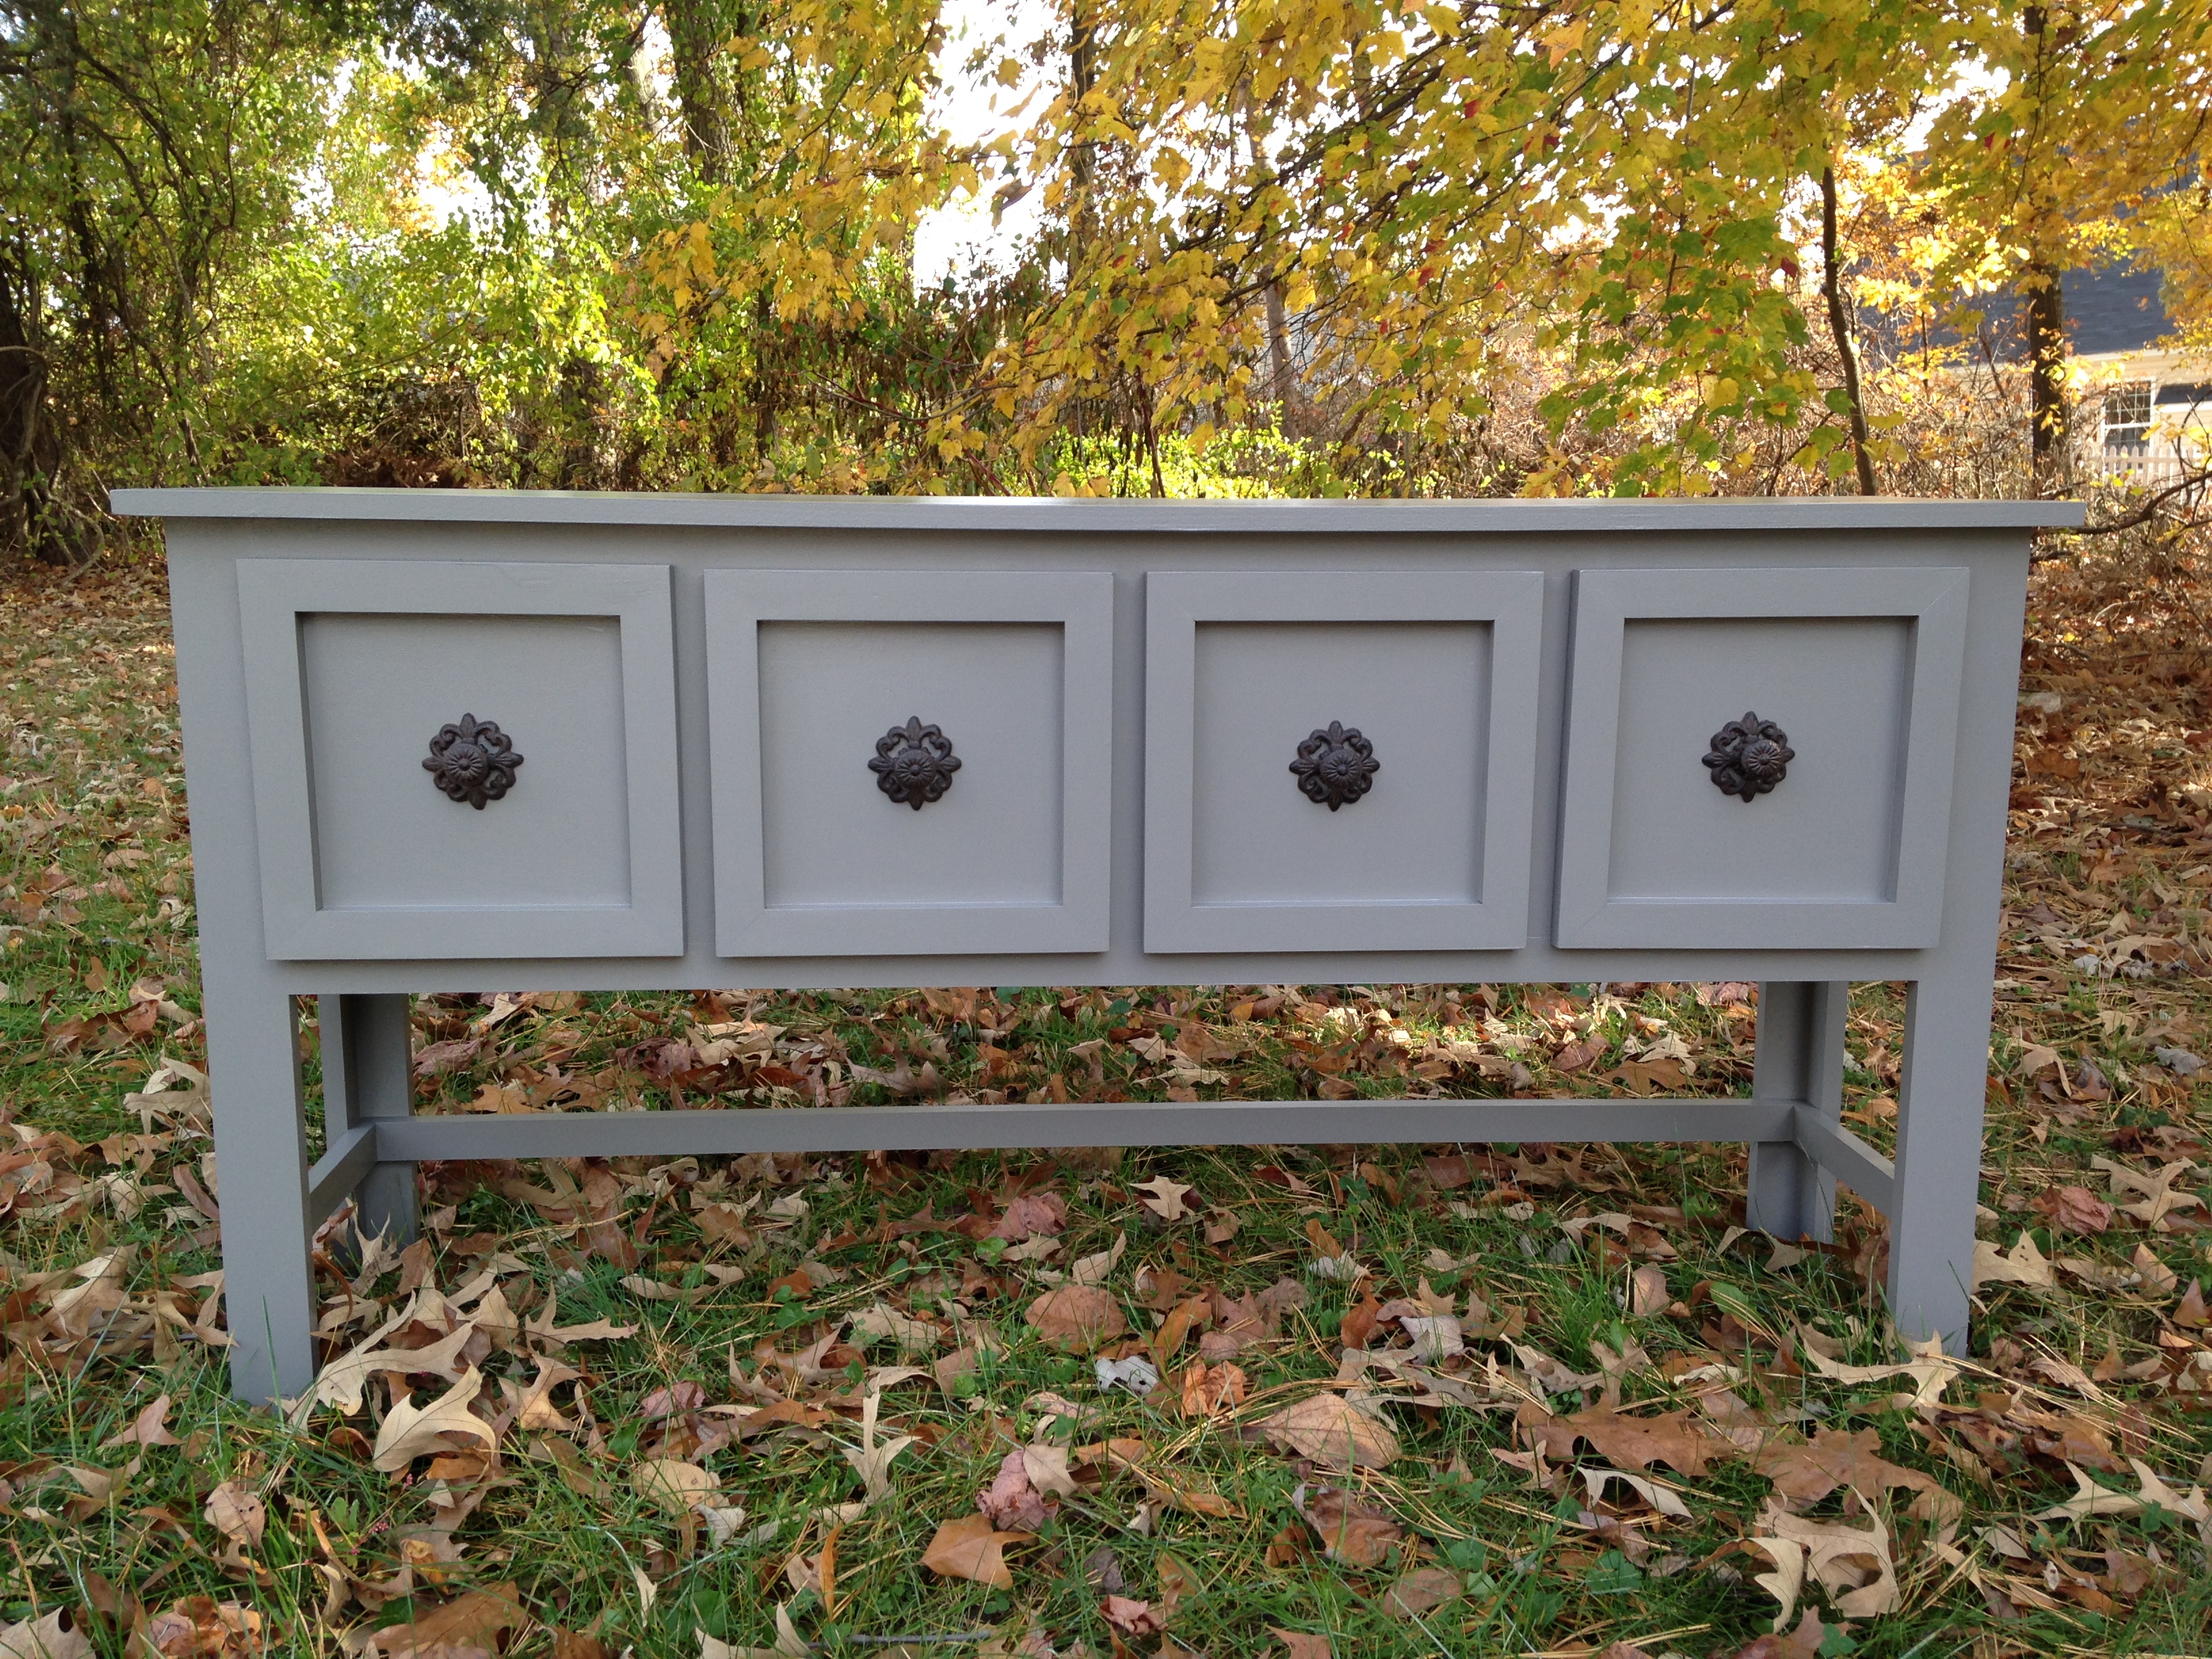
So happy with the way my Balin Console Table turned out. I altered Ana’s plan just a bit by adding 1x2’s to the sides at the top and bottom to recess the side panels and I added drawer slides for easy opening as well as trimming out the front of the drawers to recess the drawer fronts. Thank you Ana for great plans!
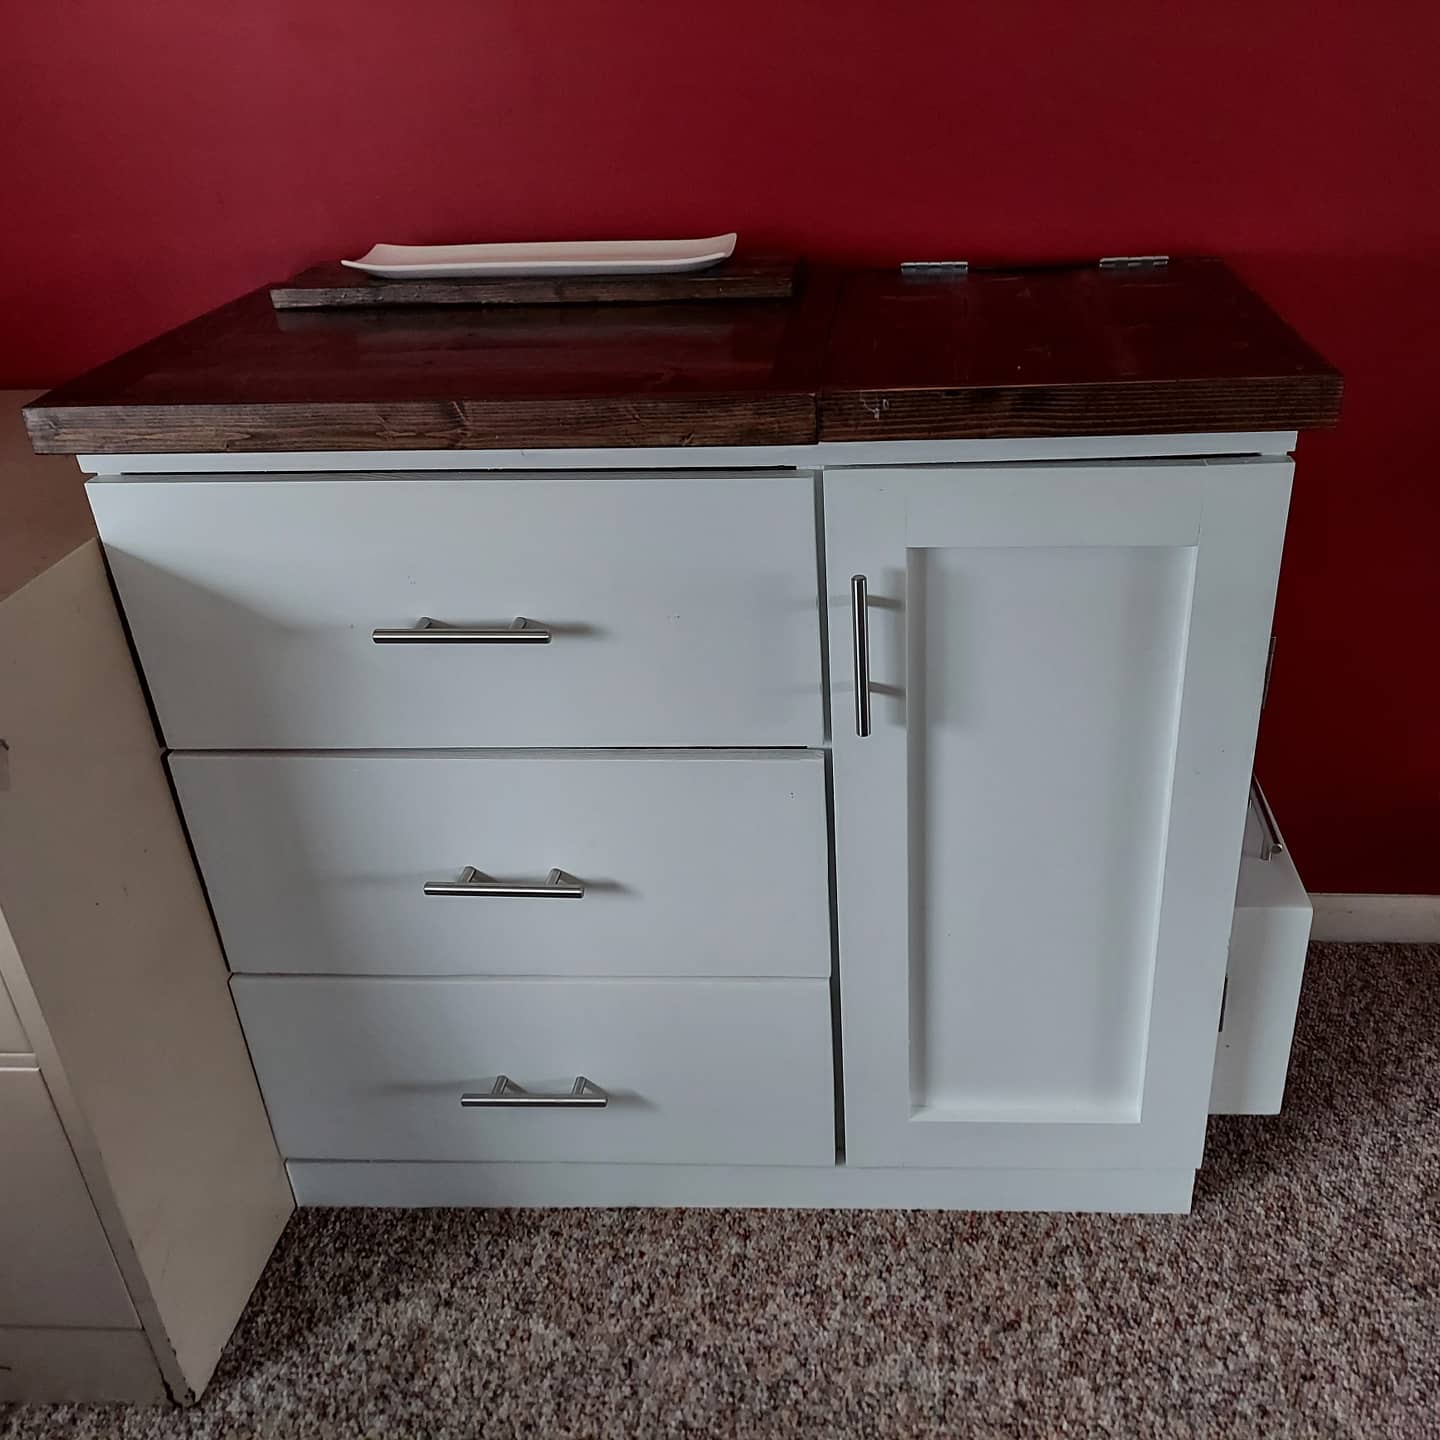
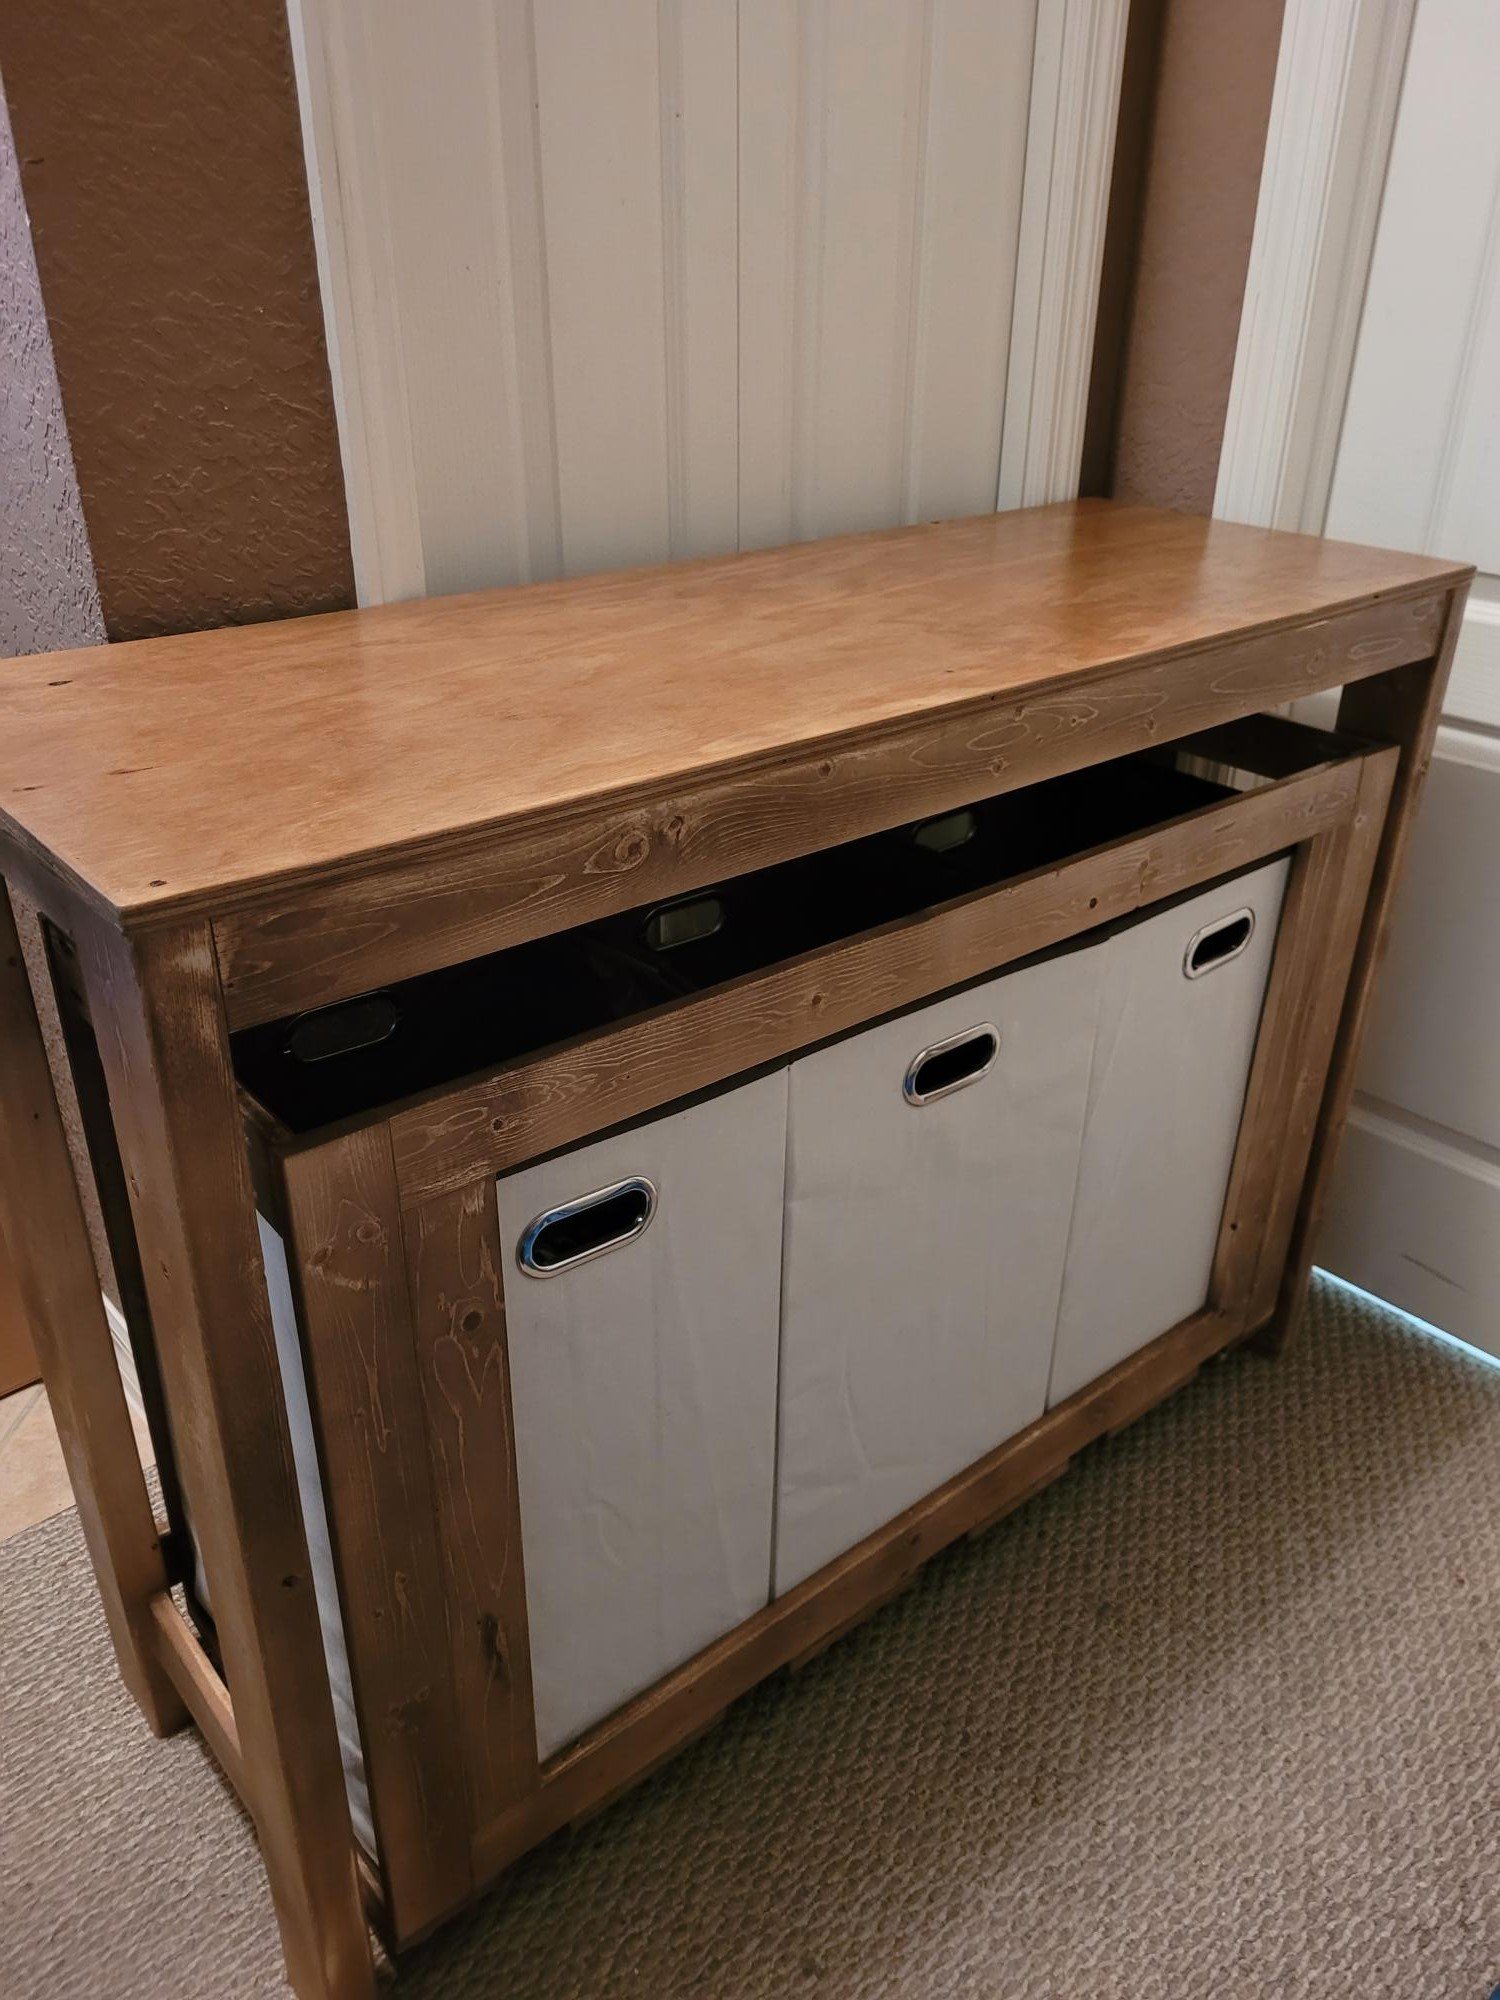
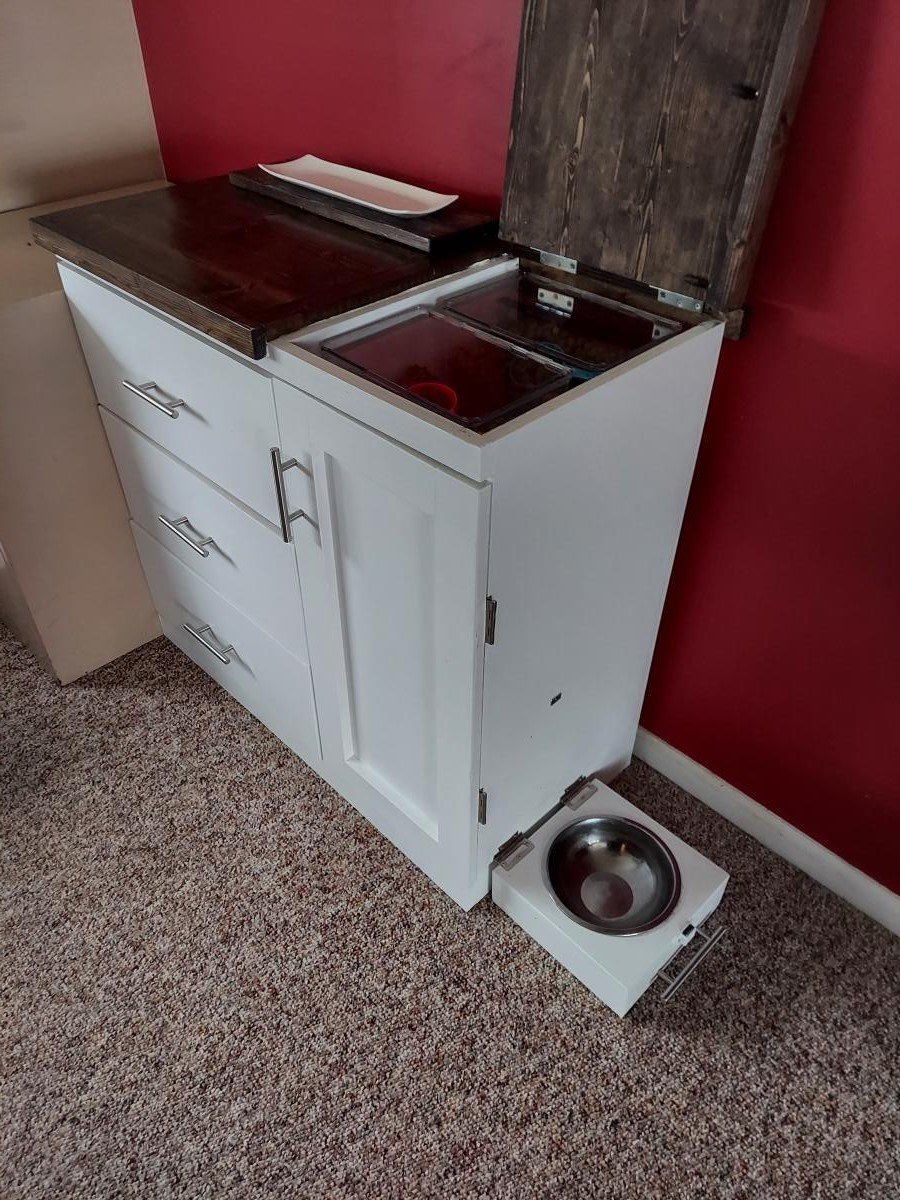
Modified plans for the modern patchwork dresser so part of the top opens for access to pet food storage bins.

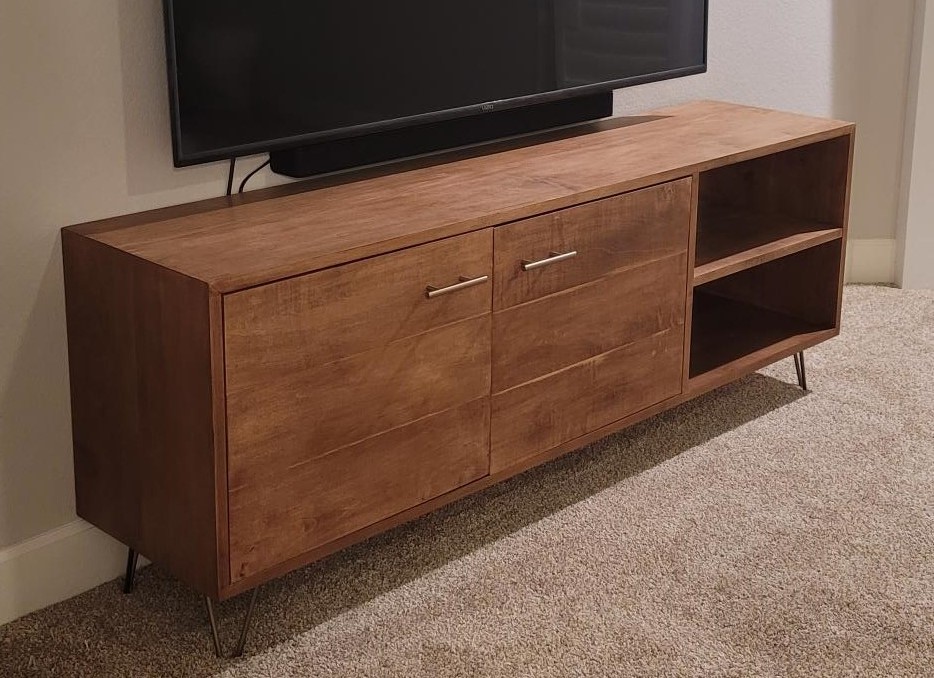
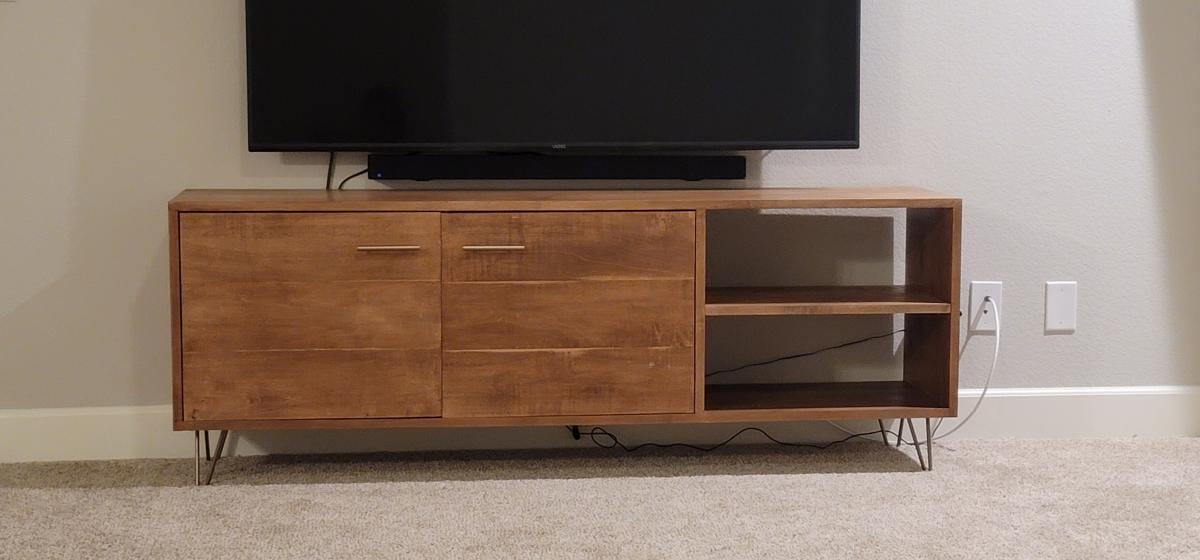
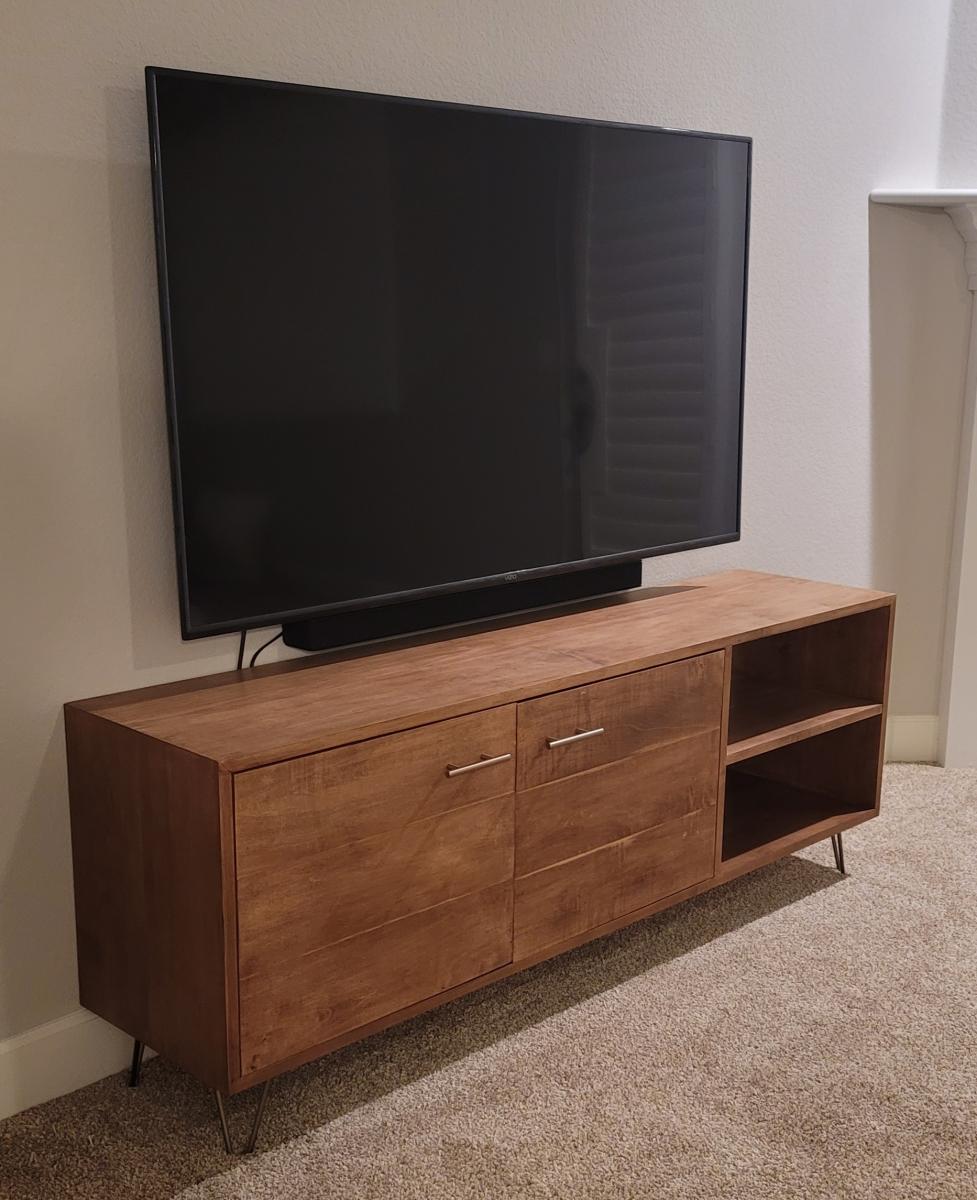
Planked wood sideboard without drawers, used as a media console table.

Built the top out of reclaimed wood reclaimed from buildings in/around Chicago. Stained top and insides shelves with minwax hickory gel stain. Outside painted in chalky finish Dutch boy antiquainted lace. Custom made rail and hangers for sliding apparatus.


Such a fun surprise for my 8-year-old daughter for Christmas! It took my 10-year-old and I several days to finish it, but we are so proud of the final product!