Community Brag Posts

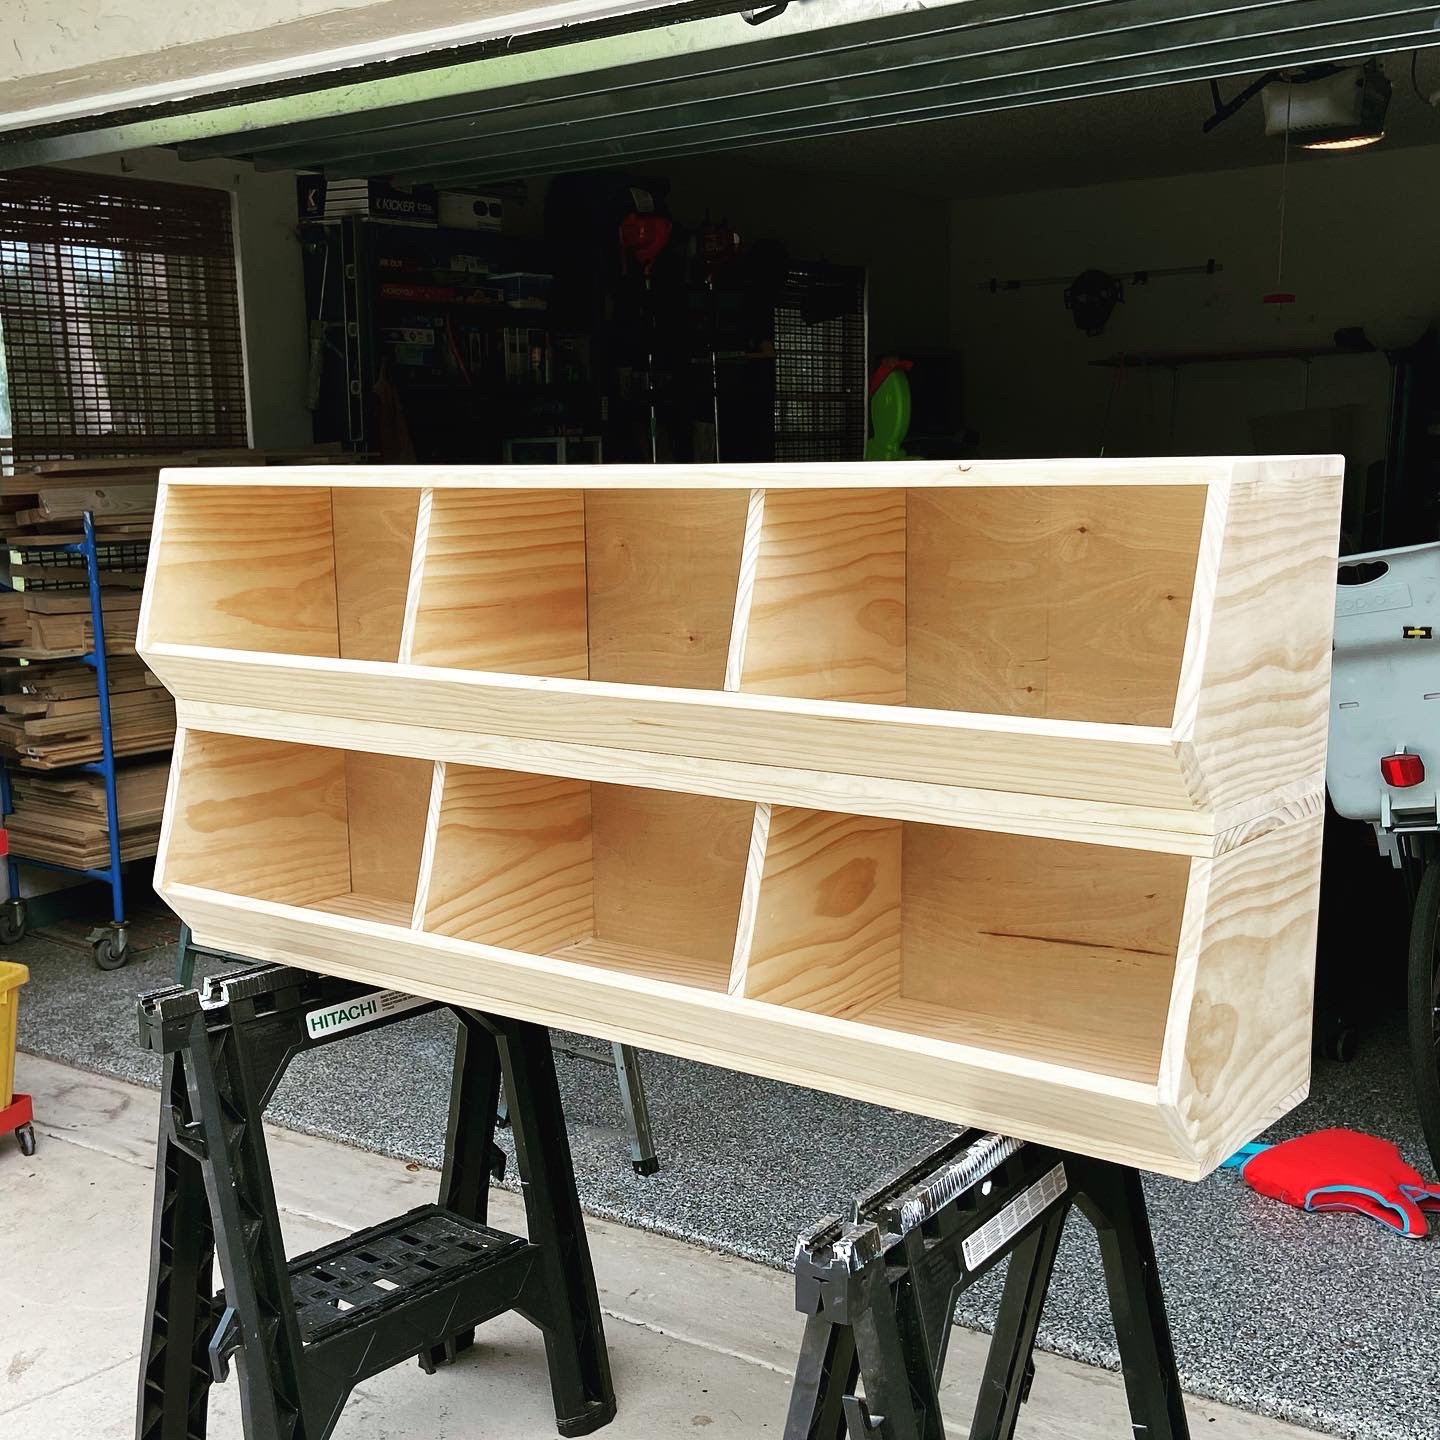
Modified Garage Shelf (w/ Workbench)

Submitted by Anonymous (not verified) on Thu, 06/08/2017 - 11:15

Great plans allow for versatility and easy customization. Put the whole thing together in a day w/ one other person. My set up is 16' long - 5' on the side shelves and 6' for the workbench. Added a pegboard and fluorescent light under the top middle shelves. I'm also designing a slim drawer to go under the workbencheck area. Thanks a bunch!

Estimated Cost
~$150 including pegboard.
Estimated Time Investment
Afternoon Project (3-6 Hours)
Finish Used
Will stain dark in the future
Recommended Skill Level
Starter Project

Comments

Farmhouse Desk

Submitted by MacandFab on Sun, 08/01/2021 - 04:49

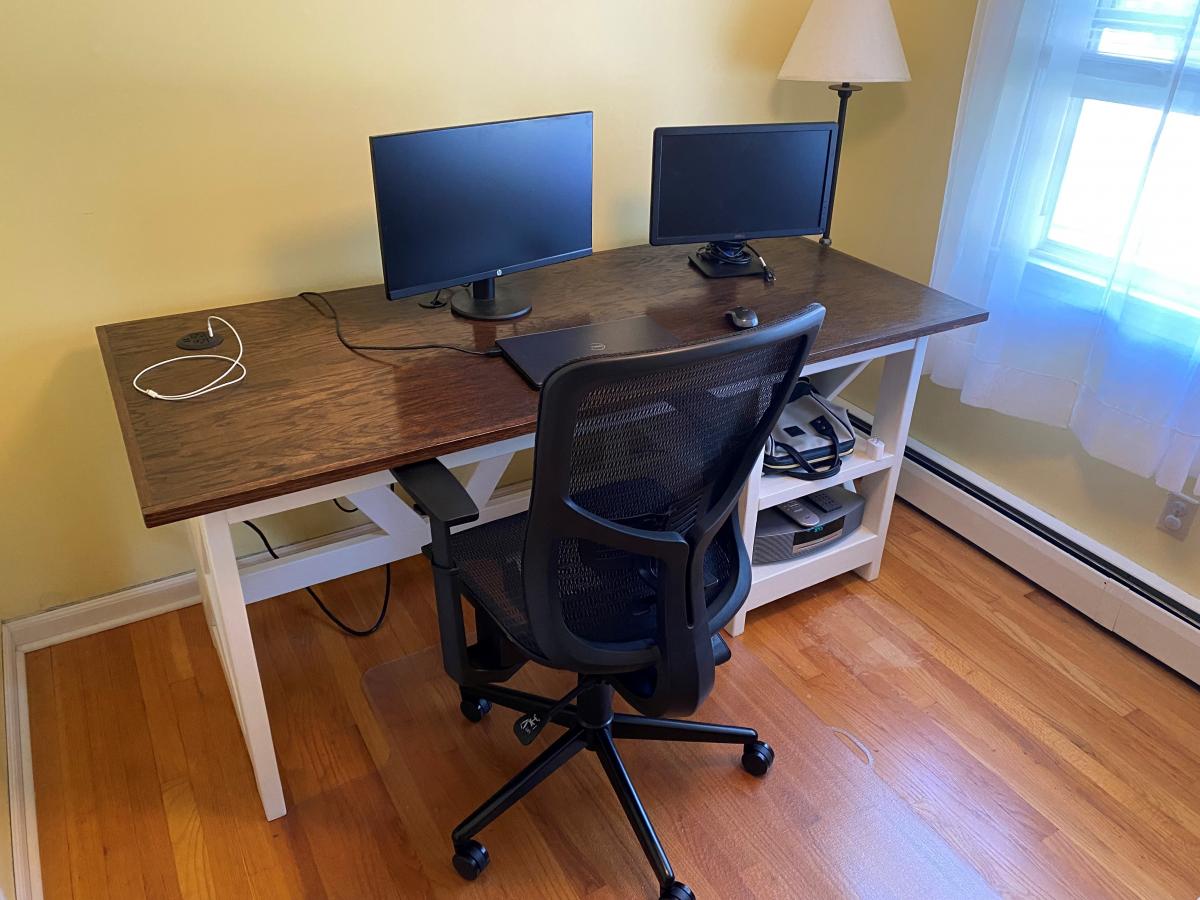
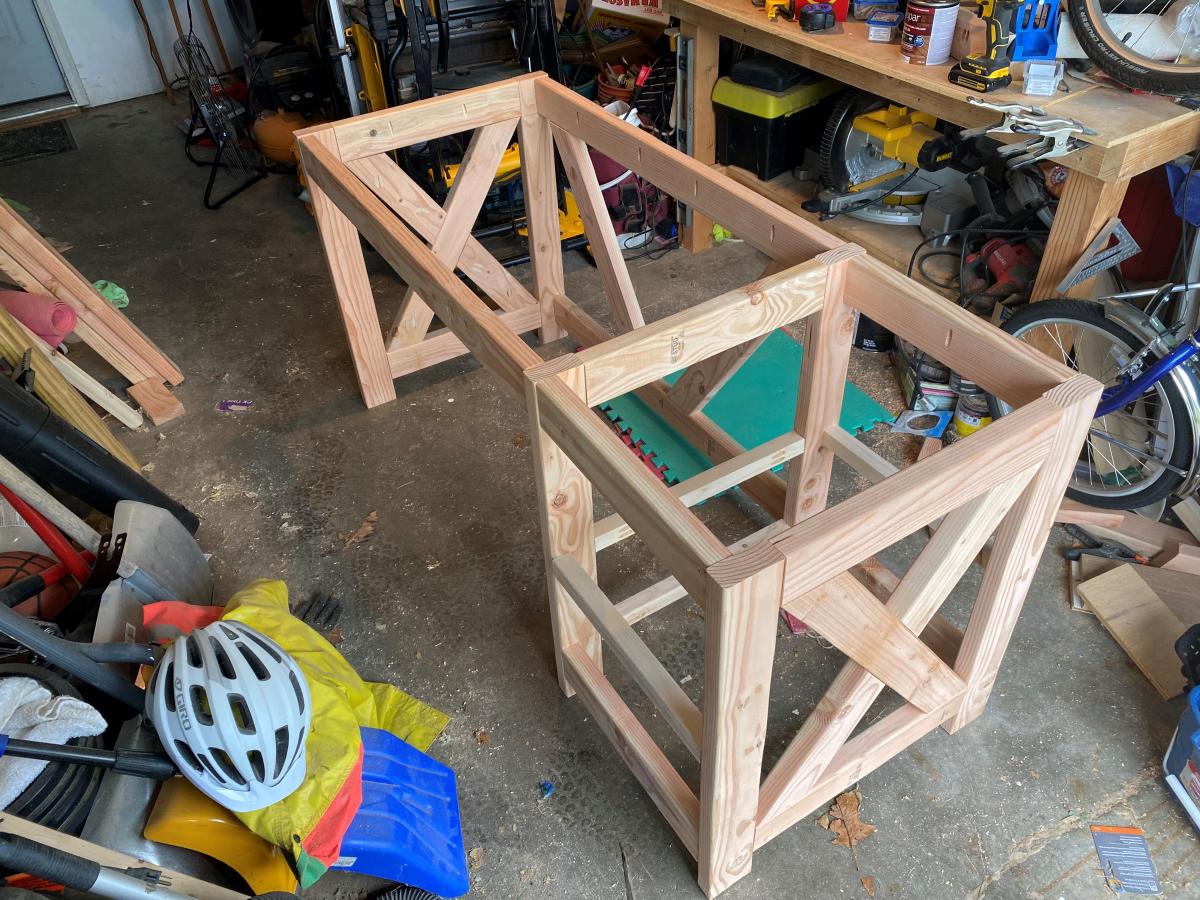
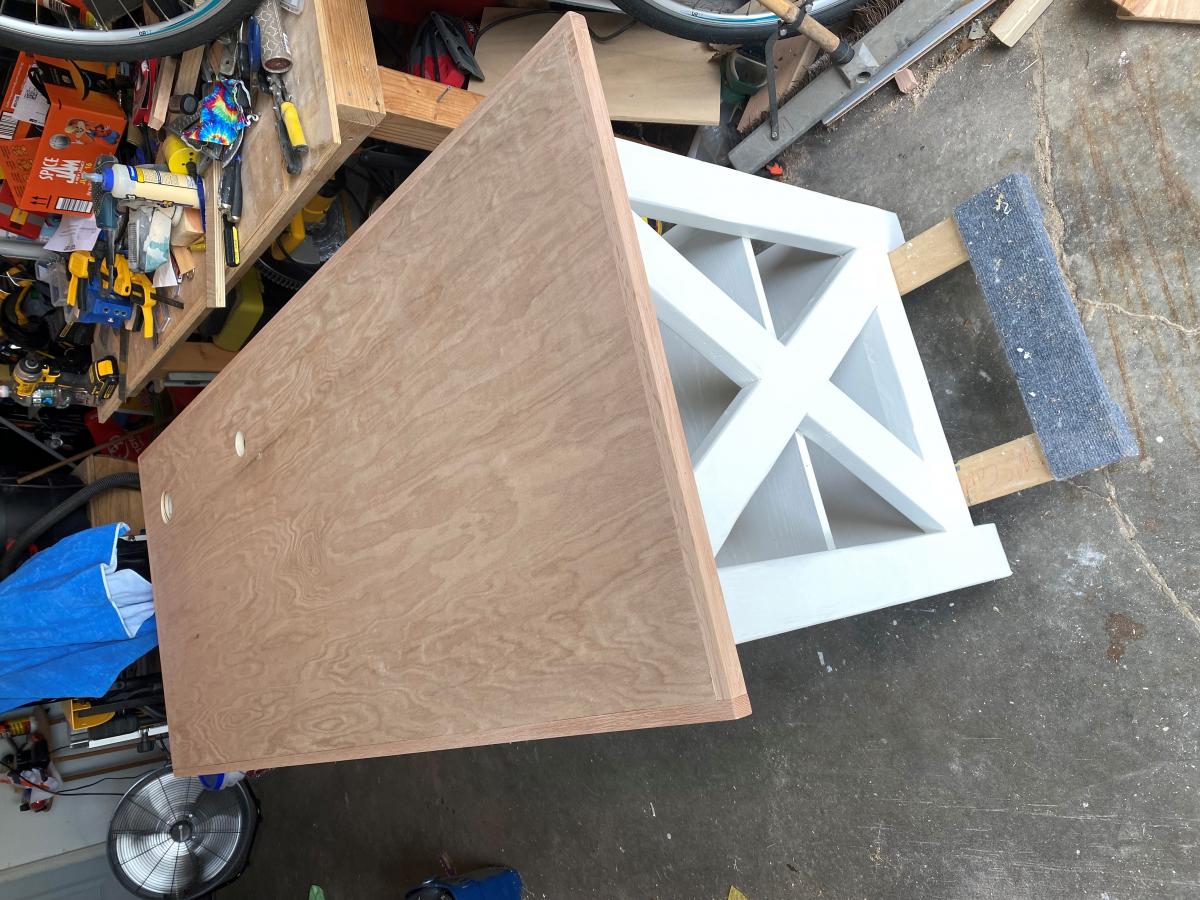
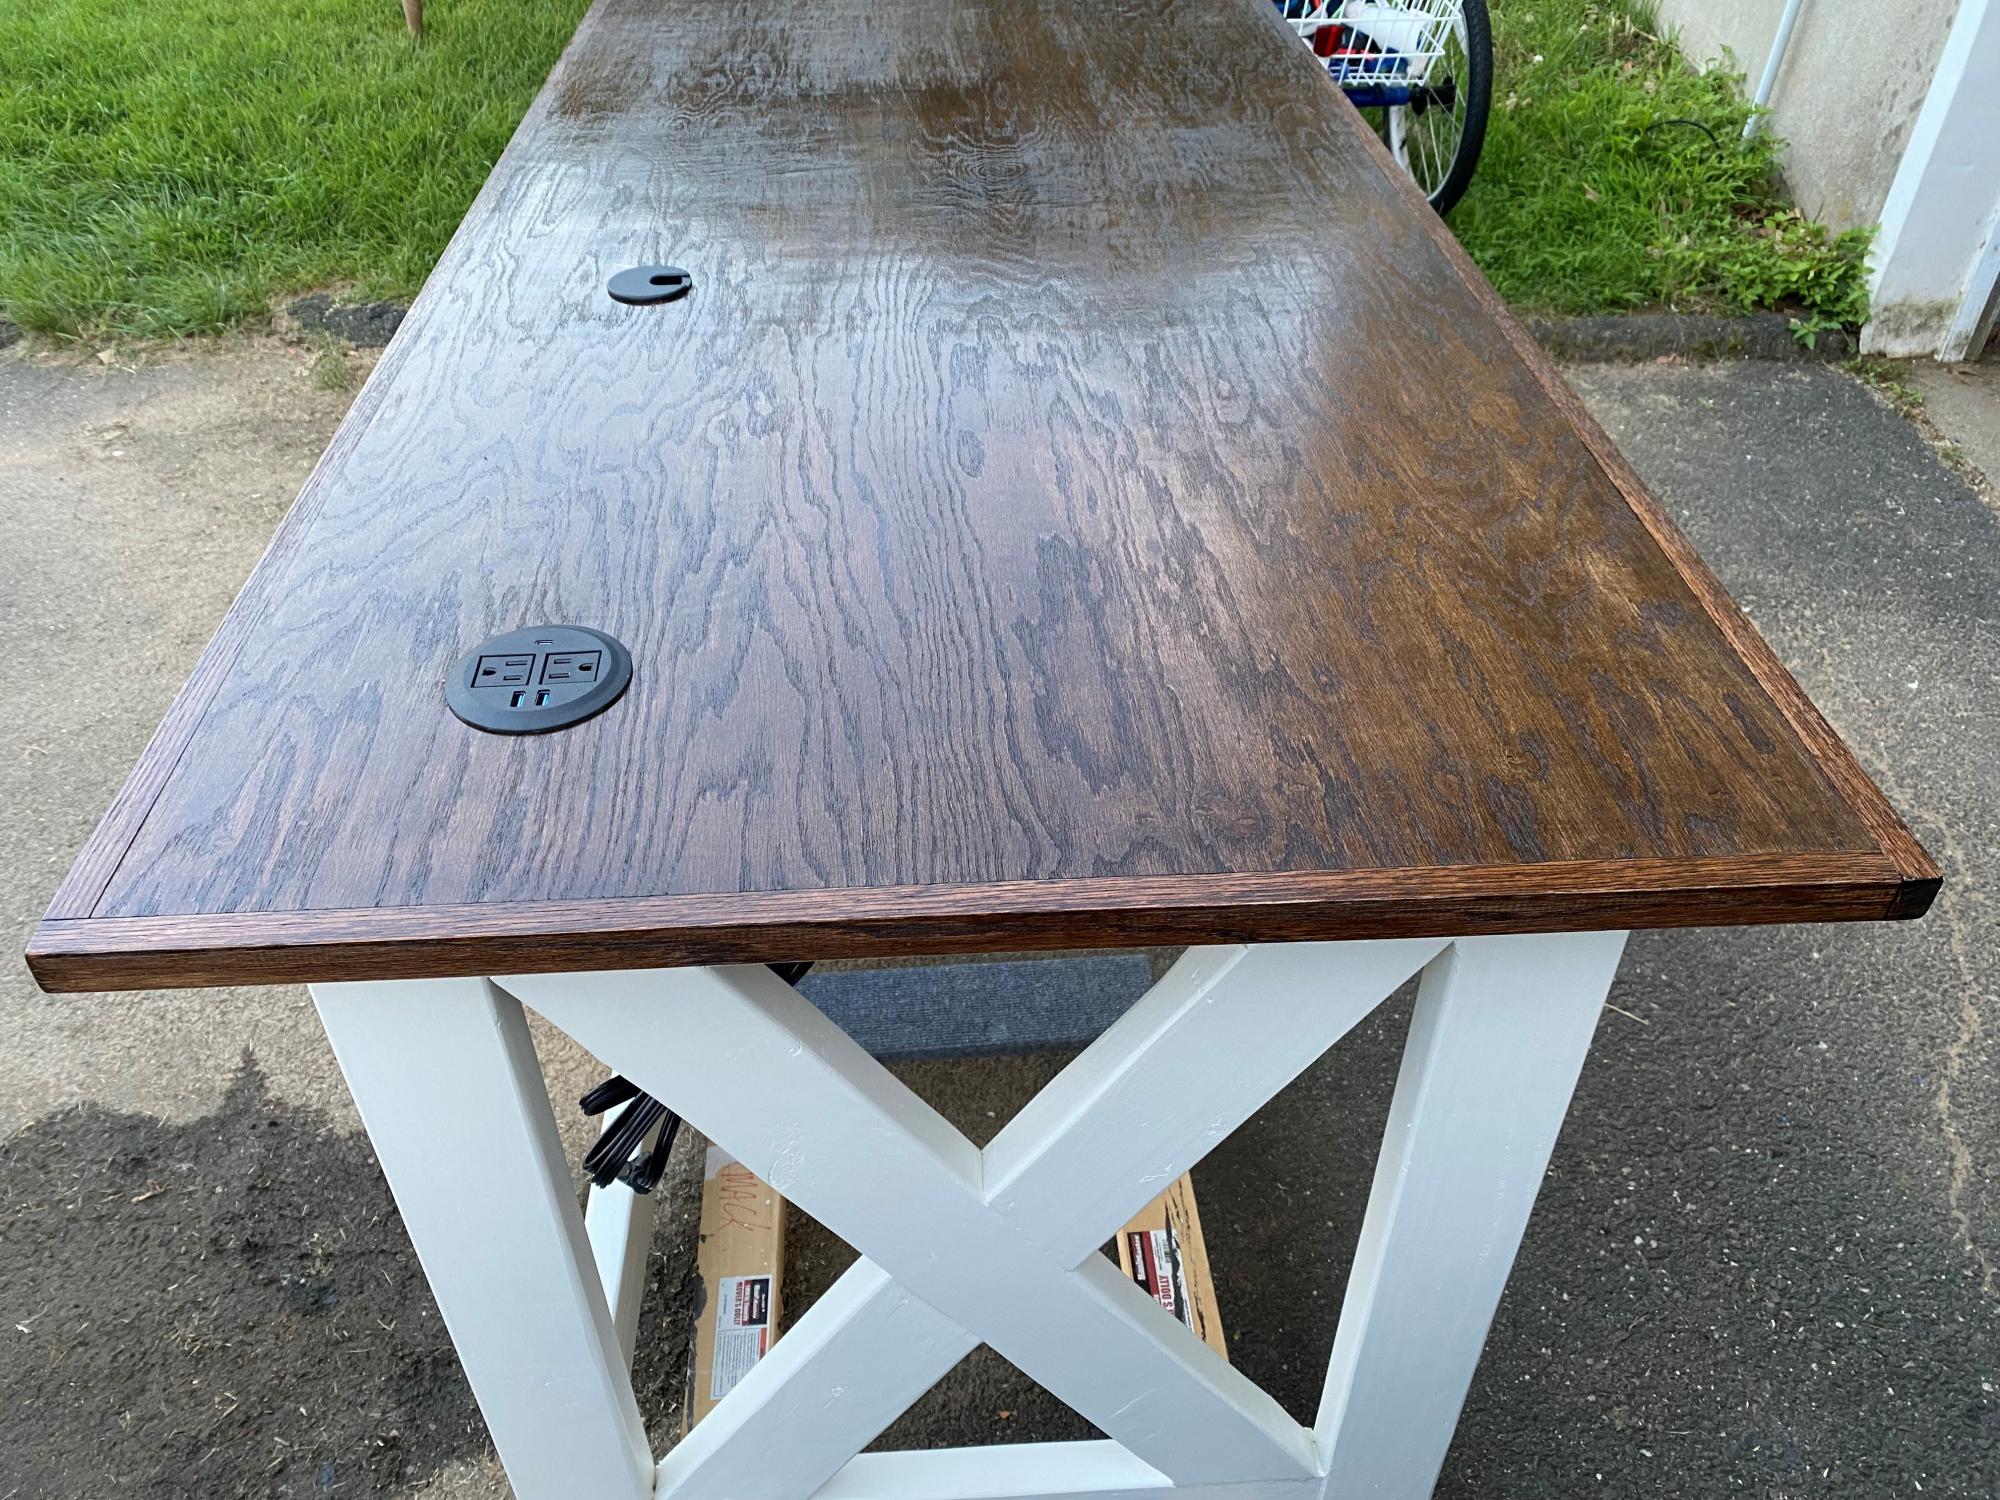
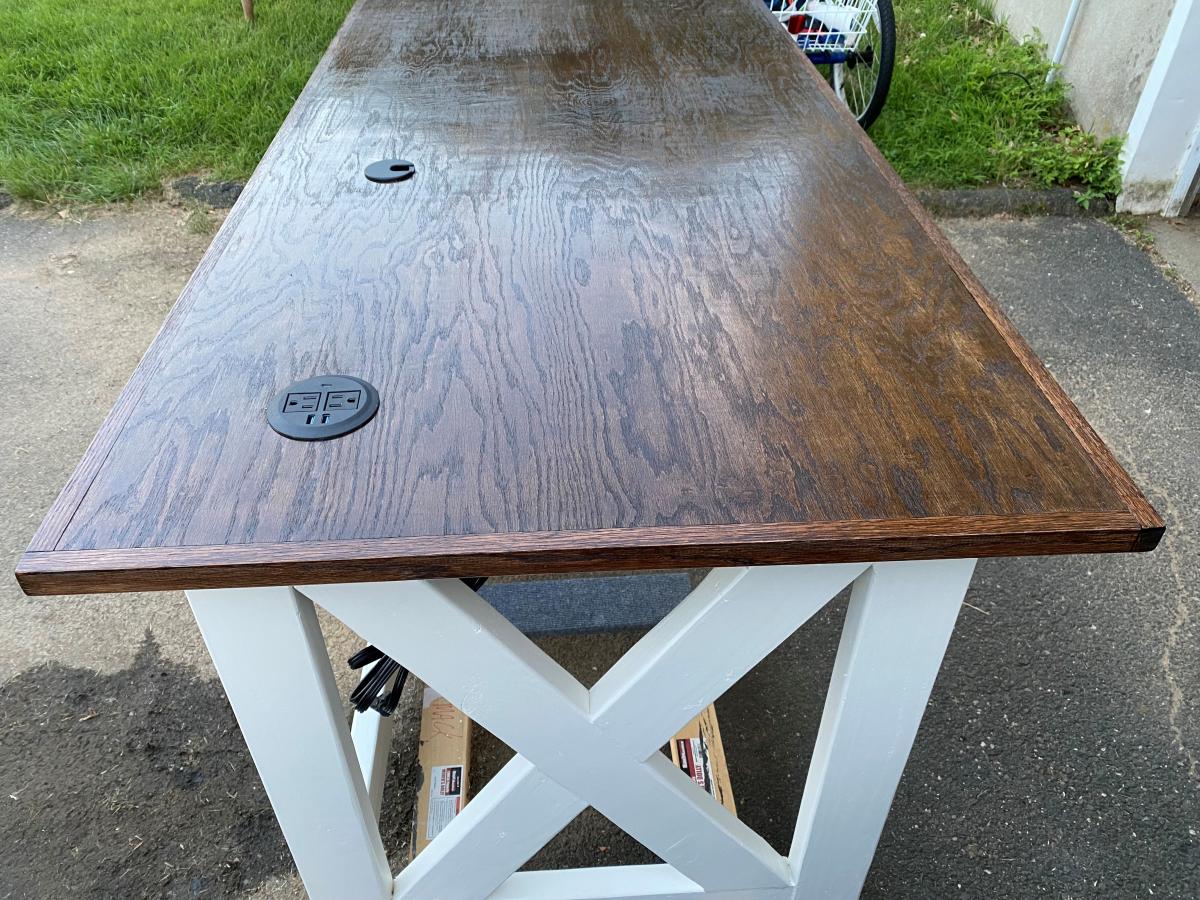
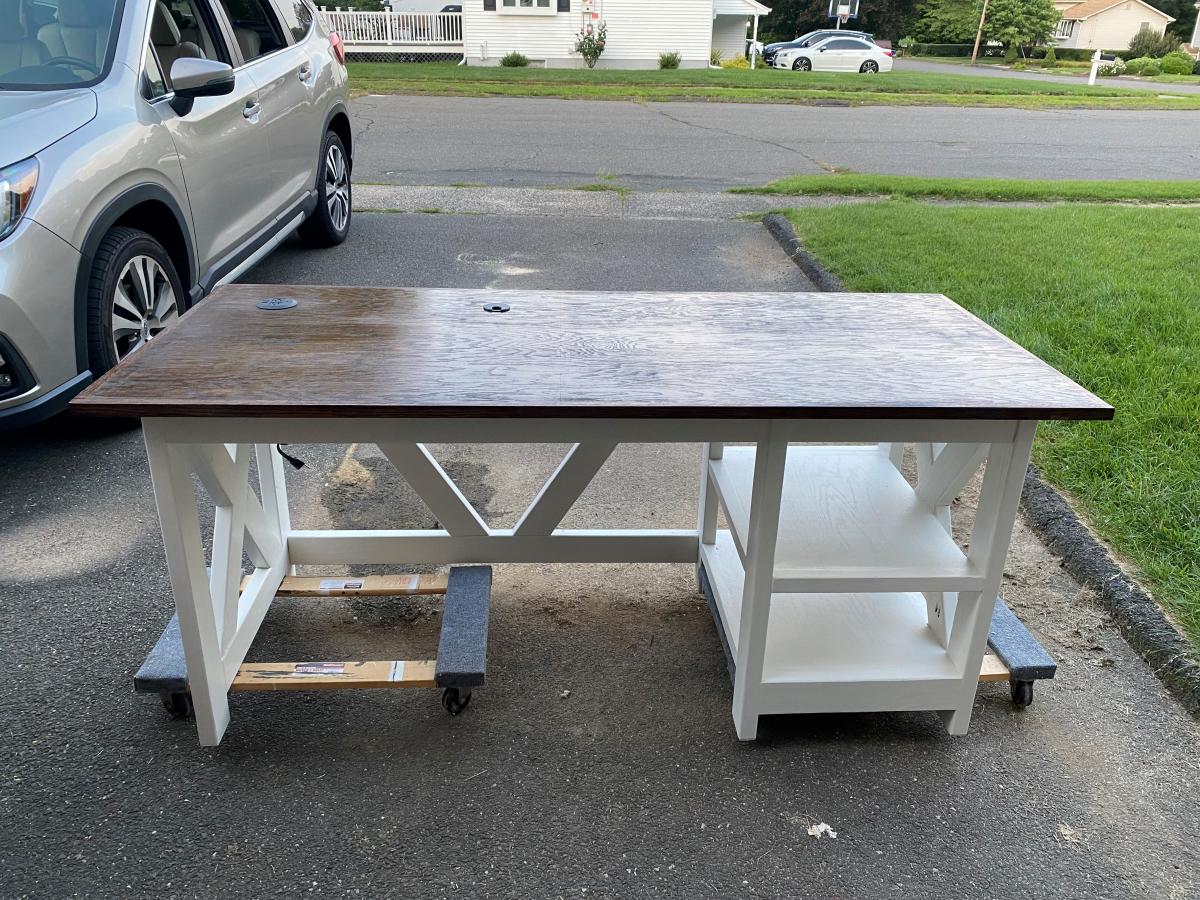
My wife needed a desk to work at home from and nothing on the retail market interested us, so I offered to build one. I followed the plans for a Farmhouse Desk, but with a change for the top. I chose a pre-sanded 3/4" red oak top and trim to cover the plywood edges. We didn't want the lips or edges that may show up using the planned 1x6" planks. The desktop measures 31.5 x 71.5" which is large, but allows for a lot of work to be accomplished. I added a grommet hole for the wires and a 3 1/8" hole for a desktop outlet with 2 USB's, 1 USB-C and two regular outlets. I also added a 9-input power strip / surge protector on the underside of the desk that the desktop outlet plugs in to. So only the power strip plugs into the wall and everything is surge protected.

It took me 4 weeks and about 25 hours, as I made it around my work schedule and family life.

Built from Plan(s)
Estimated Cost
$250
Estimated Time Investment
Week Long Project (20 Hours or More)
Finish Used
Desktop: Minwax Espresso Stain

Base: Valspar All-weather White Solid Exterior Stain
Recommended Skill Level
Beginner

Comments

Gate-Leg Sewing Table

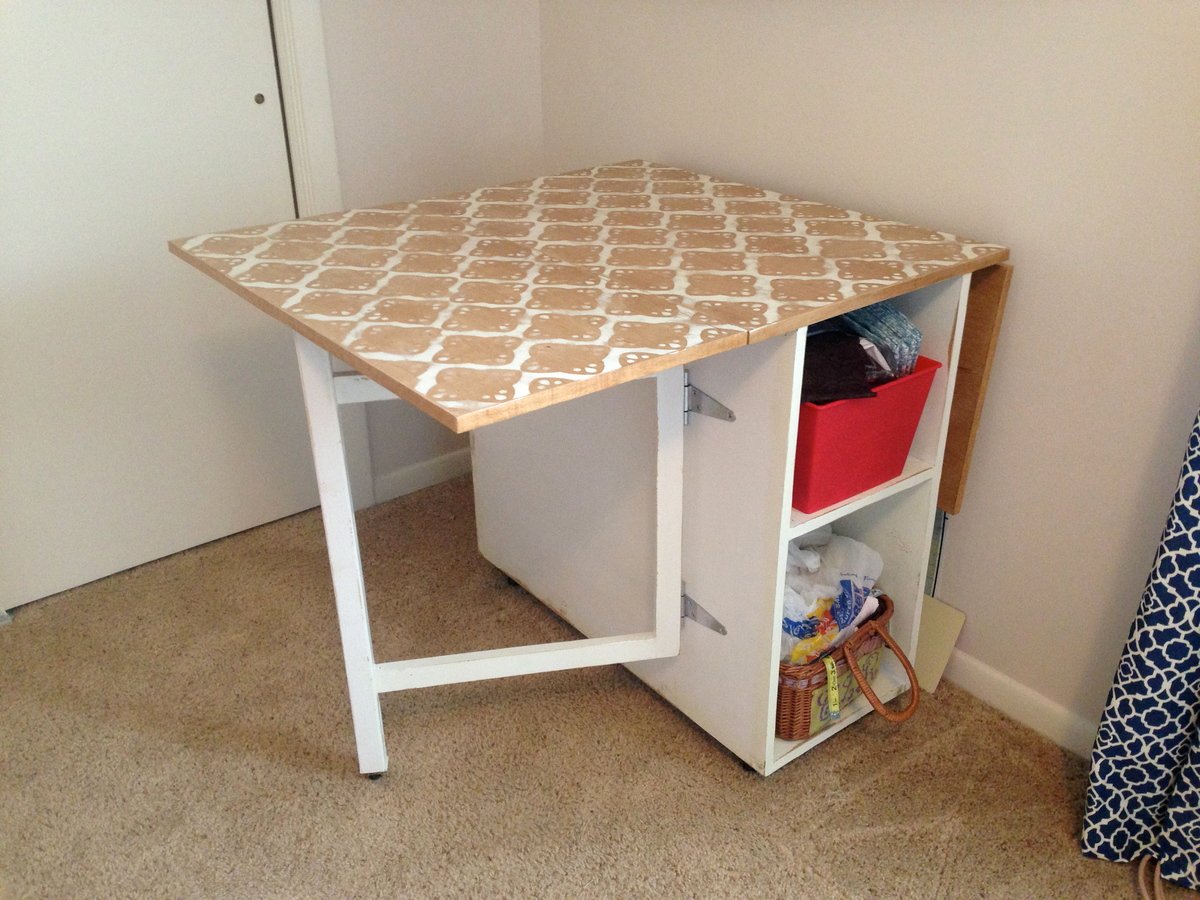
My husband and I built this table as our first project. We followed all of the dimensions from Ana's "Small Sewing Table" project here: http://ana-white.com/2010/10/plans/sewing-table-small-spaces?page=1 The only thing we changed was the size of the table top and the legs. We were worried about putting my heavy sewing machine on top of the leaf called for in the plan, so we created gate legs to support the leaves. Since the legs were going to be folded up in between the base and each leaf, we extended the center portion of the table top to accommodate the change. After it was assembled and stained, I decided that I didn't like the solid color, so I stenciled on a pattern with white latex enamel paint (what I had on hand) and continued to paint the base. After lightly scuffing it up with the sander, I layered 3 coats of poly on top. It has held up well, even after many large quilt projects! I just LOVE my sewing table!

Built from Plan(s)
Estimated Cost
$120
Estimated Time Investment
Weekend Project (10-20 Hours)
Finish Used
Golden Oak Minwax Stain
Polycrilic
Valspa Latex Enamel in Satin White
Recommended Skill Level
Beginner

Comments

TinyHouser

Fri, 08/05/2016 - 13:41

Hi there. Could you please tell me what the brackets are you used with the gateleg? Do you remember where you got them? Thank you!!!

msweeley

Sun, 05/12/2024 - 08:40

How heavy of sewing machine can this hold? My machine is 32 lbs. Would it be able to sit and be used on the “leaf” side of the table ?

4x4 truss beam table concrete top with benches

Submitted by upnarms on Sat, 03/14/2015 - 12:20

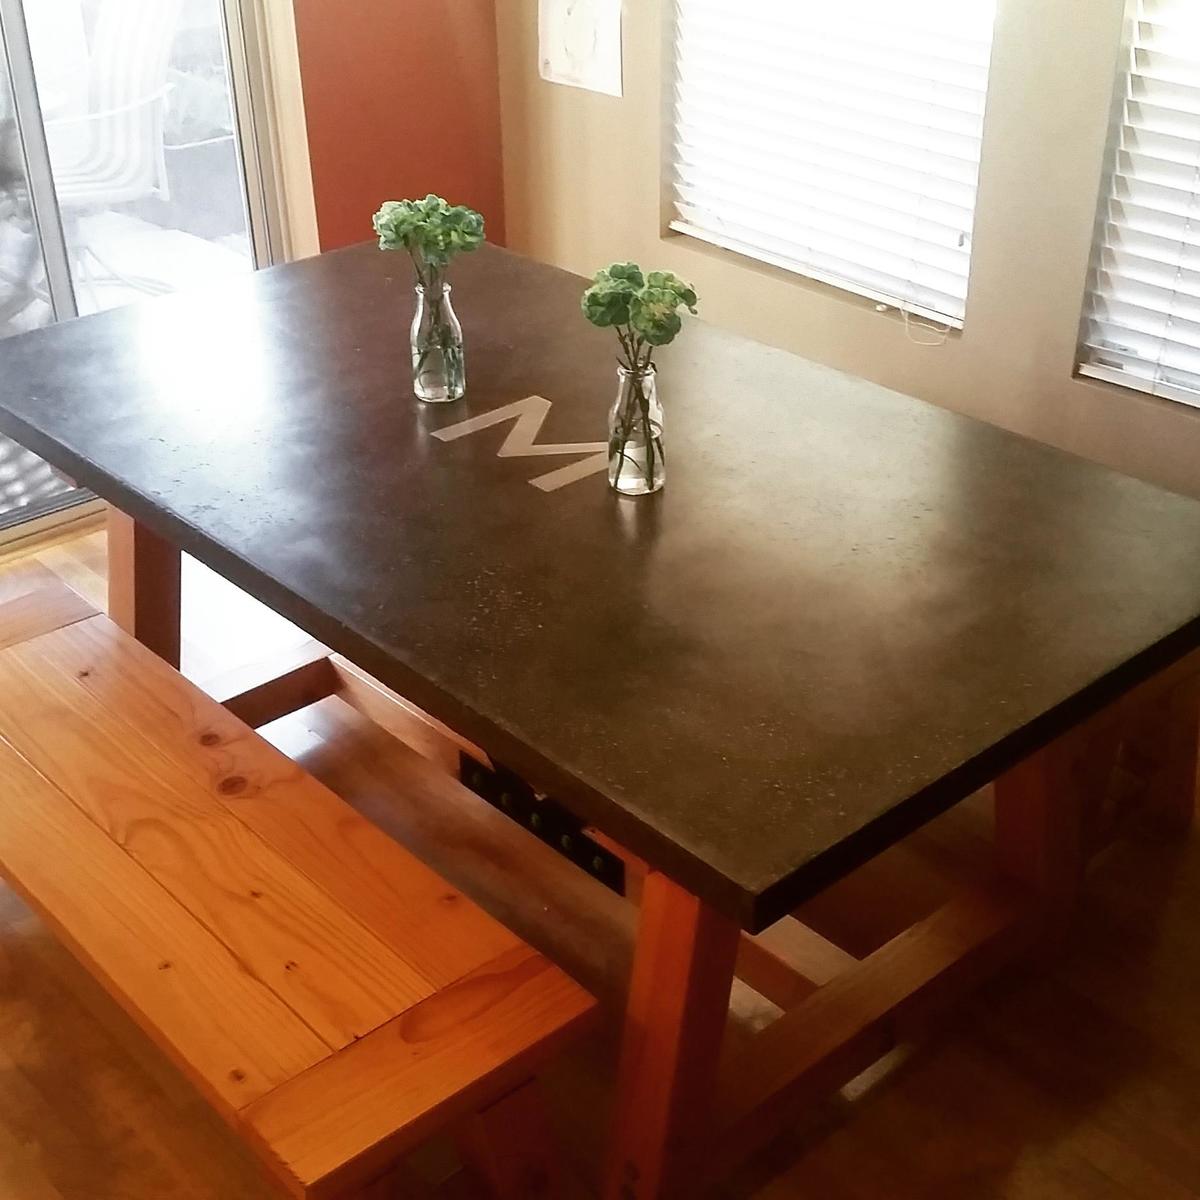
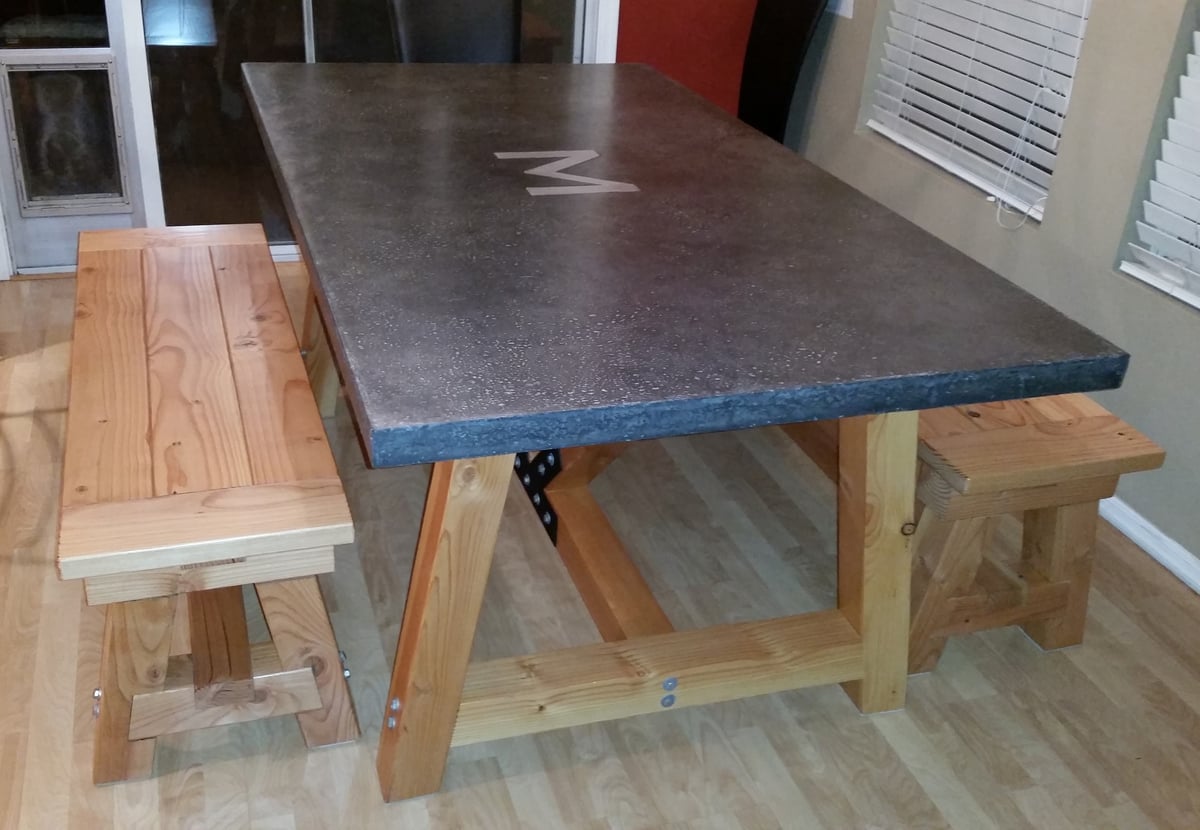
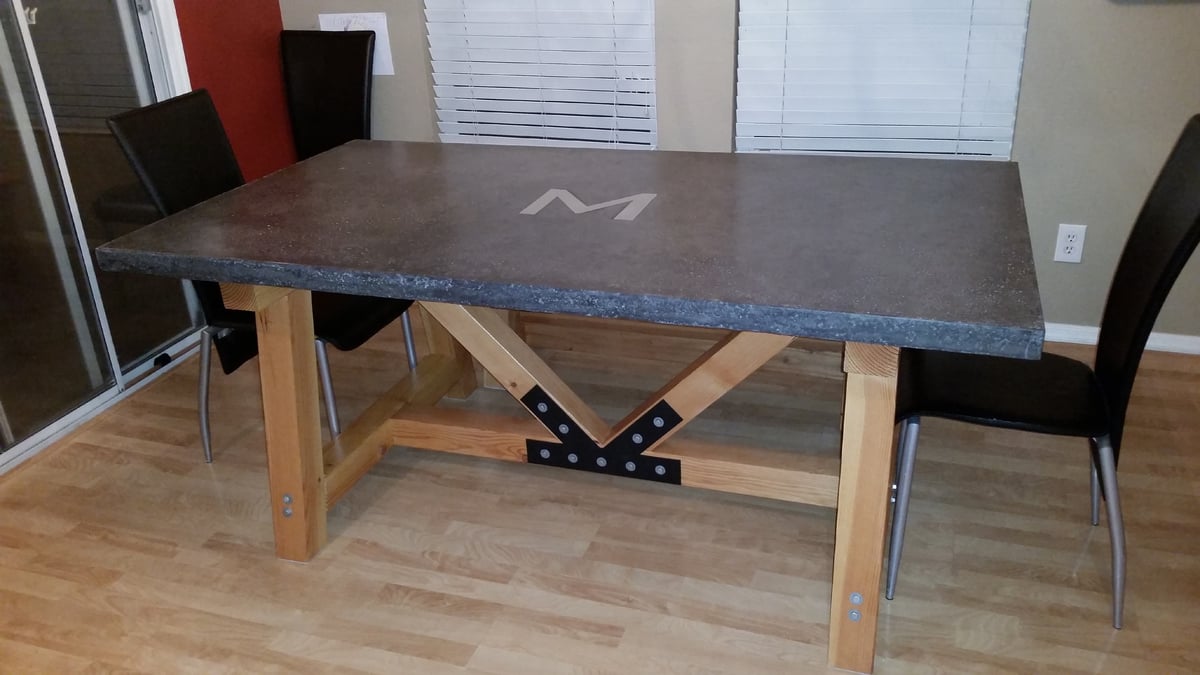
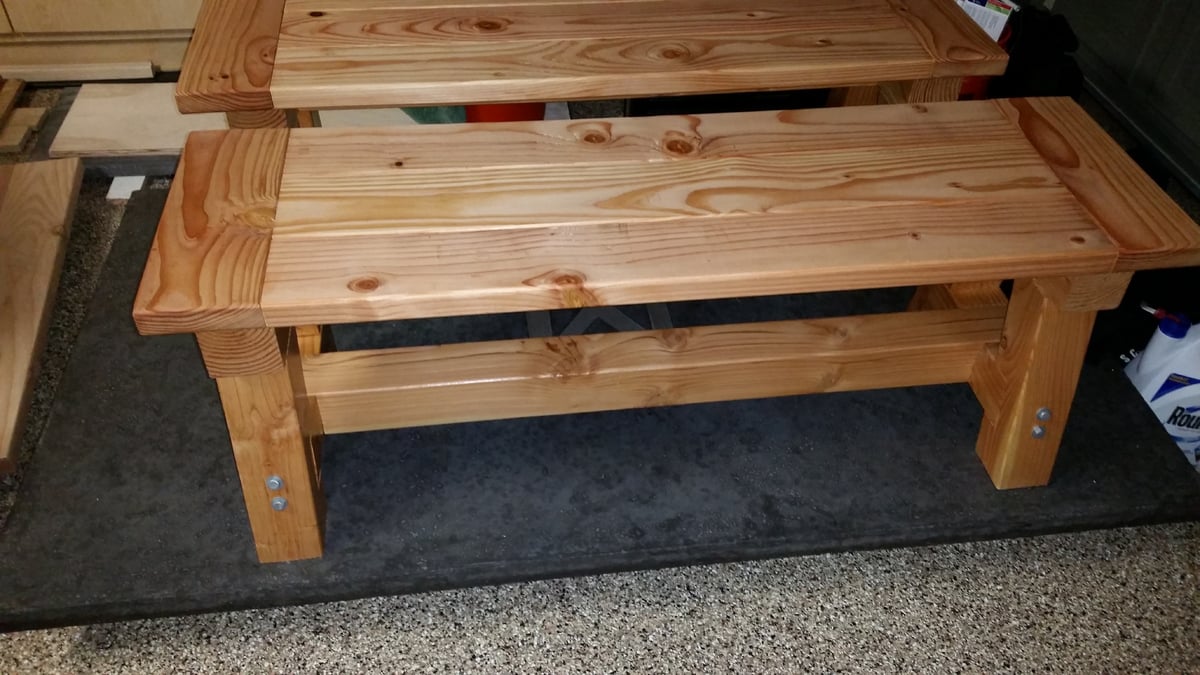
Douglas Fir 4x4 truss beam table, made from the listed plans (modified for a 72" table top and concrete used for the top).  Also, added steal gusset plates with lag bolts to replicate appearance of exposed truss beams.  Used pocket screws in conjunction with lag bolts.  Benches were altered with half-lap joints for strength (very time consuming).  Concrete table top made with Quikrete countertop mix (charcoal powder pigment added), an aluminum "M" inlay, and slurry coated with a lighter gray grout to fill in bugholes/ voids.


Table was fairly easy- hard part was finding straight wood (mostly green DF is sold near me, so some beams would warp beyond suitability as they dried).  I had to purchase a few extras to get the pieces correct.  If KD is available, go with that.  I was able to find KD DF at another hardware store for the benches.


Concrete was a PITA.  I never worked with concrete before. Watched a million youtube videos, read countless blogs, etc.  So much good info out there and I probably over-researched it.  I despise concrete, now (the mixing/ pouring/ screeding/ and weight) but I LOVE the result.


The project was my secret excuse to buy tools Ive always wanted.


If I wouldve been able to work straight through, I think I couldve completed this in a month.  The table and benches were a couple of weekends worth.  The concrete took most of my time with making melamine molds, special ordering the bags, renting the mixer, waiting it to cure, polishing and filling the top, etc.  A wood top wouldve cut down on the overall time considerably.


If you do a wood top (as I did for my benches), either use some type of joiner to get the board edges perfectly squared against one another with no gaps, OR leave gaps big enough between boards to let crumbs fall through, OR (this is what I did for my benches) I used a super clear (Lexel) caulk for the seams of the boards and then went over it after it dried with the satin polycrylic to take away any gloss.  Now all those crumbs dont get wedged between the boards.  They wipe away with ease.


Finally, I used heavy duty felt (4x6") from the local HD at $2.50 a pair.  Cut them to size and used the self-adhesive WITH gel superglue to put on bottom of bench and table legs.  A must.

Estimated Cost
Materials-

DF beams for table- $70
DF wood for benches- $100
Concrete, pigment, grout, melamine form molds- $250
Misc hardware- $50
Stain and clear finish- $20

Custom steel gusset plates and aluminum inlay letter- $150
Concrete Mixer rental- $40

I purchased several tools for this, as I did not own them before. I know I will use them for several projects in the future, so to me it was well worth the investment. I was able to make the table and benches with tools for under $1200. Not bad, considering the table without benches is sold at a retailer for $3000. I obtained a better finished product, customized, with some nice new tools for less than half. Plus I got to learn A TON!

I bought the following tools:
Kreg HD jig
Sliding compound miter saw (12")
orbital polisher/ sander (7")
random orbit handheld sander (5")

The concrete added the extra expense of diamond polishing pads as well.
Estimated Time Investment
Week Long Project (20 Hours or More)
Finish Used
Minwax natural stain, Minwax Polycrylic satin. I used one coat of natural stain. I wanted it to be light, but finished. I love the way the natural finish came out. I wasn't going to put any clear on it, as I did not want any sheen. However, I have children and the wood wouldve been dirty by the second day. The Polycrylic satin was amazing. Not as shiny as I was afraid of. Much more forgiving than semi gloss or gloss. Three coats applied with foam brushes. Lay it on, dont brush it on to avoid bubbles. Go slow and smooth. Dries nice. I did 2 coats, then a very light sanding with 220, just to get rid of the roughness. One coat after that and done.
Recommended Skill Level
Intermediate

Comments

upnarms

Mon, 03/16/2015 - 10:57

The top was made from nearly 4 bags of counter top mix. I did create a lip by placing an insert in the mold, taking out a bit of weight, while giving it a 2" profile edge. It's about 300lbs still! I had 3 people help me lift it into place.

petesveen

Tue, 03/17/2015 - 07:26

Nice job on the concrete top! Turned out great and coordinates well with the base. Cheers! - DIY Pete

Faux Driftwood Finish Media Console

Submitted by Anonymous (not verified) on Sun, 06/11/2017 - 19:37


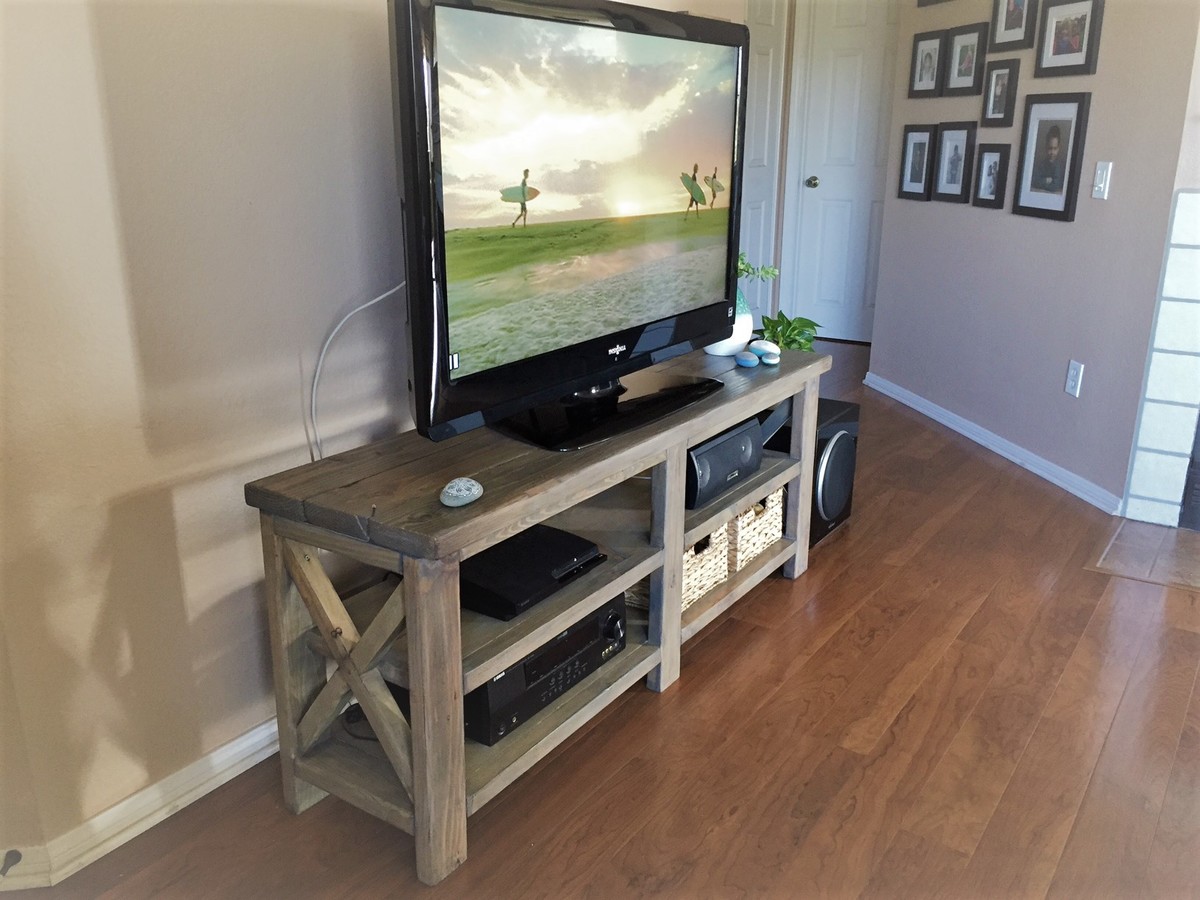
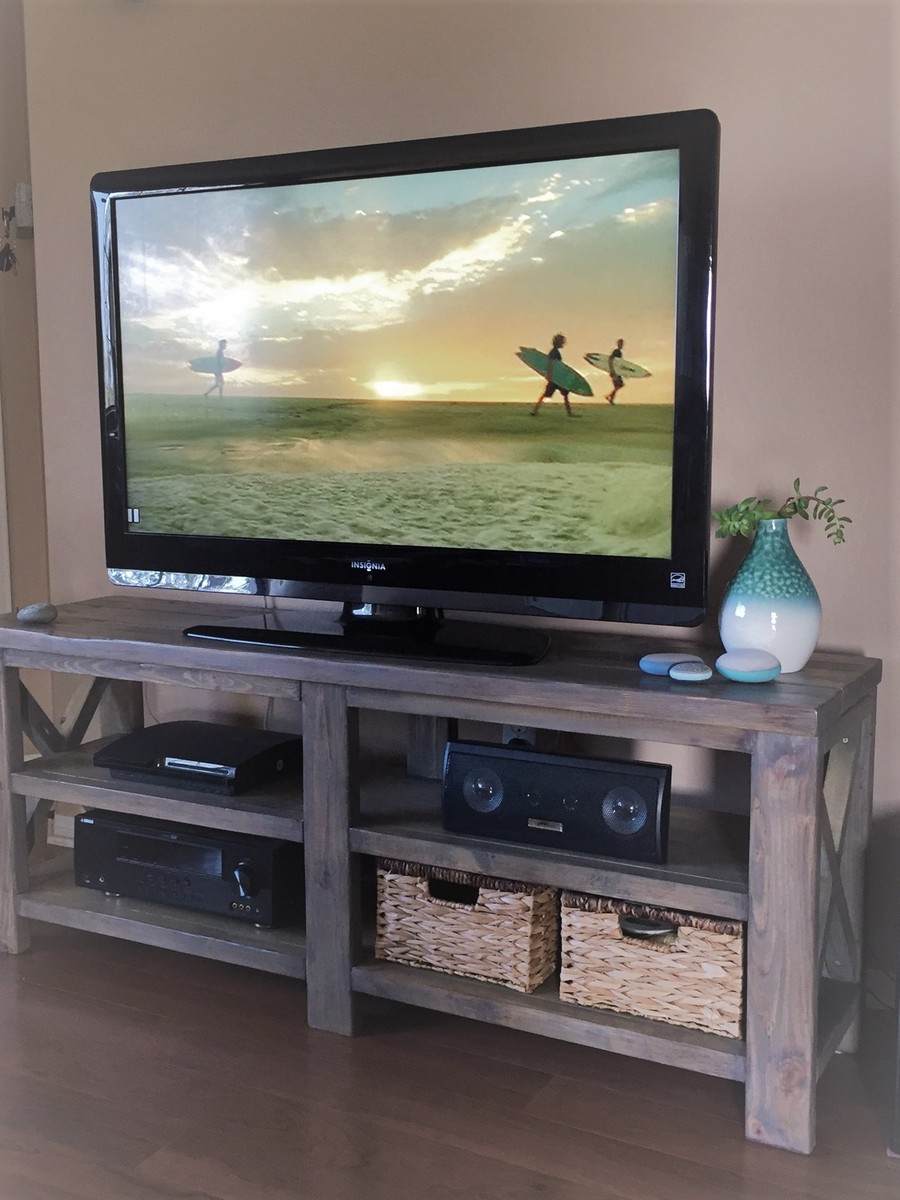
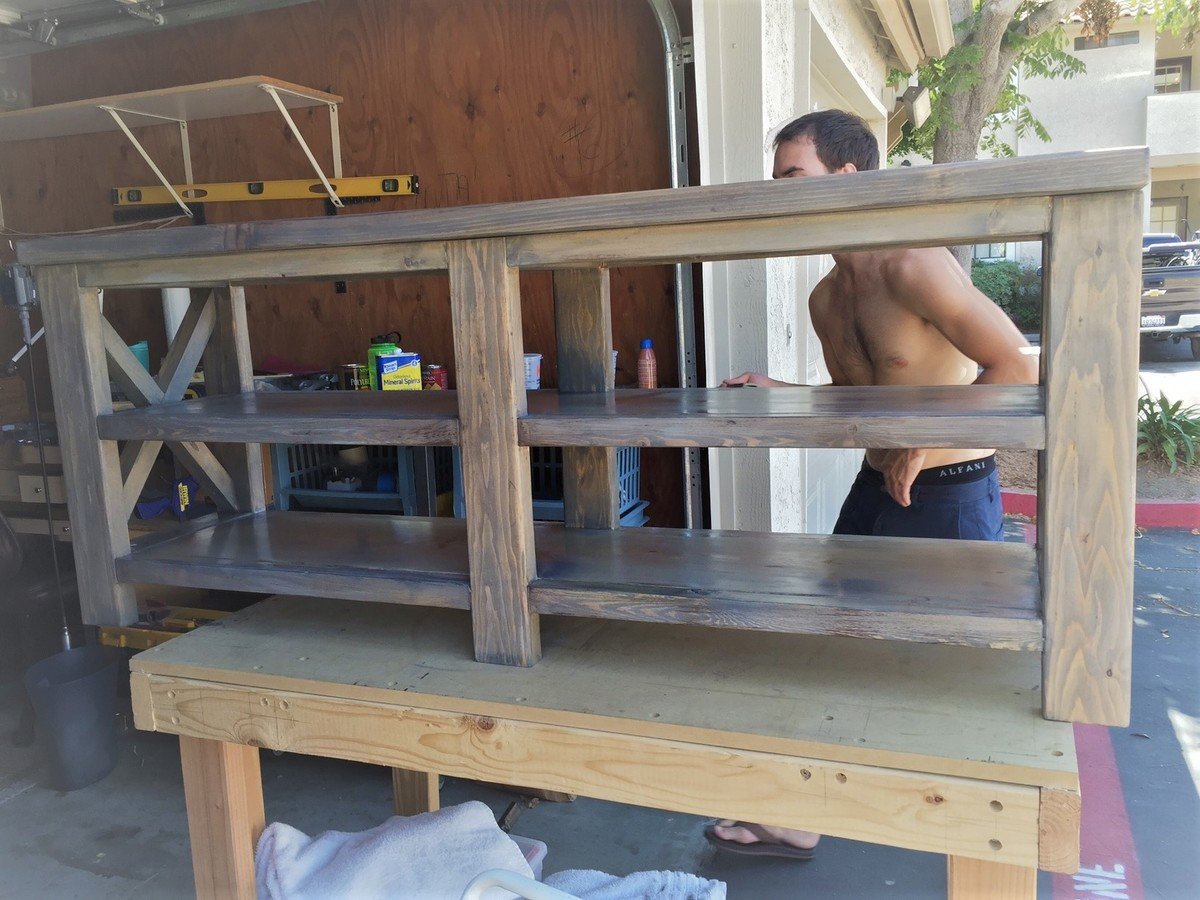
My girlfriend requested I make this stand for our TV which is 46". (It looks like something she wanted from a furniture store that was being sold for around $1,100.)  I followed the plan, but customized the size. My table is 60" long and 24" high.


We wanted to make a weatherbeaten "driftwood" look. The Classic Gray was darker and had more opacity with one coat than expected, so we stopped at one coat.  Classic Gray is a lot "cooler" in tone before the clear coats, because the clear polyurethane I used  has a warm tint to it. (In the future, I also want to try the crystal clear Minwax Polycrylic, which would not warm the tone of the gray.) After the stain, we added some brown dry brushstrokes to make it look rustic or aged. 

I lightly sanded between each of the clear coats. Two coats on the under parts and three coats on the top. 

I added felt pads that I cut to fit to protect our floors from scratching. 

The wood is part pine and part common board. 

Girlfriend loves it! It is a huge hit. Lots of compliments from neighbors as I worked, too. 

Built from Plan(s)
Estimated Cost
$100
Estimated Time Investment
Weekend Project (10-20 Hours)
Finish Used
Sanded to 220

1 application of Minwax pre-stain Wood Conditioner

1 coat Minwax Wood Finish Penetrating Stain, color Classic Gray

Dry brushstrokes of Martha Stewart Vanilla Bean Multi-Surface Satin Acrylic Craft Paint at edges (color is a neutral grayish brown)

2 coats of Minwax Polyurethane, Clear Satin
Recommended Skill Level
Beginner

Small cedar shed

Submitted by sarusso82 on Sun, 08/08/2021 - 05:41

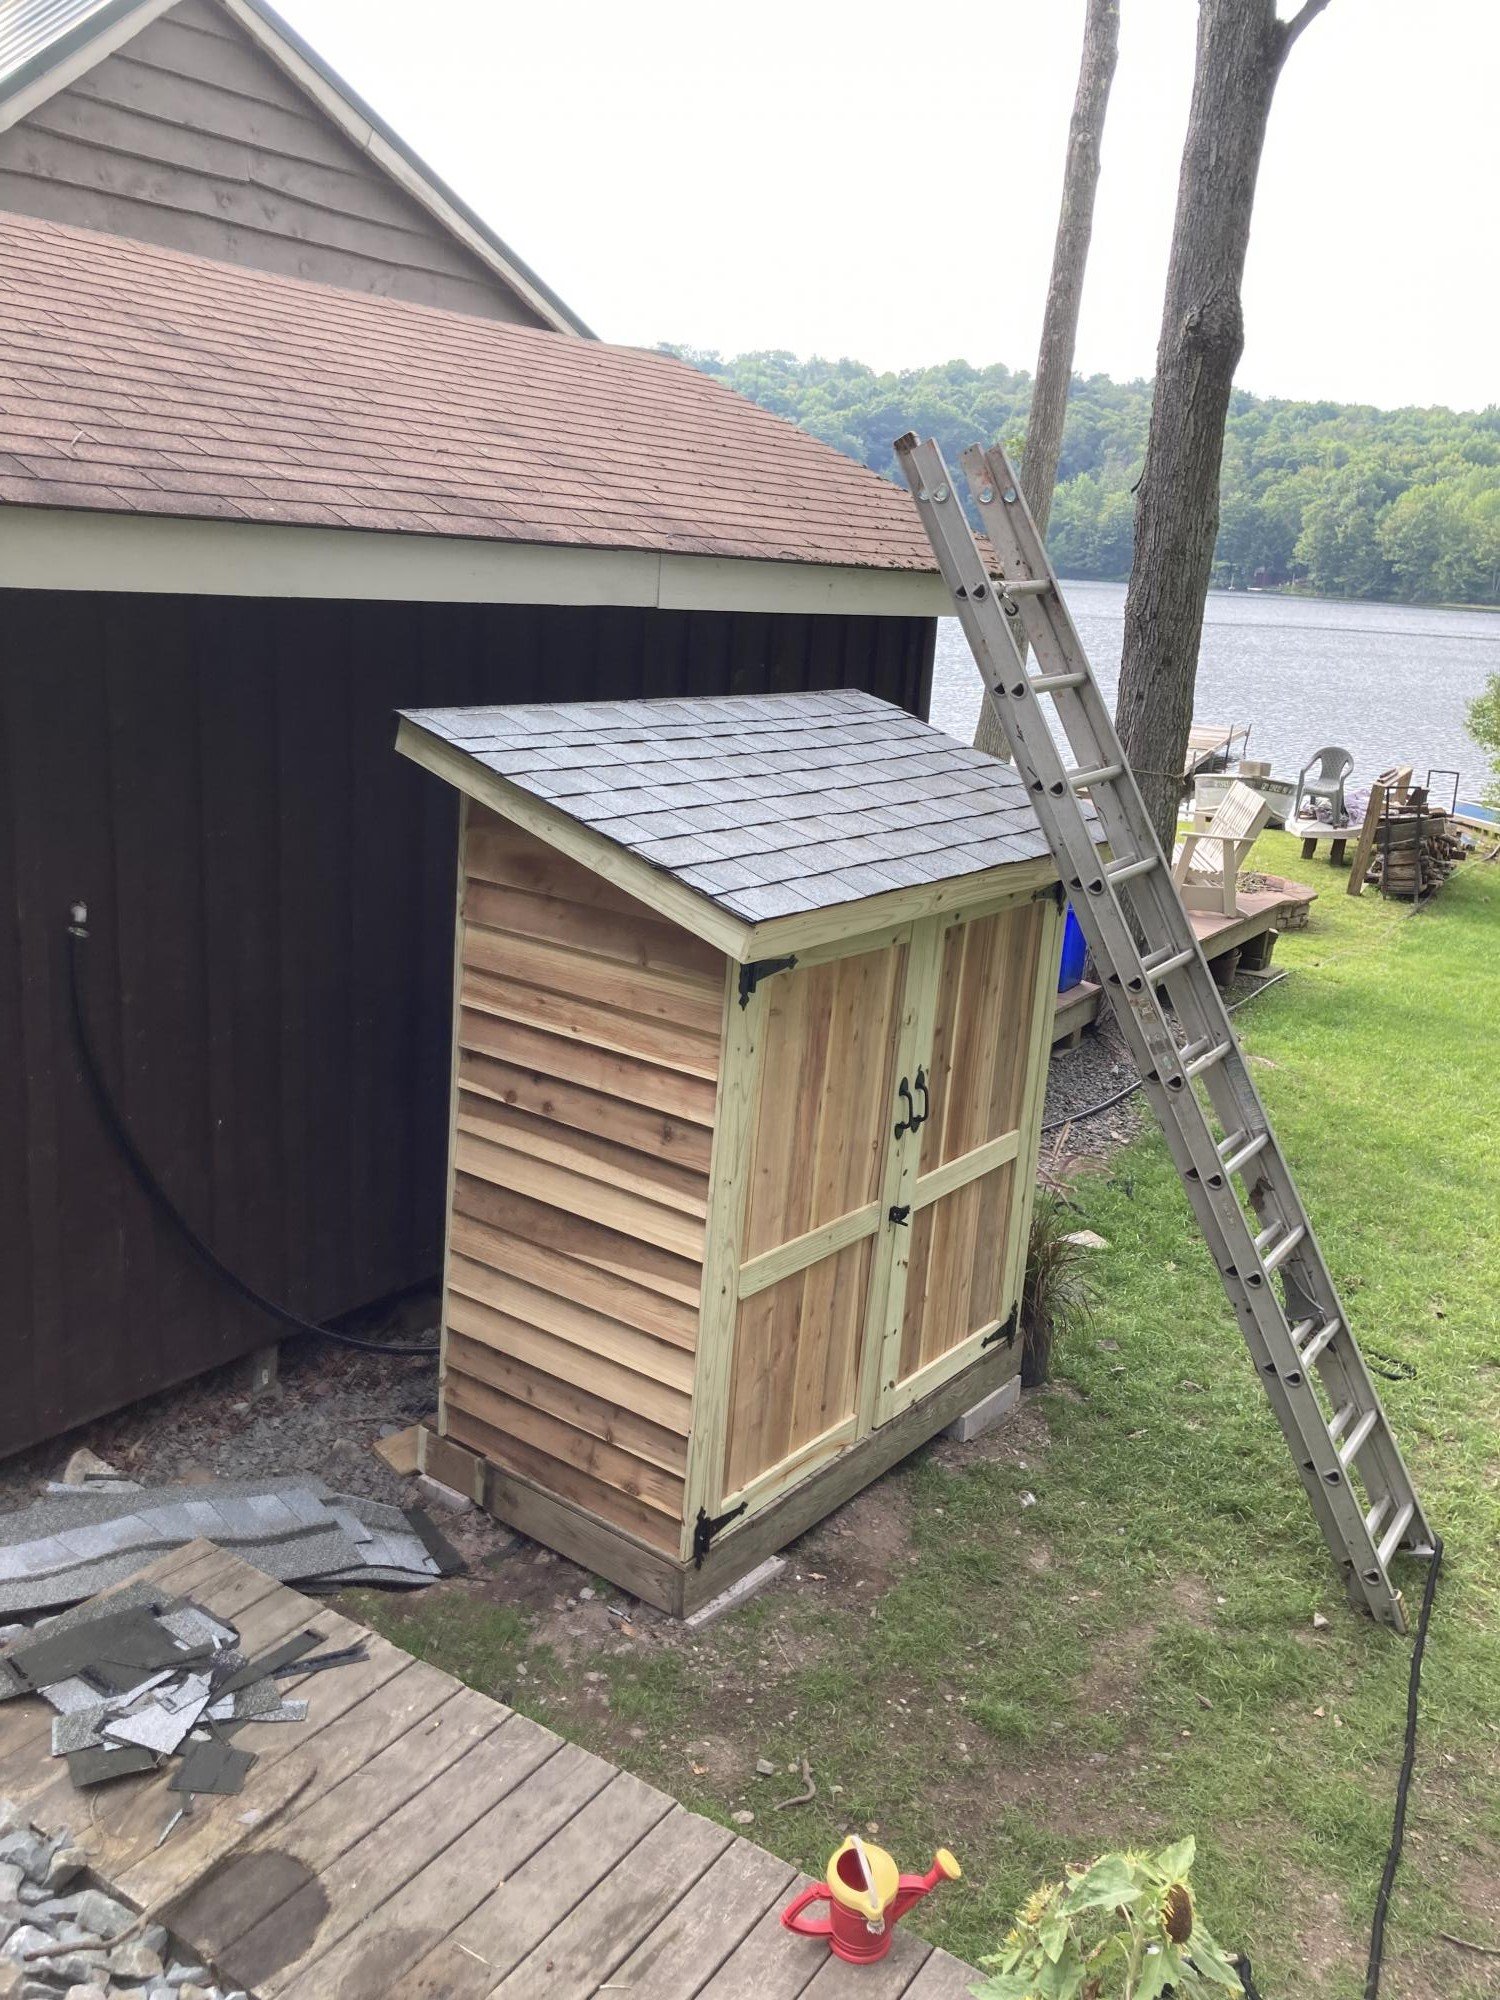
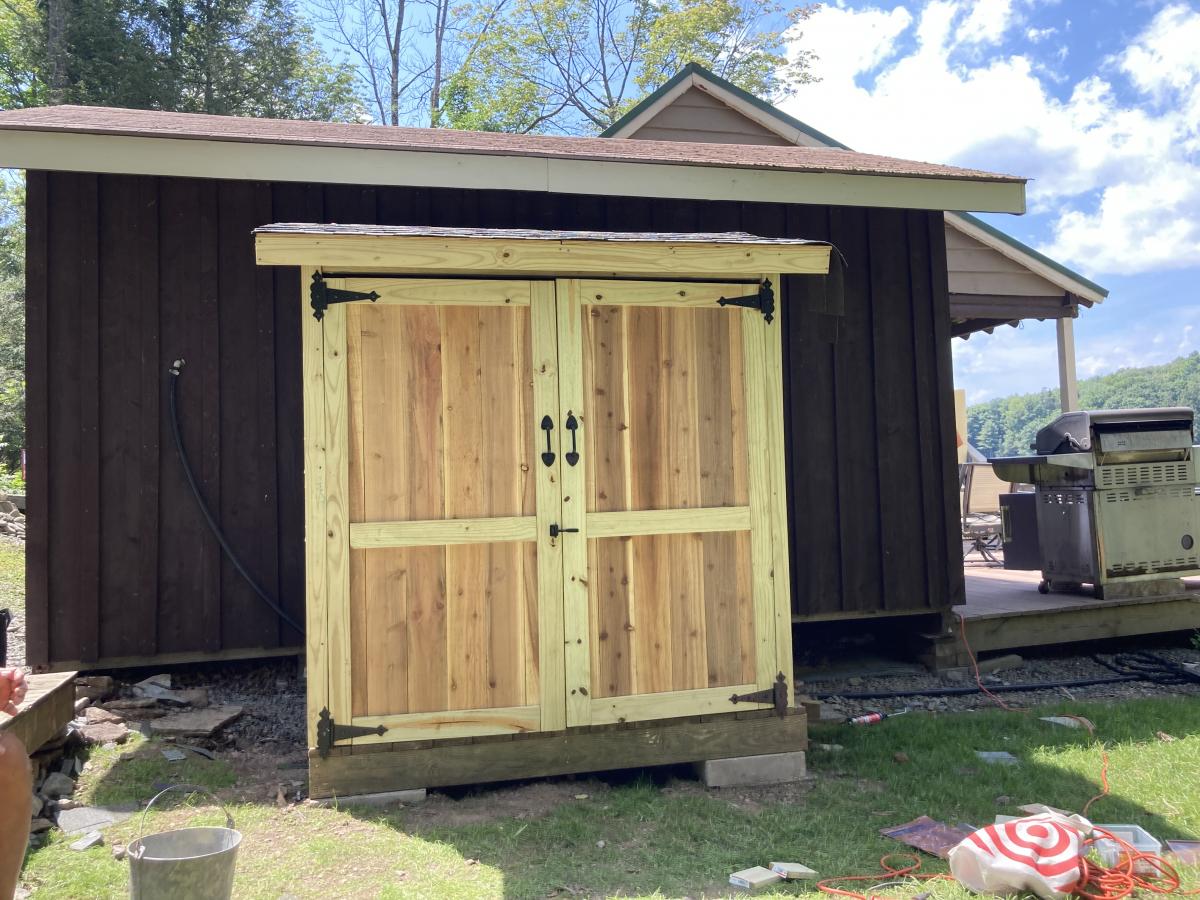
First shot at using plans from Ana, and thought it was great! Can’t wait to try another!

Built from Plan(s)
Estimated Cost
500
Estimated Time Investment
Weekend Project (10-20 Hours)
Recommended Skill Level
Beginner

Comments

Adirondack Chairs

Submitted by JoanneS on Thu, 04/25/2013 - 18:12

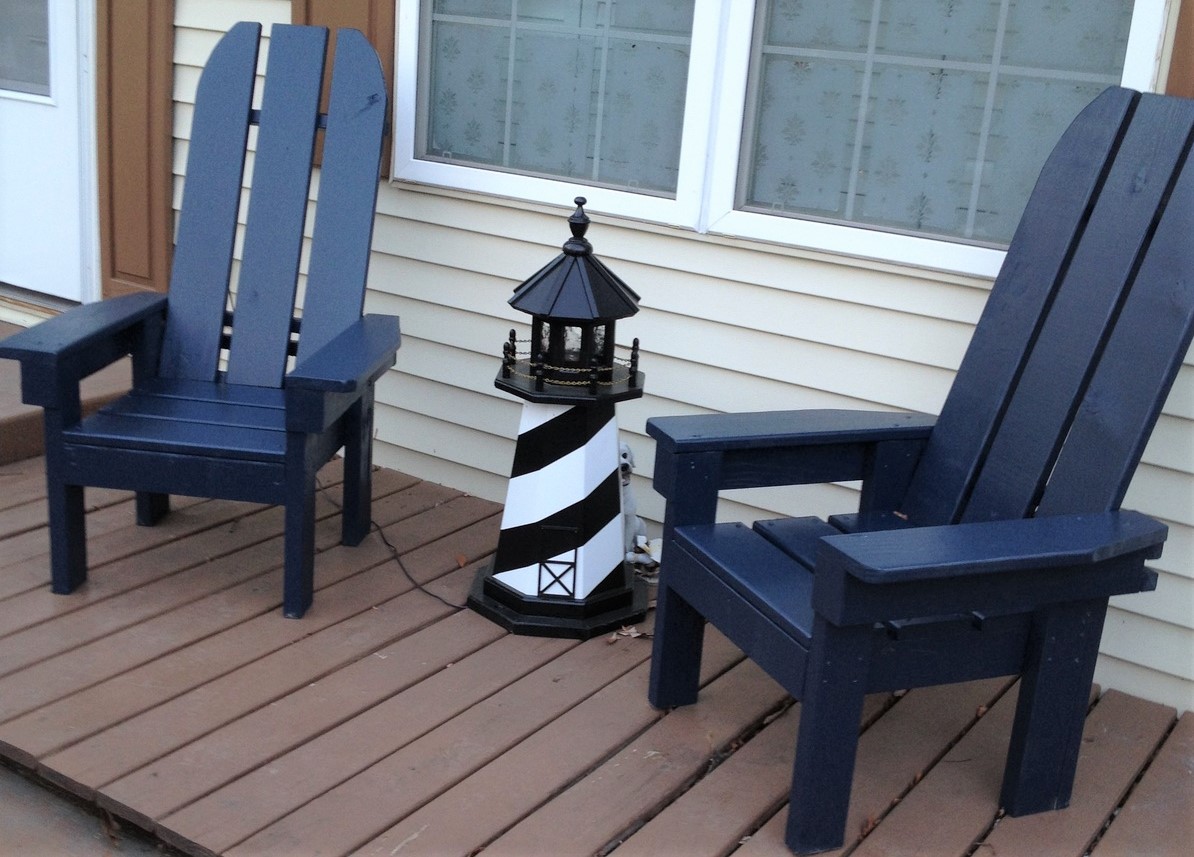
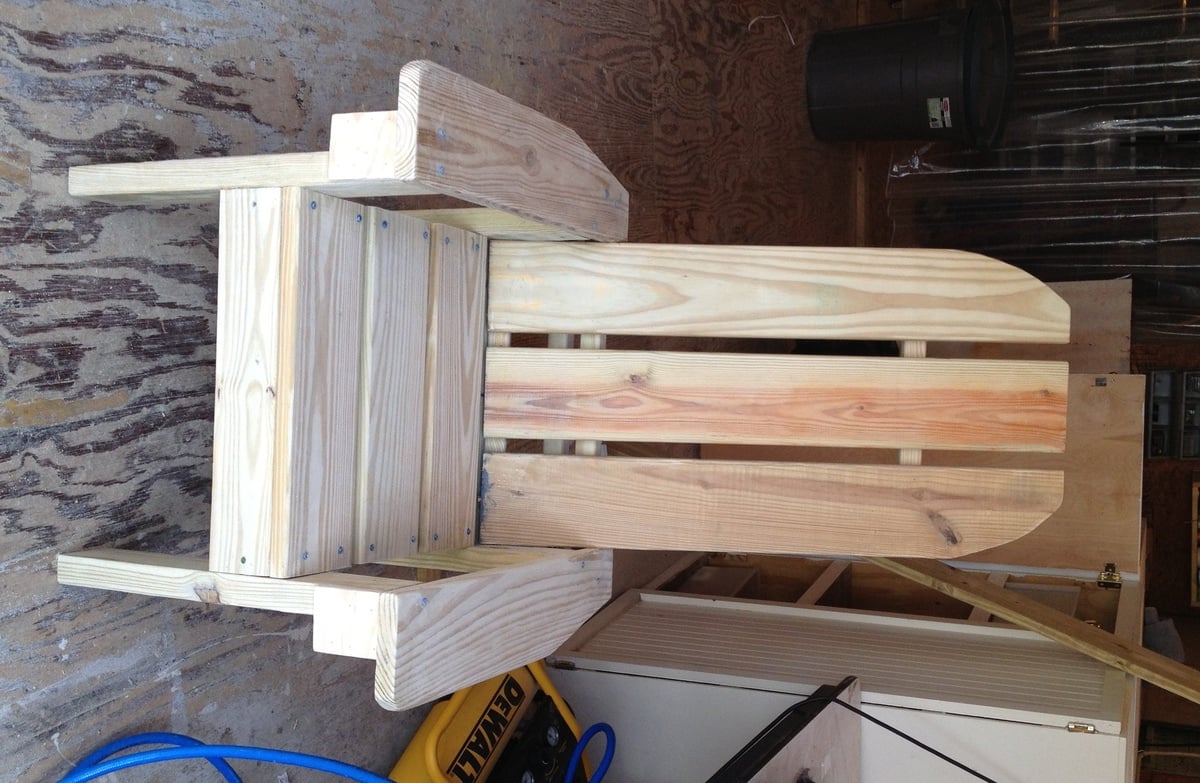
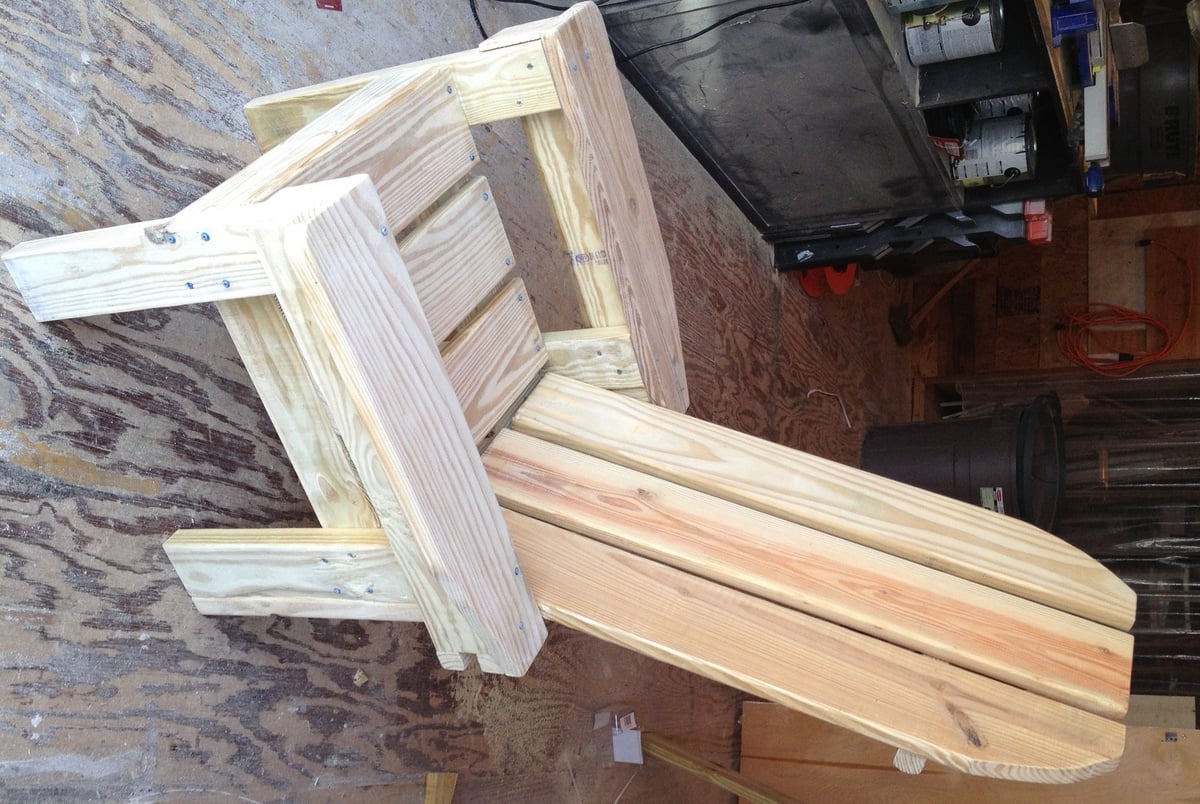
These sturdy chairs are a wonderful replacement for plastic deck chairs! They are nice and heavy, and won't blow over in a storm! This project is a mix of Ana's Adirondack Chairs and the Simple Outdoor Lounge Chair. I combined ideas from the two plans to use the extra lumber we had left over from an outside project from last year. Left-over lumber included some 2x4 for the bottom frames, some 5/4 decking board for the seat, back, and arms, and a few balusters at the back. Most of the lumber was left over, so I only had to spend $20 for 2 boxes of Kreg screws and 2 pc 5/4 x 8 decking board. Finished with some left over exterior latex semi gloss paint. This was a fun weekend project - built the chairs on one day, and finished the sanding and painting the next day. My next project is a little outdoor table to go with them, and I have a few scraps left over to use for that. These chairs have received lots of compliments, and we've given Ana's web site name to several admirers. Ana, thank you for your wonderful plans!

Estimated Cost
$20
Estimated Time Investment
Weekend Project (10-20 Hours)
Finish Used
Ace Royal exterior semi-gloss paint in navy blue (left over paint from about 5 years ago, was color-matched, so it doesn't have a name).
Recommended Skill Level
Beginner

Comments

mepaganjr

Sun, 09/28/2014 - 10:46

I don't see any plans for this chair.  Is it possible to get them?

JoanneS

Sun, 09/28/2014 - 18:15

Hi Mepaganjr,

I used the plan for the Simple Outdoor Lounge Chair

http://ana-white.com/2010/05/plans/simple-outdoor-lounge-chair

as my guide for the seat part, and the slant of the back,

and used Ana's Adirondack Chair

http://ana-white.com/2010/05/furniture-plans-adirondack-chair-ana.html

as the inspiration for the tall chair back and front legs.  I did several adjustments to fit the mixture of sizes of 2x and 5/4 scrap wood that I had available.   I traced a paint can lid to make the curve on the top of the chair backs.

A great plan that has a similar seat and legs is the Adult Adirondack Chair, which is in Ana's book, The Handbuilt Home, on page 174.  That's a great plan because it only uses six 1x4's an one 1x2.  If I hadn't been using up the mixed scrap lumber, I would have used the Adult Adirondack Chair plan.  

Happy building!  :)  Joanne

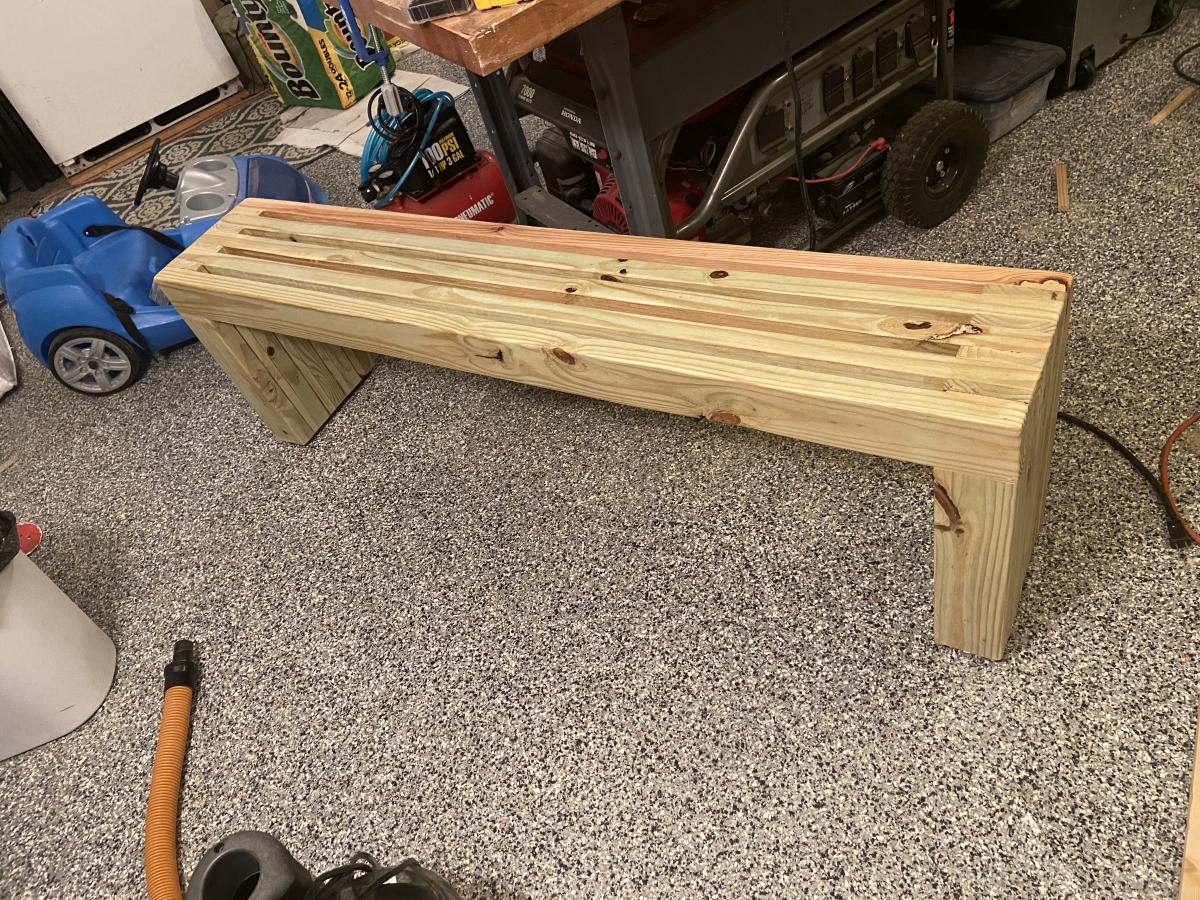
Garage Shoe storage and Bench

Combined Mimi's Storage Bence with the Shoe Shrine Shelf and came up with a what we really needed.  I like how it turned out!

Estimated Cost
$225
Estimated Time Investment
Weekend Project (10-20 Hours)
Finish Used
Simple white trim paint
Recommended Skill Level
Intermediate

Comments

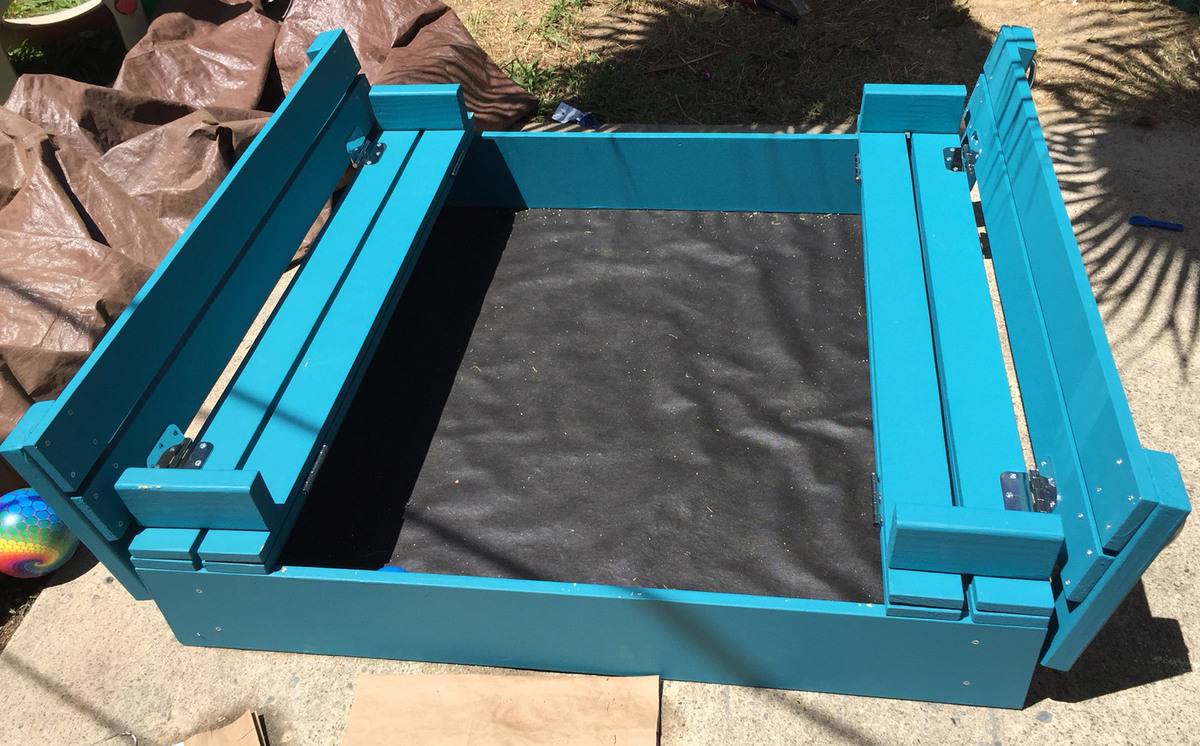
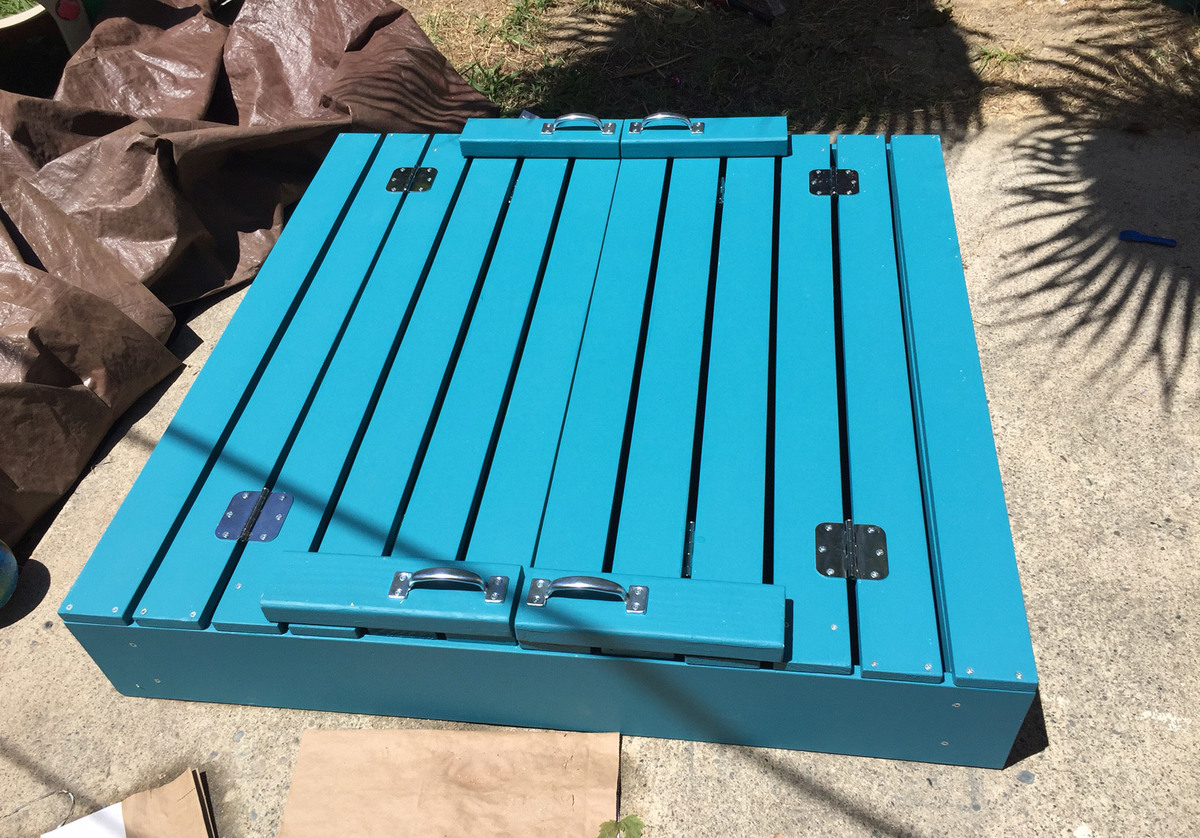
Sandbox w/ Built In Seats

Submitted by Anonymous (not verified) on Wed, 06/14/2017 - 07:30

I have built some other stuff before, but not with paint and sanding and such. It was definitely a great learning project. There are imperfections, but it's a toy, so kids will be having fun and that is all that matters.

Built from Plan(s)
Estimated Cost
$100... but, the paint will be used on other projects, and I paid for better boards for on top.
Estimated Time Investment
Weekend Project (10-20 Hours)
Recommended Skill Level
Beginner

Comments

Photo dump!!

Submitted by Anonymous (not verified) on Thu, 08/26/2021 - 04:13

I have built all these recently with the help of your plans! Thank you!!

Comments

Saw Horse writing desk

Submitted by Anders on Sun, 04/28/2013 - 14:42

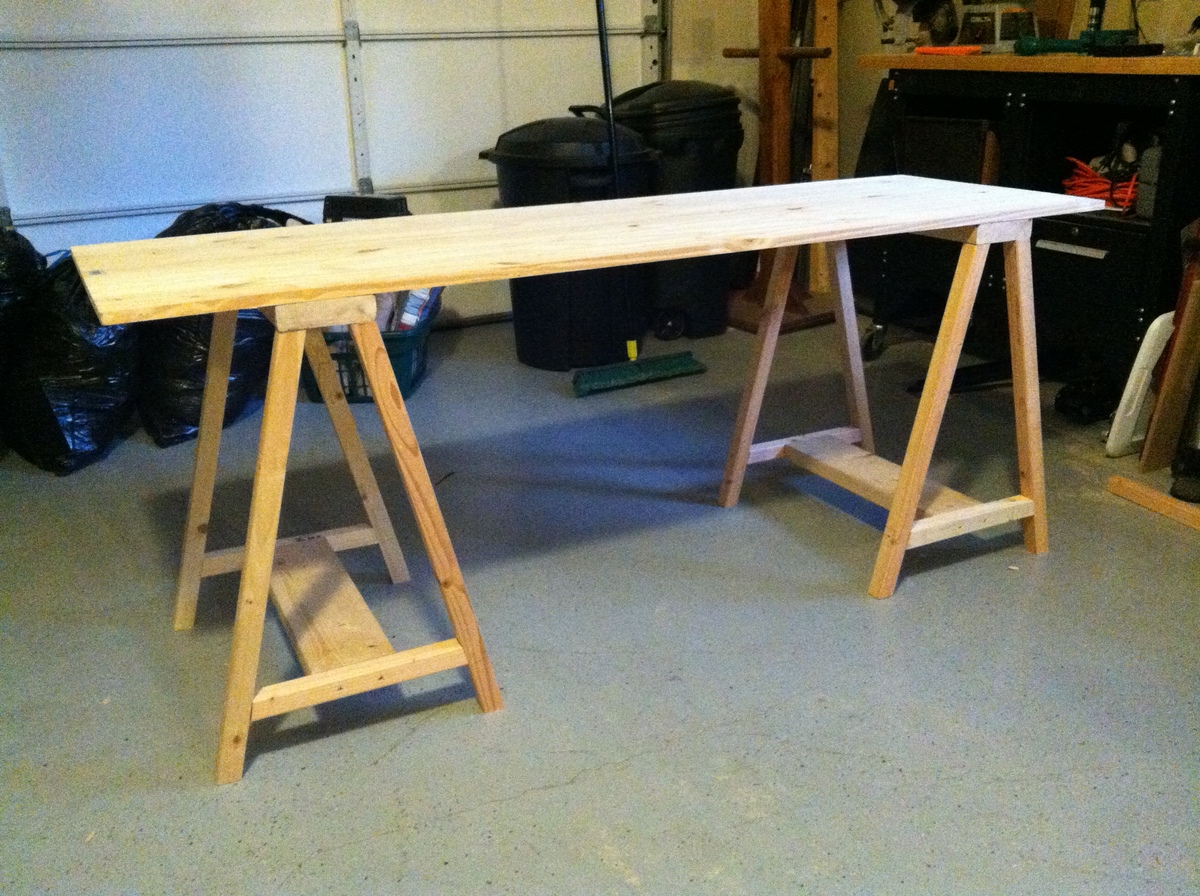
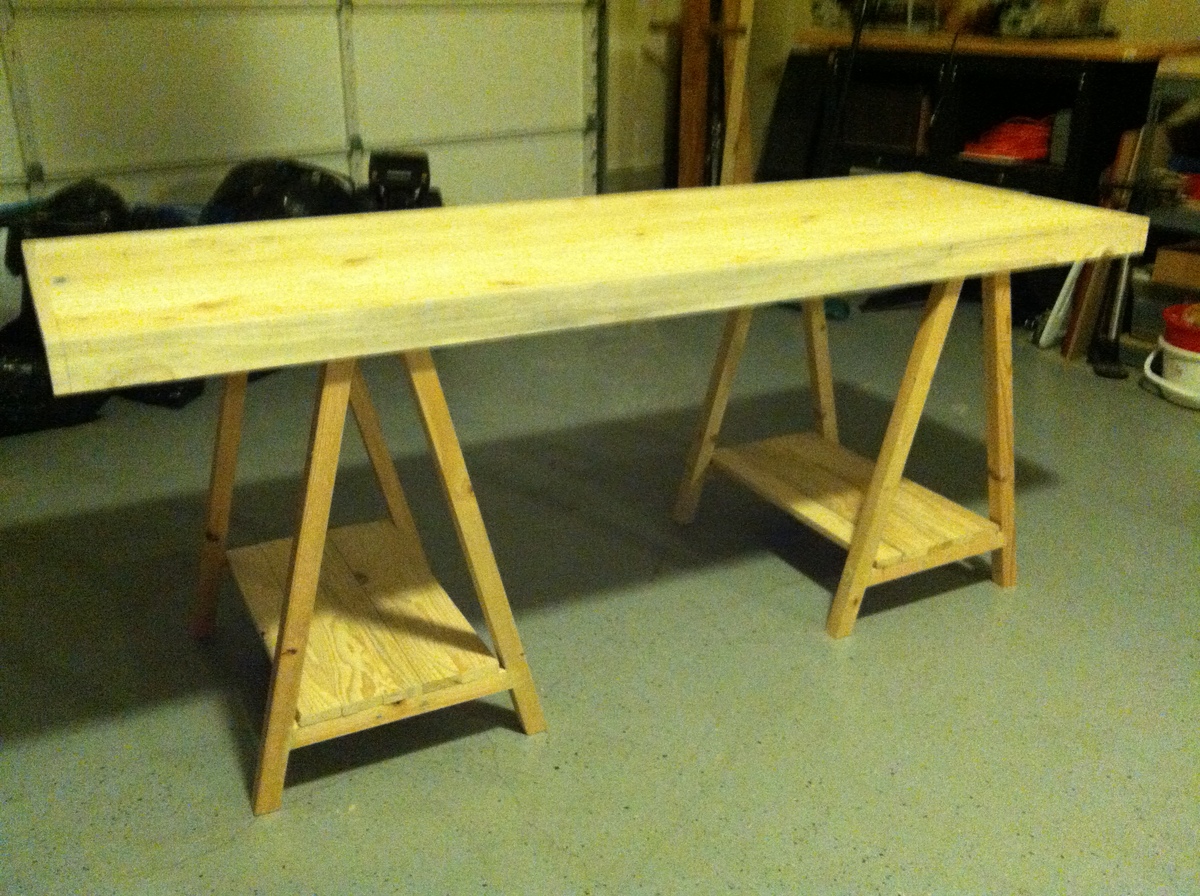
I enjoyed building this project for my wife. The plans are easy to follow. I decided to trim the desk by adding 1x3 boards along the sides, and widened the shelves on the bottom with additional 1x3 boards. I also found an old chair and stained it to match the desk.

Estimated Cost
$80
Estimated Time Investment
Weekend Project (10-20 Hours)
Recommended Skill Level
Beginner

Rustic Wine Rack

Submitted by tedgray86 on Wed, 03/18/2015 - 21:53

Ask for materials and how to

Estimated Time Investment
An Hour or Two (0-2 Hours)
Recommended Skill Level
Beginner

outdoor club chairs and couch set

Submitted by Anonymous (not verified) on Sat, 06/17/2017 - 14:16

We found an outdoor set online that we LOVED - until we saw the price tag haha! So DIY to the rescue, as always. This was our first project that we have ever done based on our own plans, but I did refer to Ana's adirondack post when deciding on the back-tilt of the chairs' support. The simplicity of the set definitely helped with the fact that we blazed our own trail - just straight cuts with a miter saw and screws! Easy peasy. We LOVE it, especially because they're so solid with these 4x4's so our kids can run all over these things like monkeys. DIY forever!

Estimated Cost
500
Estimated Time Investment
Weekend Project (10-20 Hours)
Finish Used
weathered grey from Rustoleum
Recommended Skill Level
Starter Project

Comments

Modern Farmhouse Bed Twin version

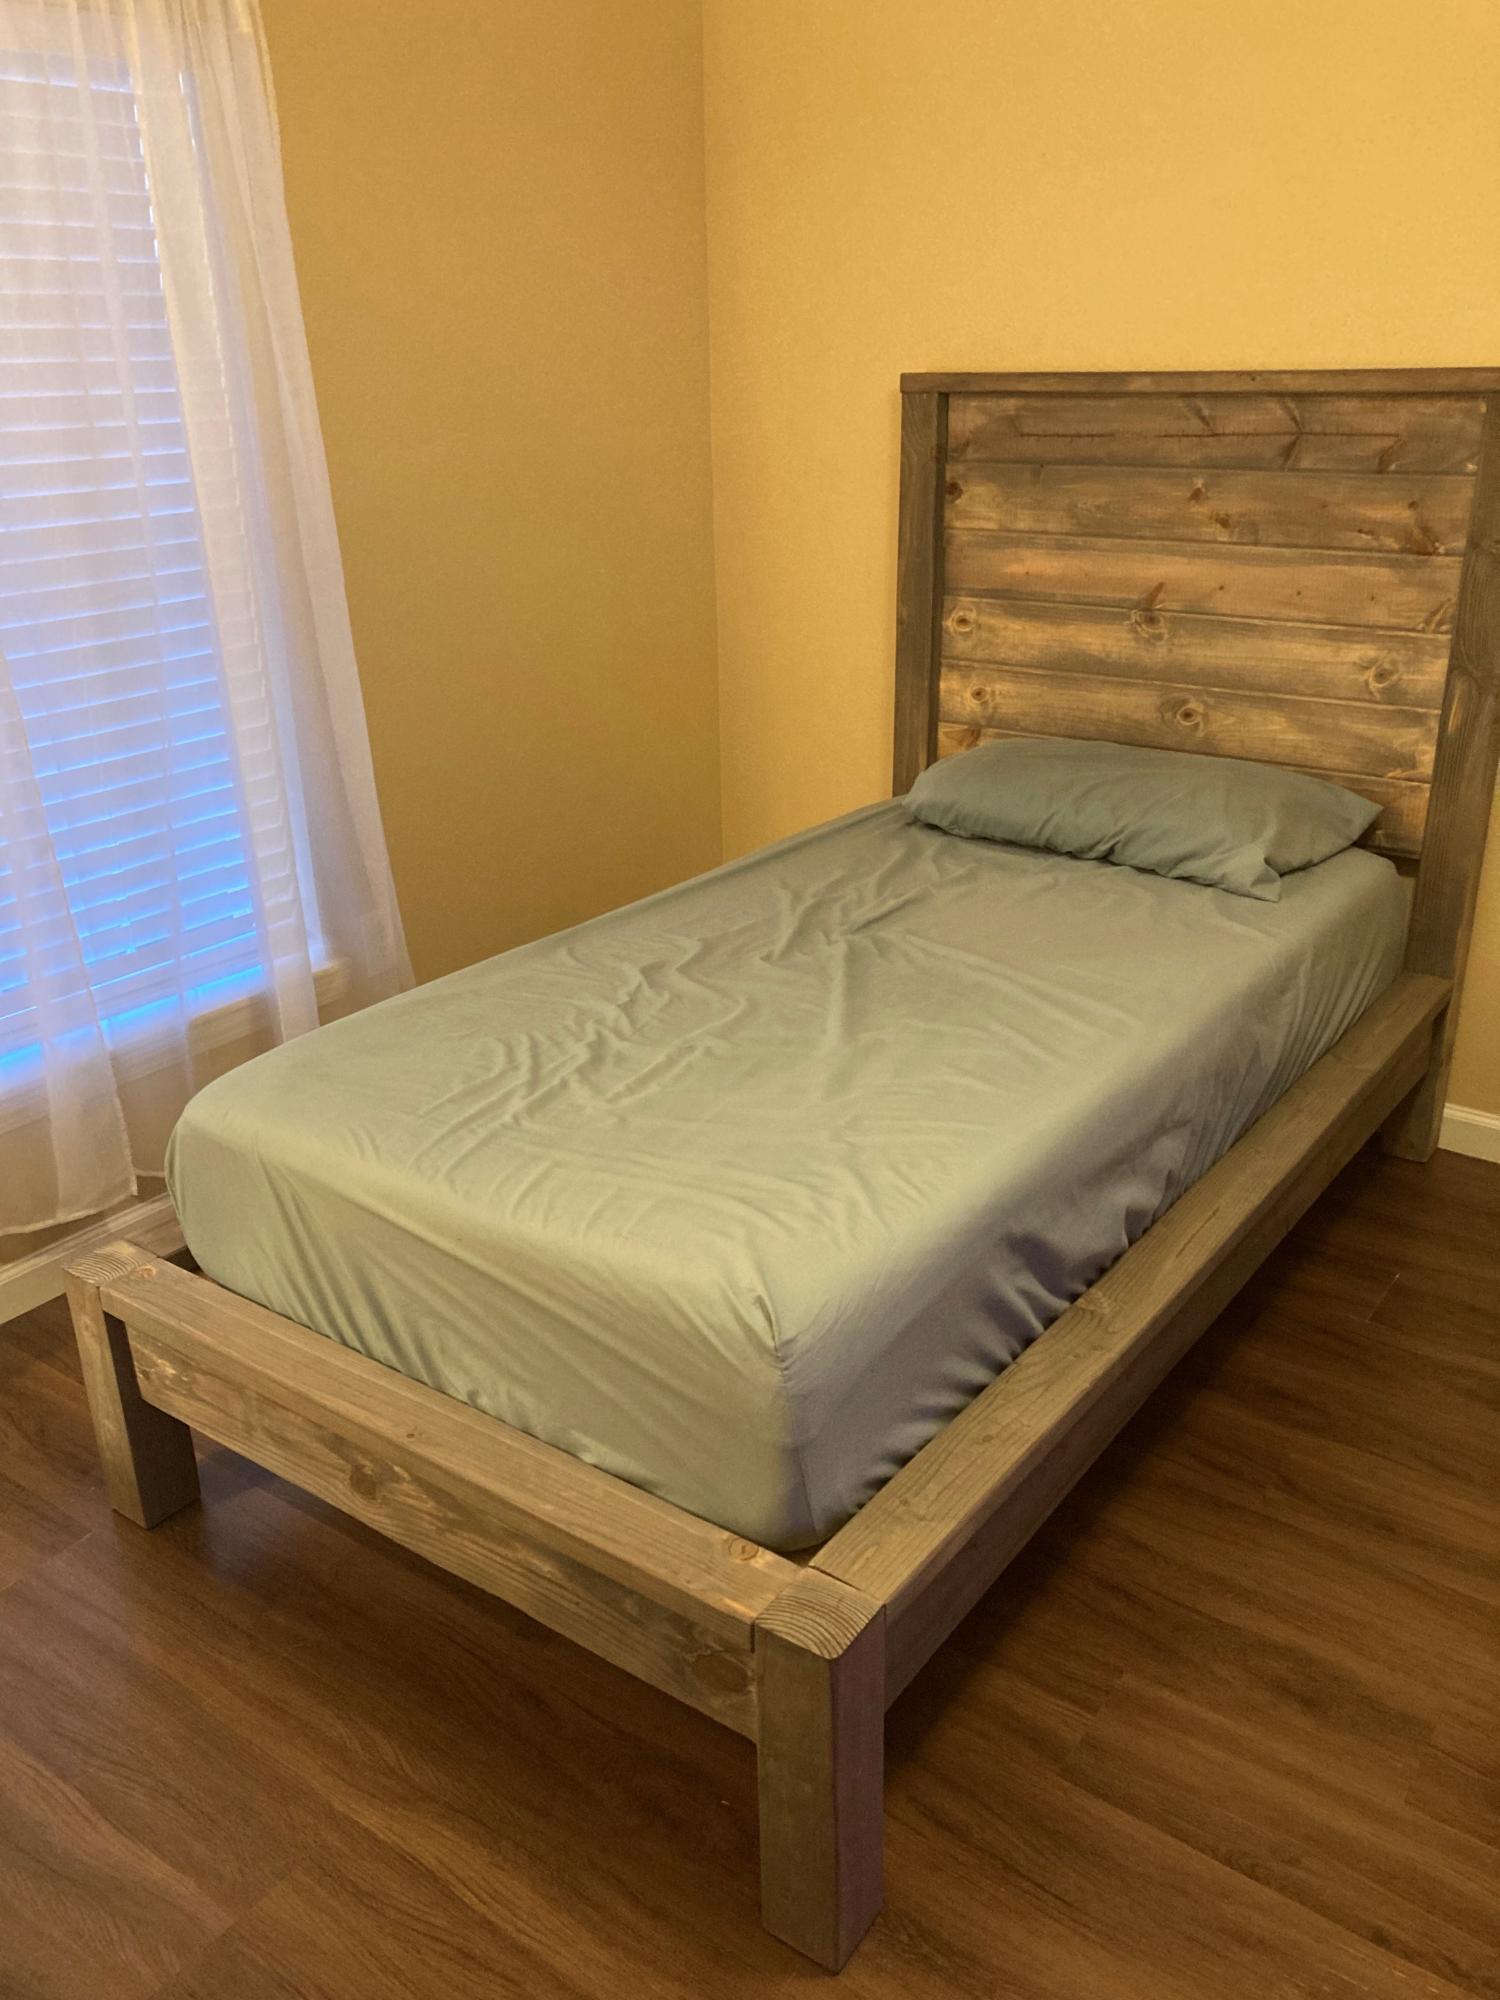
I built this bed for my (adult) son. The instructions were easy to follow. I left off the 2 x 2" cleats on the headboard to make it easier to attach the tongue and groove headboard pieces with pocket hole screws (I did lay two 2 x 2's underneath the tongue & groove pieces for spacing as I attached the boards). Since I made this as a platform bed I added a 6th tongue & groove headboard piece and the optional center cleat underneath. I used the suggested Varathane Weathered Wood Accelerator for the finish; mine came out much more grey than the bed pictured with the plans and my son liked the finish (I did too). Finding non-pressure treated 4x4's and semi-straight 2x4's was the hardest part. I used pine wood and bought all the lumber for about $175 (purchased at peak COVID lumber prices). This bed is definitely solid and I'm looking forward to making the matching nightstand! Thank you Ana for the bed plans!

Built from Plan(s)

Comments

Customized Farmhouse Table

Submitted by hhoward on Mon, 04/29/2013 - 23:06

I found this website while trying to find DIY plans for a bookcase for my sons room. After I saw all the plans, the bookcase project got bumped down the list. My husband was a little skeptical when I said I wanted to build a kitchen table, but he still handed over the keys to his truck and off I went to the hardware store.

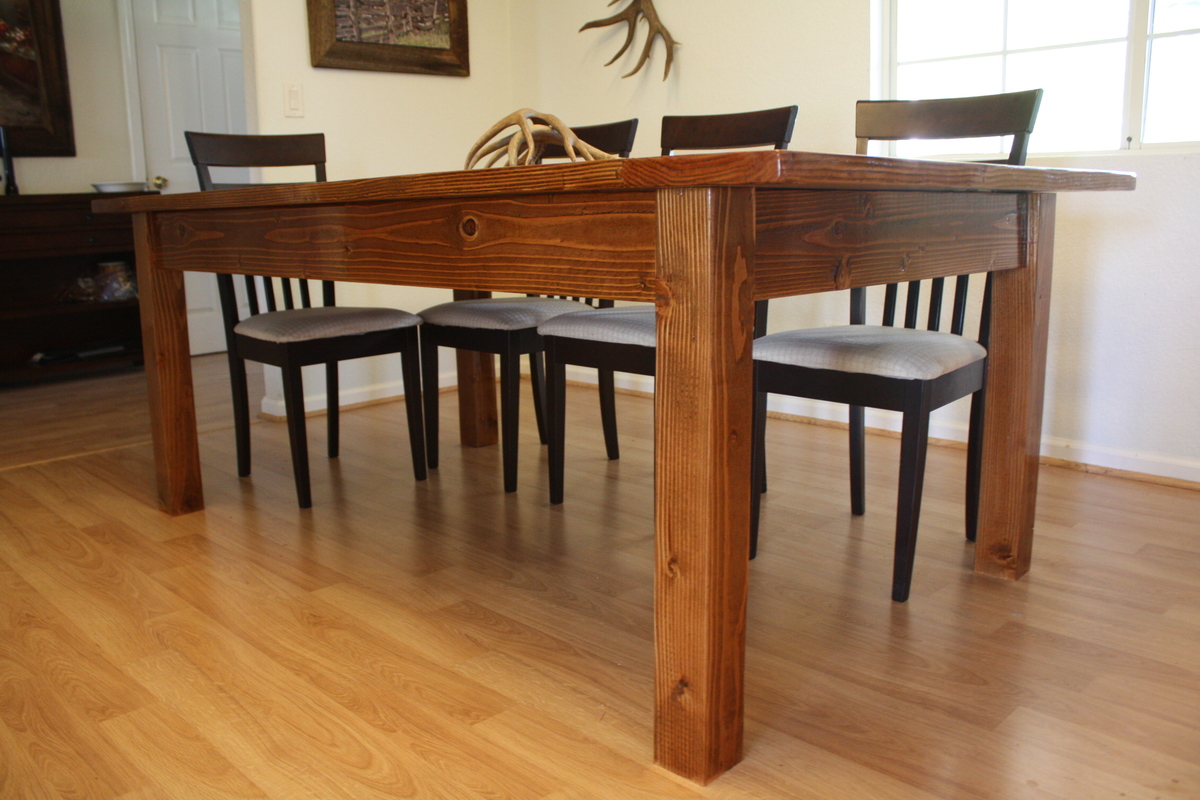
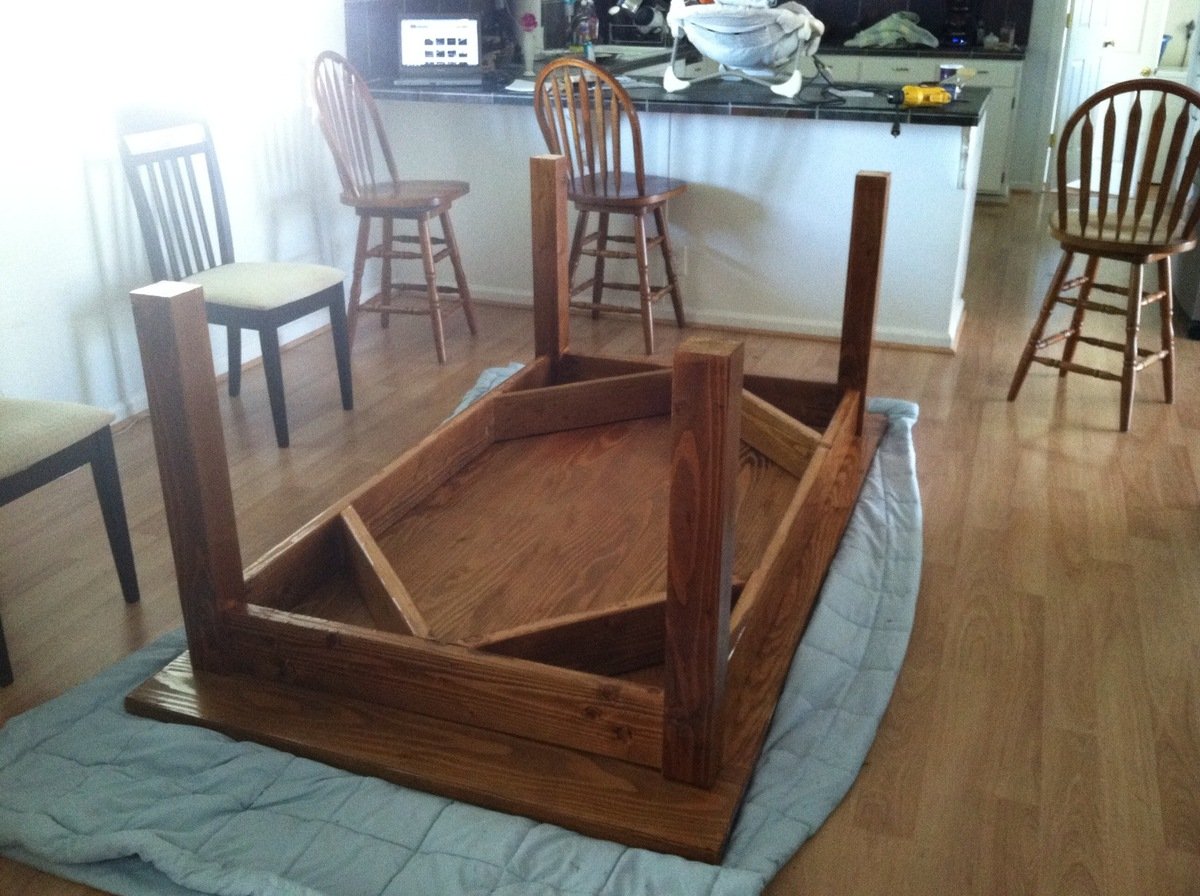
I built this during the night after my 4 month old son went down for the night, so usually around 7:30pm. I tried to be finished with anything loud (sanding) by 9pm. I changed the dimensions to be shorter and wider than the plans and I removed the stretchers since I wanted the option to put chairs on the ends. To keep the table sturdy and square I substituted 2 x 6 for the side boards instead of 2 x 4 and also added corner supports underneath. Because I had 2 x 6 as the side boards I also needed to make the table slightly higher to still give adequate leg room. The table is 31" high instead of the normal 30". The top is 2 x 10 tongue and groove clear Doug Fir left over from a flooring project.

I sanded the entire table starting with 80 grit, 120, 220 and then used 320 in between polyurethane coats. I also sanded down all corners and edges since in no time my son will be learning to walk and I want to avoid serious injuries by running into sharp corners.

.

Estimated Cost
$150
Estimated Time Investment
Weekend Project (10-20 Hours)
Finish Used
First coat was Watco Danish Oil Medium Walnut (brought more red out of the wood than I was anticipating) followed by two coats of Watco Danish Oil Dark Walnut. Applied 3 coats of Minwax Fast Drying Clear Gloss Polyurethane.
Recommended Skill Level
Beginner

Comments

Industrial shelf unit for basement bedroom

Submitted by PauletteC on Sat, 03/21/2015 - 06:34

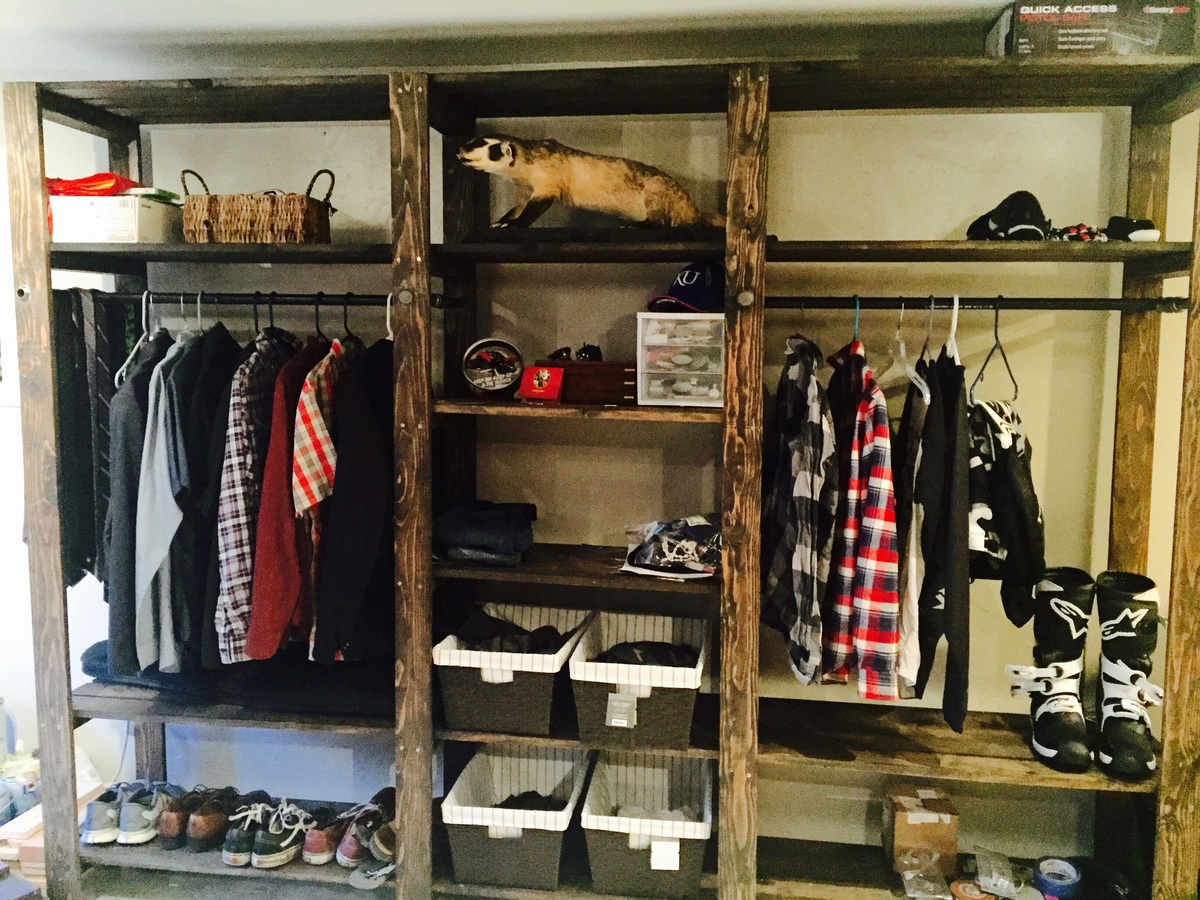
My son and I made this shelf unit when converting our basement to a dorm for him. While we think it turned out great, it DID take a lot longer than the plans suggest. The video suggests it can be completed in a couple of hours. It took us about 4 days. I found the instructions very clear which was very helpful. We chose a darker stain for our unit. It's very functional, although a little bit wobbly. My husband plans to attach it to the wall for better stability.  Thanks so much for a perfect solution to a room without a closet! He loves it and we've received many compliments. And I liked that we built it together. Cost was spot on for what you estimated. About $200

Built from Plan(s)
Estimated Time Investment
Weekend Project (10-20 Hours)
Recommended Skill Level
Intermediate
Comments

Console turned TV Stand

Submitted by Anonymous (not verified) on Thu, 06/22/2017 - 12:18

Took the console table and made some slight modifications to give different compartments for a TV stand :) Currently made the "Rustic" themed coffee table and some end tables. All have the matching "X" accents on the sides. Cabinet set into the center with shelves on either side. It's nice to have customized shelf heights for my various TV accessories. 

Built from Plan(s)
Estimated Time Investment
Weekend Project (10-20 Hours)
Finish Used
Minwax Dark Walnut
2 coats of Minwax Clear Semi-Gloss
Recommended Skill Level
Intermediate
Fancy X Farmhouse Table

Submitted by classywolf on Mon, 09/13/2021 - 09:13

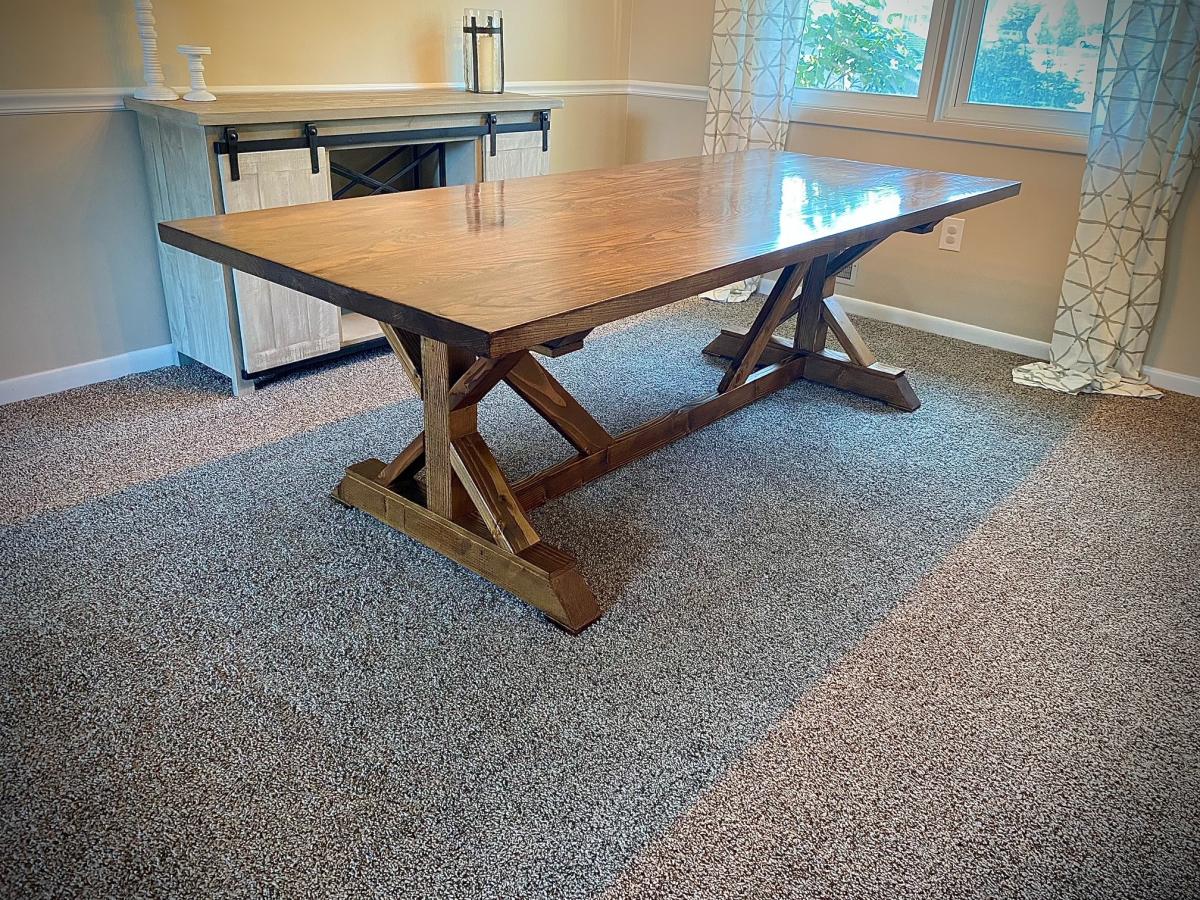
First AW project - very easy to follow with the plans, comments, and some basic problem solving. We like others did substitute some 4x4s for her stacked 2x4s.

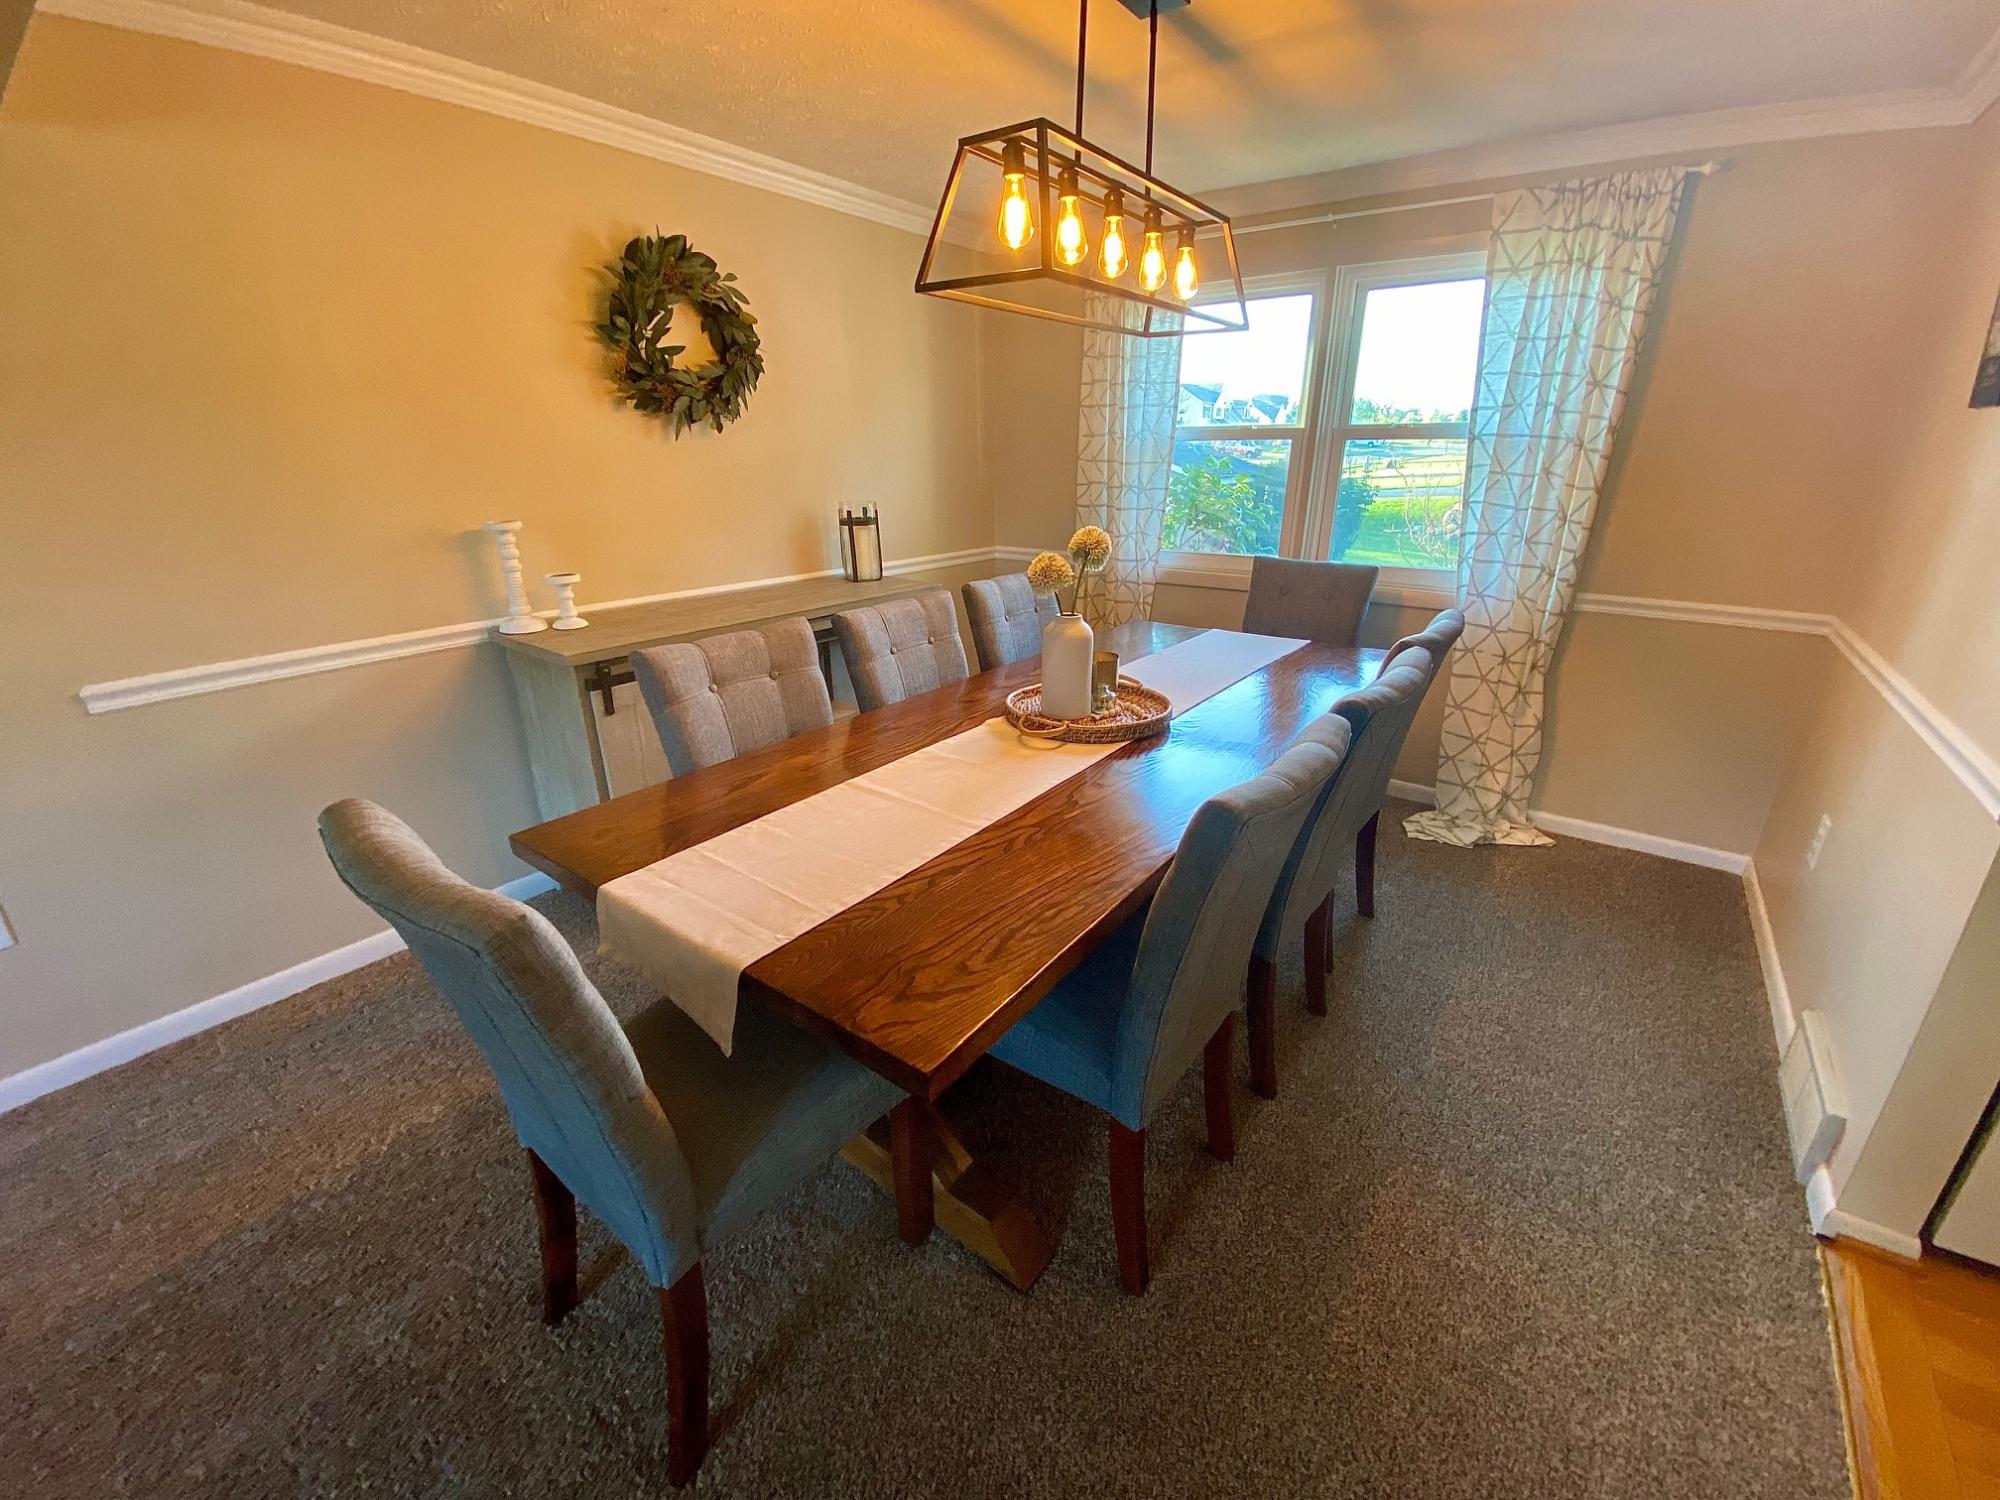
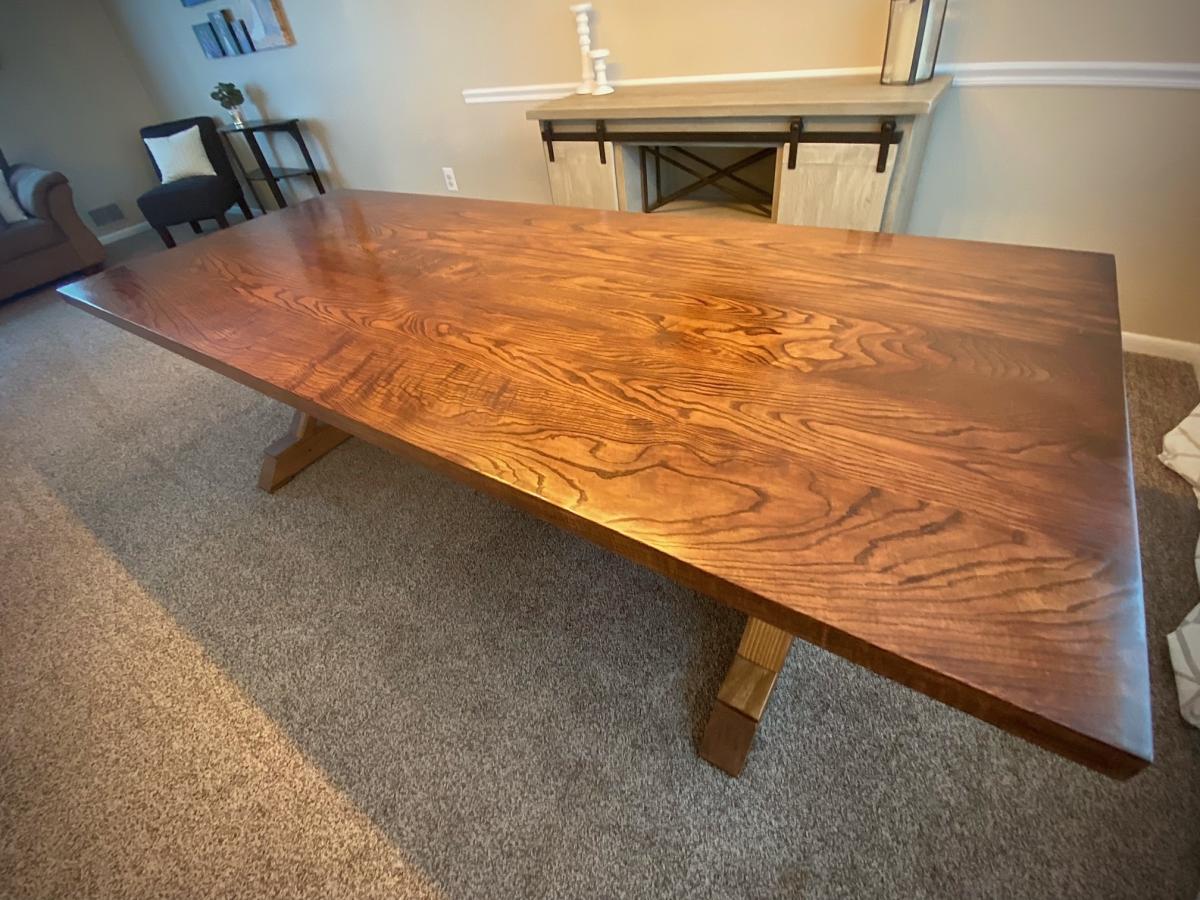
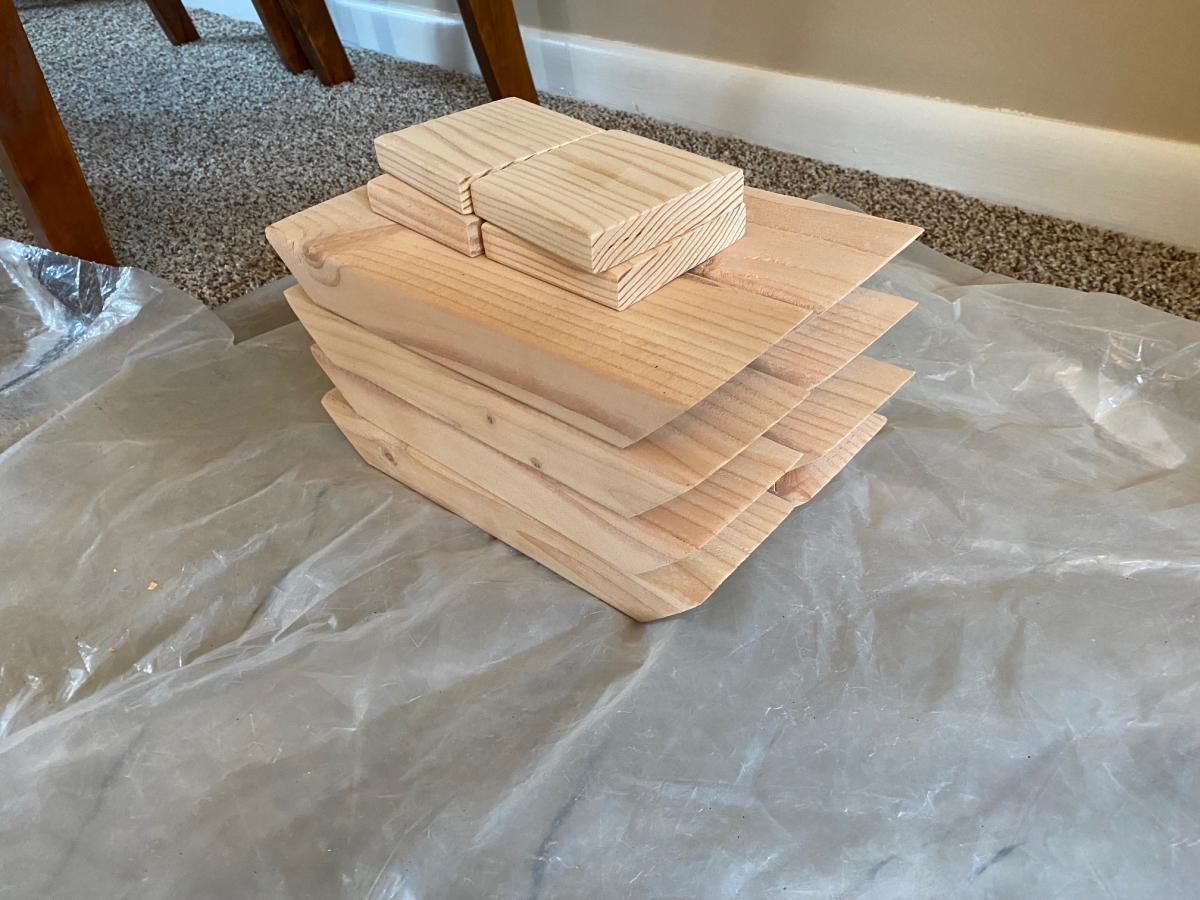
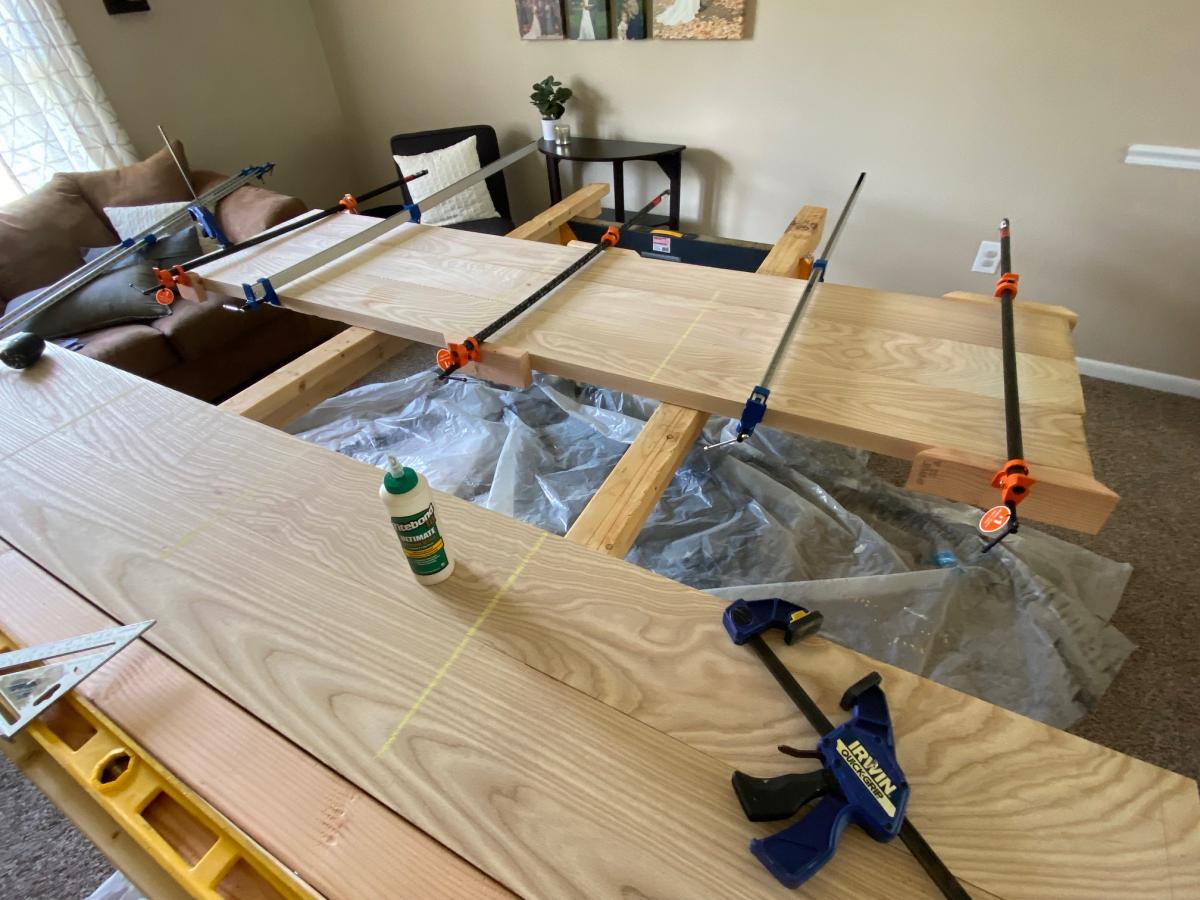
We used 2x8 Ash boards for the top, rough milled down at a local hardwood depot. ($600...Ouch). The lumber was glued up with Titebond iii and clamped with pipe clamps. Then used a combination of electric planer and belt sander to make sure it was completely flat and even after the glue up. Finish sanding was done with a 6" orbital, and the ends were cut flush with a circ saw.

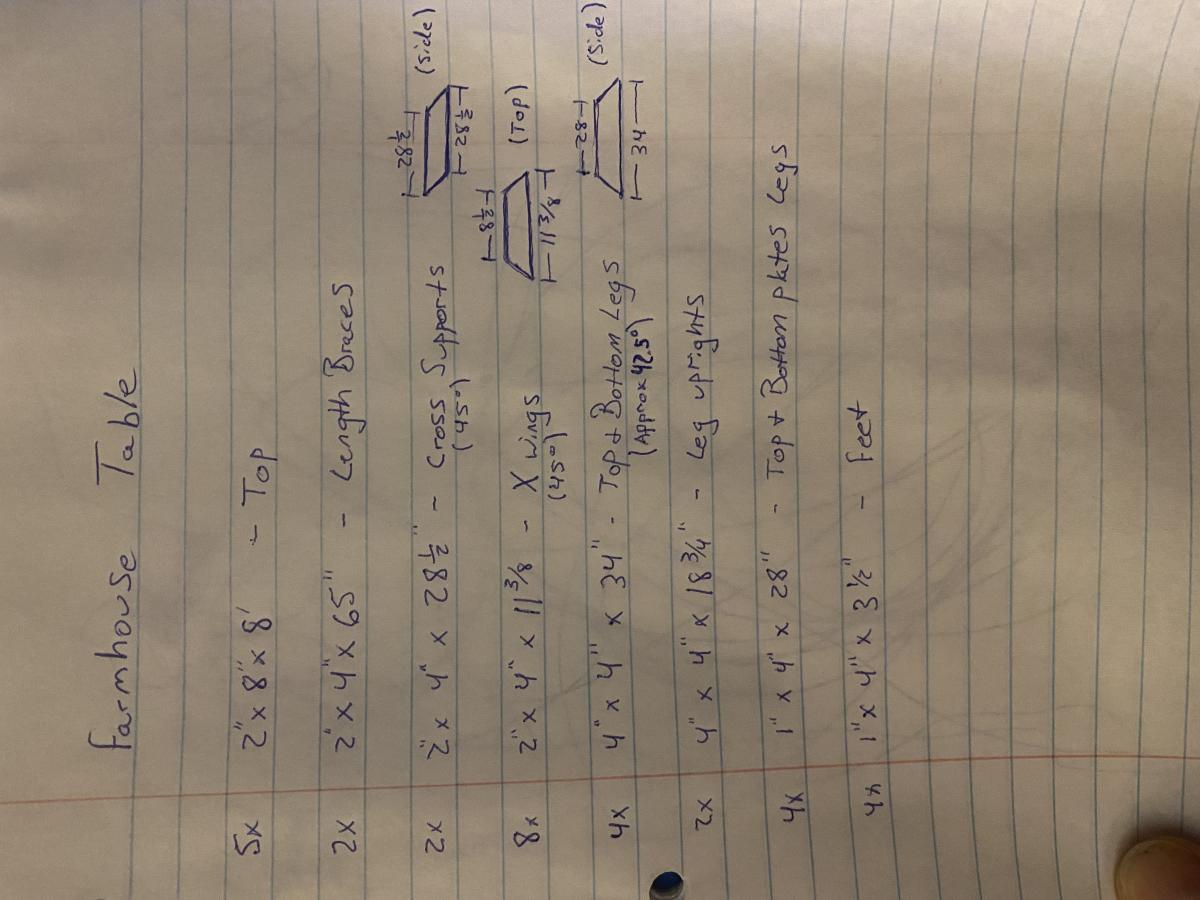
The base of the table was the easiest (and cheapest). It is made of kiln dried Doug Fir from the blue big box store. A photo of the cut list we used is attached. Used a chop saw for everything. This video helped visualize everything even though ours were not exactly the same. We used similar screw selection as this video as well:

https://www.youtube.com/watch?v=qg_hwoekV80

We used a kreg bit to predrill/counter sink our screws. Then purchased Douglas fir wood plugs from this etsy user. Didnt feel like cutting our own. This user has a lot of other species as well.

https://www.etsy.com/listing/991000659/douglas-fir-clear-tapered-wood-p…

A lot of people had questions about how to connect the top to the base. We routed a groove on the top of the base on each side and connected the two with Z clips. We used this method:

https://www.youtube.com/watch?v=J7Z69COtzzw

And these clips:

https://www.amazon.com/Table-Fasteners-Connectors-Screws-Brackets14/dp/…

Finishing was the most stressful part. Our first staining attempt was very blotchy despite being sanded very well and using a preconditioner. Since we spent so much money on the top and wanted this to be a perfect heirloom piece, we ended up re-planing and sanding the whole top (Kill me). We then used this method to precondition the wood by The Wood Whisperer - which worked great:

https://youtu.be/rjPX1byriM8

The table final coat was finished using these methods by PMK Woodworking. 3:2:1 ratio of
Mineral Spirits: Oil Based Poly: Boiled Linseed Oil:

https://www.youtube.com/watch?v=MxP5YuTHyic
https://www.youtube.com/watch?v=J_6g4oGEJ5s

Overall very happy. Took way longer and cost way more than expected. But hopefully will be our forever table that our kids will fight over one day. If you wanted to do this cheap and have it look rustic with imperfections, that would also be great and very doable.

Thanks to Ana, all the links above, and all your comments!
Good luck

Built from Plan(s)

Comments

Chicken Tractor

Submitted by Cliffhorn on Thu, 05/02/2013 - 07:26

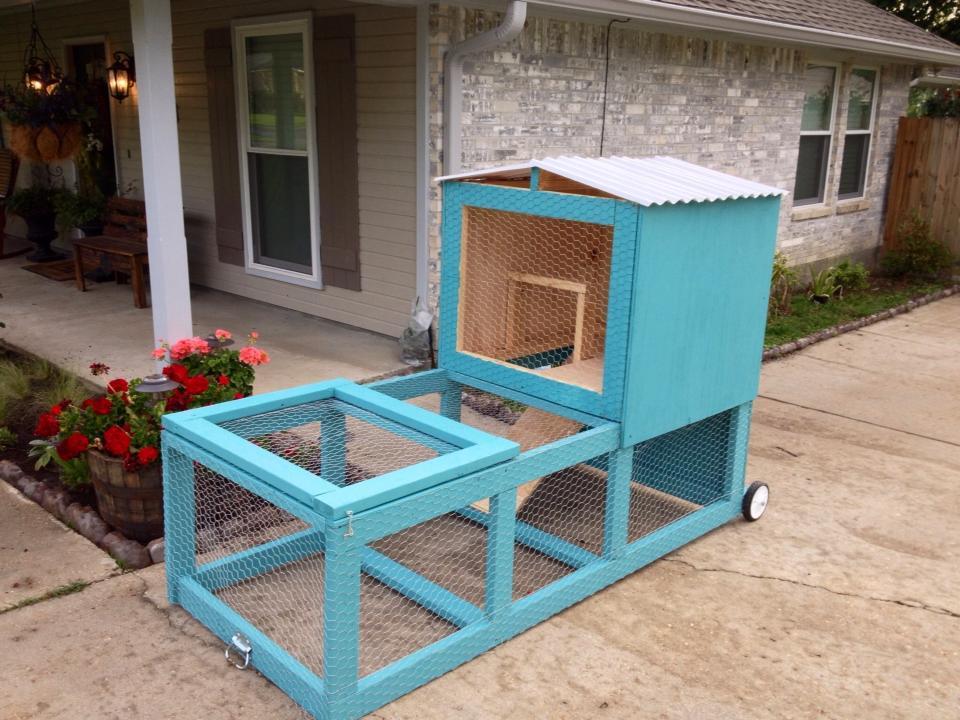
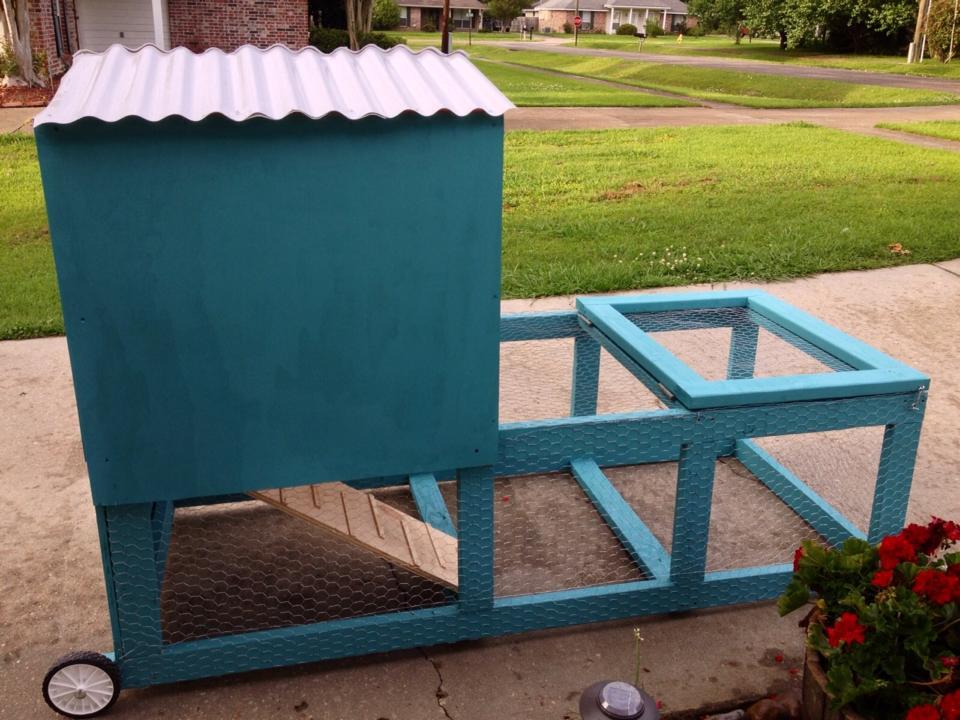
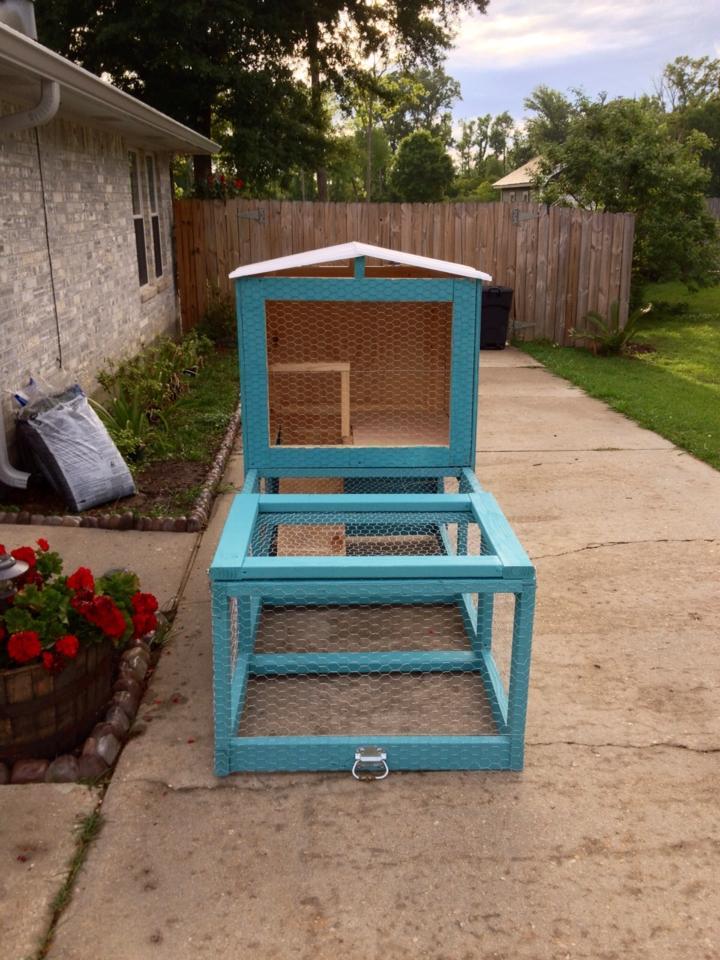
A friend of mine got two baby chicks and needed something for them to live in. She also wanted to be able to move it around the yard so they could have freah grass to be on. It uses 2x4s, 3/4 plywood, chicken wire, and plastic roofing. It was a fun build.

Estimated Time Investment
Day Project (6-9 Hours)
Recommended Skill Level
Starter Project

Comments

Truss End Table

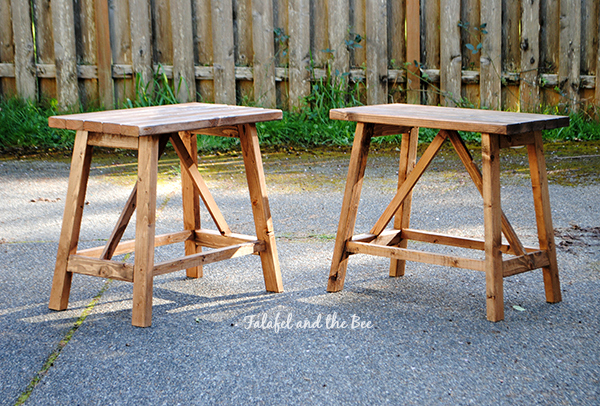
My husband and I built these end tables together. The construction took about 3 hours.

Built from Plan(s)
Estimated Time Investment
Afternoon Project (3-6 Hours)
Finish Used
Minwax Special Walnut 224 stain
and Polycryllic
We only used these because the stain matched the table I built. The off-gassing takes a little too long for me (because I am chemical sensitive). I have used Saman products for other projects and liked them much better.
Recommended Skill Level
Intermediate
Comments