Community Brag Posts

High Loft with Desk

Submitted by Anonymous (not verified) on Mon, 11/18/2024 - 10:06

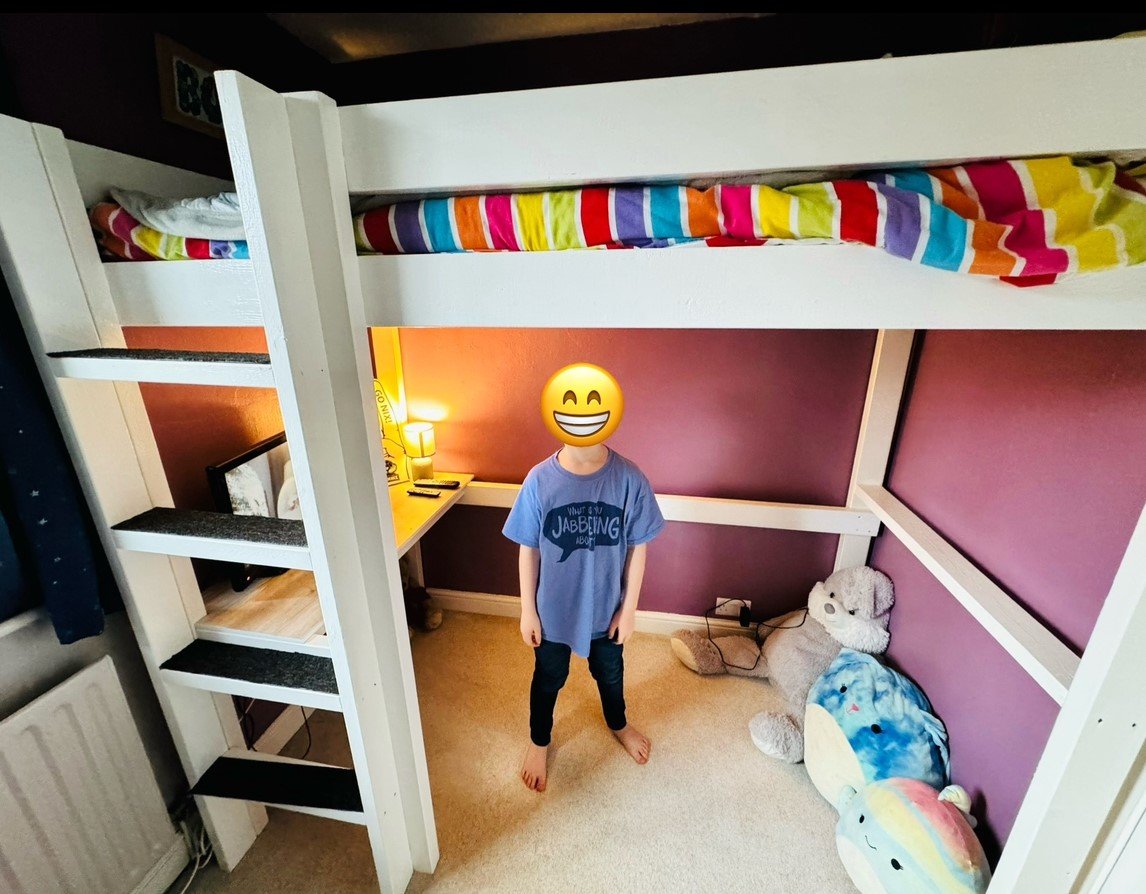
My sons tiny box room needed updating. He wanted something more grown up. The brief was "a high bed with a den underneath". As with all Ana White plans it was easy to follow and gave me the inspiration to build something bespoke to a very limited space. I have added a desk for him to do homework. He's over the moon with it. Thank you for the inspiration. - Harry

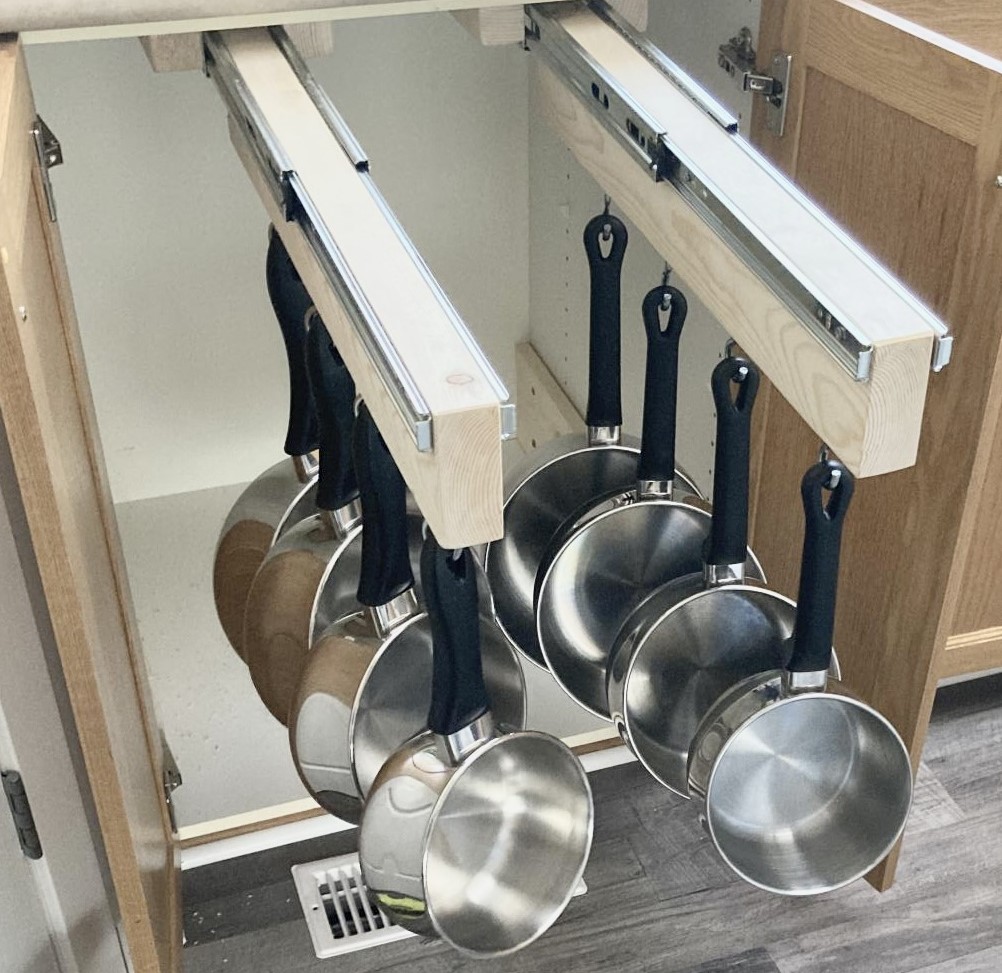
Pot holder

Submitted by Anonymous (not verified) on Tue, 01/12/2021 - 06:21

Working off your idea. Added another holder. There will be a bottom drawer for bigger stuff.

Built from Plan(s)
Finish Used
Will be painted
Recommended Skill Level
Starter Project

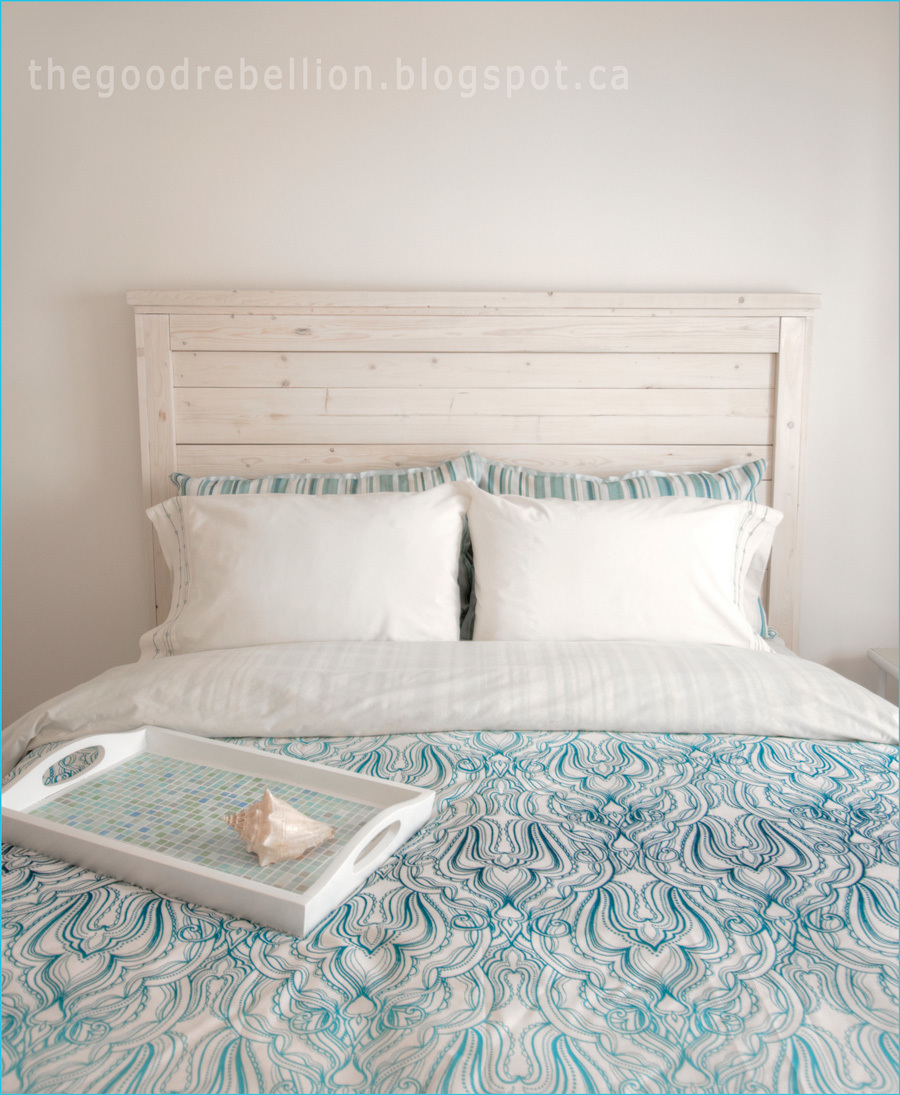
White Washed Queen Headboard

Submitted by sawdust on Tue, 02/12/2013 - 11:39

This is my first piece of furniture I've ever made from a plan. I would recommend this for someone who is new to the craft. I also sanded each board before I put it together. I just find this easier to do than sanding it afterwards. Plus, it gives me the chance to look at the grain and see where I might want it. Both the stain and clear coat I used can be washed out of your brush with soap and water.

Estimated Cost
$90.00
Estimated Time Investment
Weekend Project (10-20 Hours)
Finish Used
Minwax white wash pickling stain - one application with a foam brush.
A very forgiving stain and easy to use.
Minxax Polycrylic clear satin - one coat with a paint brush.
Recommended Skill Level
Starter Project

Comments

spiceylg

Wed, 02/13/2013 - 05:18

Really like the white wash look, great job! Also, love the bedding and the tray. Did you make that tray, too?

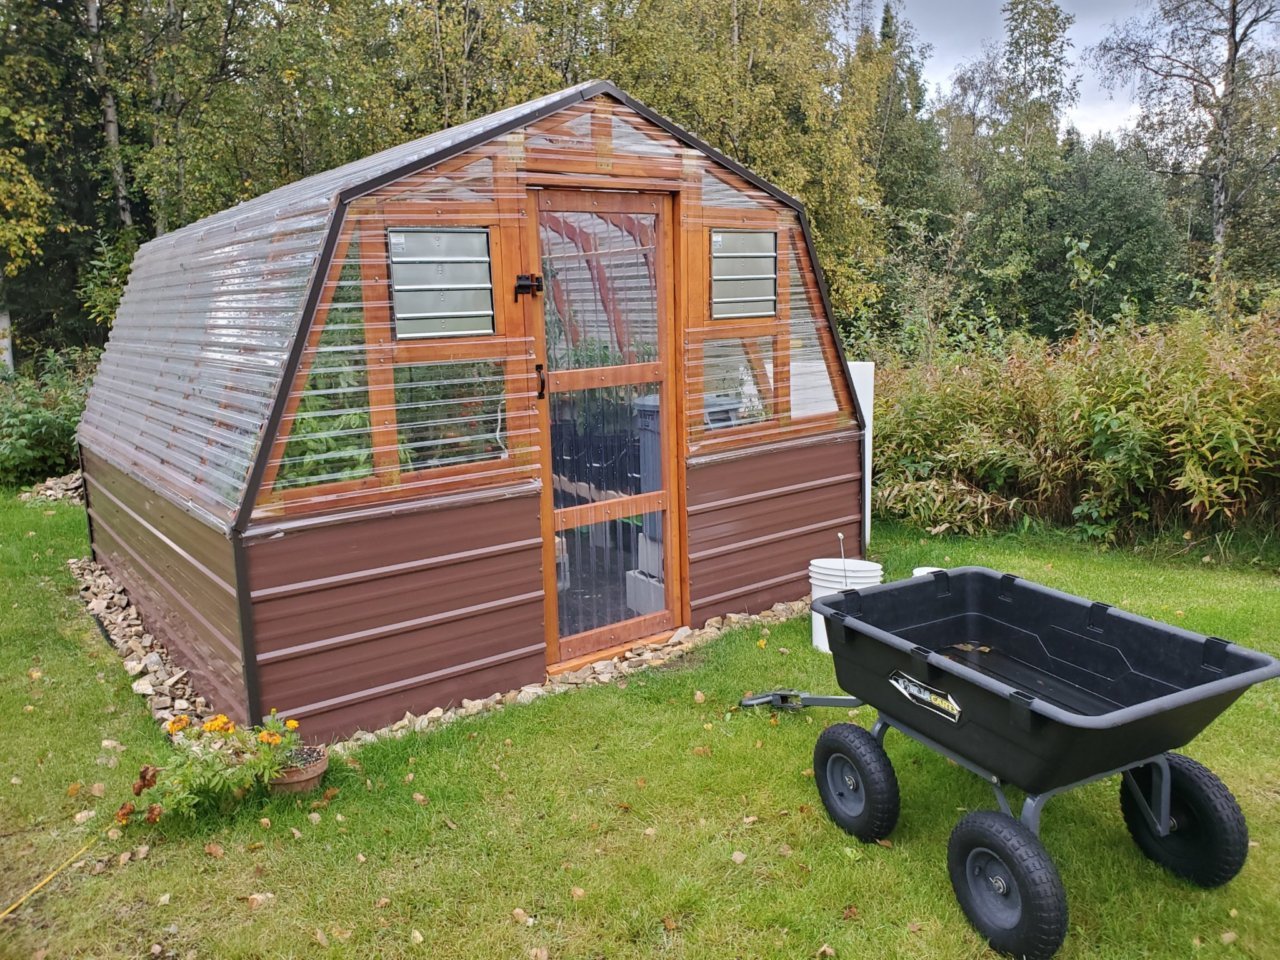
Frosty Garden Greenhouse

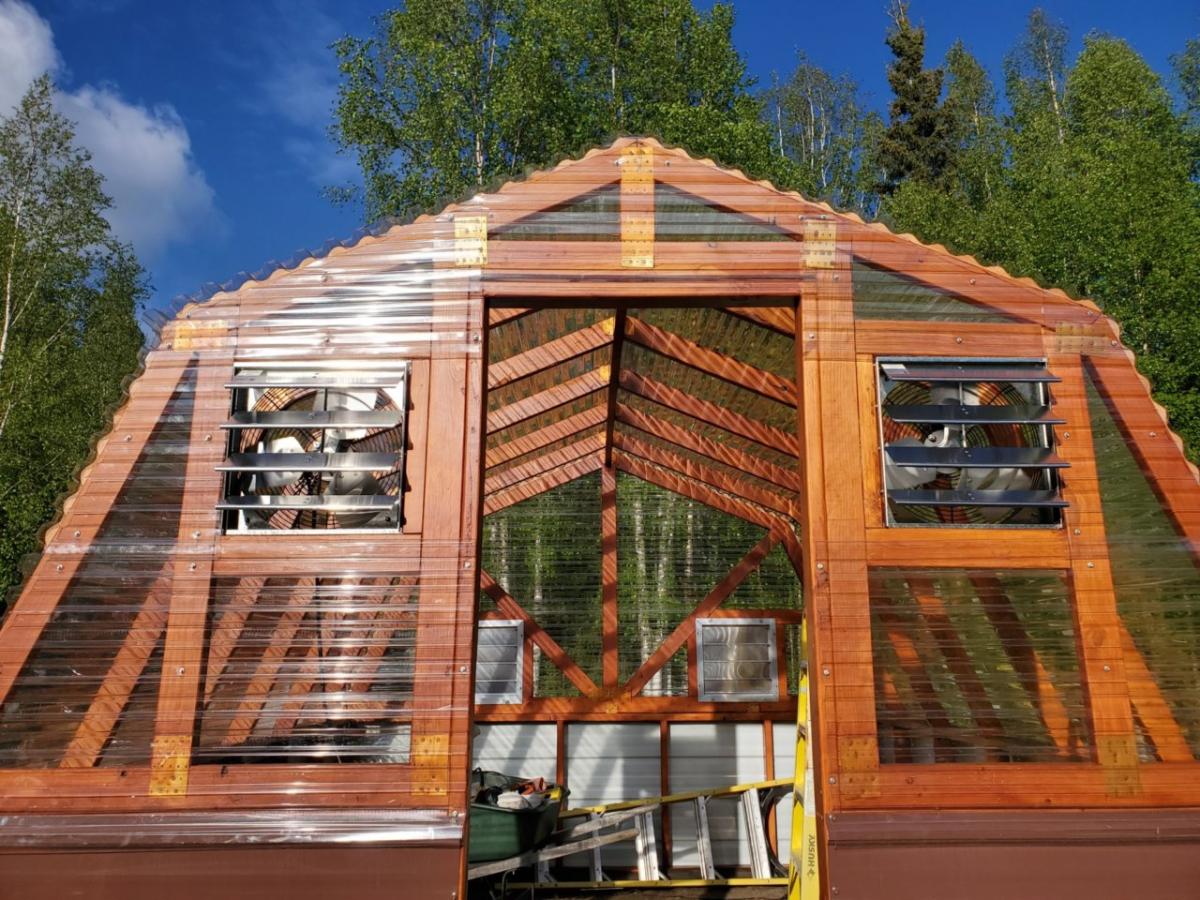
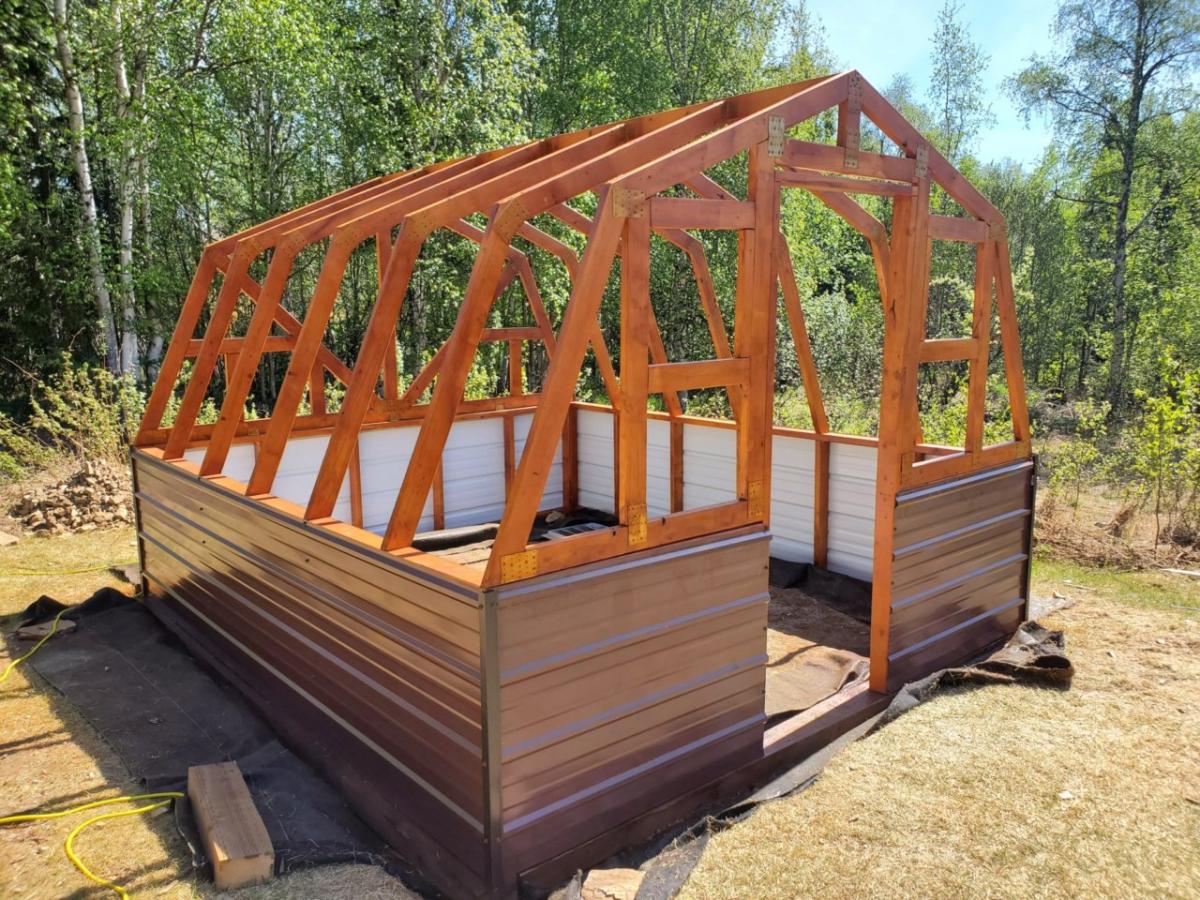
It was truly great for us to find a greenhouse design from a fellow Interior Alaskan blogger. We kept coming back to this design, enough times to where we decided to actually build it.

We would be the first to admit that tackling a gambrel style building was slightly intimidating and not what we had in mind for our very first self-built building! But, we faithfully followed the cut lists and directions. It turned out beautifully! If you're in the same boat, have confidence that you can build this too!

We love the options available for making it your own. We decided to stain the greenhouse lumber of ours to match our cedar sided home. We also built a semi frost-resistant foundation, since we're a little north of Ana at 65 degrees and sometimes experience frost heaving. We also added full climate controls to ours, adding both fans and louvers that keep our greenhouse at perfect temperatures.

The performance has been great! Building this greenhouse has been the single greatest thing we have done in our years of subarctic gardening. We might even consider building a second greenhouse down the road. No matter how big your greenhouse is, it's never quite enough!

Thanks for the great plans, Ana! We appreciate your work!

Built from Plan(s)
Estimated Cost
$2400
Estimated Time Investment
Week Long Project (20 Hours or More)
Finish Used
Transparent cedar stain
Recommended Skill Level
Intermediate

Comments

Modern Craft Table…Done!

This was mine and my husbands first project ever! And it turned out even better than expected….now we are hooked! Next the loft bed!

Built from Plan(s)
Estimated Time Investment
Weekend Project (10-20 Hours)
Finish Used
Behr Ultra White
Recommended Skill Level
Starter Project

Barn Greenhouse on the Penninsula!

Submitted by klatz on Fri, 05/15/2015 - 09:08

Super easy to follow and build! We went with treated lumber from Home Depot and have around $1500 into the project. Will be looking at adding an automatic fan and thermostat next year. Benches on one side for starters and a raised bed on the other side.

Built from Plan(s)
Estimated Cost
$1500
Estimated Time Investment
Week Long Project (20 Hours or More)
Recommended Skill Level
Intermediate

Comments

MartiB8

Fri, 06/12/2020 - 11:00

What a fabulous job! I love the red door for a pop of color. And the thermometer is a brilliant idea. I'm modifying this plan to better fit my yard. Thanks for sharing!

Octagon Picnic Table

Submitted by Anonymous (not verified) on Sat, 04/09/2022 - 10:23

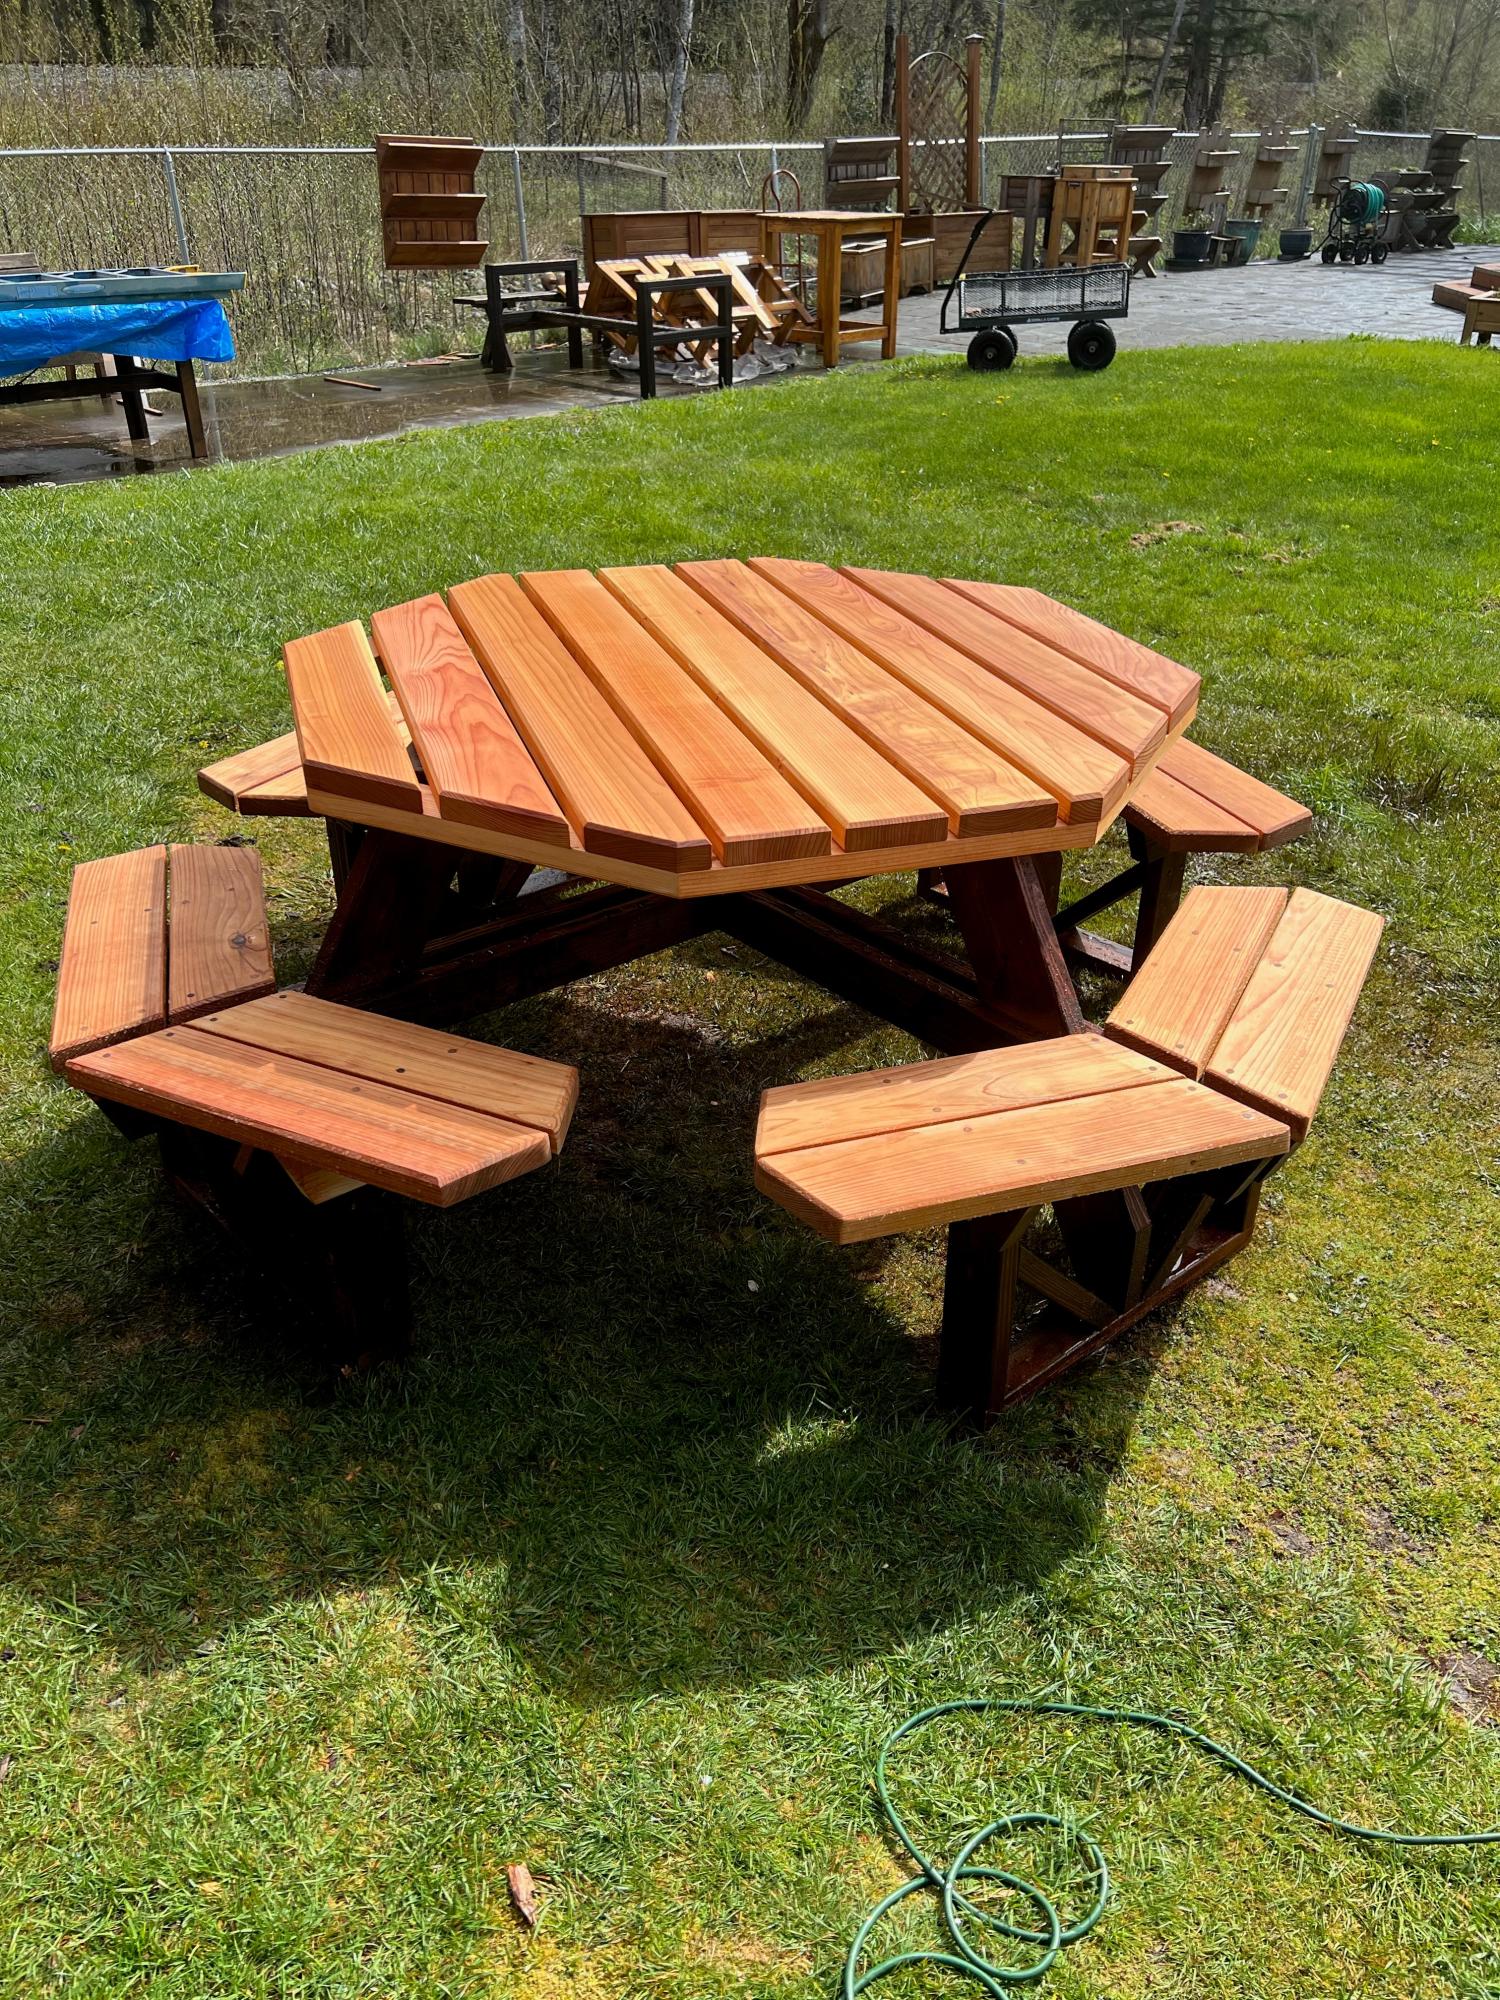
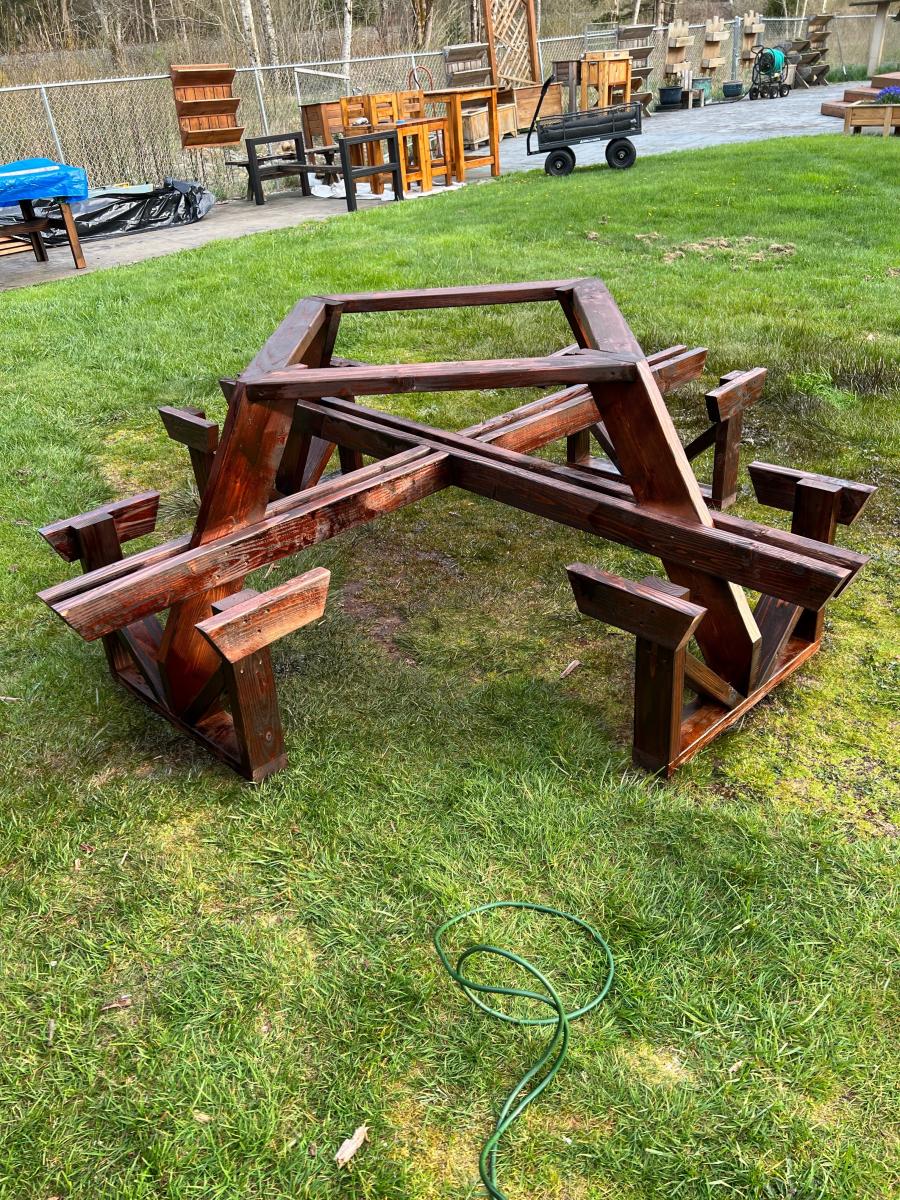
I just finished this octagon picnic table as per your plans
the 2x6 are all clear Western Red Cedar and the skeleton is
Douglas Fir. I think it turned out astonishingly excellent.

Thanks for the inspiration Ana.

Seasonal And Holiday

Glider

Submitted by Seansg5 on Sun, 08/09/2015 - 20:24

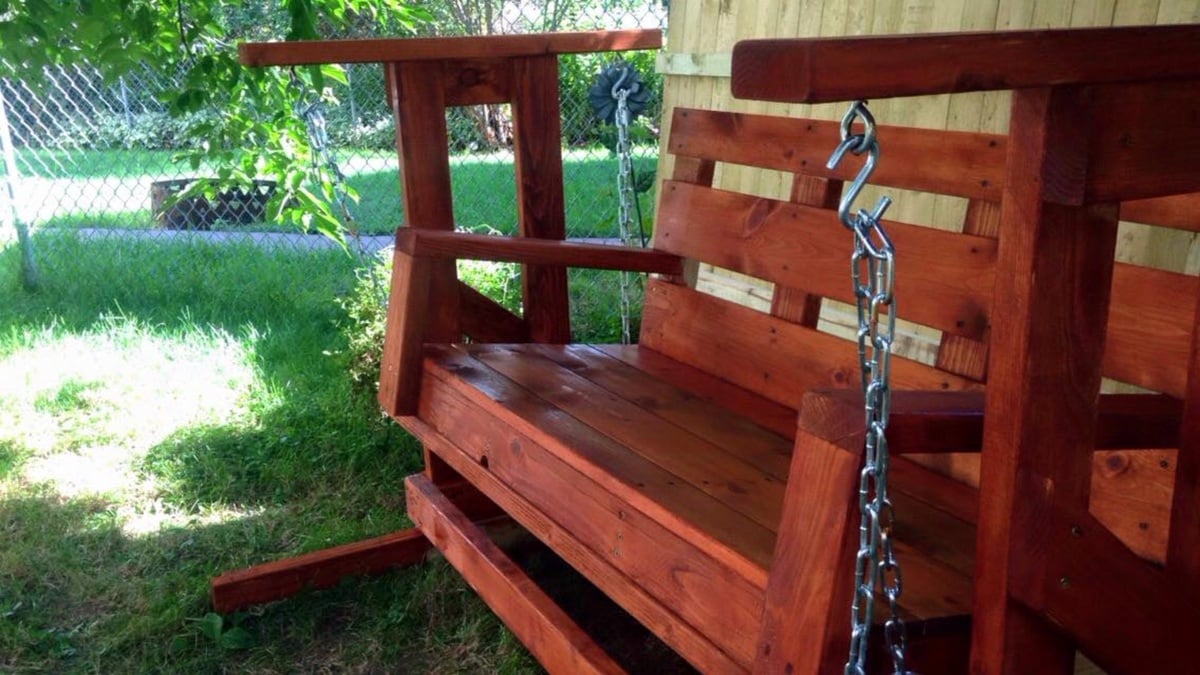
The bench was easy to build with great instructions. I had Home Depot make my cuts for this first project and then I went and bought a miter saw and other power tools for future ones. So much fun. 

Built from Plan(s)
Estimated Cost
$100
Estimated Time Investment
Afternoon Project (3-6 Hours)
Recommended Skill Level
Beginner

Comments

Cross35

Mon, 03/14/2016 - 08:35

Great work.  DId you do anything different to the swing itself?  How did you build the frame.  I'm looking to do this exact thing for my patio.  I don't have anywhere to hang the swing.


Thanks for sharing any info.

mbarland

Sat, 06/13/2020 - 16:54

Made the chair and then built the glider frame for it just eyeballing the picture. I can't figure out how to upload a photo of my design, but can try to describe it.

I made mine with a 4x4 on the base of each leg, but a 2x4 would work as well, it was just what I had on hand. The base board on each leg I made 48". From there I put two 48" vertical boards. The vertical boards were centered and from the front edge of the first board to the back edge of the second board. Two 16" boards were then used at the top and bottom of the vertical boards to hold them in place. Cap it off with a 30" board on top of the verticals. This is where you'll attach your eye bolts. I put both eye bolts 3 1/2" back from the front (a scrap of 2x4 works well as a guide). To join the two legs, I used two 52" boards on top of the base 4X4 of the verticals (one in front of the legs and one behind).

DIY Barn Door From 2x6 Boards

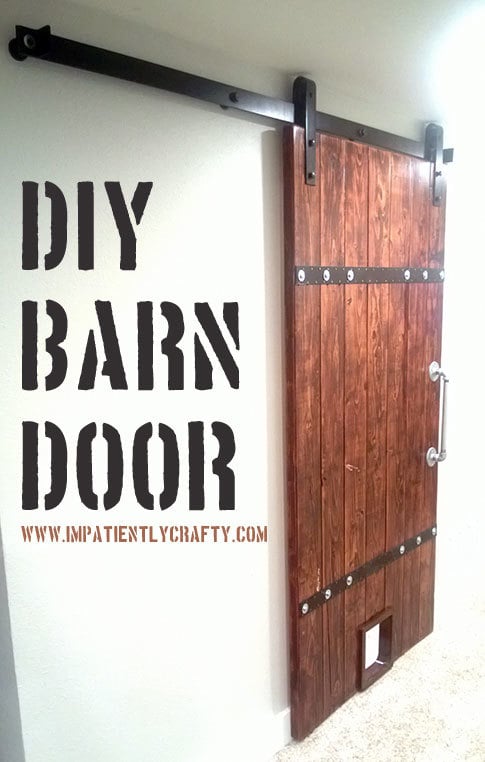
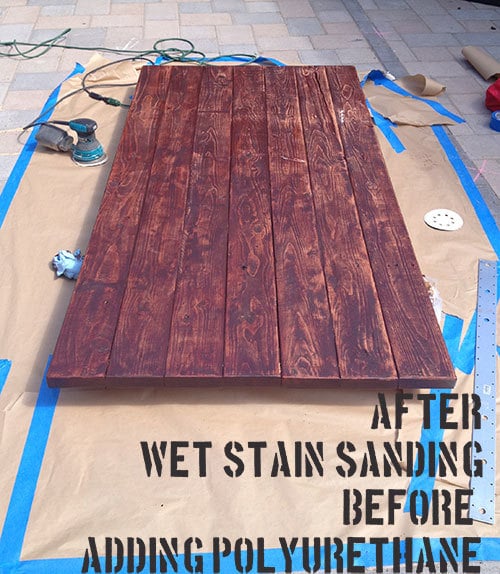
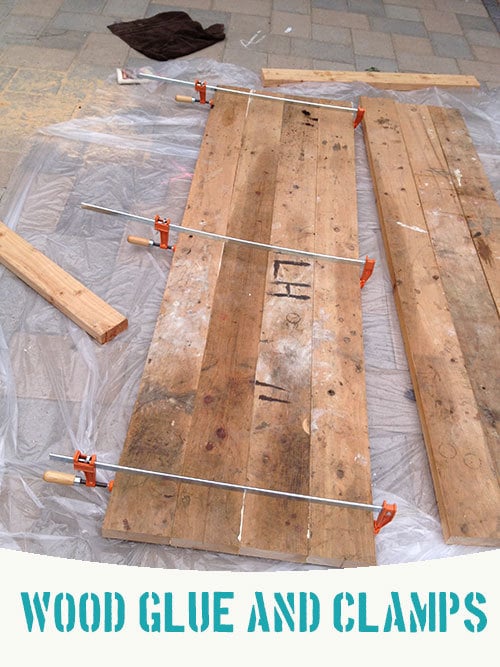
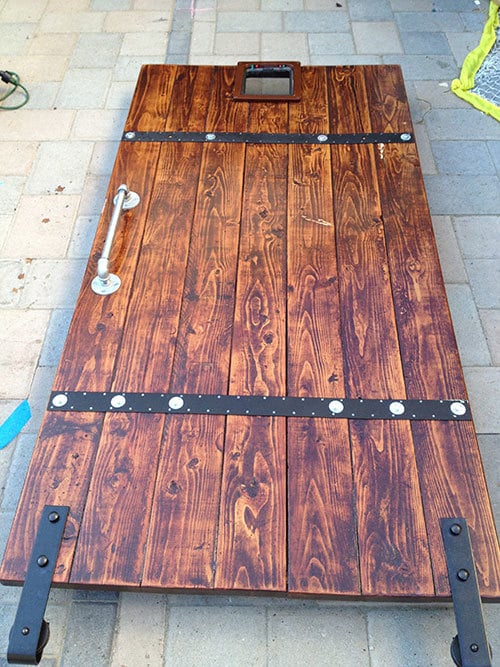
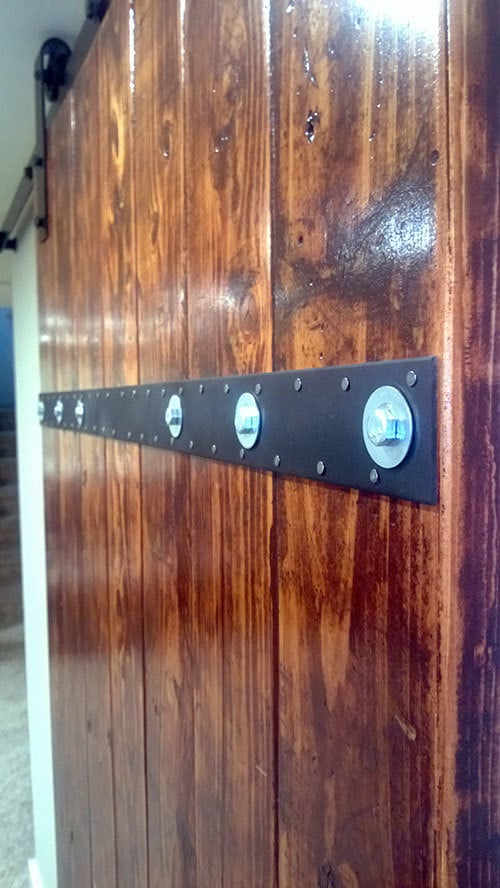
I made his Barn door out of the wood that was left in our garage when we moved in. Using (7) 2x6 boards and adding stain sanding and hardware, it became a super functional industrial rustic (is that a design style LOL) door! (I added a cat door to for our cat ;))

Estimated Time Investment
Afternoon Project (3-6 Hours)
Finish Used
Rustoleum summer oak, varathane cabernet, flat black spray paint, and polyurethane semi gloss. I have the full tutorial on my blog and am more than happy to answer any questions ;)
Recommended Skill Level
Beginner

Comments

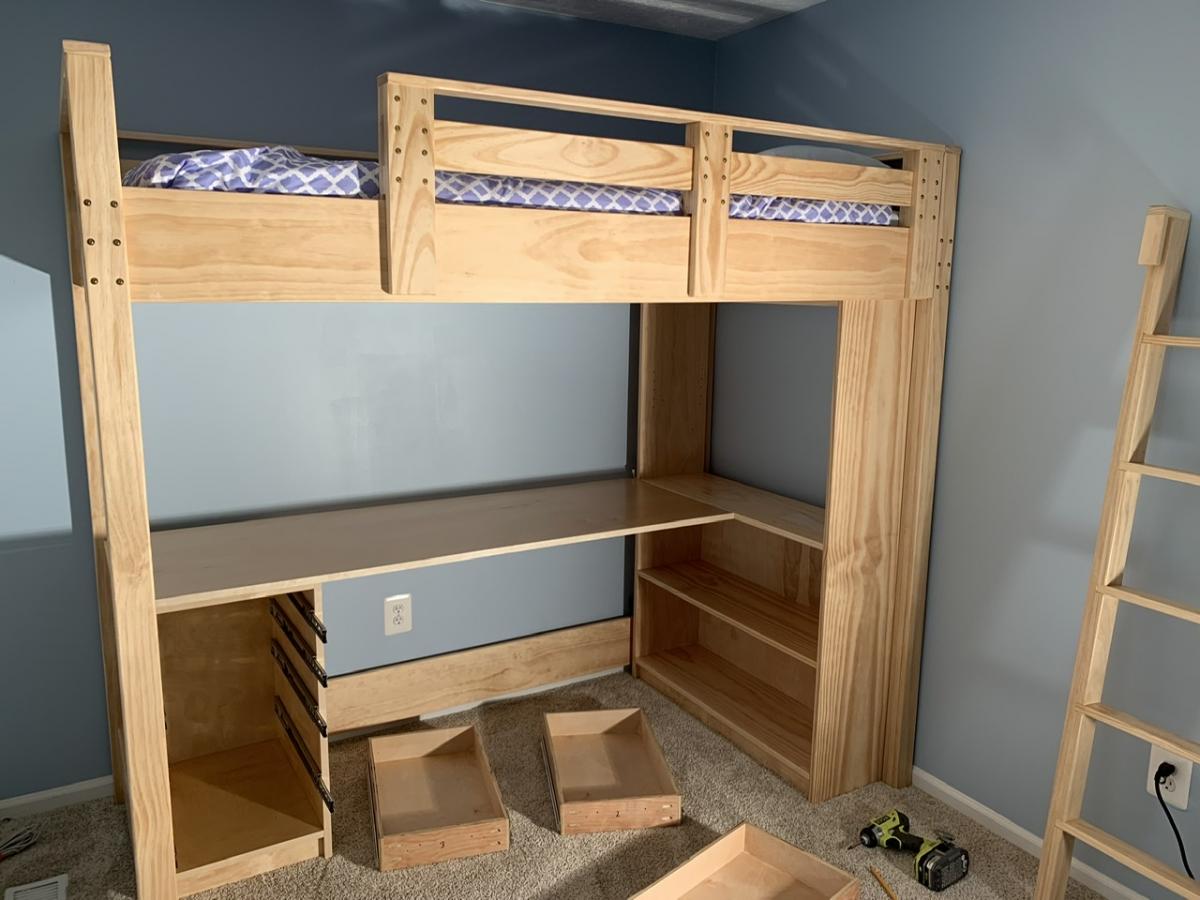
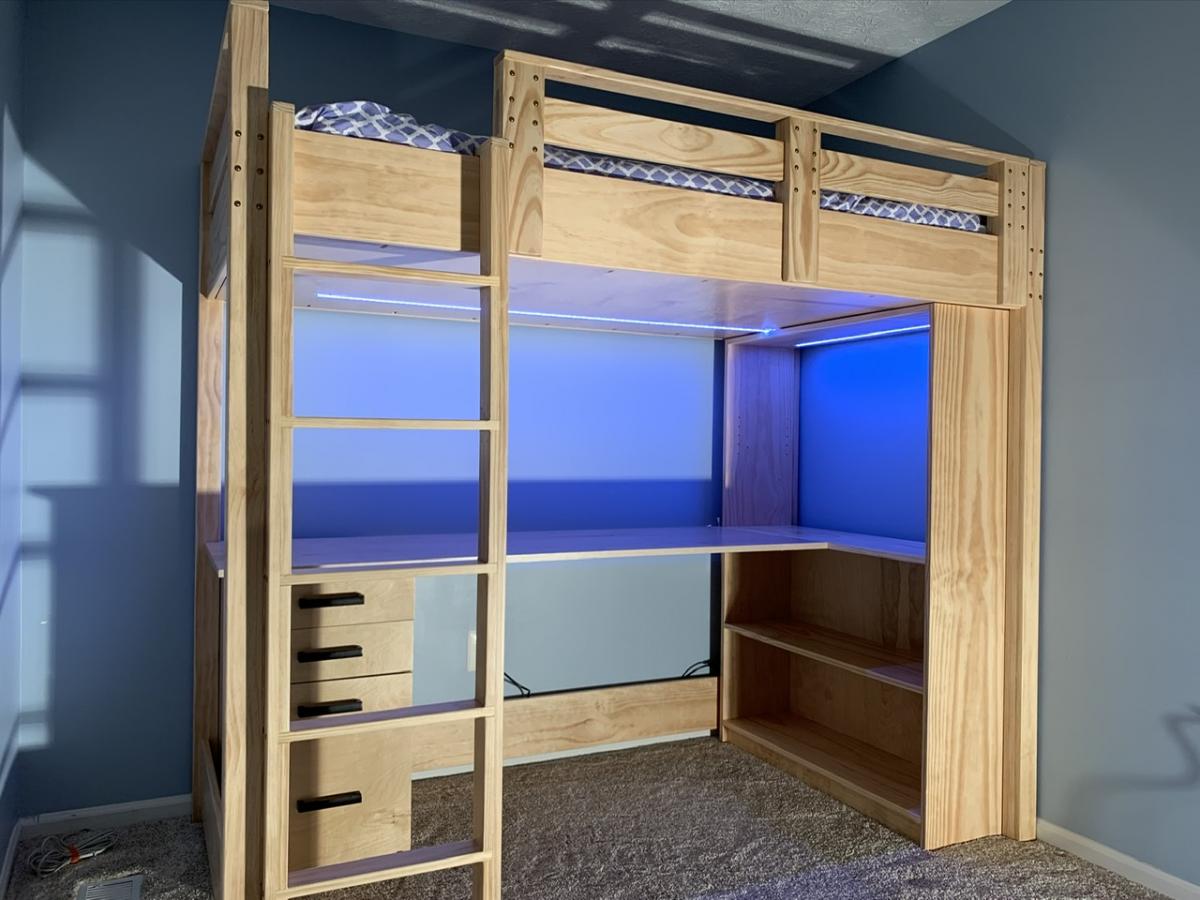
Modified and Expanded Loft Bed, Shelves, and Desk

Submitted by mickelsn on Mon, 11/25/2019 - 20:09

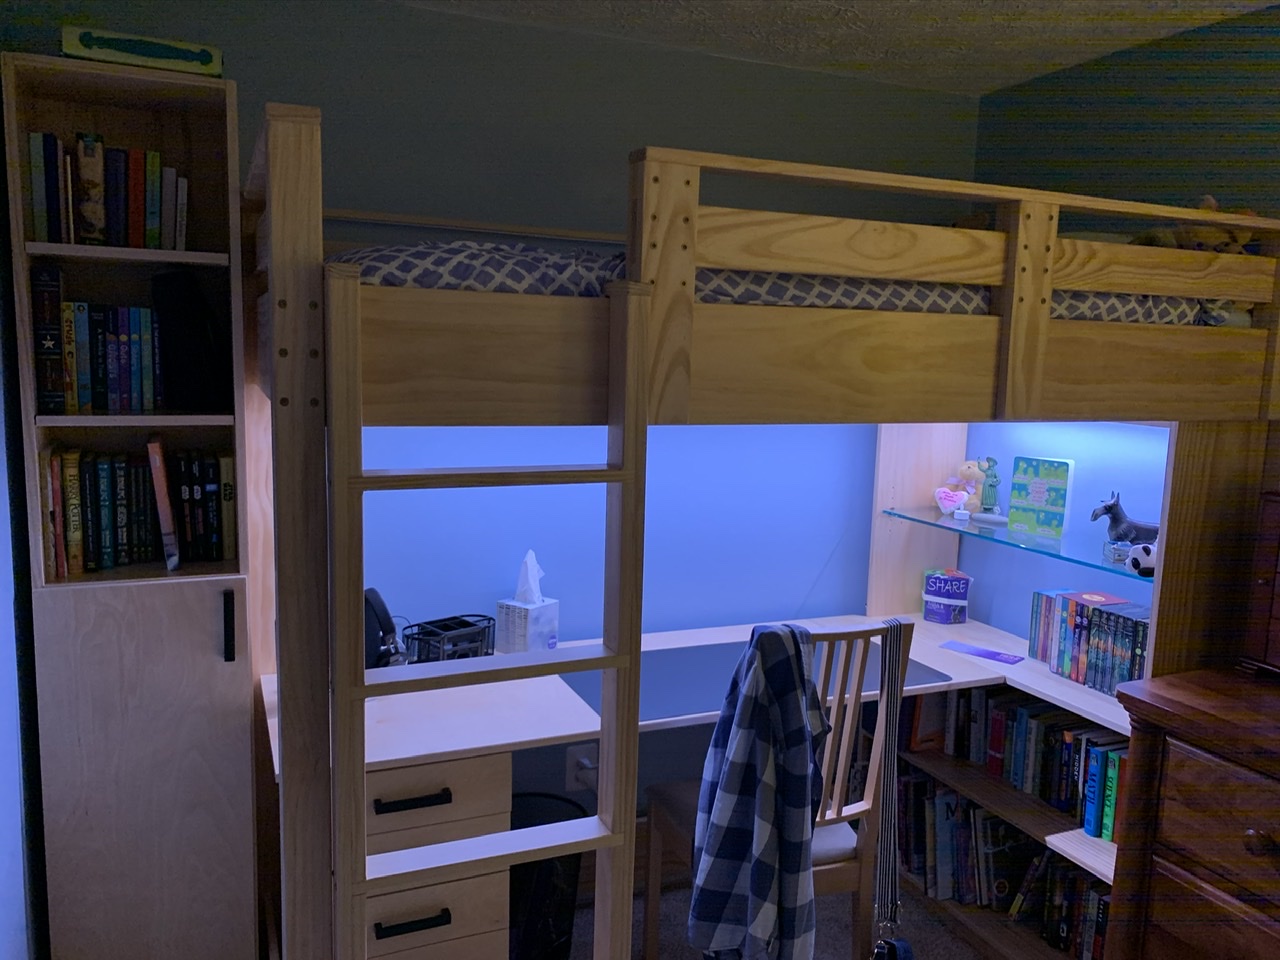
My daughter desperately needed a new loft bed for her small bedroom as she became a teenager. After looking a long time, I finally decided to   take the plunge and make something custom after we couldn’t find a bed that met her needs (she’s VERY tall for her age). Thank you for posting the loft bed and bookshelf plans to this site, as they were great to work from and customize! This is my first woodworking project of any kind, and it came out great with these plans.

We followed the Loft Bed and Loft Bed Bookshelf plans pretty closely, but we did make some changes as we went...

First, we tweaked the guard rail design to make it removable by adding back vertical posts. This way, the front and back posts slide over the front rail and it no longer needs to be screwed in place. This is a nice tight grip for safety, but it’s much easier to make the bed by removing the guard rail and dealing with the mattress. If you do this, just make sure the back vertical posts are shorter than the front ones to make room for the cleats and slats on the inside of the rail! This also means the top of the rail is made with a 1x3 instead of the 1x2 in the instructions.

We also decided to use a vertical ladder design rather than an angled ladder. We did this for space considerations in the room; it’s a bit harder to get up the ladder, but not that much. This also helped avoid any weird angle cuts with my basic tools. We also made the ladder about 3” wider than the one called for in the plans.

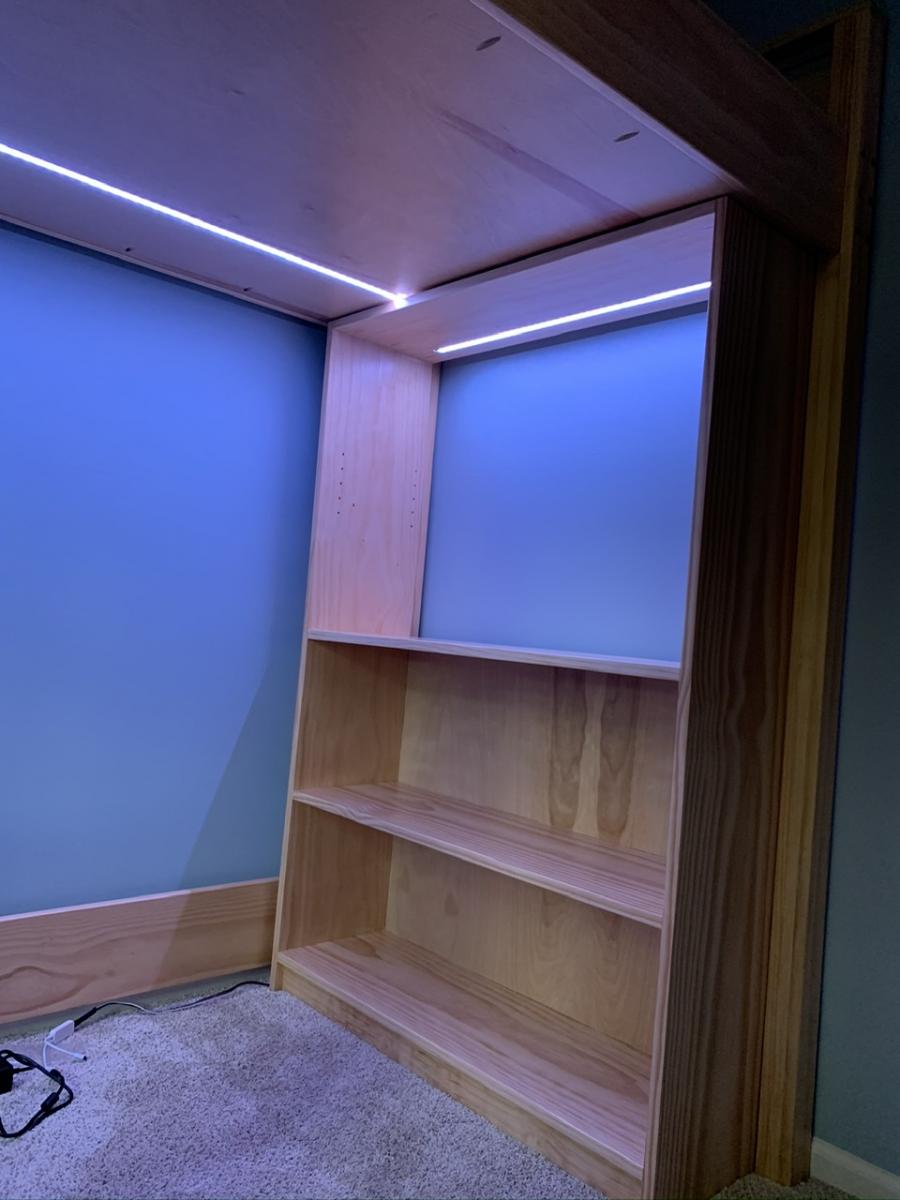
One of my favorite features was adding a 3/4” plywood “ceiling” above the desk. We did this by moving the long side cleats upward by 3/4” of an inch in the plans, and using pocket holes roughly every 10 inches around the perimeter of the plywood. We used this to hide the bottom of the mattress and all the bedding from view when sitting at the desk. It also provides for LED strip lighting above the desk, which is installed by routing out a pathway in the board and installing the lights within an aluminum channel for heat dissipation and to allow installation of a plastic diffuser over the lights. The wiring for the lights lives in the ~1.5” gap between the board and the slats thanks to the 1 x 2 cleats.

In the shelving, we made the upper shelf in the wide bookcase adjustable with the help of a Kreg shelf pin jig. We also ordered a 3/8” tempered glass shelf for this area to let more of the LED light strip we installed in the top of this shelf shine down as well. Again, this was installed in a routed-out pathway that holds an aluminum channel, and the wiring goes up through both the bookcase top and the plywood bed “ceiling” panel to join into the power. We got the strip lights, aluminum channel with diffusers, power supply, and controller from Amazon.

To get power to the LED lights, I routed out a channel for 5-conductor wire in the middle board of a rear leg assembly. Before gluing up the leg, I coated the wire with silicone spray to avoid the glue adhering to it so I could slide the wire around as needed. With a little bit of chiseling, this wire is able to come out of the slide-in joints for the upper and lower wide rails on the back of the bed. On the top, these wires go into a splitter and then to the two sets of LED light strips. On the bottom, the wires to into the LED controller which is mounted to a scrap board along with the power supply that stands on end in the 3/4” gap between the back side wall of the bookshelf and the bottom bed rail.

We created a custom-designed file drawer unit as the pedestal for the desk opposite the wide bookshelf. This was modeled roughly after Ikea Alex drawers with three narrow drawers and one file drawer. The carcass is about 14 1/2” wide by 21 3/4” deep by 29 1/4” tall and made of 3/4” plywood. The drawer boxes are approximately 12” wide by 20” long made of 1/2” plywood with 3/4” plywood fronts. We used full-extension soft-close drawer slides and positioned the cabinet so they have nearly full extension behind the ladder. Four wooden dowels are used on the top corners to align and secure this end of the desk surface.

Speaking of the desk, it is a piece of 3/4” plywood approximately 24” deep by 64” long. One end rests on the file drawer cabinet, and the other end is flush with the middle shelf of the bookcase and attached using two 6” by 5” 14-gauge galvanized T-straps usually used in framing applications. These are screwed upwards into the bottom of the desk and shelf from below, and are holding up quite well. This avoids the need for desk legs by the bookshelf.

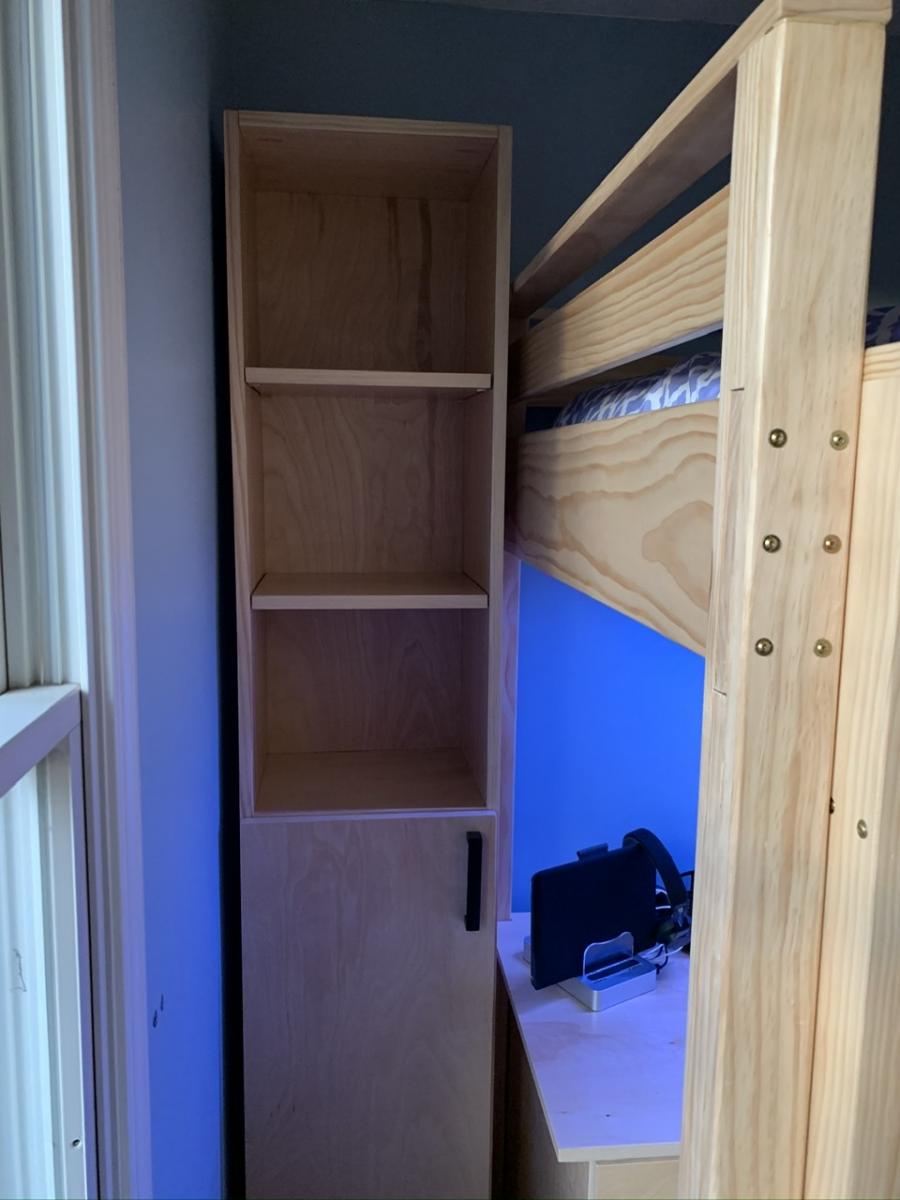
We then adapted the techniques used for the wide bookshelf to build a narrow bookcase (79” tall, 14 1/2” wide) out of two more 10-foot long 1x12 boards. This bookcase sits between the end of the bed and the corner of the room to finish out the look and provide more storage. The top, middle, and bottom shelves are fixed and there are a total of four adjustable shelves (two in the top half, two in the bottom half). We also cut a door and installed it using a pair of full-overlay euro hinges. With these dimensions, the tall bookcase is also capable of working with 11” x 11” x 11” storage cubes just like the wide bookshelf.

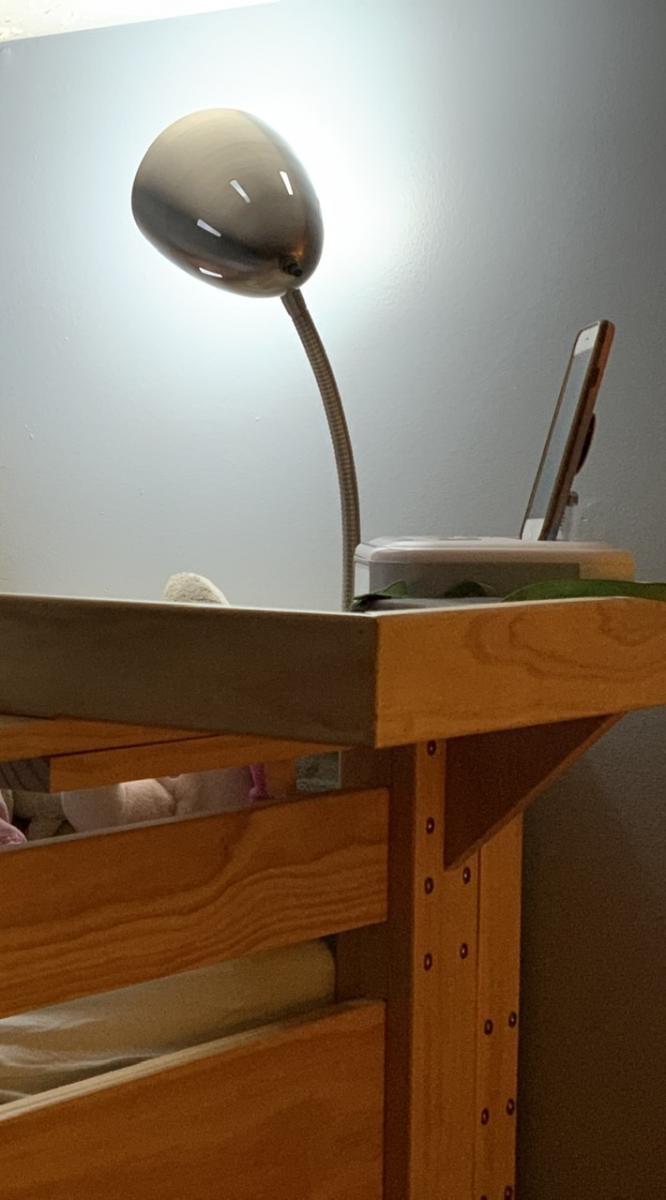
The finishing touch was to create a shelf that attaches to the guard rail and provides a place for my daughter’s alarm clock to sit and be within easy reach. This shelf is made around a piece of the scrap 3/4” plywood that is approximately 21” long and 9” deep. I used leftover 1x3 pine that I glued and nailed to the outside perimeter of the plywood flush with the bottom to hide the layers in the plywood while providing walls around the shelf. I also glued and screwed another 1x3 piece to the front of the plywood, this time flush with the top, as the first piece of a U-shaped grip to slide over the top of the guard rail. Another 1x3 scrap was then positioned, glued, and brad nailed to this front piece to finish the grip. I then cut a triangular piece of wood from a 1x6 to provide additional support under the shelf against one of the vertical pieces of the guard rail. This piece is held in place with counter-sunk screws that go through the top of the plywood shelf down into E-Z Lok threaded inserts in the top of the triangular wood support. The whole shelf assembly is only attached to the guard rail so that I can still easily remove the rail to change bedding on the mattress.

The whole project is constructed out of Home Depot select pine boards and birch plywood. Throughout construction, I used a 3/16” round-over bit in a router to eliminate sharp corners pretty much everywhere on the bed itself (legs, rails, ladder, etc.). I didn’t use this on the bookshelves, the file drawers, or the desk. Edge banding was used to hide any exposed plywood edges. I used 200-grit sanding discs and an orbital sander to sand the various pieces during construction and before finishing. The entire thing is finished with two or three coats of Minwax Polycrylic water-based polyurethane, sanding between coats, which gives this a nice smooth finish and lets the richness of the wood grain come through.

Hopefully the pictures I’ve posted can help understand the write-up on modifications to the project. I enjoyed building this a lot, and my daughter really loves what this did to her room to make it much more usable! That was worth all the effort and time right there.

Ana, thanks a million for the plans!!
Estimated Cost
$750 in materials for wood, LED lighting, tempered glass shelf, etc.
Estimated Time Investment
Week Long Project (20 Hours or More)
Finish Used
Minwax Polycrylic, Satin finish. Used Shur-Line 3.5” x 7” White Fiber pads to apply on most flat surfaces, with foam brushes to get into corners and apply to edges. For complex pieces like the ladder and guard rail, used Minwax Polycrylic Satin spray. Sanded between coats with 320-grit sandpaper in all cases. Used two coats when doing pad application; four coats when doing spray application.
Recommended Skill Level
Beginner

Pergola Swing

Submitted by grarob1956 on Thu, 04/23/2020 - 17:59

I saw this project on YouTube under Arbor Pergola Swing. It did not mention any specific detailed plans or cut list but it was enough to get me started. I began with (2) 10' 6" x 6" post. buried each 24" and cemented. I cut the post tops at 83" from ground line. The rafter consist of (2) 10' 2"x 6". I used the leftovers of the 6" x 6" post tops in the middle of my rafters to hang the swing from with 1/2 " eye bolt. Then I used (9) 2" x 2 " x 8' and cut each at 36" to finish off the top and (2) 2x6x8 for the 4 rafter supports. I drew out the designs of the rafters and top ends free hand and at made a template for the cuts with s jigsaw.

The entire cost including hardware minus the swing was $170. My wife had purchased the swing last Fall at a clearance for $40 brand new.

Built from Plan(s)
Estimated Cost
$170.00
Estimated Time Investment
Weekend Project (10-20 Hours)
Finish Used
Valspar Duramax Special Walnut
Recommended Skill Level
Intermediate

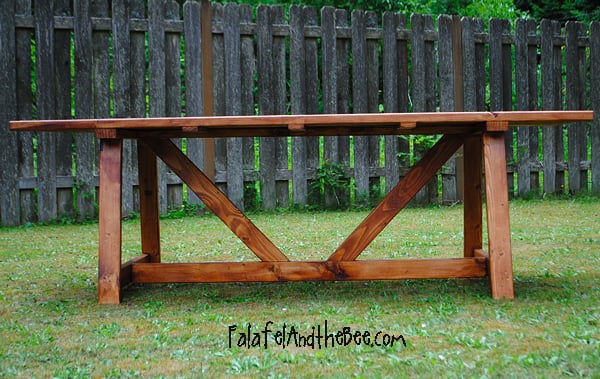
Providence Picnic Table by Falafel and the Bee

This is my second large wood project...and both from this blog! The plans were fabulously easy. This was the first time I used my miter saw, and it was a great way to break it in.


Estimated Cost
Under $120.00
Estimated Time Investment
Weekend Project (10-20 Hours)
Finish Used
Benjamin Moore Arborcoat Transparent Teak
Recommended Skill Level
Intermediate
Seasonal And Holiday

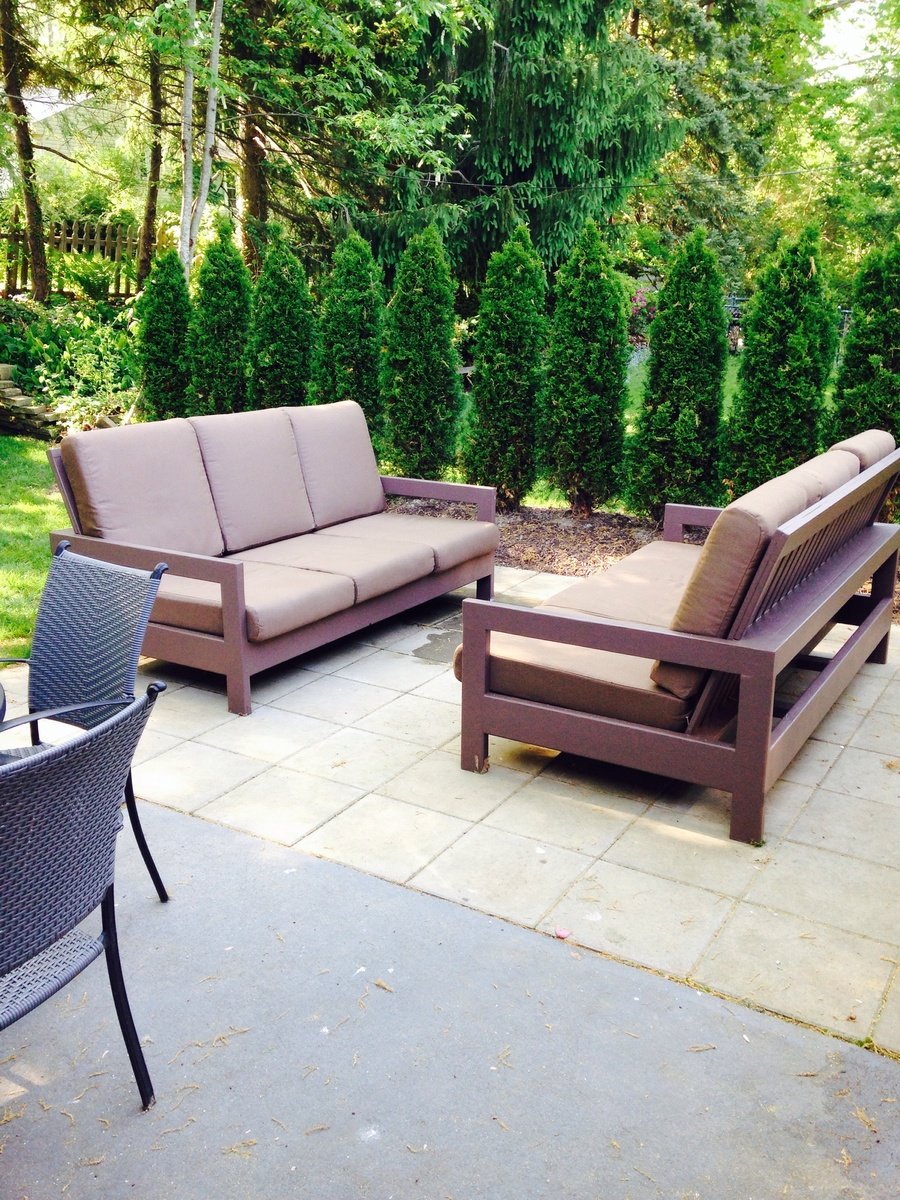
Outdoor patio couches

Submitted by Chrisann on Tue, 05/27/2014 - 11:06

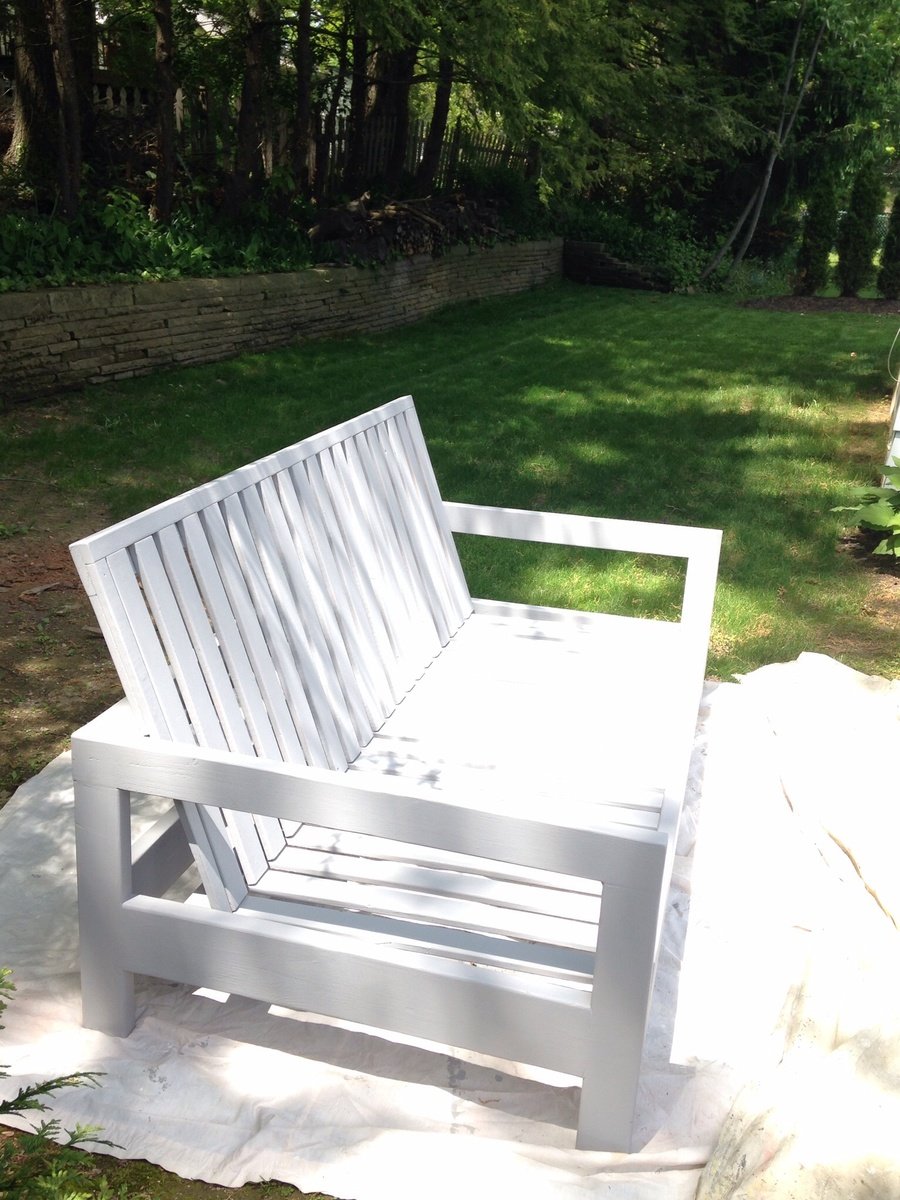
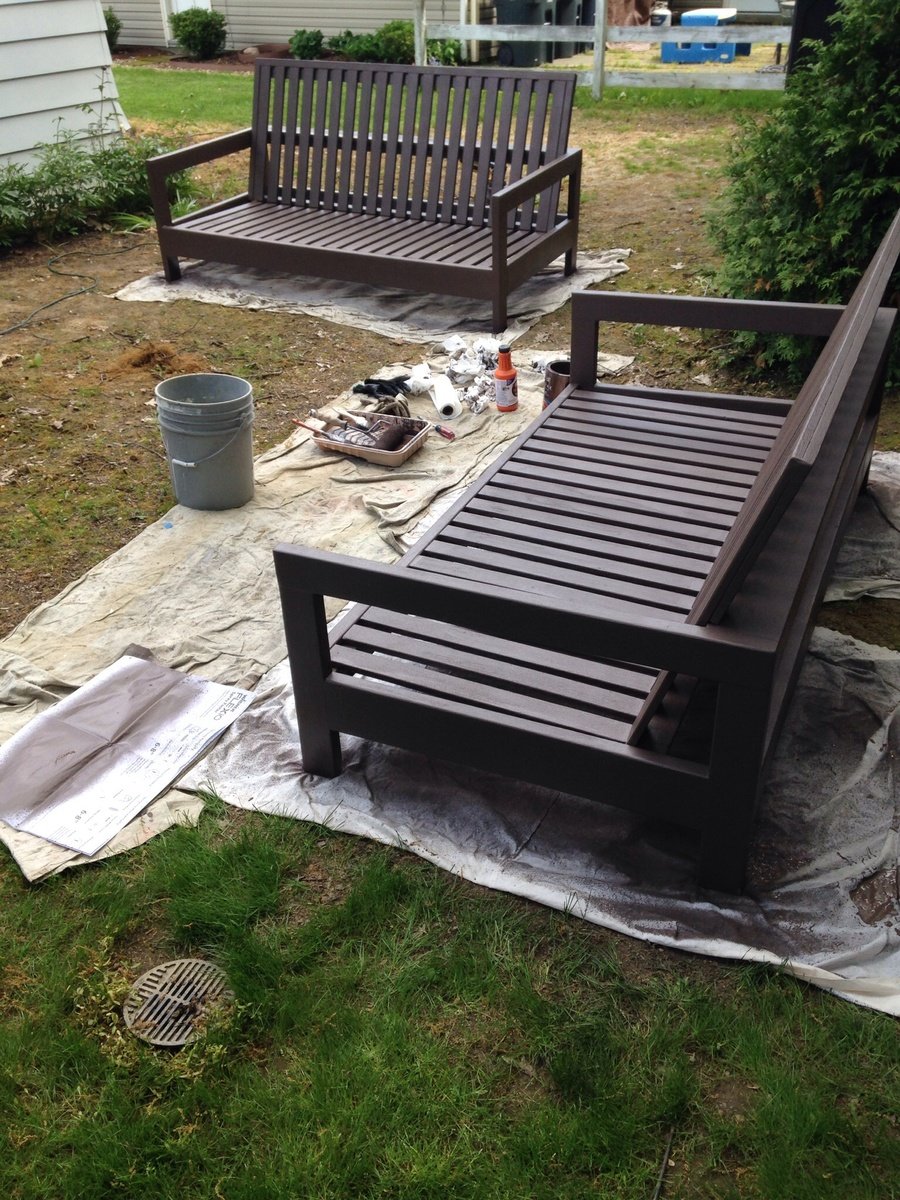
Love this design! We had to adjust the plans to fit a different cushion from Restoration Hardware. The couches turned out great and we had a party the day after the paint dried! Thx Ana-white!

Estimated Cost
Material $200, cushions $700
Estimated Time Investment
Week Long Project (20 Hours or More)
Finish Used
Valspar outdoor paint "frontier road"
Recommended Skill Level
Intermediate

Boot rack

Submitted by Taa-daa on Fri, 09/23/2016 - 17:31

My garage is in a different dimention now! Thank you Ana!

I had a bit of trouble with the length of the dowels but overall I am so happy with it.

Built from Plan(s)
Estimated Cost
I used scrap wood we had left from the previous project so I am not sure
Estimated Time Investment
Afternoon Project (3-6 Hours)
Recommended Skill Level
Beginner

Comments

Taa-daa

Sun, 09/25/2016 - 18:56

I have to say I will be making a few of those! I find the plan you designed is simply awesome! The boots are of the floor which simplifies the cleaning, the dowels are not very long so you wouldn't stumble upon them, the spacing is great! I can go on and on about this one very well thoughtout !!!
DIY Greenhouse Project -Added elevated raised beds & temp/humidity control

Submitted by Anonymous (not verified) on Sun, 07/05/2020 - 09:09

We loved this greenhouse plan from AnaWhite and wanted to be able to grow in 3 seasons so we modified the design to include humidity & temperature control & 18" deep elevated cedar beds inside with 4x4 posts for support and trellis option. We added electricity in order to have a lighted workspace and the ability to put in a circulating fan to control mold and fungus. We added 2 work tables (2x2') on the inside of the door left and right side door in order to do seed trays & store supplies. This was a wonderful project for my husband and my plants inside are doing incredibly well compared to my outside garden beds here in zone 5. Products used:

Foundation
We had a landscape company come and scape/dig a platform and then fill/compact with crushed rock
My husband then used rebar driven into a 4x4 frame in order to secure the frame to the ground and create a base upon which to build the greenhouse

Active ventilation
AC Infinity Cloudline T8 Inline duct fan
Air king range hood wall cap 8" on the bottom outside of the greenhouse wall for air intake + flex 8" duct to the fan itself
Shelter logic autovent automatic shelter vent kits (1 on each side of the front wall) in order to allow air intake from the bottom back of the greenhouse under the elevated beds to flow to the front of the greenhouse and out
Circulating fan- Hurricane wall mount fan 16" - this fan has 3 speeds with tilt function and small mounting bracket

Soil - sourced 3 yards of 50/50 loam/compost from local landscaping supply
60% loam
30% organic compost
10% organic topsoil + perlite

Soil beds
-cedar frame 2 feet wide along sides, 3 feet wide on the back wall
-galvanized metal roofing with holes drilled into it for drainage
-landscape cloth lined

Built from Plan(s)
Estimated Cost
$2000
Estimated Time Investment
Week Long Project (20 Hours or More)
Finish Used
None
Recommended Skill Level
Intermediate

Comments

bushy99

Wed, 09/09/2020 - 13:09

Thanks for that update! I was wondering how to vent this project, as Green houses need the ventilation. Good to know dollar amount also. Great photos.
bushy99

Wed, 09/09/2020 - 13:09

Thanks for that update! I was wondering how to vent this project, as Green houses need the ventilation. Good to know dollar amount also. Great photos.

bushy99

Wed, 09/09/2020 - 13:09

Thanks for that update! I was wondering how to vent this project, as Green houses need the ventilation. Good to know dollar amount also. Great photos.

Farmhouse Bed - King

Submitted by SNukem on Thu, 07/03/2014 - 21:43

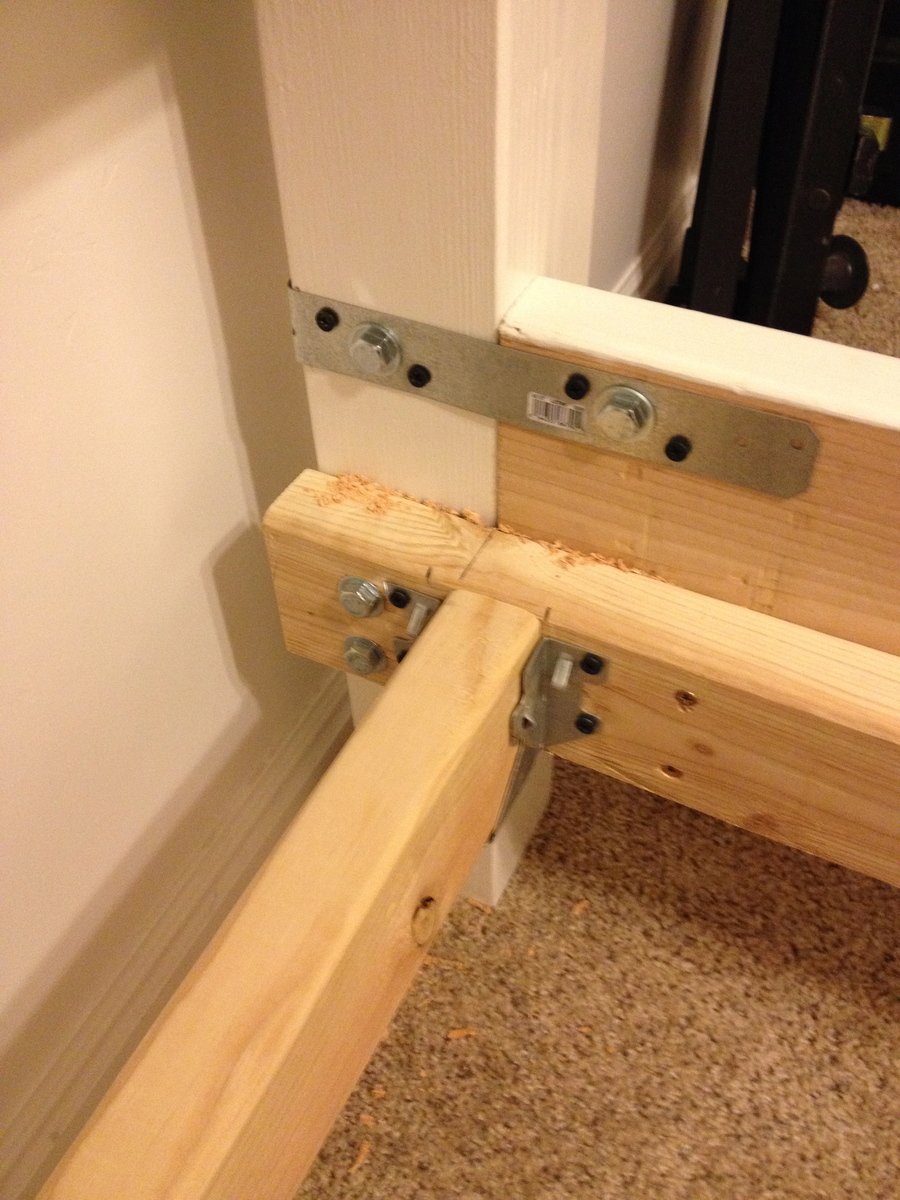
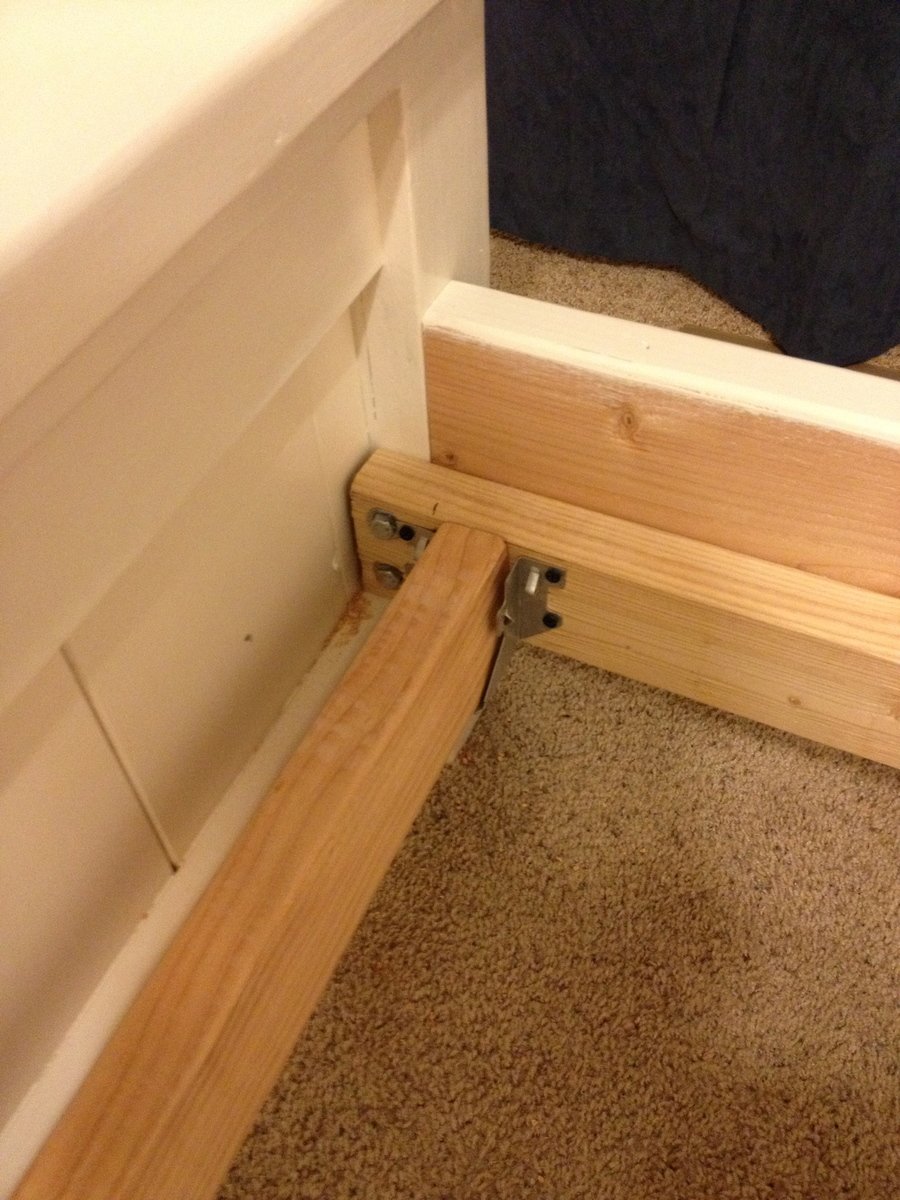
We built the farmhouse king size bed over the last week. We used 2x4 hangers to hold the 2x4's in place and used 2x4's to support the mattress. We put 7/16" plywood on top of the 2x4's to support the mattress. We struggled with how we were going to attach the side rails to the bed frame and finally came up with a way we felt would be strong enough. Please see the pictures included to see exactly how we attached the rails to the bed frame. We used lag bolts, and metal brackets.

Estimated Cost
200
Estimated Time Investment
Week Long Project (20 Hours or More)
Finish Used
Glidden Antique White Primer and paint combo in semigloss, we did 2 coats.
Recommended Skill Level
Beginner

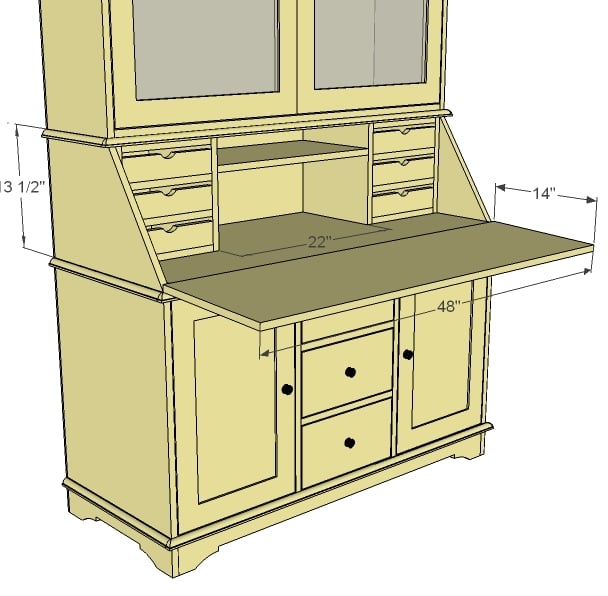
Hidden Desk

Submitted by Anonymous (not verified) on Sat, 10/08/2016 - 12:24

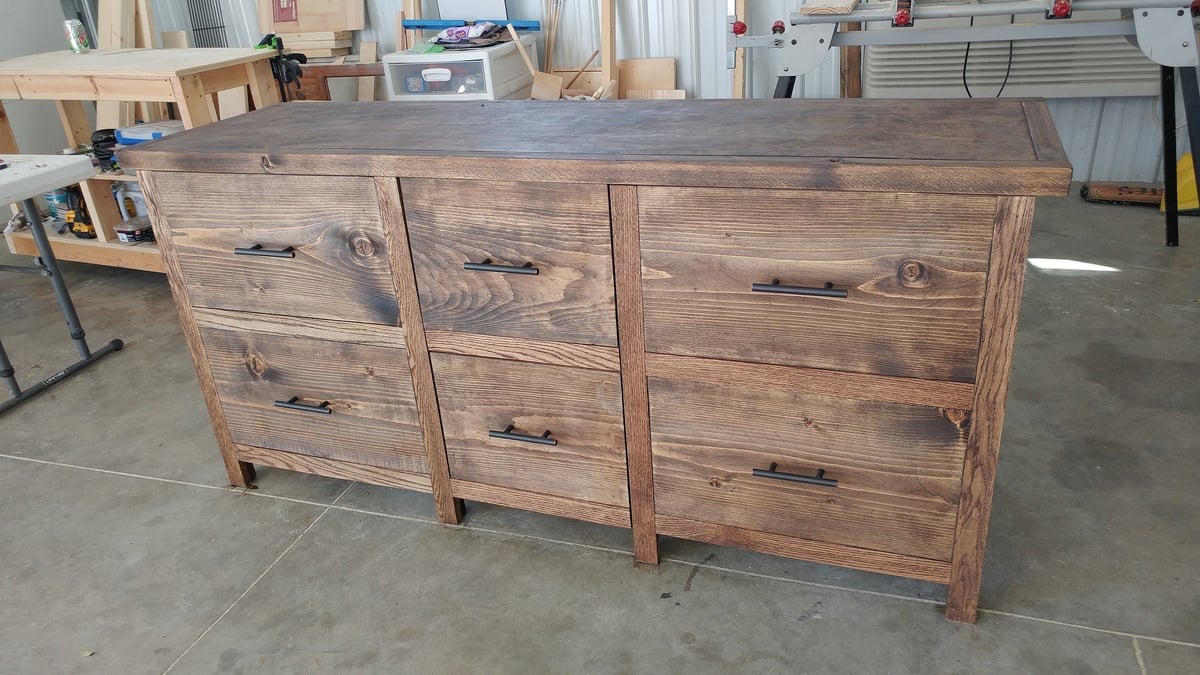
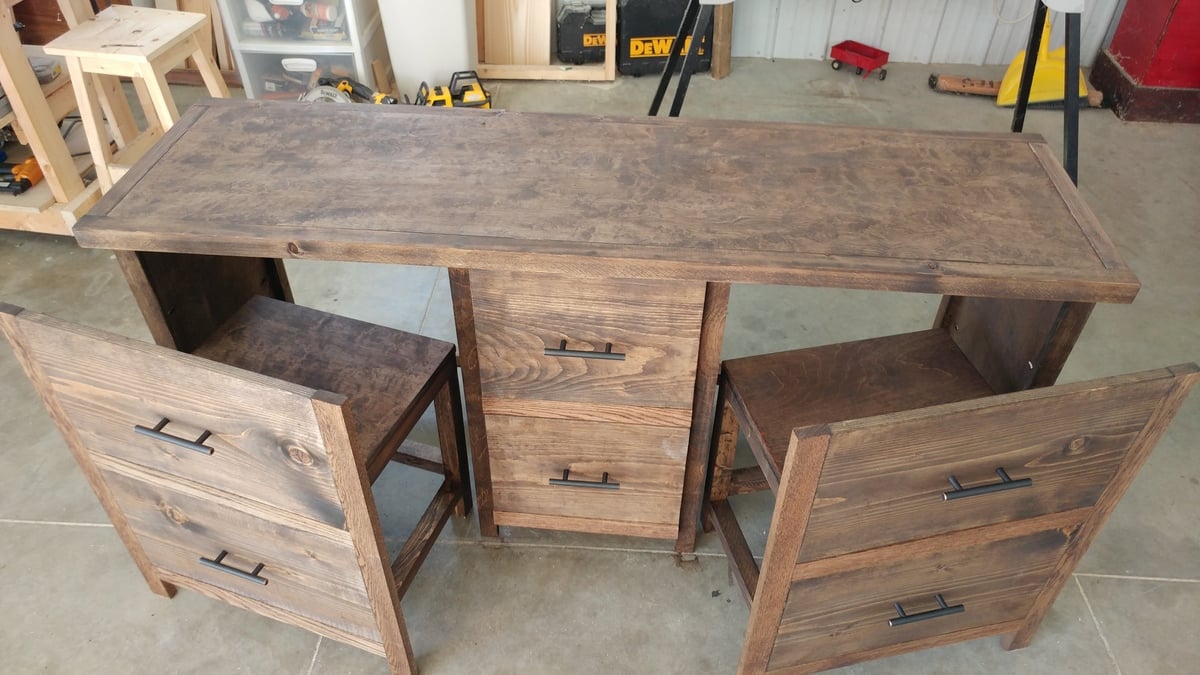
I shrunk the size and dumbed down the plans to fit my skill level.

Built from Plan(s)
Estimated Cost
175
Estimated Time Investment
Weekend Project (10-20 Hours)
Finish Used
Walnut
Recommended Skill Level
Intermediate

Comments

Texastia

Mon, 10/10/2016 - 09:08

I love what you did! It looks so great! I prefer this style, which is more simplistic than the other. Great work!!


Jessi_ites

Tue, 10/11/2016 - 14:56

Thanks! I wish I would of set up an account before I posted so I could get notifications.  I honestly didn't think anyone would notice it :)

Jessi_ites

Tue, 10/11/2016 - 14:58

I am so excited that people noticed this :)  Is there any way of putting this under my account?  I didnt make an account until today and I would like to get notifications.   I have my project on my facebook page and can prove that I made it with other pictures. Thanks!

crstorm

Mon, 01/20/2020 - 07:44

I would love to see this in a farm-house (rather than rustic) aesthetic along with drawers under the seats for extra storage. Maybe on casters with a fold up extension on the other side? So many ideas running through my head with this!

Back