Community Brag Posts

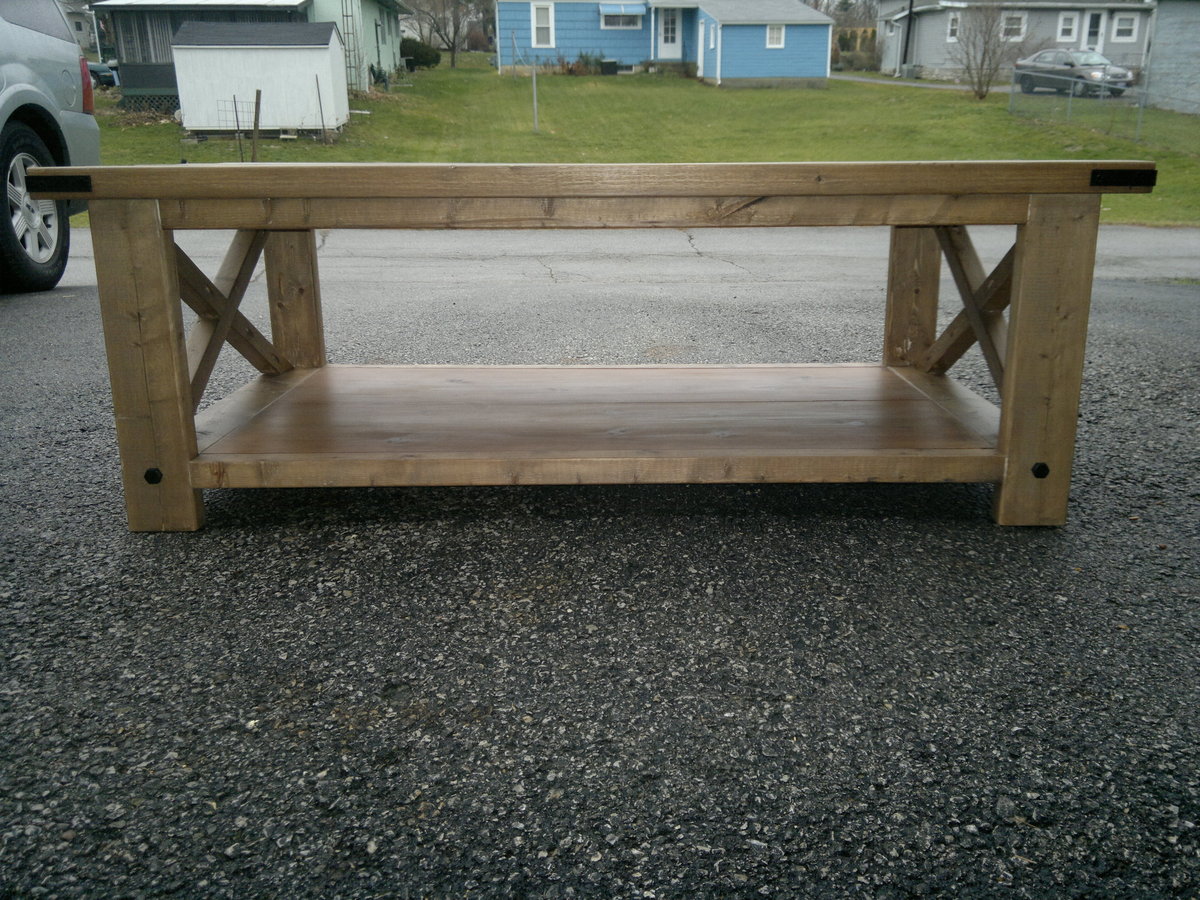
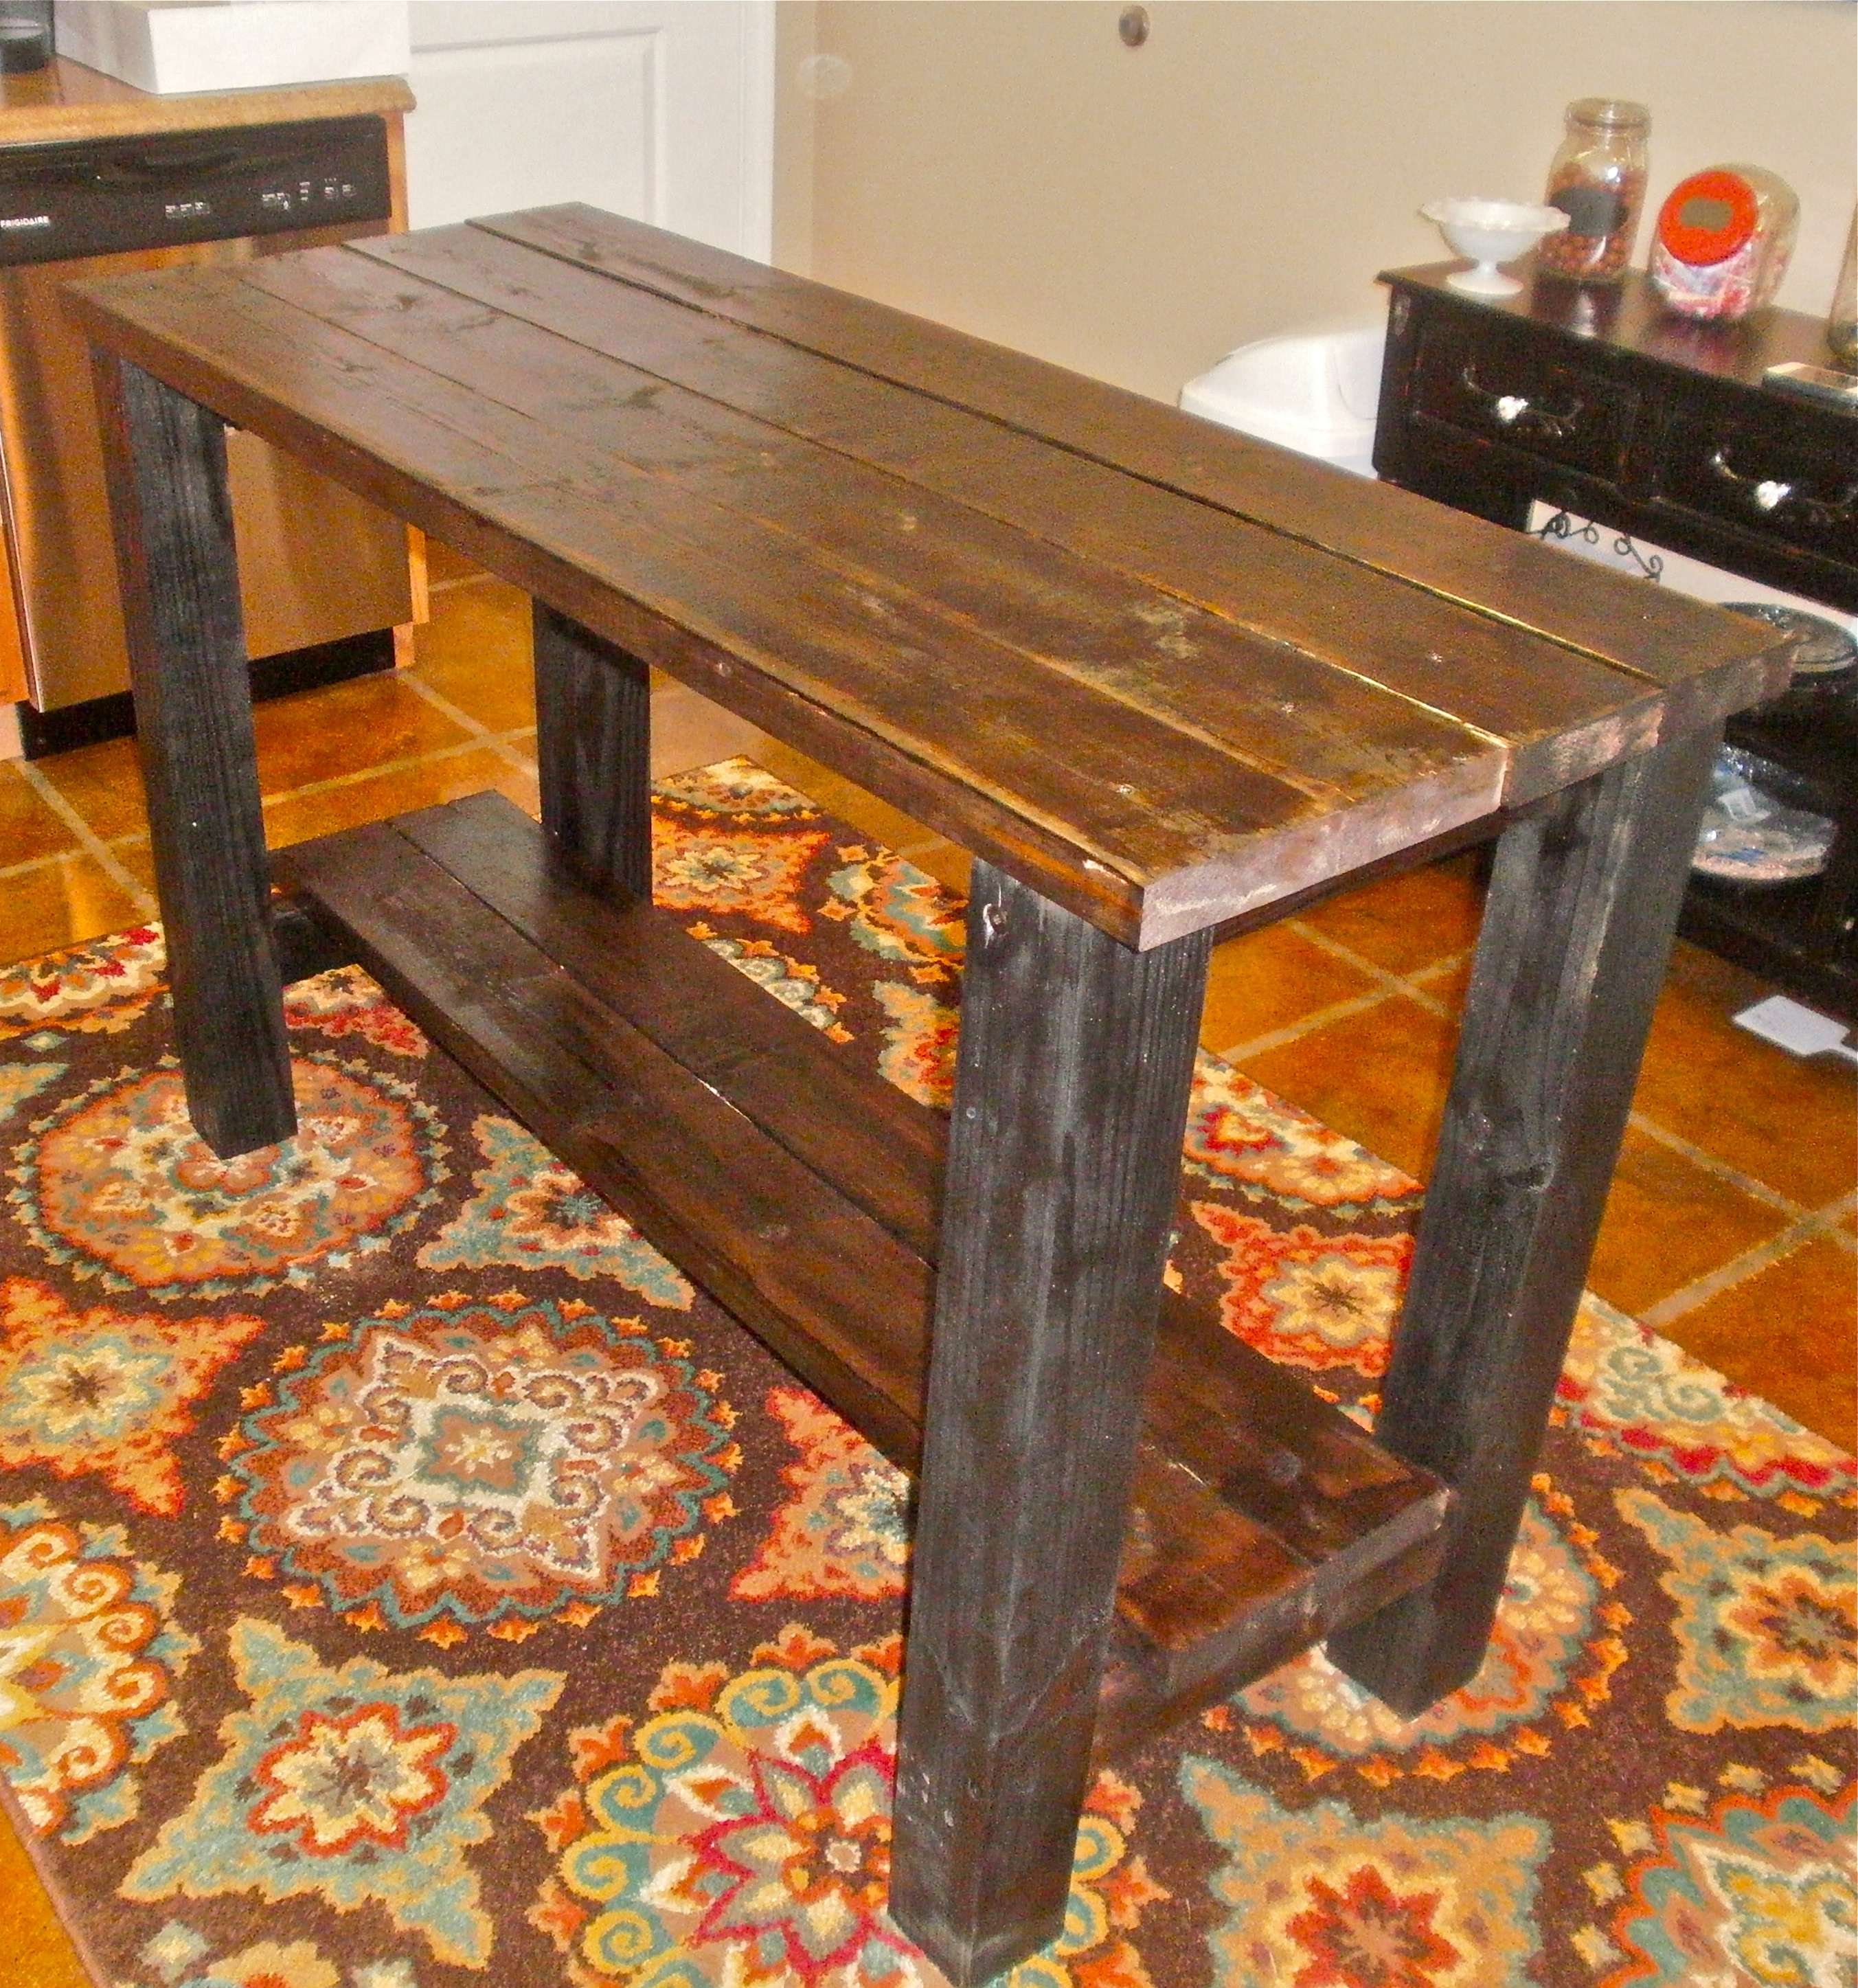
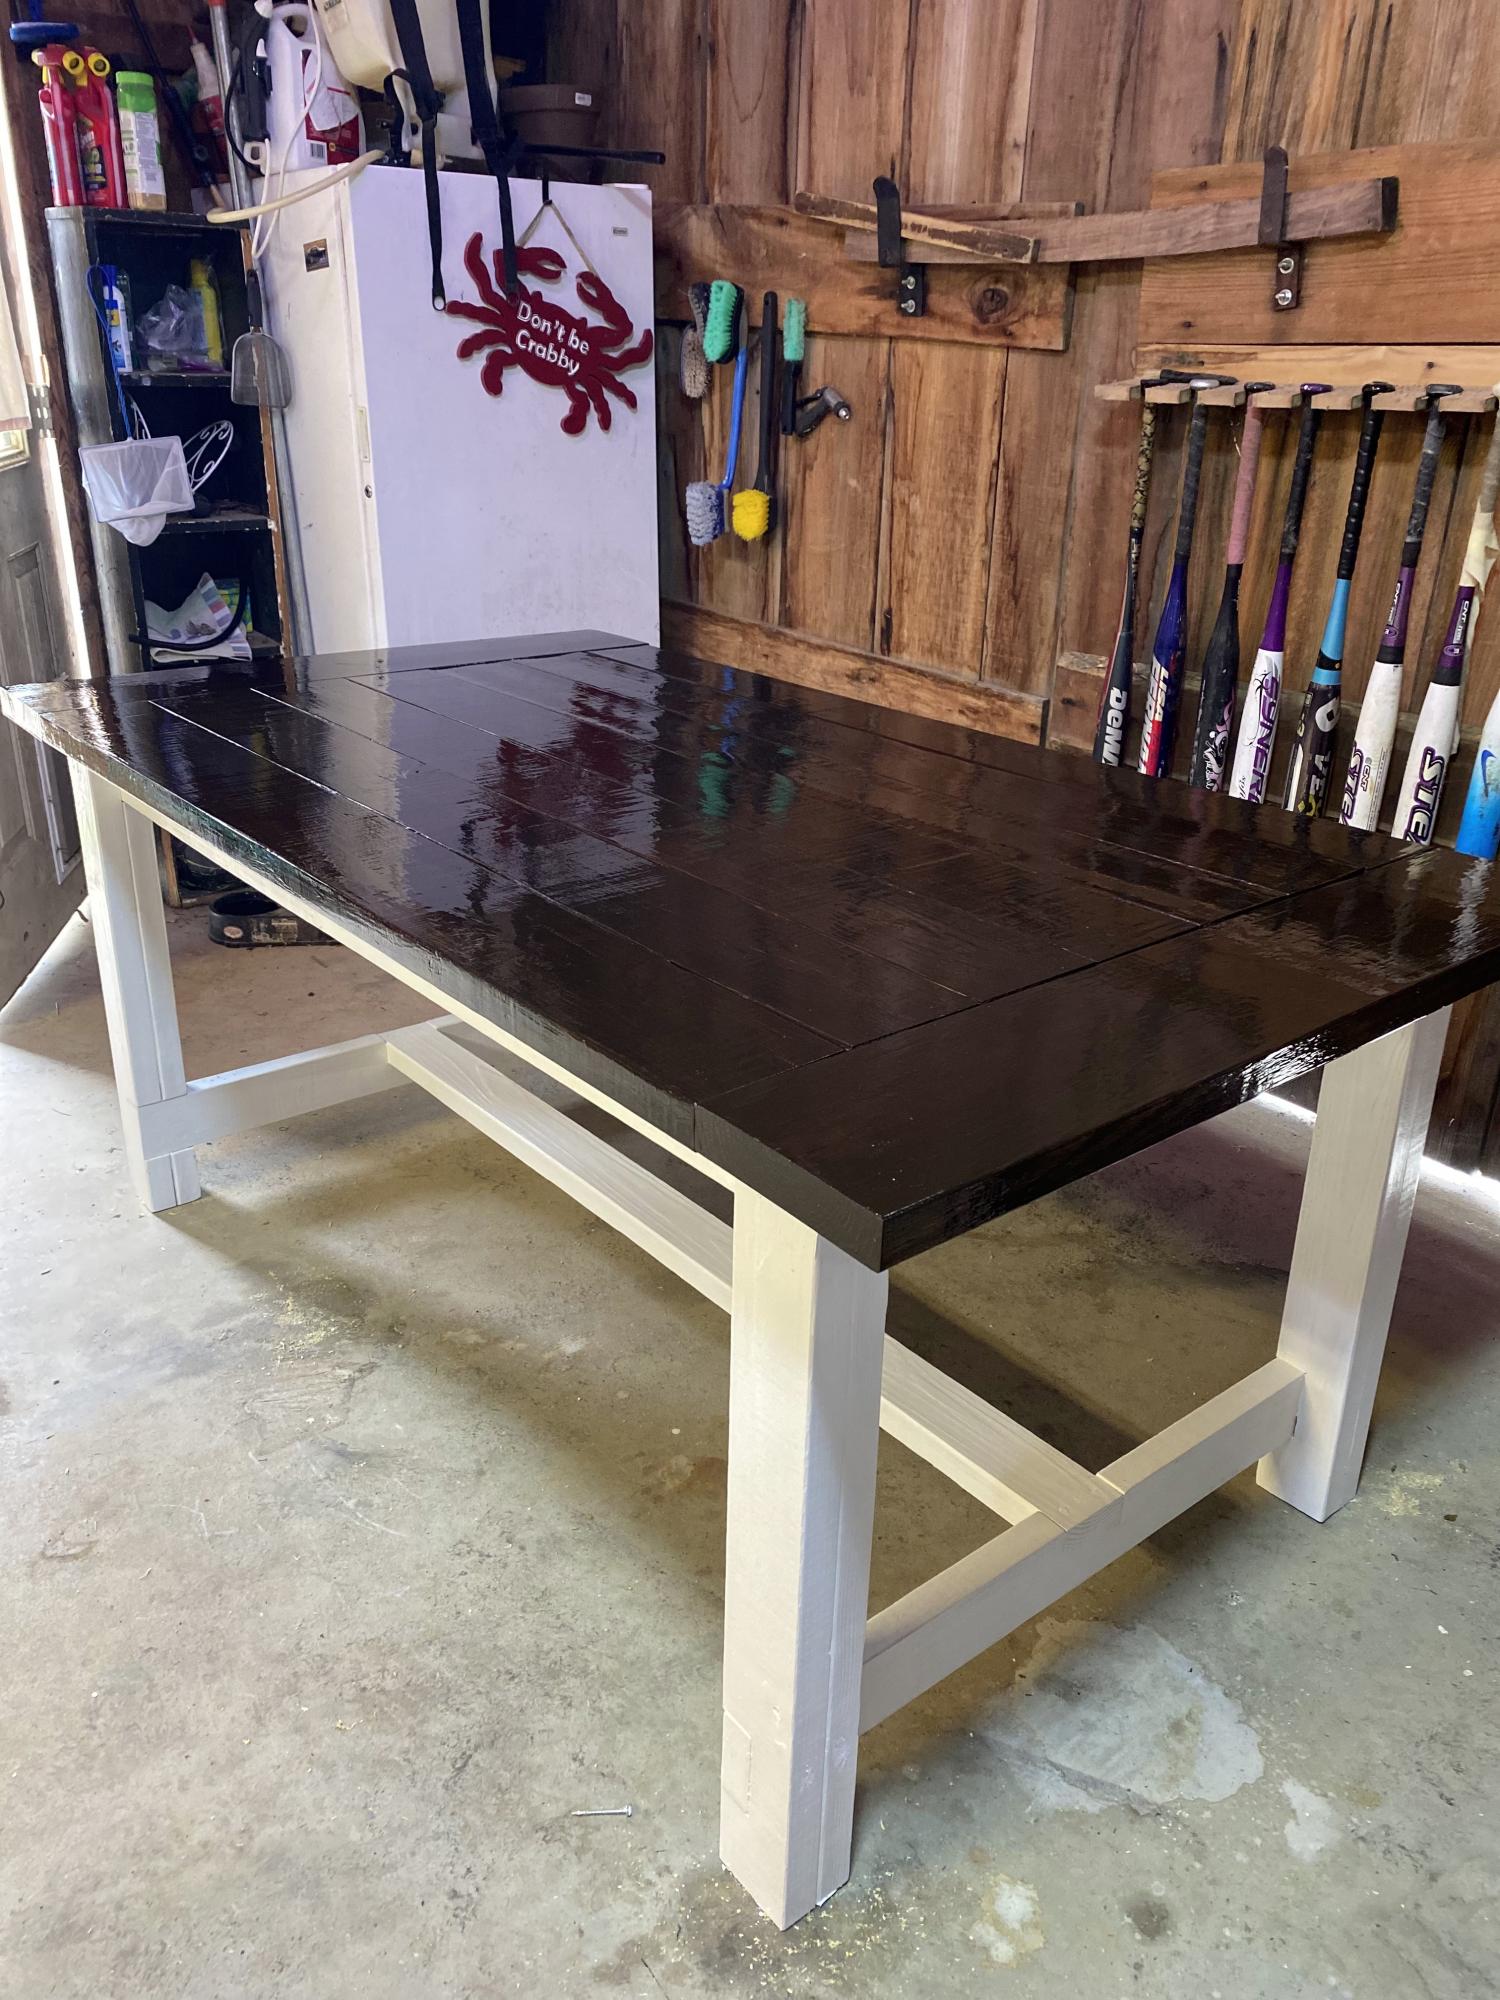
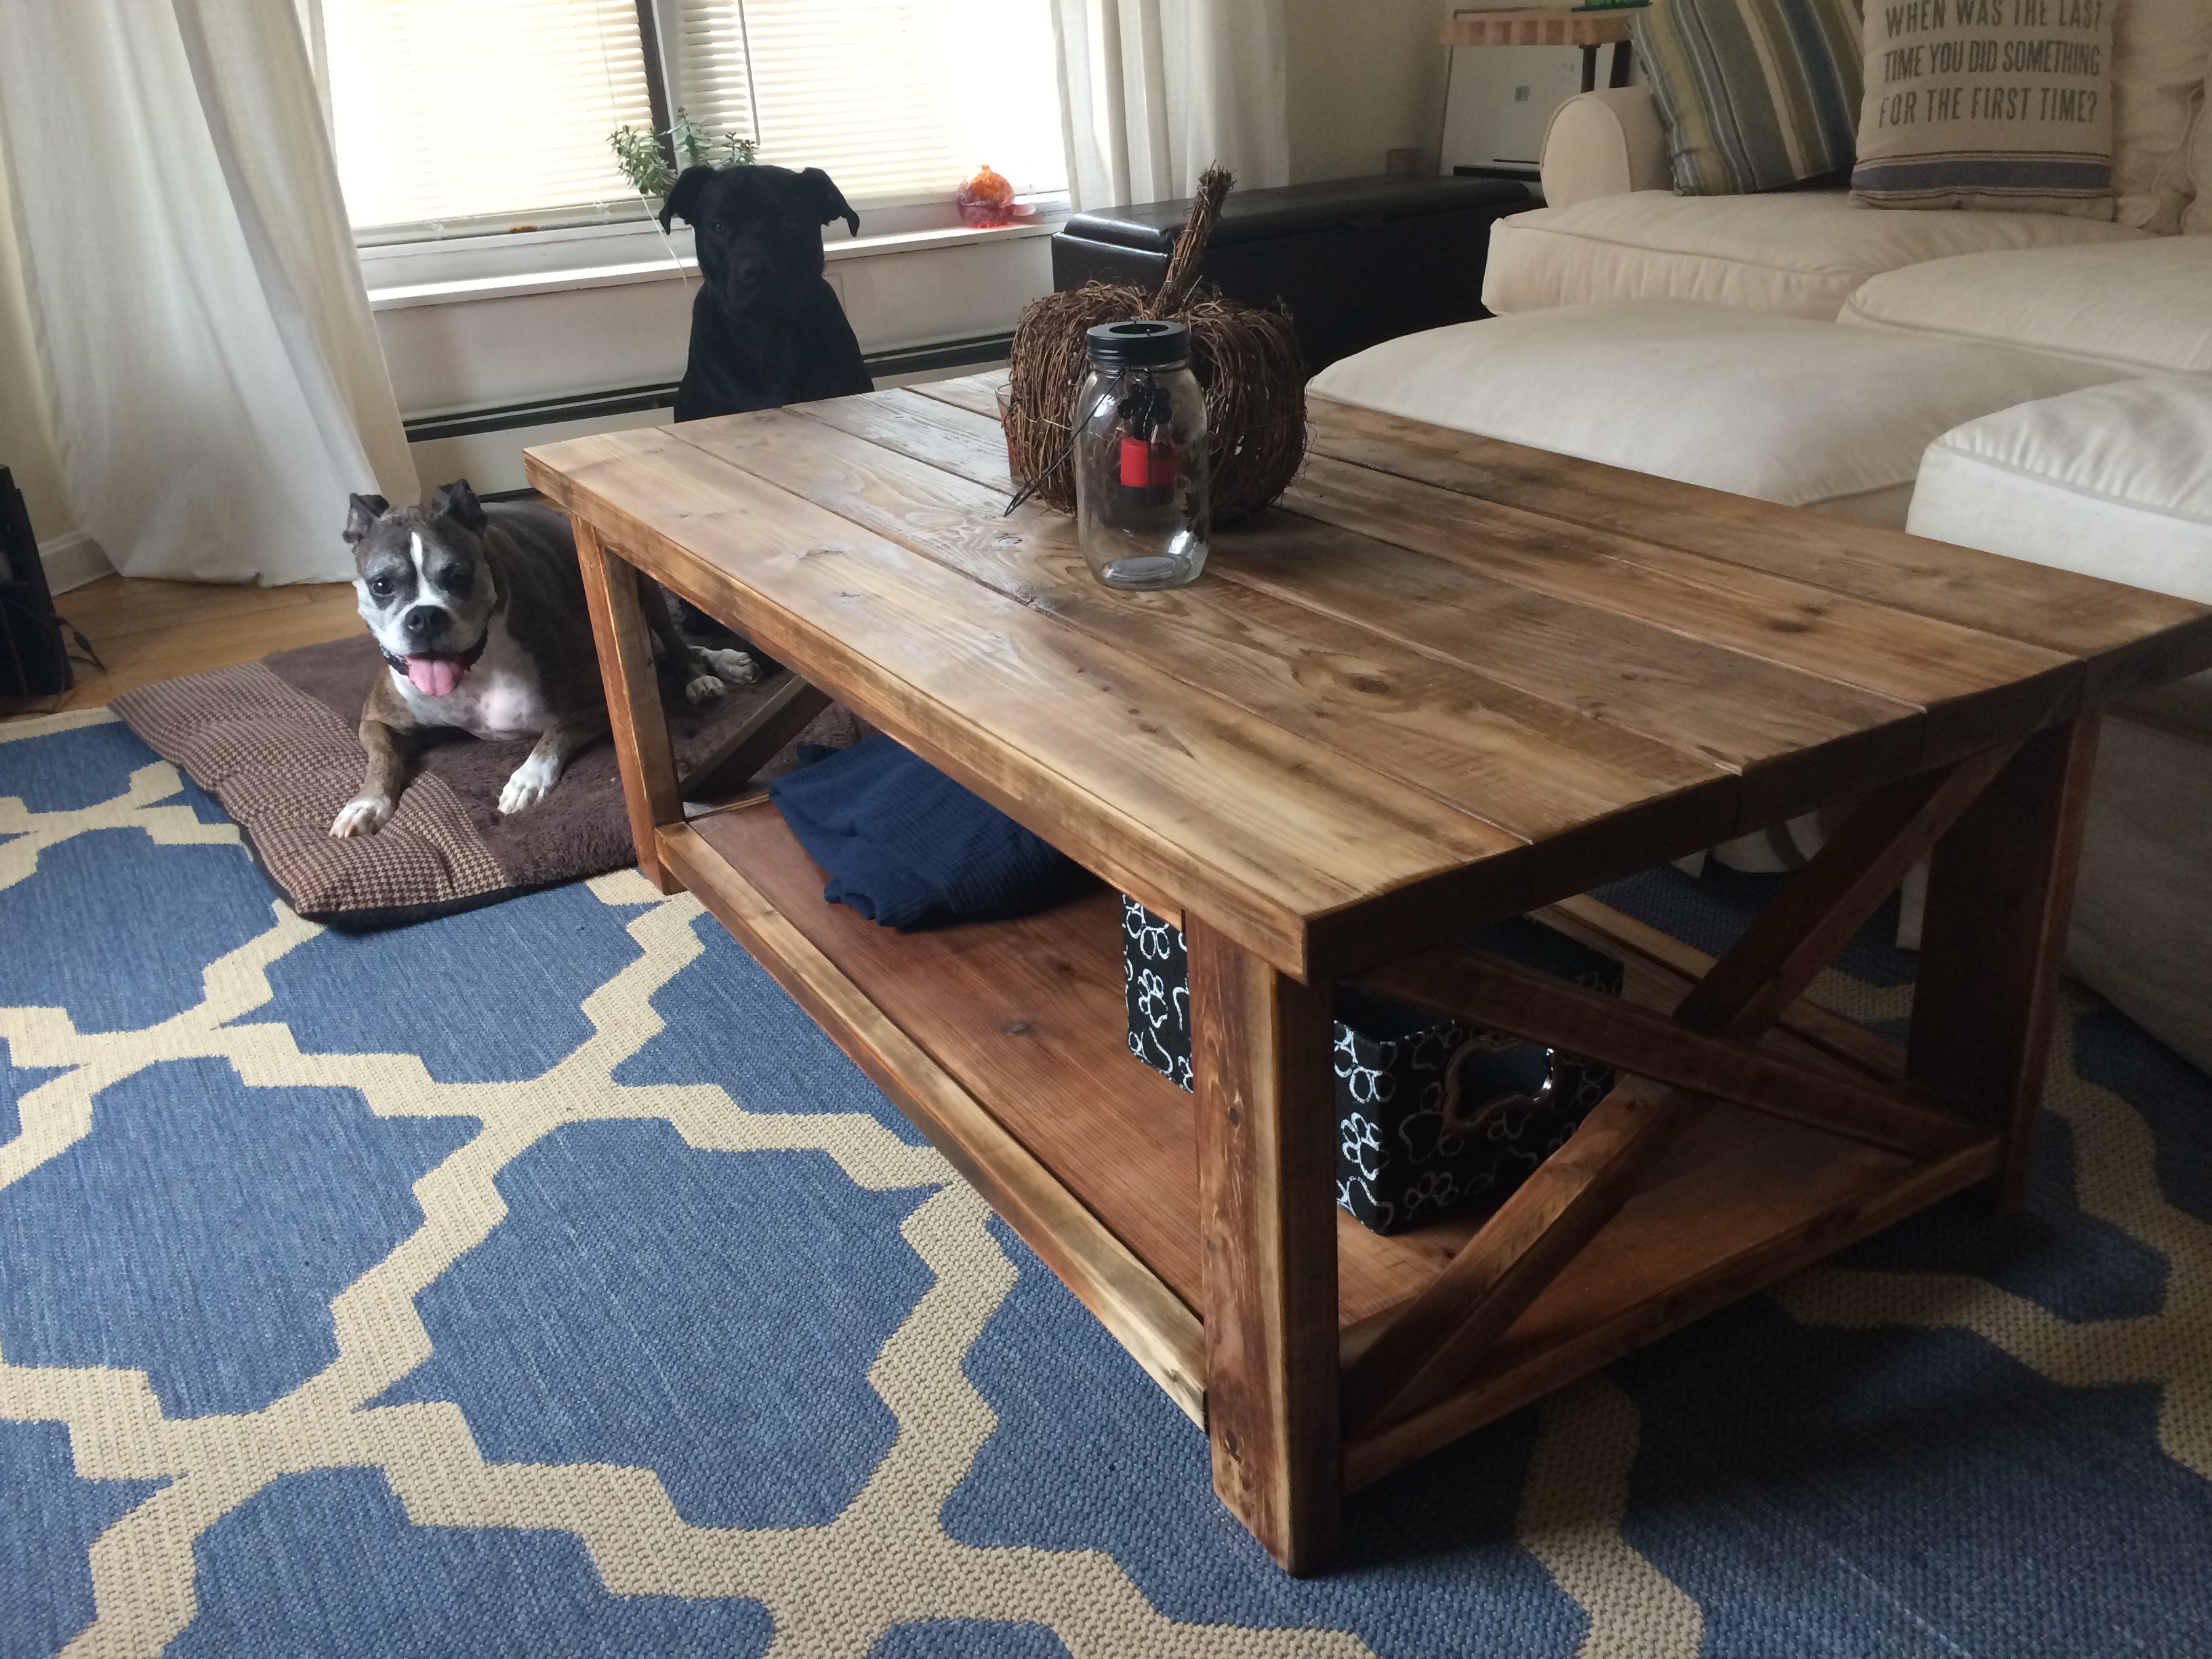
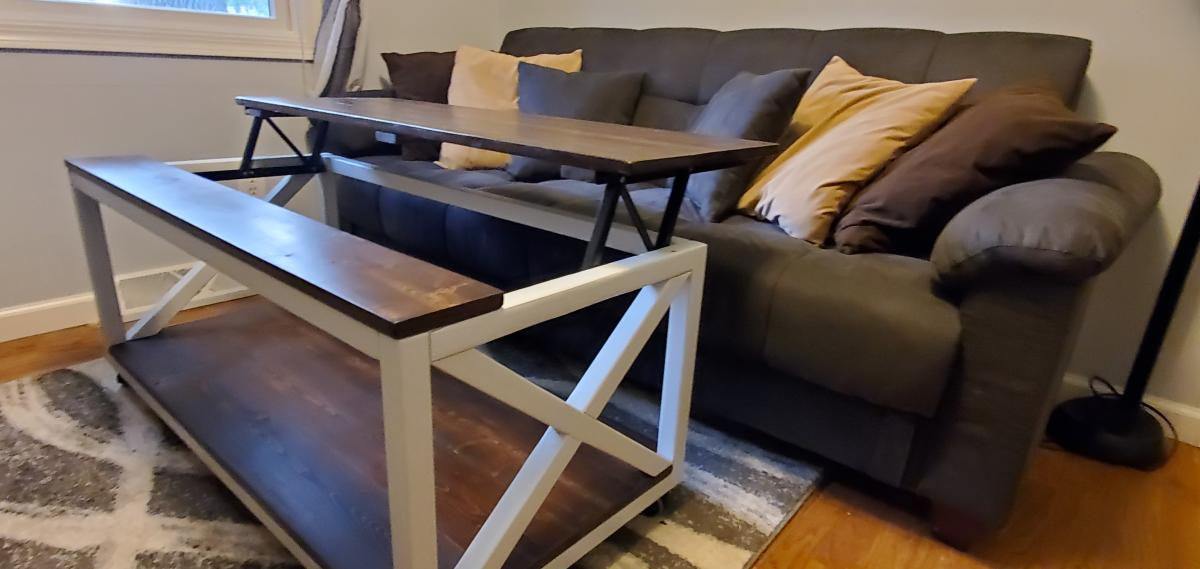
Box Frame Coffee Table with Lift Top

Submitted by idotaz on Thu, 09/10/2020 - 17:06

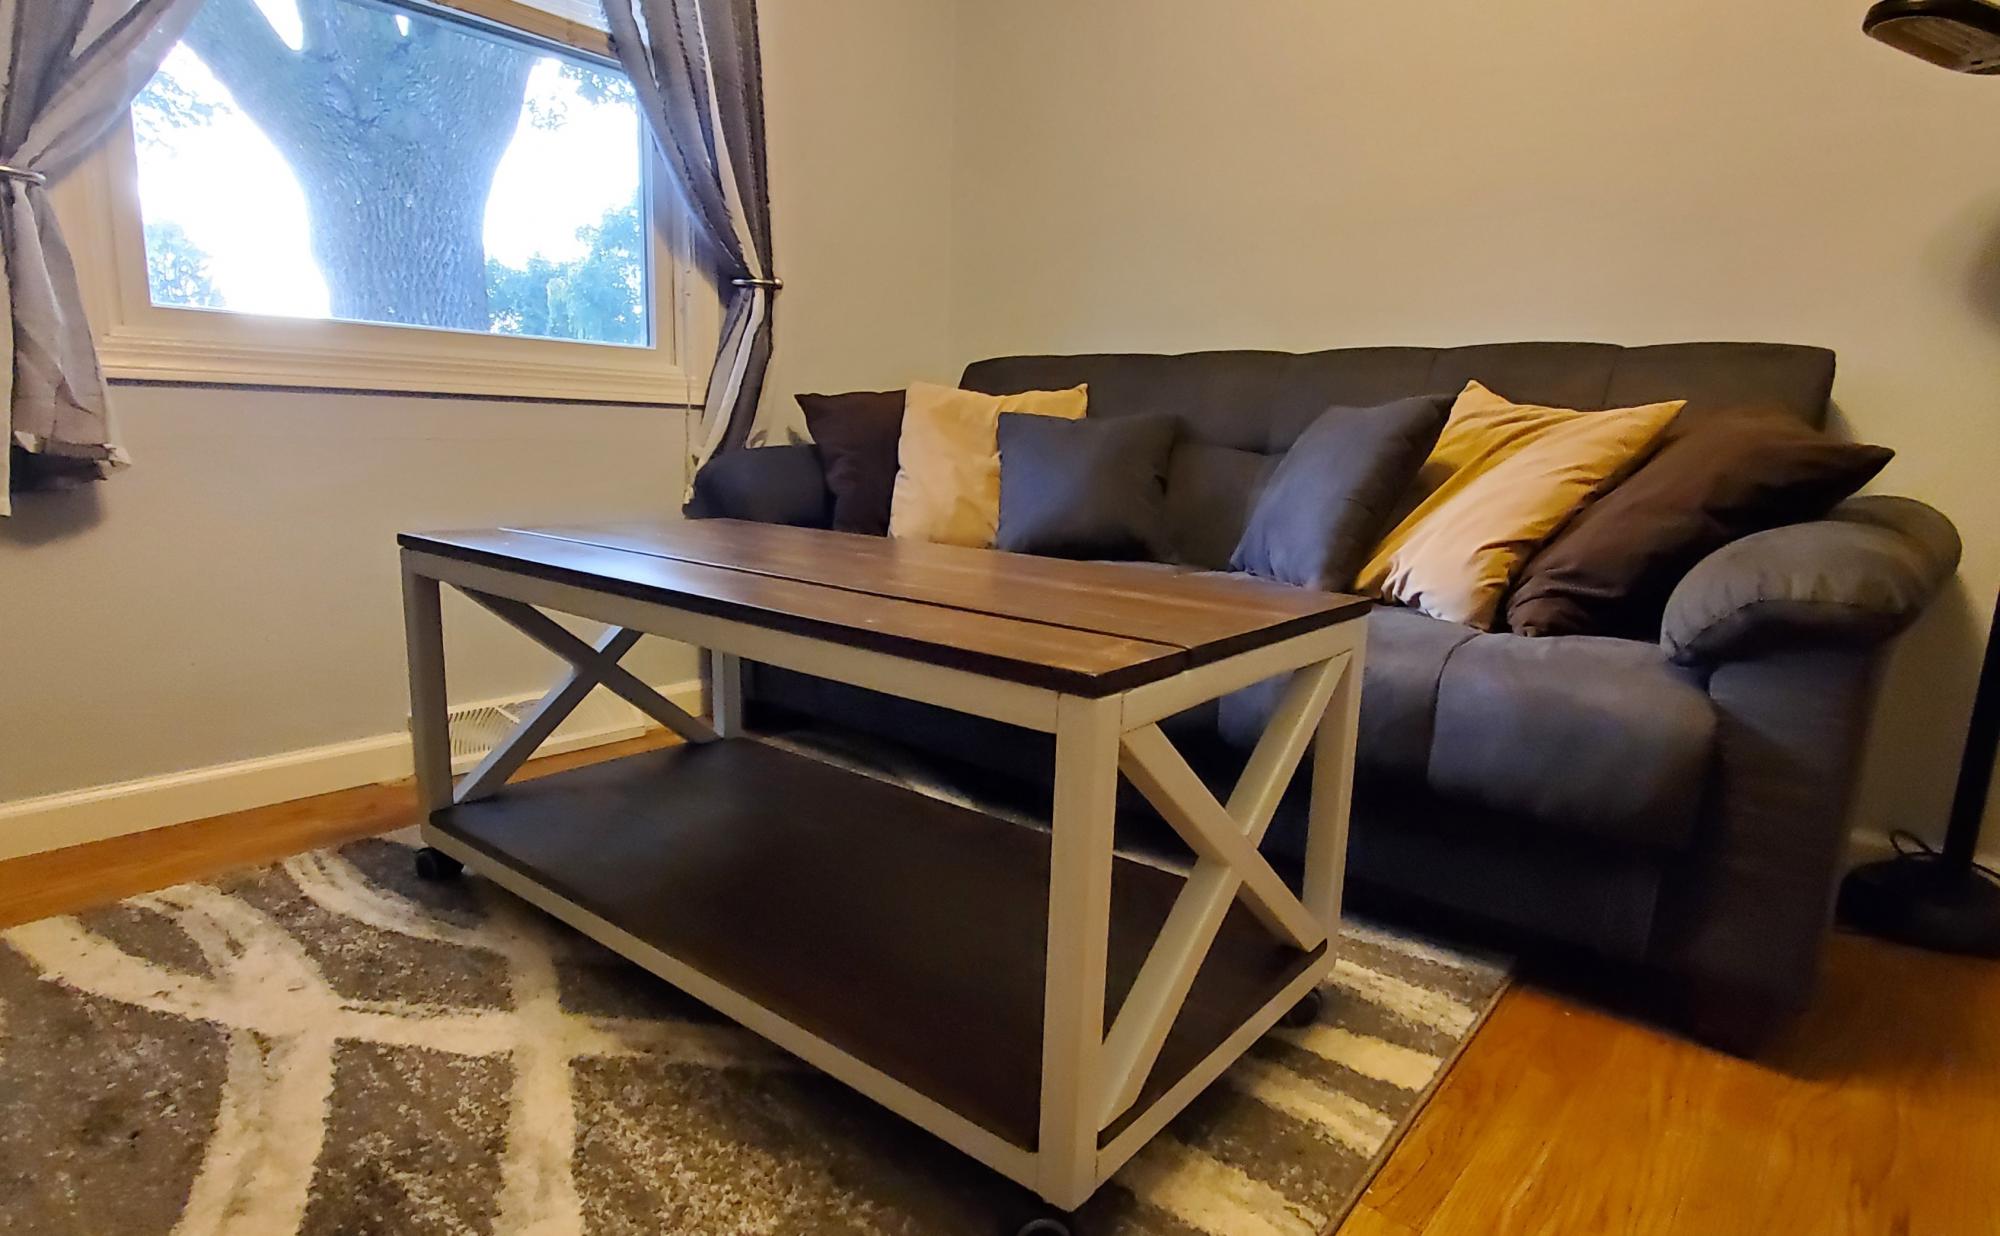
It took me 4 days to build and finish. I went to the store the very same day I received an email with these plans in it! I love the results! I'm typing this post up on my laptop sitting at my new coffee table!! Work days will be a little more comfortable from here on out LOL! Thank you Ana for sharing your talents in designing amazing build plans.

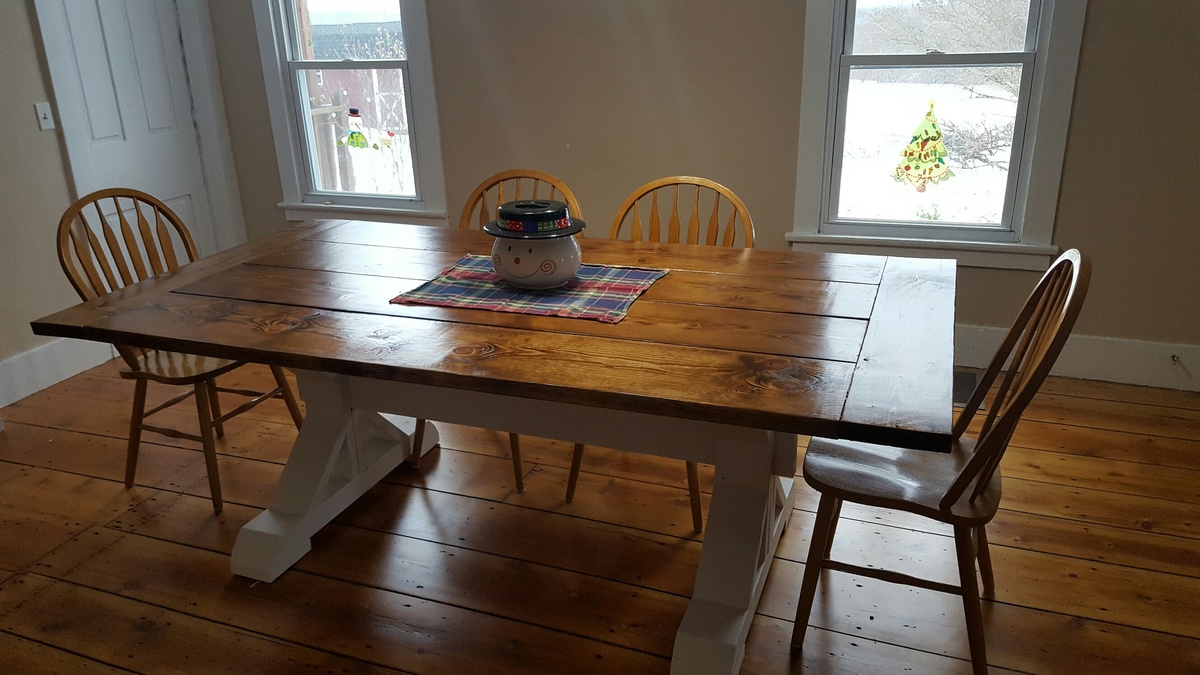
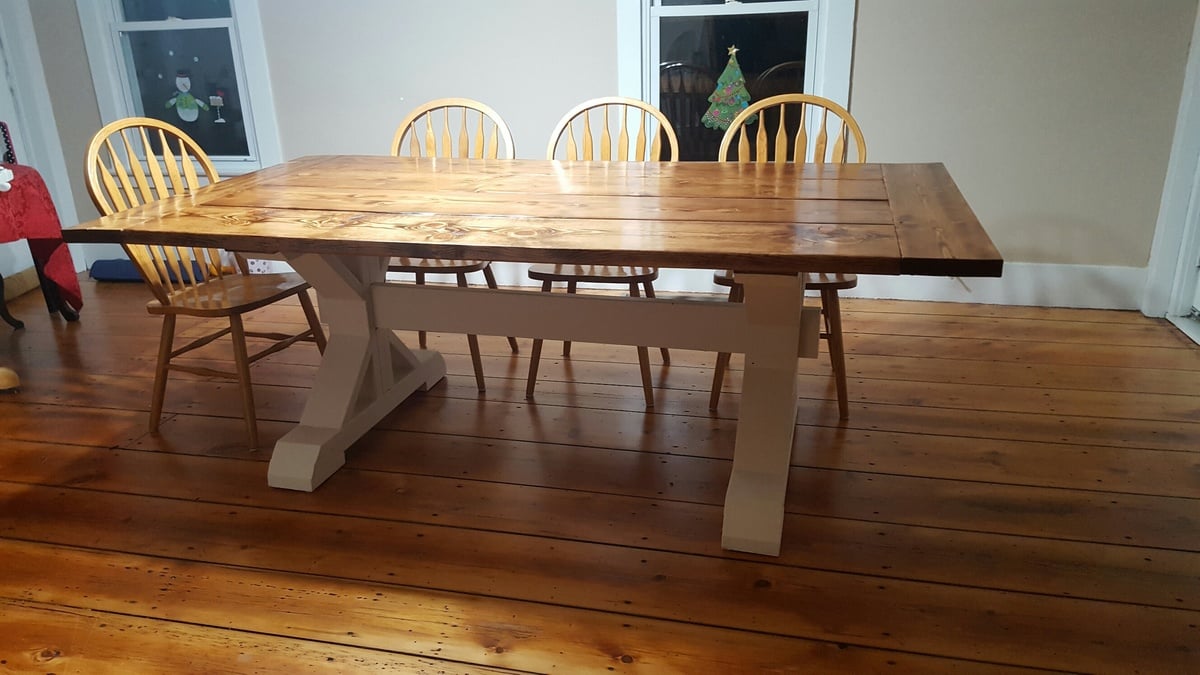
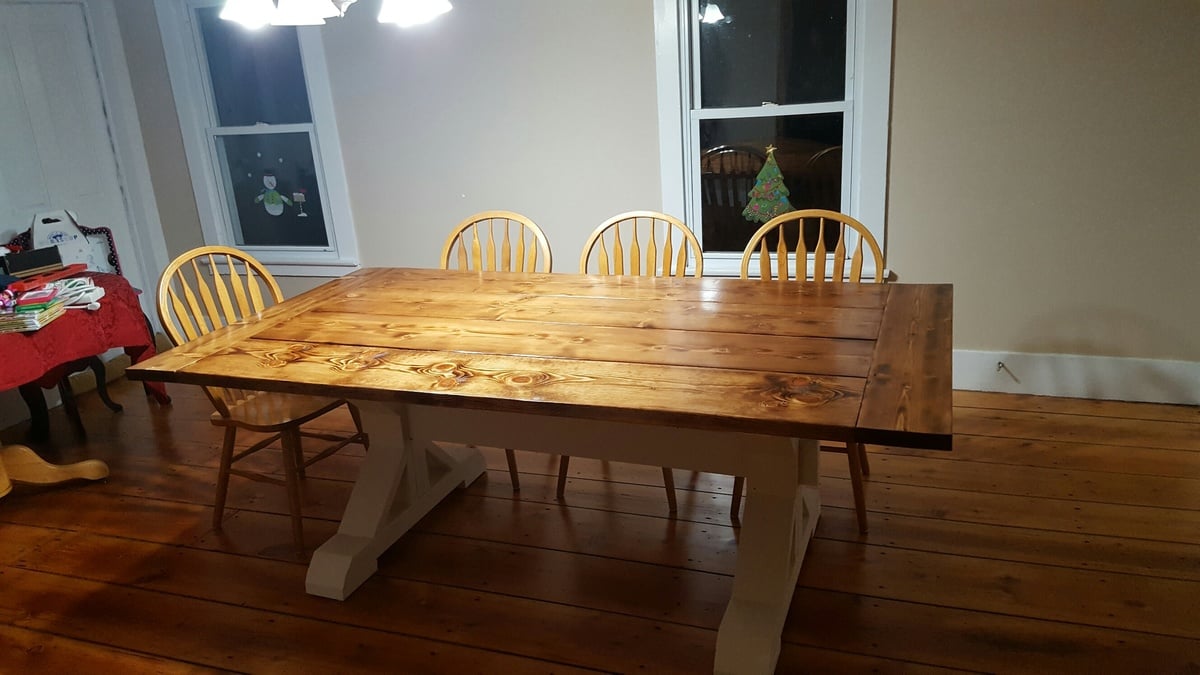
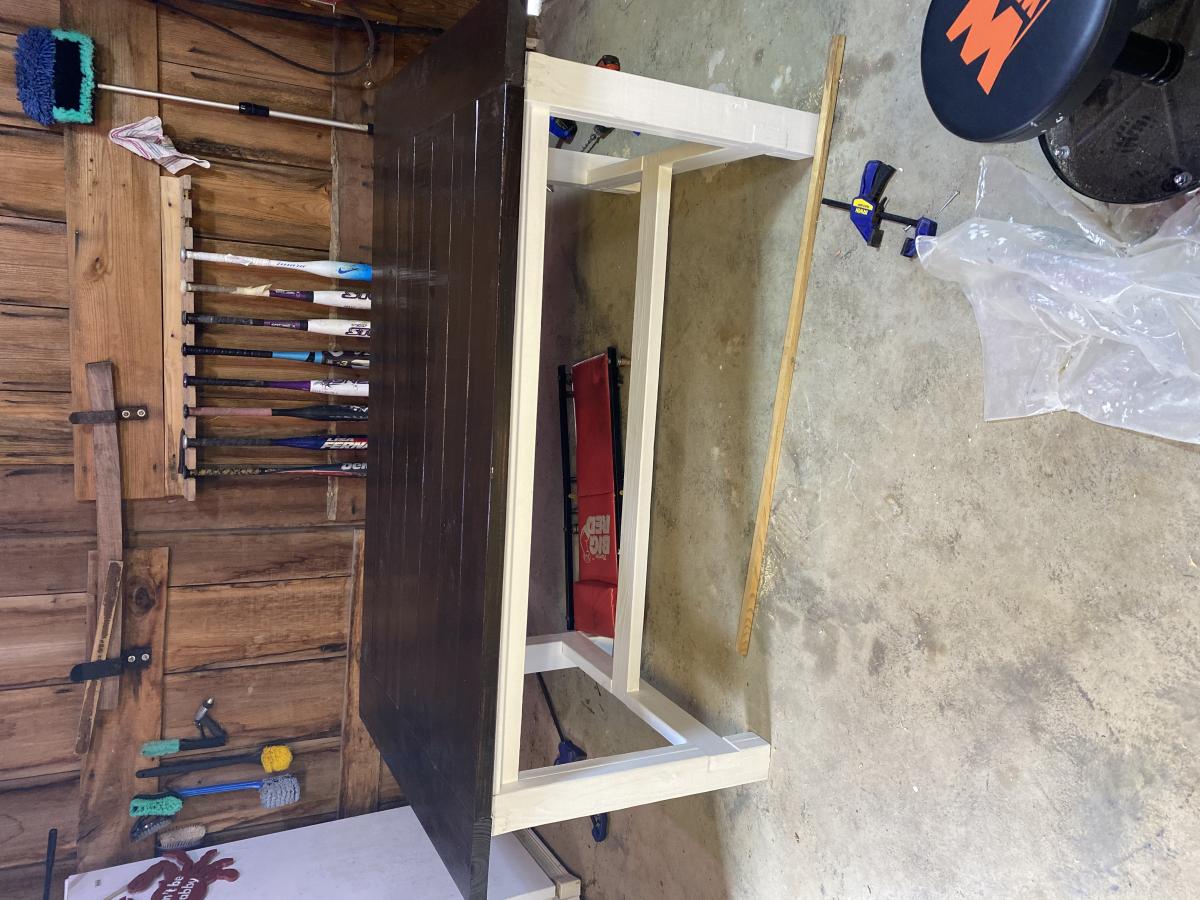
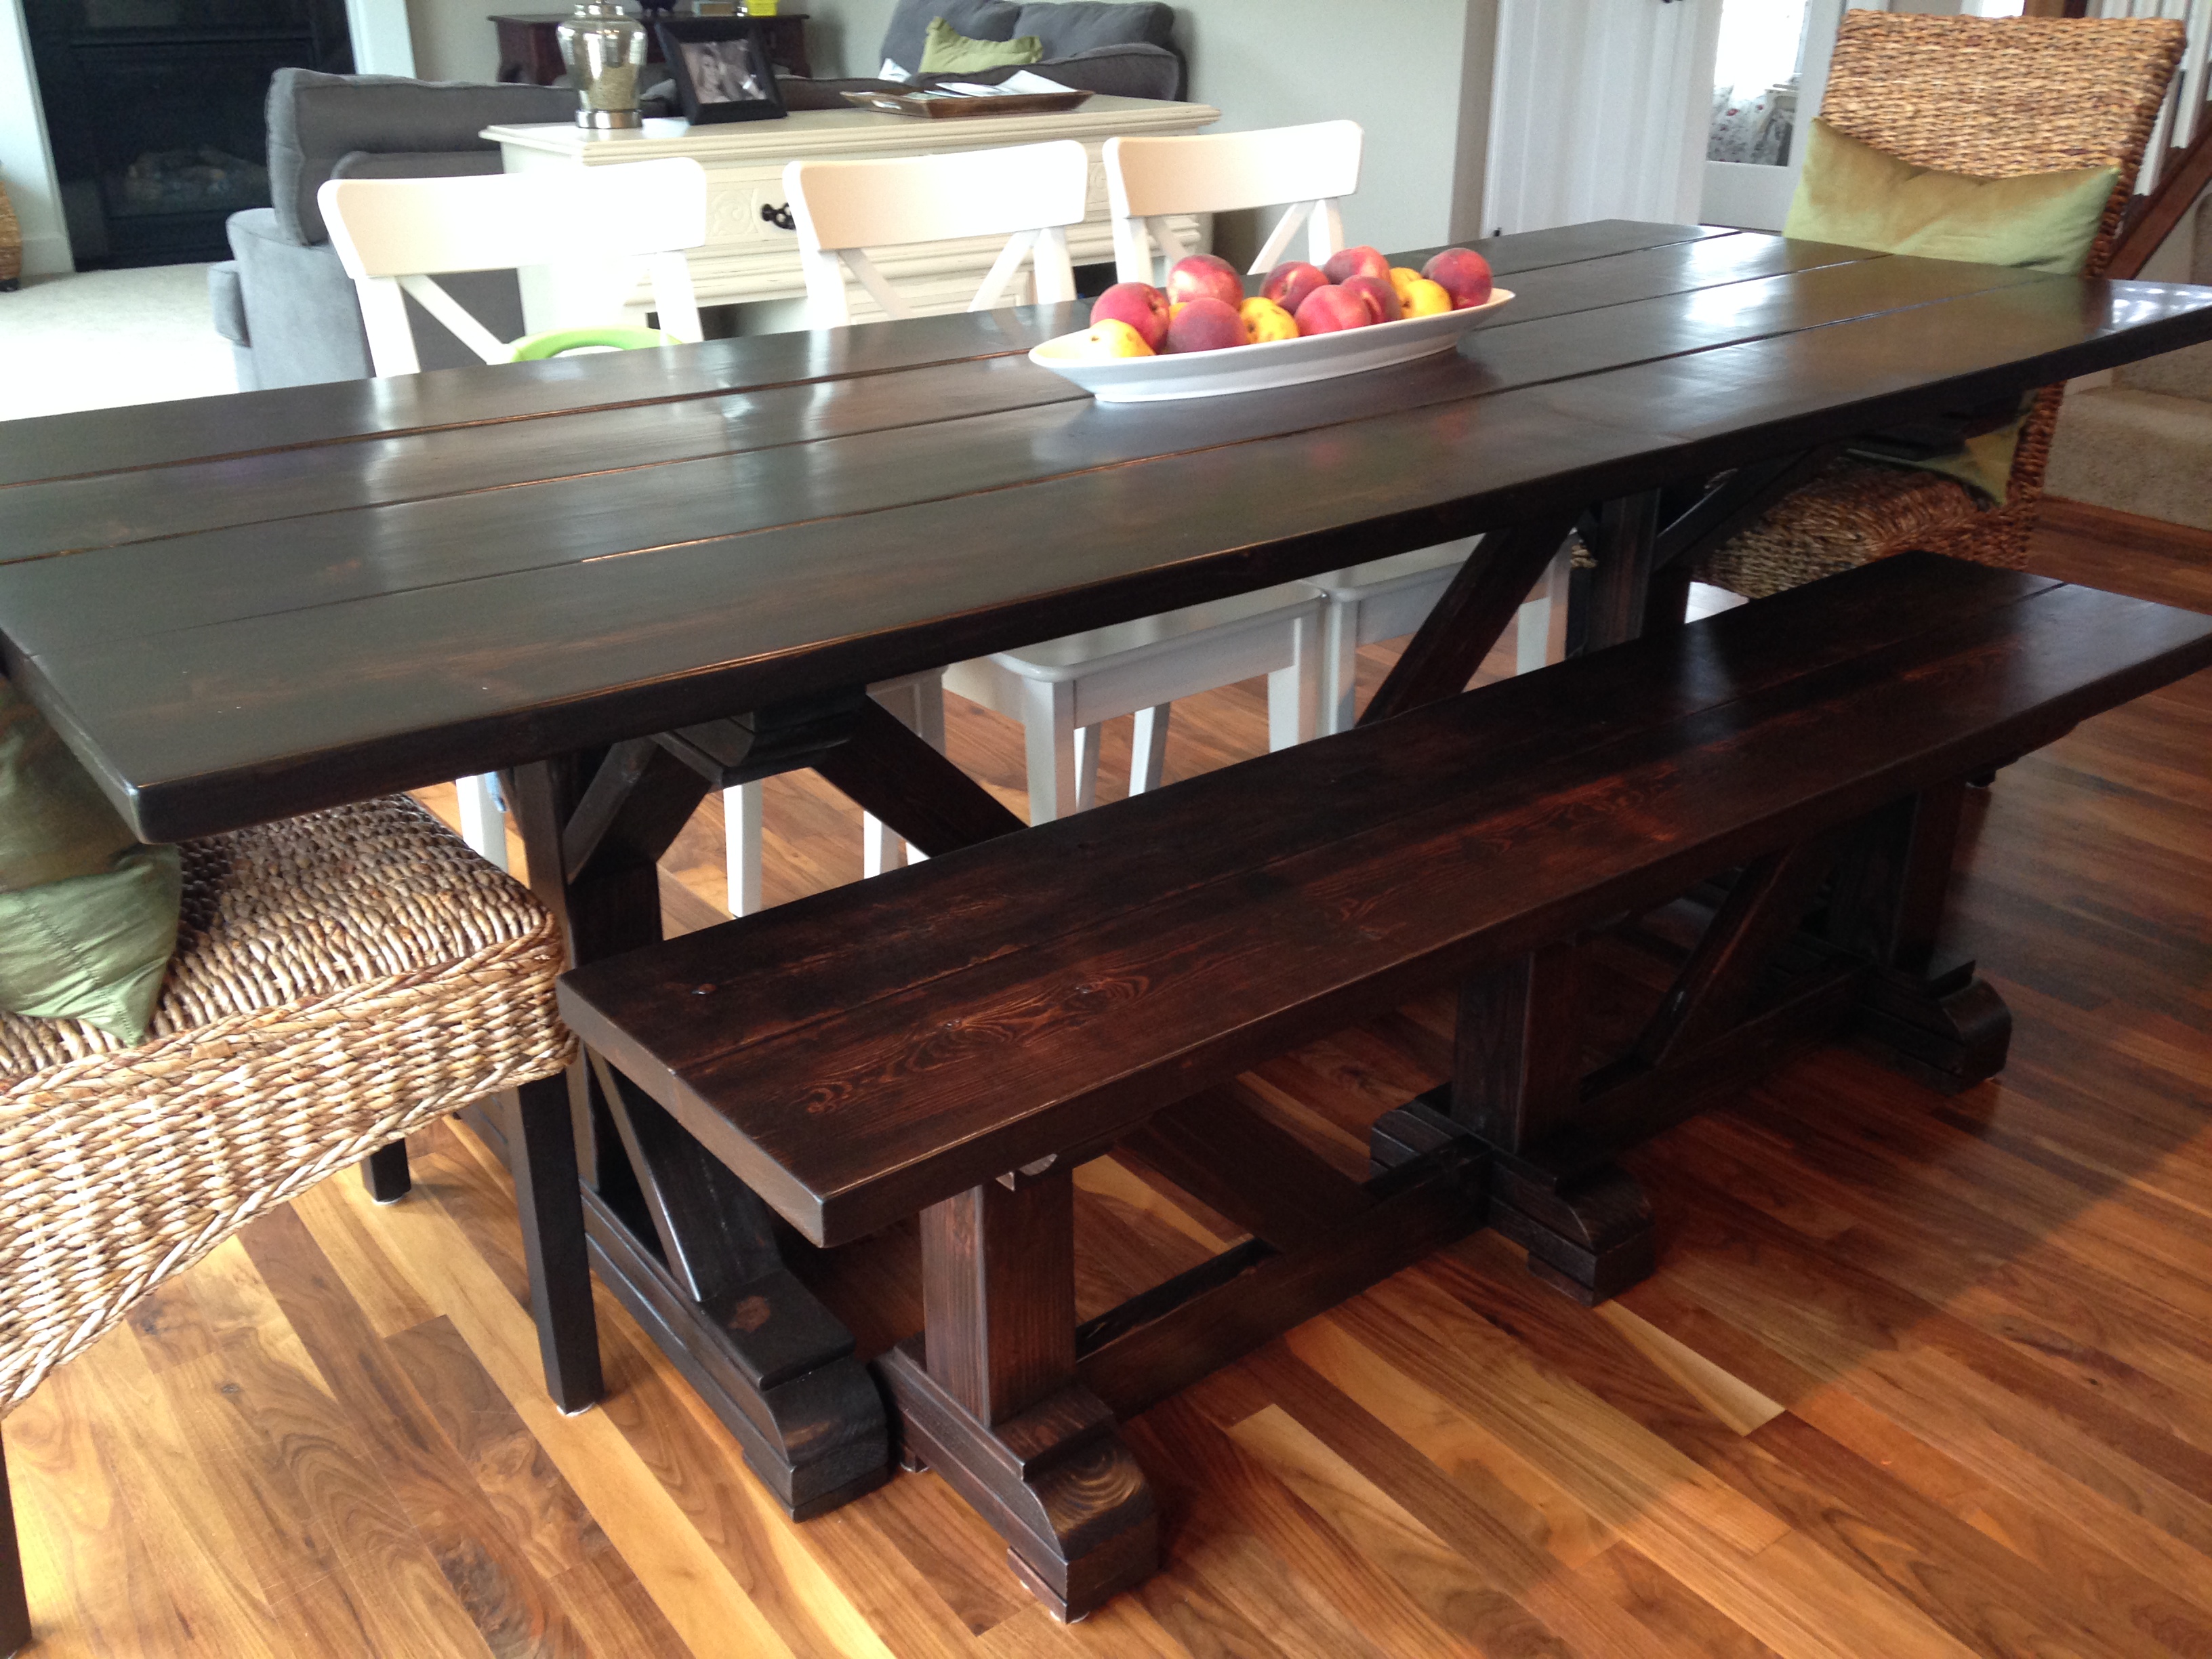
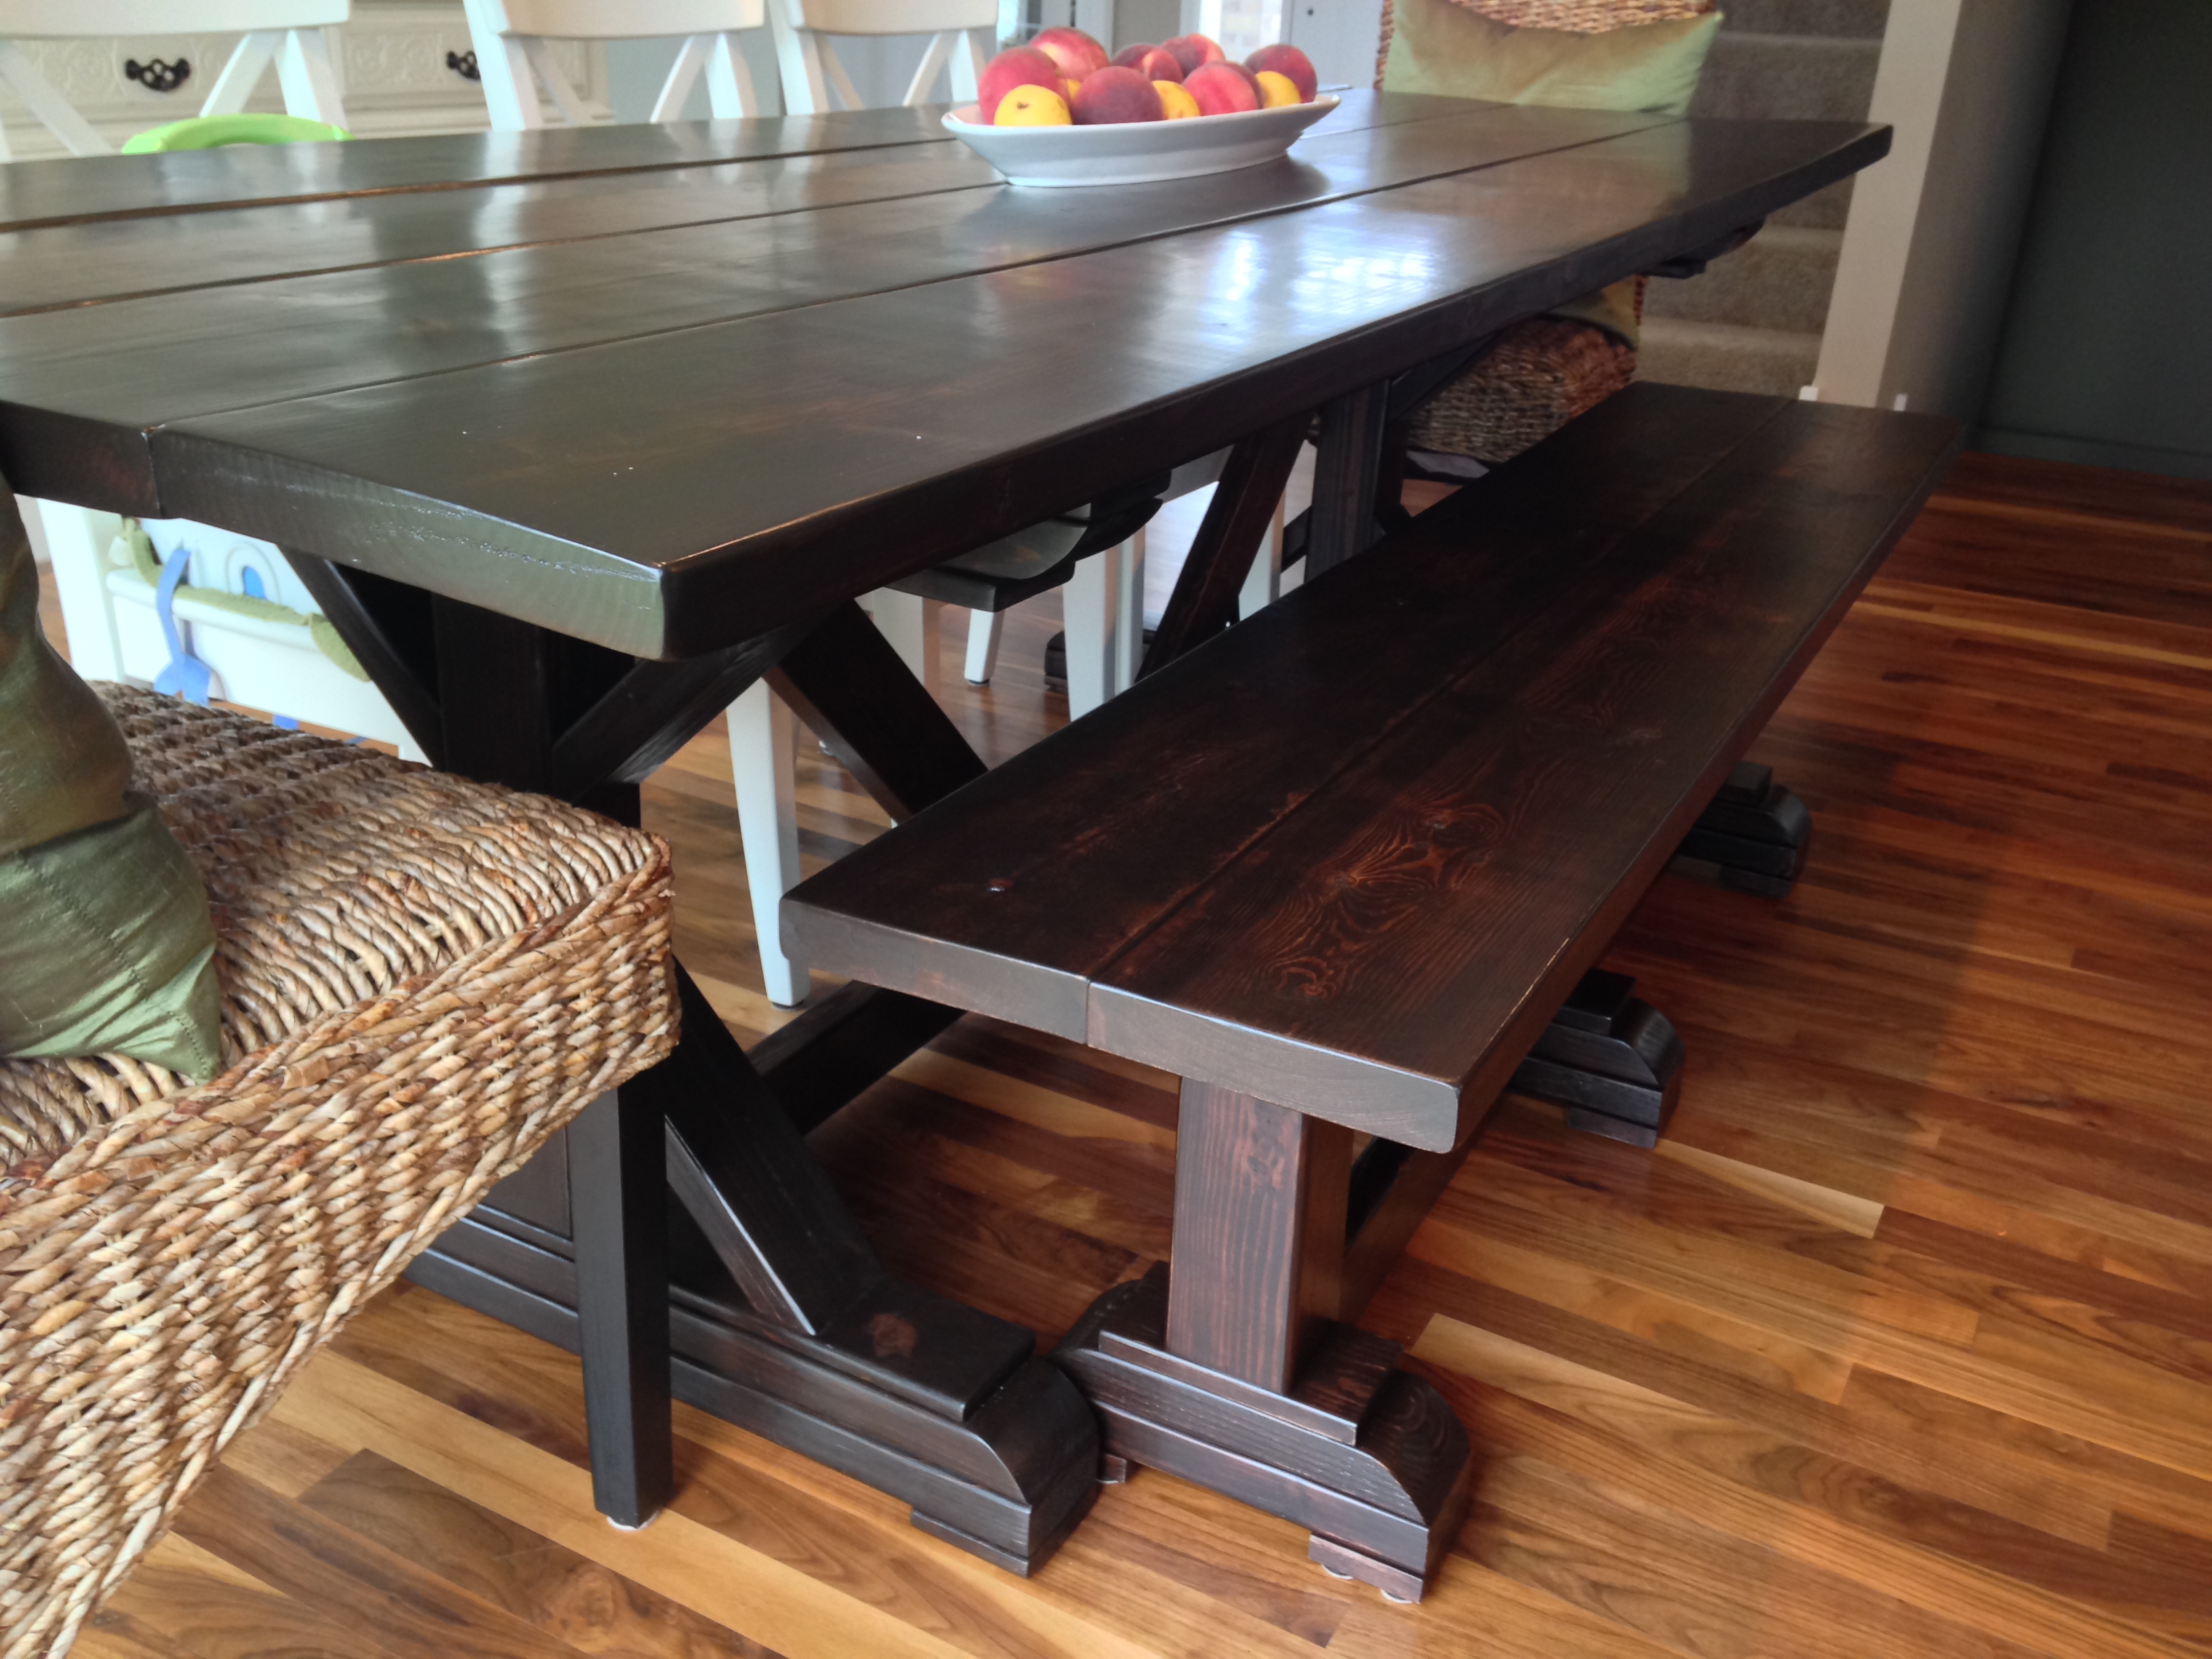
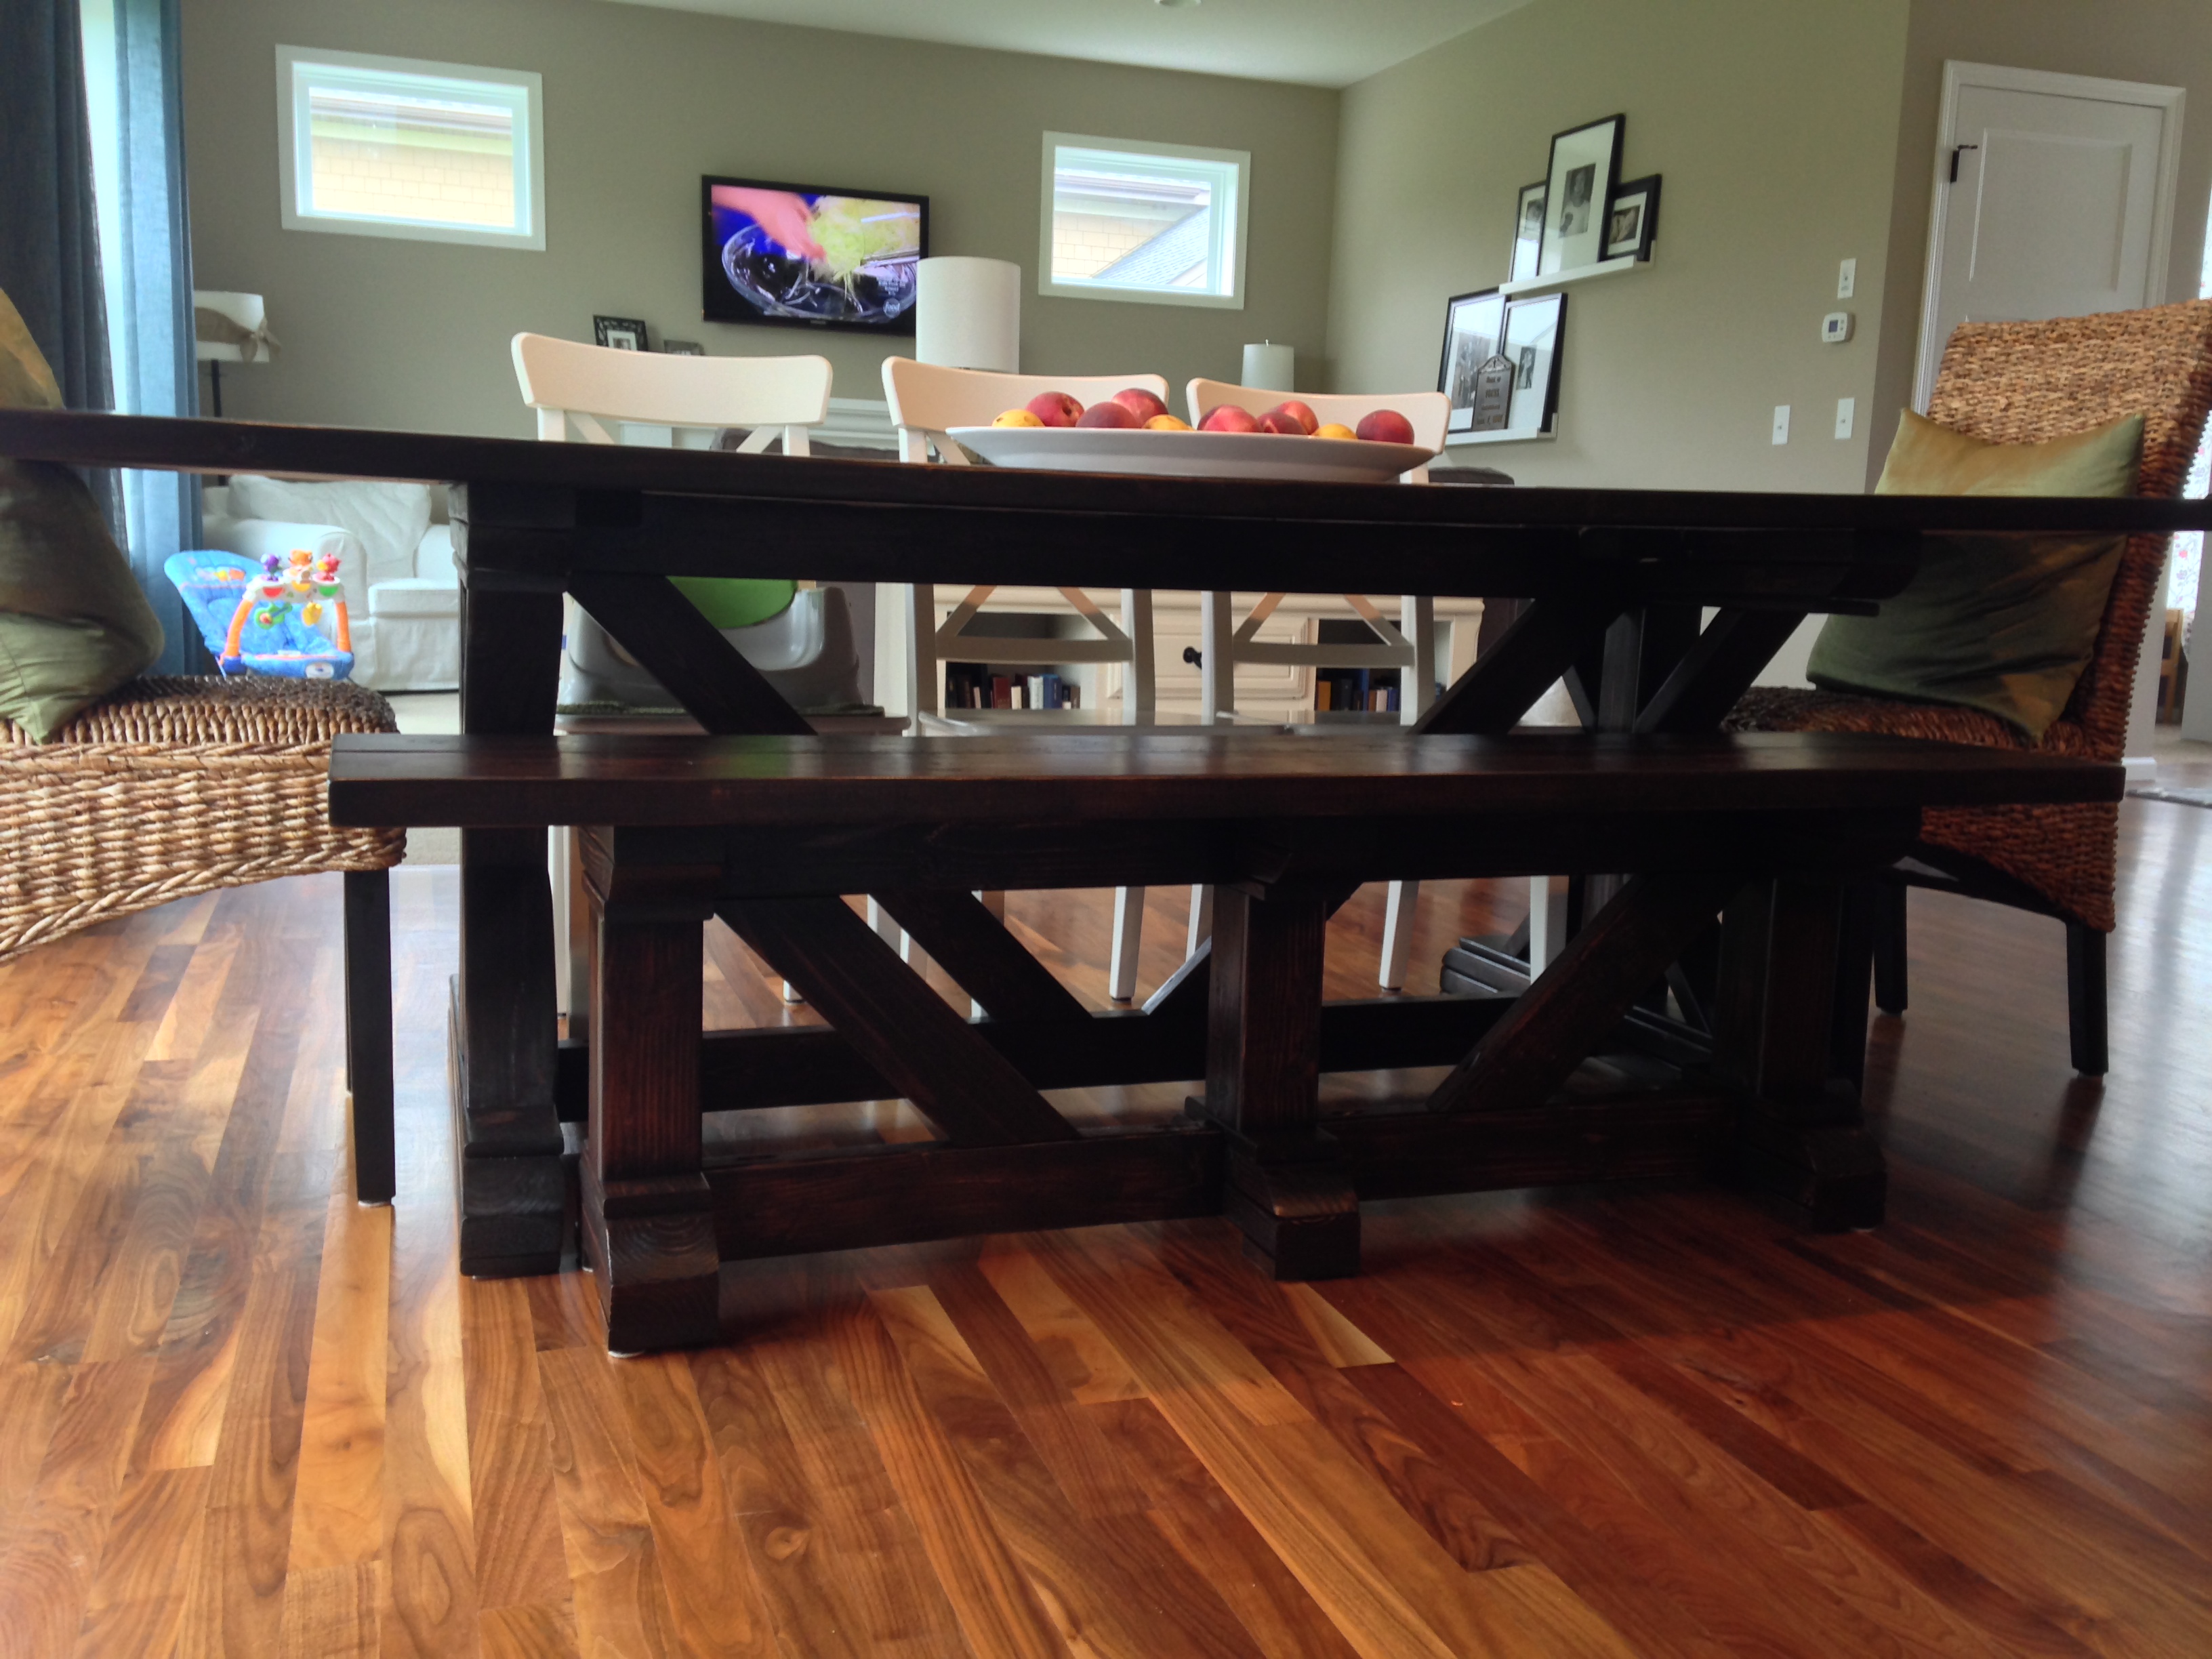
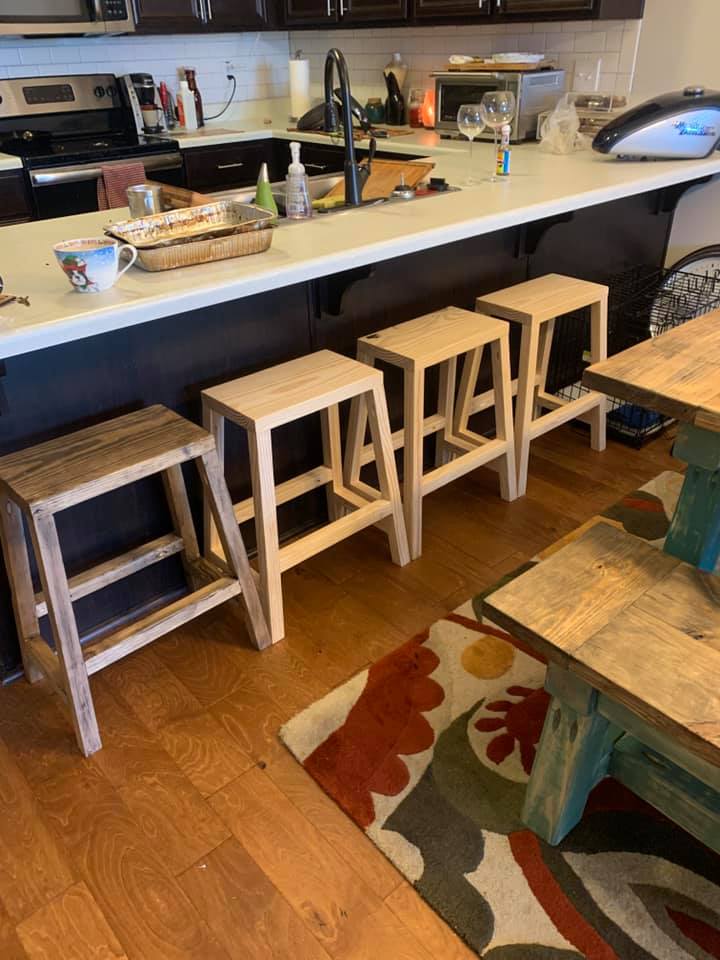
I did the modifications and added the bottom shelf and the x braces. I did a half lap to join the x braces. I also added small casters so it is easy to roll the table out of my way to get up without having to always close the table top. The finish is dark walnut stain and latex paint in the color Tinsel.

Estimated Cost
$40-$50
Estimated Time Investment
Weekend Project (10-20 Hours)
Finish Used
Dark Walnut stain
Latex Paint in the color Tinsel
Recommended Skill Level
Beginner

Love Seat

We wanted a simple loveseat that used standard-sized cushions (that I found at target.com) that we could put on our narrow screened-in porch. The cushions were about twice the cost of the lumber! I modified the plan by changing the outsides from 2x3's to 2x4's and I made decorative panels of our State's flag using a stencil I created from an image on the Internet. I then cut the stencil out, marked it and cut it out using a scroll saw. The pattern is on 1/4' plywood framed in with 1 x 2's on the sides and 1/2" quarter round on the tops and bottoms of the patterns on both sides. This was fun and quick to build and it met our needs perfectly! I'm even designing some matching end tables for it! Since we're in Charleston, SC we used a color called "Charleston Green", it's nearly black but in bright sun you can see a little green. We barely get to use it though as the cat has taken it over! Thanks for a great plan!

Estimated Cost
$65
Estimated Time Investment
Day Project (6-9 Hours)
Finish Used
Olympic 2 in 1 Waterproof/strain Charleston Green
Recommended Skill Level
Intermediate

Asian inspired outdoor bench (no screws!)

Submitted by jennibee on Sat, 09/13/2014 - 14:47

This is made by using treated lumber and concrete deck piers. The genius of this bench is that there are no screws. It fits together like a puzzle and sits on concrete deck piers. I left it untreated for a bit and decided to let the piers stay gray. The original plans called for the piers to be stained black and a stain to be applied to the wood. I wanted to post this as inspiration but will add the link to the template for the wood pieces at a later time. 

Estimated Time Investment
Afternoon Project (3-6 Hours)
Finish Used
I have future plans to use simple decking stain in a cherry color for the wood part and black concrete stain for the concrete deck piers.
Recommended Skill Level
Beginner

Rustic X Coffee Table

This project took several months of off and on work but I am very happy with the results. Followed the plans on this website to the T and they were great. Got the wood from the local lowes and the hardware from Ace Hardware. Used the Kreg Jig pocket hole system to hide the fasteners which makes a big difference. I also used flat black spray paint for the hardware.

I loved the rustic look that this project was finished with so I did the same. The stain was great, really easy to make and stains really well. I covered the stain with the recommended wax which gives it a really nice shine and is very smooth.

Huge thanks to this website!

Estimated Cost
100.00
Estimated Time Investment
Week Long Project (20 Hours or More)
Finish Used
"Hillary's oxidized finish"
Recommended Skill Level
Beginner

Comments

Rolling Cart - Home Depot Project - Modified

I built this at the Home Depot "Do it Herself" class last month.  I have been trying to figure out something for a large ironing board (for yardage of fabric for quilting) for quite some time now.  I decided this was PERFECT!  I removed the top tray, and added a 2' X 4' craft board on top, covered it with insulbright and canvas and it's a perfect Ironging station!!  I keep the ironing supplies underneath, and I have tons of extra storage space, it's WONDERFUL!


Estimated Cost
$35 (since I won the project from the free class, no cost on that material) spent $15 for the craft board, $20 on the Insulbright and I had the canvas material for the cover!
Estimated Time Investment
Afternoon Project (3-6 Hours)
Finish Used
First, i removed the top tray (it would have been useless with the board on top). Then i screwed in the craft board to the side poles. (2 screws in each post) Then, I glued down the Insulbright (special batting for ironing on) and stapled that to the bottom. then put the canvas down on top and stapled that nice and tight.
Recommended Skill Level
Beginner

Wife's Farmhouse Table

Submitted by DrOriginal on Thu, 01/05/2017 - 16:50

Built my wife a farmhouse table. We kind of took 3 different plans and made 1 table. We used the table top from one set of plans, the legs from another, and the X design from a 3rd. We built it on our week off for Christmas. Building wise it took 10-20 hours, but there was a lot of drying time with all the stain and poly. Two coats of Early American stain and 3 coats of poly on the table top. It's about 7' long, and the only problem now is we don't have enough chairs. 

Estimated Cost
$150 in lumber and screws. Quart of stain, poly and paint. Which we had on hand.
Estimated Time Investment
Weekend Project (10-20 Hours)
Finish Used
Minwax Early American
Recommended Skill Level
Beginner

Porch Swing

Submitted by Anonymous (not verified) on Tue, 09/15/2020 - 19:18

I used this plan and it came out amazing. It was easy to follow and my wife loves it. Thank you!

Built from Plan(s)

Comments

Plaster Ceiling Renovation Upgrade

I am all about charm and character, but when it comes to my 1940s brick bungalow, the plaster ceiling cracks got on my nerves. Every changing season brought the inevitable expansion and contraction that would leave new mapped territory on the ceilings in the bedrooms. I usually just mudded over them and smoothed them out with a bit of paint, but that was getting old. So, I decided, after much brainstorming, to come up with a permanent solution. I created a ceiling treatment using beadboard and lightweight trim board to make a faux beamed ceiling. The rooms look great and I finished the look with crown moulding. I chronicled the project with detailed step-by-step directions and photos on my blog: www.momthebuilder.net. Check it out and let me know what you think!
-Angie

Estimated Cost
$500 for two rooms
Estimated Time Investment
Week Long Project (20 Hours or More)
Recommended Skill Level
Beginner

Comments

5 tator tots (not verified)

Fri, 12/07/2012 - 18:06

I saw a similar project on the Lowe's website using v-groove paneling. We will be trading rooms with our girls (our 3rd daughter is due in a few weeks so they will get the big room) this summer and I want to do this to the ugly paneled ceiling in their current room. Trying to create a "master bedroom" in a house that doesn't really have one. I love how it looks!

Farmhouse play kitchen

Submitted by Brittmason on Sat, 01/07/2017 - 18:40

We wanted to make our daughter a play kitchen for her birthday. We have a farmhouse sink so we wanted her to have one just like ours. My husband built it out of wood. We wanted the cabinets to look like Shaker cabinets so we added trim to them & the Fridge. We bought the handles from Home Depot.  If you have any questions I will be happy to answer them. 

Estimated Cost
$200.00
Estimated Time Investment
Weekend Project (10-20 Hours)
Finish Used
We used Behr paint in a custom color I would call Dusty Pink. We sprayed painted the handles, knobs & burners.
Recommended Skill Level
Beginner

Ten-ish Dollar Shelves

Submitted by gwinnclan on Tue, 12/11/2012 - 14:11

I wanted to add a little homey touch to my ledges so I burned a saying into one of the two ledges in each pair. My husband and I used the plan for the Ten Dollar Ledges and instead of painting, we finished them with Stain/Finish in one.

Built from Plan(s)
Estimated Cost
$15-20
Estimated Time Investment
Weekend Project (10-20 Hours)
Recommended Skill Level
Beginner

Comments

MamaHowell09 (not verified)

Tue, 12/11/2012 - 16:11

I love how this looks!! I must know! How did you burn it? And are they individual letters? Anyways, this is so lovely! Almost as much as the pictures on the shelves!! :)

spiceylg

Wed, 12/12/2012 - 05:25

I agree, I love the additional touch of the letters. Great idea and so pretty!

Rustic Dresser

Submitted by kmh380 on Sun, 09/21/2014 - 20:20

9 drawer dresser made out of African mahogany wood. 

Estimated Time Investment
Week Long Project (20 Hours or More)
Finish Used
Matte poly
Recommended Skill Level
Advanced

Comments

Farm table

Submitted by Anonymous (not verified) on Sun, 09/20/2020 - 19:15

First table I’ve built and thanks for the easy to follow plans. Love this site!

Estimated Time Investment
Weekend Project (10-20 Hours)
Finish Used
Paint, stain and sealant
Recommended Skill Level
Intermediate

Dog Crate Build for Bullet. Very easy, and inexpensive.

Built for our new puppy, Bullet. He is a brindle boxer, and our new pride and joy! Dimensions of this crate will work for him for approximately a year or so. I assume at some point i'll need to build another, slightly larger version of this one. But all-in-all it came out excellent. One issue in the cut list as mentioned before, but you figure it out when you get to it. Not a big deal. Time frame for cutting and assembly is would probably have been just a few hours(3-4) had I not spent 2 days sanding, staining, lacquering, waiting for lacquer to dry, sanding, waxing and polishing.

Estimated Cost
$50 without stain/lacquer materials.
Estimated Time Investment
Afternoon Project (3-6 Hours)
Finish Used
Red Oak stain w/lacquer.
Recommended Skill Level
Beginner

Comments

Farm table/bench combo

Submitted by Junkyard15 on Fri, 09/26/2014 - 05:48

I used the plans for the Fancy X Farmhouse table, but customized the lengths of both the bench and table to fit our room and to the sizes we wanted.  Thanks Ana!

Estimated Cost
Wood was less than $200.
Estimated Time Investment
Week Long Project (20 Hours or More)
Finish Used
Gel Stain and Minwax Poly
Recommended Skill Level
Intermediate

Rustic X Coffee table by Corey

Submitted by Anonymous (not verified) on Tue, 01/10/2017 - 14:29

I had a great time building this coffee table and the instructions were easy to follow, especially for a beginner like me. Thanks Ana! 

Estimated Cost
$80
Estimated Time Investment
Afternoon Project (3-6 Hours)
Recommended Skill Level
Beginner

Farmhouse Counter Stools

Submitted by wbengle77 on Wed, 09/23/2020 - 09:09

This was a pretty strait forward project, the only change i made was the wood used. I did not use the 2x2 furring strips i opted for the upgraded Select Pine Boards. So it changed from 3 bucks to 12 a board. I also used metal nylon feet.

Built from Plan(s)
Estimated Cost
depends on wood and finish
Estimated Time Investment
Afternoon Project (3-6 Hours)
Finish Used
I used an antiquing wax, then I used butcher block oil and wax to finish.
Recommended Skill Level
Starter Project

Comments

Sliding "barn" door from reclaimed pallet wood

I saw many different sliding door projects online, so I did my own spin on one. I was able to get several old pallets for free (pine and oak). I went to Lowes and bought a few 2x3s which I used as the frame, and the track hardware which was only $13! Most doors I see are mounted from the wall, but since I have 7' ceilings downstairs I mounted mine from the ceiling. This project only took about 4 hours total and cost about $40 when you figure in costs for screws, stain, etc. The most difficult part was taking apart the pallets. Using a reciprocating saw with a 12'' demolition blade is the best way to take them apart. Thanks for the idea Ana.

Estimated Cost
$40
Estimated Time Investment
Afternoon Project (3-6 Hours)
Finish Used
Minwax Dark Walnut
Recommended Skill Level
Beginner

Comments

BREATHESMILEBE

Mon, 05/13/2013 - 20:00

Hi!!
This looks so awesome! I came across this and was hoping to repeat it. You mention that you found the door hanging hardware at Lowes for $13. I can't seem to find it. Do you happen to remember the name of it? I'm entering "hanging door hardware" into Lowes and Home Depot and can't seem to find any hanging door hardware at all. I'd appreciate the help. Thanks!
Tina

Rustic X coffee table - first project!!

A little warmer than I had planned but very happy with my completed first project. Thanks Ana!

Built from Plan(s)
Estimated Cost
~200
Estimated Time Investment
Weekend Project (10-20 Hours)
Recommended Skill Level
Beginner

Comments

Sliding Door Console w/ Fireplace

Submitted by schke1 on Sat, 01/14/2017 - 15:40

I used the Sliding Door Console and modified it for a 36" Electric Fireplace insert.  Behind the doors are the shelves as per the original design.  

I did purchase the door track - and used reclaimed wood for the doors.  These pieces are about 1/4 - 3/4" wide and vary in color.  

Built from Plan(s)
Estimated Cost
Wood was around $125. Door hanger was just under $100. Fireplace was $349.
Estimated Time Investment
Weekend Project (10-20 Hours)
Finish Used
Miniwax Dark Walnut and Polycrylic - No stain on reclaimed wood
Recommended Skill Level
Intermediate

Farmhouse Cubbies for Tots

I don't have a mudroom so I needed better organization for shoes, coats, and whatnot. I wanted it to match the Farmhouse Barn Door Entertainment Center I built, so I used the same paint and stain. My sizes were a tad smaller than most storage boxes, so I had to custom-build the cubby boxes. I added a rope around the whole perimeter as well as felt on the bottom to prevent scratching. The kids love it!

Estimated Time Investment
Week Long Project (20 Hours or More)
Recommended Skill Level
Intermediate

Comments