Community Brag Posts

Child's Fire Station Loft Bed

I used the plans for the fire station loft bed (http://ana-white.com/2011/11/fire-station-loft-bed), but added the stairs from the camp loft bed (http://ana-white.com/2012/07/plans/camp-loft-bed-stair-junior-height) since my son is young. I was afraid of him climbing down the ladder at night if he wakes up. The stairs are not attached and can be removed when he is older. They were designed so he can climb through the space where the lower rungs of the ladder were and use underneath the stairs as a fort, etc. The project took quite a bit of time and cost about $500 (not including the Kreg Jig or mattress).
Built from Plan(s)
Estimated Cost
500.00
Estimated Time Investment
Week Long Project (20 Hours or More)
Recommended Skill Level
Intermediate
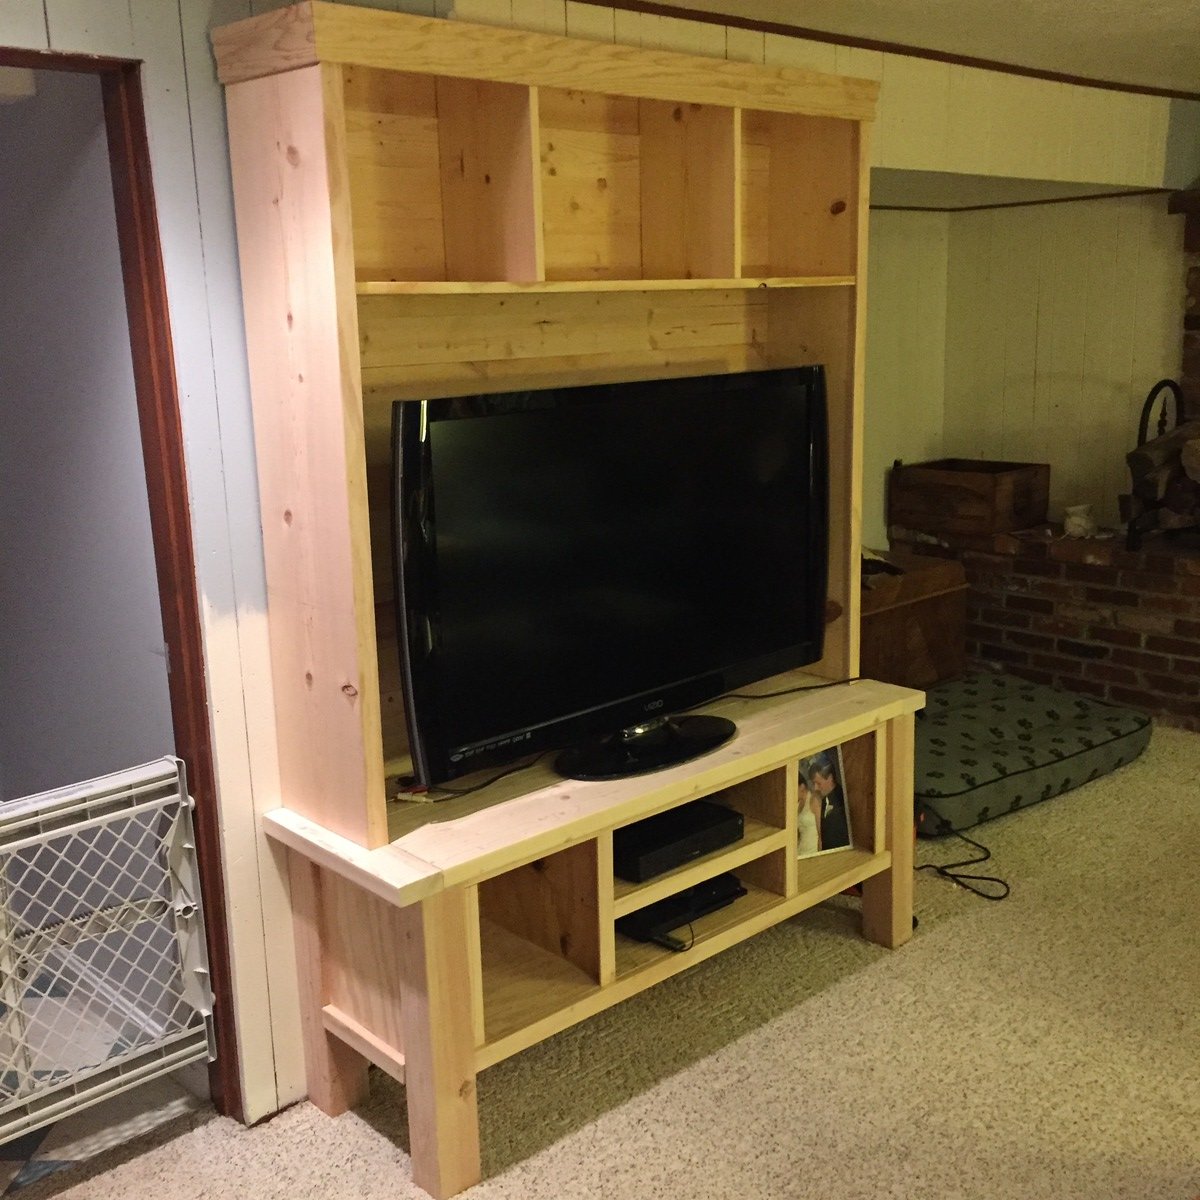
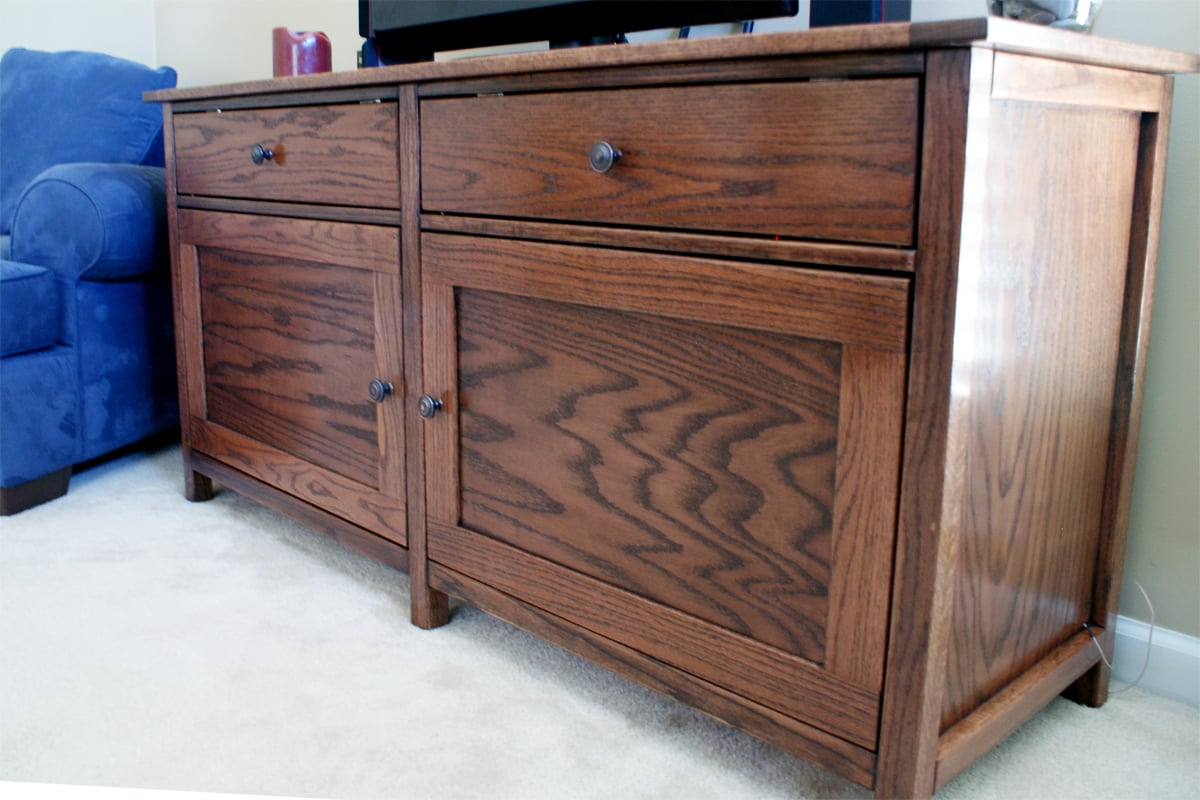
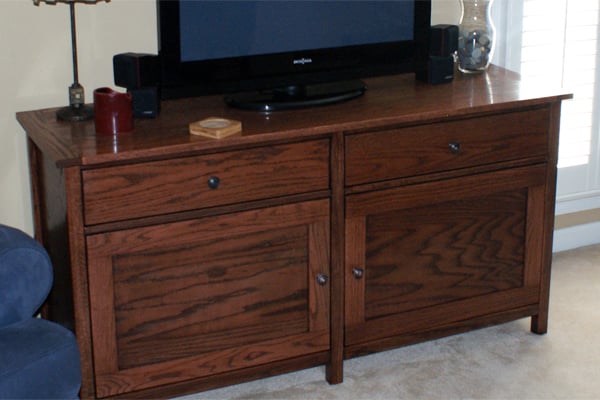
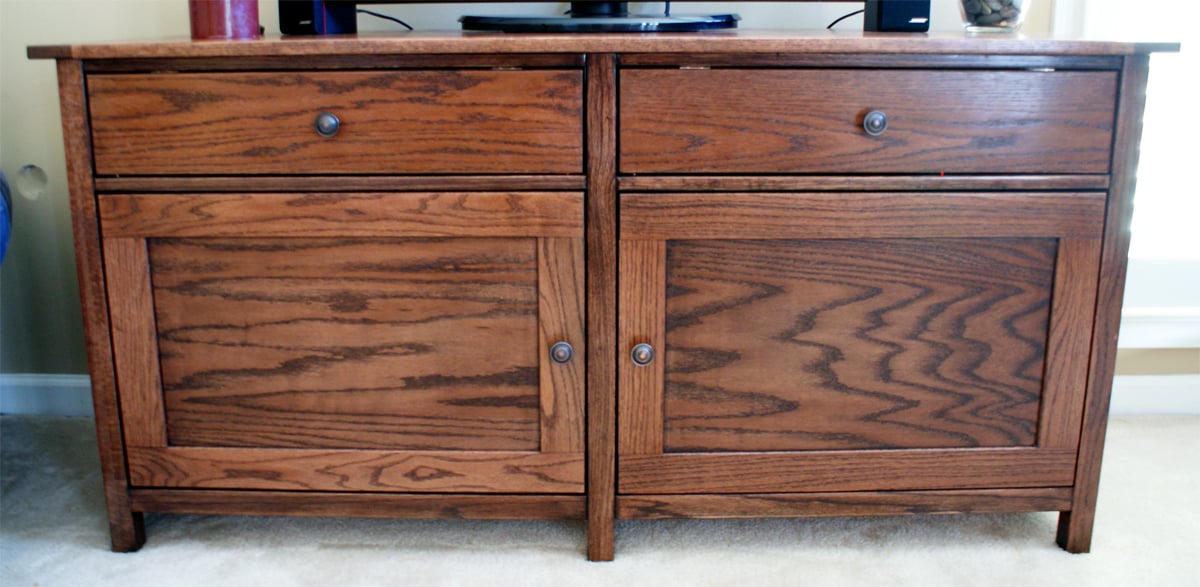
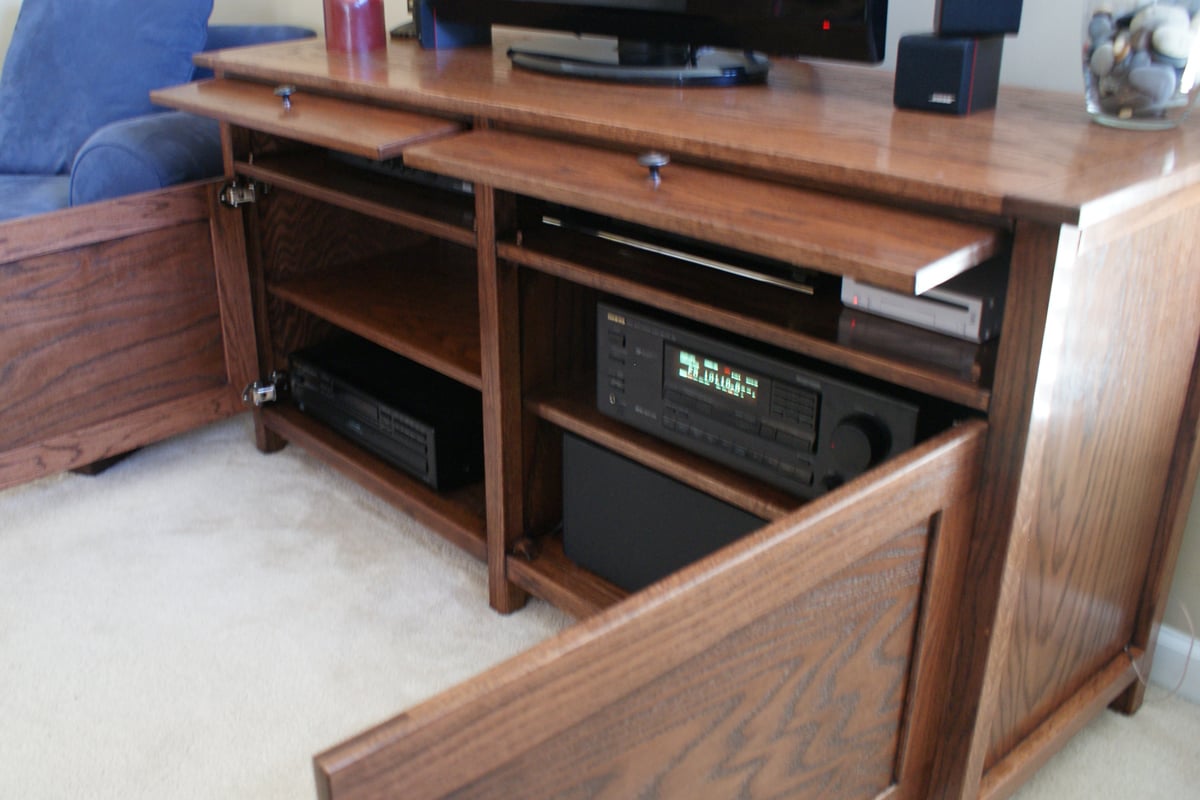
Family Room Entertainment Center
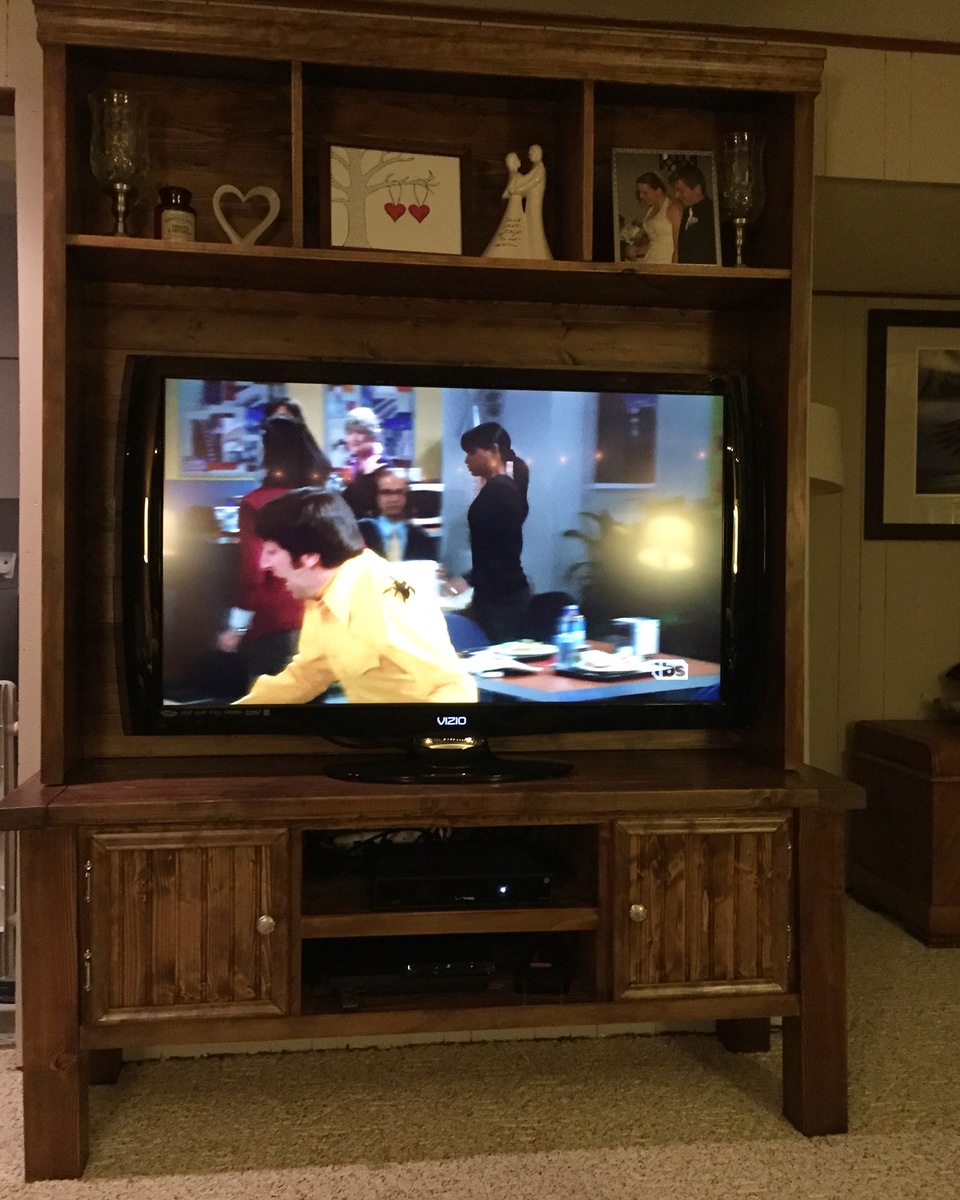
I built this for our family room TV and all the components. We wanted to hide all of the TV cords from view when we walked down the stairs - this was perfect! I'm so proud of it! Since this was going to be used where you were able to see the profile, I inset the planked back of the hutch and had to shave off 3/4" for the hutch shelves. I used pocket holes to hold the planks together for the back of the hutch. I decided to add cabinet doors to the console so that I could hide away all of the gaming supplies and unsightly necessitates. I used pine wainscoting and trim with a lip to hide the edges from view.
Built from Plan(s)
Estimated Cost
$100
Estimated Time Investment
Weekend Project (10-20 Hours)
Finish Used
Stain and Polyurethane
Recommended Skill Level
Intermediate
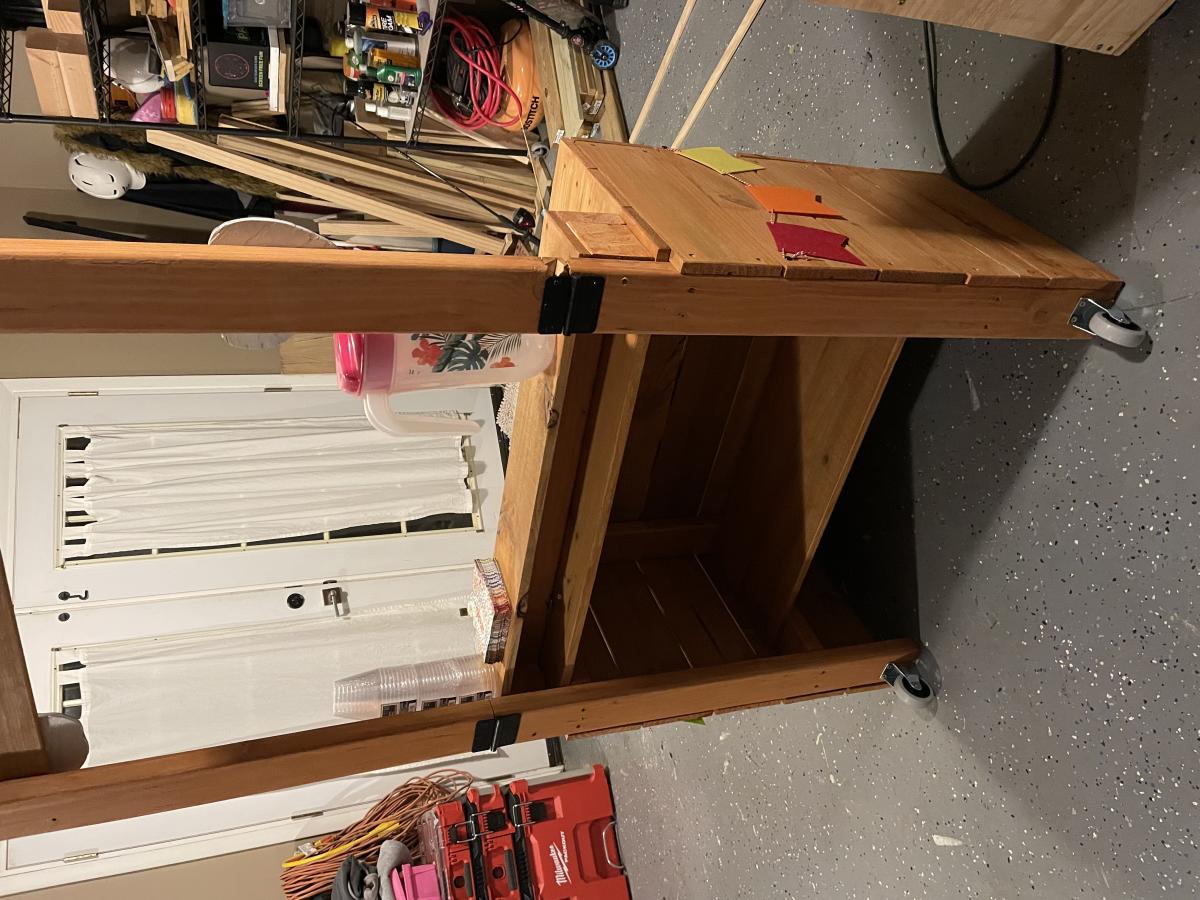
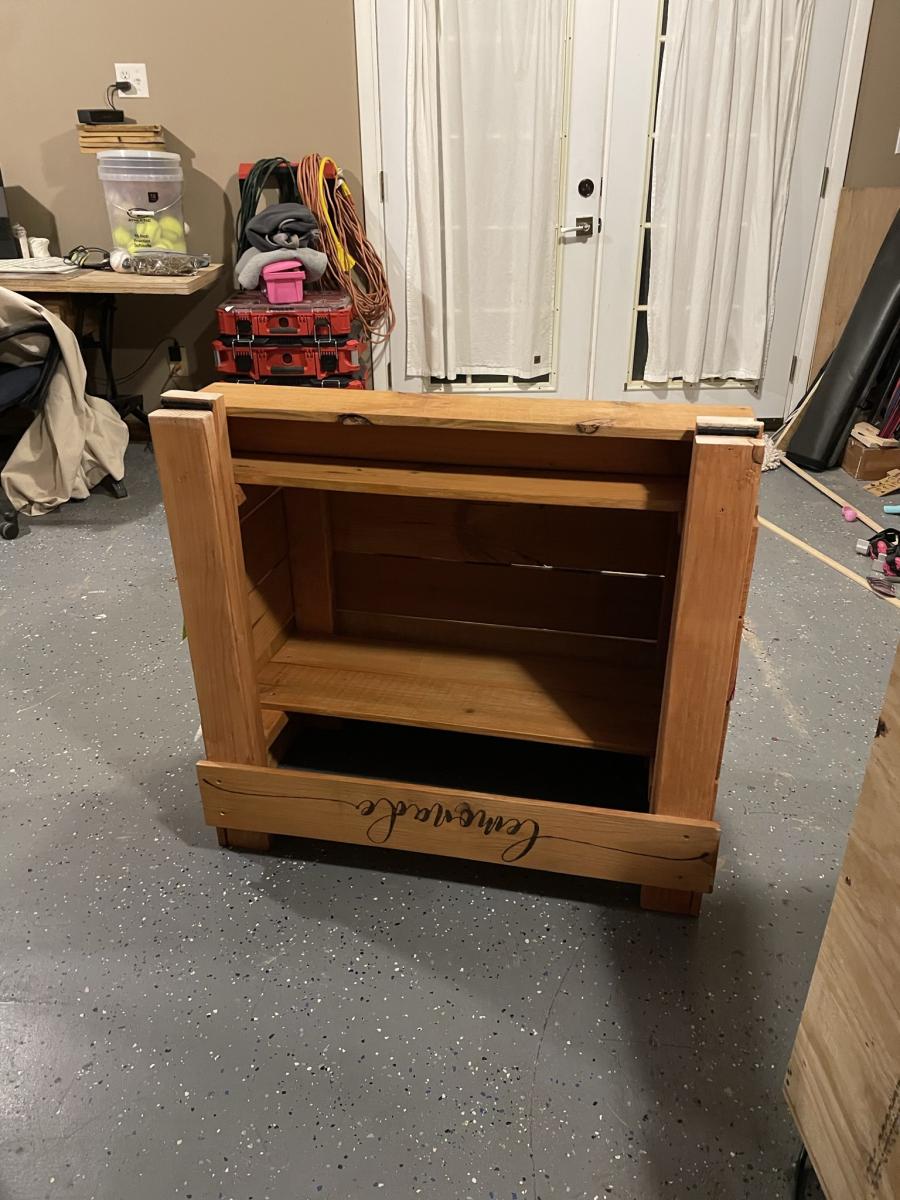
Lemonade stand
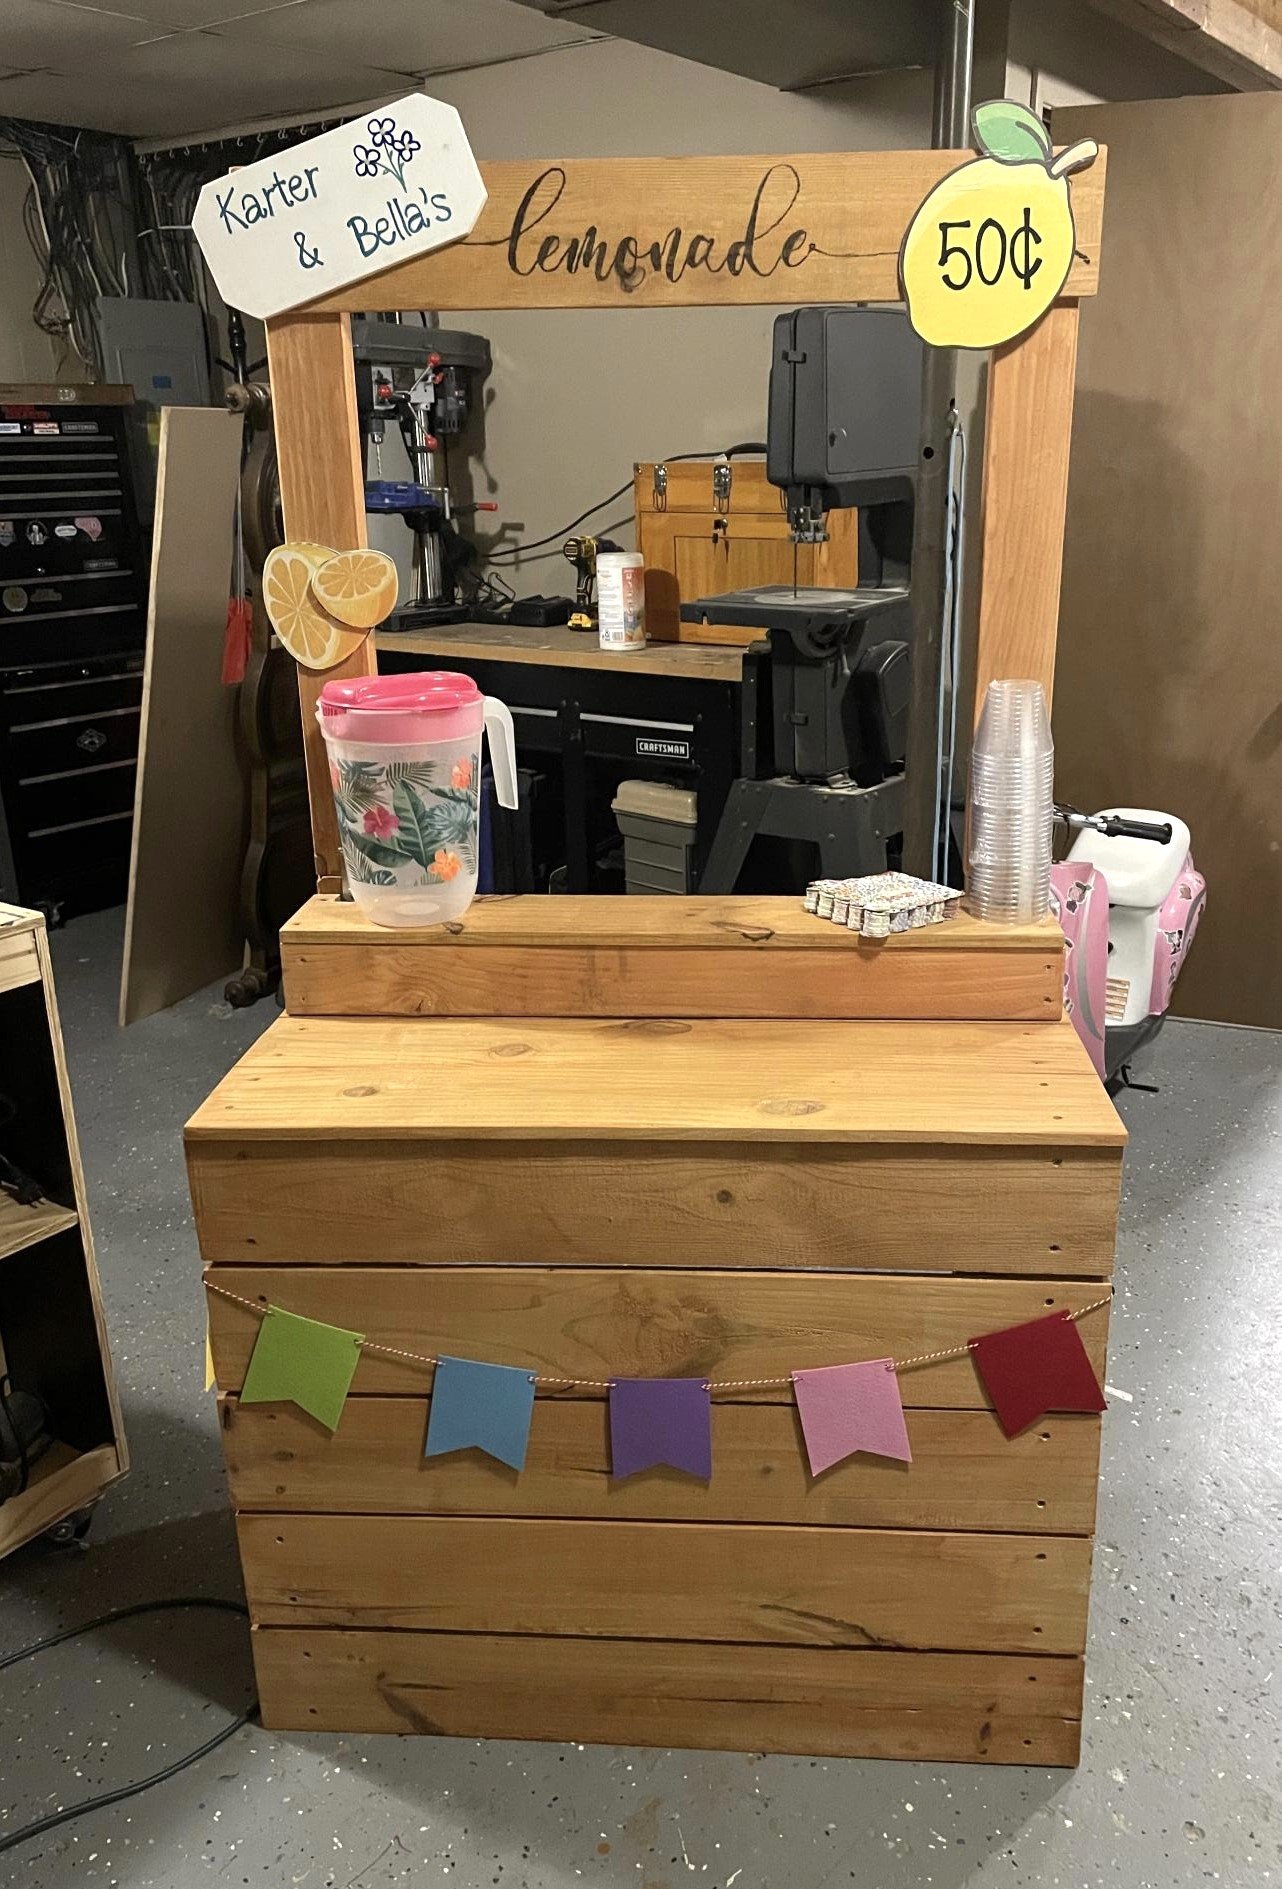
My granddaughter wanted a lemonade stand and it had to be easily portable. I used Ana White’s plans, made it a little taller (30” counter height, 65” total height), added hinges so the top drops down, and wheels on the back side so you can tilt and pull it behind you like a suitcase. Added a hook for a cutting board and hooks for a bungee strap to hold the cooler, pitchers and supplies inside while you haul it. A sign for her and sissy, some painted wood decor and we’re all set. Just add lemons!
Built from Plan(s)
Comments
Tue, 06/13/2023 - 08:58
Oh my, so cute!
So many great additions, I'm sure your granddaughter is thrilled!!! I'd love to see photos of her working it, if you'd like to share! [email protected]
Thank you for sharing!
Benchmark Media Console
This is my FIRST ana-white project and the first furniture I have ever built.
I made a few modifications to the original plan. Rather than using plexi-glass for the doors, I chose to use plywood panels to hide the electronics (Then I will use a rf repeater so the remotes still work). The doors are assembled using half-lap joints cut using a tenoning jig and a slot bit using a router with 1/4" plywood set into the slot during assembly.
I also chose to put a 1/8" roundover to most of the edges with the router to add a little interest and mounted the top doors from the top so they "flip up" rather than down.
Finishing was my biggest challenge but after fixing many mistakes, I finally am satisfied with the result. I used 4 coats of oil-varnish blend on top of a water borne stain.
I really enjoyed this project and it definitely gave me the addiction. I'm pleased with the final product and it's a huge step up from the IKEA thing we had before. I just bought a new table saw and can't wait to start my next one.
Thanks for looking!
Built from Plan(s)
Estimated Cost
500
Estimated Time Investment
Week Long Project (20 Hours or More)
Finish Used
General finishes water based stain (brown mahogany color)
General finishes Arm-R-Seal oil-poly blend
General finishes Arm-R-Seal oil-poly blend
Recommended Skill Level
Intermediate
Comments

Tue, 01/31/2012 - 08:04
That looks great!
I really love how you attached the top doors! And the doors in general look great!


Tue, 01/31/2012 - 08:43
This is absolutely beautiful.
This is absolutely beautiful. What a timeless piece, your hard work has certainly paid off.

Tue, 01/31/2012 - 09:39
Very very nice - especially
Very very nice - especially love that this is your first project!
Tue, 01/31/2012 - 10:05
Thank you so much
Thank you sooo much for the comments. This website truly was my sole inspiration for getting into woodworking. I've learned a lot and am humbled by the talent in this community. Thank you.
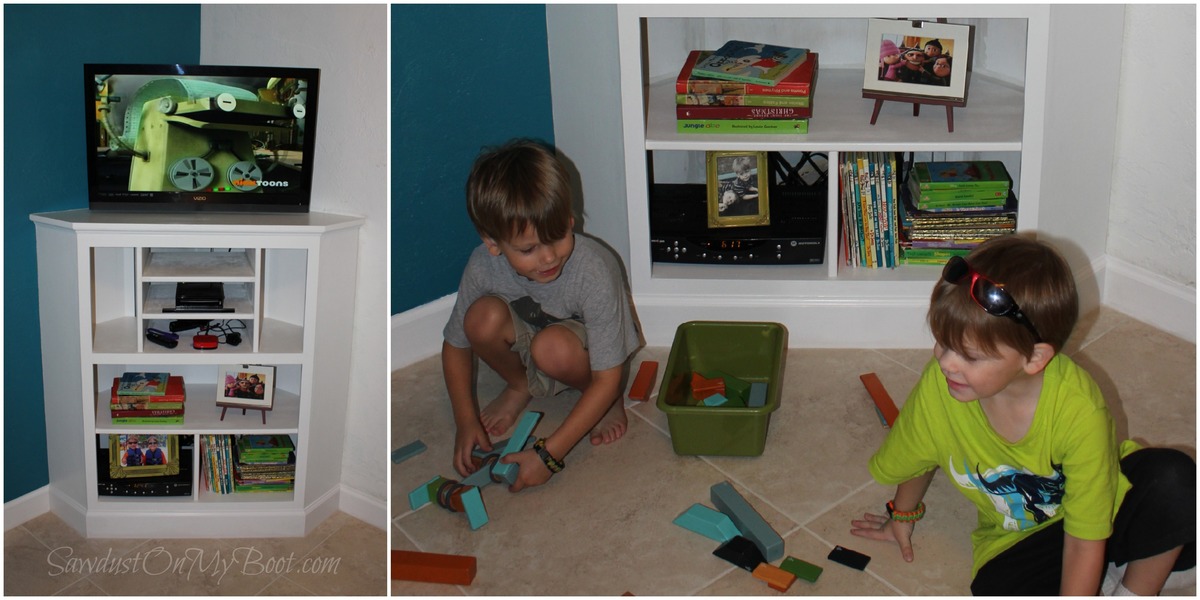
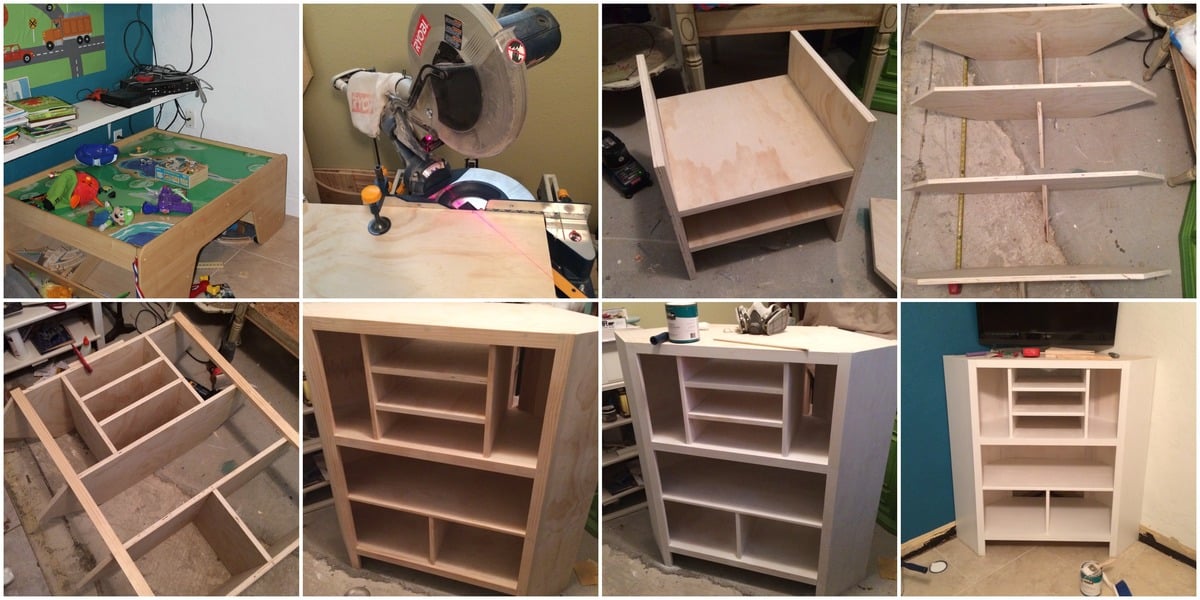
Built-In Corner Media Cabinet
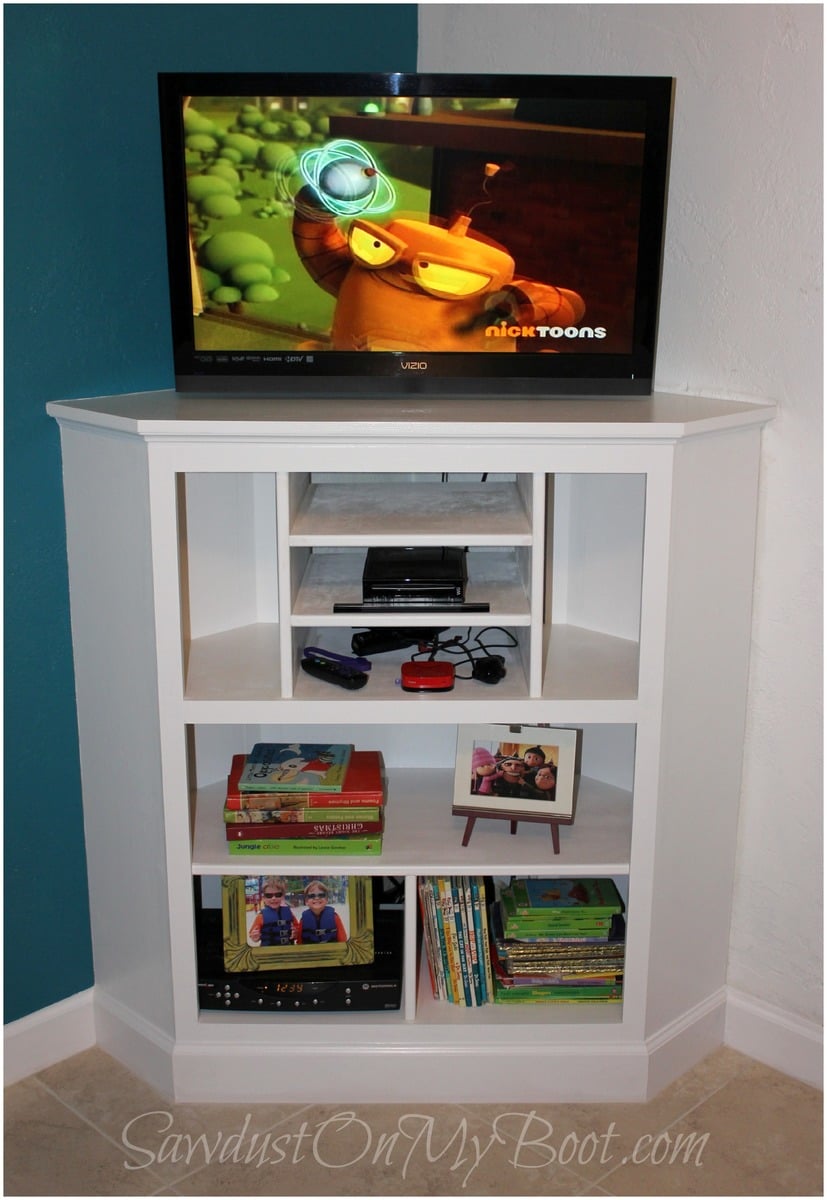
This was a particularly fun build for me since it was for my little guys' room! Hope Santa fills it with tech goodies on Christmas!! Please check out the details on my website! Happy Holidays!!! :D
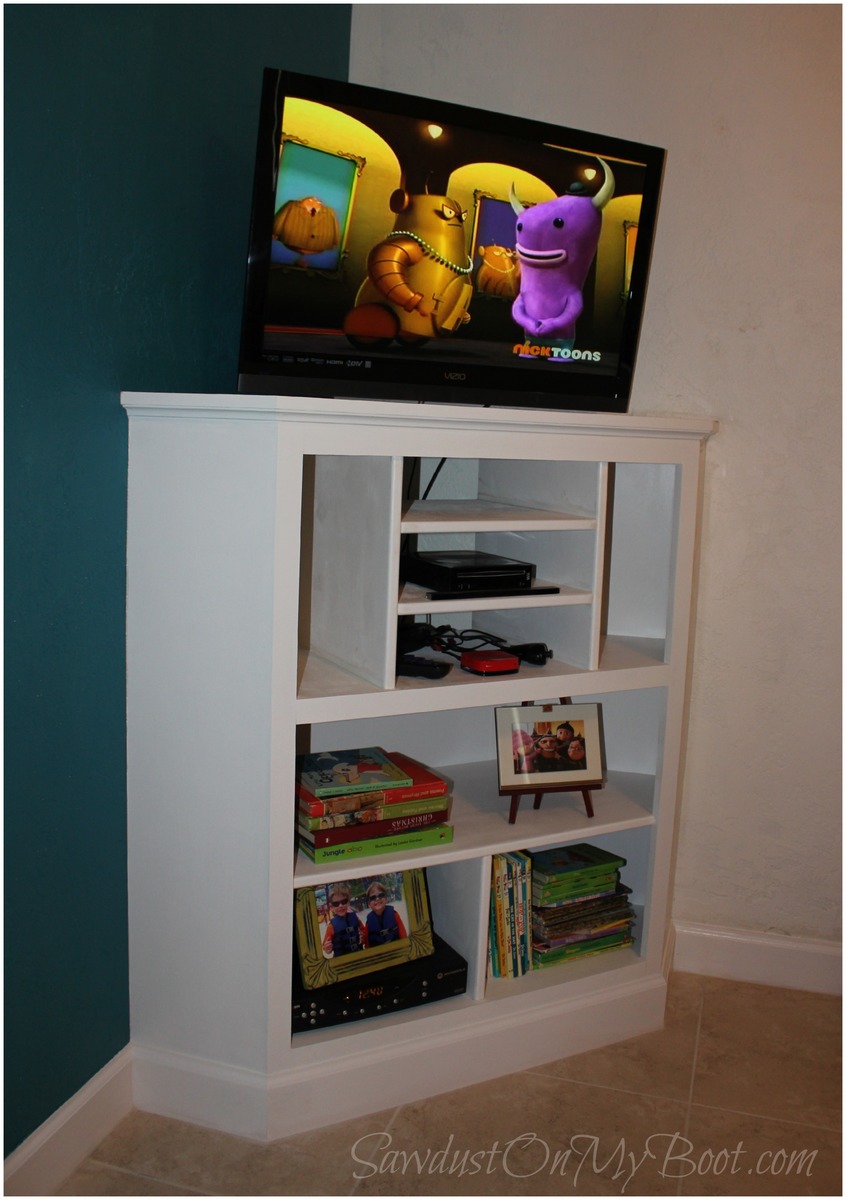
Built from Plan(s)
Estimated Cost
$150
Estimated Time Investment
Weekend Project (10-20 Hours)
Finish Used
Semi-Gloss Latex Paint
Recommended Skill Level
Intermediate
Comments
Fri, 12/13/2013 - 05:38
Beautiful!!
Great job. The molding looks perfect too!! I love the name of your site. I live on an island and when I'm working on stuff I like to wear my cowgirl boots :) my friends all tease me for them...but I love getting 'sawdust on my boots'! Again, great job!!
chalkboard shelf - key holder

Made this little chalkboard shelf/key holder for my niece. She is building a new house and I thought it would look nice in her kitchen or entry way. It was inspired by Ana's "easiest chalkboard shelf from scraps," but I routed the edges of the 1x12 and add different hooks for keys.
Built from Plan(s)
Estimated Cost
I used all scraps I had laying around.
Estimated Time Investment
An Hour or Two (0-2 Hours)
Finish Used
Gold trim paint around the edges and chalkboard paint on the inside.
Recommended Skill Level
Starter Project
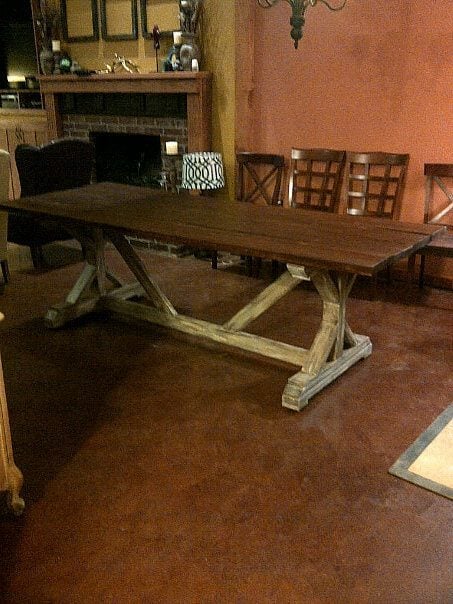
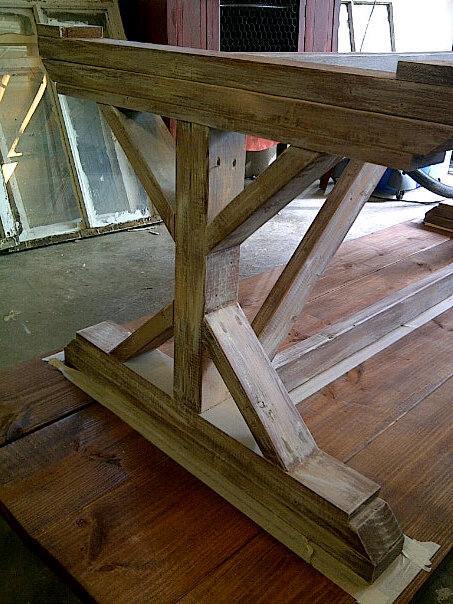
Modified 4x4 Truss Beam Table
Build this 4x4 Truss Beam Table for my wife's Birthday. For this table however, I did change the top and used the Fancy X Farmhouse Table top shortened to 7' (84"). I also used Whitney's plans on where to put the pocket holes (link provided in 4x4 Truss Beam Table Plans). This is my first wood project and with that first time using an Ana White plan. The plans are awesome and very easy to follow, we can not wait to build the matching benches! Biggest tip I have is do not wait to long after buying the boards to start the build, the wood sat for about 3 weeks(due to work travel) and some warped a lot.
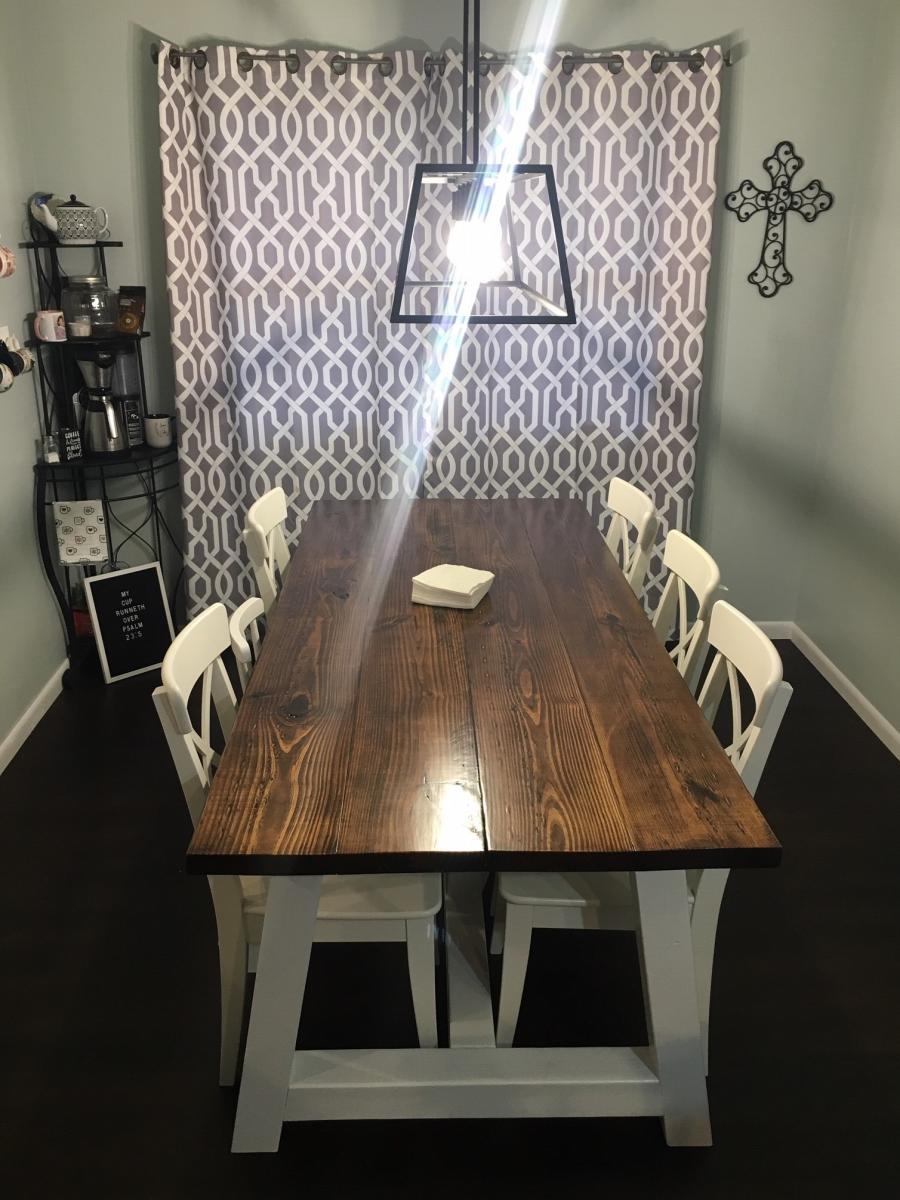

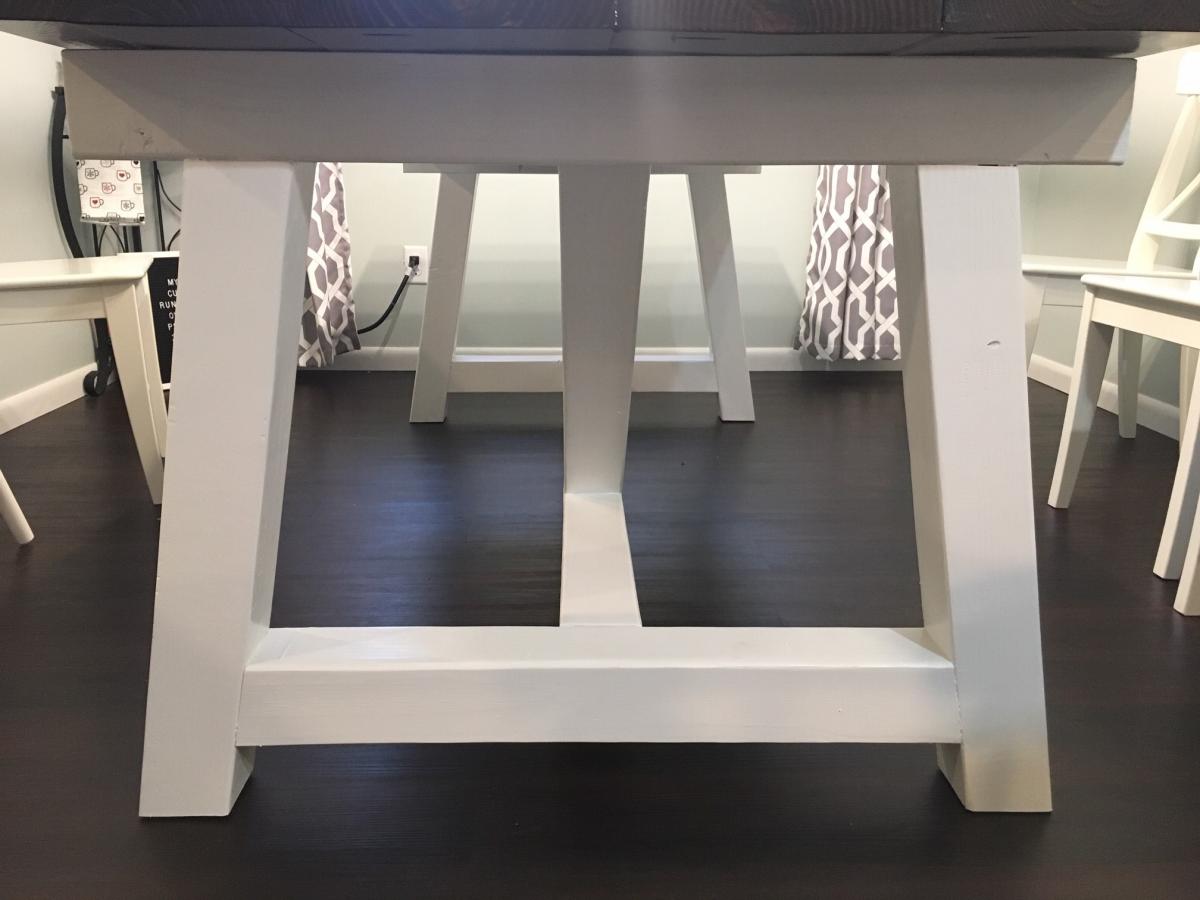
Built from Plan(s)
Estimated Cost
I do not have the exact amount anymore but between $100-150
Estimated Time Investment
Week Long Project (20 Hours or More)
Finish Used
Varathane- Kona and clear Poly
Sherwin Williams- White Cotton
Sherwin Williams- White Cotton
Recommended Skill Level
Beginner
Fancy X Farm Table
My husband and I built this together. Once we figured out how to use a Kreg Jig it was sooo easy!! I stained the top in English Chestnut and then chalk painted the based.
Built from Plan(s)
Estimated Cost
$100
Estimated Time Investment
Weekend Project (10-20 Hours)
Recommended Skill Level
Beginner
Comments
Farmhouse table
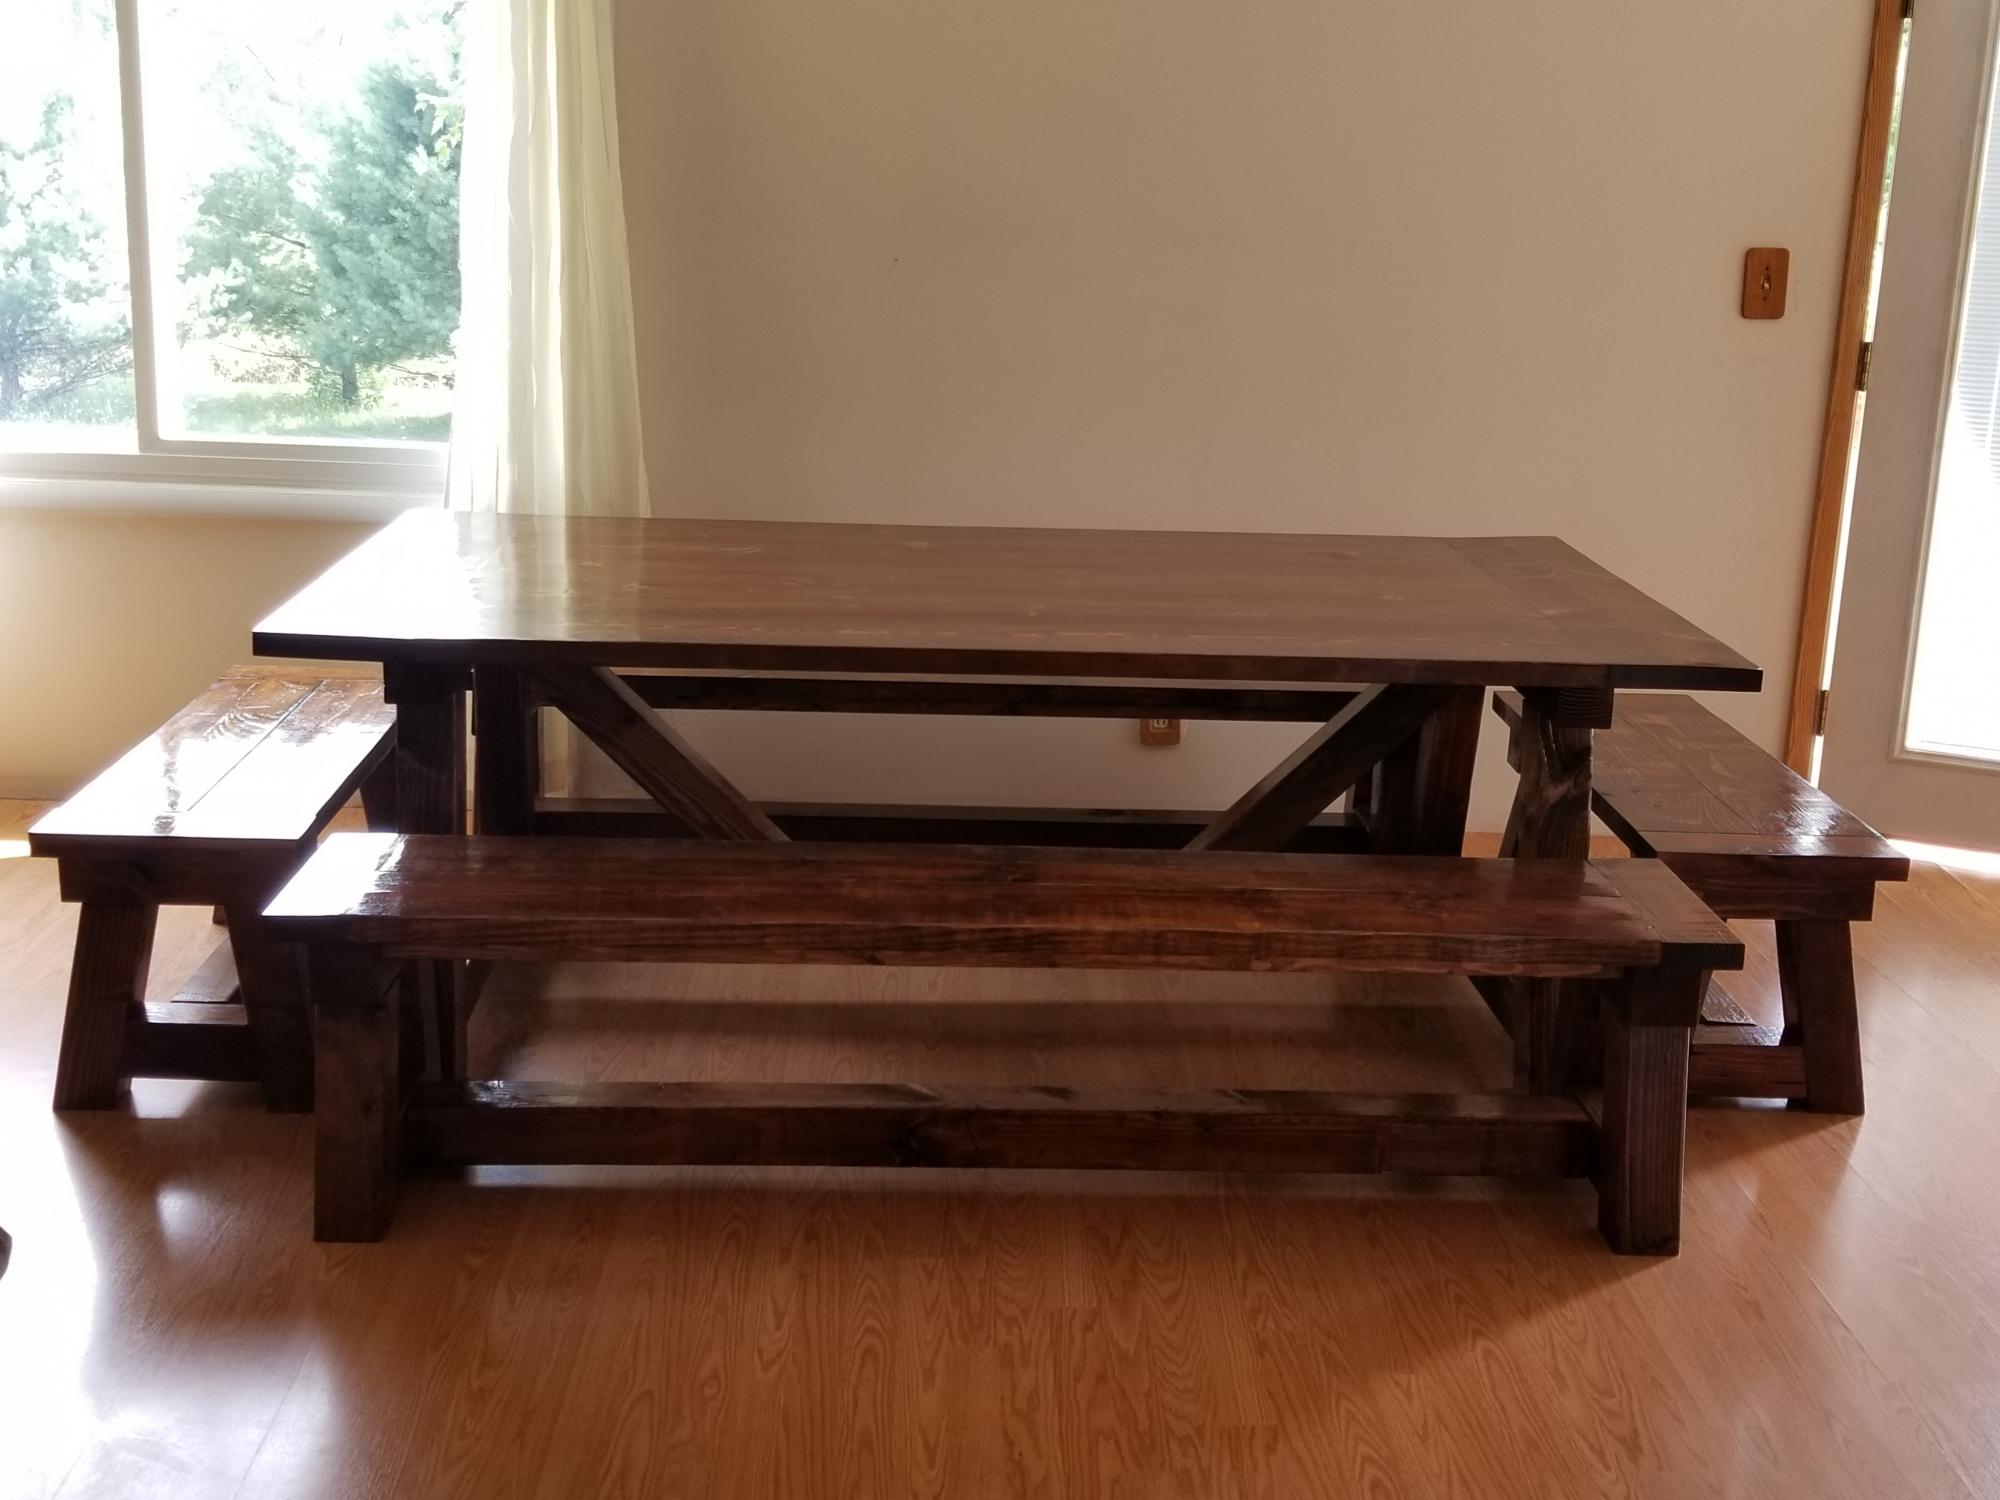
I have a friend who had a dream to have a Thanksgiving table that would seat her whole family! She asked for Two extra benches for the ends. She loves her new table, and I loved building it for her!
Built from Plan(s)
Estimated Cost
$300
Estimated Time Investment
Week Long Project (20 Hours or More)
Finish Used
High gloss polyurethane
Recommended Skill Level
Intermediate
Pool supplies storage shed
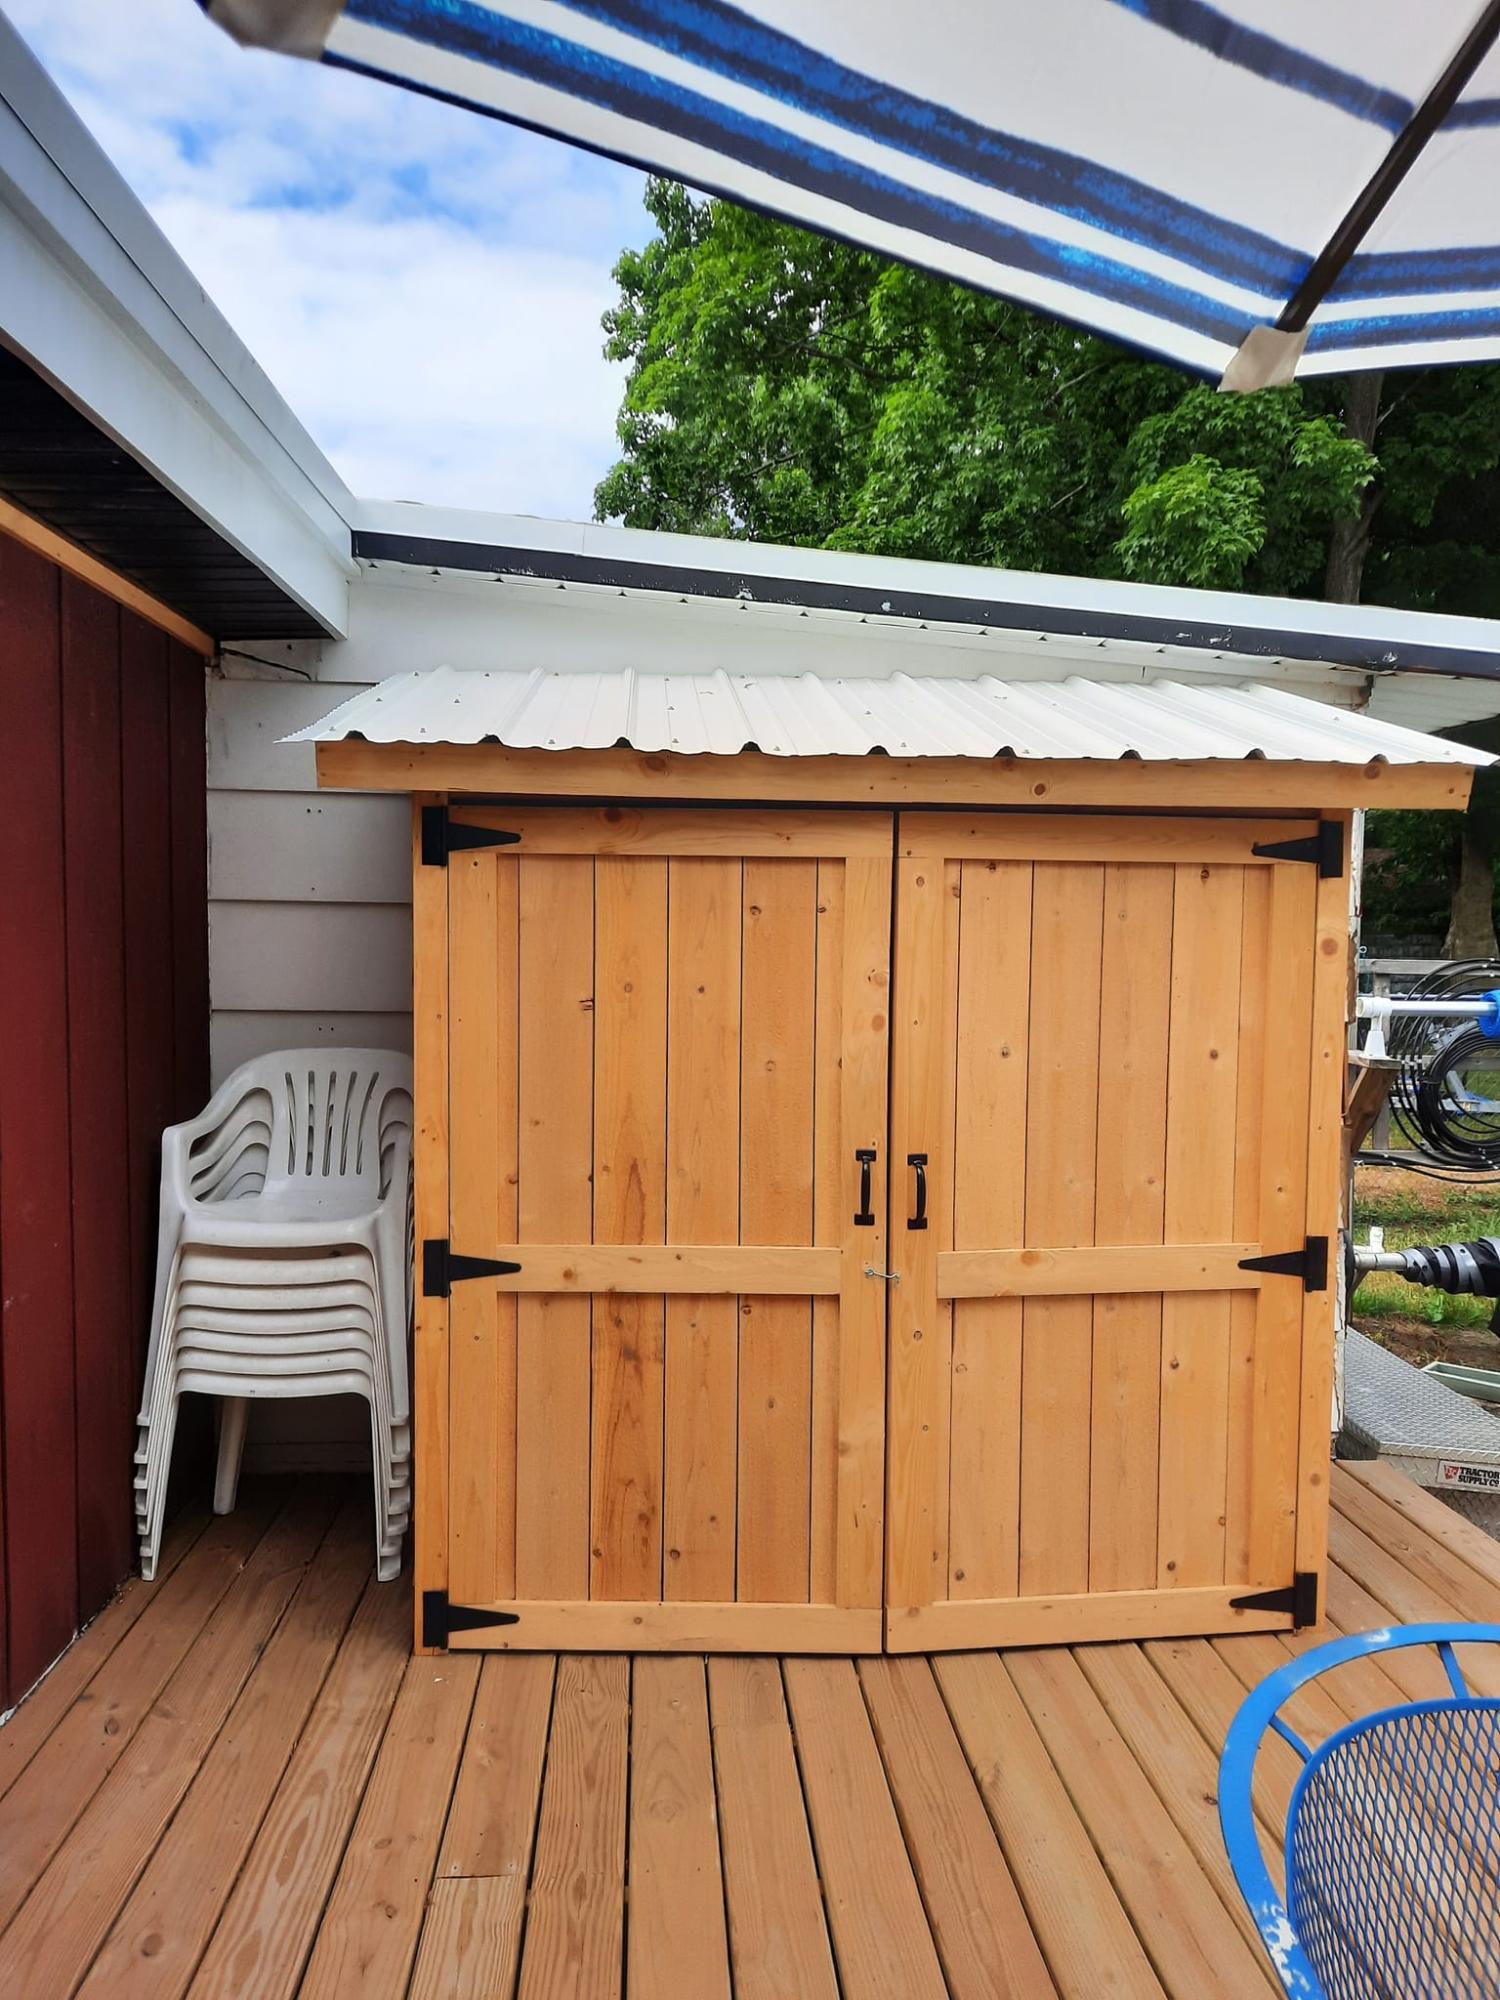
I was looking for a shed to keep pool towels and other deck and pool items. This shed hit every feature I was looking
for. My husband loved the plans. He's always saying he can build anything with a measured drawing and a
cut list. The only thing we changed was the roofing material. we were given some metal roofing by a friend.
Built from Plan(s)
Comments
Mon, 06/26/2023 - 12:20
Great Pool Supply Shed
Fabulous, so glad you found our plans helpful! It looks great.
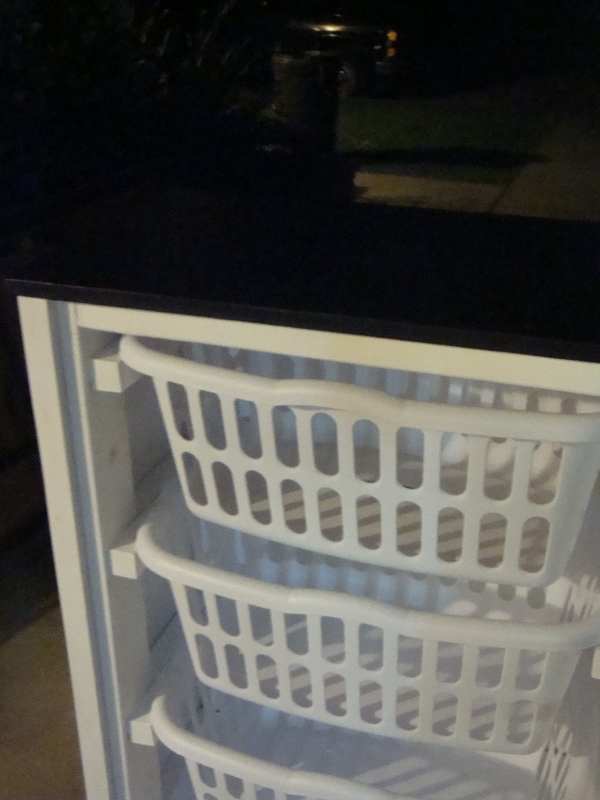
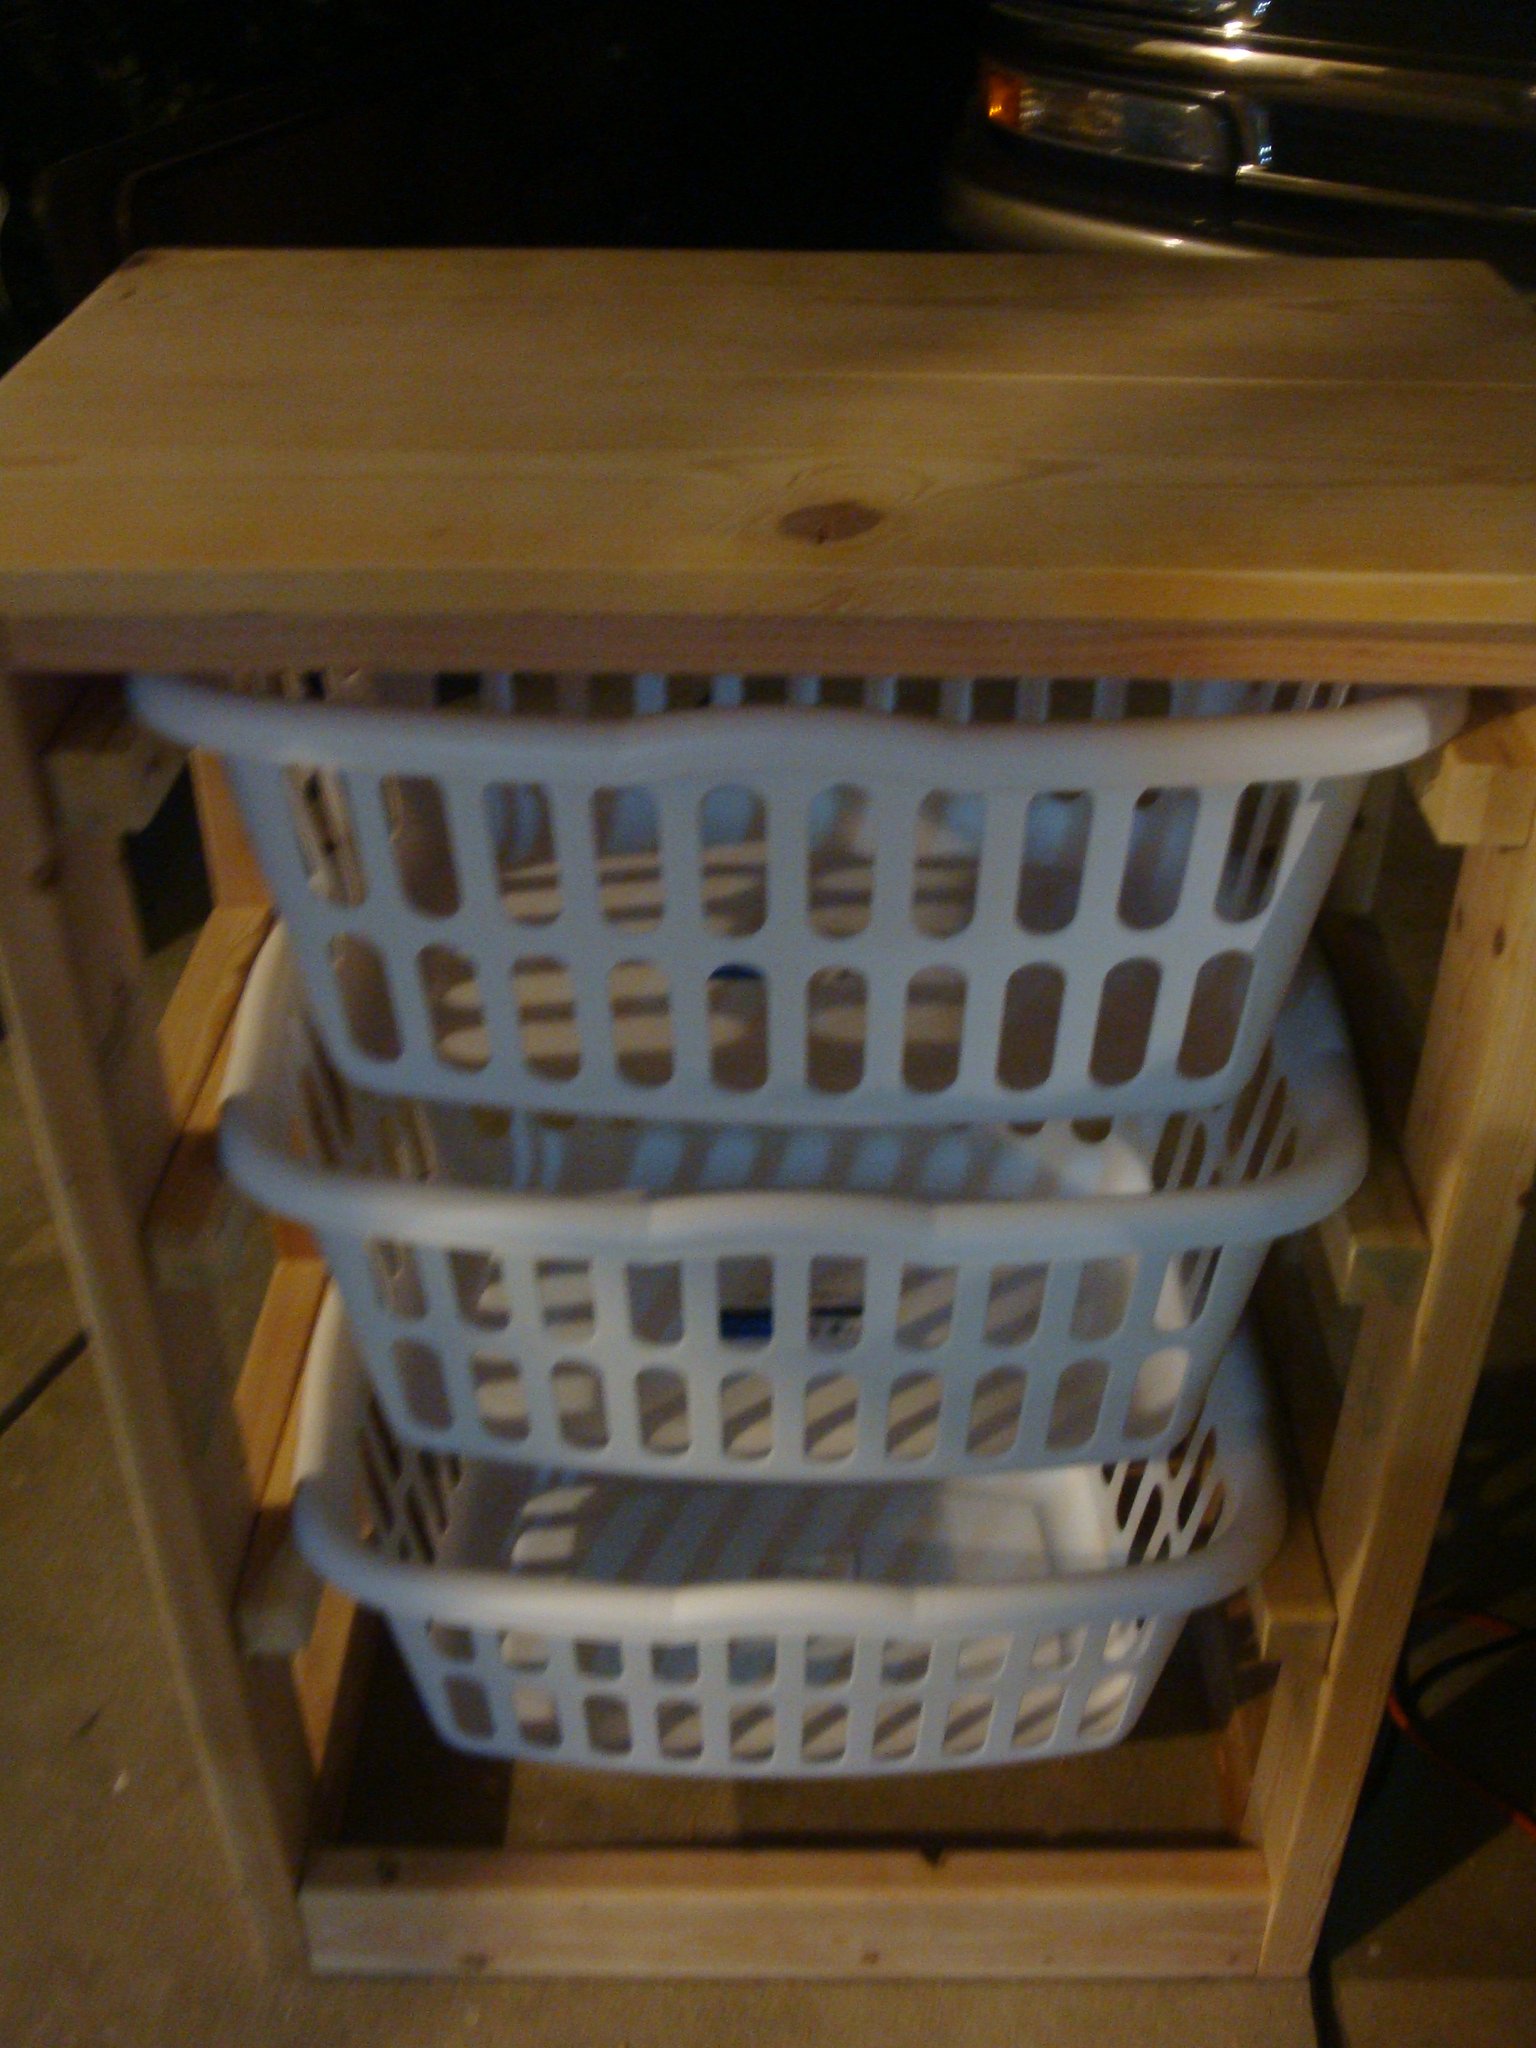
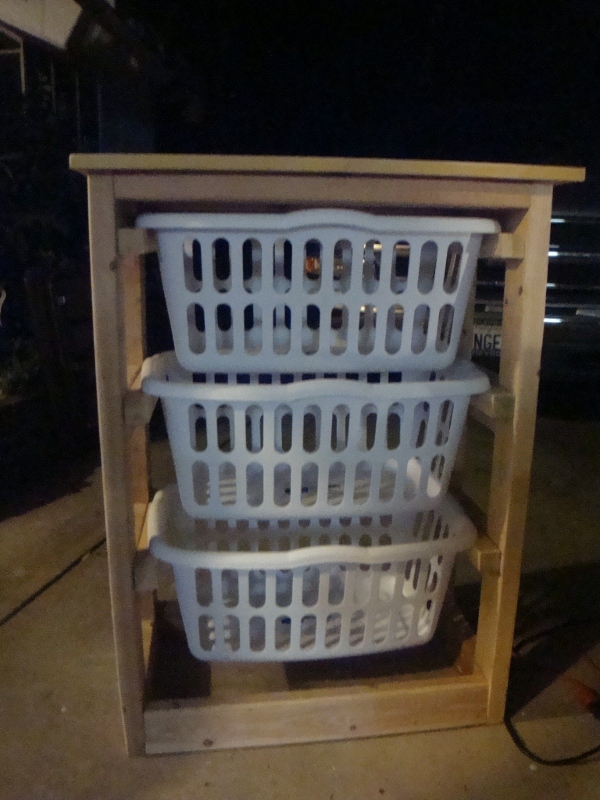
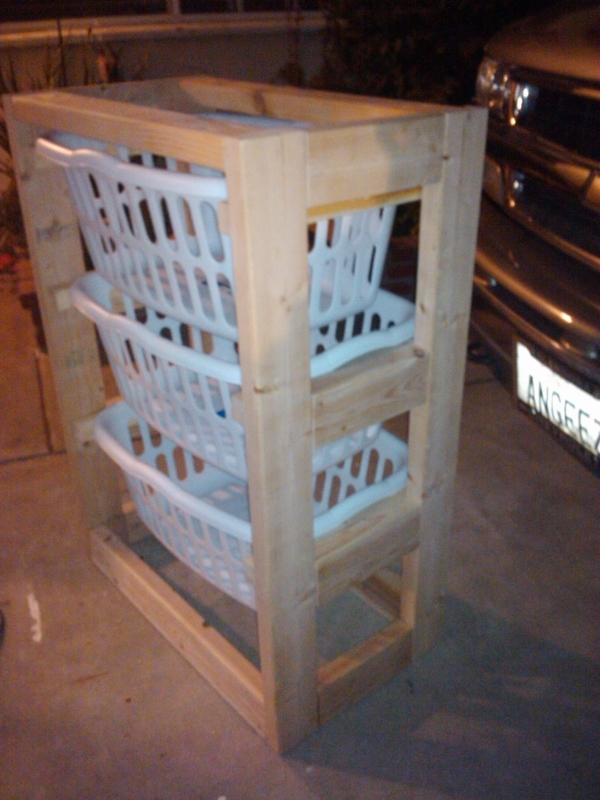
Laundry Basket Dresser
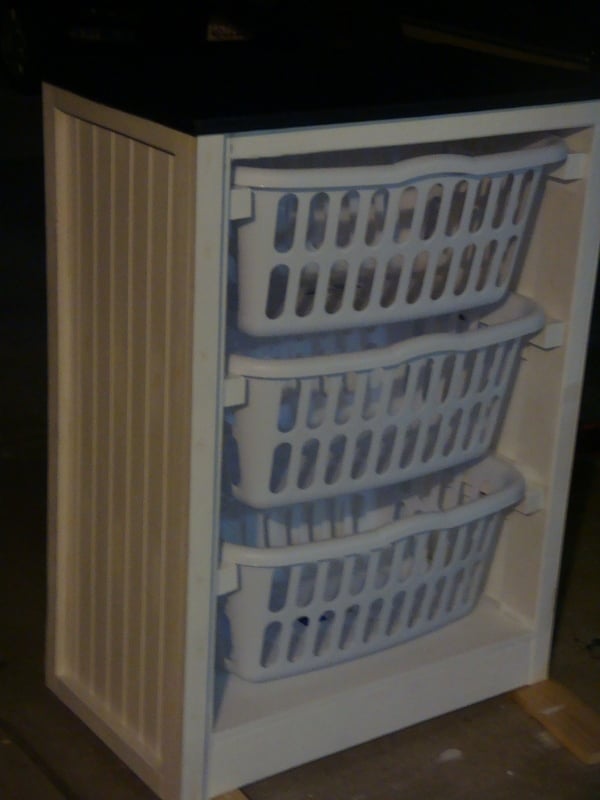
I built this 3 times, the first time, I wanted to beef it up, so I took it apart and decided that I was going to use a frame to make it more sturdy. This was for my 6'4 football playing husband, wanted a place for his sweats, jerseys, etc, so the 2nd one is the white beadboard one in the pic....Then, when I finally did move it into the house, boy I missed it in the garage. I had been using the baskets for my paint brushes, tack clothes, tarps, etc.....So, I built another one, just for me and my sundries. That's the one you see in the pic that is just the frame with baskets. My 180 6 ft tall son actually was caught sitting on top of it, and I'm proud to say, it held, no problem. I love Ana's plans, you can follow to the tee, always a good idea, or add in your own flavor. It's like adding your own spice to the soup. This is one of my favorite pieces to build, used my kreg, and the one that gets the most compliments and requests. For the top, I didn't have a 1x16 on hand, so I kregged together 2 1x8's. Absolutely beautiful.
Built from Plan(s)
Estimated Cost
Beadboard was the biggest expense, 19.00 wood-18.00..38.00 total
Estimated Time Investment
Weekend Project (10-20 Hours)
Finish Used
wood body kilz x2, sanded in between, then 2 coats of Behr semi gloss Utra White. Top pine is sanded, then 2 coats of Black Onyx stain, sanded in between then coated 2 coats with Polyurethane.
Recommended Skill Level
Intermediate
Comments
Tue, 02/28/2012 - 13:14
Laundry Shelves
Durability was my one concern with these plans, so I am so glad you shared these modifications! I am a very visual person, so seeing them made with the 2x4 frame has really helped me know how I want to build these. Thank you for sharing.
Tue, 03/20/2012 - 10:00
laundry basket dresser
Both of these are awesome! They look great and STURDY! I'm inspired again :~)

Thu, 09/12/2013 - 02:25
very durable, glad I went
very durable, glad I went with the 2x4's, both going strong.
Fri, 07/17/2015 - 18:21
Plans
Long shot since this was posted so long ago but I would love some more details on the supply list for this particulr version of the laundry dresser. I really like the bead board and frame but am struggling with the dimentions of all of the 2x4's for the frame. Thanks!
Craft Table

I built this table from the all the great info on this site. I used Purebond Plywood in Oak for the top and pine for the base. I created an opening for quick access to items I use frequently. I also used cup hooks attached underneath the tabletop for my scissors. Painted in Ultra white from Valspar with several coats of Polyacrylic. I used my Kreg Jig to build the whole thing.
Estimated Time Investment
Weekend Project (10-20 Hours)
Finish Used
Valpar Ultra White Painy
Recommended Skill Level
Beginner
Comments
Bunk Beds with Climbing Wall
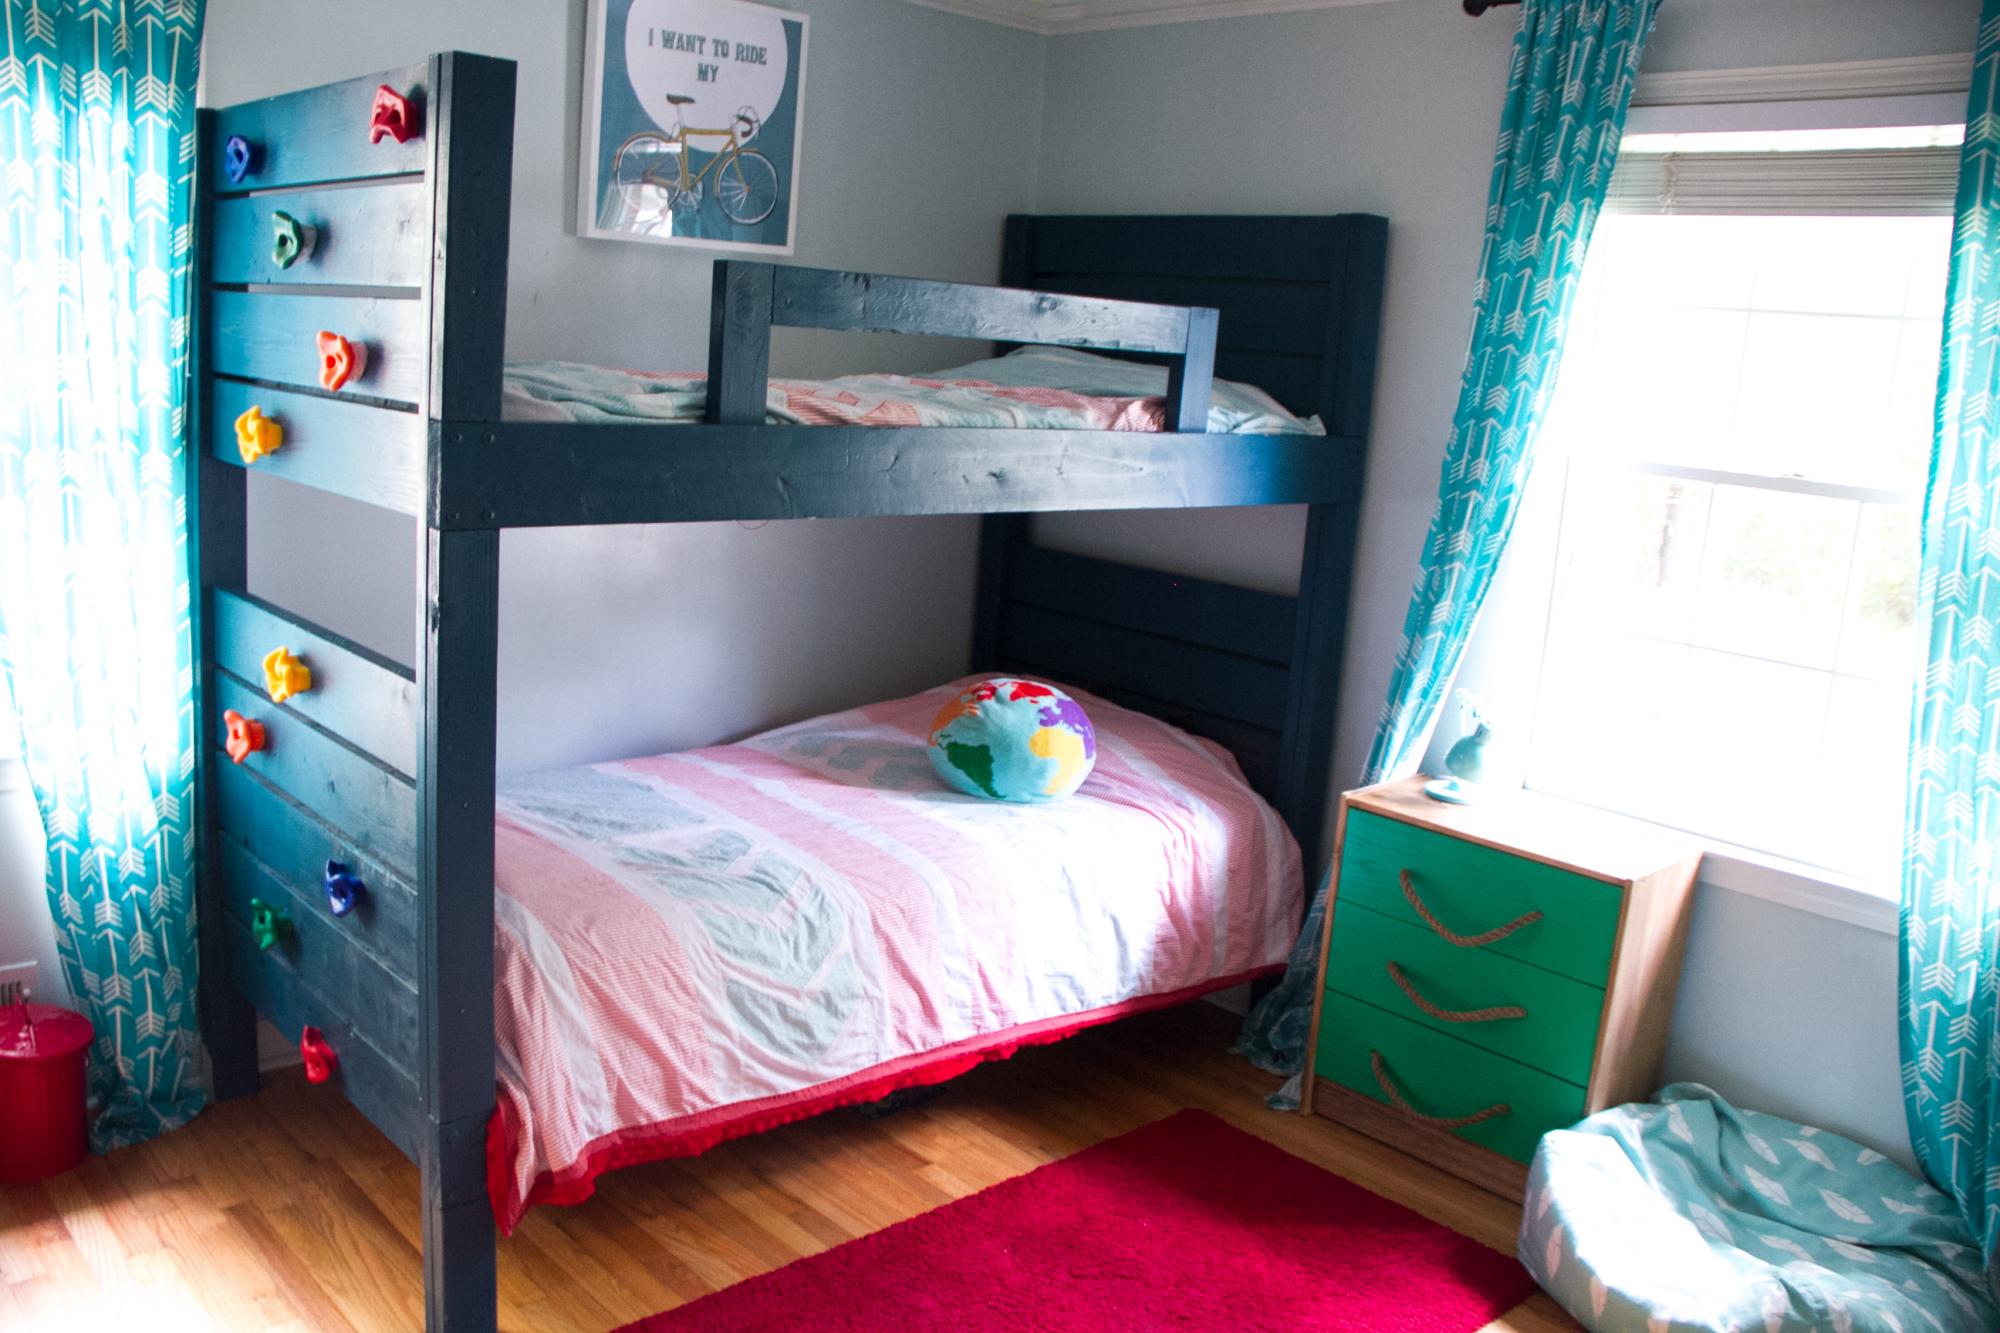
I built this bunkbed for my boys bedroom based on Ana's plans with a slight modification to make it more fun for them- a climbing wall on the end instead of a ladder! I followed Ana's plans which were easy and clear to understand and the result is super sturdy and strong! We had IKEA bed slats already and they fit perfectly on the cleats to hold up the mattresses. I simplified the guard rail a bit and used a dark teal paint to finish. A 10 pack of climbing wall hand holds was purchased from Amazon (link: https://www.amazon.com/gp/product/B074CM4DBN/ref=ppx_yo_dt_b_search_asi…)- I needed slightly longer bolts than what were provided to go through the 2x6s but found what I needed at a big box store. My boys (6 & 8) absolutely love it!
Built from Plan(s)
Estimated Cost
$150
Estimated Time Investment
Weekend Project (10-20 Hours)
Finish Used
paint
Recommended Skill Level
Beginner
Corner Shelf - Mom and Daughter Project
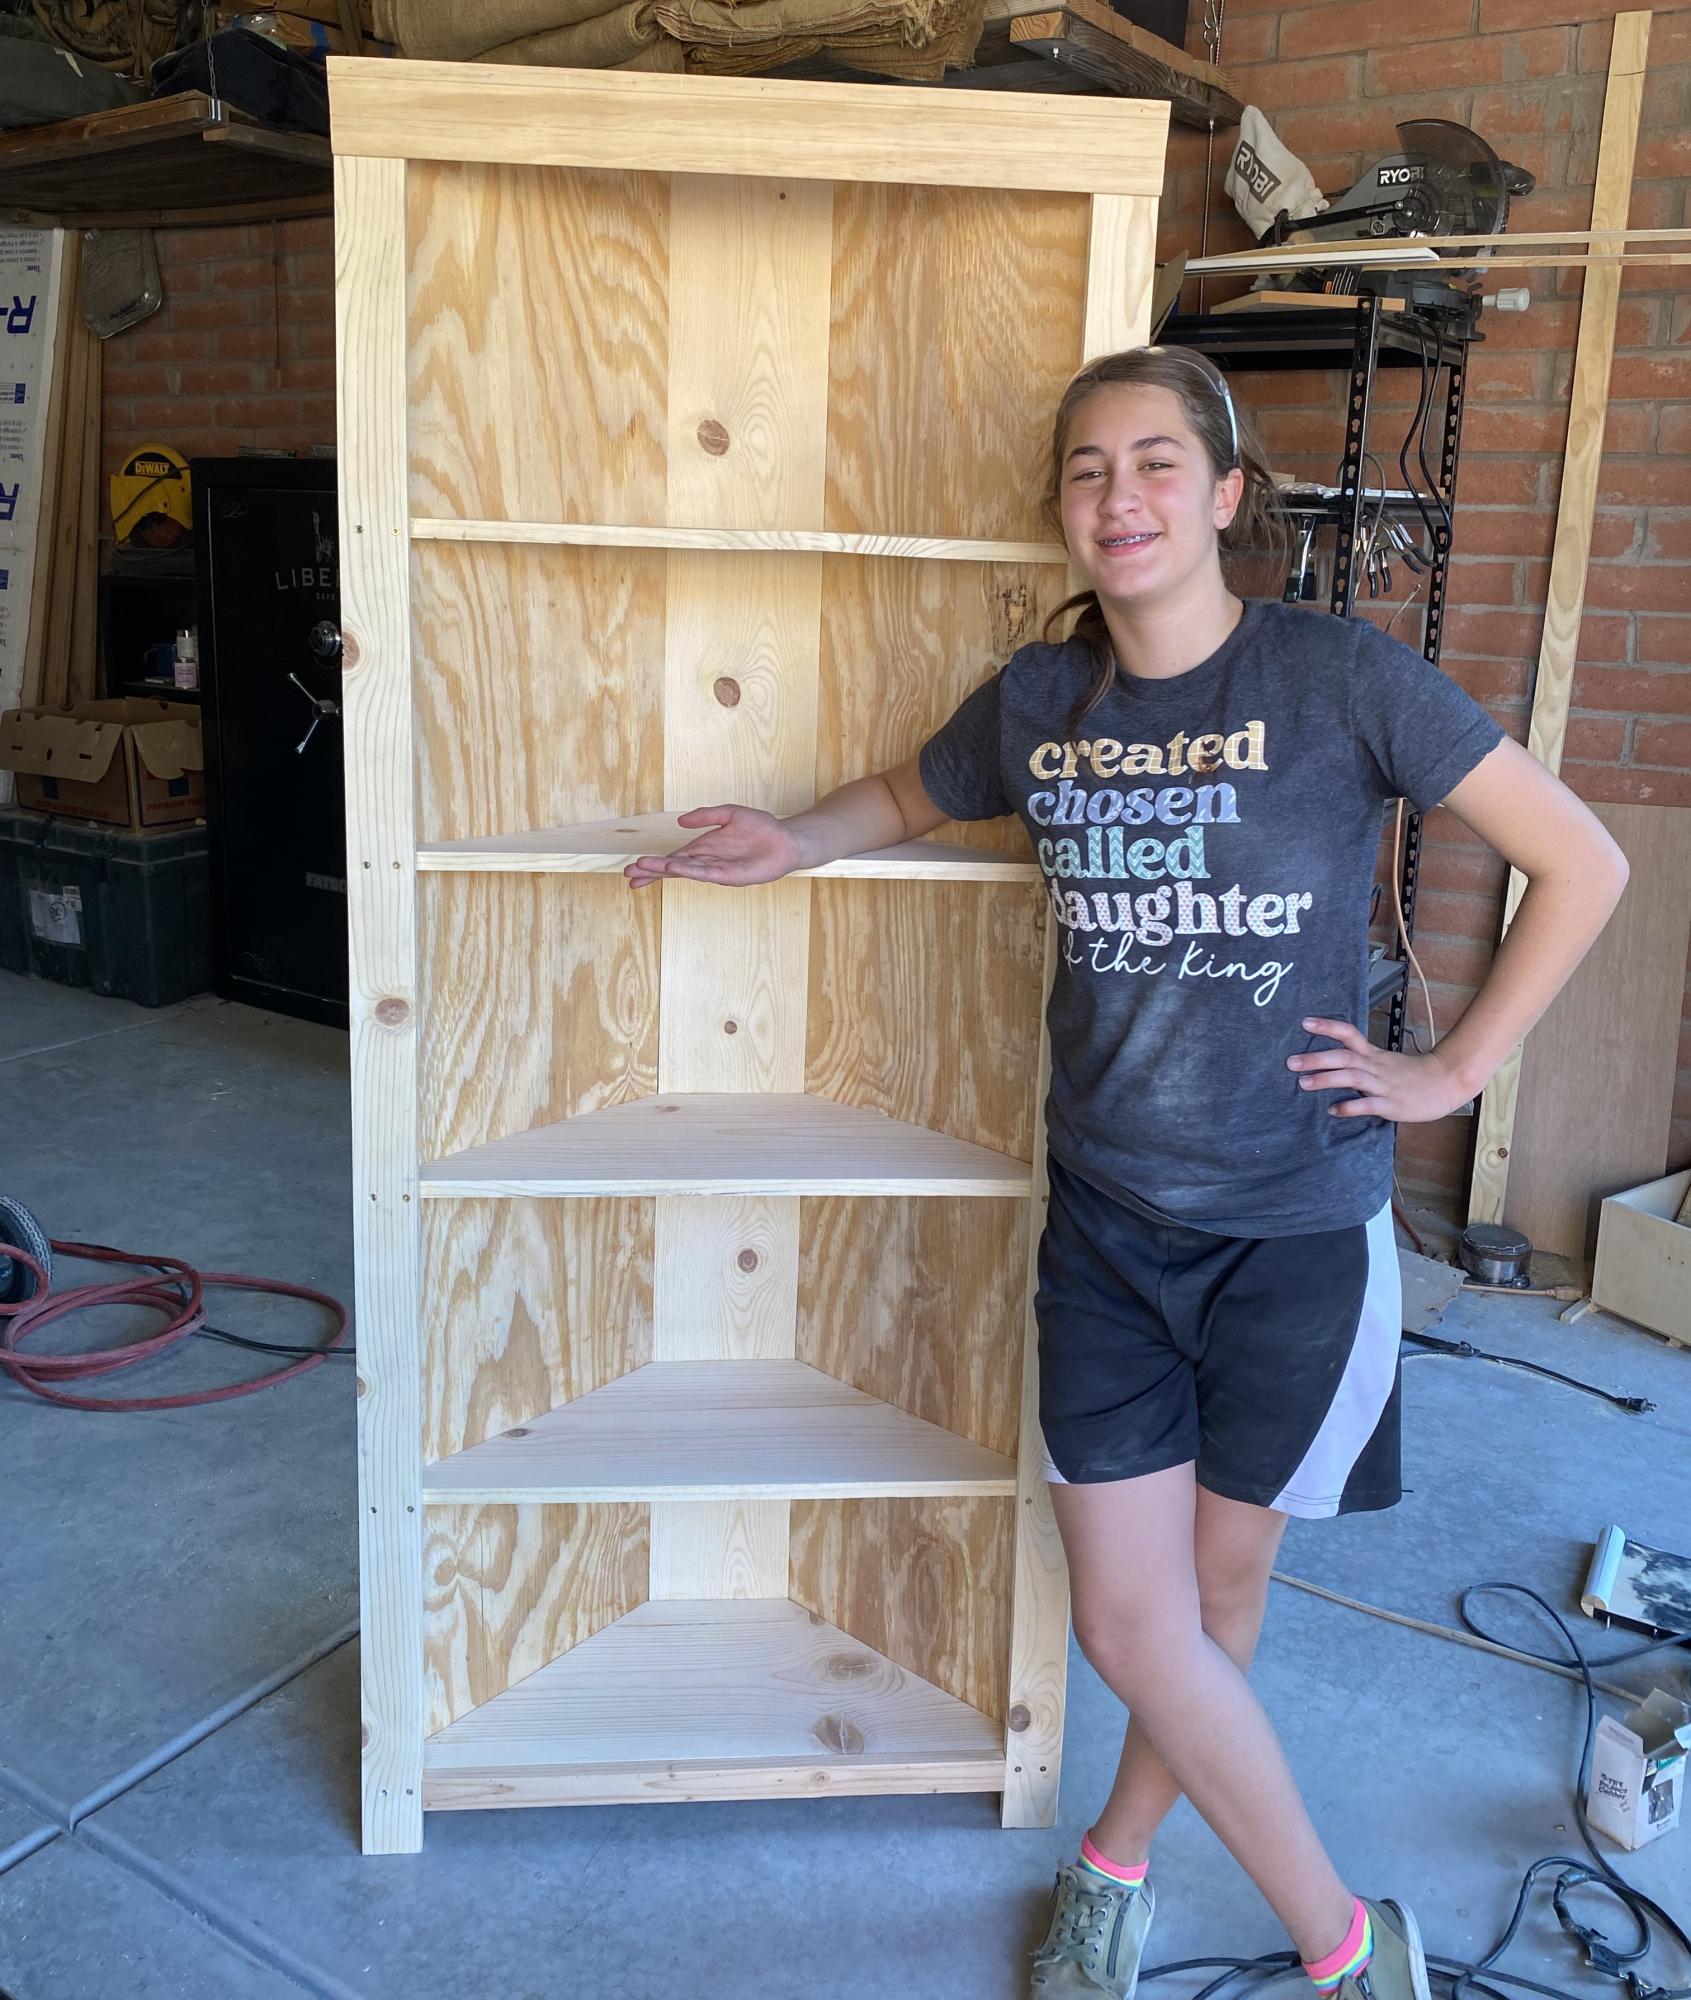
Completed the corner bookshelf (we opted to not use cupboard doors on the bottom) in two afternoons.
Beth and Jess Wegz
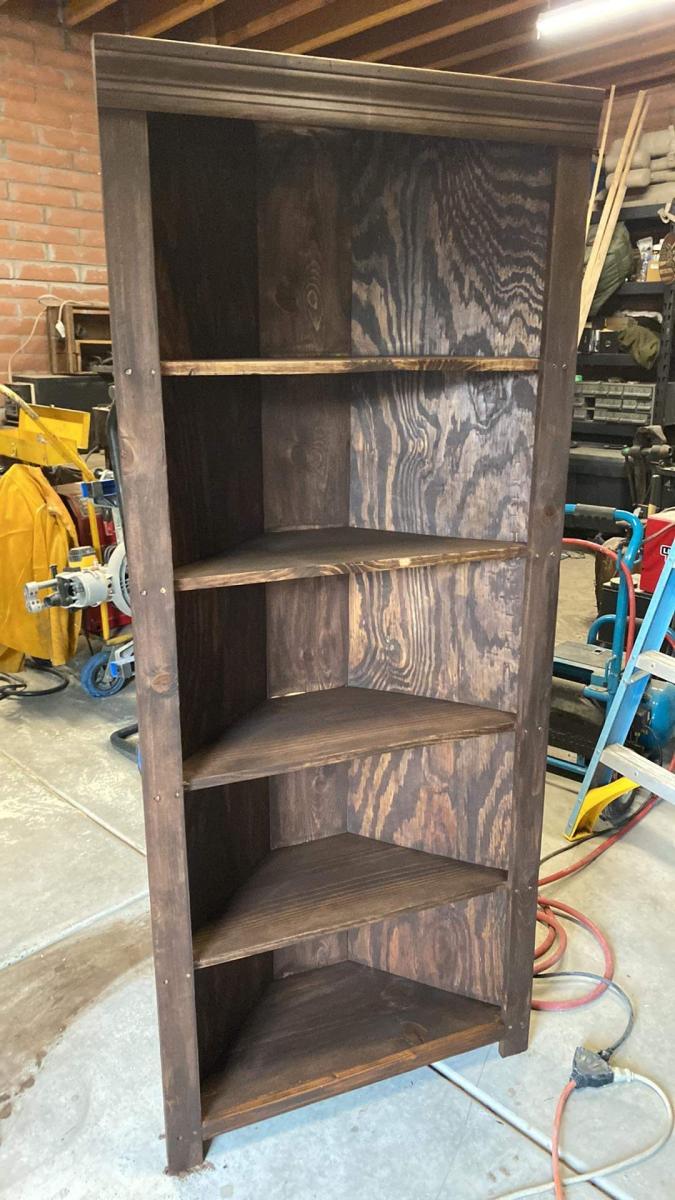
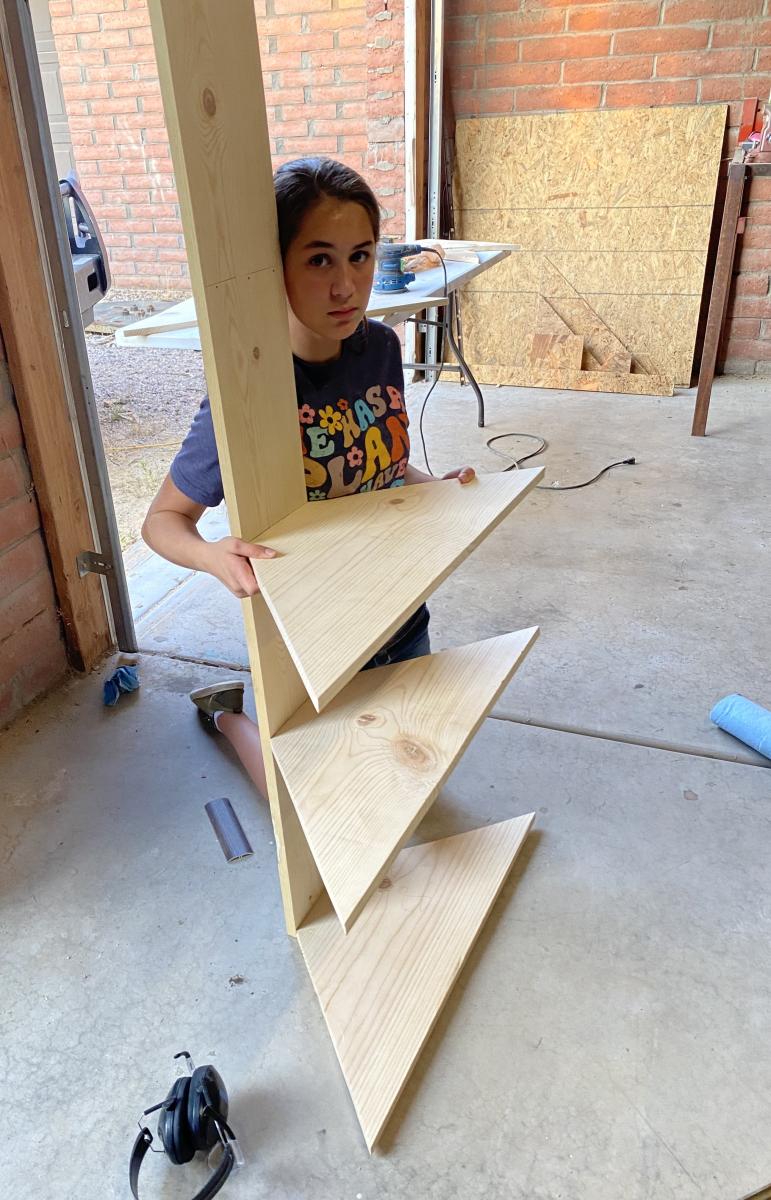
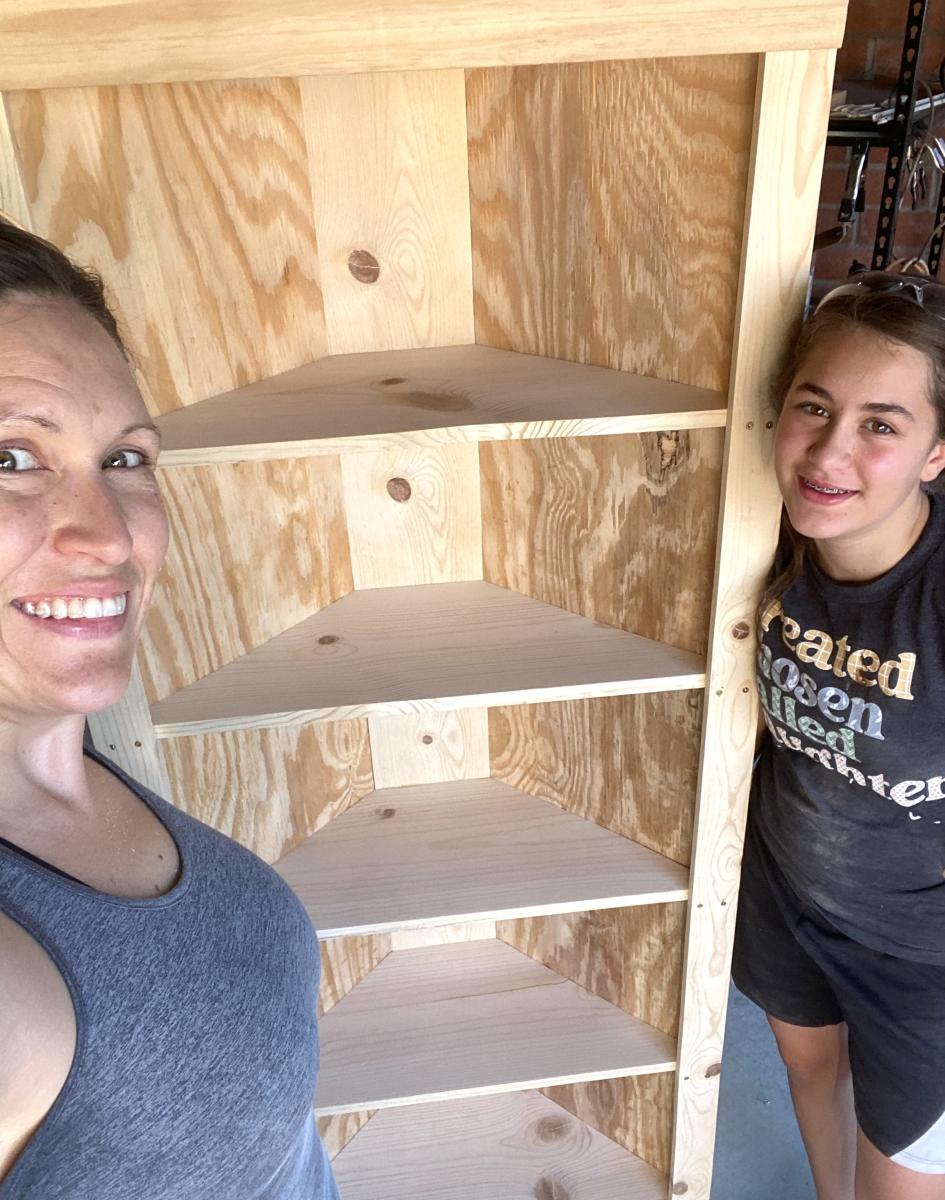
Built from Plan(s)
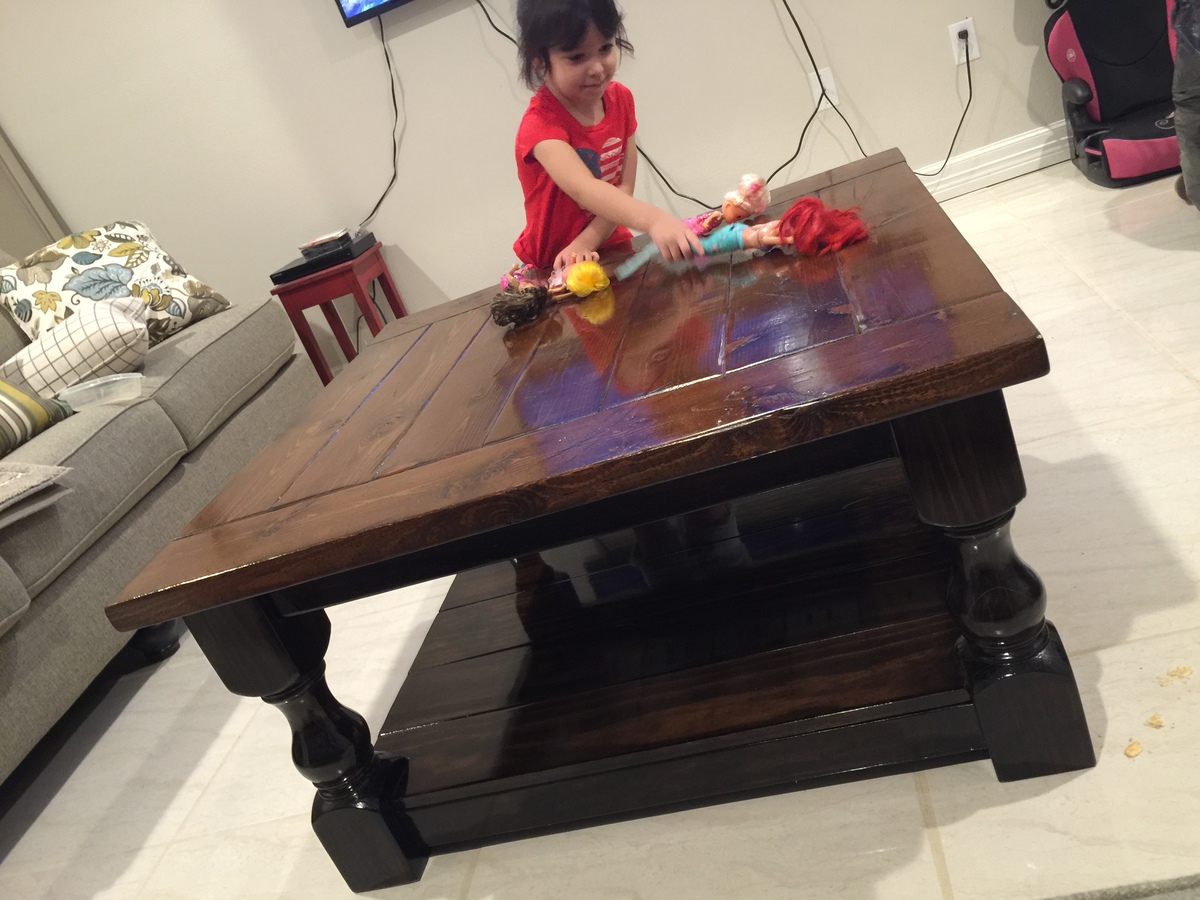
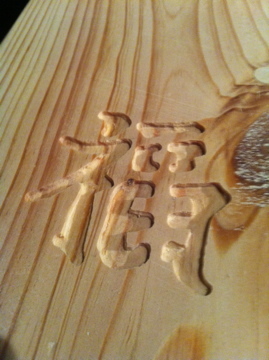
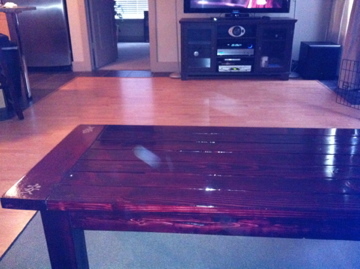
The zen inspired tryde coffee table
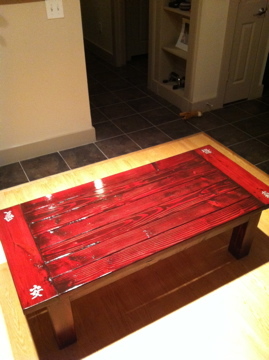
So I wanted a coffee table for my new apartment and couldn't find one I liked so I decided to build one. I wanted a zen theme for my new place so I took this plan and put a twist on it. I built it basically to plan and then carved out some Asian symbols and filled them with Woods metal. I sanded down the inlays, stained the table, distressed it, carefully cleaned up the symbols and then added a couple coats of poly. Came out pretty cool!


Built from Plan(s)
Estimated Time Investment
Weekend Project (10-20 Hours)
Finish Used
Cabot red mahogany and poly
Recommended Skill Level
Beginner
Comments


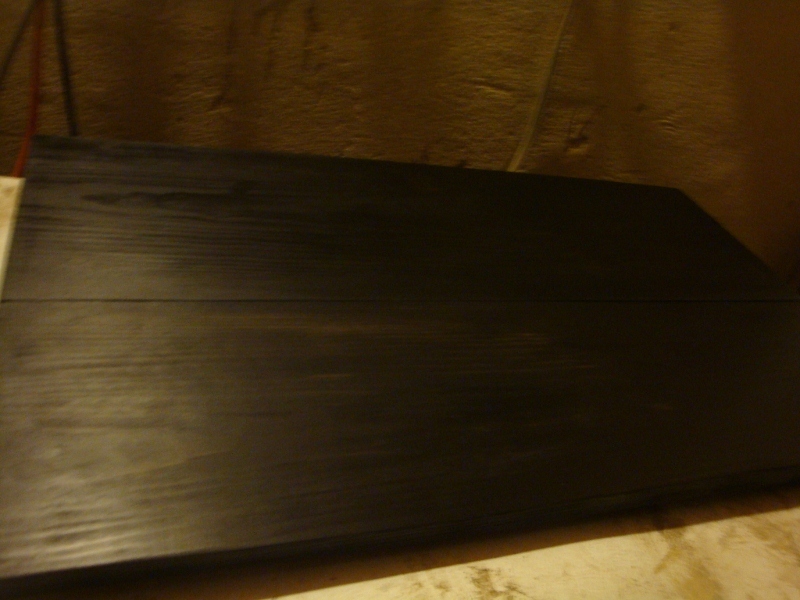
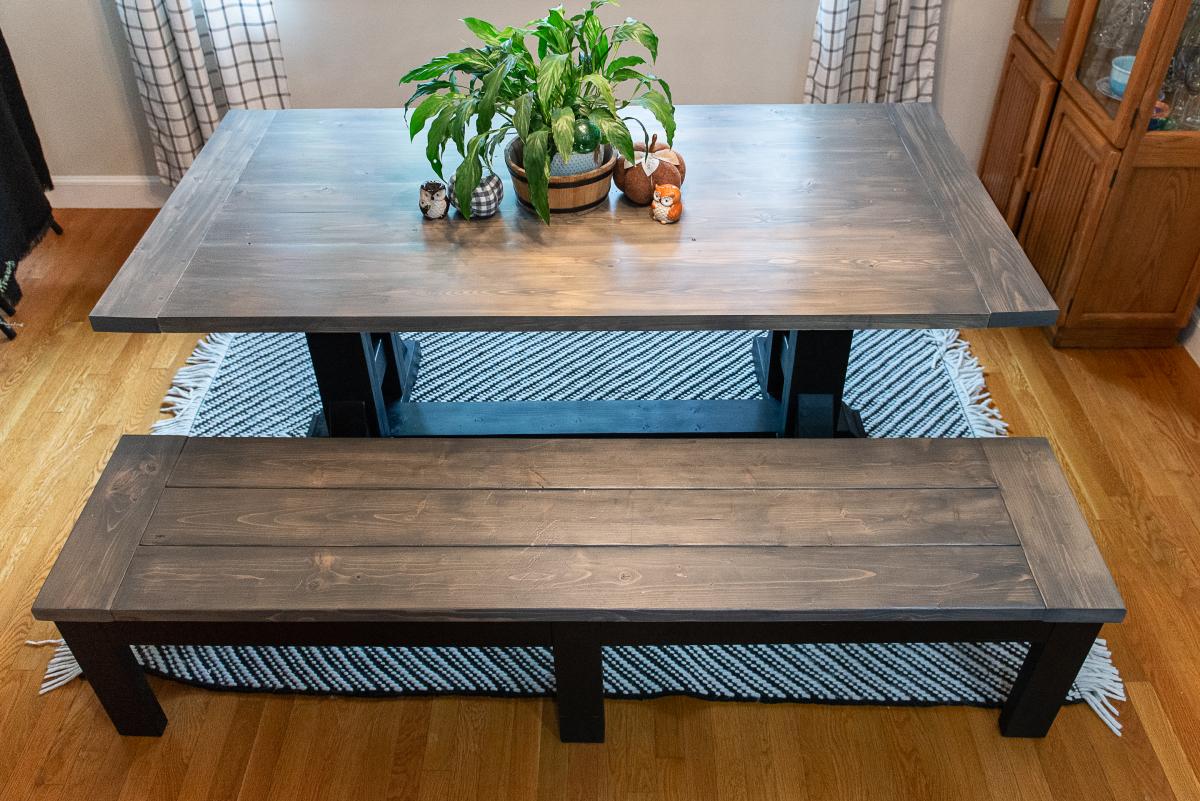
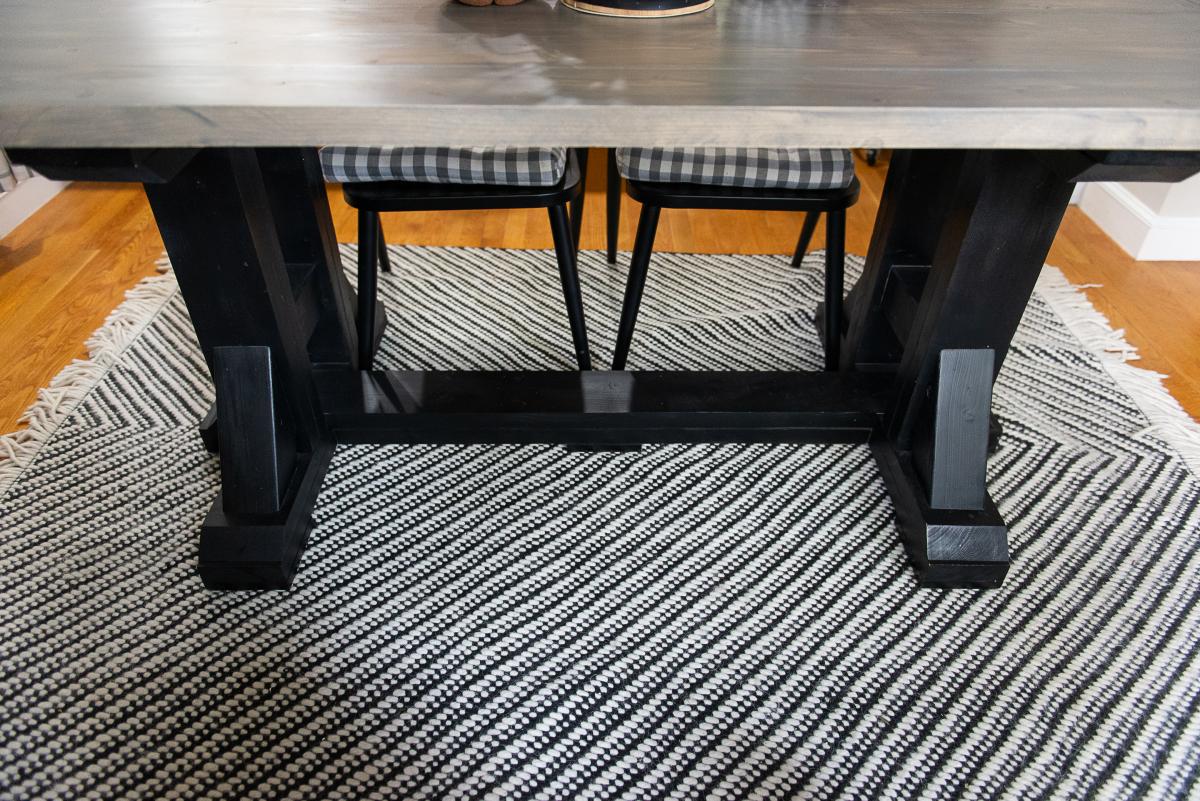
Downsized Fancy X Farmhouse Table
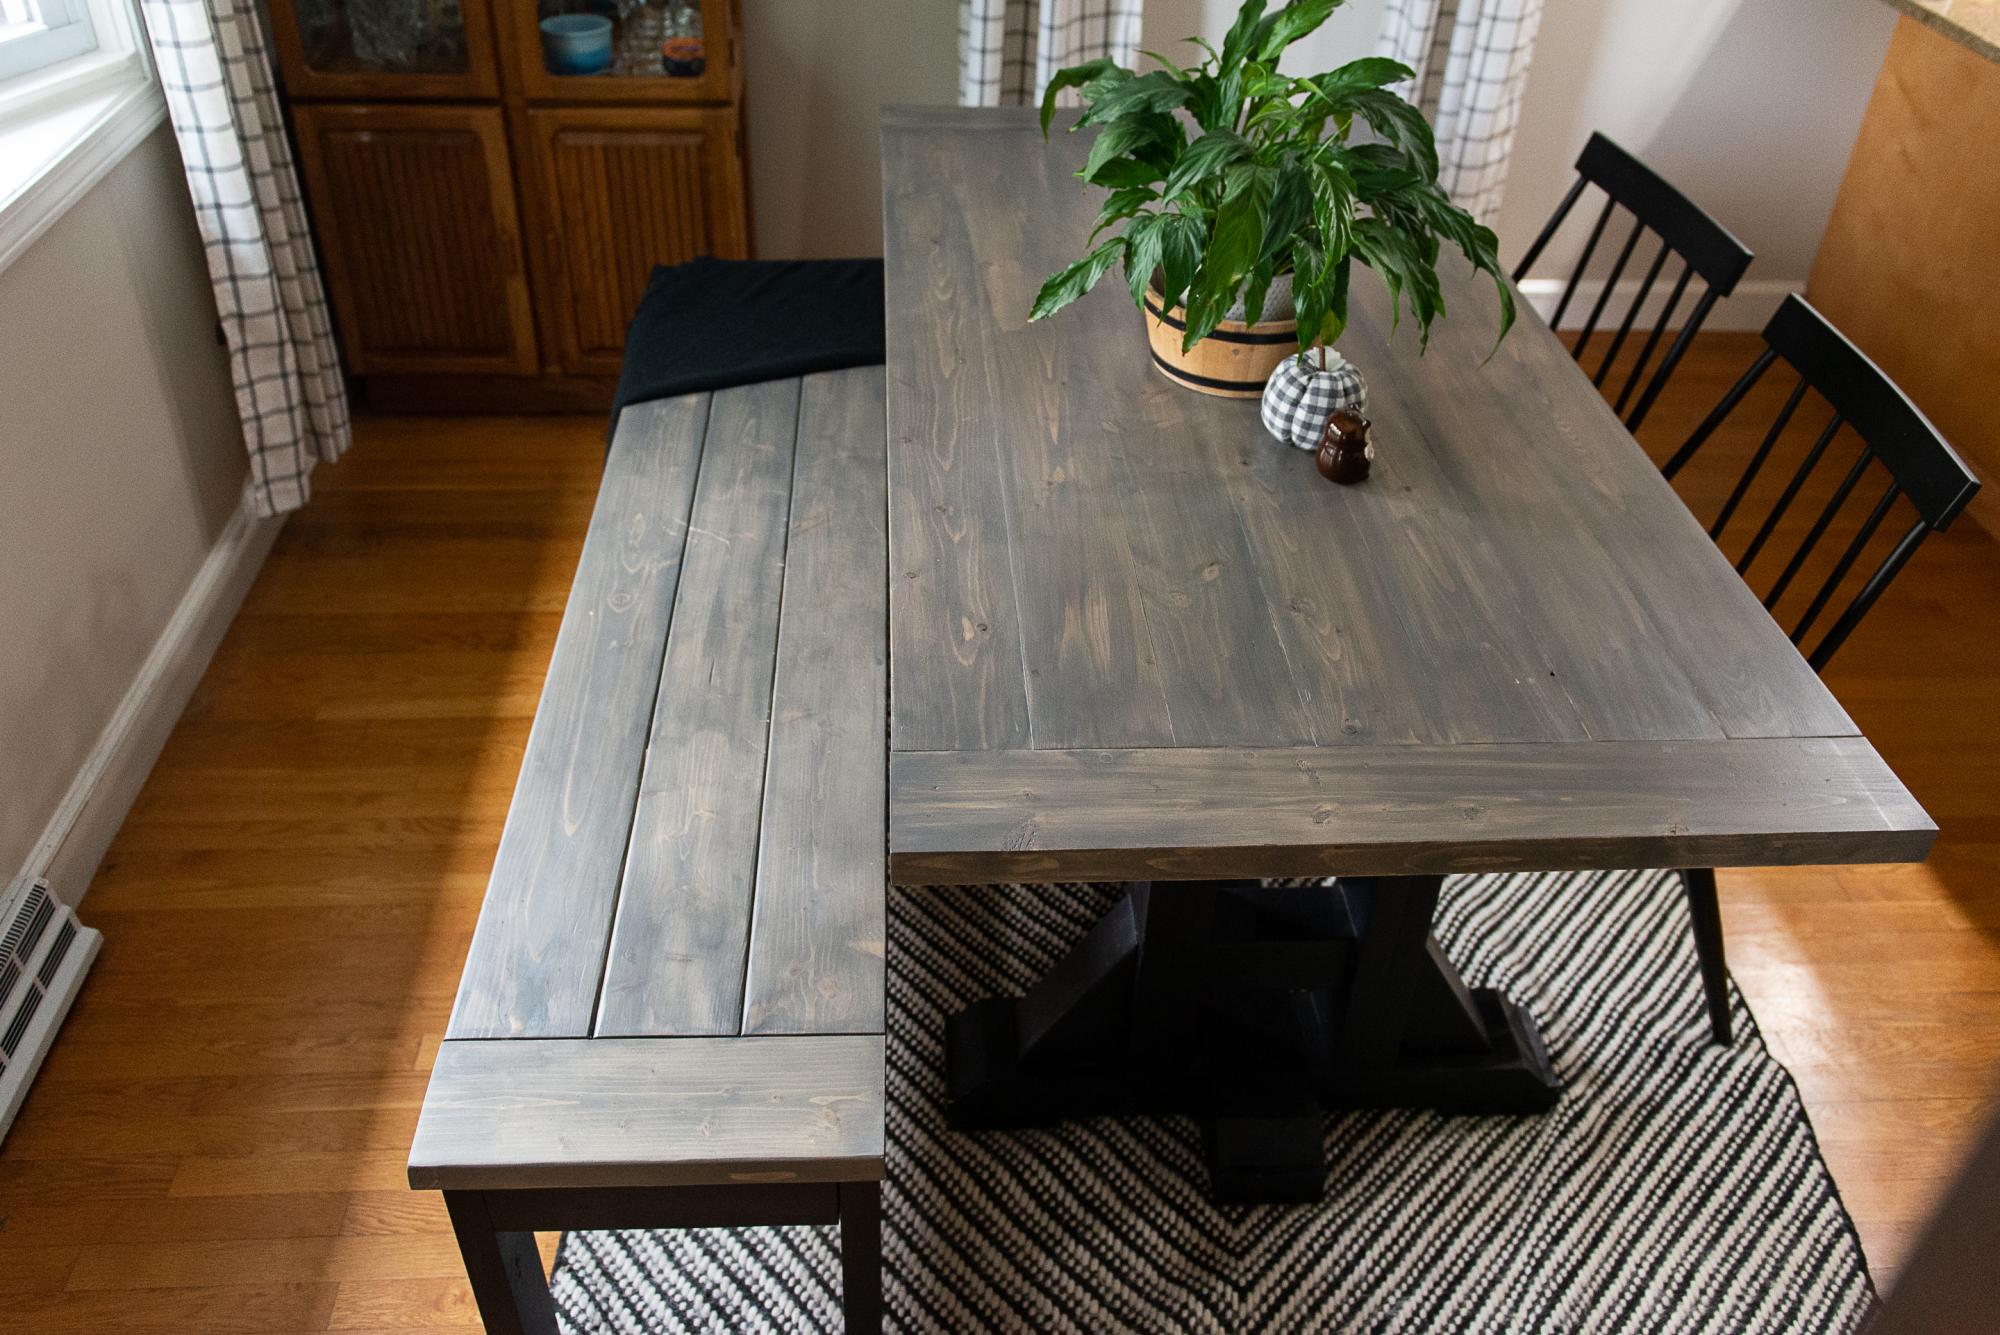
This table was modified because my dining room is really small. So the table is 71"long x 35" wide. This was actually my second attempt on the table top. The first attempt I only used kreg screws and no glue. To say that it warped is an understatement. This second attempt I used kreg screws and biscuits. For the breadboards I tried something new and used Rocklers Beadlock system. I also used Z- clips to mount it to the base so that as the wood expands and contracts it will hopefully not warp. So far it's remaining pretty flat.
Built from Plan(s)
Estimated Time Investment
Week Long Project (20 Hours or More)
Finish Used
General Finishes Graystone, General Finishes Lamp Black Milk Paint, General Finishes Flat out Flat Topcoat
Recommended Skill Level
Intermediate
Comments
Thu, 10/17/2019 - 06:16
Not sure why this posted as…
Not sure why this posted as Anonymous but it's mine, ColleenW. Thanks for looking.
Adirondack Chair as Housewarming Gift
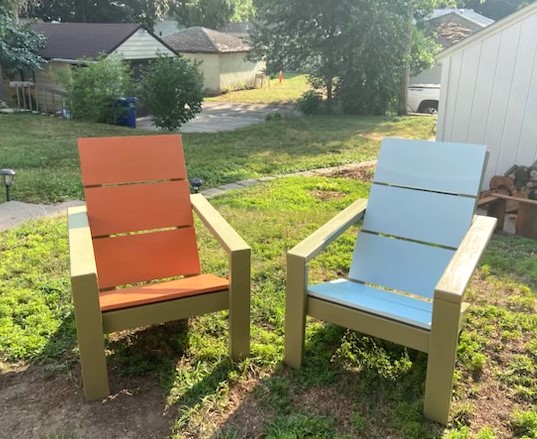
Just delivered these Adirondack chairs to my son and his GF as a housewarming gift for their first home. They selected the colors and they turned out perfect! I used a countersink for the front screws and filled with plugs so it looked very polished!
Built from Plan(s)
Play Kitchen

This is a play kitchen I made for my 2 year old. This was the first big wood project I have done. The instructions were easy to follow if you stay organized.
Estimated Cost
$140
Estimated Time Investment
Weekend Project (10-20 Hours)
Recommended Skill Level
Beginner
Comments

Wed, 12/25/2013 - 04:52
Marvelous!
This kitchen is great! The details and colors are awesome, and you did a fab job on this build! Merry Christmas!