Community Brag Posts

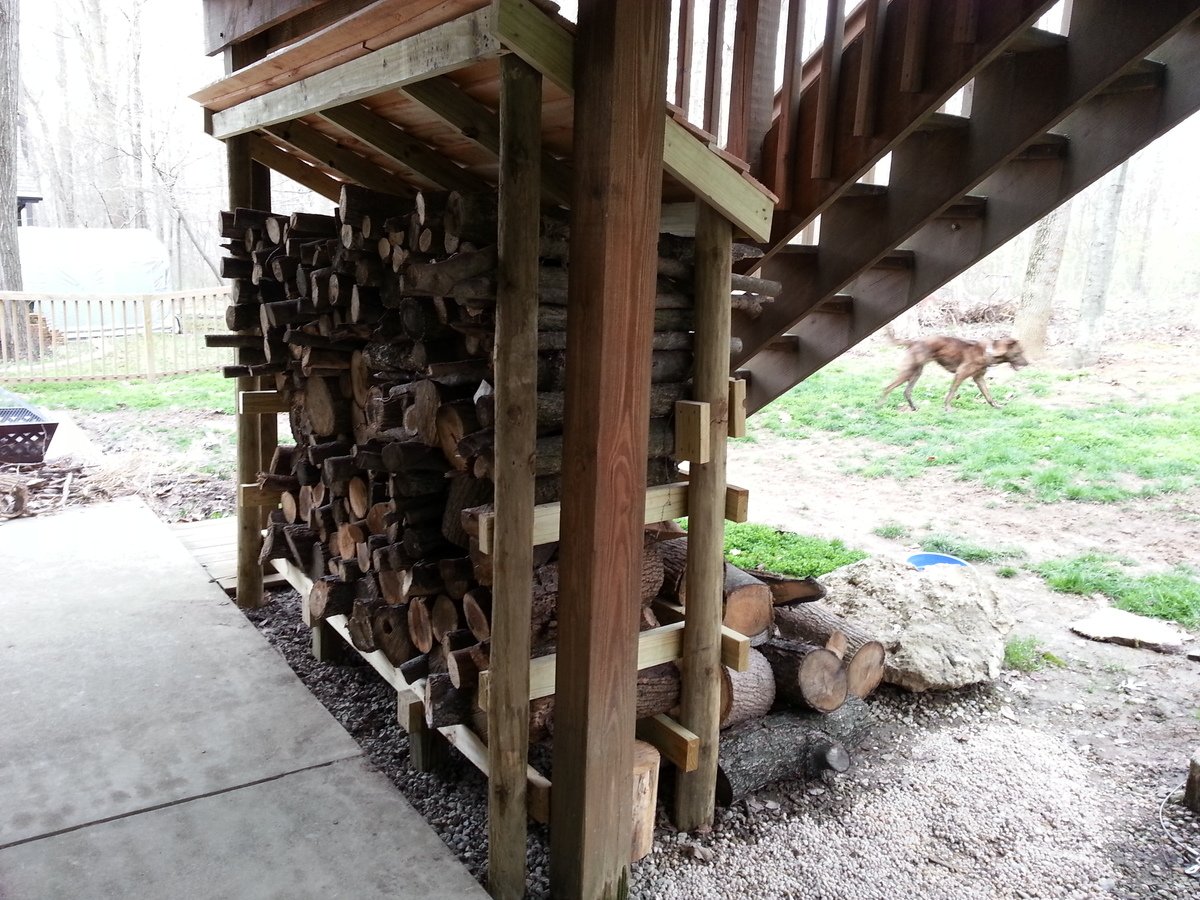
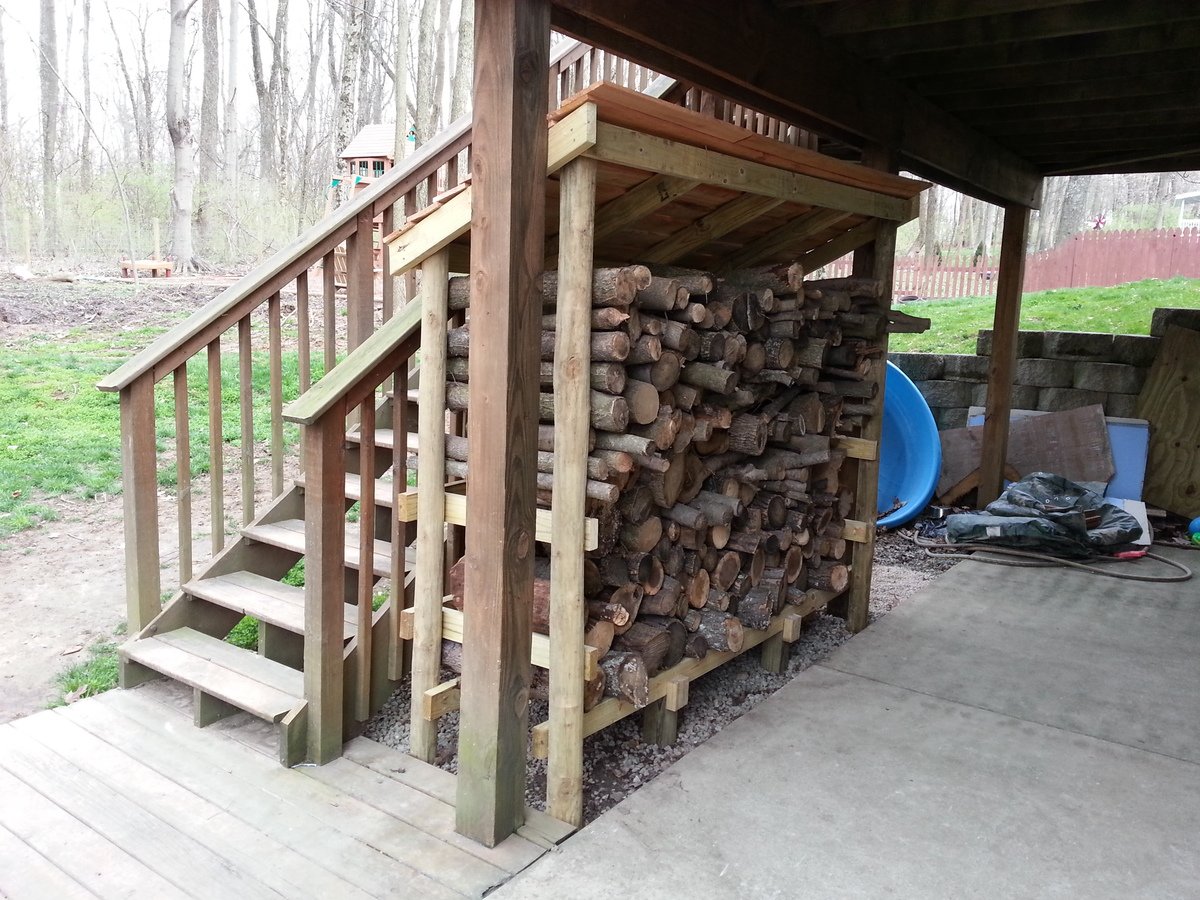
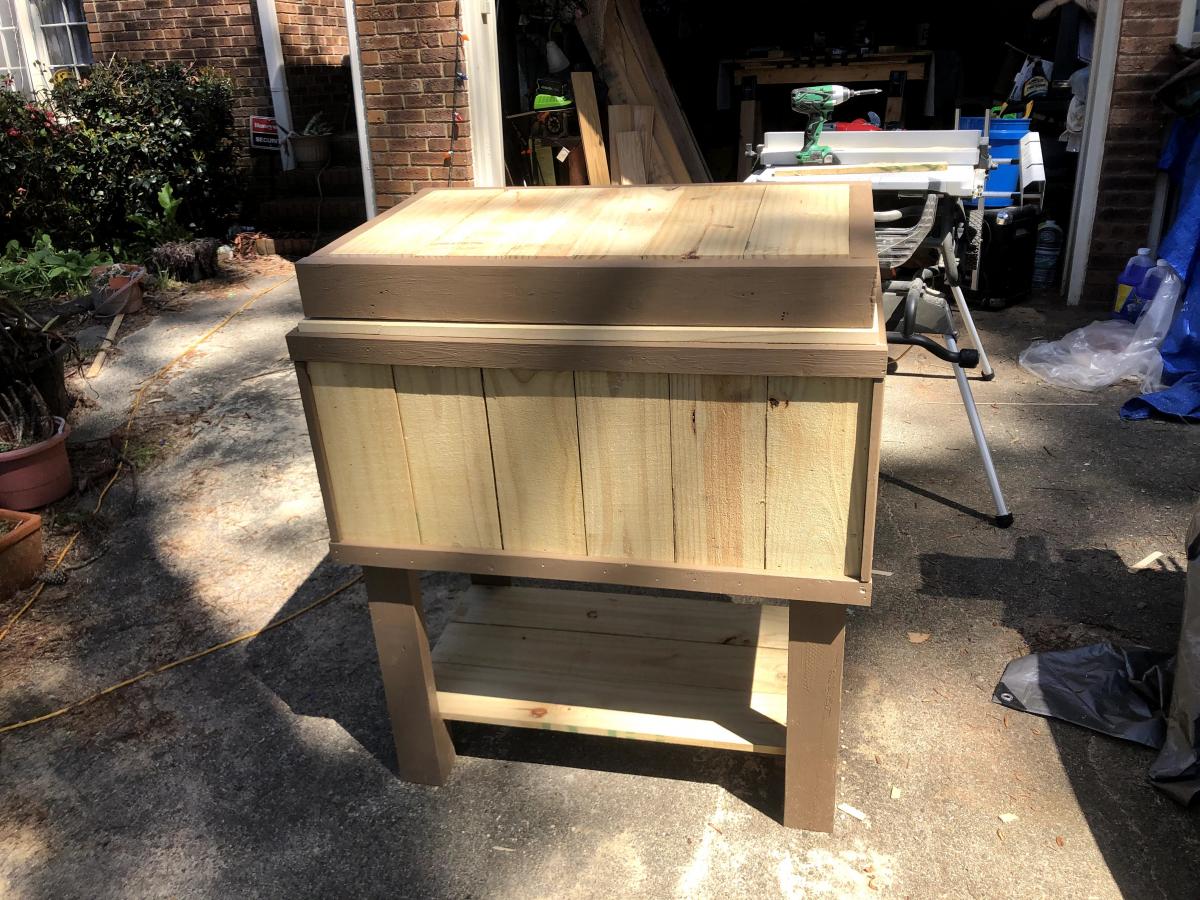
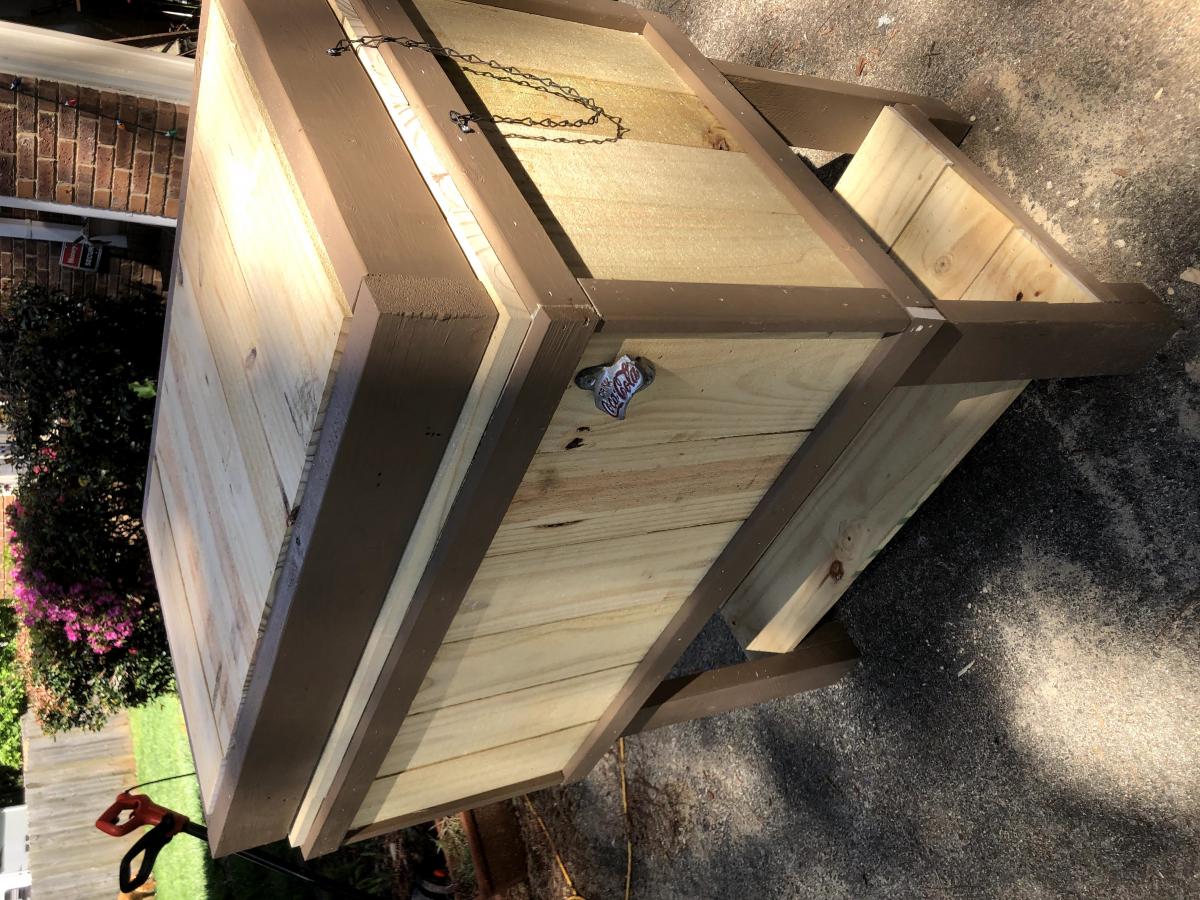
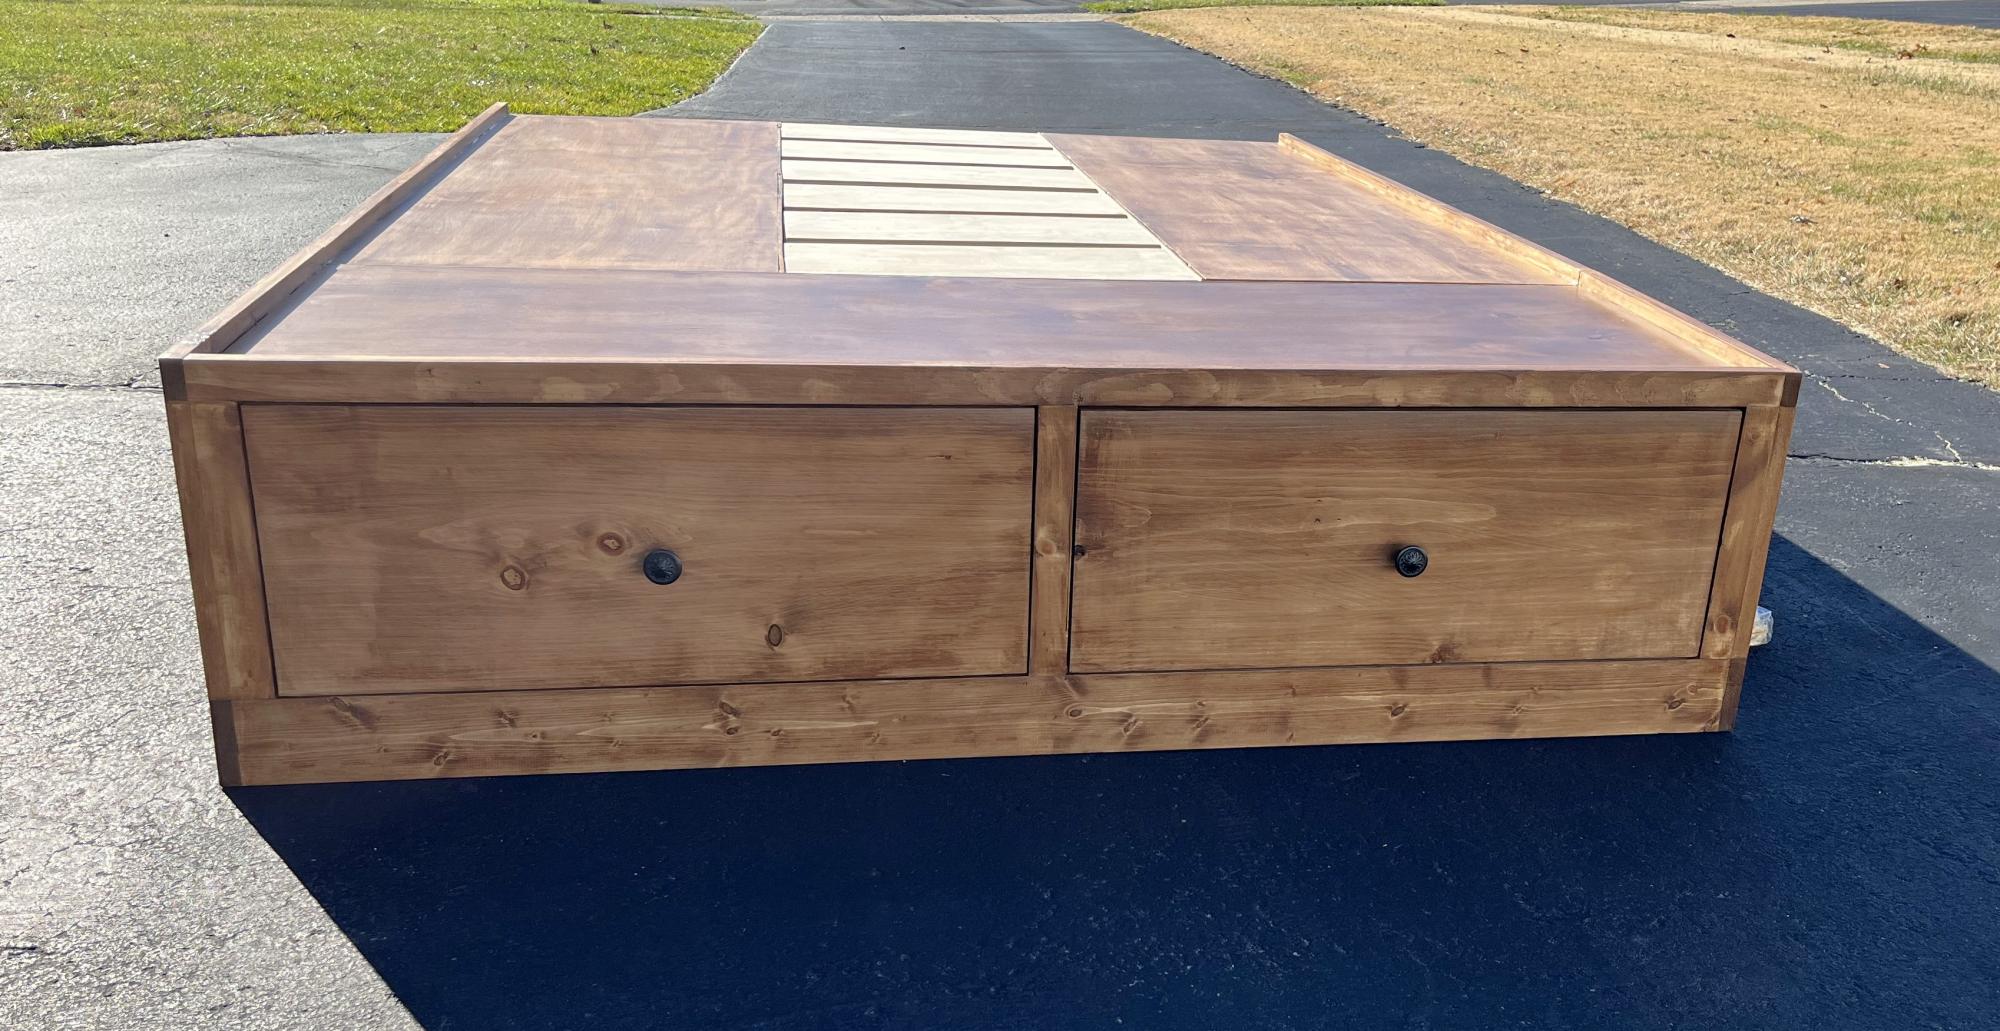
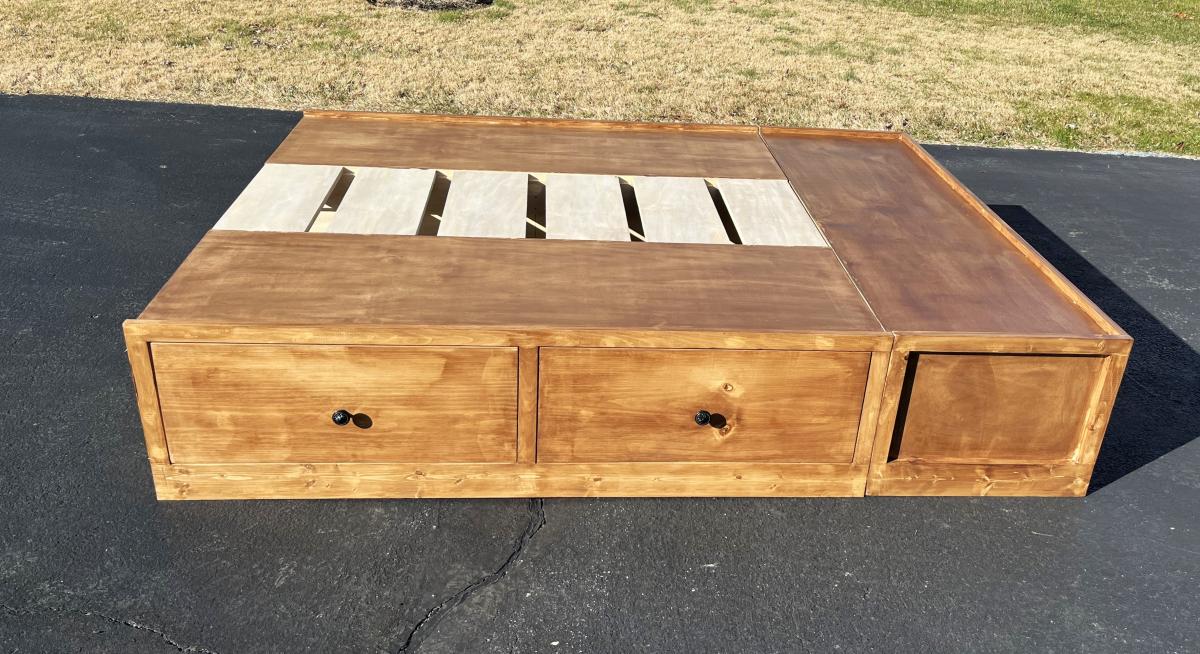
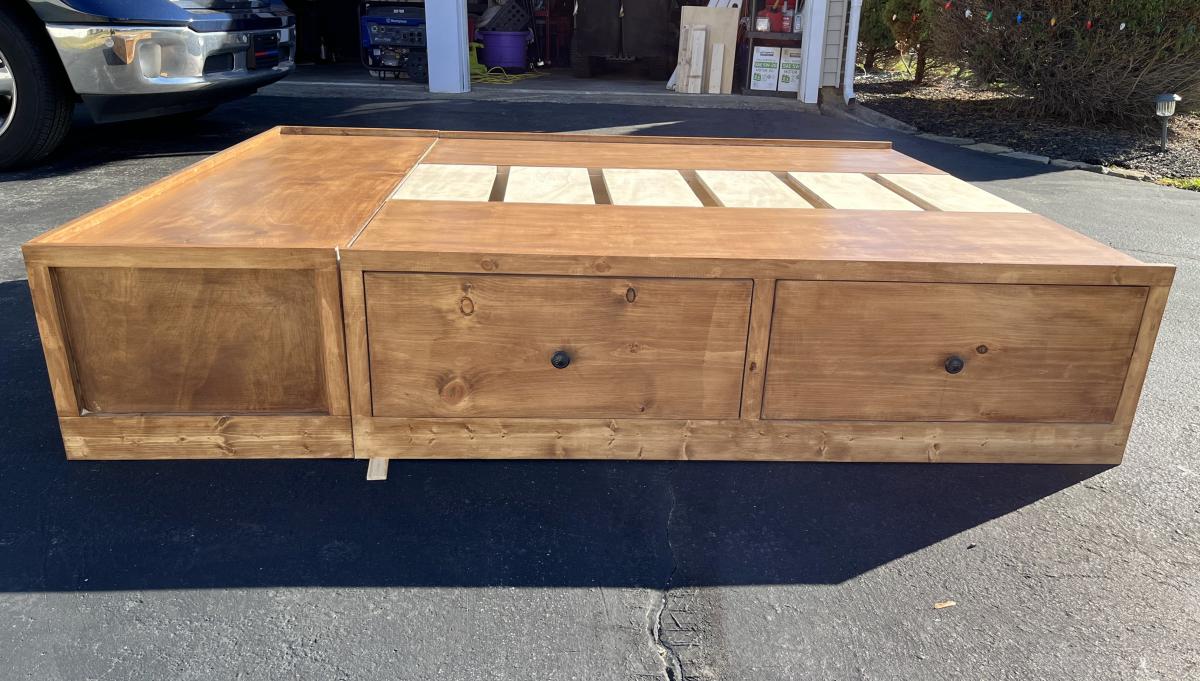
Firewood Shed using Round Posts and 2x4s

Submitted by tommybo76 on Mon, 04/15/2013 - 15:50

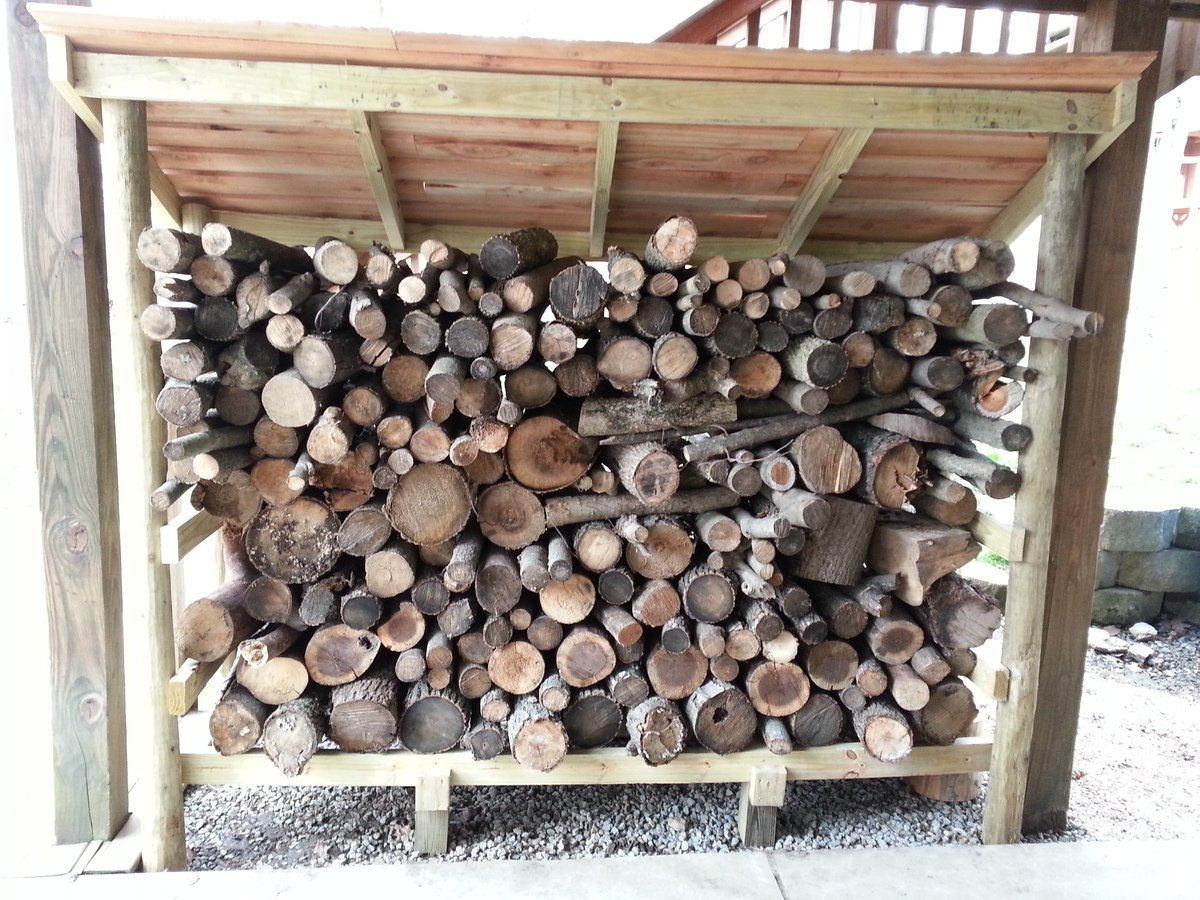
I used the basic design principles from Ana's site but decided to use 3.5x6.5 round fence posts (purchased at my local Tractor Supply Company) for a different look plus they are a little cheaper than 4x4 posts. I also used pressure treated 2x4s for some added strength and perhaps longer durability. I used Ana's cedar fence pickets idea for my roof (these pickets are used as walls on one of the other shed plans on this site). I didn't need a very robust roof as my firewood shed sits underneath the deck which provides a lot of protection from the rain. I attached the structure using 3 inch deck screws and the roof with 1.5 inch deck screws (nails would have been more than adequate for the roof but I had the screws on hand).

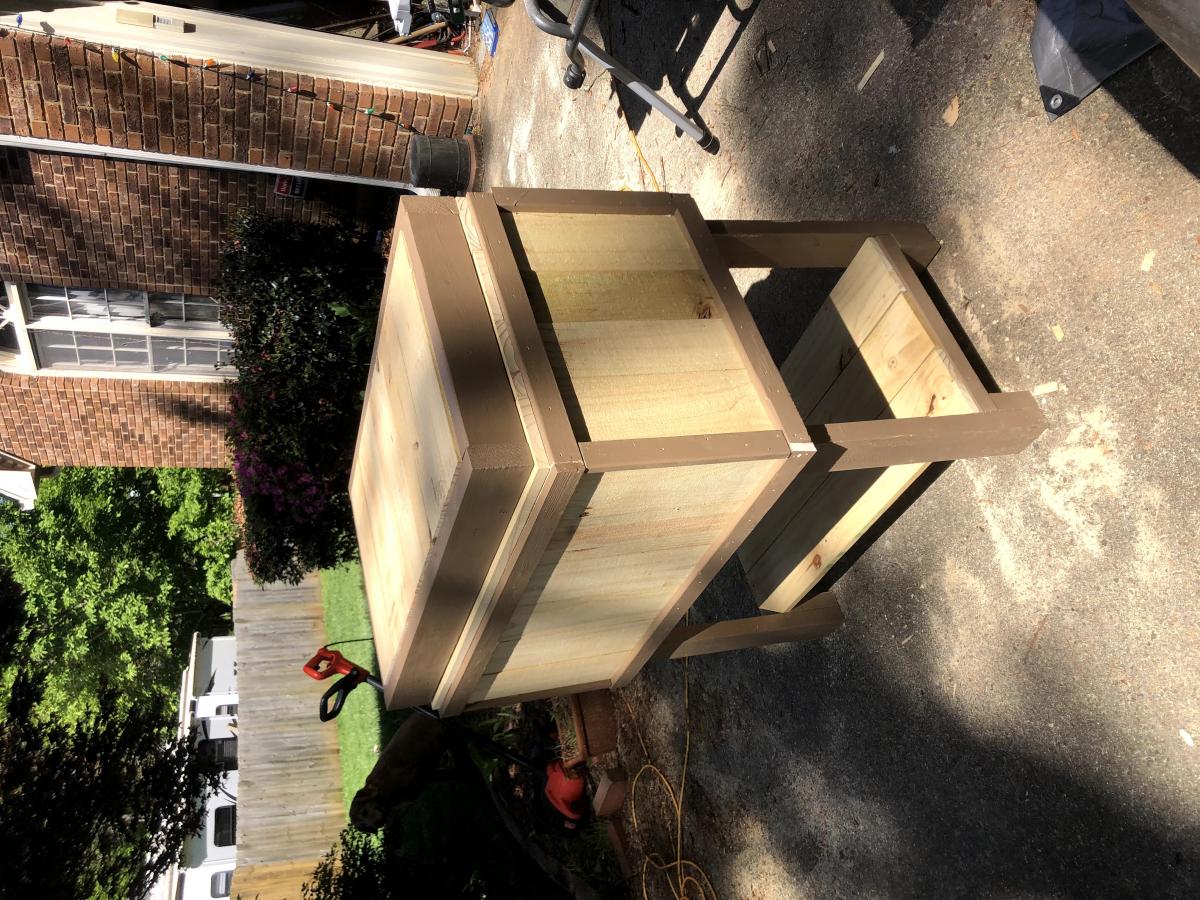
I did run into some problems due to my design changes. Most of my issues involved attempting to square up the round posts which are much closer in shape to a jagged stick than dimension lumber such as a 4x4 post. If I had to do it over again I would not have used the round posts. Constant tweaks and adjustments to the posts significantly delayed my build time and frustrated me at times. I was just barely able to wedge my woodshed in between the 2 deck posts which actually came in handy as I was able to secure the shed to the deck posts with 3 inch screws...making the shed very solid! The final issue I discovered after loading up my wood shed. The 2x4s at the bottom of the structure began to sag. I fixed this by using my floor jack to raise them up and placed 8 inch tall 4x4s underneath (2 in the front and 2 in the back).

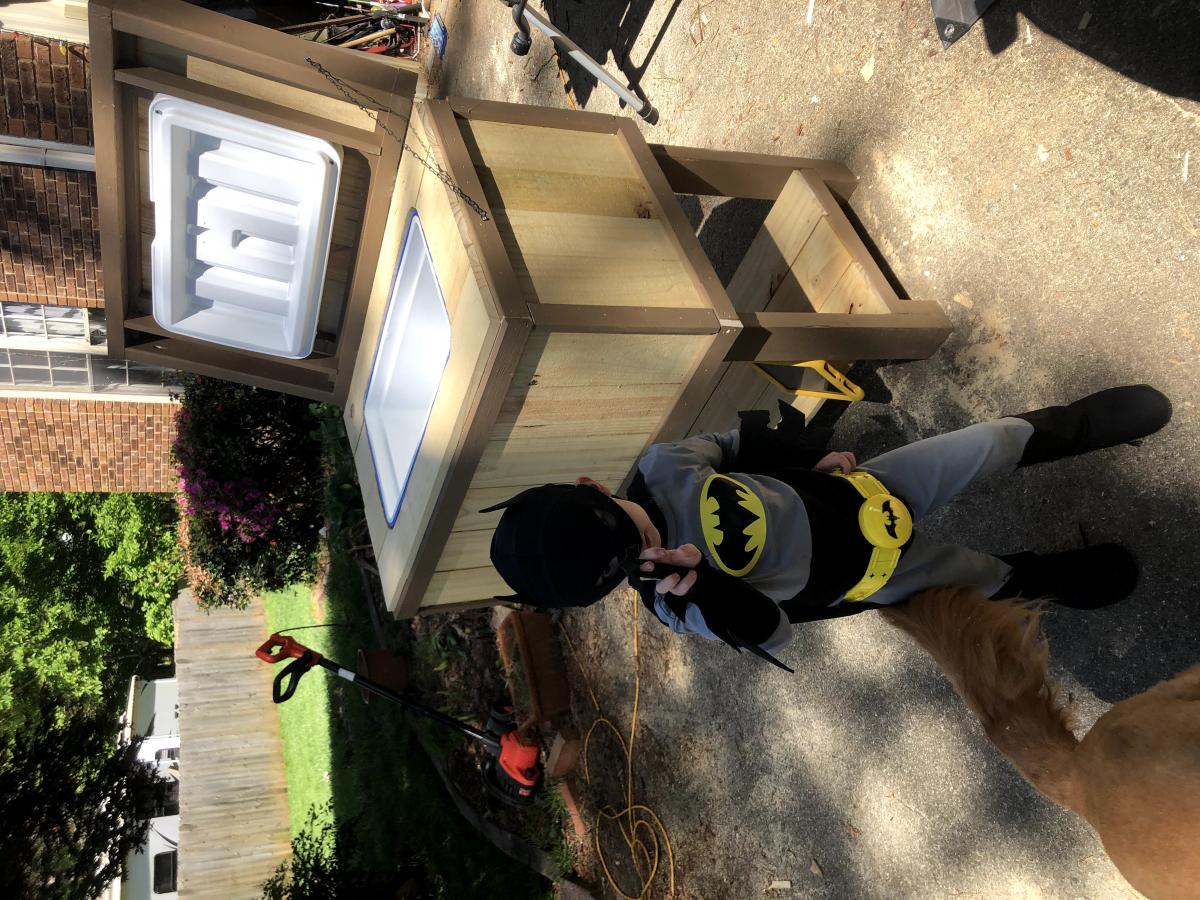
Overall I'm happy with the way it turned out and I really love all the plans on this site...GREAT ideas!!

Built from Plan(s)
Estimated Cost
$90
Estimated Time Investment
Day Project (6-9 Hours)
Recommended Skill Level
Beginner

Desk

Submitted by gfranq on Sat, 03/21/2015 - 14:51

This was my biggest project to date. The hardest part was finishing it.

Built from Plan(s)
Estimated Time Investment
Day Project (6-9 Hours)
Finish Used
Sherwyn Williams Acrylic Latex Satin in "Mosaic Tile". I then sprayed it with a coat of polyurethane
Recommended Skill Level
Beginner

Comments

Counter height dining set

Submitted by Lukilla on Sun, 10/10/2021 - 10:18

Threw this together over a 4 day weekend. Love how light these chairs are.

Substituted edge glued project panel for the table top and seats instead of joining several planks.

Used a combination dark walnut, jacobean, and early American stain on the finish.

Comments

2x4 garage shelving

Submitted by mjberger85 on Sat, 05/23/2015 - 15:07

I built this to fit inside a closet that I have in my garage to store all my camping stuff. I built it 5 feet long so I only had to buy 2x4s that were 10 feet long. I also built the bottom shelf closer to the ground to allow just a little bit more space between the first and second shelf. All in all it was a very easy and fulfilling project. I was a little worried about how sturdy the shelves would be but they are very solid. Thanks Ana!

Estimated Cost
$60
Estimated Time Investment
An Hour or Two (0-2 Hours)
Recommended Skill Level
Beginner

Comments

Narrow Cottage End Table

Submitted by mom of 4 on Tue, 07/30/2013 - 16:21

I built matching side tables using Ana's Narrow Cottage End Table plan. I changed the height to suit the arms of my furniture. They fit our tight space and look fantastic with our existing wood pieces. Very easy to build, even the drawers! I used a router to finish the edge on the drawers, to make them stand out a little more. I learned to put my pocket holes on the outside of the drawer, since the back one is in the back, and the front one is covered by the separate drawer front piece. A Kreg jig makes this a very simple project. Also, I sanded my boards before assembly, then did touch-ups before finishing the project.

Built from Plan(s)
Estimated Cost
$50 total for two
Estimated Time Investment
Day Project (6-9 Hours)
Finish Used
One coat Minwax Ipswich Pine Stain. One coat Minwax finishing paste, hand rubbed.
Recommended Skill Level
Intermediate

Adirondack side table ~ using recycled pallet wood

Submitted by Sharon L. on Sun, 07/24/2011 - 06:37

This was a very fun and one of the easiest projects I have made from Ana's plans! This makes me want to see if I can make matching chairs as well!

If you have seen my other projects, you know that I try to keep the lumber cost of my projects as close to free as possible. Living on the Eastern Shore of Virginia, pallets are not free, so I did have to pay $2 for each pallet, being VERY choosy about the slats being all the same size and straight. The hardest part of the project was taking the pallets apart! Check the blog link for more details.

I used 1 1/2 pallets for this project, and the following tools:

Jigsaw (to cut the ends off the pallet)

Pry-bar (to loosen the slats from the center of the pallet)

Miter saw

Drill

Table Saw (ripping the 2x4 sections of the pallet, to make the legs and spacers of the table)

Palm sander

Estimated Cost
less that $20
Estimated Time Investment
Day Project (6-9 Hours)
Finish Used
Gripper Grey primer by Glidden (leftover from other projects)

Brilliant Red Acrylic by Benjamin Moore (also leftover)

I use the Gripper Grey primer/sealer on most outdoor projects because it is a nice one-coat sealer and great for underneath darker colors.

The Brilliant Red is an off-the-shelf color.

I would recommend removing and priming/painting the tabletop pieces separately(after assembly)so that you can assure great coverage between the slats, being careful to remember where each piece belongs.
Recommended Skill Level
Beginner

Rustic Table - 4x4 legs

Submitted by Bridget327 on Tue, 11/08/2011 - 17:55

LOVED doing this! I am a total beginner so it is not truly perfect but that is what we love about it! My five year old helped me and learned how to work an electric screwdriver. We saw Pottery Barn was broadcasting a table like this and using that the screws showed as a marketing piece - so we have some screws showing and it is soooo warm and inviting. It looks 100 years old. Everyone loves it!! Thank you for the great inspiration. We made ours 6 feet long and 3 feet wide to fit our space and 4x4's for the legs.

Built from Plan(s)
Estimated Time Investment
Day Project (6-9 Hours)
Finish Used
Miniwax in jacobean
Recommended Skill Level
Starter Project

Comments

alyse (not verified)

Sun, 11/13/2011 - 17:17

I LOVE this table!!! Could you tell me which plans you followed? I need the exact same measurements...Any other pictures you have you should post, too. Great job.

Guest (not verified)

Thu, 11/24/2011 - 20:26

Can I have the step by step plan too! Pretty please! I love this table :)
Thank you so much
-erin

Beachy Storage Sofa

I love my new sofa! It is ten times more comfy than our old one. We live on an island and it was definitely cheaper to build my own sofa than to ship one in and pay duty on it. Thank you Ana for making this possible! Never thought I'd be building my own sofa, but we are so thankful for it. We even threw together our own little ottoman/toy box to go along with it from scraps...added bonus!


Built from Plan(s)
Estimated Cost
Total for everything probably about $500 ( a little higher costs for the wood here on the island, in addition to the other materials)
Estimated Time Investment
Weekend Project (10-20 Hours)
Finish Used
Clear Satin Poly finish on the parts of the wood that are still visible after the fabric goes on.
Recommended Skill Level
Intermediate

Comments

Jan (not verified)

Sat, 07/21/2012 - 09:56

this is so amazing! We go through so many sofas, mainly because we buy used, and you never know if they are going to last. This one looks really sturdy, and it could be recovered if the fabric got old, or you just wanted to update. Definitely considering this before we buy another one. And the storage hidden inside makes it even more desirable!! Love the fabric you chose as well.

Wood shelving and hanging space for guest wardrobe

Submitted by Anonymous (not verified) on Wed, 11/13/2019 - 01:01

Ana's wood shelving plans are easily adaptable for whatever requirements you may have.
Apart from some of the cutting done on a table saw I was able to do this project on my own and assemble.
I'm a beginner and managed it OK. It's not perfect but my husband was over the moon to finally have hanging space and shelving in our new house.
Would look great painted or stained.

Built from Plan(s)
Estimated Time Investment
Afternoon Project (3-6 Hours)
Recommended Skill Level
Beginner

First Ever Furniture Build - Outdoor Sofa

Submitted by Anonymous (not verified) on Wed, 08/02/2023 - 10:30

This was my first ever piece of furniture that I made and it was so much fun! I’ve got the furniture making bug now!

Melissa Pilcher

Built from Plan(s)

Comments

John's Washer/Dryer Pedestal

Submitted by coveyjt on Sun, 06/12/2016 - 10:59

The wife has a hard time bending down so she wanted pedestals for the washer and dryer.  The metal ones with a drawer were too tall.  I showed her Sausha's and she really loved that design.  I basically used the same construction plans idea from Sausha's project and some tips from Ryan's brag post.  But, I wanted to beef it up some.  I didn't like the L-bracket to attach the top and 4X4 legs.  It didn't seem sturdy enough for me.  I used my table saw to square the edges on the 4X4 posts and the 2X6 rails.  Then I used my Kreg jig and glued and screwed everything together.  I liked Ryan's trim ideas, so I used baseboard trim for the bottom and flipped it for the top trim.  I made a 1/2" lip so if it were to vibrate, the washer/dryer would not fall.  I put the trim on the bottom of the legs and was considering putting on the top but I put some different trim all the way around the bottom of the 2X6 rails.  The wife liked that.  I also added some carpet on the top to cut down on vibration and to help keep the units in place. I also put some 4X4 pieces of carpet on the bottom to keep the noise down and to help in moving it. I primed and used an gravity sprayer to paint it.  Then I put 3 coats of polyacrylic to help in cleaning and to cut down on scratches from the laundry baskets. 

laundry pedestals diy

Estimated Cost
150.00
Estimated Time Investment
Week Long Project (20 Hours or More)
Finish Used
Paint
Recommended Skill Level
Intermediate

Comments

zoolander

Wed, 06/29/2016 - 14:31

I think you could probably drive a truck on top of yours.  :)  I was a bit concerned about the strength of the construction when I first decided to build it, but I decided that since it would be stationary once I have it in place and the only force would be straight down, it would be fine.  Once I got it put together, it was actually sturdier than I thought it was going to be...from a horizontal force perspective.  Virtically, that thing could hold 100 washer/dryer pairs...the plywould would give out before the 2x4s and 4x4s would even budge.

Anyway, nice work!  I love the Kreg Jig...I need one of those. 

Cluckingham Cottage

Cluckingham Cottage wasn’t built in a day, but it WAS built by a DAME!
A-frame instructions were pretty helpful considering the builder knows nothing about construction. I made a few modifications to accommodate my 5 chooks + 2 bantams . Sturdy and tight structure.

Estimated Cost
Under $400
Estimated Time Investment
Weekend Project (10-20 Hours)

Hidden Desk

Submitted by Anonymous (not verified) on Sat, 10/08/2016 - 12:24

I shrunk the size and dumbed down the plans to fit my skill level.

Built from Plan(s)
Estimated Cost
175
Estimated Time Investment
Weekend Project (10-20 Hours)
Finish Used
Walnut
Recommended Skill Level
Intermediate

Comments

Texastia

Mon, 10/10/2016 - 09:08

I love what you did! It looks so great! I prefer this style, which is more simplistic than the other. Great work!!


Jessi_ites

Tue, 10/11/2016 - 14:56

Thanks! I wish I would of set up an account before I posted so I could get notifications.  I honestly didn't think anyone would notice it :)

Jessi_ites

Tue, 10/11/2016 - 14:58

I am so excited that people noticed this :)  Is there any way of putting this under my account?  I didnt make an account until today and I would like to get notifications.   I have my project on my facebook page and can prove that I made it with other pictures. Thanks!

crstorm

Mon, 01/20/2020 - 07:44

I would love to see this in a farm-house (rather than rustic) aesthetic along with drawers under the seats for extra storage. Maybe on casters with a fold up extension on the other side? So many ideas running through my head with this!

Farmhouse End Table

Take a deep breath in... then out. Relax as the warm water soothes your muscles. Then look at this freaking amazing end table I made! And this was only my third project ever! Great plans and easy to make.

***Only necessary change to plans was for the decorative Xs. The 2x2s must for the decorative Xs on the small version of the end table must be AT LEAST 25" not 22" as the plans call for. The 22" 2x2 did not reach diagonally (especially when making miter cuts).

I used pre-conditioner on the pine/douglas fir wood before applying the stain.

Built from Plan(s)
Estimated Cost
$30-$40 including wood, screws, pre-conditioner, and stain
Estimated Time Investment
Afternoon Project (3-6 Hours)
Finish Used
- Zar brand Grey Cashmere
- Minwax pre-conditioner
Recommended Skill Level
Beginner

Double Chair Bench

Built from plans from diyPETE.com.

One day project (another day for poly)


Estimated Cost
$100
Estimated Time Investment
Day Project (6-9 Hours)
Finish Used
Minwax Wood Finish penetrating stain: Gunstock 231 (2 coats), Minwax Helmsman Spar Urethane. (3-4 coats)
Recommended Skill Level
Beginner

Bookshelf Console

Submitted by Anonymous (not verified) on Mon, 07/15/2024 - 11:01

Extra Wide Console- we will use in our beach cottage. A little rustic paint job and tongue n groove back board. The paint job was a tedious process. First coat was Semi transparent gray stain, next was a thin coat of Kilz primer, then a light sanding and finally a baby blue stain.

Dana T

Built from Plan(s)

How to Build a Laundry Pedestal

I was tired of stooping to do laundry with my front-loading washer. I used the plans for Sausha's washer/dryer pedestals and tweaked them a bit.

Estimated Cost
$200
Estimated Time Investment
Day Project (6-9 Hours)
Finish Used
Platform: semi-gloss latex paint + primer; legs and side: chalky finish paint.
Recommended Skill Level
Intermediate

Three Bin Laundry Sorter

Submitted by Meyer1120 on Mon, 01/21/2013 - 21:10

Modified the original plan to meet our needs of a laundry sorter. Had problems with the hinges so ditched them. I used dowels with a combination of a chamfer cut on the bottom of the door. Dado-ed the trim on the doors and slide the bead board panels in. The face frame is all held together with pocket hole screws, which I highly recommend because it eliminates nail holes and keeps the face frame square. This was my first wood working project, took me a little long to get it done. Thanks for looking.

Modified January 28

So here are some more pictures of my project. I don't really have any good pictures of the dowels. But what I can tell you is, I drilled holes through the sides of the face frame and the trim pieces and then measured where the holes would be in relation to the "drawer". I then drilled holes in the drawers at those measurements, I was careful to not go to deep. I think I went in half an inch. After that I started at one end and placed the dowels in, then put each drawer in. It wasn't easy but with a little patience it worked. The key is to wax the dowels so they will last longer as well. I also am including pictures of the top and bottom trim. On the top the original plans called for an overhang piece and I didn't like the way that looked. I ran the top board an inch long on each side and then wrapped it in quarter round trim. I did this because I plan on adding the Mimi Hutch Top. The bottom was built per the plan, but I ran into a problem with my bottom trim not being level and you could tell. So I raised the whole unit on 1 1/2 legs then placed it on a level surface and again wrapped it in a decorative trim. The key on both trims was a nice miter joint. Last picture I added was of my stoppers. I took scrap from the 1x2 trim and cut them to an inch and a half or two (can't really remember), then using the Kreg Jig drill bit drilled recessed holes. I then opened the doors until the side 45s were level then mounted the blocks on each side. I feel that it is better than a chain or string catch. Again thanks for looking and I hope I answered all of your questions.

Estimated Time Investment
Week Long Project (20 Hours or More)
Finish Used
Primmer and paint
Recommended Skill Level
Intermediate

Comments

moosmani

Tue, 01/22/2013 - 11:29

Dowels! What a great idea! Would you mind sharing how you did it? Could you possibly add some pictures showing the dowels? You did a great job. It looks beautiful.

mullid1

Thu, 01/24/2013 - 09:27

I love what you have made! Could you post pictures of the top and the bottom trim? I'm very impressed that this is your first project!

mullid1

Tue, 01/29/2013 - 09:12

Thank you for the photos and new instructions! You're awesome!!!

VLT

Fri, 03/15/2013 - 12:05

This is lovely; I like the trim job you did. Is there a way to post the plans so we can all get to them. I cannot believe this was your first project!

Liz82

Sat, 11/16/2013 - 18:23

I am a little confused. I love the three bin laundry sorter, but everyone is mentioning plans. I am not finding plans for it on the site. Also, what goes in to hold the clothes? There may be obvious answers, but I am not seeing them. I'd appreciate any help you could give.

towering inferno

Tue, 12/02/2014 - 02:58

I've been thinking of working up one very similar to this, also with 3 bins, but I didn't want to use chain either.  Those stoppers will be ideal - do you put them on both sides or is one enough?  Thanks for the share!

Karahd

Sat, 01/24/2015 - 11:29

Hi-

Im not sure if you still have the plans to this awesome project, but if you do, would you be able to share them with me? Ive been looking to make something like this forever, but just couldnt find any help!

thanks,
karah
[email protected]

petemoore

Mon, 02/08/2016 - 07:46

hi im the same as everyone can you send me the build plans with dimensions etc

many thanks

virginie D.

Wed, 03/02/2016 - 14:49

Hi

It's exactely what i need. so amazing. Someone can send me the plan please? I'm so newbie to do tat all by myself without plans. Thanks you.

virginie D.

Wed, 03/02/2016 - 14:49

Hi

It's exactely what i need. so amazing. Someone can send me the plan please? I'm so newbie to do tat all by myself without plans. Thanks you.

ajbreaux

Mon, 05/02/2016 - 14:22

My wife loves this . if its possible could i get the plans and hopefully have time to build it to give to her for mothers day ? thanks 

Kimhubbell

Fri, 12/02/2016 - 11:01

I would also love to have the plans for the 3 bin sorter. I am barely an intermediate so more specifics would be a huge help! Thanks to anyone who could help.

lworthy

Mon, 07/10/2017 - 04:19

 I absolutely LOVE your laundry sorter!!!! You did a fabulous job and the TRIM, WOW amazing!!!! I've searched Ana's website and cant find the plans' could you please email me the plans to [email protected].  I started building my own furinture back in October 2016 and the reward is amazing... Keep up the good work.

Happy Building,

Lisa

woodmama

Tue, 01/16/2018 - 22:18

I'm too new at woodworking to be able to tackle this right now, but would love to download the plans for future. My most successful project so far is a pretty standard bookshelf. I got a free plan, with lots of guidelines and explanations, at https://tinyurl.com/ydeup8lo -- it came with a 440 page guide, "The Art of Woodworking" that has tips and techniques, and am plowing through that right now.

momto3

Wed, 02/28/2018 - 12:53

This is amazing.  I am very new to woodworking.  Could you send me the plans please?  I would be most appreciatative 

Ljohns

Wed, 03/11/2020 - 23:27

I would love to have the plans for the three bin laundry sorter to build for my laundry room. Are the plans available? Awesome work!

Back