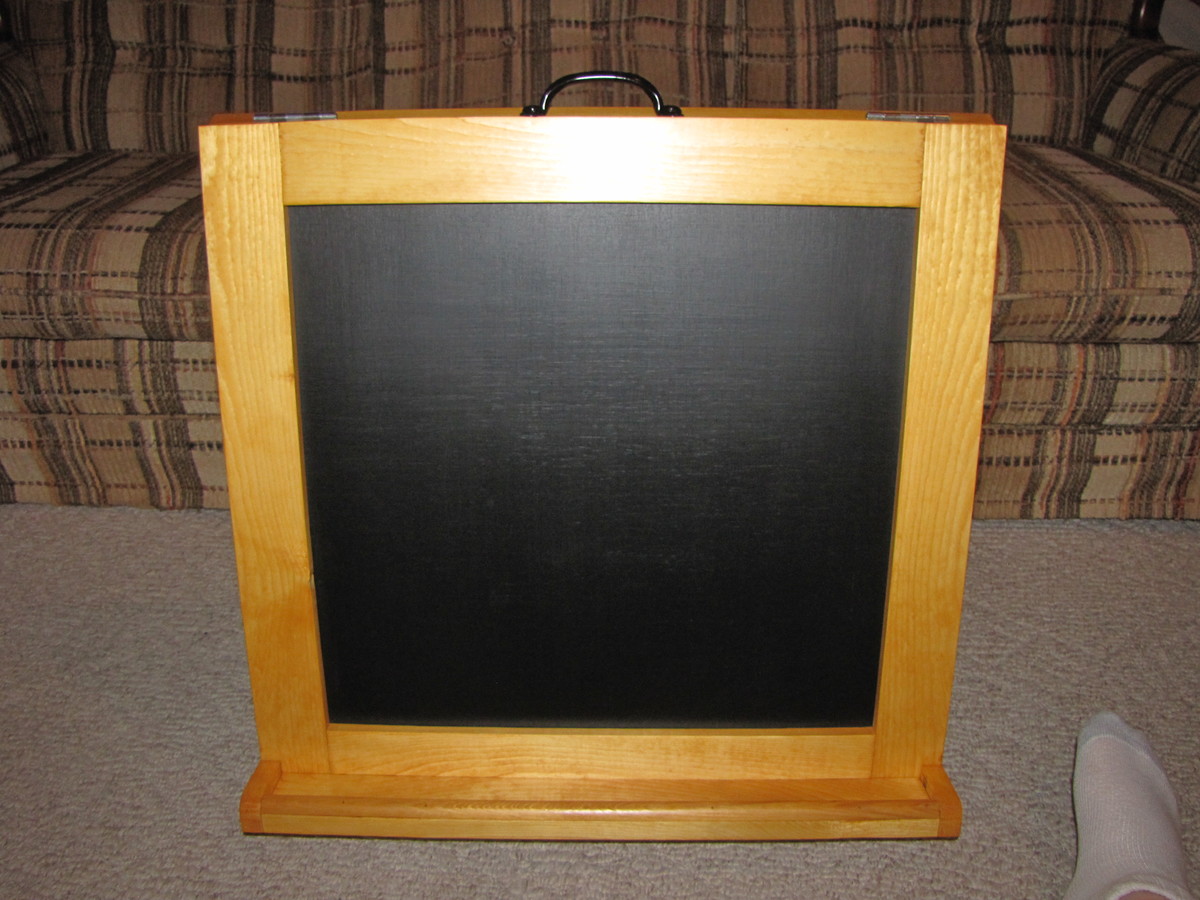
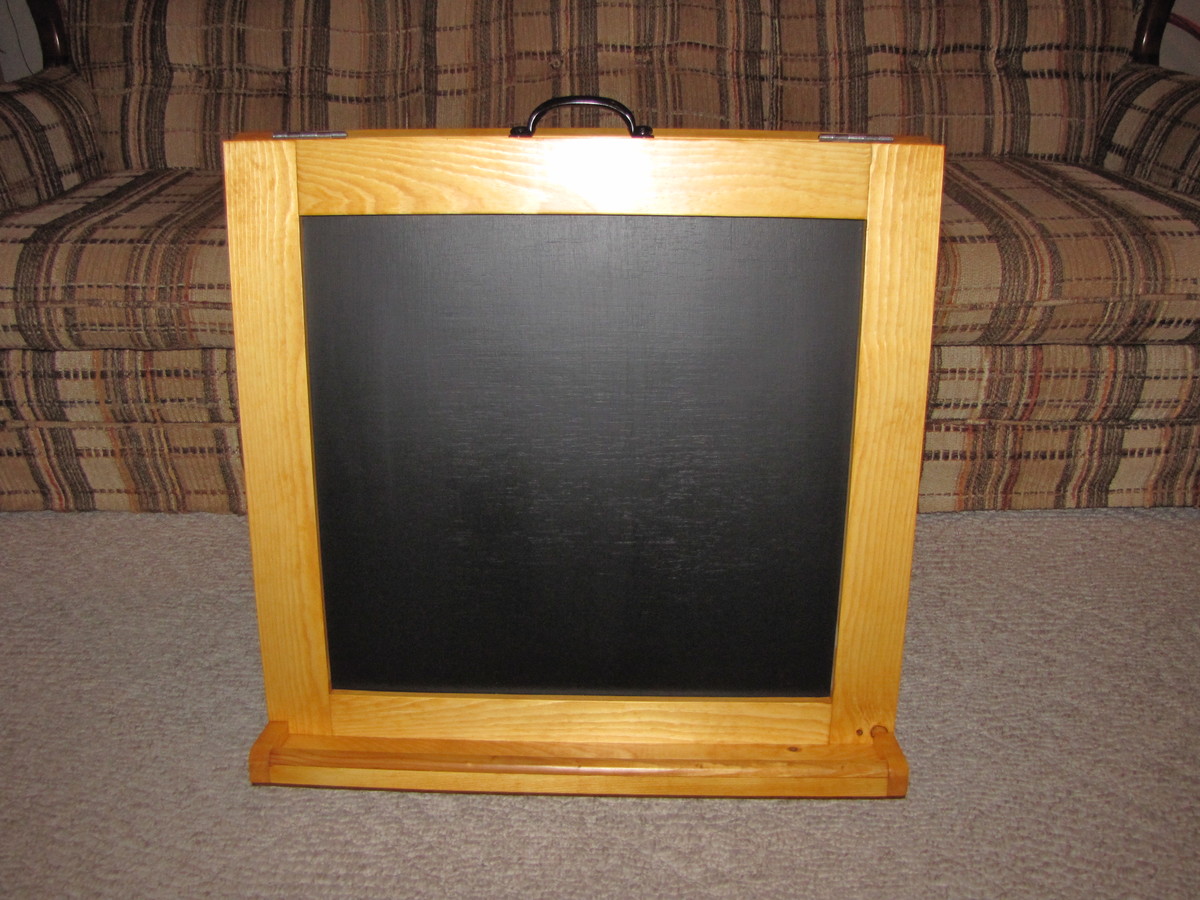
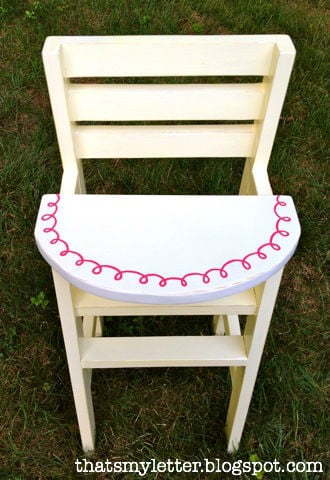
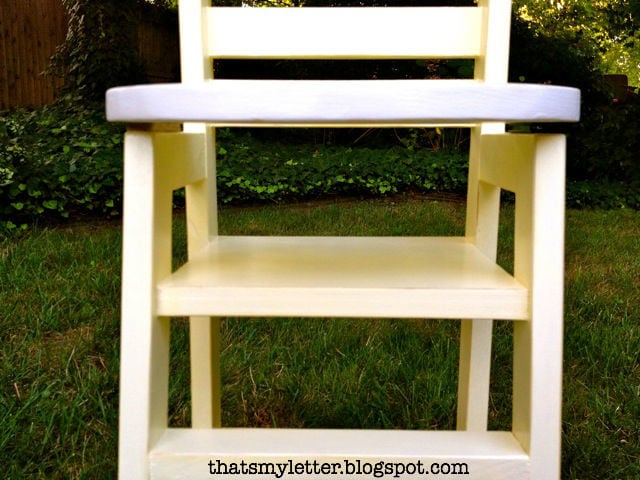
Community Brag Posts

doll high chair

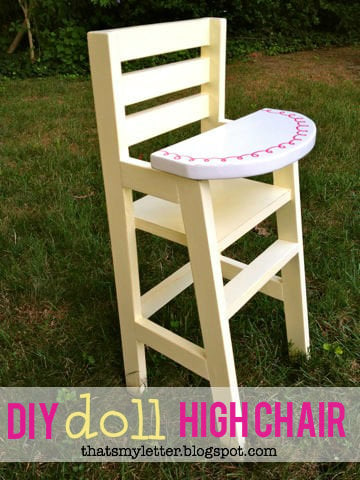
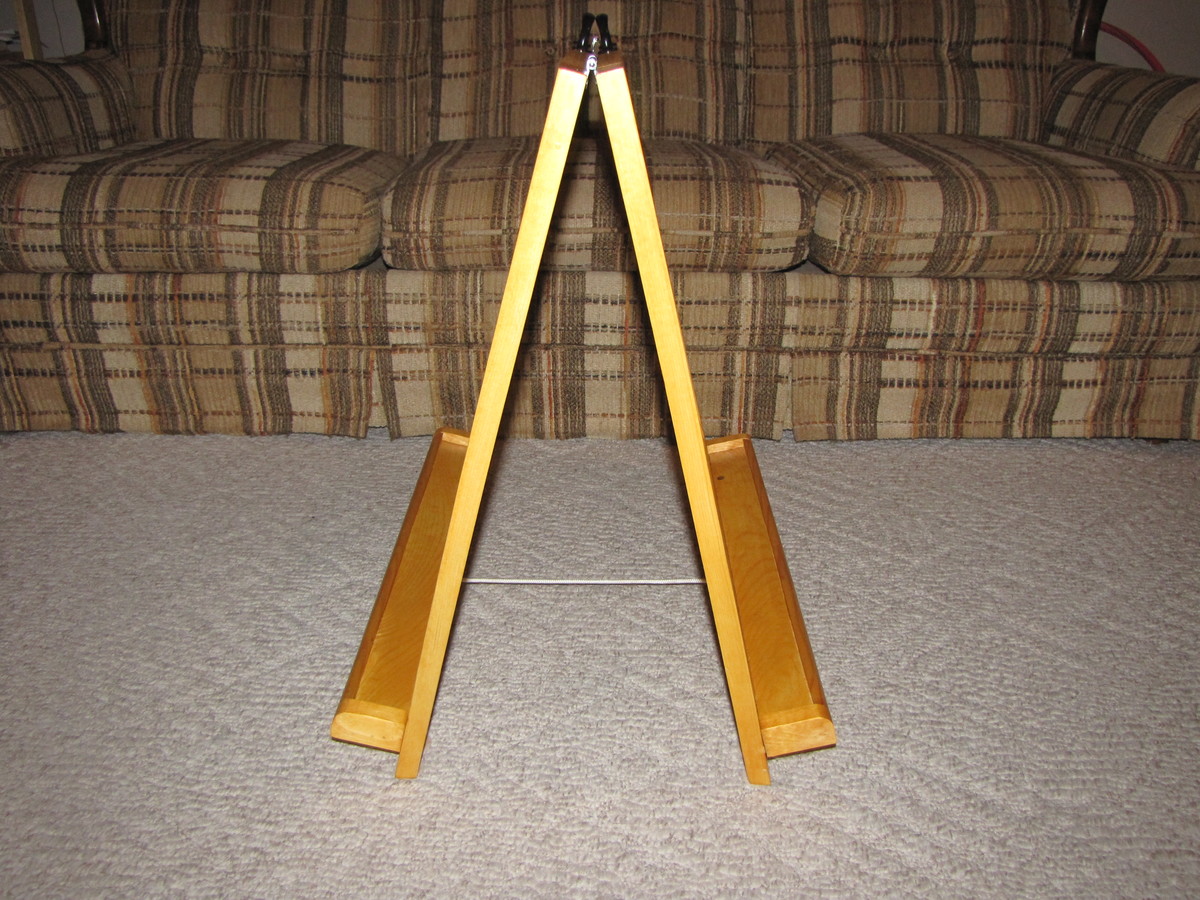
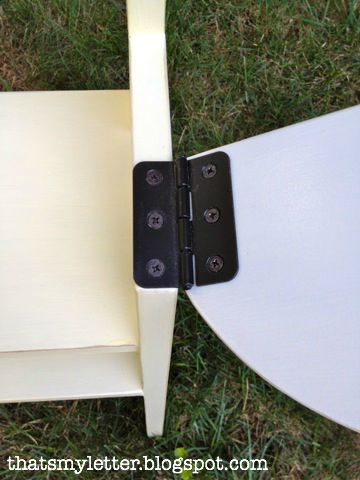
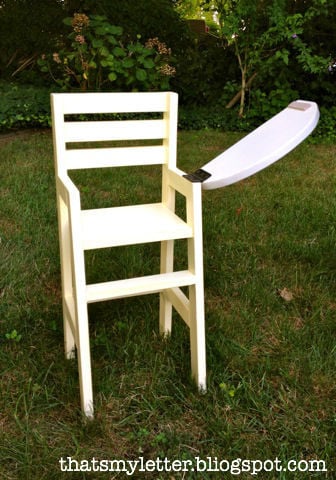
doll high chair with movable tray

Built from Plan(s)
Estimated Cost
$10
Estimated Time Investment
Afternoon Project (3-6 Hours)
Finish Used
1. prime
2. tray: Behr swiss coffee
3. chair: Behr frosted lemon
4. seal Minwax clear stain
Recommended Skill Level
Beginner

Wrap around bar - "J" shaped

"J" shaped wrap around bar

To build:
2 x 4s
1/2" plywood
#2 resaw 1 x 6" planks - sold in 16' increments
#2 resaw 1 x 4" planks
1 5/8" screws
2 1/2" screws
3" screws
Jacobian stain
lacquer
finishing nails

Needed:
Tons of time
Miter saw
3/8" driver
wrasp
hand planer

I actually built this in my living room when I lived in an apartment. I had very cool neighbors. It weighed about 300lbs when it was done.

Estimated Cost
$400
Estimated Time Investment
Week Long Project (20 Hours or More)
Finish Used
Jacobian stain and 11 coats of lacquer on top
Recommended Skill Level
Intermediate

Cedar Outdoor Dining Table and Benches

My wife and I loved the version that Finns-Dad made but we wanted it to be rectangular. The top is 1x6s around the edges with 1x4s in between. The frame is 1x4s. The bench tops are all 1x4s with 4x4 legs. There are 3/8 inch lag bolts in the legs. We did 4 coats of the urethane.

This was my first major project, and while there are many things that I would do differently if given the opportunity, we're still very pleased with it.

Built from Plan(s)
Estimated Cost
$350
Estimated Time Investment
Weekend Project (10-20 Hours)
Finish Used
Rust-Oleum Varathane Classic Clear Water Based Outdoor Spar Urethane Semi Gloss
Recommended Skill Level
Beginner

Comments

Rustic X TV console

Submitted by Anonymous (not verified) on Wed, 08/26/2020 - 12:04

Built the rustic x tv console table.

Built from Plan(s)
Estimated Cost
80
Estimated Time Investment
Weekend Project (10-20 Hours)
Finish Used
Dark walnut stain
Night view paint
Recommended Skill Level
Beginner

Recycling center

Loved building this recycling center. Basically made three cabinets from the plans and then attached them together. Now the dog can't get in the trash and the recycling and empty cans don't gather in the counter and it looks great! I used piano hinges for the doors which makes them feel much more stable.

Estimated Cost
$200 (including 3 garbage cans)
Estimated Time Investment
Weekend Project (10-20 Hours)
Recommended Skill Level
Intermediate

Comments

Cottage style end table!

Submitted by ncderemer on Sun, 12/07/2014 - 16:54

This was my first time building a project that had a drawer involved. It took me three attemts to get the drawer right and I ended up building internal wood slides for the drawer to sit on and a couple of stops to keep it from falling out or going too far back. Not having to deal with finicky drawer slides made it much easier for me. I think it looks nice and it really is the perfect height for next to a bed or chair. 

The cuts are very simple but I don't know how I would have done this without a kreg jig. It made putting all the boards together so much easier and kept them tight and strong. 


Built from Plan(s)
Estimated Cost
$20-$35, Mine was around 35 since I bought a nicer pine 2x2 for the legs and a pine 1x3. If I had used the common wood it would have dropped the price at least $10.
Estimated Time Investment
Afternoon Project (3-6 Hours)
Finish Used
Rustoleum primer 1 coat; Coat of Glidden Connecticut Blue (eggshell
Recommended Skill Level
Beginner

Comments

ncderemer

Sat, 12/13/2014 - 18:15

I really appreciate your site Anna! I spend so much time on here plotting :) and looking at all the great stuff other people are coming up with to match their own style. Thank you for all the work you put into this and the amazing plans you create.

Bi-Fold Closet Doors

We wanted to replace the vented / painted bi-fold closet doors in our Master Suite with something that was warmer and more consistent with the decorating motif of the house.  We priced out various wood bi-fold doors and were shocked at the $350 - $600 price range of what was available.   We decided that building them ourselves was a much better choice.

The frames are made from 1” Knotty Pine and the panels are from ¼” Knotty Pine.   Frames were made to fit and assembled w/ Kreg screws & Glue.  Rabbet channels were cut w/ the router and the panels were brad nailed & glued.

It was finished w/ the same stain used on our Knotty Pine ceilings / walls and finished w/ a satin varnish for a perfect match to our house.

This was a very straightforward, quick & inexpensive alternative to purchasing expensive bi-fold doors.   

The doors took about 15 hours to build / sand and 10 hours to finish.   Total cost was around $100. 


Estimated Time Investment
Week Long Project (20 Hours or More)
Finish Used
Custom stain and satin varnish.
Recommended Skill Level
Beginner

Comments

Art Studio Loft Bed

Submitted by Auntie LAD on Tue, 02/26/2013 - 08:26

After I built my nephew's AT & T Park bedroom, I had to figure out what to create for my 5 year old niece, Maggie. She loves drawing, so I settled on an "art studio," where she can work and display her art.

The bed was created using Ana's Camp Loft Bed Plans. I narrowed the stairs by 4 inches as one of the other posts had done. I also put shelves under the stairs like another post I read on this site.

I built a small drafting-type desk for underneath using my new Kreg Jig (Man, I love that thing!). I also made some curtains to pull shut in case Maggie wanted to escape from the world. Chairs, storage containers, flower light, and leaf above bed are from Ikea.

I bought some cheap picture frames, and put a bulletin board in one and a chalkboark in the other for above the bed, and the string hanging across the front of the bed is from Target. It actually has clips to hang artwork.

I painted the bed using Ana's antique finish with the Minwax pen. It came out fantastic.

Estimated Time Investment
Weekend Project (10-20 Hours)
Finish Used
Antique White paint from Home Depot with Minwax pen finish.
Recommended Skill Level
Beginner

Comments

spiceylg

Tue, 02/26/2013 - 10:00

Your niece and nephew must be over the moon! Another awesome build!

Square picnic table

Submitted by Anonymous (not verified) on Sat, 05/08/2021 - 14:13

Followed Anna White’s plans except I beveled all the edges and flooded the table leg bottoms with penetrating epoxy sealer. The table looks great!

Built from Plan(s)
Estimated Cost
$425
Estimated Time Investment
Weekend Project (10-20 Hours)
Finish Used
2 coats exterior semi-transparent sealer (Padre)
Recommended Skill Level
Intermediate

Comments

Modern outdoor chairs

Submitted by Anonymous (not verified) on Tue, 06/08/2021 - 08:01

Love these plans! Made a modification and added backs to the chairs. Also, built ottomans to match the chairs which can also be used as additional seating.
Many compliments on the set. Thanks Ana!

Comments

Spa Side Table

I completed this table with my 5 year old daughter as my assistant. My husband requested a table to put next to our new hot tub to set his drinks on and this is perfect. We only put one board on the top because I felt since it would be outside, I wanted a smooth top. I just screwed it in diagonally from the bottom. I also used spar varnish since it would be outside.

Estimated Time Investment
Afternoon Project (3-6 Hours)
Finish Used
Rust-o-Leum Ultimate Wood Stain in Kona
Semi-gloss Spar Varnish (3 coats)
Recommended Skill Level
Beginner

Cedar Garden Shed

We needed a way to get all of the lawn & garden stuff out of our garage and organized. I found Ana's plans for the Small Cedar Shed & adjusted them to fit our space. We used 2x4s as our studs & added front walls on the sides. Our shed measures 9.5'x30". We had a concrete slab poured for our foundation. We are experienced DIYer's but had never taken on a project of this scale from scratch. This project was much easier than I was anticipating, and we were able to complete it in one weekend! Similar shed kits were way more expensive and not the size that we were looking for. Thank you so much for the inspiration!

Built from Plan(s)

Comments

Seasonal And Holiday

"Cull" Lumber from a big box store= cheap 2x4's for convertable picnic table

Submitted by MrQuinn on Mon, 08/15/2011 - 14:10

I found out what the rack in the drive up area of my local Lowes was!
I often see piles of wood and sheets or plywood and such sitting there, but I never paid it much mind-turns out its a clearance rack of sorts they call it the "cull" rack, because they are culling the items from inventory that may be cut, chipped marked etc.
So I was at the store buying something for my Bocce Court and saw this pile of 16ft 2x4's and saw they were only $20 and there was 8 of them- so I picked em up for a "future project".
Needless to say they weren't the truest boards but they worked well enough for something like this. I had to buy a 2x6 to attach the top to because 2x4's aren't wide enough to give proper clearance as the plans showed(and I really didn't want to reinvent the wheel on this) so i bit the bullet and bought a $3 2"x6"x8'
Now if you notice I used all 2x4's for this instead of 2x6 so I adjusted the top to 14 1/8 to accommodate 4 2x4 pieces separated by spacers I use when installing wood floors. I made no change to the seat dimensions, but there is 4- 2x4's vice 3- 2x6's.
Great plan- perfect for more seating on my weekly bocce nights and they hold in excess of 600 lbs easily for those concerned about load limits.
(Note for those curious, that is my Bocce court in the background, it is 10'x60' and built with pressure treated 4x6's and 2x4's and a whole bunch of DG and crushed oyster shells.)

Estimated Cost
$36
Estimated Time Investment
Afternoon Project (3-6 Hours)
Finish Used
none-I very rarely finish my wood projects-I will probably spray with a sealant to slow the elements since they will stay outside.
Recommended Skill Level
Beginner

Comments

sgilly

Thu, 02/23/2012 - 11:14

I plan to build several of these for my daughter's family. They stand around a fire most nights in the spring. Those nights often end up with roasted hot dog dinners with the friends who have dropped by. The dual purpose of these would be perfect!

Queen farmhouse bed frame with drawers.

Submitted by Anonymous (not verified) on Mon, 01/14/2019 - 20:57

Took several long days to get this thing done. Being stationed in Japan it made things a bit more difficult and quite a bit more expensive sourcing the materials for this project. I had to opt for 1/2" plywood as cost of lumber here in okinawa is nearly double that of what you would see in the states. I made a few other modifications to the plans here and there where I felt it would better fit my needs. I wanted more storage space so I made the drawer boxes 20" deep. Rather than nail and glue the drawer bottoms on I wanted a reassuring solid hold so I grooved out the drawers and inserted the bottom panel with glue to secure it in place. The drawer faces I chose to add a little more detail in the molding by using miter cuts and the router to add some texture. The headboard was actually a previous project that was requested by my wife so with some modification I was able to rebuild that and fit it into the build. The 4x4's were grooved out with a 3/4" straight bit to slide my headboard and footboard slats into place. All in all this project was a lot of fun, the bed is now a monster of a thing to move but solid as a rock we love it. Thanks for the plans! 

Estimated Cost
$500
Estimated Time Investment
Week Long Project (20 Hours or More)
Recommended Skill Level
Intermediate

Built-in bench with drawers, side cabinets and floating shelves

Submitted by Anonymous (not verified) on Sat, 11/26/2022 - 05:37

I have wanted a built-in window seat on this wall for a very long time. My hubby and I finally tackled this project. Definitely not perfect and lotsa challenges and mistakes made but we are happy with outcome.

Comments

Folding Double sided Chalkboard.

Submitted by Bob C on Tue, 09/24/2013 - 10:16

This a Anna White.com Inspired Folding Chalkboard design. I just made a couple slight modification. Slightly larger, and tray to hold chalk and eraser.

This one was build for my two year old nephew as his birthday gift! I think Wyatt and his brother Marshall will get a lot of good use out of the gift.

Anna and John thank you for providing such a fantastic site!

Best Regards,

Bob C

"Remember Working SAFELY IS the most important thing you can do!"

Estimated Cost
$25.00
Estimated Time Investment
Weekend Project (10-20 Hours)
Finish Used
Golden Oak Stain and Polyurethane, Valspar Chalkboard Paint
Recommended Skill Level
Starter Project

Comments

Laundry Sort/Fold Station

Submitted by Tbacks on Sun, 07/07/2019 - 19:26

A laundry room remodel is on the to-do list but by using the laundry station pattern as a base I made a few adjustments to complete my station.  

Stain is Varathane Briarsmoke.  Absolutely love the color!!

Built from Plan(s)
Estimated Cost
$100
Made from pine common board with a sanded birch tabletop.
Estimated Time Investment
Weekend Project (10-20 Hours)
Finish Used
Varathane Briarsmoke
Recommended Skill Level
Intermediate

2x4 outdoor cedar couch with ottoman

Submitted by Anonymous (not verified) on Thu, 05/04/2023 - 11:51

I used pocket holes to hide the screws. I made an ottoman out of the outdoor coffee table plans to my dimensions that can be used as a coffee table when we need it.

Comments

Mud Room Bench

This plan started with Ana's "Mudroom Bench with Easy Drawers" project as a base. I painted 1/4" strips of plywood to give the look of distressed wood on the wall. The shelves above was a simple box with dividers. I made extra deep drawers for ALL my kids' shoes and it is so nice to just grab all the errant shoes and toss them in there out of sight! I also outfitted it with motion-detection lighting so no more fumbling for the light switch in this dark passageway.

Built from Plan(s)
Estimated Cost
$400
Estimated Time Investment
Weekend Project (10-20 Hours)
Finish Used
white enamel, black is chalk paint with wax finish
Recommended Skill Level
Intermediate