Community Brag Posts

Kids table and chairs

Great little project. Finished just in time for Thanksgiving.

Andy

Estimated Cost
50
Estimated Time Investment
Day Project (6-9 Hours)
Finish Used
Mirrowax, polyurethane semi gloss
Recommended Skill Level
Beginner

Comments

JoanneS

Thu, 11/26/2015 - 07:14

You did a super job!  These are absolutely adorable!  Happy Thanksgiving!

Built in bookcase with lights

Submitted by AndyH on Sat, 12/12/2015 - 14:19

Built in bookcase with lighting and power outlets in cupboards for audio and DVD equipment to feed to the wall mounted tv (to the left).

The photo with the lights is when it was unfinished and I also decided that I didn't like the inset doors and so made new overlay ones. Now I have four doors I need to use on another project...

Estimated Cost
$1000
Estimated Time Investment
Week Long Project (20 Hours or More)
Finish Used
Sherwin Williams Pro Classic Extra White Satin.
Recommended Skill Level
Intermediate

Comments

Ana White

Mon, 12/14/2015 - 05:43

Inspiring to see such amazing work!  Love the attention to detail and precision.  Ana

Bown

Sun, 09/10/2017 - 18:45

Did you go by a plan? I'd like to do this but I definitely need a step by step plan.

Farmhouse Table - Thanks Ana!!

I tackled the Farmhouse Table over a long weekend while my boyfriend was away - he was surprised needless to say!
I have not attempted any woodwork projects since grade 8, but this was alot of fun - I did not find it very difficult and loove using power tools :)
I made the matching bench, however I guess I did not stir the bottom of the can well enough and my bench is now red :/ soo I am going to either stain it dark or paint it white and use it as a mudroom seat!

*I also made mine shorter - 7ft long to fit in our dining room and adjusted the bench to fit.

Estimated Cost
$160 for table & bench inc. wood, screws, stain, sand paper
Estimated Time Investment
Weekend Project (10-20 Hours)
Finish Used
I sanded it until I was pretty sure the risk of splinters was eliminated. After pre-stain conditioner, it got a coat of Minwax 'Ipswitch Pine'. The result was perfect on the table (two coats), however I must not have stirred the can well enough as my bench turned out dark red :/ I wanted it to look like it's 100 years old.
Recommended Skill Level
Beginner

Comments

Maggie Jaye

Fri, 10/07/2011 - 17:15

Thank you so much Ana! We are in the process of renovating our house and your website has inspired me to take on so many more projects now!! :)

Margaret Kubiszyn (not verified)

Sat, 10/08/2011 - 19:46

I love your choice of stain - it is beautiful!

Guest (not verified)

Wed, 11/02/2011 - 04:52

I built a similar table and I am having problems with my kids getting food in between the pieces of wood. Do you have this same problem, is anyone having this same problem? Does anyone have any suggestion as to how to fix it, how to keep food and other particles from getting trapped between the cracks? Thanks! You did a great job!!

Guest (not verified)

Wed, 11/23/2011 - 15:00

I am building this table as we speak. The thought occurred to me as well concerning the cracks attracting crumbs. I believe using clamps to make the fit as tight as possible will help. Also some poly finishes may be appropriate with children which may even seal the cracks... if sanded and clamped well.

Maggie Jaye

Wed, 11/23/2011 - 15:11

I did try my best to clamp the wood together as tight as possible - due to the pieces of wood not being completely straight, they are there.

I haven't had this problem yet. I do use place mats when eating at the table, that generally stops any crumbs etc.That's probably the easiest way to avoid it :)

Thank you for your comments!

Fireplace with recessed TV mount

Submitted by medicscott on Thu, 02/16/2023 - 07:46

This is a very custom fireplace that I built for my wife as a 40th wedding anniversary gift. It is built around a Samsung 55” Frame TV and a Vivo motorized mount. The motorized mount allows the TV to be lowered to a better viewing height than the standard above mantle position which is usually too high for comfortable viewing.

In order to maintain the flush mount effect with the TV in art mode, I recessed the mount into the fireplace. That required building a “back” frame for the TV mount then the outer frame for the surround. I covered the outer frame with ½” OSB then ship lap. The mantle and hearth is made from Poplar with walnut stain and Polyurethane satin top coat. The hearth opens for storage.

This was sourced from several different plan sets with a lot of customization and input from the Technical Support Staff at Vizo-US.

Comments

Ana White

Thu, 02/16/2023 - 09:46

Happy Anniversary!
This is a beautiful, well thought out project.
I was hoping someone would do the recessed mount, and you nailed it! It's so much better with the tv flush like yours.
Also love the motorized mount.
Thank you very much for sharing photos.
Ana

Farmhouse Table

Submitted by upsidedown on Fri, 02/05/2016 - 07:21

This version of the Farmhouse Table was made with fir and finished with Varathane Early American stain. It is by far my favorite item in the house! Love it!

Estimated Cost
$250
Estimated Time Investment
Weekend Project (10-20 Hours)
Finish Used
I stained the table with Varathane Early American, and then finished it up with 3 coats of Minwax Polycrylic (gloss).
Recommended Skill Level
Intermediate

Comments

Shaunnyp

Sat, 02/06/2016 - 08:25

I absolutely love this table.  I have a small kitchen and would like to build it counter height (36 inches...including the casters) measuring 30x54 inches. This will allow me to move the table as needed to get it out of the way or move closer to my stove and use as additional prep space as needed. Any recommendations or suggestions to make a safe, sturdy, movable table would be greatly appreciated.  Also any warnings if you see any potential pitfalls I should be concerned with. Thanks in advance.

DIY Bathroom Fan Vent Cover

Submitted by lbrown on Tue, 02/28/2012 - 04:56

The plastic cover that came with the fan looked cheap and flimsy and really didn't fit in with the vintage style of my bathroom. I searched around to try and find something else that would work but was unsuccessful so I decided that I needed to make something myself.

For details on how to build it: http://www.homeandawaywithlisa.com/blog/2012/2/28/diy-bathroom-fan-vent…

Estimated Cost
$5
Estimated Time Investment
An Hour or Two (0-2 Hours)
Finish Used
Spray paint primer followed by two coats of my ceiling paint
Recommended Skill Level
Starter Project

Comments

Steven (not verified)

Tue, 02/28/2012 - 06:38

Thanks lbrown, you just gave me an idea. We are painting our entire upstairs and hate those industrial looking air return vents. This would be a great replacement for them. Thanks for the inspiration.

Kids Modern Picnic Table

Submitted by abbpim on Mon, 04/16/2012 - 09:52

This is my very first wood working project! I know its not perfect and I learned from my mistakes. I found a miter saw at a garage sale and after three hours of plugging it in and unplugging it, I finally worked up the courage to make it make a noise! Then I eventually worked up the courage to cut wood lol! I'm pretty proud of myself for building something and I am going to continue practicing until I can make really cool stuff!

Estimated Cost
$20
Estimated Time Investment
Afternoon Project (3-6 Hours)
Finish Used
Valspar, Quart Size, LA218, Fuchsia, Duramax, Exterior Semigloss, Base 4 214-4.75, 113-31.75, 105-3.63, 115-2Y7

I used 2 coats
Recommended Skill Level
Starter Project

DIY Wood Shed

Submitted by Anonymous (not verified) on Sun, 10/29/2023 - 19:18

I am a mathematics teacher in Central IL. I teach a class called Geometry in Construction. I had my math students build this wood shed in pieces at the school, then I brought it home and put it together with a few of my son's friends. The students enjoy a math class that gets to go to the wood shop to apply their math skills to a wood working project. I am proud of my students hard work and dedication.

Shari Bruyn (I'm old, so I do not have Instagram or a blog page. lol)

Built from Plan(s)

"Thomas" Train Bunk Bed

We wanted a short bunk bed for our sons, age 4 and 1. Our 4-year-old insisted on a Thomas Train bed. We modified the fort bed plans slightly to add stronger barriers on the top bunk and add a barrier on the bottom for the little guy. We also used solid plywood rather than MDF. We used 2x4's and steel angle to hold up the top bunk. It should be sturdy enough for them to use into teenage years. Because we beefed up the strength, the cost increased as well.

We tried staining it and it didn't come out as nicely as we had hoped, but the boys added their own stickers to it and now they have a Thomas bed that they love. When the 1-year-old gets older, we will probably remove the barrier on the bottom bunk to make getting in and out easier.

Built from Plan(s)
Estimated Cost
$200
Estimated Time Investment
Weekend Project (10-20 Hours)
Recommended Skill Level
Beginner

Colorful Custom Bedford Corner Desk with Live Edge Desktop

Submitted by Anonymous (not verified) on Fri, 06/28/2019 - 20:41

I followed the plans pretty closely. I added dividers to make 3 drawer units but I didn't find it necessary to have the top shelf go all the way to the back since it would never function as a shelf. I used scrap pieces for that and they weren't big enough to be full shelves.

I used 1/2" MDF for the bottom, sides, and backs of the drawers to cut down on weight, cost, and general bulkiness. I used this free app called Cut List to figure out the easiest way to have the guys at Home Depot cut all the drawer panels after I learned I'm not that good with a circular saw. I used a hack saw to cut aluminum bars for hanging files and used scrap wood to make the little brackets to hold the bars upright in the drawer. The full extension drawer slides are functionally and asthetically better but it would have been so much easier to put in basic bottom mount slides. 

I wanted a wood grain top and ended up with common pine boards over more expensive poplar or oak and I would use pine again without hesitation. I used Google SketchUp to figure out the widths of boards I needed to make the top with minimal cuts. Then joined them with glue and mending plates and sanded the hell out of them. I altered the dimensions slightly to make it the same size desktop as the Bedford desk. My two wing sections are 23" x 23" but I should have made them 23" deep by more like 24" or 25" long. I had to hack the bottom bracing to make a spot for the drawer units to slide into. If you alter the dimensions make sure you can secure a brace between the main body and the wing of the desktop and still have room for the brace at the edge of the wing. 

My cost includes things like a Kreg jig, saw blade, clamps, paint brushes etc. so you may be able to do this for less. I could have gone with a middle of the line paint I think. This project was a beast for me because a) I'm not a furniture maker b) I don't own a table saw which would have been amazing c) I picked the hardest way to make the desktop and d) I modified some of the dimensions from the basic plans. I worked on this thing for weeks (granted sometimes I didn't touch it for several days or a week). But it was a fun and rewarding project. 

Estimated Cost
$500-$600
Estimated Time Investment
Week Long Project (20 Hours or More)
Finish Used
Behr Marquee, Minwax wood conditioner, stain (honey) and stain poly
Recommended Skill Level
Intermediate

Comments

Outdoor Garbage Can Shed

Submitted by Anonymous (not verified) on Fri, 12/08/2023 - 08:45

Chose the small firewood shed project as a "template" if you will .. built this to house our garbage cans and eventually put a gate on it to "help deter" the Florida black bears (we do multiple things to keep them at bay) but this will also just be a nicer looking way to keep the cans outside.

I modified the floor since the firewood shed had a floor that was suitable for, well, firewood but not so much for rolling garbage cans. Had to leave the one slat off the back for the depth of the can which I didn't completely account for in the beginning. Overall, still need to paint it and water seal it but happy with how it turned out.

Built from Plan(s)

King Farmhouse Bed

Submitted by jhavinga on Thu, 05/22/2014 - 16:31

Second project ive completed from Ana White, and I am very happy with how this bed turned out! The only thing I would fix would be the finish, I wanted it a bit whiter. not so creamy. Otherwise very quick and easy fun project to do. =)

Estimated Cost
$300
Estimated Time Investment
Day Project (6-9 Hours)
Finish Used
1 coat of a basic latex white paint.
Then I sanded down just so raised grains would become exposed.
1 coat of dark walnut stain (wipe on with cloth)
Done.
Recommended Skill Level
Starter Project

Comments

jhavinga

Thu, 05/22/2014 - 16:34

Thank you for sharing all of these awesome projects. I was always hesitant when it came to wood, but now I cant seem to stop!

jhavinga

Wed, 06/11/2014 - 13:43

(You can do all this before or after your project is put together or not.)
Be sure to do a test piece before hand so you can see exactly what your getting :)

The first step I did once the head board and foot board were put together, was to sand any sharp edges or corners. I liked mine rounded and worn looking. I did not sand anything else.

Second step is to paint 1 even coat of a basic white latex paint.

Third step is to sand away some white paint. because we didnt sand it before hand the grains in the wood will be very bumpy. so the paint on the grains will sand off while the paint lower than the grain will remain. makes sense? hopefully i explained that right!

Fourth step is to now wipe on the stain of your choice. I went with Dark walnut. It stains the paint a bit bringing the white to a gray/brown tone. and stains the wood dark walnut so the grain patterns show up dark.

Let me know if you have any other questions and good luck!

jbogan15

Thu, 01/29/2015 - 07:49

What grit of sand paper did you use to sand off the white paint? and did you sand it by hand? Also, for the dark walnut stain, did you wipe off immediately or leave it on for a bit before wiping? Beautiful bed, I want to achieve this look!

In reply to by jbogan15

jhavinga

Fri, 02/06/2015 - 09:15

Hi jbogan15, thank you!
For sanding I used a palm sander with 120 grit to get the job done a bit quicker, than went over lightly with 220. When staining I actually just dipped a rag in the stain and would wipe the stain on. =)

Good luck!
Justin

kosborn

Fri, 01/27/2017 - 11:05

Love this look! Exactly what I am trying to achieve...A few questions about the side rails. How high did you connect them to the 4x4 posts and exactly how did you connect them? Did you use brackets or screw right into the posts? Thank You!

barkleyl

Thu, 09/05/2019 - 15:07

I have seen several beds from Anna White. I was wondering if the frame require a box spring mattress or not. If not, are the beds lower than what a traditional mattress and box springs are. Thanks ! 

Outdoor Wooden Cooler

An Outdoor Wooden Cooler is the perfect way to accent any deck, patio, or garage. Can be made from Cedar, Pressure Treated, Cyprus, etc. Sizes can vary from small 28 qt coolers to Large 120 qt coolers capable of holding hundreds of drinks. These coolers can be themed for your favorite sports team, favorite hobby, or anything of your choice. Engraving or wood burning is available.

Built from Plan(s)
Estimated Time Investment
Weekend Project (10-20 Hours)
Finish Used
Stain, painted, distressed, etc.
Recommended Skill Level
Intermediate

Comments

sgilly

Fri, 08/31/2012 - 09:52

Well, actually, two. My beer loving son-in-laws would love this, and Christmas is coming! Do you happen to have any "step-by-step" directions you'd be willing to share? I can figure out the dimensions but it would be really helpful to read - or see - the components and how you put it all together.
Thanks for sharing!

Adam_Scheetz

Fri, 09/28/2012 - 11:41

I had to make a new page because of some password issues. Thanks for comments. I have no plans yet, I've built so many it's sort of muscle memory now. Shoot me an email at [email protected] and perhaps I can help.

And no, the lid style I like is nothing more than some tongue~n~groove boards cut to length, attached with pocket holes and nailed to the lid frame. Tongue~N~groove is optional of course, you could just use regular boards.

sgilly

Fri, 09/28/2012 - 11:58

I really appreciate your response. And, I did indeed send you an email!
I have a bunch of cedar milled and planed by one of my son-in-laws. He'll be thrilled to see that I've made something he can use for his favorite beverage!

Small kitchen island with slide out double trash cans

This was a mommy do during work furlough. Wasn't too hard. I have minimal experience with saws, but with hubby help, we got it done. Some of the instructions didn't make sense, but but we were able to figure them out or change them to work. I used bead board on the front and sides that we added over the existing sides. I used a manufactured butcher block that had to be cut down. Looks great and now my trashcans don't walk around the kitchen when the dogs play. The downside, the dog bowls slide under the island. If you have to cut down butcher block, make sure you have the proper blade.

Estimated Cost
$200.00 because of the manufactured butcher block.
Estimated Time Investment
Weekend Project (10-20 Hours)
Finish Used
Black cabinet paint
Recommended Skill Level
Beginner

Ultimate roll away workbench

Submitted by maker4510 on Sat, 08/01/2020 - 05:22

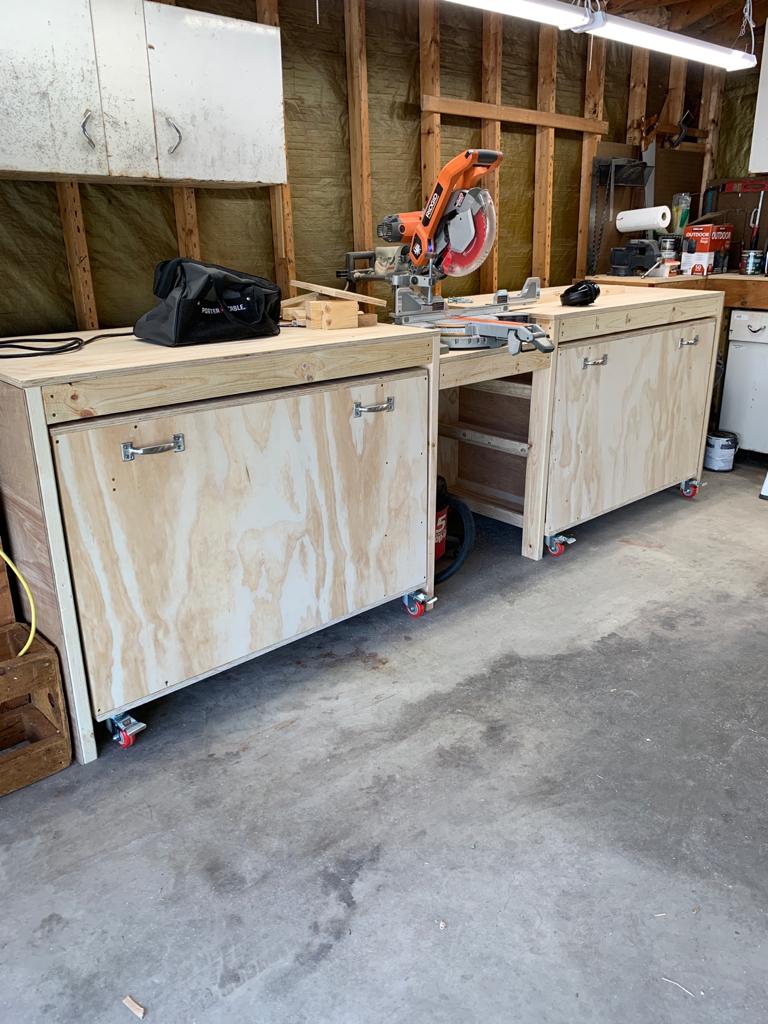
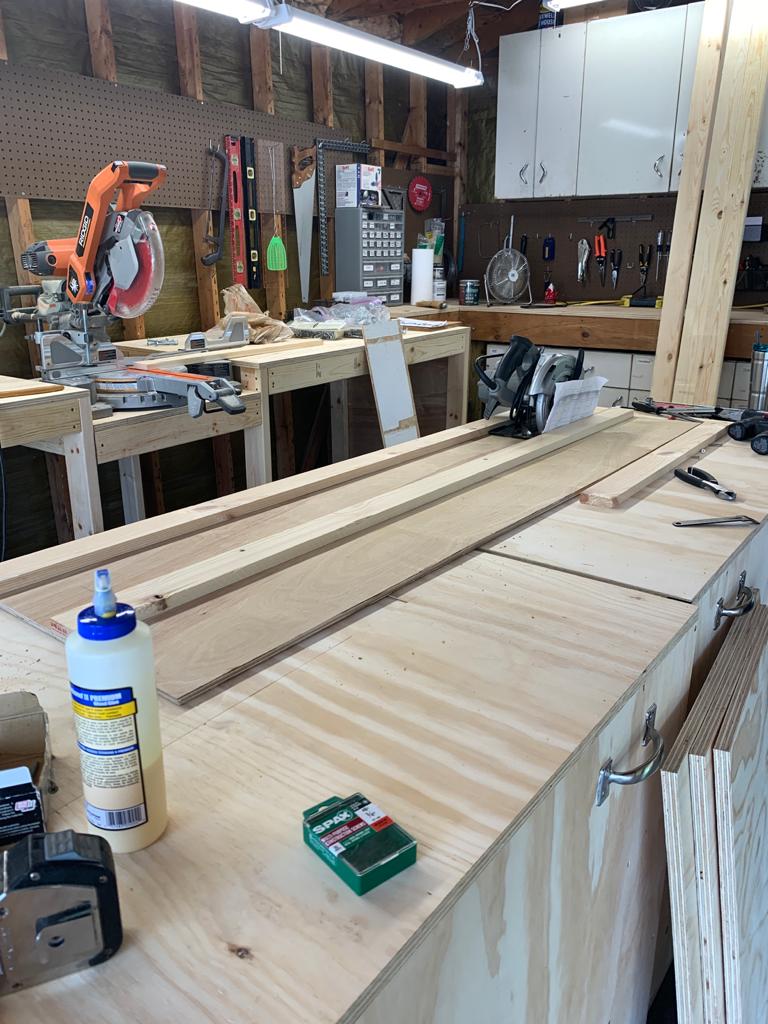
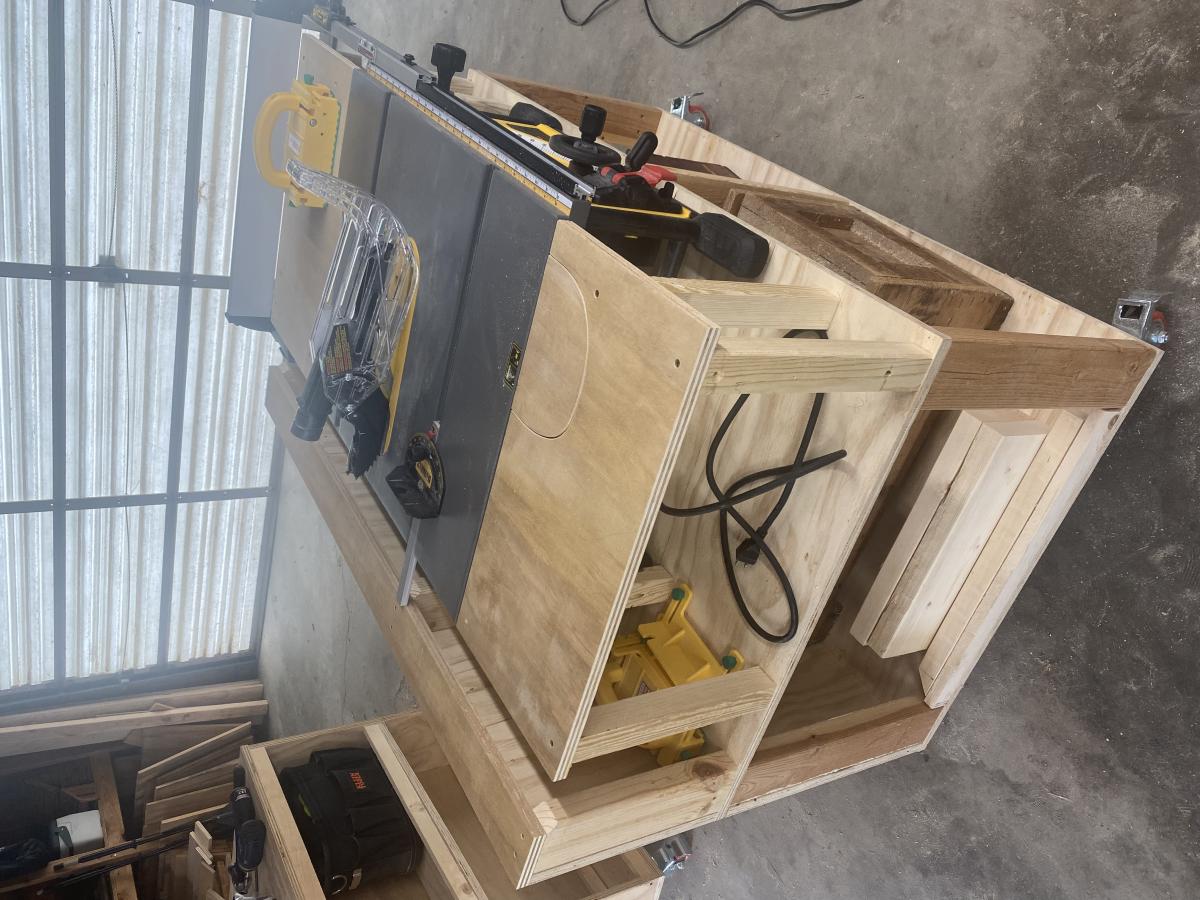
NINE MONTH UPDATE: After using the bench for almost nine months, we’ve made some changes. The first is that our table saw, a Dewalt 7491 didn’t fit in the way the plans called for because of the fence. We ended up cutting down and rebuilding the table to make a platform for the saw, then we built three “tables” around it to leave a gap for the fence operation. We also added a curved piece that can be removed to access the riving knife lever.

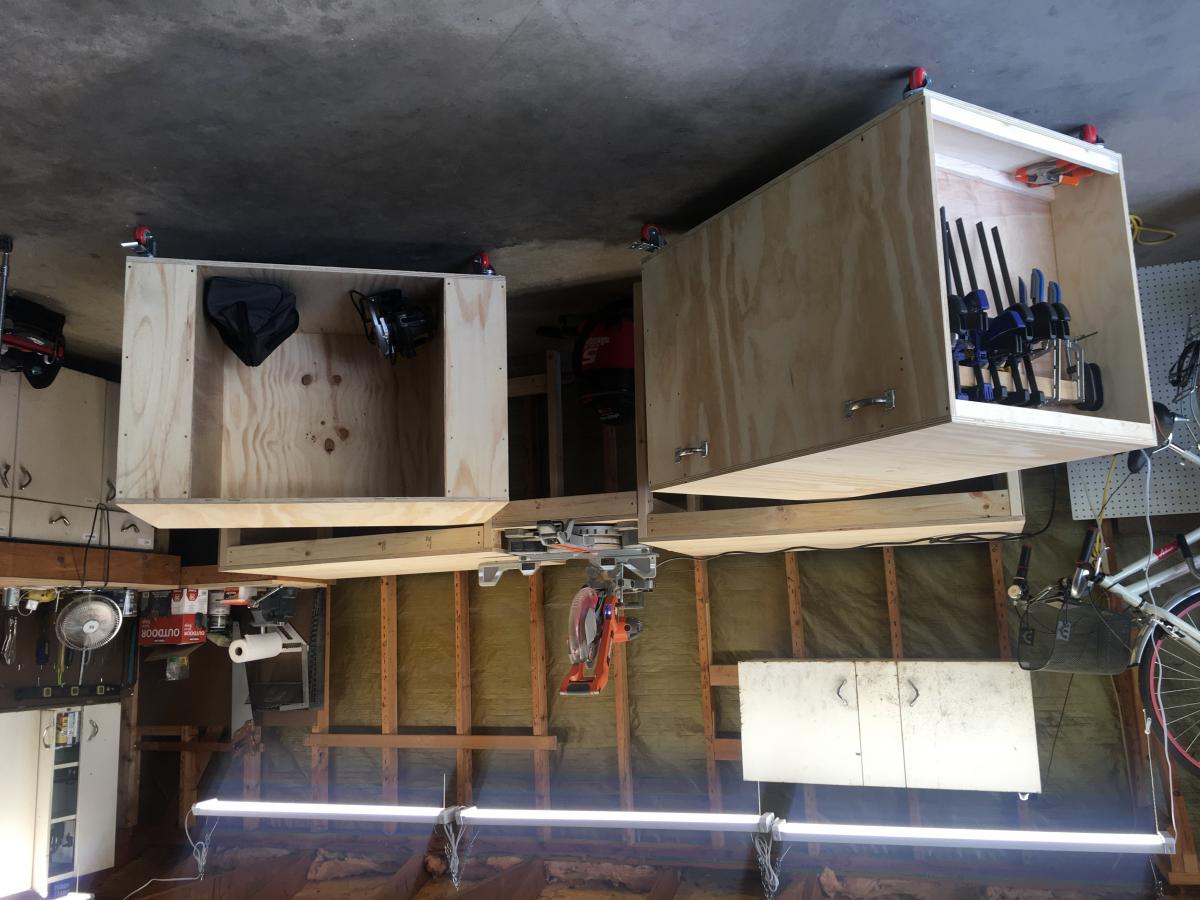
The other change we made was to take out the clamp storage that was in one of the cart ends. When we rolled the cart in and out, the clamps would catch and fall off. We put in another shelf instead.

Otherwise, we love the bench. Having the two rolling carts that we can reposition based on where we need a table extension is great. The miter saw stand works perfectly, and our dust collection setup rolls right underneath. We’re also in the process of building a router table that fits in the removable bench room area.

ALSO, sorry for the upside down/sideways pics. It won’t let me remove or fix them.

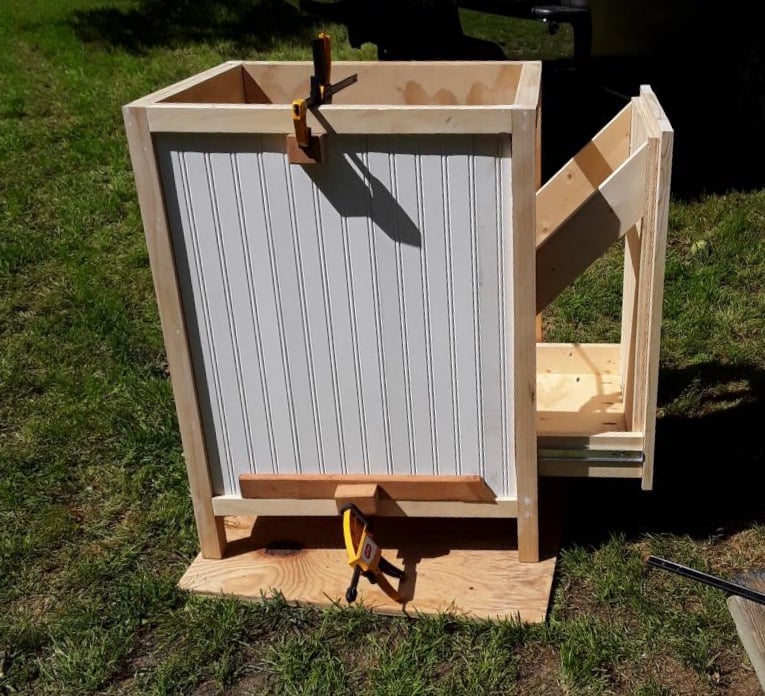
We made the ultimate roll away workbench with very few changes. Added the clamp hanger on one end as pictured. We didn’t add the shelf under the miter saw, as well be putting a dust collection cart.

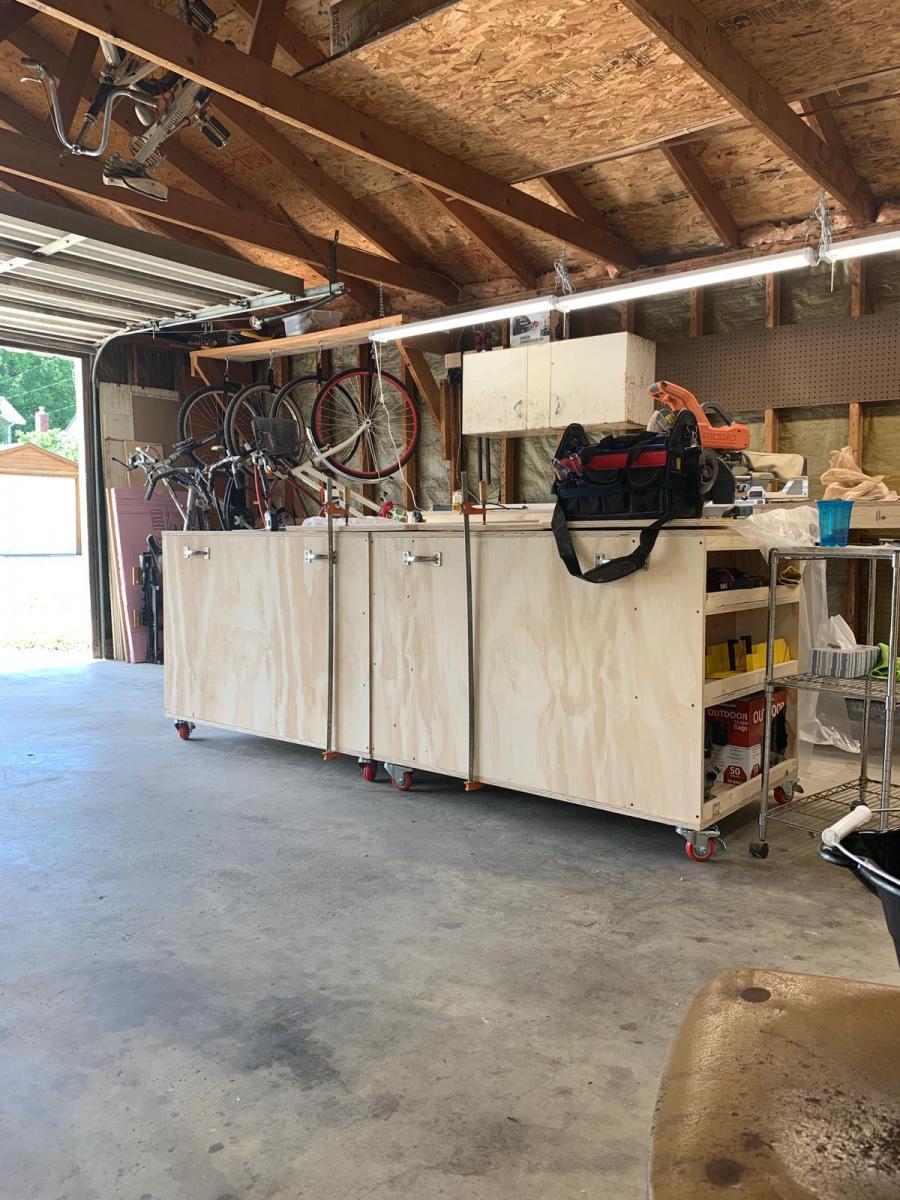
We absolutely love the cart.M, now to save up for a table saw. The only change I would like is that I wish the side shelves were a little deeper, more like 10” instead of 8”, so more tools would fit.

Estimated Cost
380
Estimated Time Investment
Weekend Project (10-20 Hours)
Finish Used
None
Recommended Skill Level
Beginner

Indoor Playground Set

Submitted by Anonymous (not verified) on Fri, 02/10/2017 - 11:56

This playroom set was inspired by the plans you posted.  I was forced to make some significant modifications due to the fact that our bonus/playroom has angled ceilings.  We have a rock climbing wall, ladder, crawl tunnel with windows, trapeze bar, monkey bars, miniature baskeball goal and a slide.  My boys are 6, 3 and 19 months and they love it!  Thanks for the inspiration.


Jim and Caroline Sparrow

Estimated Cost
$1250
Estimated Time Investment
Week Long Project (20 Hours or More)
Finish Used
Behr Paint on bottom and Minwax Stain on top
Recommended Skill Level
Advanced

Comments

Bunk Beds for a Small Room

Our bedrooms are 9' x 9' so when our girls needed to move in together, we needed a bunk bed that would be short enough to fit under the fan, have a place for drinks, books, an alarm, and tissues, and also have a place where our youngest could have a dark sleeping space while older sister stays up later.

We're not going to be in this setup for long, so I used common board to keep the cost down as much as possible. The whole bed cost about $200, but I would suggest staying away from common board. It was really warped and couldn't be sanded smooth. We ended up going with a dark, thick paint to cover the wood imperfections. To deal with the warped wood, I made an outline of each end of the bed with painter's tape on the garage floor and used weights to hold the wood where it was suppose to be. I also modified the plans to make the bottom bunk a bit shorter and made the whole thing only 3 inches off the ground. All put together the bed is very sturdy and everything lined up well.

I used some scrap wood to make the holders for drinks and tissues and a holder for the iPod and speakers. These just rest over the railing, so we can move them around if need be. The book racks are Ikea hacks....they're just spice racks painted to match the bed. The curtains are just hung on a 1" dowel set into the same cups that closet rods are put up with. I also added some flower knobs from Target so that the girls can hang a robe when it's cooler outside.

Thanks for the plans Ana! My girls LOVE this bed!

Built from Plan(s)
Estimated Cost
$200
Estimated Time Investment
Week Long Project (20 Hours or More)
Finish Used
Paint and polyurethane coat.
Recommended Skill Level
Intermediate

Comments

Full Storage Bed

I built Ana's Full Storage Bed.  This was fairly easy to build and it is a perfect bed for a child's room.  I LOVE the added storage!  You can see the plans for the crates I built to fit at our blog http://www.shanty-2-chic.com/2011/03/crates-for-storage-bed.html 

Built from Plan(s)
Estimated Cost
$120
Estimated Time Investment
Day Project (6-9 Hours)
Finish Used
Minwax Dark Walnut Stain and Minwax Polycrylic Gloss
Recommended Skill Level
Intermediate

Triple bunk beds with crib

Submitted by lazlolaz on Sun, 06/07/2015 - 08:09

We needed beds for 3 children, one of which is 14 months old, in a small bedroom and with the simple bunk bed plan to start with I came up with this. The kids love it, although it took the 14 month old a few tries before she accepted the change from her regular crib in another room to this crib/bed and sharing a room with her siblings. Now it's all good!

The beds can also be used separately. The top bunk and the middle bunk will stand 30 inches off the floor when used as separate beds, so like loft beds with storage space underneath for a dresser, reading nook, toys, etc. All side safety rails can be removed for unstacked beds as I finished them all separate from the beds. The bottom "crib" bed side rails can also be removed for single bed. At this point it would just sit on the floor as a single bed also but I may come up with some sort of feet to get it up off the floor when the time comes. They really wanted this set of bunks to be able to be used separately also. The fold-down portion of the "crib" side rail was designed to give easier access for changing sheets, etc. for the "crib". This "crib" bed also uses a regular twin mattress.

Estimated Time Investment
Week Long Project (20 Hours or More)
Finish Used
Oil based Stain and wipe on varnish.
Recommended Skill Level
Intermediate

Comments

YoshiMama

Wed, 11/23/2016 - 08:45

I have three boys (youngest is 10 months right now) and we're getting these built for us this summer. How did the baby take to it? Also, How tall was the bunk. I'm thinking about ceiling height.

cwoitas26

Fri, 05/01/2020 - 12:50

Thank you for this idea! We have special needs son who won't stay in bed unless he has a rail. Now that he is 7 this might work. Keep him with his brother in the same room too.

The link for the plans is not the same bunk bed. Is there another set of plans or do I need to just improvise based on the photos?

Thanks again!

Bunk Beds for 4 to 6

Submitted by Judianne on Thu, 07/02/2015 - 10:32

We used the Build a Simple Bed plan and the Bunk Bed from Simple Bed. I modified the plans to build a double bunk bed. We needed a way to fit up to 6 small children in a long, narrow room. Although we haven't built the trundle beds yet, each bunk will also have a trundle bed. The kids especially love their "privacy" curtains!

Built from Plan(s)
Estimated Cost
Under $300
Estimated Time Investment
Weekend Project (10-20 Hours)
Finish Used
paint
Recommended Skill Level
Beginner
Back