Community Brag Posts
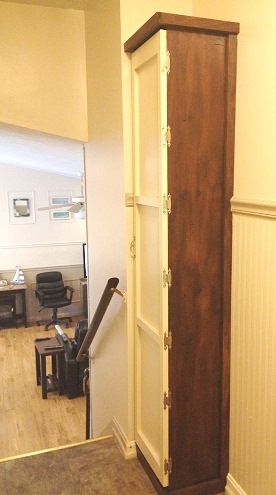
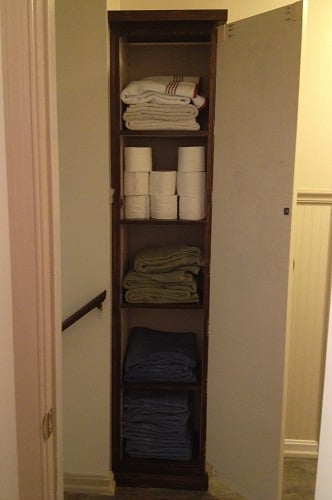
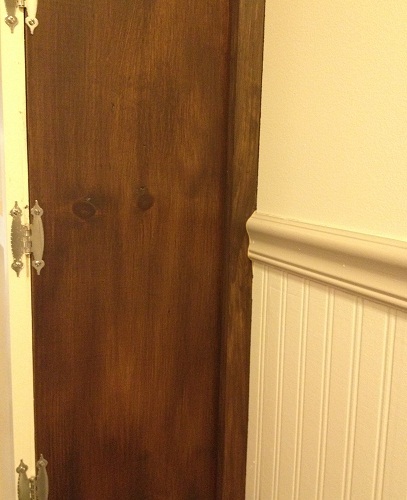
Linen Storage Tower
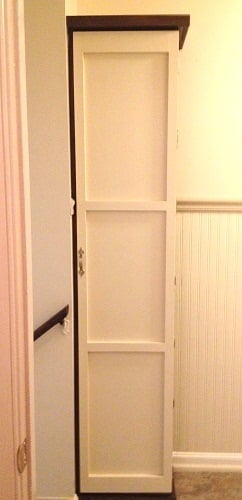
This tower plan was perfect for re-using some already stained 1x12’s I had from another project. It fills up that little square of unused space at the top of the stairs, and gives us extra storage for towels and TP for the 3 bathrooms in our house. I substituted 1x2 and ¼” plywood for the door and used some 1x2 and 1x3 to attach and build it in. This project has been up for a couple of months now, and has come in handy. This was my first attempt at doing something as a ‘built-in,’ and it gave me confidence that we could do our next big project (the pantry) as a built-in. Since the side and shelf boards were already stained, once it was assembled the finishing was easy- all I had to do was stain the trim boards to match, and paint the door and the inside.
Thanks for this great plan, Ana! I’m planning to build several more of these, for my sewing room.
Built from Plan(s)
Estimated Cost
$50
Estimated Time Investment
Day Project (6-9 Hours)
Finish Used
Cabot water based stain w/poly (walnut) on the sides and shelves and minwax express color in walnut on the trims. Door is painted with Ace Royal semi gloss in Crushed Peanut, and the inside color is Wishbone.
Recommended Skill Level
Beginner
Handmade by Kathryn Michelle Powell

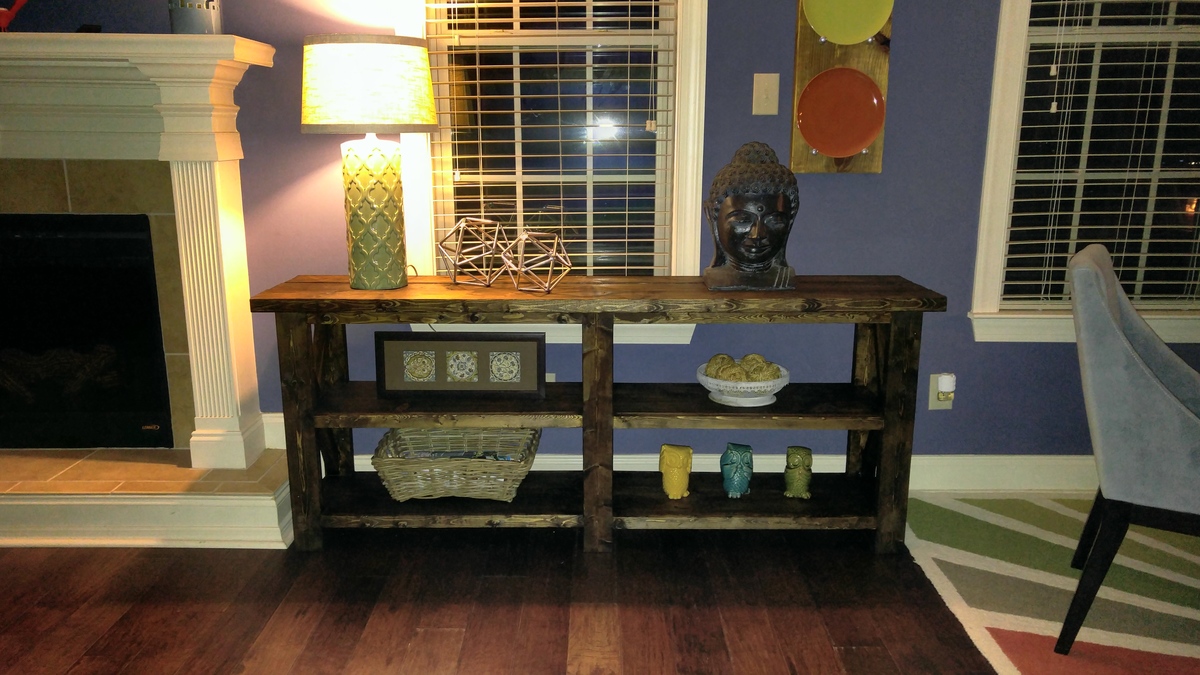
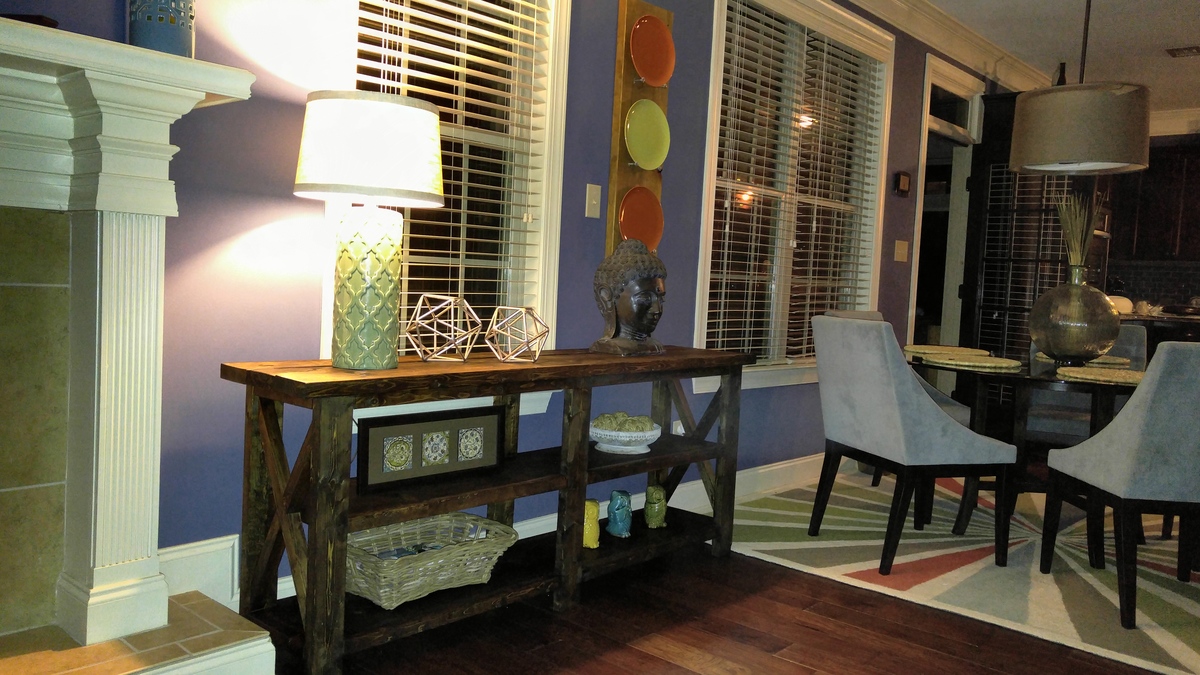
Plan for this table was easy to follow. Loving me new table.
Built from Plan(s)
Estimated Time Investment
Afternoon Project (3-6 Hours)
Finish Used
Dark Ebony Rustoleum Stain
Recommended Skill Level
Intermediate
Comments

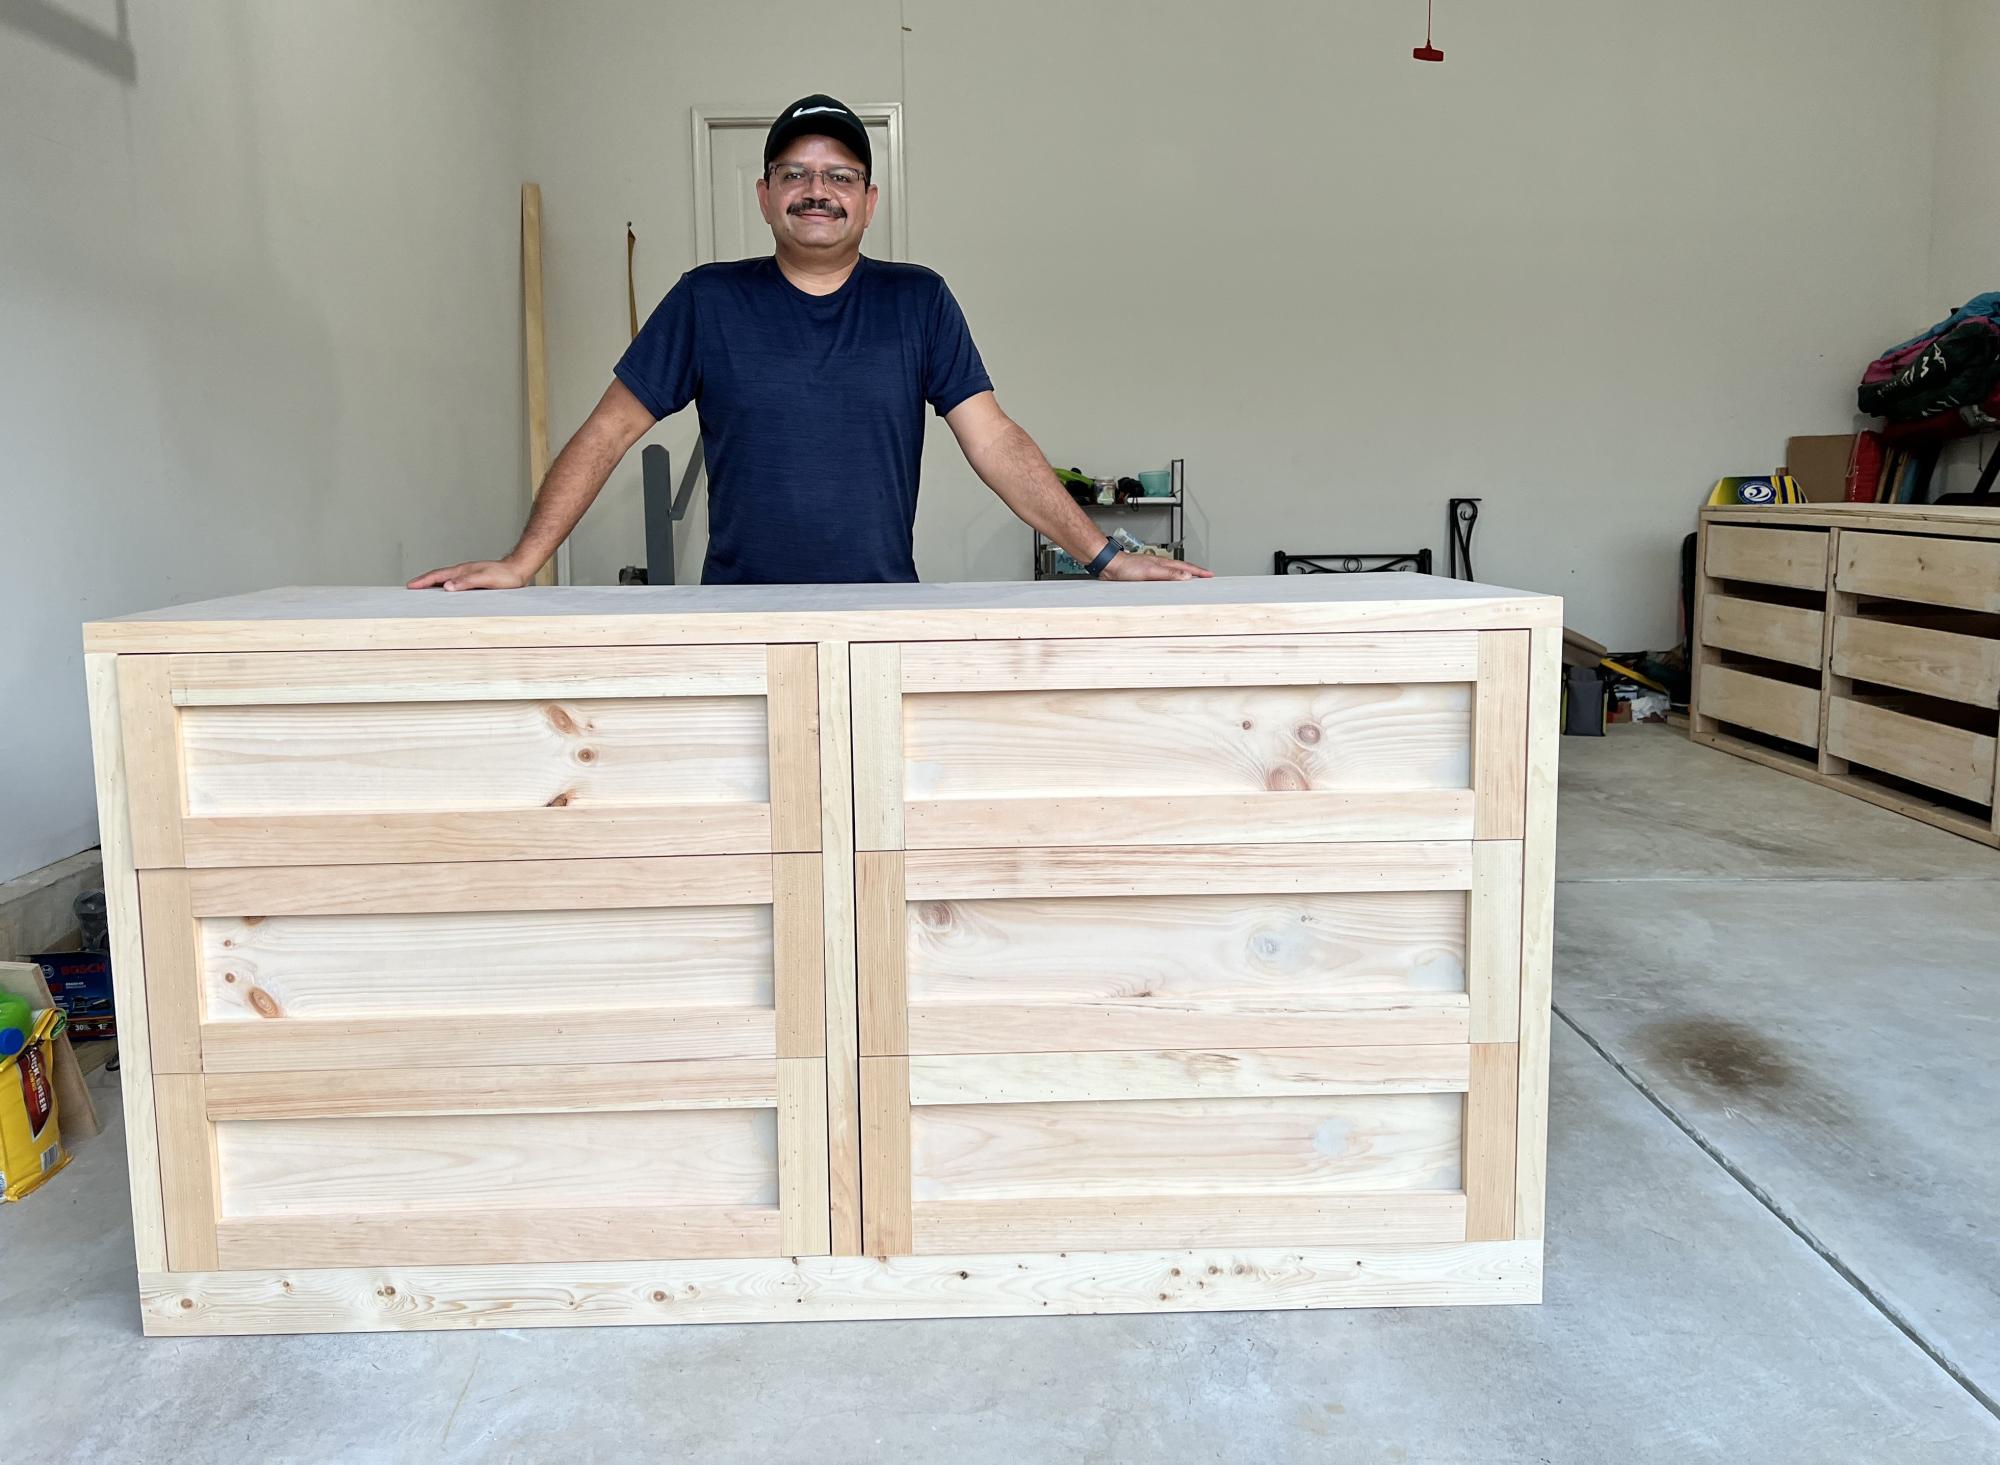
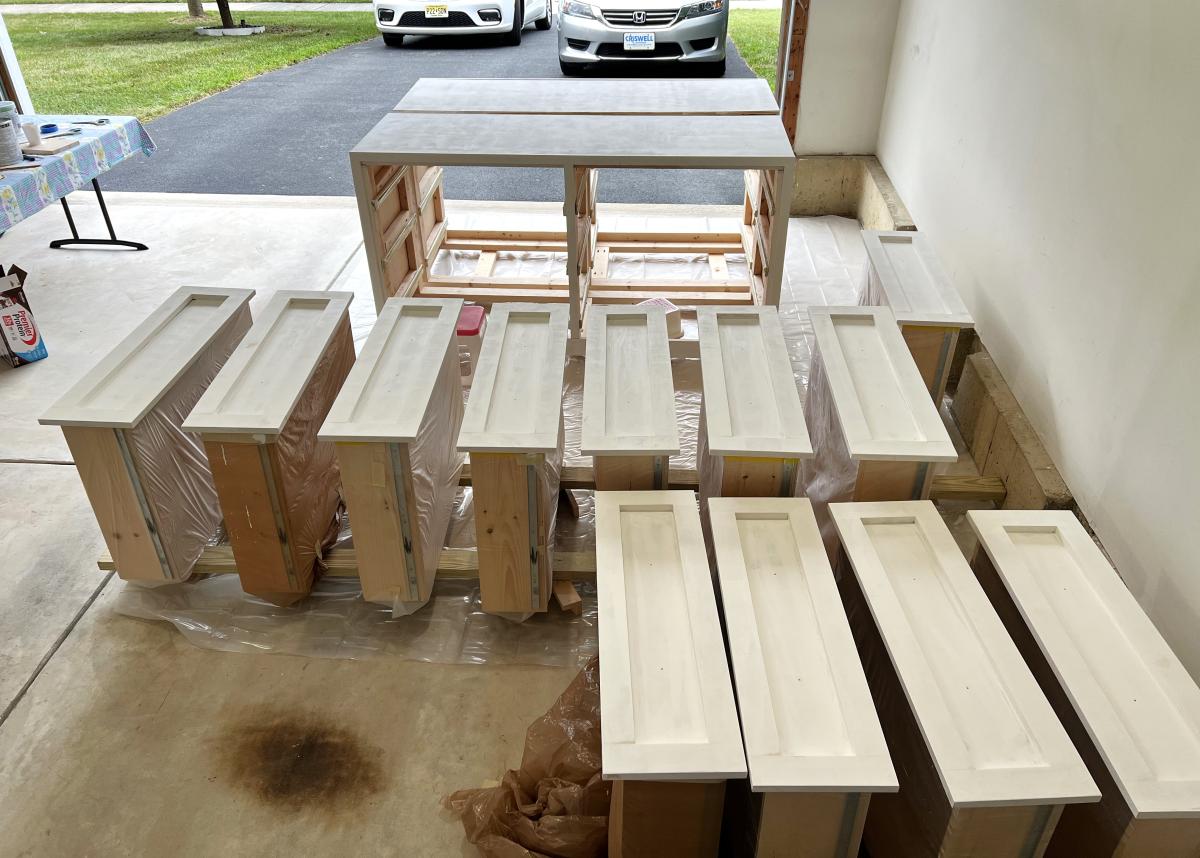
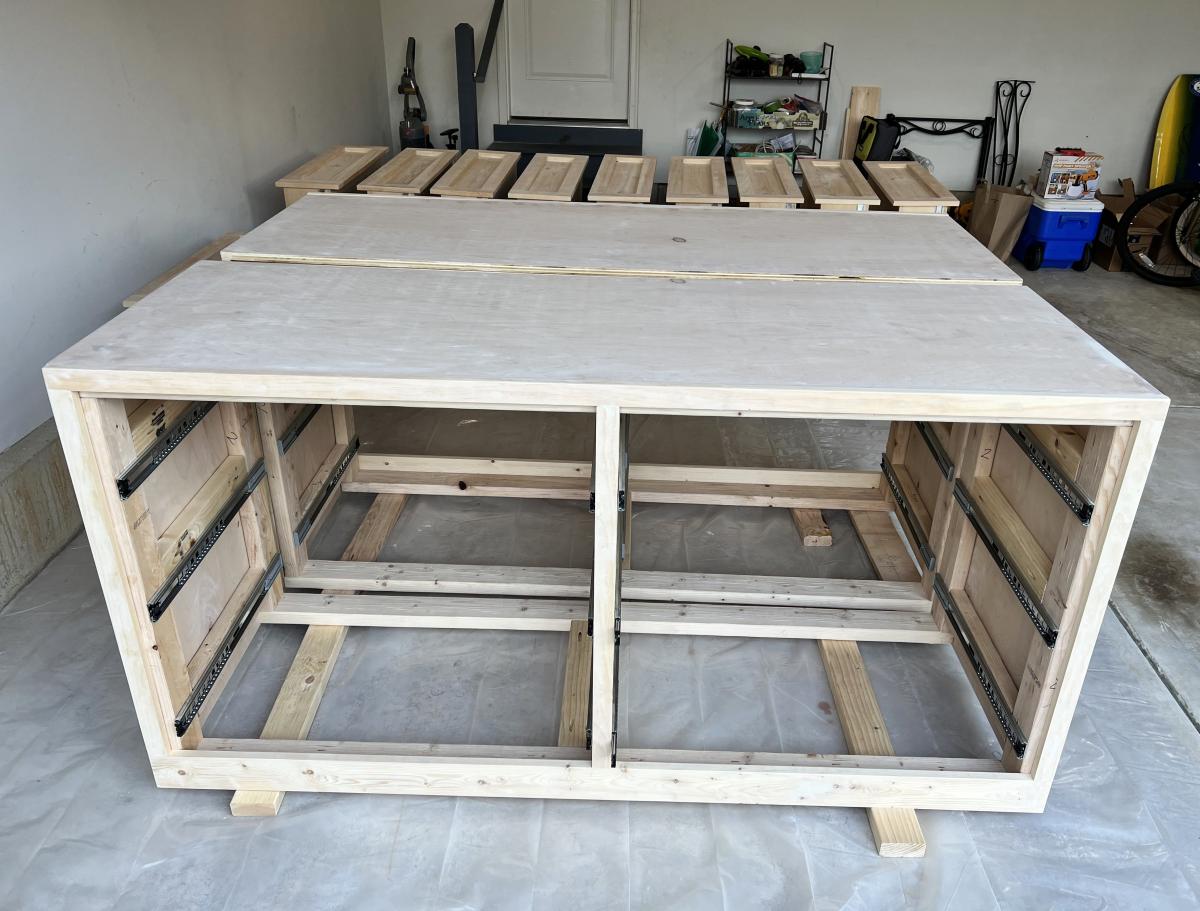
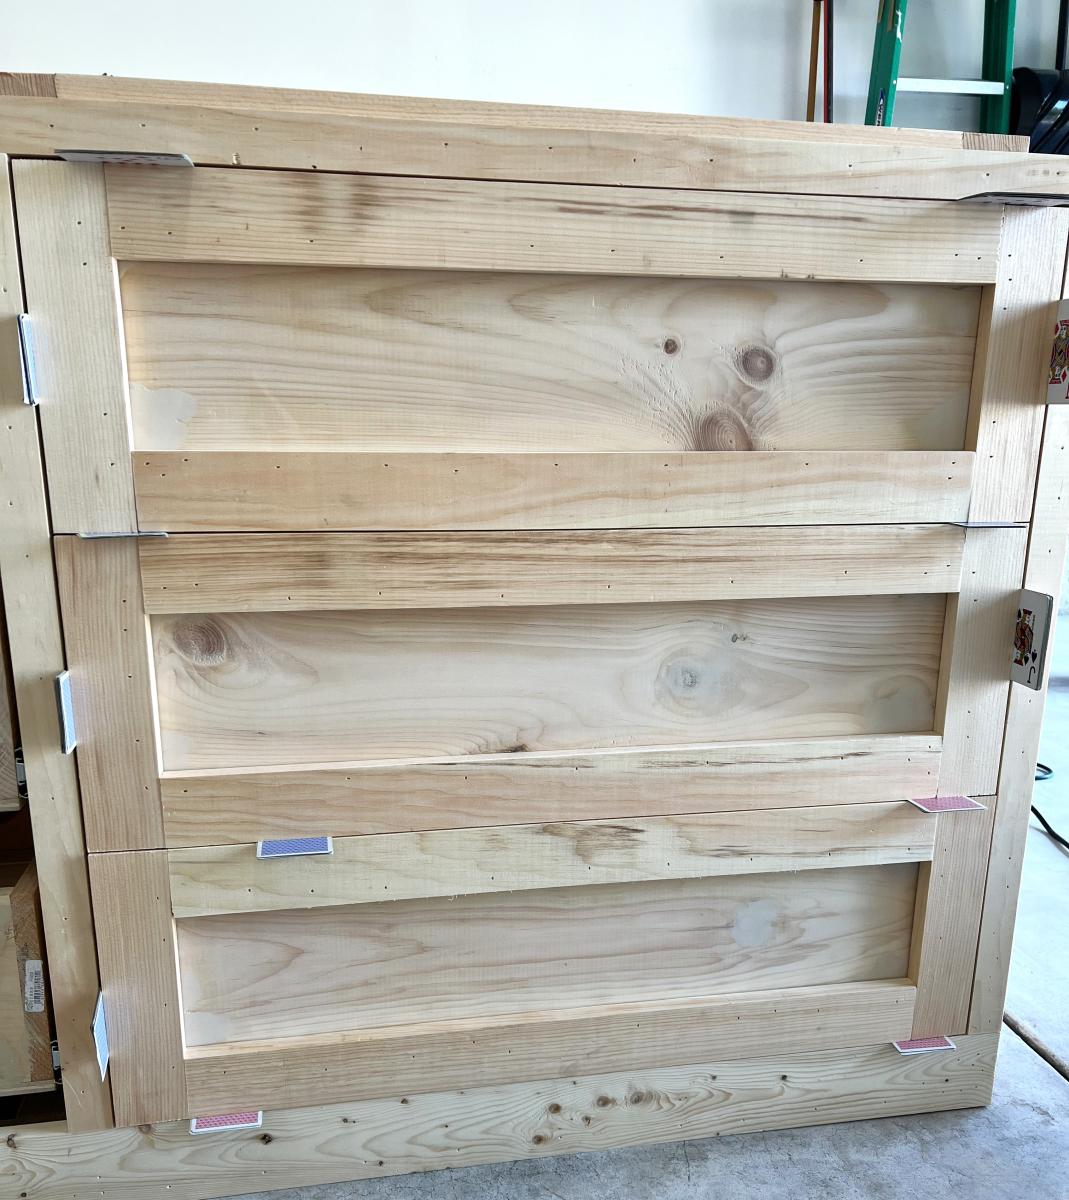
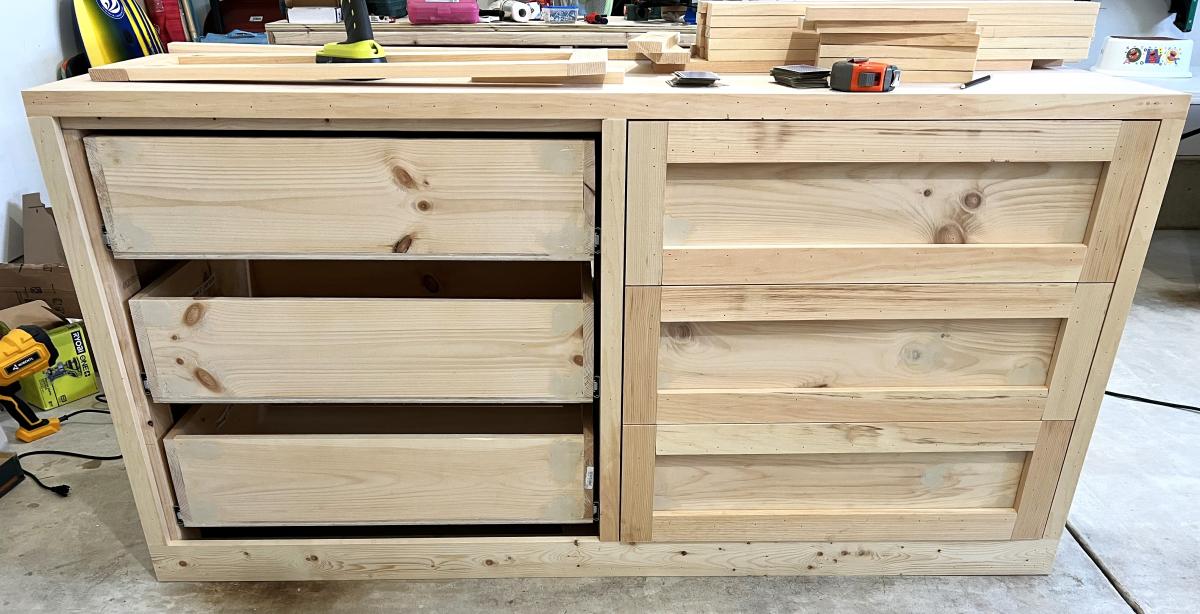
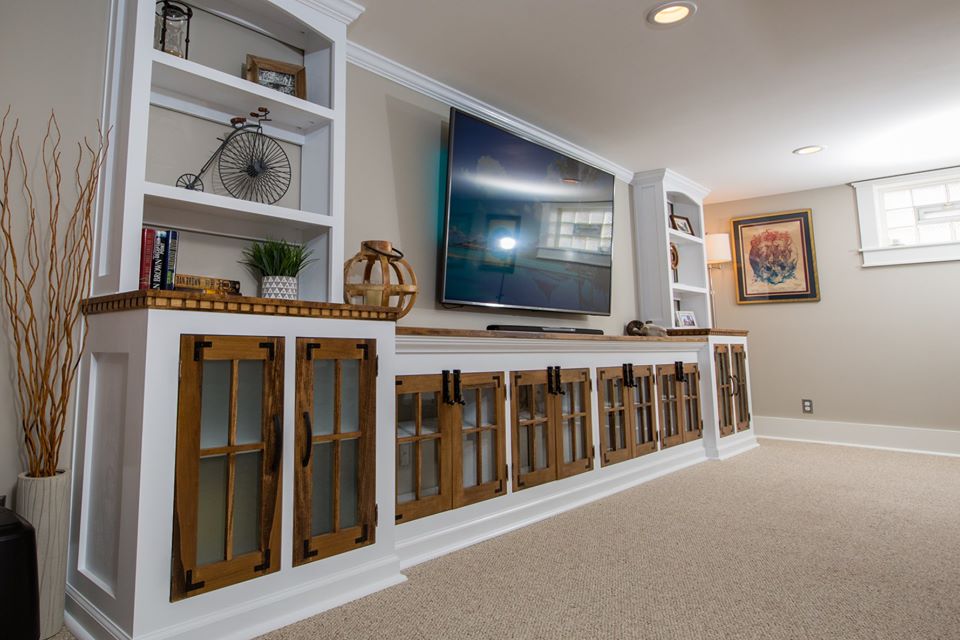
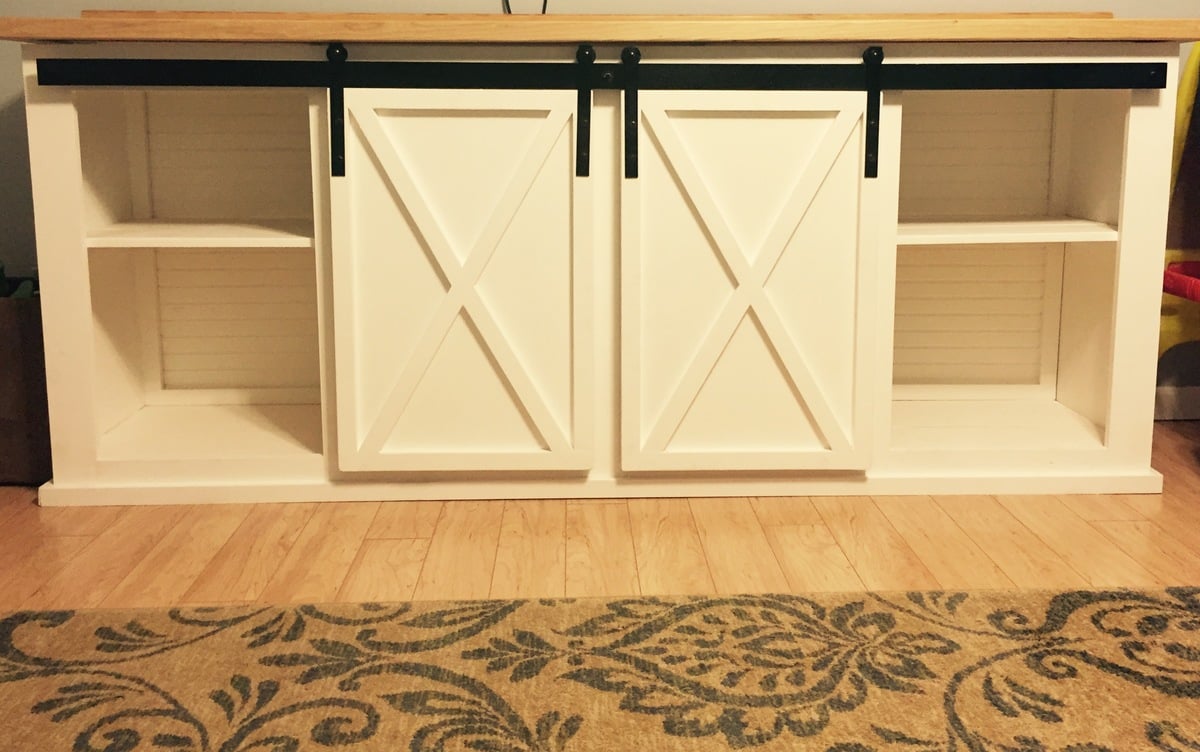
Farmhouse Media Cabinet (wall unit)
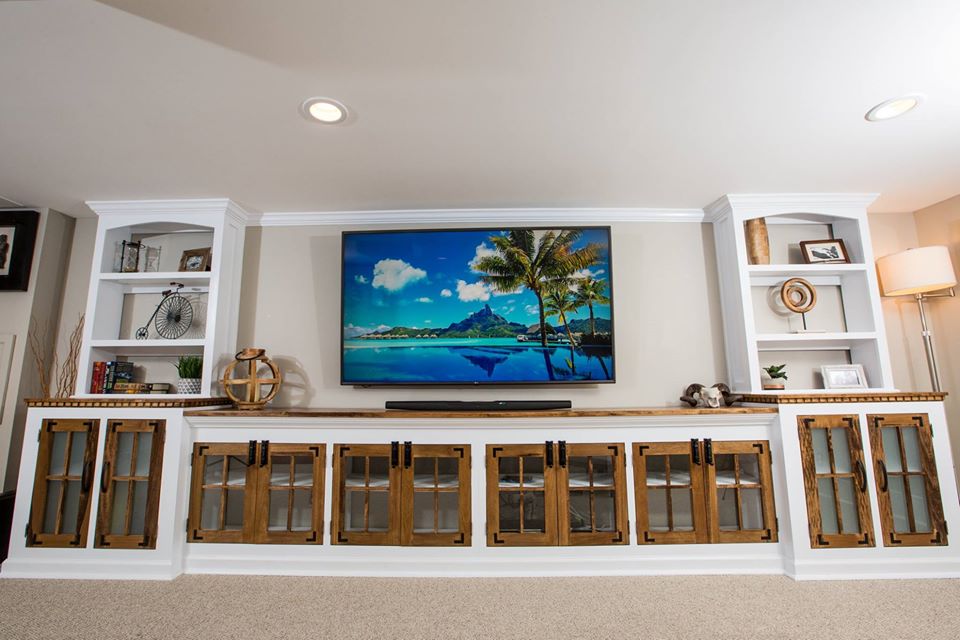
This project started as an idea to build a single Farmhouse Media Cabinet with a "42 tv mounted above it. I quickly realized that this space deserved so much more. Fast forward through weeks of debate and scouring the internet for inspiration, before finally settling on what you see pictured above. The first decision we made was to buy a monstrous 75", then everything else fell in to place from there. The tight stairwell leading to the basement forced me to build this unit in 6 sections (2 farmhouse media cabinets, 2 flanking cabinets, and 2 bookshelves.) It ended up sprawling 17' long when it was all said and done, but it fills the space so beautifully. It was by far the largest project I've ever tackled, but it was totally worth the hard work. Big shout out to Ana White for the inspiration!!
Built from Plan(s)
Estimated Cost
$1200-$1500
Estimated Time Investment
Week Long Project (20 Hours or More)
Finish Used
Minwax(Early American), and Behr Premium Plus Ultra (Maui Mist)
Recommended Skill Level
Intermediate
Comments
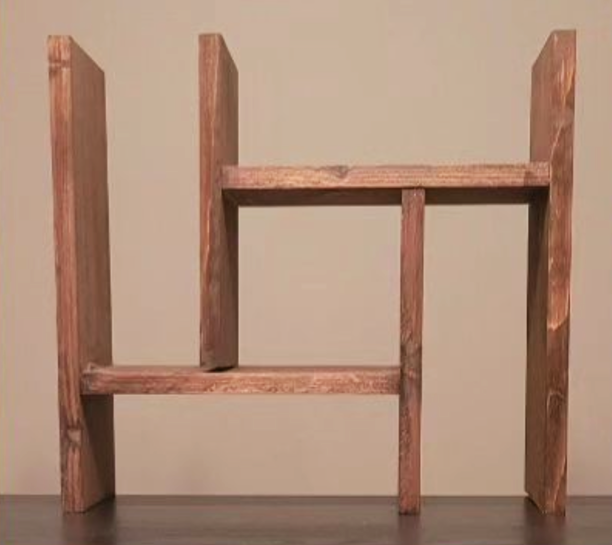
Rustic Countertop Organizer
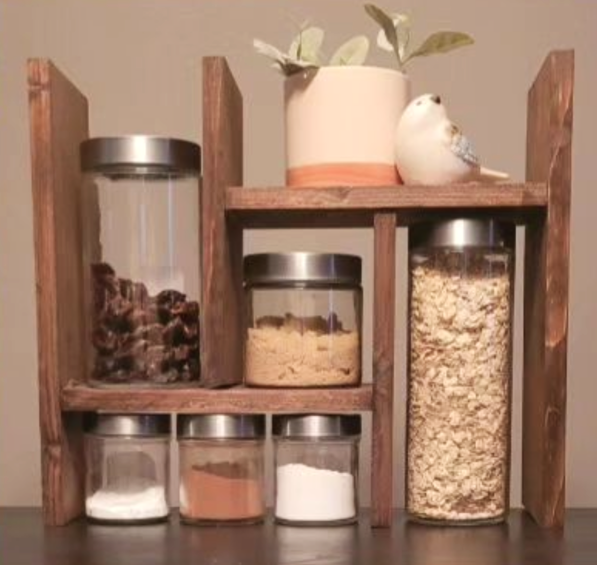
This is such a cute countertop organizer ! The possibilities for this are endless - maybe a tea / coffee bar or a hot chocolate bar - a breakfast bar or a snack bar ..... I may need to make another one...and definitely one for the bathroom !
.
The shelves slide to change the width or turn one and it becomes a corner piece!
Built from Plan(s)
Comments

Tue, 09/12/2023 - 12:30
So great to see you made…
So great to see you made this and it turned out awesome! Thank you so much for taking time to share photos.
Children's corner storage bed
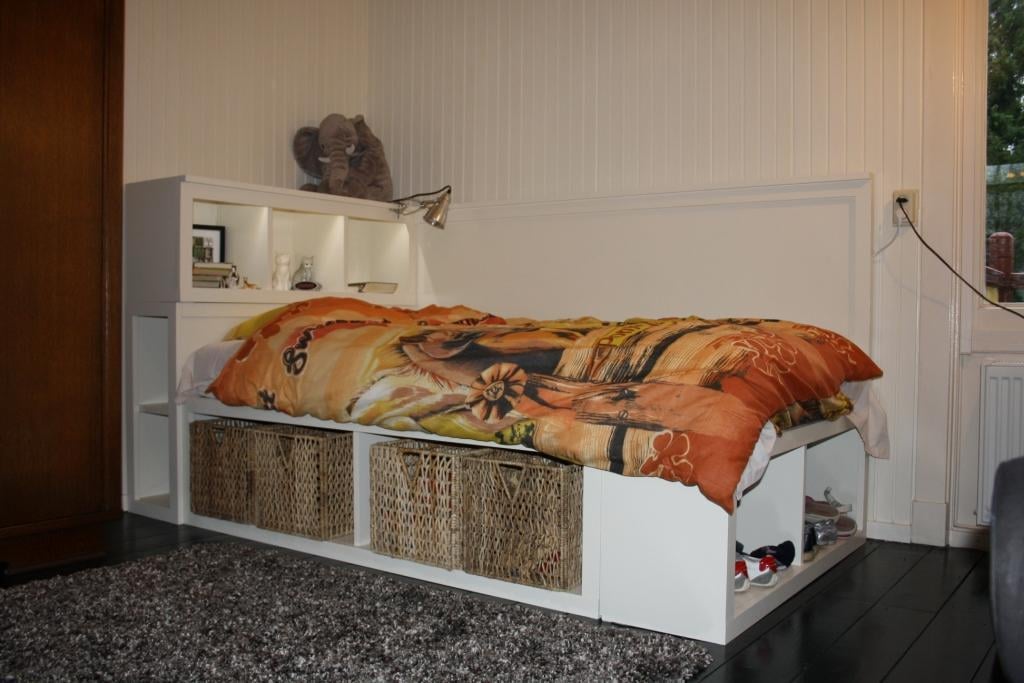
Based on a combination of storage bed plans on this site and bit of imagination, we built this wonderful corner bed for our daughter. It took some time to get the measurements right (we had to convert everything to the metric system since we live in Europe) but it turned out great.
Although the bed is in the corner right now, we made the cubby holes on the side facing the wall anyway, just in case we want to move it to the middle of the room at a later date. For now, we just placed the corner board in front of those.
Thanks everybody for the wonderful plans!
Built from Plan(s)
Estimated Cost
$ 450
Estimated Time Investment
Week Long Project (20 Hours or More)
Finish Used
Water based full gloss, colour 'White Tie' from Farrow & Ball
Recommended Skill Level
Intermediate
Comments
Wed, 03/20/2013 - 01:00
like the headboard shelves that go to floor
This is almost just what we're looking for. I love the use of space beneath the headboard shelves. I'm going to build my daughter's for a full size matress and make a twin trundle beneath it. Great job on this one.
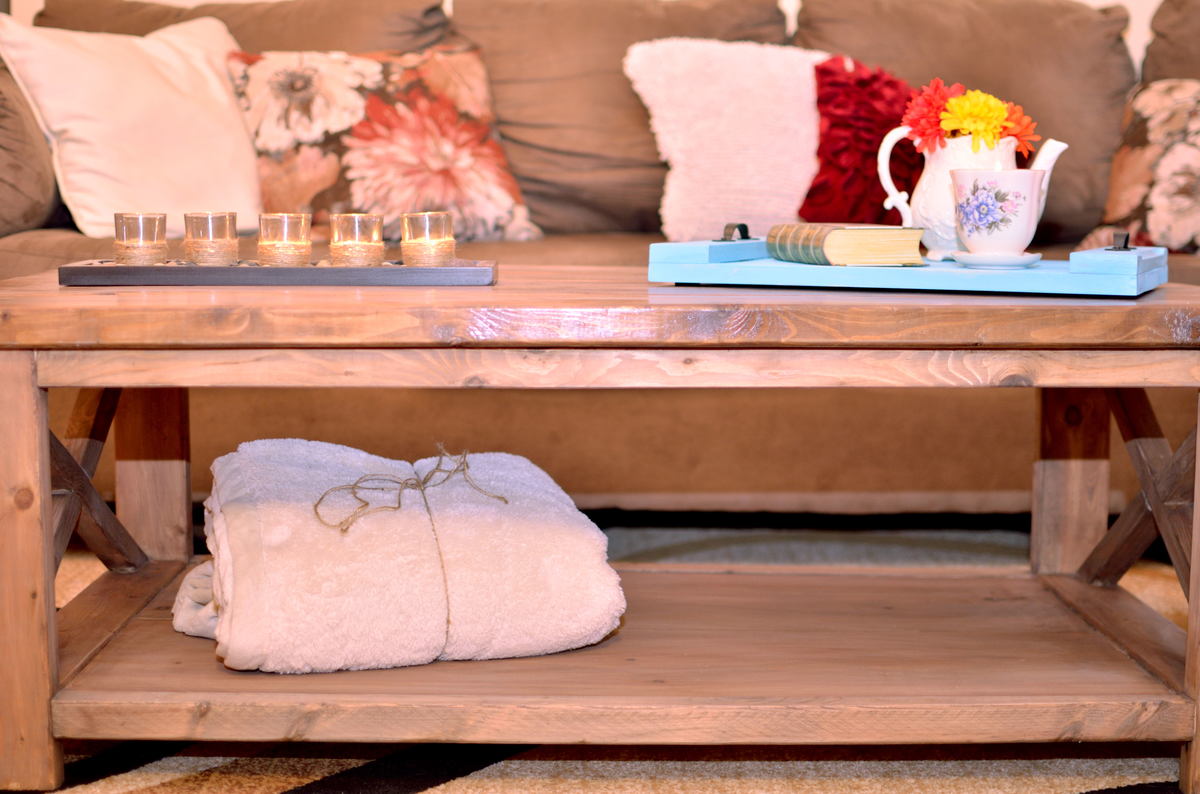
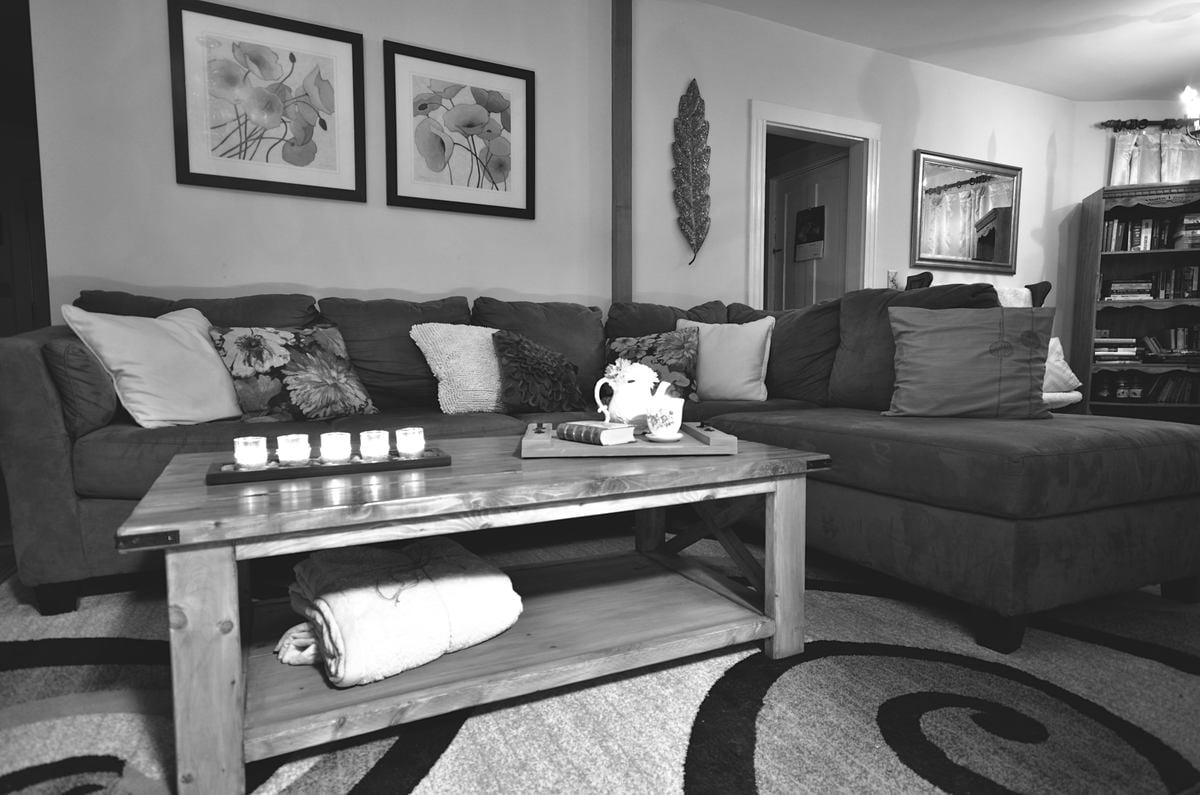
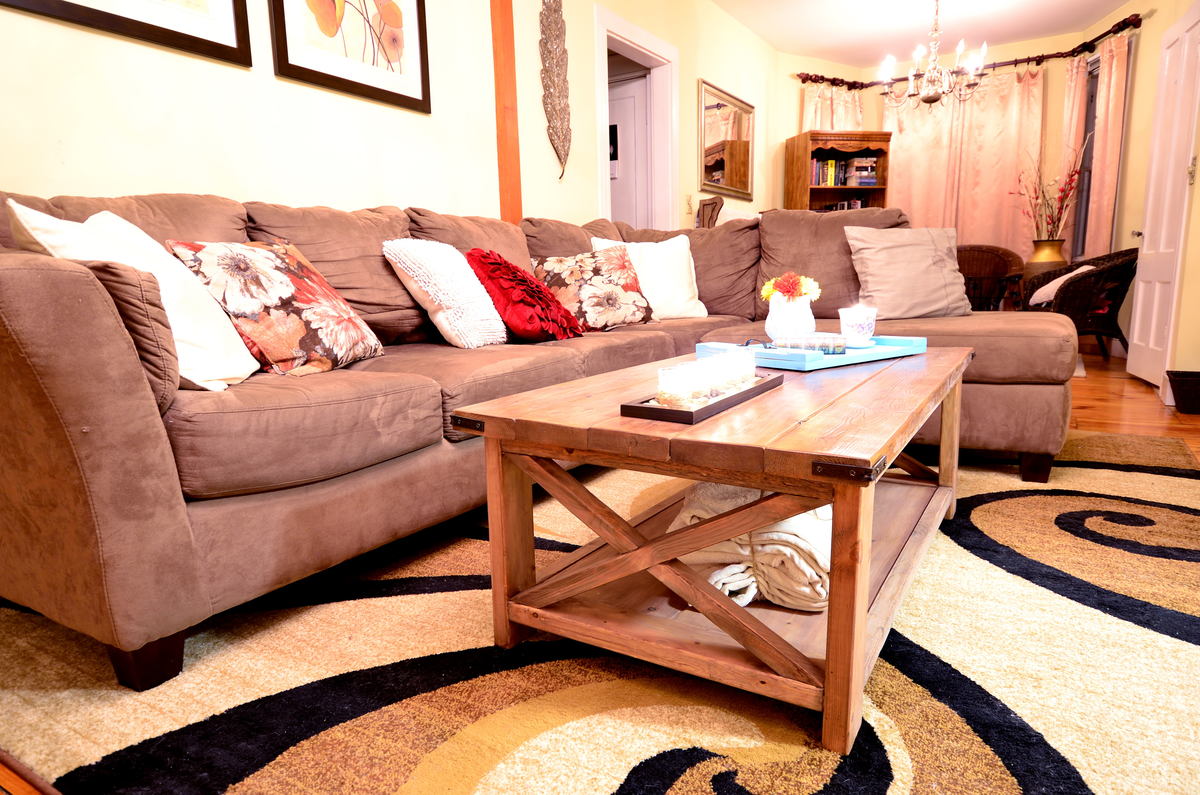
Rustic X Coffee Table
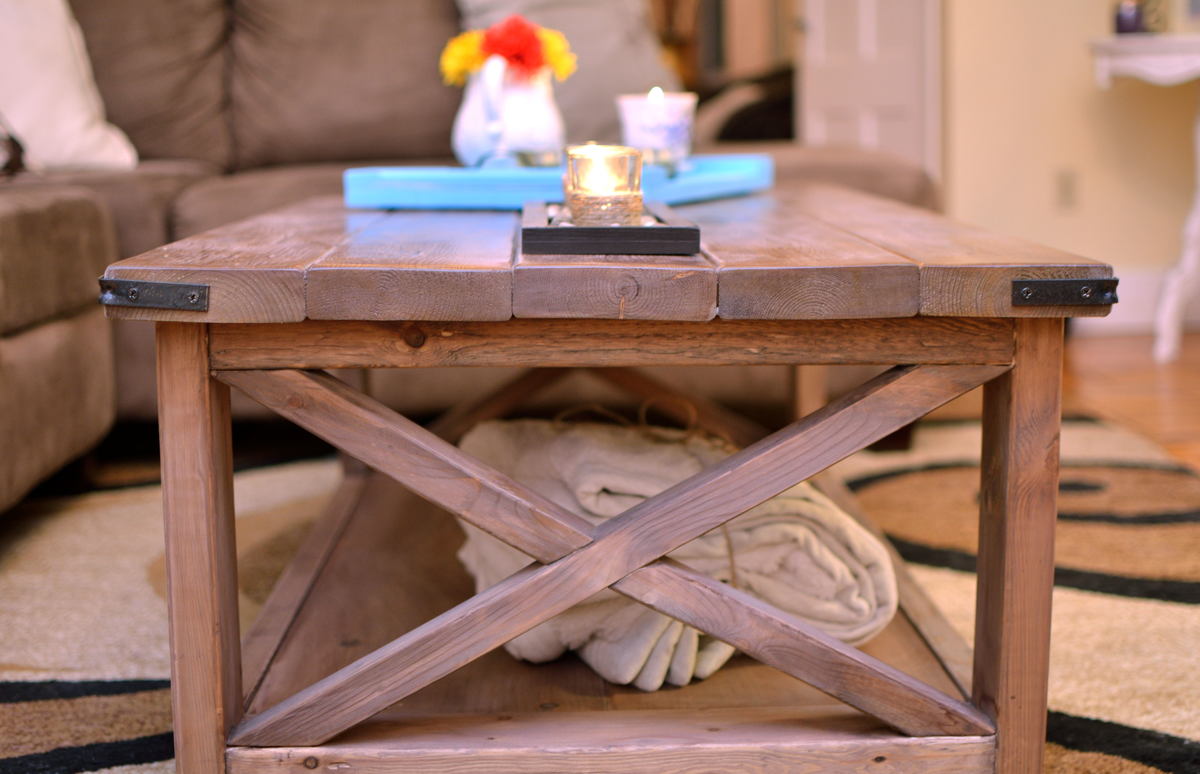
This was our first project from Ana-White. I had a coffee table which I loved, but I inherited it from a dumpster years ago (great find!) and time finally caught up to it. I decided this time around I didn't want to spend over $300 on a "rustic" coffee table that everyone has. So my boyfriend and I decided if we were going to have a table that others have, it might as well be unique in the sense that we made it!
We split the time in about a 3 week period (we both work full-time so time in our house is at a minimum). We bought the wood, cut it, and used a Kreg Jig to start putting it all together. We had some trouble with perfecting the X's (as you'll see) as our saw didn't quite hit the angle. But we managed to get it done.
The most time consuming part was sanding, sanding, and sanding some more. We went with the oxidization finish which was kind of a pain... we probably will never do that again. The outcome wasn't all that much better than regular stain. Then we used poly on the top instead of wax so it would be more durable.
Built from Plan(s)
Estimated Cost
$75
Estimated Time Investment
Weekend Project (10-20 Hours)
Finish Used
Oxidized the entire thing based on Hillary's instructions using a foam brush (black tea, steel wool-soaked vinegar) then added 3 coats of satin poly to the top for durability and lightly sanded afterwards to bring out the grey color of the oxidization.
Recommended Skill Level
Beginner
Comments
Sun, 03/08/2015 - 14:24
Metal Accent Pieces
Hi,
I was wondering what the metal accent pieces are and where I can purchase them.
Thanks!
Brooke
Queen Cassidy Shim
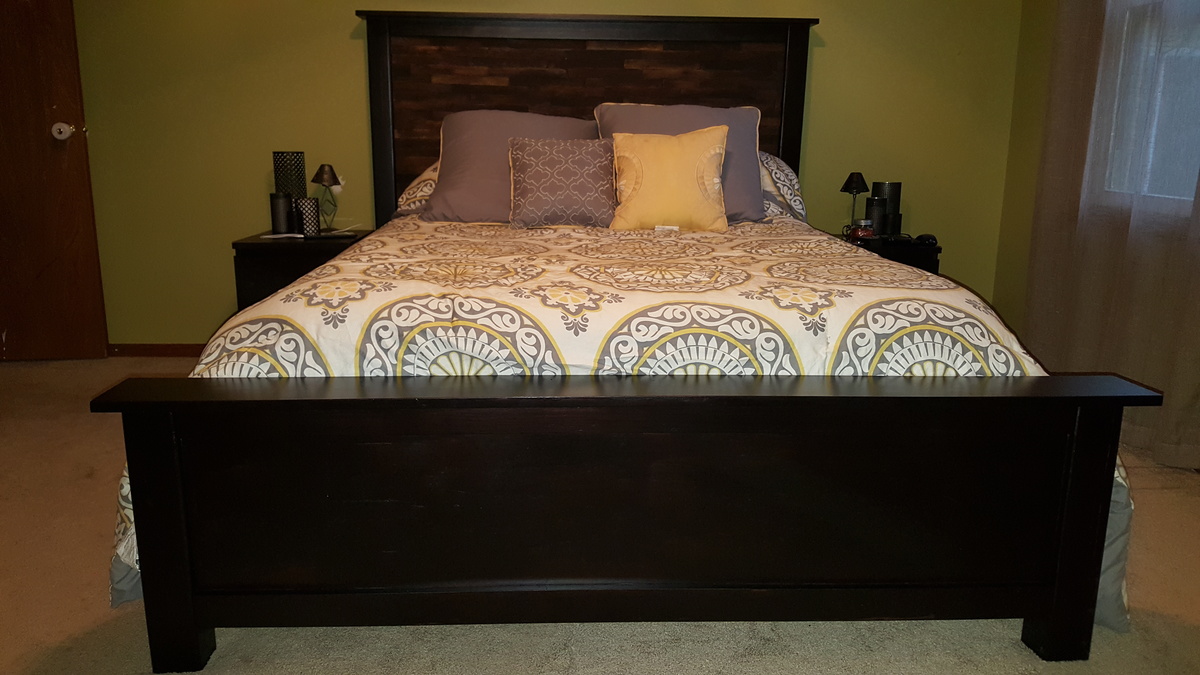
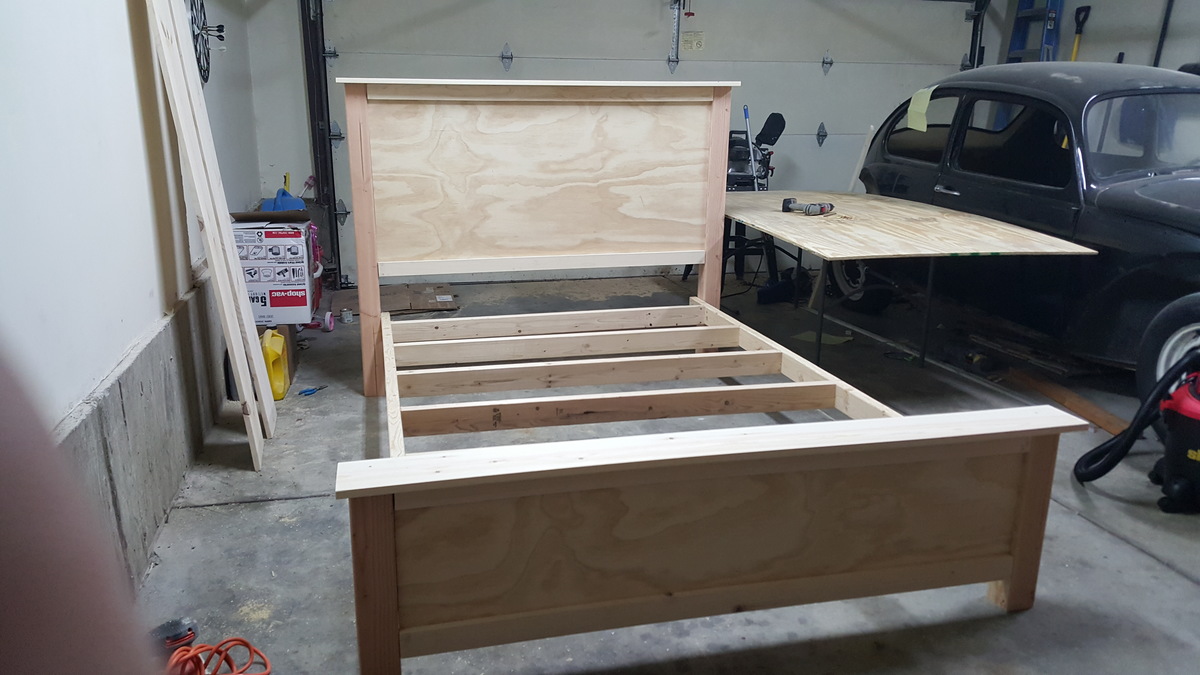
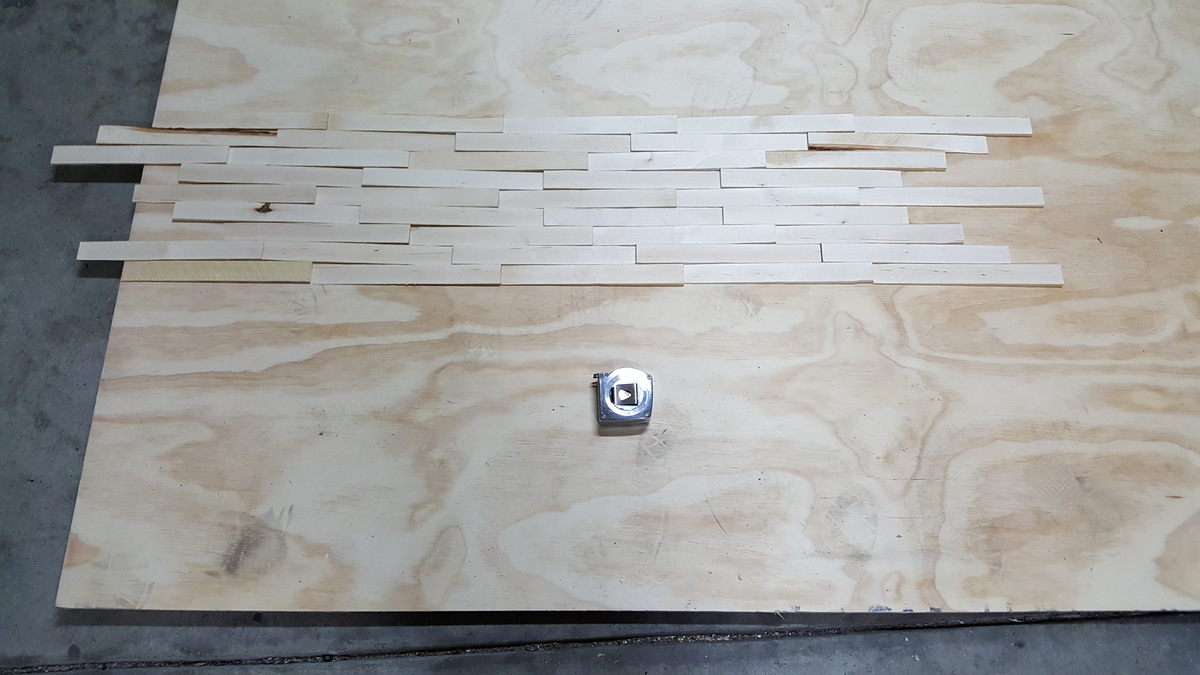
My take on this bed. My wife said she wanted me to build her a bed after I built the toddler helper tower for my daughter, also from this amazing site. And when your wife asks you to build her a bed, you build her a bed. It was a fun project aside from the shim work. It was very tedious but well worth it in the end. I made a few changes but not many and discovered a few tips along the way that might help someone else. In the pictures you can see a more detailed picture of how I layed the shims out. Staining before you attach the shims is a must. And I decided to stain the shims themselves before I attached them as well. I did that because I wanted a more "weathered" look to them and didn't want them all one uniform color. They each have one coat of stain. Just applied a little thicker to some.
As for the rest of the frame it has two coats of Minwax polyshades in Satin espresso. I'm curious to see how it holds up but so far I love the way it looks. So when I bought my 4x4's they had rounded corners. In retrospect I should have not made everything on the head and foot boards flush but instead pushed it back 1/4" or so that way theres not a gap where the rounded part meets the panel trim.
Back to the shims, after testing and debating with myself, I decided that attaching them with hot glue worked best for me. Wood glue curled the edges causing them not to sit flush. Nails would be too much of a pain as every hole would need to be filled. Hot glue seemed to do the trick and they feel solid. OK enough for me. Thanks Ana for the plans.
Built from Plan(s)
Estimated Cost
$200
Estimated Time Investment
Week Long Project (20 Hours or More)
Finish Used
Minwax polyshades satin espresso. 2 coats on the frame. One for the shims.
Recommended Skill Level
Intermediate
Modified camp loft bed

Camp loft bed plan with added headboard/bookcase with built in desk.
Built from Plan(s)
Estimated Cost
$400
Estimated Time Investment
Week Long Project (20 Hours or More)
Finish Used
Latex paint with polyurethane top coat
Recommended Skill Level
Intermediate
Comments
Sat, 01/23/2021 - 11:47
ANY SPECIFICS ON THE PLAN…
ANY SPECIFICS ON THE PLAN MODIFICATIONS?
THIS IS EXACTLY WHAT MY DAUGHTER WANTS!
THANKS,
DAN
Storage Cow Design Twin Bed

Each grandchild gets a bed made by Grandpa. Our granddaughter wanted a "cow bed." It has a fence to keep her tucked in, a happy cow staring at her, a cow jumping over the moon, drawers that are three feet deep, and more black spots than I could have imagined when I started painting. By the end I was so delirious that one of the spots on the back side is the USS Enterprise!
Dave Lund, @r10geico


Storage Sofa
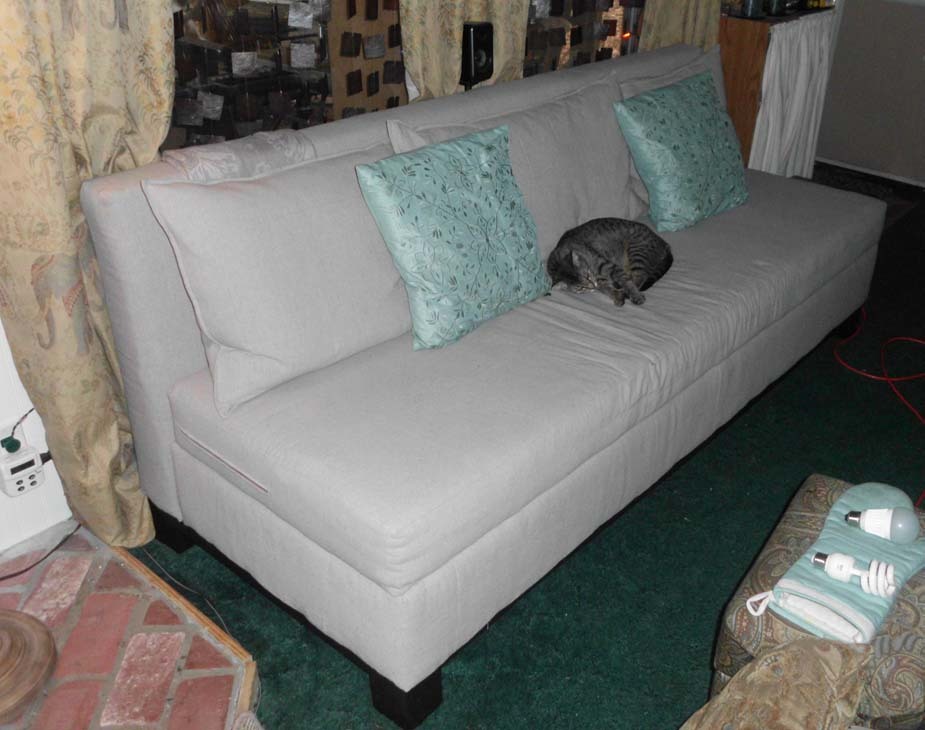
I loved the idea of the storage sofa! Such an easy build and I tweaked the plans to fit my needs... I used 5" high density foam, I lengthened the sofa to 84" (so I wouldn't have any wasted foam and also so my extremely tall son could stretch out on it without his feet hanging off the edge), I used a 2x8 for the box, and used 1/2" plywood for the seat because 1/4" ply was too flexible. I also made the seat with a zippered cover to encase the foam, batting, and plywood. This way, I can easily remove it to wash it. It's my favorite place to sit while I'm working!
Built from Plan(s)
Estimated Cost
Less than $100
Estimated Time Investment
Weekend Project (10-20 Hours)
Finish Used
I used General Finishes Stain in Espresso for the base and legs.
Recommended Skill Level
Beginner
Comments

Sun, 04/22/2012 - 03:41
OH MY GOSH!!! beautiful!!!
OH MY GOSH!!!
beautiful!!! looks storebought, great job!!
Mon, 05/21/2012 - 14:44
wonderful idea
very nicely done and im going to have to do this as well thanks again.
Thu, 08/15/2013 - 13:01
Significance of storage sofa
It cannot be denied that storage sofa provide sufficient space to keep your various household articles and clothes. They can be perfectly used for adding storage space in small houses.
Regards
Thu, 08/15/2013 - 13:02
Significance of storage sofa
It cannot be denied that storage sofa provide sufficient space to keep your various household articles and clothes. They can be perfectly used for adding storage space in small houses.
Regards
Fri, 09/06/2013 - 13:21
Storage sofa saves lots of space
It is really a fantastic idea to use storage sofa, as it can be used for dual purposes of storage plus sofa. Moreover, it will not occupy much space in the room. Anyway, please click here to see my site.
Tall corner cabinet with additions

I loved the tall corner cabinet but hate to have my television out in view all of the time so I used the plans and made an additional door opening for the tv. I adore it and now have so much space I chat wait to tackle many more projects!


Estimated Cost
200
Estimated Time Investment
Weekend Project (10-20 Hours)
Recommended Skill Level
Starter Project
Outdoor Sectional
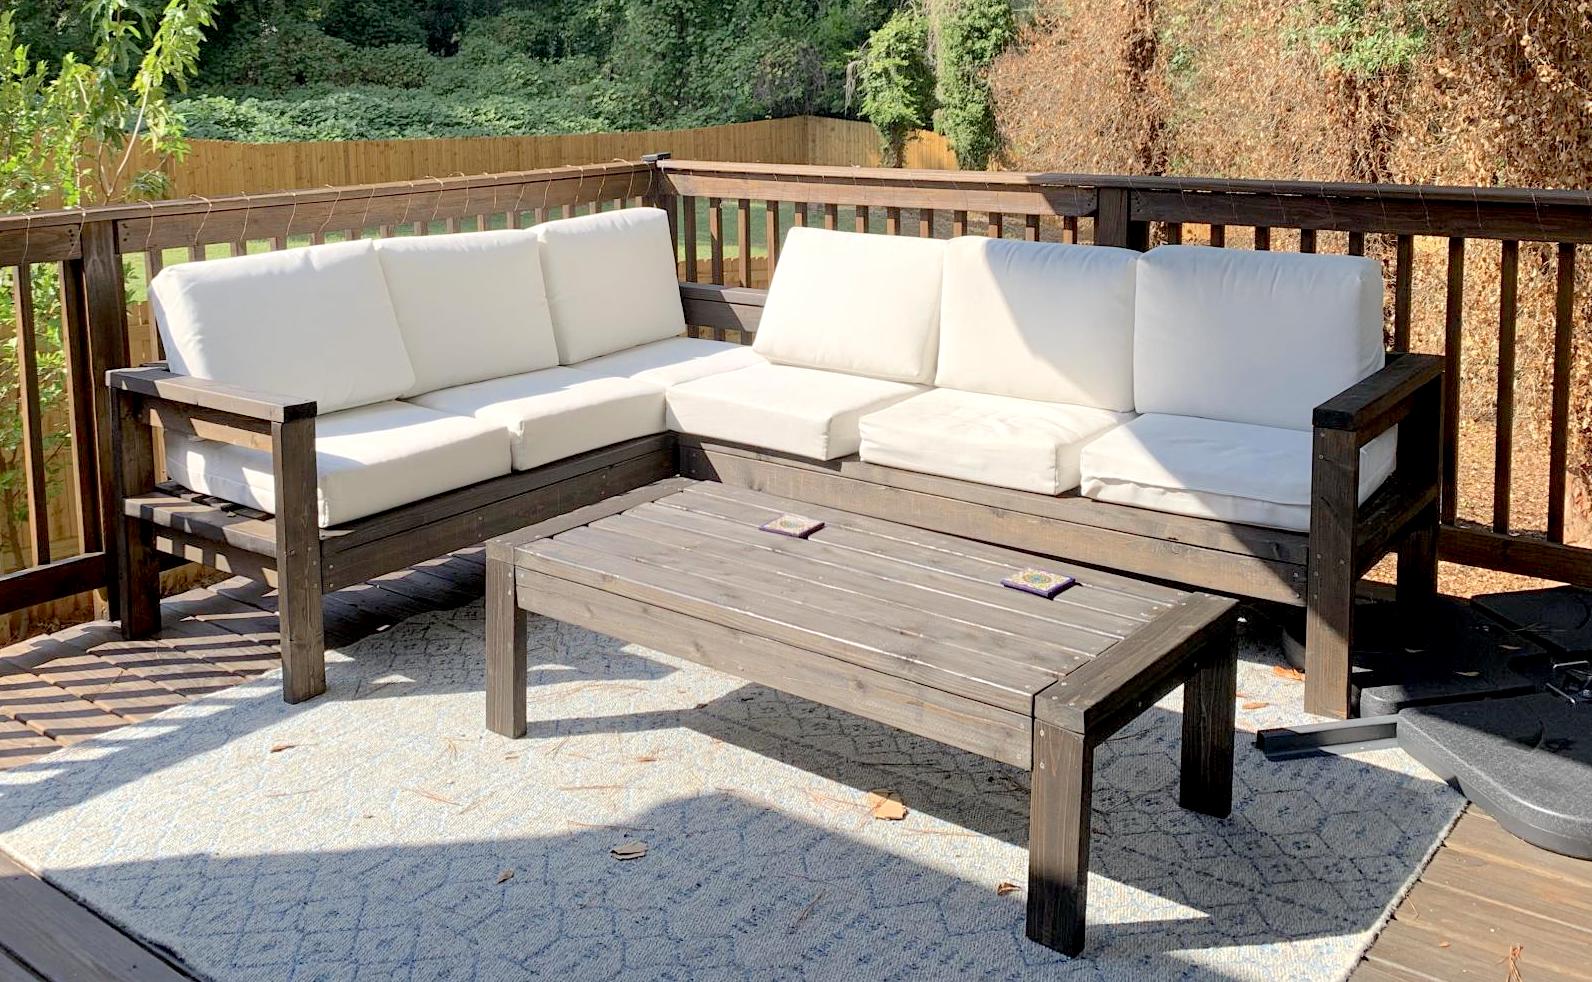
This was my first real woodworking project and was so much fun! I use my deck much more now and am excited to build more!
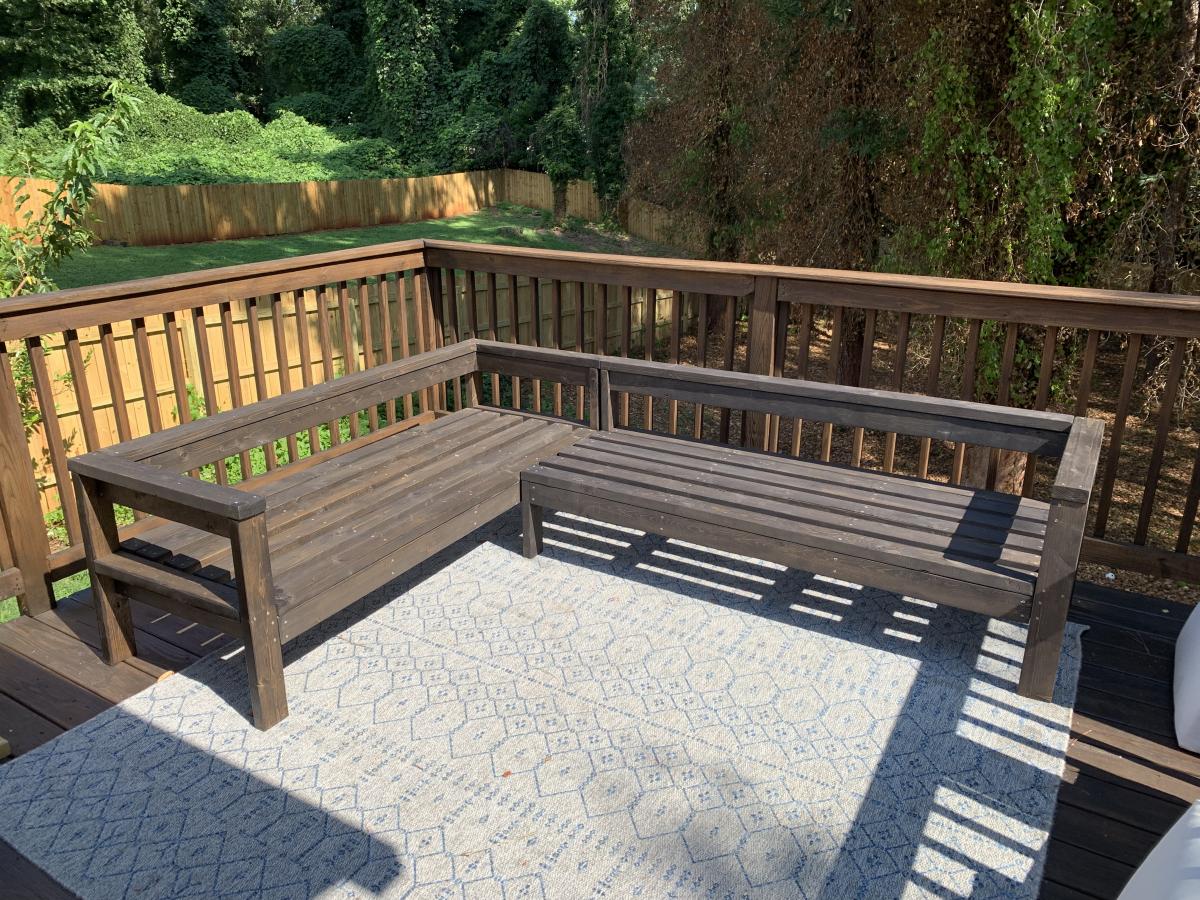
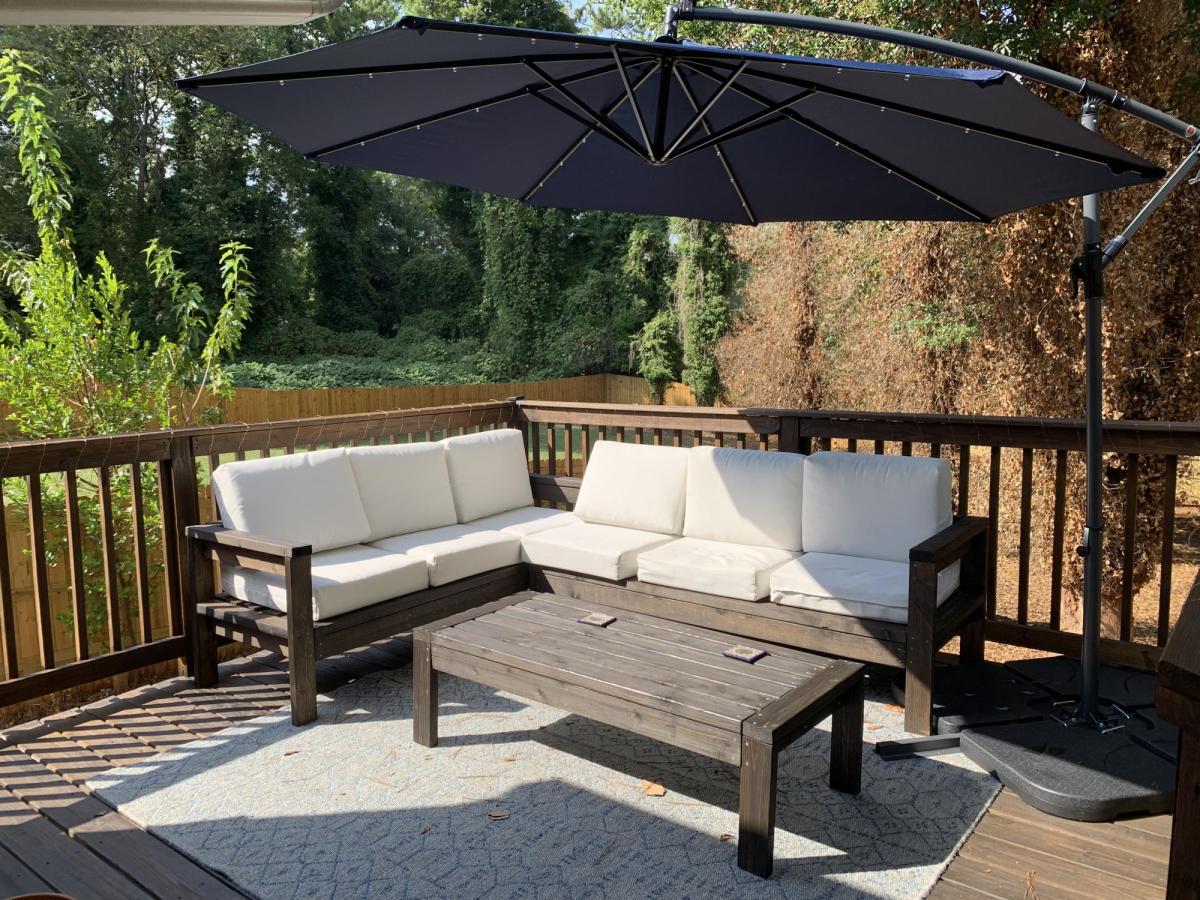
Built from Plan(s)
Estimated Cost
$500 (with cushions)
Estimated Time Investment
Week Long Project (20 Hours or More)
Finish Used
Varathane Jacobean stain
Recommended Skill Level
Beginner
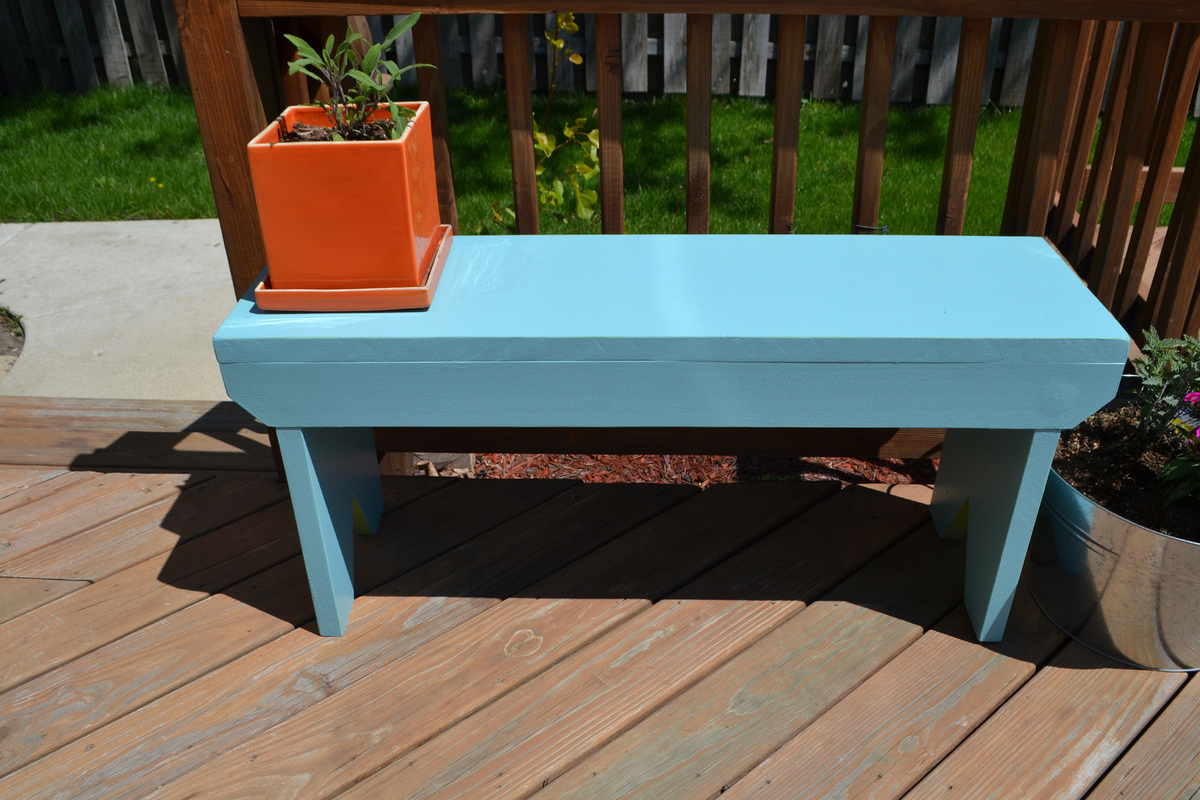
Modified 5-Board Bench
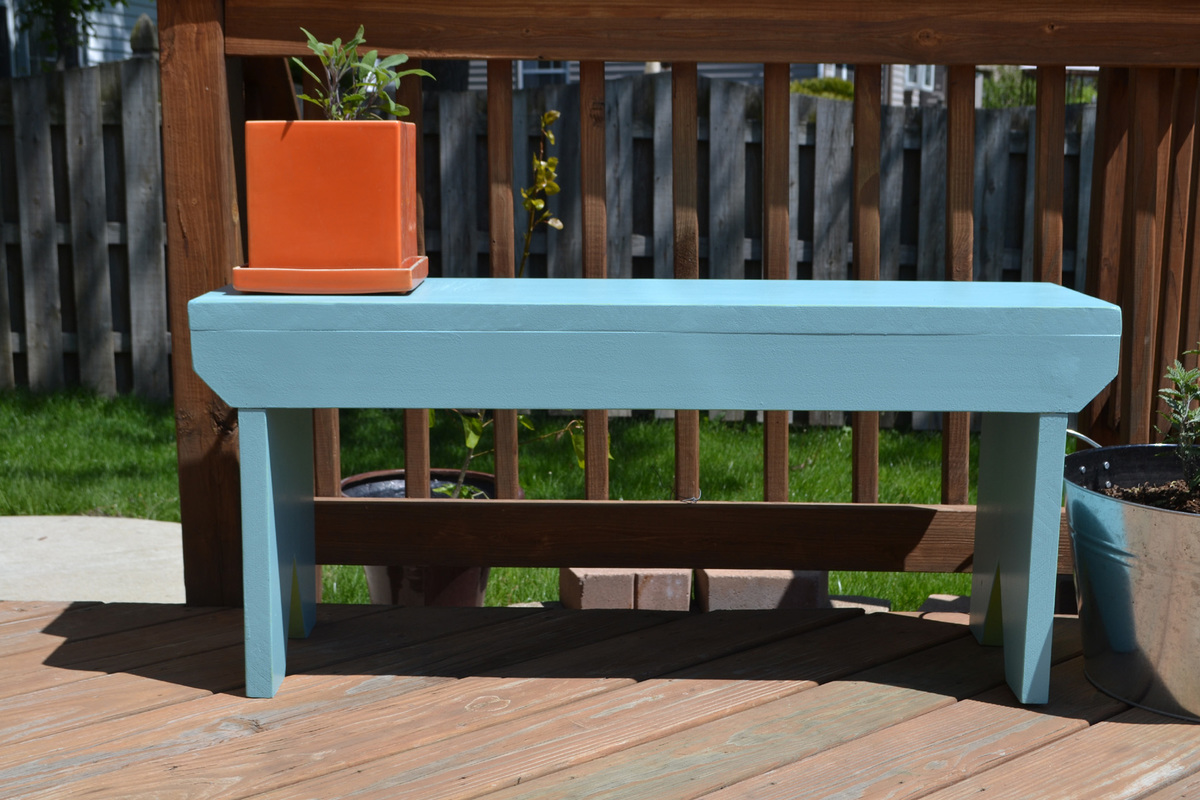
My partner purchased one of these benches for $100 at a shop in Michigan, but we gave up it over a year ago, and have missed it ever since. I decided to make one myself, using project board for the top and legs instead of 1x12s to make it sturdier. The bench will actually be used both indoors and out, but I applied Behr exterior paint to help it weather to elements.
Though it is tough to see in these pictures, the under layer of paint is actually a spring green, while the top coat is bright blue (both custom mixes), and the edges have been sanded. My partner wanted the V in the legs to remain green, and so they are. We're both very happy with the bench, and so glad we found the plans on this site. What a savings!
Estimated Cost
$30
Estimated Time Investment
Afternoon Project (3-6 Hours)
Finish Used
Behr Premium Plus Ultra Exterior Paint (includes primer)
Recommended Skill Level
Intermediate
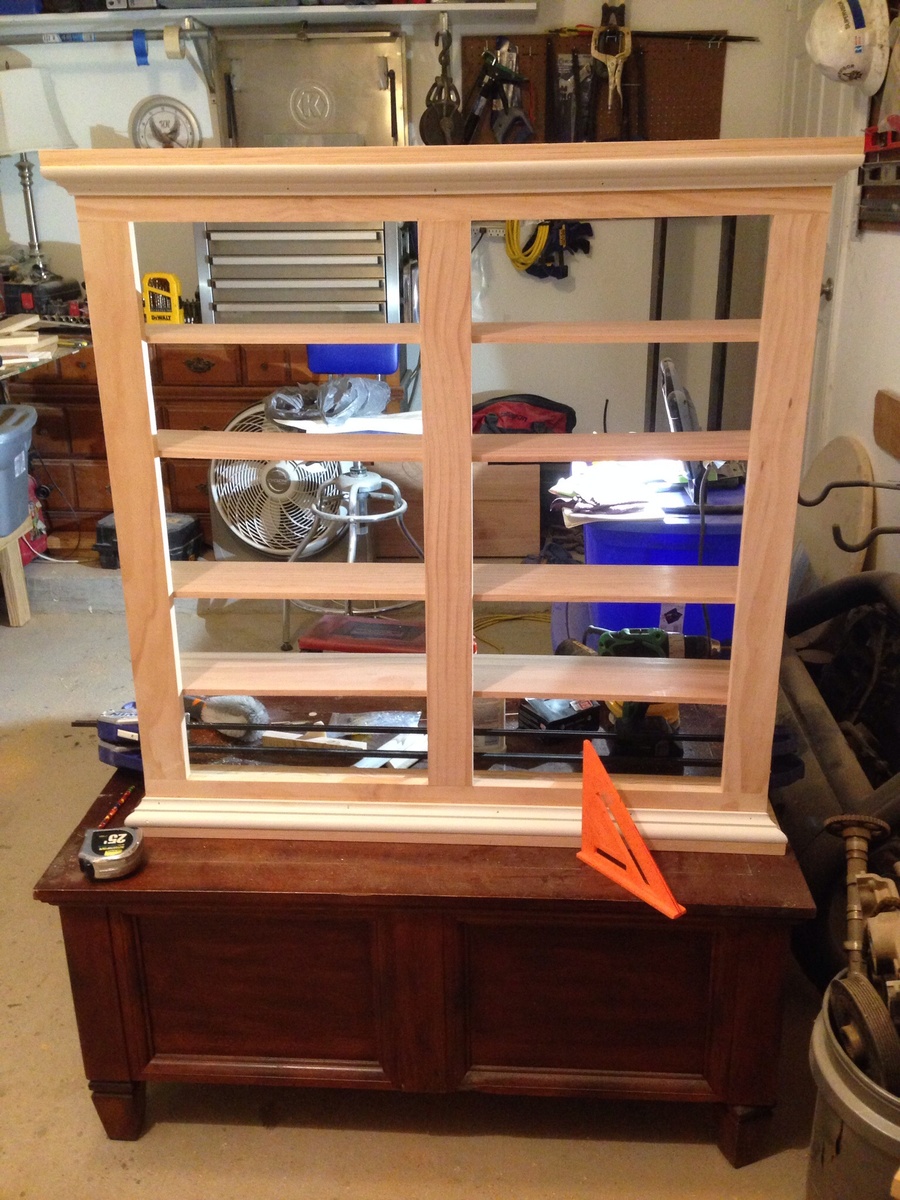
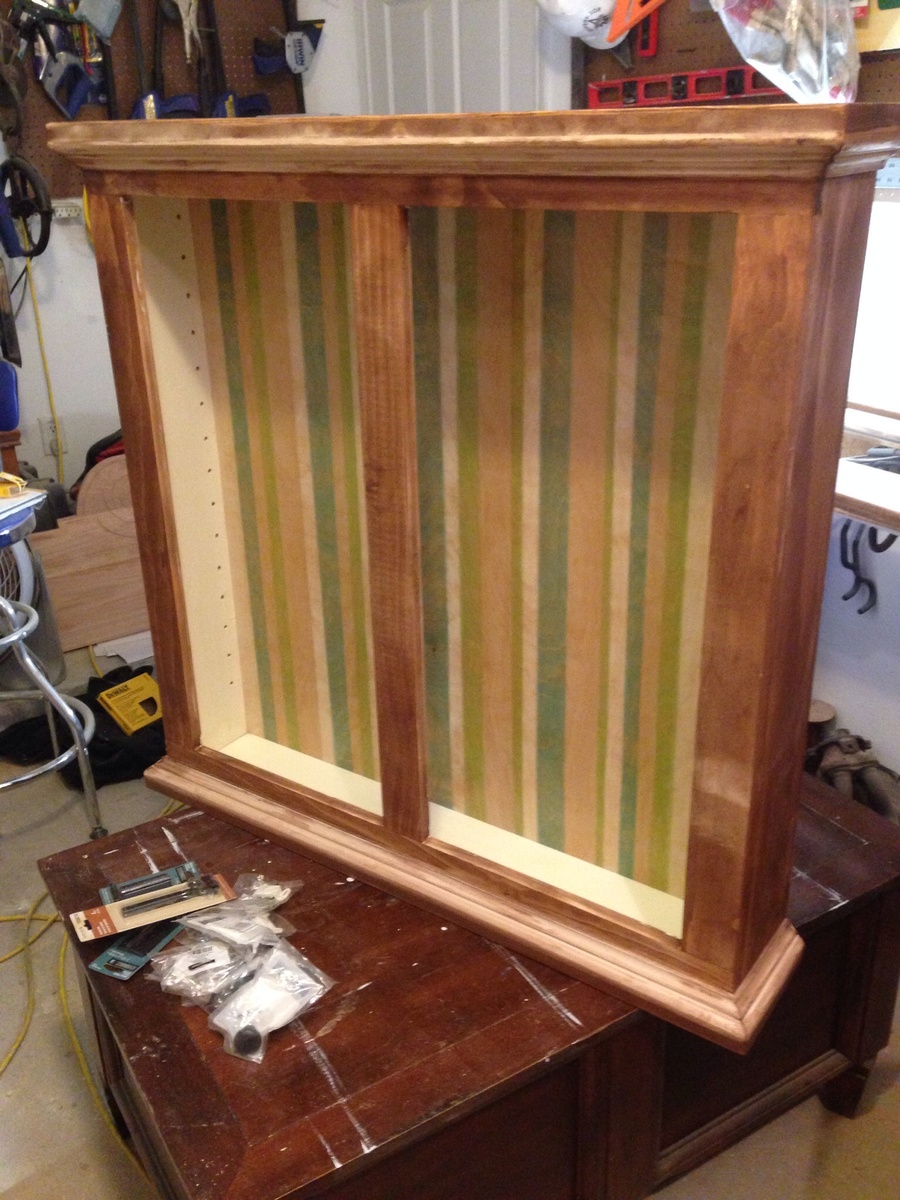
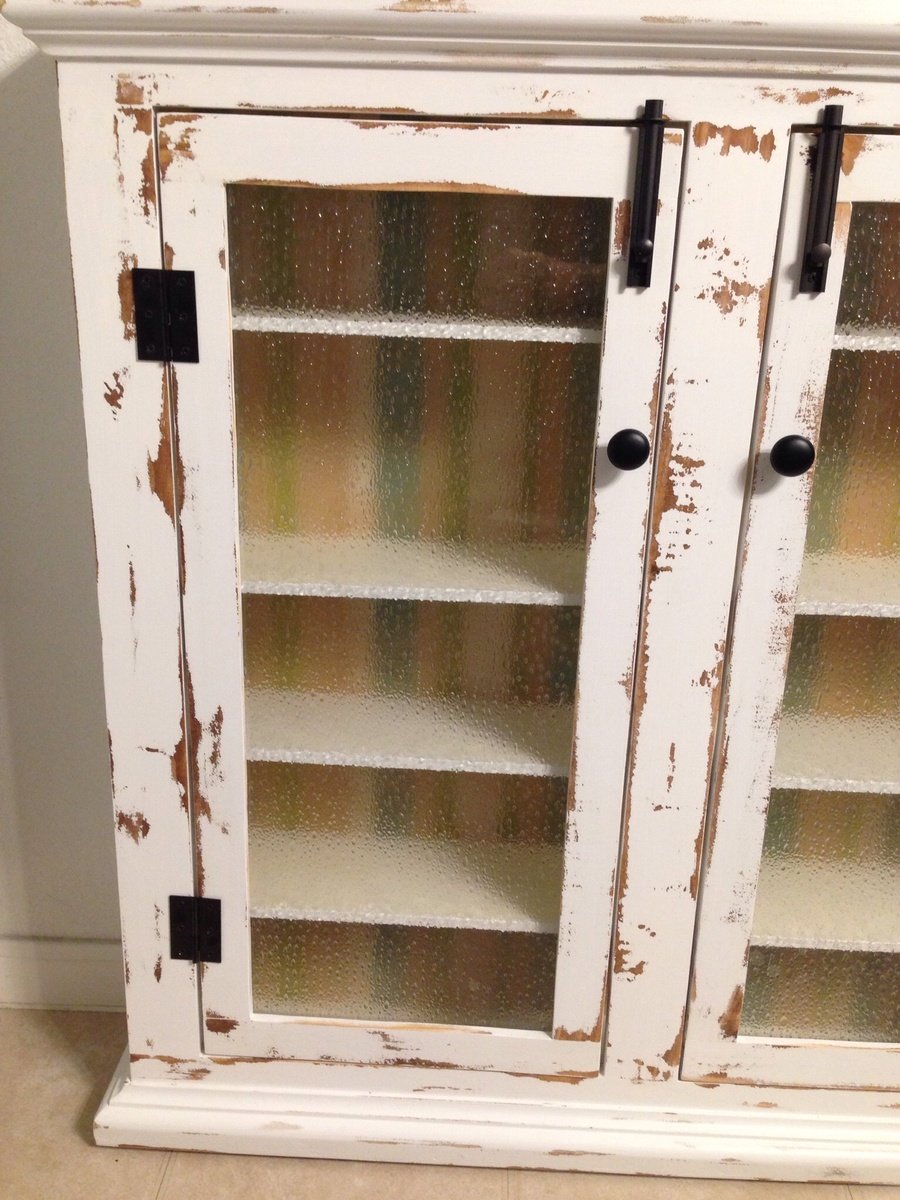
Medicine cabinet
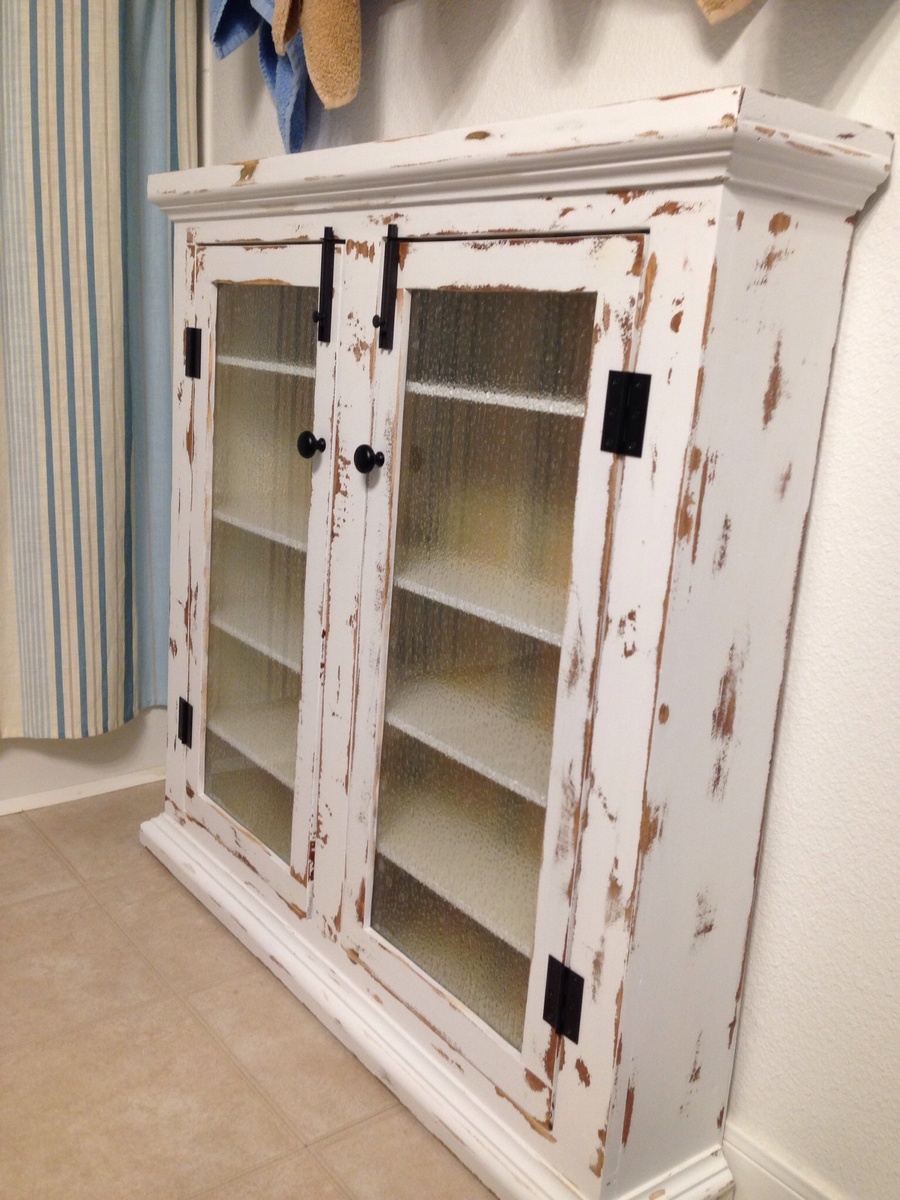
3'x3'x6".
Used to store all of those meds and vitamins and bandages for kids, adults, pets, etc.
Pine wood, painted stripe backer board, rubbed bronze hardware, dark stain and distressed white finish, seeded glass, adjustable shelves.

Built from Plan(s)
Estimated Cost
$40
Estimated Time Investment
Weekend Project (10-20 Hours)
Finish Used
Outside:
Minwax English chestnut: one coat.
White porch and trim paint: four coats.
Sand to distress.
Polycrylic spray: two coats.
Inside:
White porch and trim paint: two coats.
Minwax Helmsman urethane (yellowed slightly): one coat.
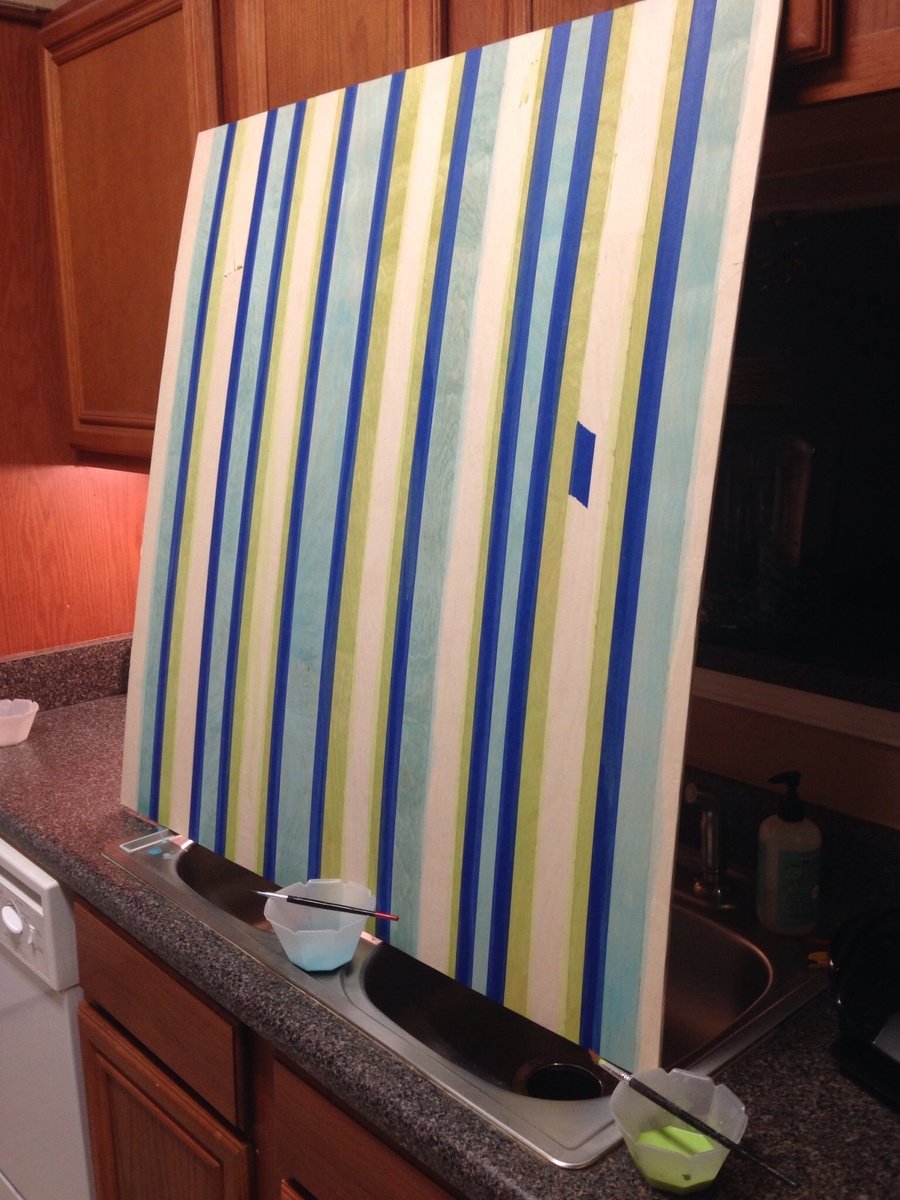
Backer board:
Taped off lines with painters tape.
Turquoise, white, tan, green acrylic craft paint watered down: two coats each stripe.
Remove tape and sand to distress as desired.
Minwax helmsman urethane: two coats.
Minwax English chestnut: one coat.
White porch and trim paint: four coats.
Sand to distress.
Polycrylic spray: two coats.
Inside:
White porch and trim paint: two coats.
Minwax Helmsman urethane (yellowed slightly): one coat.
Backer board:
Taped off lines with painters tape.
Turquoise, white, tan, green acrylic craft paint watered down: two coats each stripe.
Remove tape and sand to distress as desired.
Minwax helmsman urethane: two coats.
Recommended Skill Level
Intermediate
My Brother-in-Law killed it, 1st Build!
This was my brother-in-law's first build and he killed it. I love this sturdy piece. Best thing in my house right now.
Built from Plan(s)
Estimated Time Investment
Week Long Project (20 Hours or More)
Recommended Skill Level
Beginner
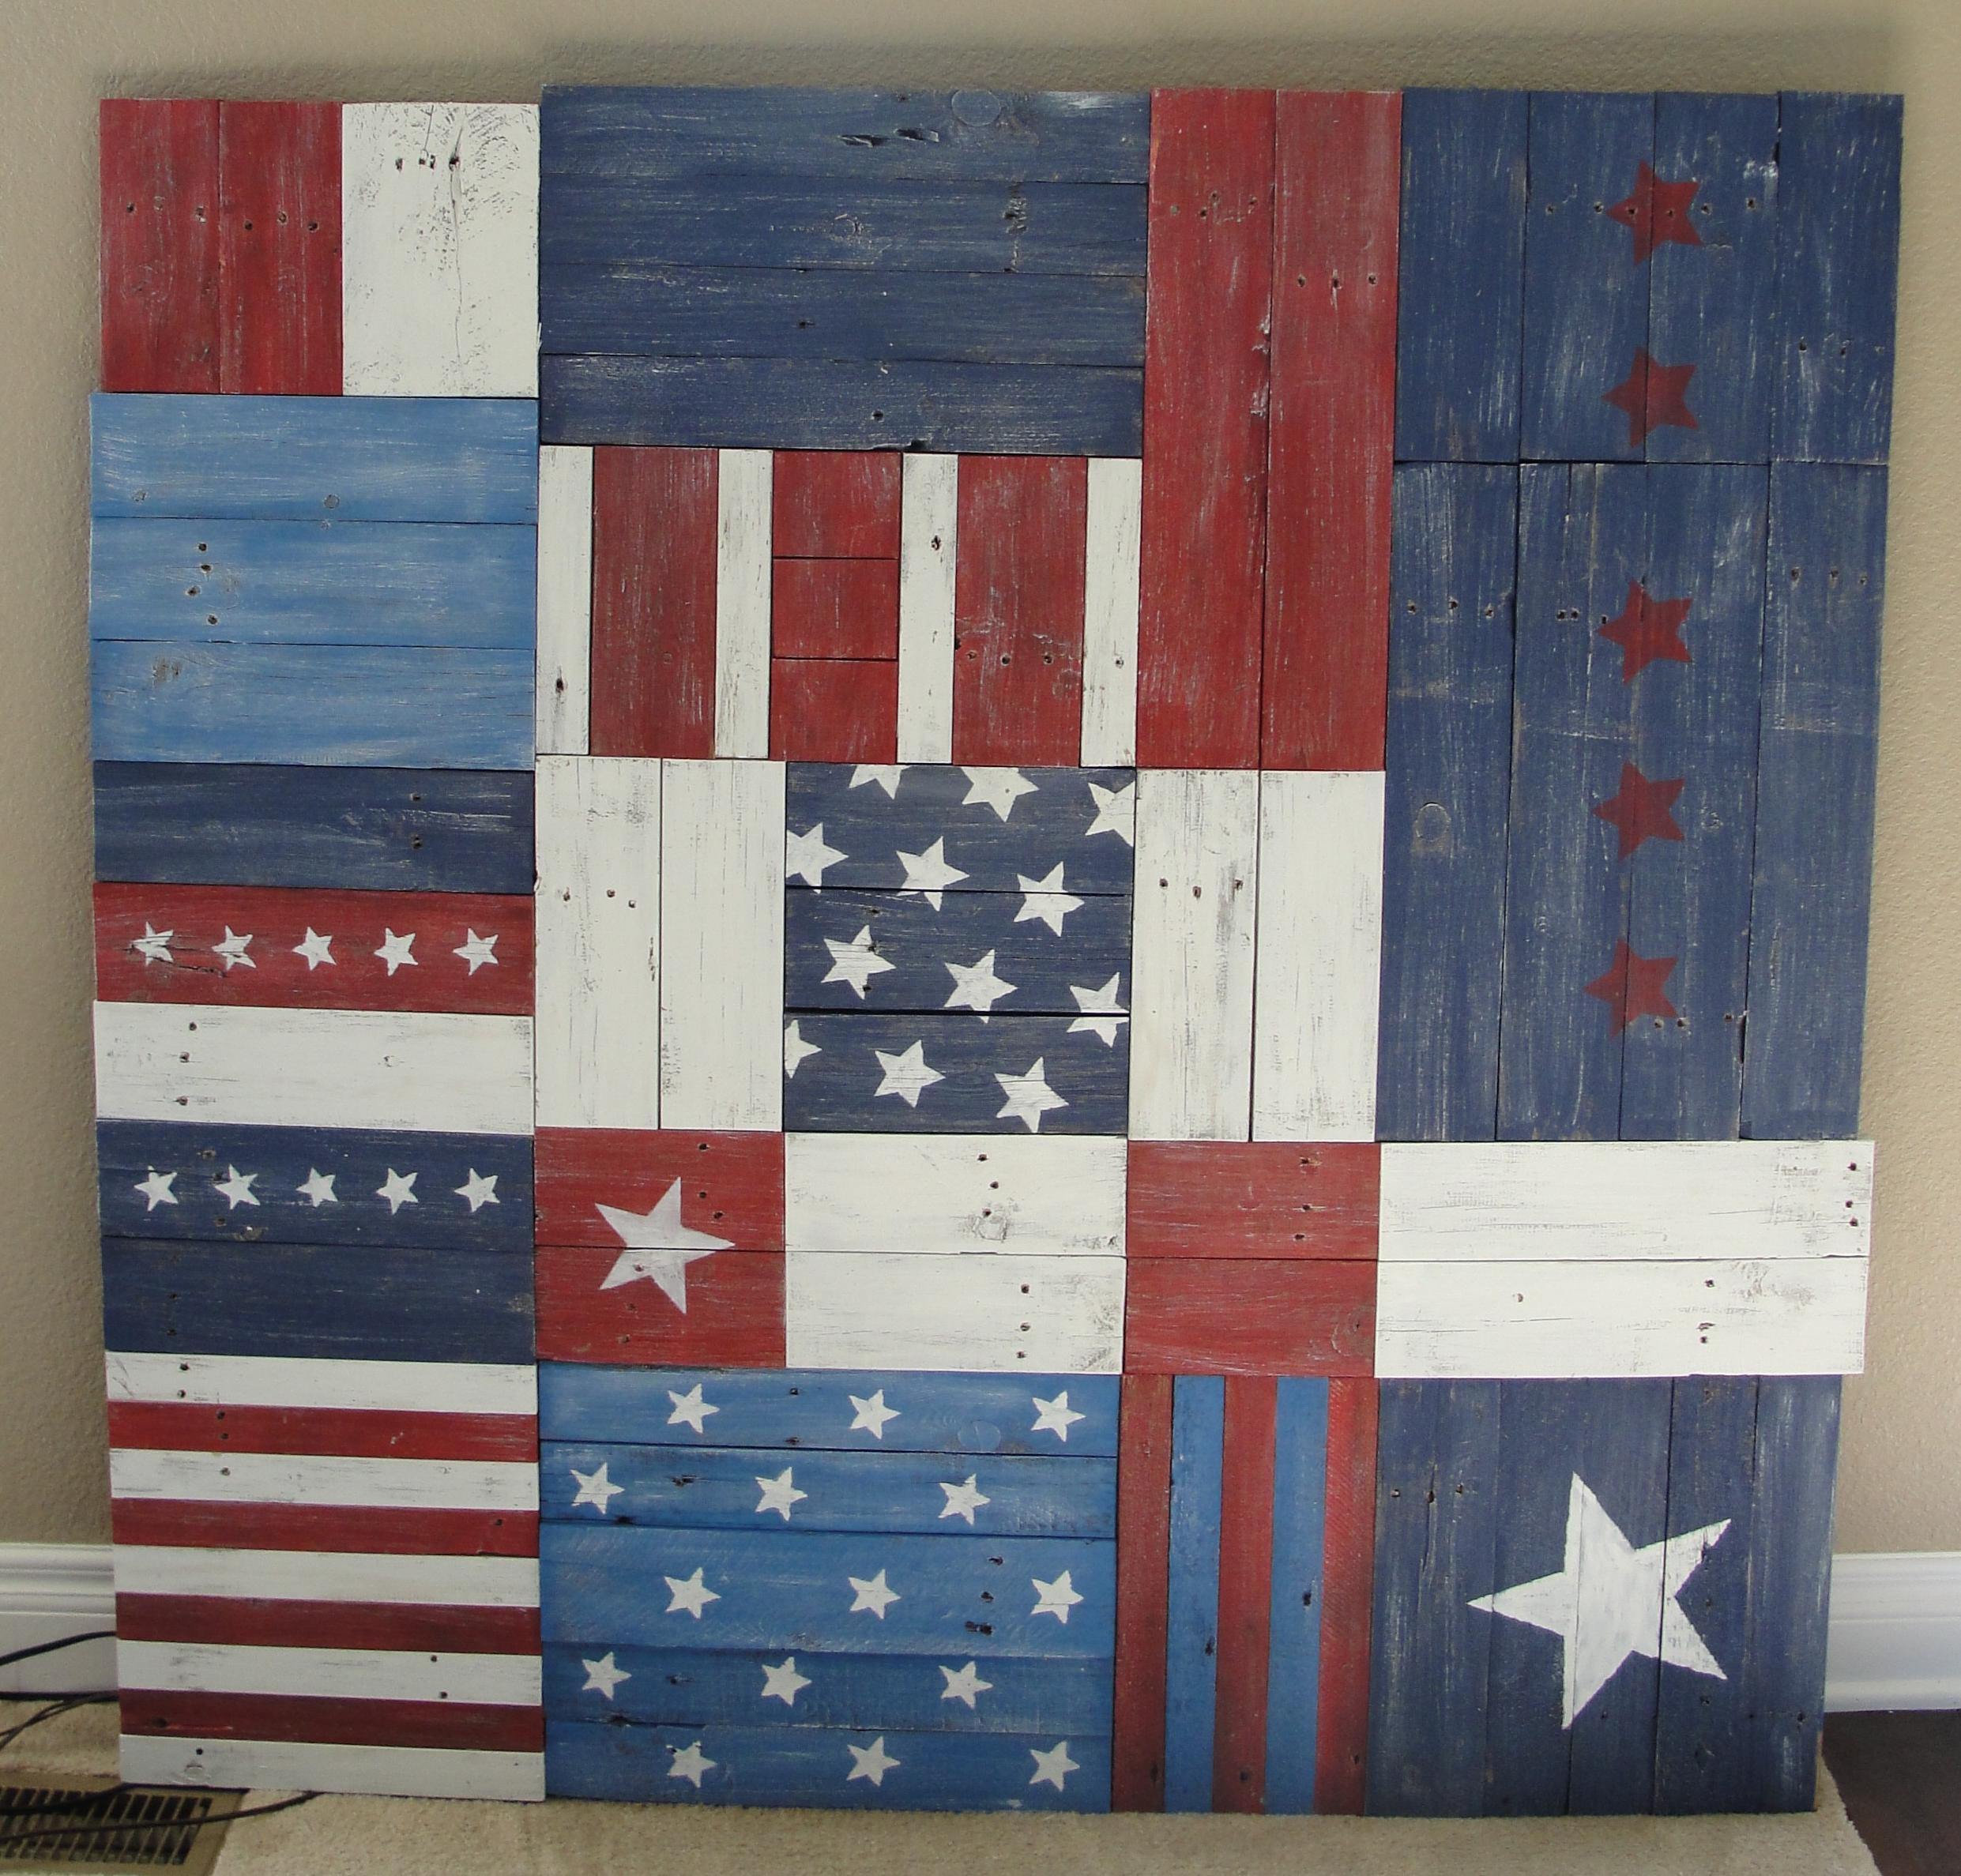
Home Decor
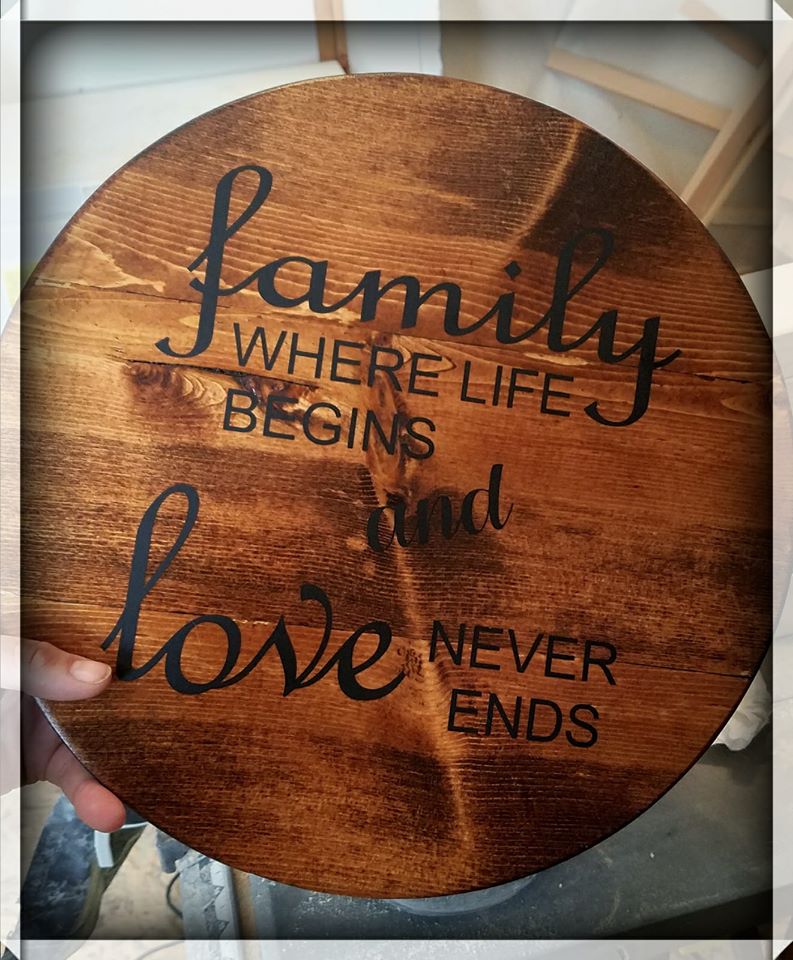
Used a Milescraft Circle Guide to cut the circle, then stained in Minwax Honey and used a Silhouette Cameo for the vinyl wording.
Estimated Cost
20
Estimated Time Investment
Afternoon Project (3-6 Hours)
Finish Used
Minwax Honey stain
Minwax Polyurethane
Minwax Polyurethane
Recommended Skill Level
Beginner
Countertop Produce Storage Bin
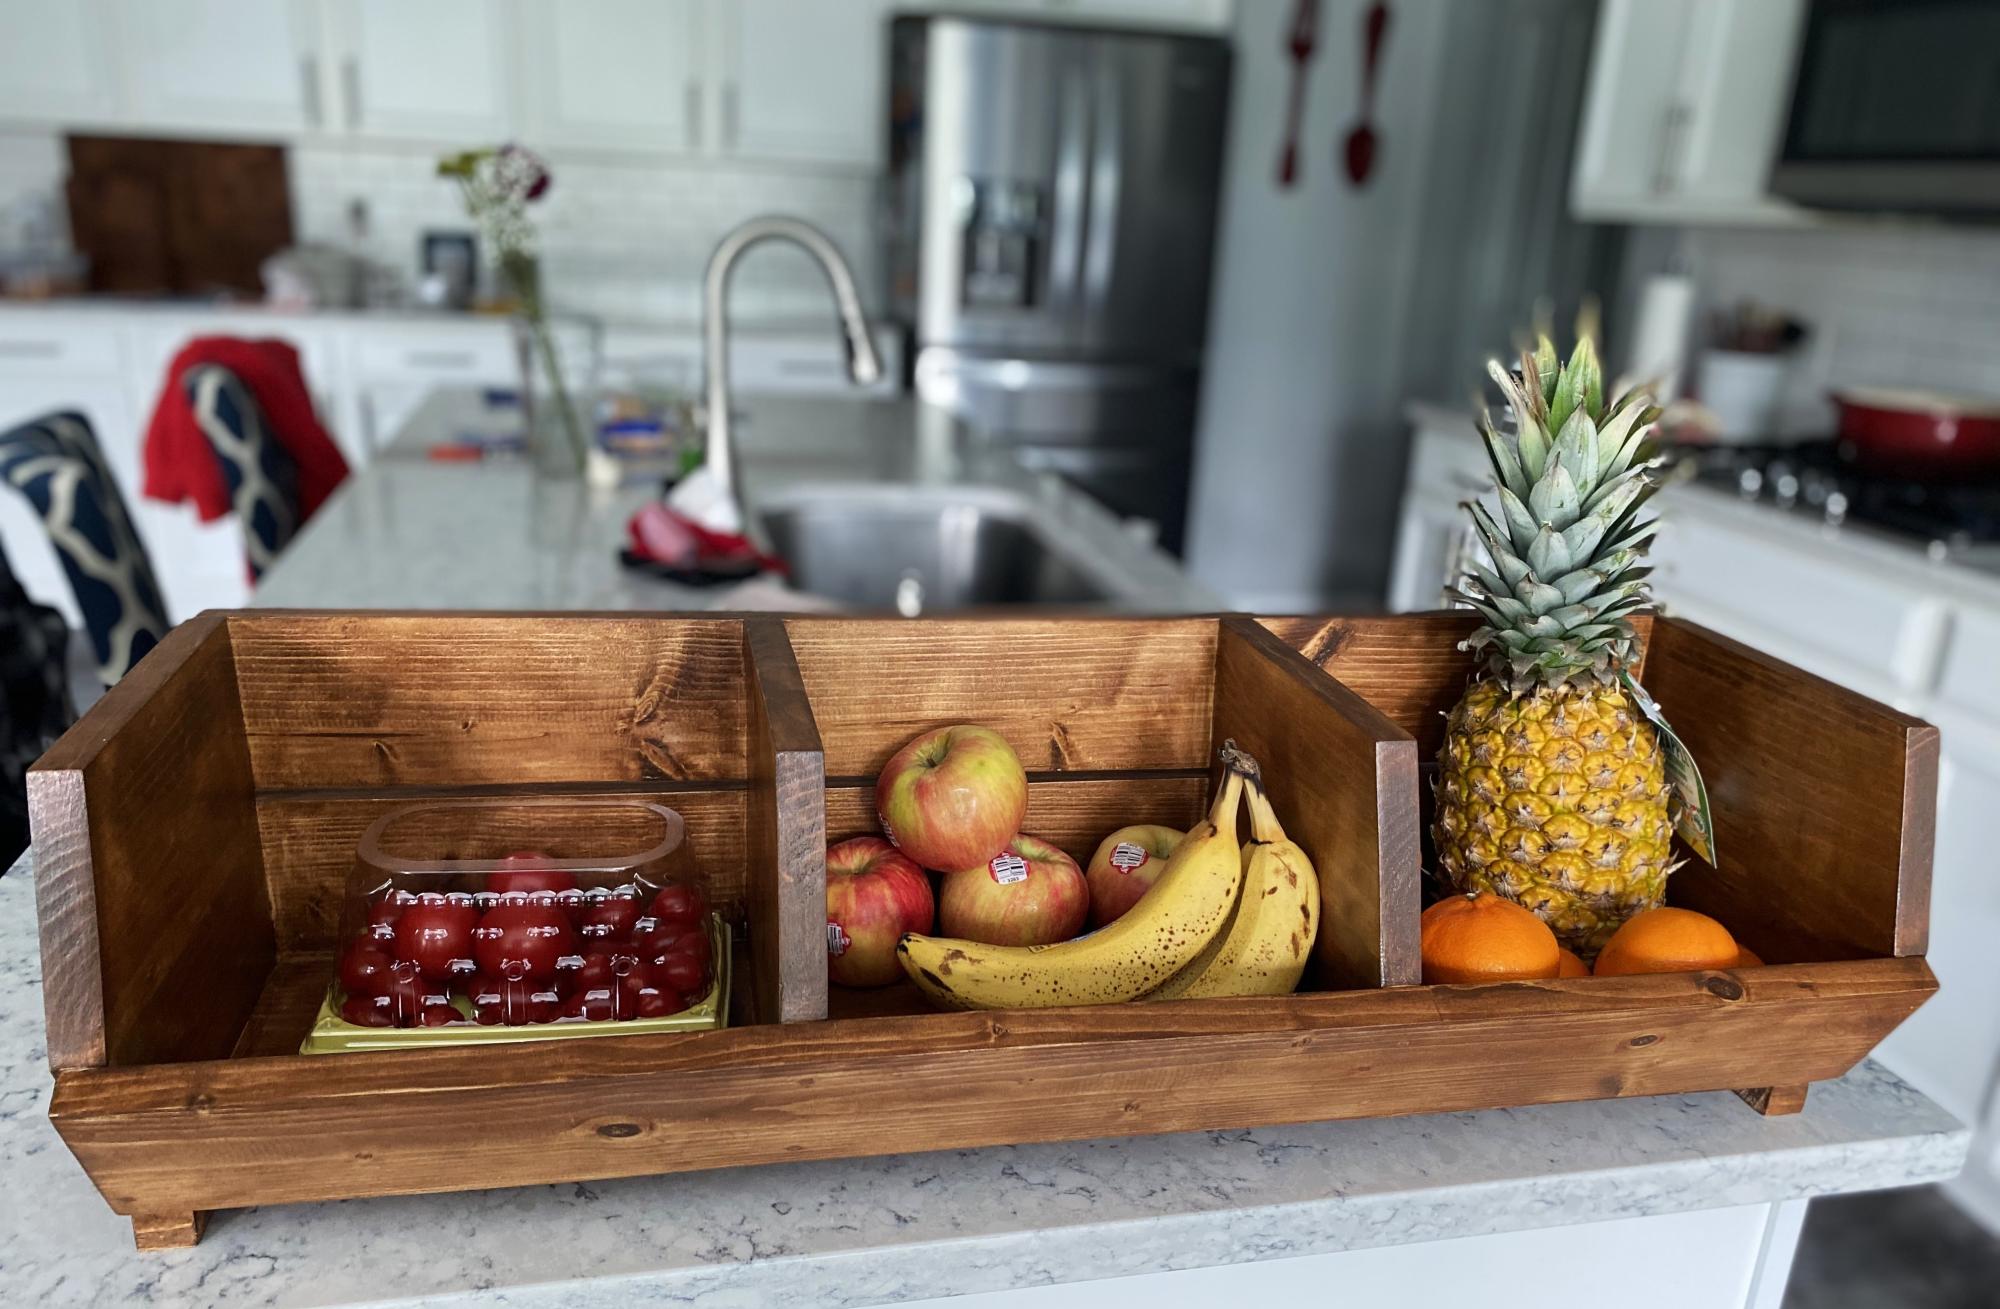
My 16-year-old son is home every other day for school with an on-line course he is taking. We started working on projects we both wanted to learn from cooking to woodworking projects. This is the very first project we made. We are both very proud and pleased with the simple directions, minimal tools required, and beautiful results. We used an early American stain and lacquer finish. We have received many compliments on it. Thank you for giving us something to build our relationship and home with.
Elizabeth
Built from Plan(s)
Comments
Mon, 09/25/2023 - 09:23
Great times!
Thank you for sharing, I love hearing about the time spent together and the project looks amazing!
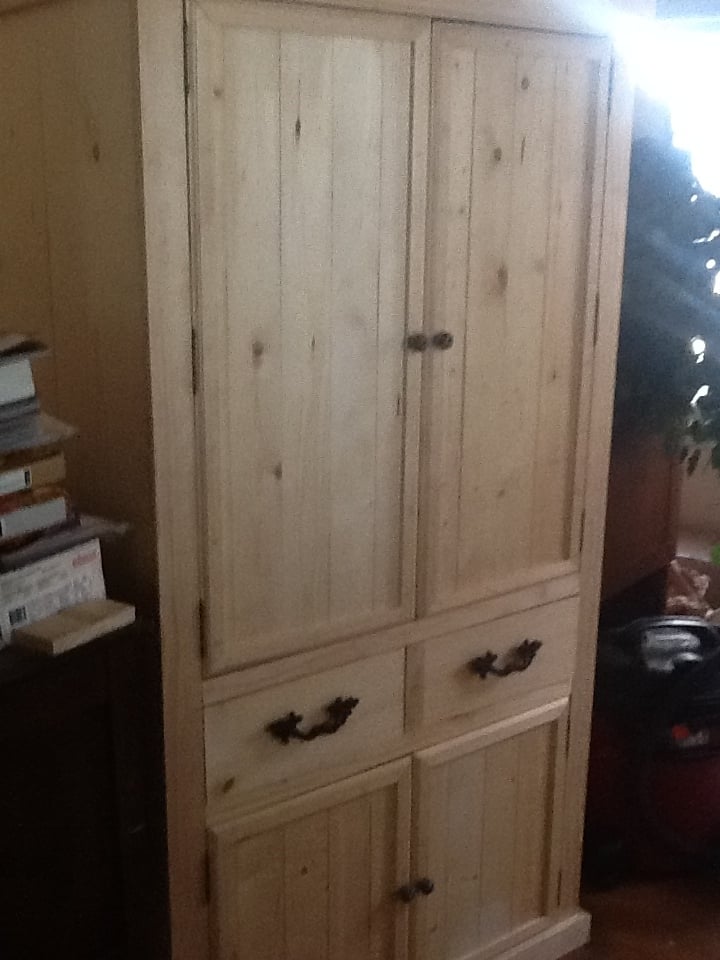
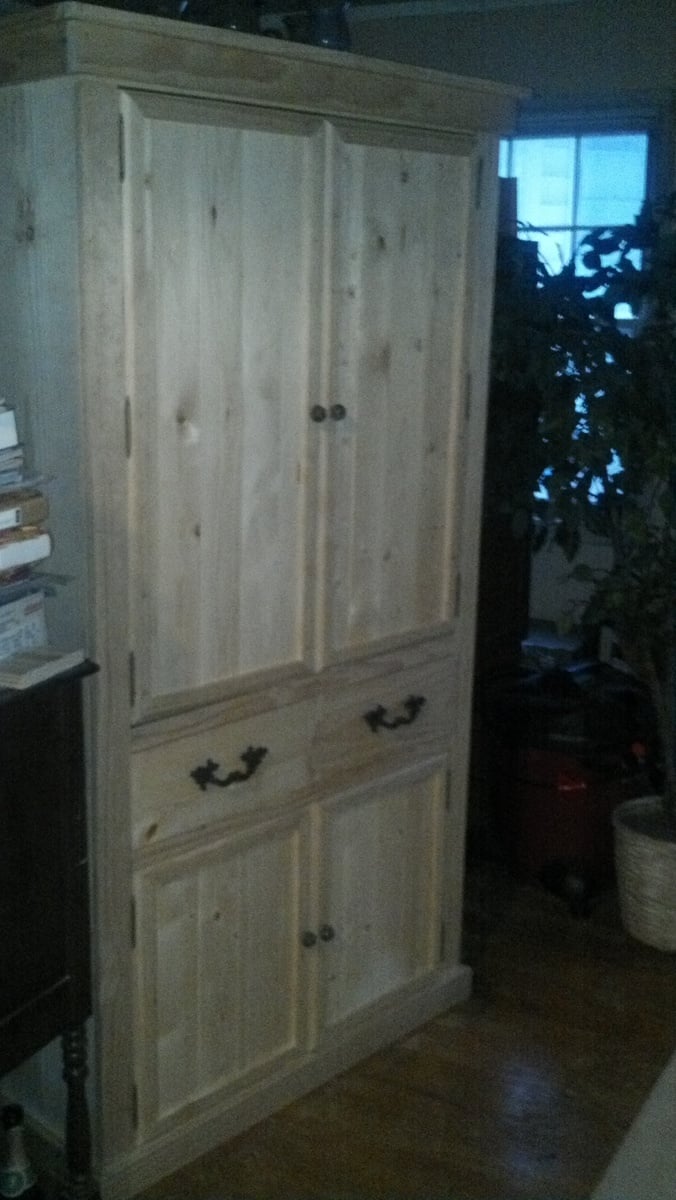
Armoire
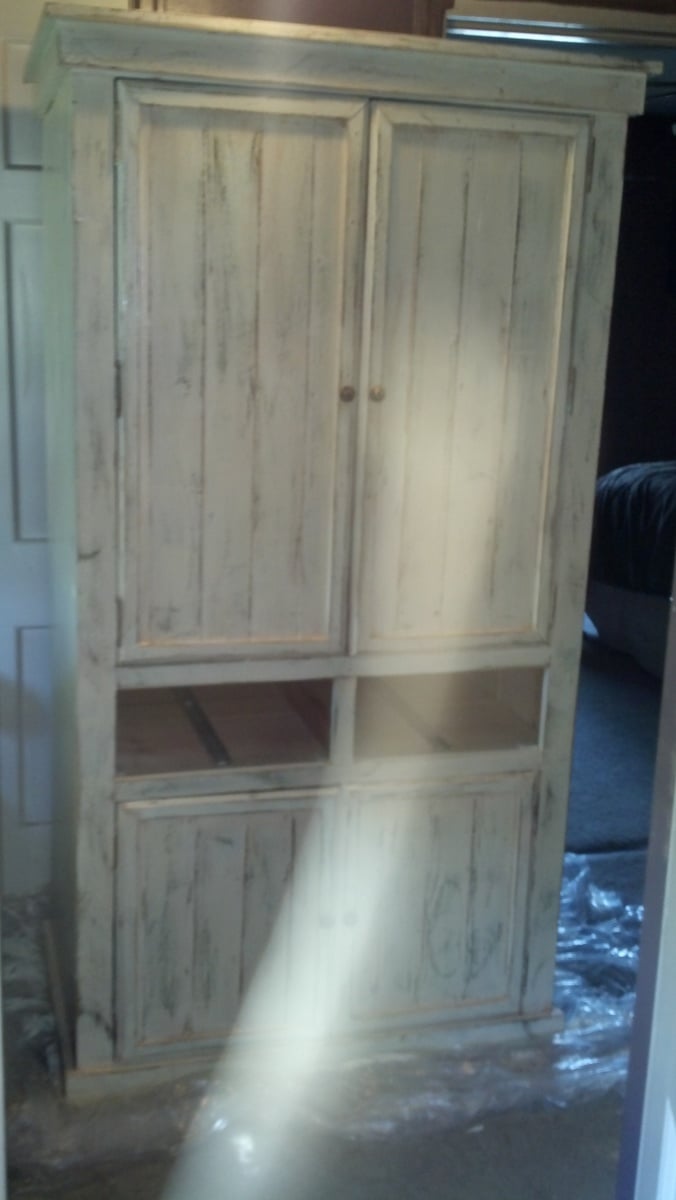
I altered the nursery armoire and made this!
Built from Plan(s)
Finish Used
layers of brown, then green, then off white paint- sanded and topped with a glaze mixed with stain for an antique finish.
Recommended Skill Level
Intermediate
Truss End Table
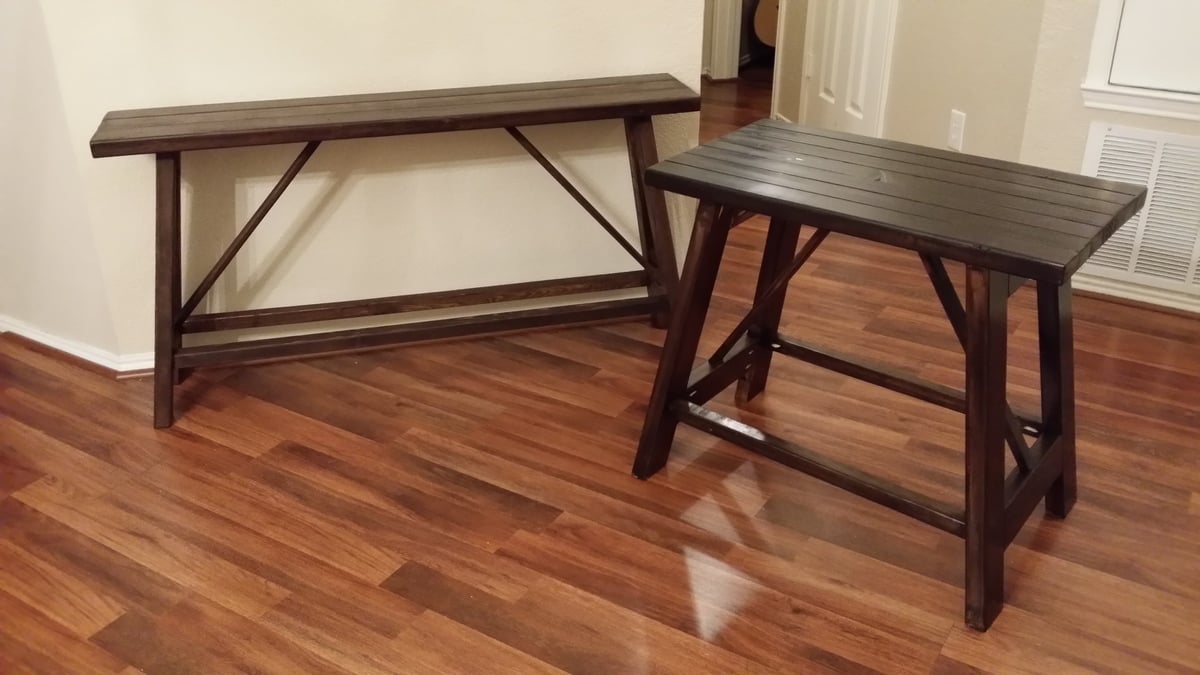
These were so easy to make. I actually messed up on the smaller one and used the 2x4's on the legs. By the time I realized it, I had to use the 2x3's on the top. I just used more of them. It still turned out great. My wife had me make another one for an empty space we had. I used the same basic layout and just modified my length and width. Thanks for the great plans.
Built from Plan(s)
Estimated Cost
$14 for the small one and $21 for the long one.
Estimated Time Investment
Afternoon Project (3-6 Hours)
Finish Used
Rustoleum Kona.
Recommended Skill Level
Beginner
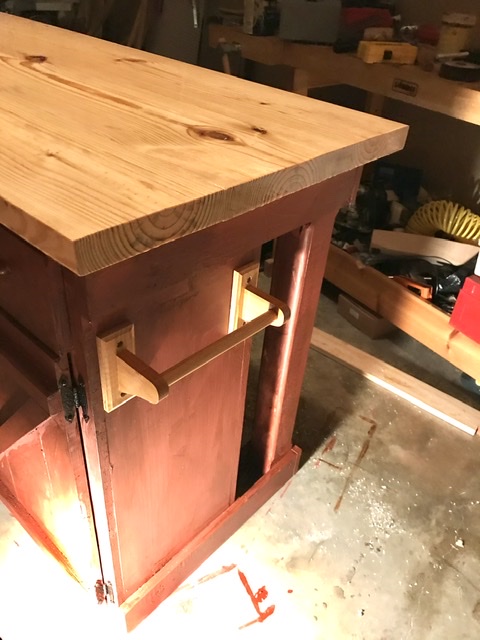
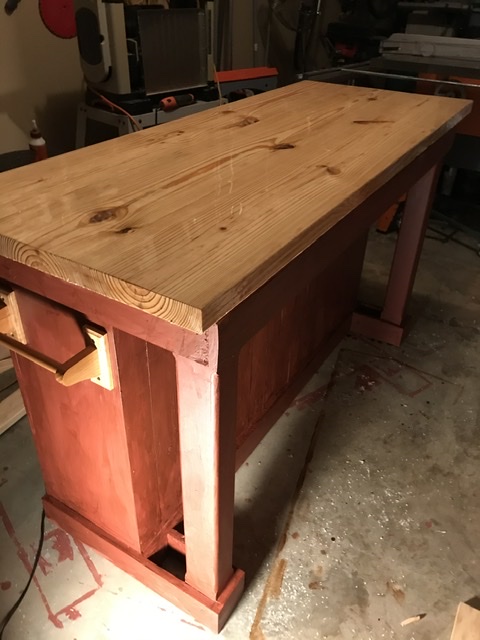
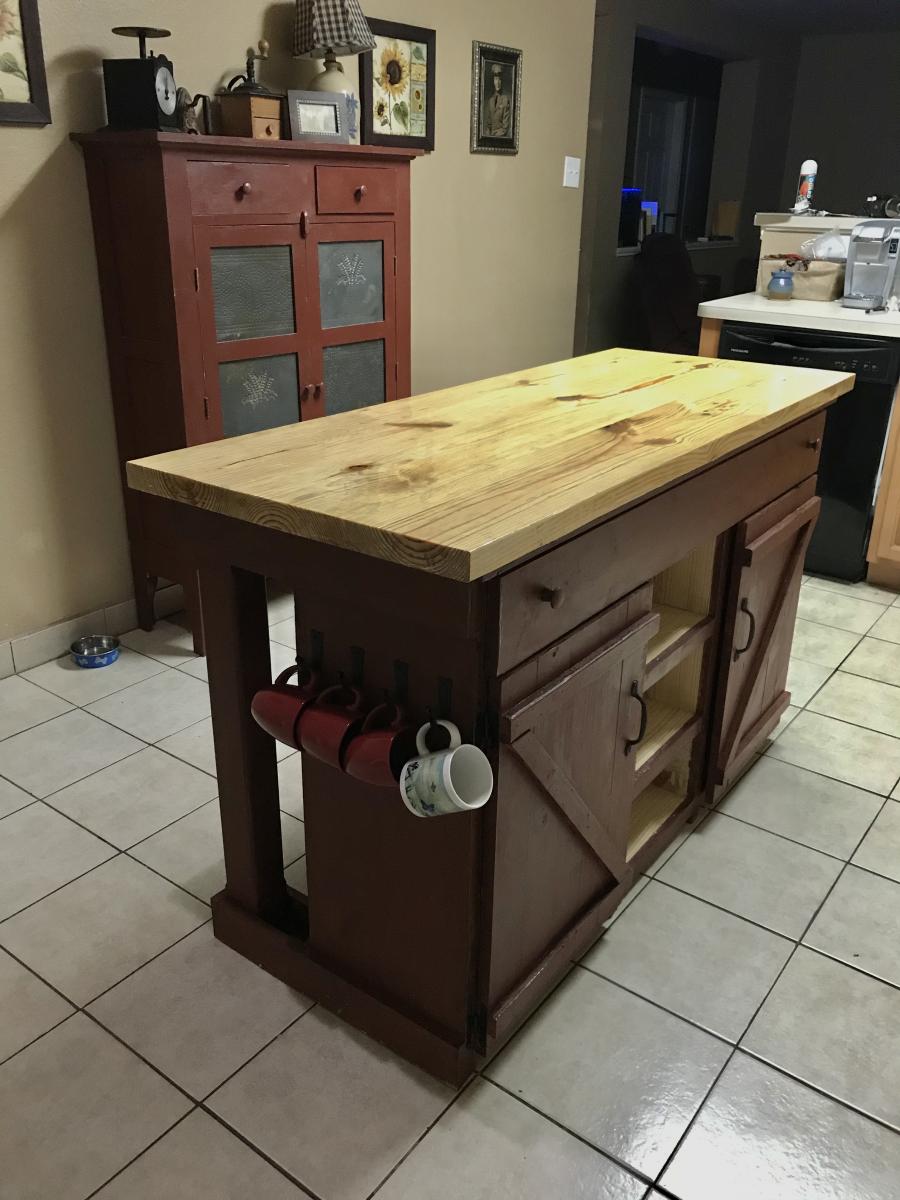
Kitchen island built from your plans
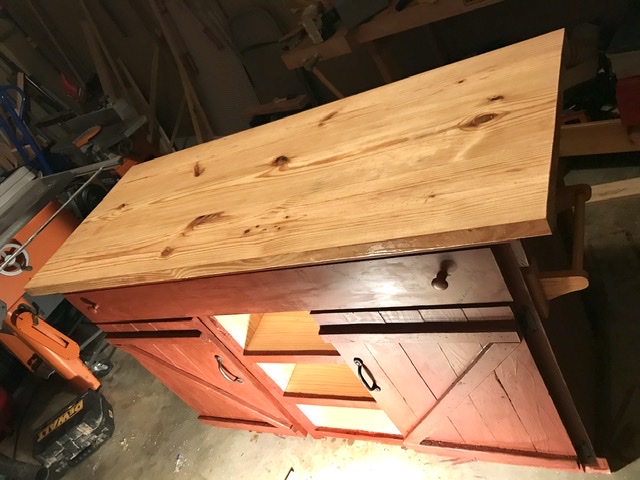
Just about finished with the kitchen island. I got a surprisingly good Home Depot to match the look of the milk paint on the pie safe that I have with a dead flat latex paint for not much money. Had some leftover burnt umber age effect glaze.
I finished the top with a couple coats of Epoxy resin for a nice glasslike finish and added some wrought iron hardware and an oak towel rack. Last thing to do is put furniture wax on the exposed white pine areas. Then I’ll try to figure out how to move it into the kitchen without sustaining any serious injuries, such as a hernia...
Built from Plan(s)
Estimated Cost
$250
Estimated Time Investment
Week Long Project (20 Hours or More)
Finish Used
Latex paint with burnt umber glaze and epoxy resin for the top.