Doll House Book Shelf

Made this for my little girls room
Built from Plan(s)
Recommended Skill Level
Beginner
Made this for my little girls room
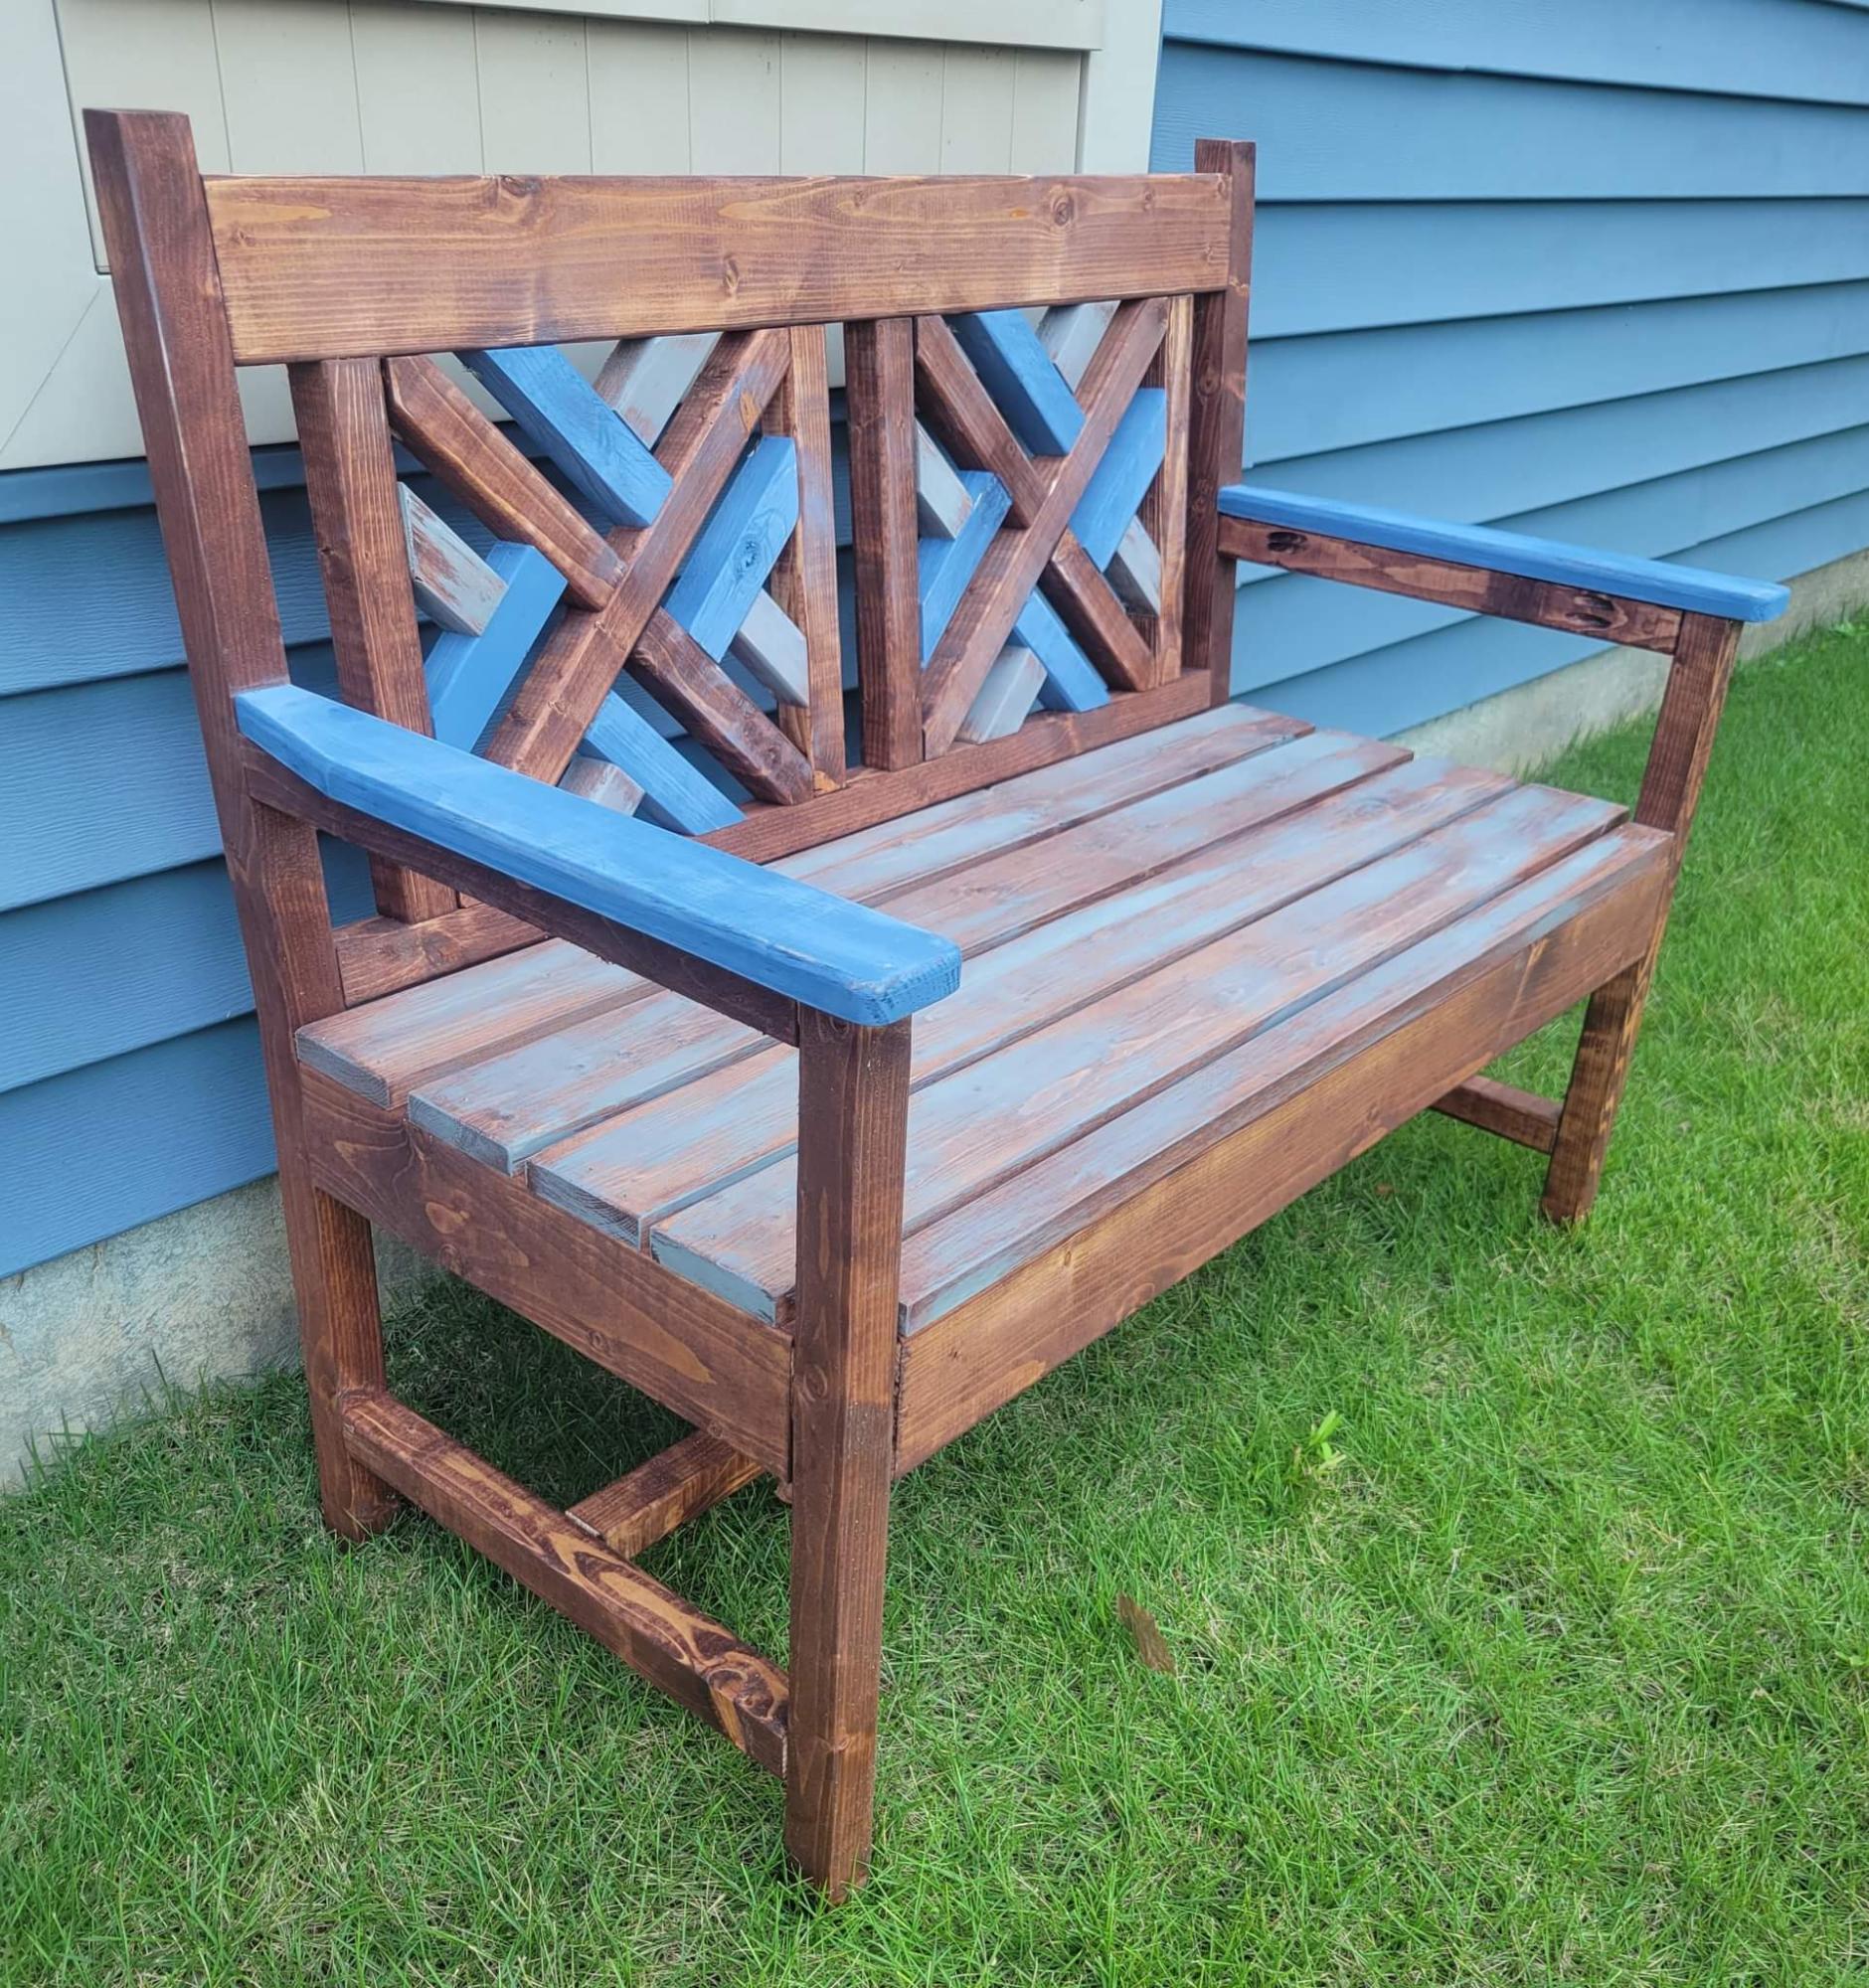
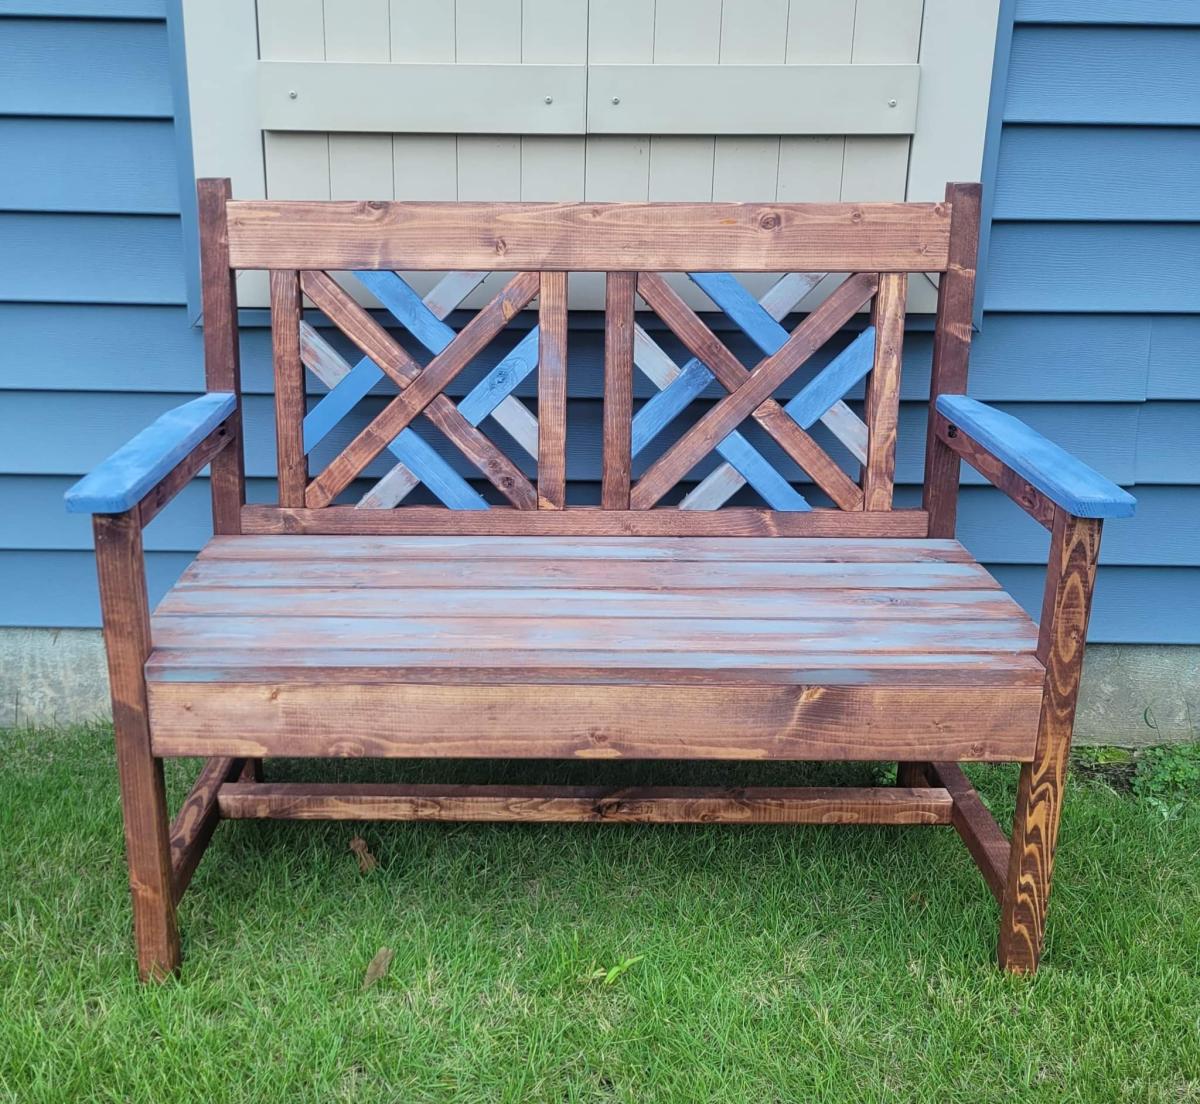
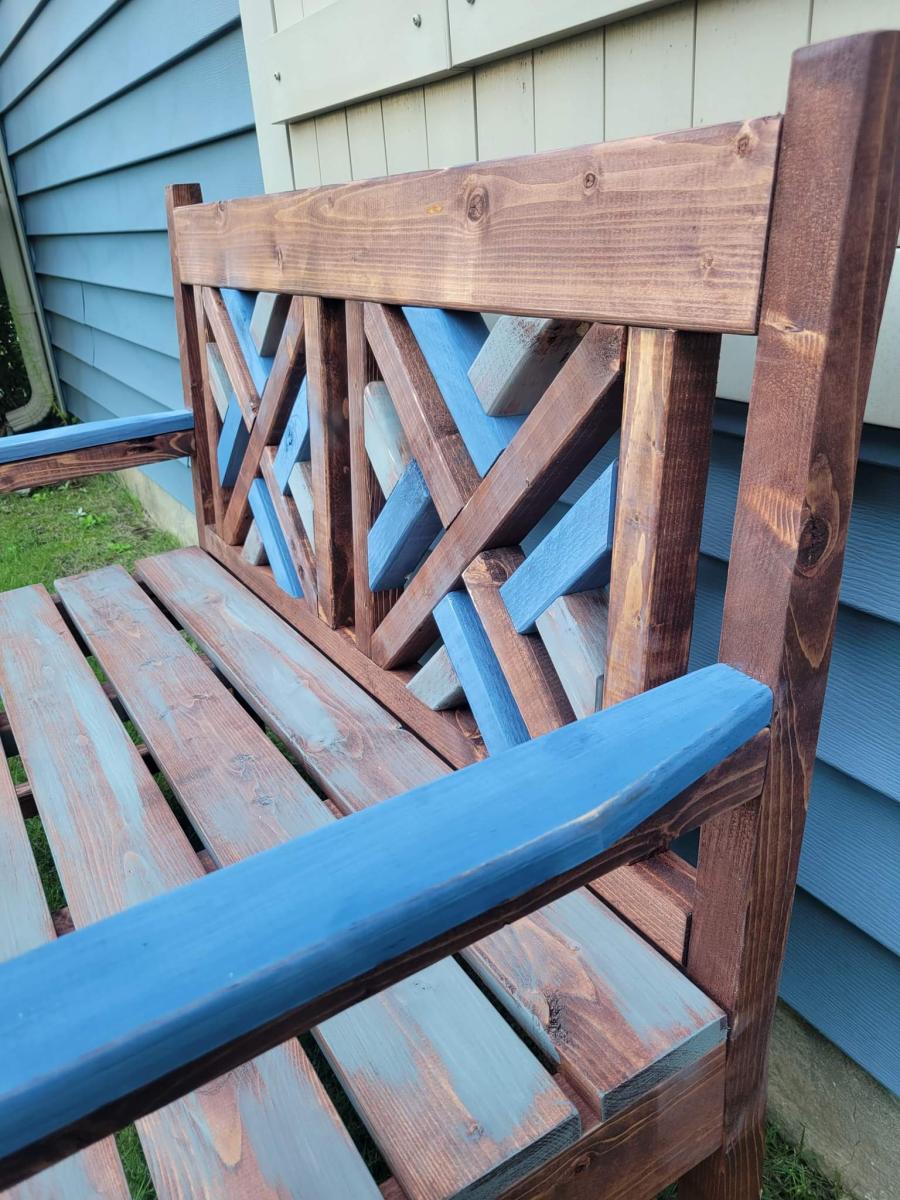
What a fun project! My 2x2 scraps had started to accumulate, and I couldn't think of anything to do with them. Ana White to the rescue! Built this one for the fun of it, and my wife had fun with the colors. Great plan as always. I added 2x2s to support the seat slats, but im sure it'd be fine without
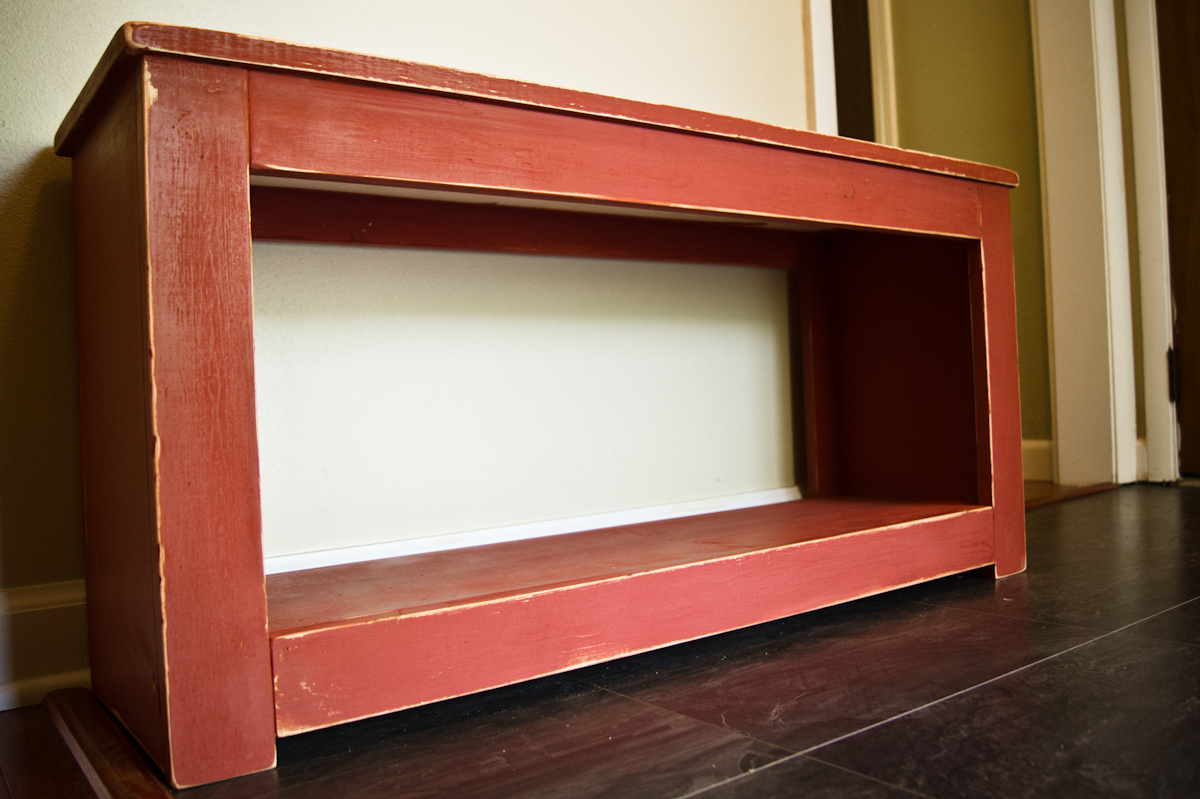
Built this bench over a couple of nights. It was really easy. The most difficult part was deciding on the color and finish. Overall it came out great and looks good by our front door. The finish is Old Fashion Milk Paint in Salem Red. I painted two coats and then sanded the sides and corners. I'm contemplating adding an antiquing glaze to give it an older look.
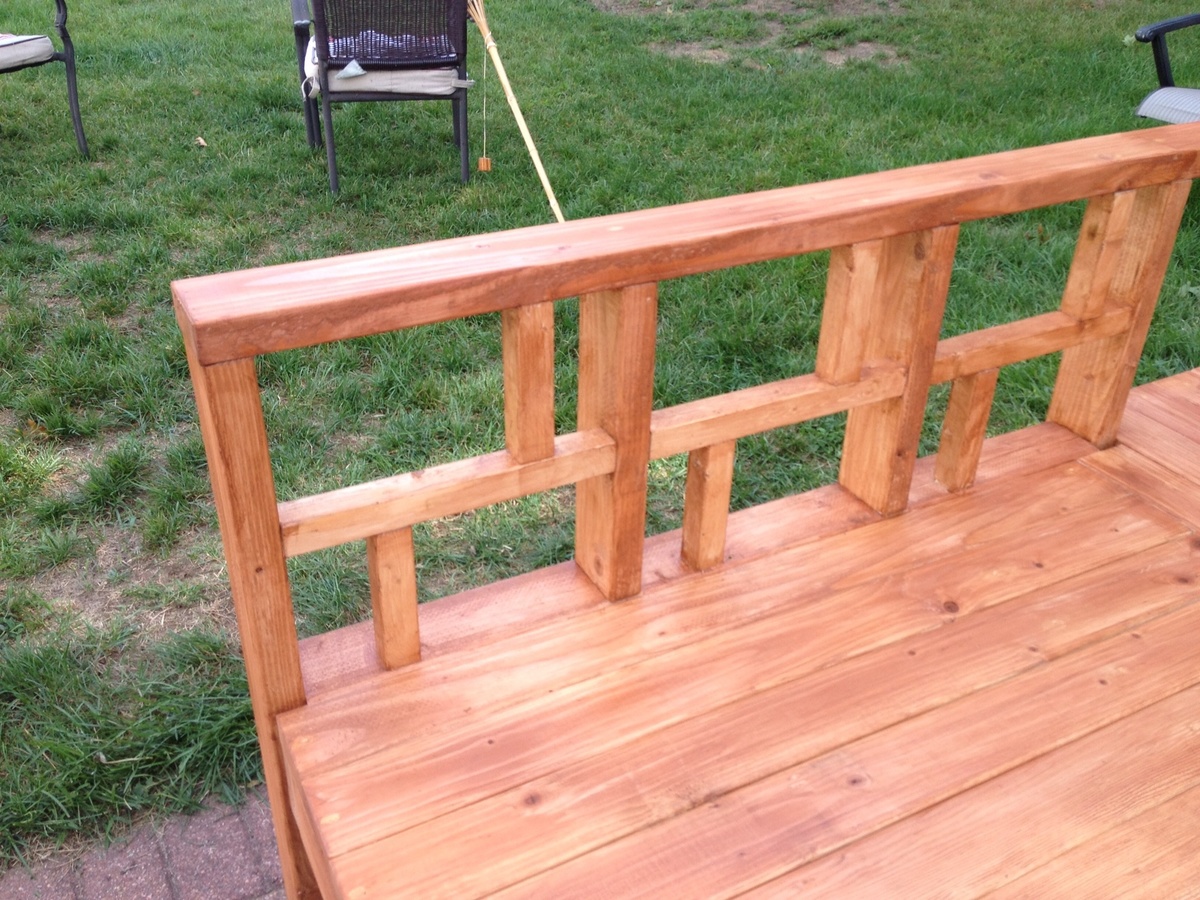
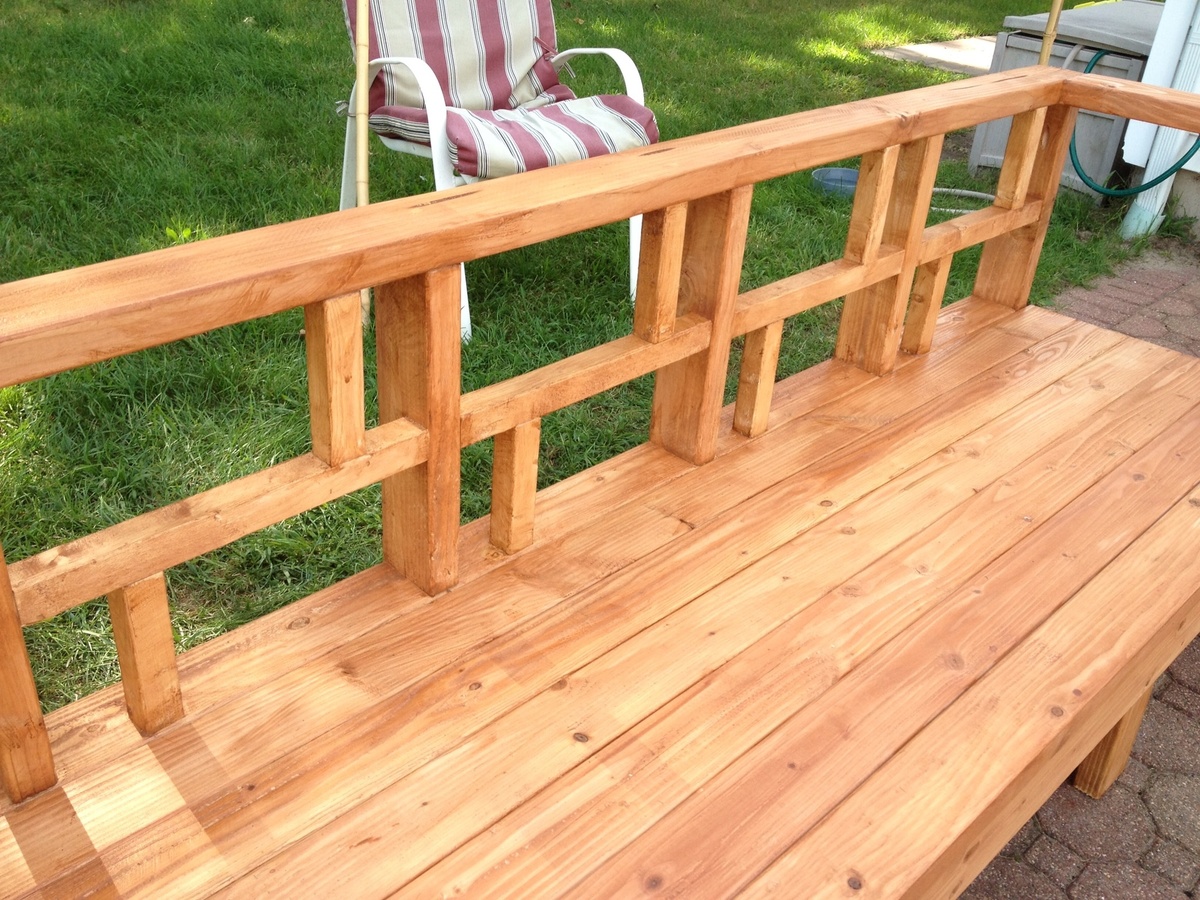
I utilized a mix of the platform sectional and the simple modern sectional to create this piece. I added the design on the back rather than the simple 1x4. I also made the entire piece out of 2x4s and 2x2s.
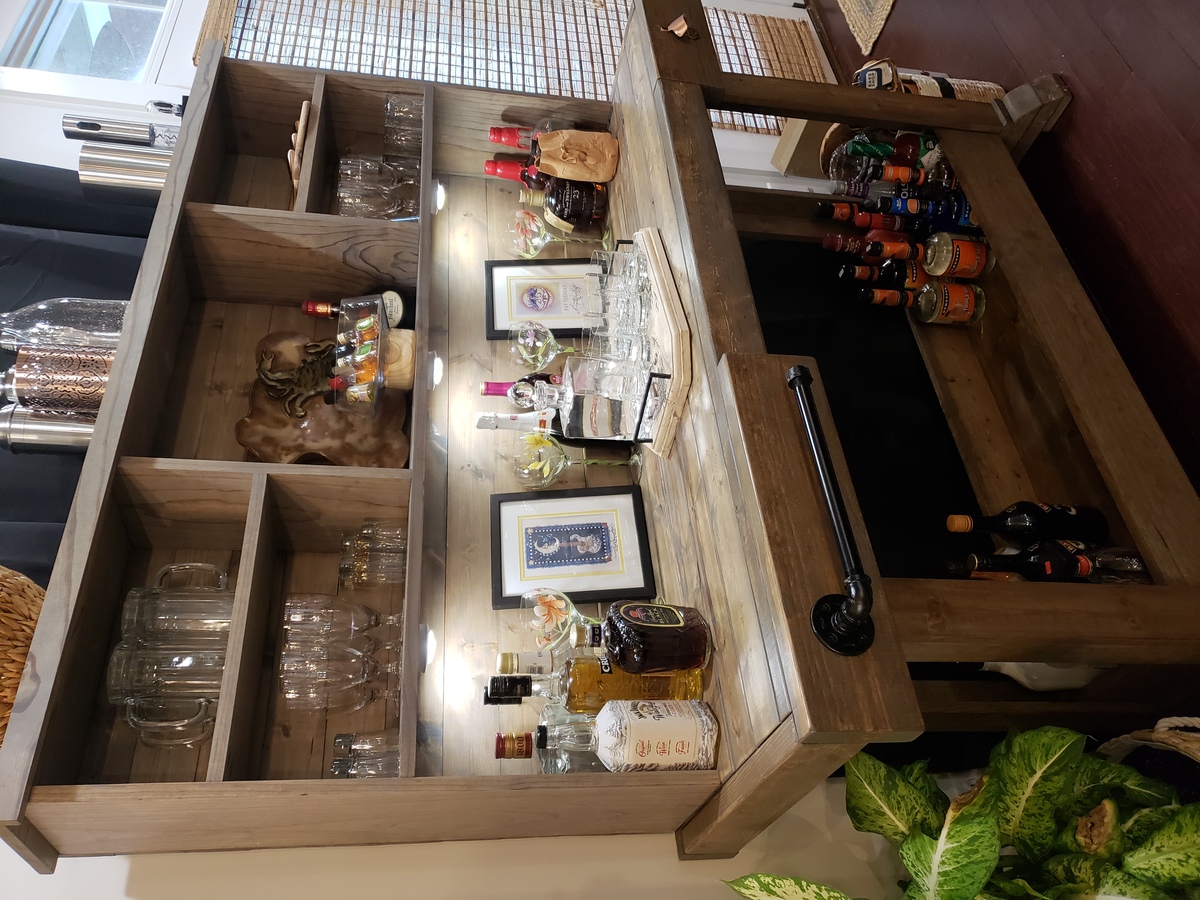
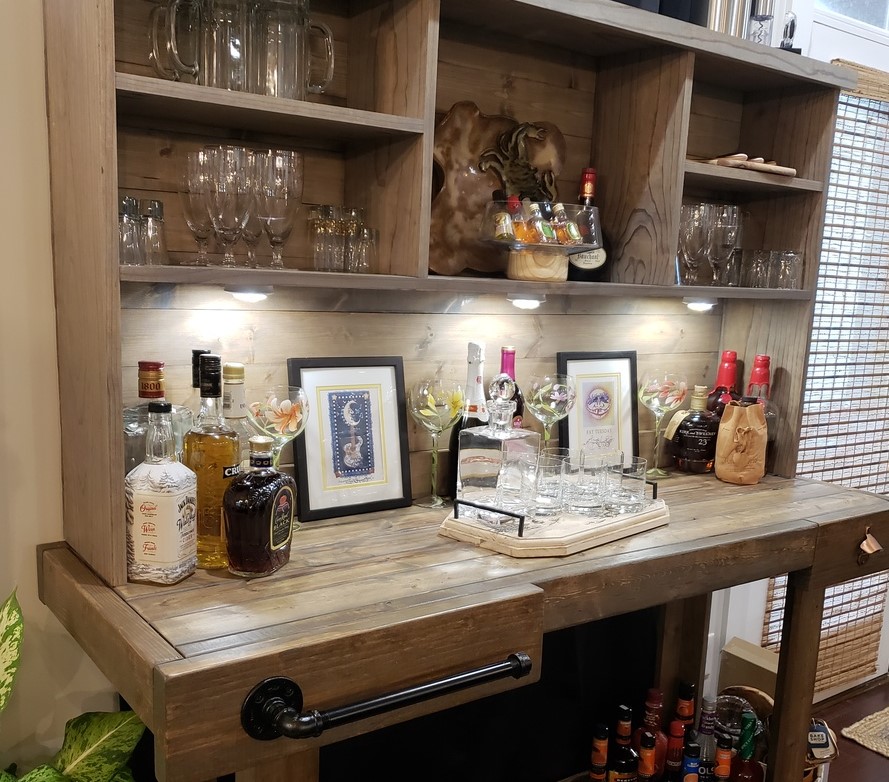
Love my new minibar! Built using select pine for the 1x and stud grade 2x4s.
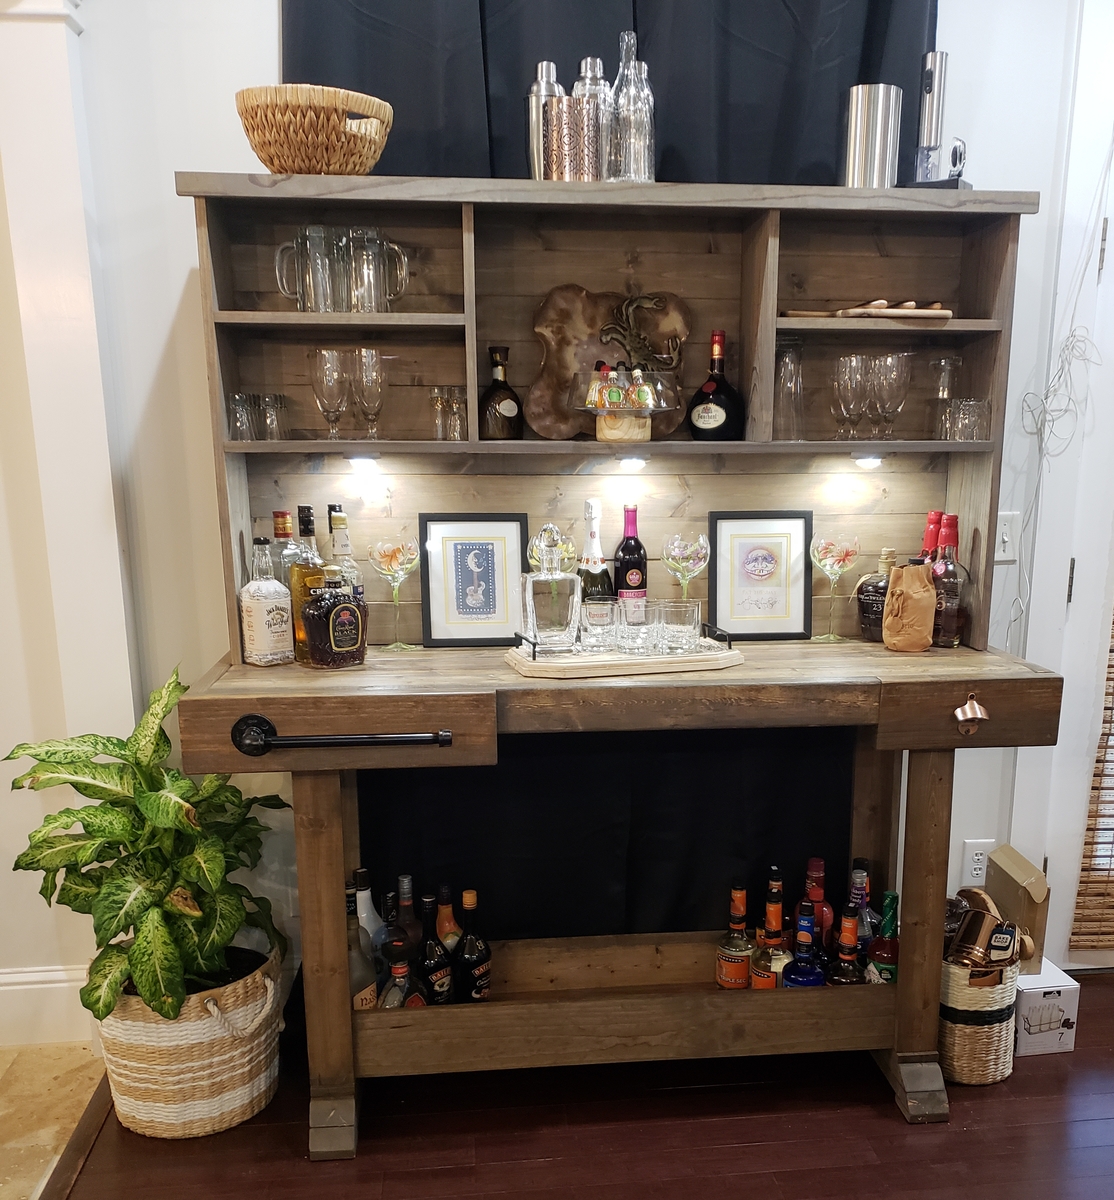
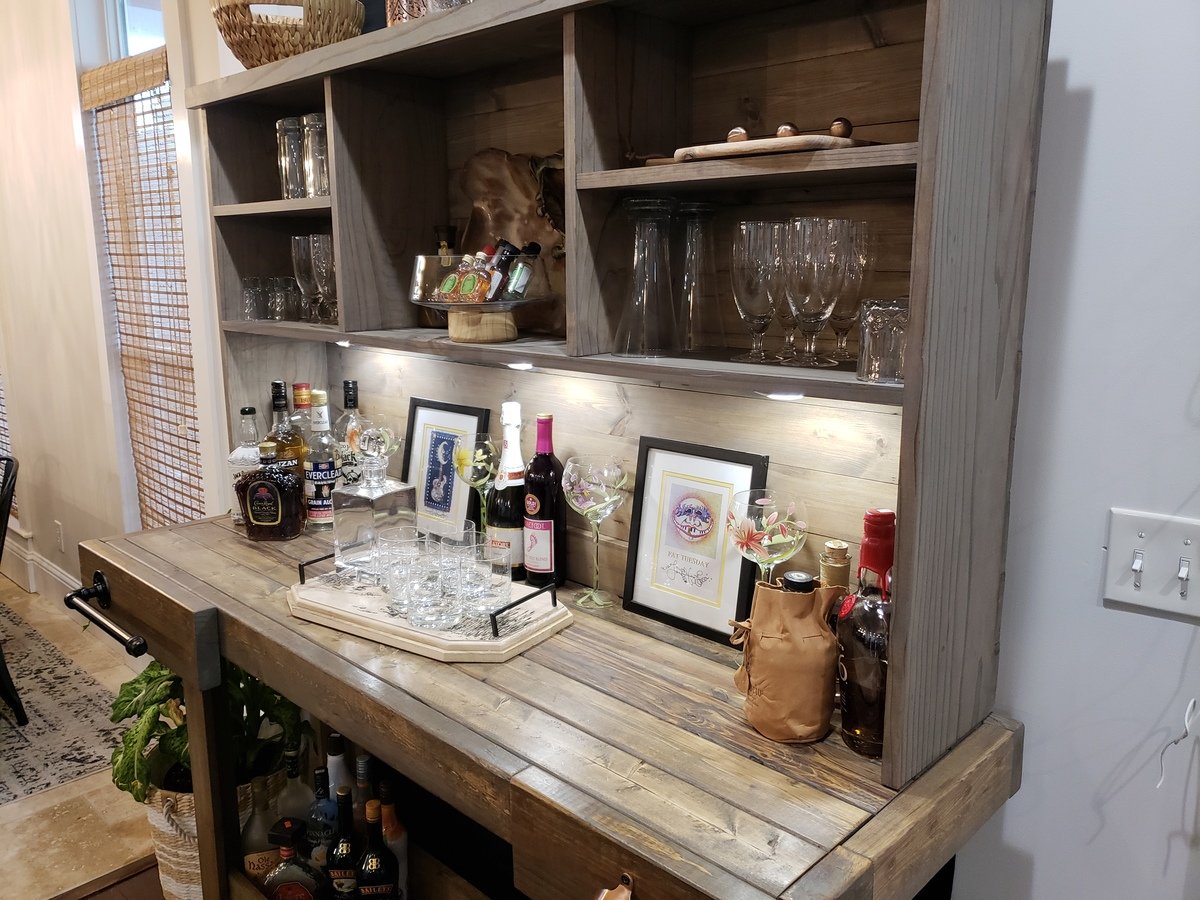
I used Ana's plan for the Workbench console which is a pottery barn knock off for the Markham Console. The hutch is Ana's plan for the Rustic Hutch. I first stained with dark walnut danish oil and didn't like the color. It was too yellowish. I went over that with minwax grey wash and loved the color. I finished with minwax dark paste wax.
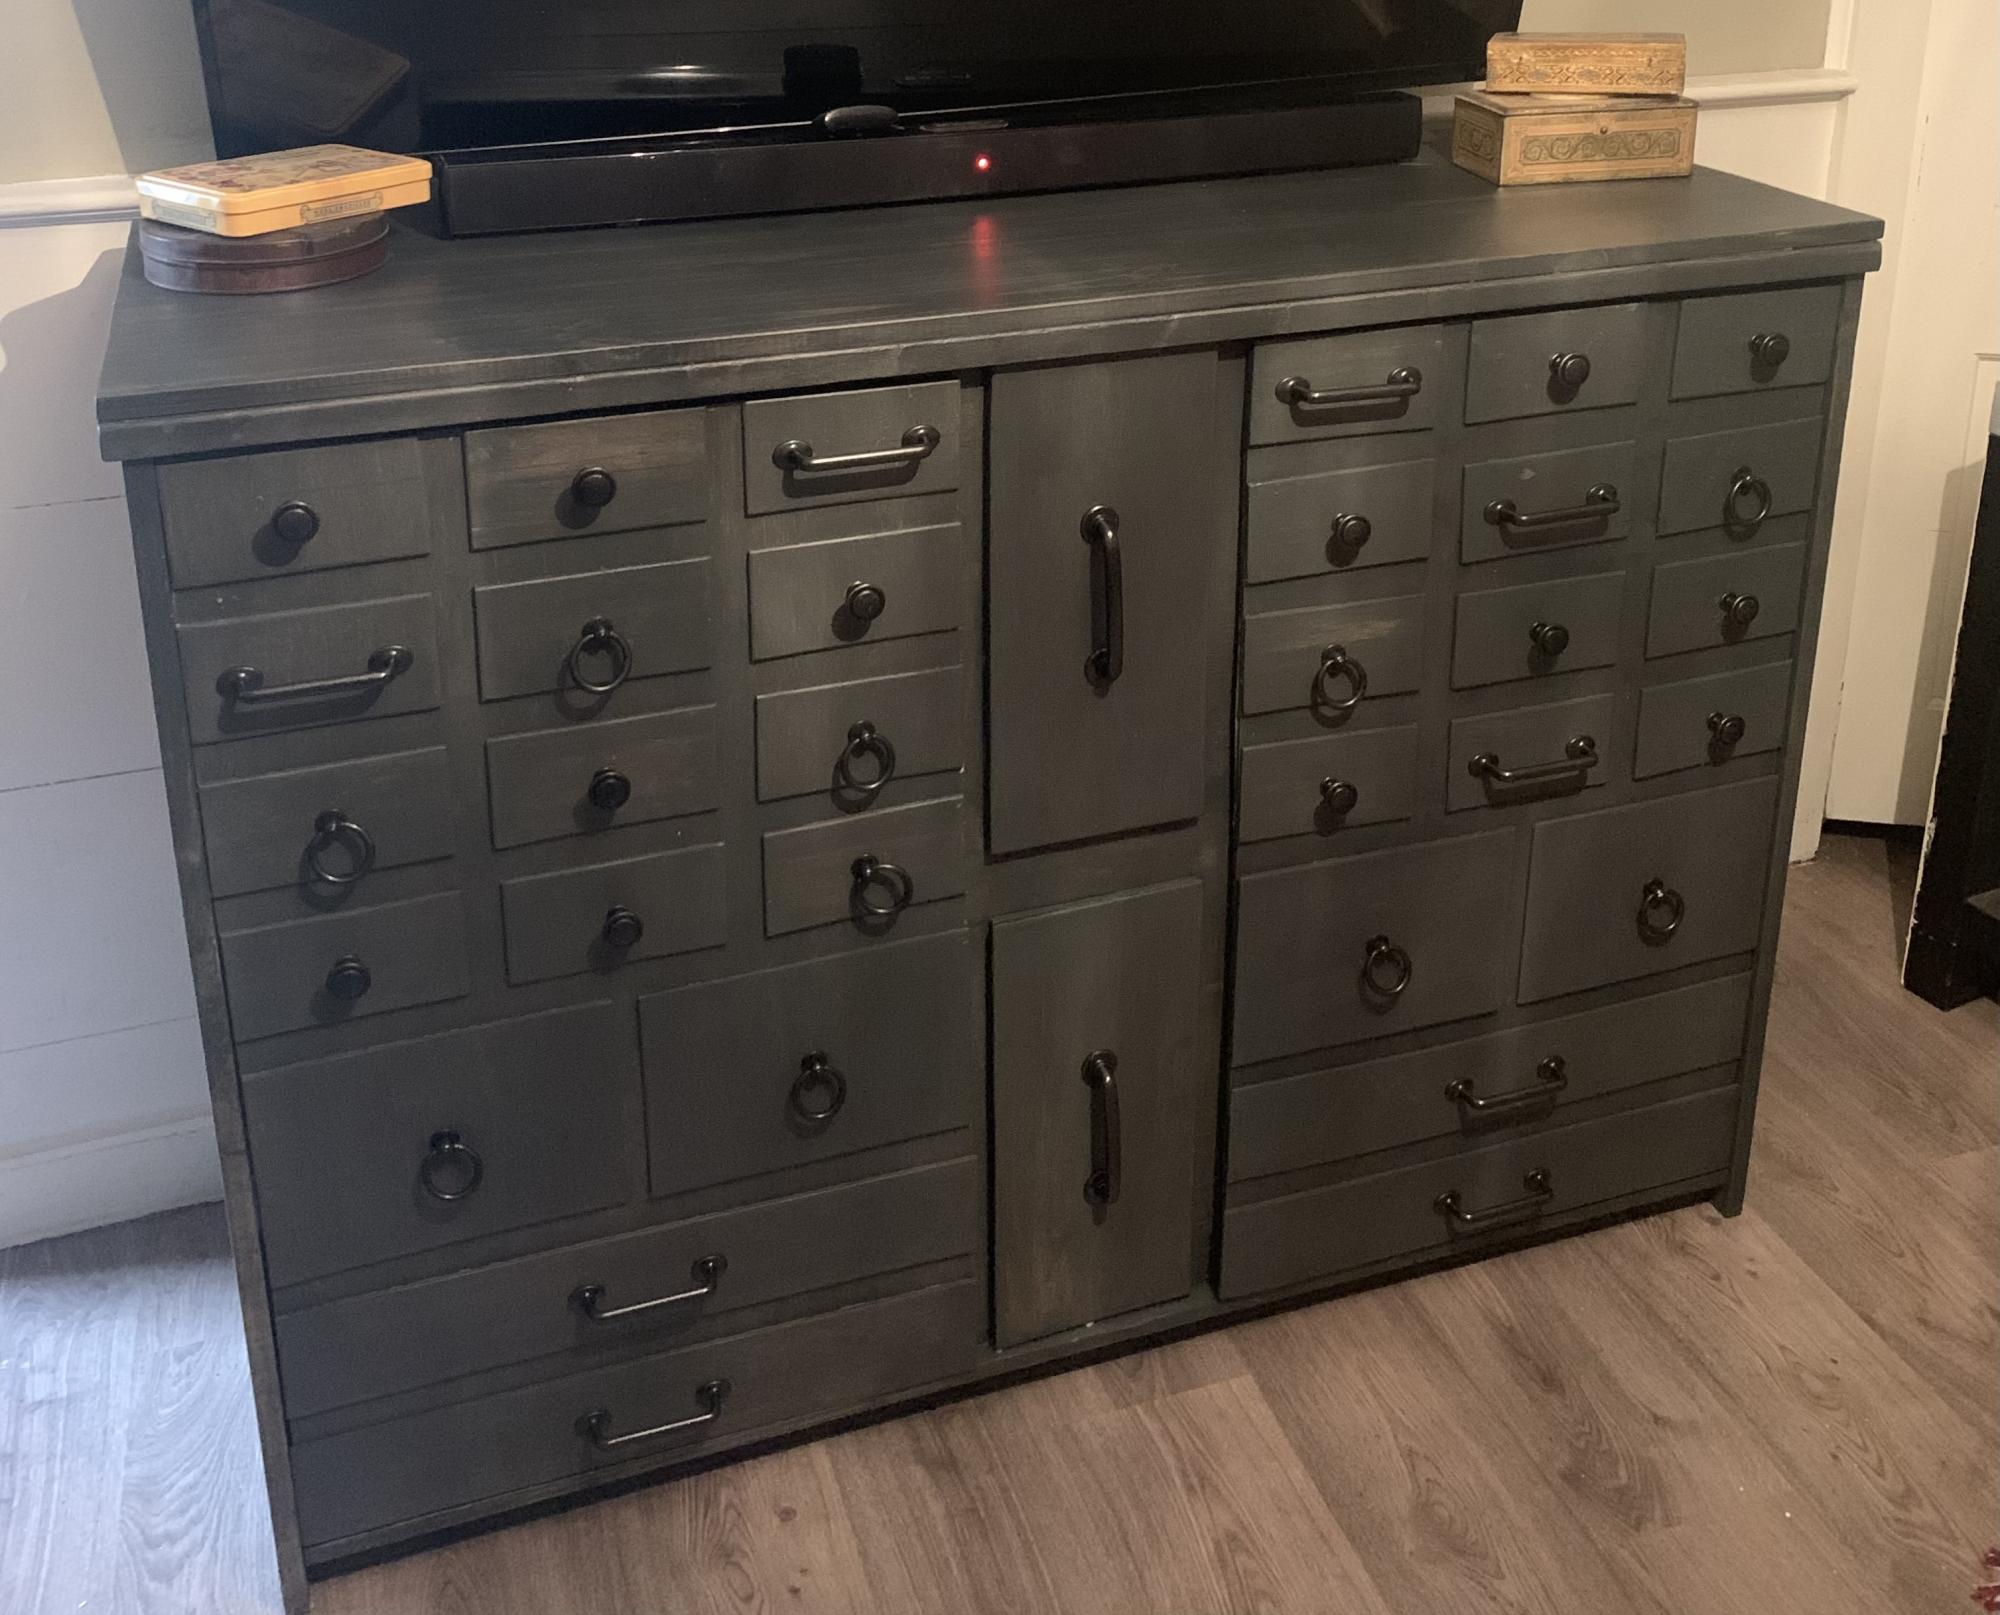
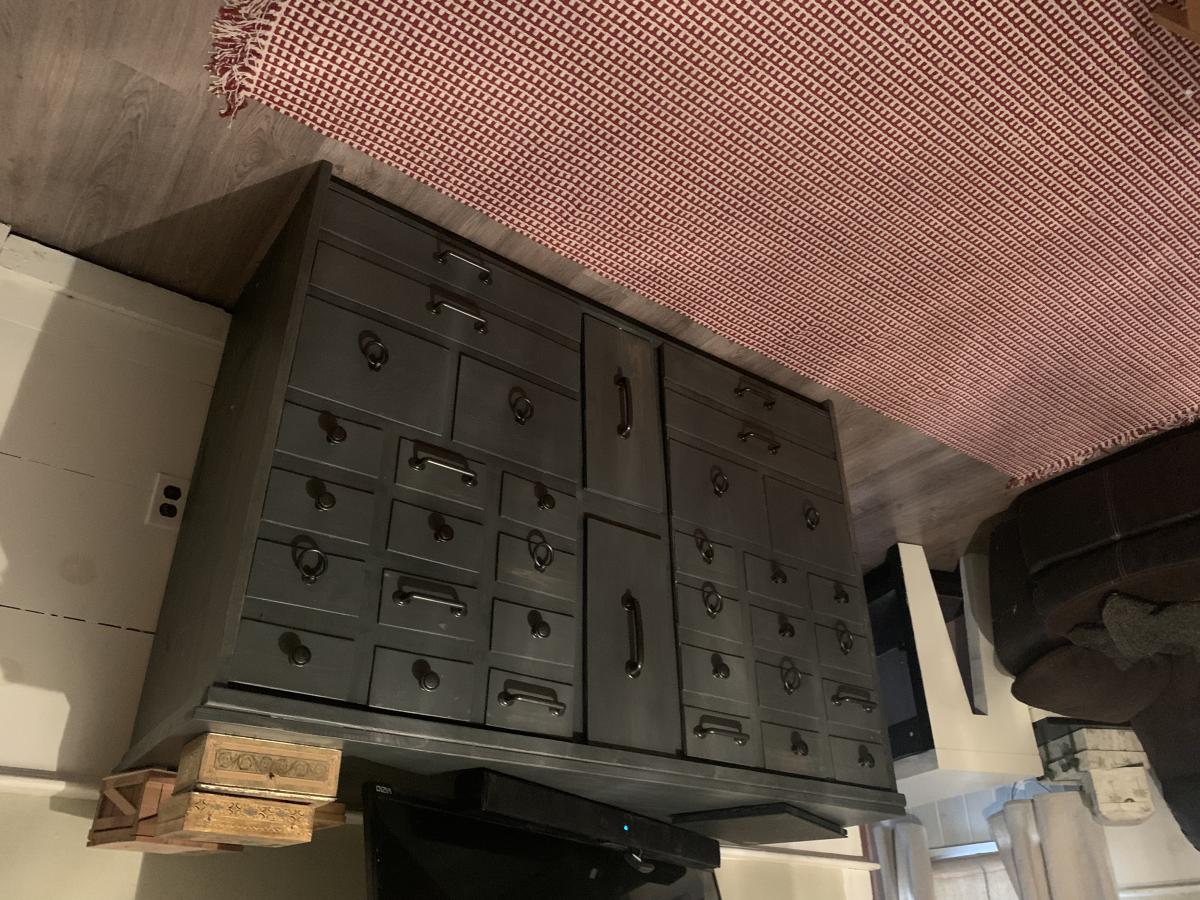
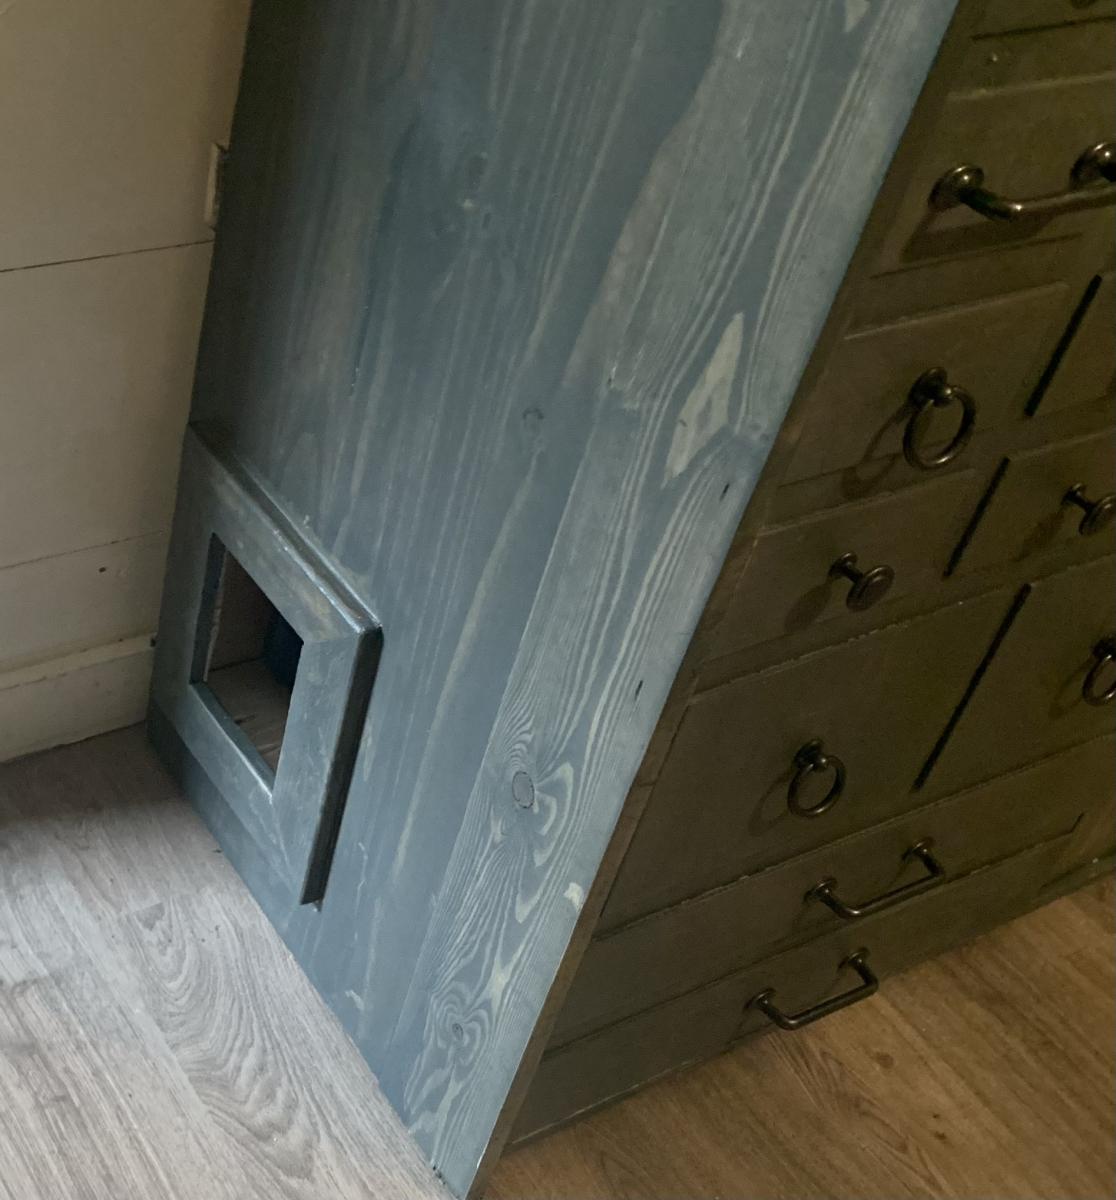
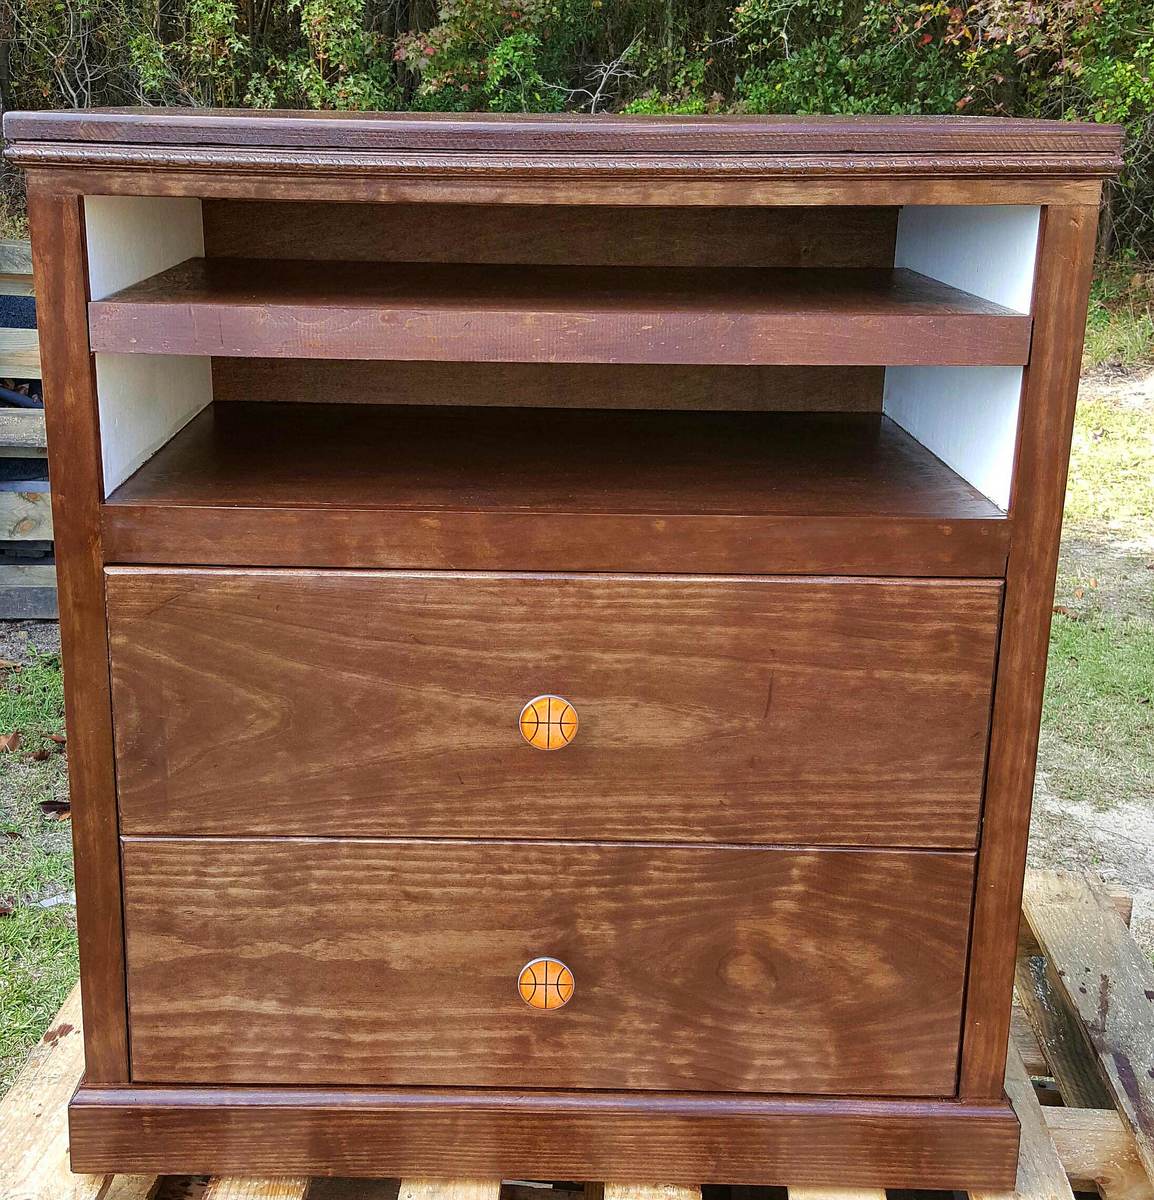
Just used Ana’s plan for apothecary cabinets. Needed mine wider, shallower and taller for use under wall mounted tv and wanted it to reach very high chair rail behind it. As well as hiding tv wires and providing much needed storage I needed to hide a cat box.
Tue, 09/06/2022 - 11:44
Love the look of this, great job incorporating the cat box! Thank you for sharing.
I made this table for a baby shower gift for my newest niece. I used the clara plan as a starting point and went from there. I ended up using (2) 2x12x36 for the top kreg jigged together and sanded them completely smooth. I used existing legs from an end table and added the aprons.
I also just shortened the cubbie length to make it short enough to fit on top of the table.
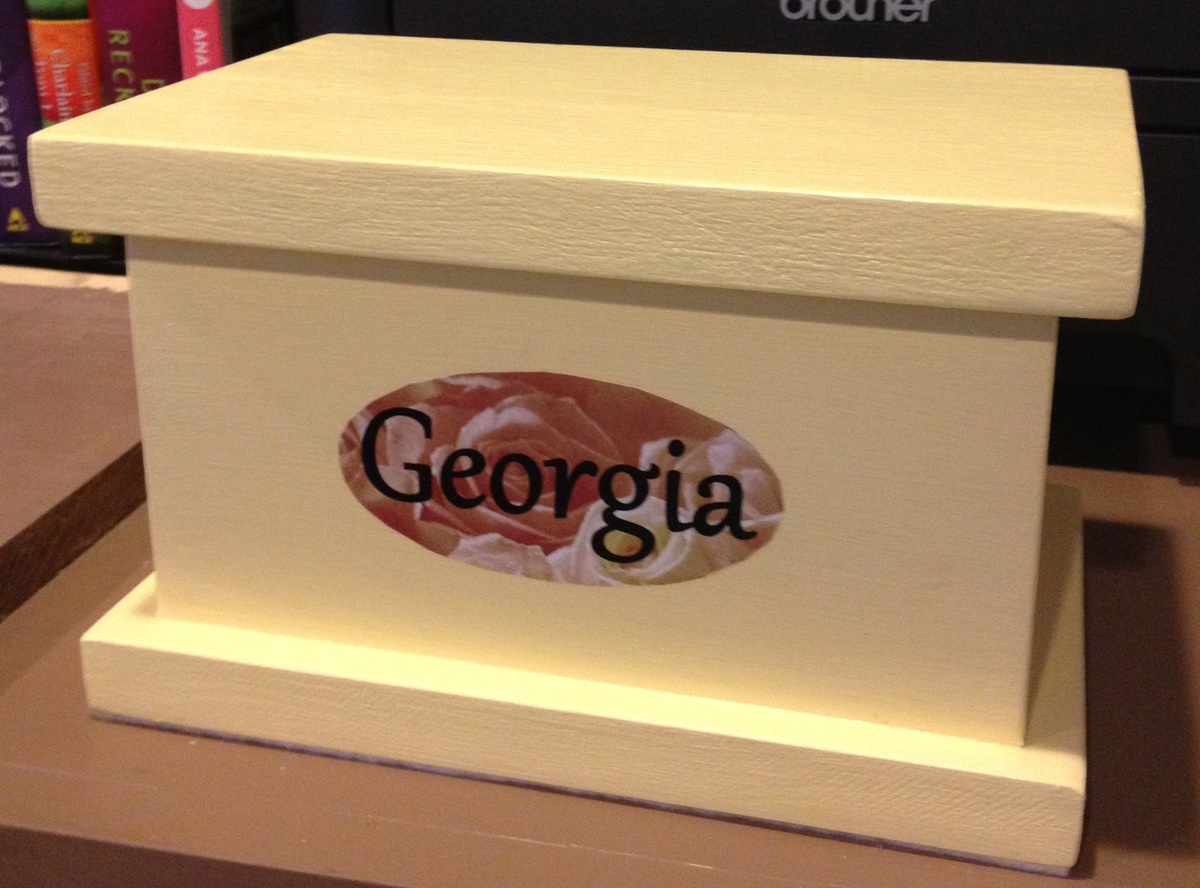
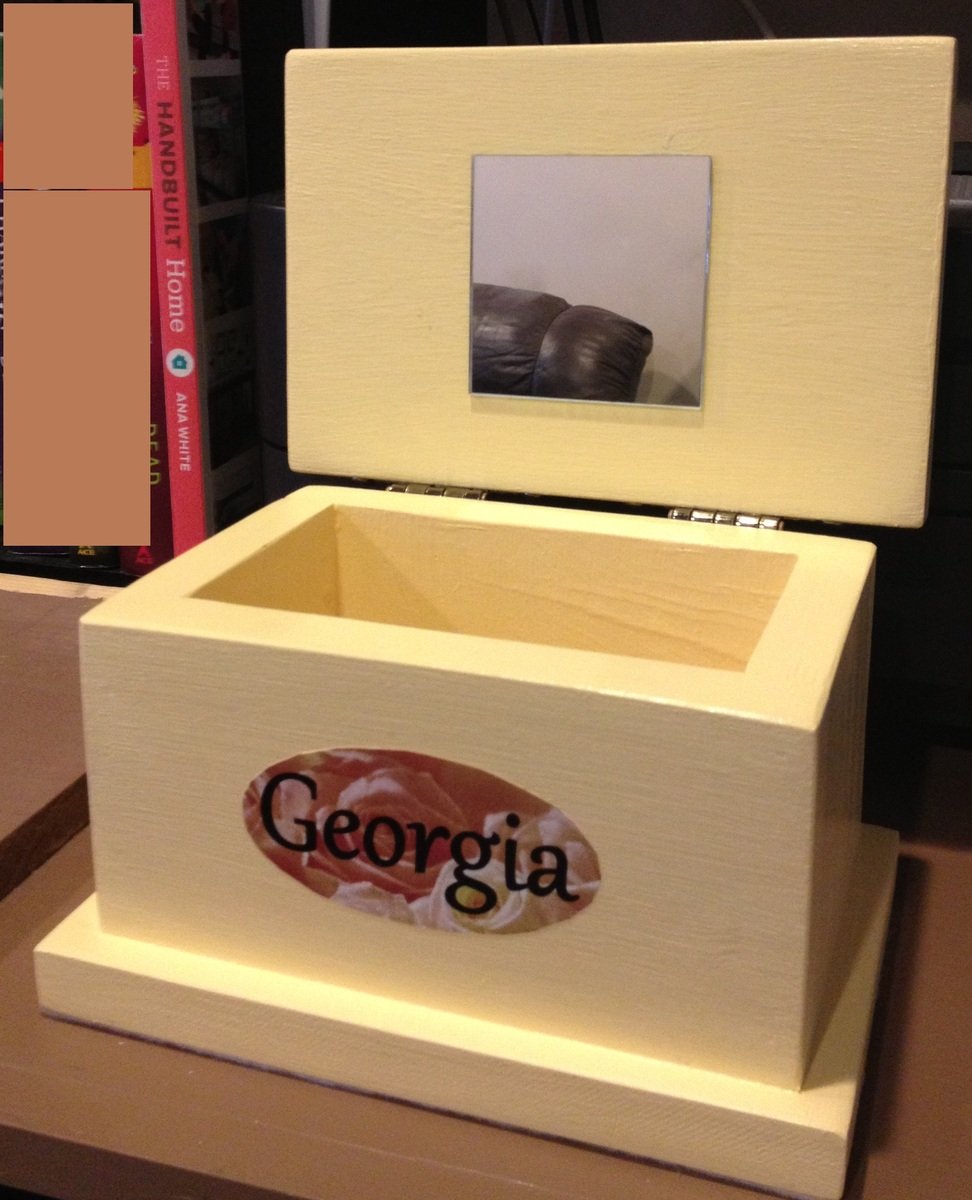
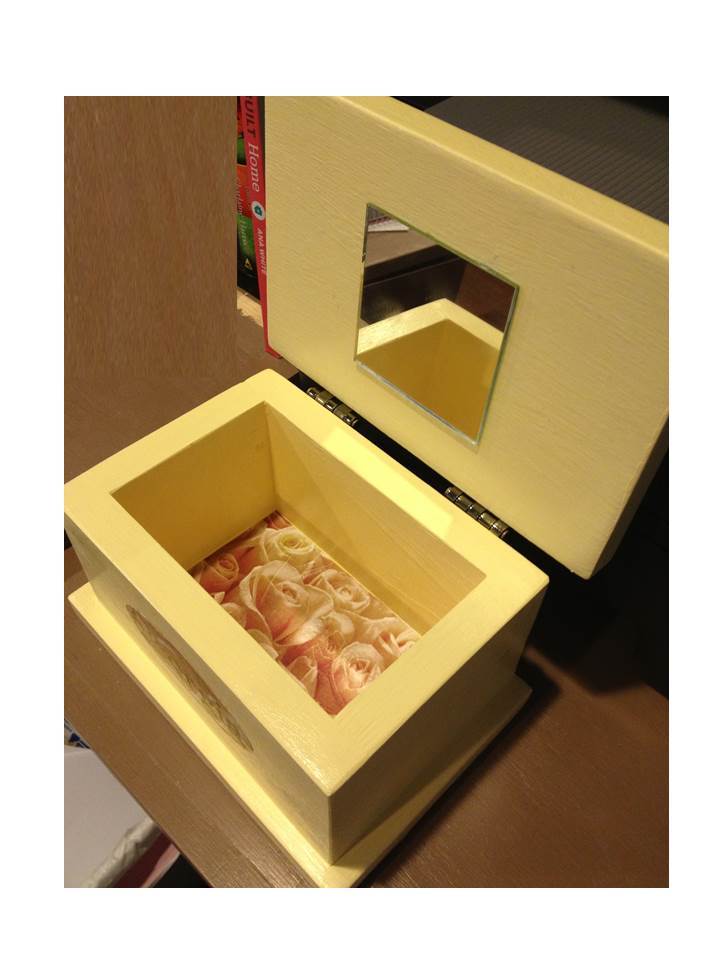
This build is a little jewelry box for a family friend who just had a baby girl named Georgia. Although I've built this box several times for myself and others to use for storage, I hadn't done a plan for it until now. This is from Georgia's Jewelry Box plan.
The wood is 1x4 and 1x6 whitewood scraps. The hinges are flat "H" style hinges from Lowes. I had them for another project and ended up not using them. The hinge color works very well with the light yellow, which I thought would be pretty for a little girl.
Originally I was going to paint or stencil her name on the front, but ended up printing it on pretty scrapbook paper and attaching with Mod Podge. Also added this paper to the bottom inside the box. Everything is top coated with Mod Podge.
On the inside of the top, I glued a 3" craft mirror (these are available in a 5-pack from Michael's for $1.99).
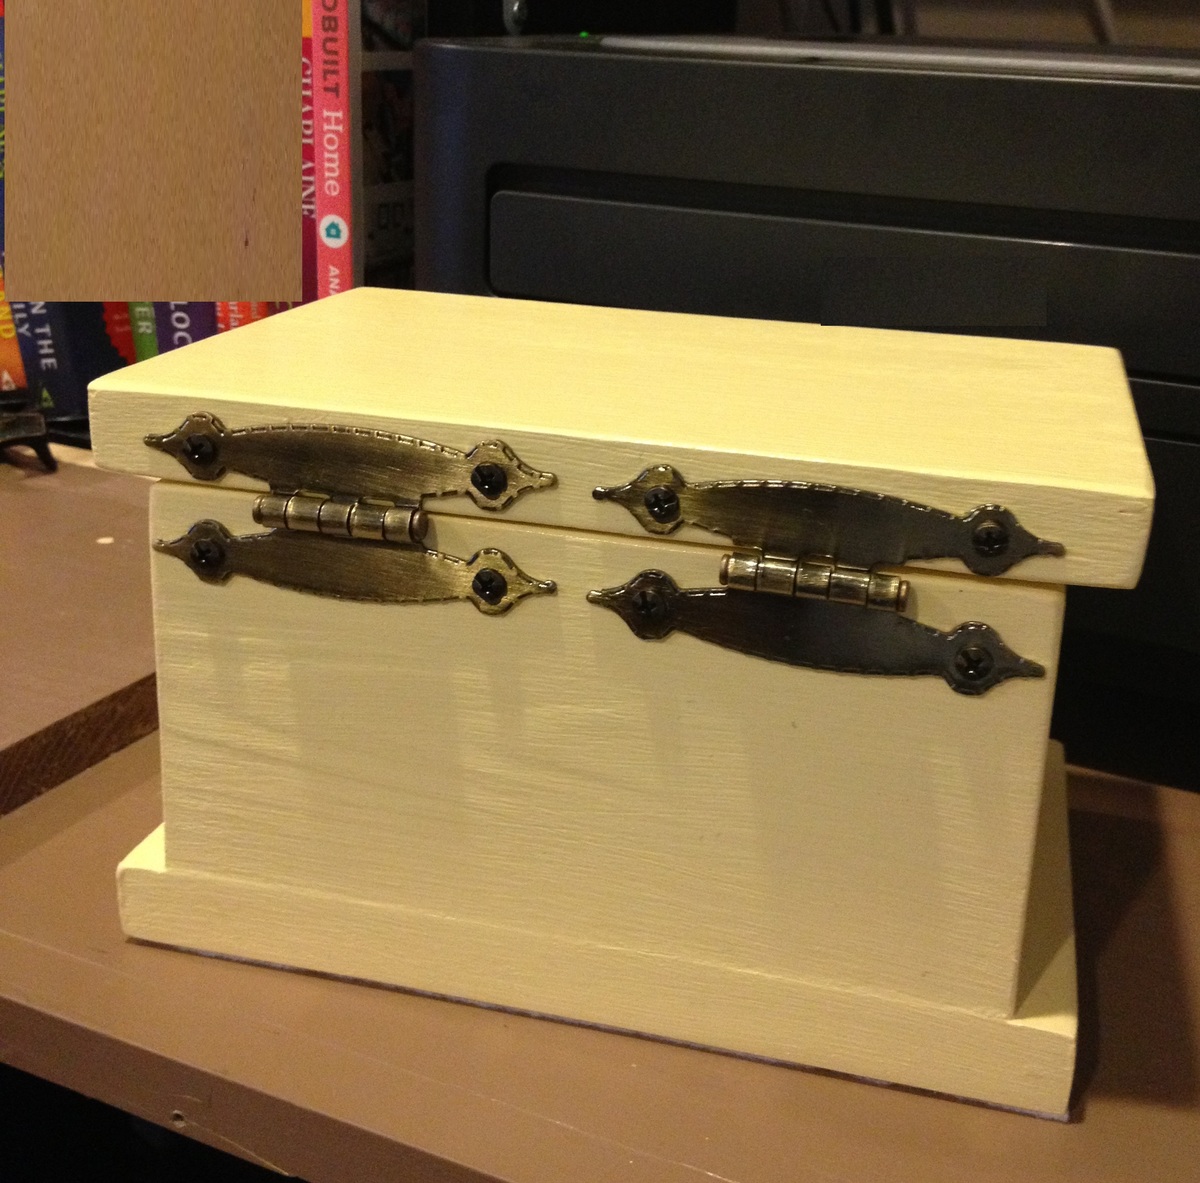
This was a very easy build. It look less than an hour to cut, build, and sand. The finishing I completed a few minutes at a time throughout the day, but the actual work between drying times wasn't more than an hour.
Fairly easy to build in a weekend.

Used your plans, worked perfectly. First time using the Kreg, gonna use that a lot more!

Wed, 01/02/2019 - 12:48
What a gorgeous room! I love the crisp white of the coffee table with your rug and sectional! Beautiful build, much appreciate you sharing!
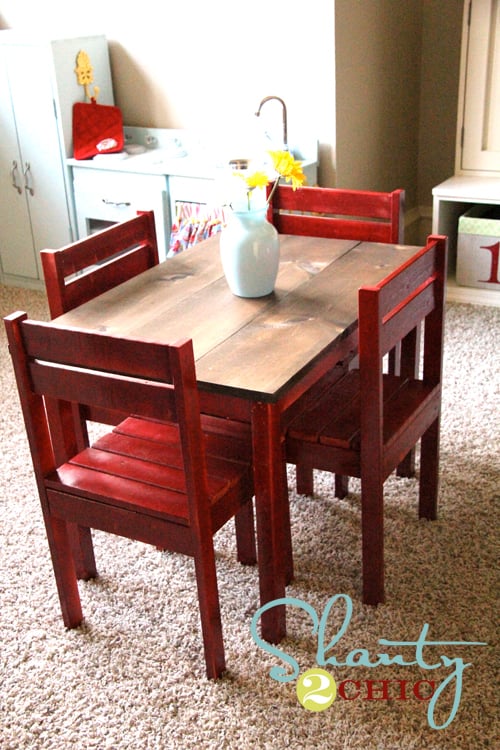
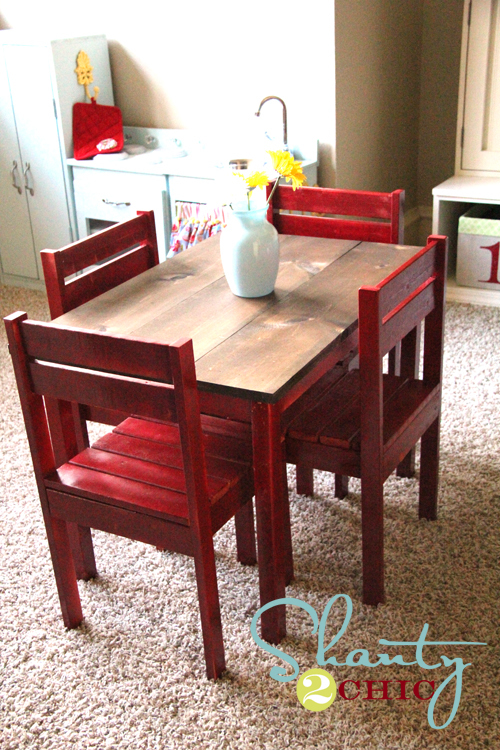
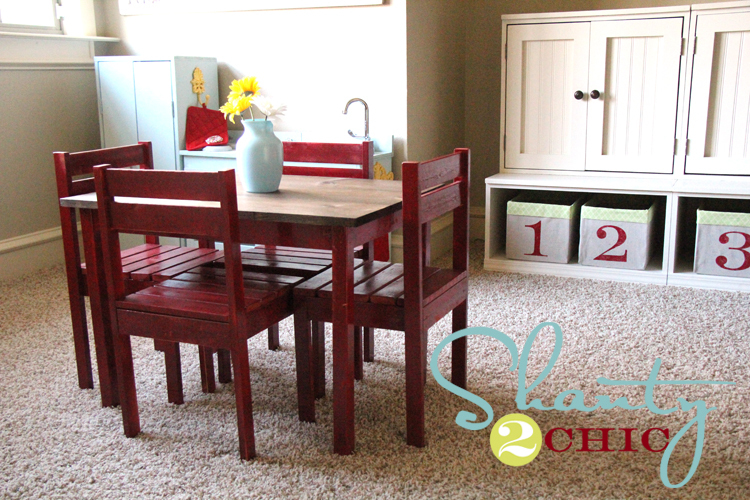
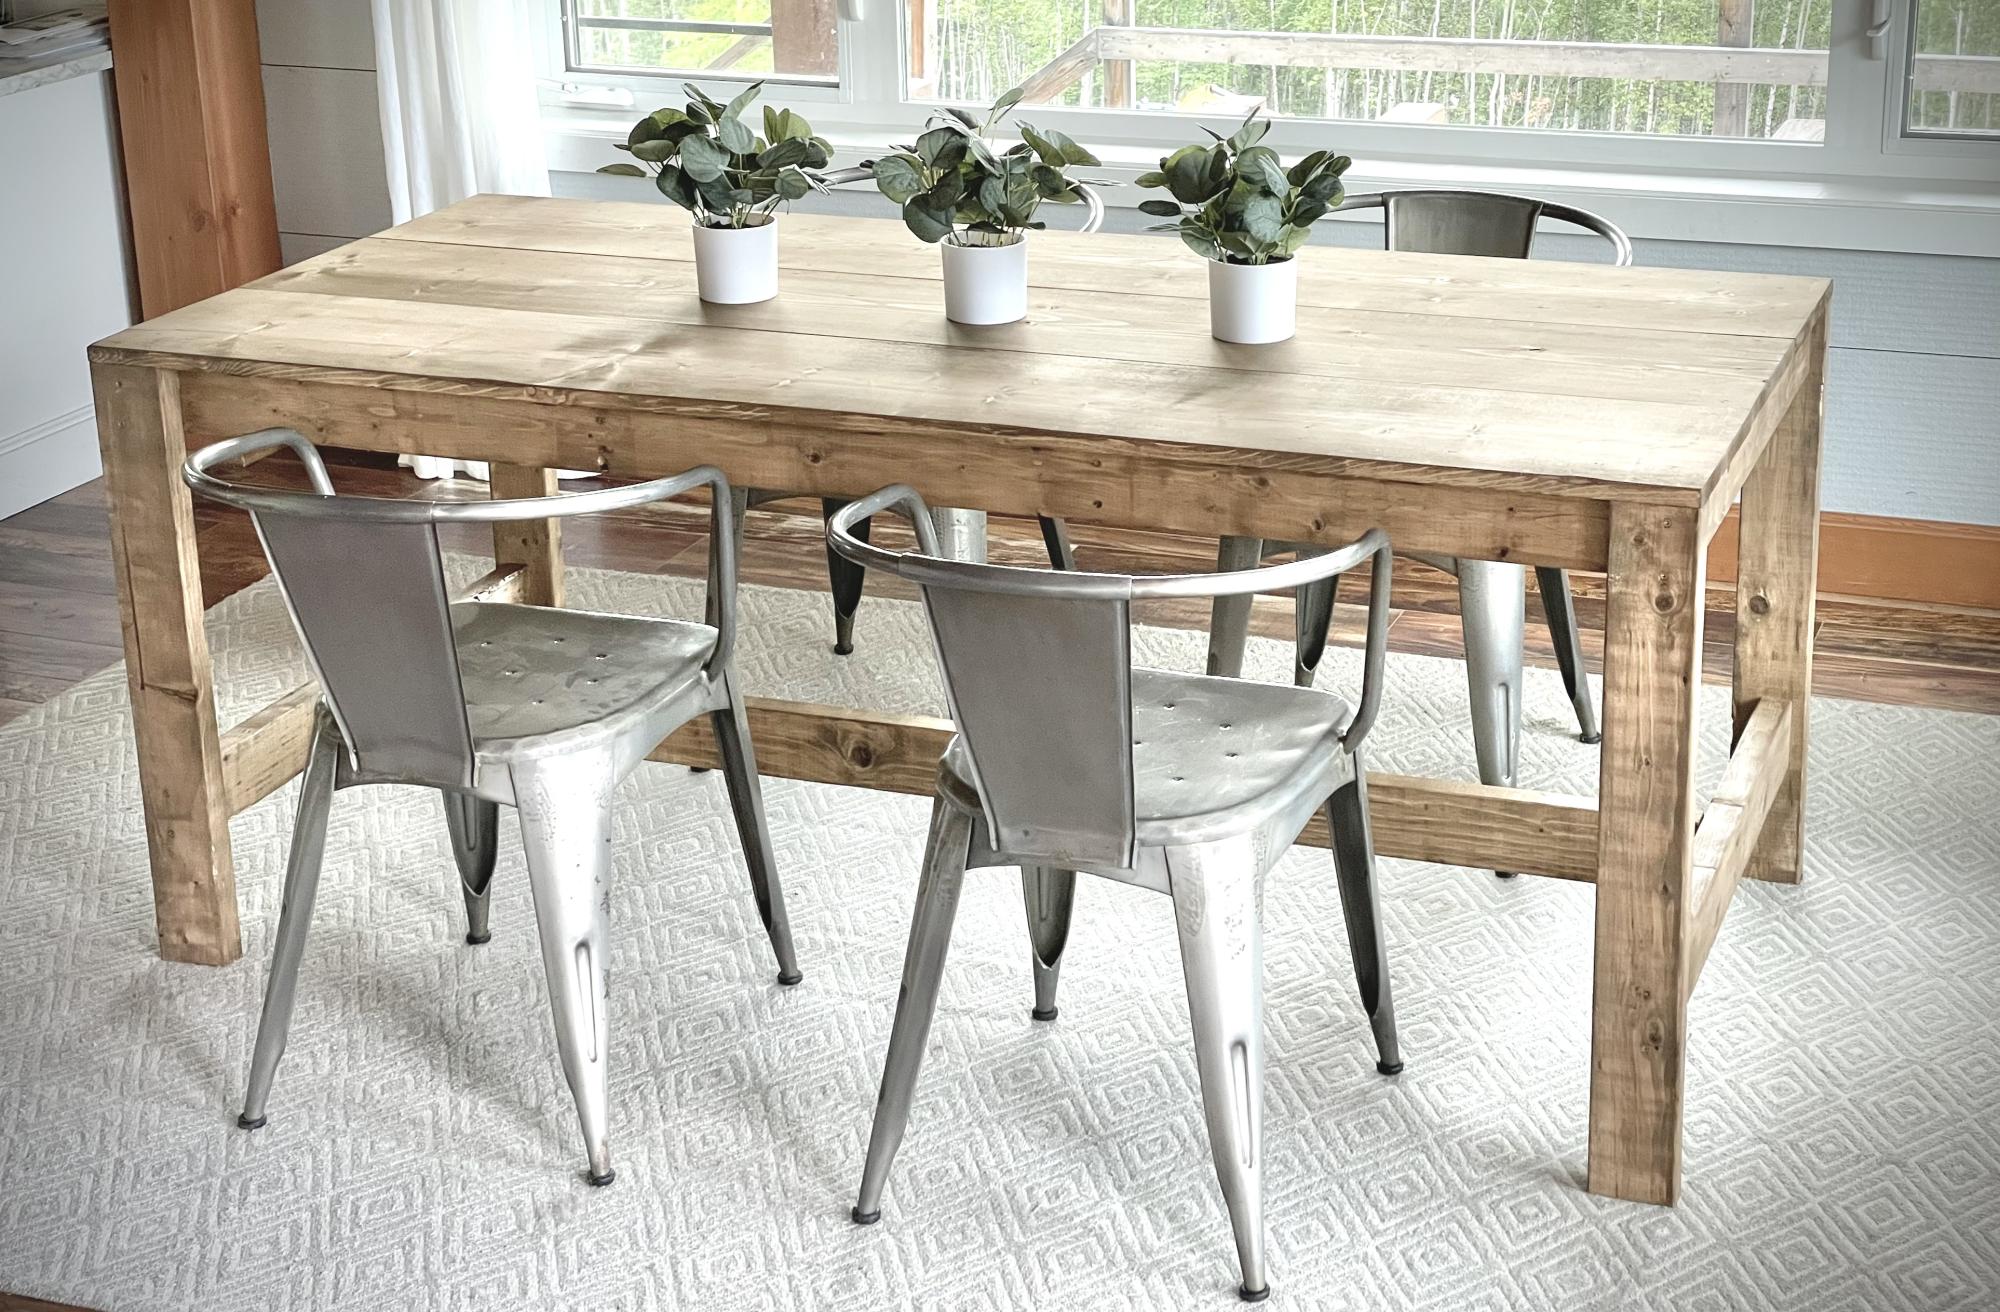
I used Ana's plan for the Clara table and the $4 stackable chairs for this project. I spent a total of $30. I used furring strips to save money. My kiddos love it! You can see more details at http://www.shanty-2-chic.com/2011/08/table-and-chairs-for-the-playroom… !!
built this a few months ago, but just now getting around to posting it. I could'nt have ever even came close to building something like this without ana. So thank you.
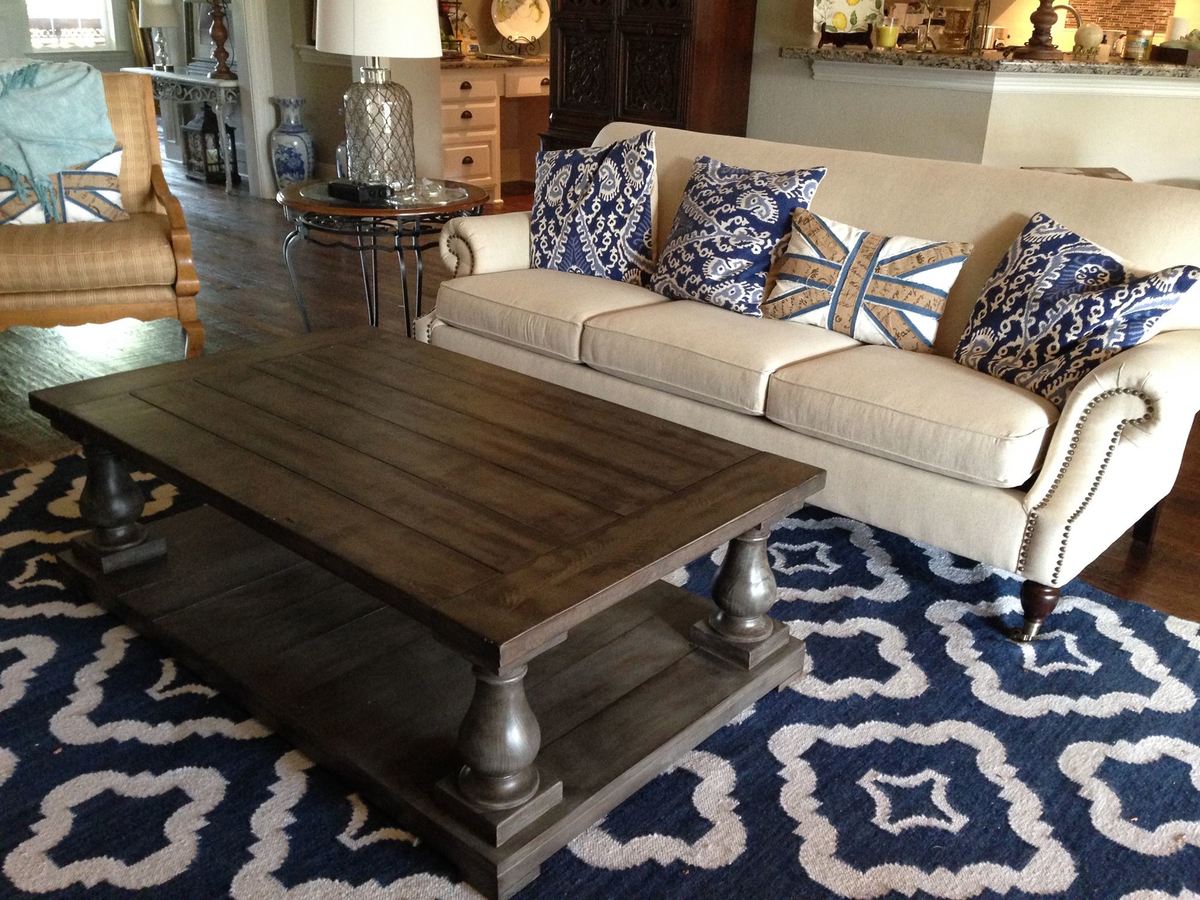
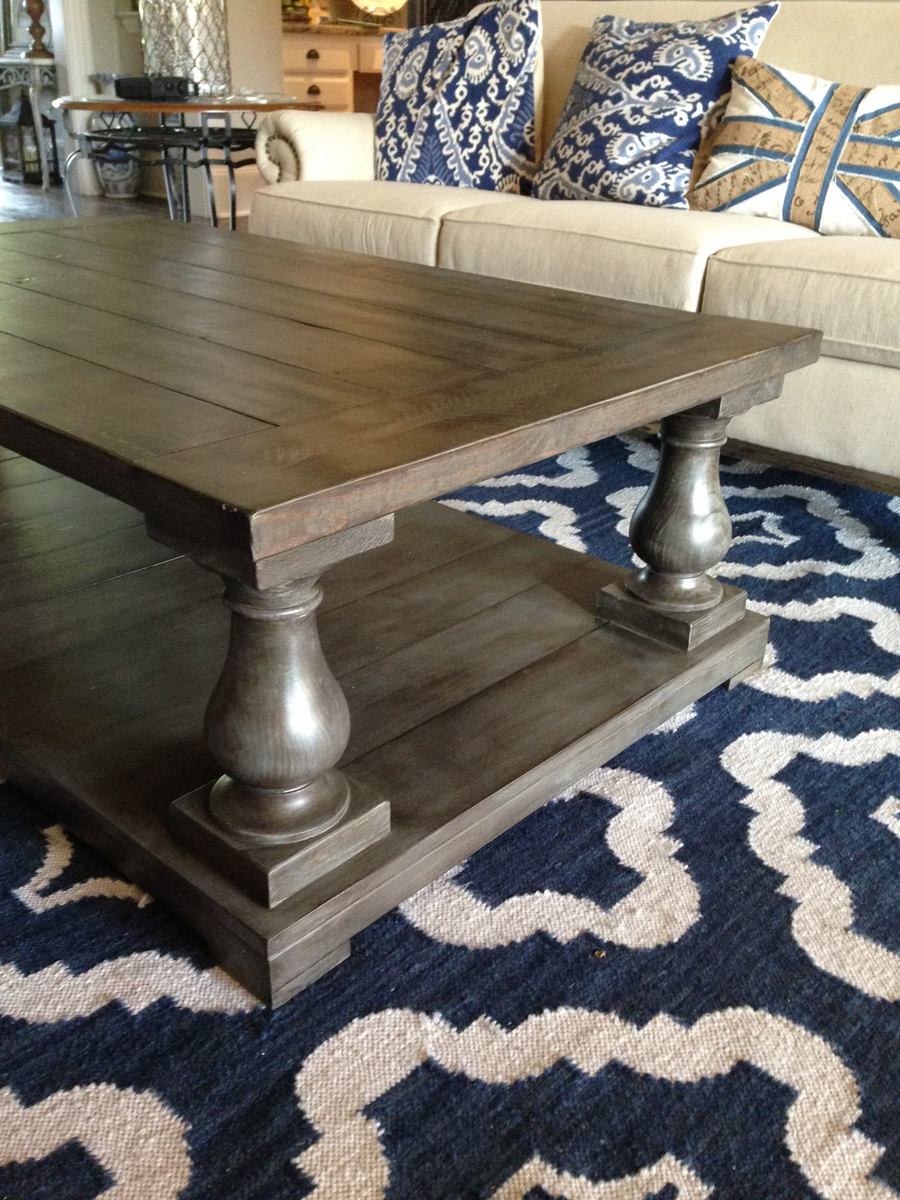
This table was my first build. Once I learned how to use the Kreg Jig and my husband taught me how to use the table and miter saws, I have fallen in love with building furniture. Since building this table, I have built a twin bed, two farm tables, a bench, the kitchen island/rolling server table from Ana's book, and an awesome workbench with red racing wheels! This past weekend I finished my first custom order - an 8-foot Husky leg Farm table using Ana's plan. I now have orders for another balustrade coffee table and an end table using the matching legs from Osborne. THank you Ana!
Sat, 02/18/2017 - 12:34
Where did you get your sofa? This is what I am looking for. And I LOVE the choice of stains.
Tue, 03/13/2018 - 17:01
Can you tell me how you applied the 3 different stains to give such a rich color. This is so beautiful.
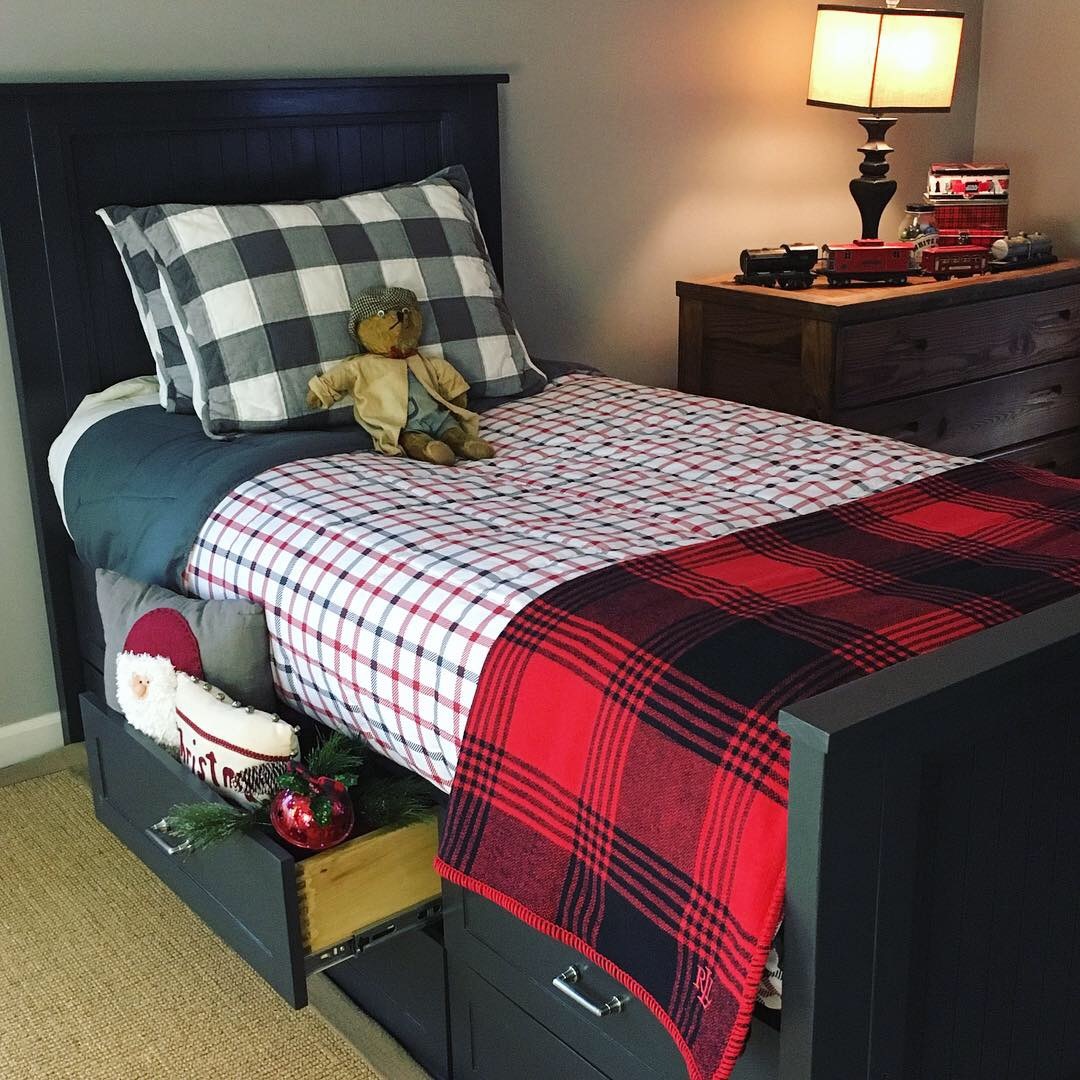
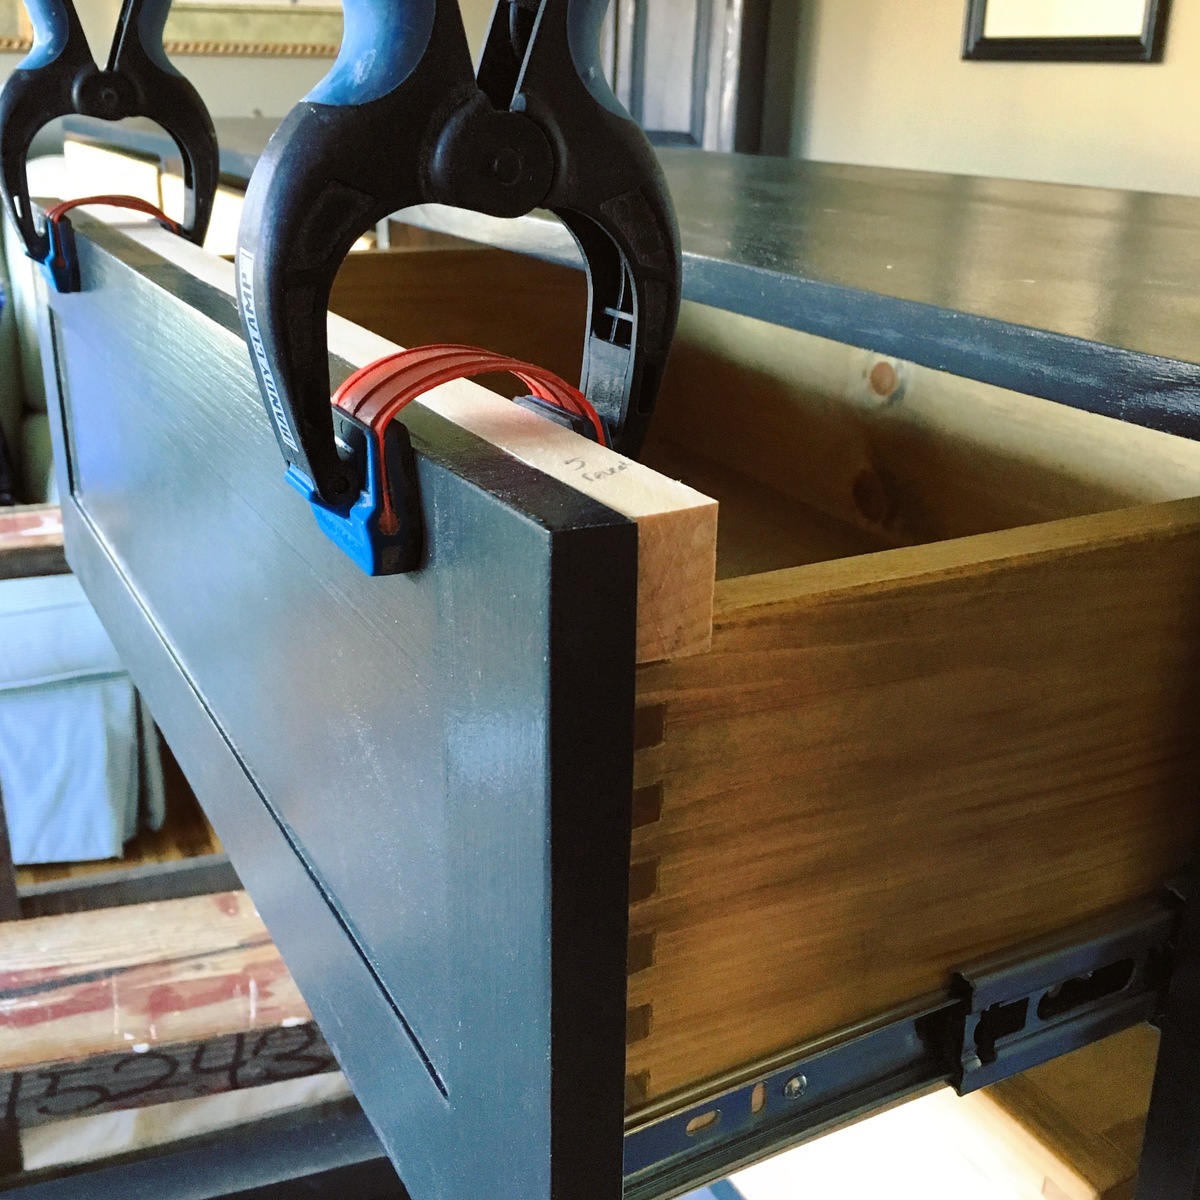
Utilizing Ana’s plans I was able to build this great bed with a few “ extras”. Box joint drawers..rail/stile drawer frames.. peg joinery to name a few! So much fun following these plans and achieving results that made one young man very happy! Thanks Ana!!
Fri, 01/04/2019 - 13:30
Wow, this is so beautiful and obviously well made! I love the staging too! Thank you so much for using our plans and sharing a photo! Ana
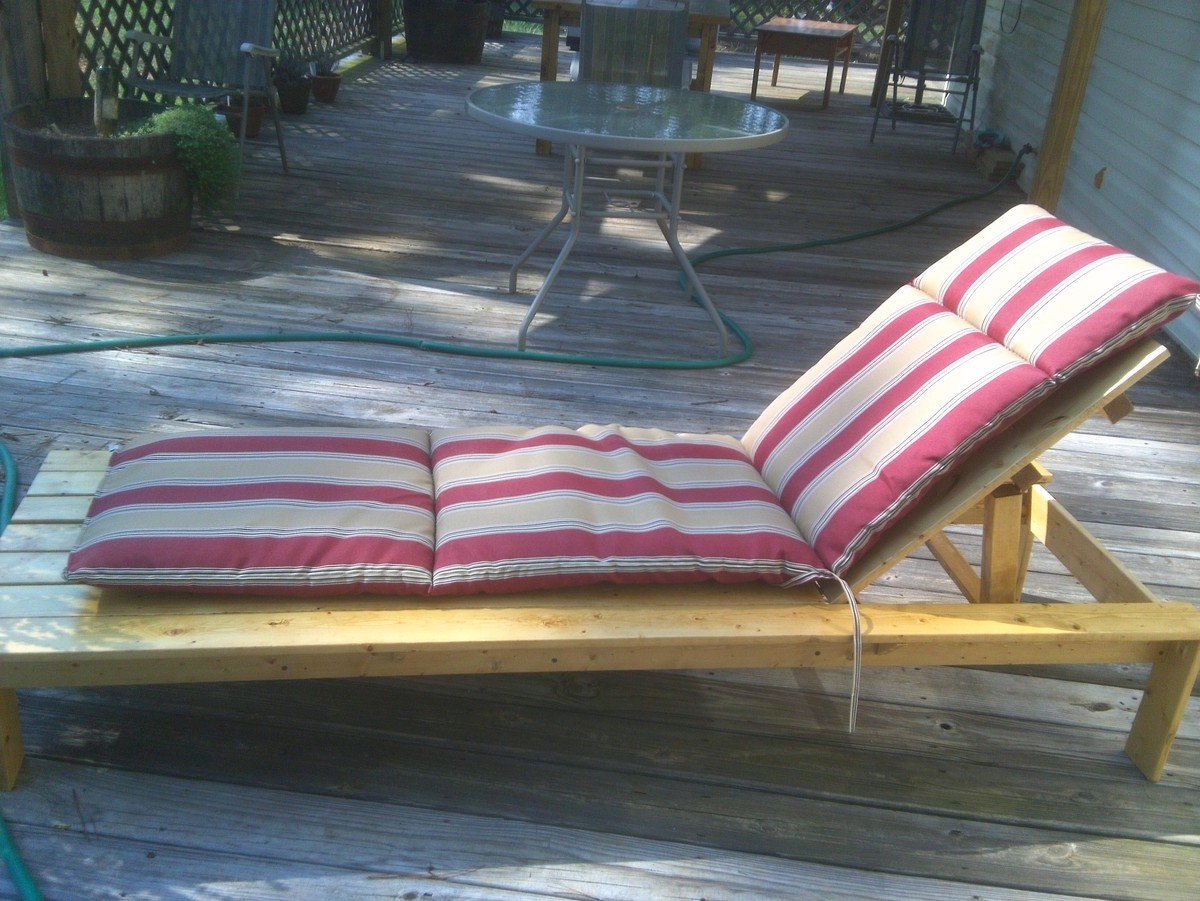
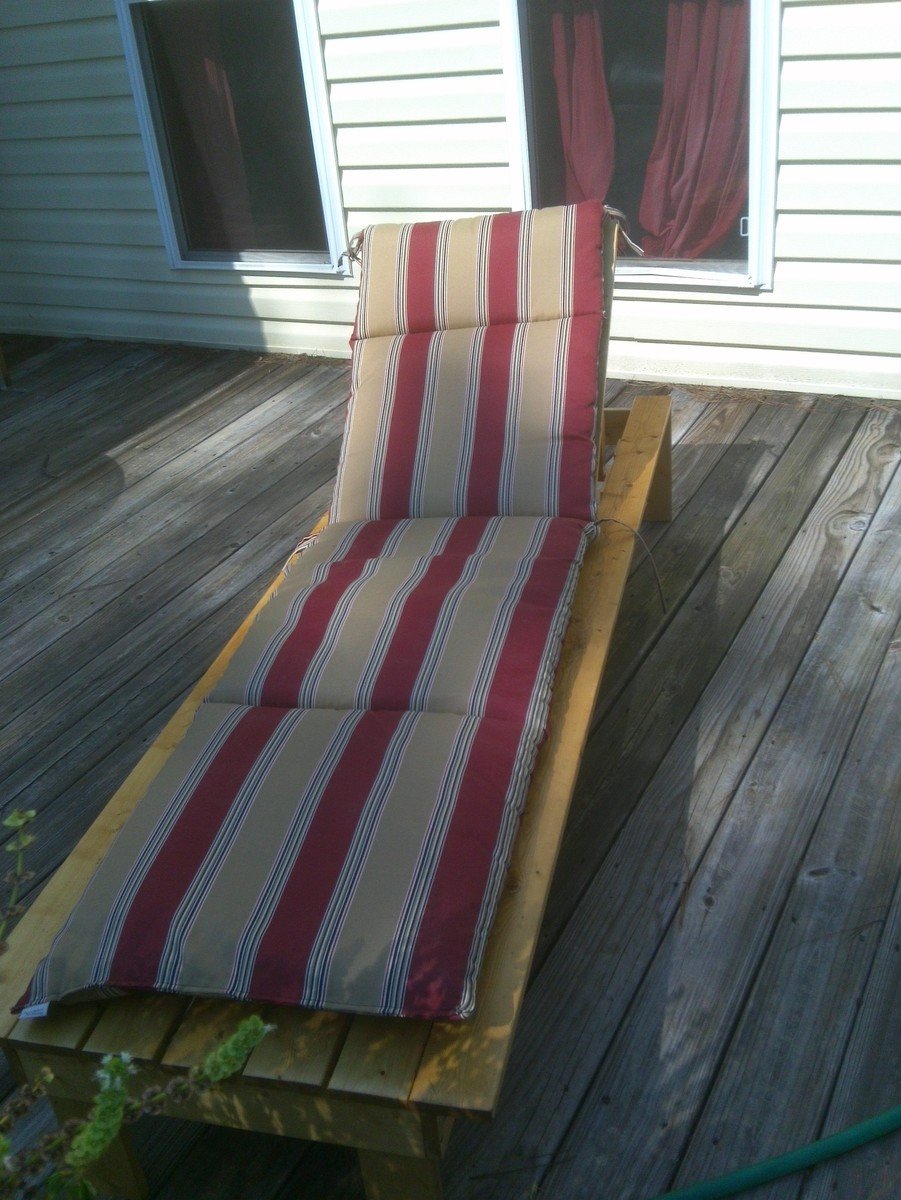
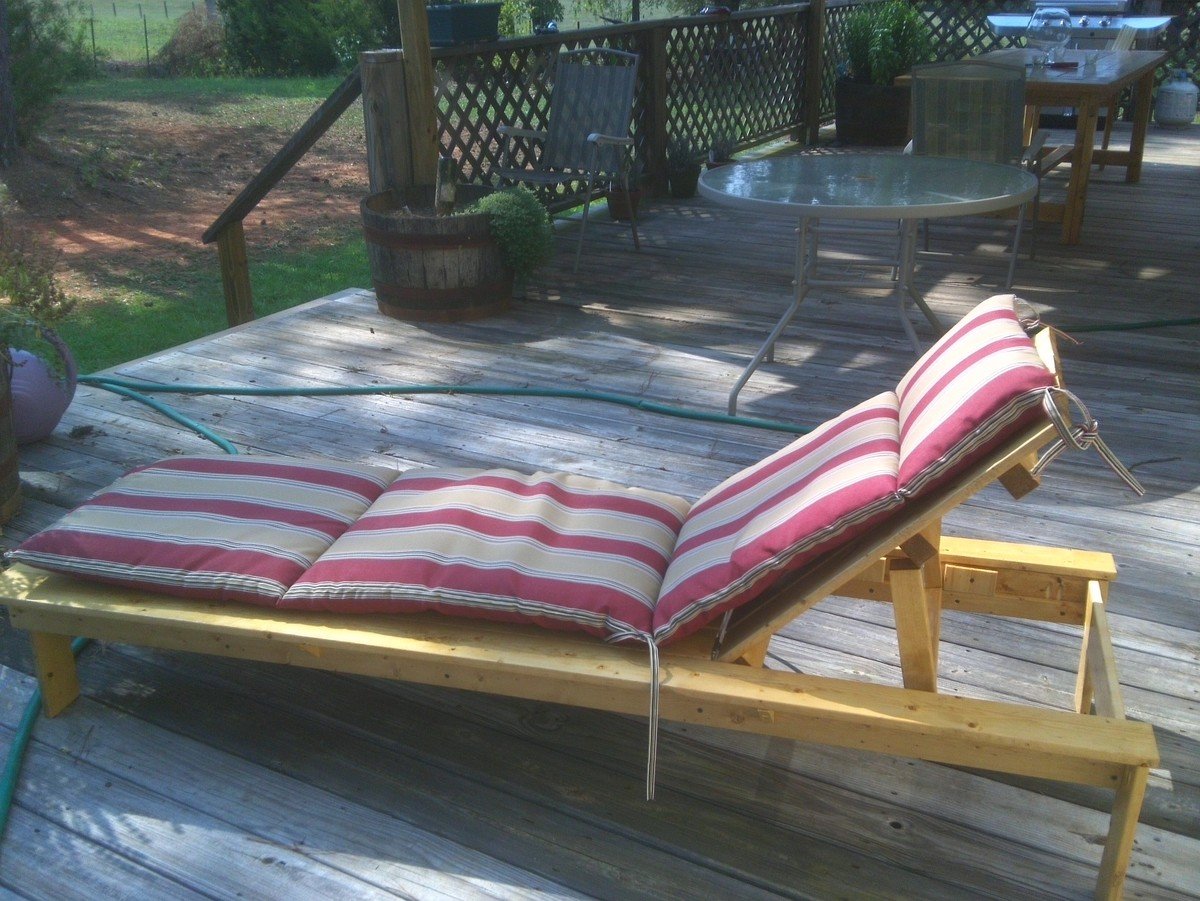
This was my second project from the site. I wanted somewhere to read my book on the back deck. This chair is perfect. When I get tired of reading I can lay it down and take a nap. It is very sturdy and easy to put together. I do recommend using pocket holes to assemble it. I found it much easier.
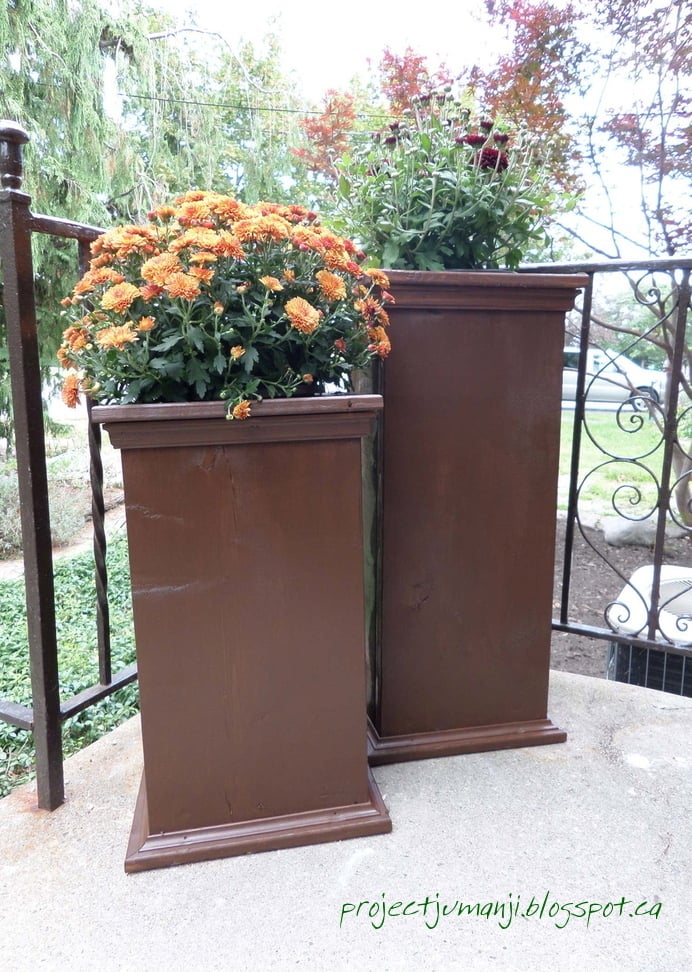
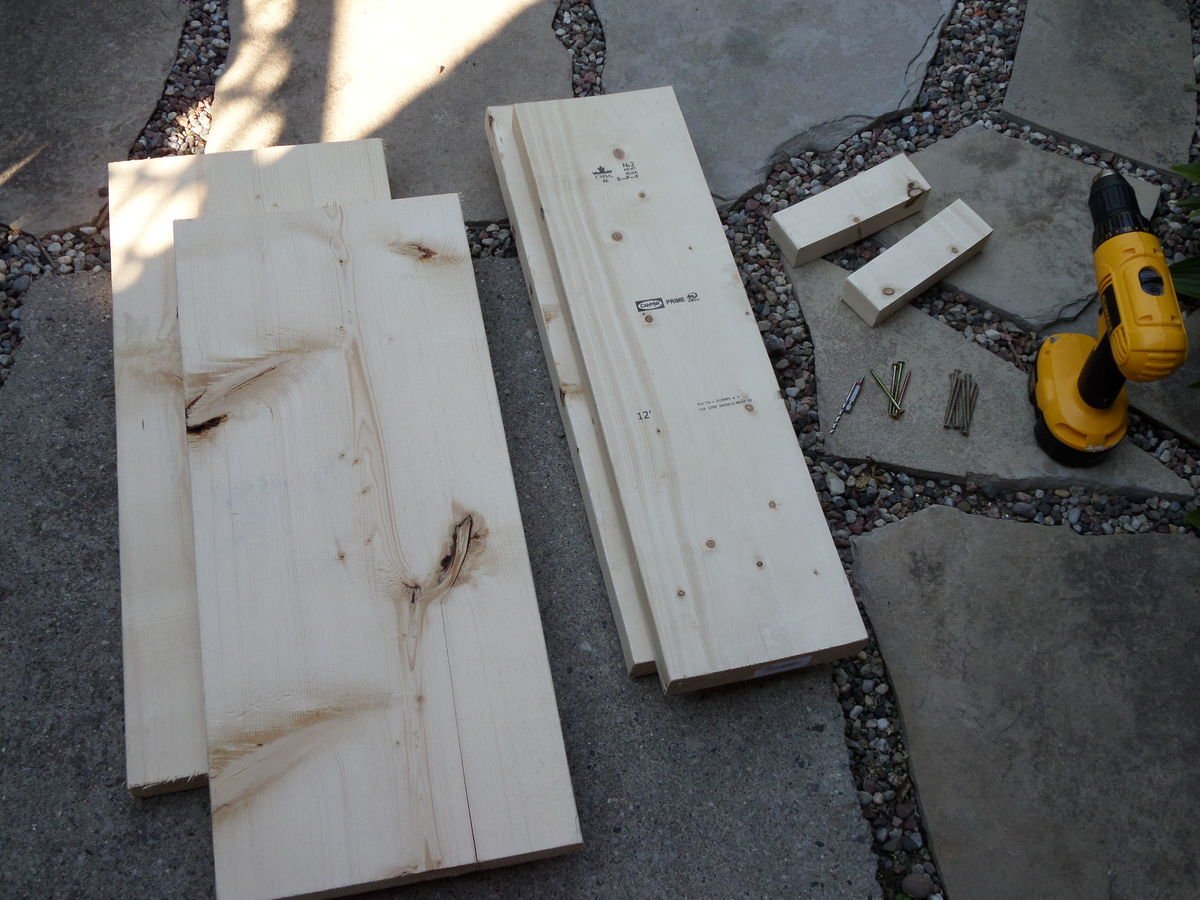
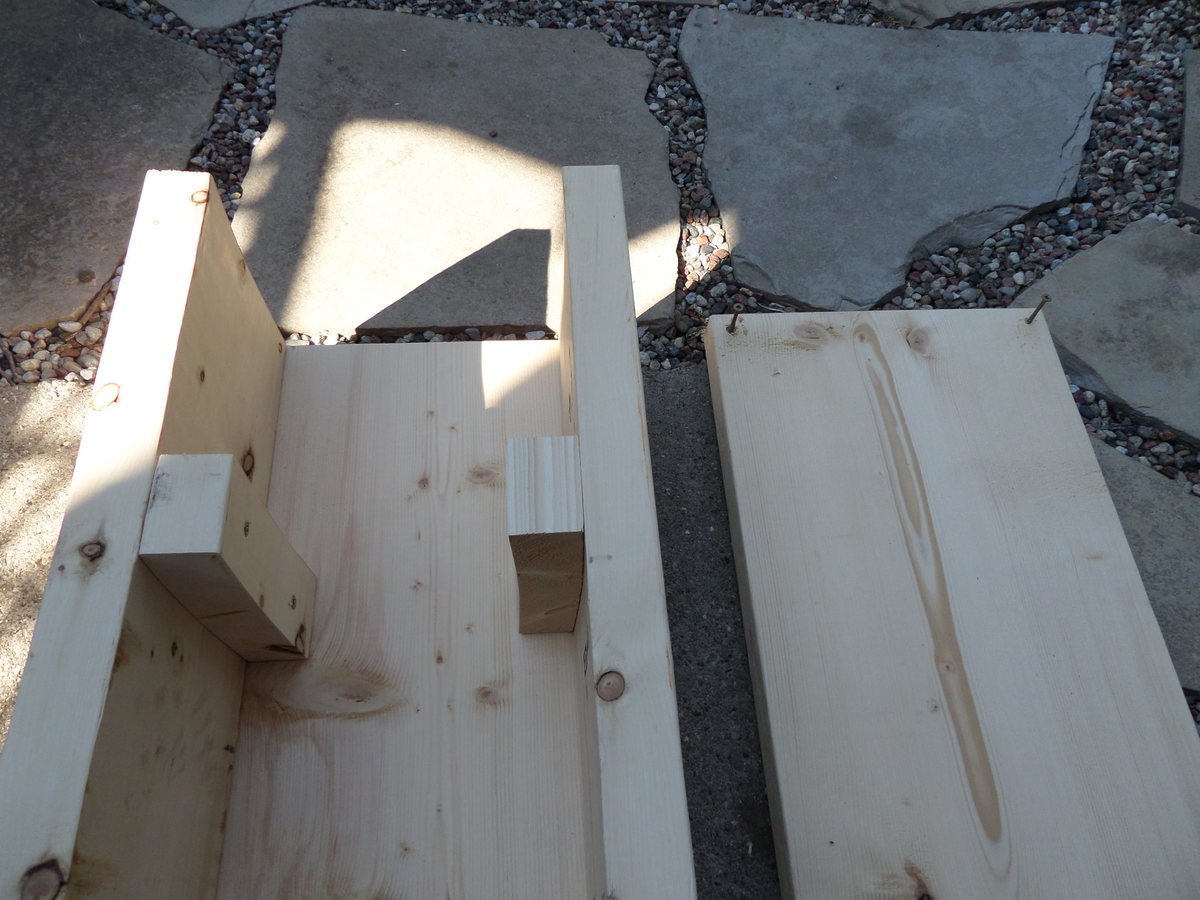
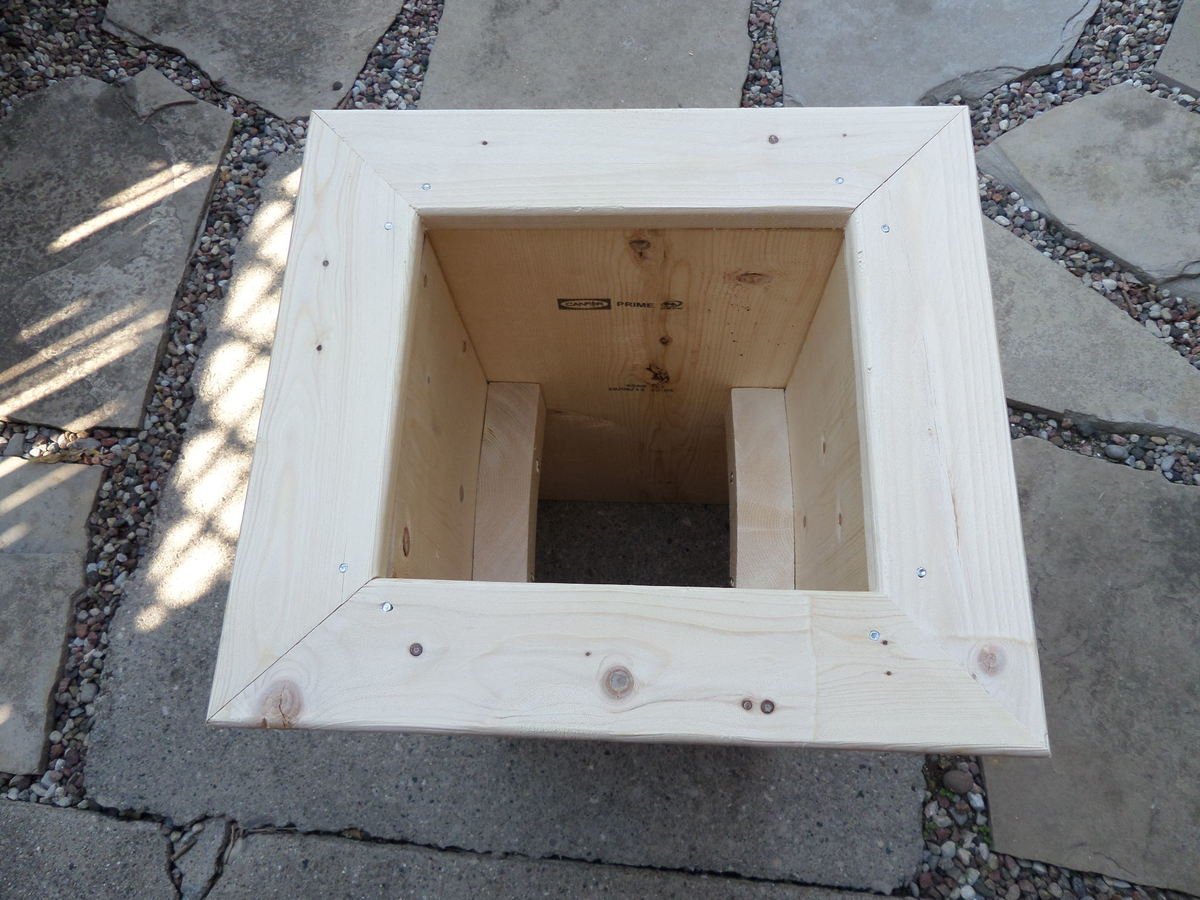
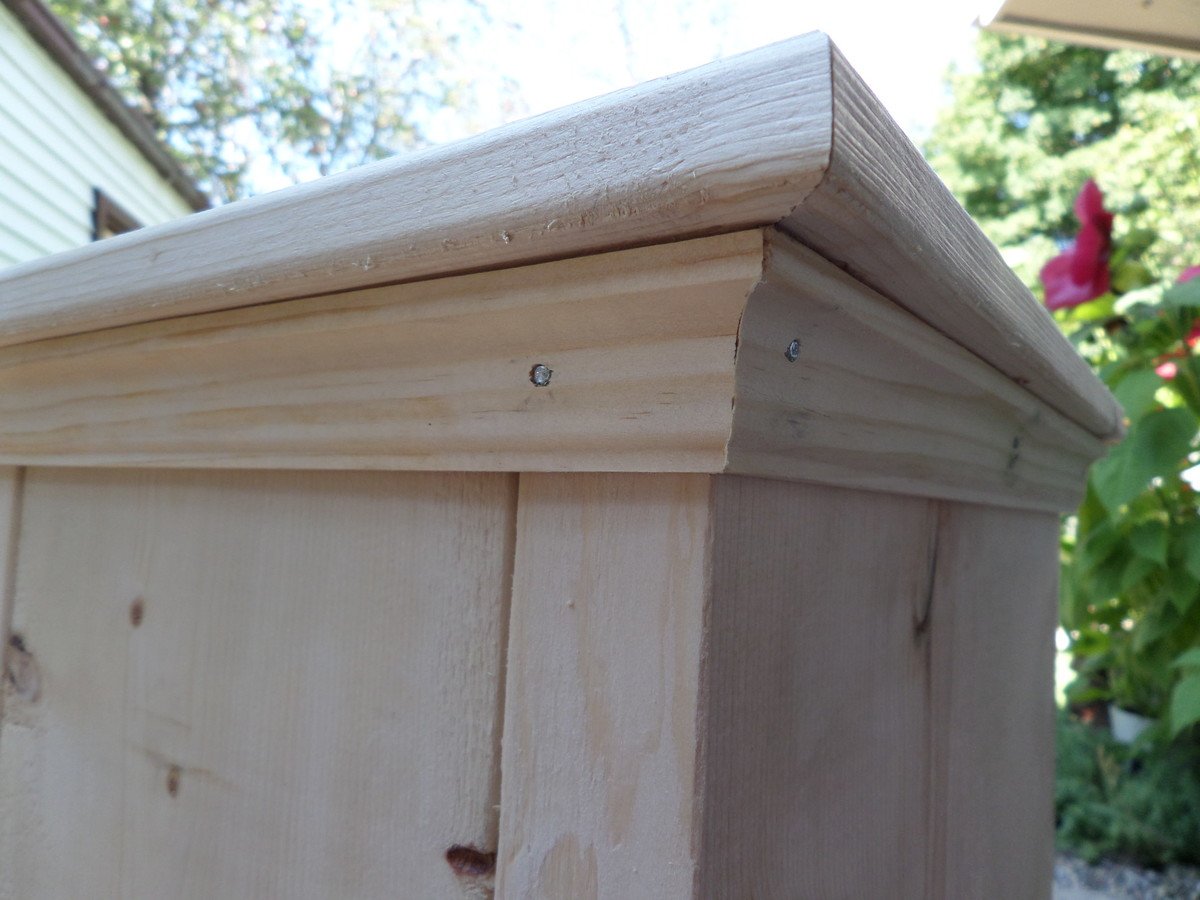
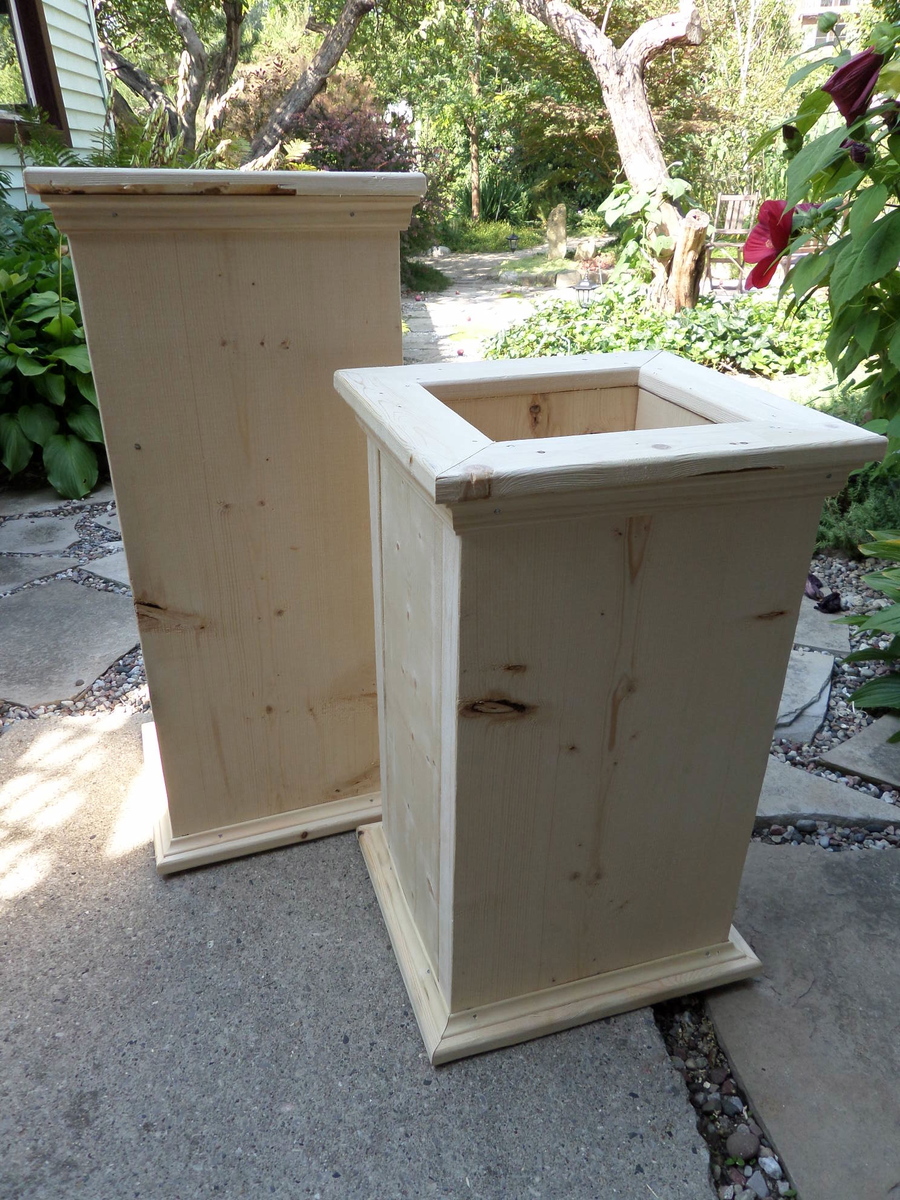
Just in time for Fall Mums, I wanted a set of sturdy planters that I knew would hold up in the winter. I wanted to try something that felt more 'simple' to me than the pattern I was inspired by.
I used some 2" wide pine so they ended up quite heavy, but I know they'll hold the test of time.
It was quite an easy project, and I encourage anyone to make their own. It took me only a Saturday once I got going. Painted them the next day... then done!
Enjoy the details here --> http://projectjumanji.blogspot.ca/2013/08/homemade-decorative-planter-b…
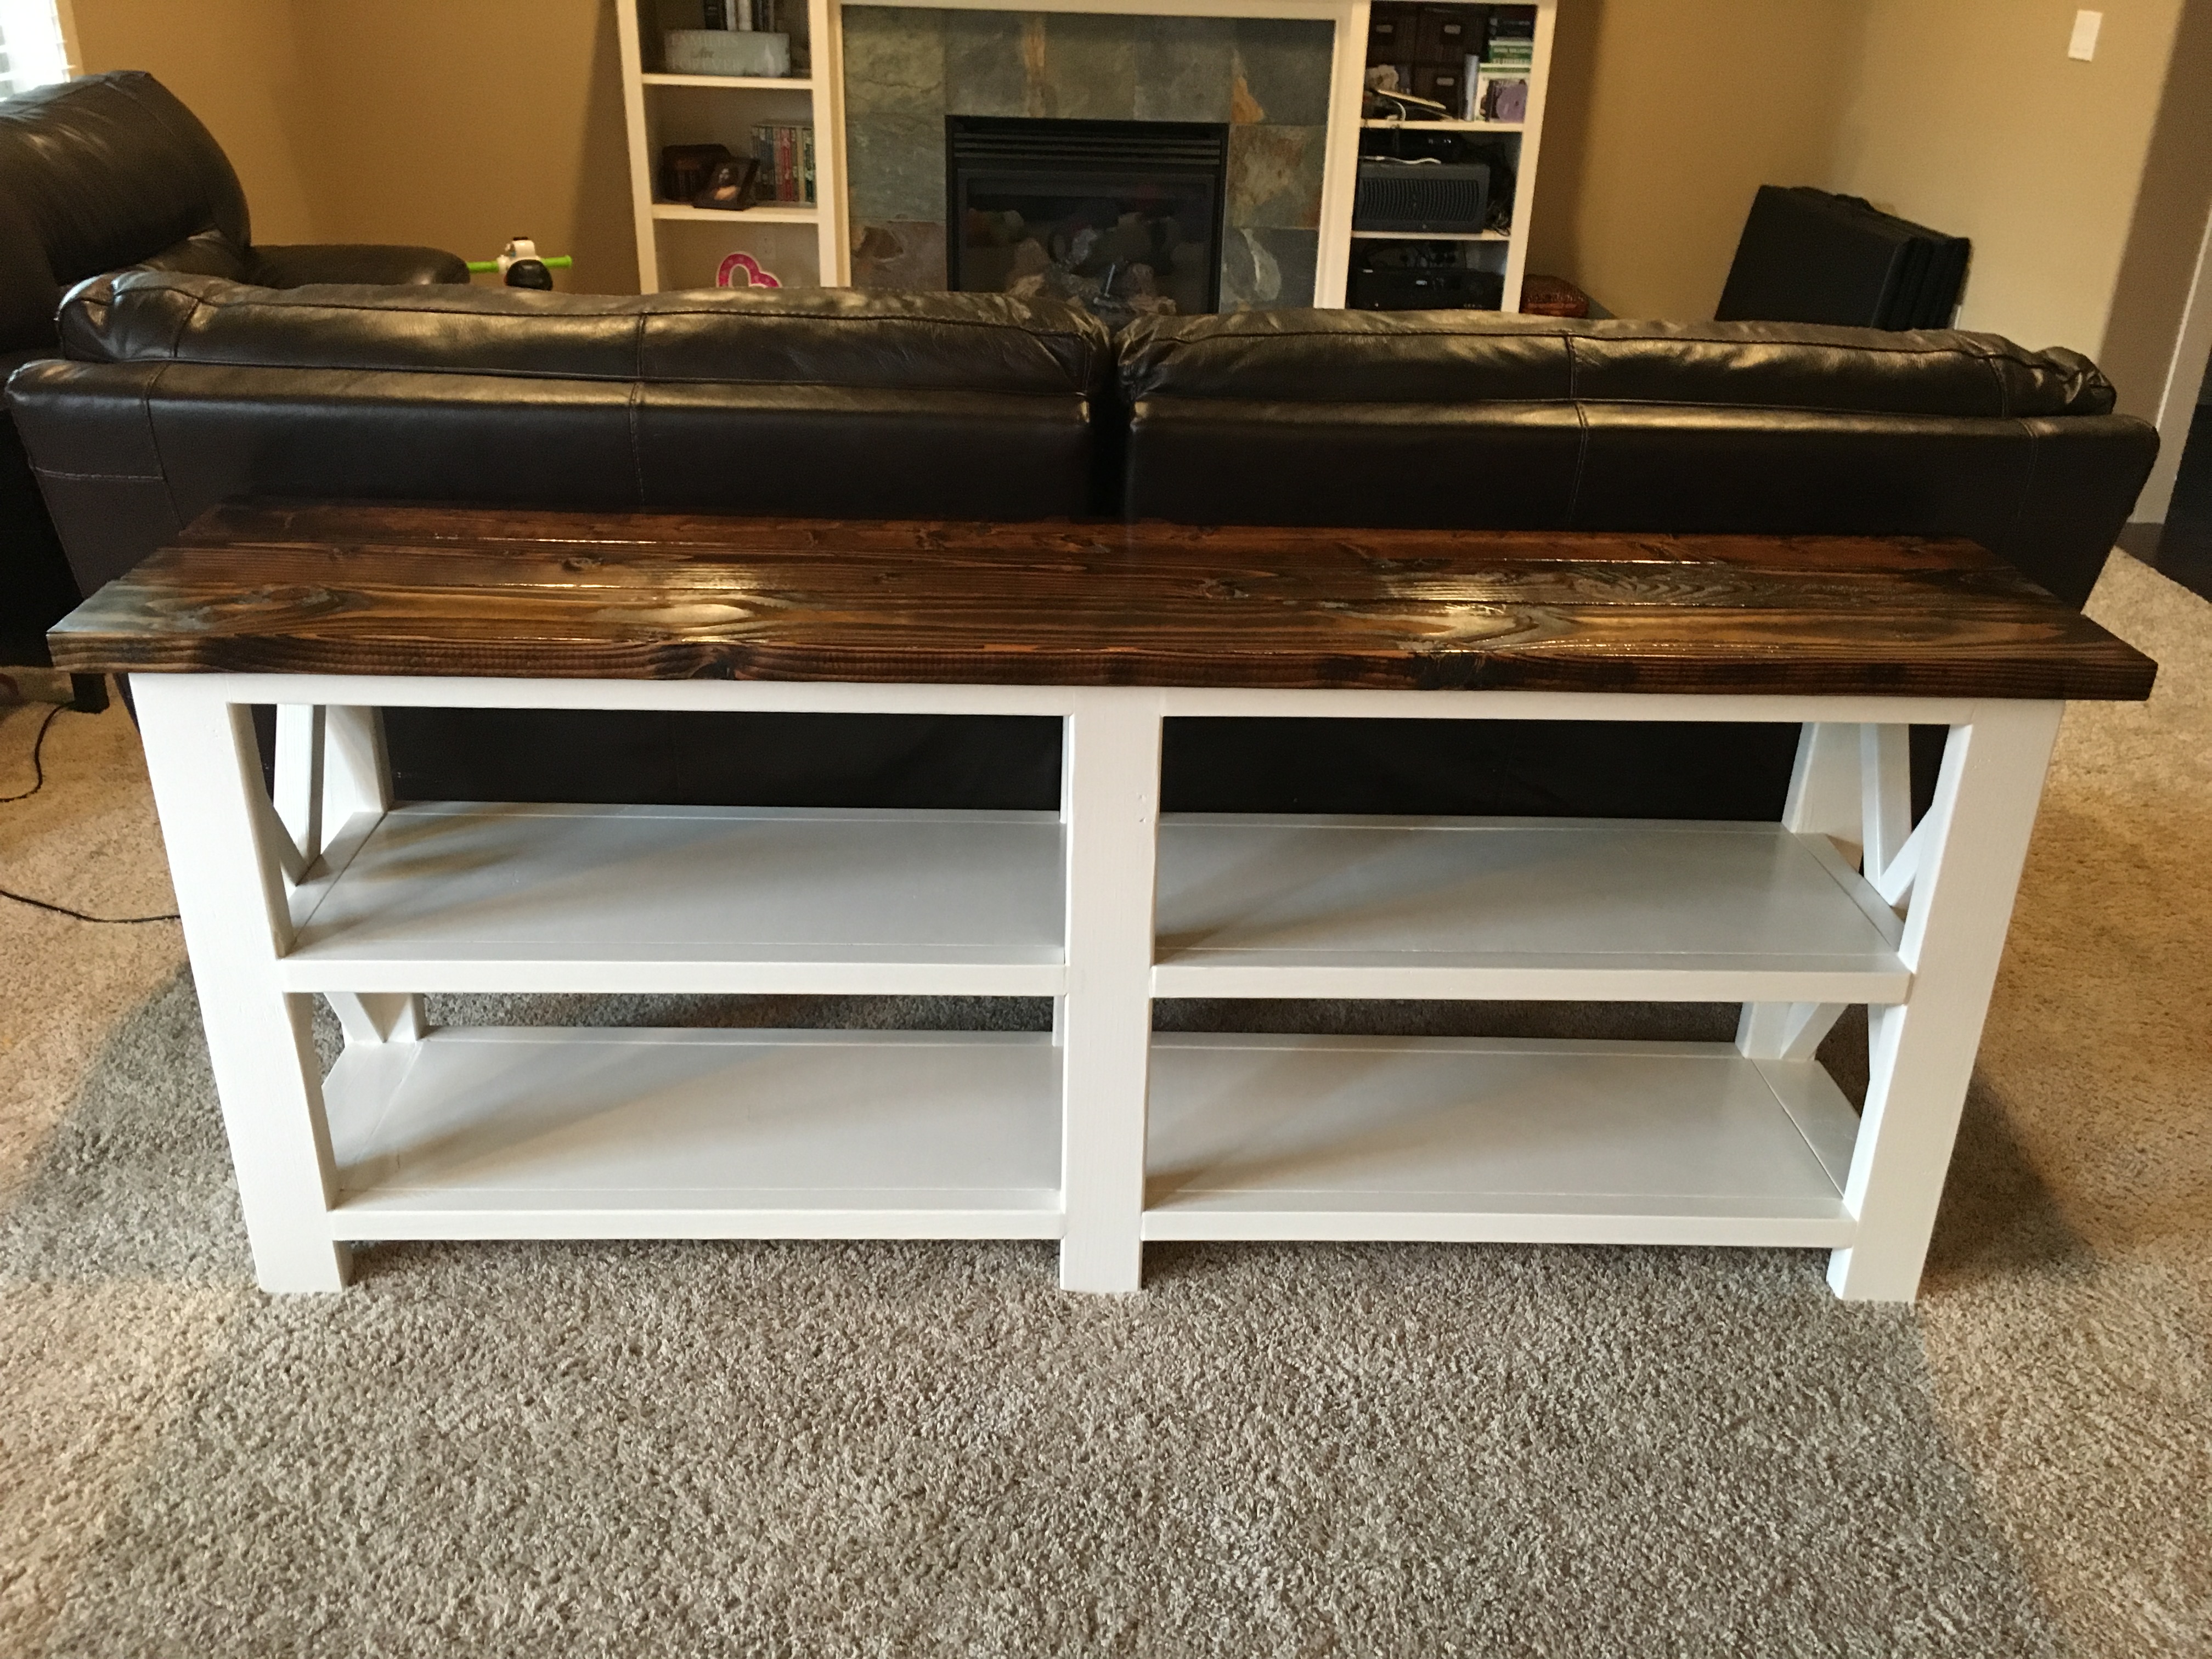
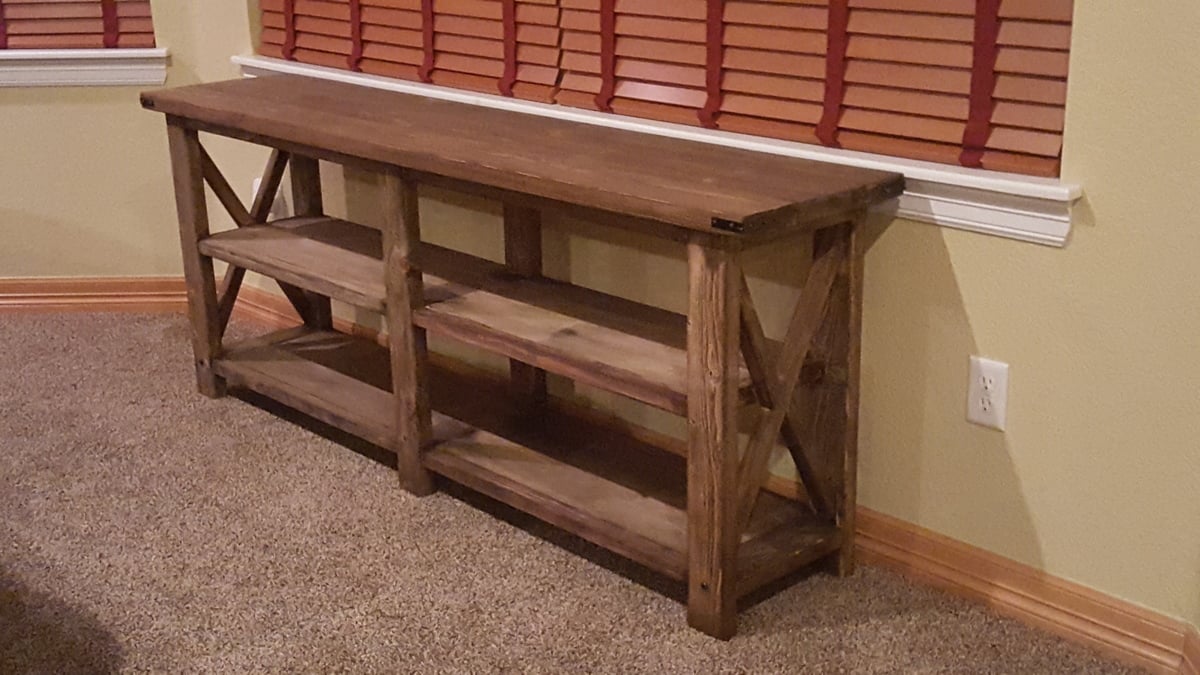
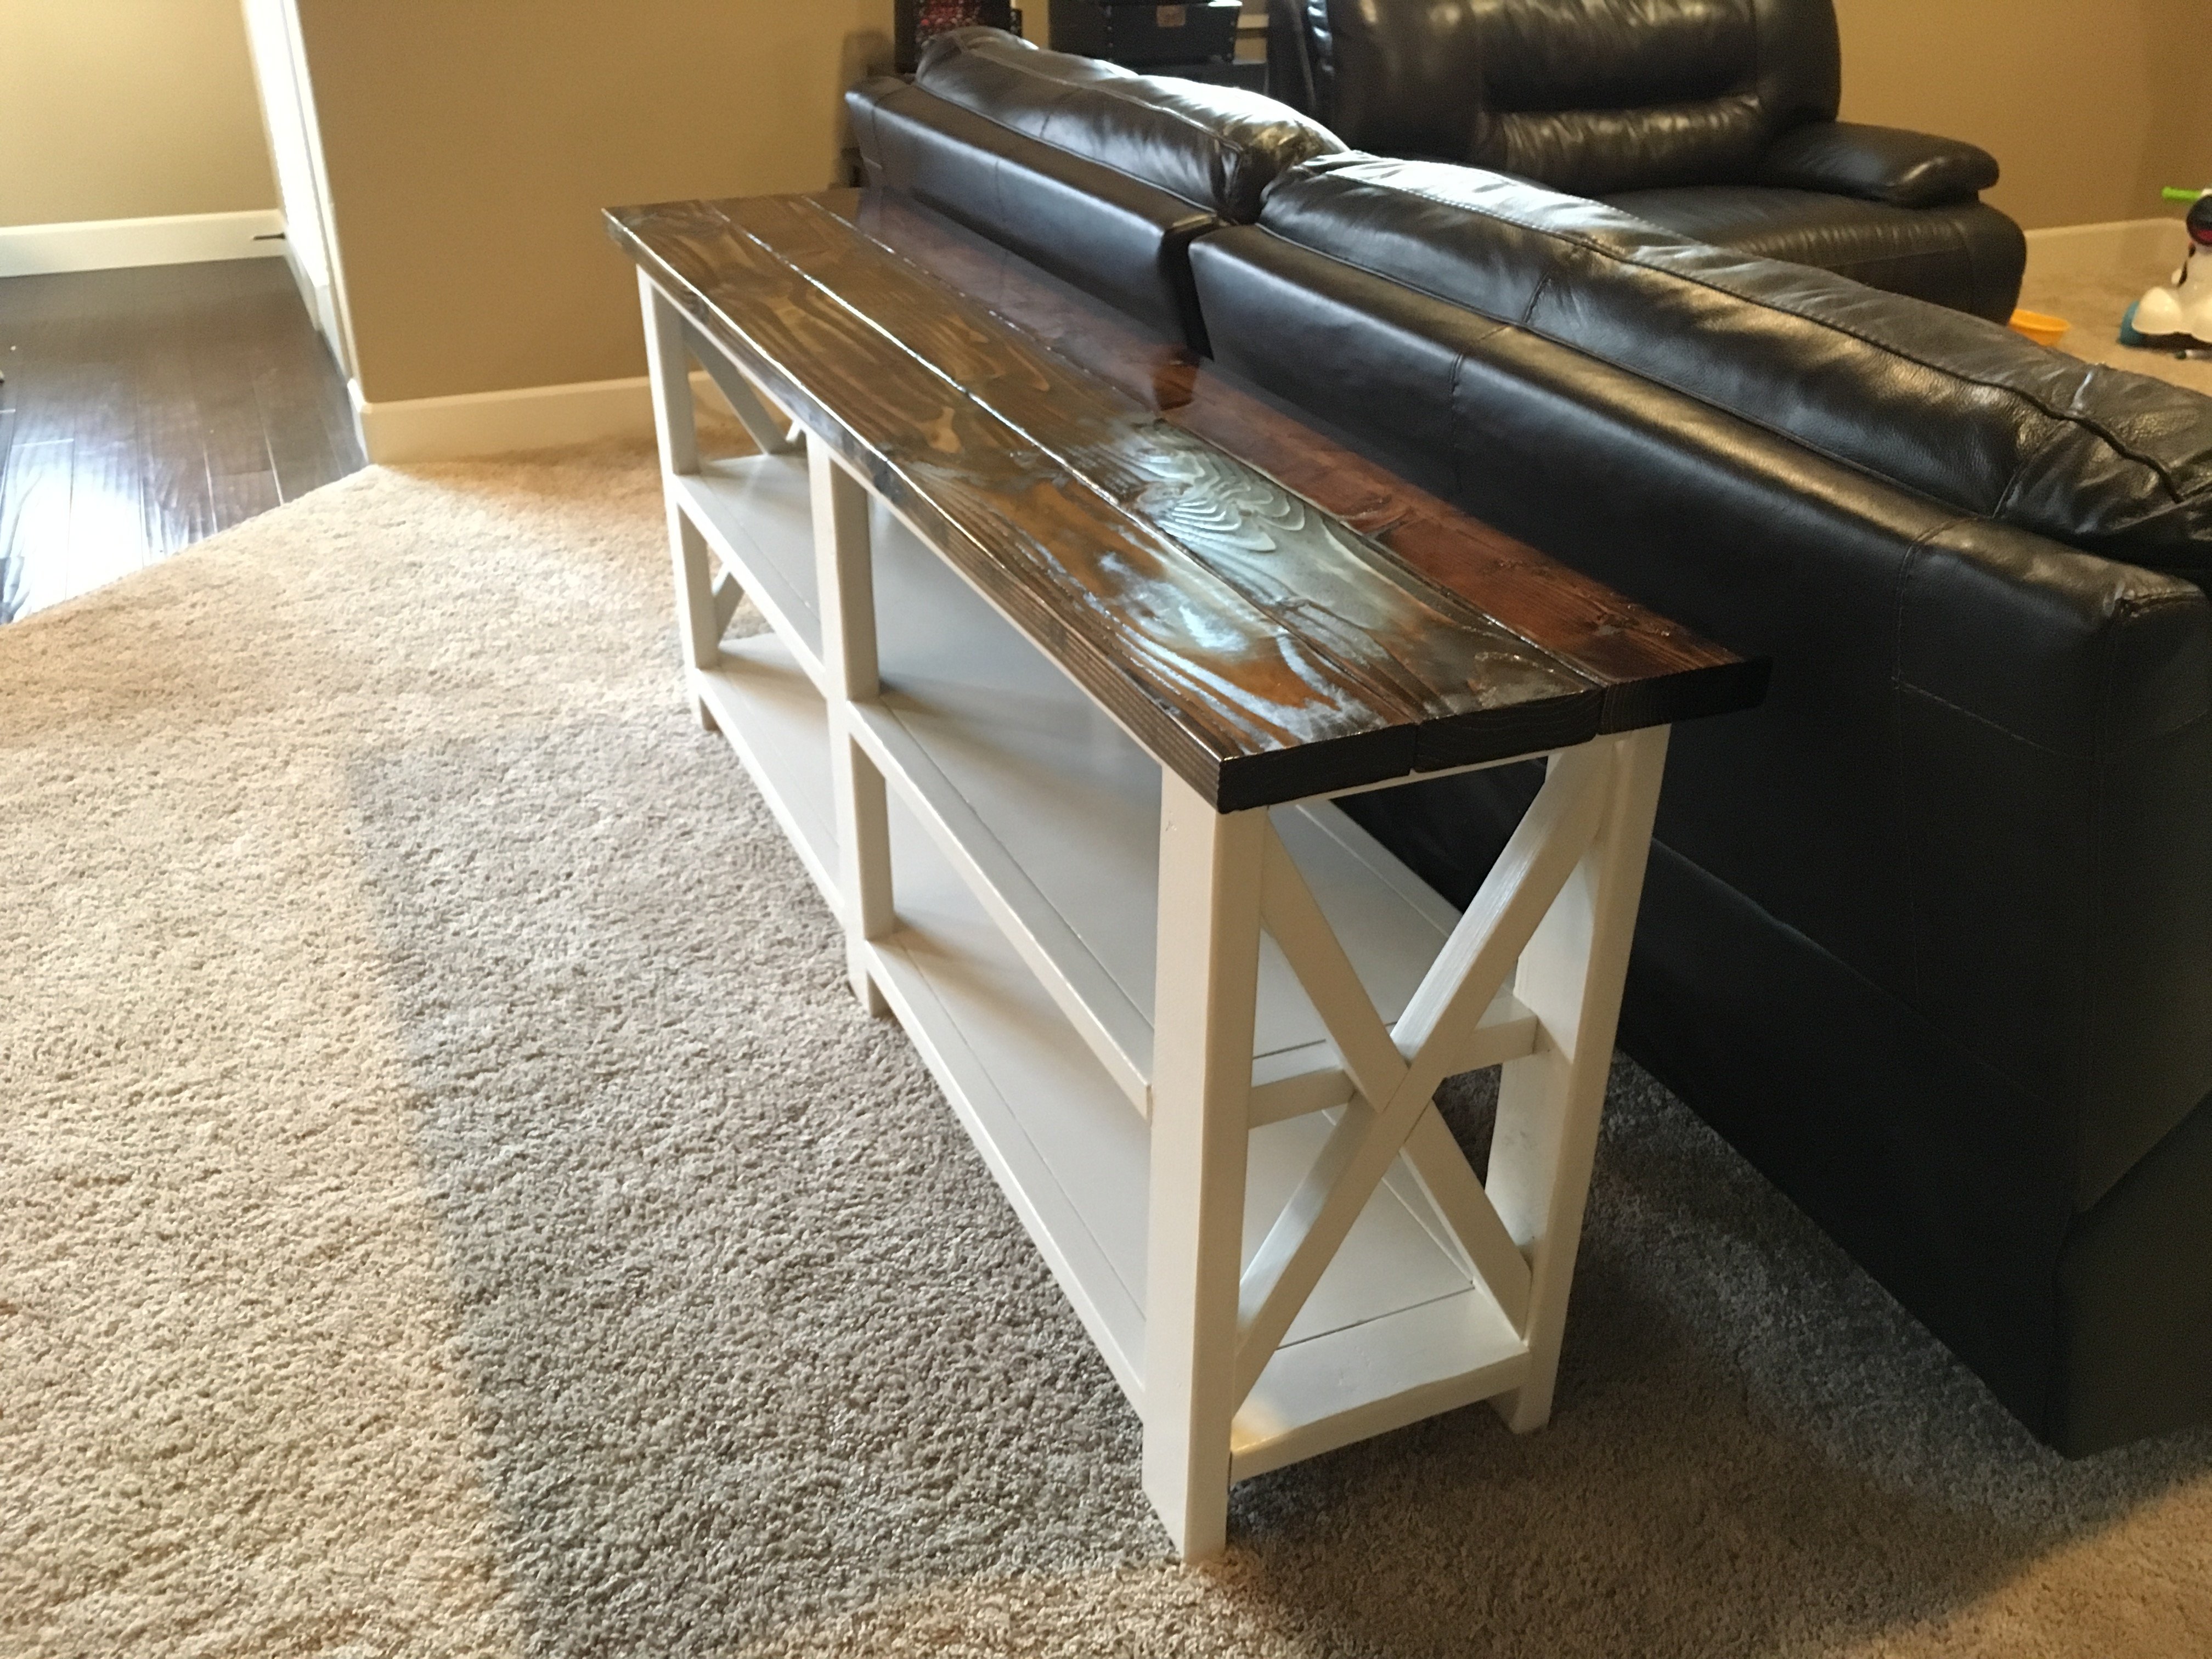
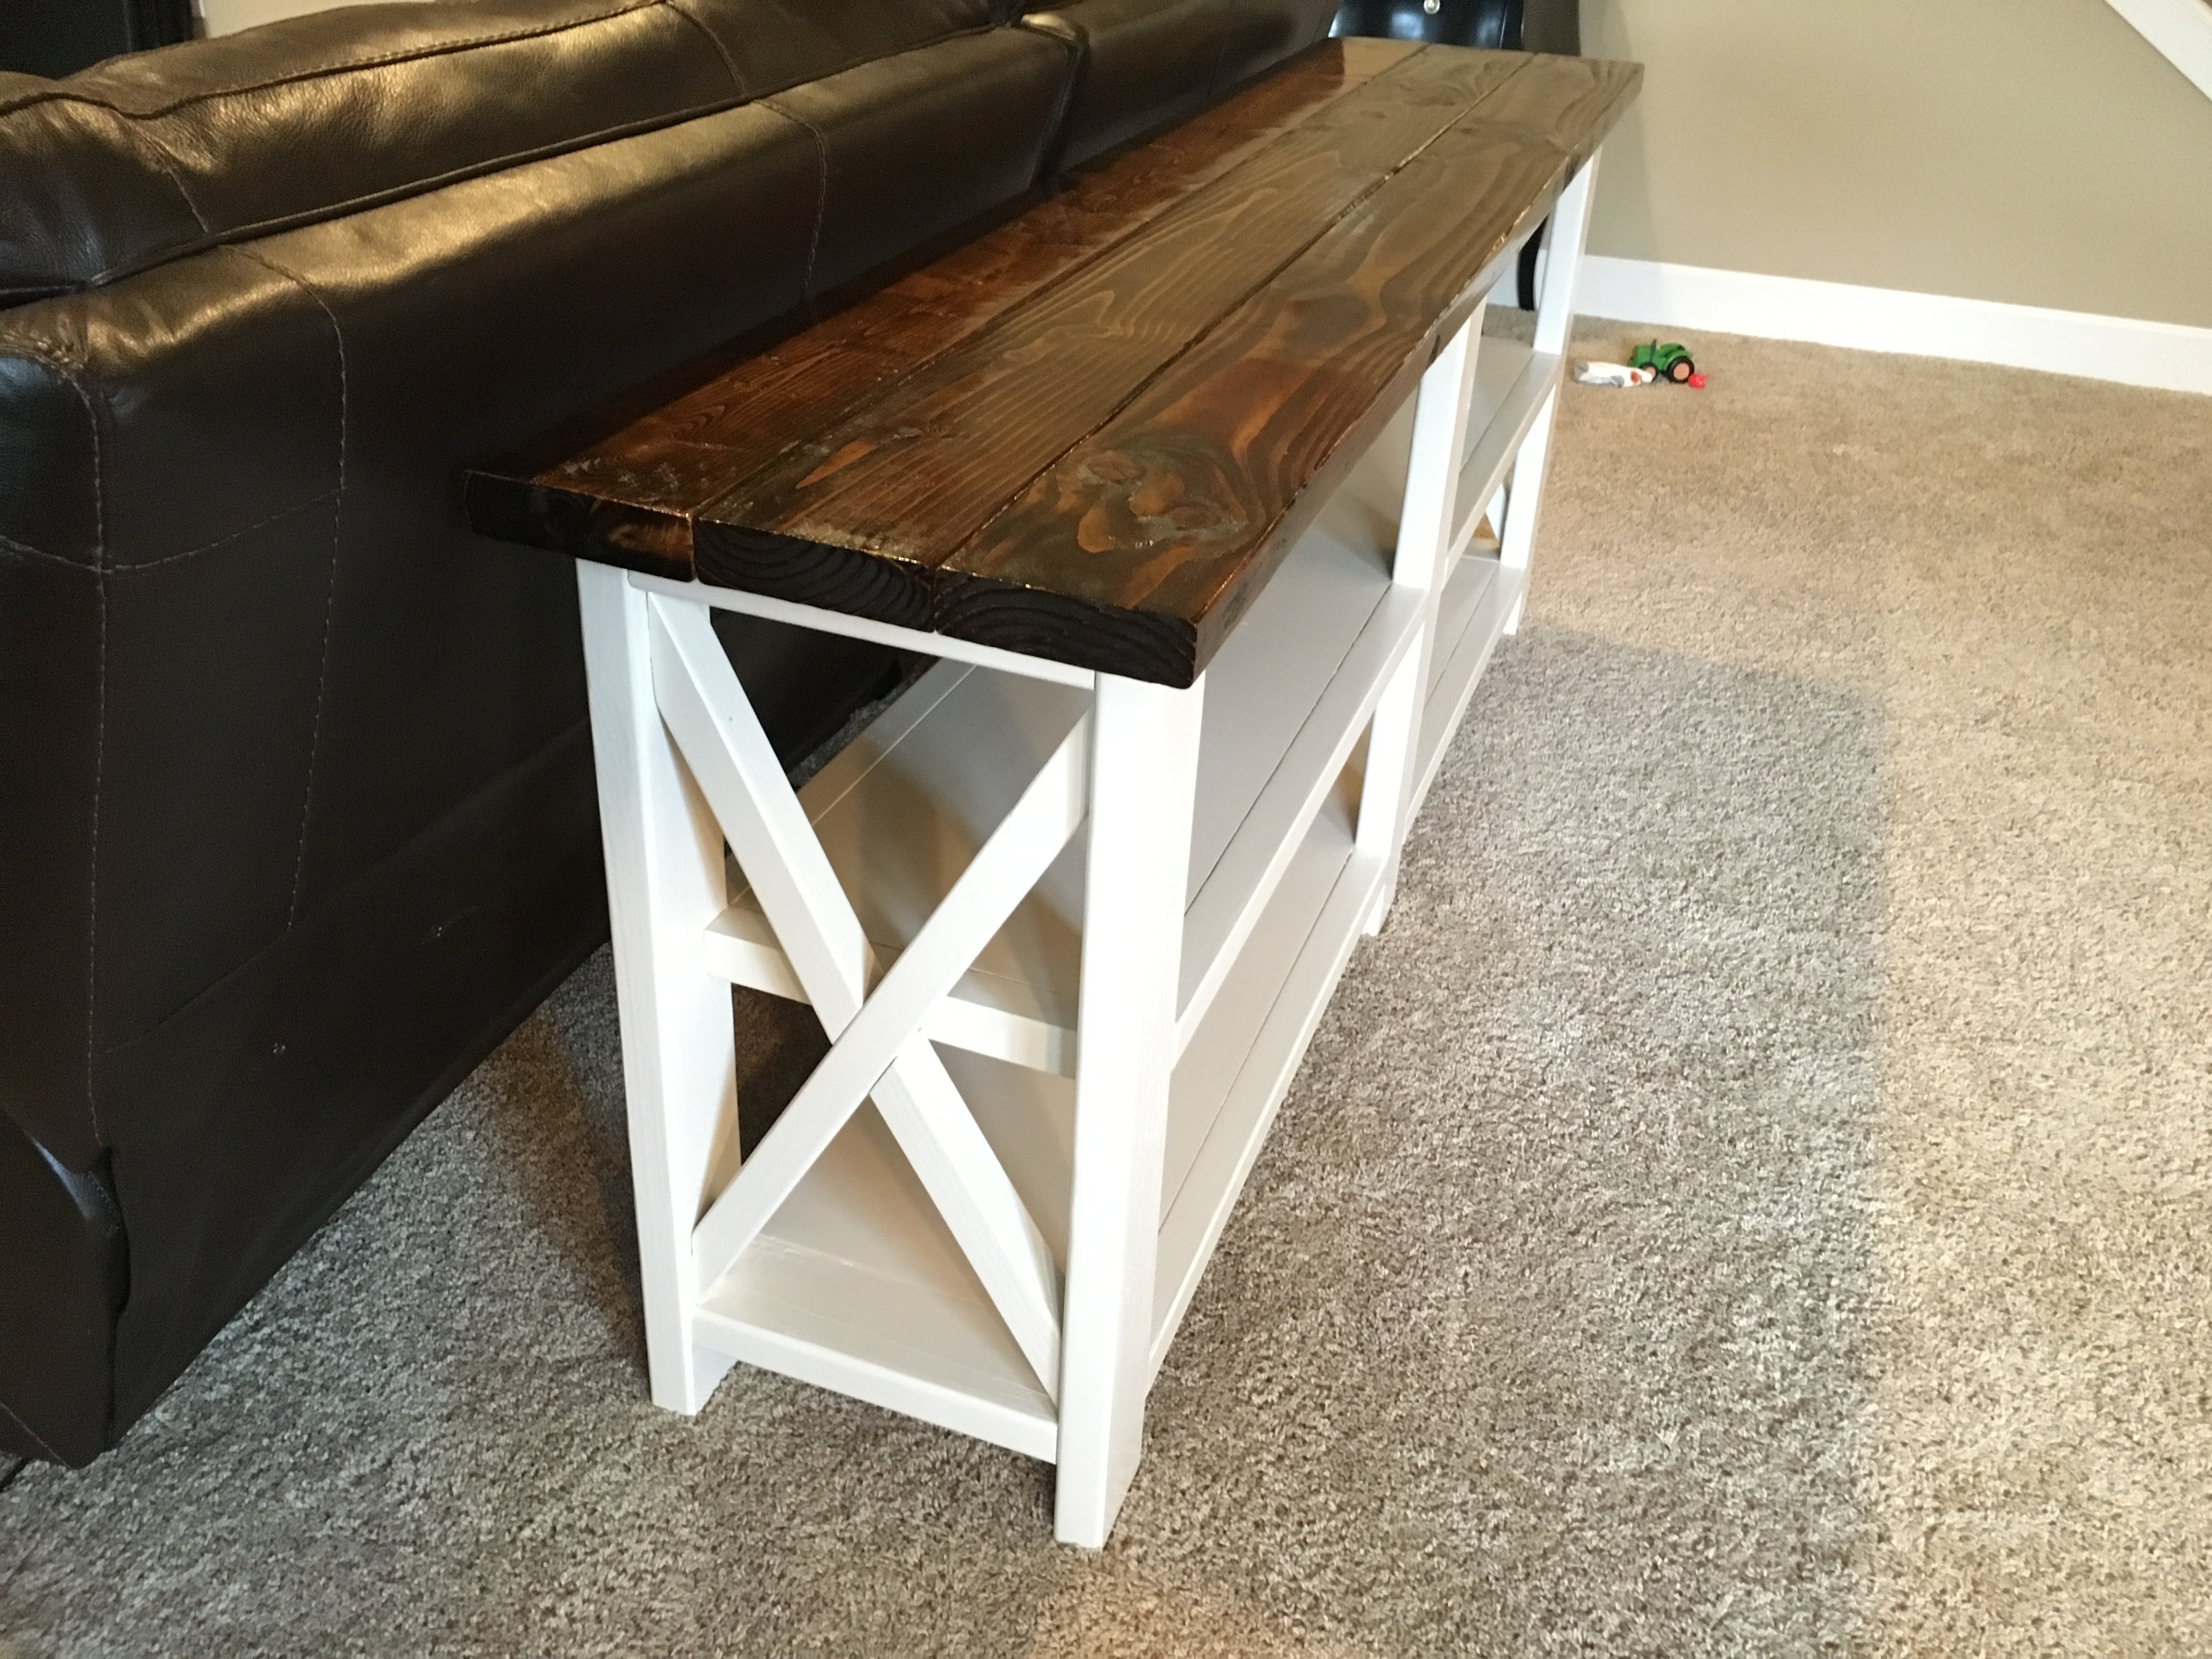
Followed the Rustic X console plan except did not go for the rustic stain look. I am happy with how it turned out, even though this is my first wood furniture type project. I am not much of a handyman.

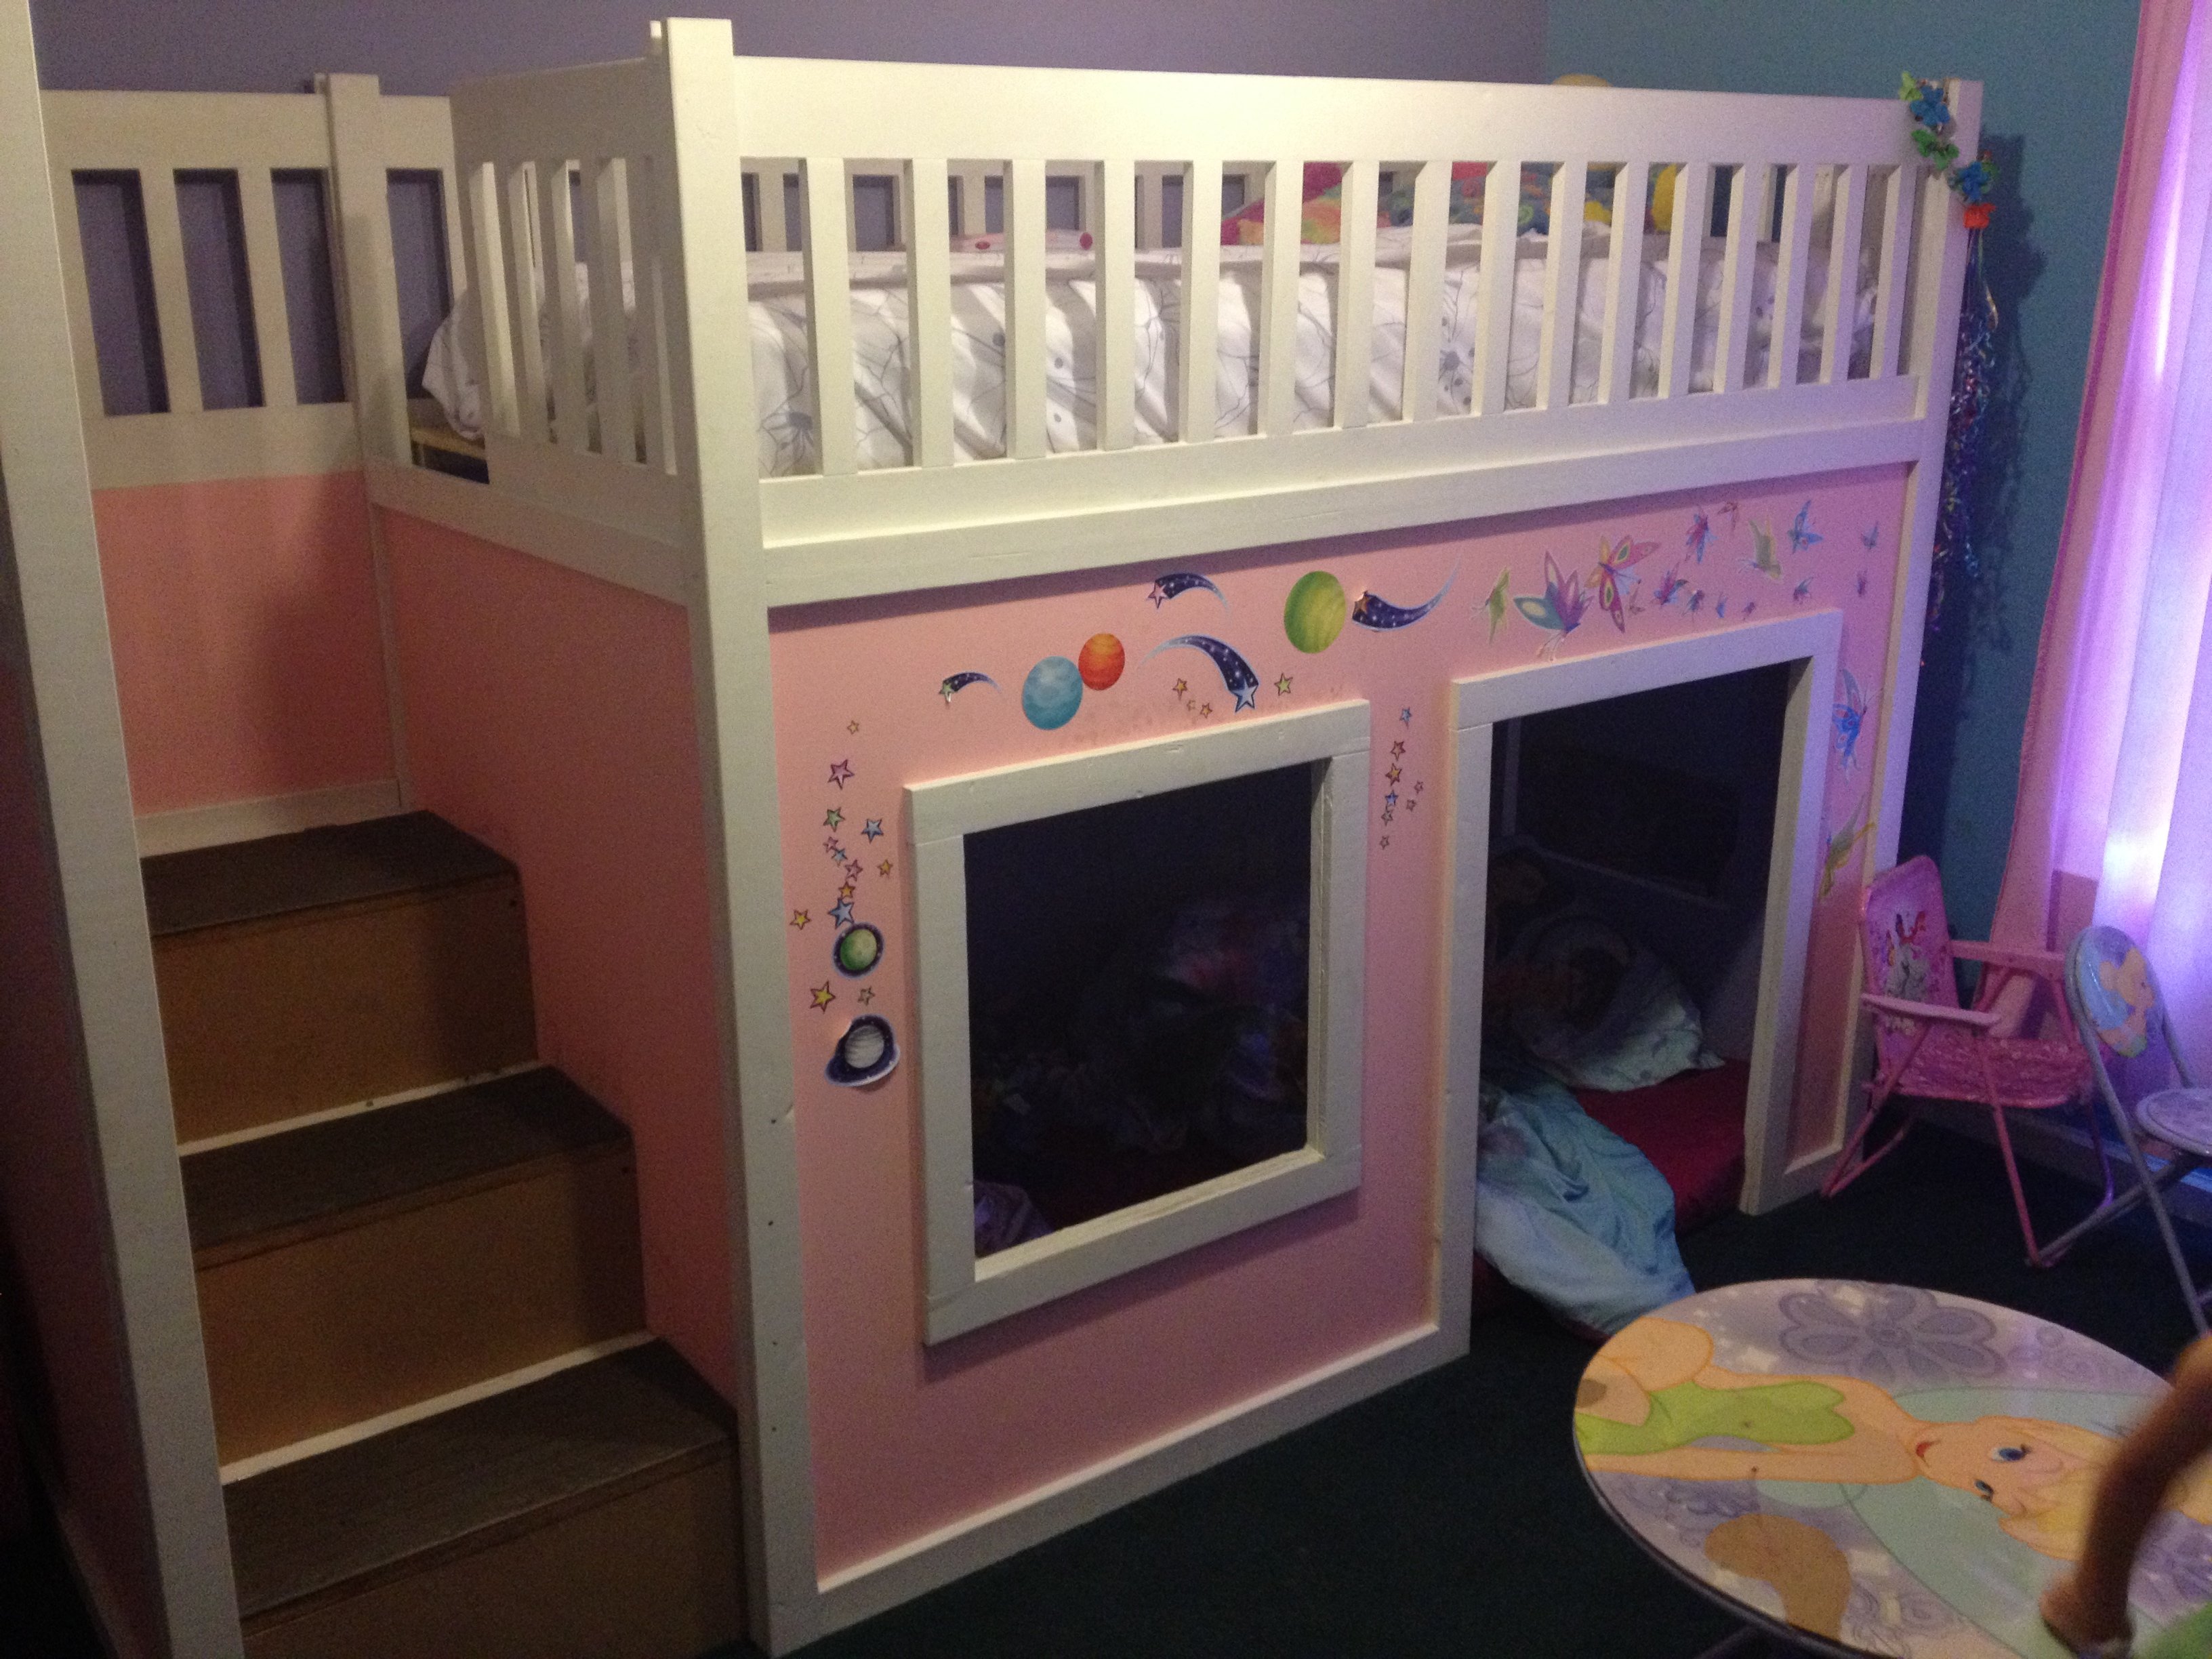
I built this American girl doll house for my daughter. I wanted to give her something to keep her youth alive!


Sun, 01/06/2019 - 16:43
What an amazing Christmas gift! Super dad! Thanks so much for sharing a photo and building! Ana
Sun, 01/06/2019 - 21:46
Thanks Ana! This is her momma that built it for her. I wanted to tackle something on my own and challenge myself. Your plans were amazing to work with. Thanks for taking the time to make these plans so easy to understand and follow. She is very happy with the doll house! Happy New Year! -Abbey
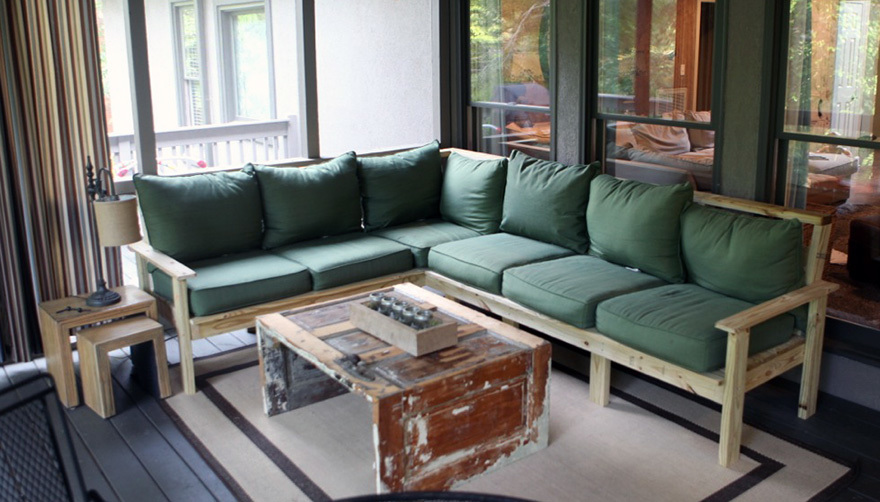
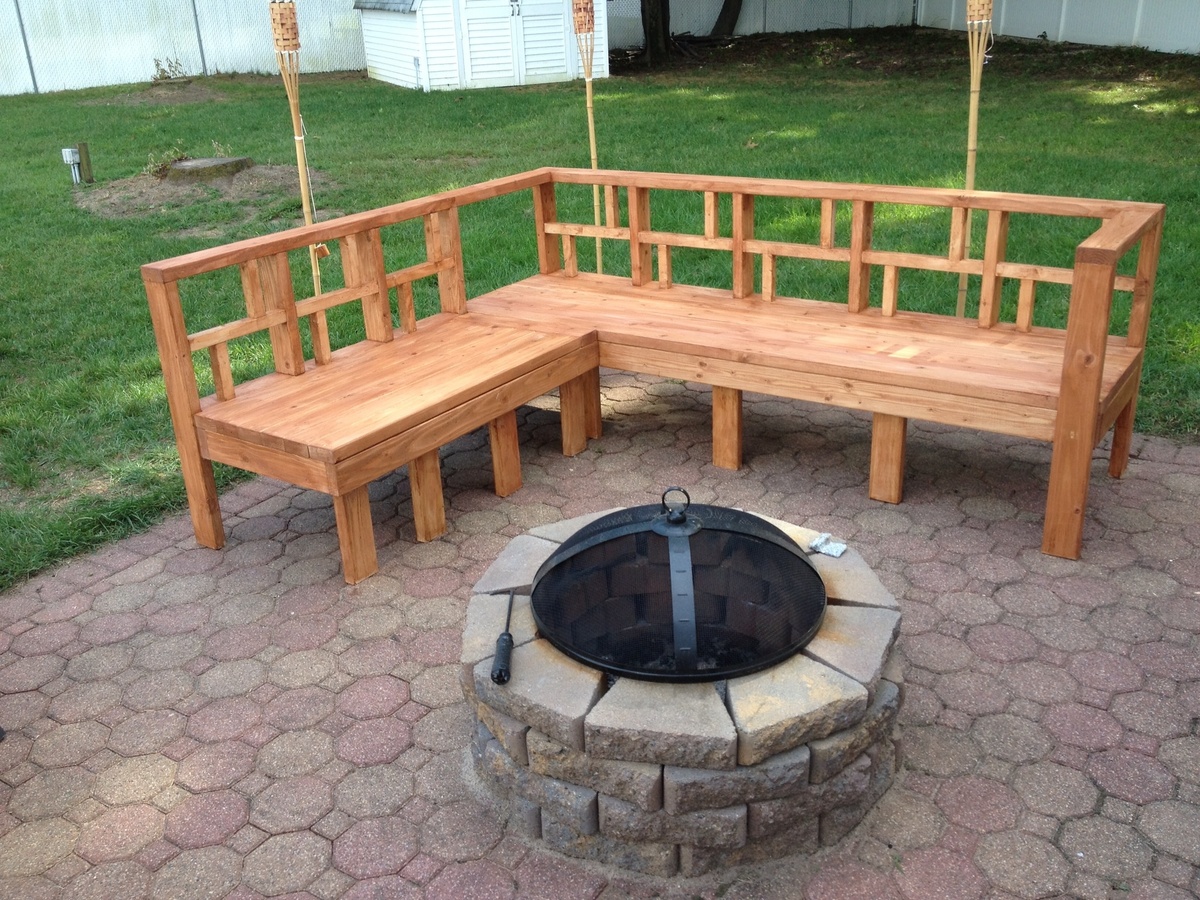
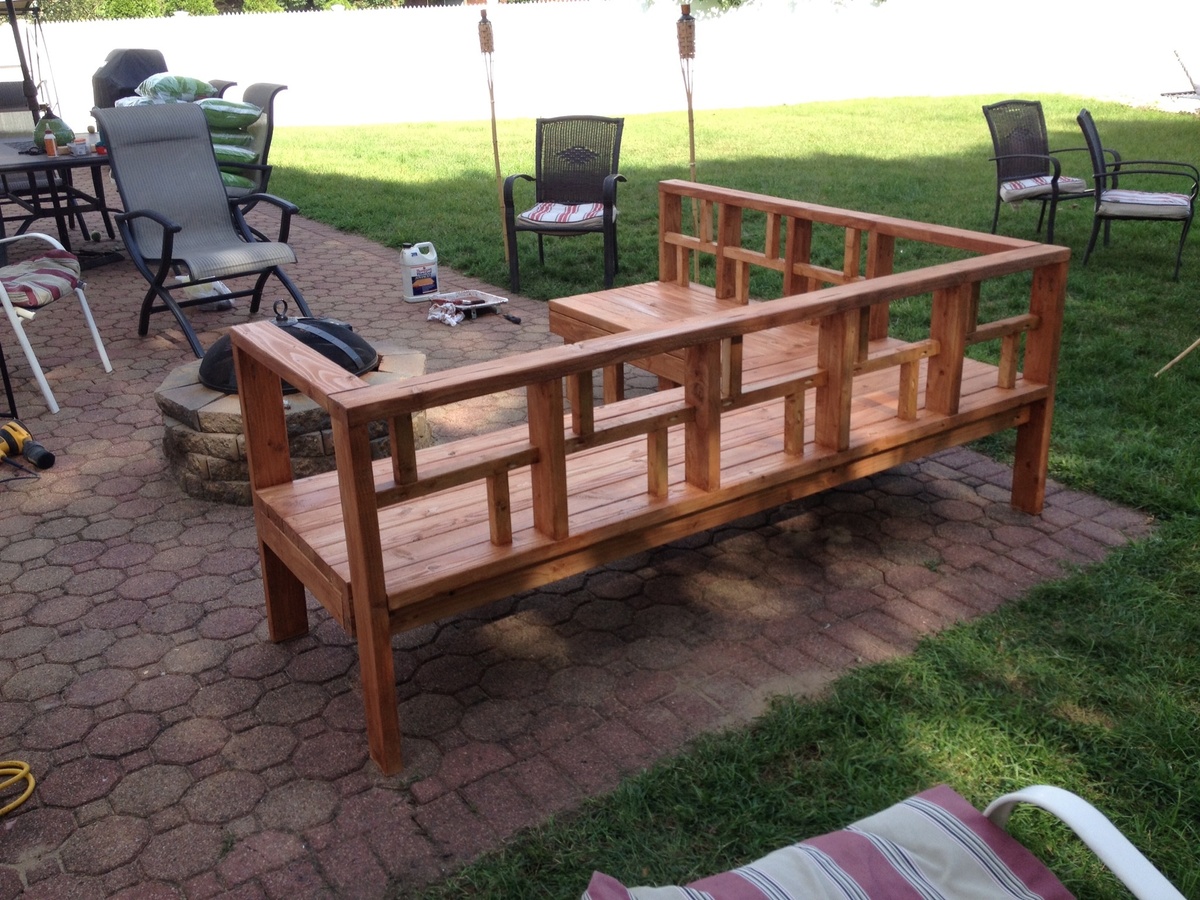
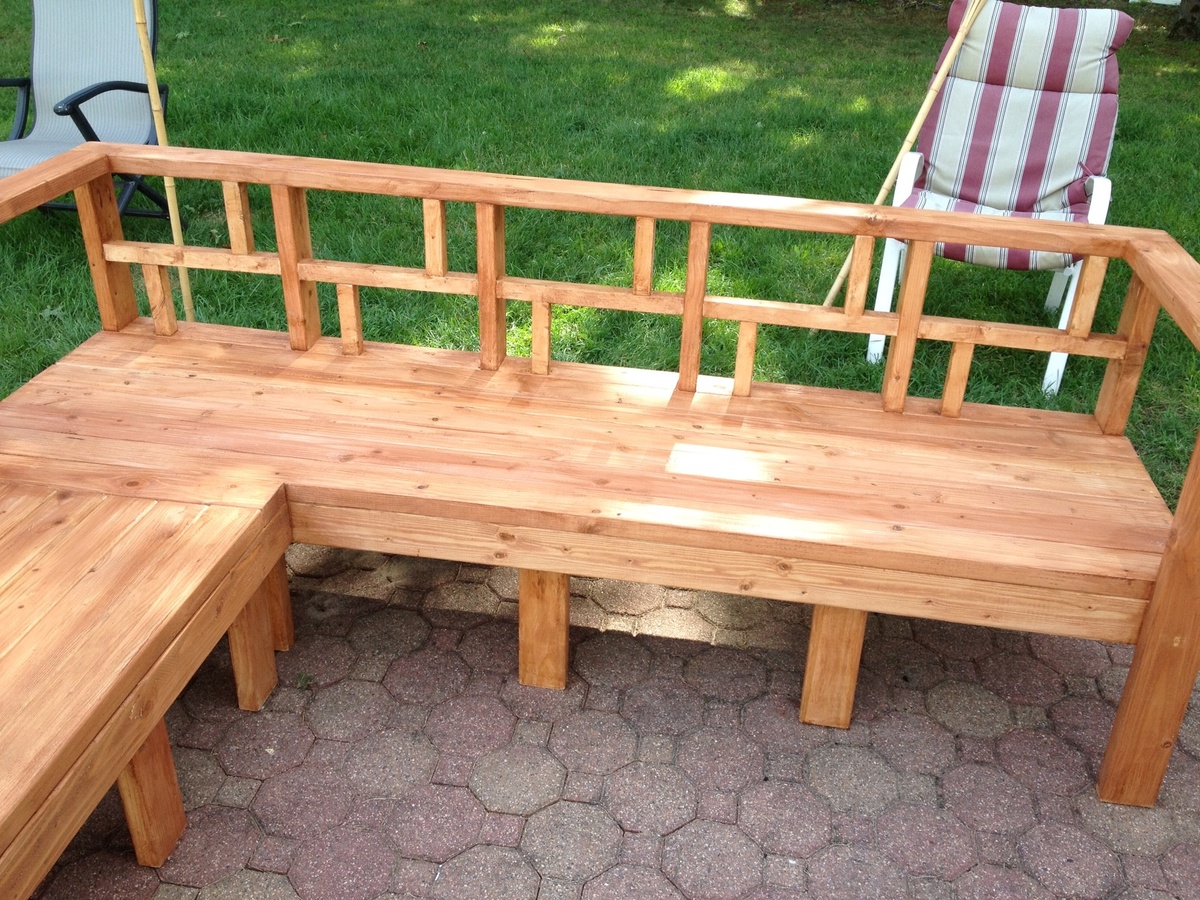
I designed and built this sectional for some friends, and then wrote a how-to about the process! There are free plans for it, and a time-lapse video of it being built at http://www.iliketomakestuff.com/outdoor-sectional/


Comments
Ana White
Wed, 12/26/2018 - 13:54
Love it! Thanks so much for
Love it! Thanks so much for sharing a brag post!