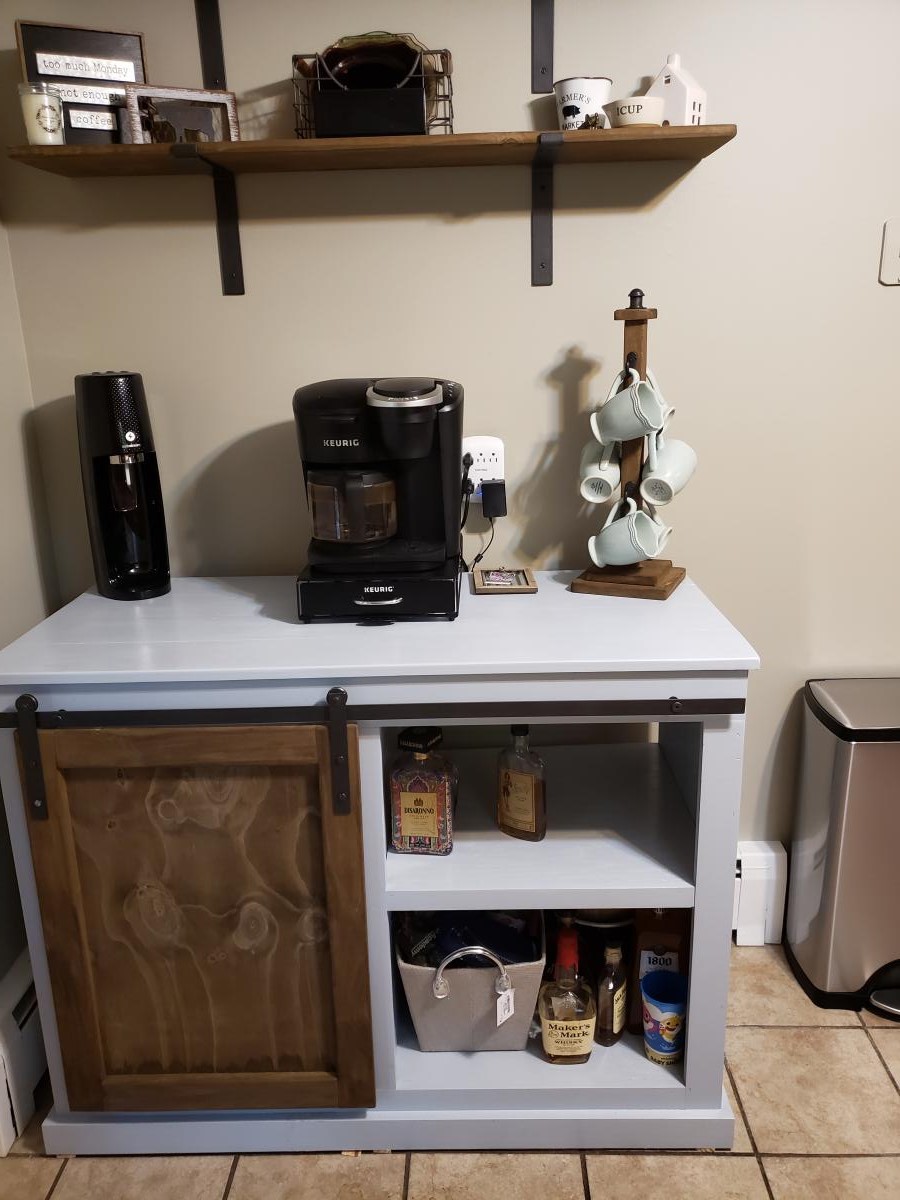
Barn Door Fridge
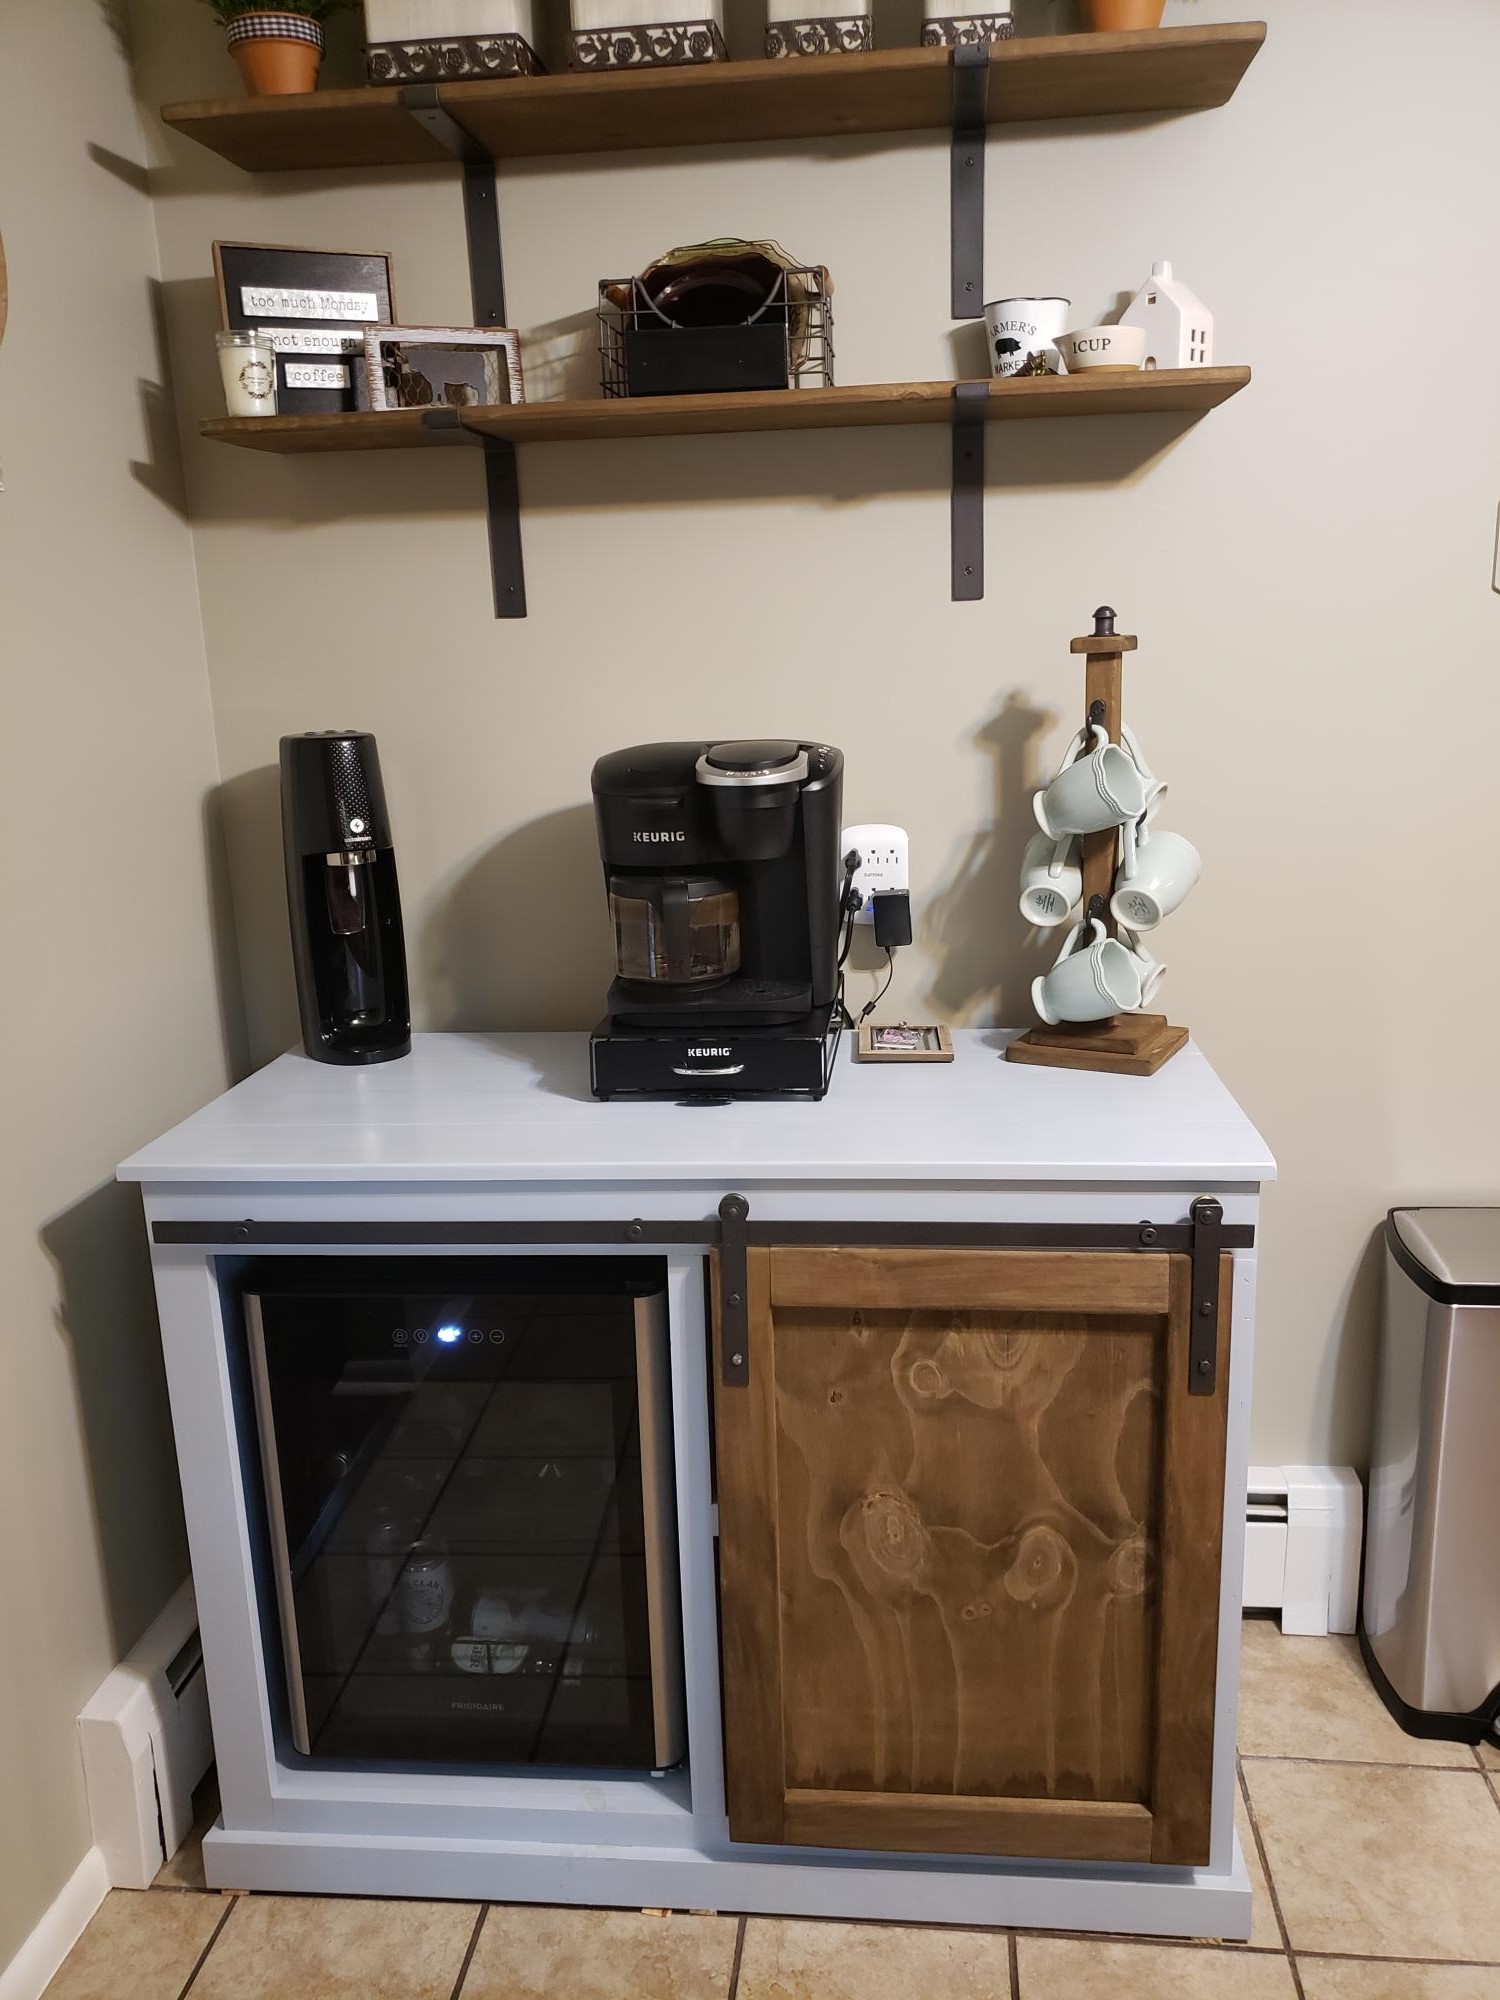
My first larger build. Had a lot of fun with it.
Built from Plan(s)
Estimated Time Investment
Weekend Project (10-20 Hours)
Recommended Skill Level
Intermediate
My first larger build. Had a lot of fun with it.
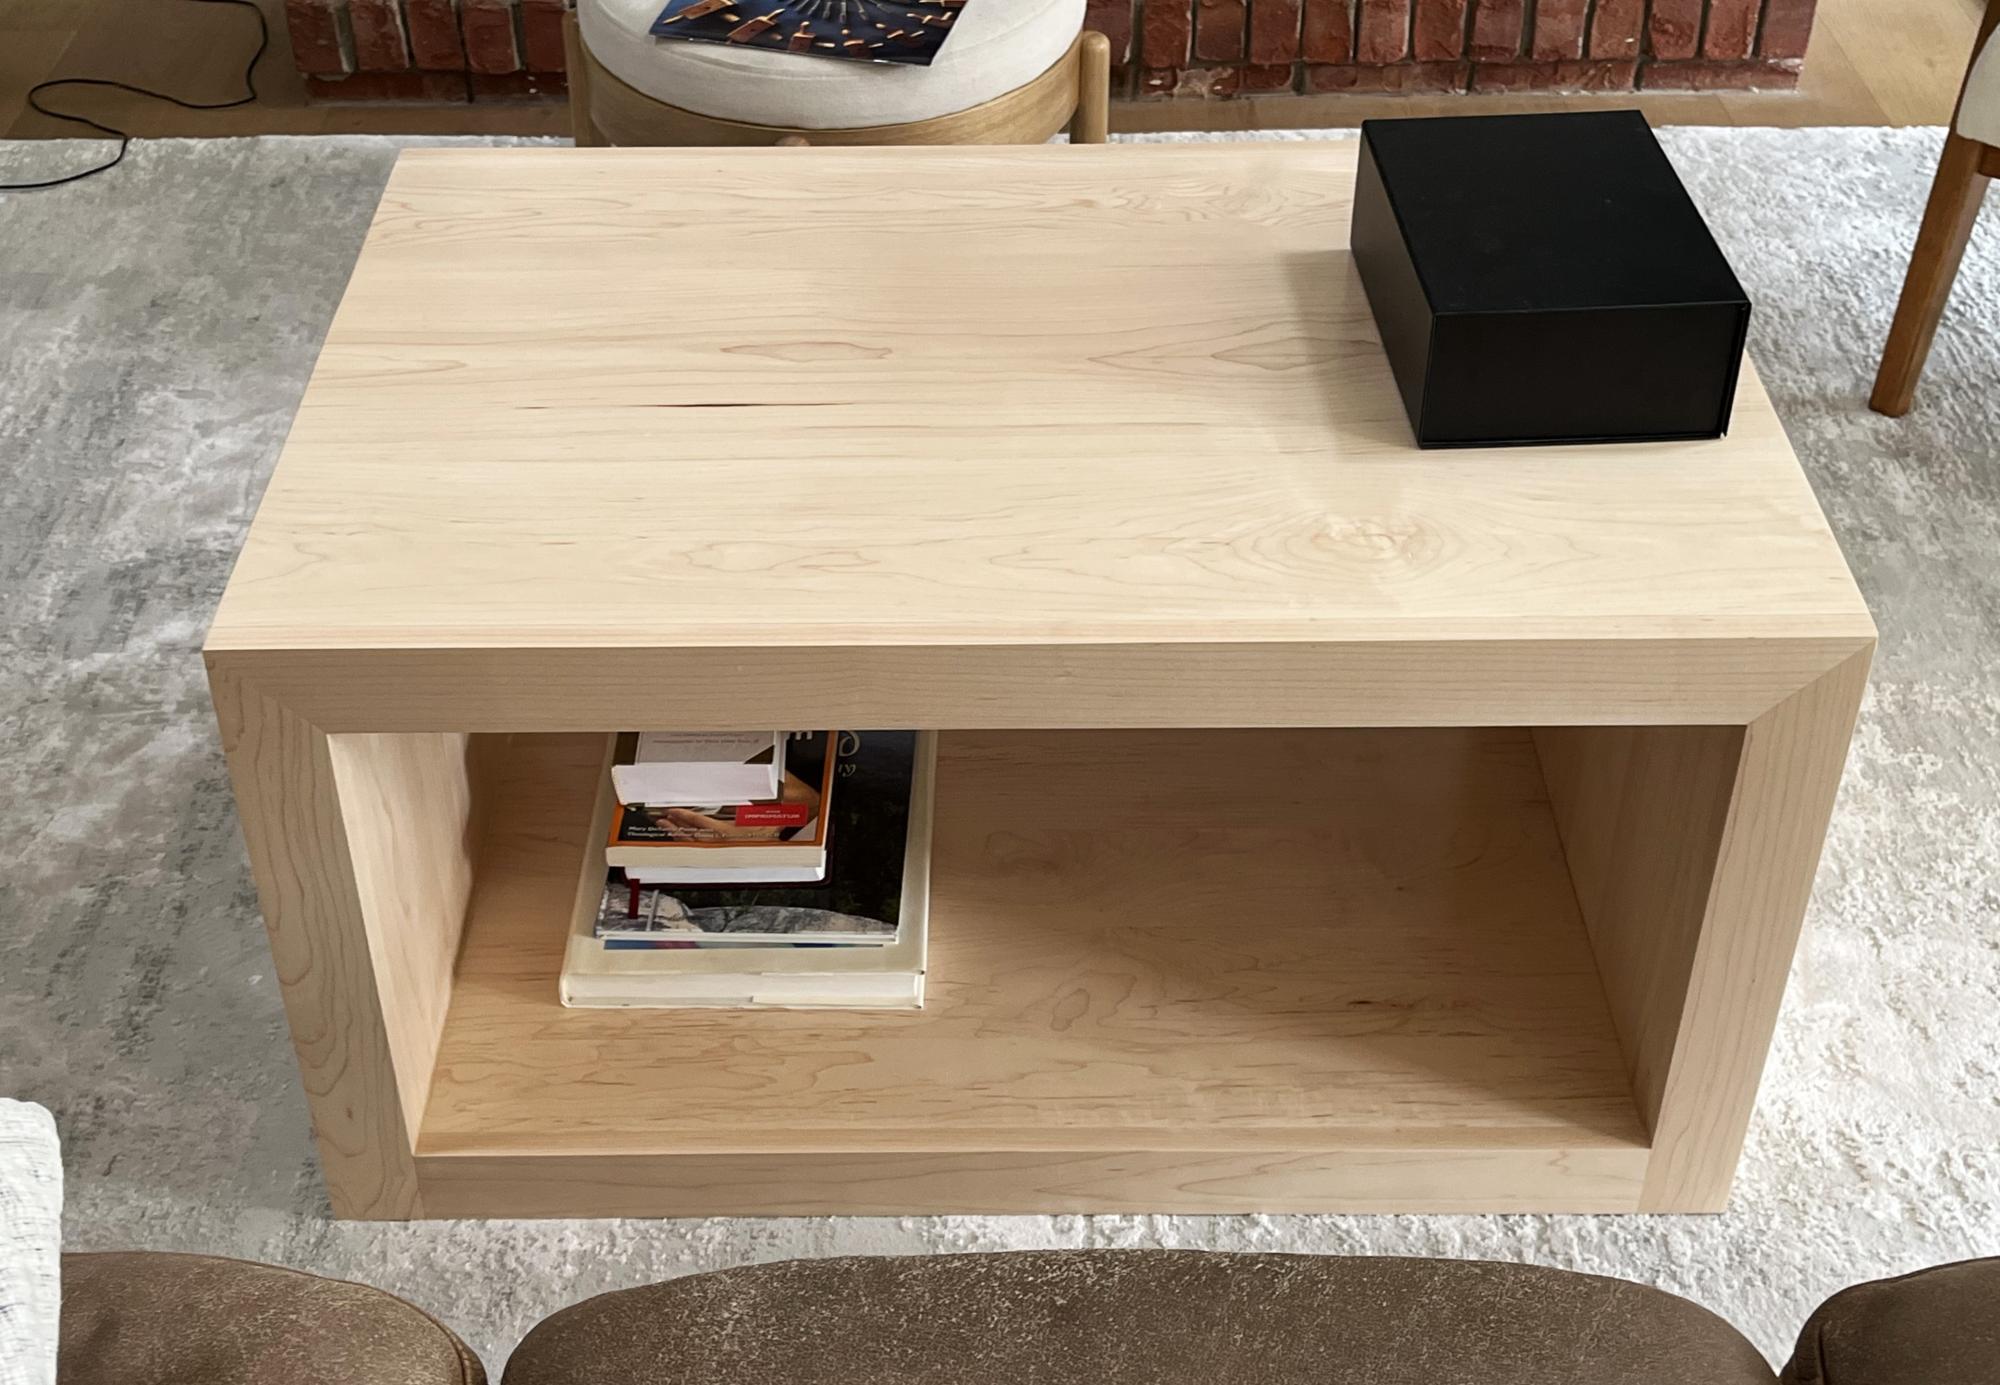
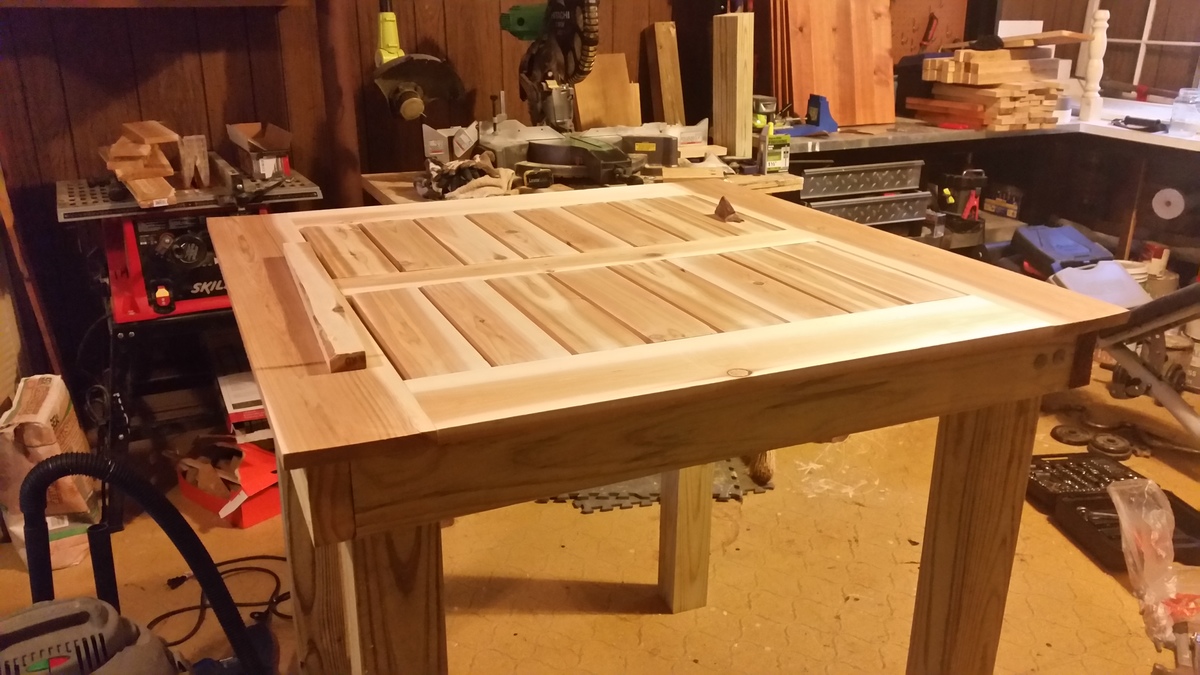
Hard Maple waterfall edge coffee table.
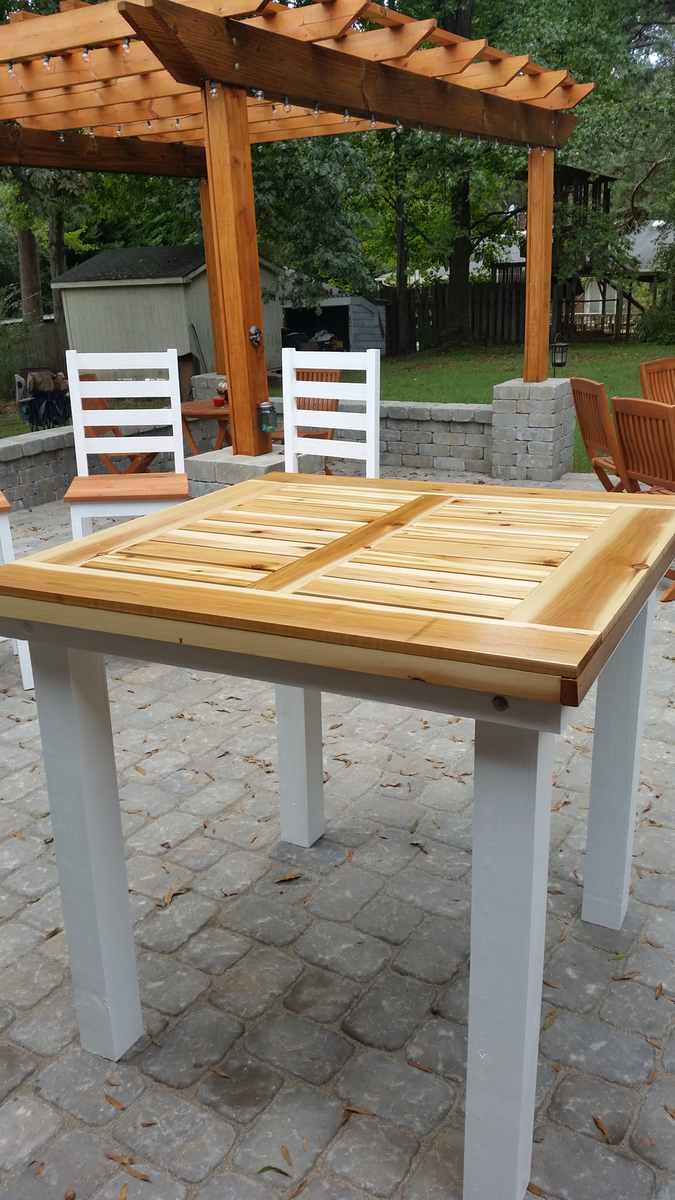
Scott

Similar to: http://ana-white.com/2011/01/sausha%E2%80%99s-washerdryer-pedestals.
Dimensions and finish were unique to my needs.

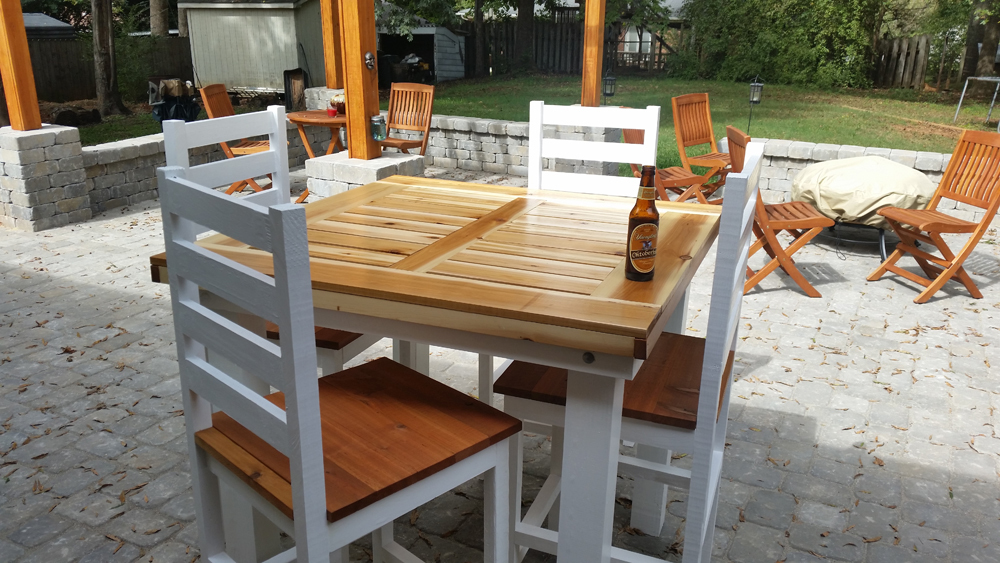
Ana Whites site is always my first stop for inspiration, she always has good designs and diagrams. I usually use her plans as a rough guide, and then tweak them as needed.
For this table, I made it 42" square, and adjusted the height.
The main difference is I built this from PT pine, and cedar as this is going to be an outdoor table, and I would like it to last. I painted the frame with 3 coats of exterior semi gloss paint, and used Helmsman spar urethane for the top. I did not stain the wood, as I love the color variations of natural cedar.
I also used galvanized carriage bolts to connect the legs. This increased the costt, but I wanted to be able to remove the legs. For more in depth connection details see my blog.
The table turned out quite well, is very sturdy and has gotten quite a few compliments, thanks Ana for the inspiration to build cool stuf! I love building STUFF!
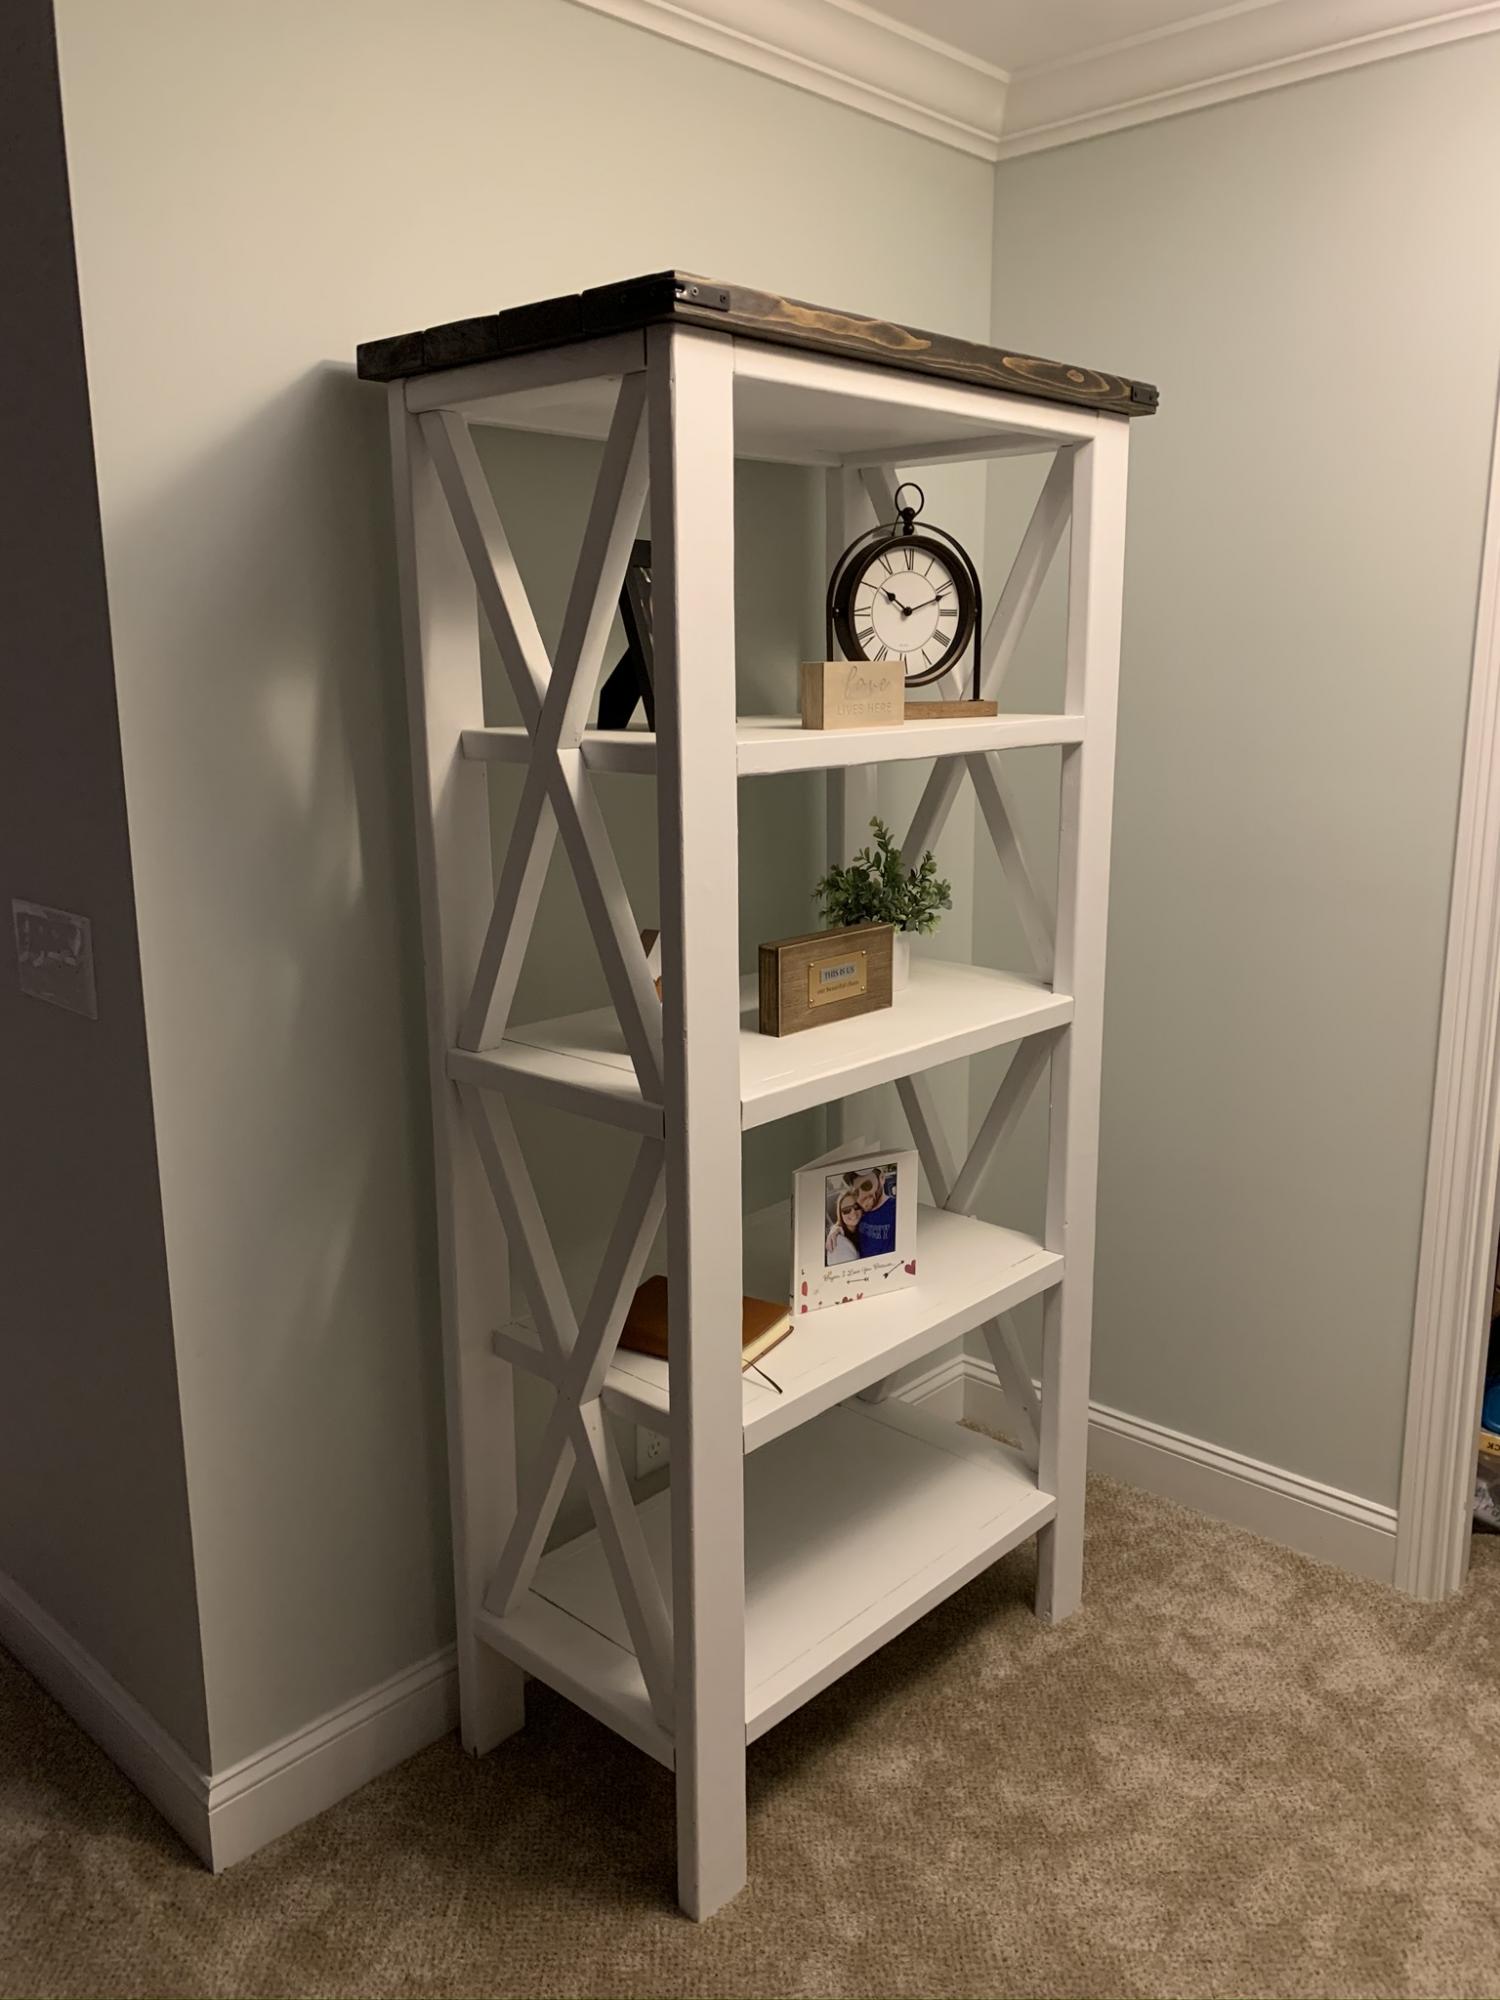
Added a 2x6 stained top to the bookshelf to add accent .

I’ve built the greenhouse for your plans, but I love it.
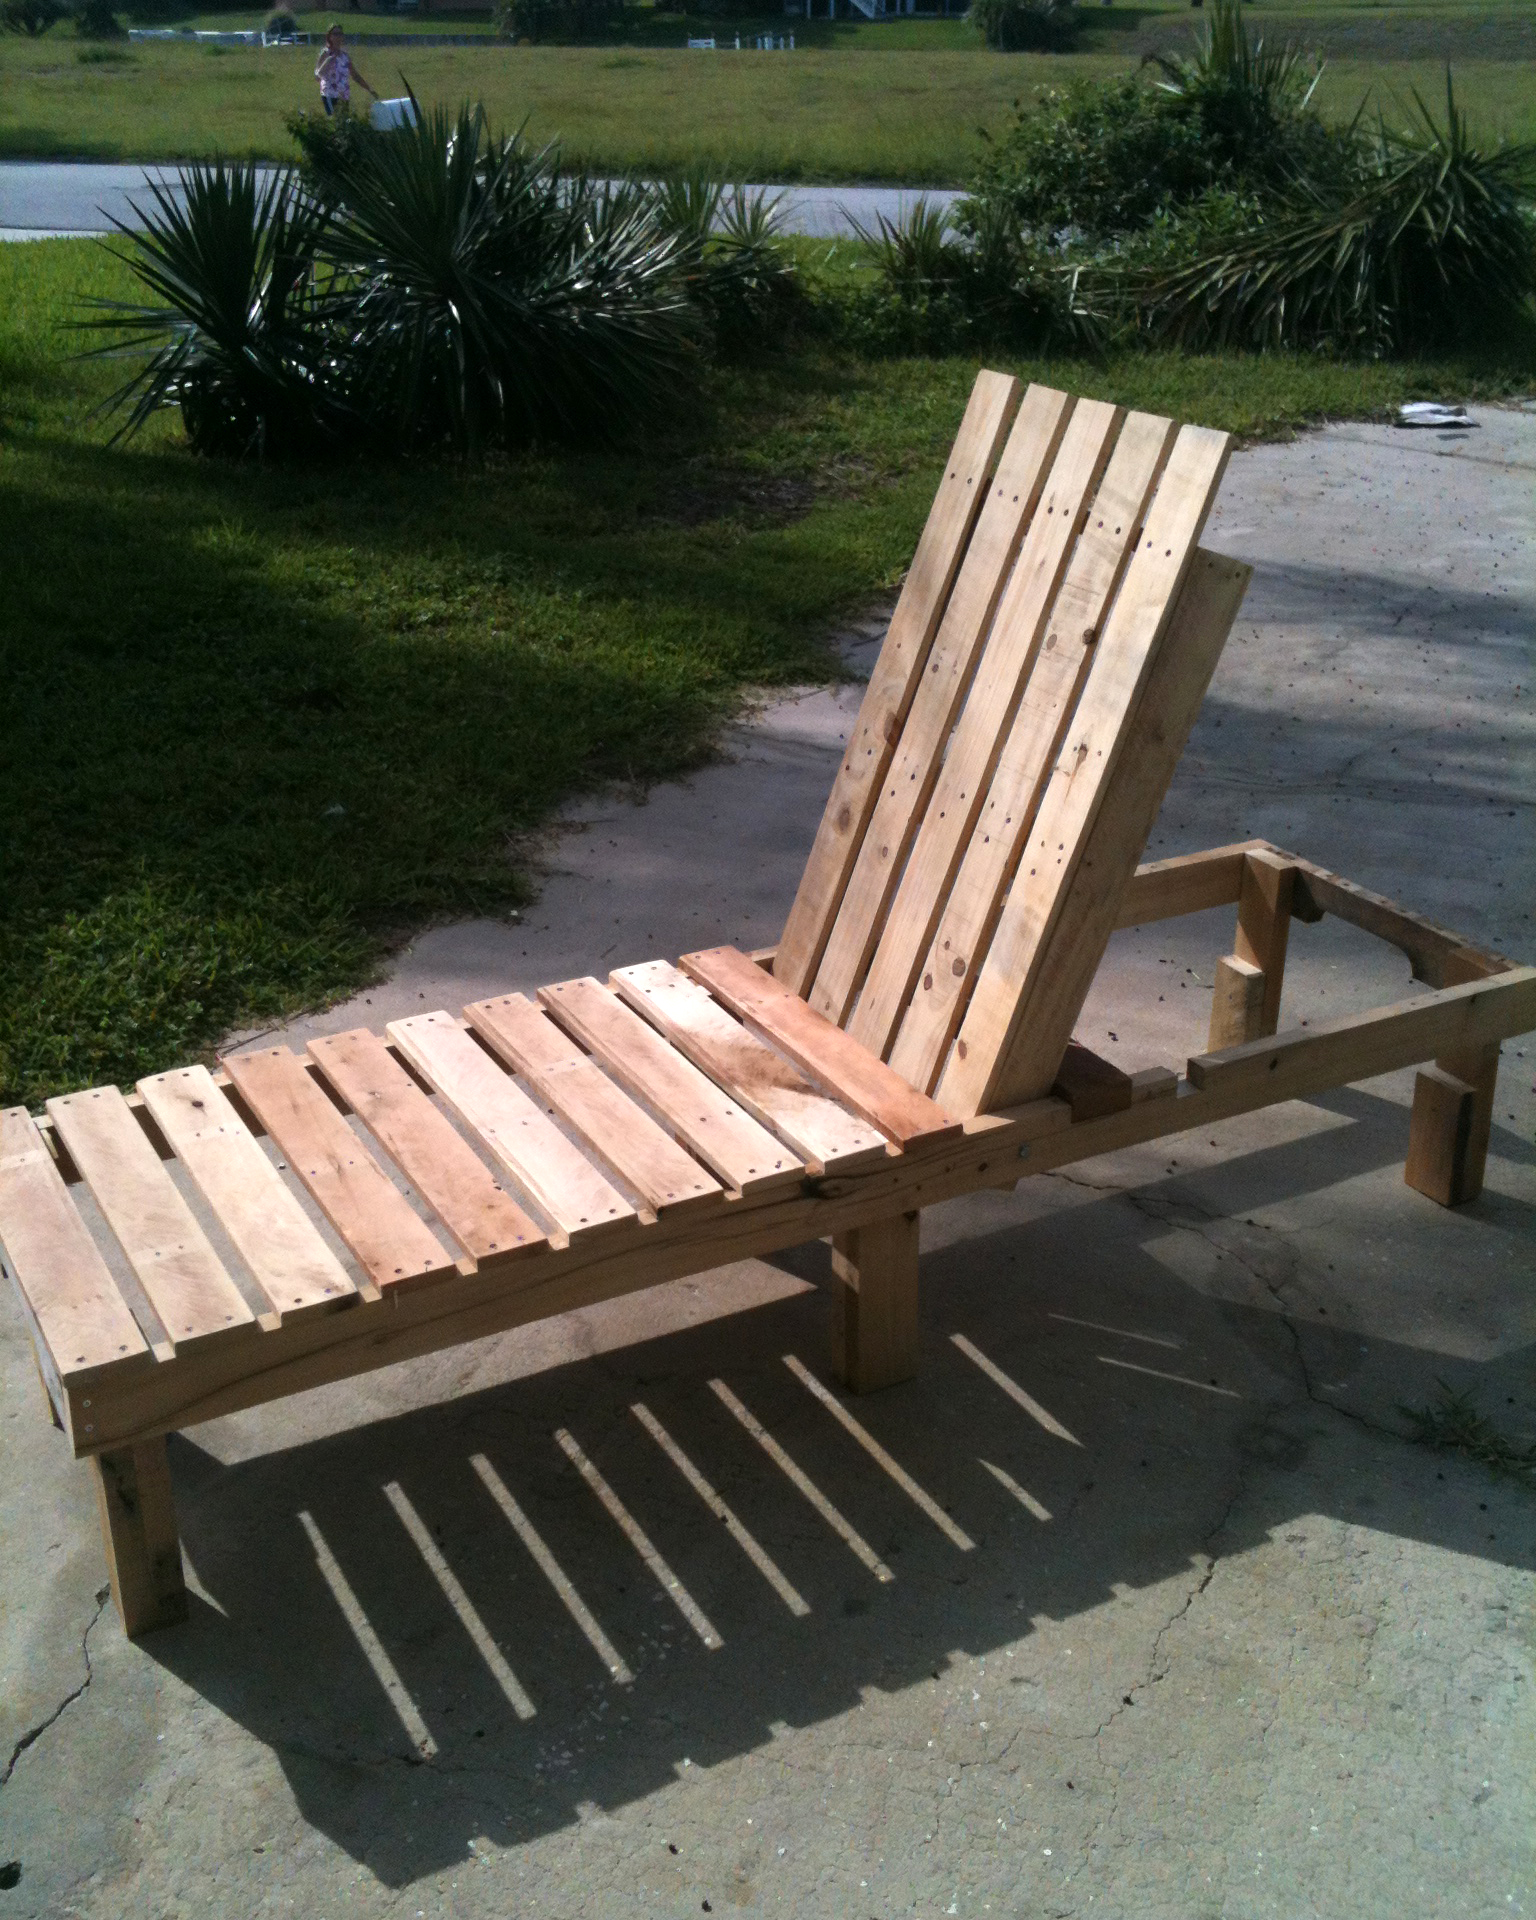
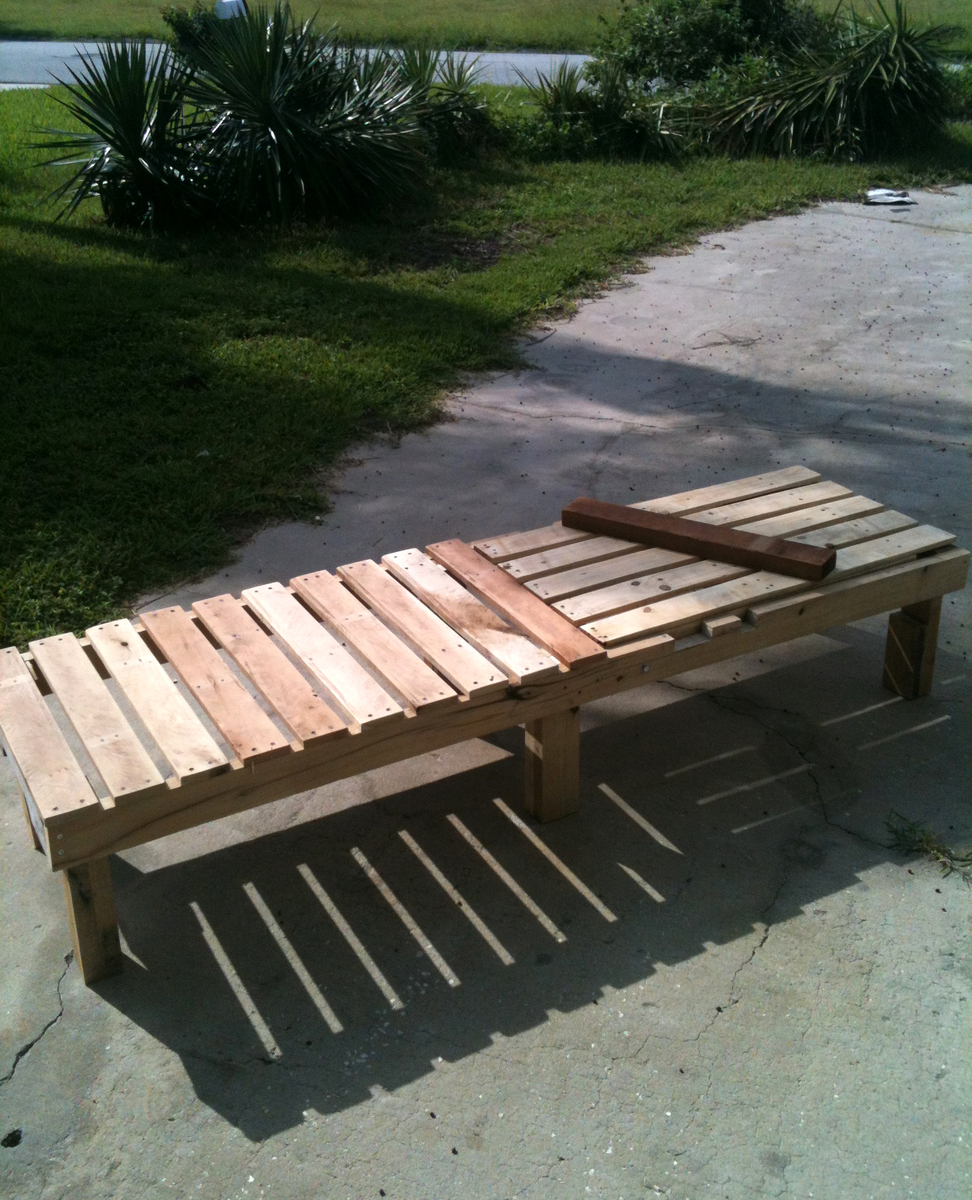
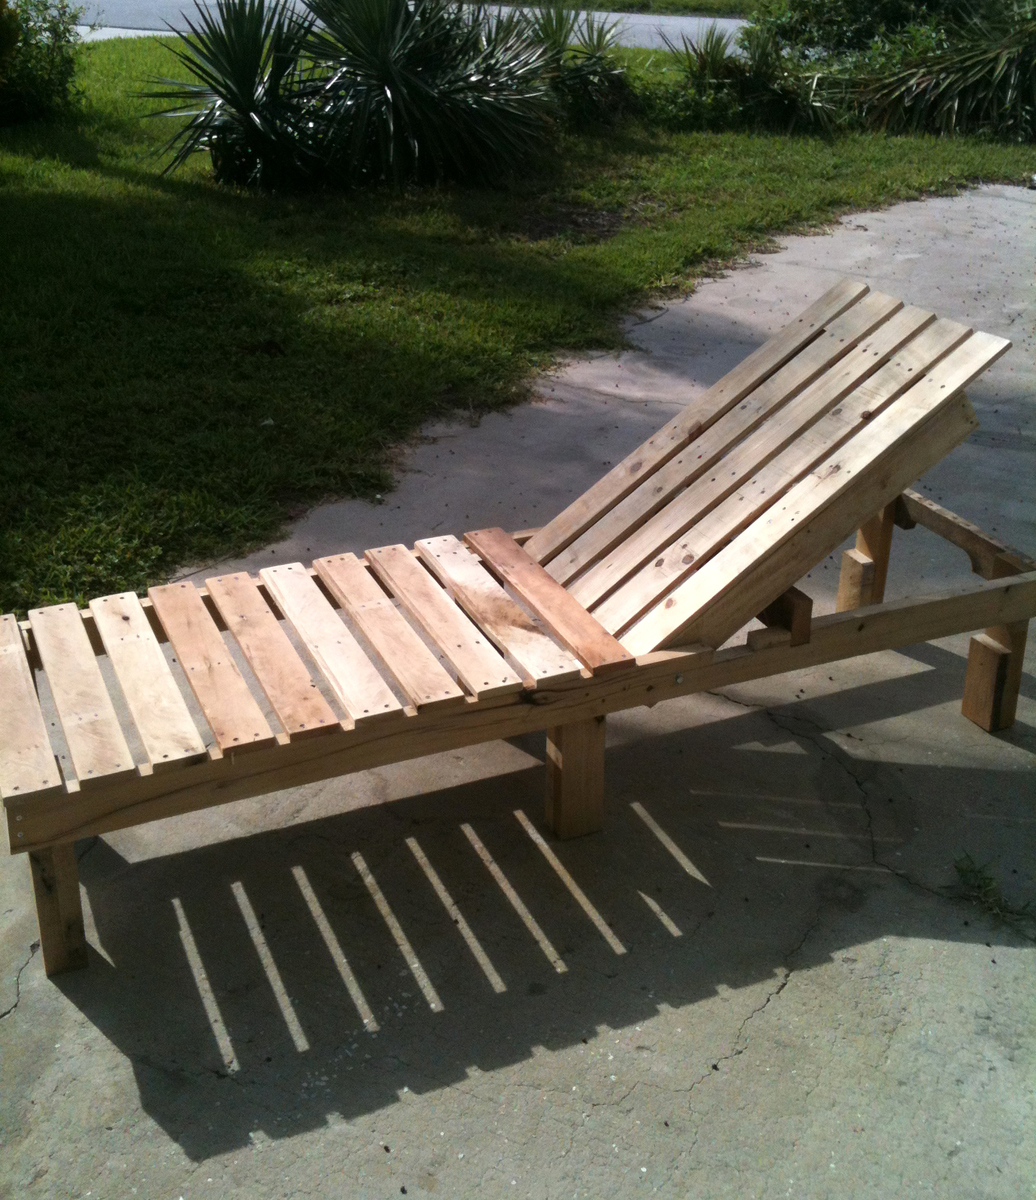
I saw these plans on Ana White's website, so I figured I would try to make one with recycled wooden pallets. It was a fun and easy project. I added a third set of legs in the center of the chair to provide extra support. Using the pallet wood offered a few challenges, mostly relating to the size of 2x4s you buy versus the ones used to build pallets.
The end user of this chaise lounge chair is going to seal it with a cedar colored stain/sealer so that is matches the Pallirondack Double Settee (one of my other projects) I made for them earlier this year.
Great plans, great fun.
This project took a long time since it was my first and I had a baby boy in the middle of completing it. But finally it is finished. I had help with the construction and the plan was modified a little bit (83x38 inches) mostly since it needed to fit in the back of my father-in-law's van for transport to our new home. The finished product came out pretty well for my first foray into woodworking!
Sun, 07/06/2014 - 14:59
Your finish is beautifully smooth! How did you get squared edges on your tabletop boards? Did you run them through a table saw?
Sun, 07/06/2014 - 18:26
Yes, we used the table saw to square all of the edges. This ensures a tight fit on the table top with no room for crumbs to get in!
Sat, 11/12/2016 - 09:41
Did you use wood filler or sand the top to show the wood edges less?
This was one of my first builds ever! I'm hooked!
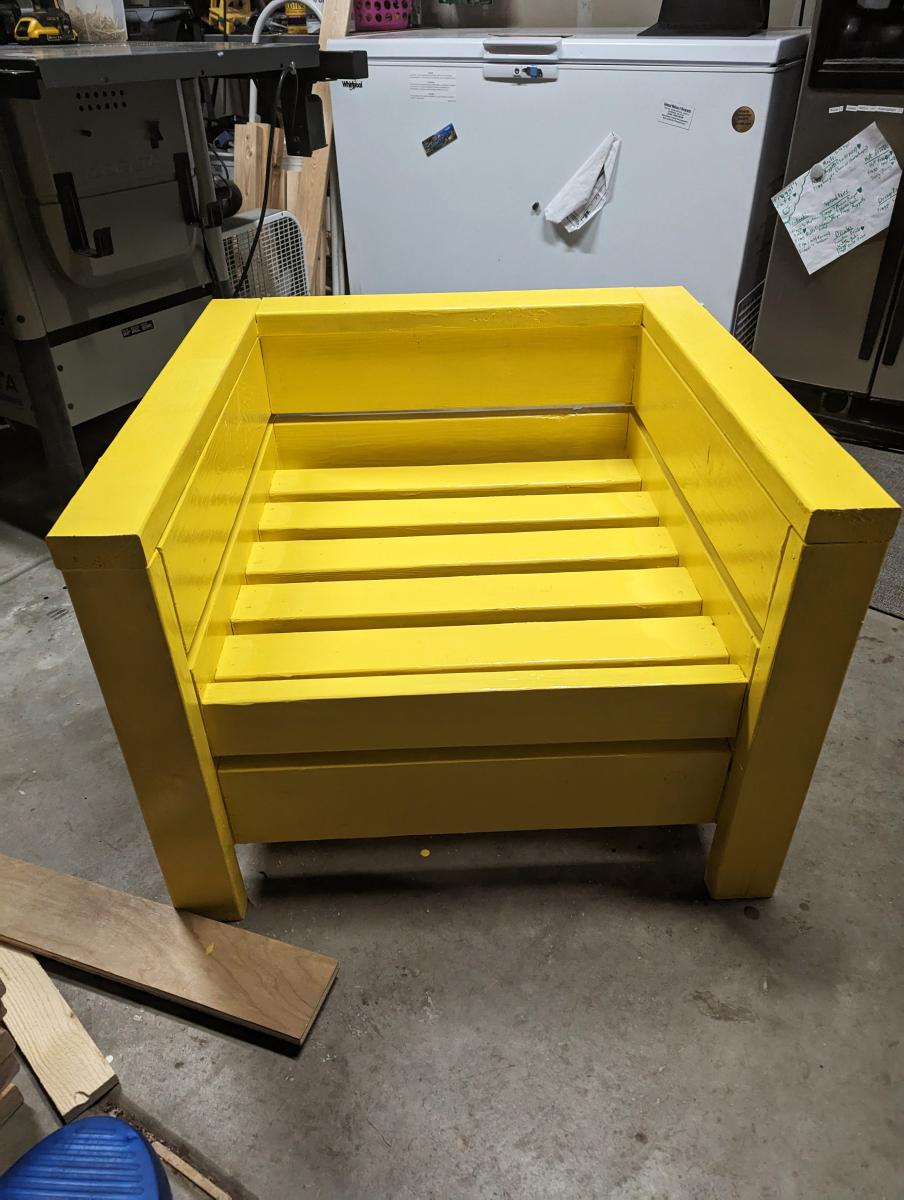
My first Ana White project! I'm getting so many compliments on these! My shop is my driveway so due to the weather, it took me about a week to get these built and painted. And I can only fit enough wood in my car to make one at a time! But they were so fun and easy to make!

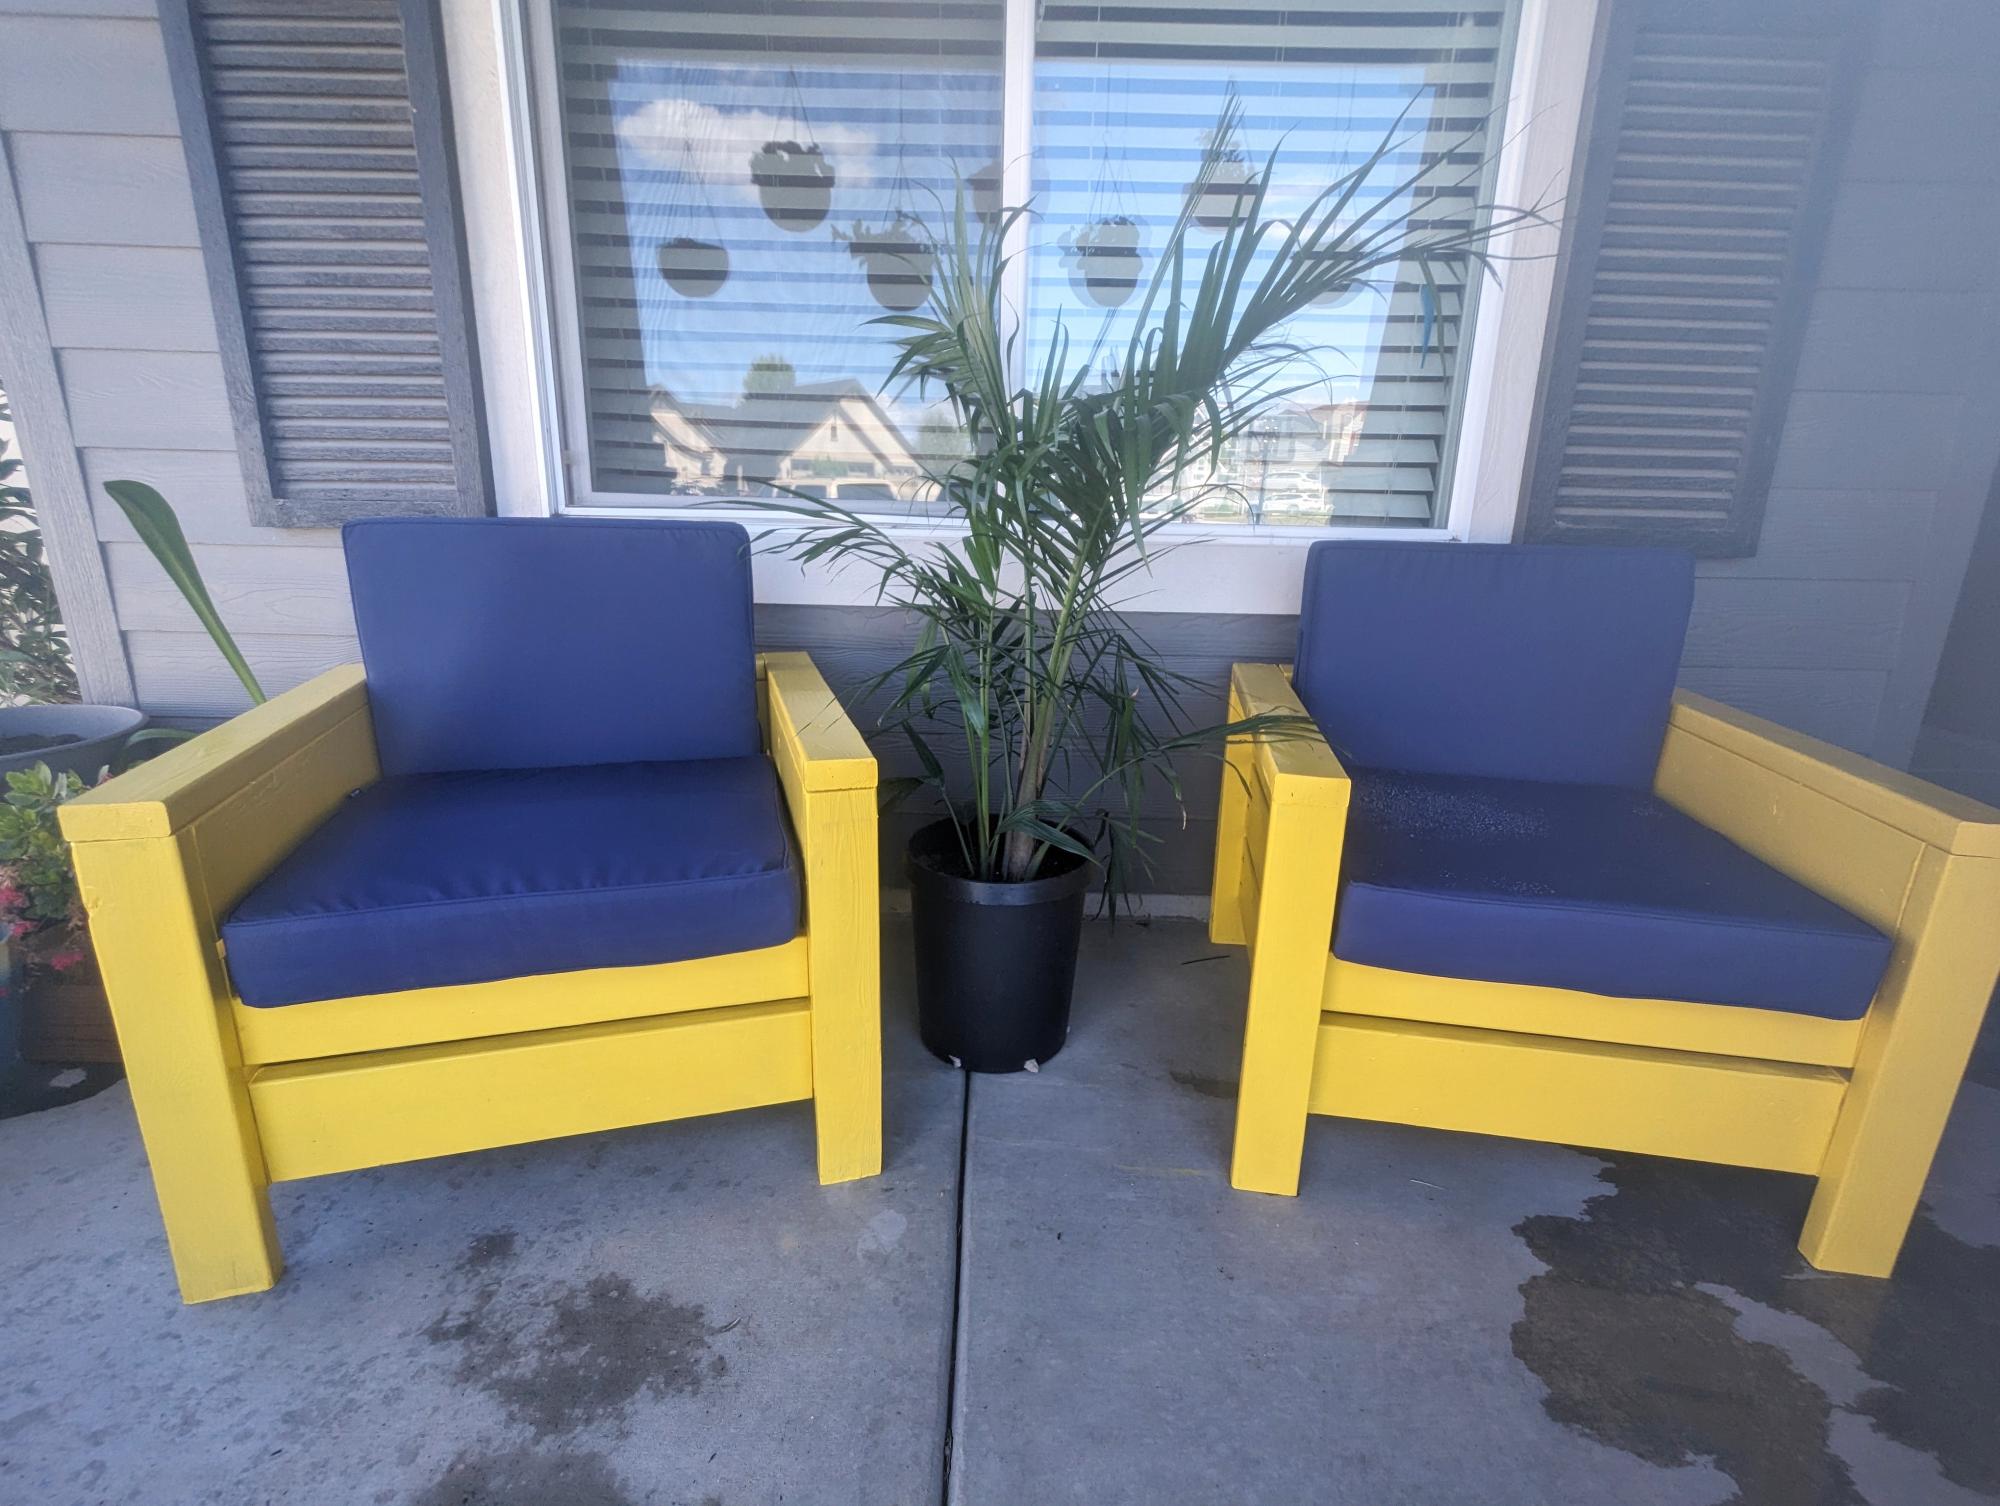
I chose to use your plans for the "Modern Outdoor Chair from 2x4s and 2x6s" and it turned out great on our front porch! Now we have a new place to chill in our chairs among our plants in the shade on summer days!
David Herrin
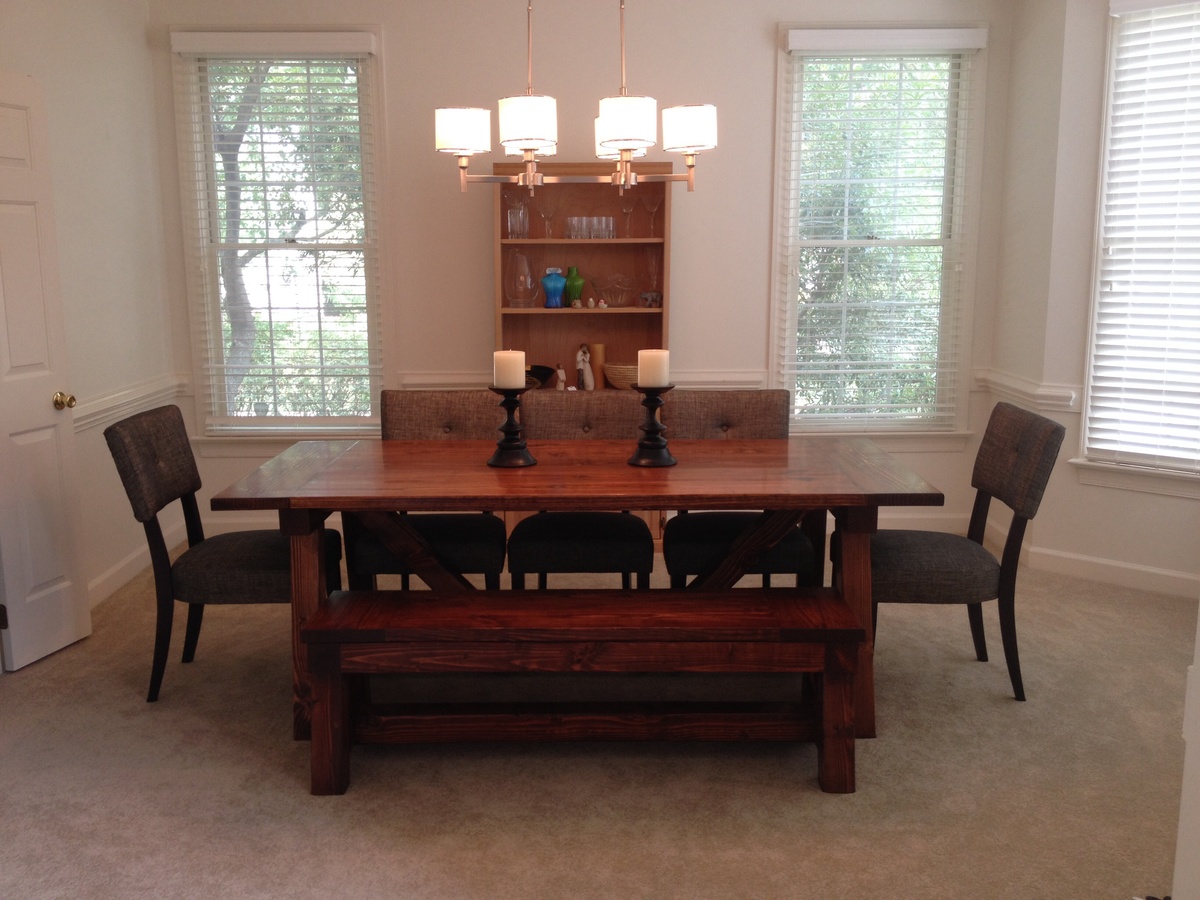
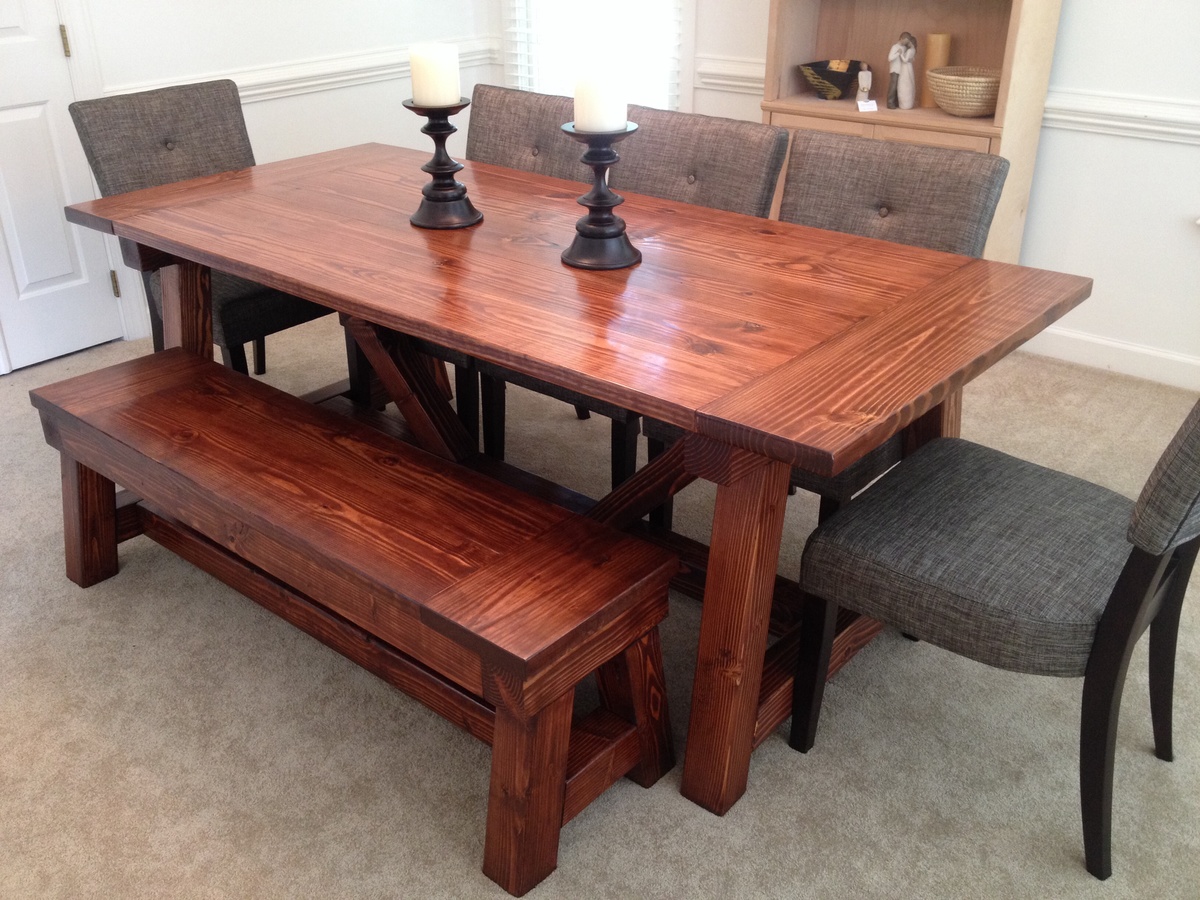
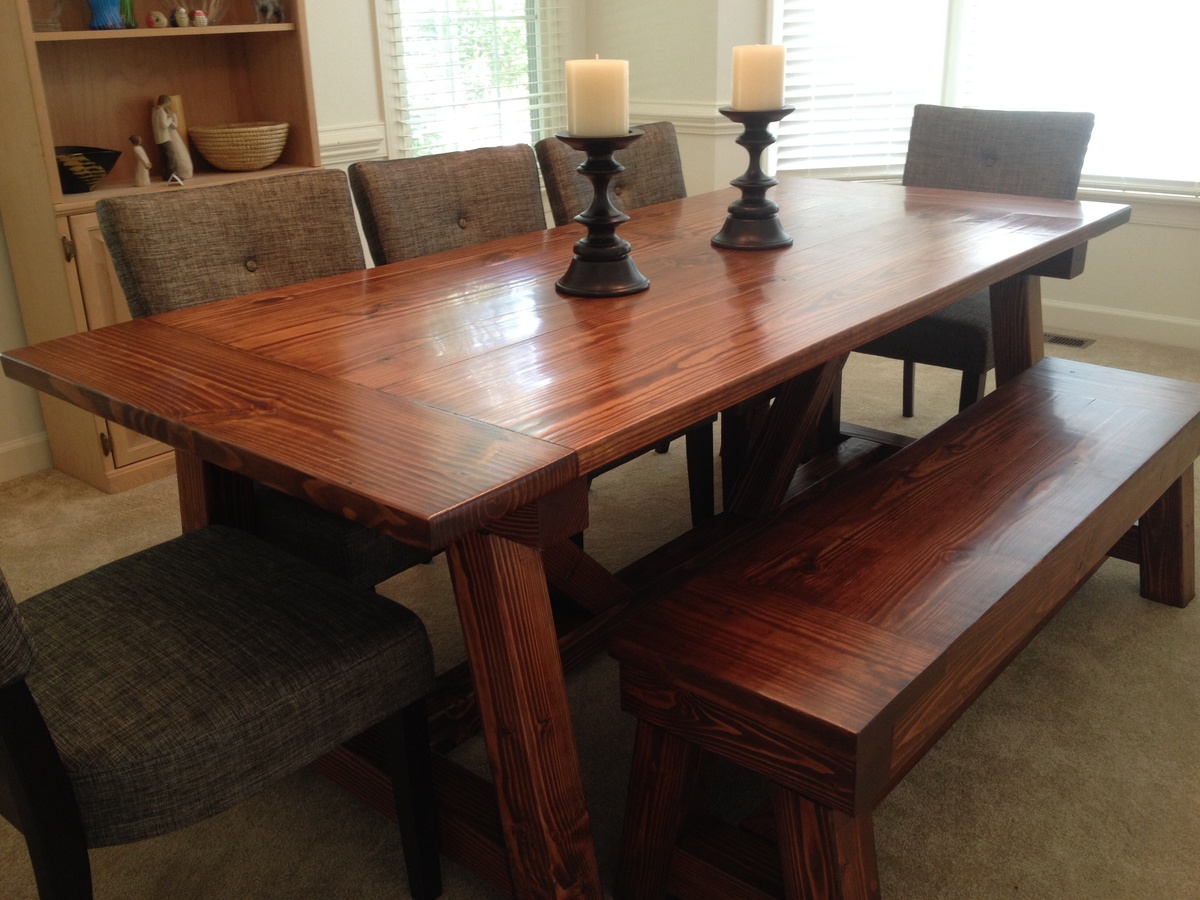
This was my first project from Ana White and it turned out so well I made more. Very easy and inexpensive. Used Red Oak for the tabletop and California Redwood for the legs.

Barnwood fancy x farmhouse table.
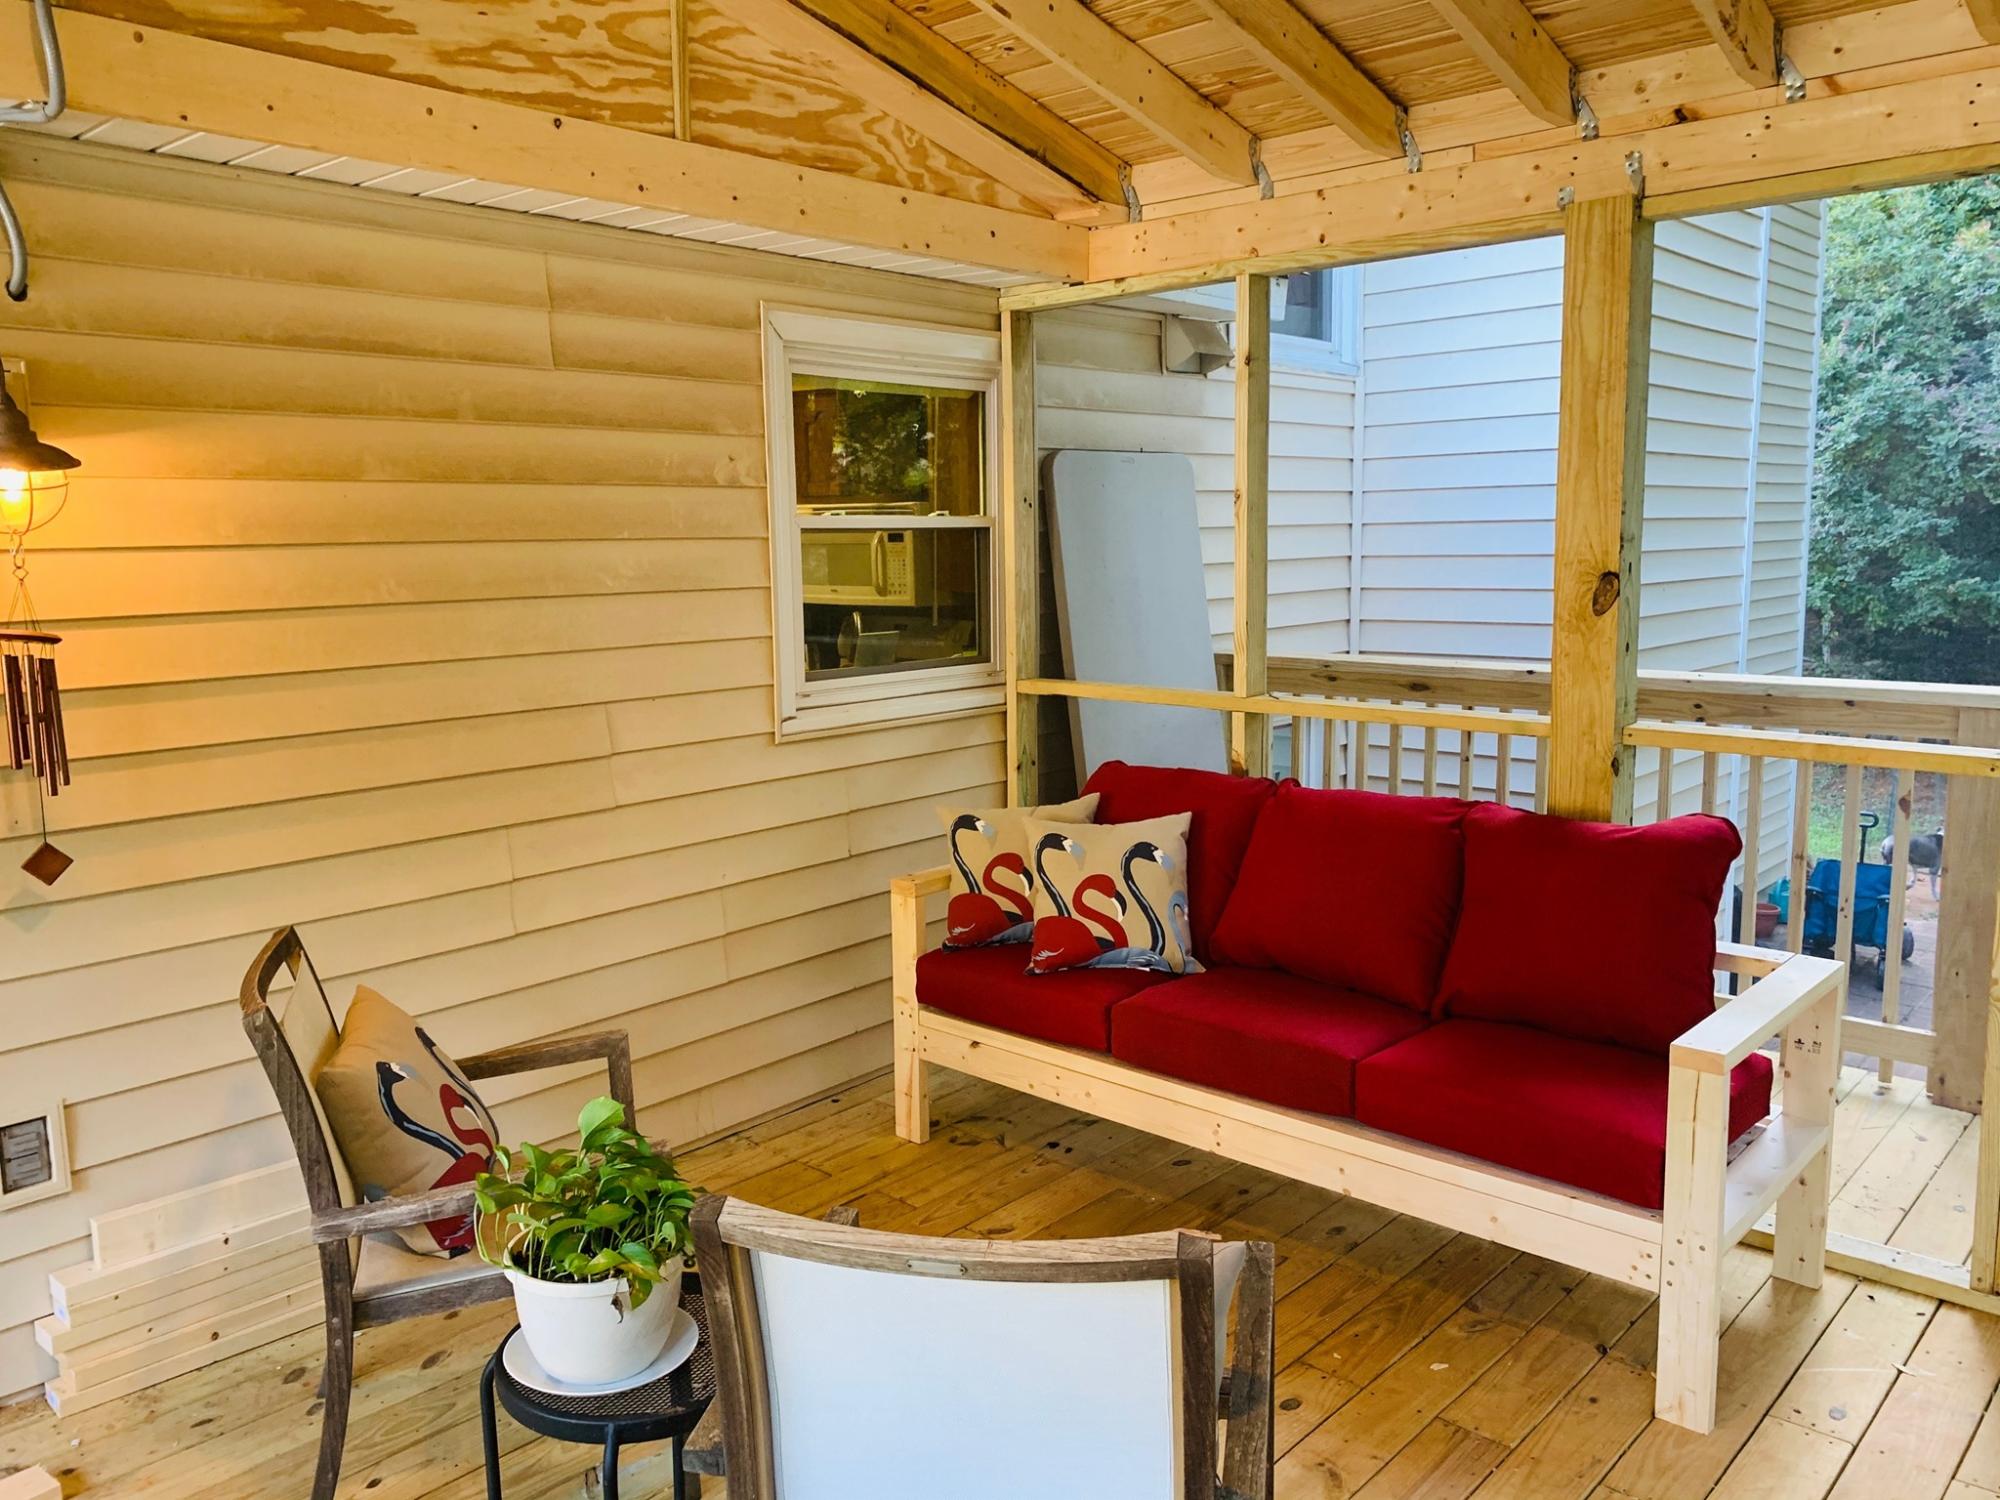
Followed the plan exactly. Added an extra 6 foot board across the back for better pillow support. Got the 24" cushions from the big box store. With one extra 8 foot board + left overs, I have enough to make a modified, small 34"x17" coffee table from the 2x4 plans linked below, which is perfect for the space I need. Will add a photo for that when I'm done.
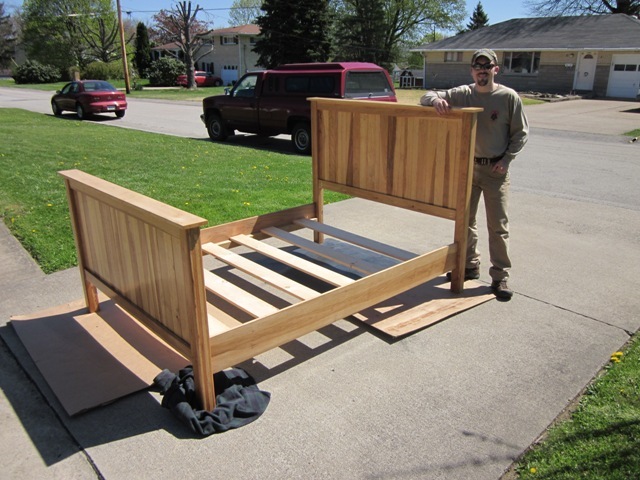
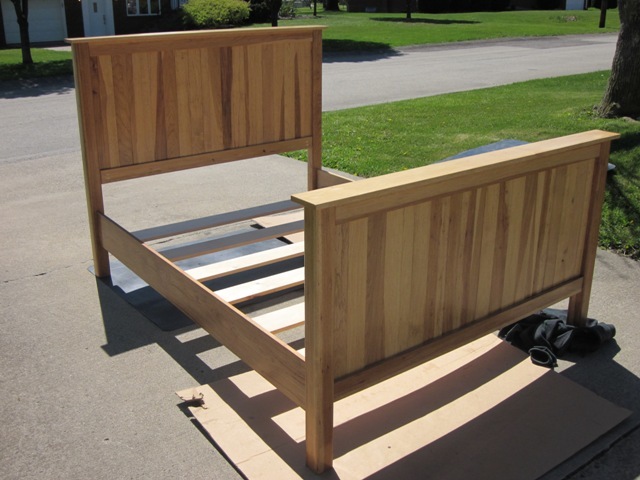
The bed was a wedding present to my wife. I got rough cut, kiln dried hickory at a local sawmill, planed, and joined it to get the finished lumber. The lumber was sanded with three grtis with a random orbital sander and wet sanded once. The posts are laminated hickory slats that I inleted for the rail hook hardware. The head and footboard slates are tongue and groove, fitted into troughs on the top and bottom. The tops of the posts were milled out to allow the tongue and groove cap to fit flush. Three coats of Golden Oak, and then two coated of polyurethane. Looks great, but really heavy.
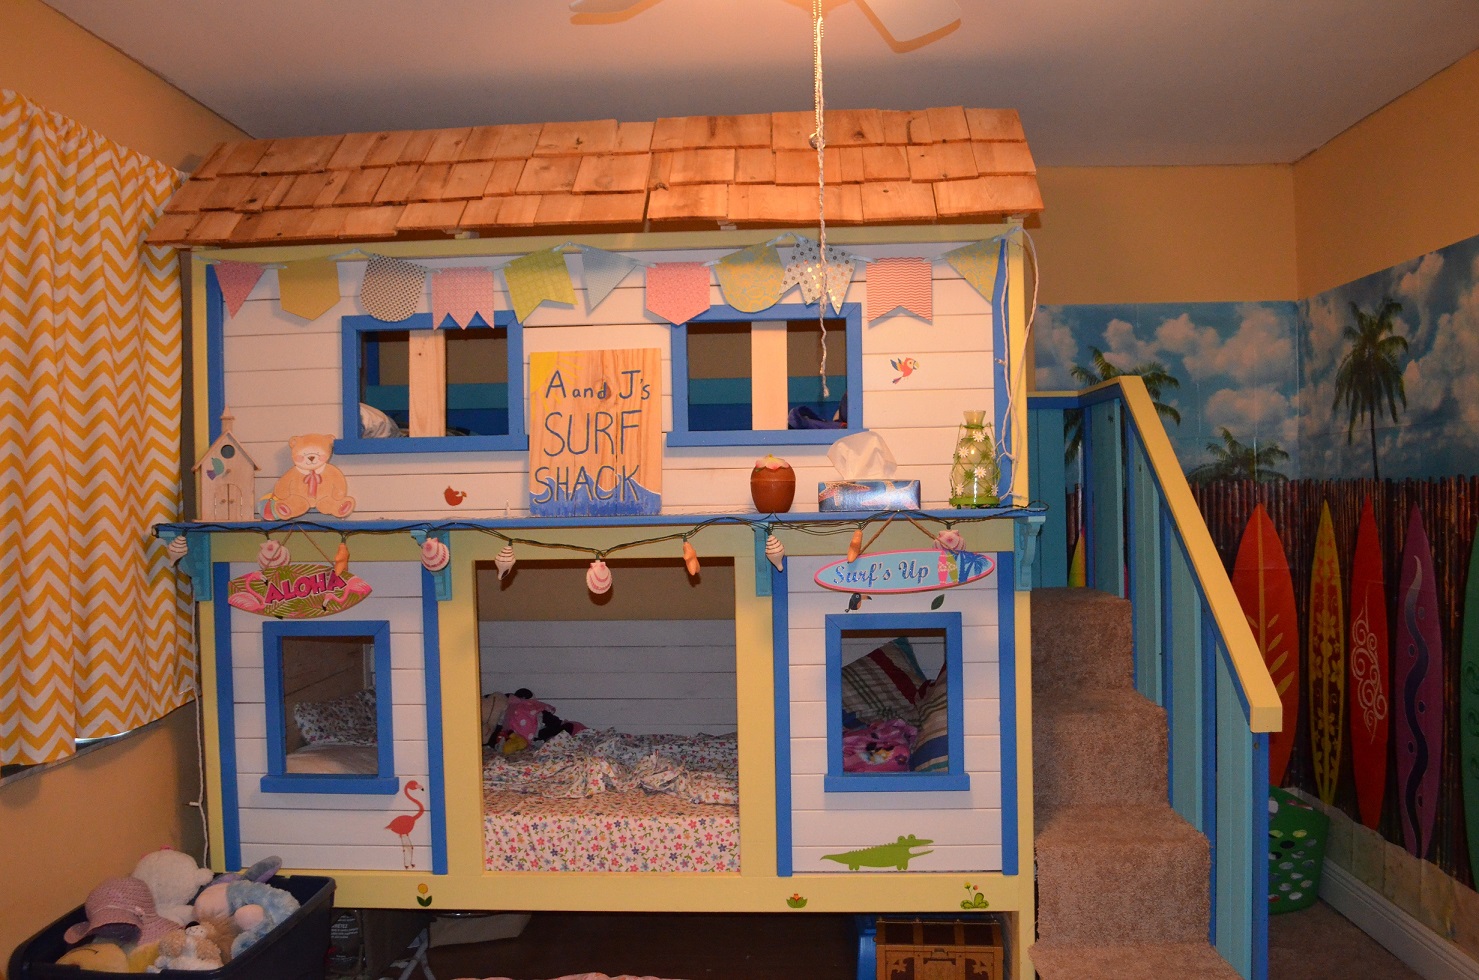
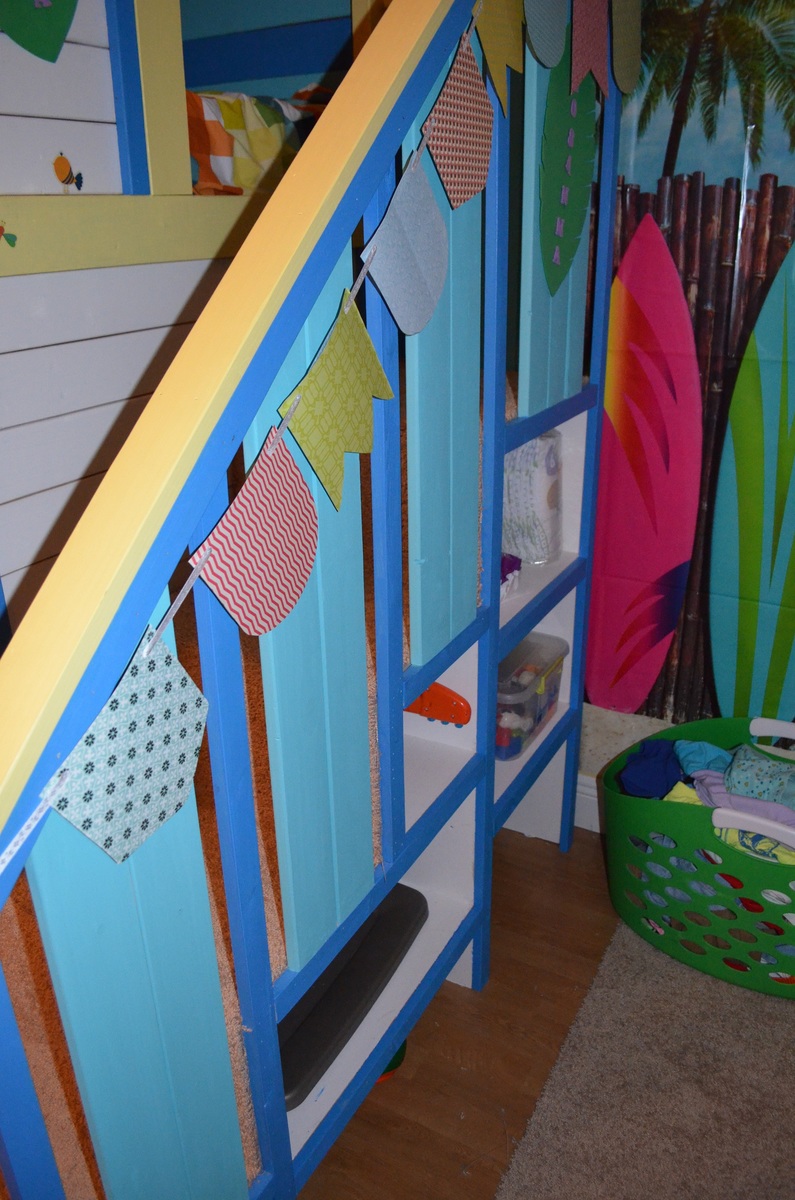
We kept the windows square. Our Jigsaw is broken, so we also skipped the heart cutouts. We have a boy and a girl, so we chose a beach house theme. I'm a total beginner builder, and my husband helped me at night after the kids were in bed. It took us about 6 weeks. We used shakes to build the roof. They are pretty affordable from Home Depot. 1x6 boards were considerably more expensive, so we substituted 1x4s.

Thu, 07/17/2014 - 12:51
LOVE the beach theme! We have a little boy now, and I have thought about altering our sweet pea version so it's a little more neutral for a little boy. You did a great job, and I love the cedar shakes. They look great!
These Chairs where fun and easy to build. I used 1x8 for the back. I used counter sunk 1 1/4 in screws and pocket holes and kreig screws. I thought A hinge would not be safe so I screws the tray down with a 2in overhang. Can not wait until Christmas.
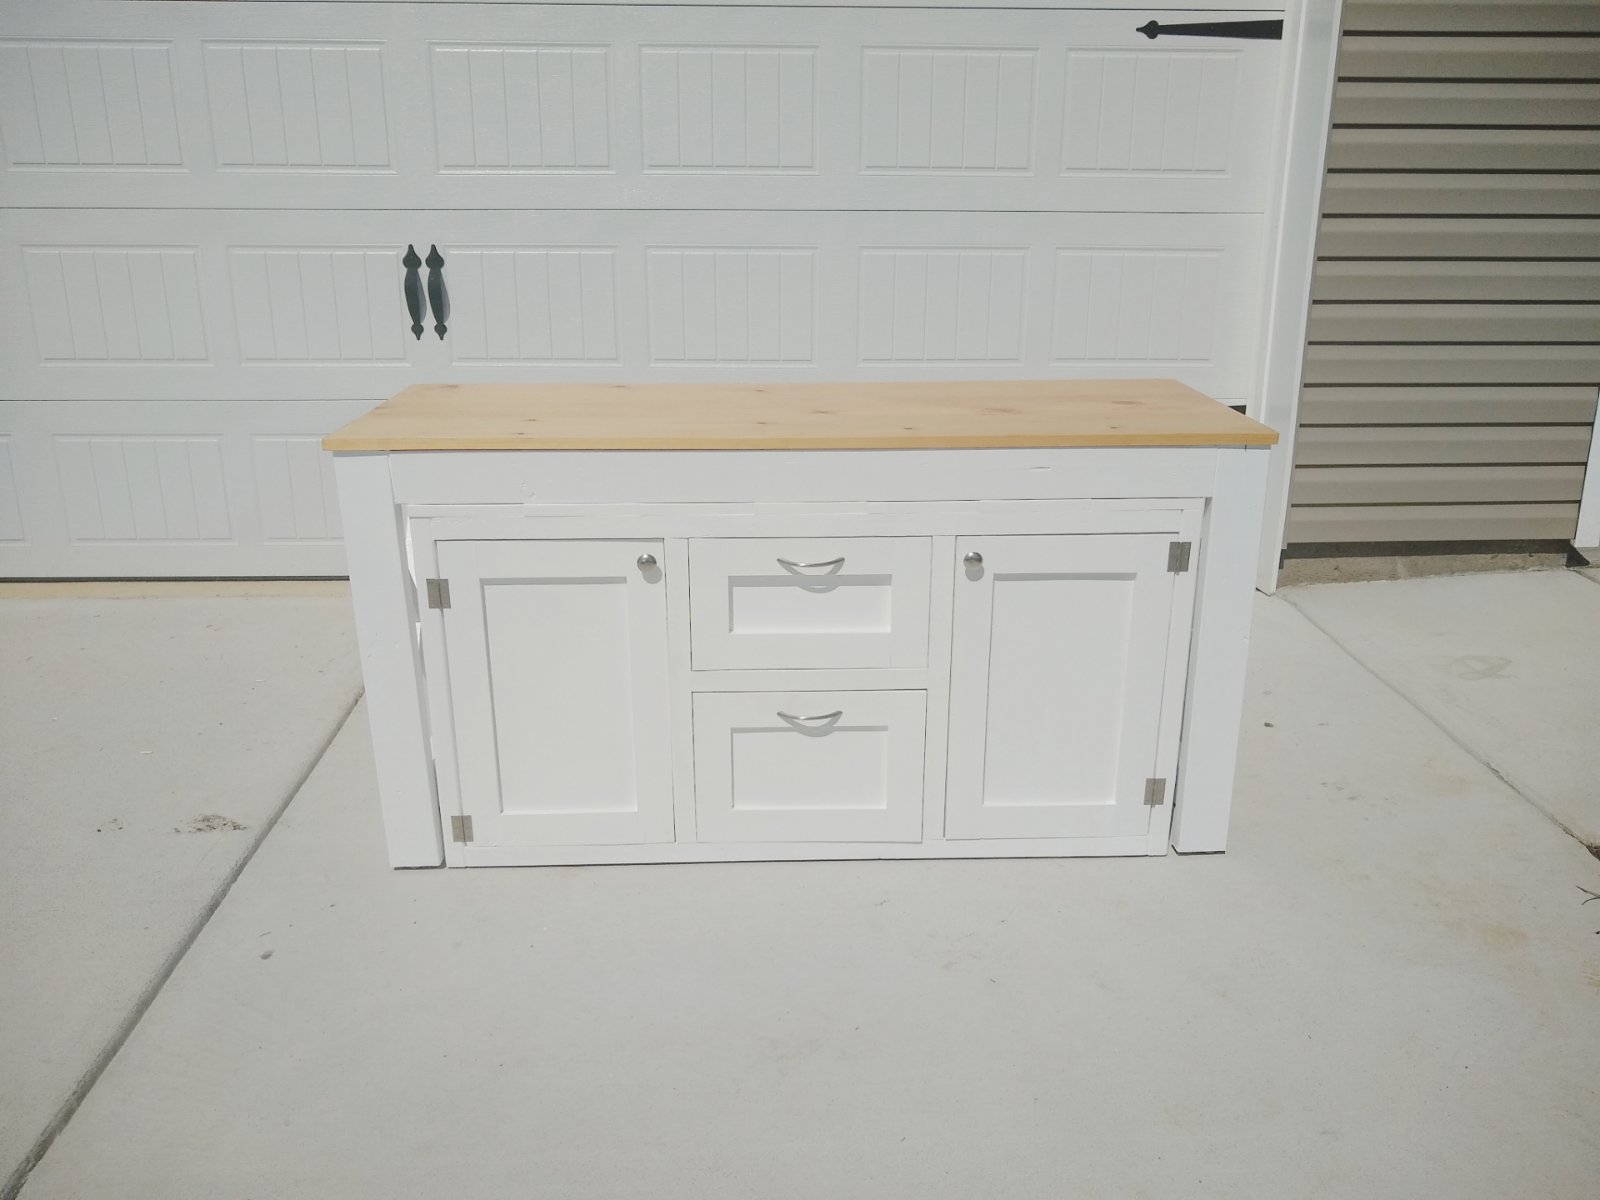
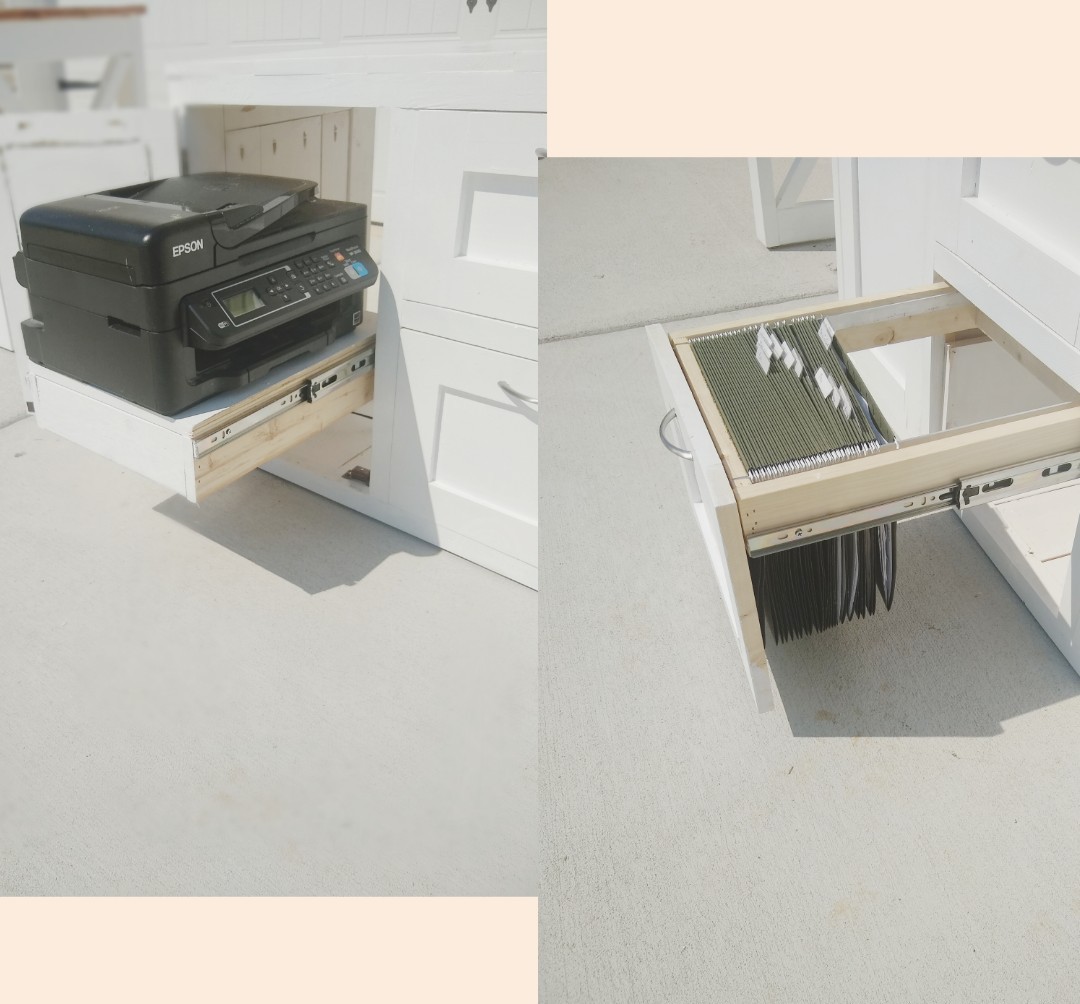
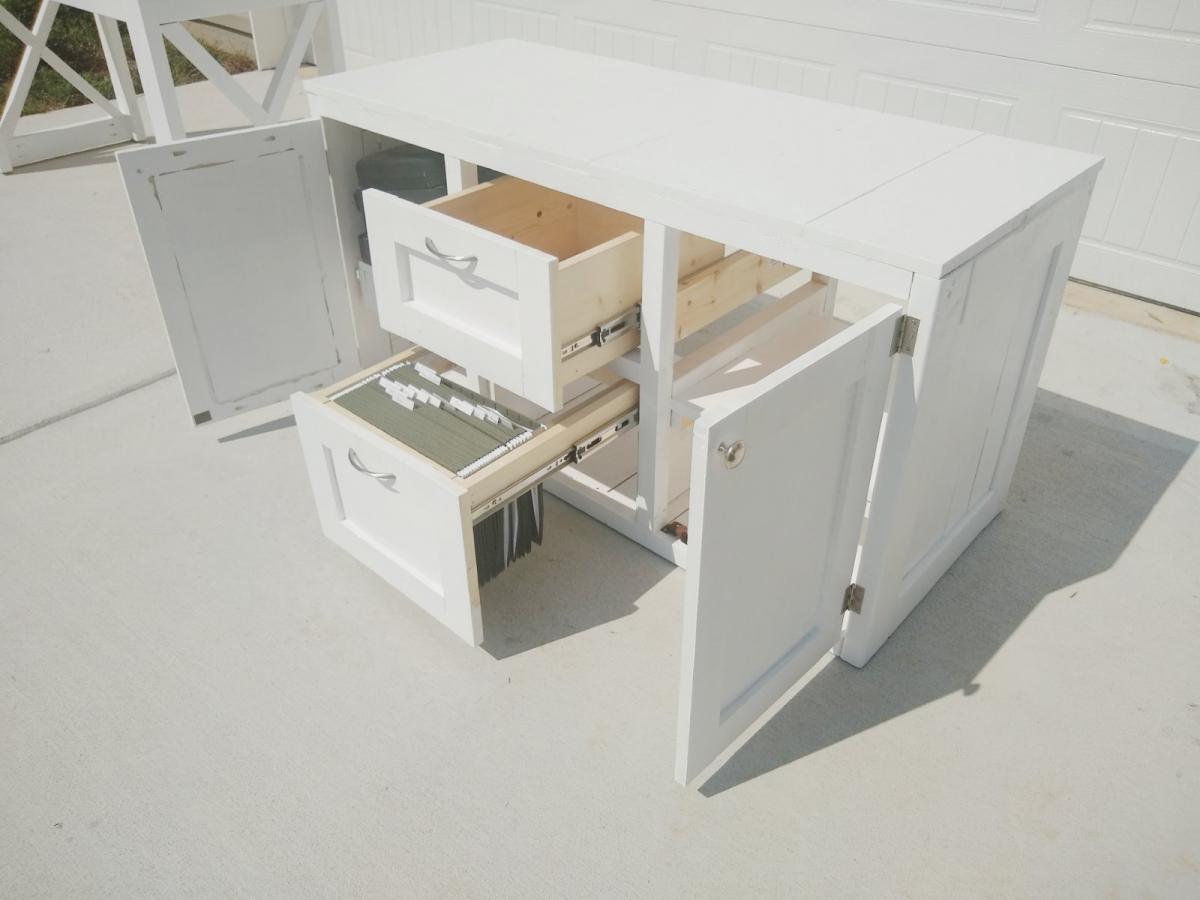
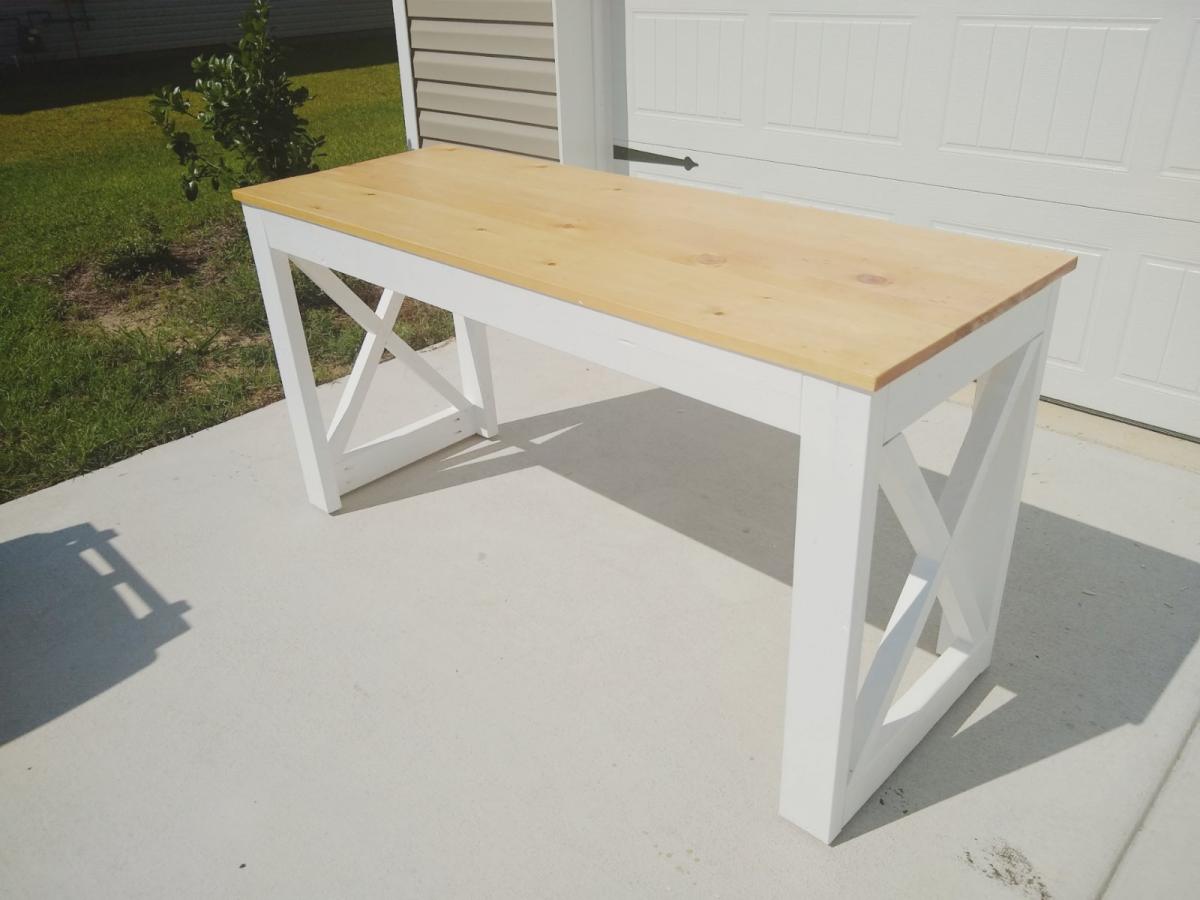
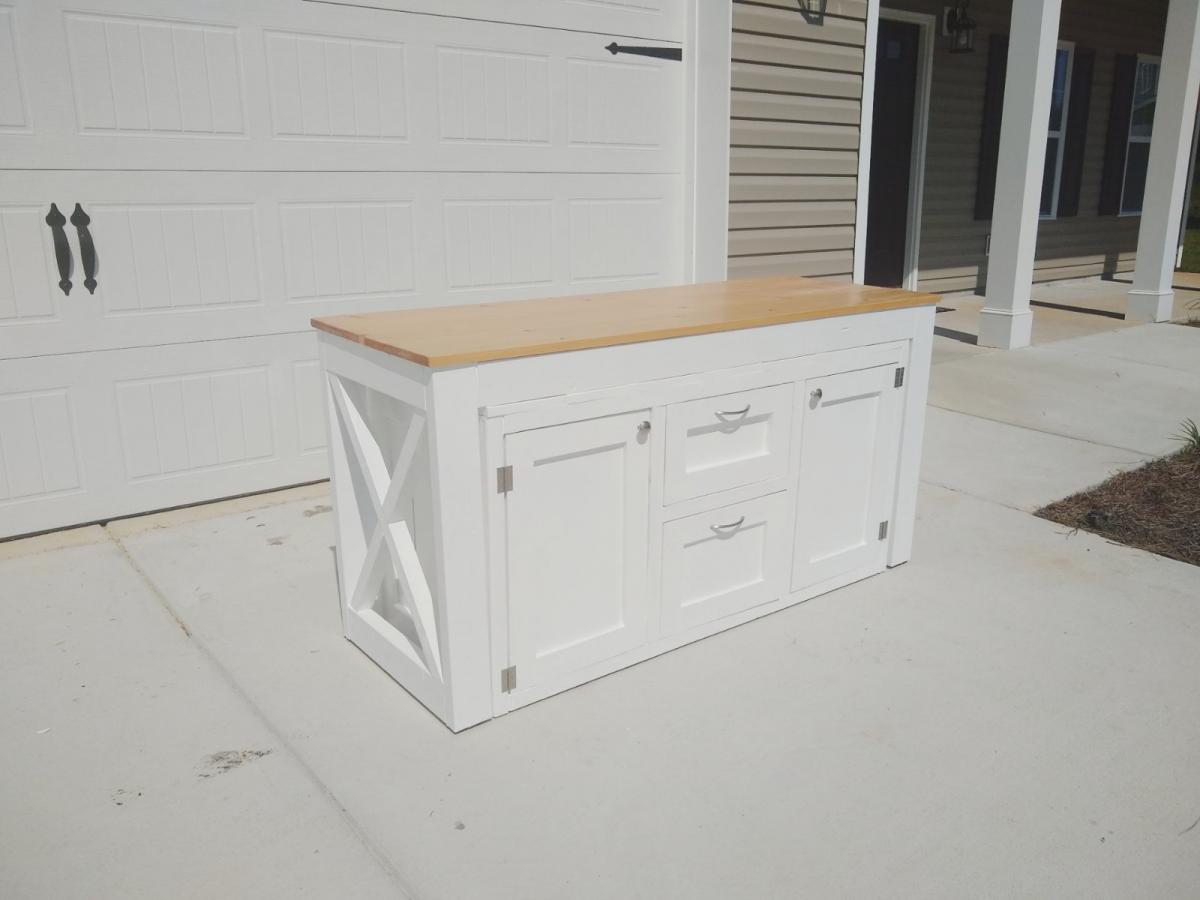
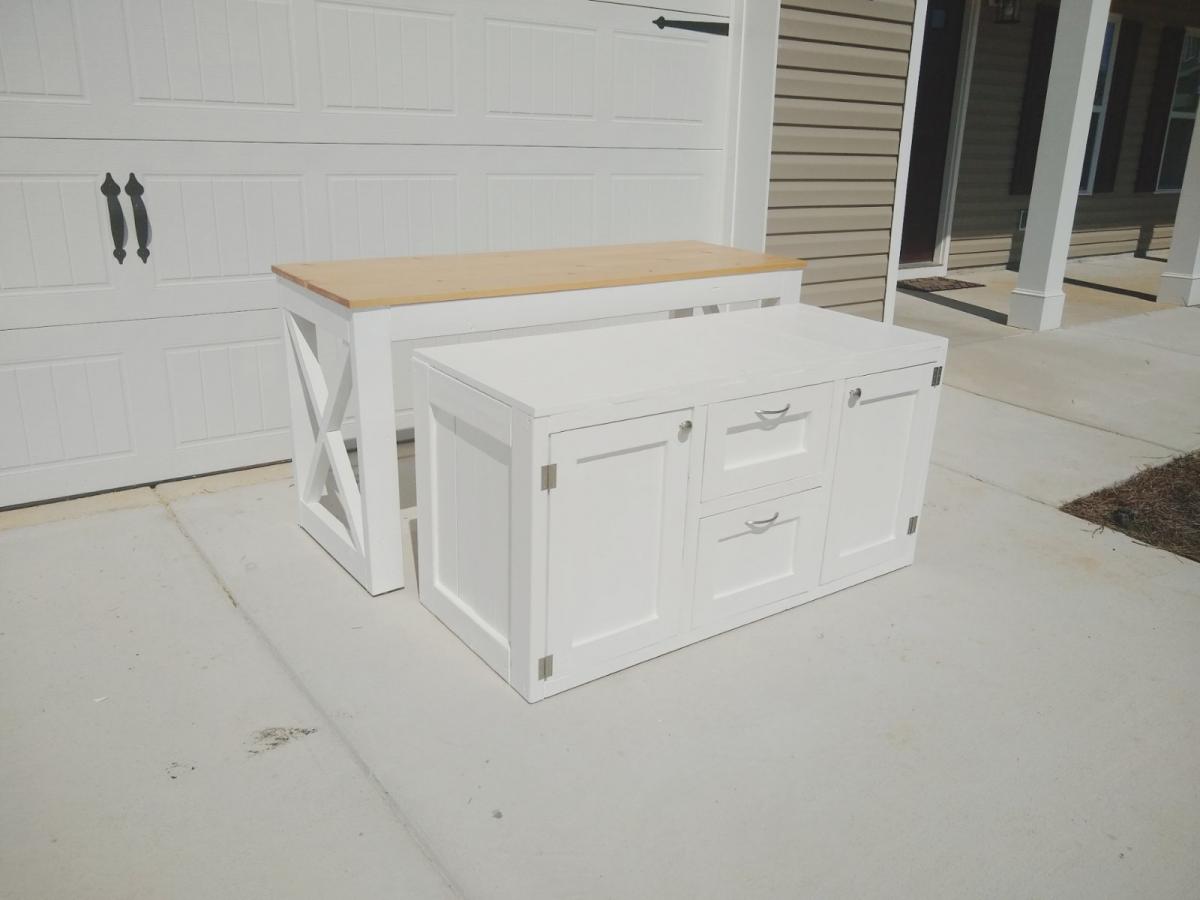
So loving this nesting office station❤️! We will have a sofa sleeper in the office as well. So we needed a desk that could be moved to the wall when the sofa sleeper is being used by guest. I saw a post from Ana for her Nesting Grill Station and I came up with the idea to make this nesting office station. The cabinet includes a file folder drawer (which is from Ana's mail boss plans), a regular drawer, cabinet doors with shelves. One of the shelves is a pull out shelf for the printer. I think it came together great! Design for nesting desk inspired by these plans: https://www.ana-white.com/woodworking-projects/nesting-grill-station https://www.ana-white.com/woodworking-projects/mail-boss
Wed, 07/15/2020 - 04:40
I love this! Very creative and practical design and oh so pretty. Nice job!
Mon, 08/31/2020 - 09:47
This looks so good. Great work. Do you mind sharing how you concealed the wheels? Do you have wheels on both pieces?
Sat, 10/03/2020 - 08:35
Hi, Thank you! Actually I didn't add wheels to the design since this will be in an office with thick carpeting. I added adjustable metal foot pads to the bottom of the desk.
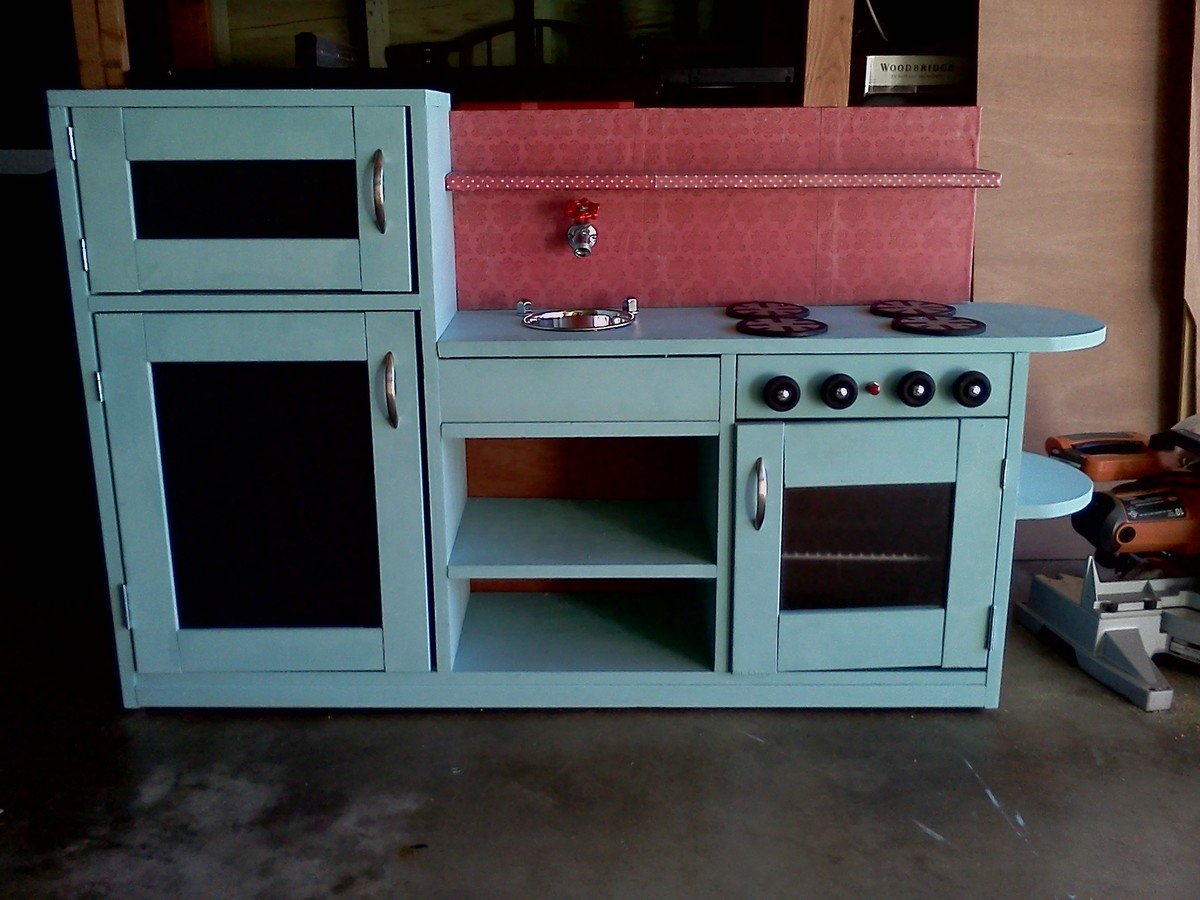
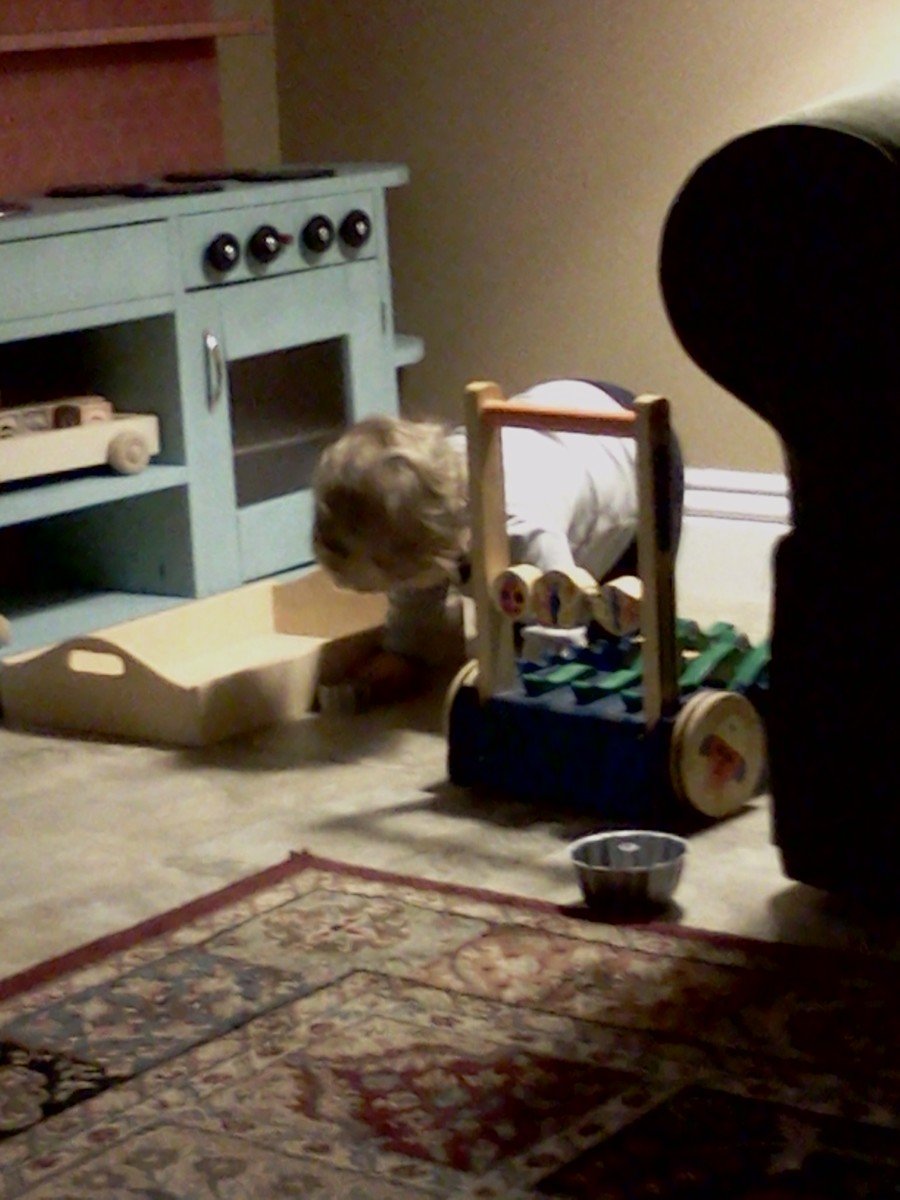
Wow, this was an amazingly fun project! My first Ana White project that I made for my baby girl's first birthday. Way young, I know but it's been lots of fun for this amateur woodworker watch his daughter make lots of creations in this little kitchen. Still to be added is the curtain under the sink. Some things to note--scrapbook paper for the backsplash that I gluegunned on and then modge-podged the surface to create one childproof layer; magnetic metal inserts that I sprayed with chalkboard paint (dual feature!); the sink is made from a thrift store bowl and the faucets on the countertop are really lugnuts gluegunned into nuts and bolts underneath, but loose enough to still turn; and our burners are silver and black painted pieces of plywood (probably the hardest part of the creative process was figuring that out); and lastly our stove knobs are made of toy truck wheels. We also added a fun battery operated light in the oven that I fashioned out of a battery powered LED light, PVC pipe, a light switch from Radio Shack and some wire. That took a ton of time.
What I learned the most in this project was the need to keep being creative and not let reality limit me. With creativity there is always a way! Have fun and enjoy yourself with this one. Our little one regularly gives us "cake" and "soup" that she makes in her little kitchen. Thanks, Ana, for a great forum!