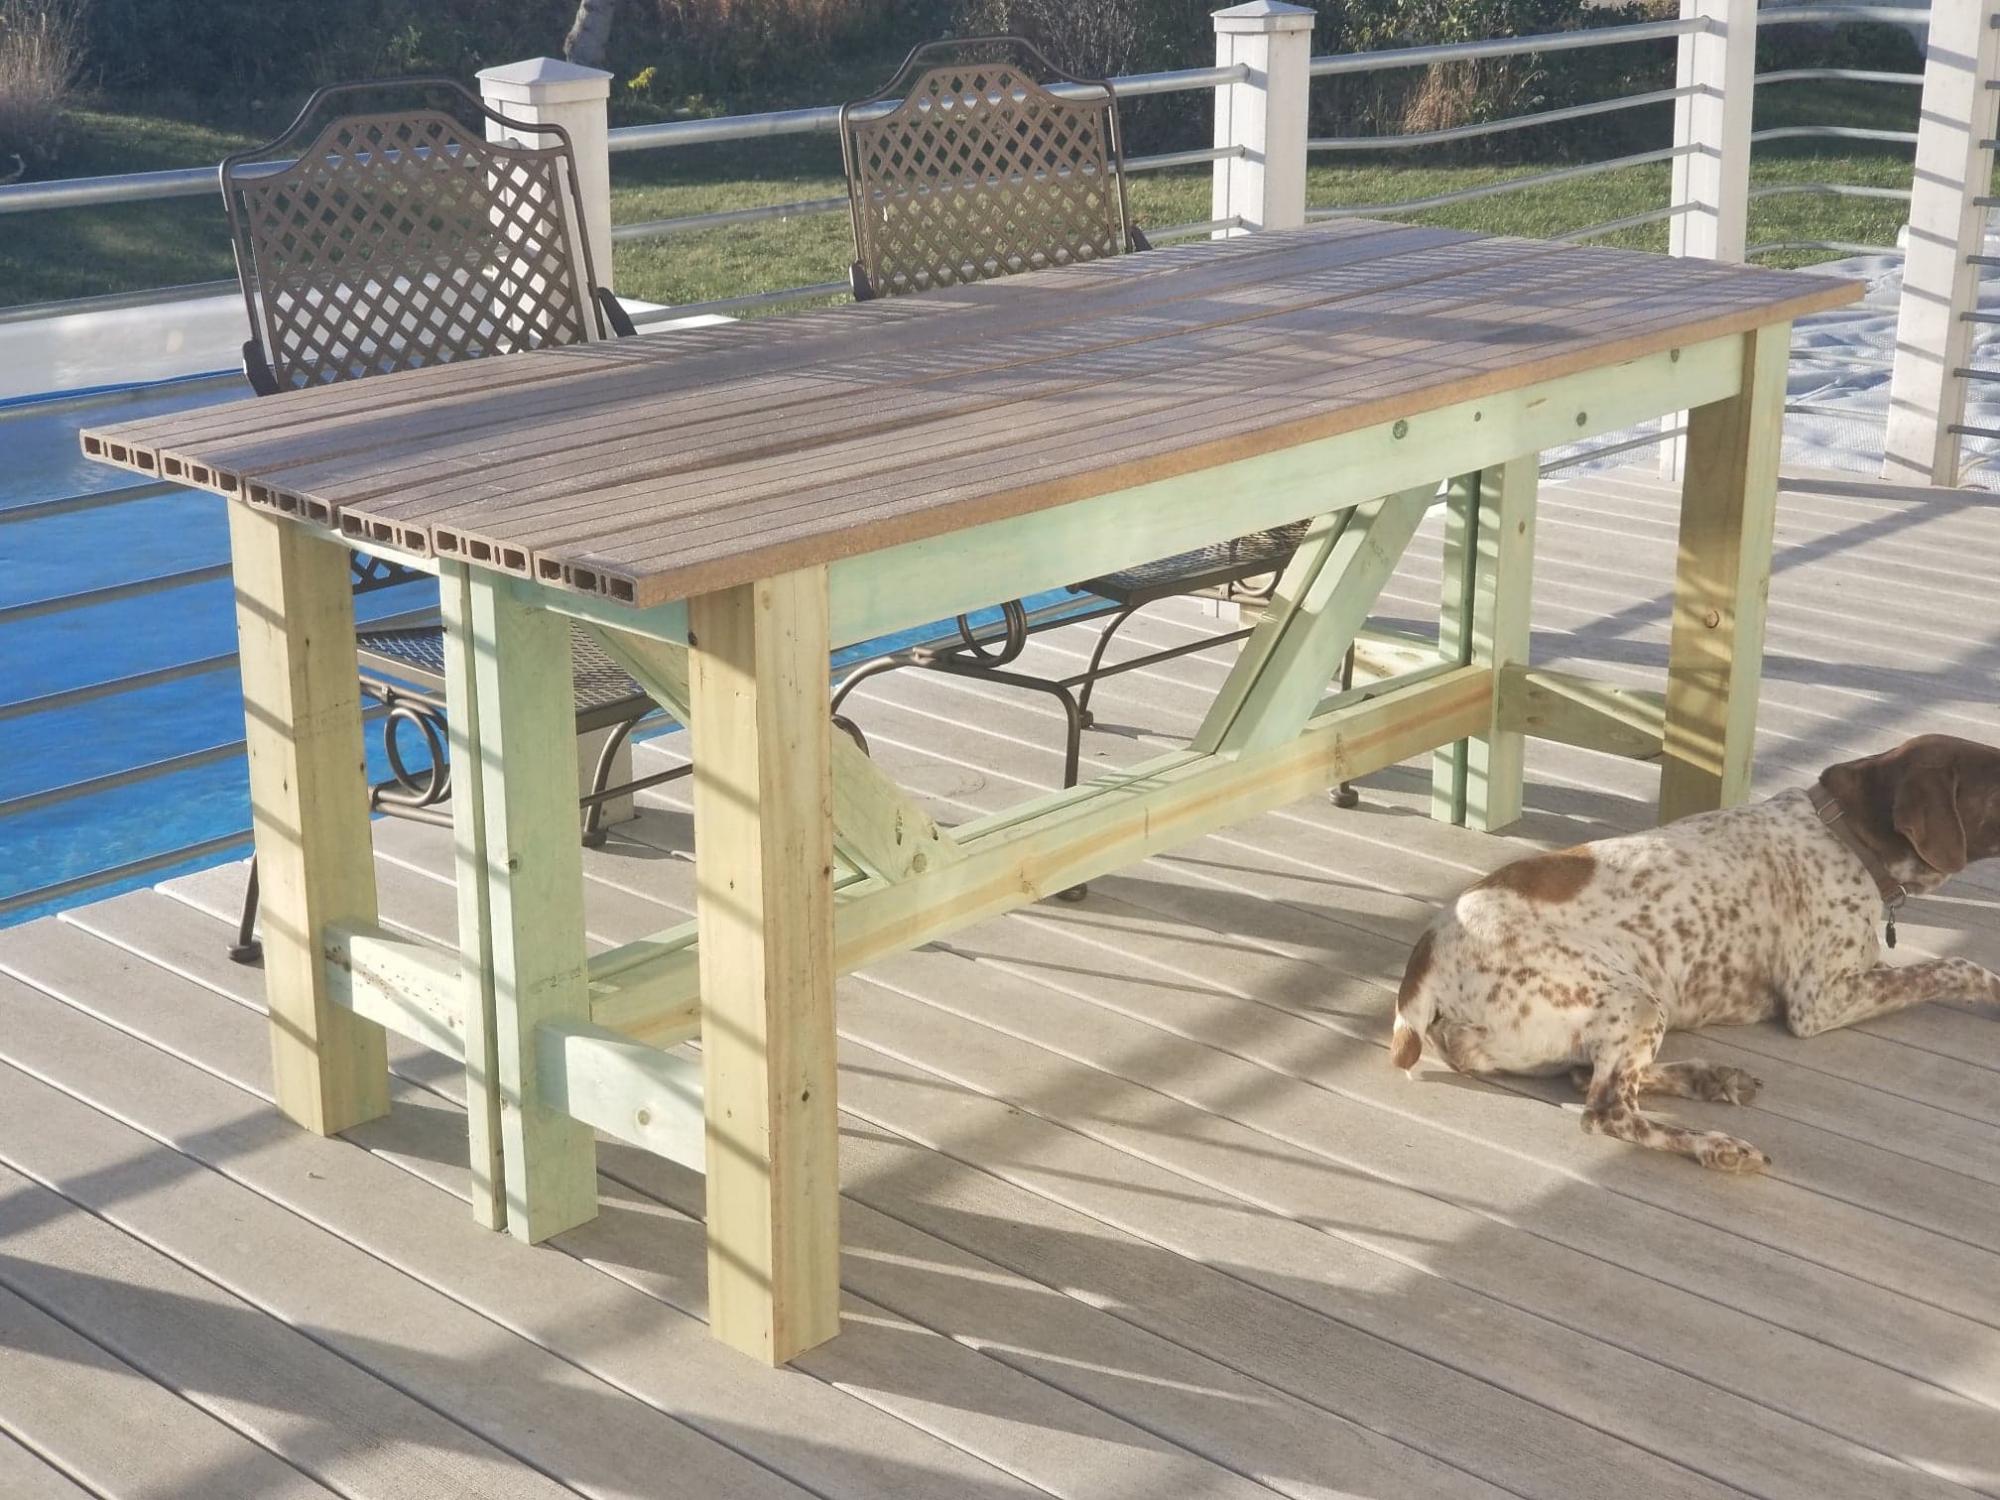
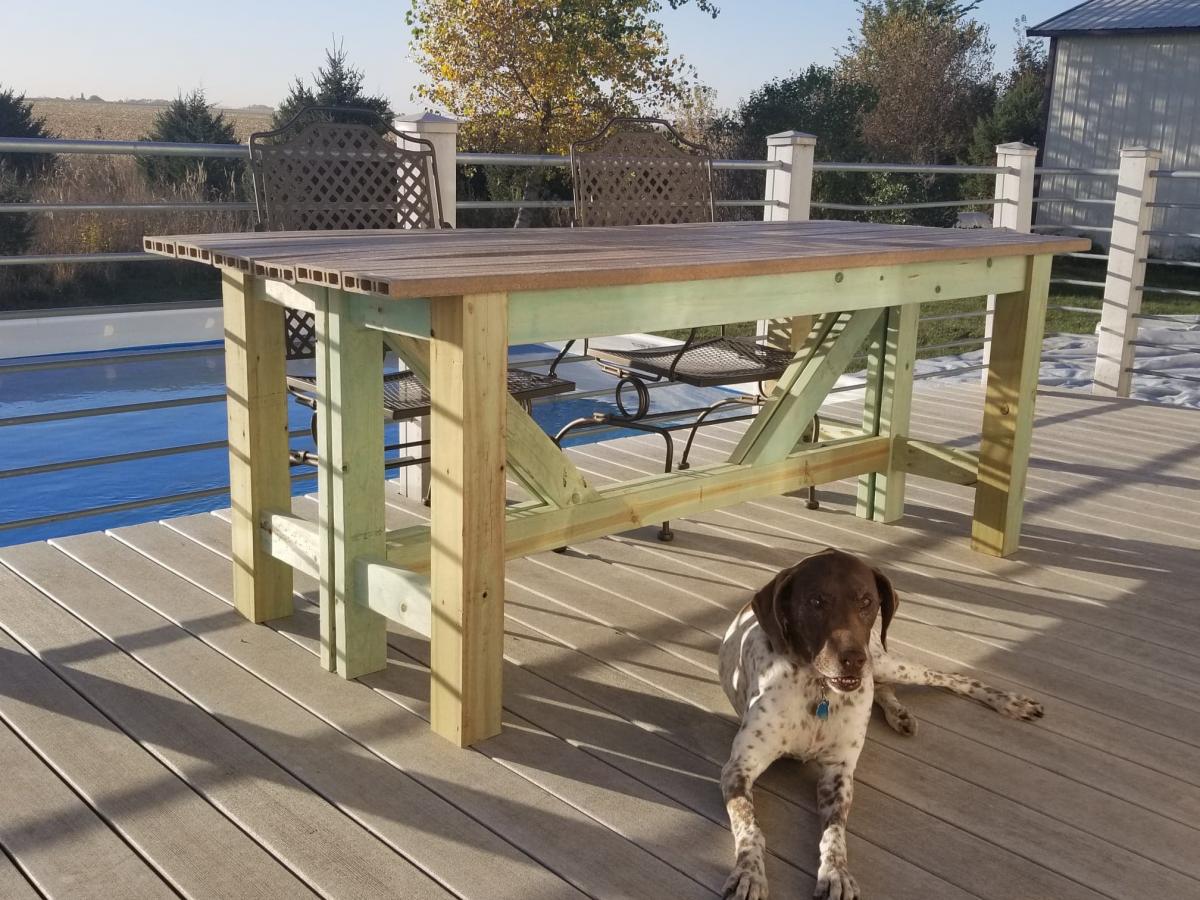
My wife and I were looking for a dining table for our deck. We looked at a few to purchase but could not decide. I wanted something that would not take up a lot of deck space. When the Facebook post for the "Outdoor Bar Table" came up, it inspired me to try to build a similar table. I already had purchased a Kreg HD pockethole jig for a project I never got to (At least yet), so I figured construction would be pretty simple.
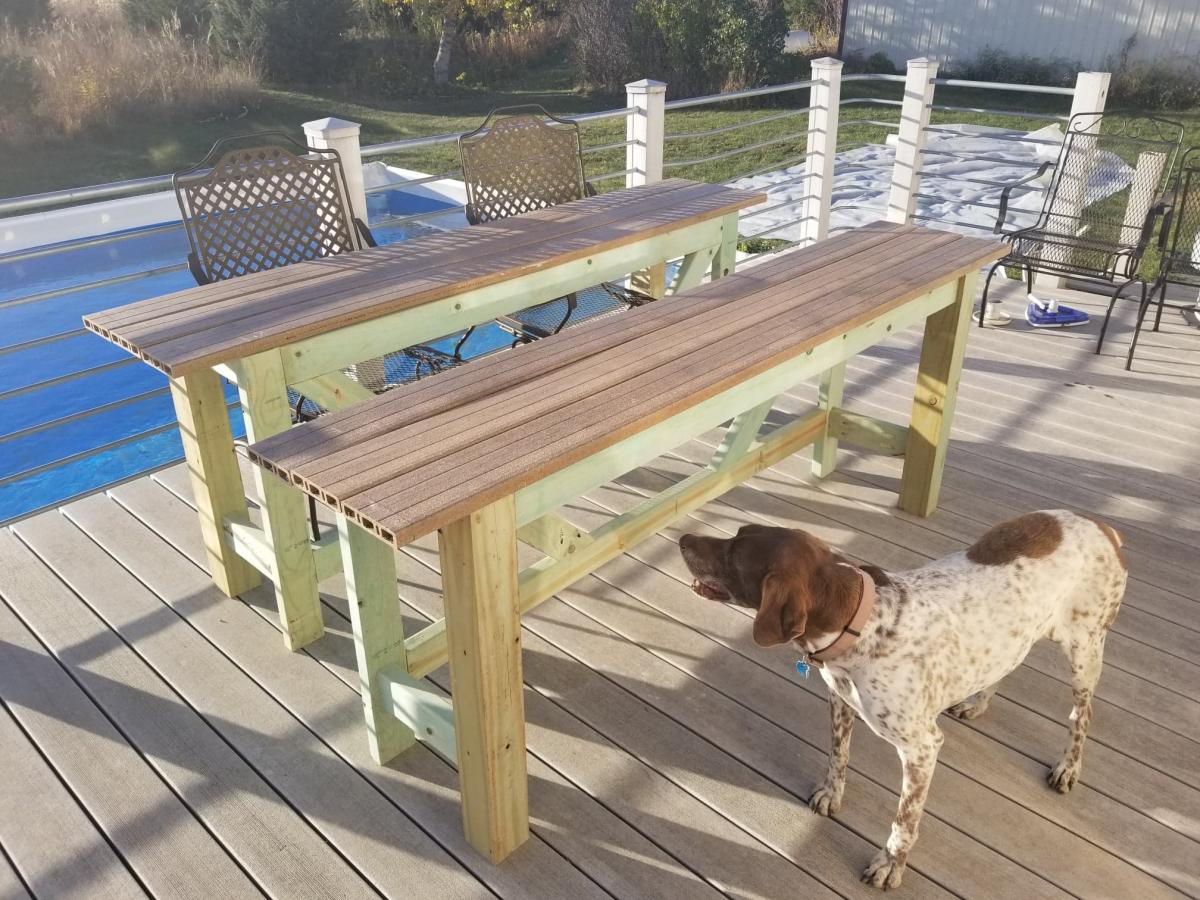
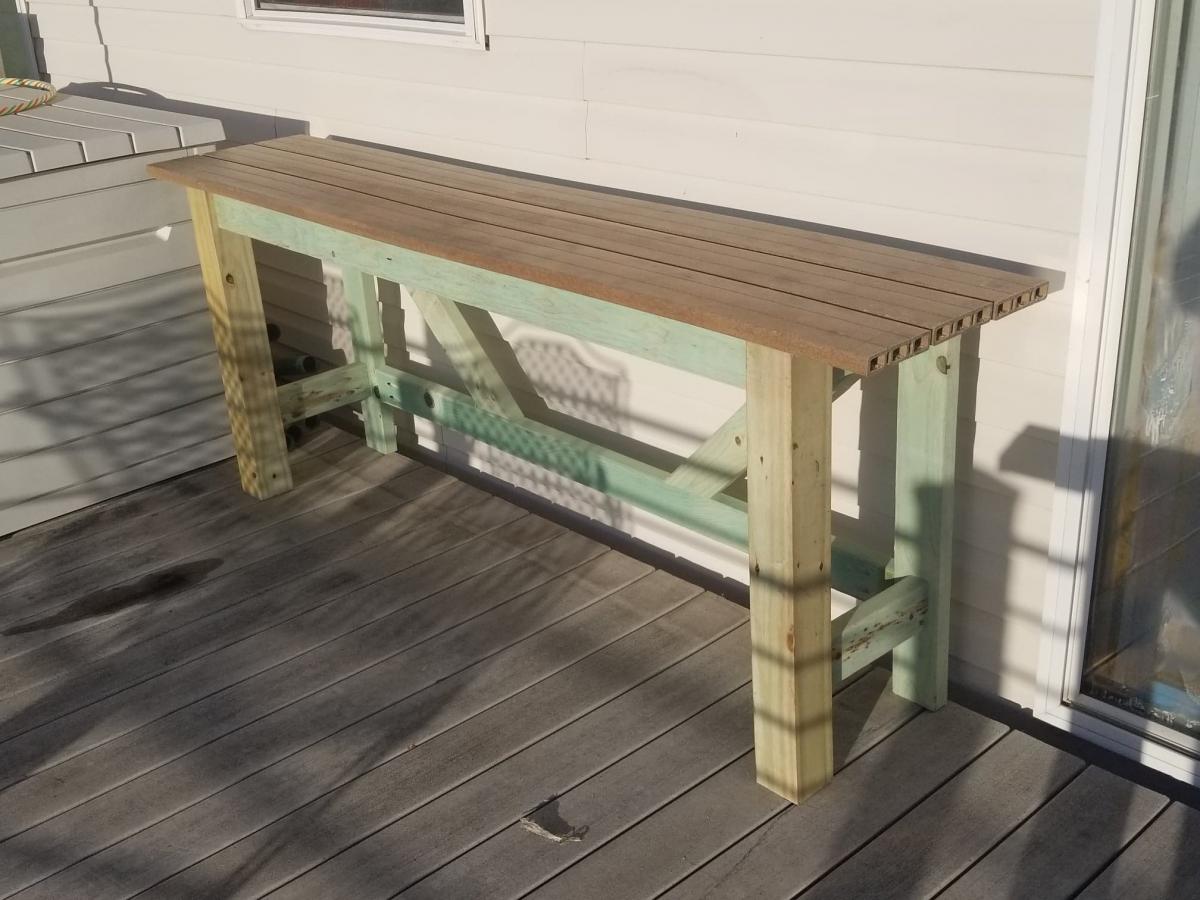
I should say my tables are loosely based off of Ana's plans, they served as a good reference. I lowered the table to 30" to match our existing deck chairs. I decided to actually build 2 half tables, so that when we were not using the table they could be set to the side of the deck. The back of each table is constructed with 2x4s so when the tables are put together it maintains the 4x4 look.
For the tabletop I had extra composite deck boards that I never used for the deck, so the depth of each half table was based on using 3 deck boards, with a 1/4" gap between each deck board. I used the same hidden fastener method I used on the original deck, so the deck boards are secured from under the table.
This being my first pocket hole project, there are a couple of small mistakes. 1) On the 45 degree trusses cut all 4 at the same time, then did the pocket holes. I missed the fact that I needed to drill 2 of the pocket holes on the opposite side. 2) I built the 2nd table back on top of the 1st table back so they matched. but I got mixed up when assembling the 2nd table so the pocket holes that should have been on the side facing the other table back, are facing the opposite side.
I did use Treated lumber for the table frame, and some of the pieces were still pretty wet, so we will wait until next year to paint the base.
We really like how they turned out, and that we still have almost all of our deck space when the tables are in the "Stored" locations.


Comments
Ana White
Fri, 05/11/2012 - 10:16
Beautiful, I love the color
Beautiful, I love the color you choose too!
PS - for a second, I thought the pergola was on fire! haha! Glad it's just beautiful lights!
Jade (not verified)
Fri, 05/11/2012 - 14:43
:)
love this
taylorgdaddy
Sat, 05/12/2012 - 05:22
thanks
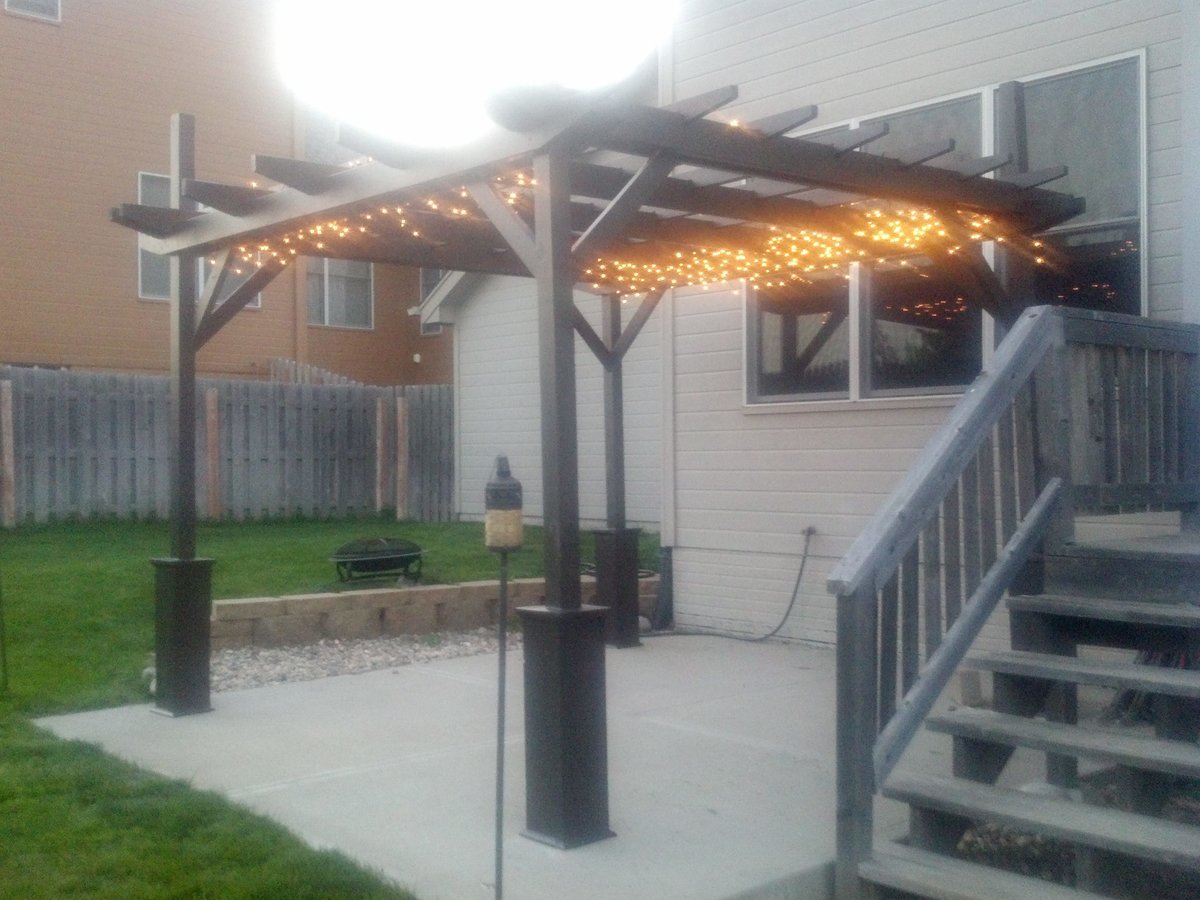
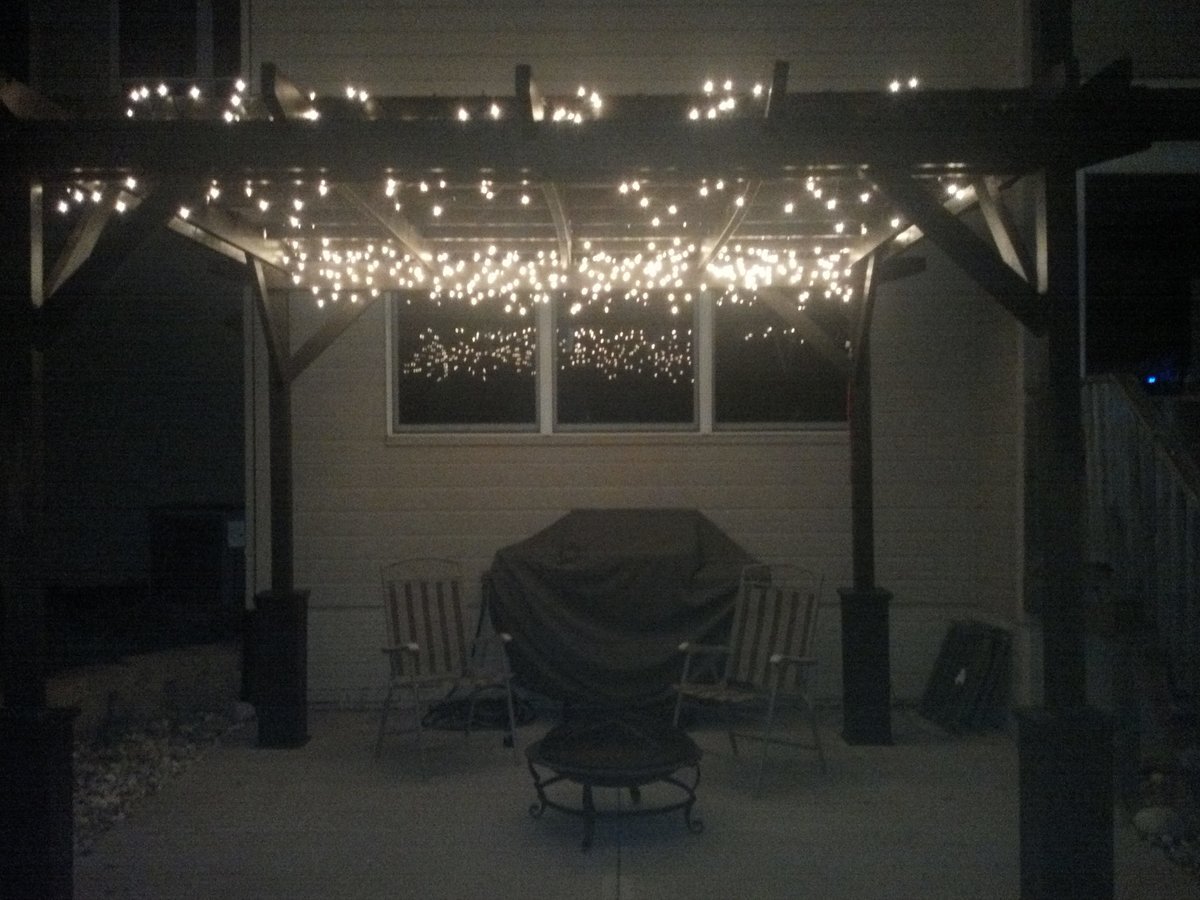
Thank you Ana, I have had multiple people say it looks like it is on fire...hilarious :) We will be adding outdoor fabric over the top for shade and gathering outdoor curtains on the posts. Will take another pic when that is complete. This site is awesome and I will continue to support you as much as I am able.
Thanks for the comment Jade!
lipstickandsawdust
Sun, 05/13/2012 - 06:03
Nice
Very nice Pergola, the color is perfect and the construction rocks! This is on my list of to- do projects for my mom. I have not really made any "outdoor" projects yet. So, I'll keep getting my feet wet with indoor projects.
taylorgdaddy
Thu, 05/17/2012 - 08:31
thx
Thank you lipstickandsawdust! I can send the other plans that I combined with Ana's which showed how to do the cut out notches if you like this construction better. Have a great weekend.
Forrest (not verified)
Tue, 08/28/2012 - 09:24
Notches
You mentioned that you combined another set of plans when it came to cutting the notches. That's one of the hang ups I have getting started is that I'm not sure how best to do that. What did you do? The pergola looks great!
jdlemmons
Thu, 05/17/2012 - 11:45
Beautiful!
My husband is DYING to have a pergola. I showed him the plans and he is down to build and is really excited for it! That's our next project as soon as I finish our bed (haha!). Did you paint or stain this?
taylorgdaddy
Sat, 05/19/2012 - 05:01
:)
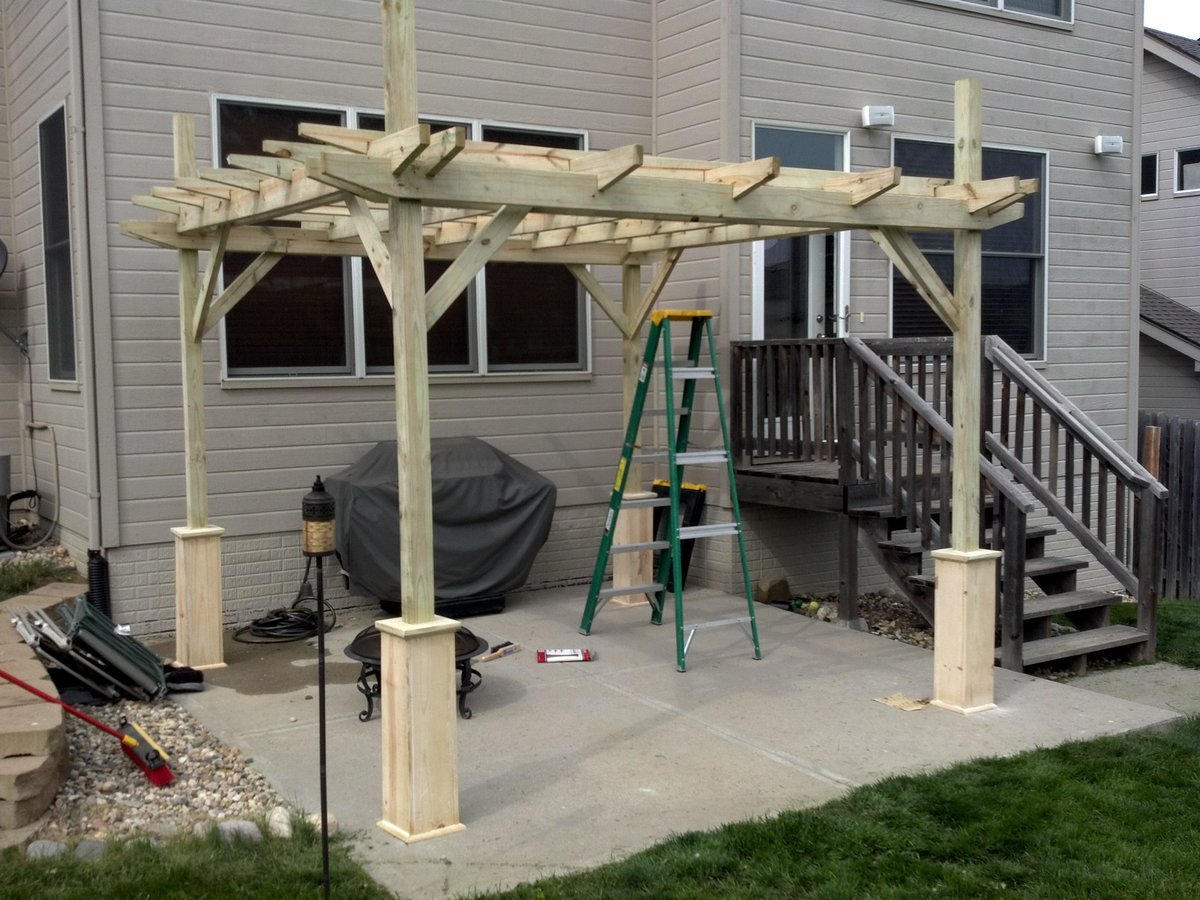
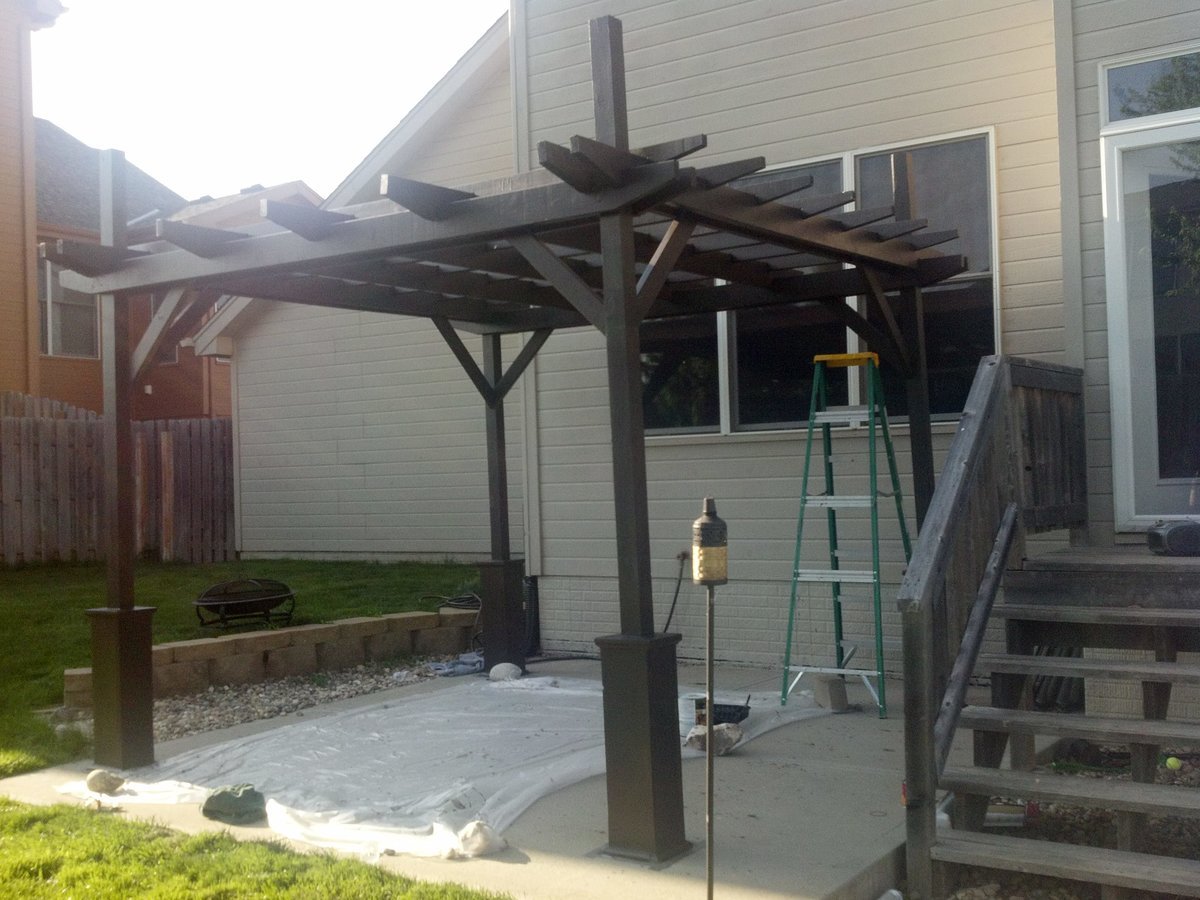
I is the Behr weatherproof stain and the color was "coffee". It took two gallons which was two coats. Post pics when your husband is done I would like to see them. Good luck with the bed.
YankeeBelle
Fri, 05/25/2012 - 18:54
Beautiful Pergola!
Great job! I want to build one too! The original plans say advanced, but on this post it says beginner.....watcha think? Can I do it? (so far I've made a picture frame and framed out some trimwork). Thanks for posting....btw, I love the twinkle lights!
slee (not verified)
Wed, 06/27/2012 - 17:00
Beautiful!
You did an awesome job! I'll be showing my husband these pics and hopefully they will inspire him to make us one too! I'd love your modifications to the plans also since we have heavy snow etc.. up here in Quebec too. Thanks for sharing!
jeremy bales (not verified)
Thu, 09/20/2012 - 06:47
size and wood material list
Im trying to build a 10x10 just like this but im trying to figure out exactly what wood dimensions I should order before i do. Im going to use cedar and I know i want to use 6x6 posts and I want to use 2x6 on top like yours but i cant figure out what exactgly I need to order. My wife wants me to do the decorative around the posts as well.
Please help!
sully82384
Sun, 04/28/2013 - 11:27
Hi I was hoping you would
Hi I was hoping you would share your plans with me I live in oregon I wanna make one of these but I plan on using 12 ft 4x4 posts putting them 3 ft in the ground and I like the way you used 2x4's and 2x6's id like to know the dimensions you used if you modified anas plan what was your spacing and what degree did you cut the outside piece's on the 2x4's and 2x6's I love the design you created from anas plan
sully82384
Sun, 04/28/2013 - 11:29
oh I would also like to know
oh I would also like to know how you did the cut out notches if you dont mind