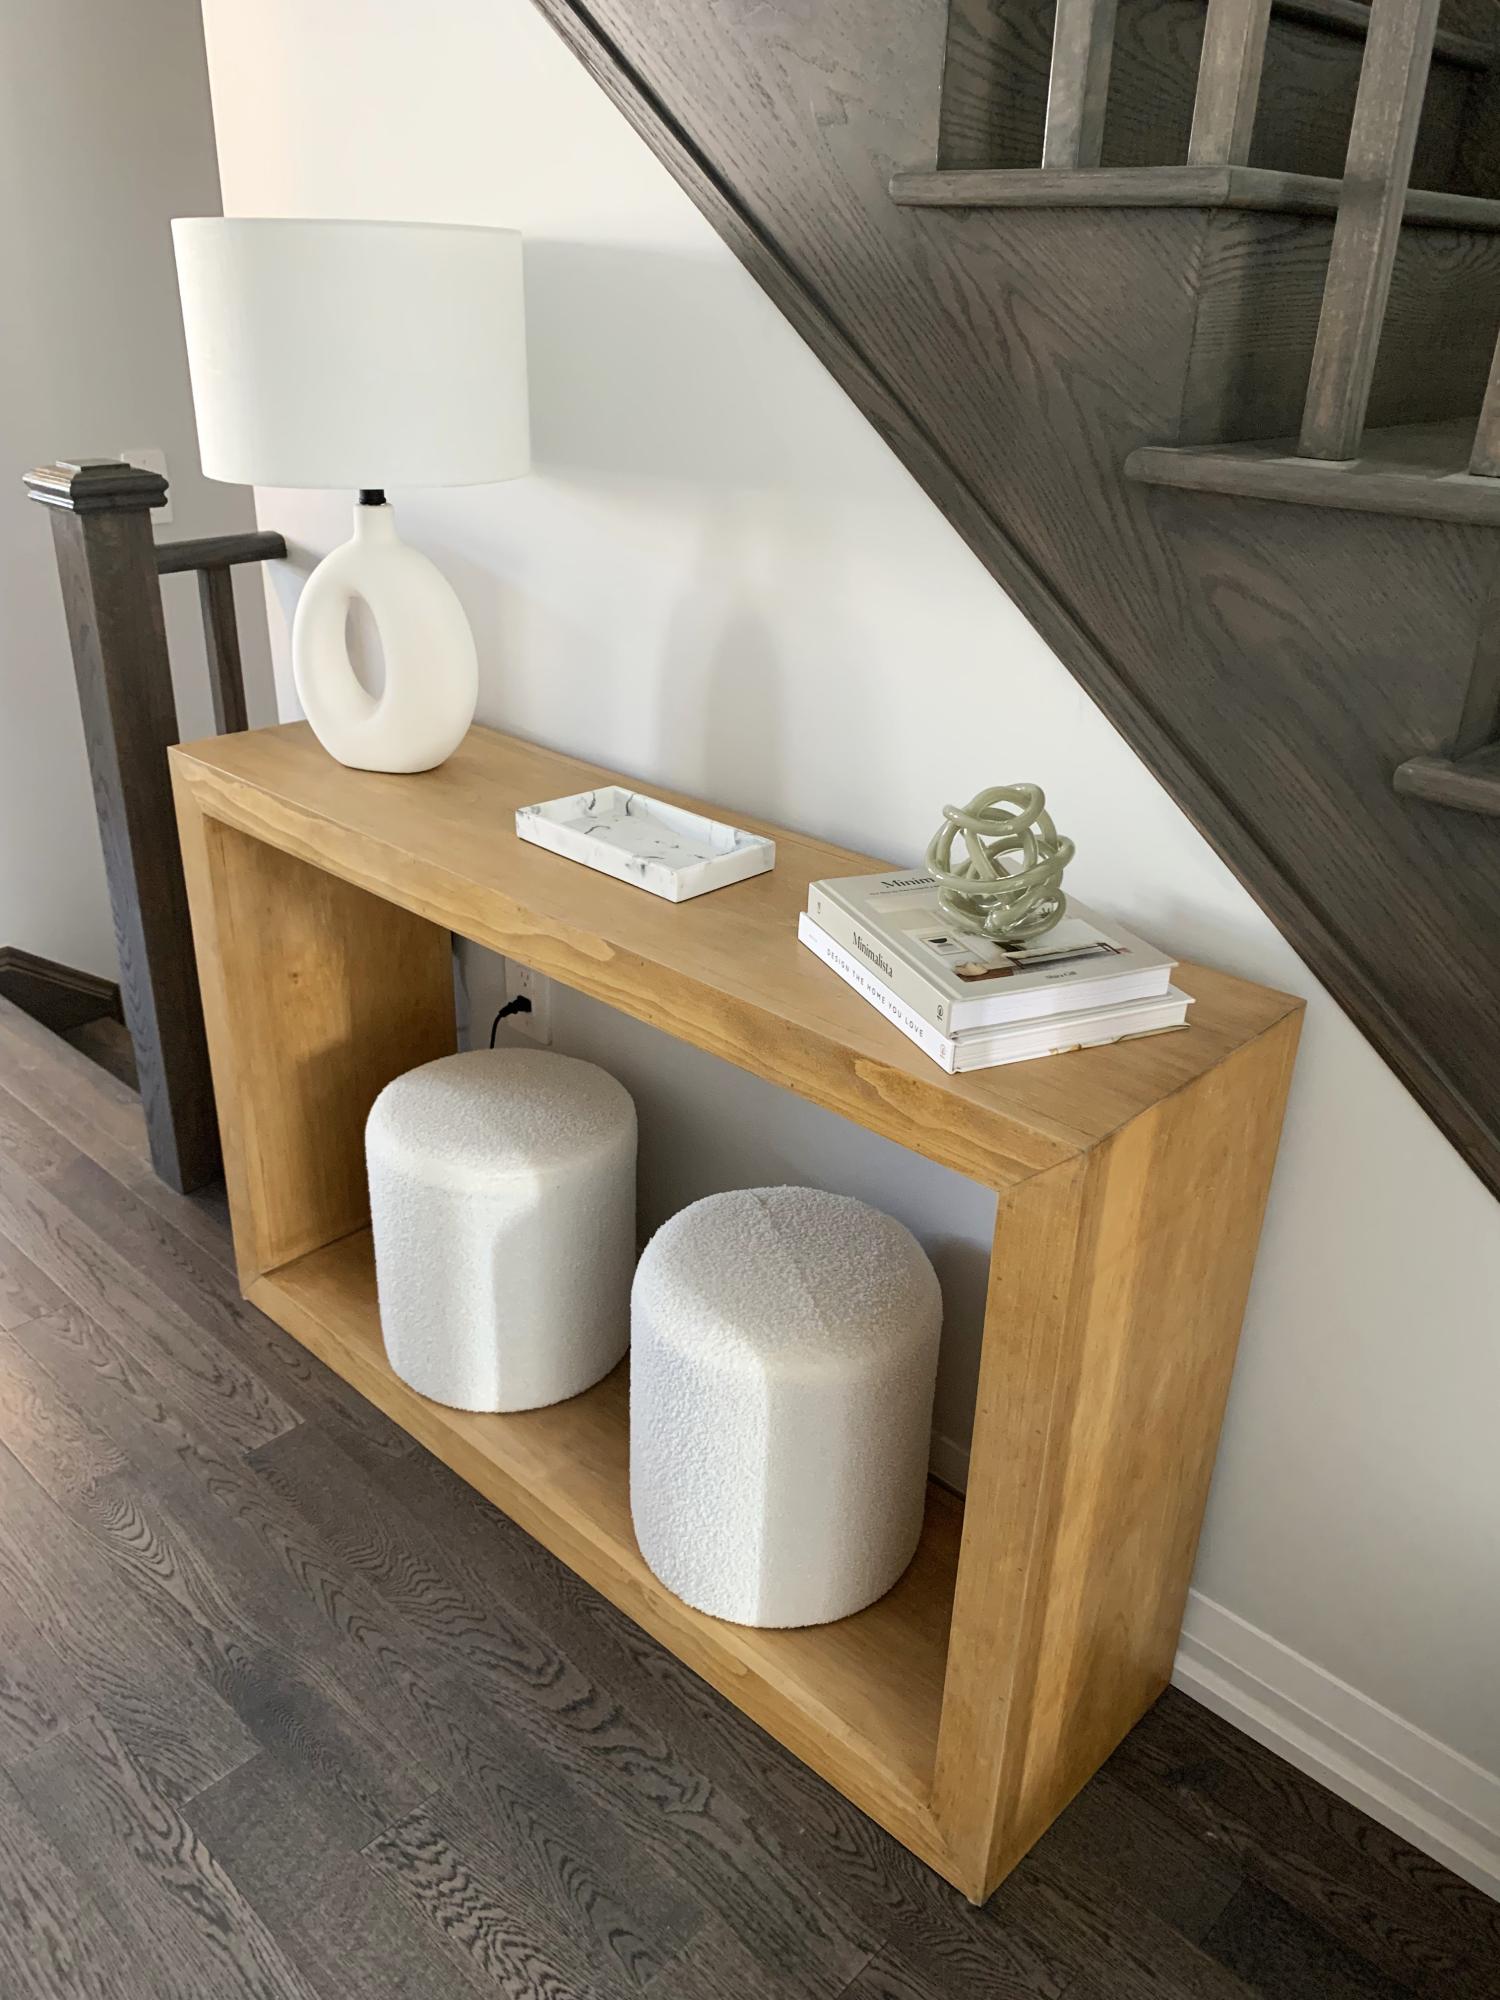
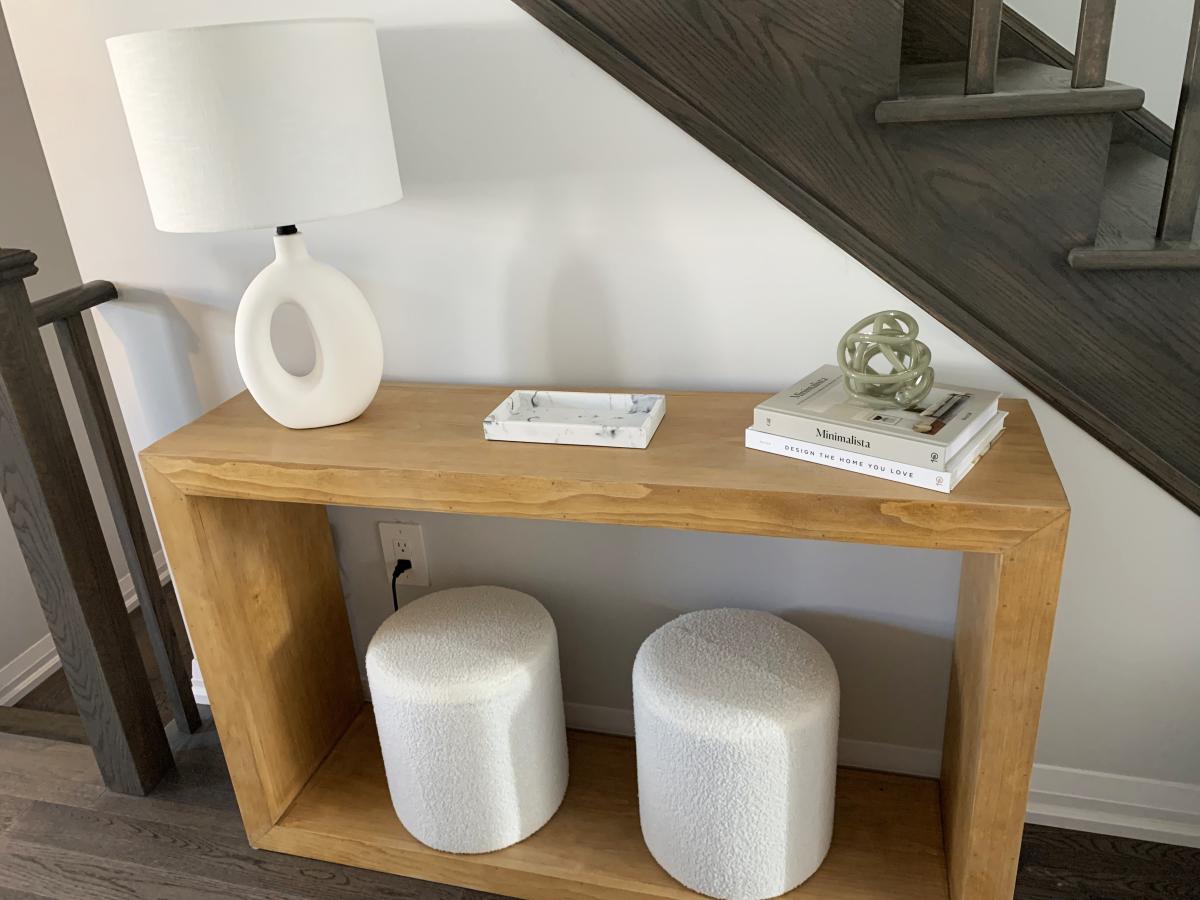
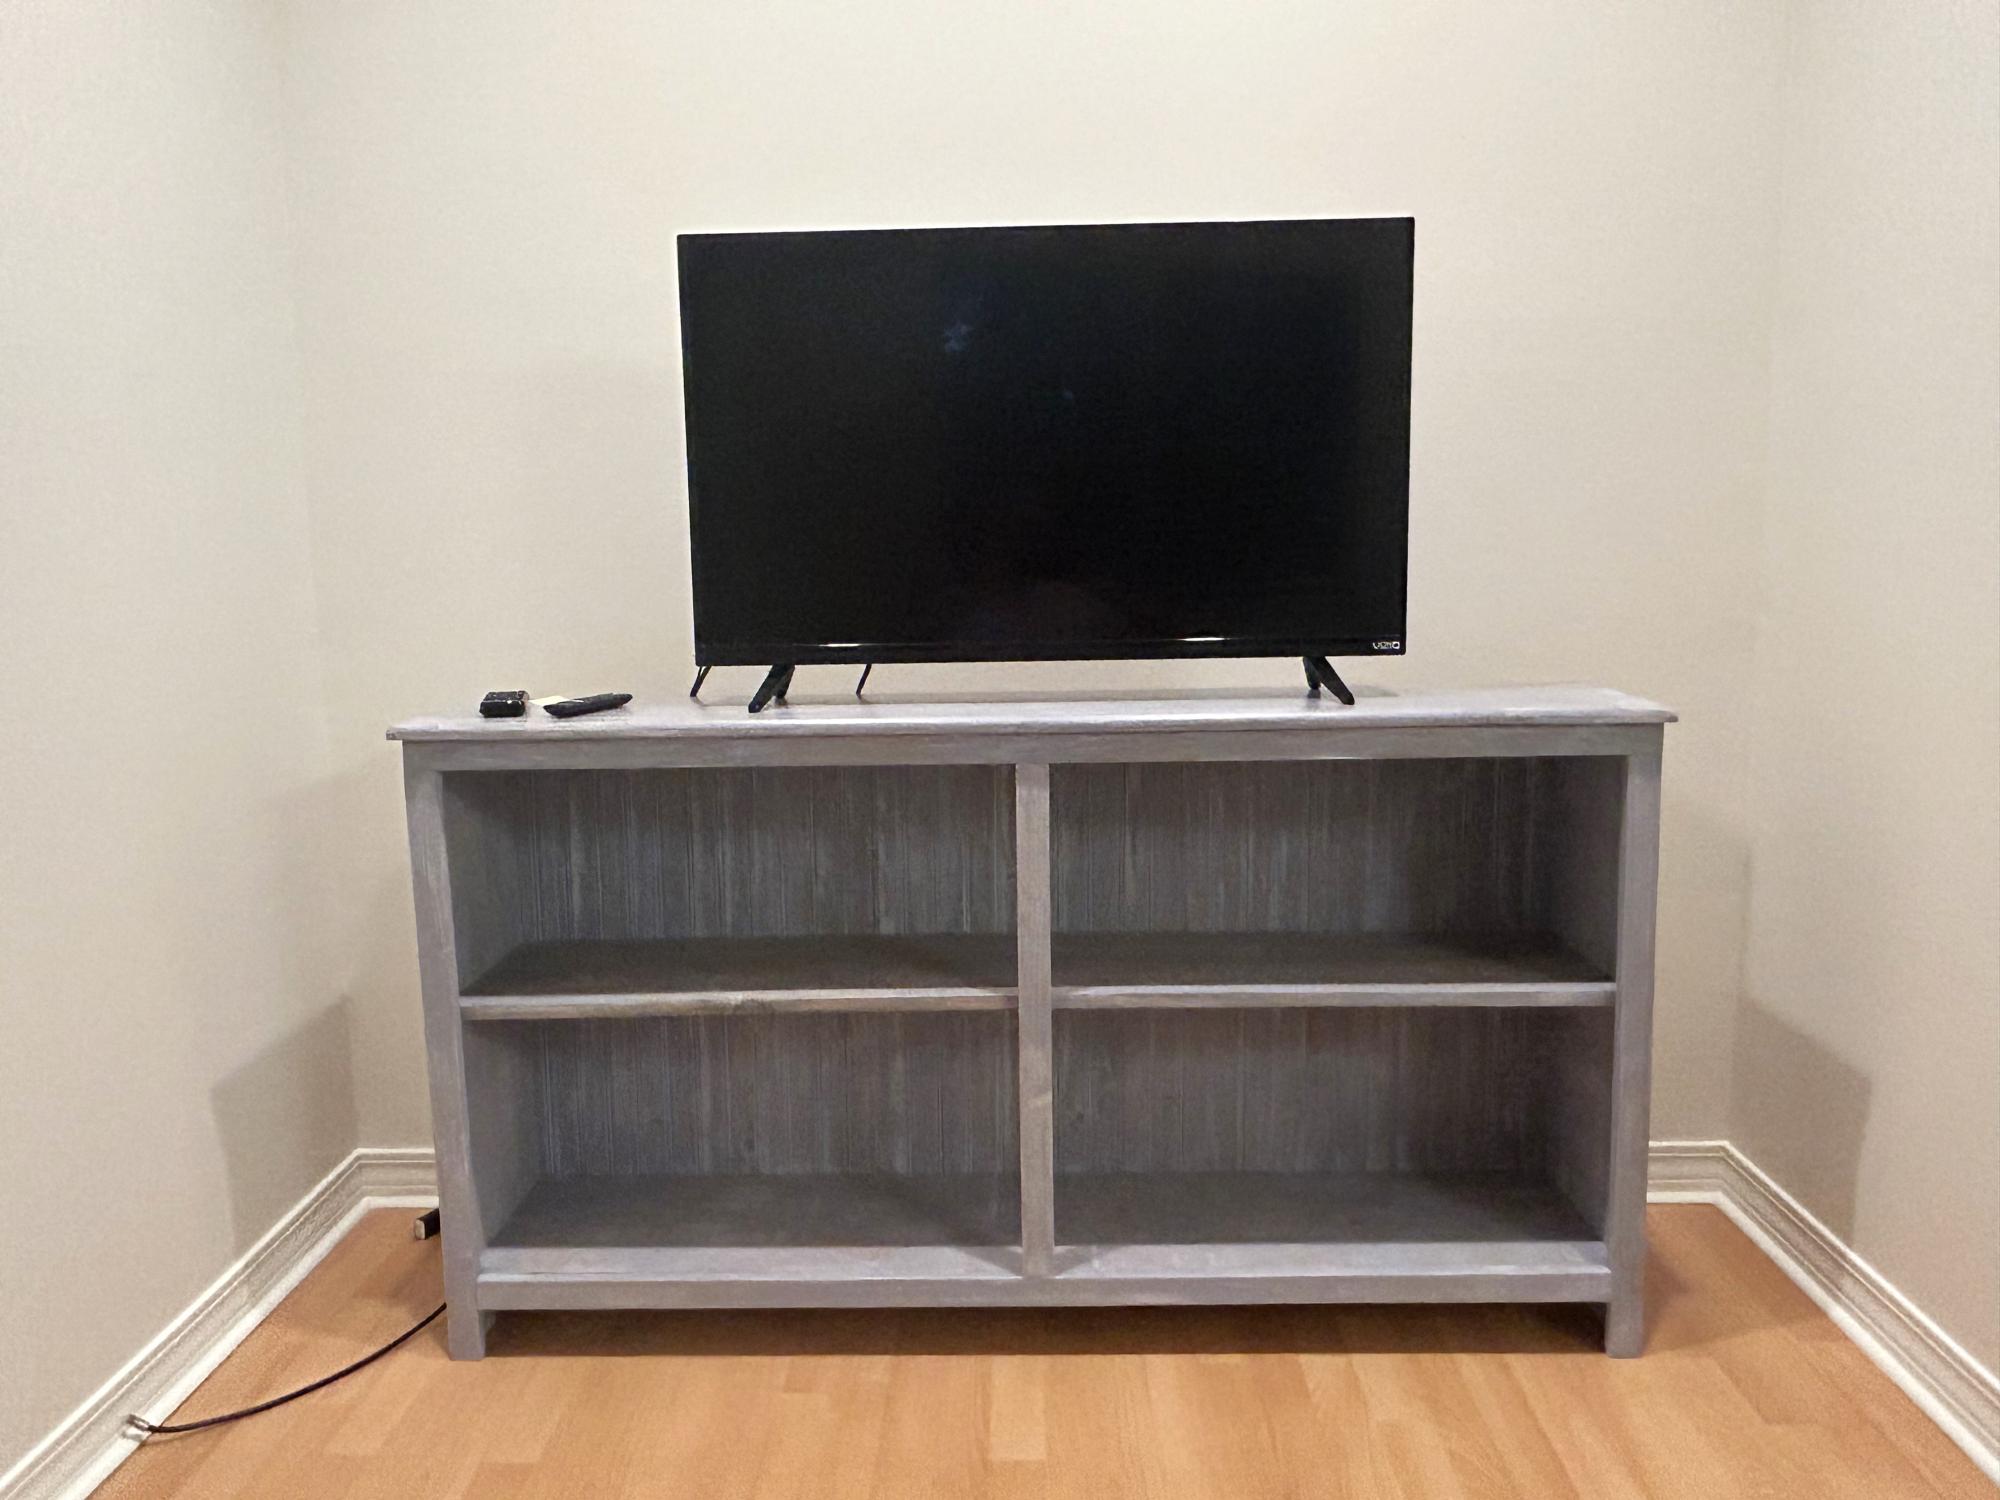
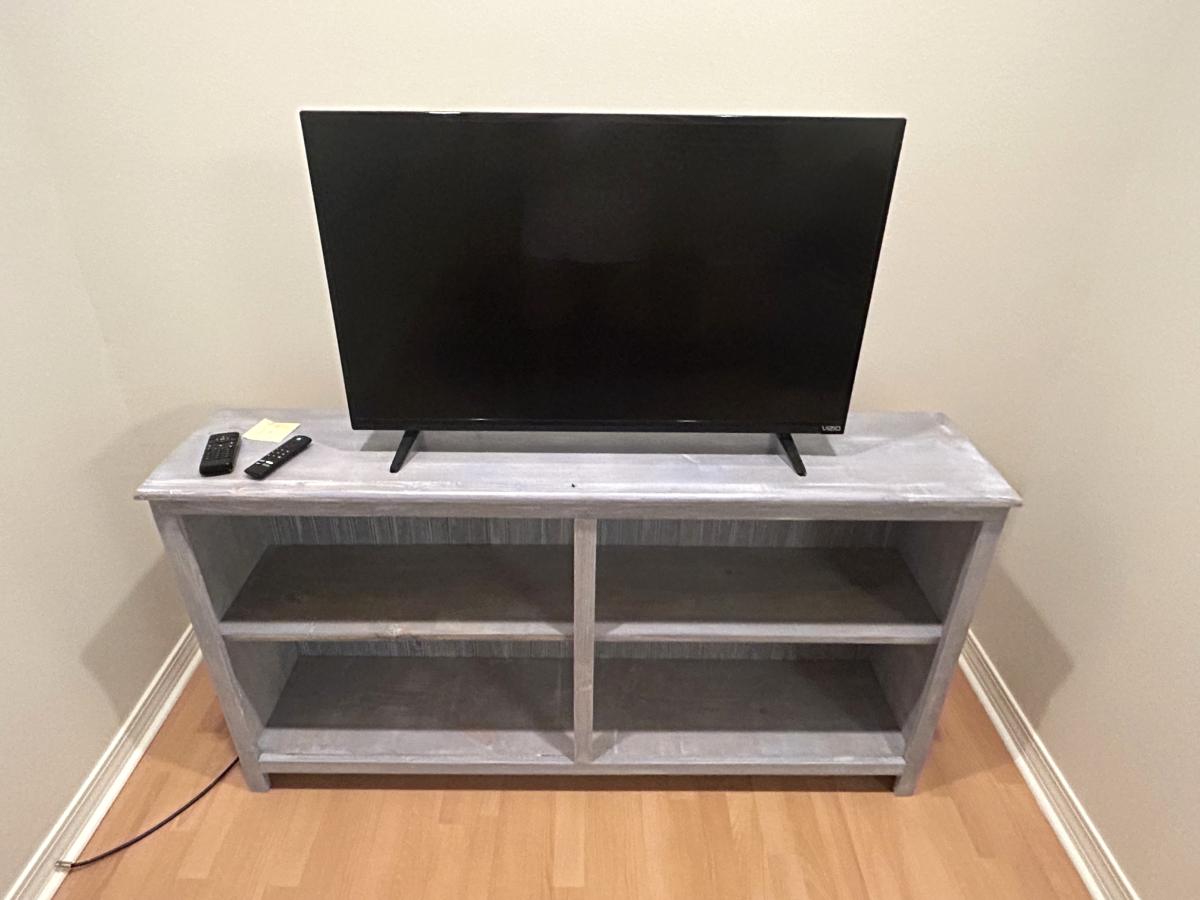
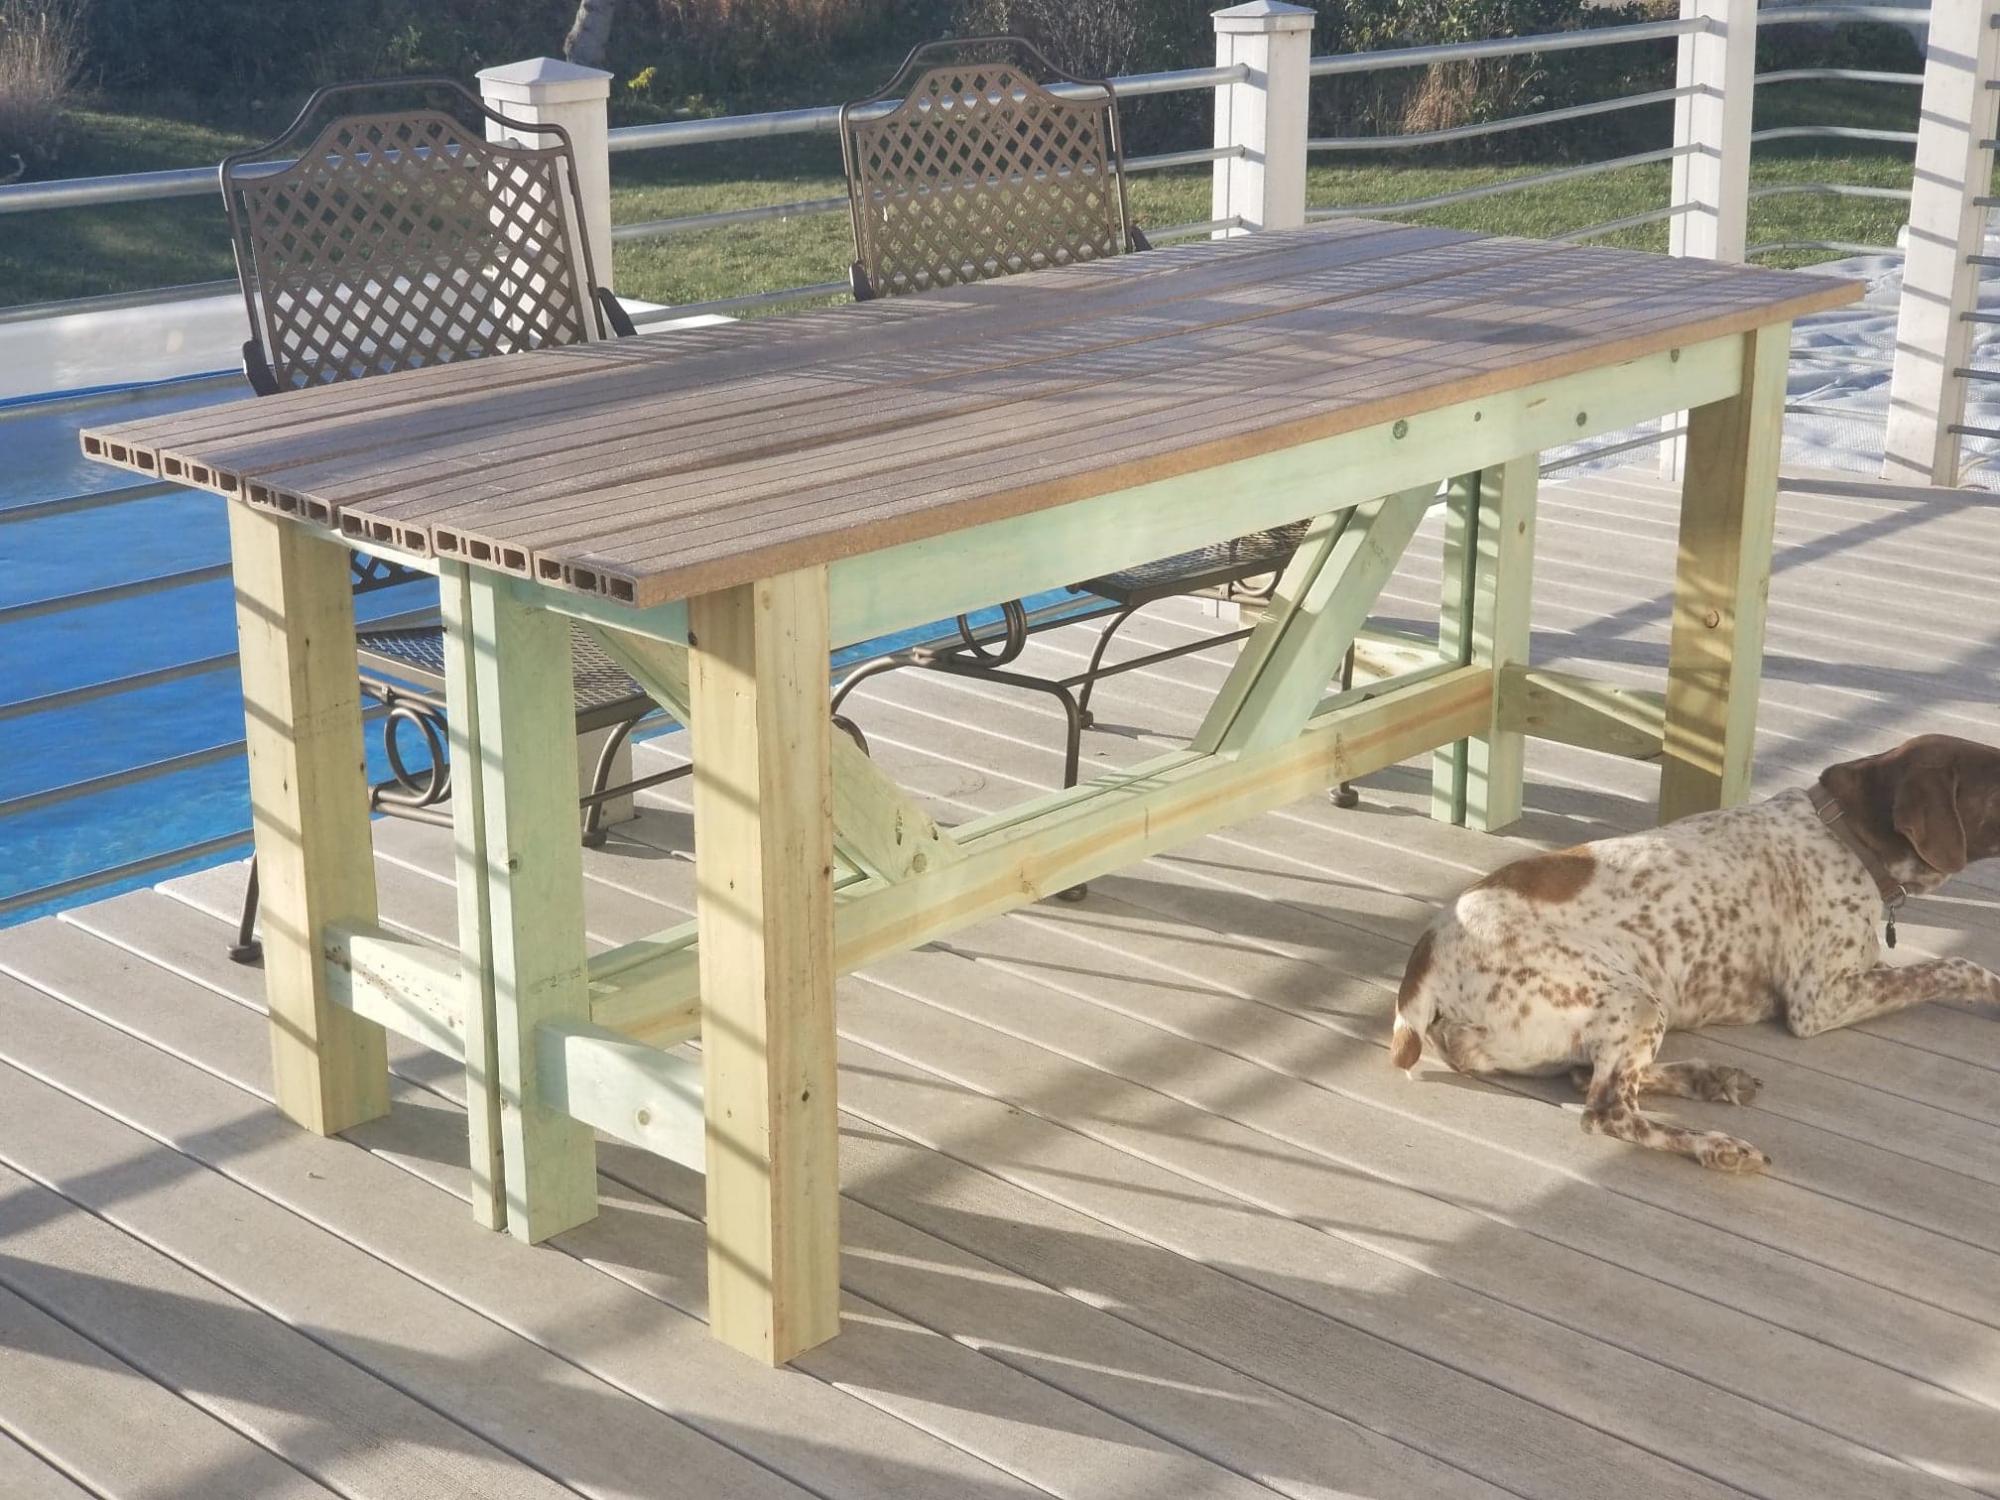
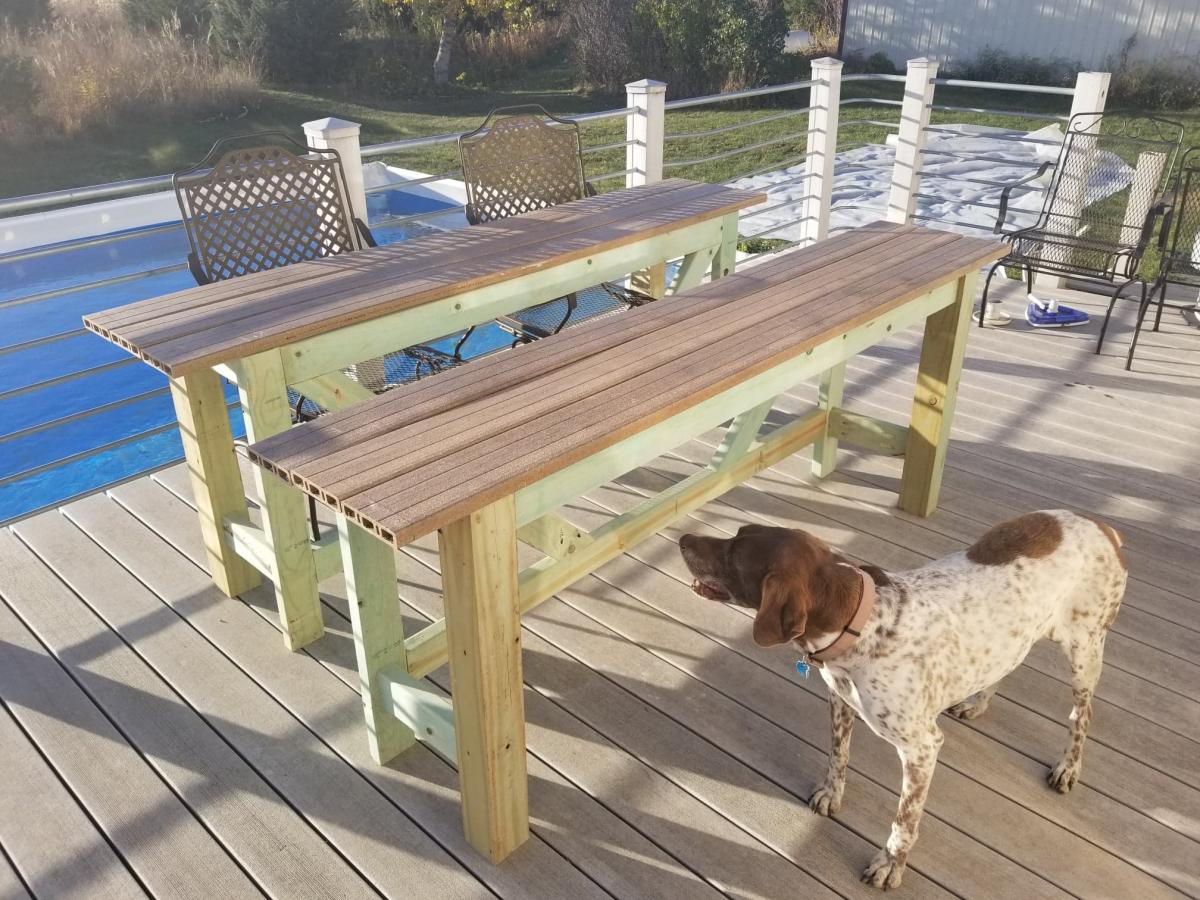
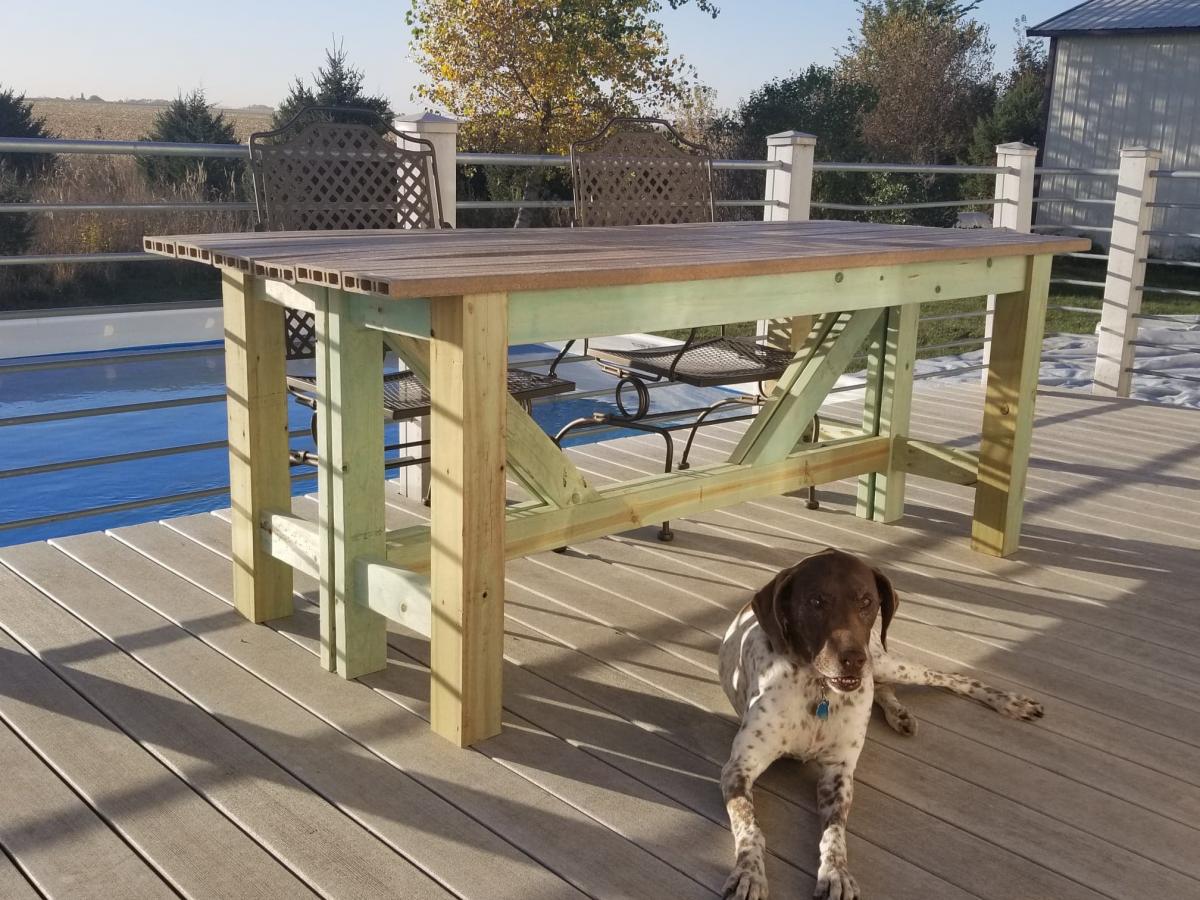
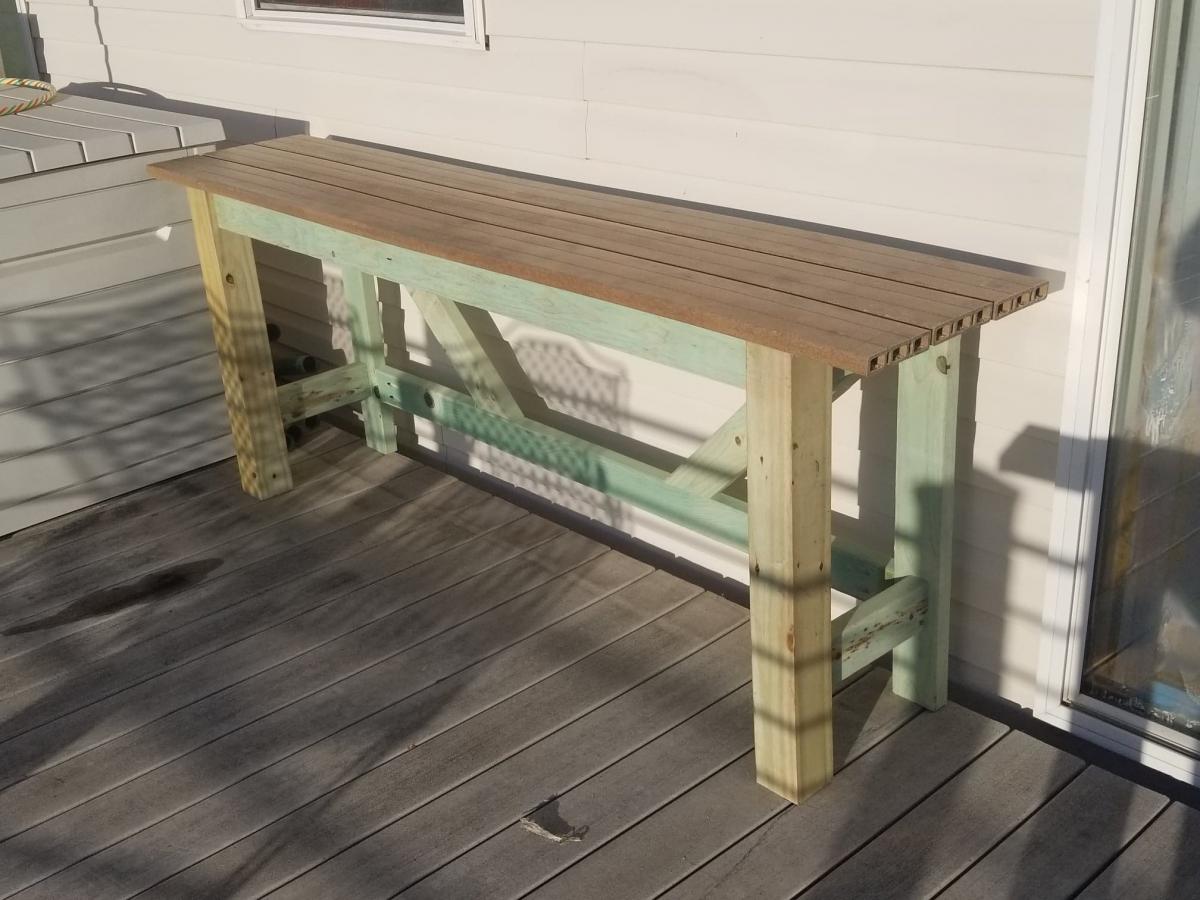
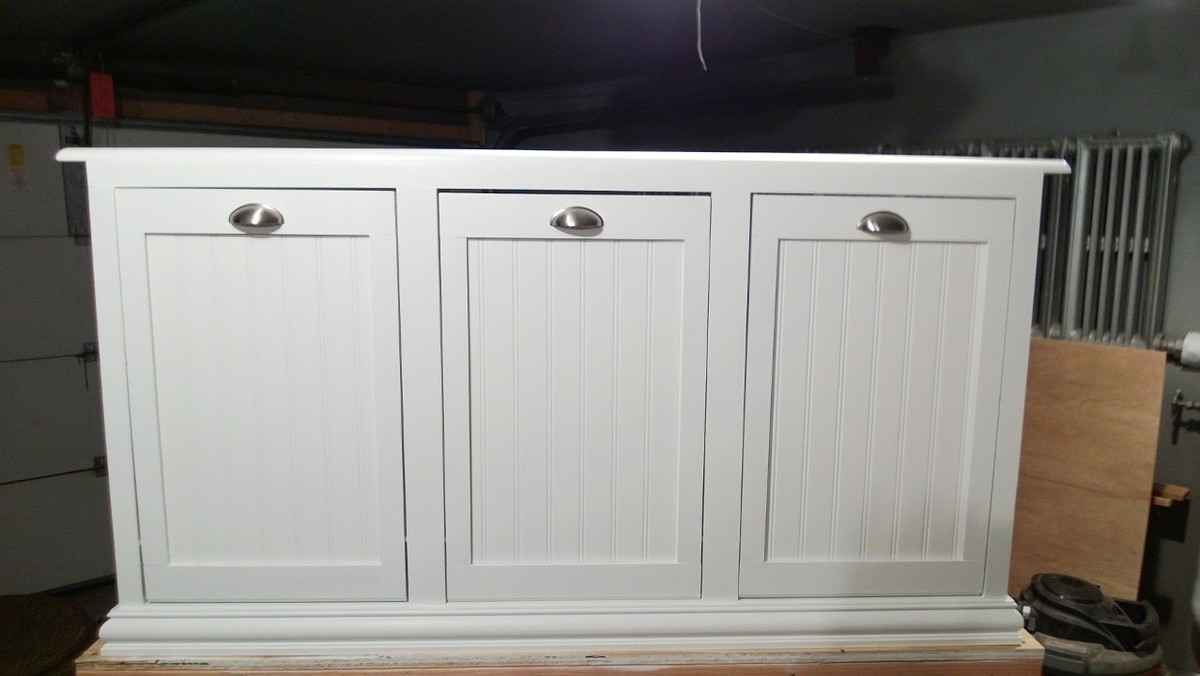
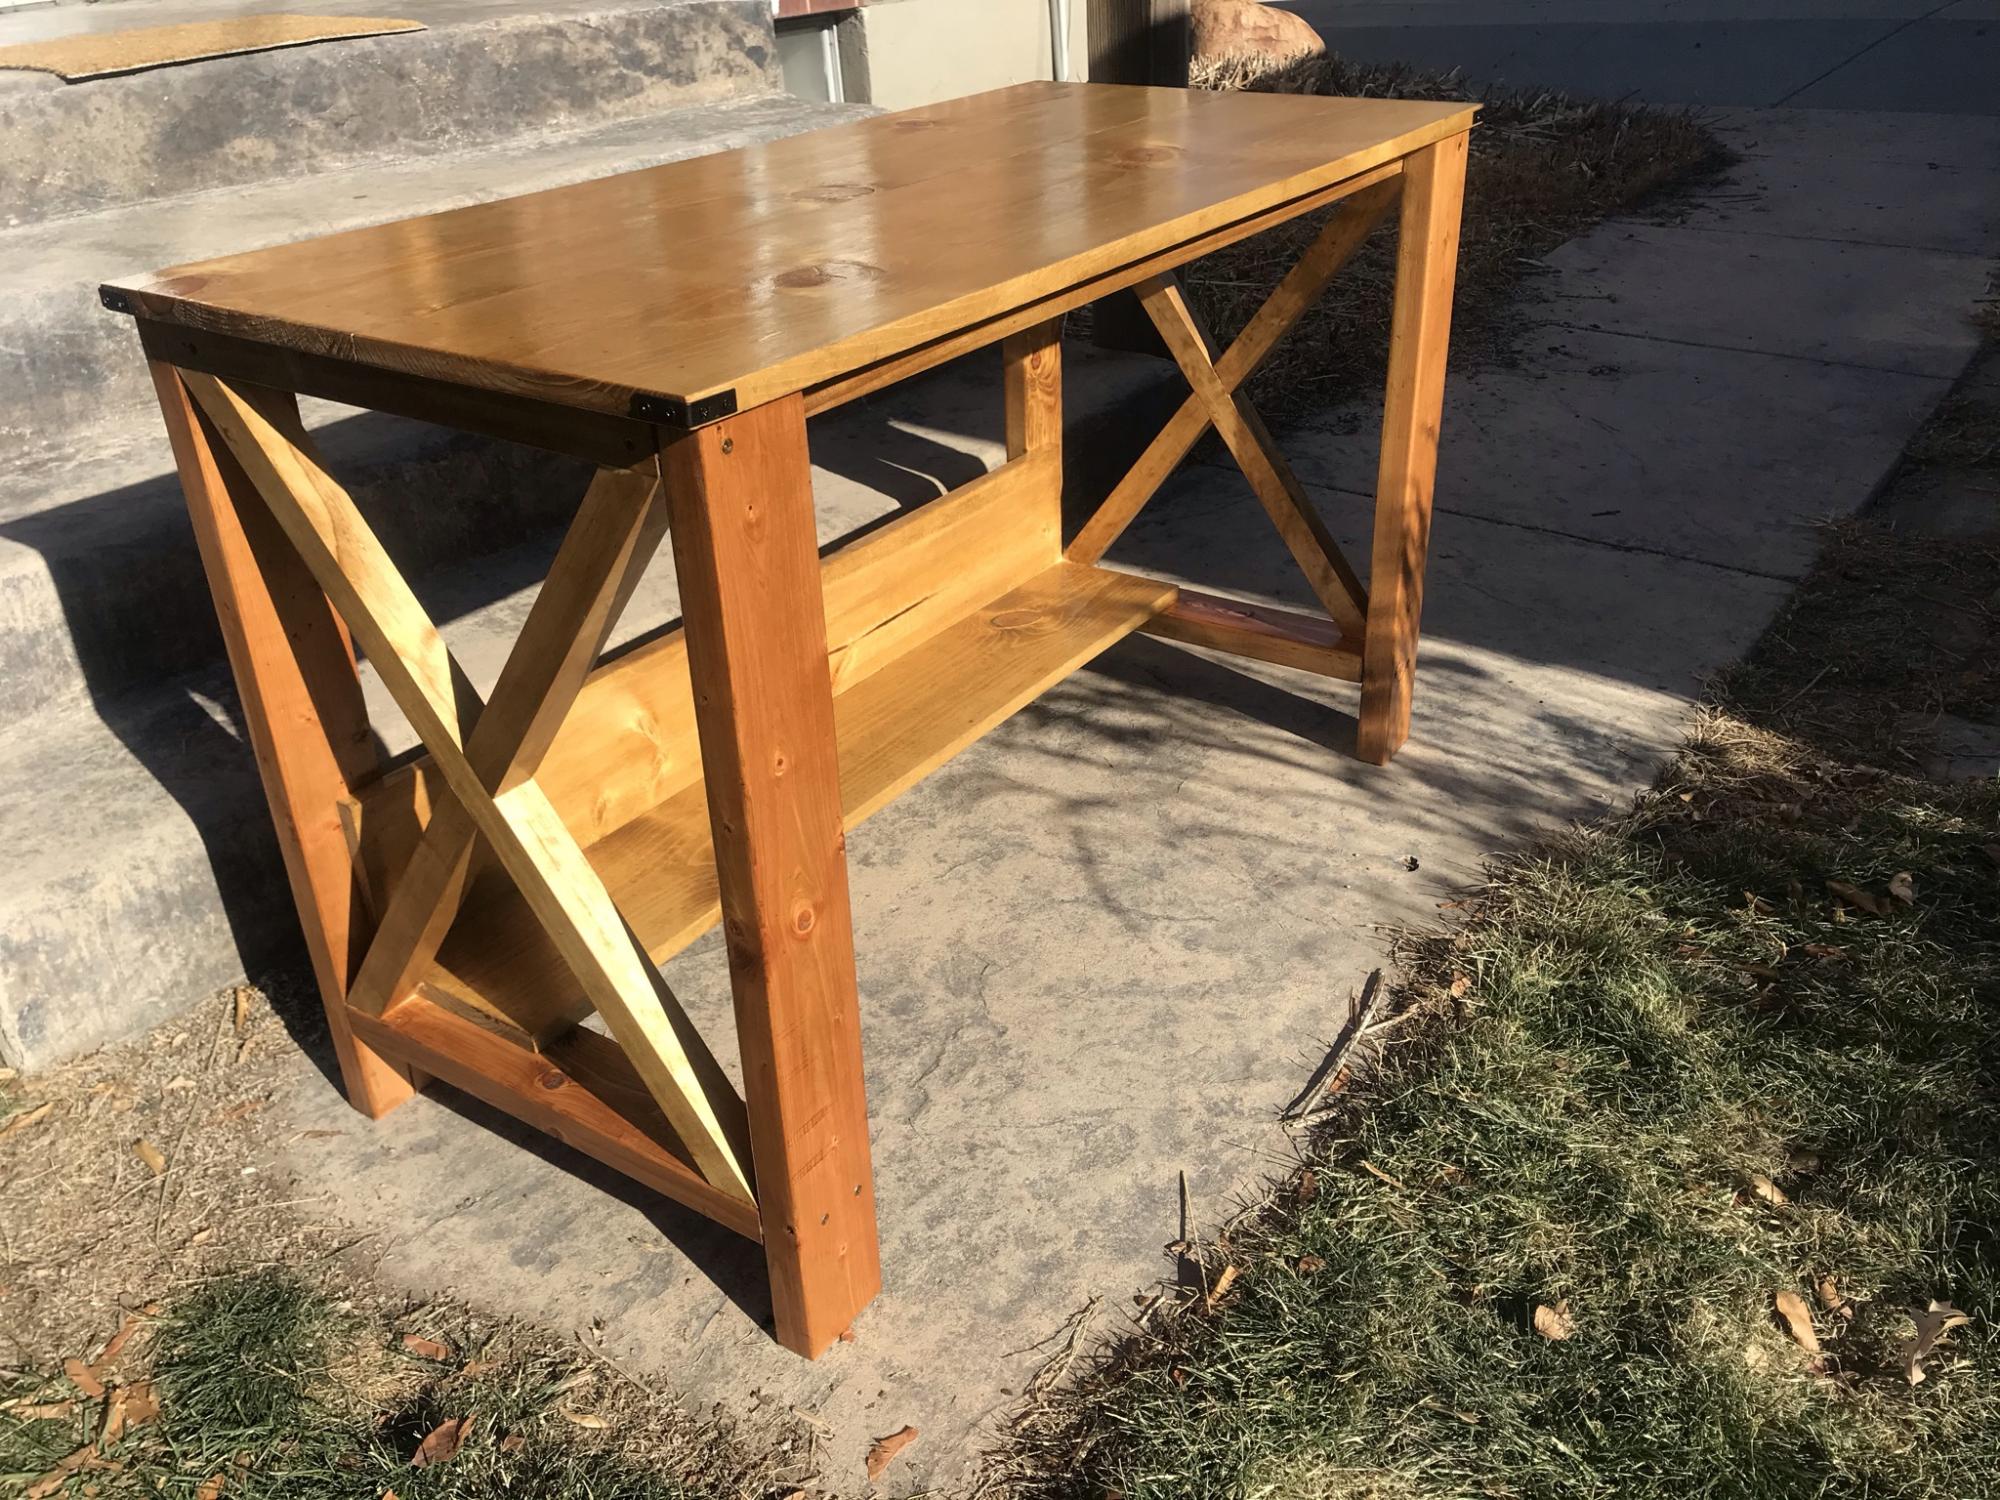
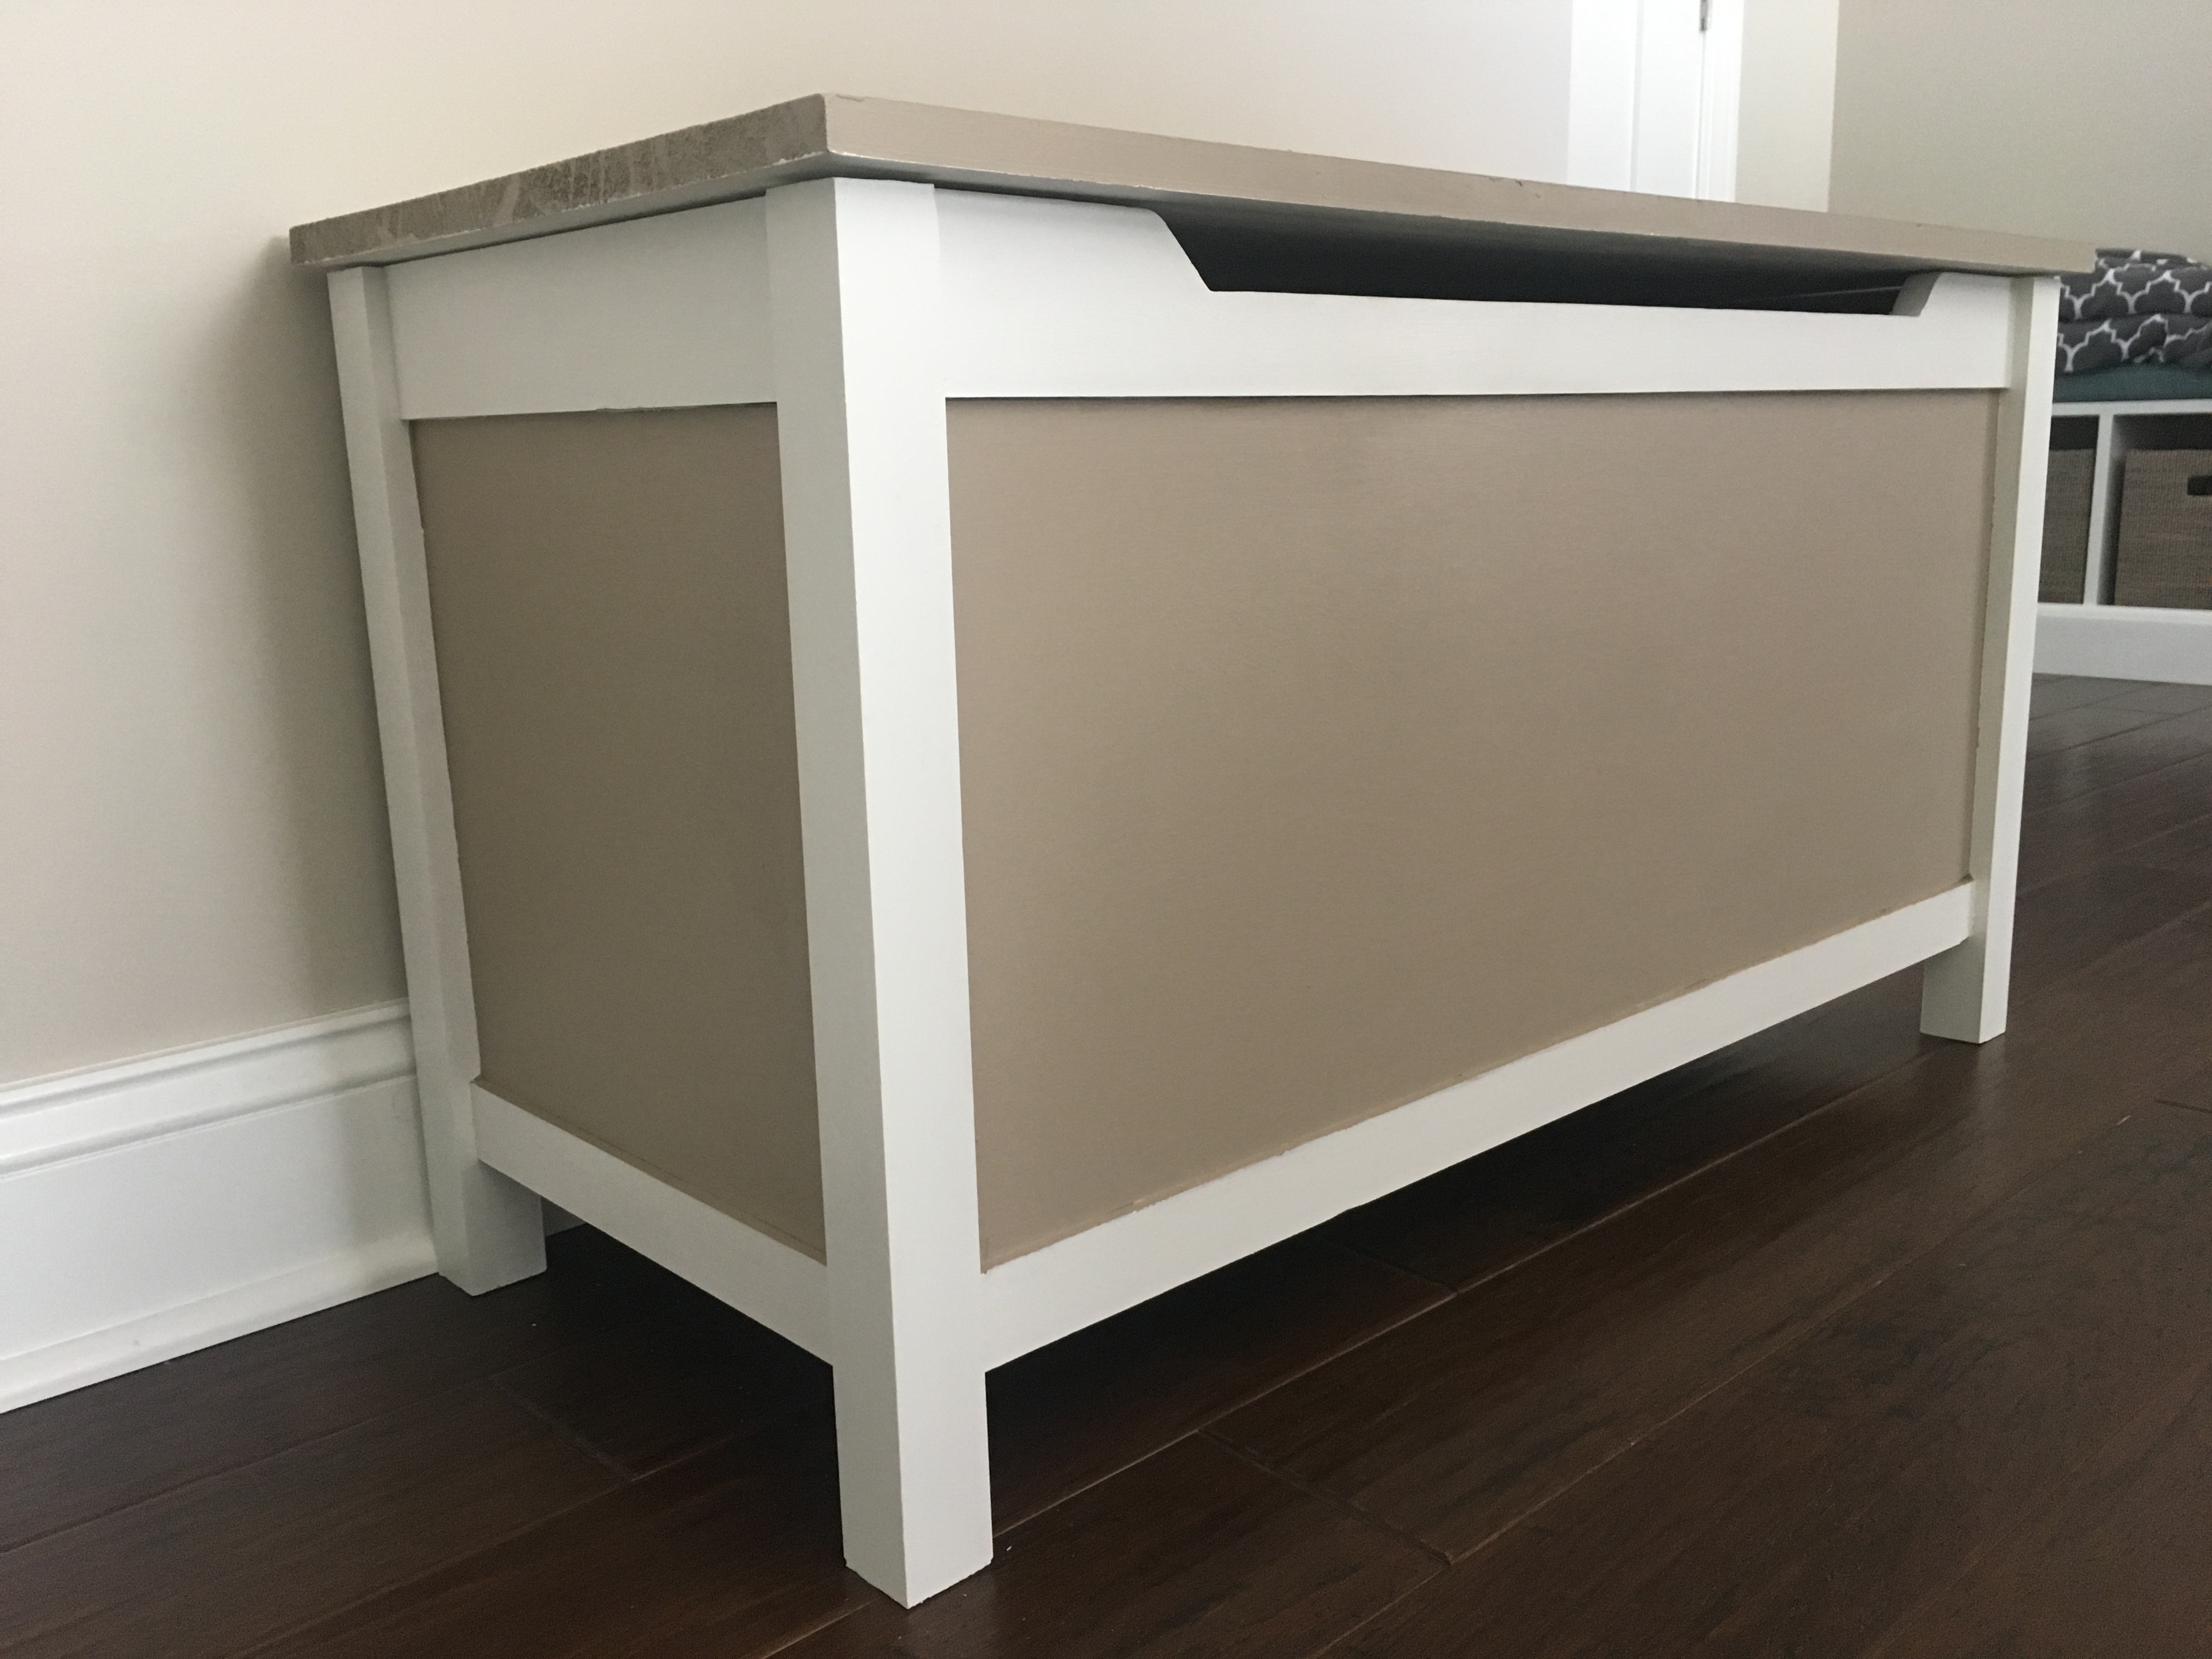
Community Brag Posts

Farmhouse End Table

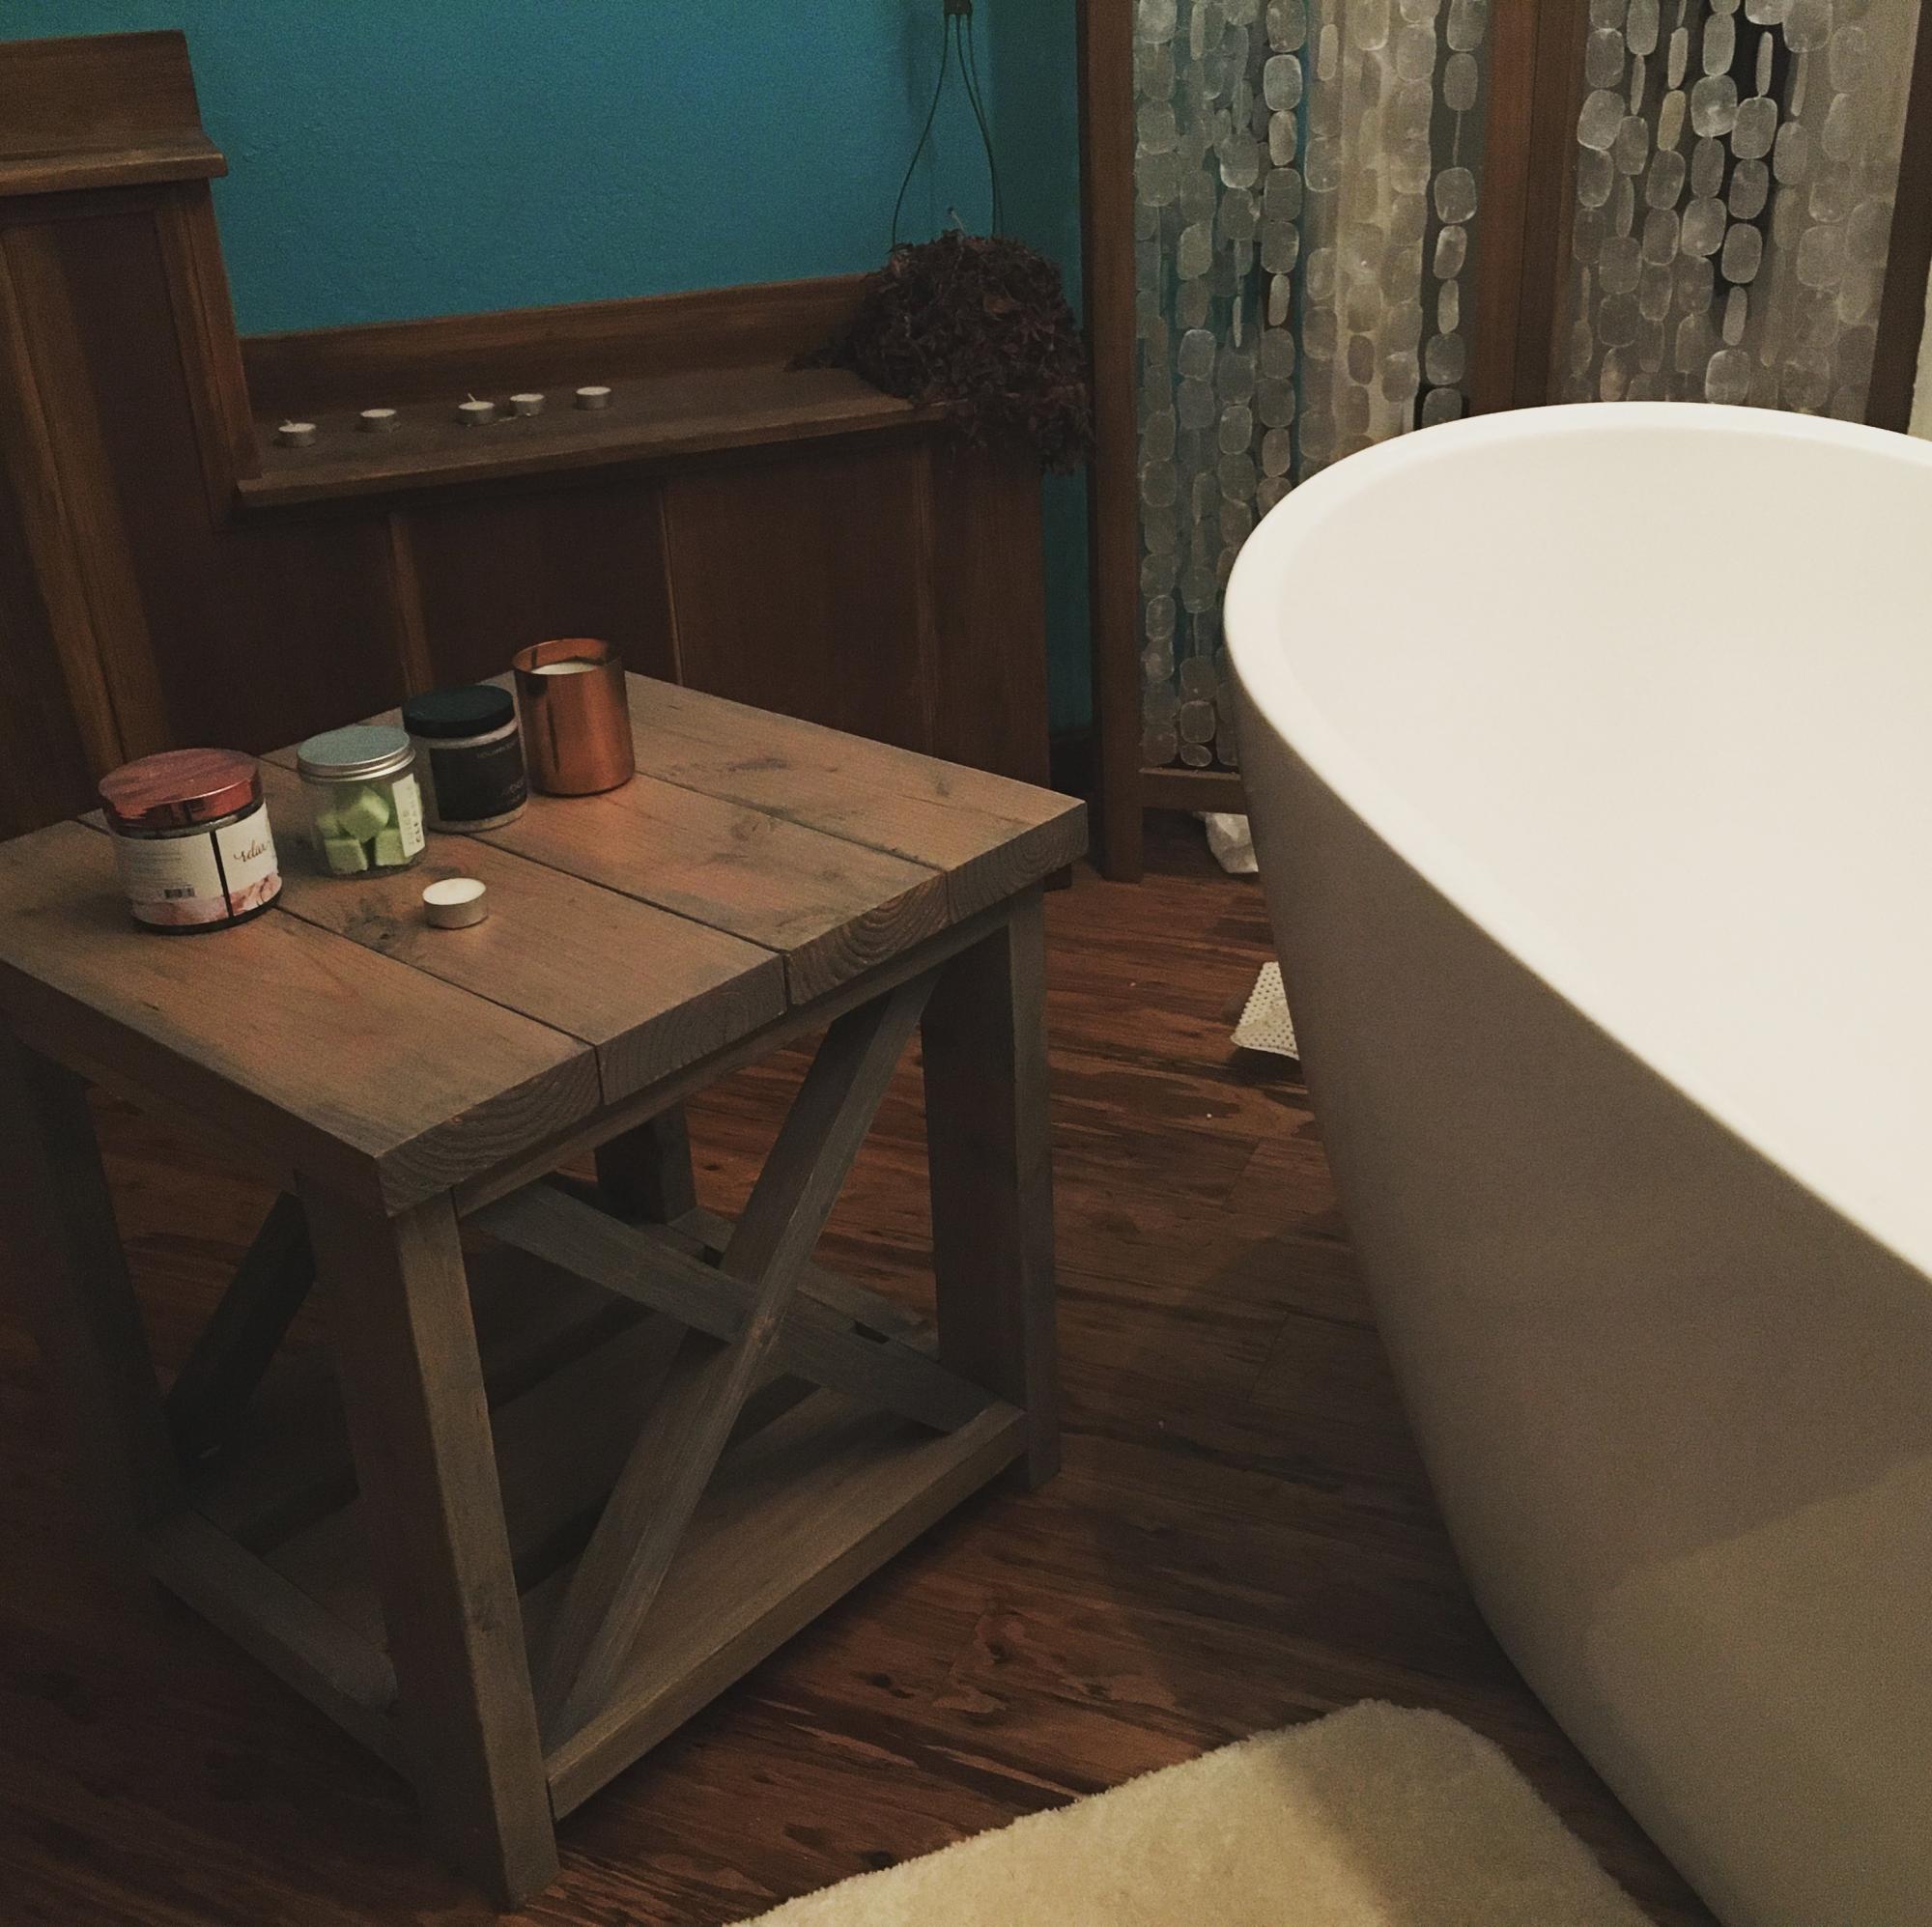
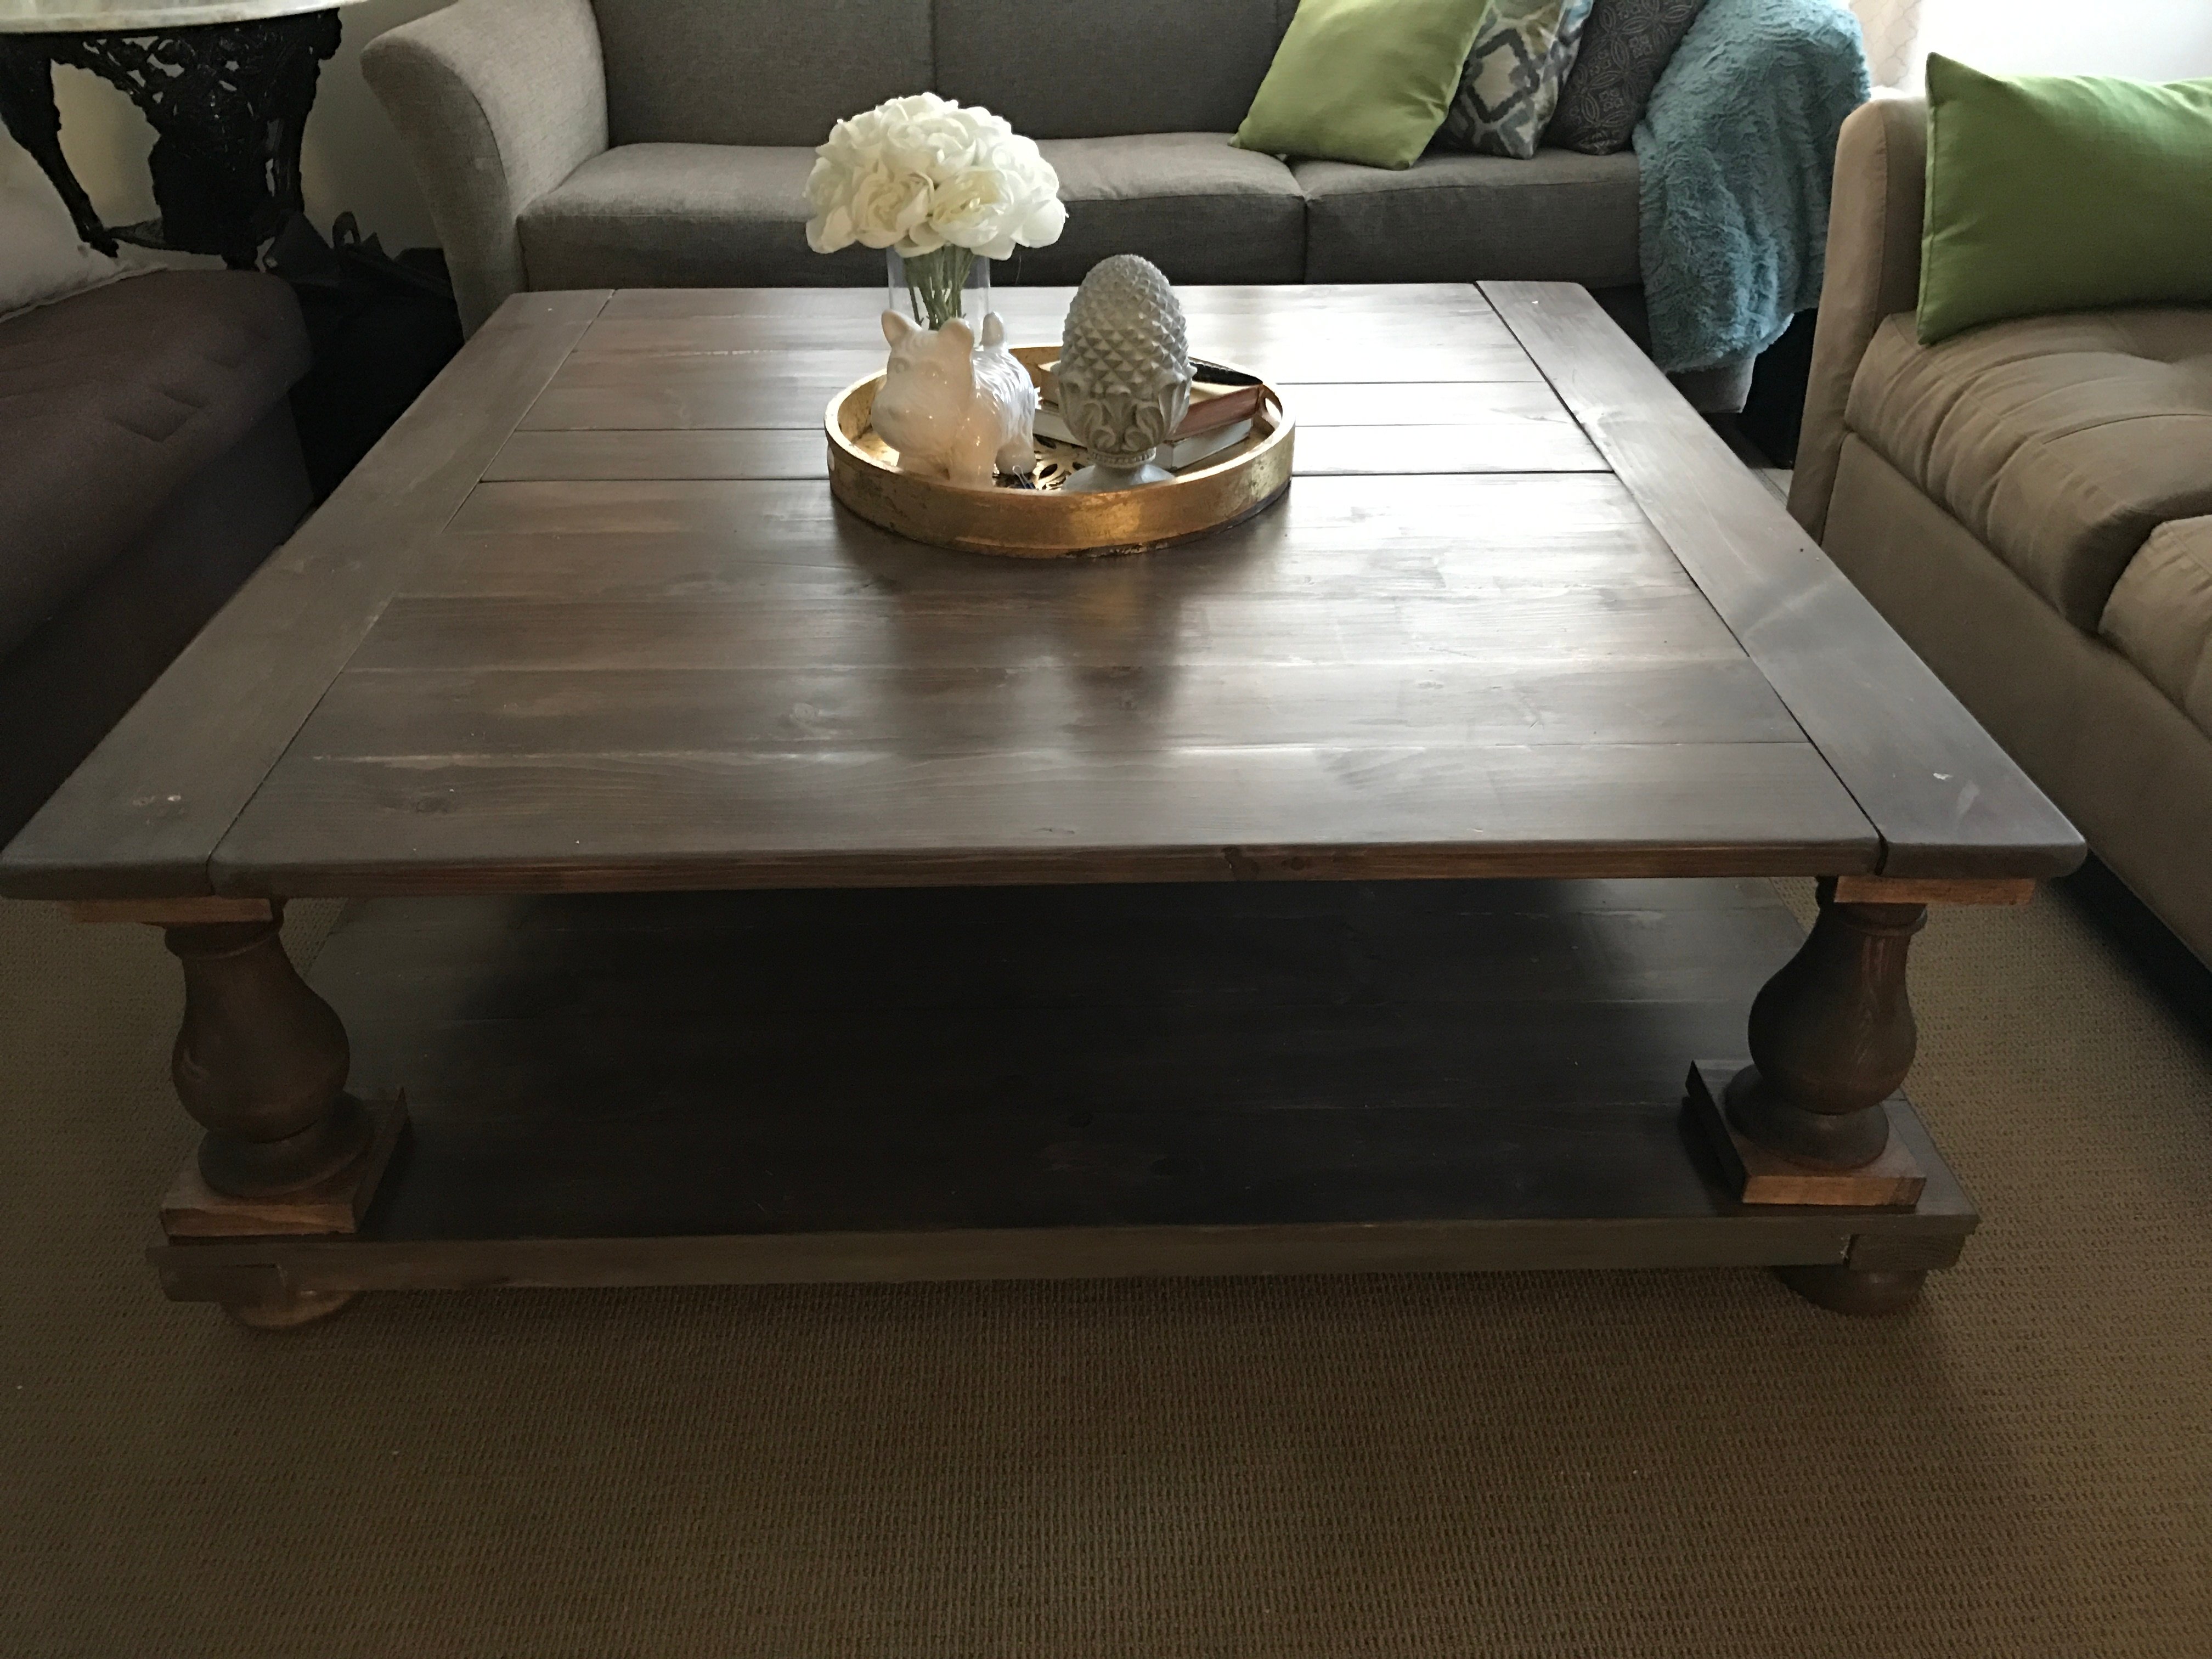
Take a deep breath in... then out. Relax as the warm water soothes your muscles. Then look at this freaking amazing end table I made! And this was only my third project ever! Great plans and easy to make.

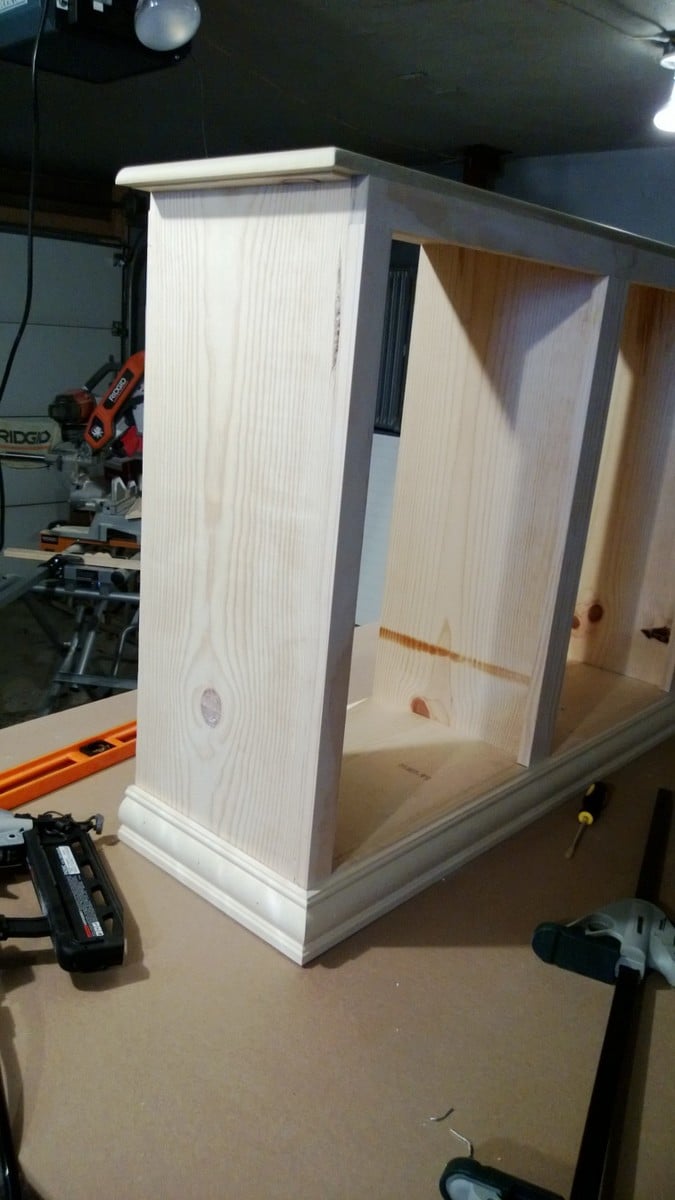
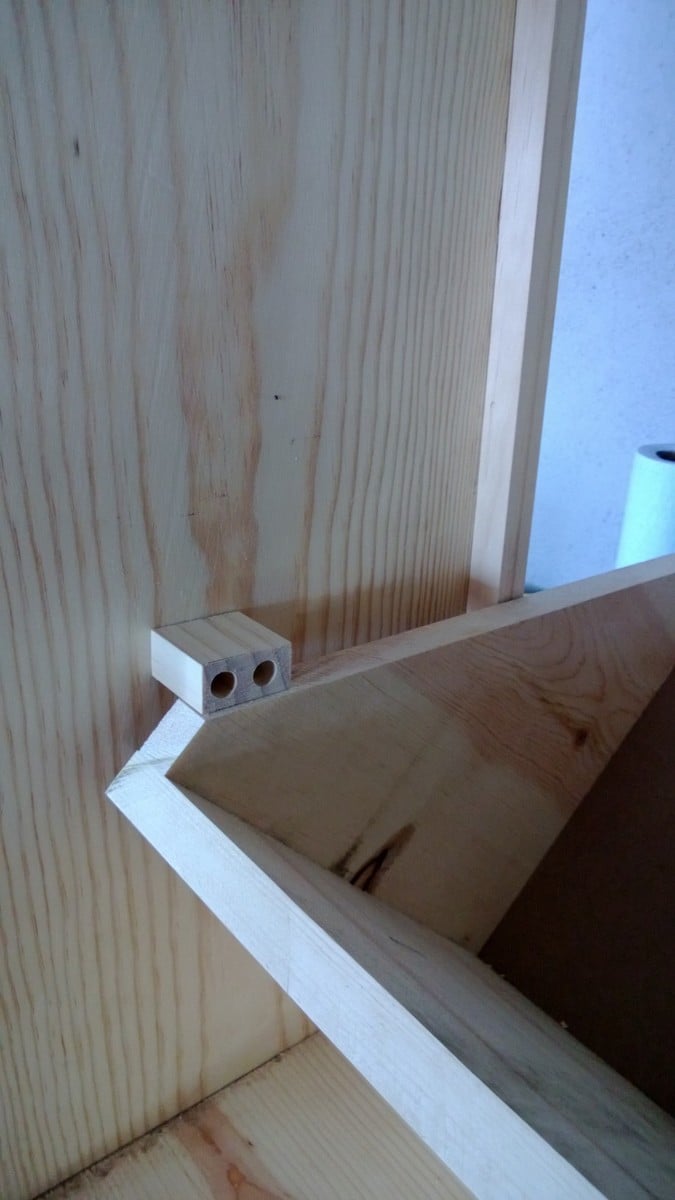
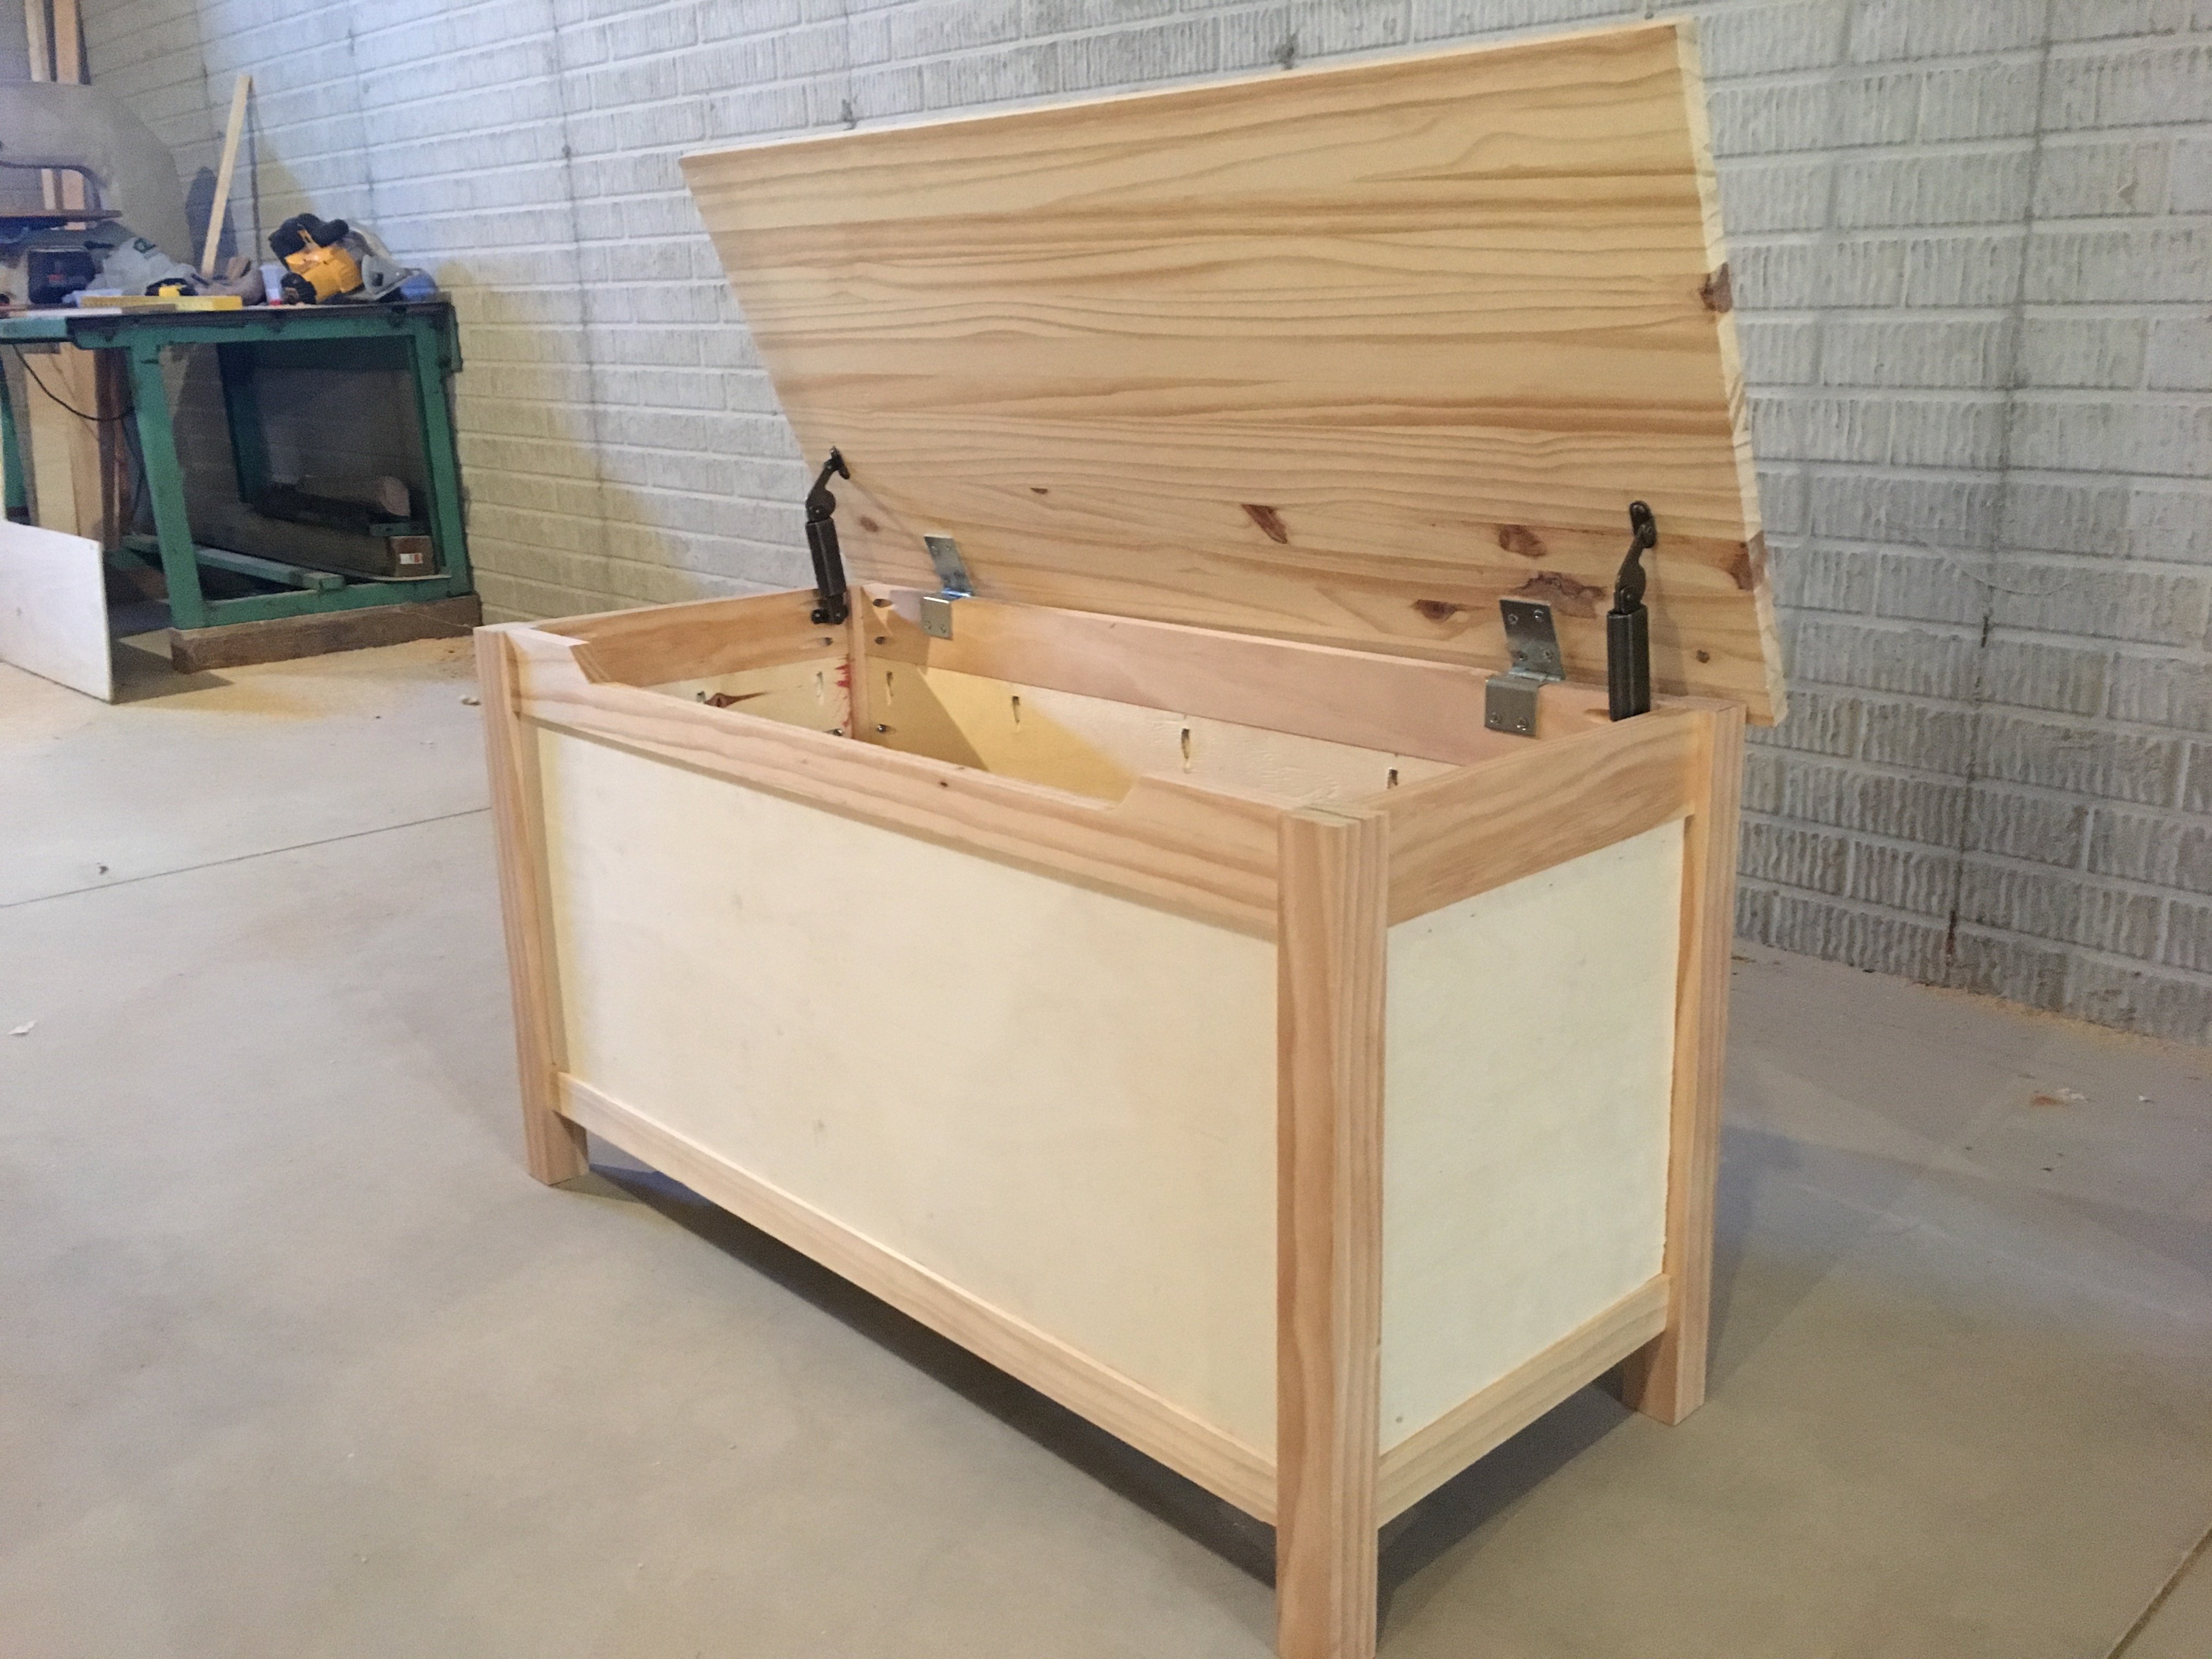
***Only necessary change to plans was for the decorative Xs. The 2x2s must for the decorative Xs on the small version of the end table must be AT LEAST 25" not 22" as the plans call for. The 22" 2x2 did not reach diagonally (especially when making miter cuts).

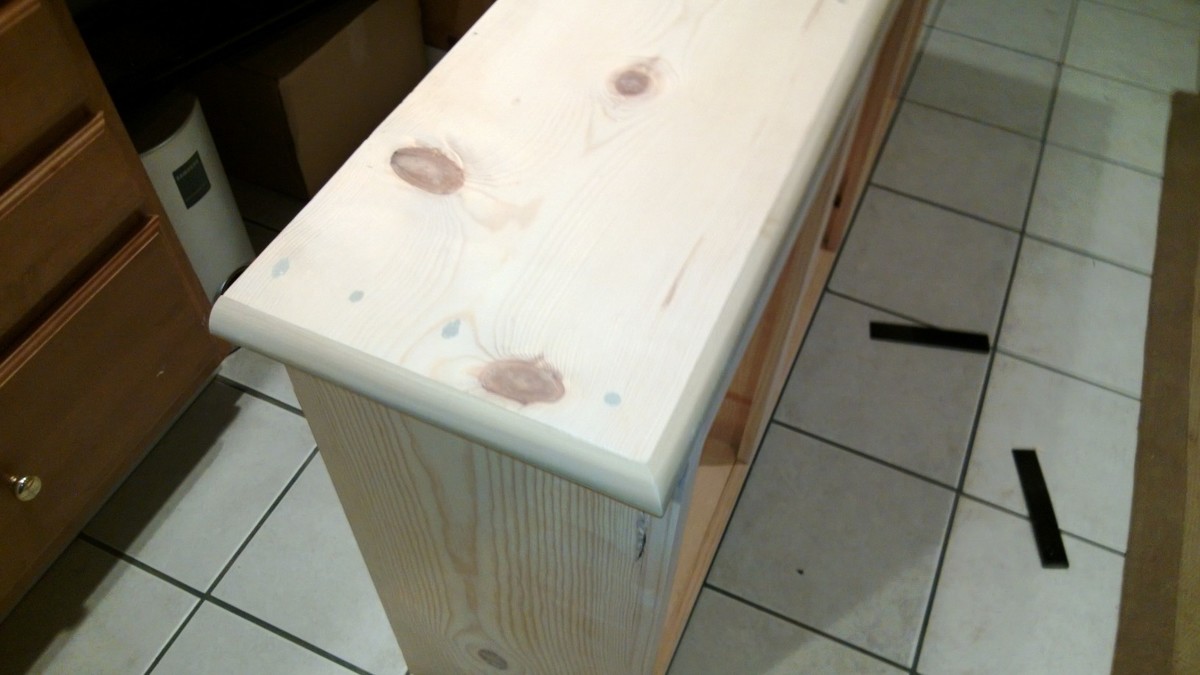
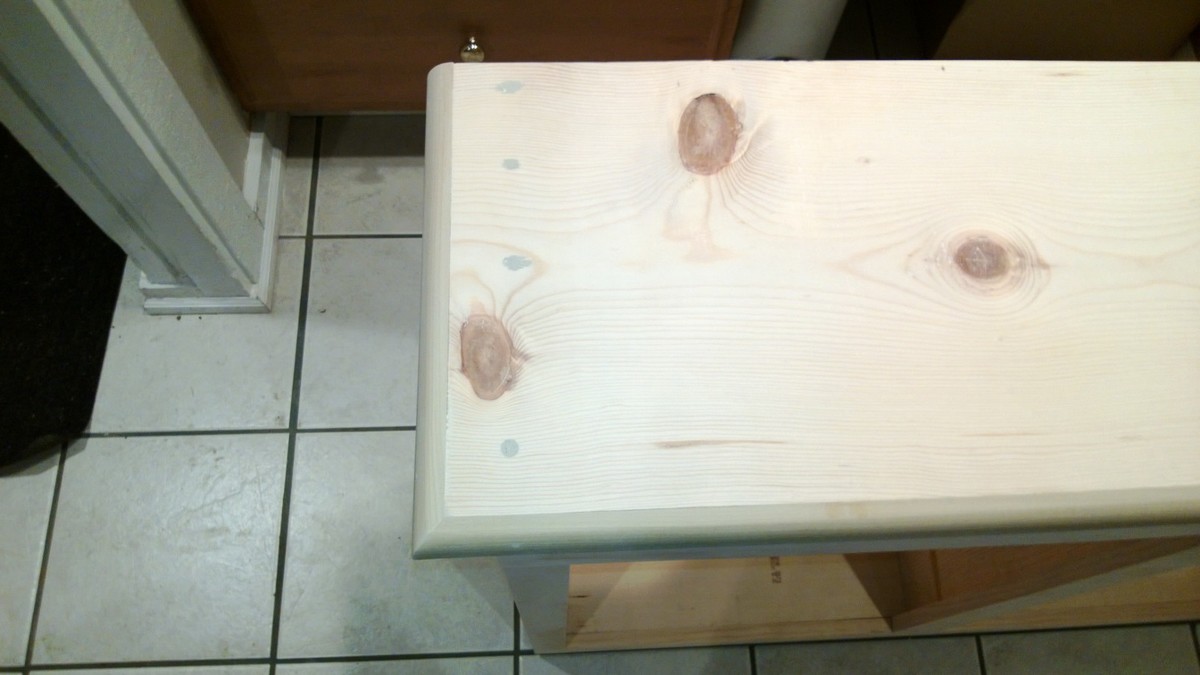
I used pre-conditioner on the pine/douglas fir wood before applying the stain.

Built from Plan(s)
Estimated Cost
$30-$40 including wood, screws, pre-conditioner, and stain
Estimated Time Investment
Afternoon Project (3-6 Hours)
Finish Used
- Zar brand Grey Cashmere
- Minwax pre-conditioner
Recommended Skill Level
Beginner

Waterfall Entry Console

Submitted by Anonymous (not verified) on Tue, 06/04/2024 - 07:59

Made the console table for my daughter. Plans were very detailed, accurate and accompanied with great pics and videos. Only tough time we had was trying to get the right diluted whitewash. Onto the matching coffee table next! Thanks Ana!

Brad Brouse

Built from Plan(s)

Double Chair Bench

Built from plans from diyPETE.com.

One day project (another day for poly)


Estimated Cost
$100
Estimated Time Investment
Day Project (6-9 Hours)
Finish Used
Minwax Wood Finish penetrating stain: Gunstock 231 (2 coats), Minwax Helmsman Spar Urethane. (3-4 coats)
Recommended Skill Level
Beginner

Bookshelf Console

Submitted by Anonymous (not verified) on Mon, 07/15/2024 - 11:01

Extra Wide Console- we will use in our beach cottage. A little rustic paint job and tongue n groove back board. The paint job was a tedious process. First coat was Semi transparent gray stain, next was a thin coat of Kilz primer, then a light sanding and finally a baby blue stain.

Dana T

Built from Plan(s)

How to Build a Laundry Pedestal

I was tired of stooping to do laundry with my front-loading washer. I used the plans for Sausha's washer/dryer pedestals and tweaked them a bit.

Estimated Cost
$200
Estimated Time Investment
Day Project (6-9 Hours)
Finish Used
Platform: semi-gloss latex paint + primer; legs and side: chalky finish paint.
Recommended Skill Level
Intermediate

Outdoor Deck Tables

Submitted by Scott-F on Sun, 10/11/2020 - 18:34

My wife and I were looking for a dining table for our deck. We looked at a few to purchase but could not decide. I wanted something that would not take up a lot of deck space. When the Facebook post for the "Outdoor Bar Table" came up, it inspired me to try to build a similar table. I already had purchased a Kreg HD pockethole jig for a project I never got to (At least yet), so I figured construction would be pretty simple.

I should say my tables are loosely based off of Ana's plans, they served as a good reference. I lowered the table to 30" to match our existing deck chairs. I decided to actually build 2 half tables, so that when we were not using the table they could be set to the side of the deck. The back of each table is constructed with 2x4s so when the tables are put together it maintains the 4x4 look.

For the tabletop I had extra composite deck boards that I never used for the deck, so the depth of each half table was based on using 3 deck boards, with a 1/4" gap between each deck board. I used the same hidden fastener method I used on the original deck, so the deck boards are secured from under the table.

This being my first pocket hole project, there are a couple of small mistakes. 1) On the 45 degree trusses cut all 4 at the same time, then did the pocket holes. I missed the fact that I needed to drill 2 of the pocket holes on the opposite side. 2) I built the 2nd table back on top of the 1st table back so they matched. but I got mixed up when assembling the 2nd table so the pocket holes that should have been on the side facing the other table back, are facing the opposite side.

I did use Treated lumber for the table frame, and some of the pieces were still pretty wet, so we will wait until next year to paint the base.

We really like how they turned out, and that we still have almost all of our deck space when the tables are in the "Stored" locations.

Built from Plan(s)
Estimated Cost
$85
Estimated Time Investment
Afternoon Project (3-6 Hours)
Finish Used
None as of yet, Plan on painting after treated wood dries out
Recommended Skill Level
Starter Project

Comments

Three Bin Laundry Sorter

Submitted by Meyer1120 on Mon, 01/21/2013 - 21:10

Modified the original plan to meet our needs of a laundry sorter. Had problems with the hinges so ditched them. I used dowels with a combination of a chamfer cut on the bottom of the door. Dado-ed the trim on the doors and slide the bead board panels in. The face frame is all held together with pocket hole screws, which I highly recommend because it eliminates nail holes and keeps the face frame square. This was my first wood working project, took me a little long to get it done. Thanks for looking.

Modified January 28

So here are some more pictures of my project. I don't really have any good pictures of the dowels. But what I can tell you is, I drilled holes through the sides of the face frame and the trim pieces and then measured where the holes would be in relation to the "drawer". I then drilled holes in the drawers at those measurements, I was careful to not go to deep. I think I went in half an inch. After that I started at one end and placed the dowels in, then put each drawer in. It wasn't easy but with a little patience it worked. The key is to wax the dowels so they will last longer as well. I also am including pictures of the top and bottom trim. On the top the original plans called for an overhang piece and I didn't like the way that looked. I ran the top board an inch long on each side and then wrapped it in quarter round trim. I did this because I plan on adding the Mimi Hutch Top. The bottom was built per the plan, but I ran into a problem with my bottom trim not being level and you could tell. So I raised the whole unit on 1 1/2 legs then placed it on a level surface and again wrapped it in a decorative trim. The key on both trims was a nice miter joint. Last picture I added was of my stoppers. I took scrap from the 1x2 trim and cut them to an inch and a half or two (can't really remember), then using the Kreg Jig drill bit drilled recessed holes. I then opened the doors until the side 45s were level then mounted the blocks on each side. I feel that it is better than a chain or string catch. Again thanks for looking and I hope I answered all of your questions.

Estimated Time Investment
Week Long Project (20 Hours or More)
Finish Used
Primmer and paint
Recommended Skill Level
Intermediate

Comments

moosmani

Tue, 01/22/2013 - 11:29

Dowels! What a great idea! Would you mind sharing how you did it? Could you possibly add some pictures showing the dowels? You did a great job. It looks beautiful.

mullid1

Thu, 01/24/2013 - 09:27

I love what you have made! Could you post pictures of the top and the bottom trim? I'm very impressed that this is your first project!

mullid1

Tue, 01/29/2013 - 09:12

Thank you for the photos and new instructions! You're awesome!!!

VLT

Fri, 03/15/2013 - 12:05

This is lovely; I like the trim job you did. Is there a way to post the plans so we can all get to them. I cannot believe this was your first project!

Liz82

Sat, 11/16/2013 - 18:23

I am a little confused. I love the three bin laundry sorter, but everyone is mentioning plans. I am not finding plans for it on the site. Also, what goes in to hold the clothes? There may be obvious answers, but I am not seeing them. I'd appreciate any help you could give.

towering inferno

Tue, 12/02/2014 - 02:58

I've been thinking of working up one very similar to this, also with 3 bins, but I didn't want to use chain either.  Those stoppers will be ideal - do you put them on both sides or is one enough?  Thanks for the share!

Karahd

Sat, 01/24/2015 - 11:29

Hi-

Im not sure if you still have the plans to this awesome project, but if you do, would you be able to share them with me? Ive been looking to make something like this forever, but just couldnt find any help!

thanks,
karah
[email protected]

petemoore

Mon, 02/08/2016 - 07:46

hi im the same as everyone can you send me the build plans with dimensions etc

many thanks

virginie D.

Wed, 03/02/2016 - 14:49

Hi

It's exactely what i need. so amazing. Someone can send me the plan please? I'm so newbie to do tat all by myself without plans. Thanks you.

virginie D.

Wed, 03/02/2016 - 14:49

Hi

It's exactely what i need. so amazing. Someone can send me the plan please? I'm so newbie to do tat all by myself without plans. Thanks you.

ajbreaux

Mon, 05/02/2016 - 14:22

My wife loves this . if its possible could i get the plans and hopefully have time to build it to give to her for mothers day ? thanks 

Kimhubbell

Fri, 12/02/2016 - 11:01

I would also love to have the plans for the 3 bin sorter. I am barely an intermediate so more specifics would be a huge help! Thanks to anyone who could help.

lworthy

Mon, 07/10/2017 - 04:19

 I absolutely LOVE your laundry sorter!!!! You did a fabulous job and the TRIM, WOW amazing!!!! I've searched Ana's website and cant find the plans' could you please email me the plans to [email protected].  I started building my own furinture back in October 2016 and the reward is amazing... Keep up the good work.

Happy Building,

Lisa

woodmama

Tue, 01/16/2018 - 22:18

I'm too new at woodworking to be able to tackle this right now, but would love to download the plans for future. My most successful project so far is a pretty standard bookshelf. I got a free plan, with lots of guidelines and explanations, at https://tinyurl.com/ydeup8lo -- it came with a 440 page guide, "The Art of Woodworking" that has tips and techniques, and am plowing through that right now.

momto3

Wed, 02/28/2018 - 12:53

This is amazing.  I am very new to woodworking.  Could you send me the plans please?  I would be most appreciatative 

Ljohns

Wed, 03/11/2020 - 23:27

I would love to have the plans for the three bin laundry sorter to build for my laundry room. Are the plans available? Awesome work!

Large square Balustrade Coffee Table

Submitted by Dea Roc on Mon, 02/20/2017 - 13:53

About This Project

Loved loved the table and thought it would be perfect for our living room. I wanted an oversized square table so I adjusted the plans for a 55" square.  I also added center support frame due to size

I found round feet at Home Depot and counter sunk a nut onto bottom to screw in. 

I ordered the legs from Osborne. We assembled the table in sections since it was too large for our work table. I stained each section prior to assembling top to bottom. 

I used Minwax Pre stain. 2 coats Minwax Special Walnut. One coat Minwax classic grey which I wiped on and off immediately. Top coat Minwax poly 

My first ever wood project!

Thanks Ana and Jen's House of Wood for the idea and plan. 

Built from Plan(s)
Estimated Cost
275. Including legs.
Estimated Time Investment
Weekend Project (10-20 Hours)
Finish Used
I used Minwax Pre stain. 2 coats Minwax Special Walnut. One coat Minwax classic grey which I wiped on and off immediately. Top coat Minwax poly
Recommended Skill Level
Beginner

Comments

Farmhouse desk

Submitted by Ulrike on Tue, 12/22/2020 - 08:53

Fun project

Built from Plan(s)
Estimated Cost
80
Estimated Time Investment
Weekend Project (10-20 Hours)
Finish Used
Varathane Golden Oak
Recommended Skill Level
Beginner

Frosty Garden Greenhouse

It was truly great for us to find a greenhouse design from a fellow Interior Alaskan blogger. We kept coming back to this design, enough times to where we decided to actually build it.

We would be the first to admit that tackling a gambrel style building was slightly intimidating and not what we had in mind for our very first self-built building! But, we faithfully followed the cut lists and directions. It turned out beautifully! If you're in the same boat, have confidence that you can build this too!

We love the options available for making it your own. We decided to stain the greenhouse lumber of ours to match our cedar sided home. We also built a semi frost-resistant foundation, since we're a little north of Ana at 65 degrees and sometimes experience frost heaving. We also added full climate controls to ours, adding both fans and louvers that keep our greenhouse at perfect temperatures.

The performance has been great! Building this greenhouse has been the single greatest thing we have done in our years of subarctic gardening. We might even consider building a second greenhouse down the road. No matter how big your greenhouse is, it's never quite enough!

Thanks for the great plans, Ana! We appreciate your work!

Built from Plan(s)
Estimated Cost
$2400
Estimated Time Investment
Week Long Project (20 Hours or More)
Finish Used
Transparent cedar stain
Recommended Skill Level
Intermediate

Comments

Bench to Table conversion

Submitted by Donna_Led on Fri, 04/09/2021 - 15:22

We made two of the Picnic Table to Bench units in the month of March. The second one is in the bottom part of the picture hidden by the wood rack. I took the picture from our upstairs porch. My husband is still amazed that we accomplished this. He is not a DIY'er. We built a new house in 2016 and had a bunch of leftover wood sitting on our (unfinished) basement floor. We managed to build our benches mostly from that wood. We did have to buy 3 more pieces to finish the second back/tabletop. Then we got the balance of the wood moved out to our storage barn. The color is deck stain from our porches. I chose 20 hours as our time frame because the used wood required a lot of sanding and prep work. Our time frame was probably about 3 weeks but we are 68 and 73 years old and were really in no hurry. The plans were very simple to follow. We made them 6 feet long.

Estimated Cost
Nearly free except for the big bolts and three 2x6x8ft boards. We had everything else.
Estimated Time Investment
Week Long Project (20 Hours or More)
Finish Used
Solid deck paint from Lowes in a cedar color we already had.
Recommended Skill Level
Beginner

Comments

Bookcase/ laundry and cleaning storage

Submitted by Anonymous (not verified) on Wed, 06/02/2021 - 08:26

We mainly followed the plan but made some adjustments because we wanted the “ugly” side to be able to house brooms and mops and we cut the width down just a tad. We absolutely love how it turned out!! And we definitely needed this in our space!

Built from Plan(s)
Estimated Cost
400
Estimated Time Investment
Weekend Project (10-20 Hours)
Finish Used
Chalk paint
Recommended Skill Level
Intermediate

Comments

Outdoor Sectional

Submitted by jwhipp on Thu, 04/11/2013 - 11:38

We followed the outdoor sectional plan from Ana Whites blog to create this outdoor sectional. First we bought the cushions and custom built this sectional to fit the cushions. We used 2x4's and the kreg jig for pocket screws, then covered the base in beadboard and some pine trim, gave it a good sanding and a nice paint job.

Estimated Cost
900
Estimated Time Investment
Week Long Project (20 Hours or More)
Finish Used
bead board and pine trim
Recommended Skill Level
Intermediate

Comments

Juanita_r

Thu, 04/11/2013 - 15:12

I just want to curl up there with a book and spend the day on that lounge, so pretty & inviting. where did you get the base and back cushions, they are a great colour?

jwhipp

Fri, 04/12/2013 - 05:46

Thanks! We built the frame according to Ana's design (customized dimensions for our cushions) and then covered the base in bead board and used pine trim around the edges. The cushions are from the Frontgate Outlet in Cincinnati.

Easy 8 ft shelves

Submitted by jeff.meyer on Wed, 06/16/2021 - 20:18

Easy picture frame shelves.

Built from Plan(s)
Estimated Cost
24.00
Estimated Time Investment
An Hour or Two (0-2 Hours)
Finish Used
white paint
Recommended Skill Level
Starter Project

Comments

Firewood Shed using Round Posts and 2x4s

Submitted by tommybo76 on Mon, 04/15/2013 - 15:50

I used the basic design principles from Ana's site but decided to use 3.5x6.5 round fence posts (purchased at my local Tractor Supply Company) for a different look plus they are a little cheaper than 4x4 posts. I also used pressure treated 2x4s for some added strength and perhaps longer durability. I used Ana's cedar fence pickets idea for my roof (these pickets are used as walls on one of the other shed plans on this site). I didn't need a very robust roof as my firewood shed sits underneath the deck which provides a lot of protection from the rain. I attached the structure using 3 inch deck screws and the roof with 1.5 inch deck screws (nails would have been more than adequate for the roof but I had the screws on hand).

I did run into some problems due to my design changes. Most of my issues involved attempting to square up the round posts which are much closer in shape to a jagged stick than dimension lumber such as a 4x4 post. If I had to do it over again I would not have used the round posts. Constant tweaks and adjustments to the posts significantly delayed my build time and frustrated me at times. I was just barely able to wedge my woodshed in between the 2 deck posts which actually came in handy as I was able to secure the shed to the deck posts with 3 inch screws...making the shed very solid! The final issue I discovered after loading up my wood shed. The 2x4s at the bottom of the structure began to sag. I fixed this by using my floor jack to raise them up and placed 8 inch tall 4x4s underneath (2 in the front and 2 in the back).

Overall I'm happy with the way it turned out and I really love all the plans on this site...GREAT ideas!!

Built from Plan(s)
Estimated Cost
$90
Estimated Time Investment
Day Project (6-9 Hours)
Recommended Skill Level
Beginner

Desk

Submitted by gfranq on Sat, 03/21/2015 - 14:51

This was my biggest project to date. The hardest part was finishing it.

Built from Plan(s)
Estimated Time Investment
Day Project (6-9 Hours)
Finish Used
Sherwyn Williams Acrylic Latex Satin in "Mosaic Tile". I then sprayed it with a coat of polyurethane
Recommended Skill Level
Beginner

Comments

Cedar Raised Garden Beds - 3 Tiers

Steps:

1) Cut the boards to the specs below or adjust to your space

2) Kreg Jig the cut boards along each of the sides (length wise and on the ends) for attaching and making a box.  

3) Make 3 separate boxes, don't assemble until you move to location.  I used 4x4 cedar posts in the corners of the base box to add stability.  I used 2x2 pine in the front corners of boxes 2 and 3 for stability.  Install these after the dirt has been added so you can hammer in as a stake, attach with screws on front and sides.  I created 2 stakes for boxes 2 and 3 and added to the front to prevent bowing when the dirt is added.

Box Dimensions:

1) (base) 70.5" L x 46 W x 4 cedar boards high

2) 70.5" L x 32 W x 2 cedar boards high

3) 70.5" L x 16 W x 2 cedar boards high

Estimated Time Investment
Day Project (6-9 Hours)
Recommended Skill Level
Beginner

Cedar Planter Boxes

Submitted by KaityJene on Wed, 07/17/2013 - 19:59

They were simple to make and the plan was easy to follow. The only modification I made was adding the 1x3 topper in place of the longer legs sticking out of the top.

Built from Plan(s)
Estimated Cost
$23
Estimated Time Investment
Day Project (6-9 Hours)
Finish Used
Thompson's Water Seal which I just brushed on using a cheap paint brush.
Recommended Skill Level
Beginner

Comments

Debi G

Fri, 07/19/2013 - 06:36

Adding these to my to-do list for spring (yes, I plan ahead). I'm thinking of elevating and elongating them to fit around a bay window.

Children's Toy box

Submitted by jjunge08 on Sun, 03/18/2018 - 14:03

My wife and I are expecting our first child so I wanted to make a toybox for his toys.  I liked the plan that i found on this website since the front piece had the cutout to reduce fingers getting pinched.  I also added some spring assisted hinges to make help the lid stay up and also close a little softer than just regular hinges.  

Built from Plan(s)
Estimated Cost
Total cost for lumber is about $50-70
Hinges and Spring Hinges - $15
Estimated Time Investment
Weekend Project (10-20 Hours)
Finish Used
Painted
Recommended Skill Level
Beginner

DIY Modern Box Joint Dining Table

Hi friends!

Jen Woodhouse from The House of Wood here. 

After sharing my new dining room, I got a lot of requests for plans for my dining table, so I’m thrilled to finally deliver. The box joints on the legs add just the right amount of detail to this dining table, don’t you think?

Be sure to tag me @jenwoodhouse if you share photos of your build on social media. I'd love to see it!

You can get all the details for this build on my website jenwoodhouse.com 

Estimated Time Investment
Afternoon Project (3-6 Hours)
Recommended Skill Level
Intermediate
Back