Community Brag Posts
Play kitchen for Christmas
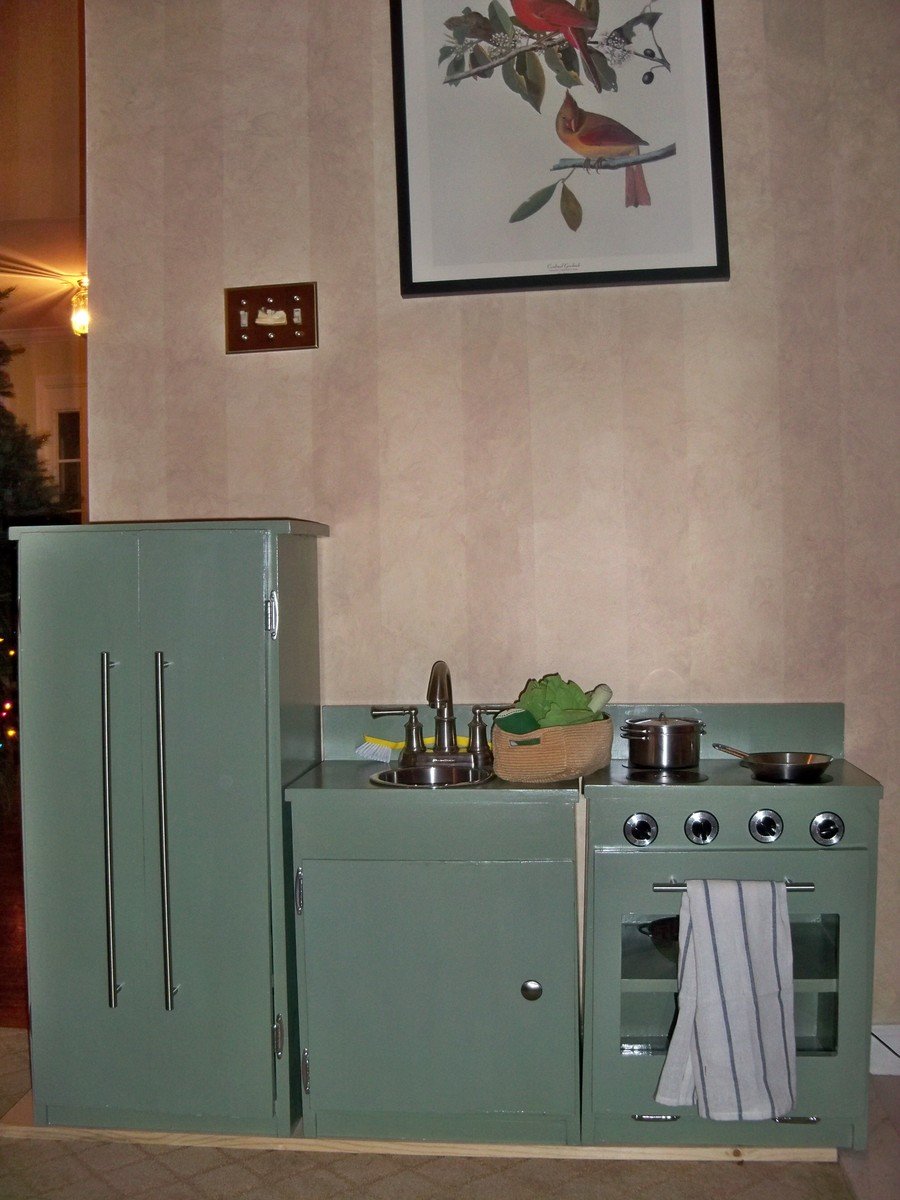
I never built anything before this. I really wanted a sturdy wooden kitchen for my son for Christmas but they were sooo expensive. Then I found this plan and decided to give it a try. And I did it! All by myself with no real experience (seriously, I had to buy a drill for the project). It isn't perfect but my son doesn't know (or care) and I had fun doing it. Note that as we have it placed across the threshold from carpet to tile floor, I currently have a board underneath to level it. I modified to put a door on the sink since I don't sew and thought the curtain might look a bit feminine on my son's kitchen.
Built from Plan(s)
Estimated Cost
hard to say since I had lots of start up costs, maybe $130? could do for more or less
Estimated Time Investment
Weekend Project (10-20 Hours)
Finish Used
I believe the green paint is "Olivine".
Recommended Skill Level
Beginner
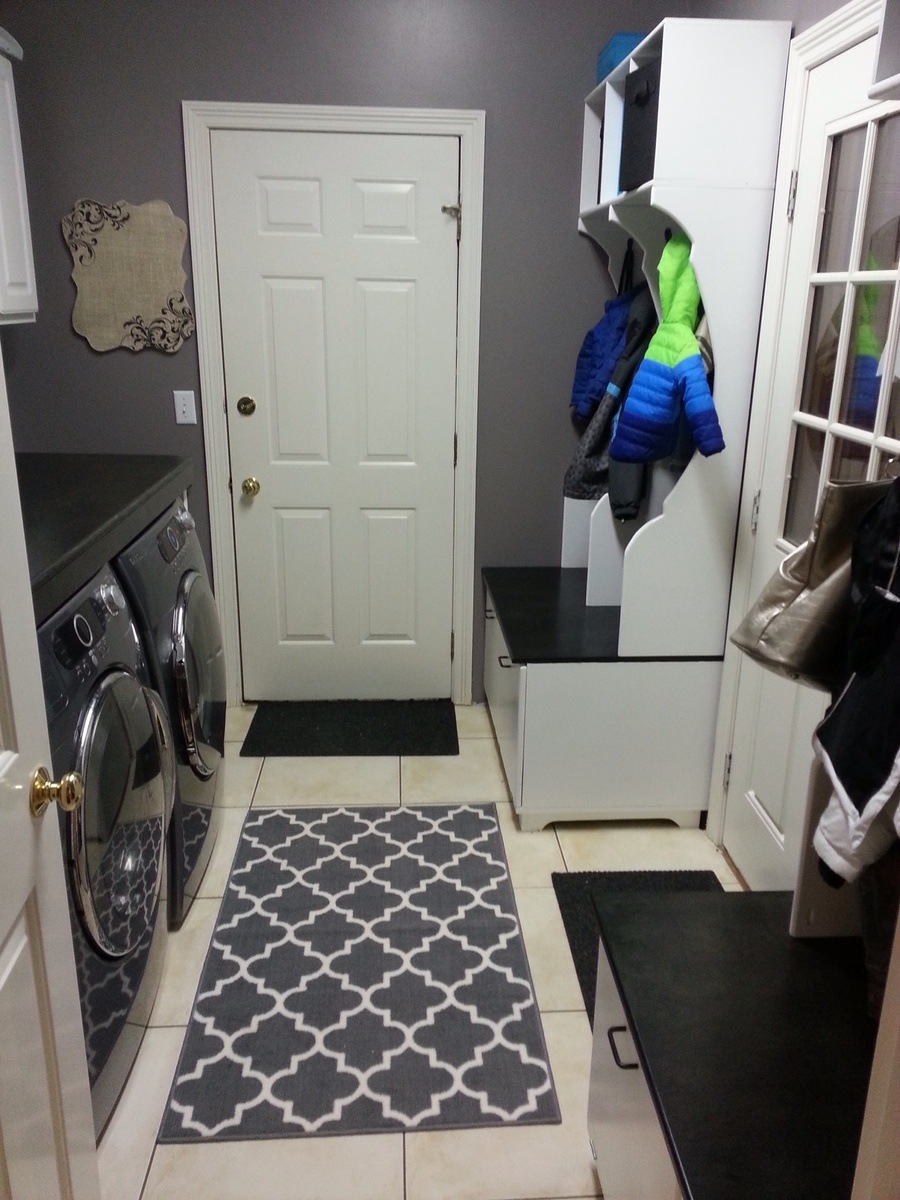
Mudroom lockers and shoe storage
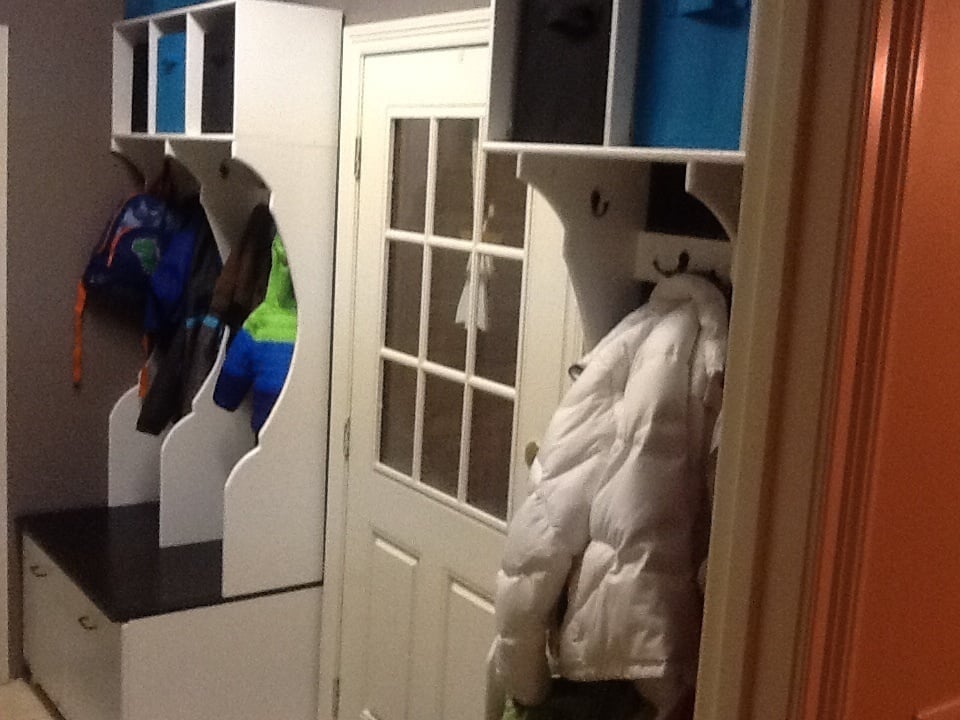
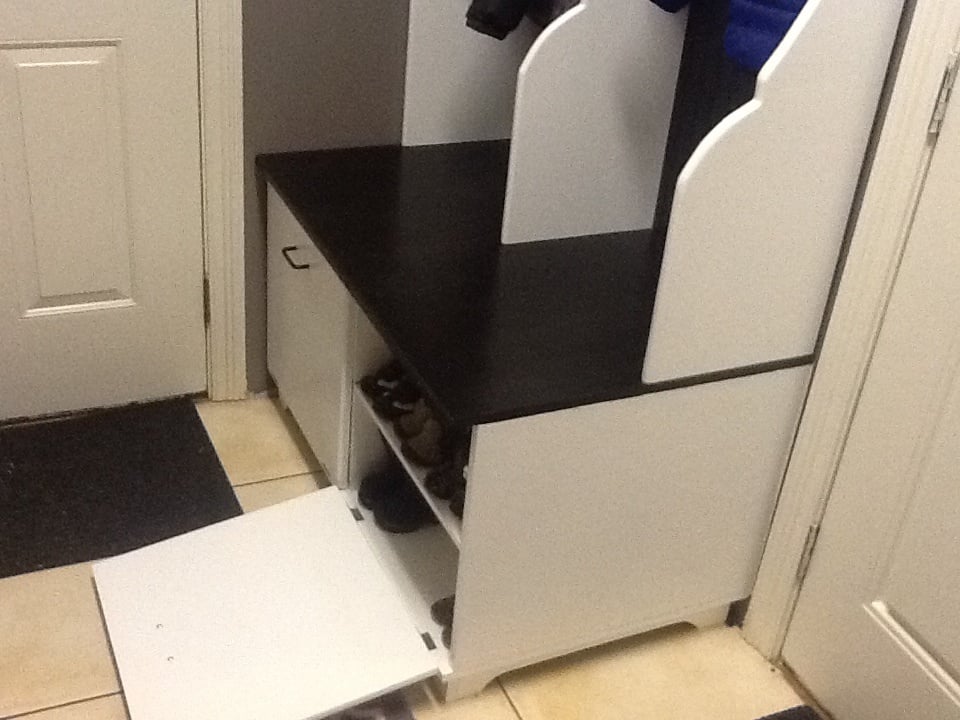
My wife requested this project as a Christmas present. Since we have a door in the middle of the room, I decided to build 2 identical hutches with storage areas for all 4 of us. I used 3/4 plywood that was cut to 2'x4' sheets at the store to make transport and further cutting on my table saw manageable. I connected the main pieces by using the kreg jig. After attaching the bead board to the back with screws and nails, the hutch was very sturdy. We had trouble finding baskets to fit the squares which I designed to fit a 12" square basket that we already had in the house. It proved very difficult to find that size so we went with a slightly smaller basket (I wish we would have researched this ahead of time). The color scheme came from another brag on Ana's site.
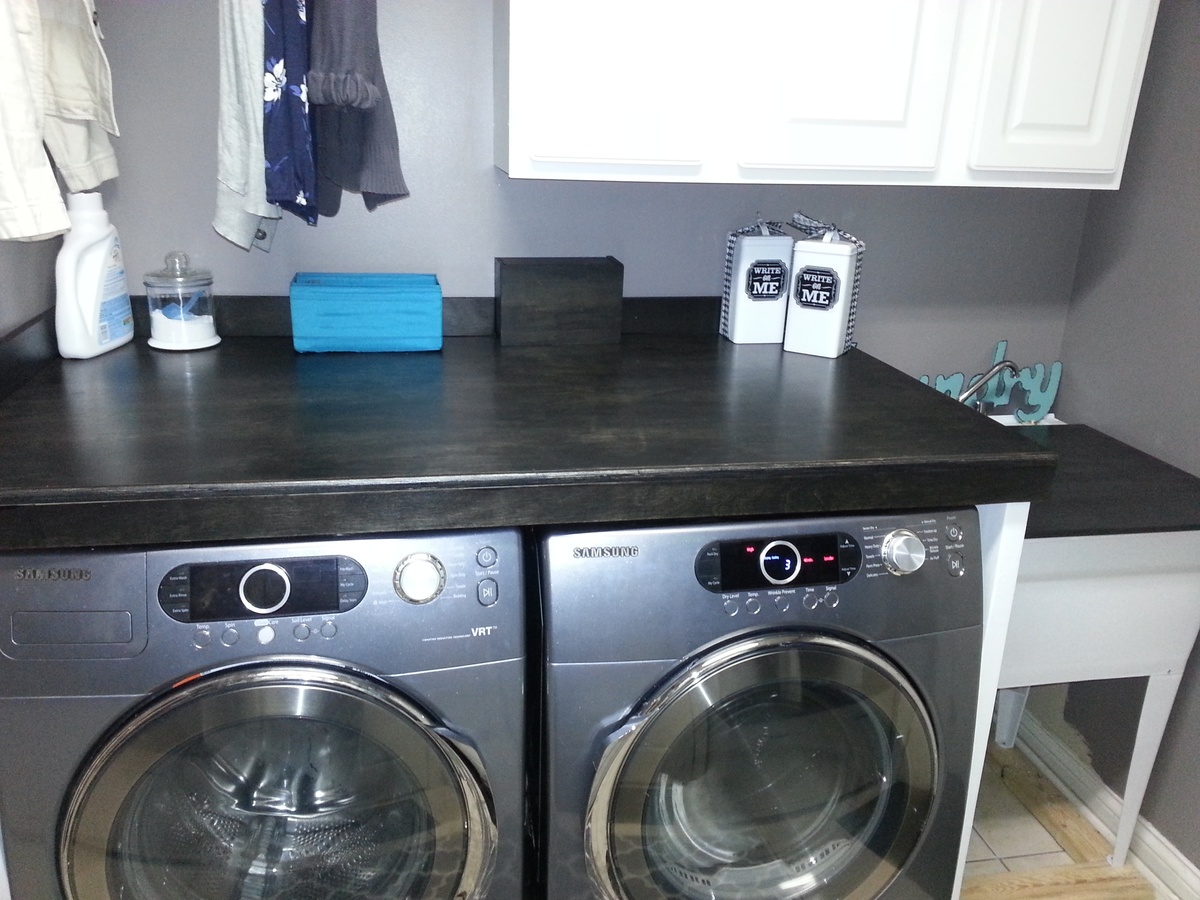
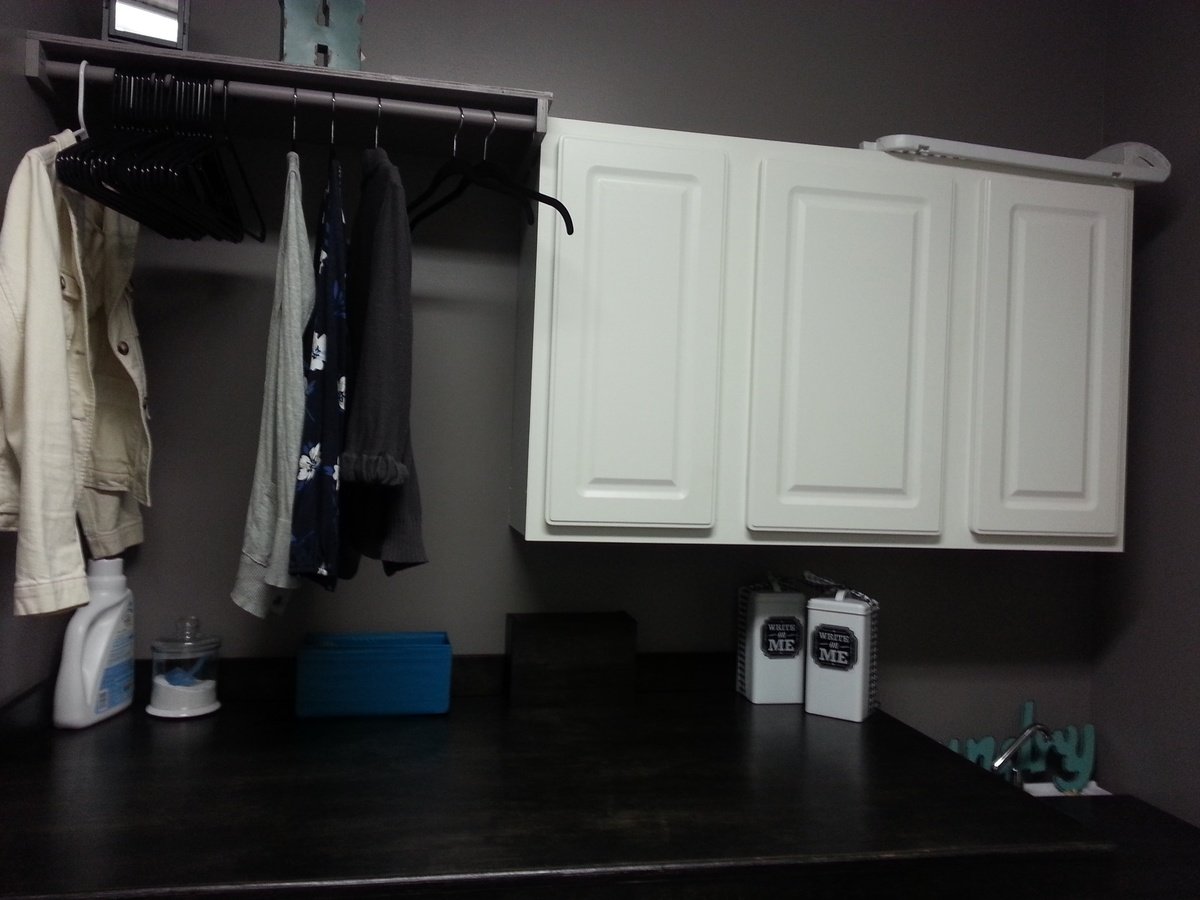
After completing the hutches, Patti mentioned that someday she'd like to take the washer and dryer off the pedestals and add a table across the top of them to fold clothes...so before putting away the tools I decided that was the "someday" LOL. I stained the tabletop to match the hutch and painted the 2x4 legs white. I then added a 1 inch dowel to hang clothes and a shelf above the dowel. Of course, the new room would not have been complete without new paint! I plan on building a cabinet for the laundry sink with a pullout drawer for recyclables in the near future.
It's fantastic to have a spot for all our coats, shoes and hats/gloves. It makes it easier getting two young boys out the door for school when you know exactly where their items are stored and makes the room look so organized compared to before. Thanks to all for your inspirational posts/brags!!

Built from Plan(s)
Estimated Cost
150
Estimated Time Investment
Week Long Project (20 Hours or More)
Finish Used
Ebony stain, polyurethane, white paint
Recommended Skill Level
Intermediate
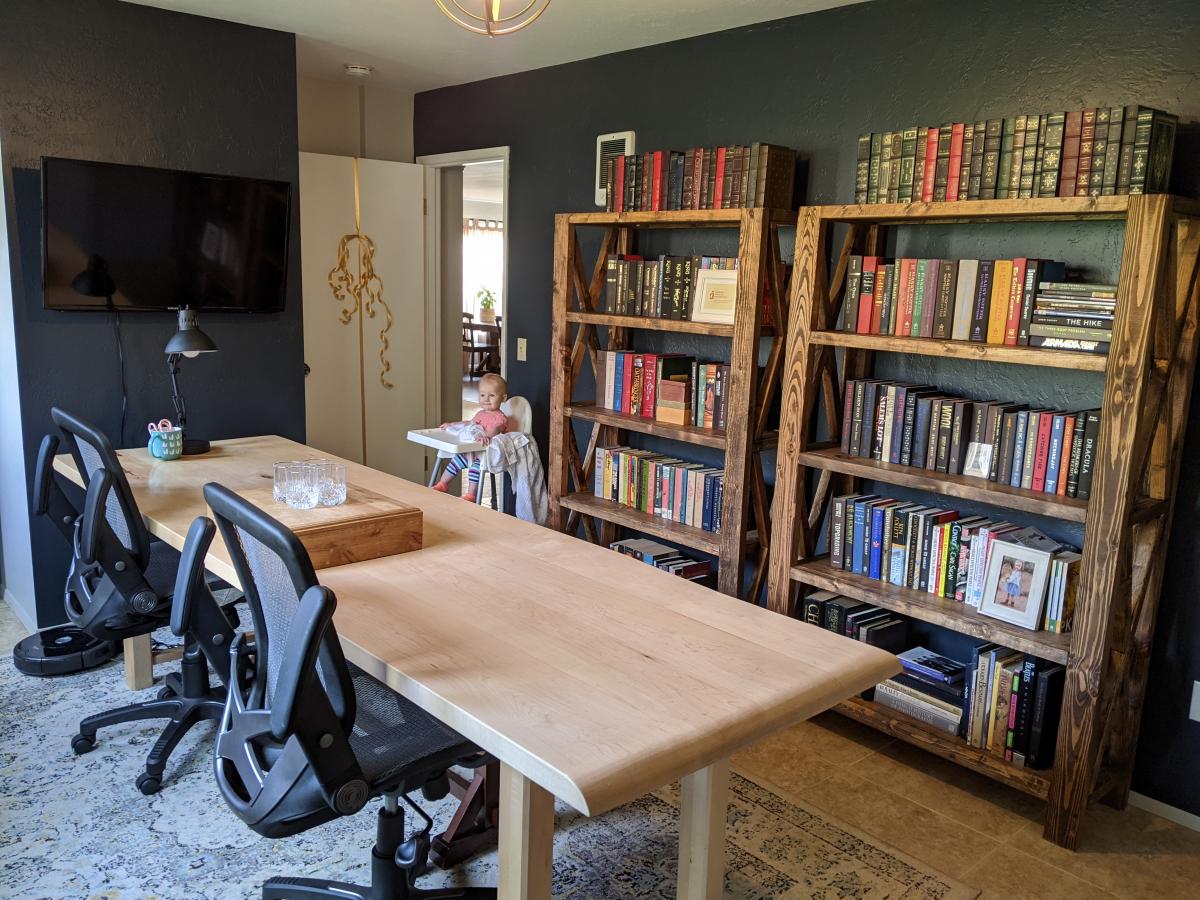
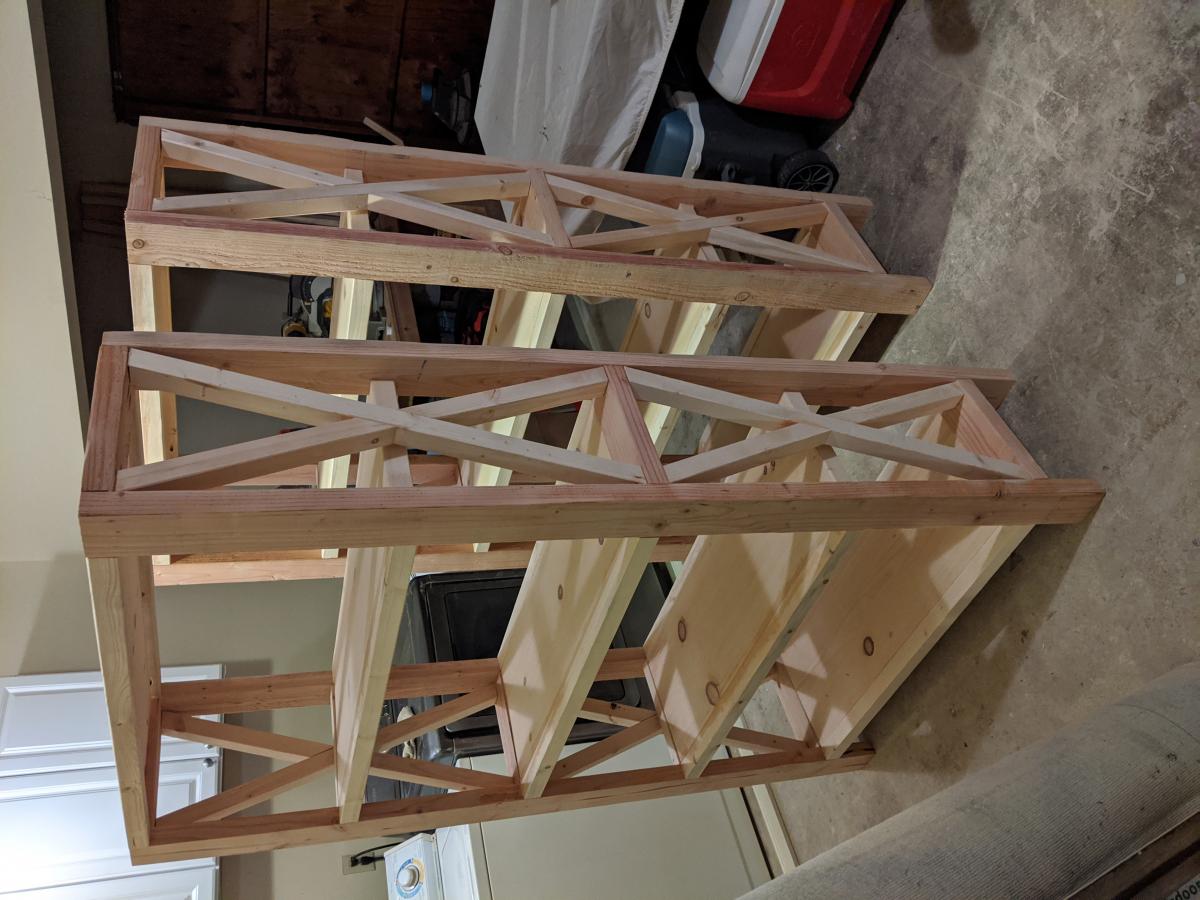
Tall Rustic X Bookshelves
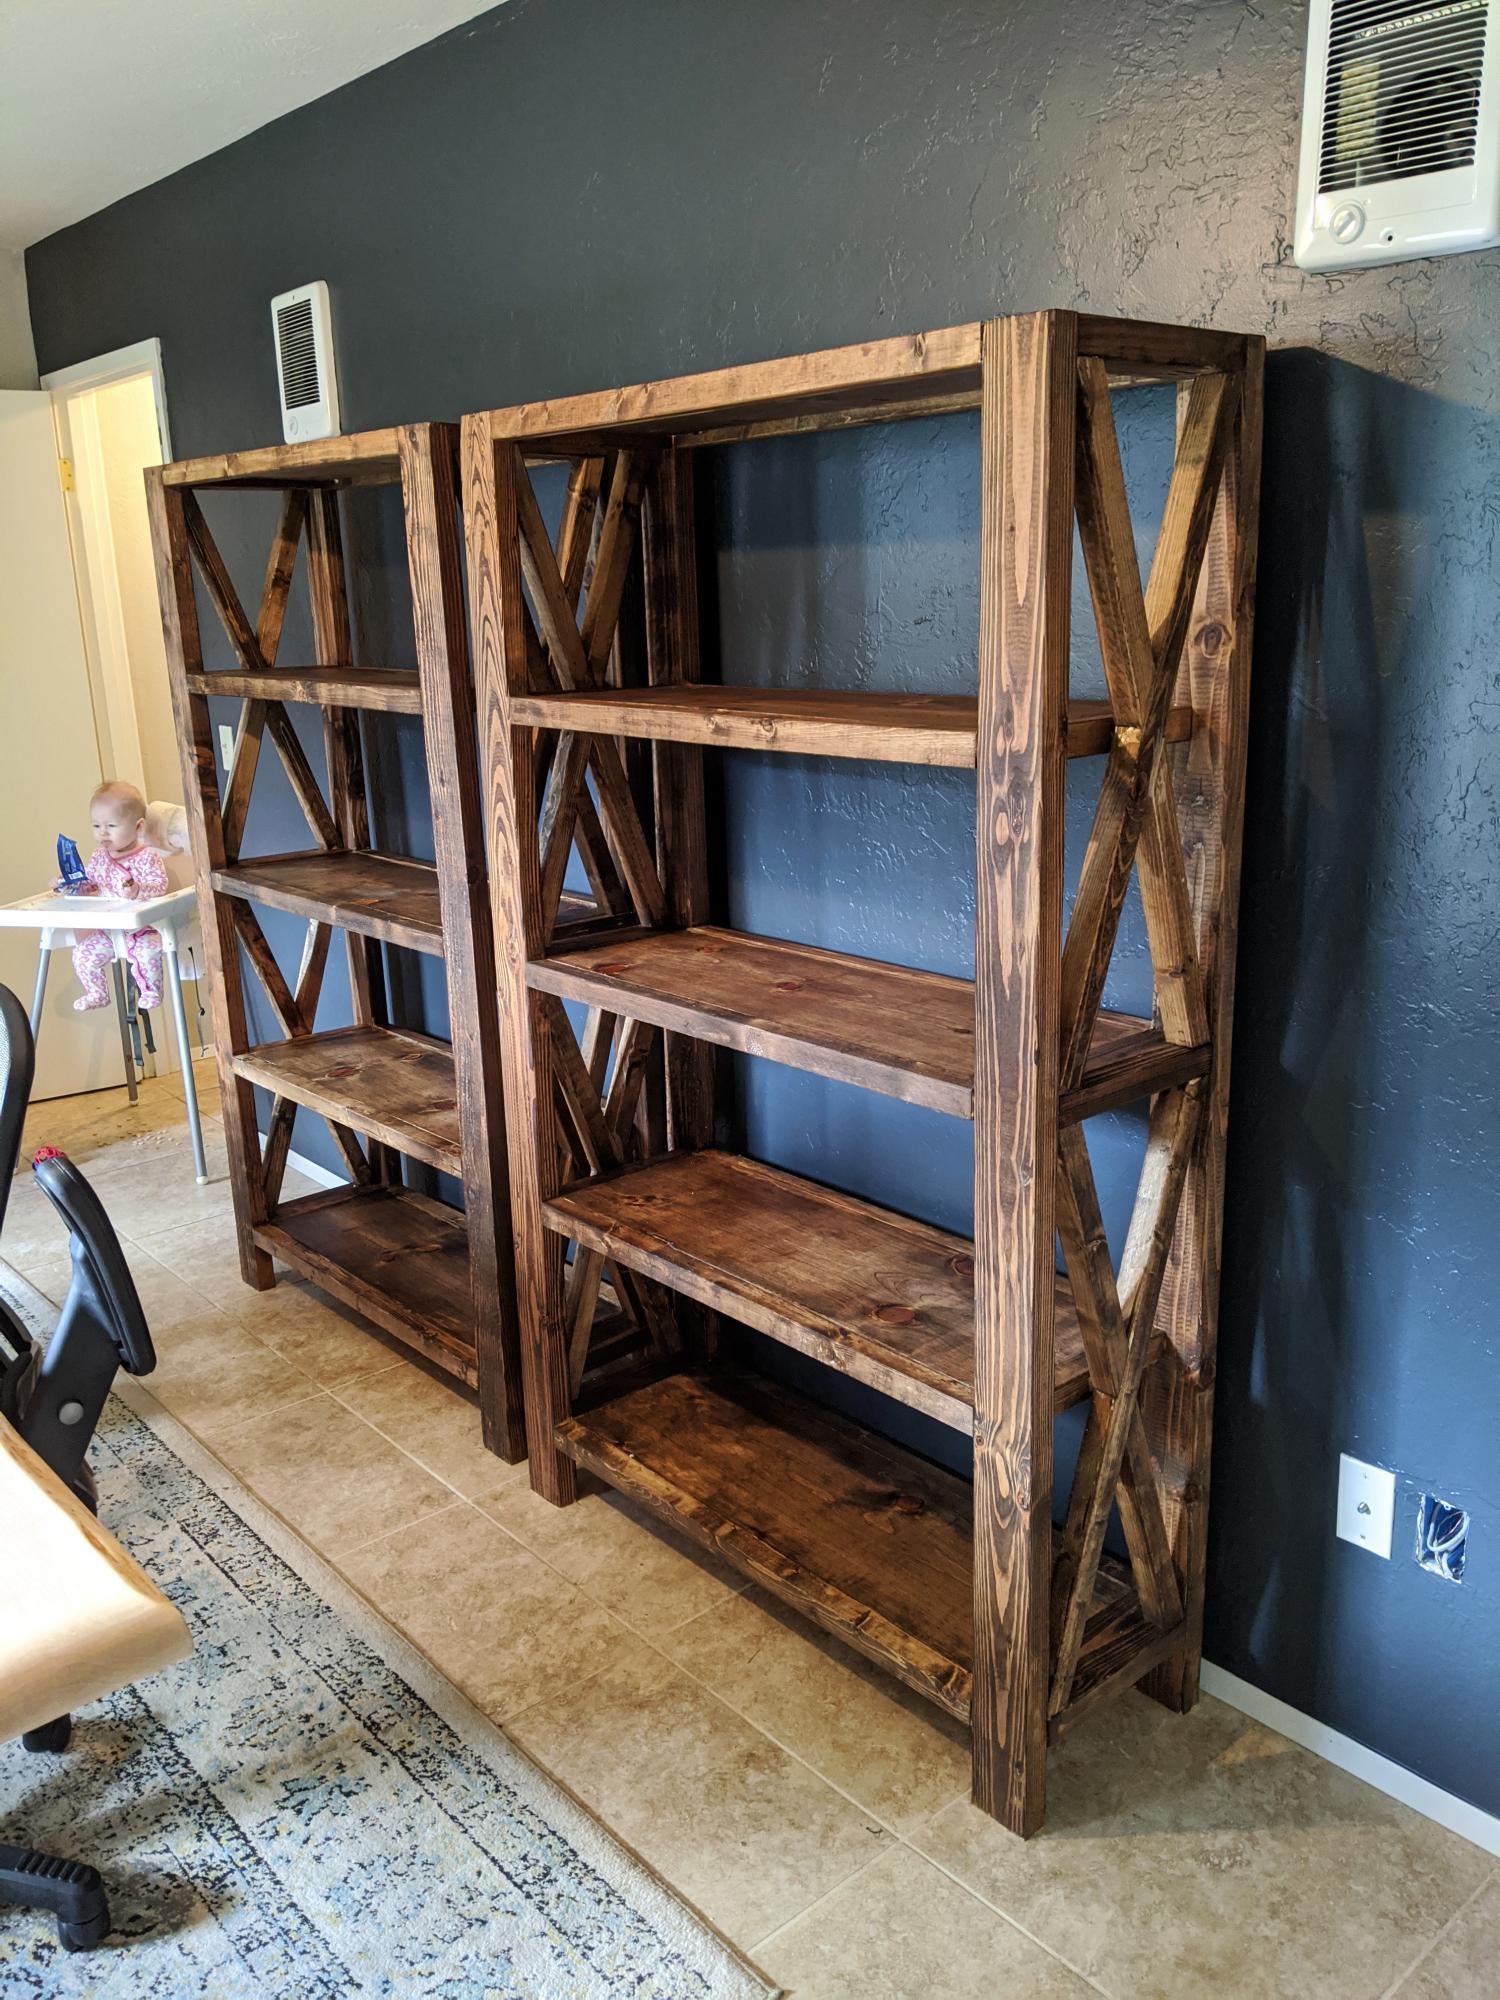
I followed the Rustic X Tall Bookshelf plan to make a set of bookshelves for my husband for Christmas! It was my second ever woodworking project. The plan was really easy to follow and so fun to make! I ended up using an additional shelf piece on the very top for a more modern spin on it. I also bought a pocket hole jig to use on this project. I'm happy with how it turned out!
Built from Plan(s)
Estimated Cost
$75 per shelf
Estimated Time Investment
Weekend Project (10-20 Hours)
Finish Used
MinWax English Chesnut Wood Finish and Paste Wax
Recommended Skill Level
Intermediate
Outdoor DIY Sofa
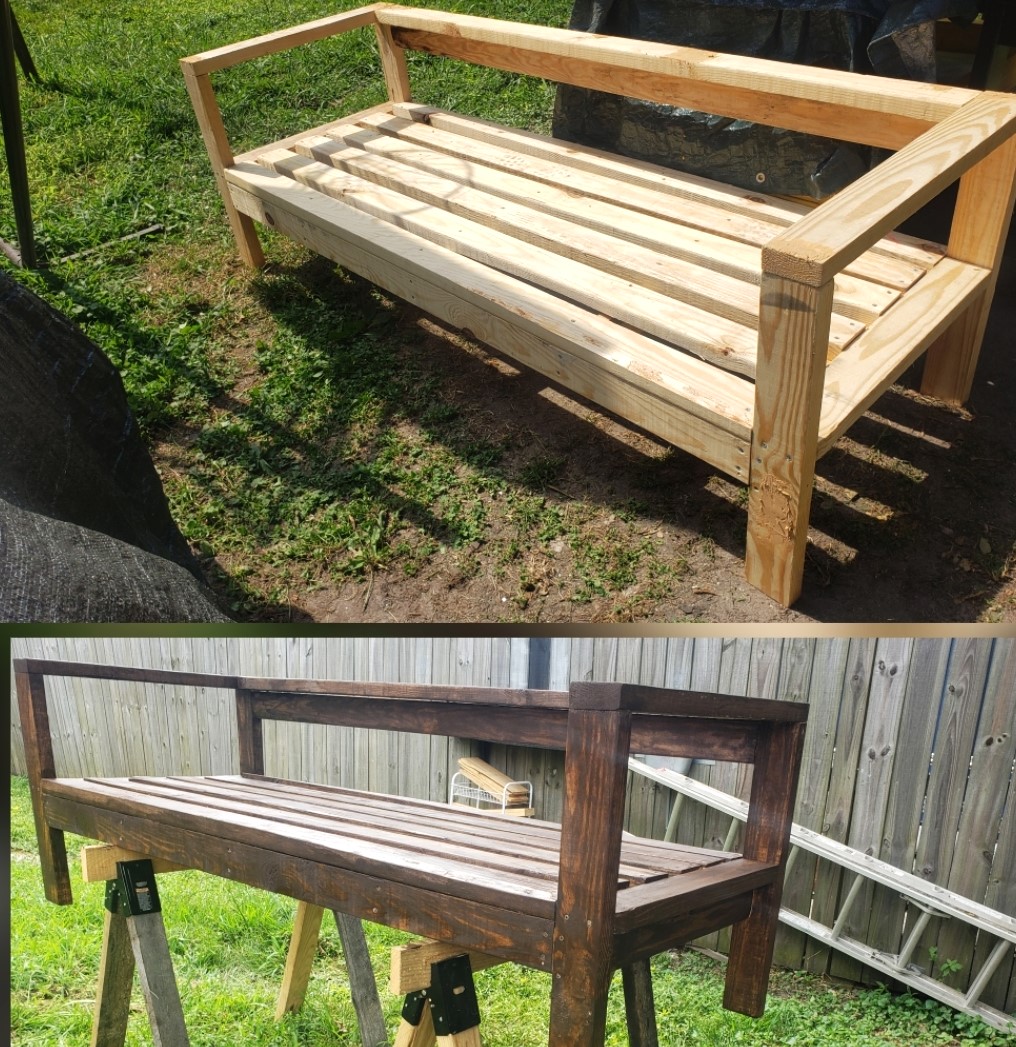
Outdoor Sofa
Wood Worker Flames
Built from Plan(s)
Step Stool
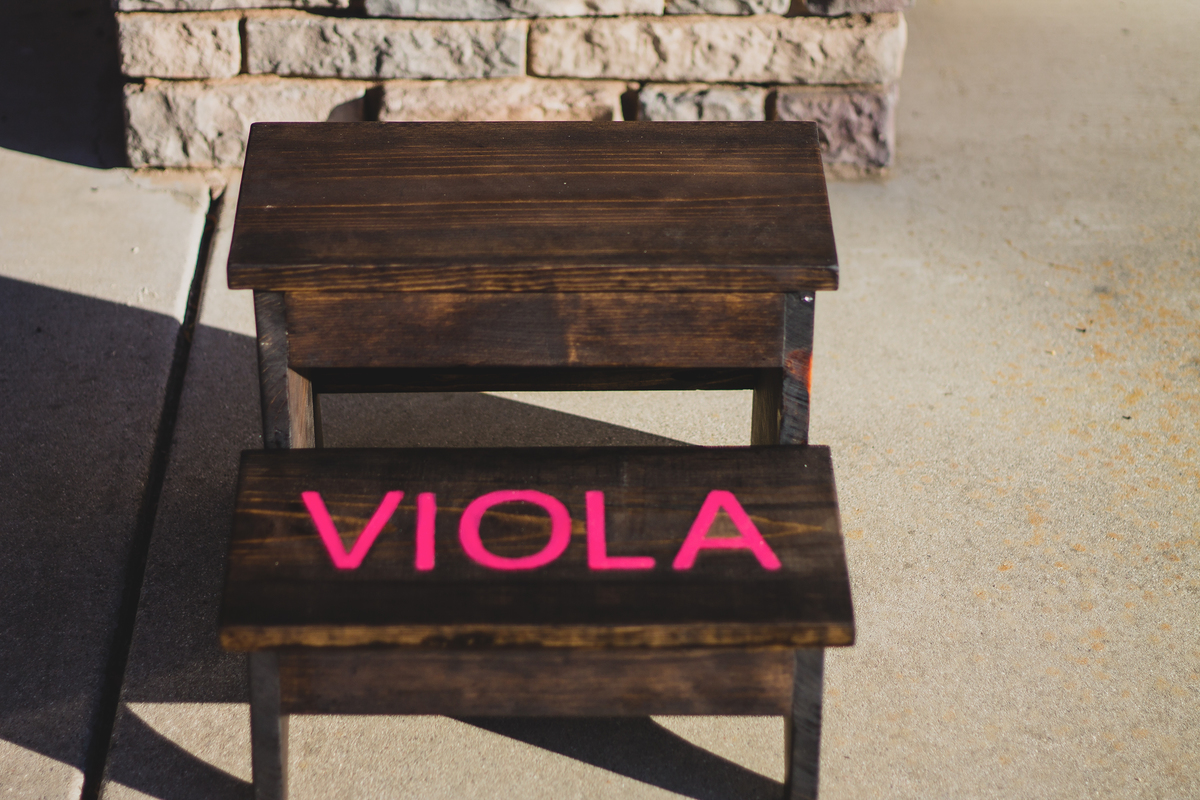
we made two of step stools for two little girls for Christmas! we personalized them. we drill some wholes so, it'd be easy for the girls to carry around.
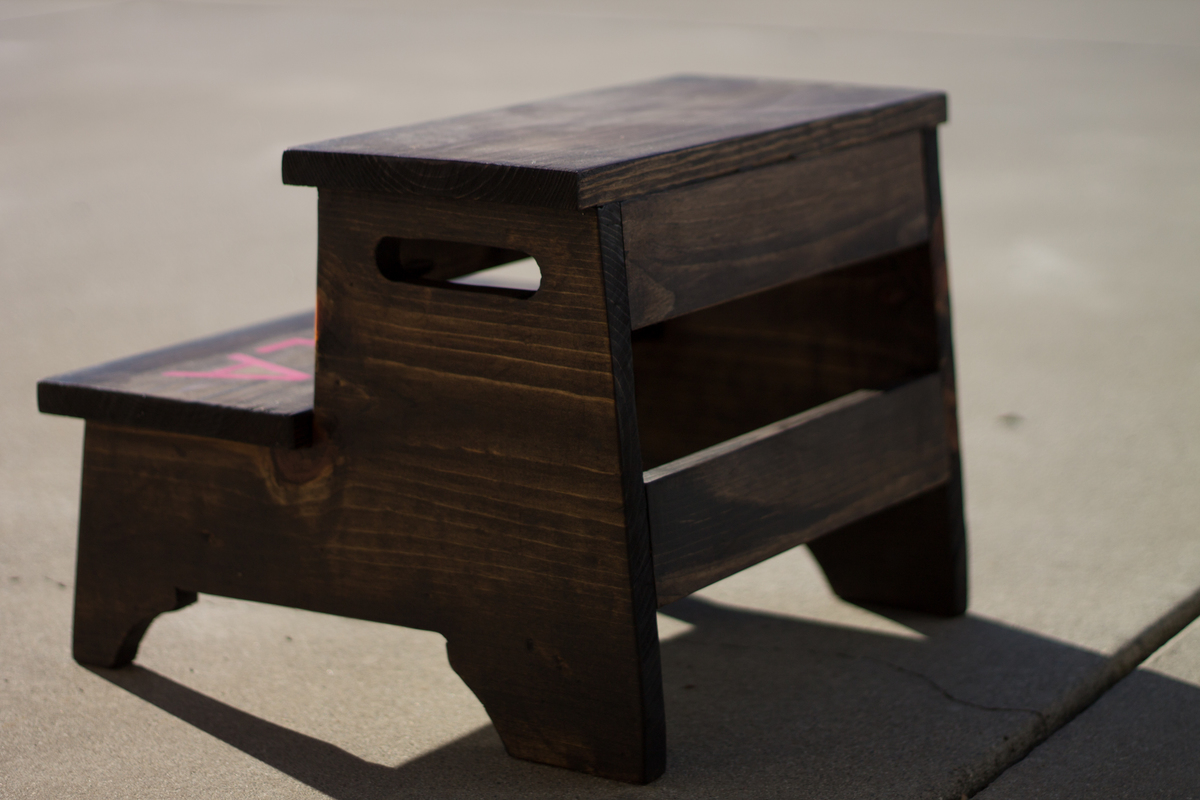
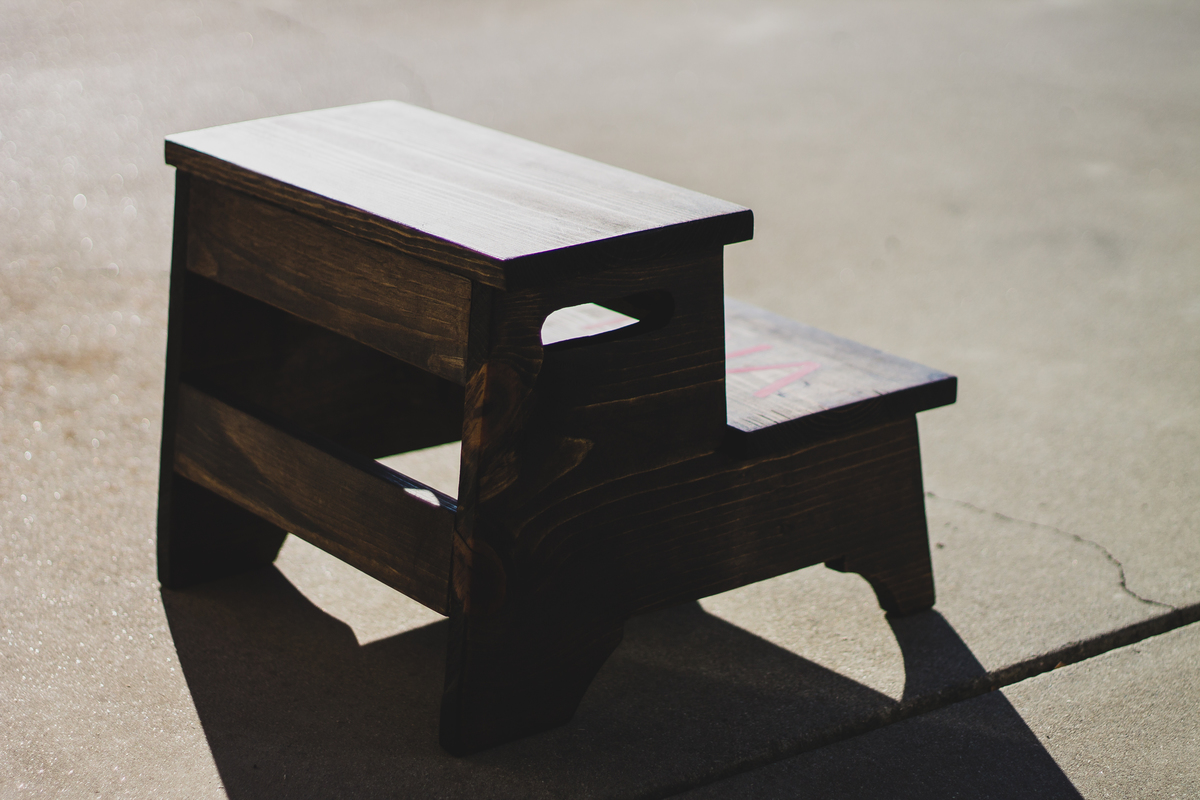
Built from Plan(s)
Estimated Cost
$20
Estimated Time Investment
Afternoon Project (3-6 Hours)
Recommended Skill Level
Beginner
2x single lounger Simple Modern collection
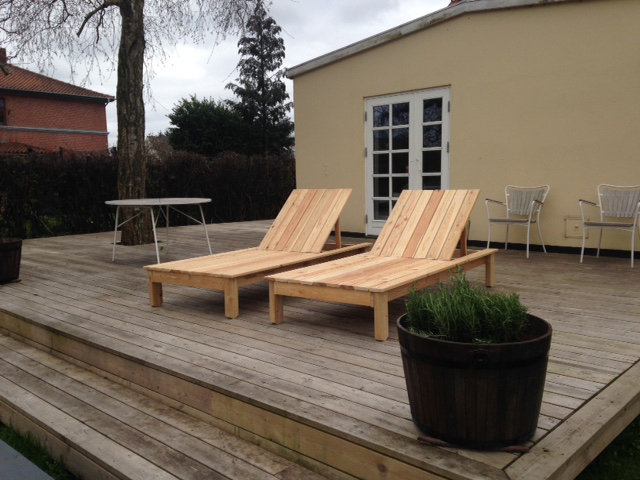
Thank you for a very clear tutorial. Only challenge was the hinges but managed OK. I changed the position of the legs and chose some bit thicker tree and rounded the bottoms to make it more steady and easier to move around.
Built from Plan(s)
Estimated Cost
600 DKK (90 dollars) its a bit more expensive in Europe
Estimated Time Investment
Afternoon Project (3-6 Hours)
Finish Used
None, will let nature take over. Will wash it once in a while
Recommended Skill Level
Beginner
Folding workbench
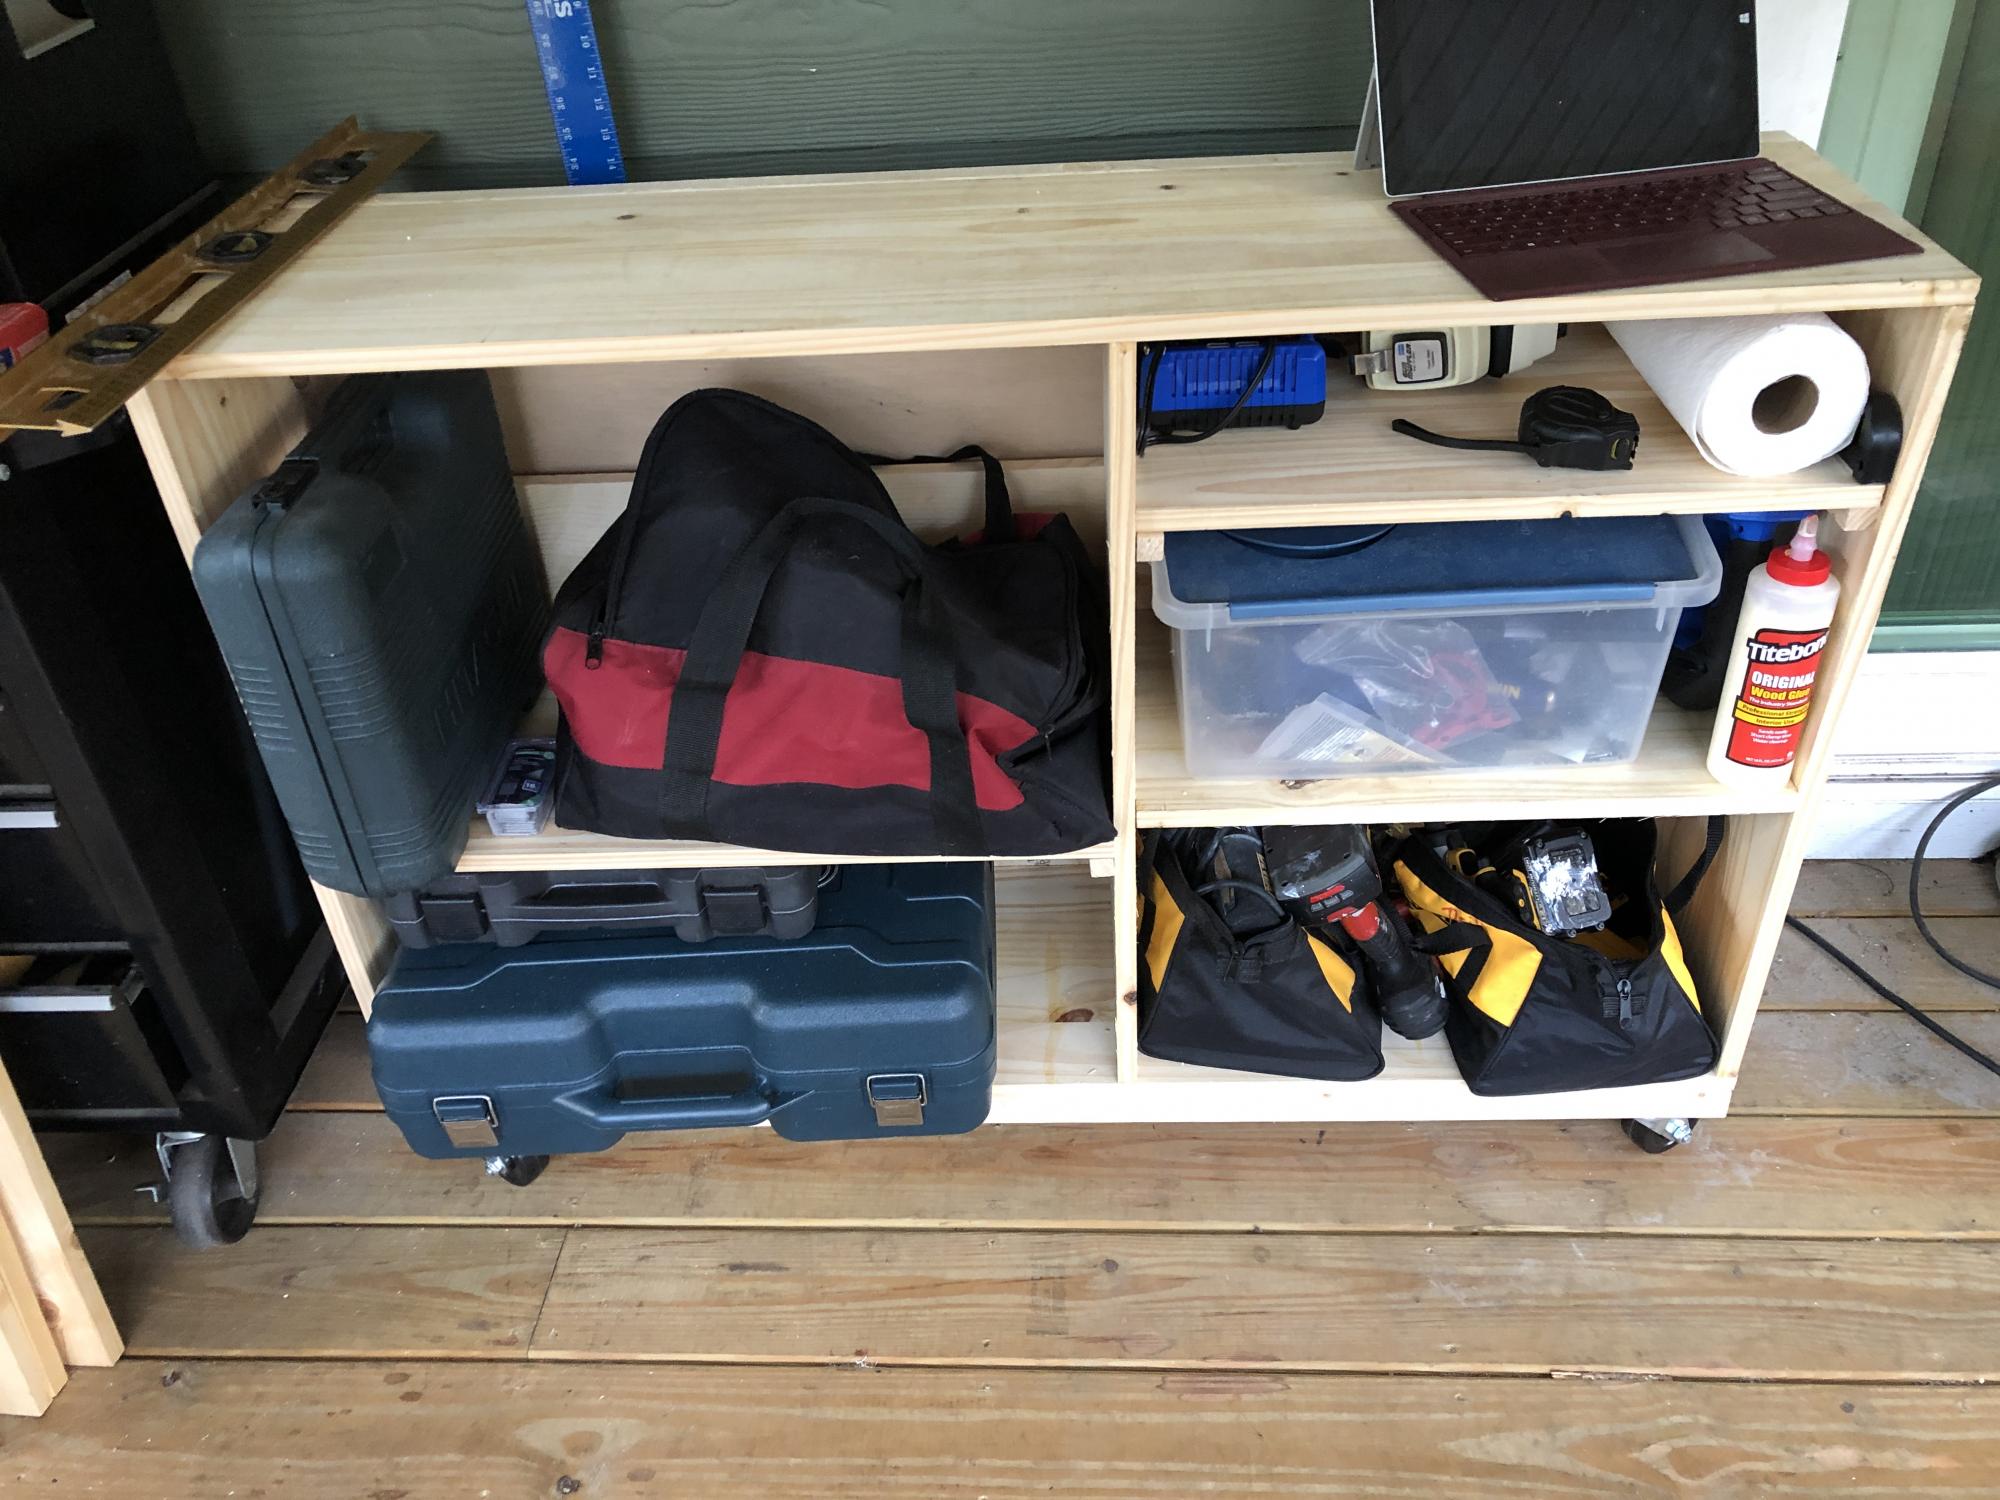
We do not have a garage yet, so this size works great to push out of the way when not being used and pull out for a workbench and also to extend the table top for the saw. The plans were easy to follow and easy to modify. I added a base made of 2x4’s to make it sturdier since it will be moved across a deck vs a level floor. I also added some boards behind the shelf to keep things from falling out the back and adjusted the height to match the table saw top. Next up will be a router table stand to replace the camping footlocker.
Built from Plan(s)
Estimated Cost
$100
Estimated Time Investment
Afternoon Project (3-6 Hours)
Recommended Skill Level
Starter Project
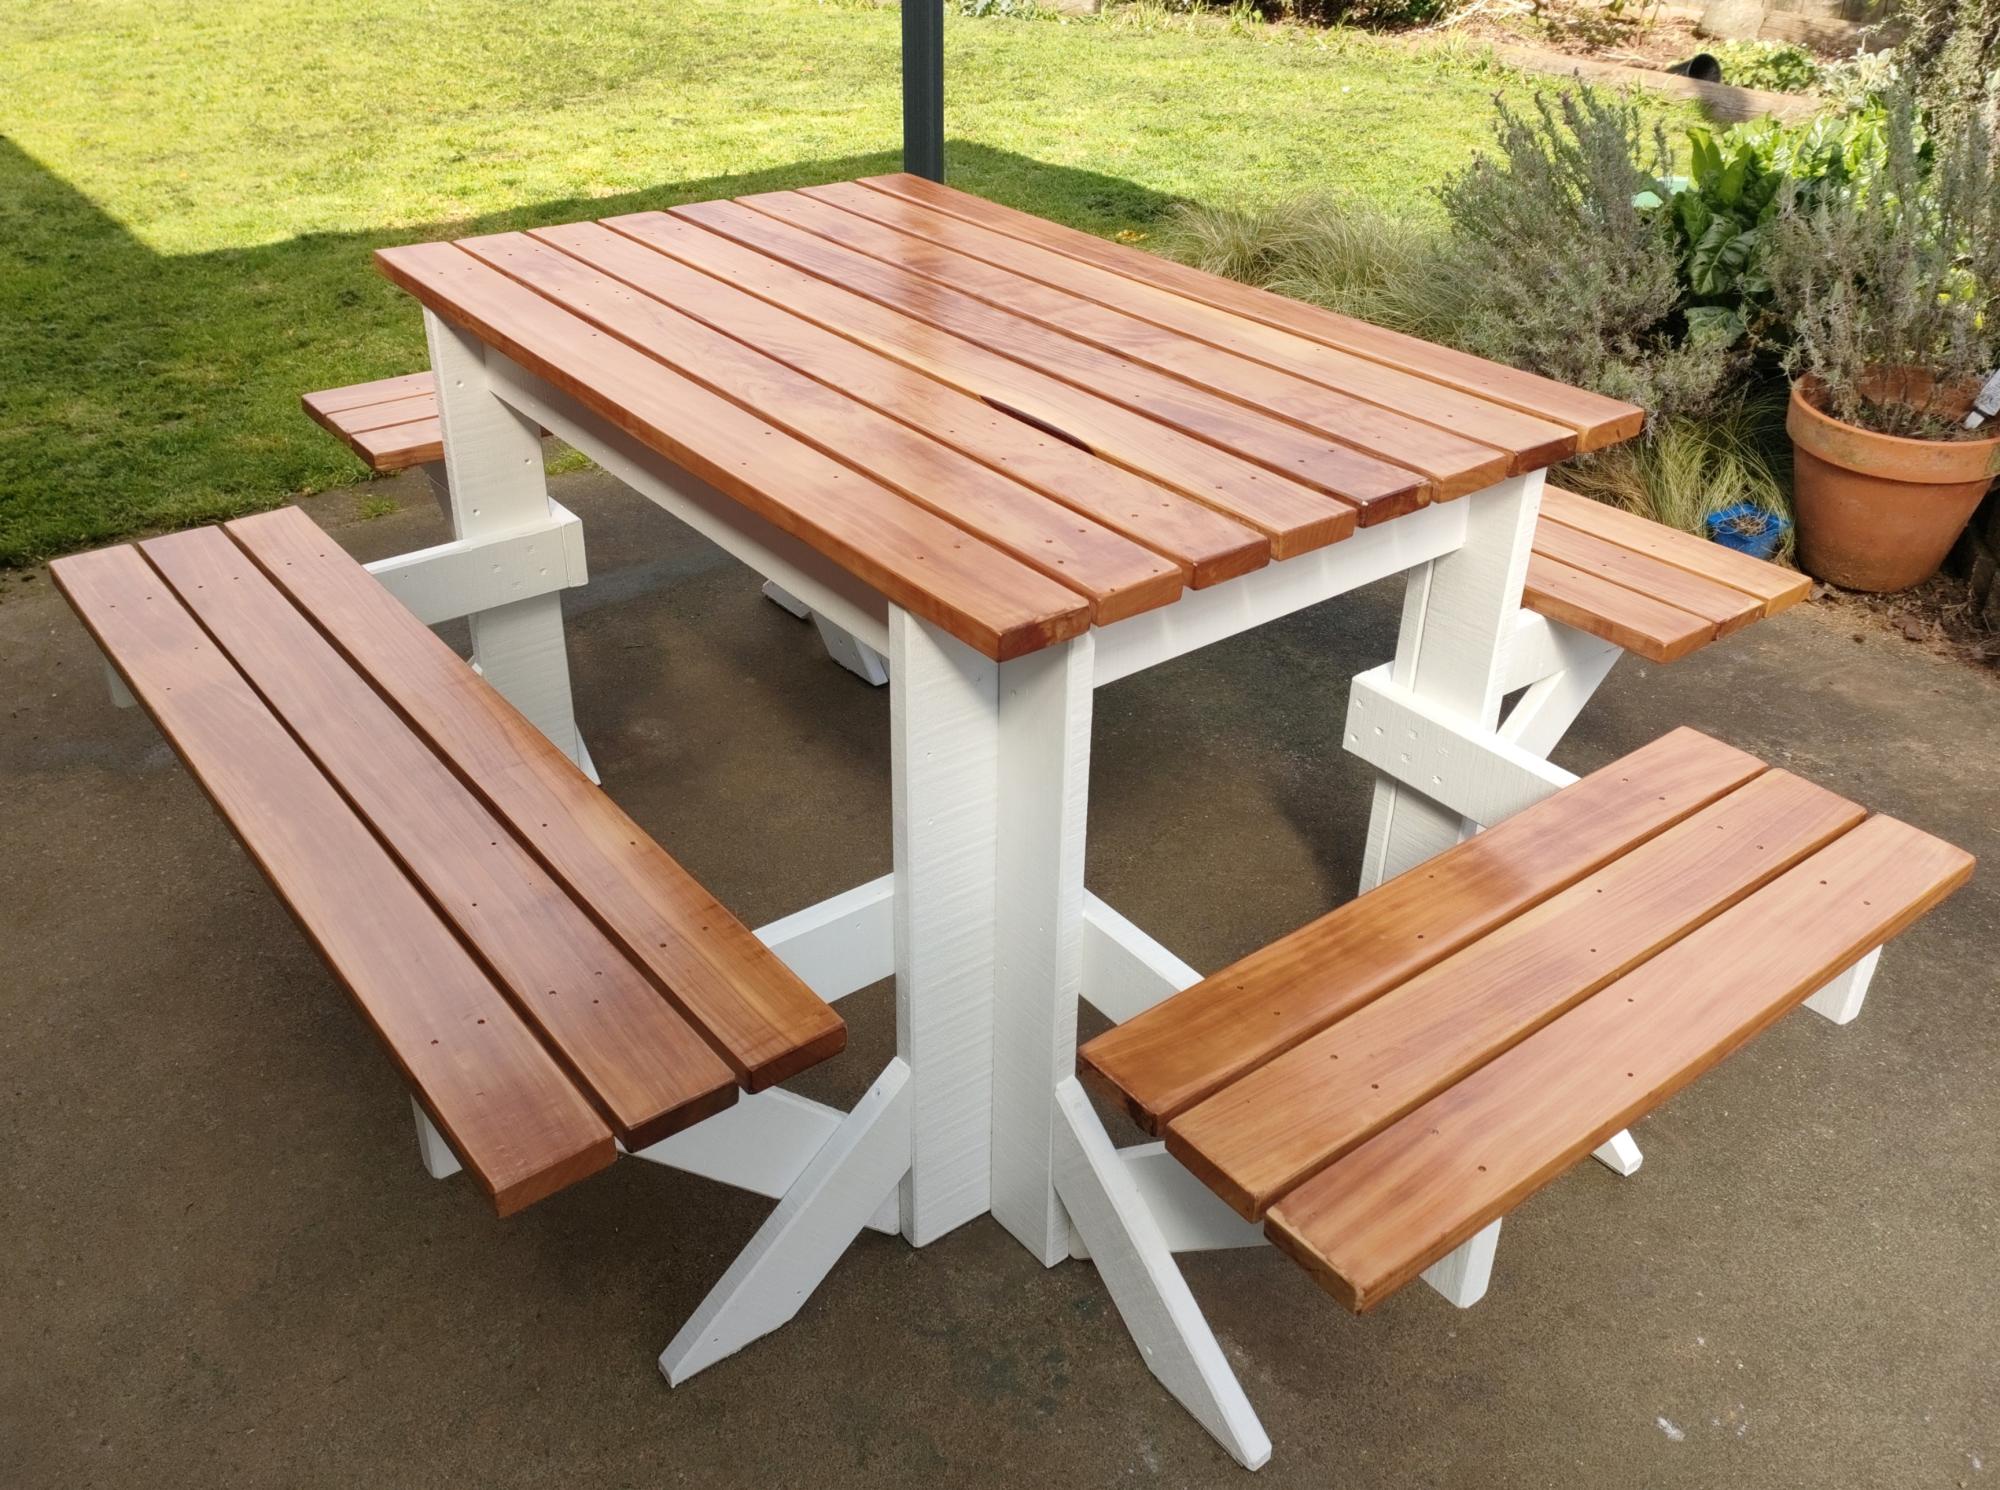
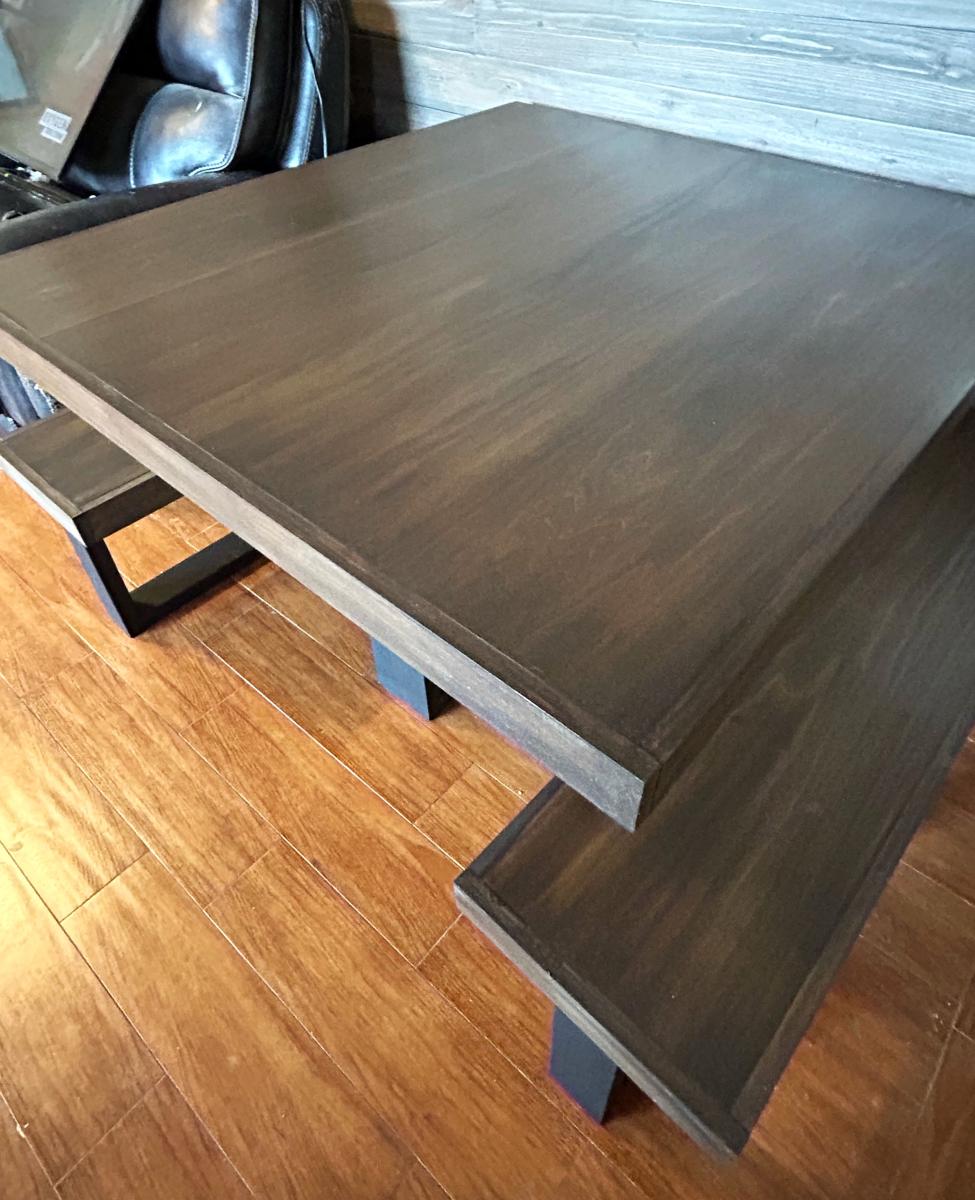
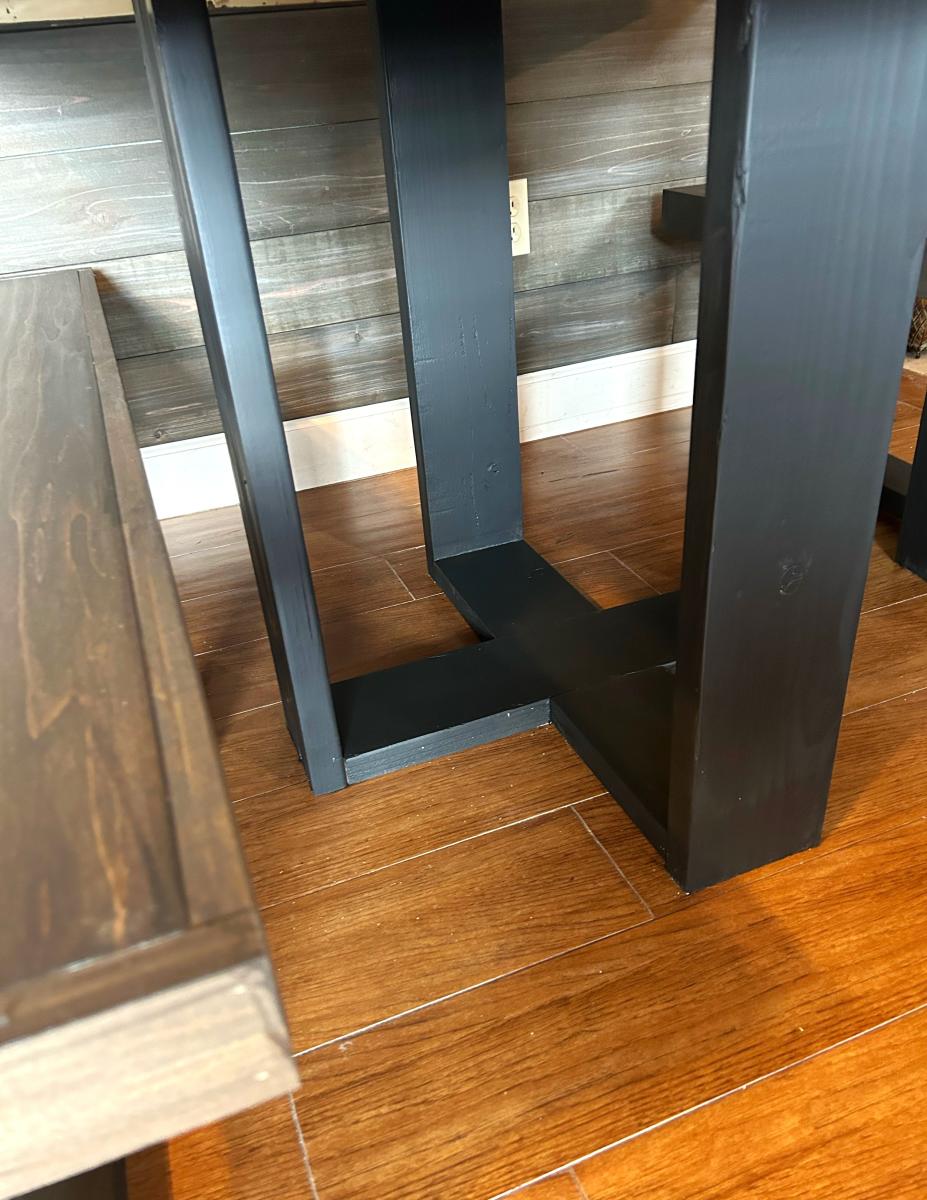
Modern Square Table and Benches
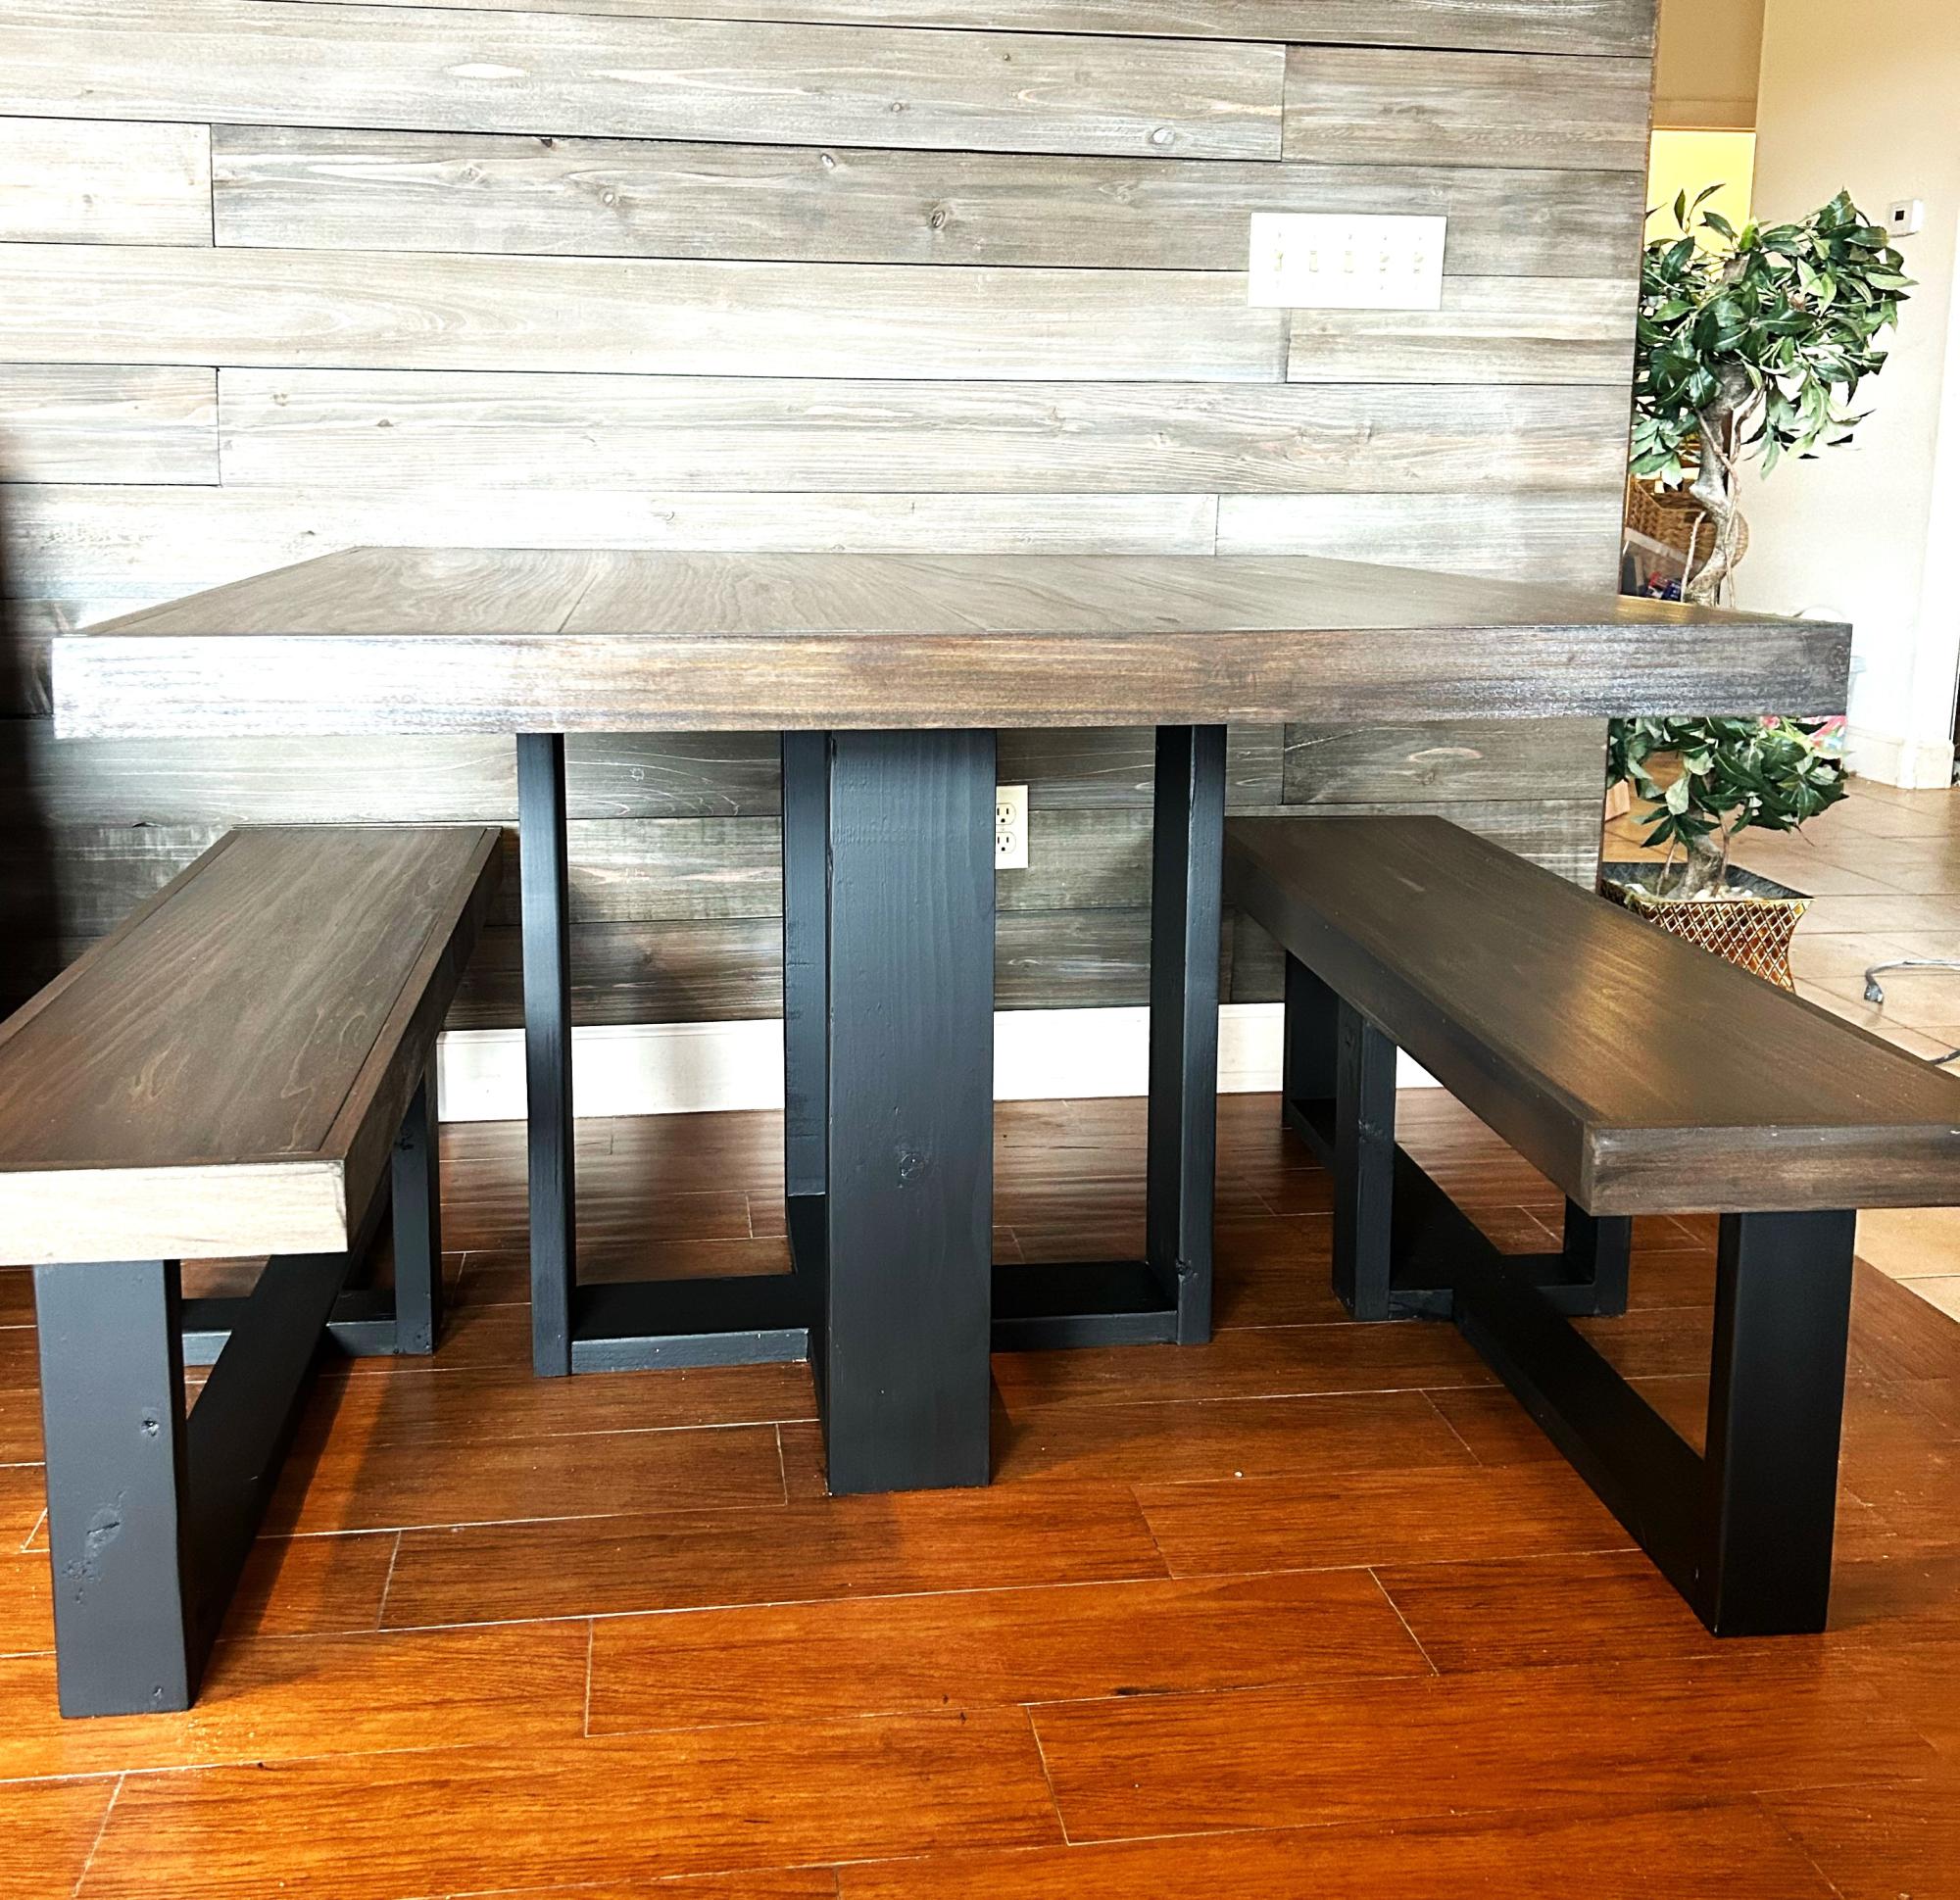
This is my first brag post! I modified the base to make benches. I am not super creative or any good at math, so I was super proud :D
Built from Plan(s)
Twin Farmhouse Bed
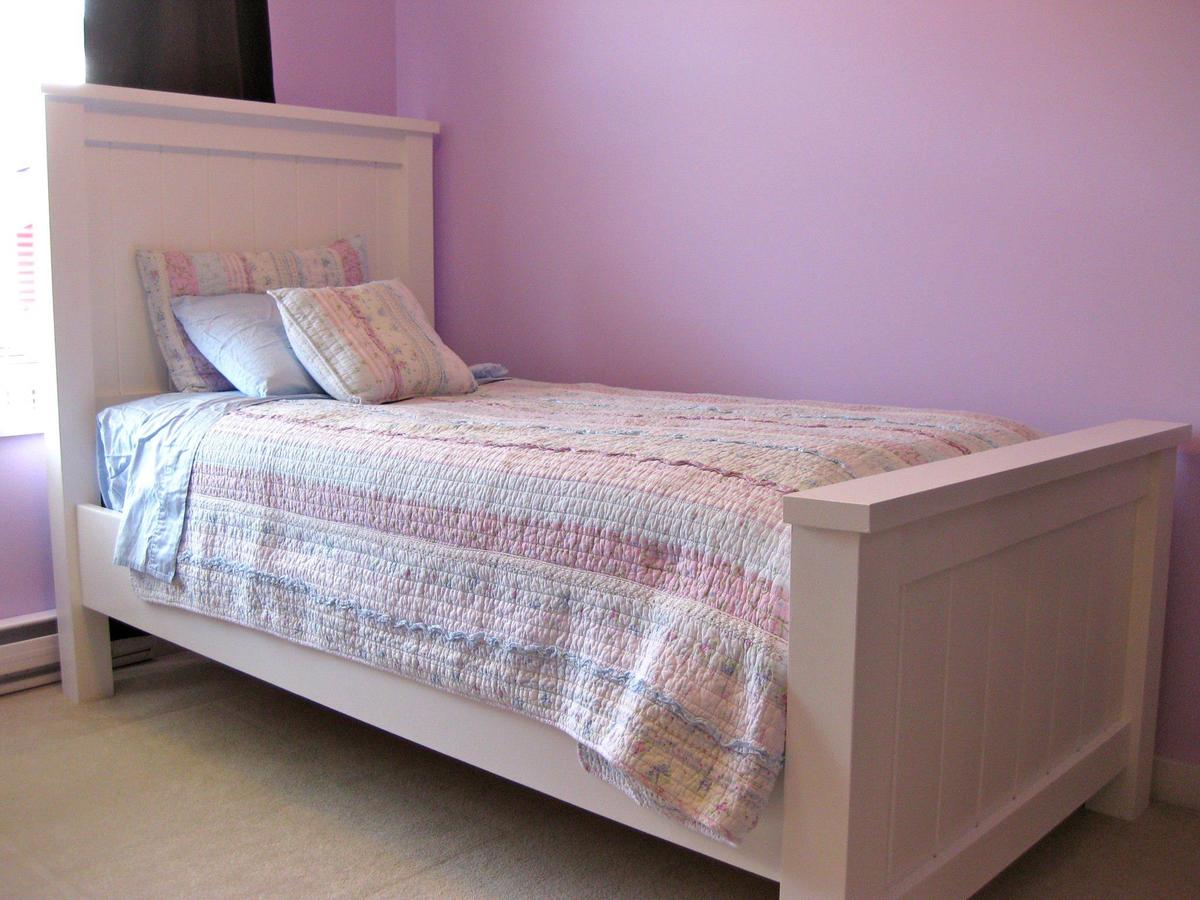
My handy Dad built this for my daughter using the awesome Plan as a base. Made a couple minor modifications (raised it up so more space under the bed; added brackets so the siderails can easily be removed; etc). Turned out perfectly!
Built from Plan(s)
Estimated Cost
$250 (CDN)
Estimated Time Investment
Weekend Project (10-20 Hours)
Finish Used
One coat of primer and two coats white semi-gloss paint.
Recommended Skill Level
Intermediate
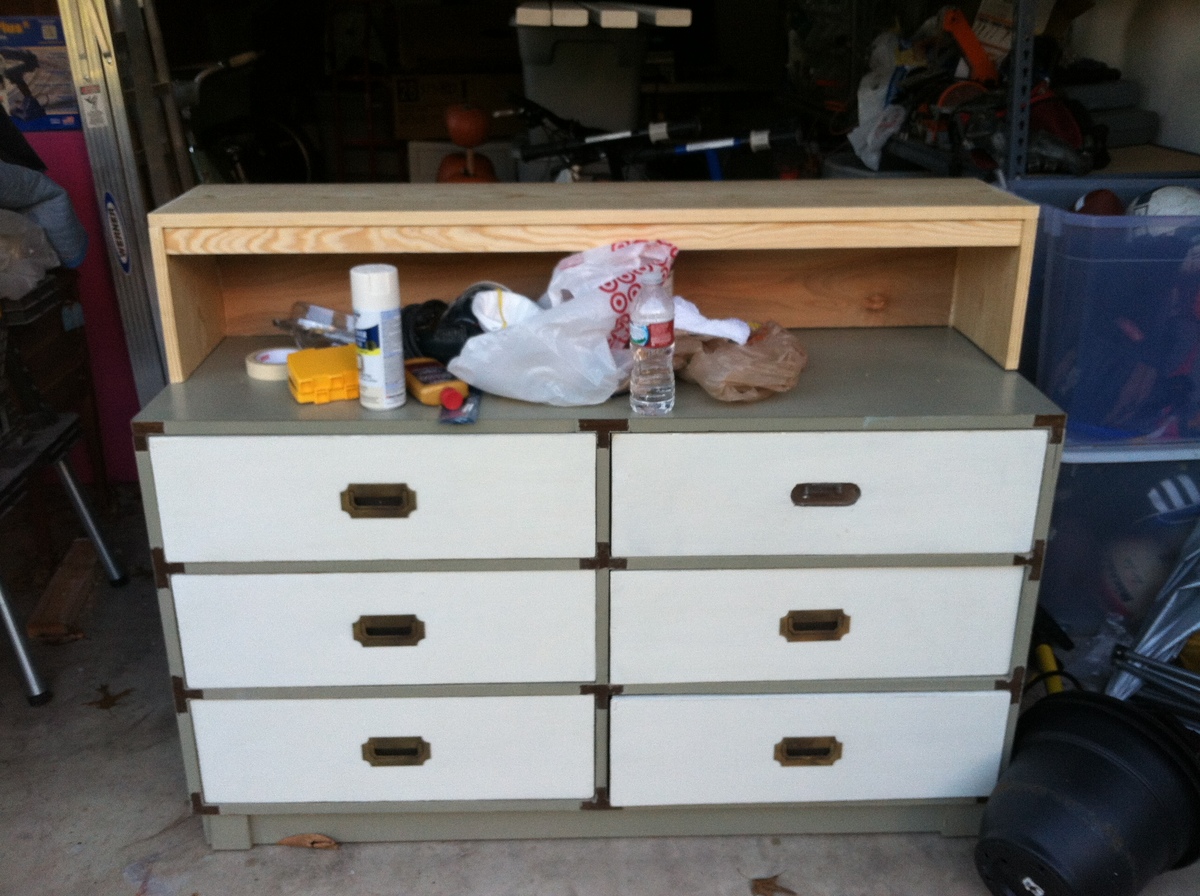
TV Hutch for Existing Dresser
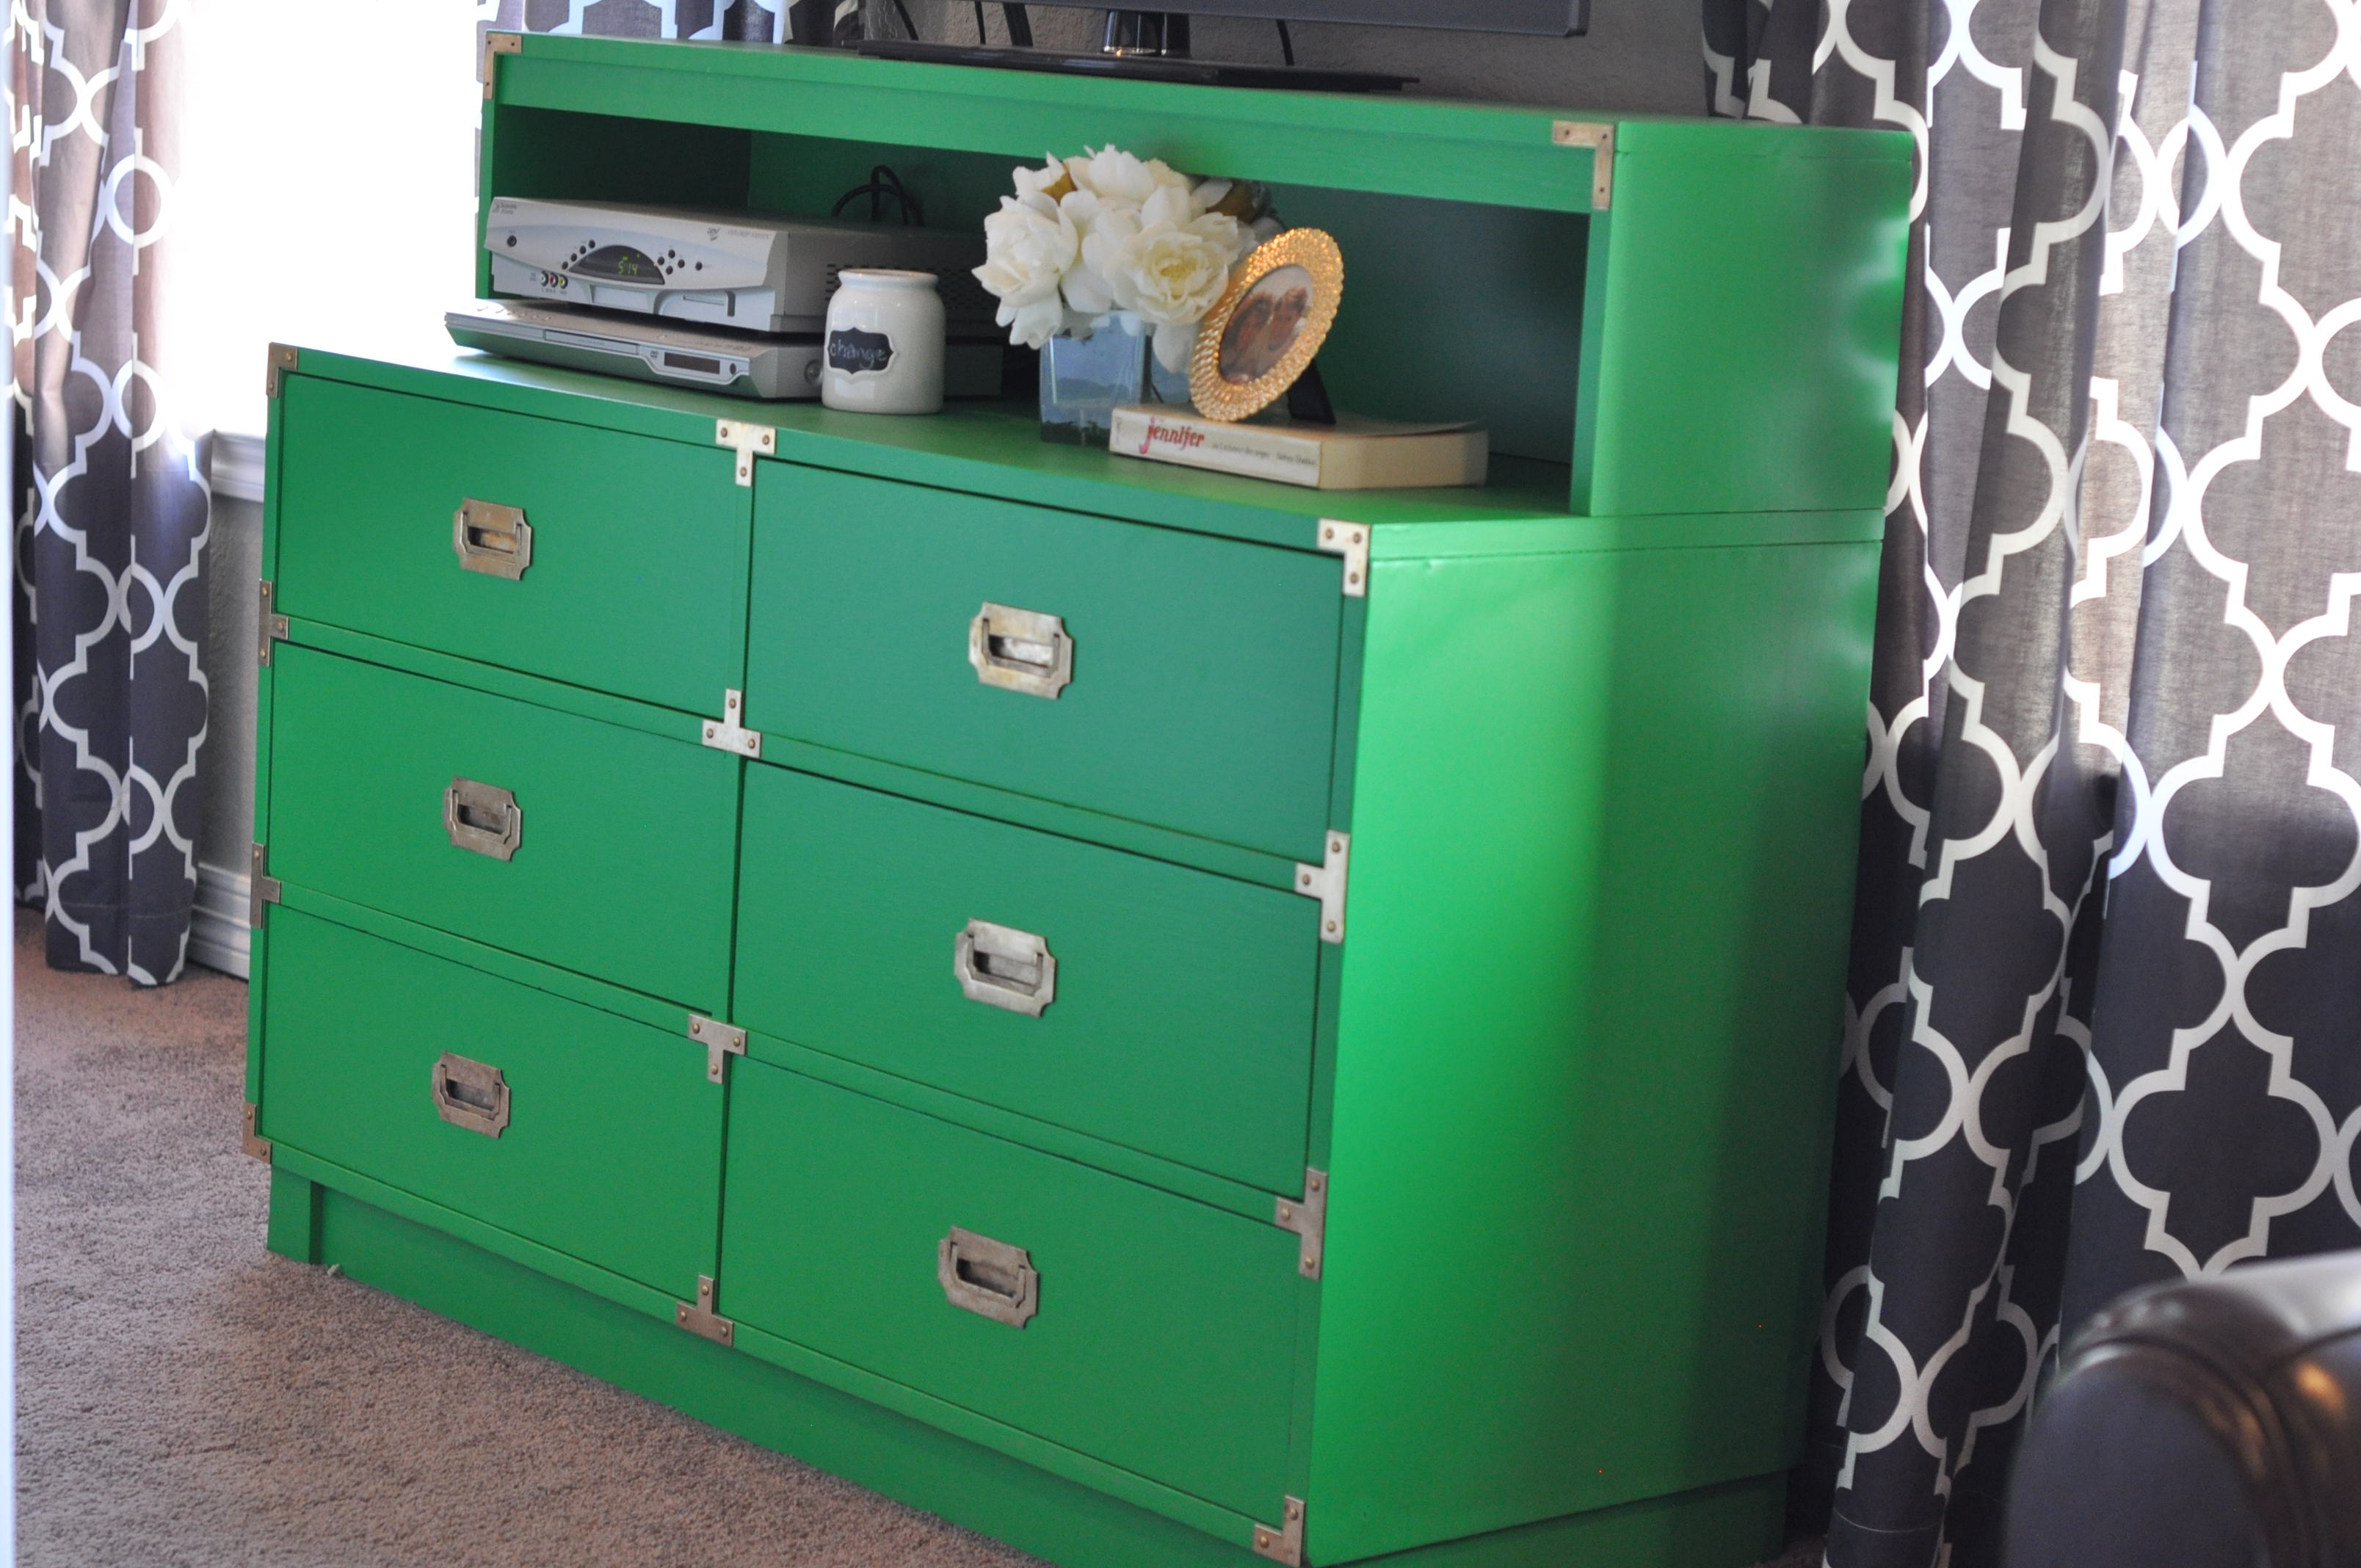
I bought a campaign dresser off of CL that I wanted to use as a TV stand, but it was too short. I searched Ana's plans for "Hutch" and figured out how she builds hutches, and made a simple hutch for the dresser. That's my favorite part about Ana's site...I'm gaining knowledge and experience to be able to build whatever I want!! I used 1 x 10 boards for the body of the hutch, 3/4" plywood for the back, and a 1 x 2 for the trim.
Estimated Cost
$20
Estimated Time Investment
An Hour or Two (0-2 Hours)
Finish Used
1 coat primer and then Sherwin Williams Duration latex in "Envy"
Recommended Skill Level
Beginner
Comments

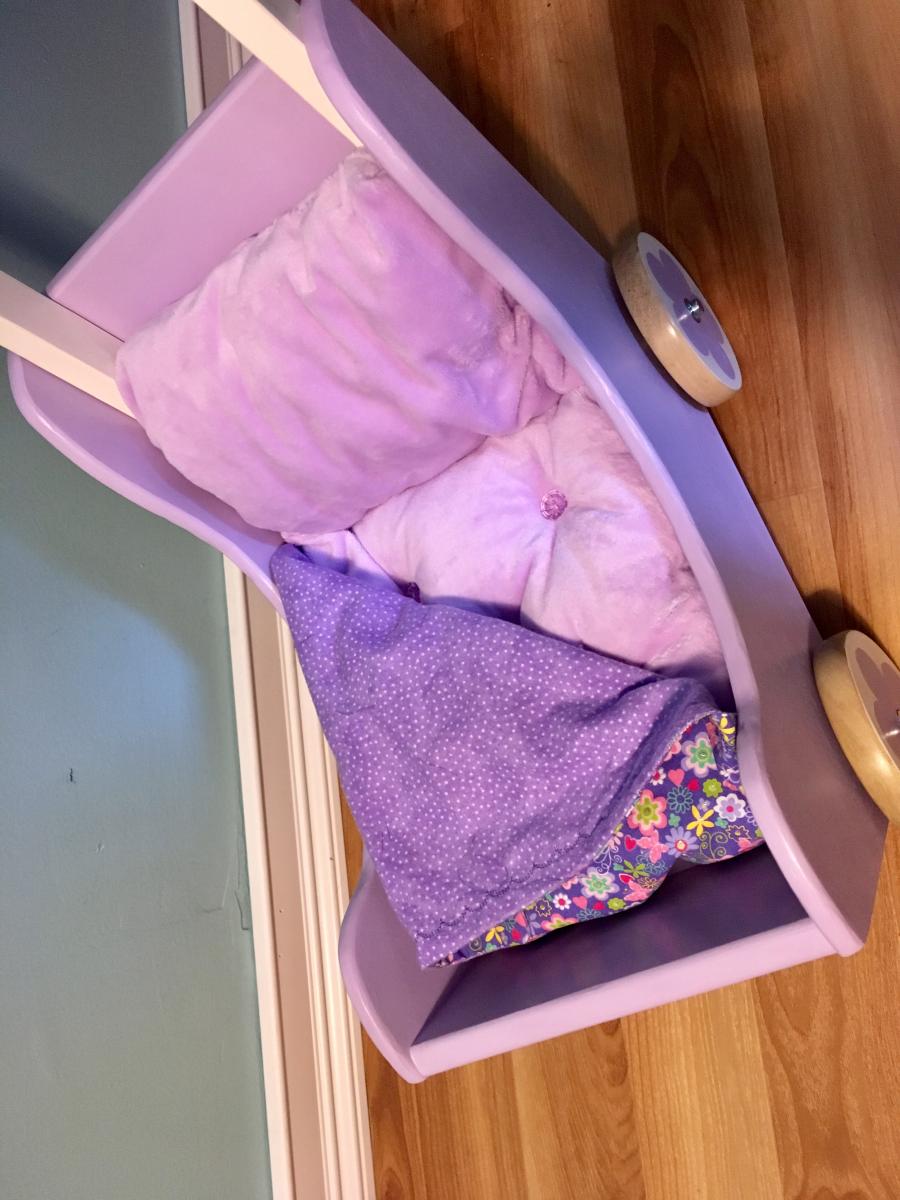
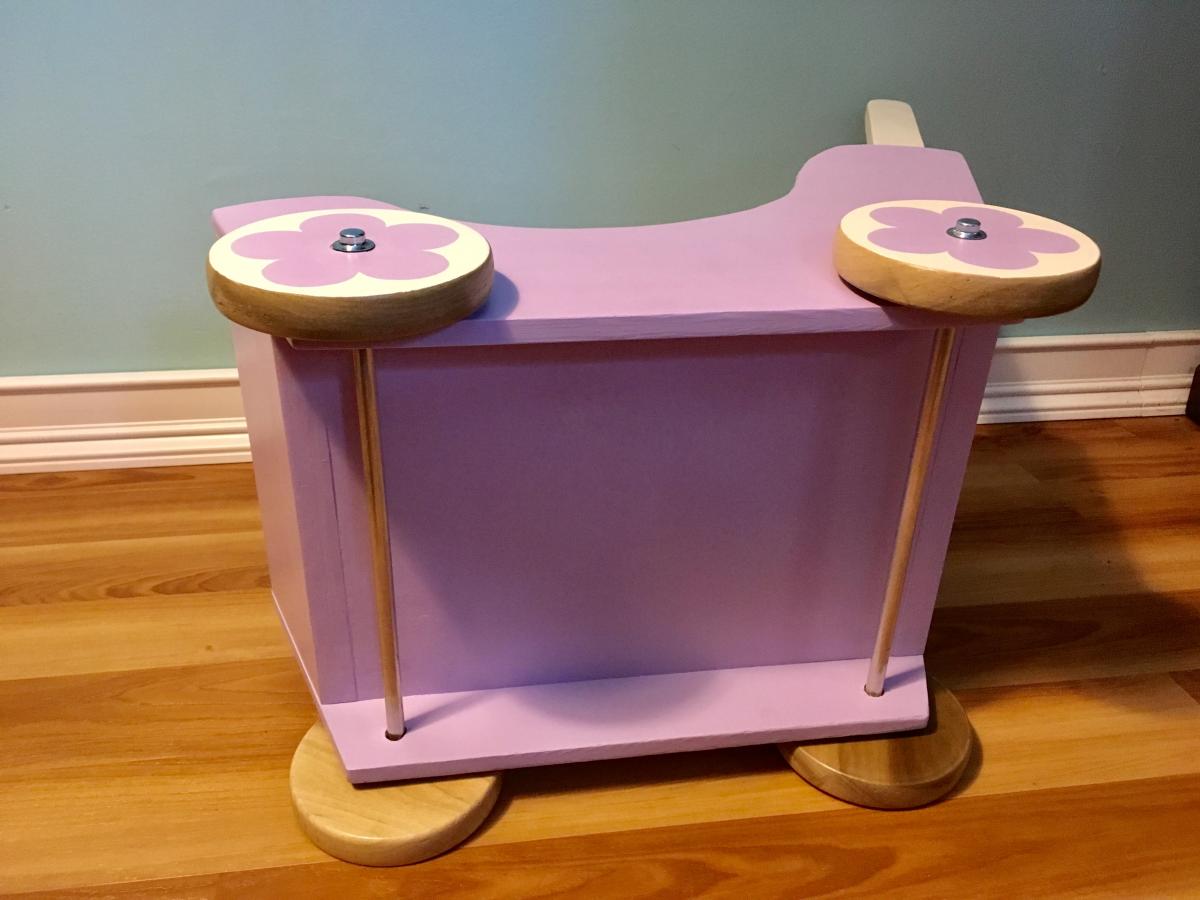
Purple Doll Pram
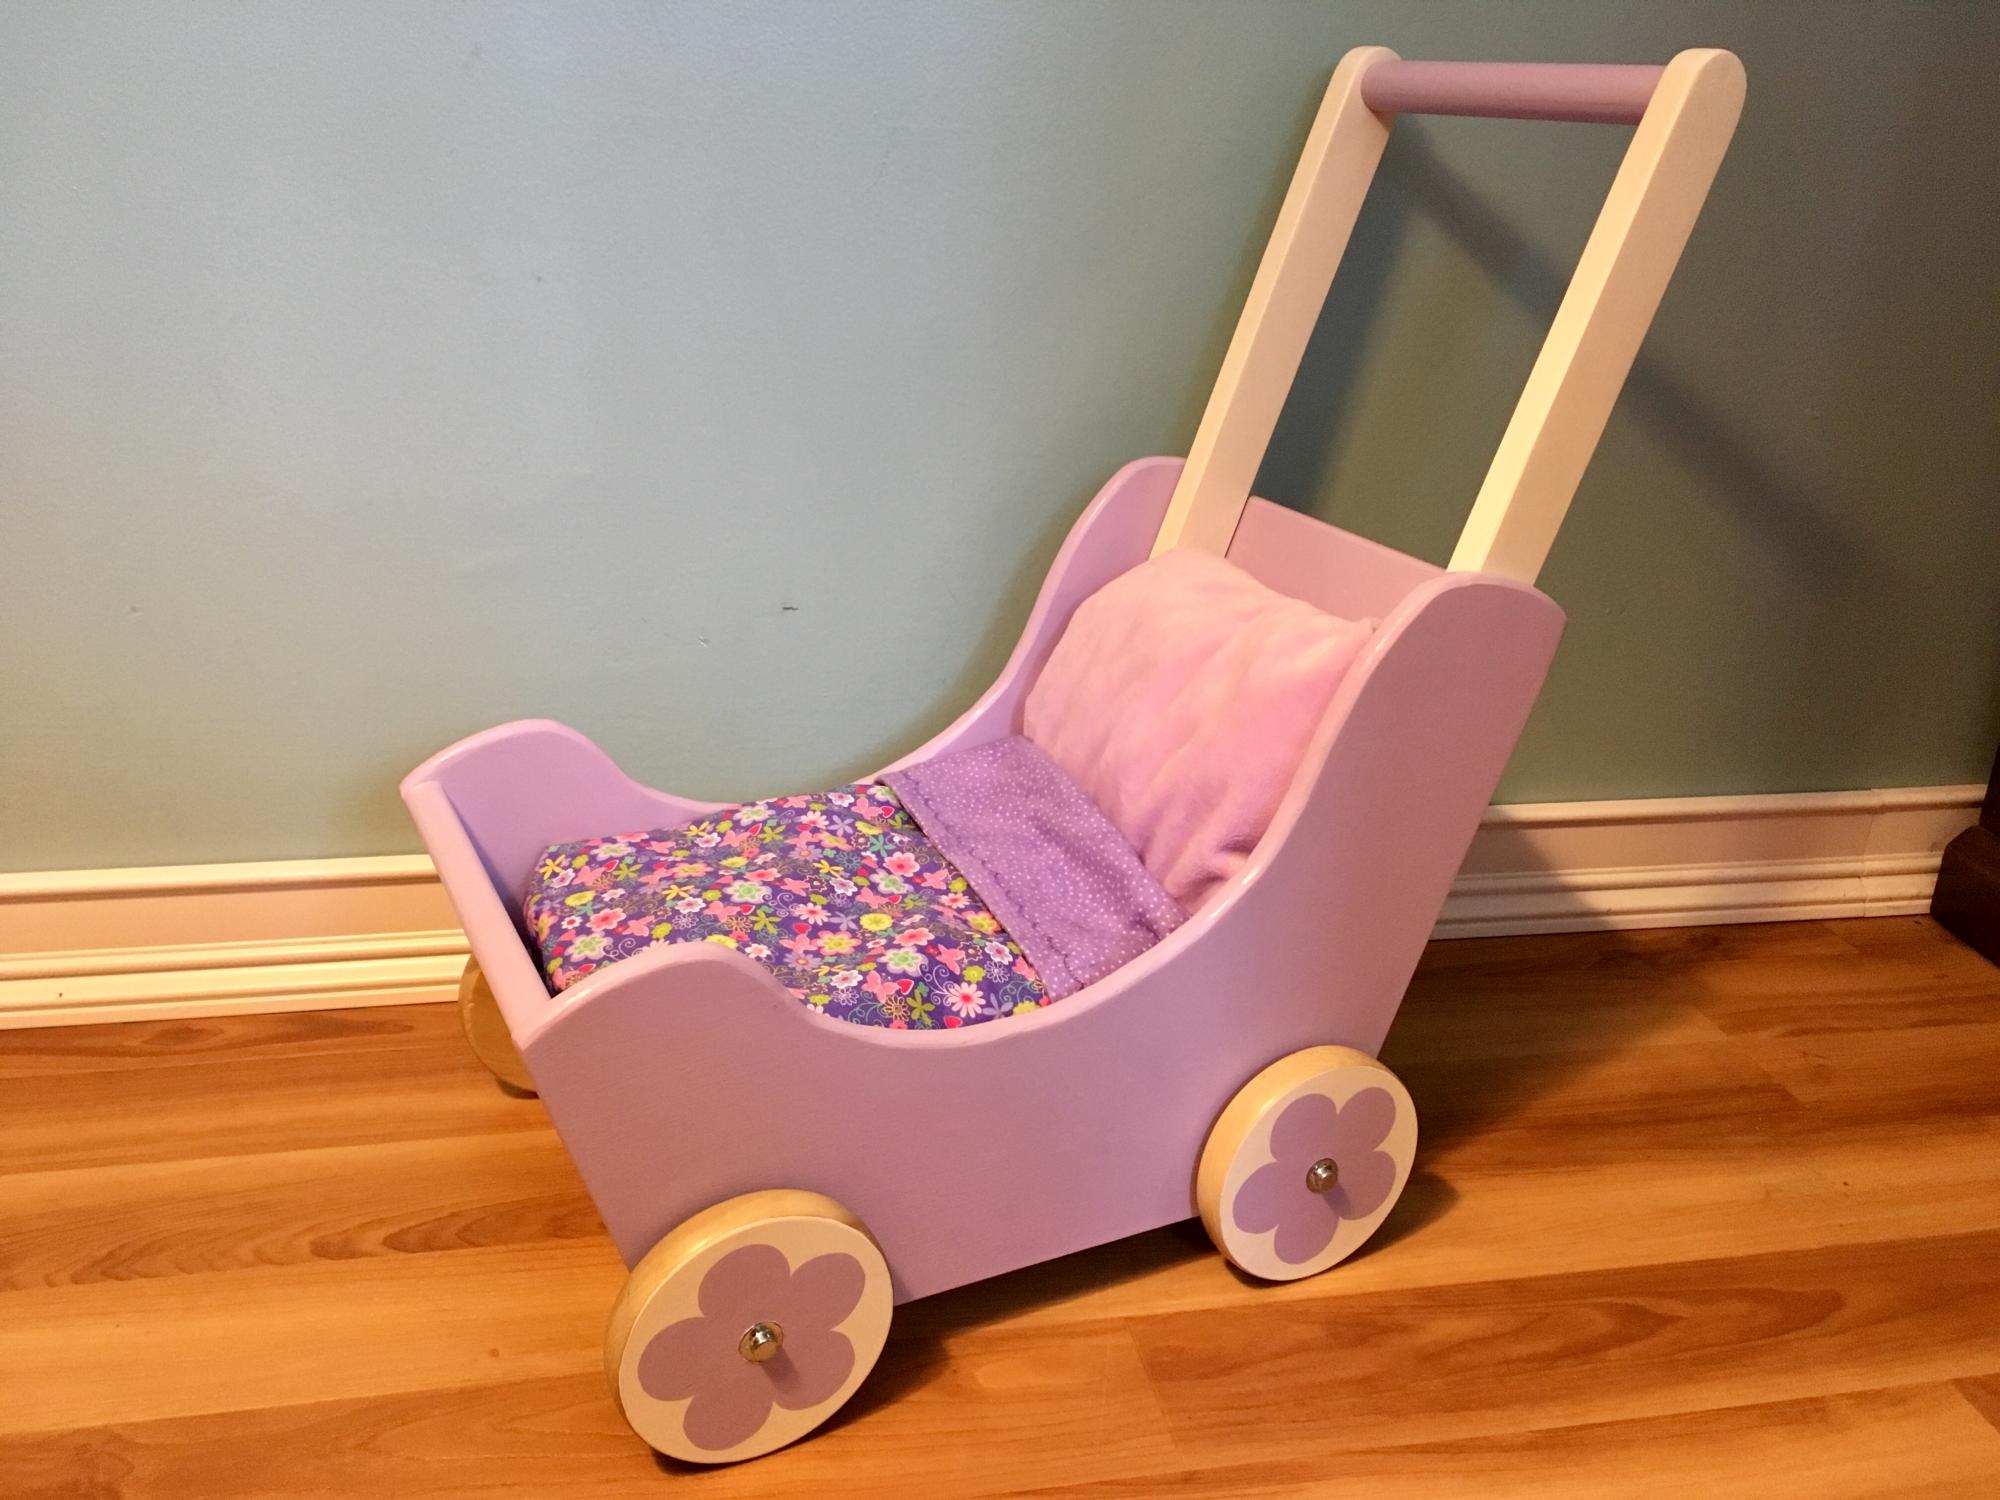
I made this for a friends daughter. I attached the wheels with 3/8" aluminum rods, washers, and axle caps. It can be tricky to get the rods the exact length you need, but it allows the wheels to roll very well. The wheels were cut with a 5" hole saw and then sanded smooth. For sanding, I attached each wheel to my drill and spun them over sand paper. This allowed the wheels to maintain their circular shape.
Built from Plan(s)
Estimated Time Investment
Weekend Project (10-20 Hours)
Finish Used
Behr Ultra grape hyacinth, ceylon cream, and a varathane water based poly for the wheels
Recommended Skill Level
Intermediate
Arbor Press Workbench
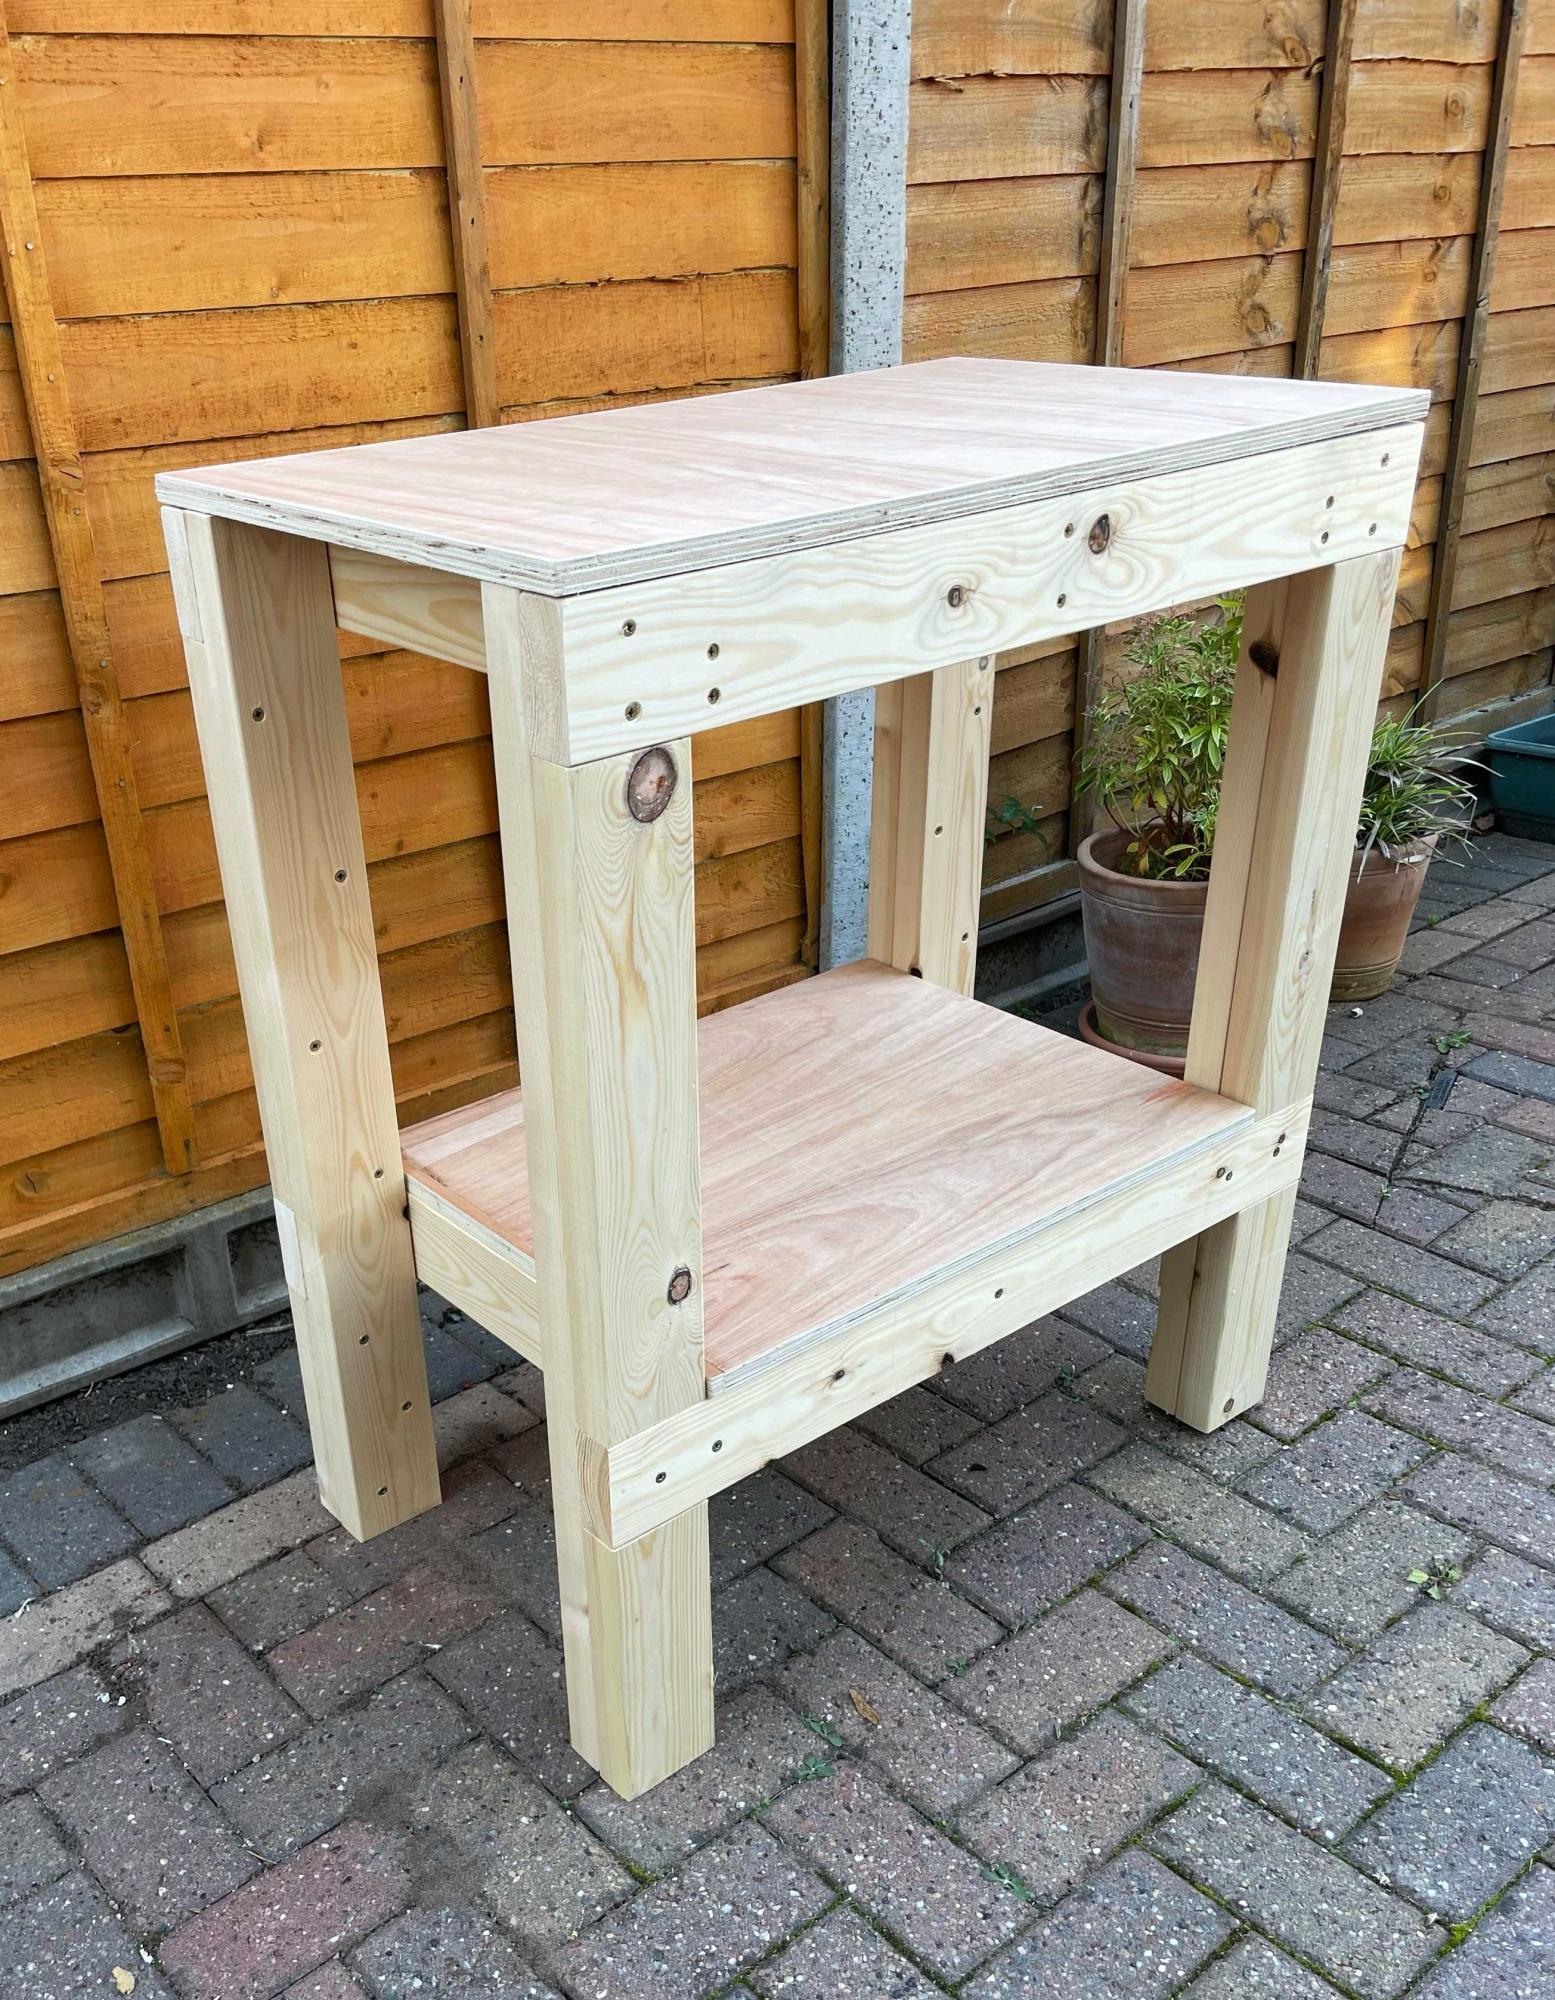
Needed a small workbench to fit in a tight space, but still wanted something sturdy as it supports a 1-ton arbor press. Your plans were so helpful!
Built from Plan(s)
Comments
Fri, 09/08/2023 - 09:39
Sturdy Workbench!
Thank you for sharing your project, it looks like it will get the job done!
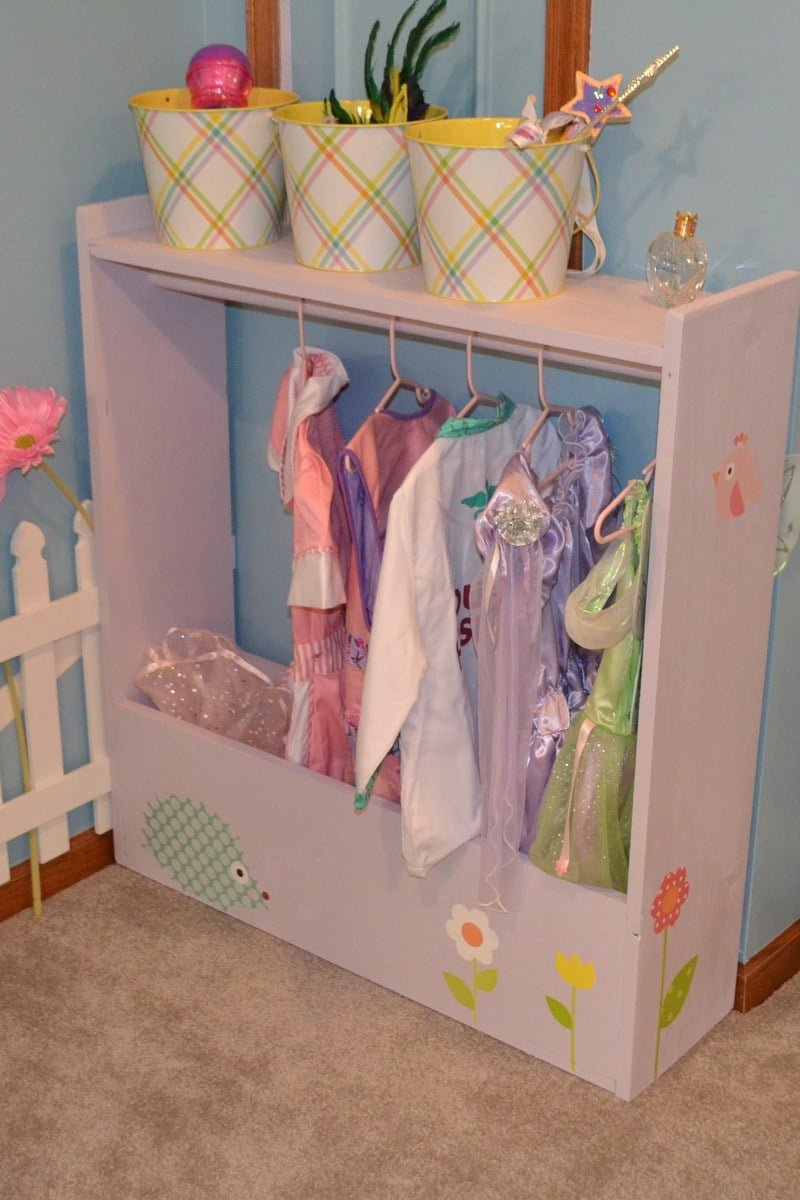
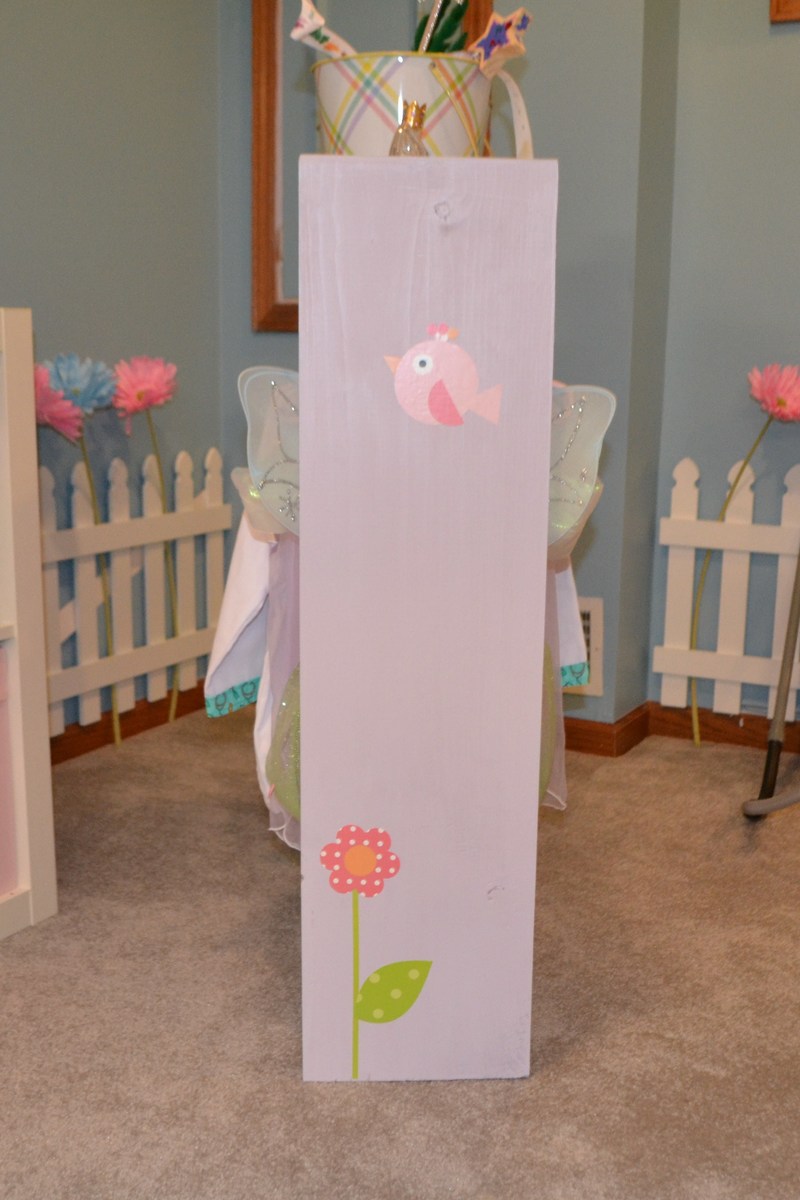
Dress-Up Storage
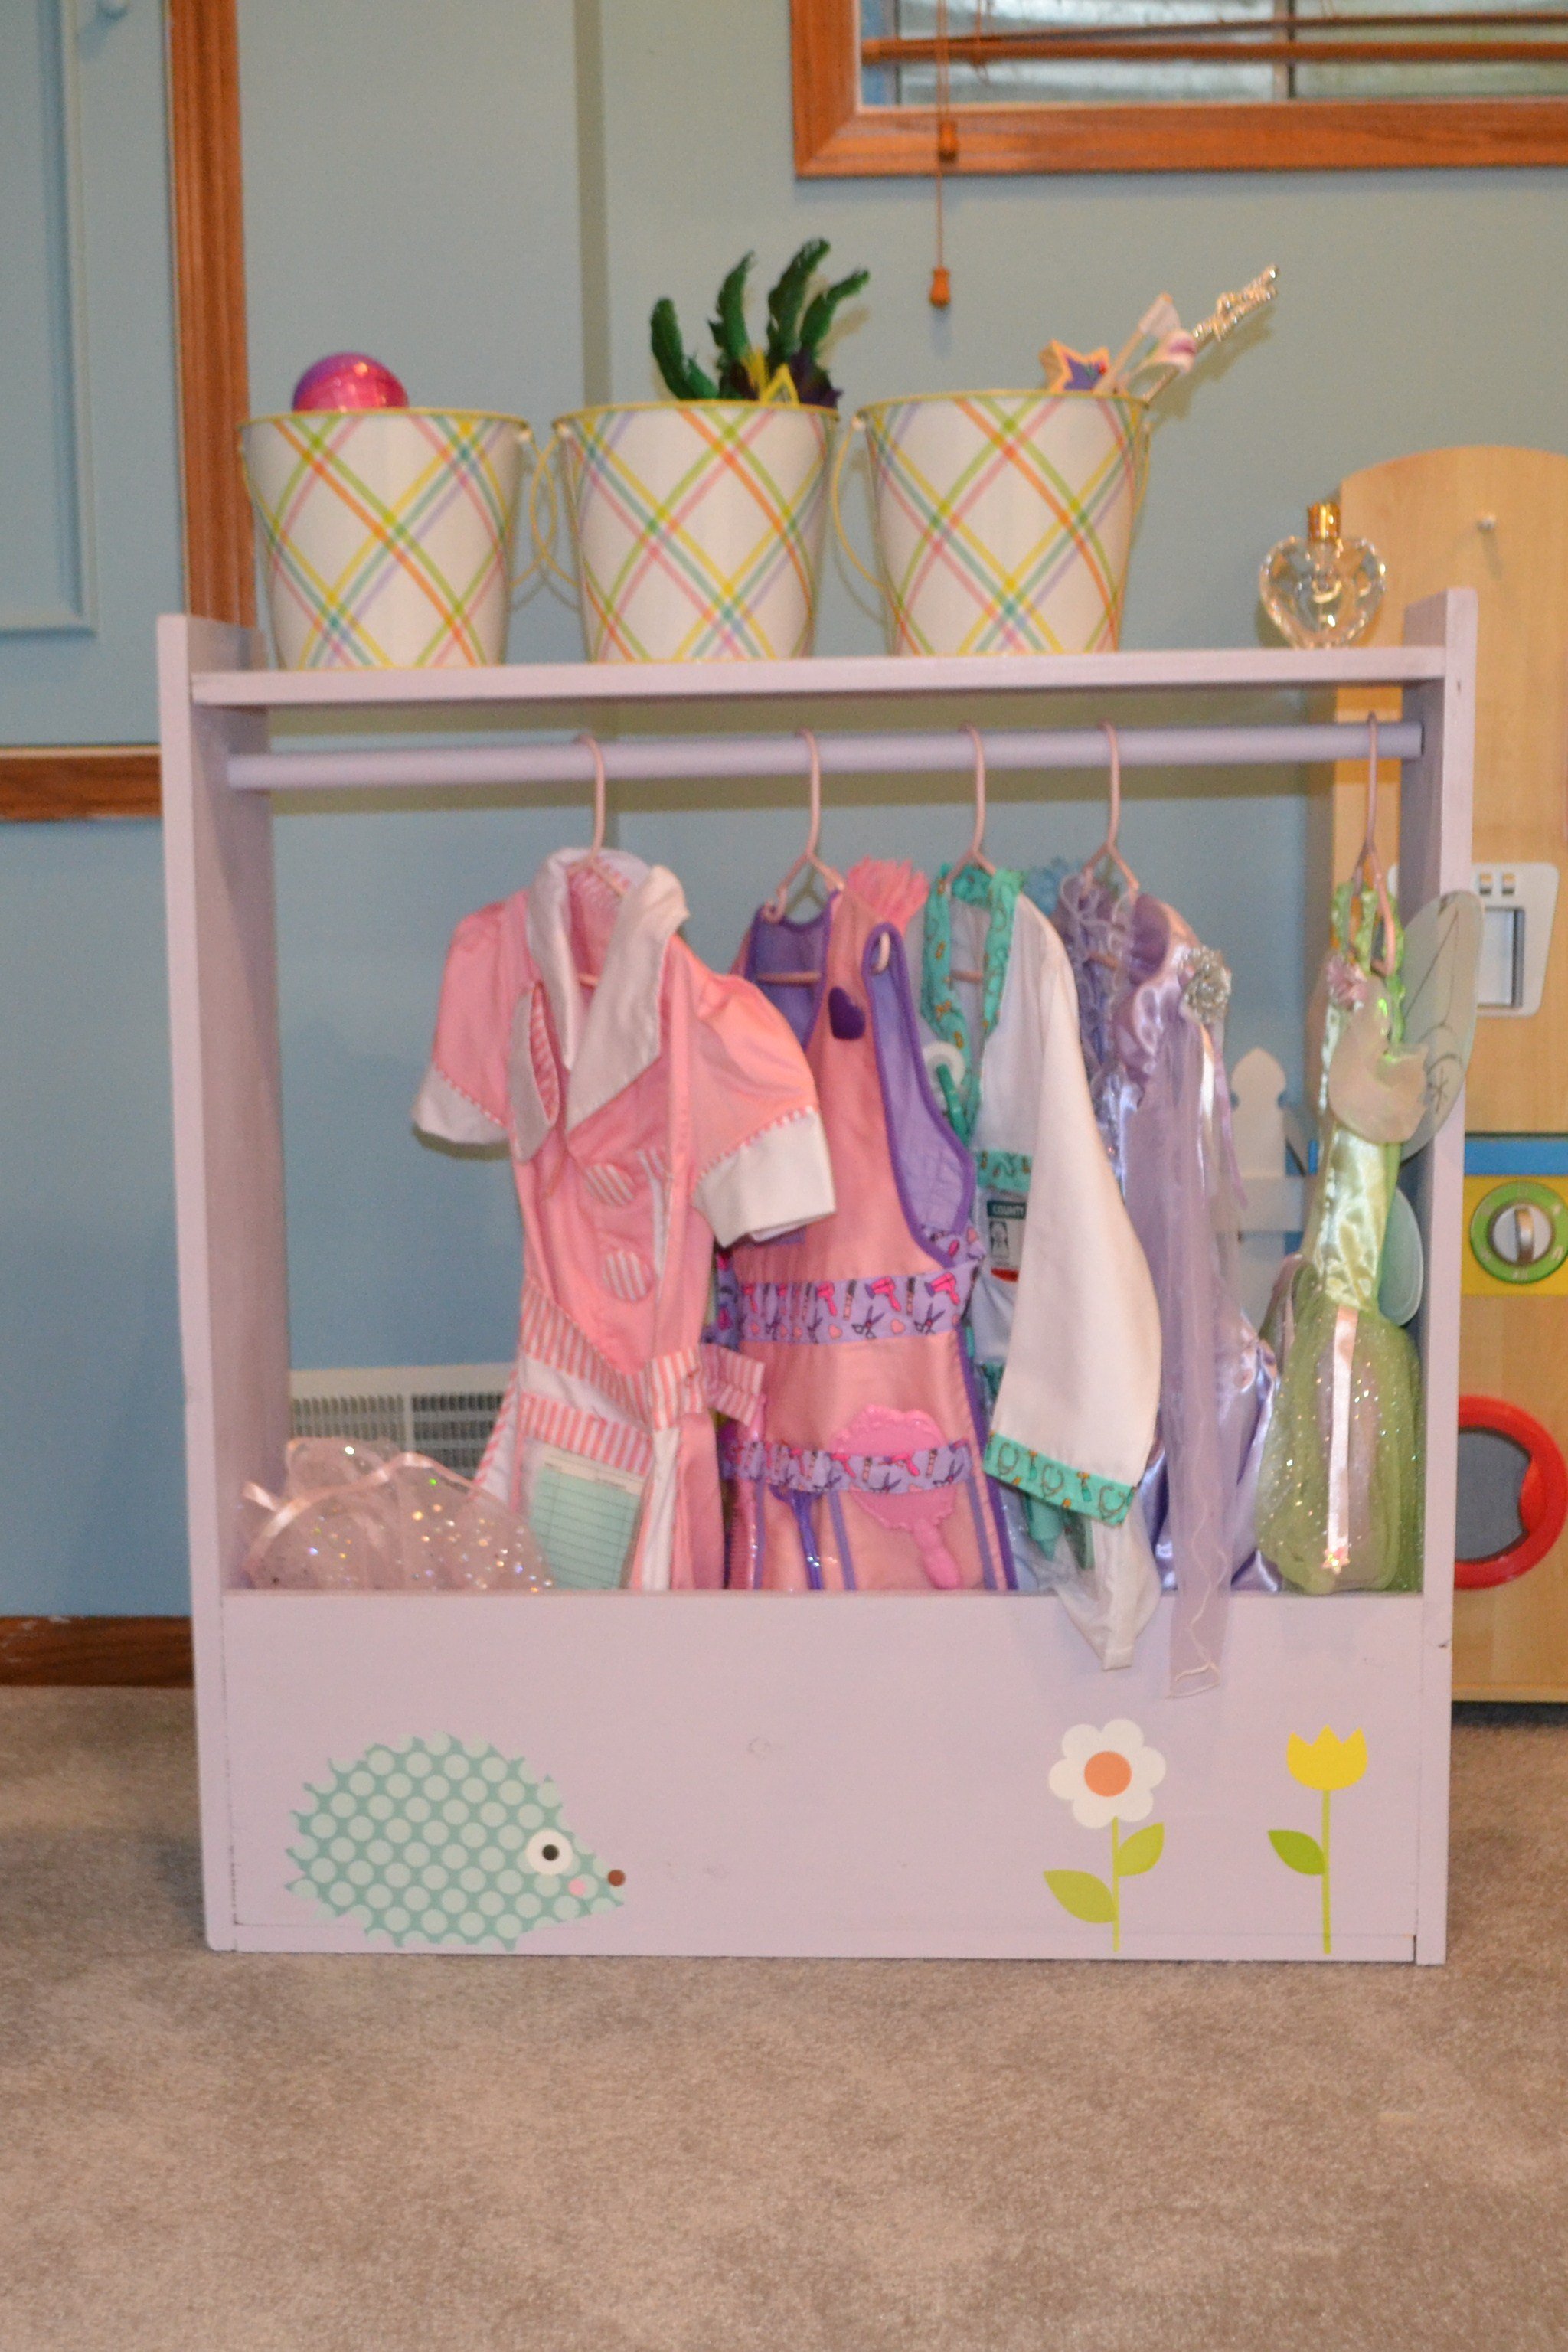
This was my first woodworking project, so I kept it simple. The one modification I made was to square the edges at the top, rather than rounding them out, as I just prefer clean lines. I used some leftover paint (Behr Foxgloves) and added a few vinyl wall decals that match the decal on the main wall of the play area. A few buckets on top store her jewelry and accessories.
I didn't add casters because we have rather thick carpet in the basement, but won't rule it out for the future.
Estimated Cost
$30
Estimated Time Investment
An Hour or Two (0-2 Hours)
Finish Used
Paint (Behr Foxgloves)
Recommended Skill Level
Beginner
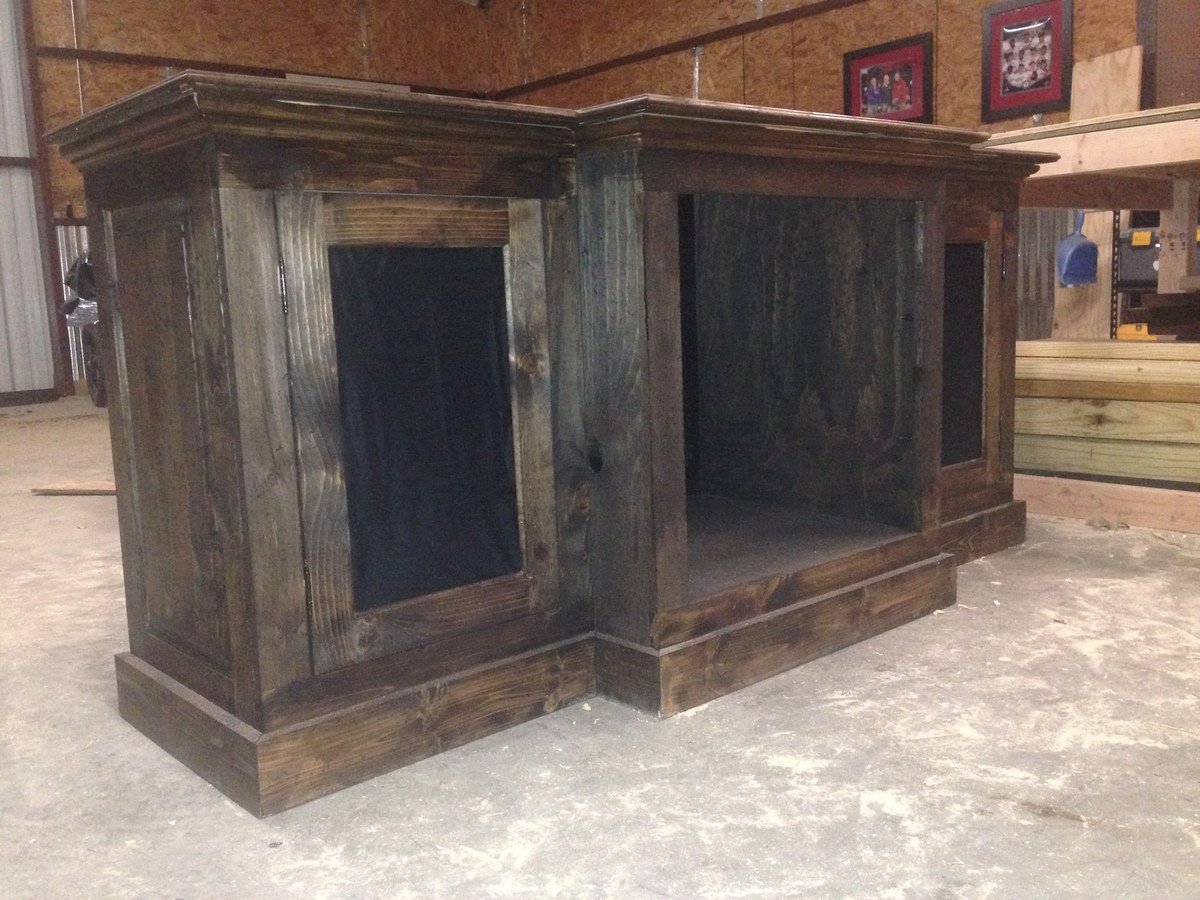
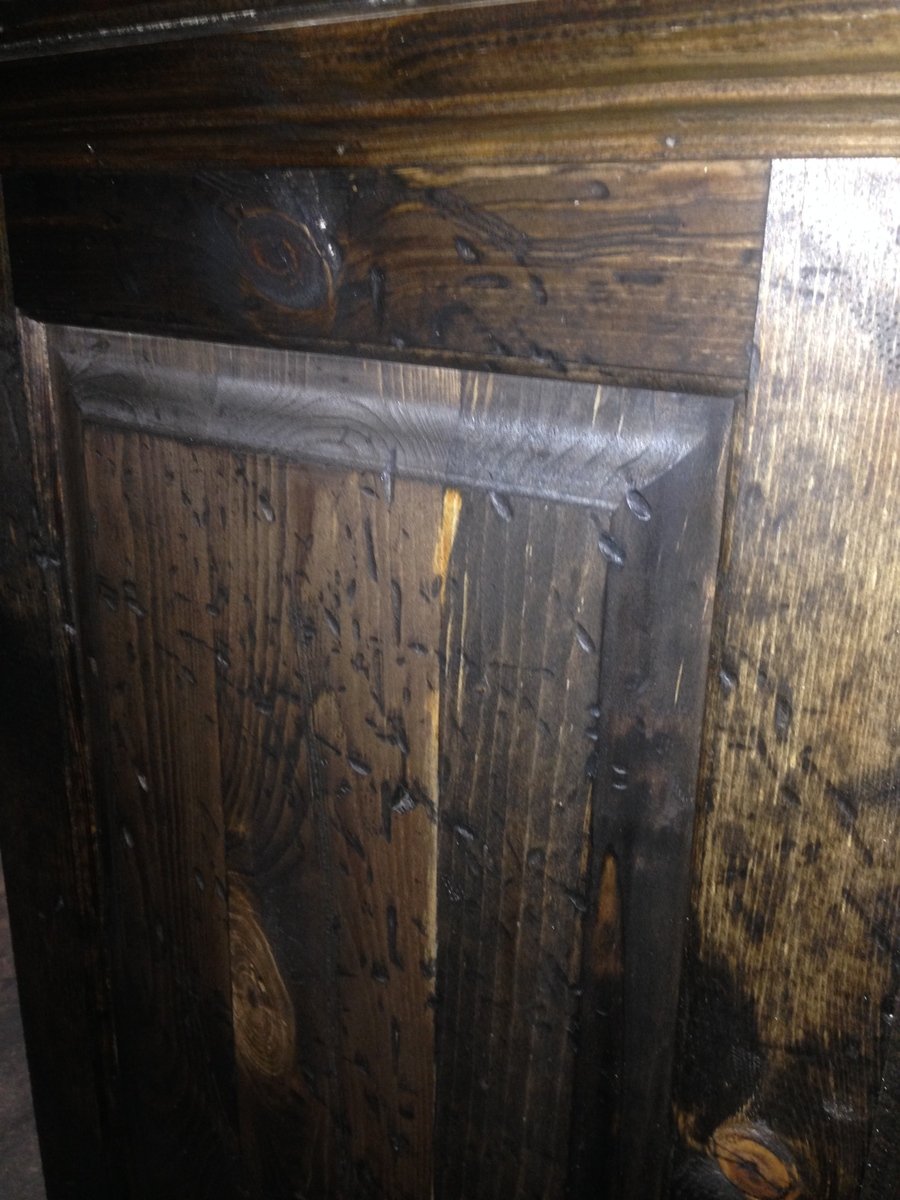
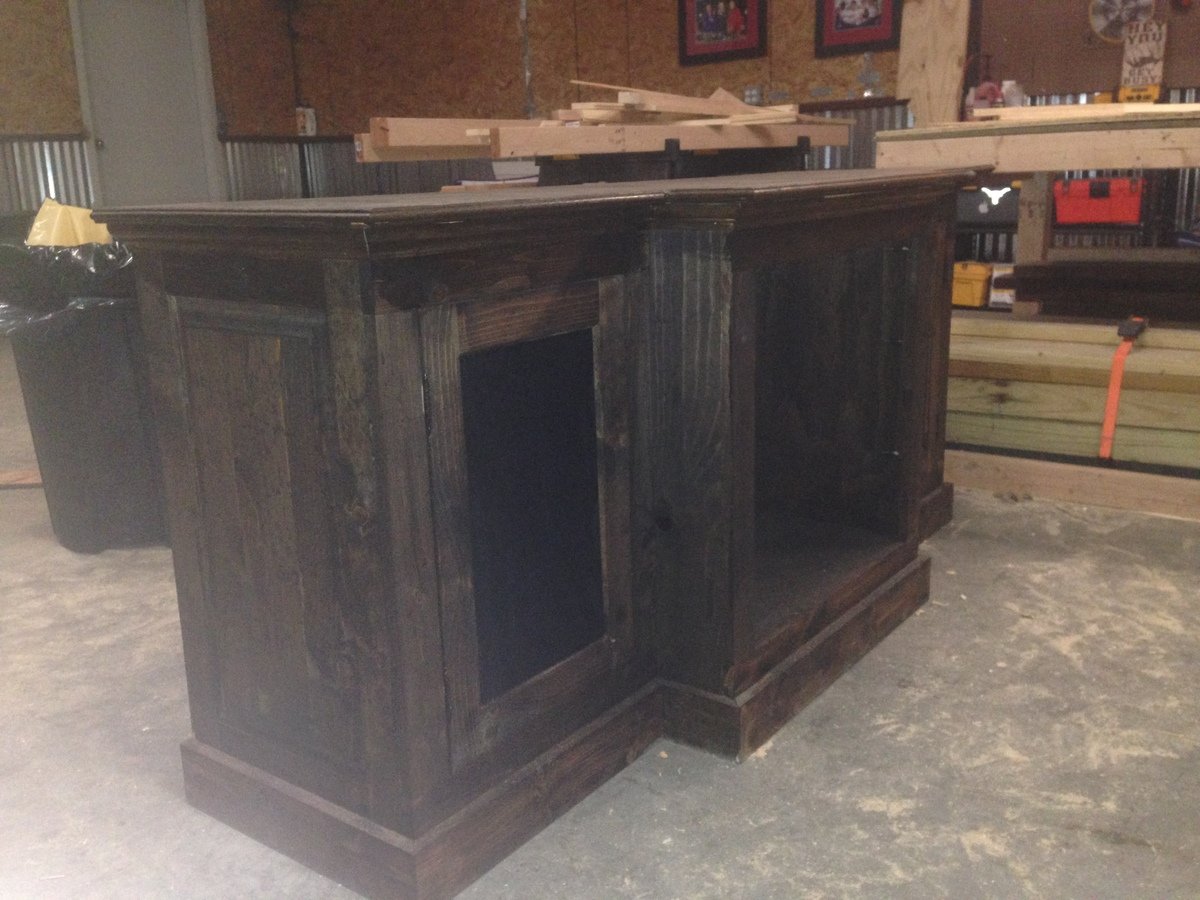
Restoration Hardware Inspired Media Console
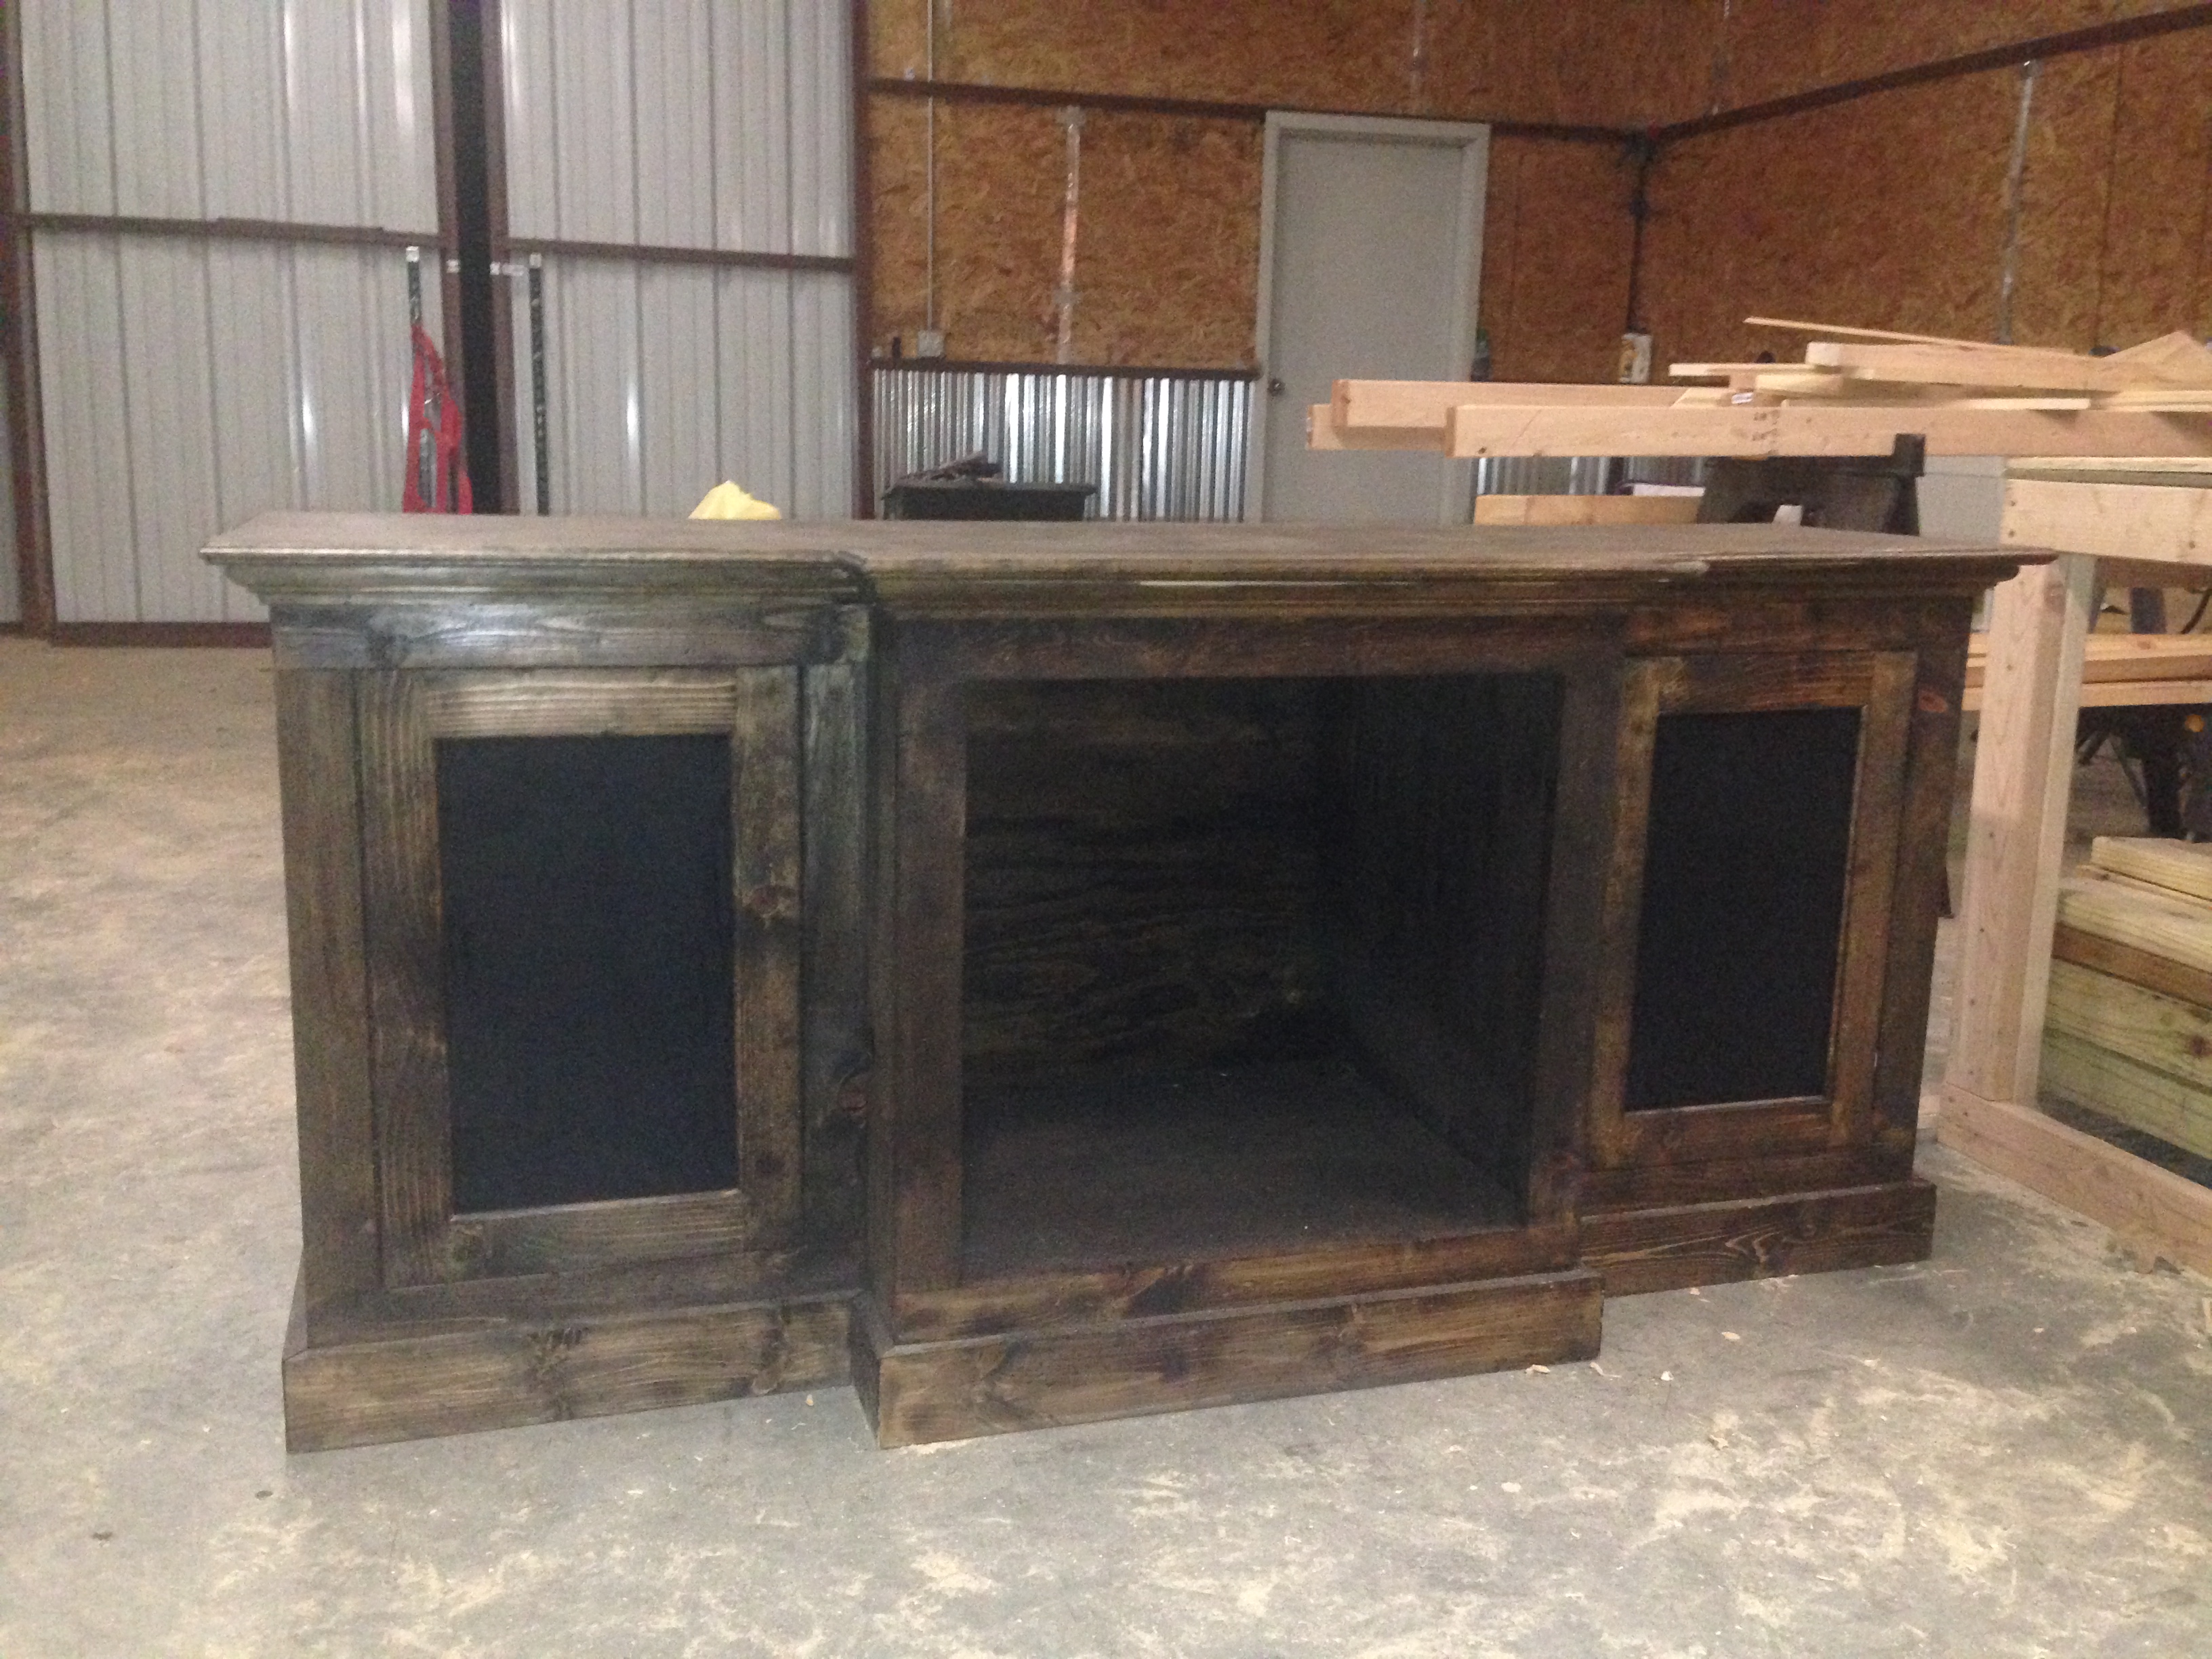
We got some new furniture and realized that the TV stand we currently have just wasn't going to work. We found a media console at Restoration Hardware that we really liked (http://www.restorationhardware.com/catalog/product/product.jsp?productI…). Well, we liked everything but the $1,300 price tag. With a couple sheets of 3/4 plywood, some 1x3's, 1x4's and 1x6's we built this for a fraction of the price. We even modified it so the two side doors have speaker mesh instead of solid panels so we can enjoy the sound without the eyesore of the speakers.
The stain is still drying so I don't have a final installed photo.
Estimated Time Investment
Weekend Project (10-20 Hours)
Finish Used
Once built, I beat it with chains, burned it with a torch and put one coat of MinWax Dark Walnut.
Recommended Skill Level
Intermediate
Comments
Fri, 09/05/2014 - 11:23
Love this Media Console
I was curious if you had any kind of plans for this peice or if you could at least tell me what sizes of wood you used. I am very interested in building this!
Thnak you,
Meghan
Wed, 02/11/2015 - 10:25
media console
I would also love plans if you are willing to share them. Great work!

Sat, 03/14/2015 - 08:18
Hi Daniel! Awesome job!
I am trying to build a similar style cabinet with the middle part coming out. Could you please let me know, since the middle section of the cabinet comes out, is the bottom and top cut out of one piece of wood? You can email me at [email protected]. Any help would be greatly appreciated. Thanks so much! Erika

Sun, 10/16/2016 - 20:00
Any plans?
Hello! This is a beautiful piece. Would love to see the plans, if they are available. Please let me know! Thank you!
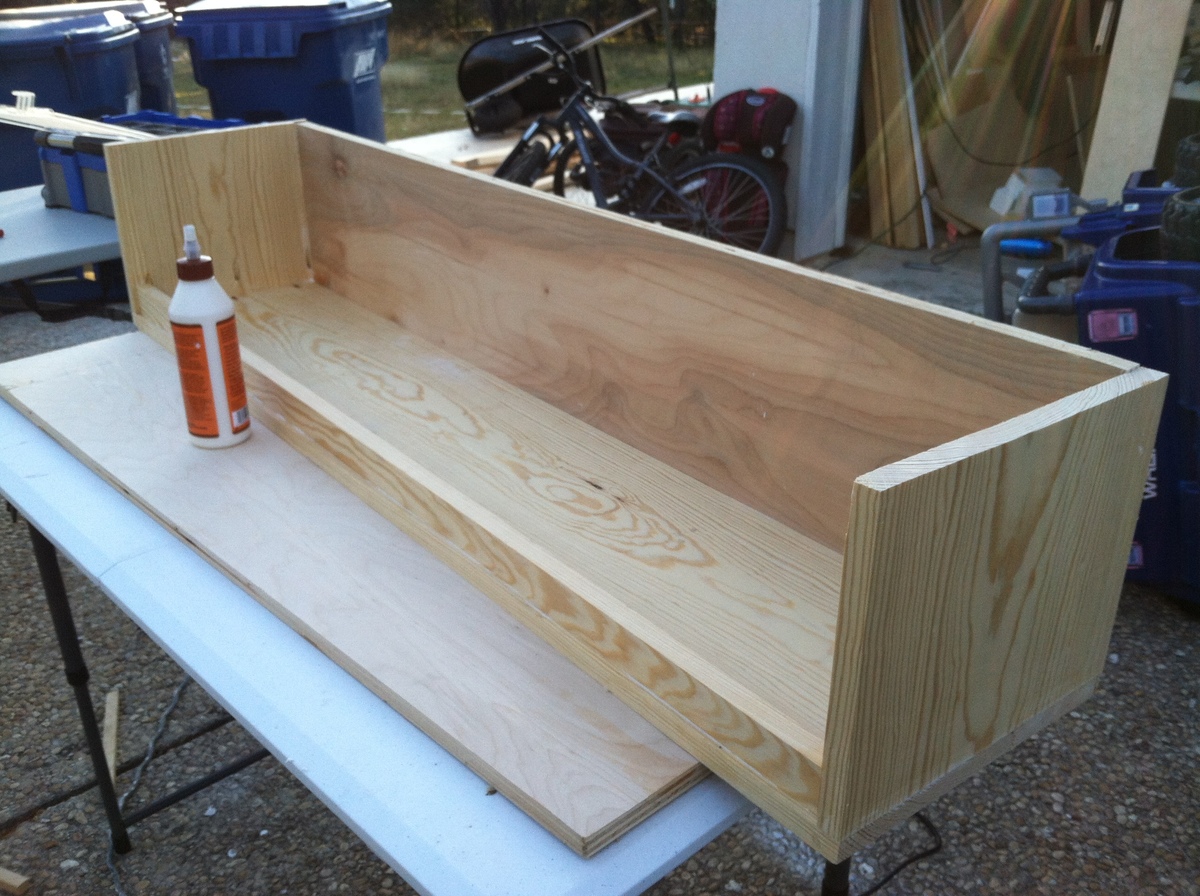
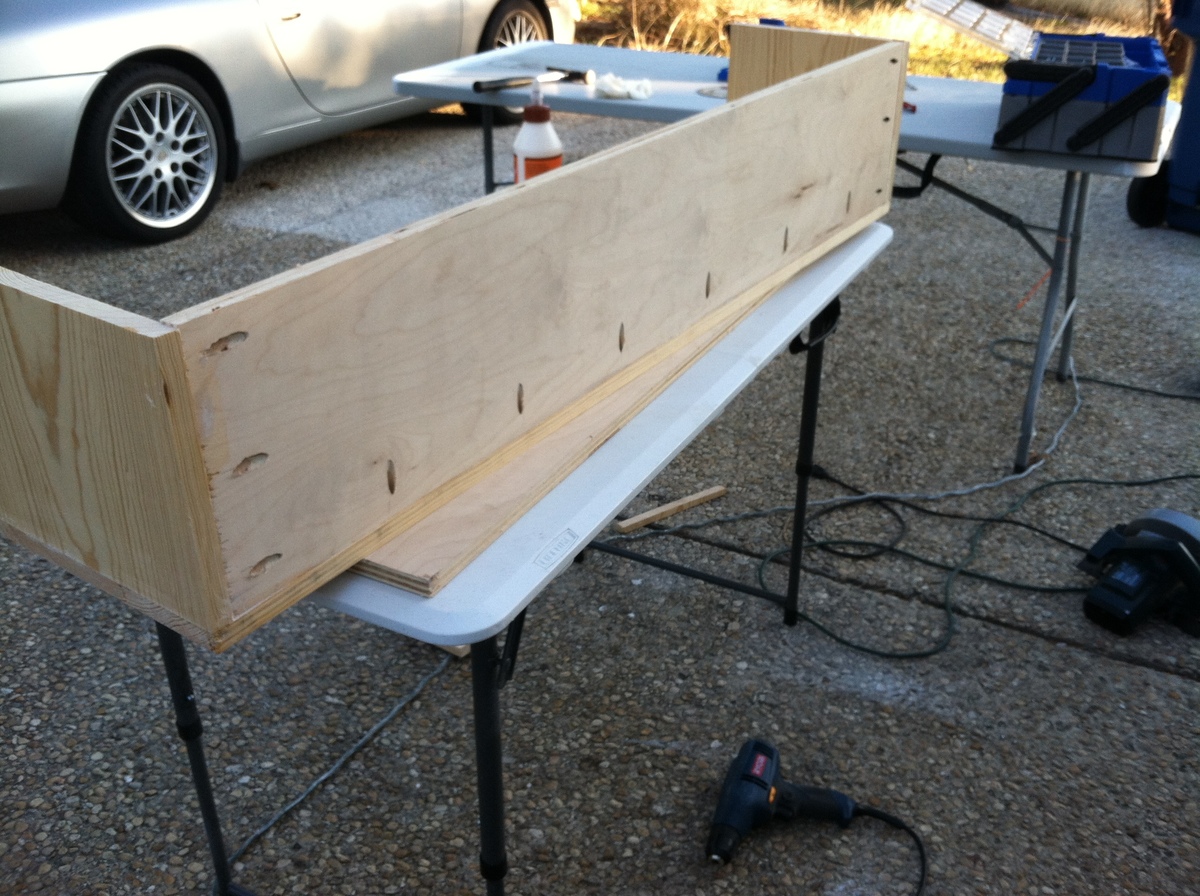
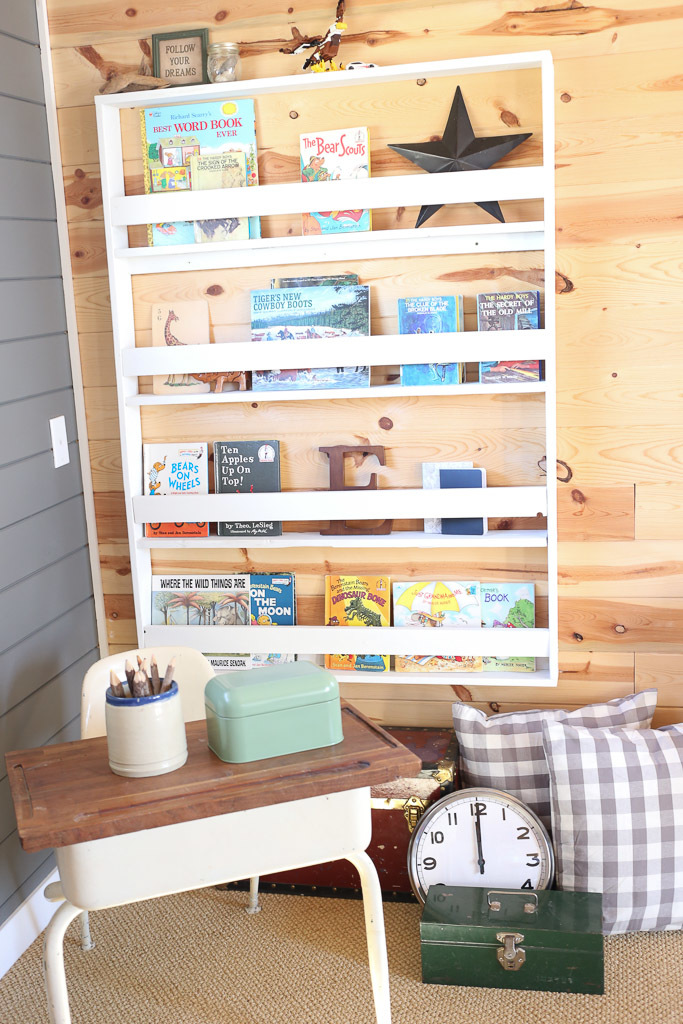
Book Rack
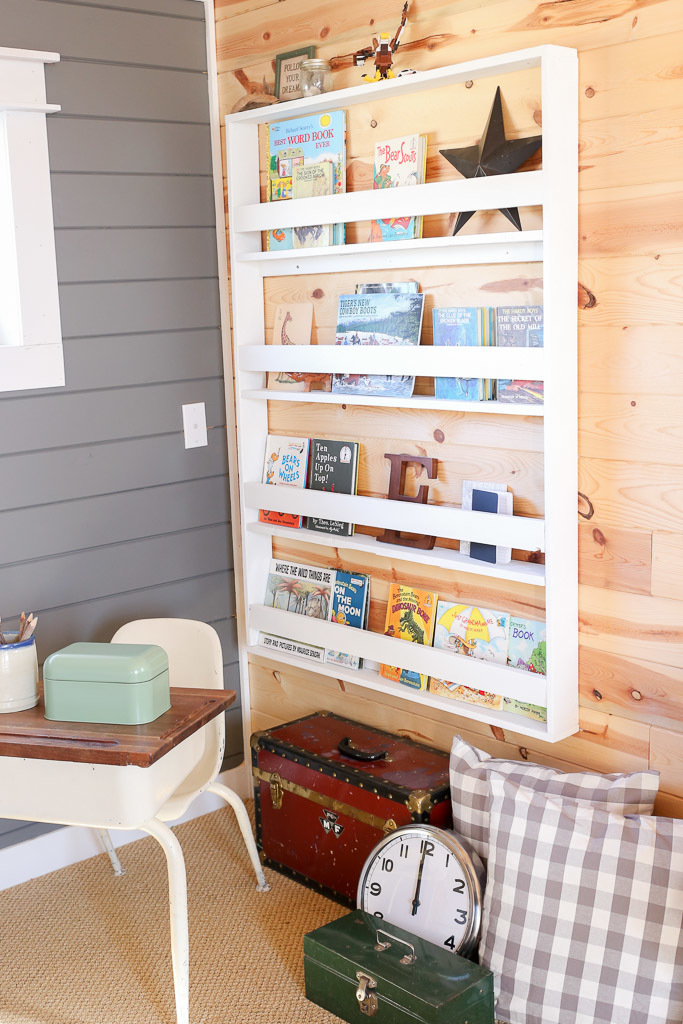
I built this book rack using scrap wood and modified plans from the Full Length Plate Rack. It was a really straightforward build, and functions very well as vertical storage that takes up little space. I predrilled, screwed and glued all of the joints, vs. stapling.
Built from Plan(s)
Estimated Time Investment
Afternoon Project (3-6 Hours)
Finish Used
2 coats of "Simplicity" country chic chalk paint.
Recommended Skill Level
Beginner
Comments

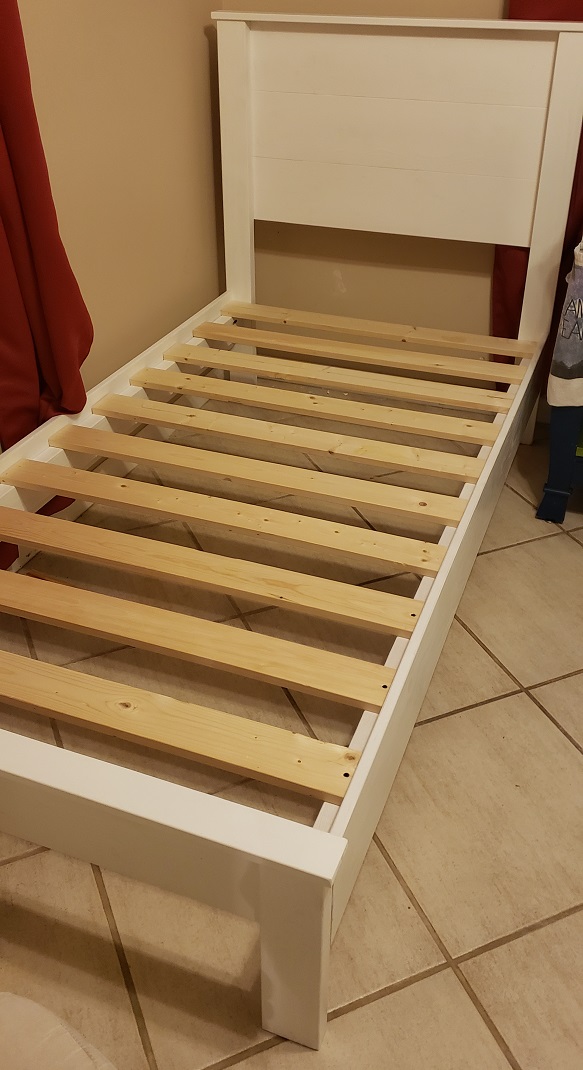
Kids Twin Bed
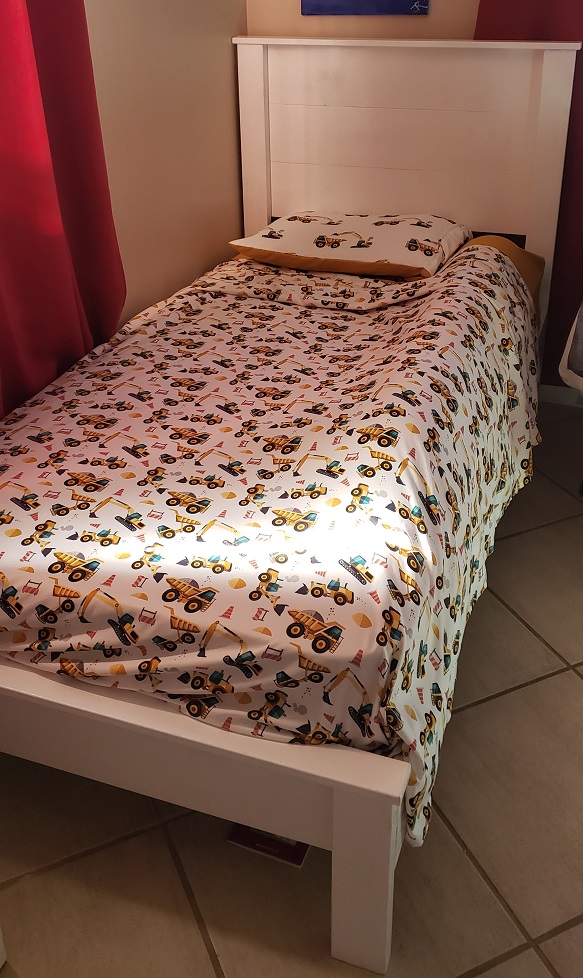
I built this for my second son who was tired of "being in jail", he's almost 3. His older brother is now jealous!
Was a nice easy build - the hardest part was paint spraying for the first time! I would cut the slats pieces about 1/4" smaller to give a bit more wiggle room when lining up the pieces, and make sure to keep the headboard and footboard square when lining up.
The cost was higher for me being in the Bahamas. I used fir for the frame and spruce for the planks, why, I thought it would save some money but didn't really.
I used pocket holes to attach the bed rails to the headboard and footboard.
Built from Plan(s)
Estimated Cost
$250
Estimated Time Investment
Day Project (6-9 Hours)
Finish Used
Wonder-Tones interior primer/paint
Recommended Skill Level
Beginner
Wood Scrap King Bed
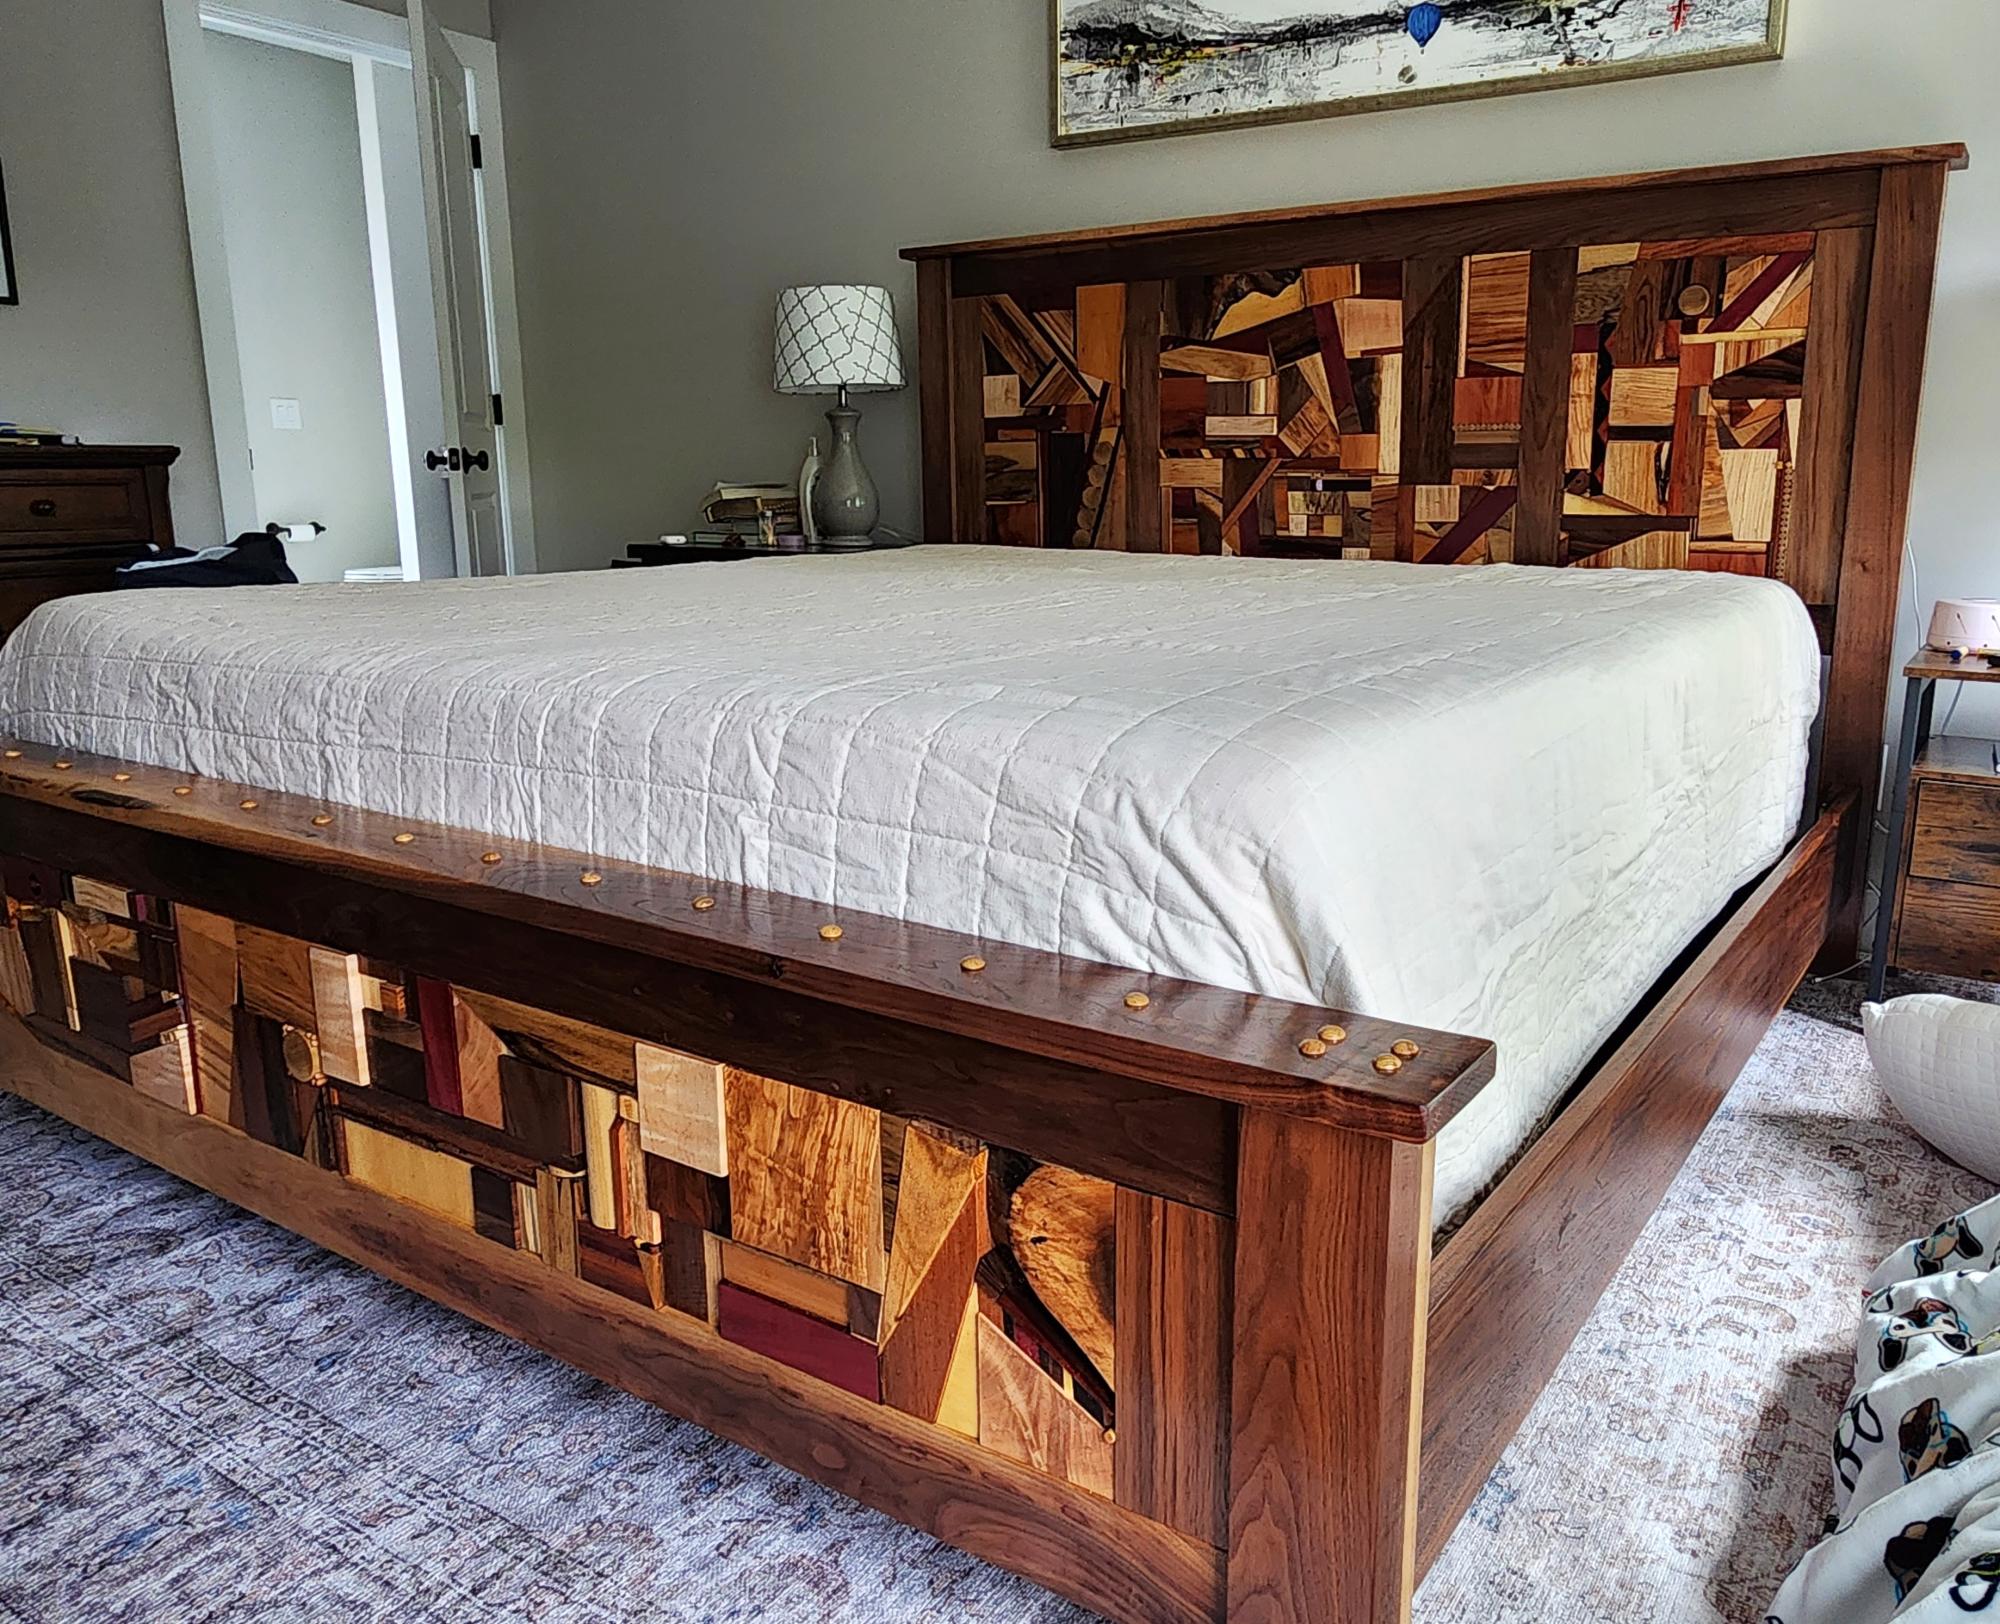
Using Ana's Cassidy bed plans, I made this king sized bed. I substituted scrap pieces for them shims.
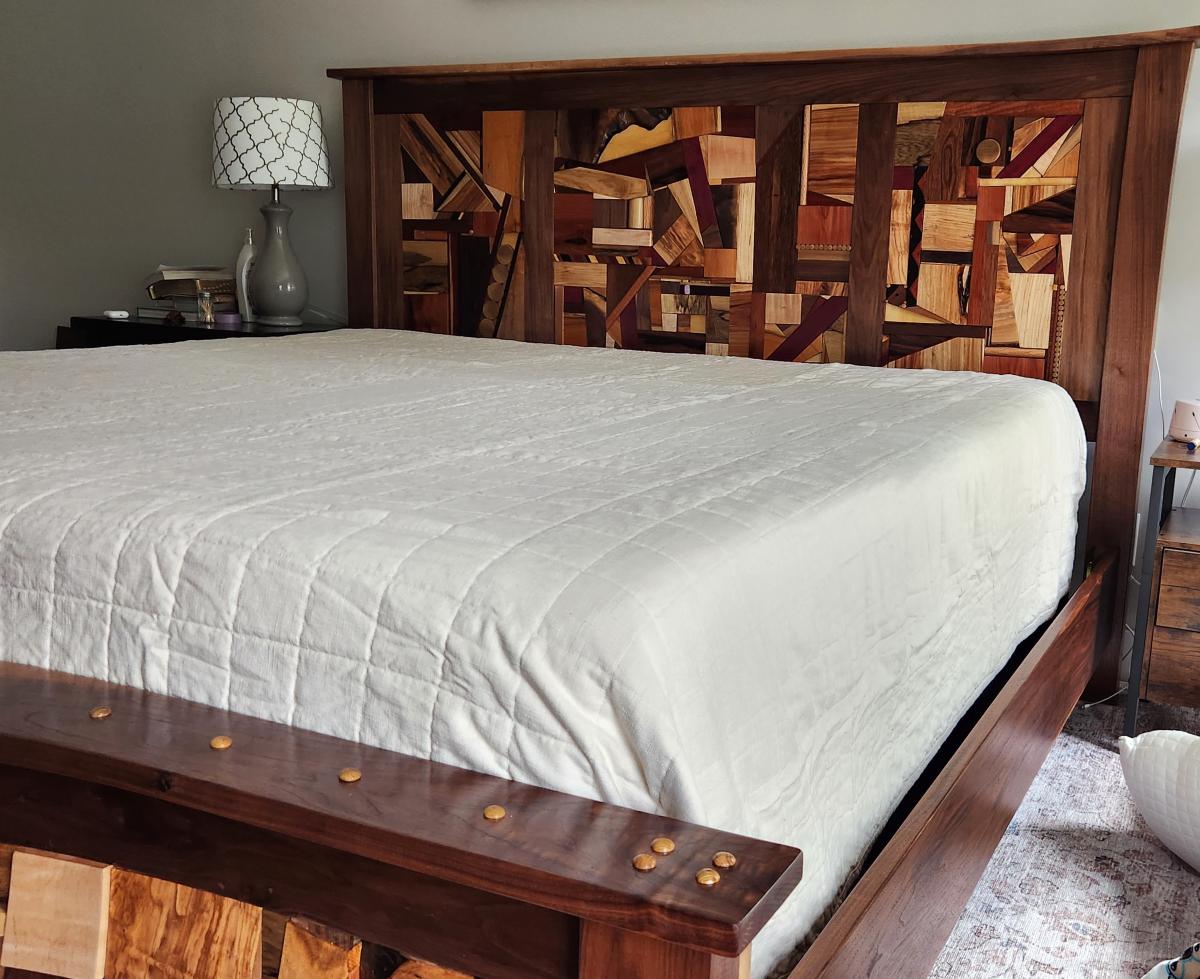
Built from Plan(s)
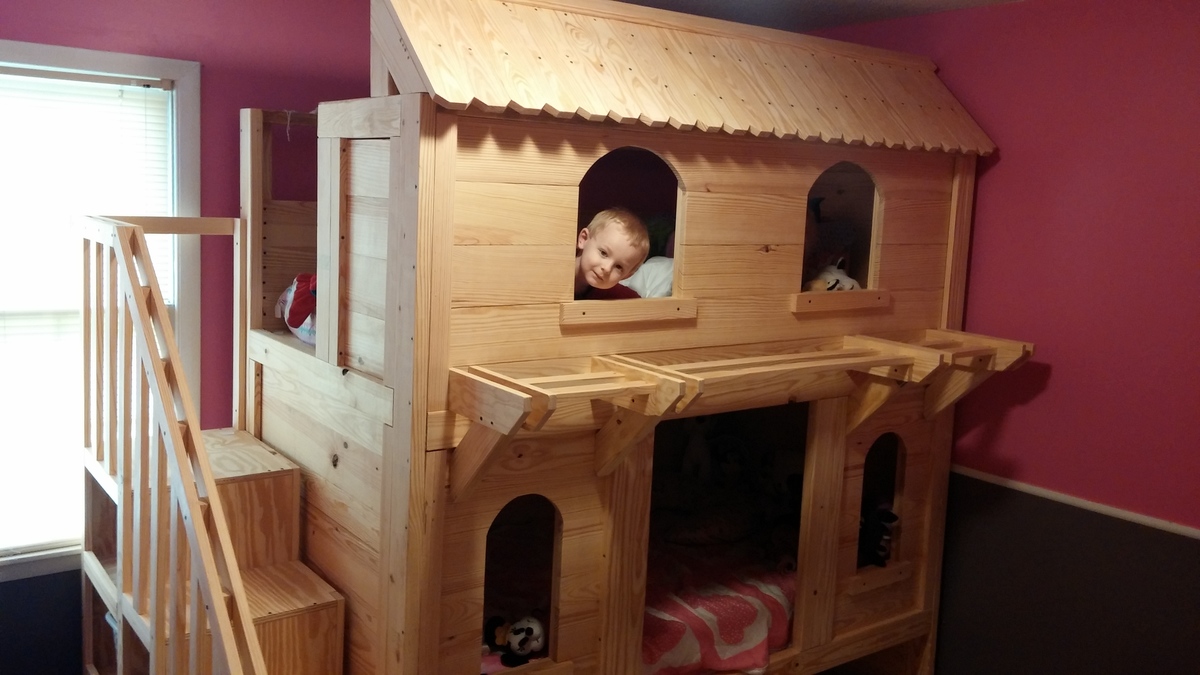
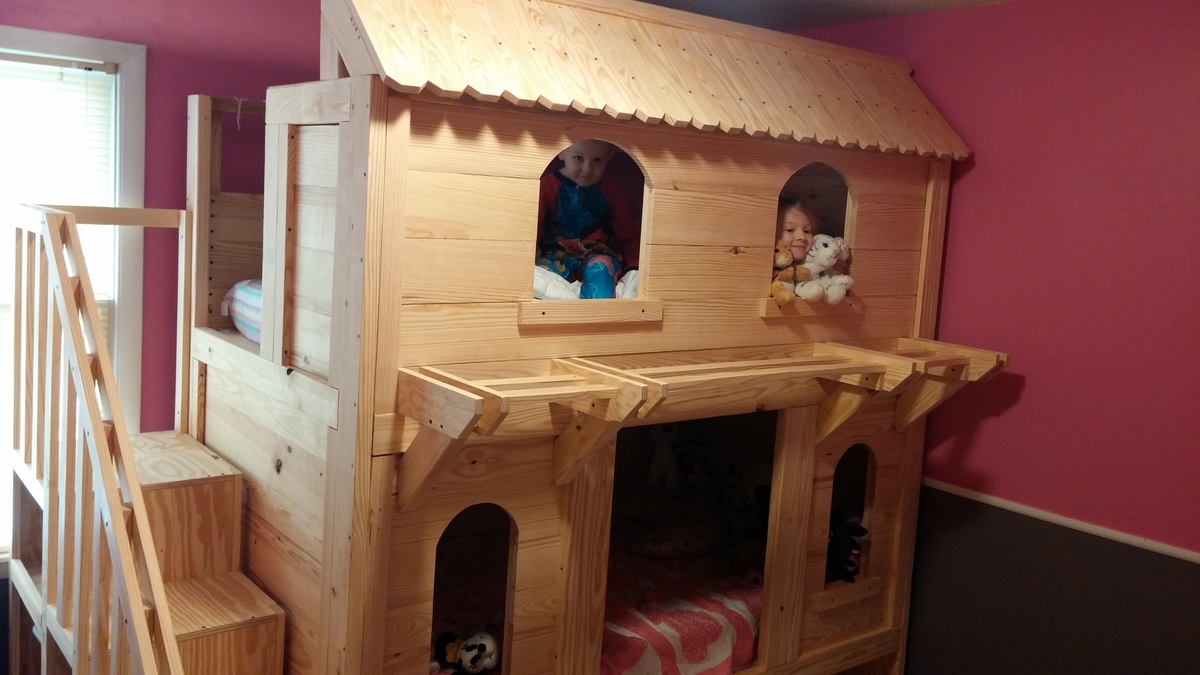
Playhouse
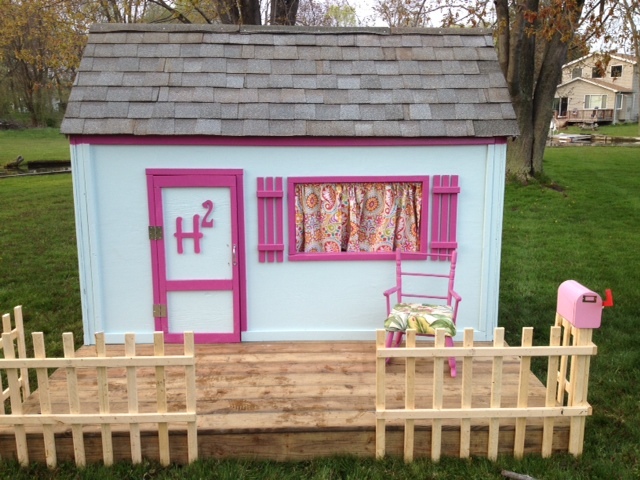
This was our first project and it was pretty simple! We are really happy with the results. We went a little further and lined the inside ceiling and used outdoor carpet inside as well. We saved money by using reminant wood for the deck and some old shingles that had been lying around. It was our first time roofing so it is far from perfect but it should stay dry. Overall our two little girls LOVE it.
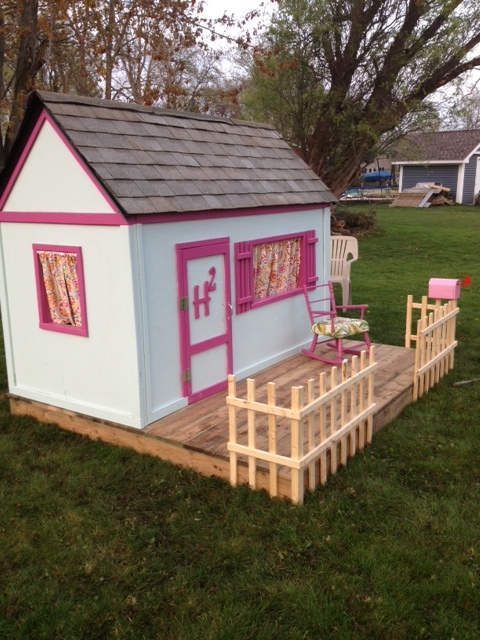
Built from Plan(s)
Estimated Cost
$400-$500
Estimated Time Investment
Week Long Project (20 Hours or More)
Finish Used
Exterior Paint
Recommended Skill Level
Beginner
Comments
Leslie Is Ready
Sat, 08/26/2023 - 15:16
Plans?
Are there any plans fir this project? I love it!