Community Brag Posts

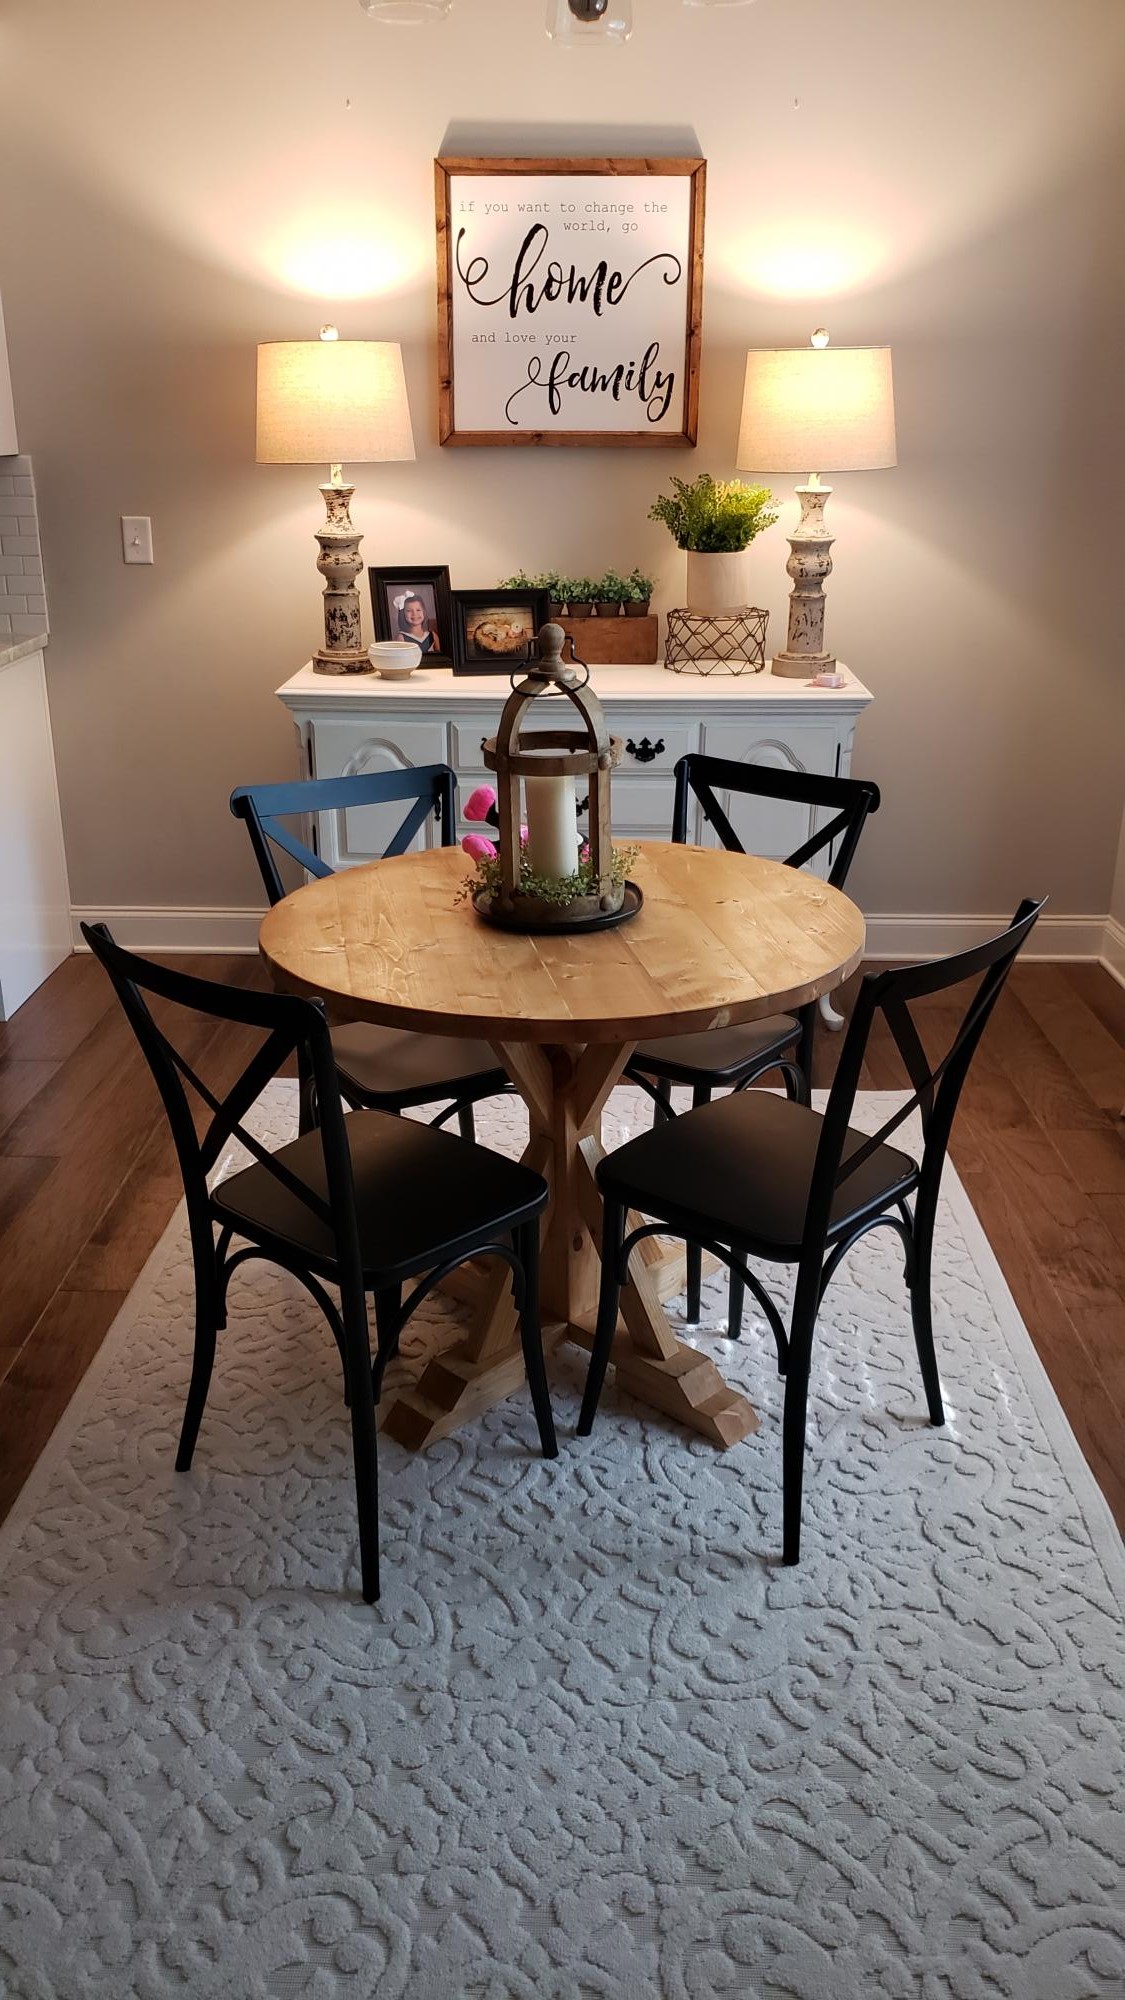
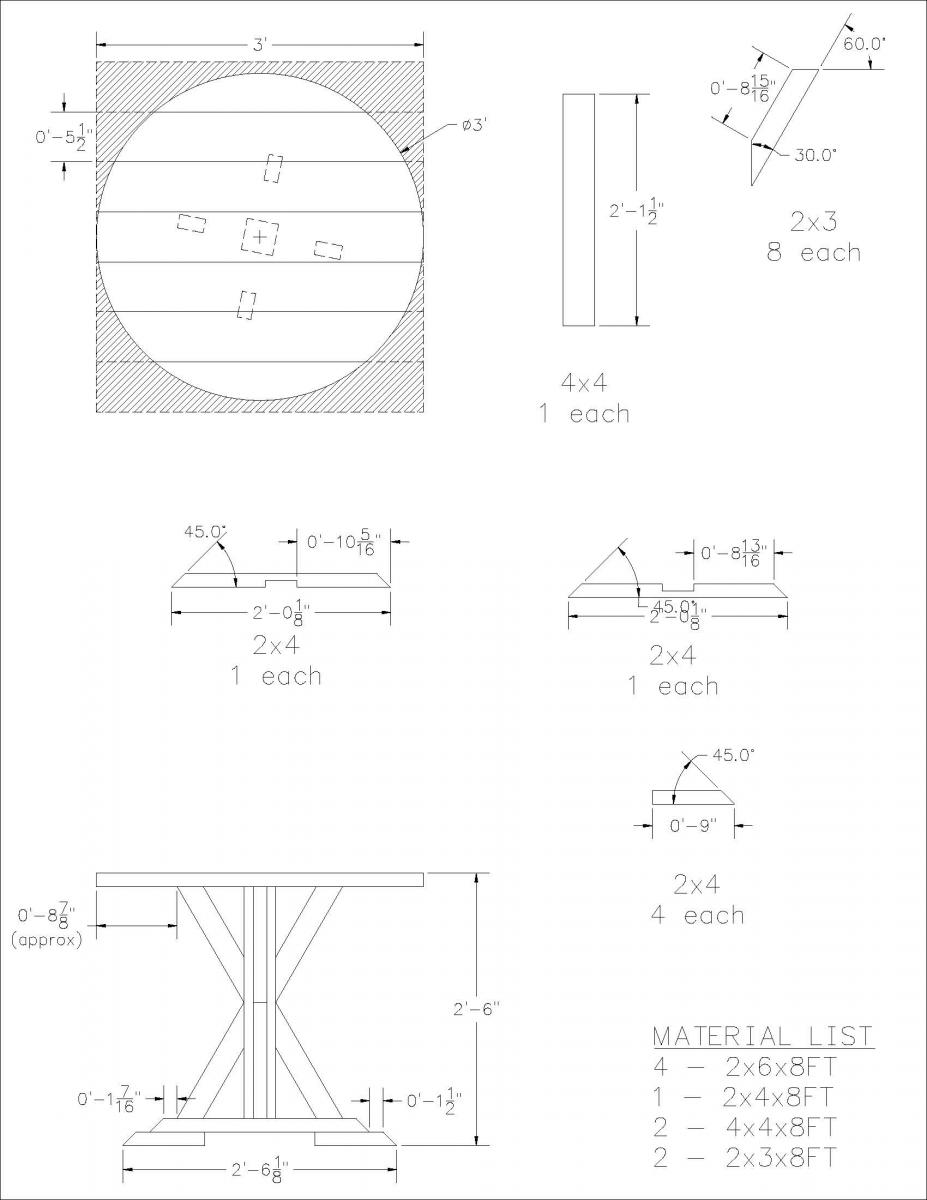
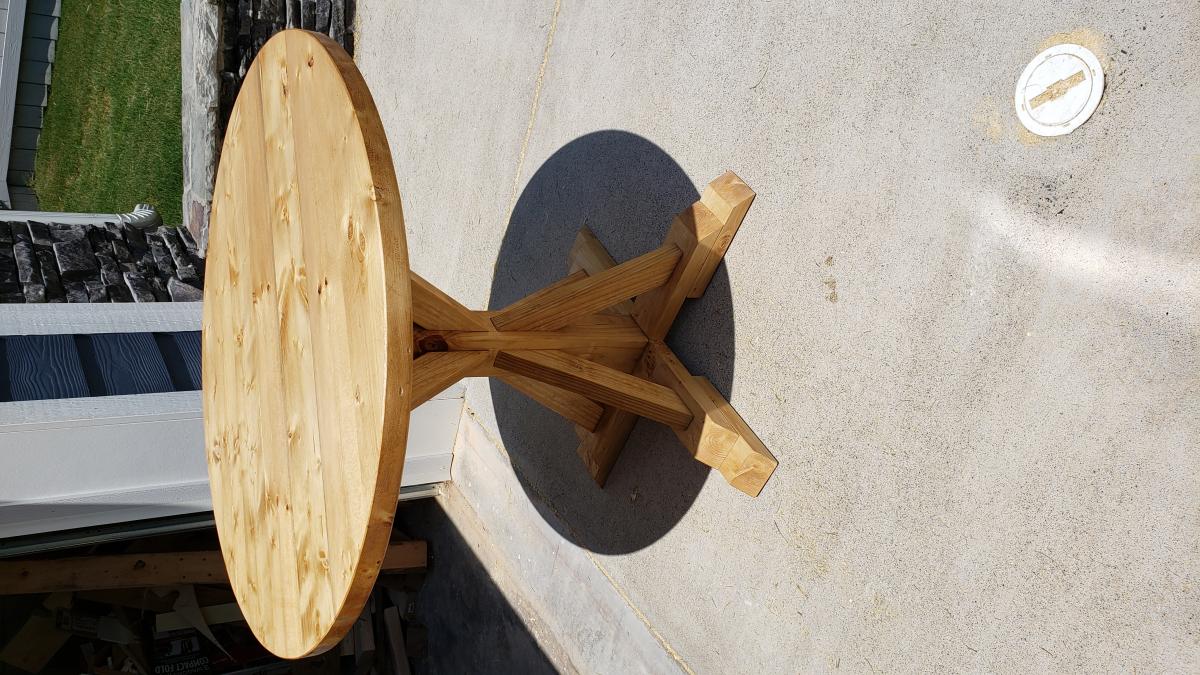
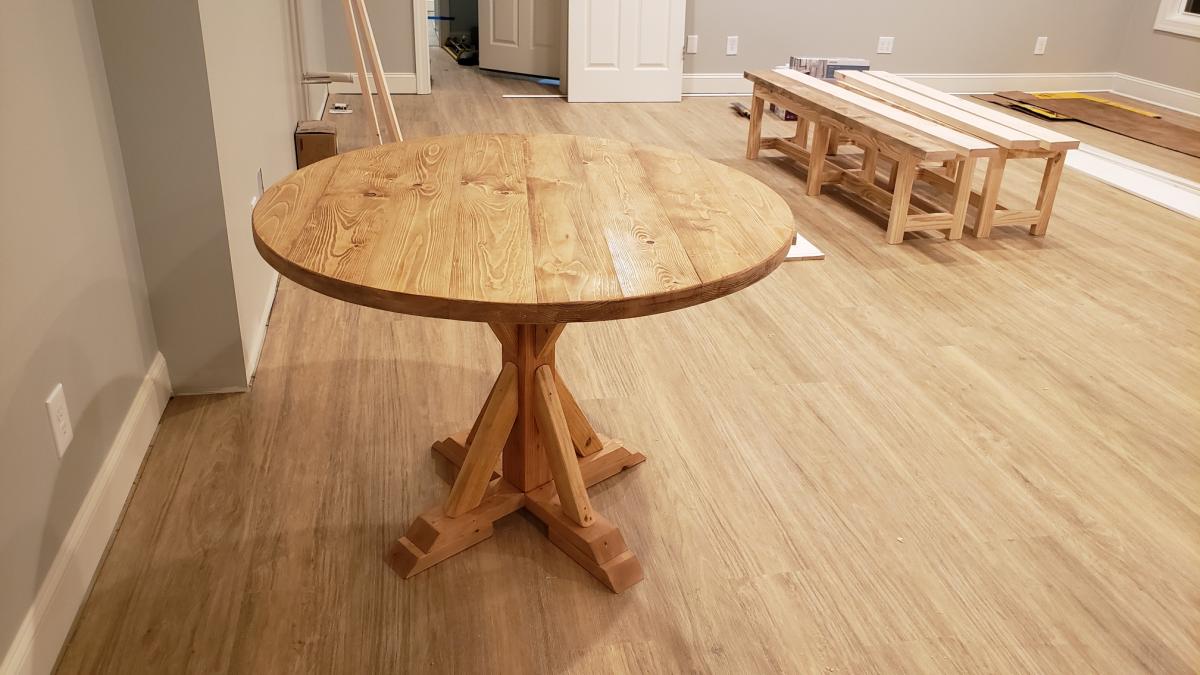
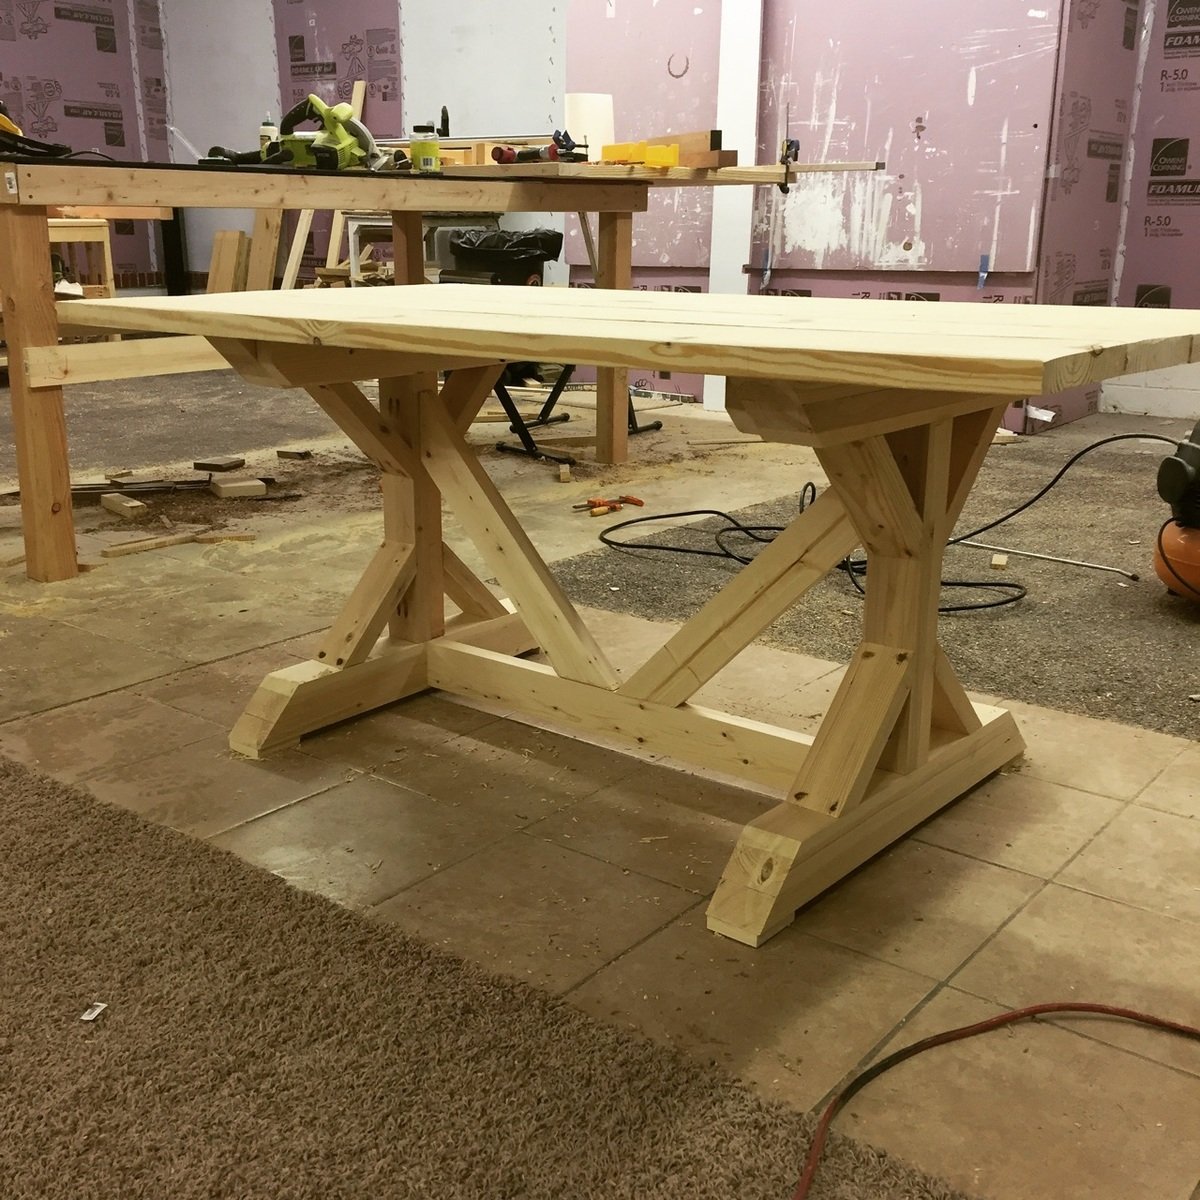
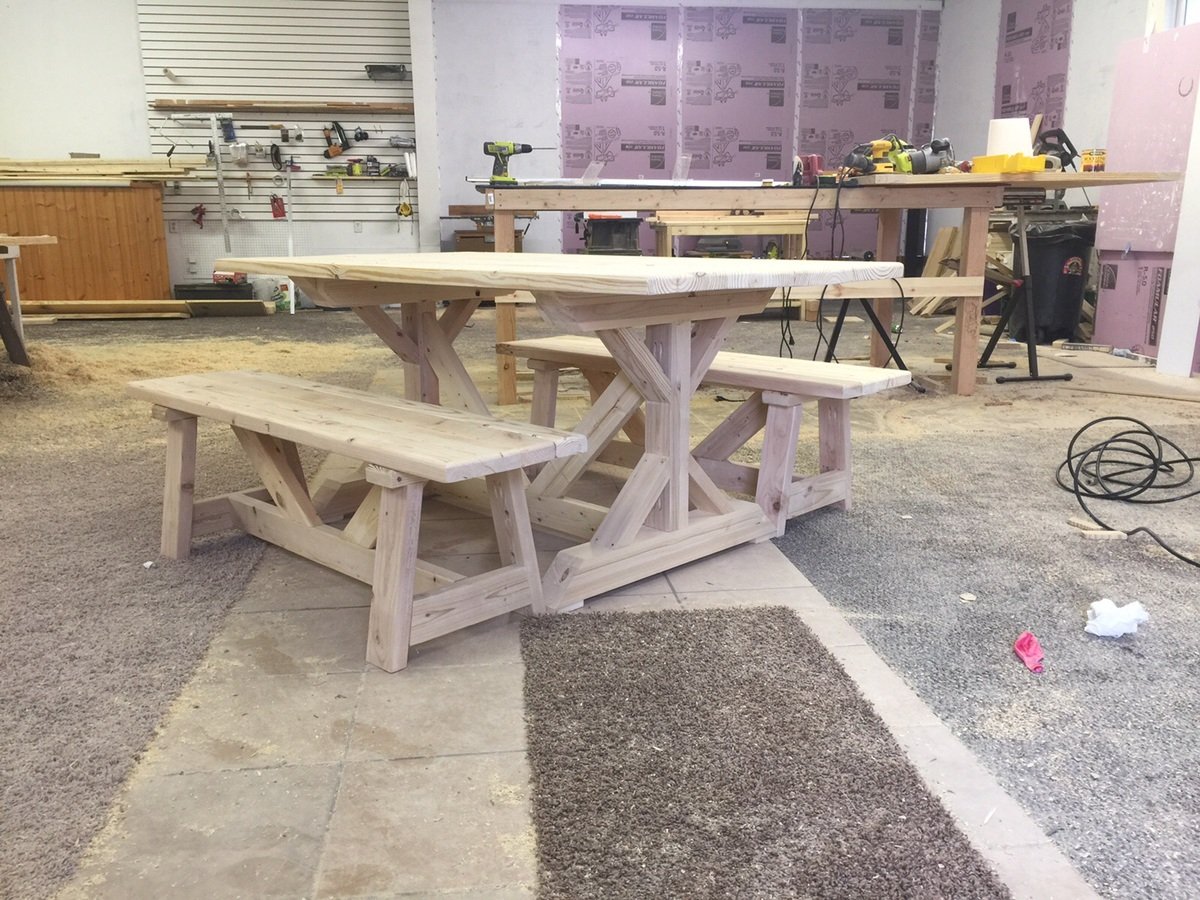
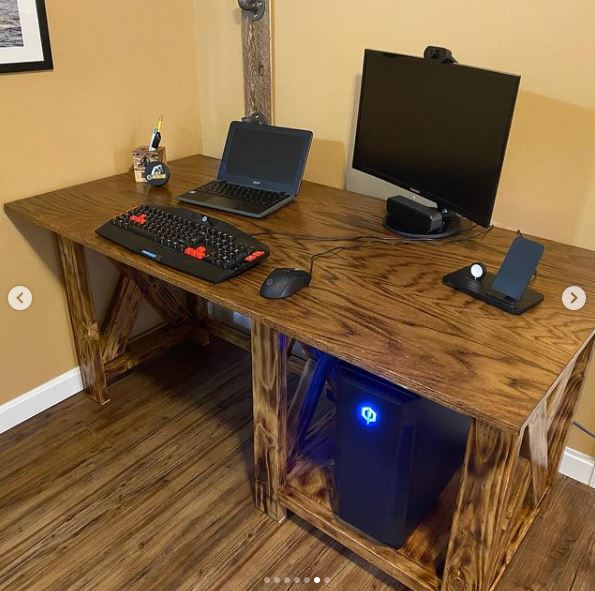
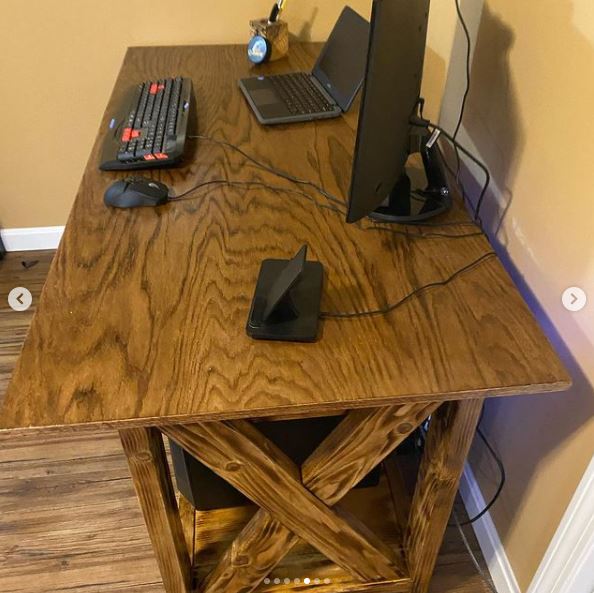
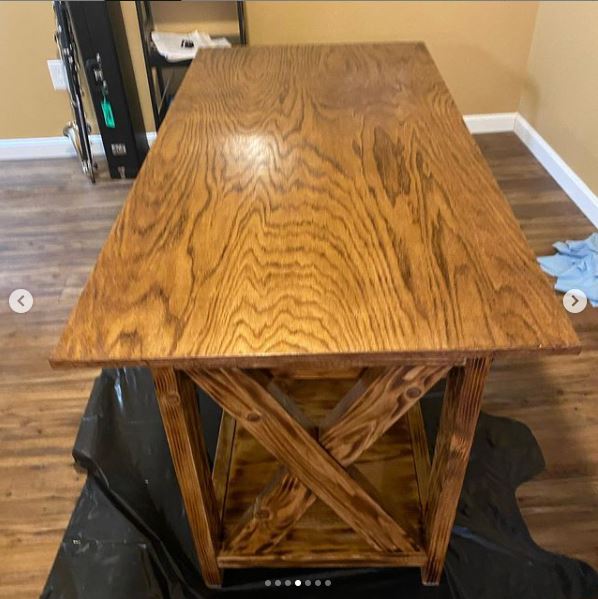
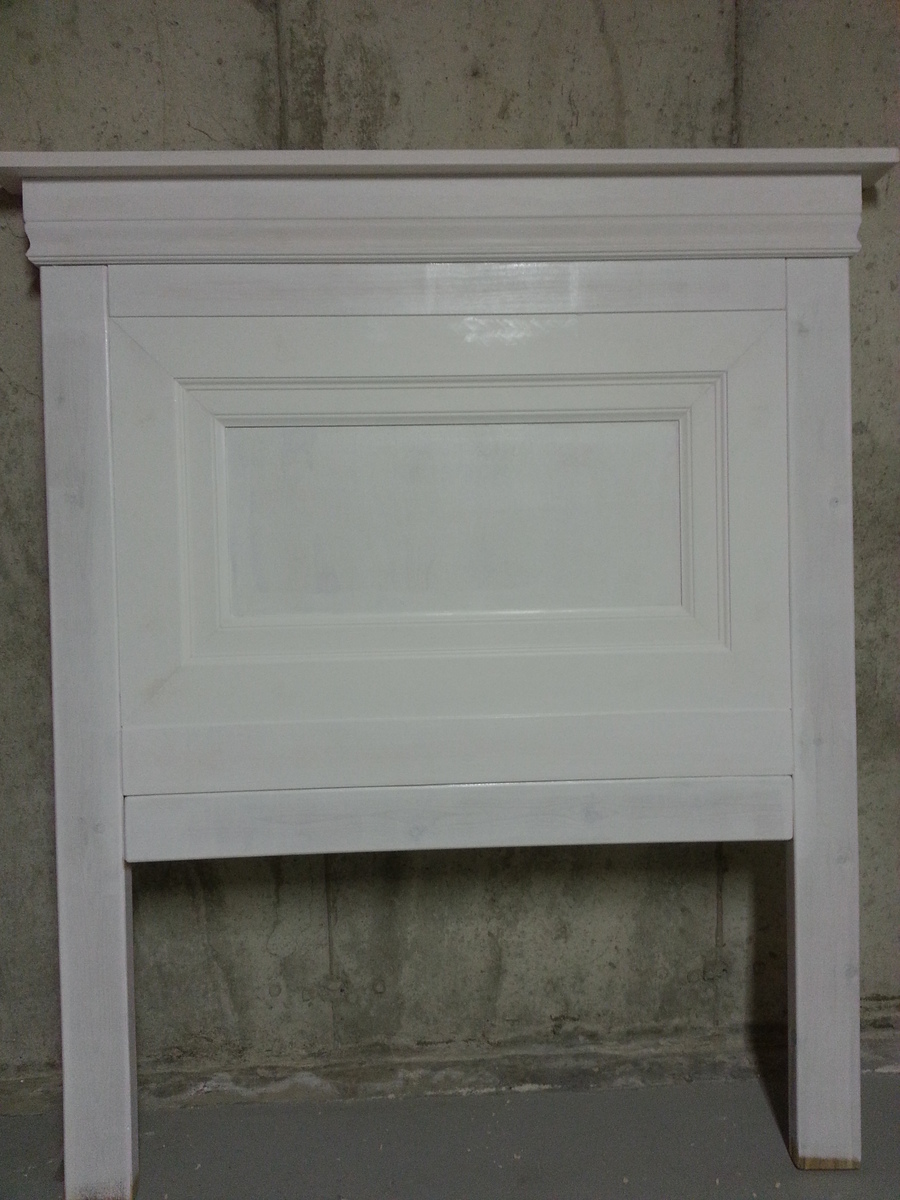
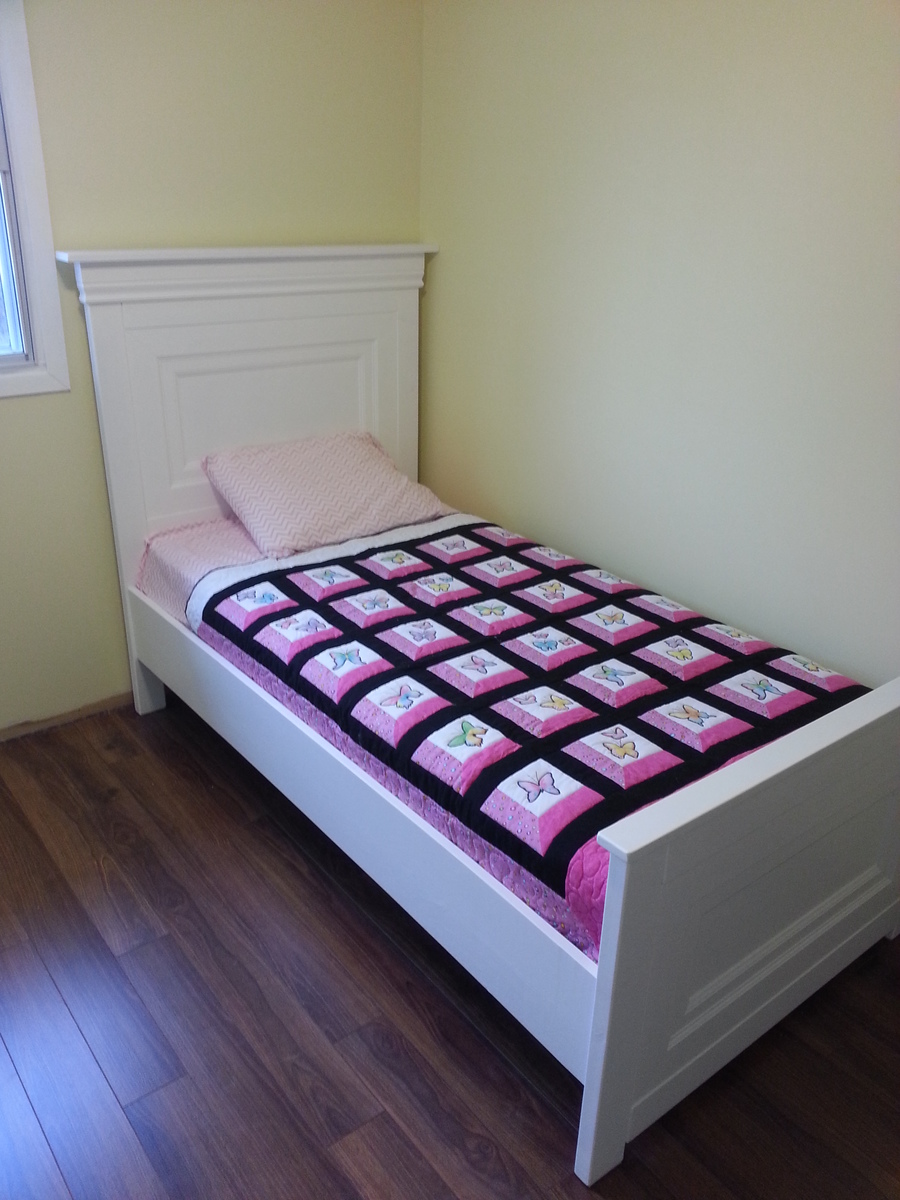
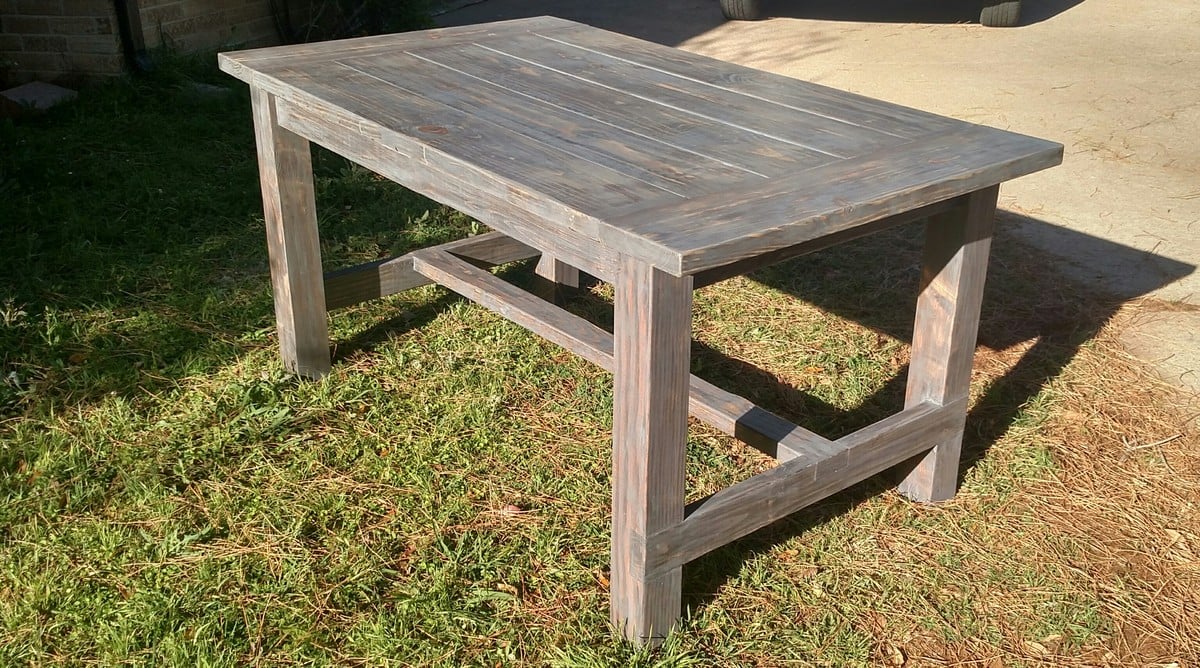
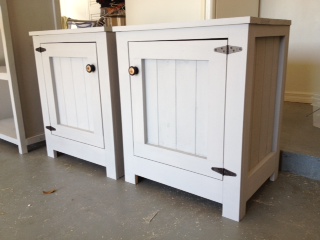
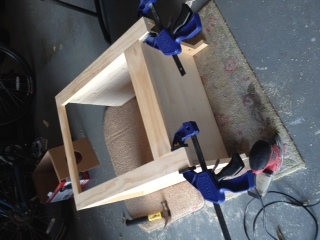
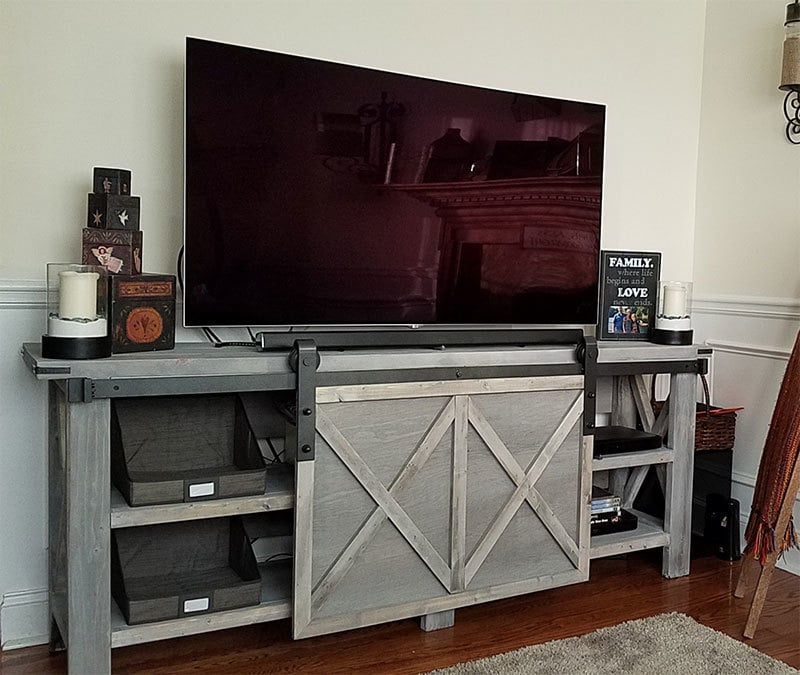
Rustic X Coffee Table

Submitted by Anonymous (not verified) on Sun, 03/26/2017 - 08:23

Really took one afternoon to cut and assemble. Couple more hours to sand, and then 2 days to stain and allow for dry time between coats. Very cool table
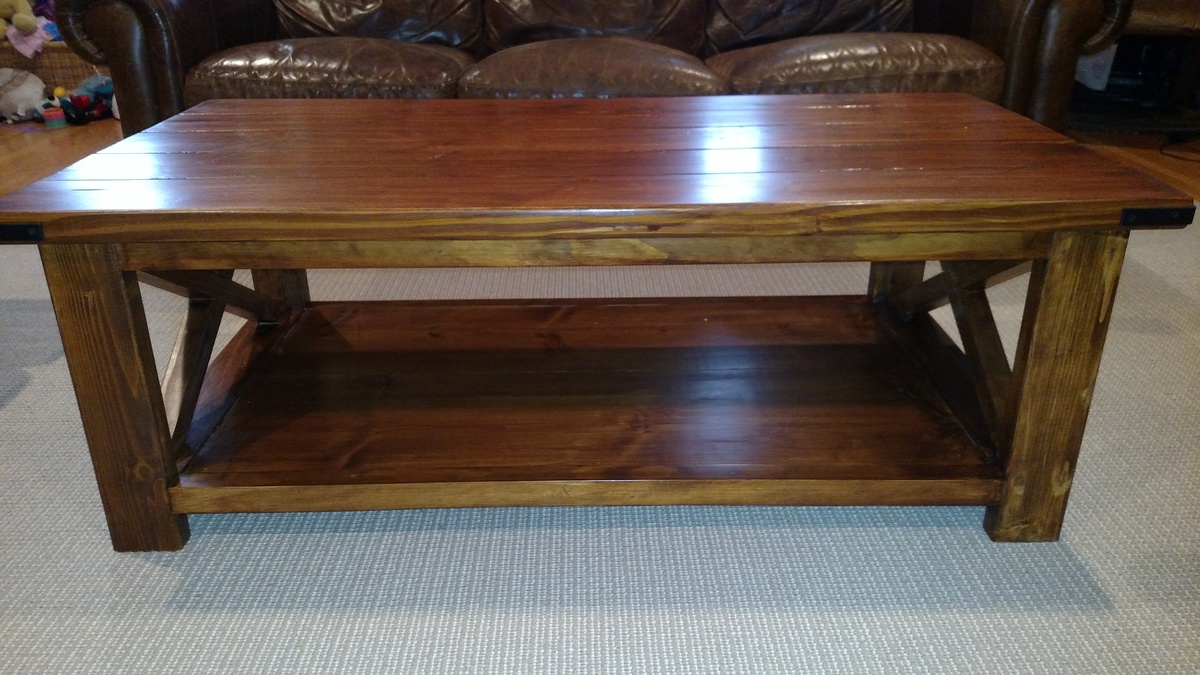
Built from Plan(s)
Estimated Cost
$100
Estimated Time Investment
Weekend Project (10-20 Hours)
Finish Used
varathane provincal.
2 coats minwax satin finish urethane
Recommended Skill Level
Intermediate

3ft Round Dining Table

Submitted by lydiamatt on Tue, 01/26/2021 - 10:28

Hey! I found several tables similar to this style base without a round top that I liked so I tweaked a look to get this result. The top is glued/screwed with pocket holes, and I have built 3 of these tables - 2 have been 42" diameter, 1 has been 36" diameter. Any larger and some reinforcement would be needed to stabilize the top. Email me with any questions you have at [email protected] Thanks Matt

Estimated Cost
$120ish
Estimated Time Investment
Day Project (6-9 Hours)
Finish Used
Minwax Puritan Pine color stain & poly sealant
Recommended Skill Level
Intermediate

Comments

Reading Nook Truss Shelve

Submitted by drew on Tue, 02/19/2013 - 10:11

This is my first Anna White project. It turned out really well.

Built from Plan(s)
Estimated Cost
$75
Estimated Time Investment
Weekend Project (10-20 Hours)
Finish Used
Rust-O-Leum Brand Kona (2x4s) and Paprika (1x12s)

Project itself is quick to build (maybe 2 hours or so) but properly applying the stain takes a bit of time and paitence.

I applied one coat of of stain with a 2 1/2 inch angled synthetic brush using the colors listed. Let them soak for about 5 mins then wipe clean with a soft clean cotton rag. Let dry overnight. Followed by applying three coats of Rust-O-Leum brand polyurethane. Wait three hours min between coats. Then dry overnight. Didn't turn out as smooth as I hoped for but the weather conditions were not warm for February in KY. So I advise actually following the temp suggestions as listed on your stain product. I didn't have paitence to wait for Spring.
Recommended Skill Level
Beginner

Comments

Industrial Media Console

Submitted by zjlawlor on Sun, 12/28/2014 - 11:12

I built this media console for my brother. When I first started woodworking he showed me an entertainment center that he liked on Etsy and I did my own twist on it. I started with Ana's media console plans and made some modifications to get my basic structure. I cut down some cool pallet boards to use for slats and fill in the bottom. From there all I had to do was figure out how to work metal! This was by far the toughest part. Using a bunch of angle iron, expanded metal, and hex bolts, I was able to achieve the look I was going for. No welds! Granted, it would likely look better with welds, I did not have the tools or the know-how. I also ordered the 5" industrial casters for this project which I had in mind for the start and really love the look.

Estimated Cost
About $250
Estimated Time Investment
Week Long Project (20 Hours or More)
Finish Used
I was going for more of a grey color to match my brother's other furniture. Used an earth stain and poly mix I found. Did 3 coats with light sanding in between each, and after my final coat I sanded down the slats to let the pallet boards character show through.
Recommended Skill Level
Advanced

6'6" X Frame

Submitted by Anonymous (not verified) on Mon, 03/27/2017 - 08:40

I built this 6'6" X Frame and two beches in my shop this week. I used biscuts to hold the top together and jointed and planed the entire thing prior to the build. It will be finished off with a Dark Walnut color.

Estimated Time Investment
Weekend Project (10-20 Hours)
Recommended Skill Level
Intermediate

RUSTIC X DESK

Submitted by Anonymous (not verified) on Tue, 02/02/2021 - 11:45

We adjusted the top a little. Used oak top. 15 year old loves his new desk! Compound miter saw was a big help. We used a torch on the pine to bring out the grain. Erik Ormberg [email protected]

Built from Plan(s)
Estimated Cost
$200.00
Estimated Time Investment
Day Project (6-9 Hours)
Finish Used
Red oak stain on top. Driftwood on the bottom.
Recommended Skill Level
Intermediate

Comments

Grand Champion Planked Sideboard

Submitted by adobbins29 on Tue, 12/30/2014 - 17:41

My son built this project for the local youth fair and livestock show and won Reserve Grand Champion in woodworking.

Built from Plan(s)
Estimated Time Investment
Week Long Project (20 Hours or More)
Finish Used
Rustoleum restore kit for kitchen cabinets
Recommended Skill Level
Intermediate

Comments

JoanneS

Tue, 12/30/2014 - 20:05

What an awesome build! Beautifully done! The award is well deserved! Love the finish and the details!

American girl 3 story doll house and furniture

For my daughters 8th birthday I decided I would make her a doll house for her American Girl dolls. Then I decided to make all the doll furniture too. Then I started thinking that I might as well sew all the bedding and cushions. She loves it!! 

Estimated Cost
$220-250
Estimated Time Investment
Week Long Project (20 Hours or More)
Finish Used
A lot easier with the alloy wheels.
Recommended Skill Level
Beginner

Comments

Queen bed with rails and headboard

Submitted by K79miller on Sun, 02/07/2021 - 09:21

I have an adjustable bed frame so the rails are not supporting any weight. Each piece of wood in the headboard is 5.5 inches long and 1.5 inches tall. I used boards that were 1/2 inch thick and 3/4 inch thick and put them on in the checkerboard pattern. I have some navy blue and coral in my bedroom so I decided to paint a few block with those colors. I used poplar wood because I thought it would hold up better and it wasn't too expensive. It took a while to build because of cutting all of the individual blocks.

Estimated Cost
$150
Estimated Time Investment
Week Long Project (20 Hours or More)
Finish Used
Sherwin Williams Emerald paint
Recommended Skill Level
Intermediate

Comments

4 Cubby Shelf

Submitted by JenFarrell on Sun, 02/24/2013 - 18:14

My first project!!! The house we live in has 4 closets in the entire house.. so we're quite in need of storage. I was really hoping the bookcase would work out, to relieve the jam-packed linen closet. I'm so happy with it, and with the learning experience. I didn't do the moulding option, more or less because I'm impatient and want to get the next project going. Thanks Ana for the inspiration and the plans!!

Built from Plan(s)
Estimated Cost
$75 (I think I could reduce that cost if I chose wood that wasn't nicely finished already)
Estimated Time Investment
Weekend Project (10-20 Hours)
Finish Used
White paint
Recommended Skill Level
Beginner

Comments

Pantry Shelving System

Submitted by hstreat on Fri, 03/31/2017 - 20:23

DIY Home Project:


So I wanted to help my Wife Patty with reorganizing and reclaiming the usable storage space in our laundry room/pantry.


As you can see, in the before and after photos, we had quite a bit of clutter with the limited storage space, so I designed a two section shelving system to maximize use of the upper dead space in the pantry while adding additional shelving for increased storage and better organization.


The two sections are built 48' square with a frame base added to the bottom of the lower section.

The tops of each section are measure at 49 1/2" to create a 3/4" overhang on each side.


Estimated Cost
$35-40
Estimated Time Investment
Weekend Project (10-20 Hours)
Finish Used
BEHR Premium Plus Ultra 1 gal. Ultra Pure White Eggshell Enamel Interior Paint
Recommended Skill Level
Intermediate

Art Studio Loft Bed

Submitted by Auntie LAD on Tue, 02/26/2013 - 08:26

After I built my nephew's AT & T Park bedroom, I had to figure out what to create for my 5 year old niece, Maggie. She loves drawing, so I settled on an "art studio," where she can work and display her art.

The bed was created using Ana's Camp Loft Bed Plans. I narrowed the stairs by 4 inches as one of the other posts had done. I also put shelves under the stairs like another post I read on this site.

I built a small drafting-type desk for underneath using my new Kreg Jig (Man, I love that thing!). I also made some curtains to pull shut in case Maggie wanted to escape from the world. Chairs, storage containers, flower light, and leaf above bed are from Ikea.

I bought some cheap picture frames, and put a bulletin board in one and a chalkboark in the other for above the bed, and the string hanging across the front of the bed is from Target. It actually has clips to hang artwork.

I painted the bed using Ana's antique finish with the Minwax pen. It came out fantastic.

Estimated Time Investment
Weekend Project (10-20 Hours)
Finish Used
Antique White paint from Home Depot with Minwax pen finish.
Recommended Skill Level
Beginner

Comments

spiceylg

Tue, 02/26/2013 - 10:00

Your niece and nephew must be over the moon! Another awesome build!

Panel Single Bed

Submitted by JaredR on Sun, 01/04/2015 - 12:42

  After looking high and low for a solid wood bed that wouldn't break the bank for my daughter's 3rd birthday I discovered this site and the plans for the Twin Panel Bed.  The plans were easy to follow and I managed to build this entire bed with nothing but a mitre saw, a 4" electric sander, a power drill, and an R3 Kreg Jig. 

  I made a few modifications to the original plan, such as dropping the headboard height to 54", using baseboard moulding instead of  crown on the top of the headboard, and not using moulding around the feet of the footboard.  It was simply finished with 3 coats of a white melamine finish paint I had left over.

Built from Plan(s)
Estimated Cost
$375.00, all wood was bought at a Canadian Lowes. I used cedar 2x4 because of the smoother finish which were about $9 for an 8' length.
Estimated Time Investment
Week Long Project (20 Hours or More)
Finish Used
CIL Realife white melamine paint
Recommended Skill Level
Intermediate

Comments

cableguy2006

Mon, 01/05/2015 - 05:10

Wow this looks amazing. It's so much better than the original plans. I want to copy cat your build. Are there any additional specifics you can provide to help me or just any tips or tricks. What kind of hardware did you use for the railing?

JaredR

Mon, 01/05/2015 - 14:22

I pretty much used the original directions but subtracted the additional height from the legs of the headboard. I highly recommend getting 2x4 that are semi-sanded like the cedar ones I used, the time you save is more than worth the extra cost. To attach the rails I just used the Kreg Jig and made 3 pocket holes on the 1x10 and 2 on the 2x4 that supports the slats, so there are 10 screws holding up each rail in total. Looking back i probably should have used metal brackets to make it easier to take apart if necessary, but that's a lesson learned I guess.

cableguy2006

Sun, 01/11/2015 - 15:36

ok awesome, so you subtracted from the original 74" length on the headboard feet? so its 20" shorter, did you just subtract those same 20" from the length of the plywood as well?

My first project

Submitted by lmflerlage on Mon, 02/22/2021 - 12:42

This modern farmhouse end table fits my space so well. This was my first project and was completed with glue and nails as I did not have the pocket hole jig initially. I loved this piece so much I made the coordinating coffee table. I would recommend staining/painting prior to assembly.

Estimated Cost
$40
Estimated Time Investment
Weekend Project (10-20 Hours)
Recommended Skill Level
Beginner

Comments

Kentwood Night Stands

Submitted by jbayer80 on Thu, 02/28/2013 - 19:49

1st the bookshelf, now the nightstands, soon the bed, then.....my sons toddler room is DONE!

Estimated Cost
$50 Each
Estimated Time Investment
Weekend Project (10-20 Hours)
Finish Used
A. S. Chalk Paint (Paris Grey)
Recommended Skill Level
Beginner

Comments

bhoppy

Fri, 03/01/2013 - 07:37

Looks great! How did the A.S. paint do on unfinished wood? Did you prime before hand?

jbayer80

Sat, 03/02/2013 - 08:49

It did fine. I did no prep work before I painted. Since the cans are almost $40 per can I've tried to stretch the paint as far as possible so there is only a thin layer on there. I gave it a lite...and I mean lite sanding after it dried. Since it was such a thin layer you can see some of the wood under but it sort of gives it a antique look. I also added wax (not the A.S. wax) to protect it.

Next time I will be making my own chalk paint for half the cost.

jbayer80

Sat, 04/06/2013 - 05:33

I just wanted to make a note that these night stands are VERY big, actually to the point of looking odd next to the bed I made. I know I could have looked at the dems before hand but never imagined they were this big. I still love them, I just wish they were a bit smaller.

I will be posting the bed I made and the night stands will be in the pic as well so you can see and let me know your thoughts.

Rustic X Console

Submitted by Anonymous (not verified) on Thu, 04/06/2017 - 10:37

My wife and I just finished our version of the Rustic X Console. We had never built a piece of furniture before and after buying the tools could have probably purchased one for the same price, but it was worth it. We added the barn door hardware and made a door to mimic the X design of the ends. Also added back pieces to hide the Wires. Now on to the coffee tabes to match. Fun project. The finish is grey and walnut stain wiped on together and a gray wash over that.

Built from Plan(s)
Estimated Cost
$200 in materials and hardware...much more to buy the tools to build it.
Estimated Time Investment
Day Project (6-9 Hours)
Finish Used
Walnut and grey stain painted like a 3 year old then wiped off with a grey wash of paint diluted with water also wiped off until we liked the results.
Recommended Skill Level
Beginner