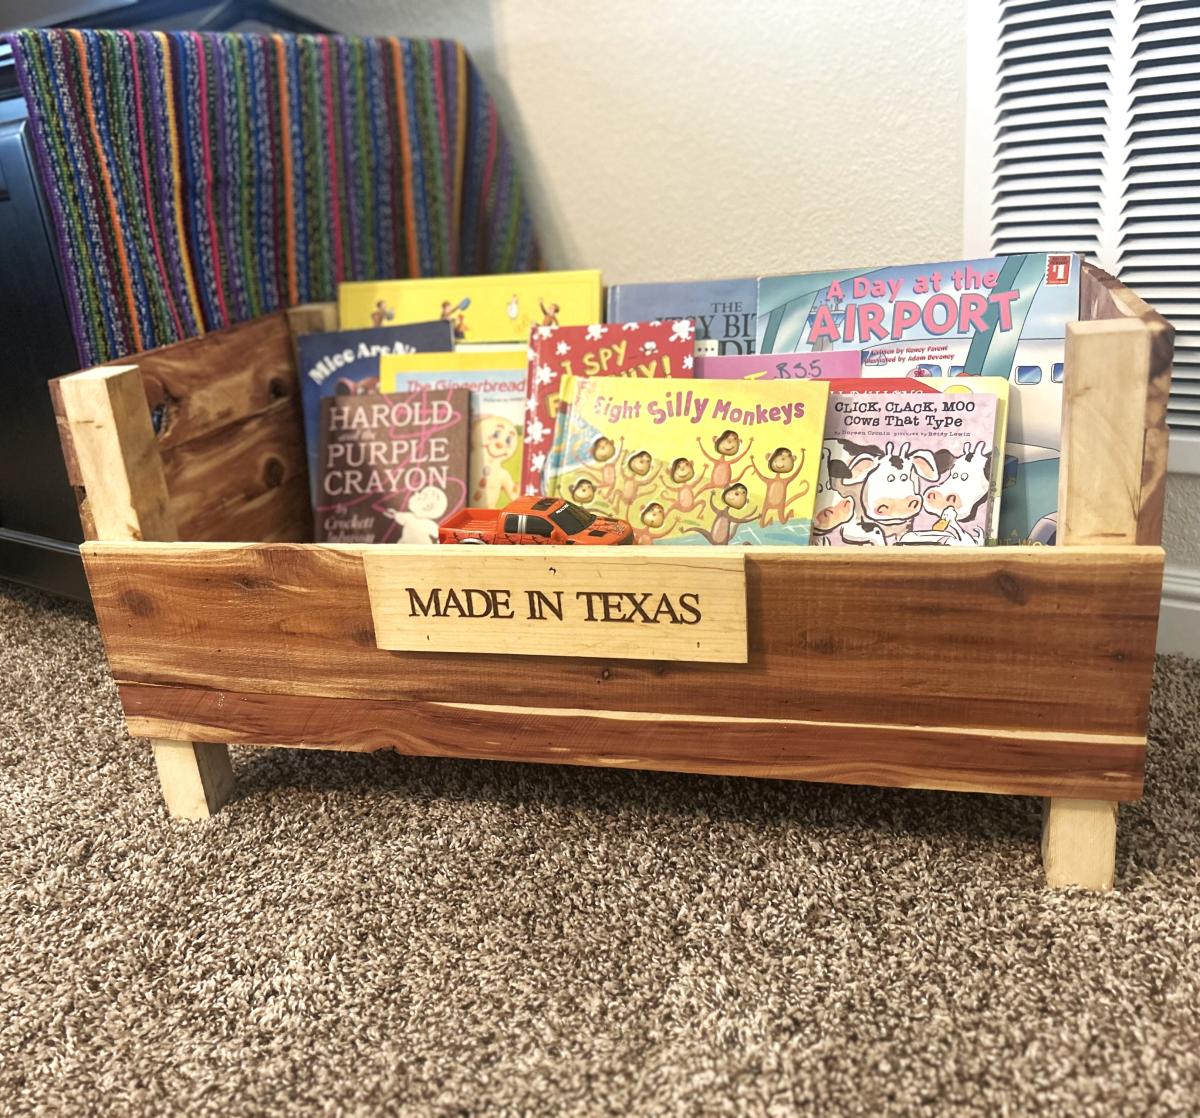
Low Profile Book Bin
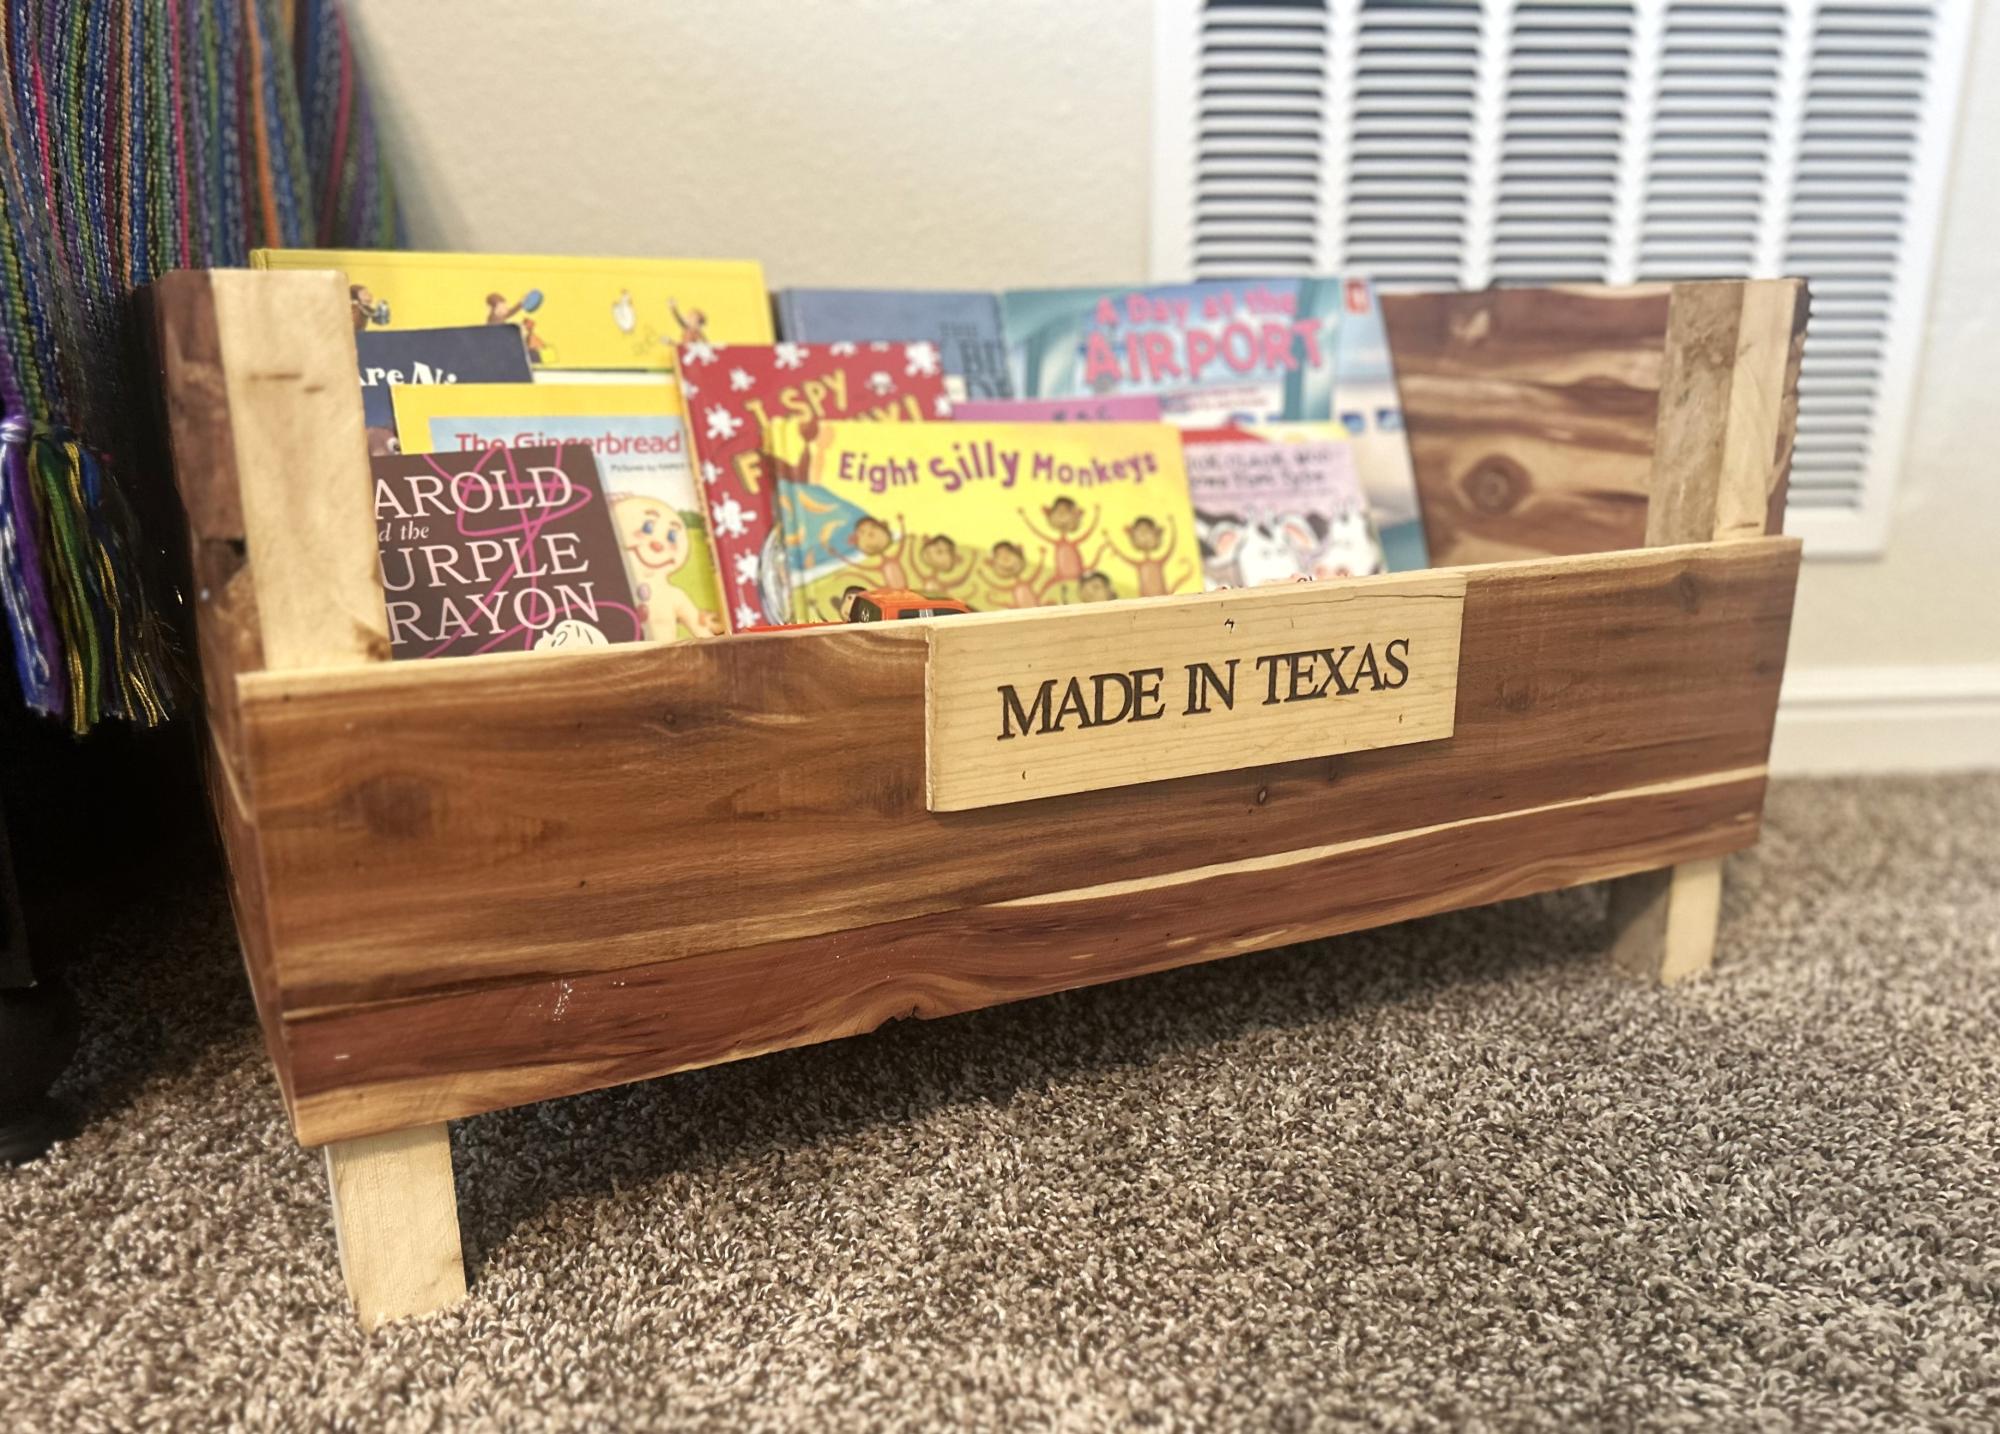
Built this simple book rack for our grandchildren...looks great and is a huge hit!
Built from Plan(s)
Built this simple book rack for our grandchildren...looks great and is a huge hit!
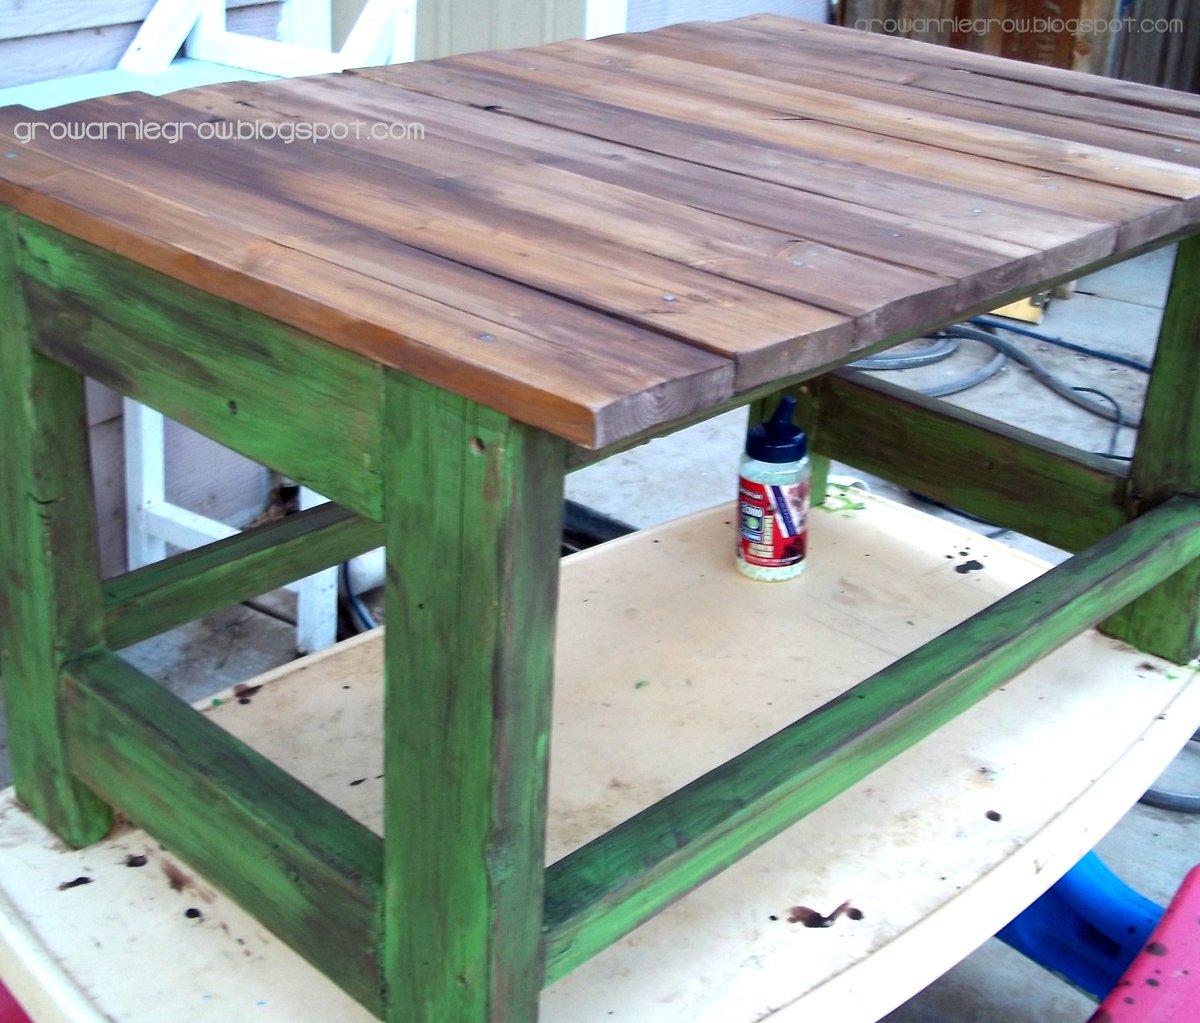
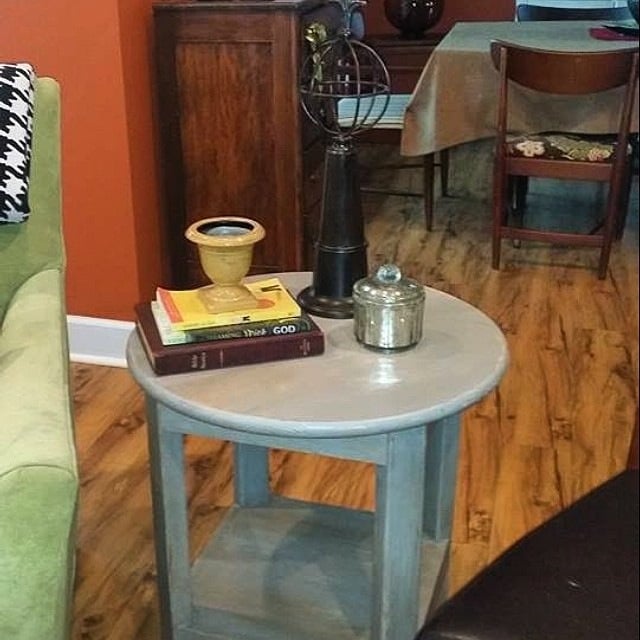
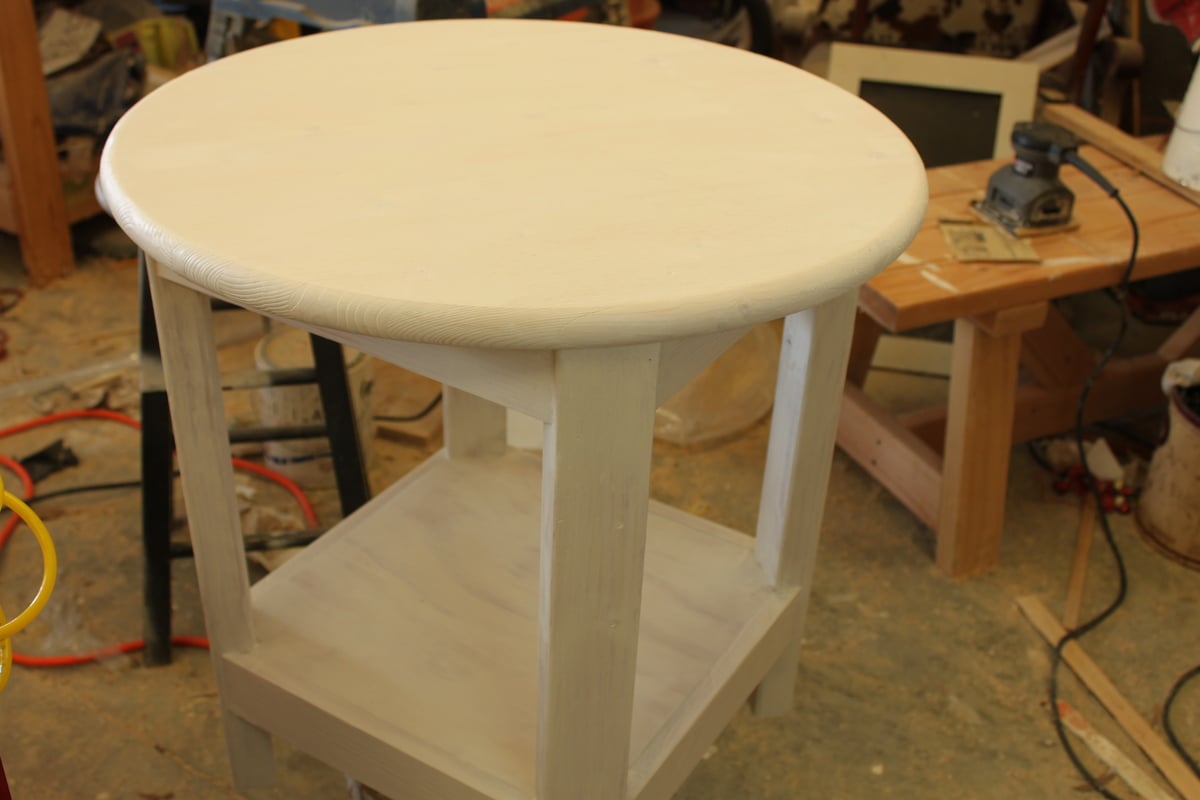
I needed an end table that was a little bigger than the average end table - I had a space to fill in a corner between a couch and chair and was tired of the blank space being used as a dumping ground for...things my kids didn't want to put away or throw away. :) So I pulled ideas from a couple projects here and came up this. The cost was free since I just used the leftover wood from other projects we'd done and paint we already had lying around.

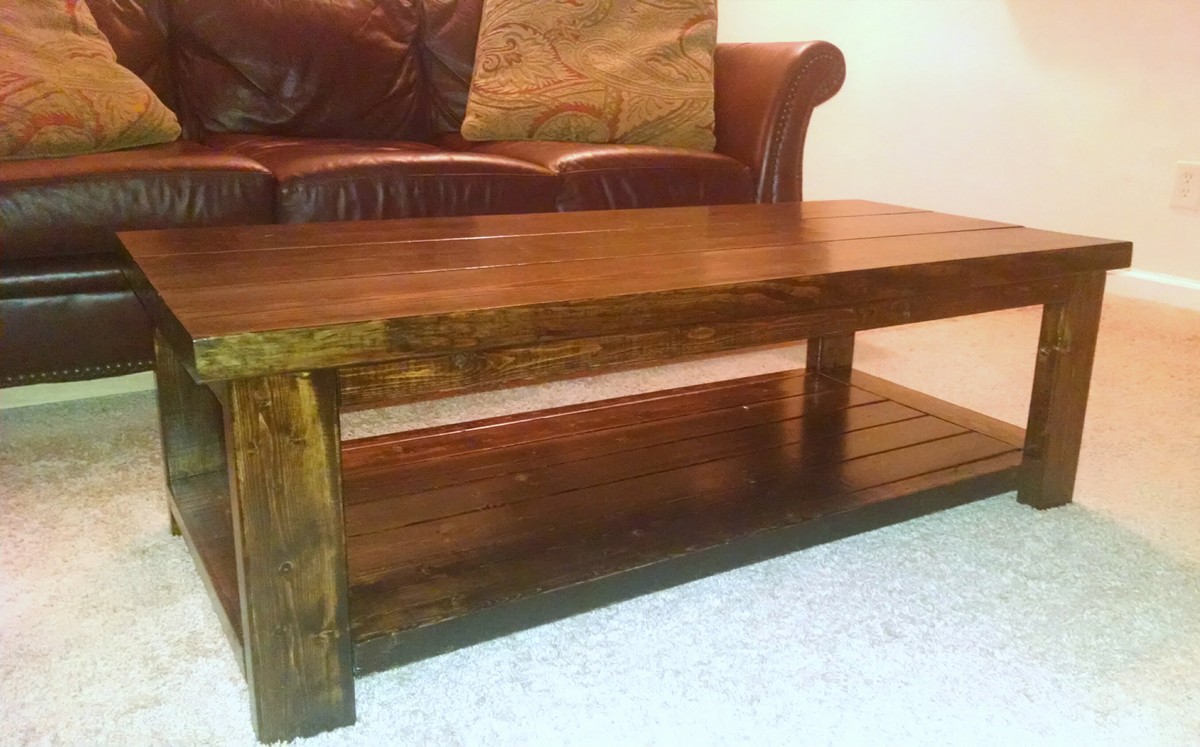
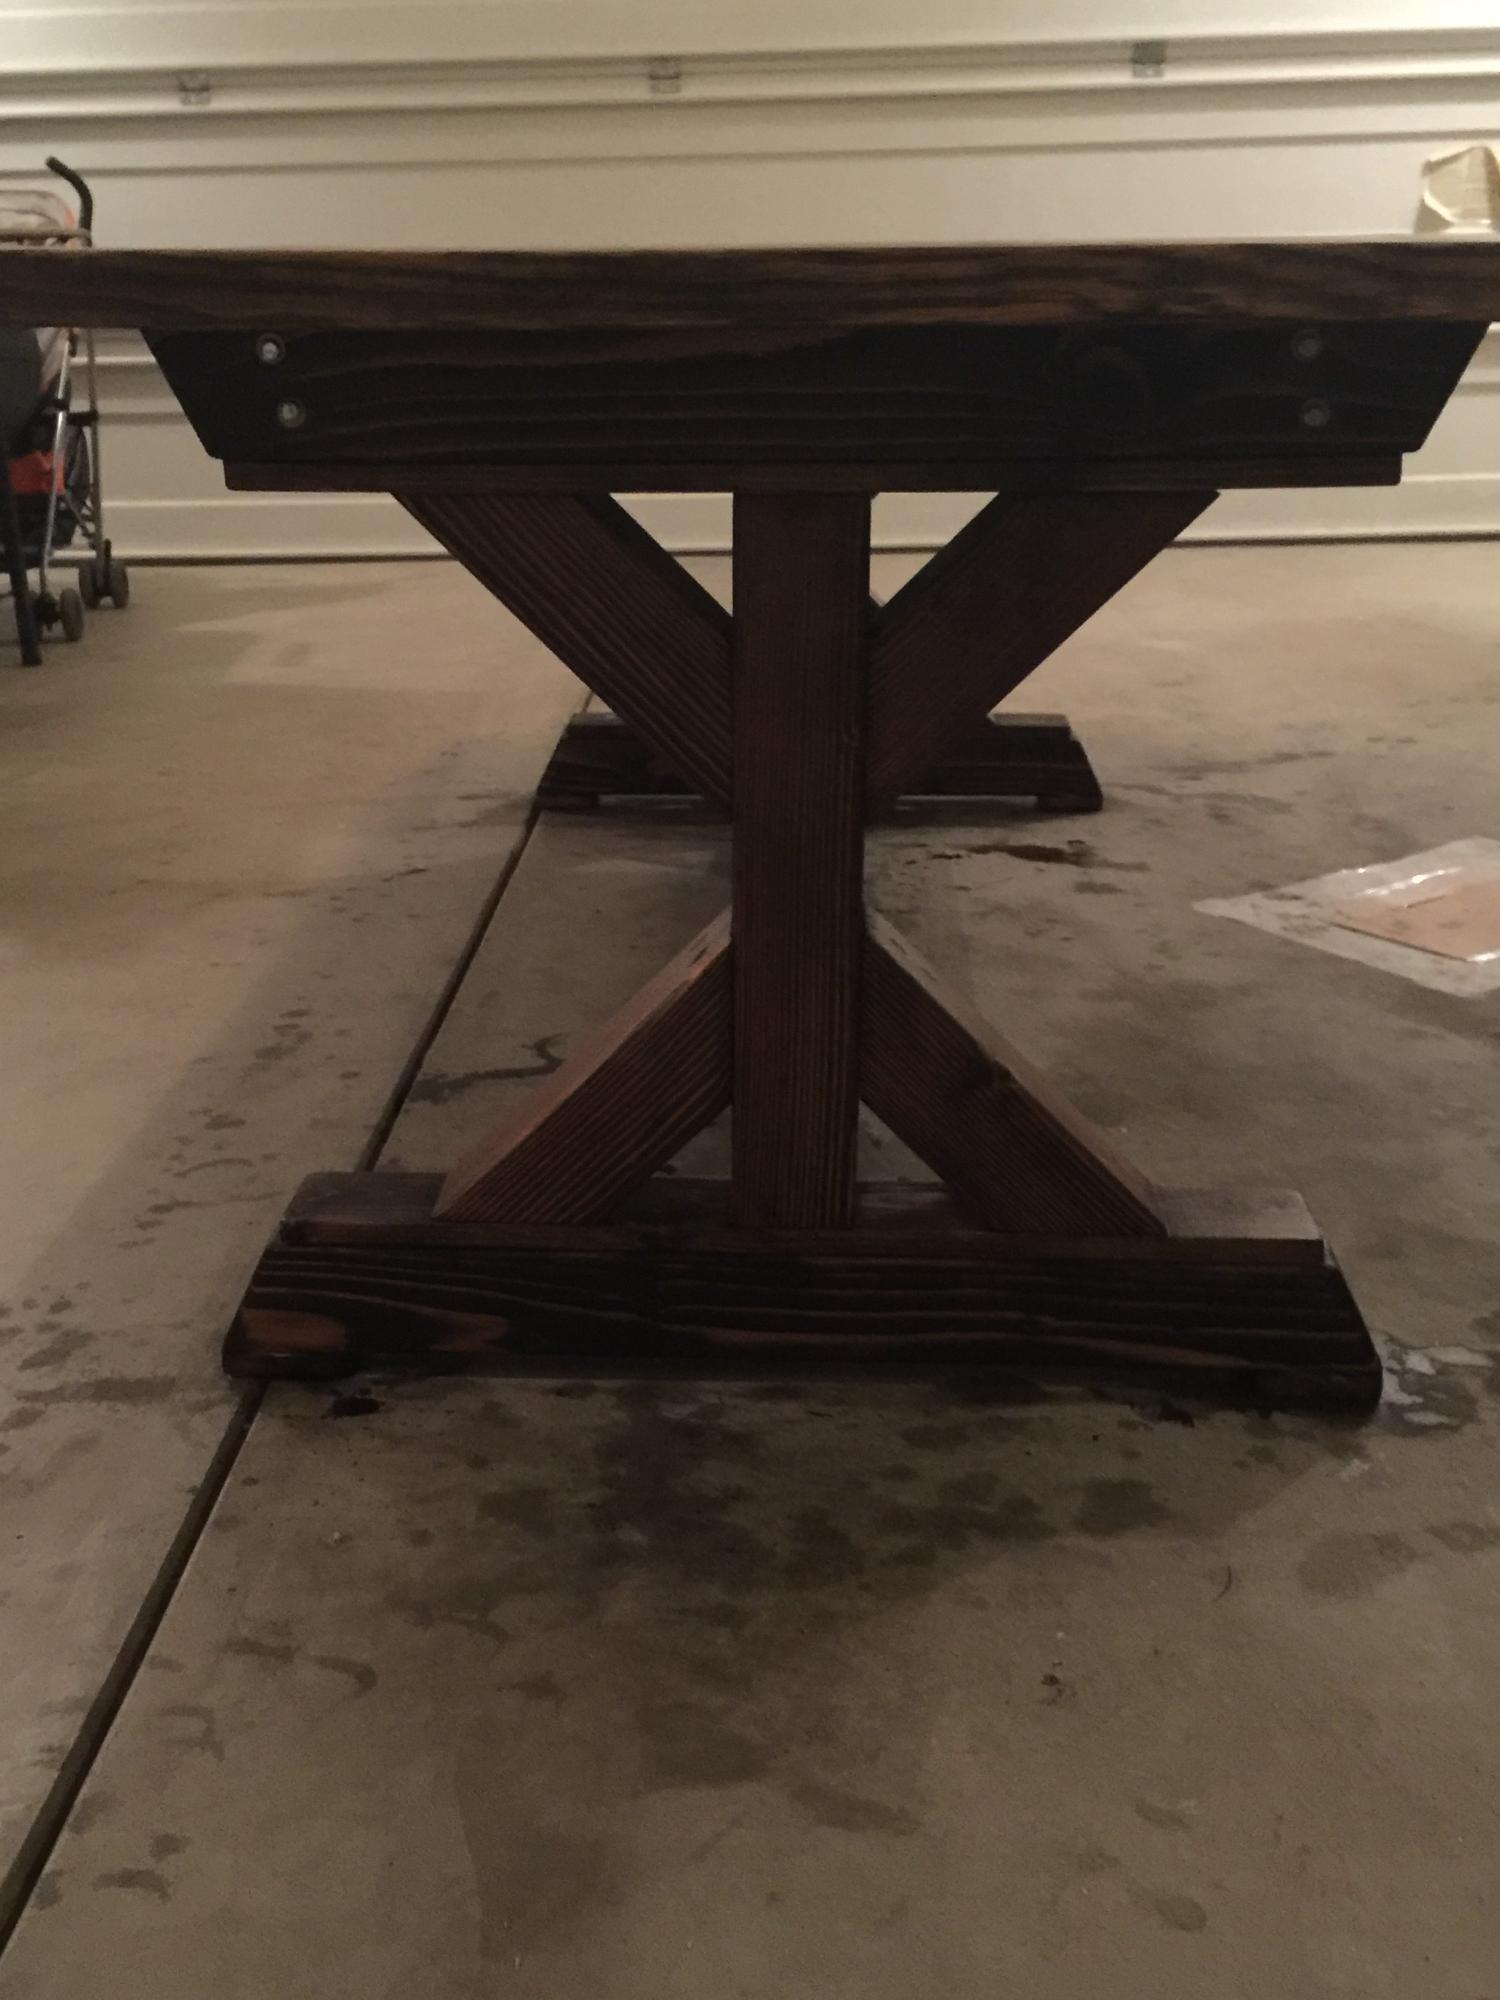
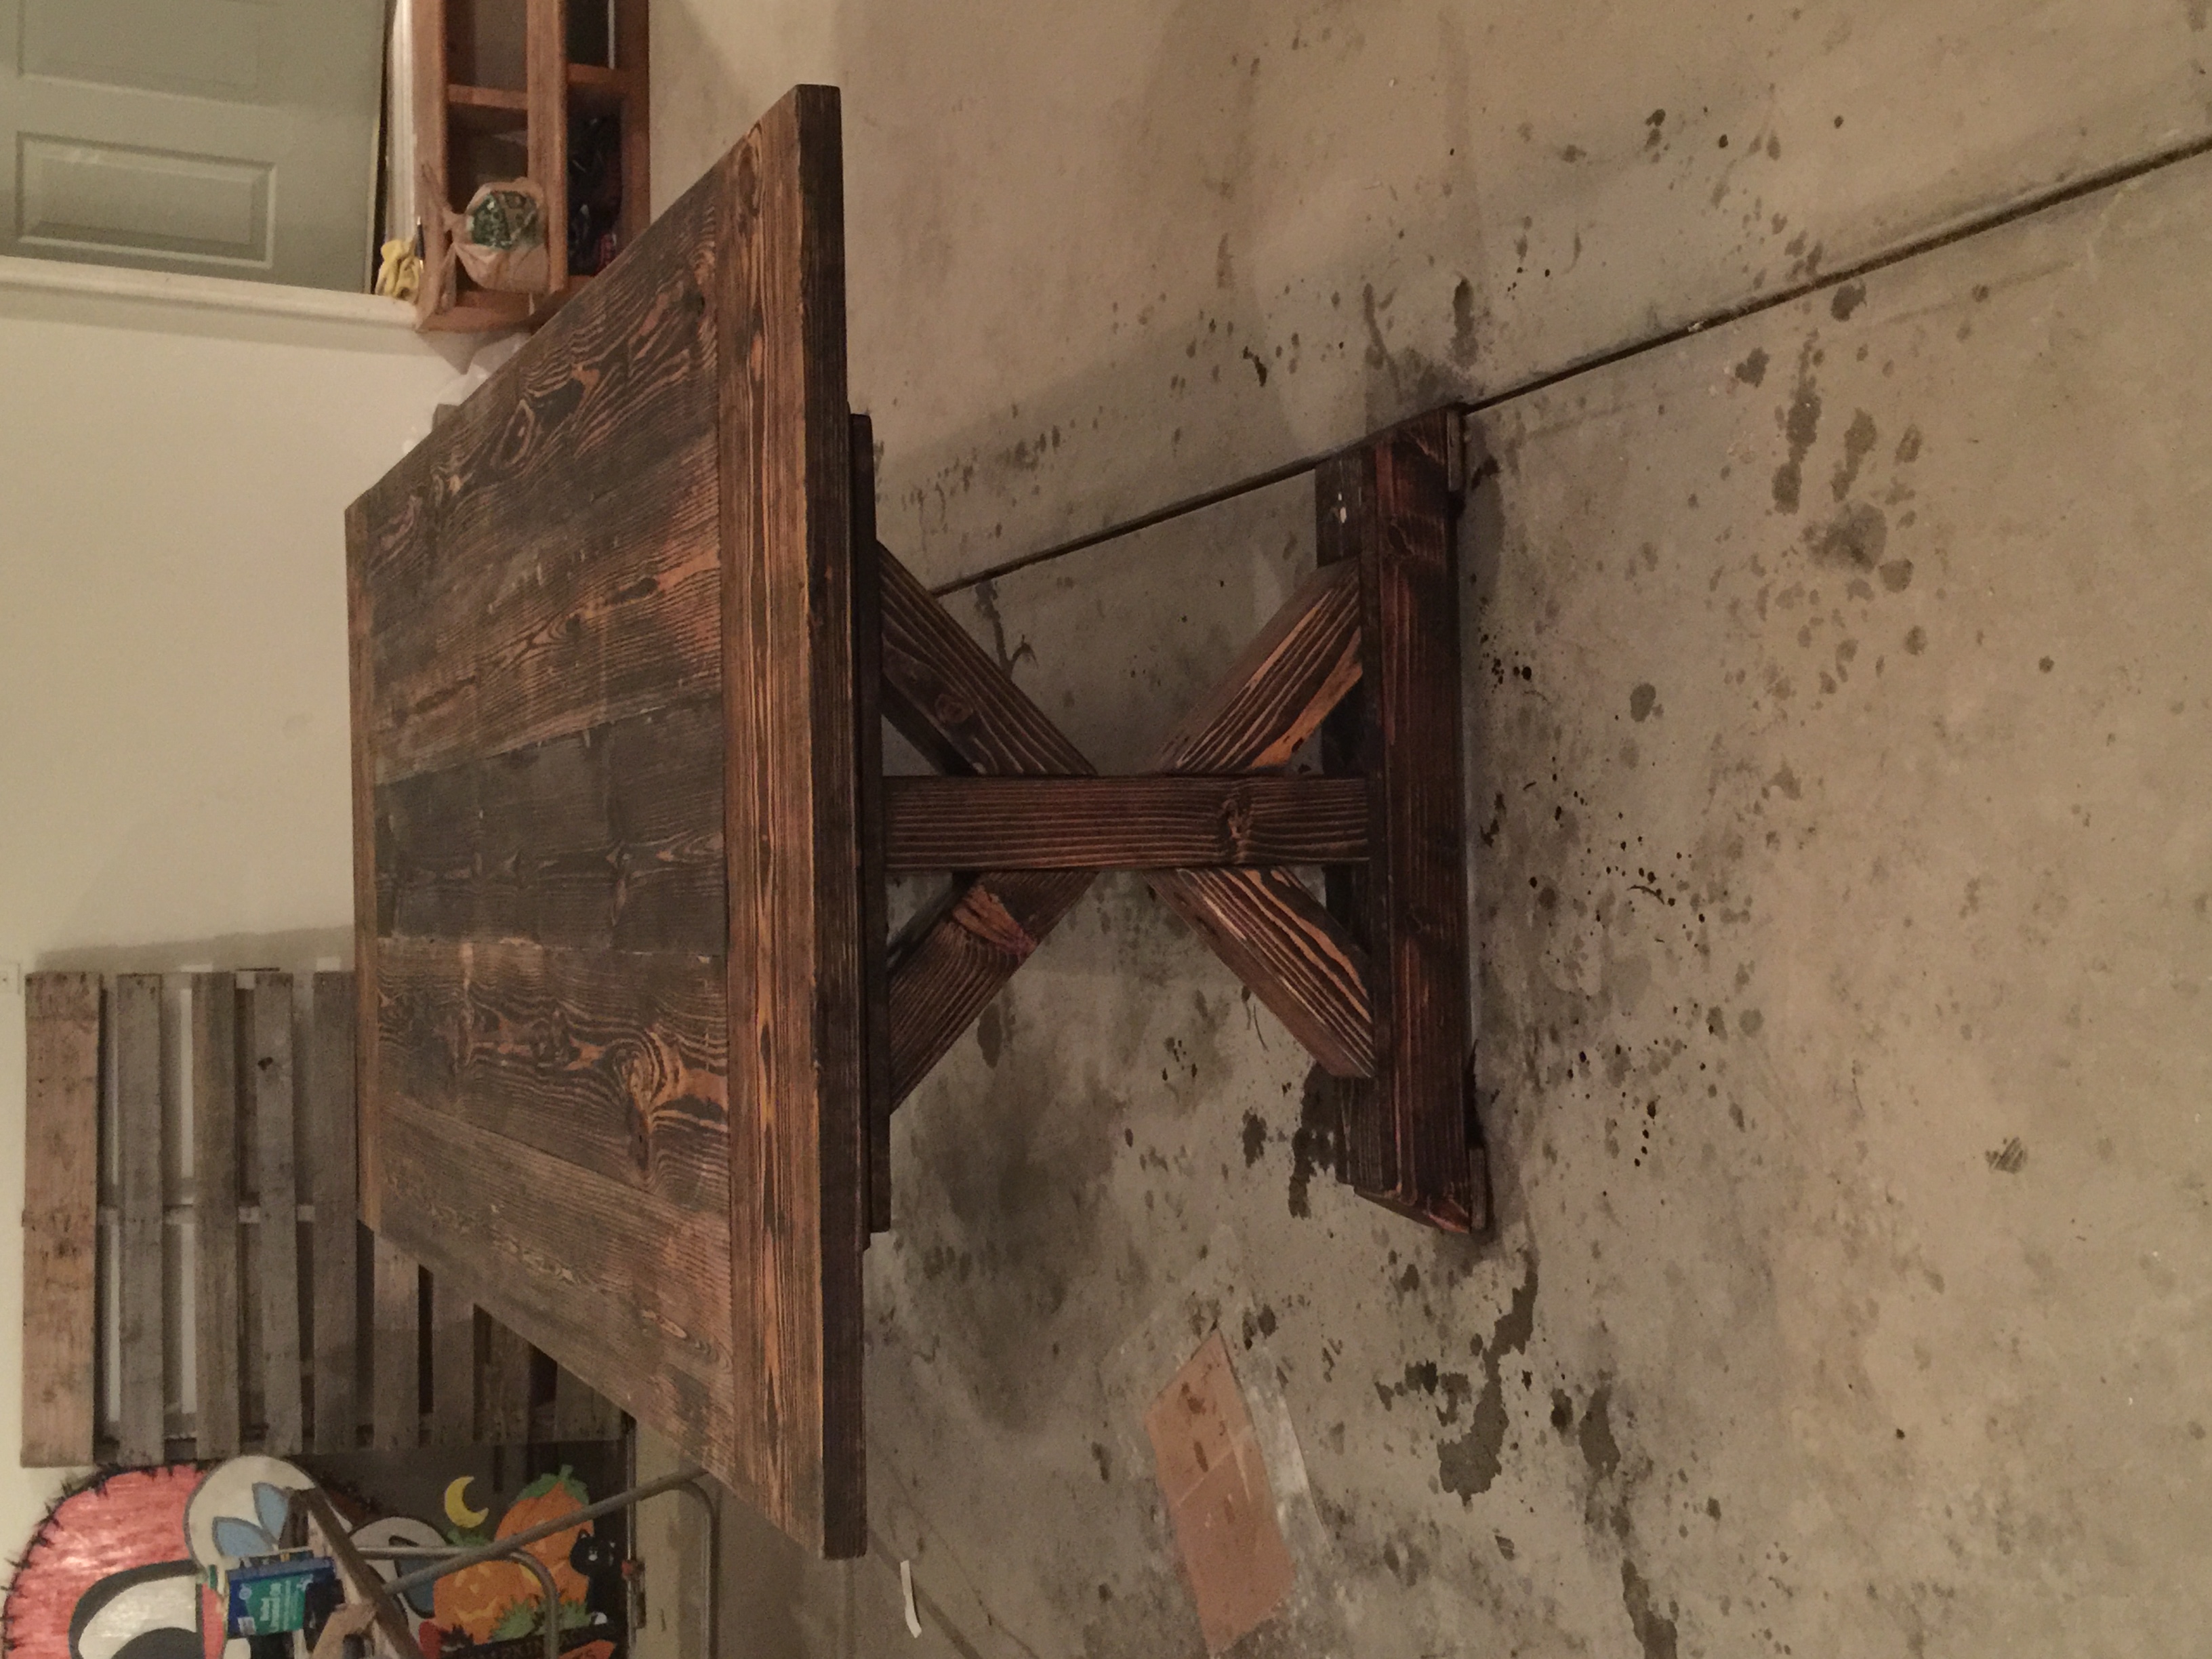
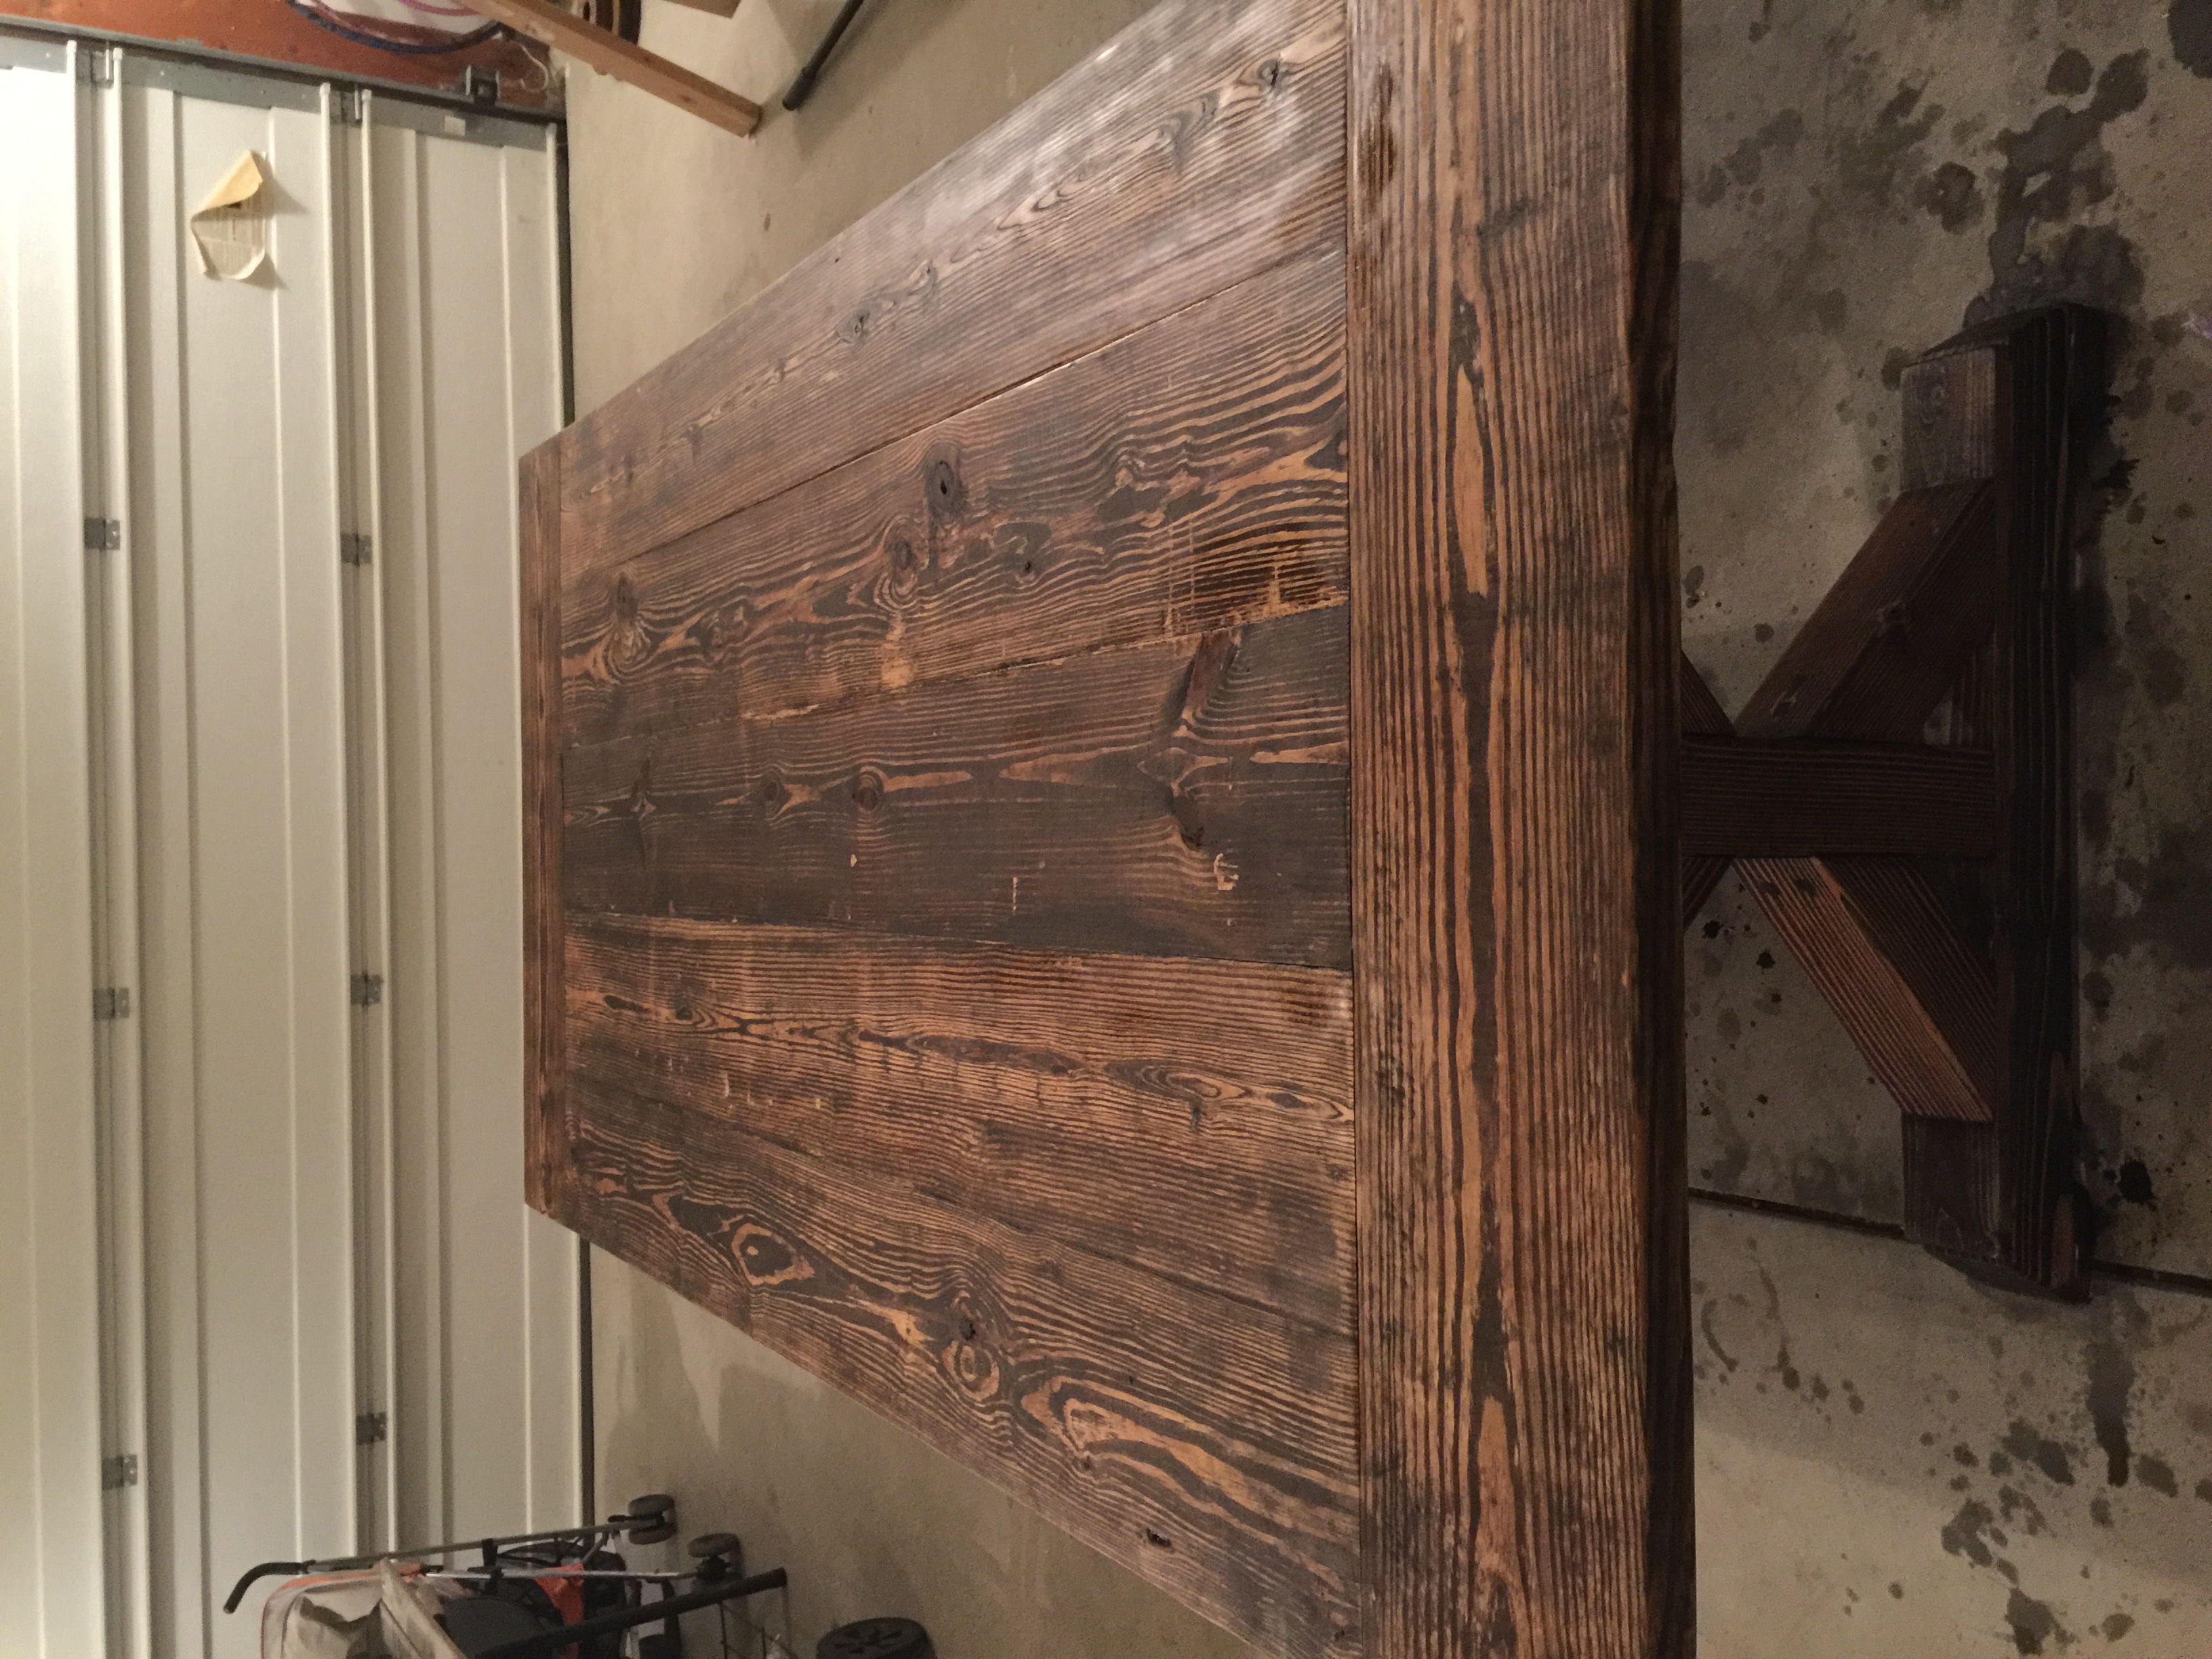
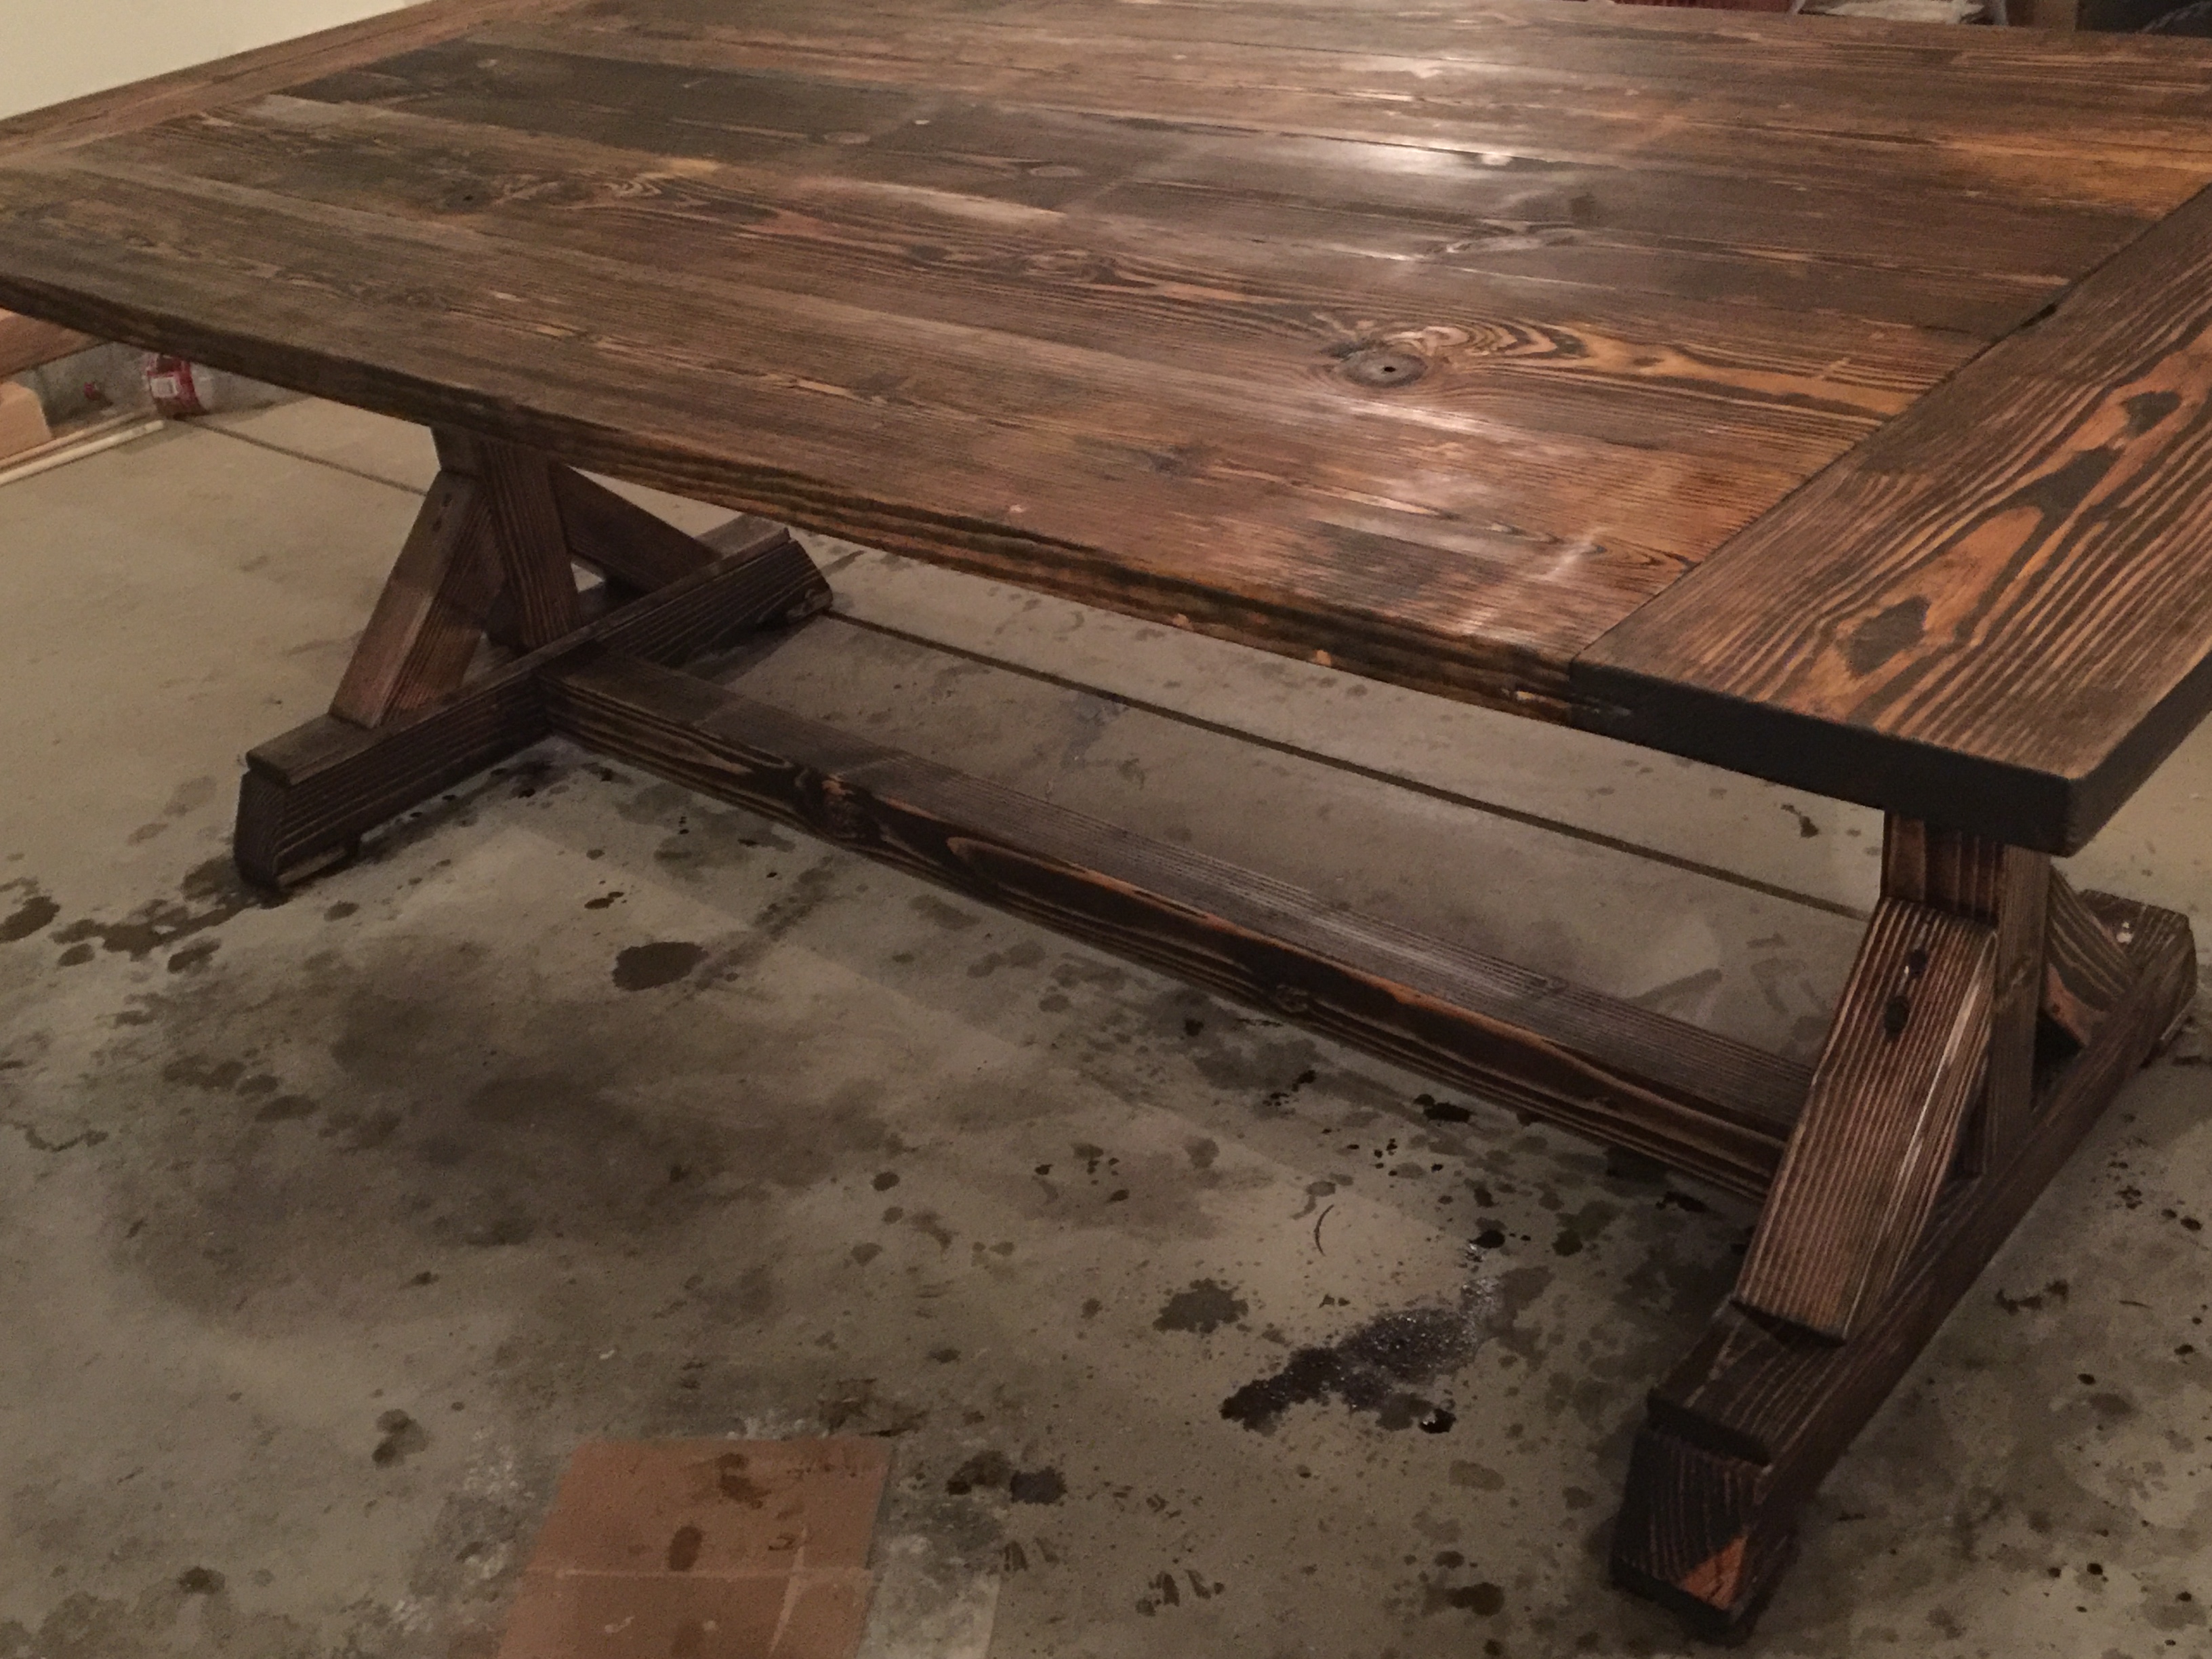
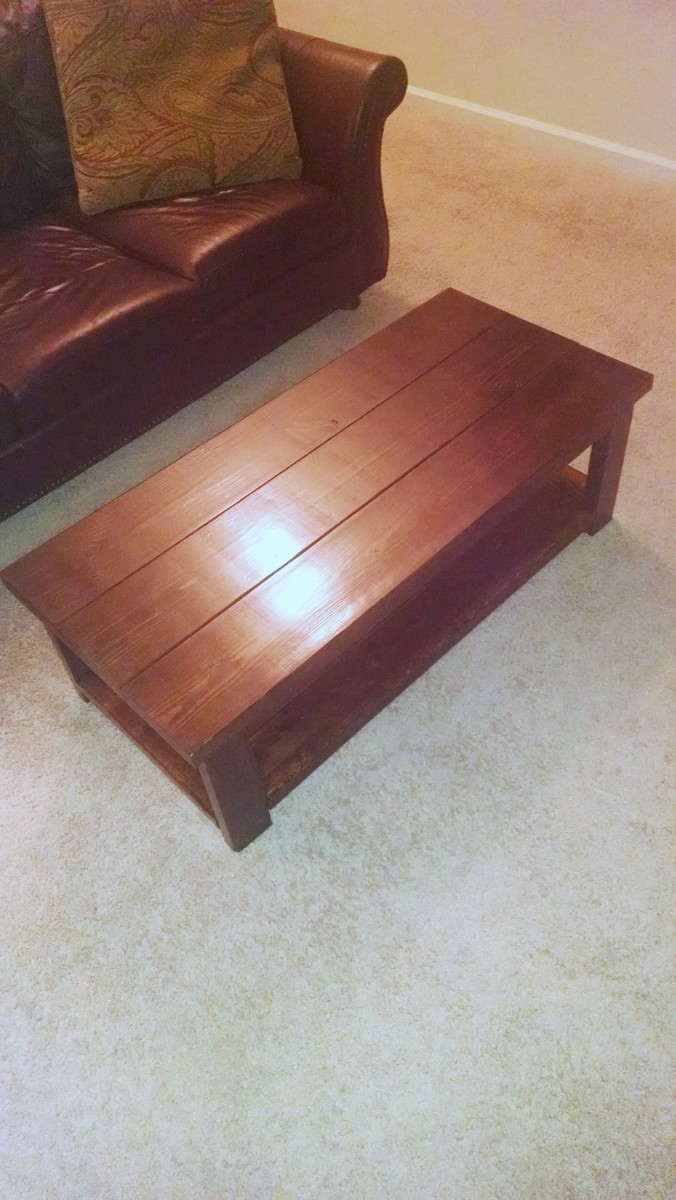
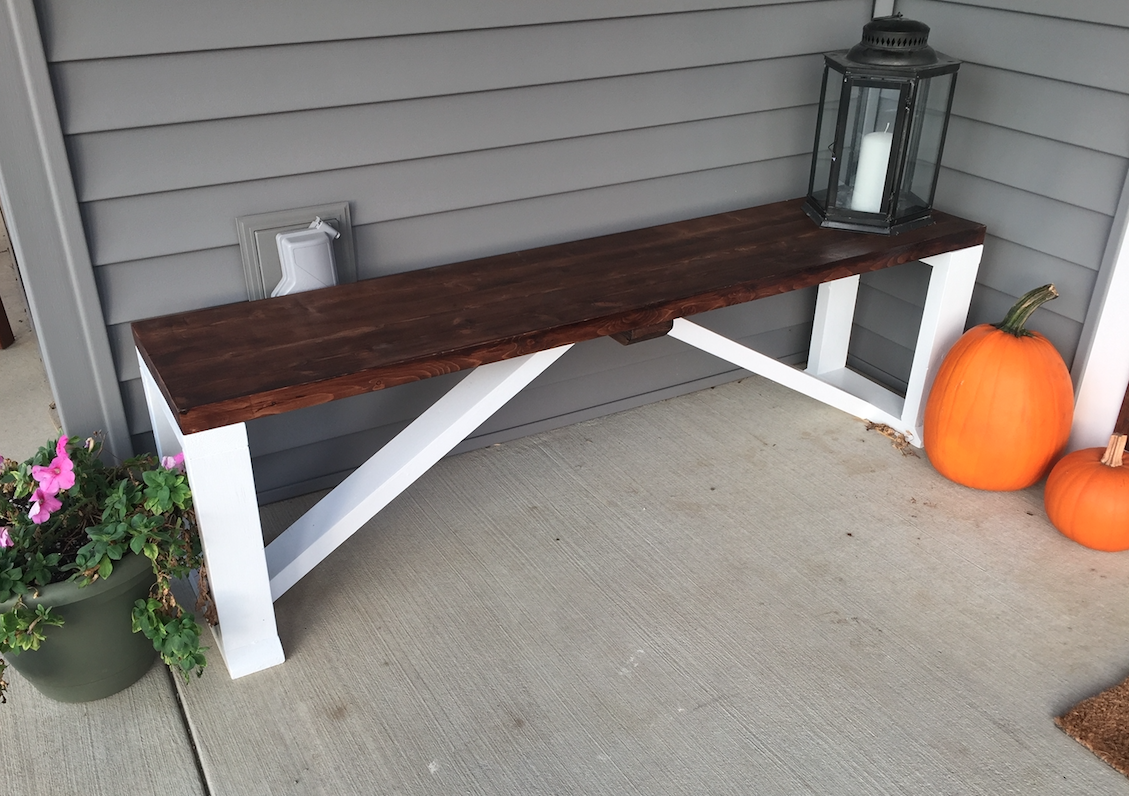
This is my variation of the Rustic X Coffee Table. I was going for a more classic to modern look and I prefer dark stain. This was my first furniture building project and I'm very happy with the results.
I changed the top to be three 2x8's (1.5" x 7.25") and the bottom shelf is five 2x4's (1.5" x 3.5") and adjusted lengths accordingly. I also shortened the legs to 14" so it's a good height for use as a foot rest from the couch.
I was originally going to change the X's on the ends to 3 vertical 2x2's, but we have our first baby on the way and the way the spacing worked out was asking for a head to get stuck. So I decided to leave it open.
The table top and the bottom shelf were biscuit joined instead of doing tons of pocket holes. I recommend that if you have access to a biscuit/plate joiner (I borrowed a friend's) . The rest of the frame was done using pocket holes from the Kreg jig.
I recommend buying Kreg Jig R3 instead of the Mini. You get way more for your money. I also recommend using the Kreg pocket hole screws, some of which come with the R3 kit. They make driving much easier and you don't have to worry about stripping the square heads.

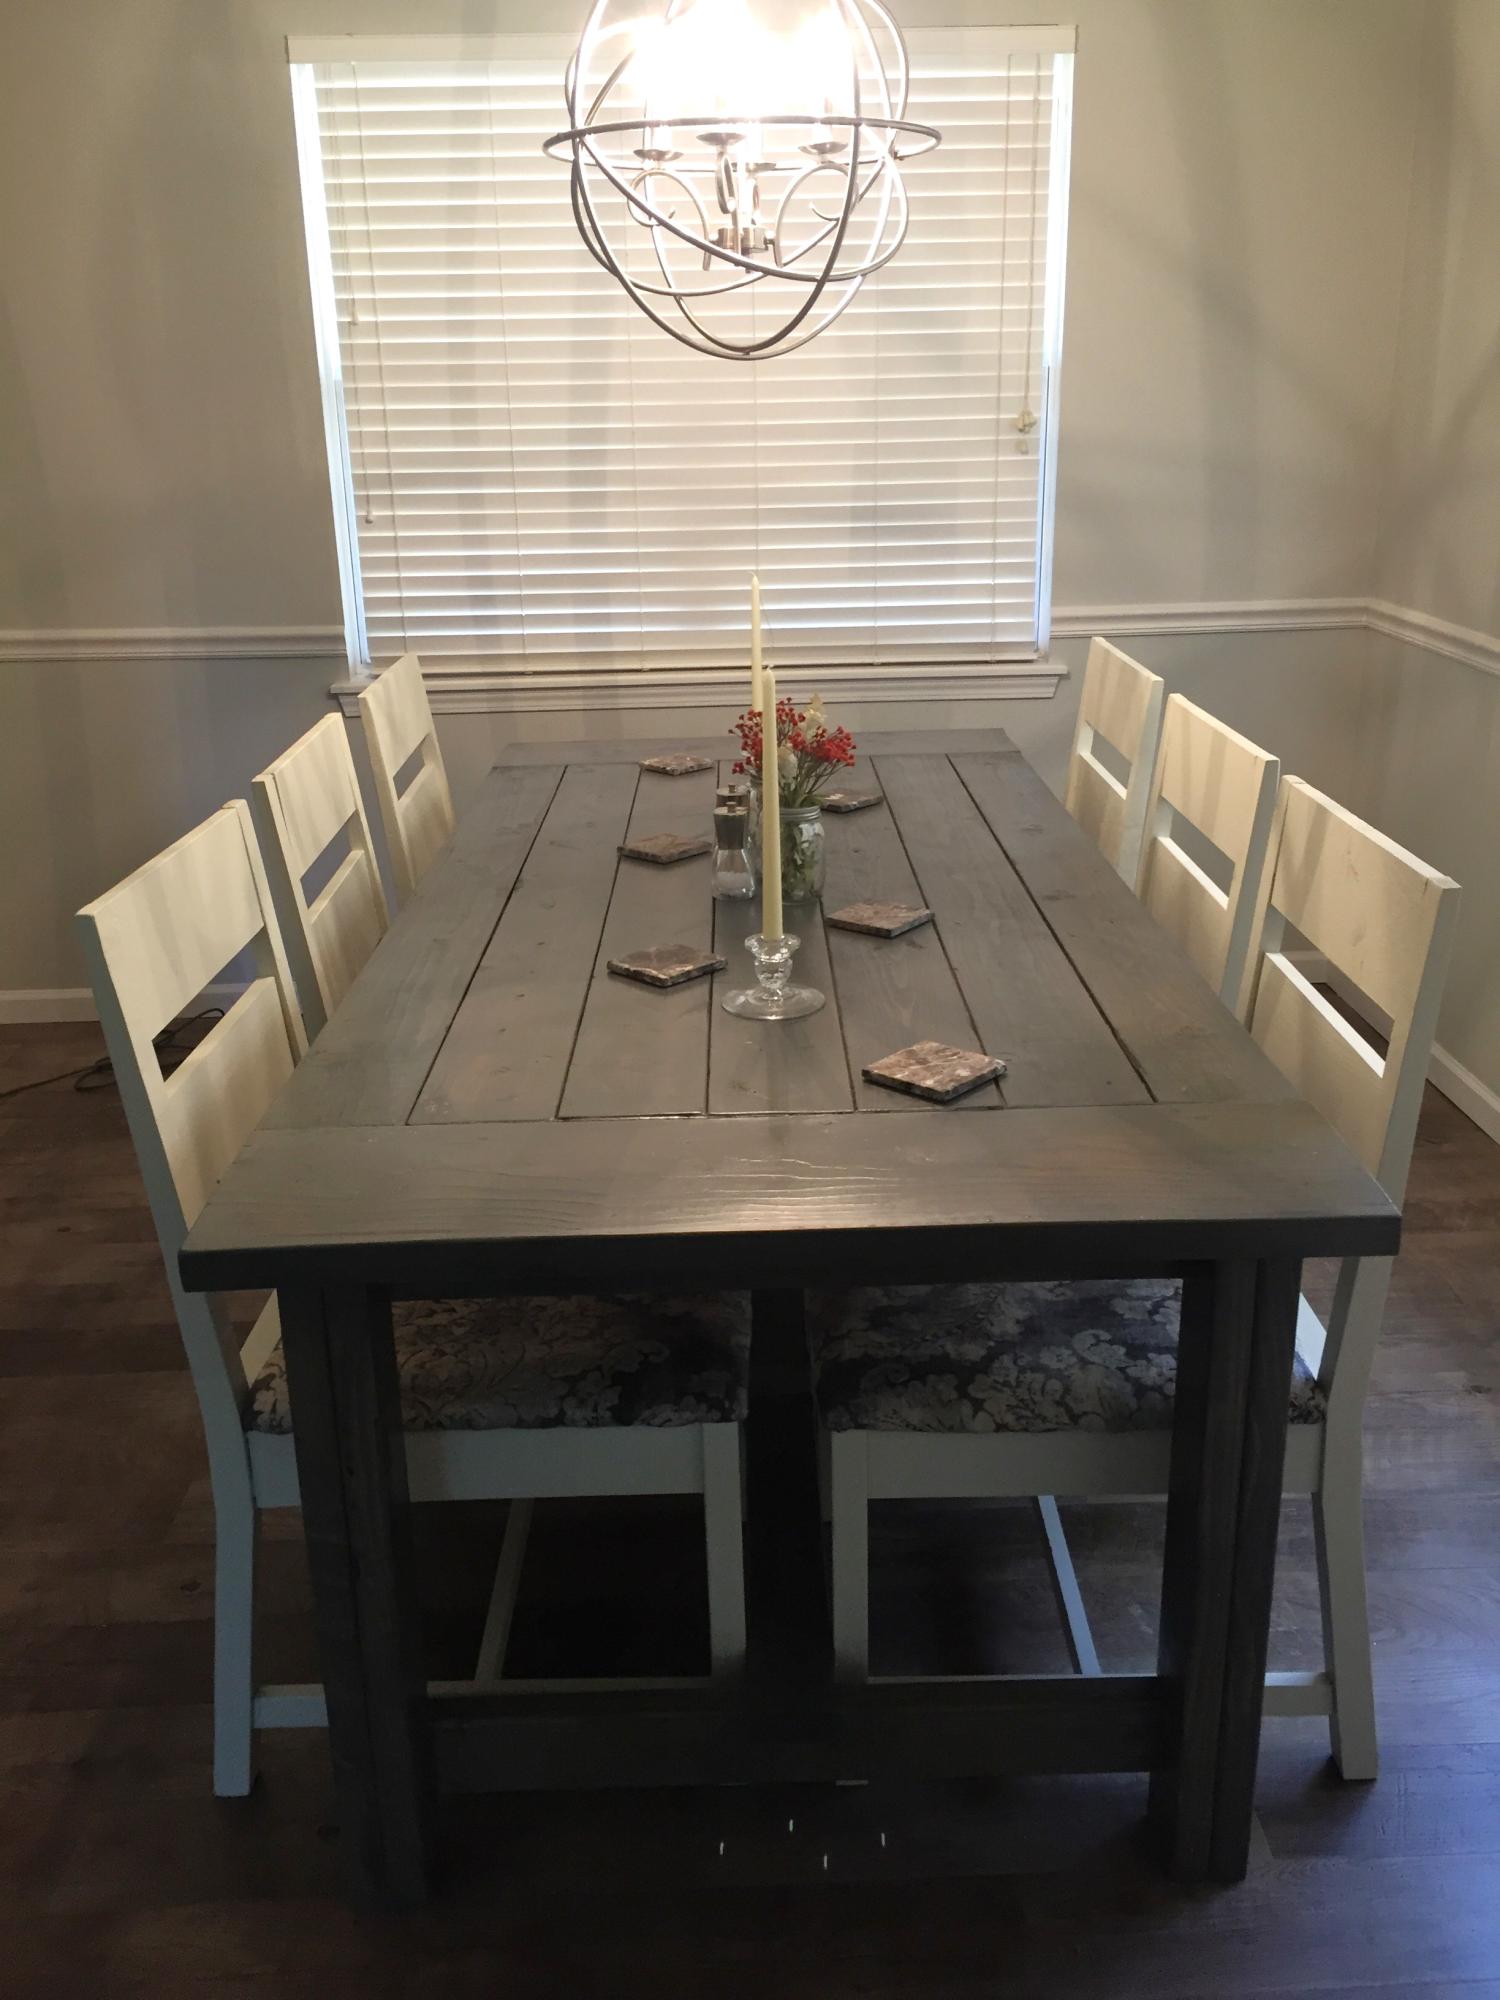
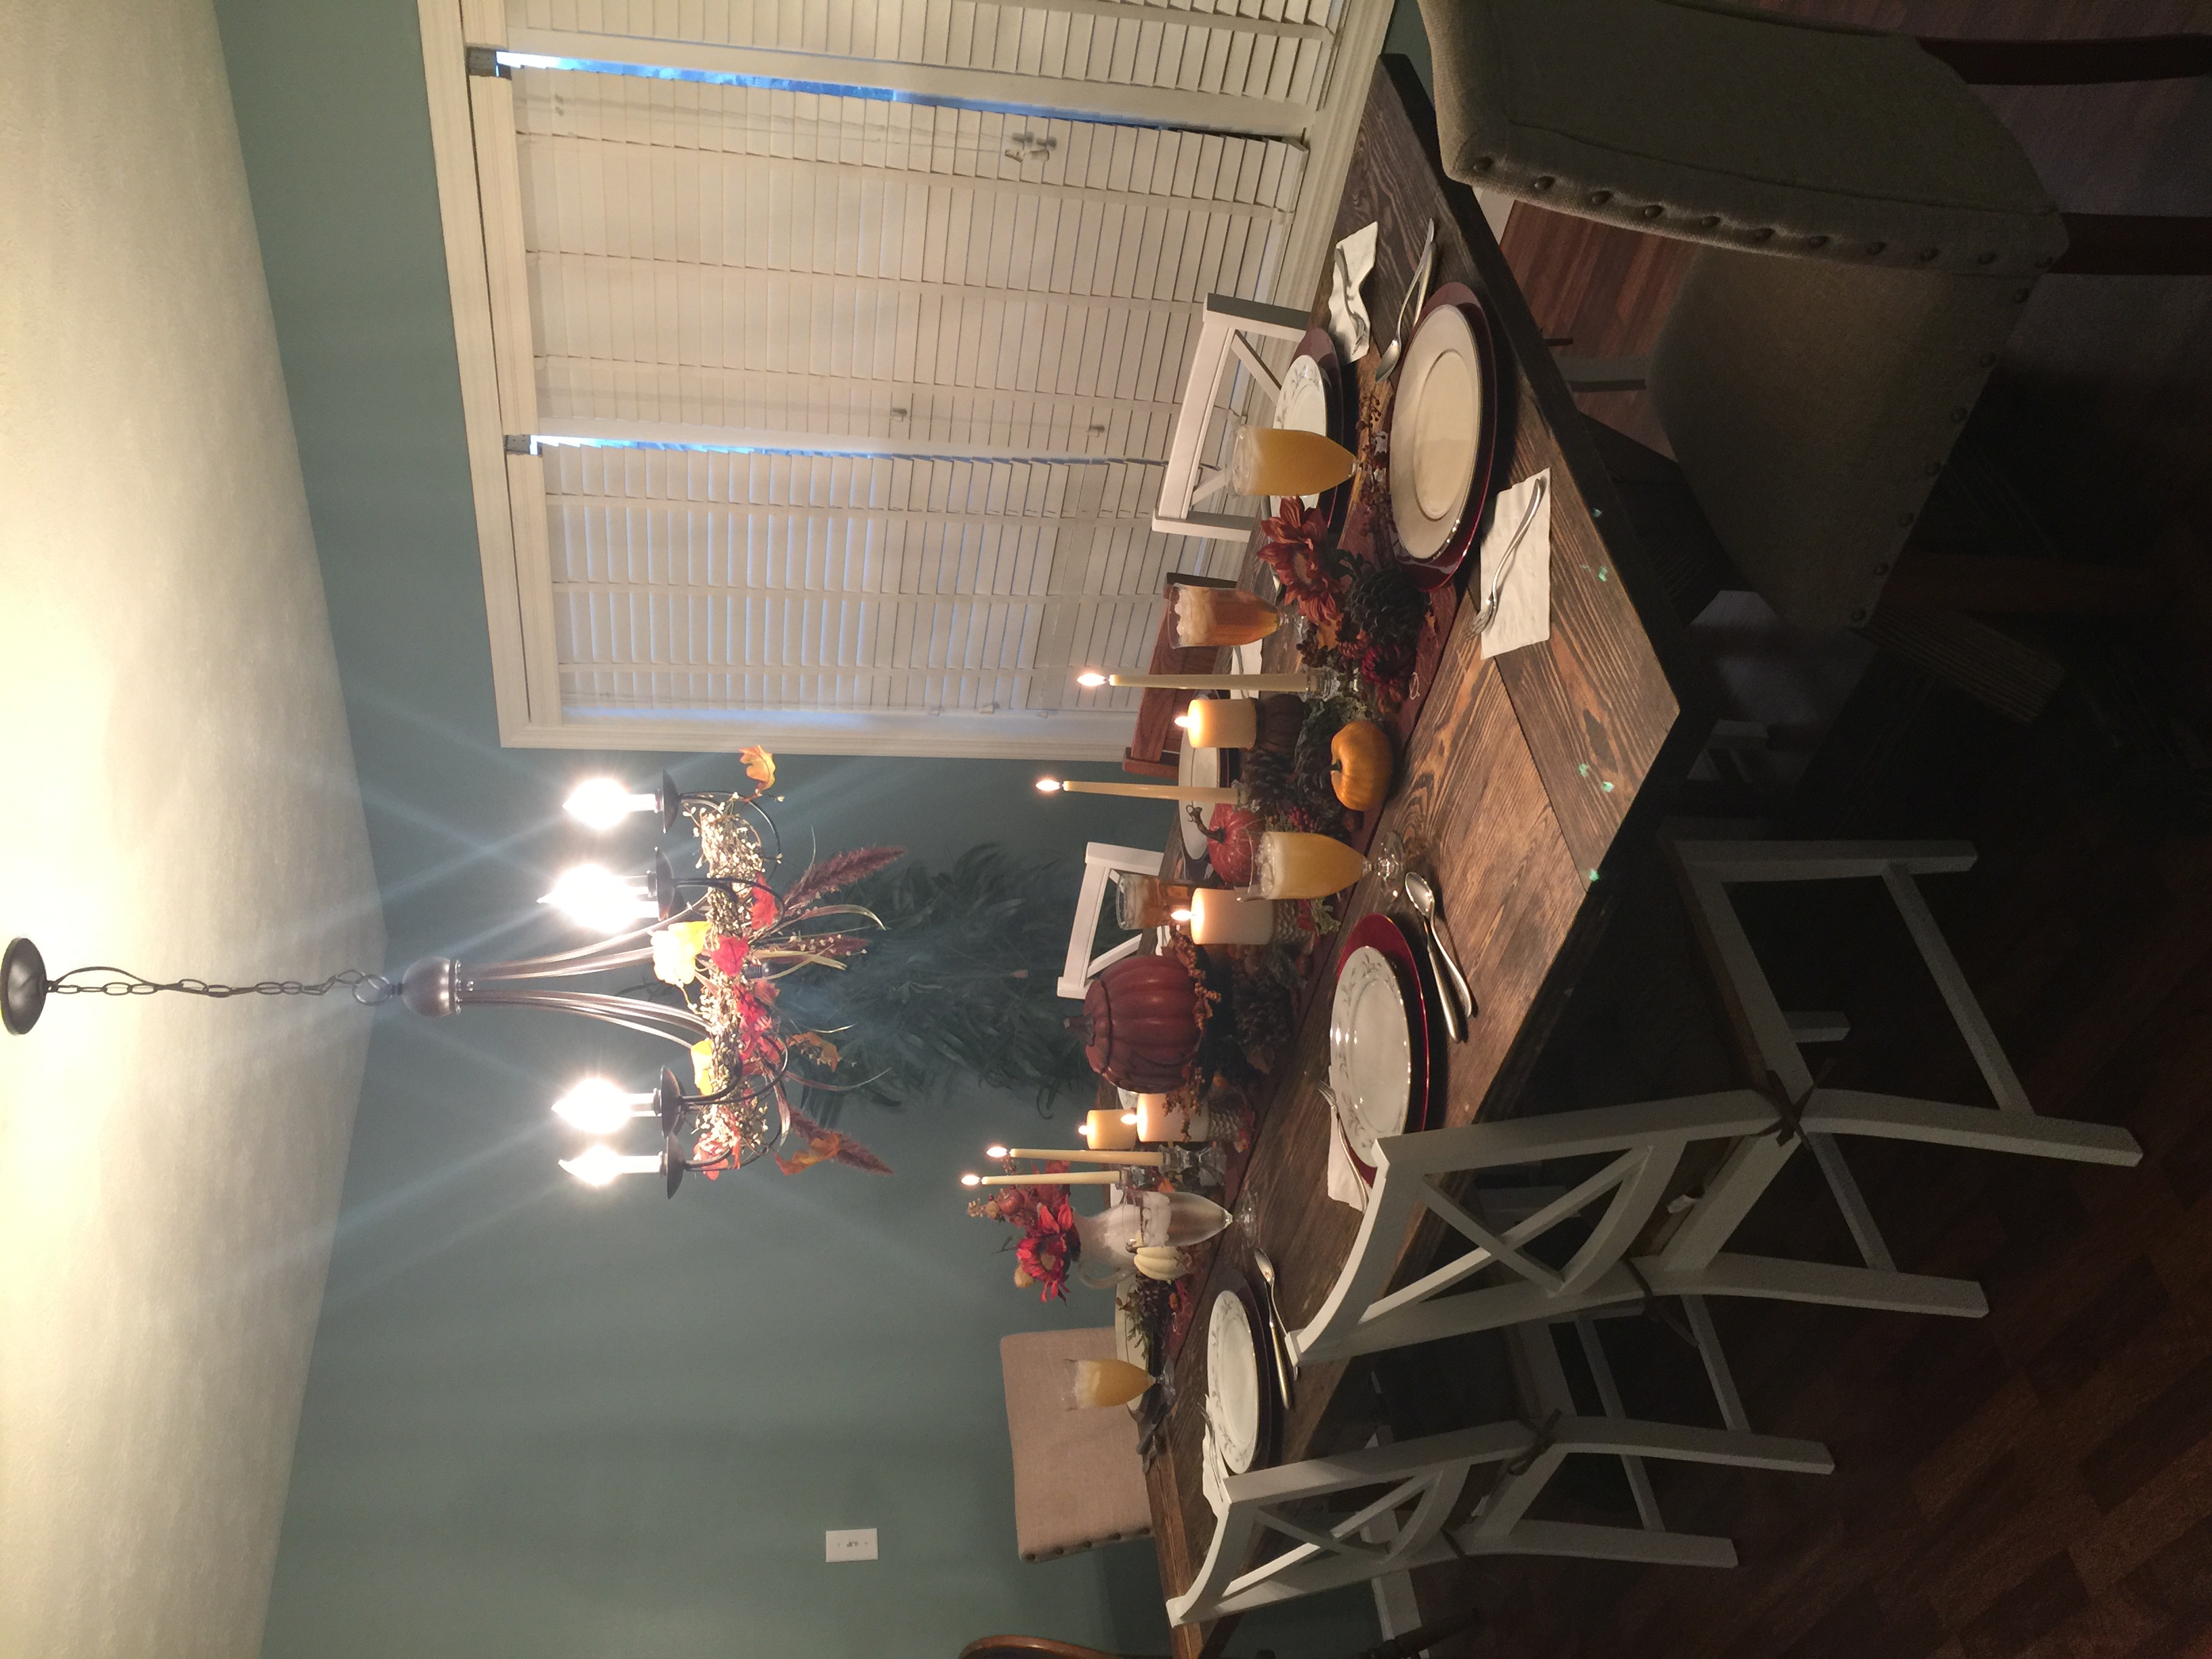
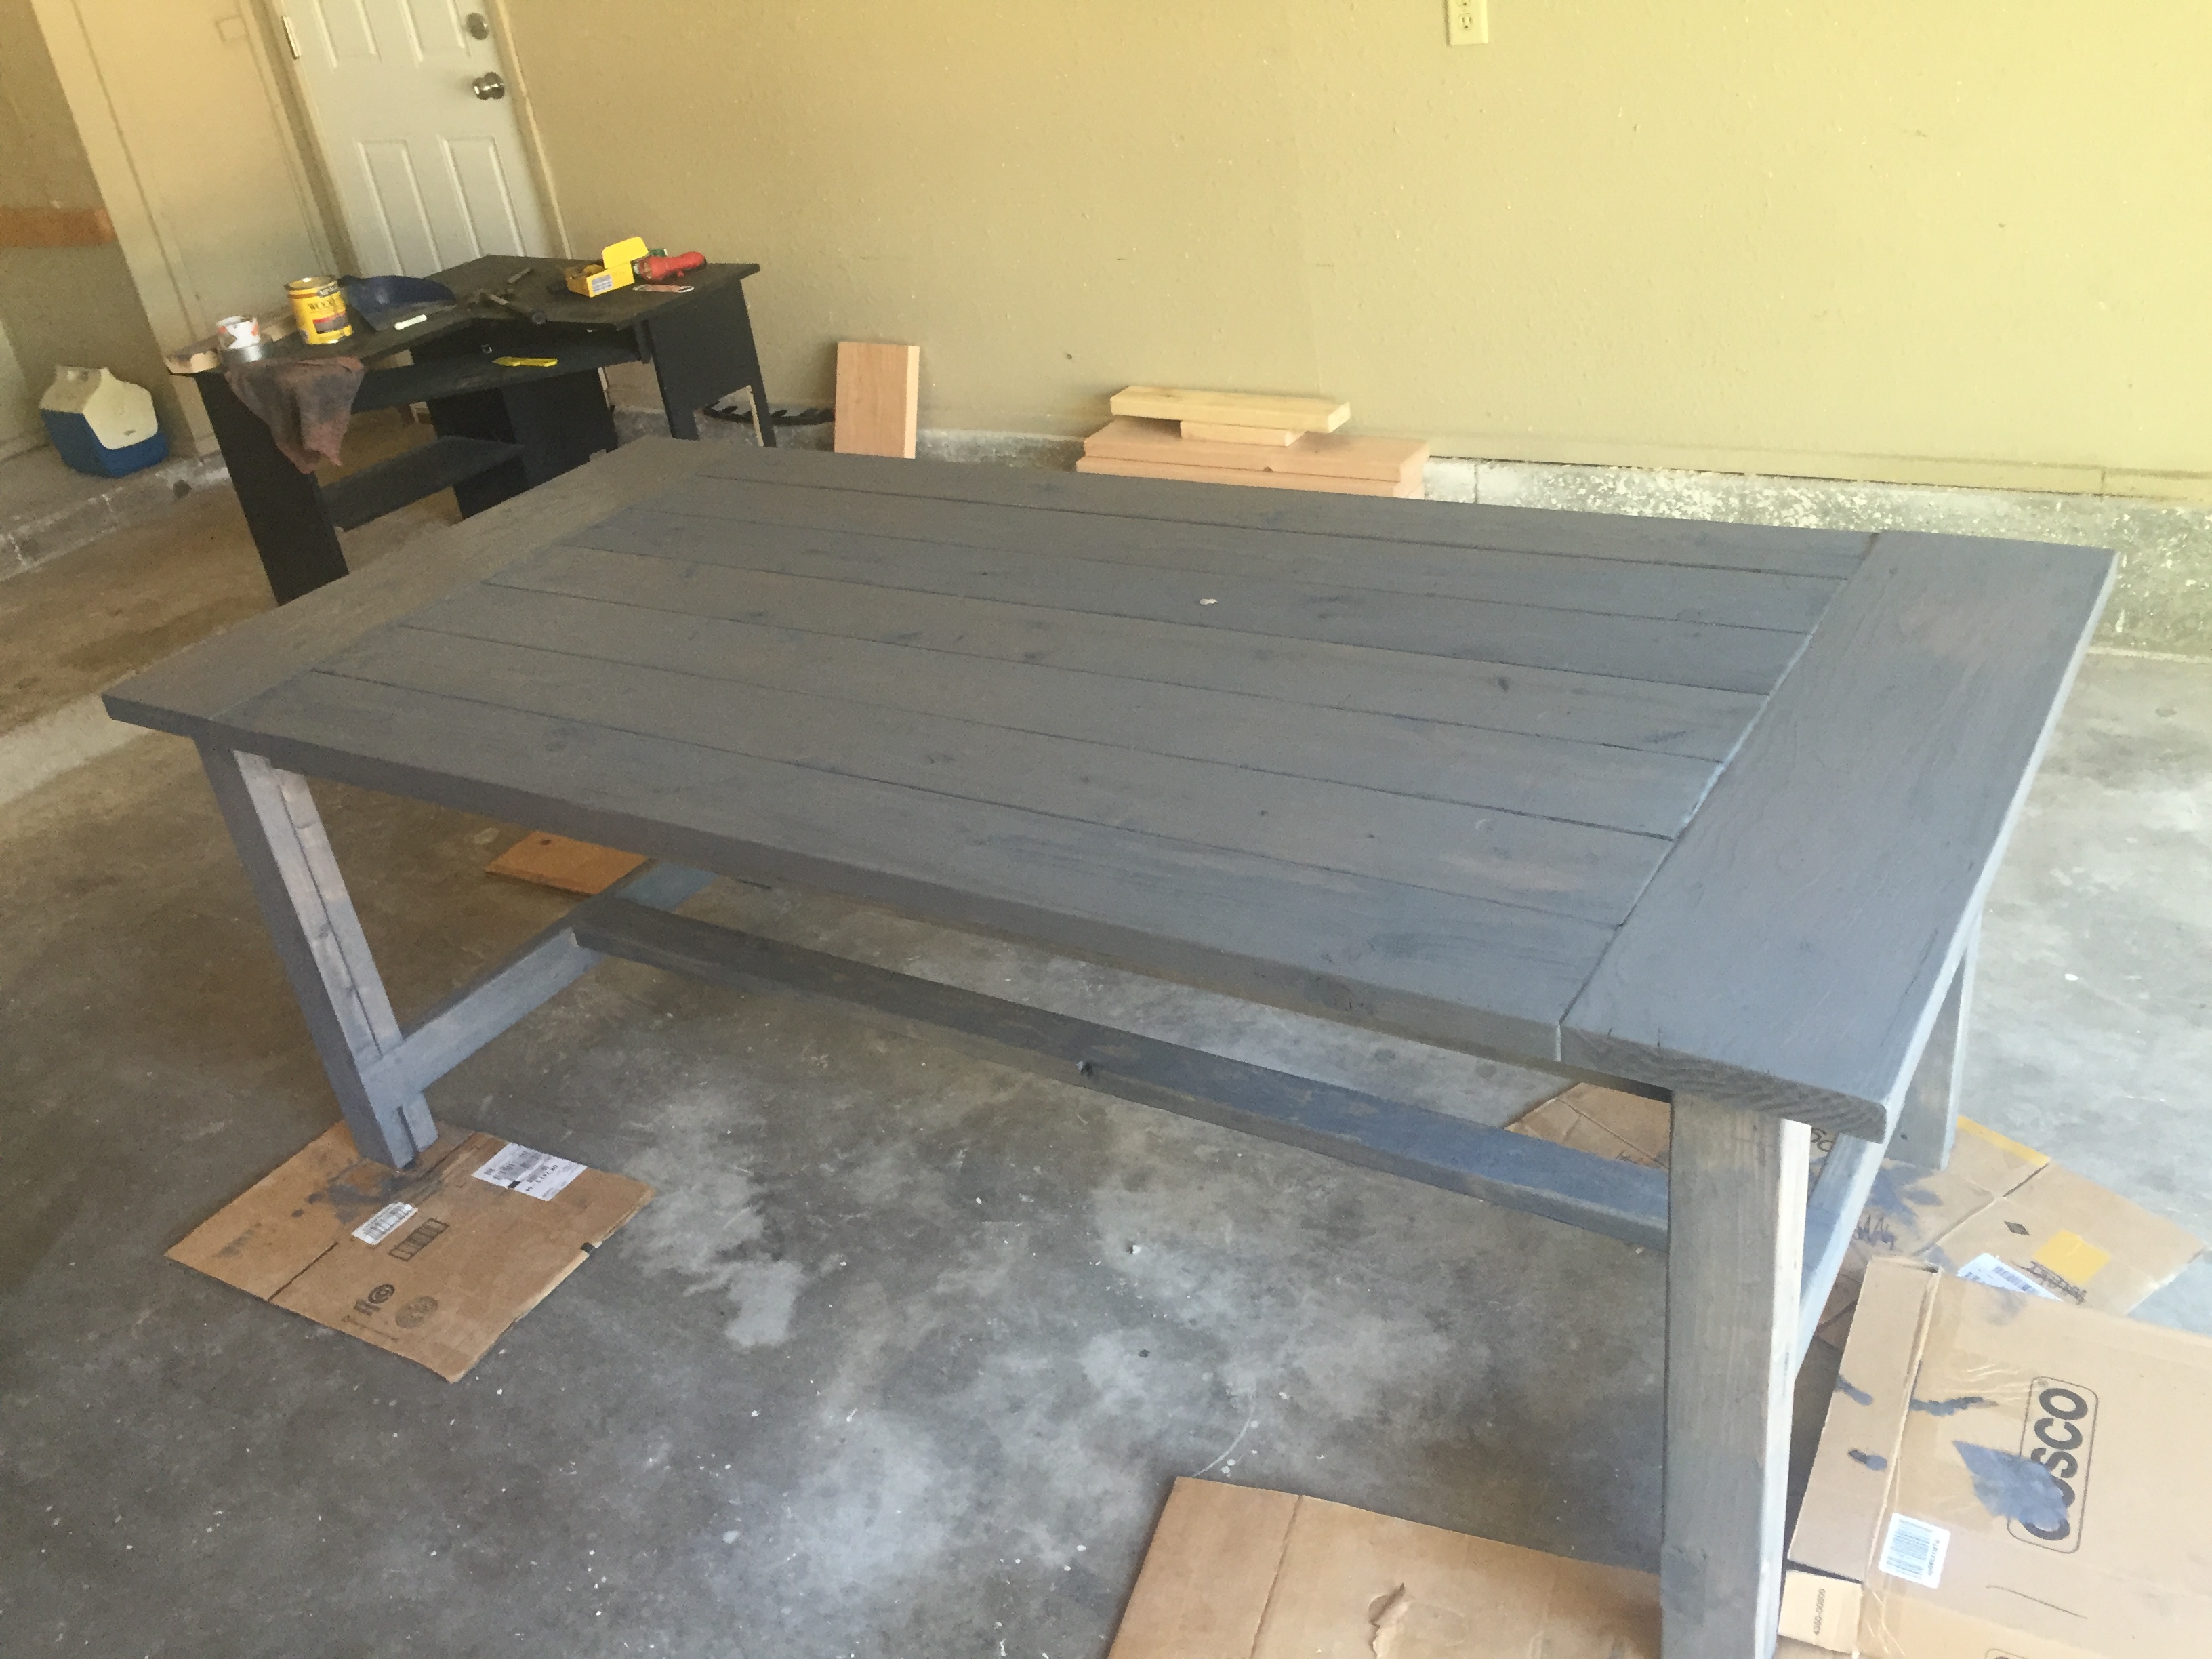
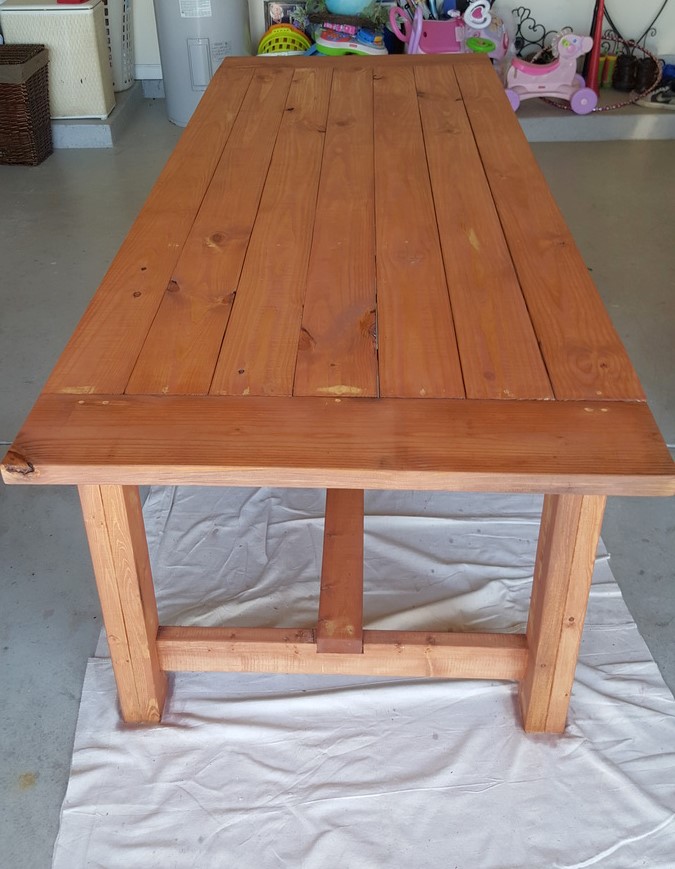
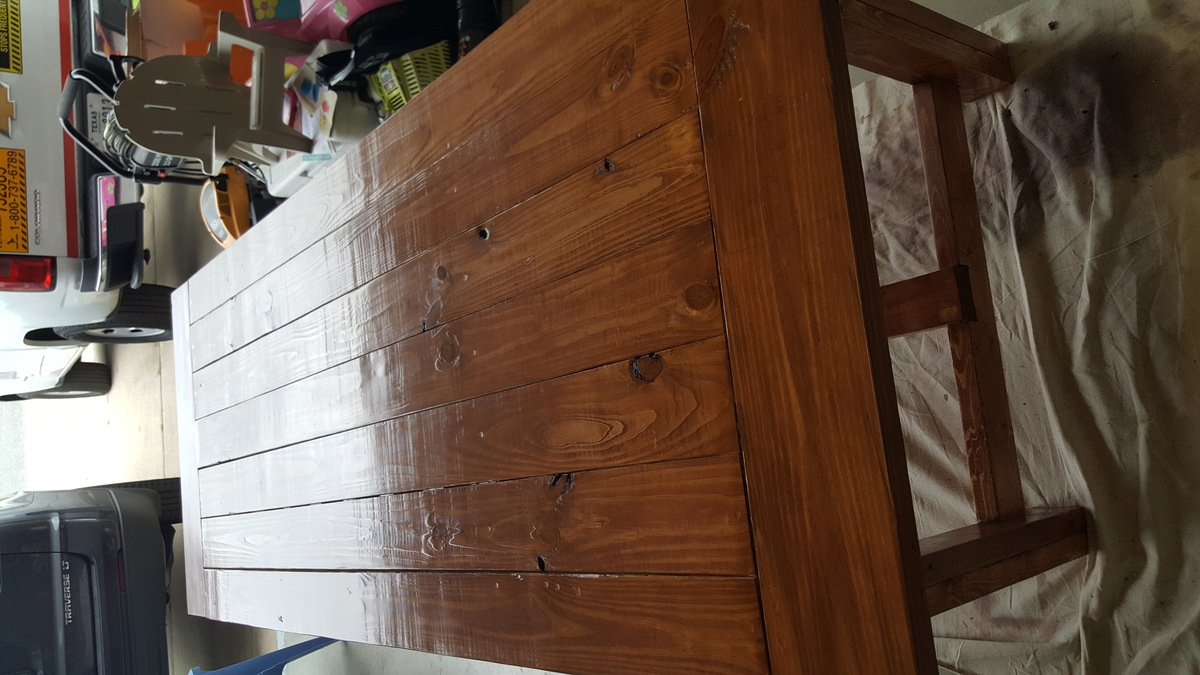
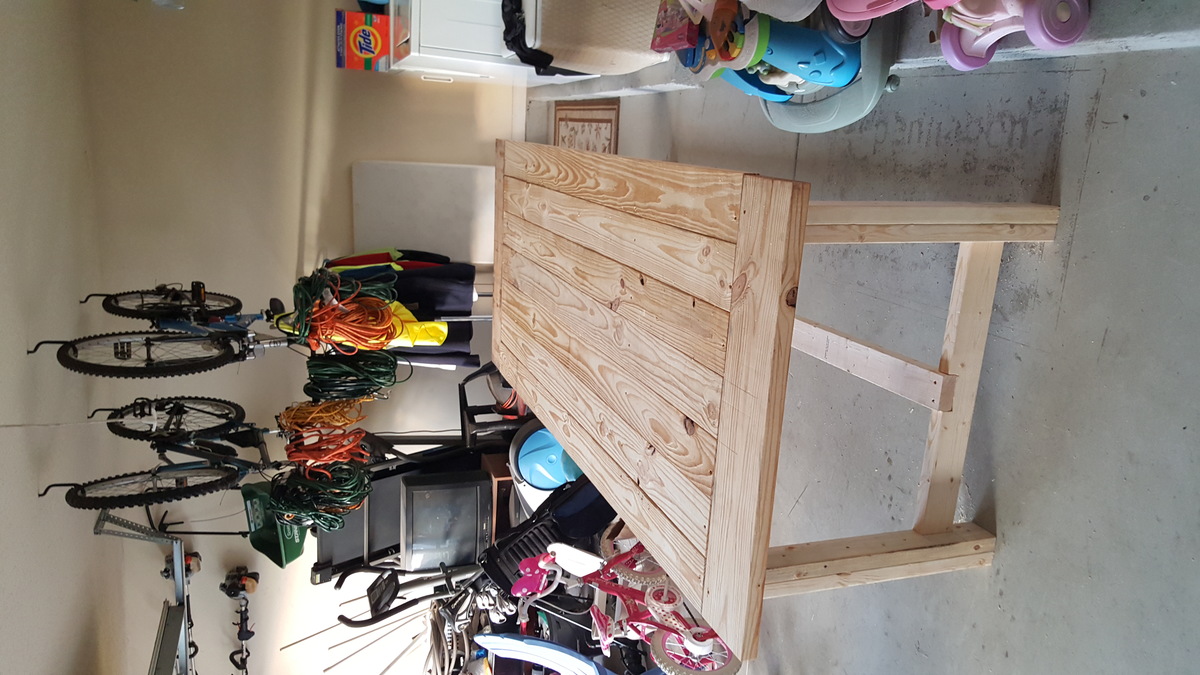
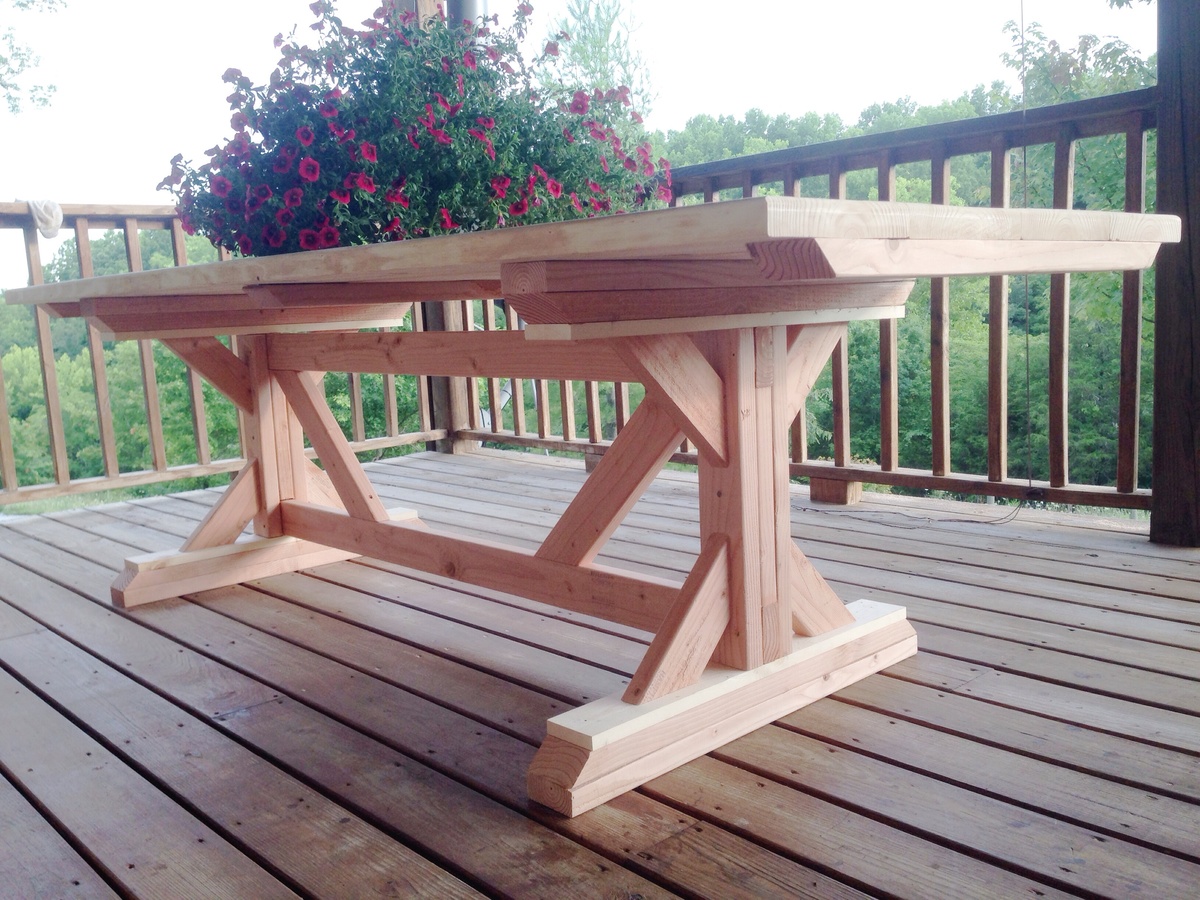
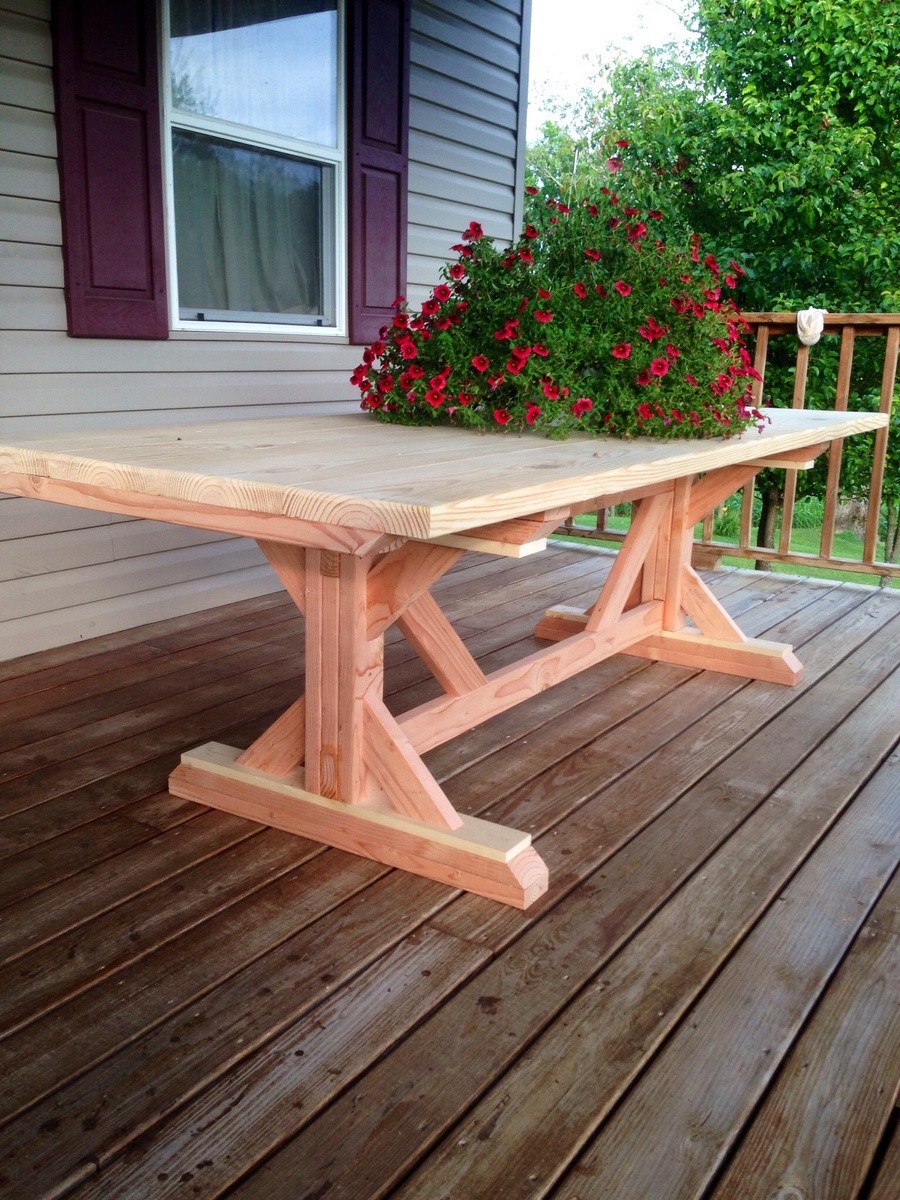
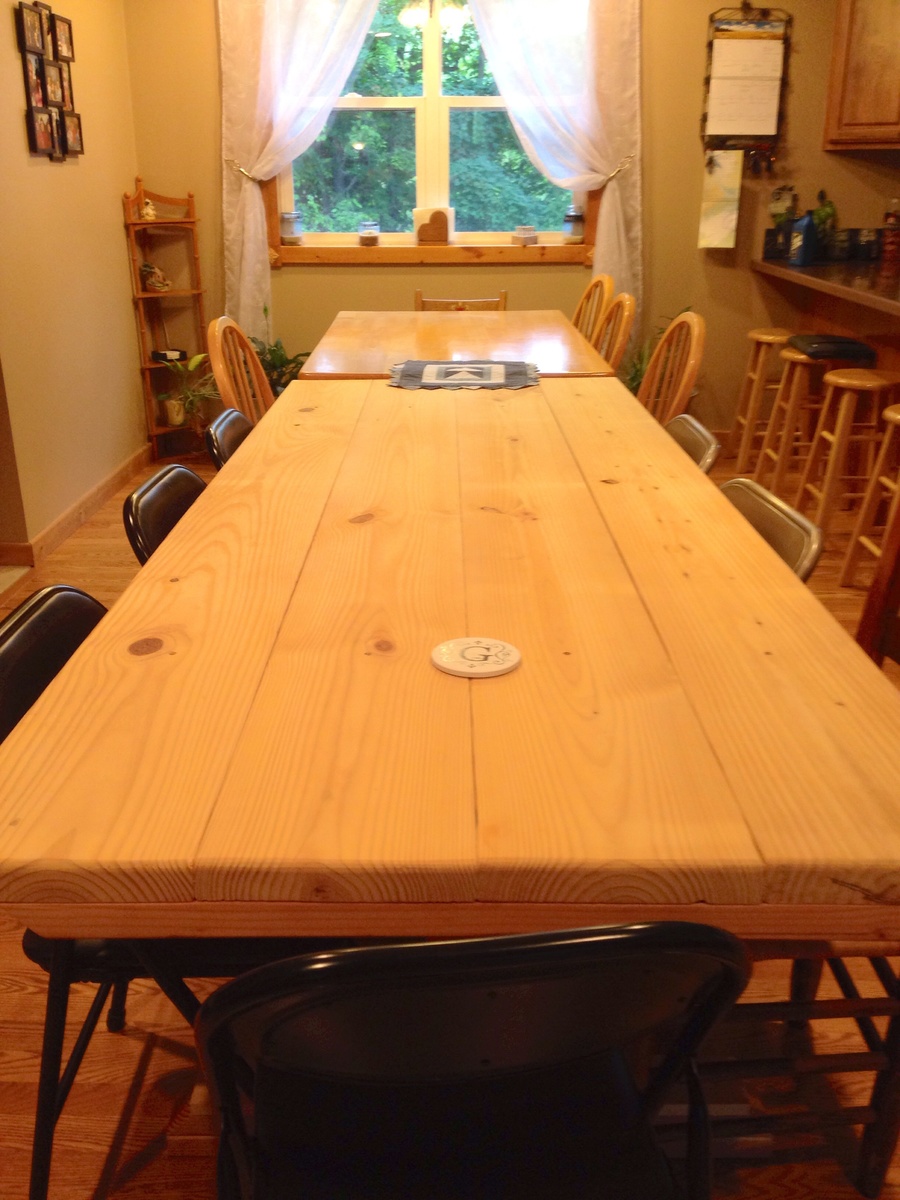
Seven foot farmhouse table with weathered grey stain. Instead of using the pocket hole method we screwed the boards together and put stainable wood filler over the screw holes. The chairs were made from ana white plans as well.
We are in love with our new table! It was definitely a labor of love and being so large we had to transport it in pieces but it was very worth it.

This is a king sized bed frame. The beams interlock. They were burnt with a torch, stained and clear coated. The headboard was my first attempt at upholstery.


Mon, 10/22/2012 - 18:54
Oh my gosh, this bed is absolutely gorgeous! Did you use or modify one of Ana's plans, draw it up yourself? Would absolutely love the plans to build one for myself if its okay :)
Sun, 10/28/2012 - 07:31
Thanks! I don't really have any plans for it. I got the idea from searching screwless bedframe. Found one one instructables site:
http://www.instructables.com/id/Nail-less-glue-less-almost-screw-less-f…
I wanted one that could be built with no screws (the headboard does have some screws though). My plan is to raise the frame on posts also so I could get rid of the box spring.
The hardest part is making the wedge cutout. I used a miter saw first and finished the cut on the scroll saw to get straight clean cutout. (step 3 from the website posted shows a good picture)
The headboard is basically a smaller version of the bed frame. Then I stapled the fabric on, then stuffed it with quilting baton.
Hope that helps. Check out the link, it will help more.
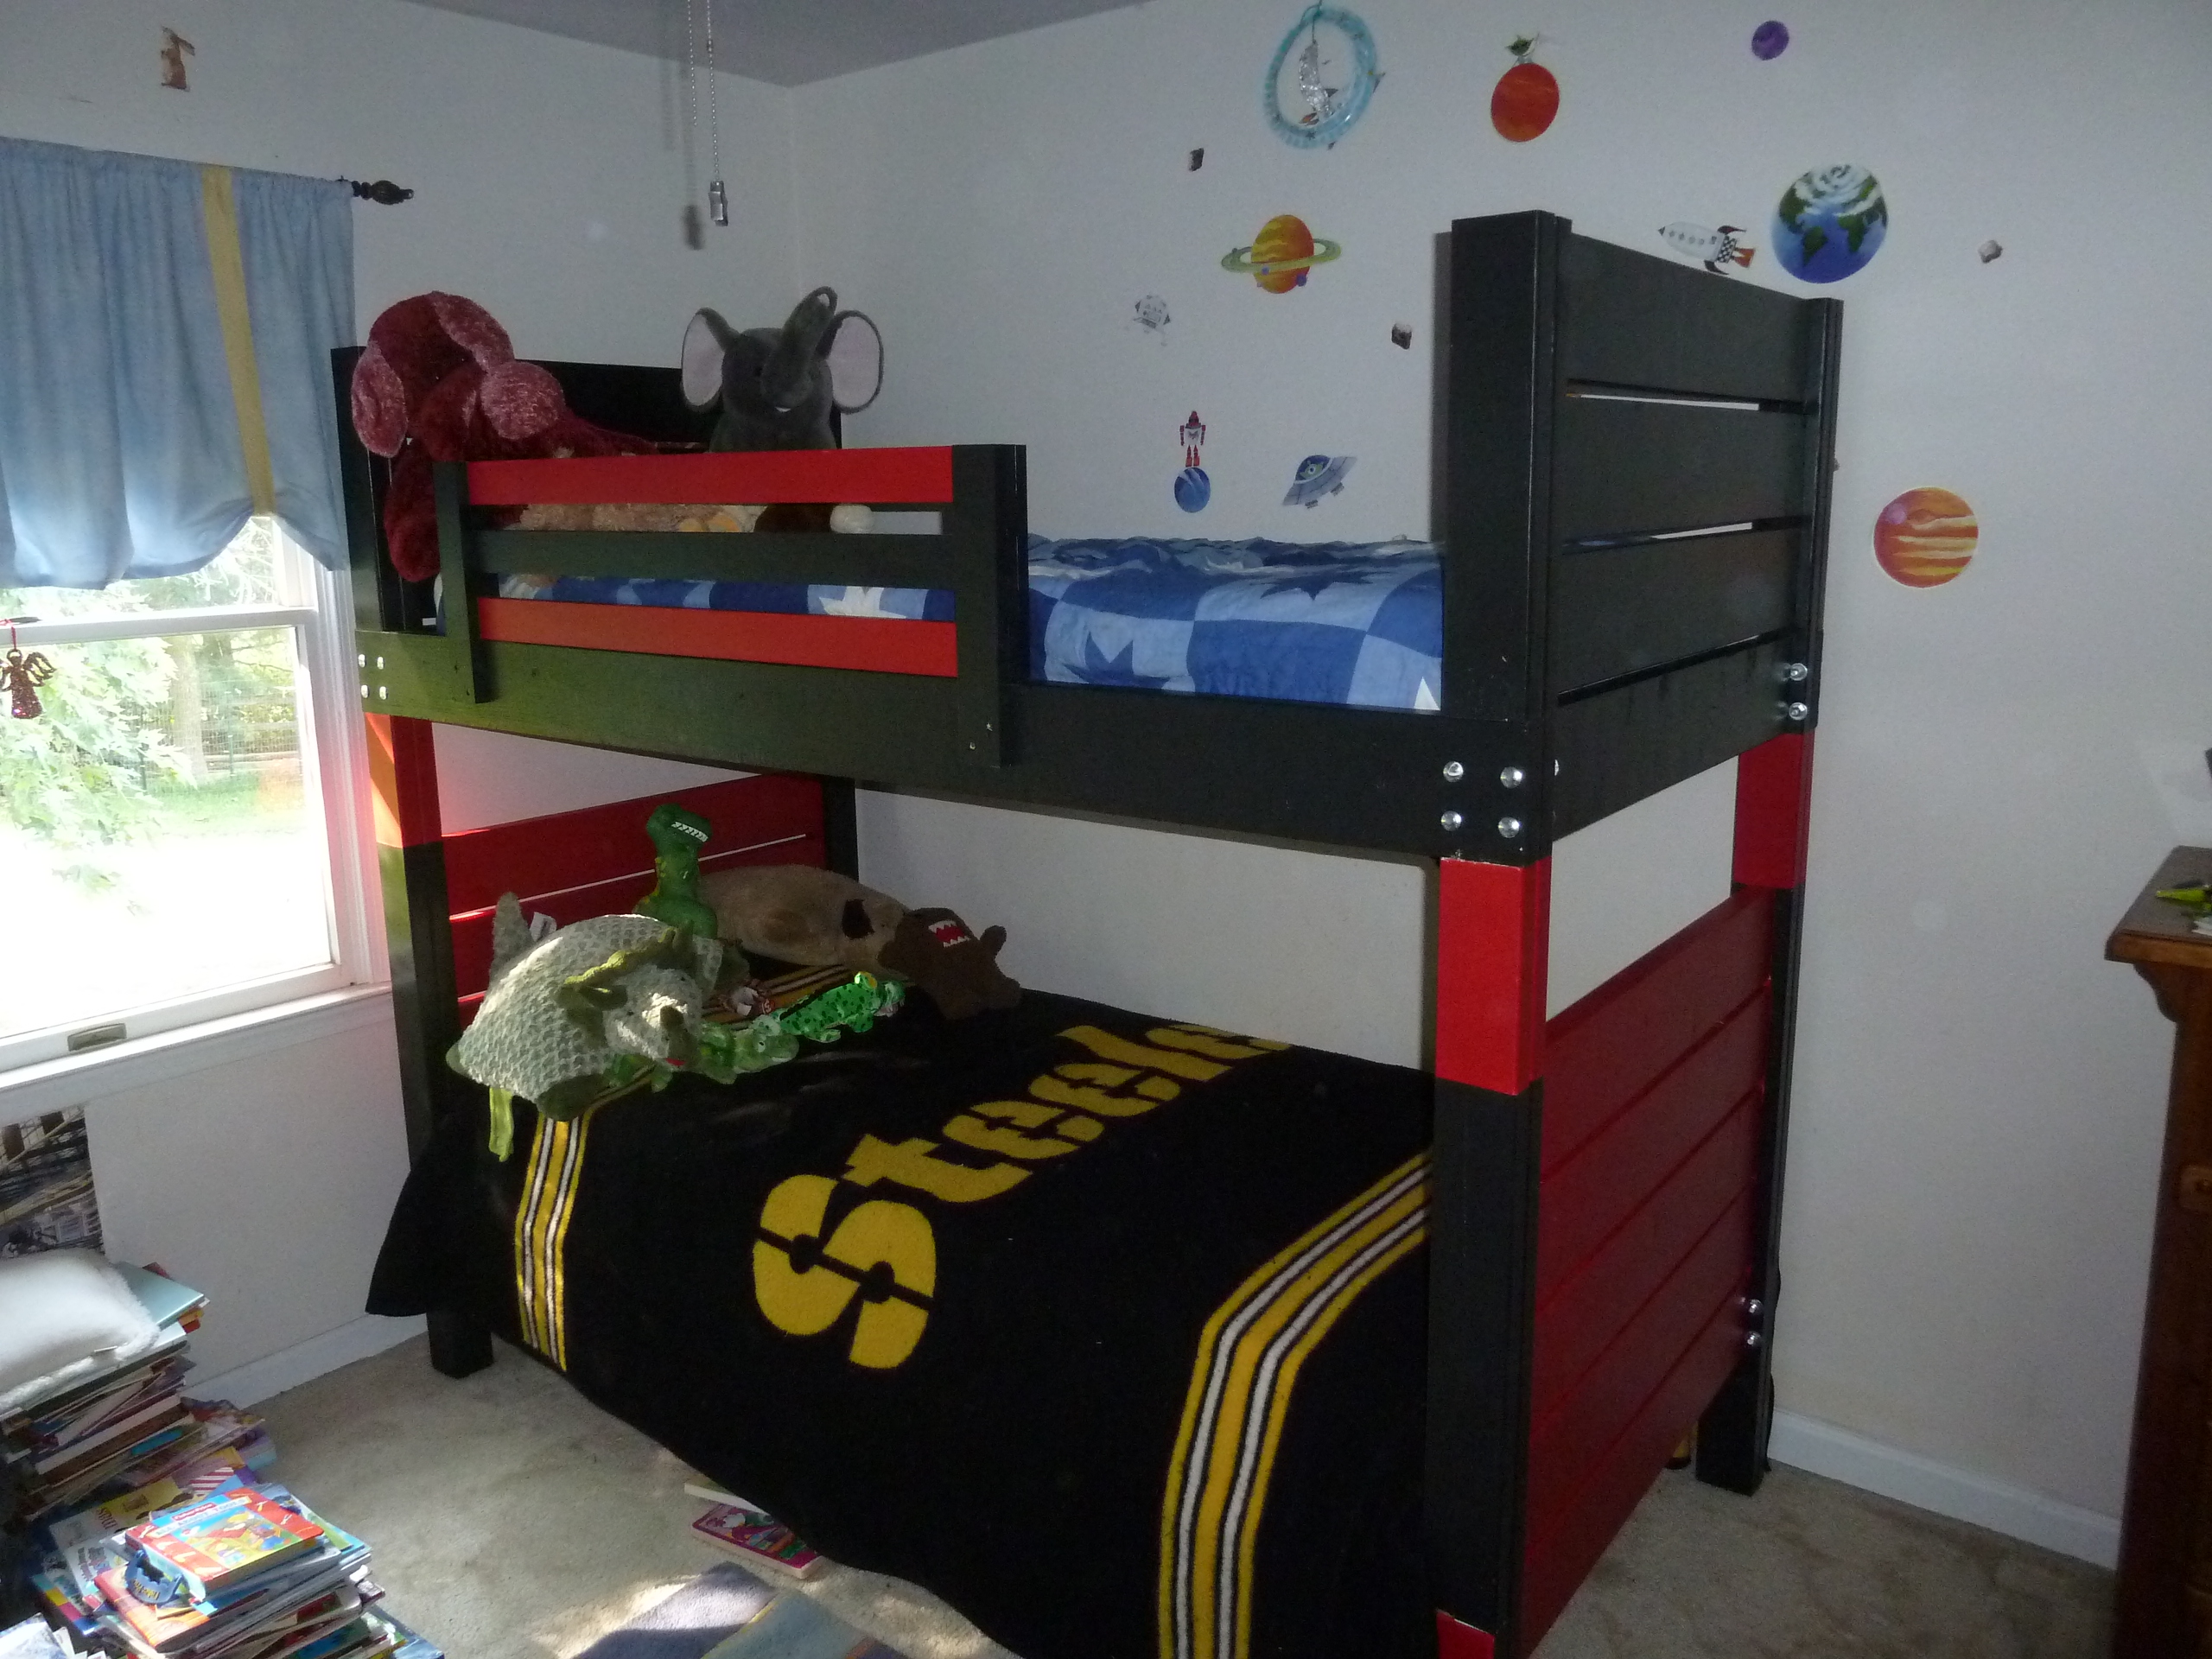
This was a great first project. My son was outgrowing his toddler bed and needed something new, and he wanted a bunk bed.
The bed is made exactly per the instructions for the Side Street Bunk Bed (http://ana-white.com/2012/03/plans/side-street-bunk-beds). The headboard and footboard are very heavy- get some help carrying them in the house. It has a coat of primer and 3 coats of black and red.
Assembly took about a day and a half, and the painting took another 2 days for the 3 coats. I didn't sand this down at all- and gives it a "rugged" look. The 3 coats of paint help to soften the feel so no worry of splinters. I have the ladder built, but just not installed yet.
I built this farmhouse table and benchs from Ana's plan and my sister in law fell in love the moment I delivered it to her home. Plans were straight foward and easy to fallow. Thanks Ana!!

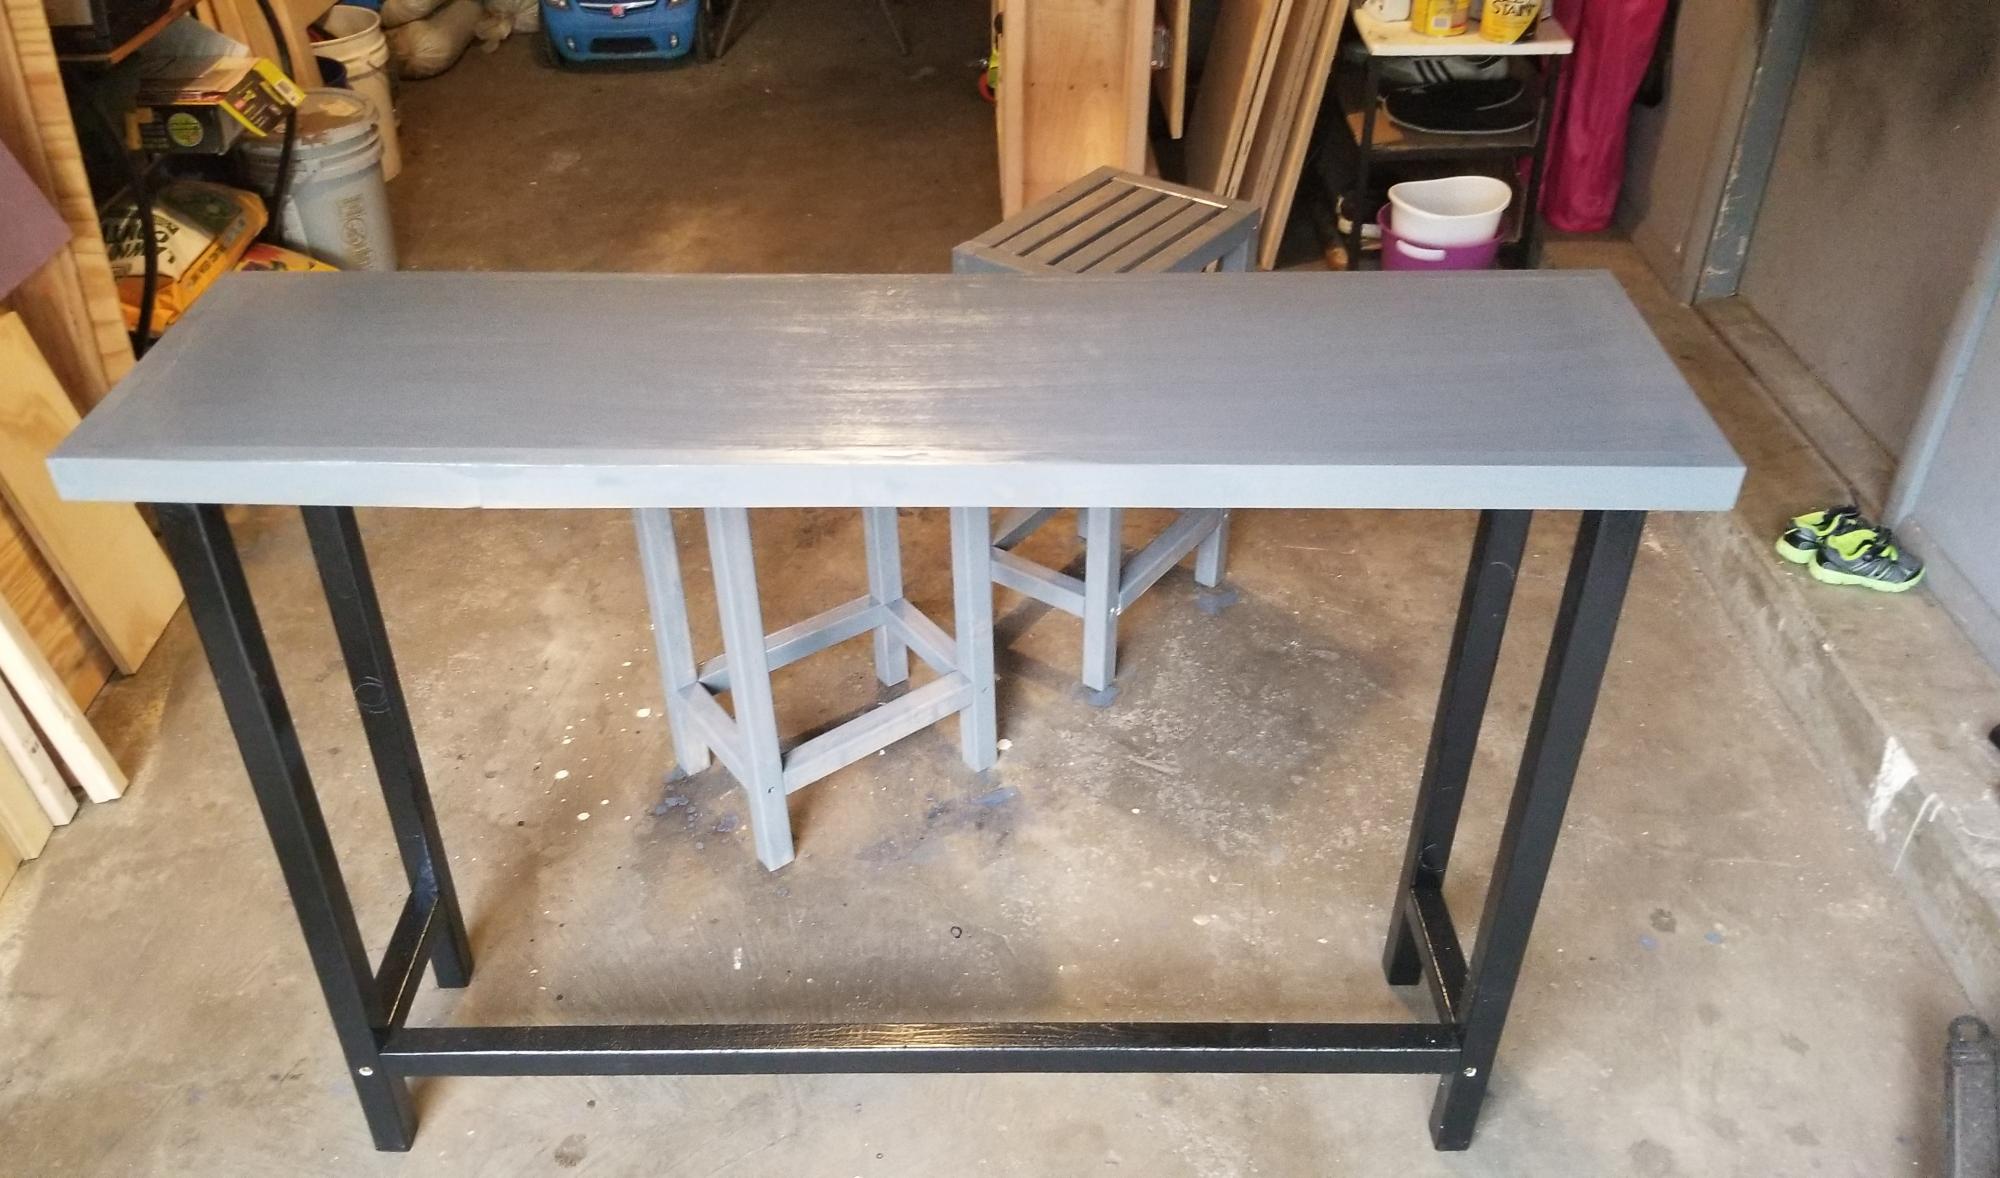
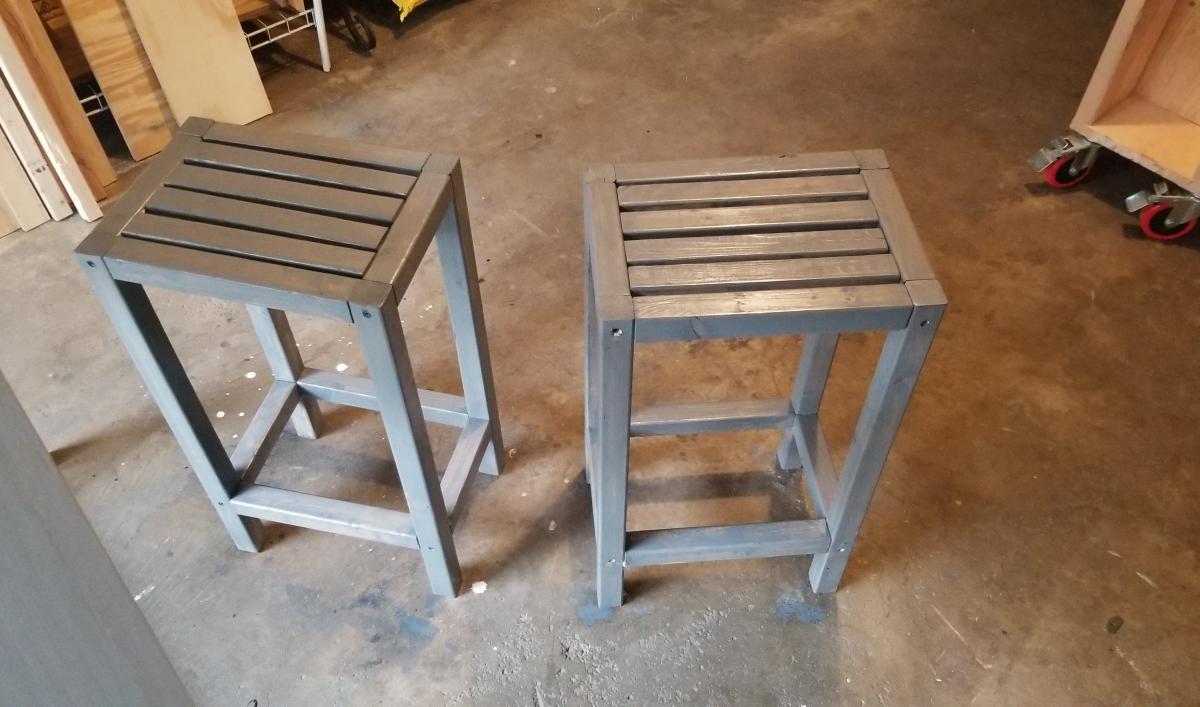
Wanted a little extra seating other than table in dining room, this will go on other side of island of same height
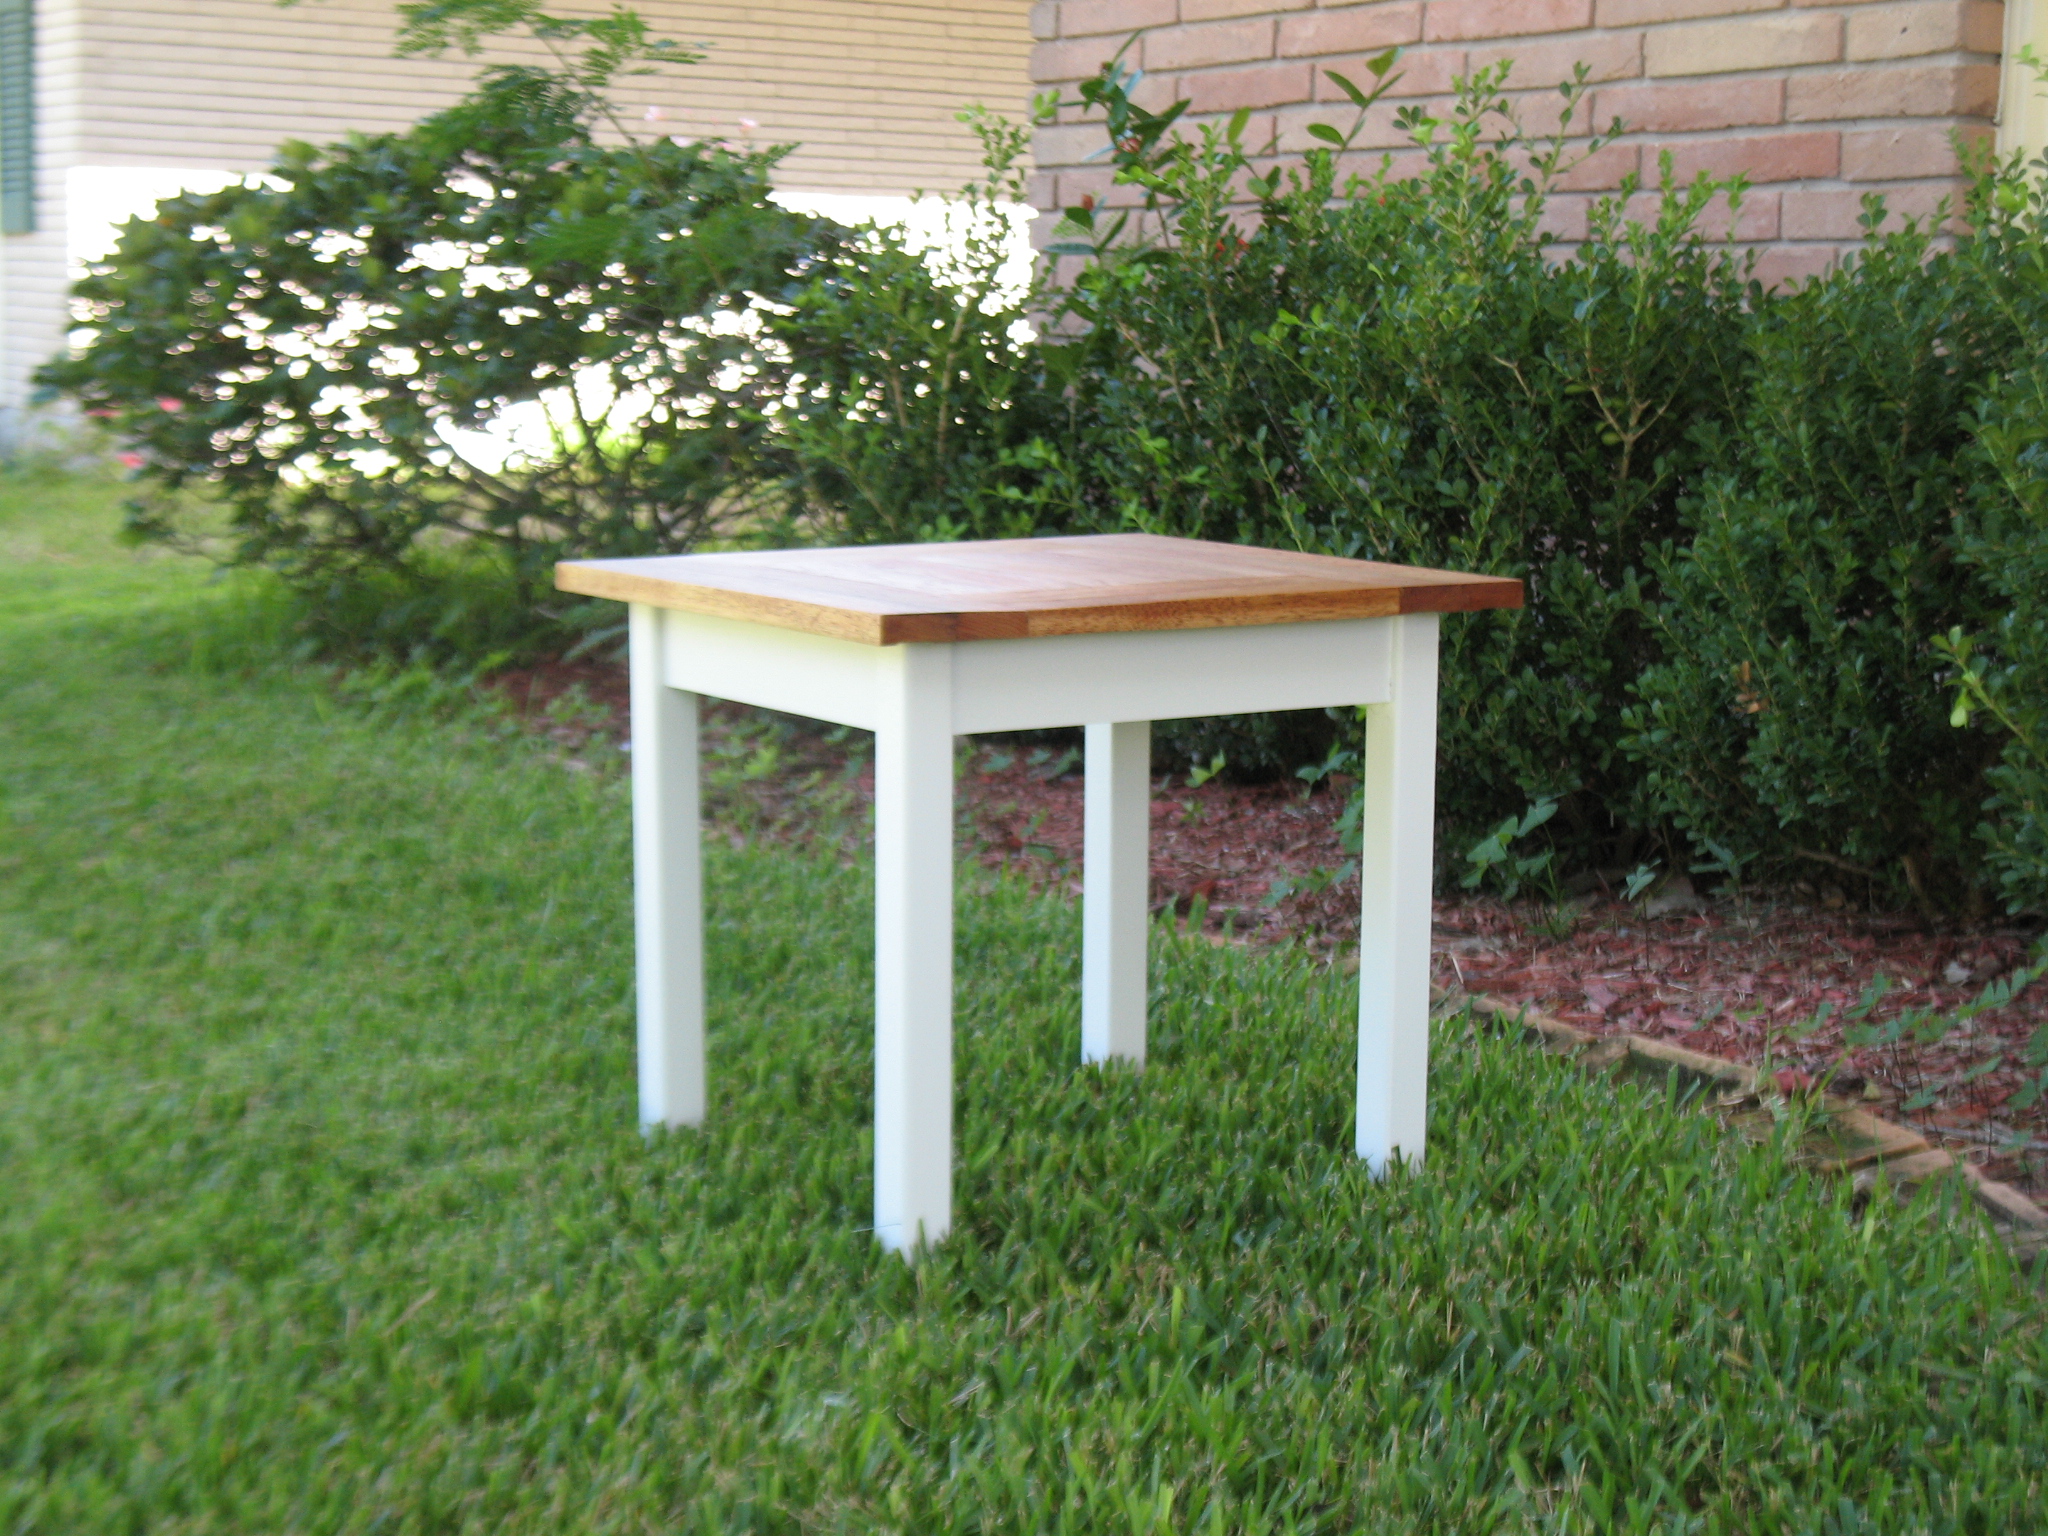
This small but elegant side table was made based upon a plan from The Design Confidential. A friend of mine gave me a lot of 3/4" solid oak flooring that her deceased husband (11 years ago) had stored in a shed. It is beautiful. So I made this little table using the wood for the top. I made the top by putting Tightbond III glue in the flooring grooves and then clamping the pieces together. Then after the glue dried I used my flooring saw to rip the tongues and grooves so I have one solid piece of flooring/top. I also did not glue the top to the base but just used pocket hole screws from the underside to hold it on the base. The reason was in case the top or base became damaged it would be easily removable for repair.
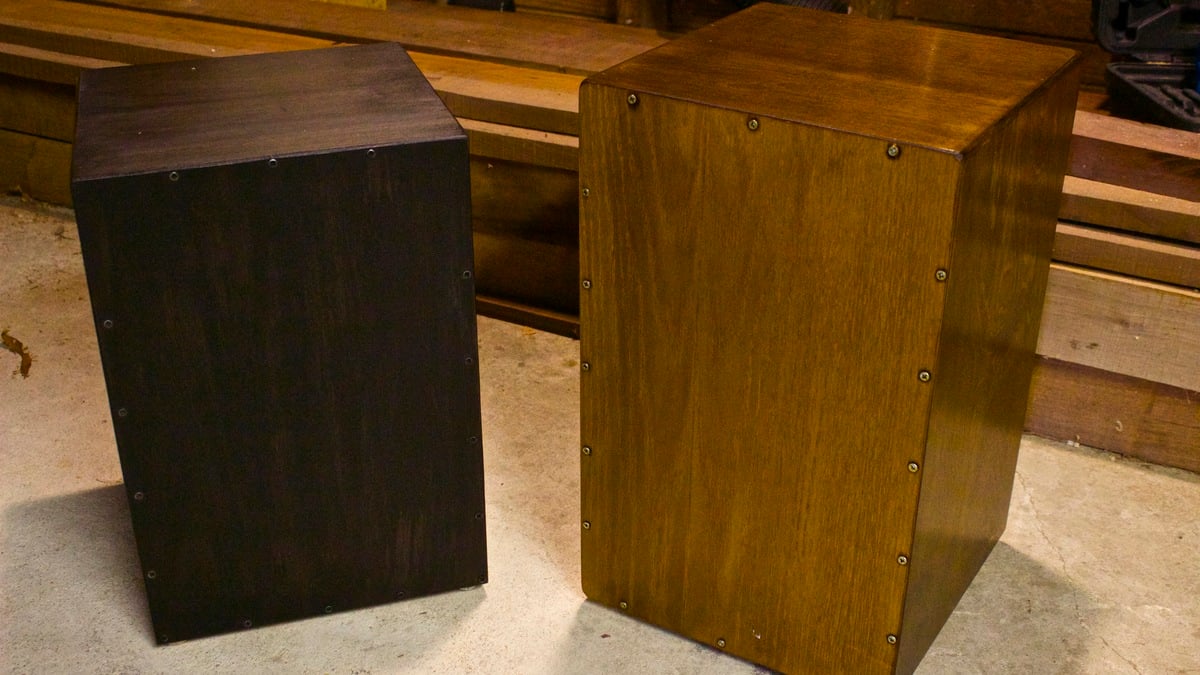
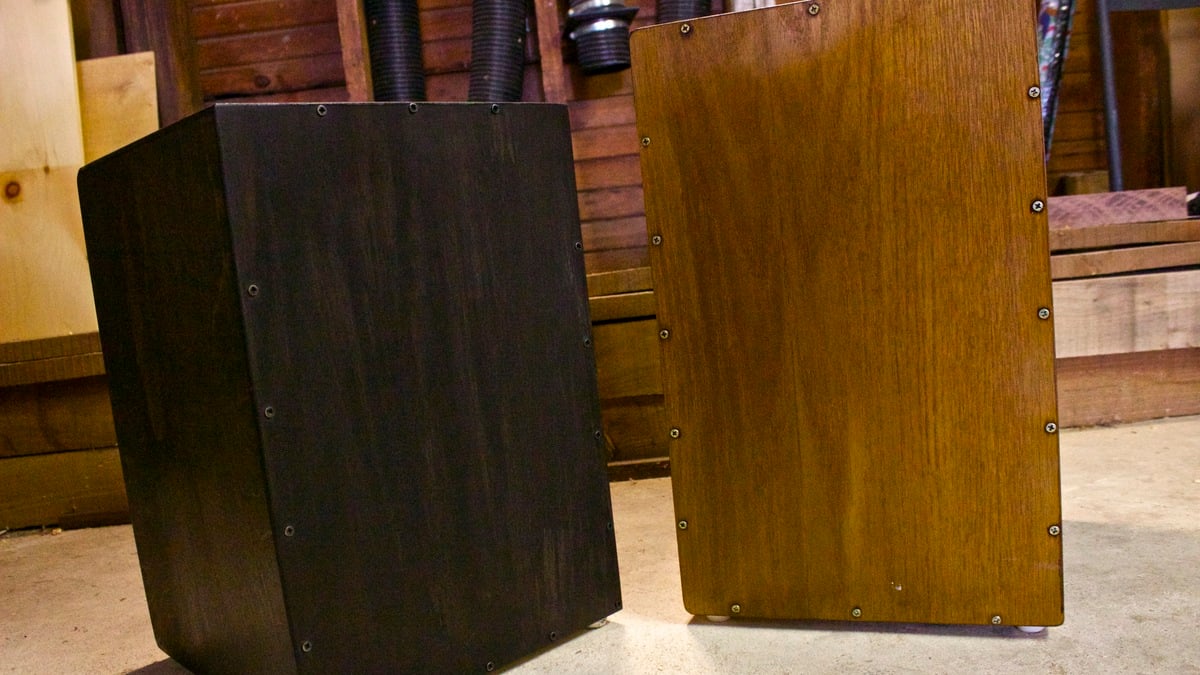
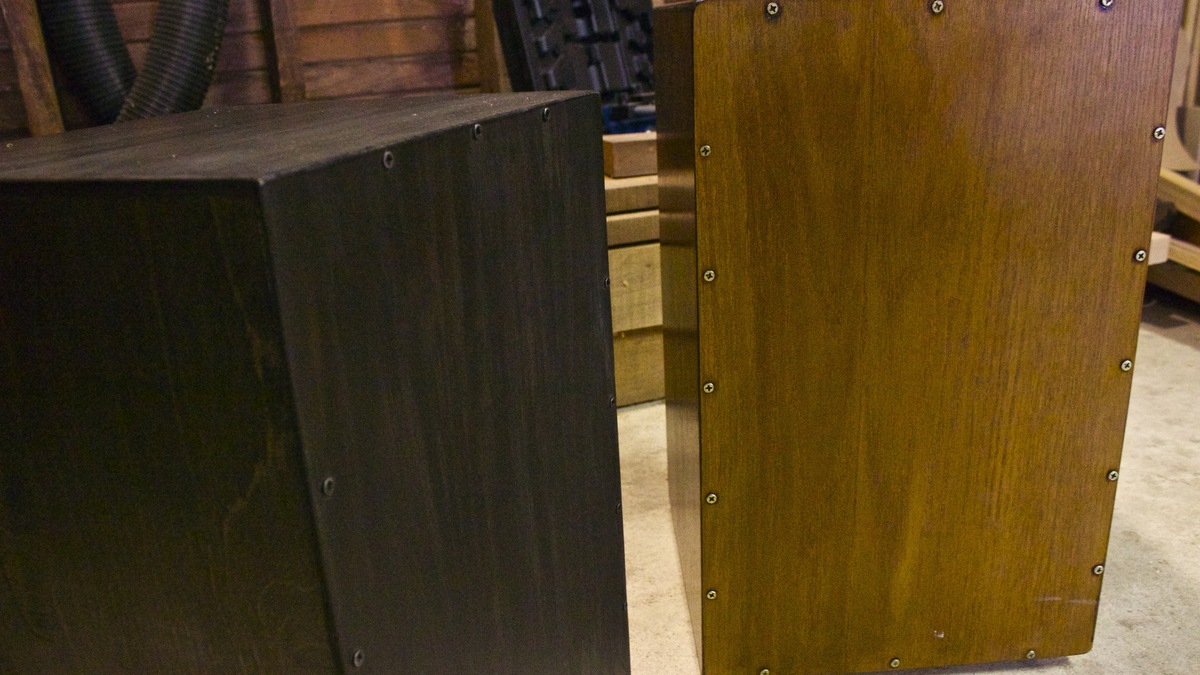
I went to Guitar Center to buy a Cajon drum and they wanted $200 for them. No way was I going to spend that. I hope you like the video!
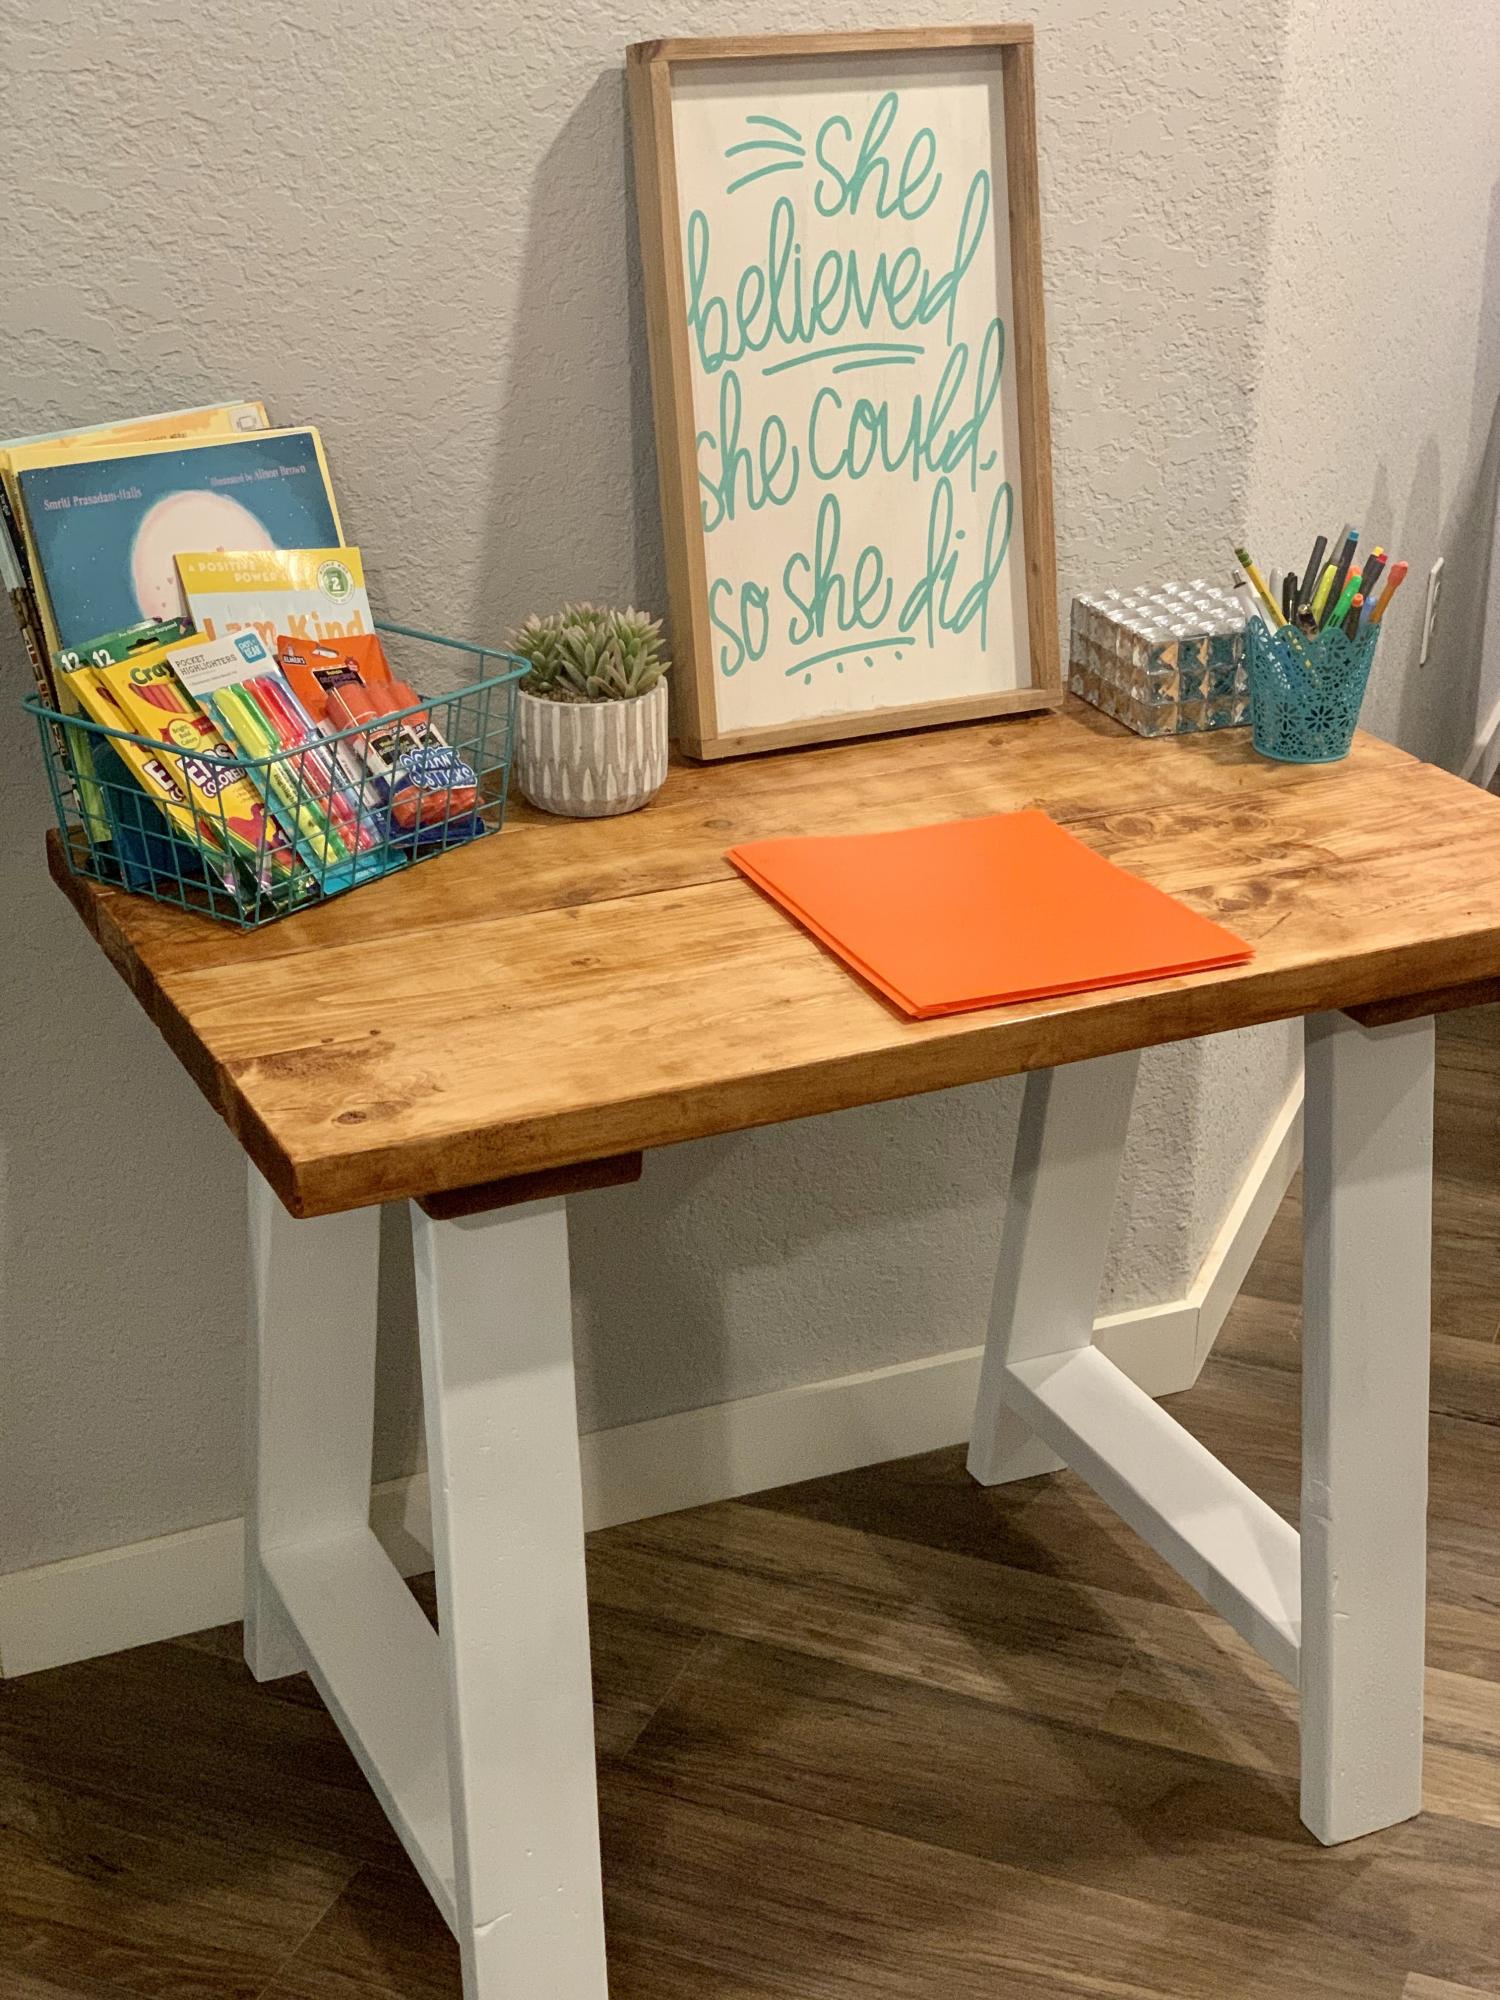
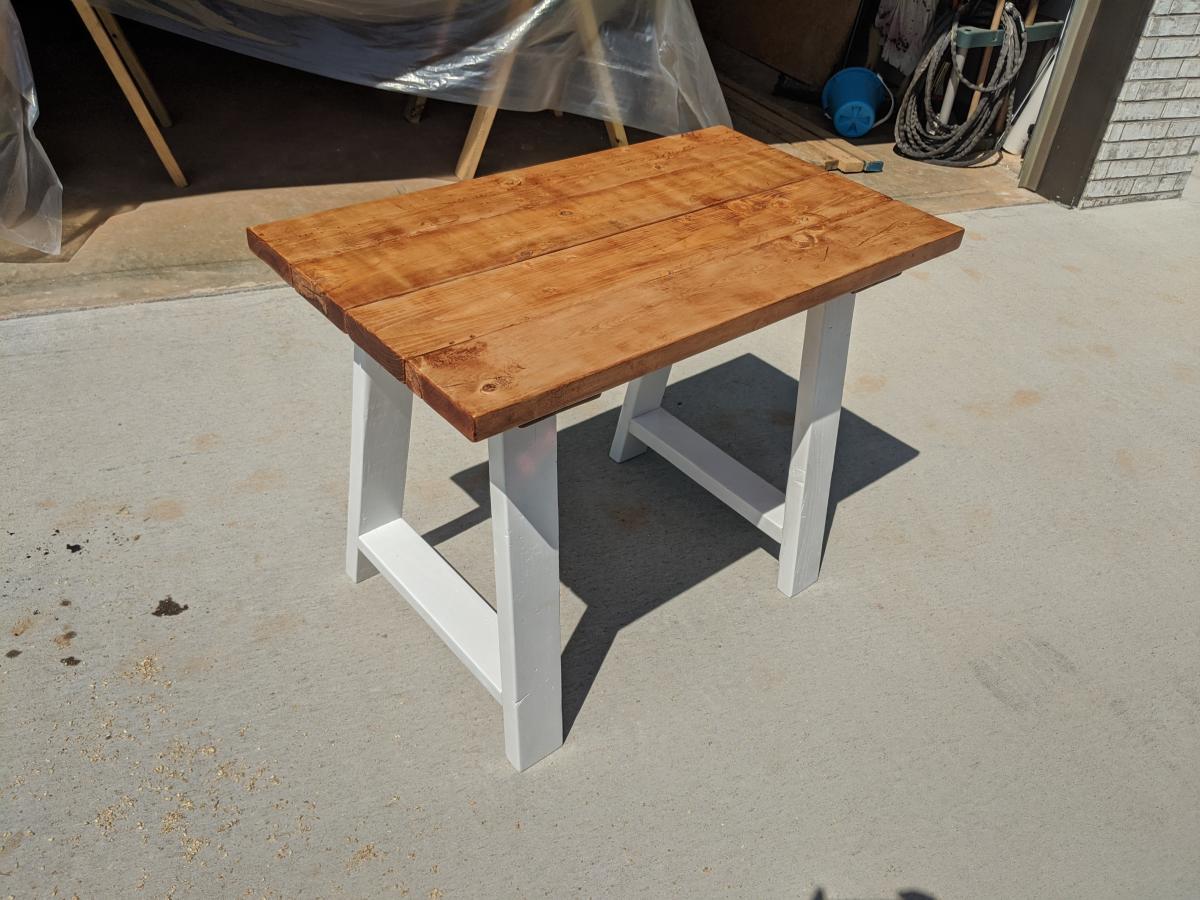
Made this desk for someone who's kid had to do virtual classes due to COVID-19. Quick and easy plans.
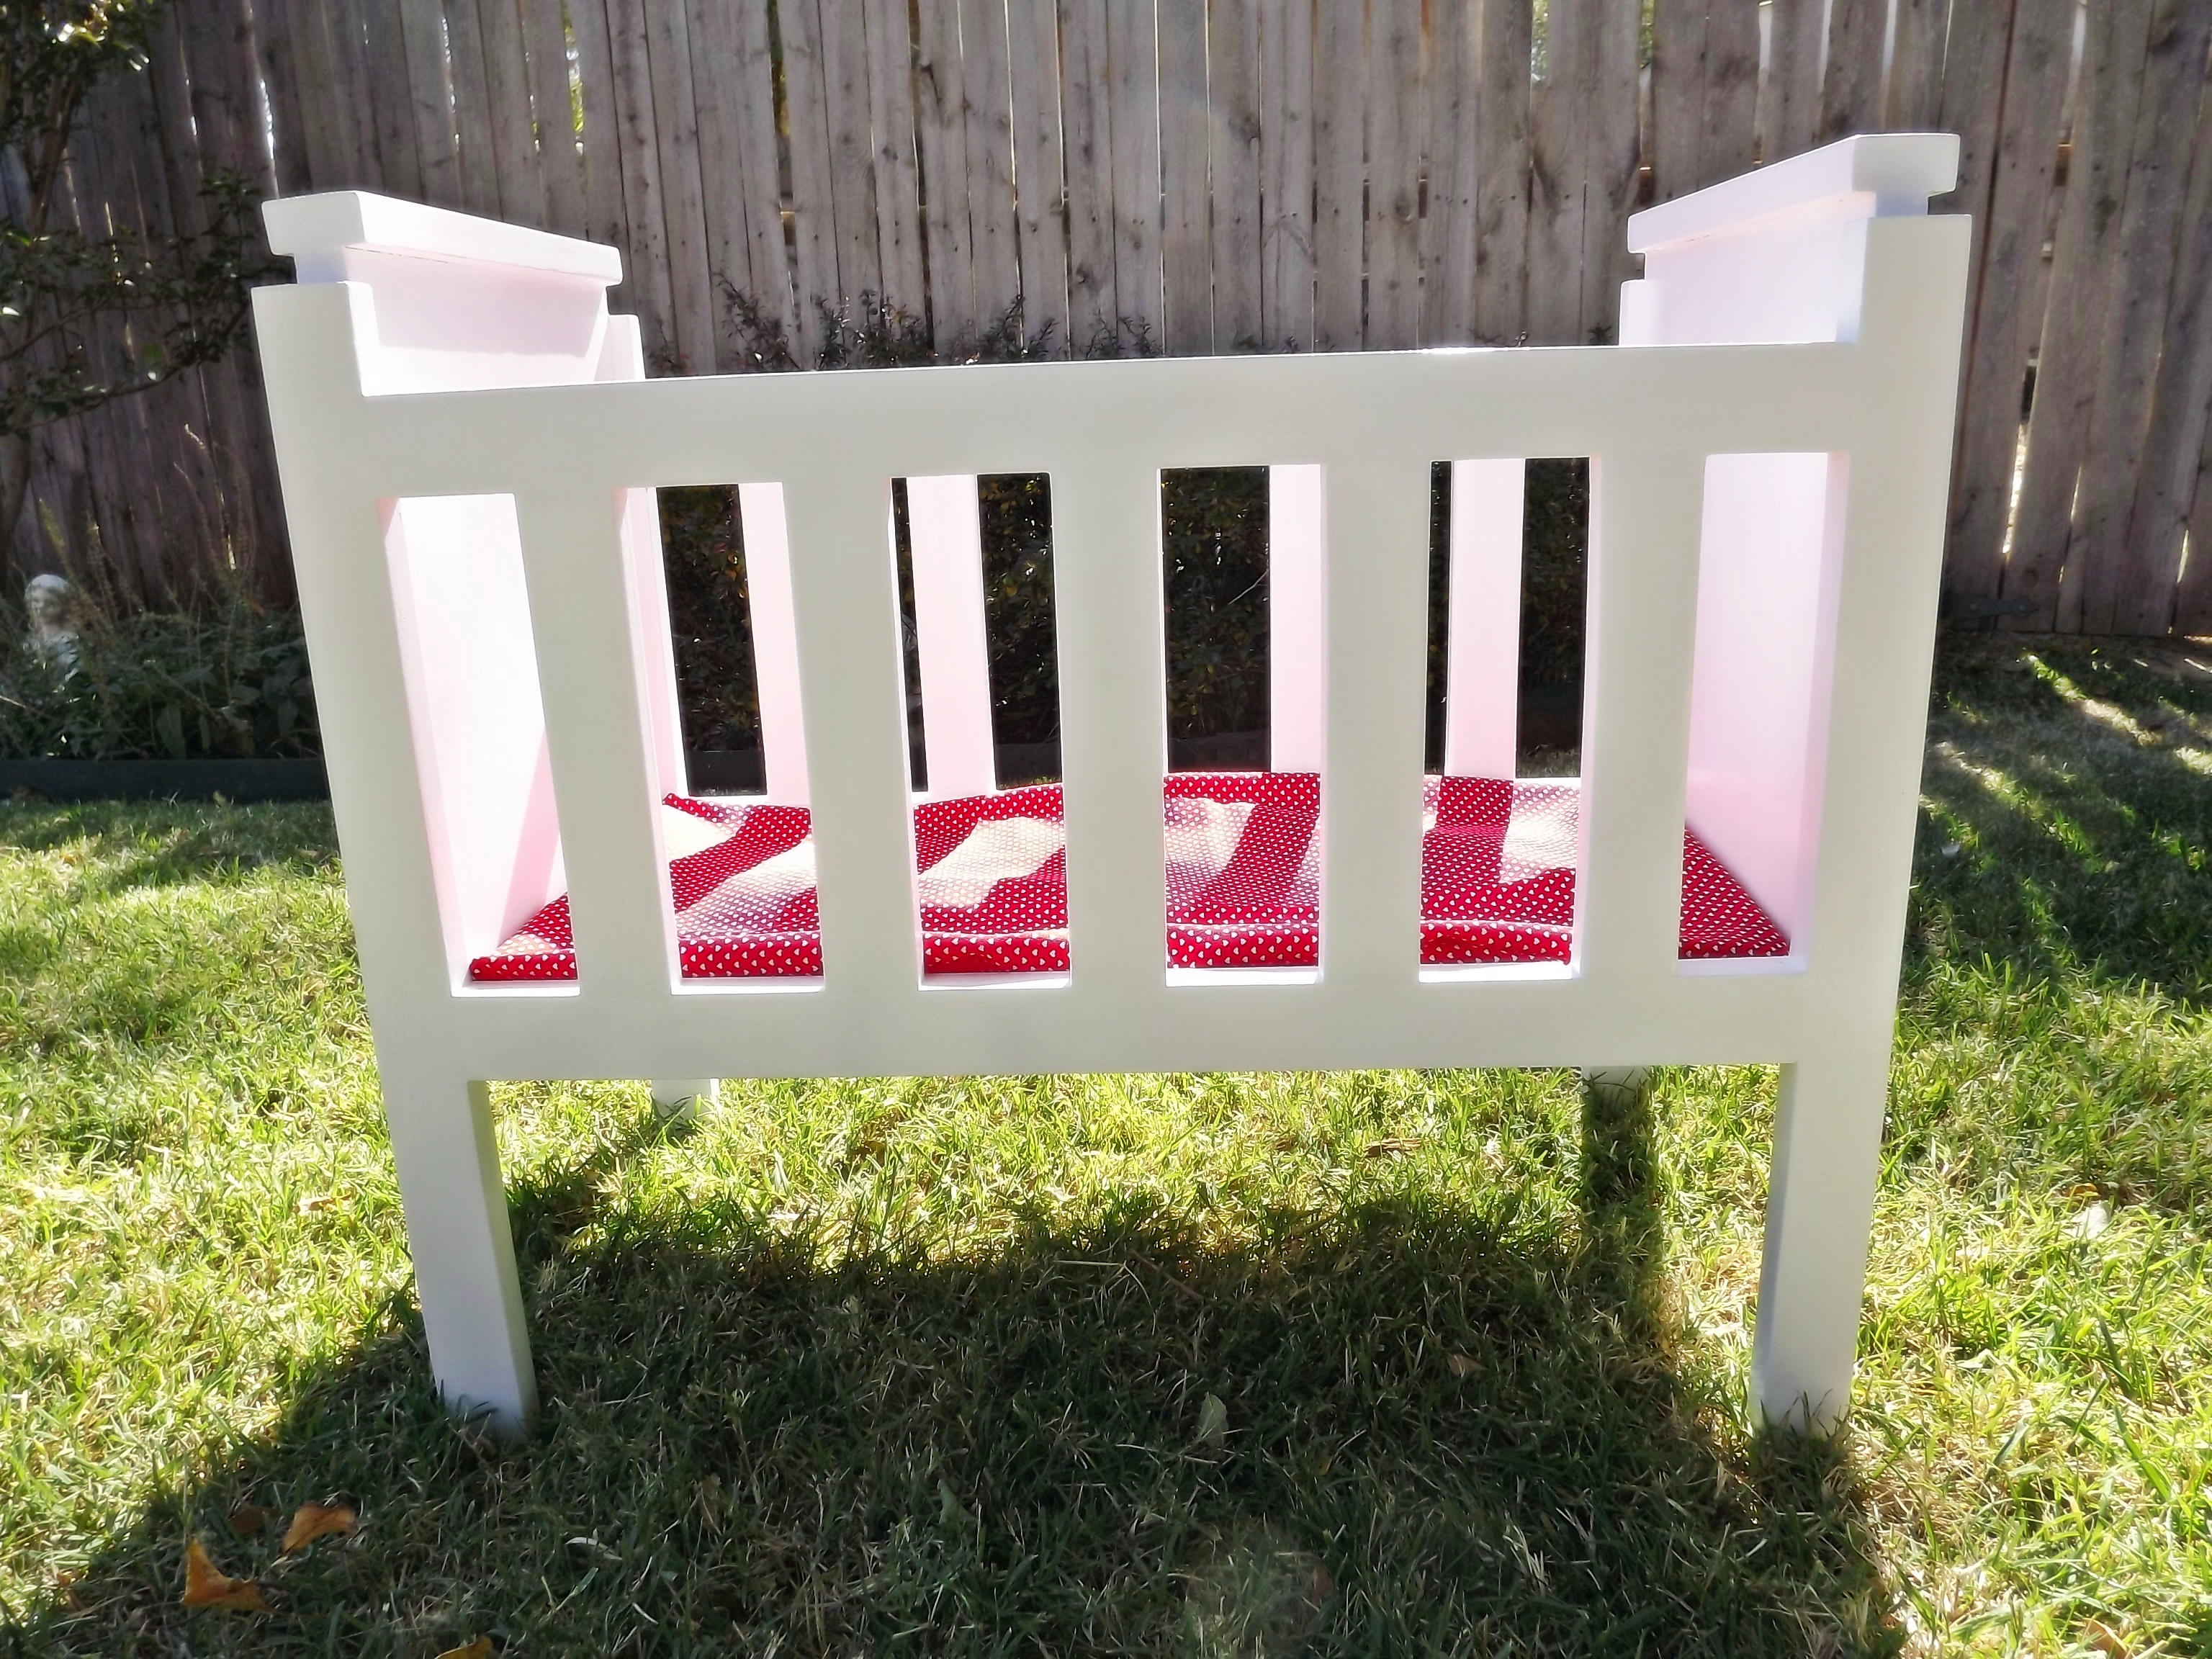
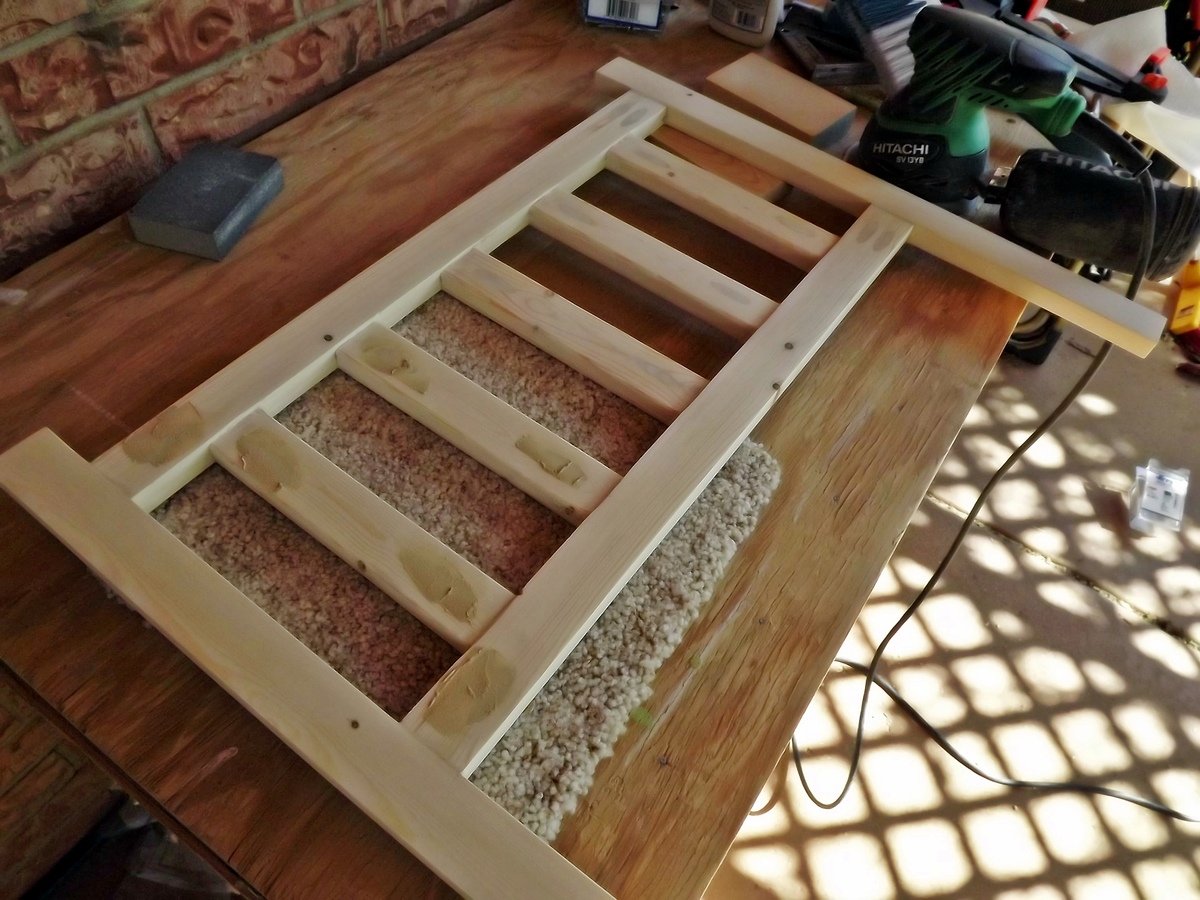
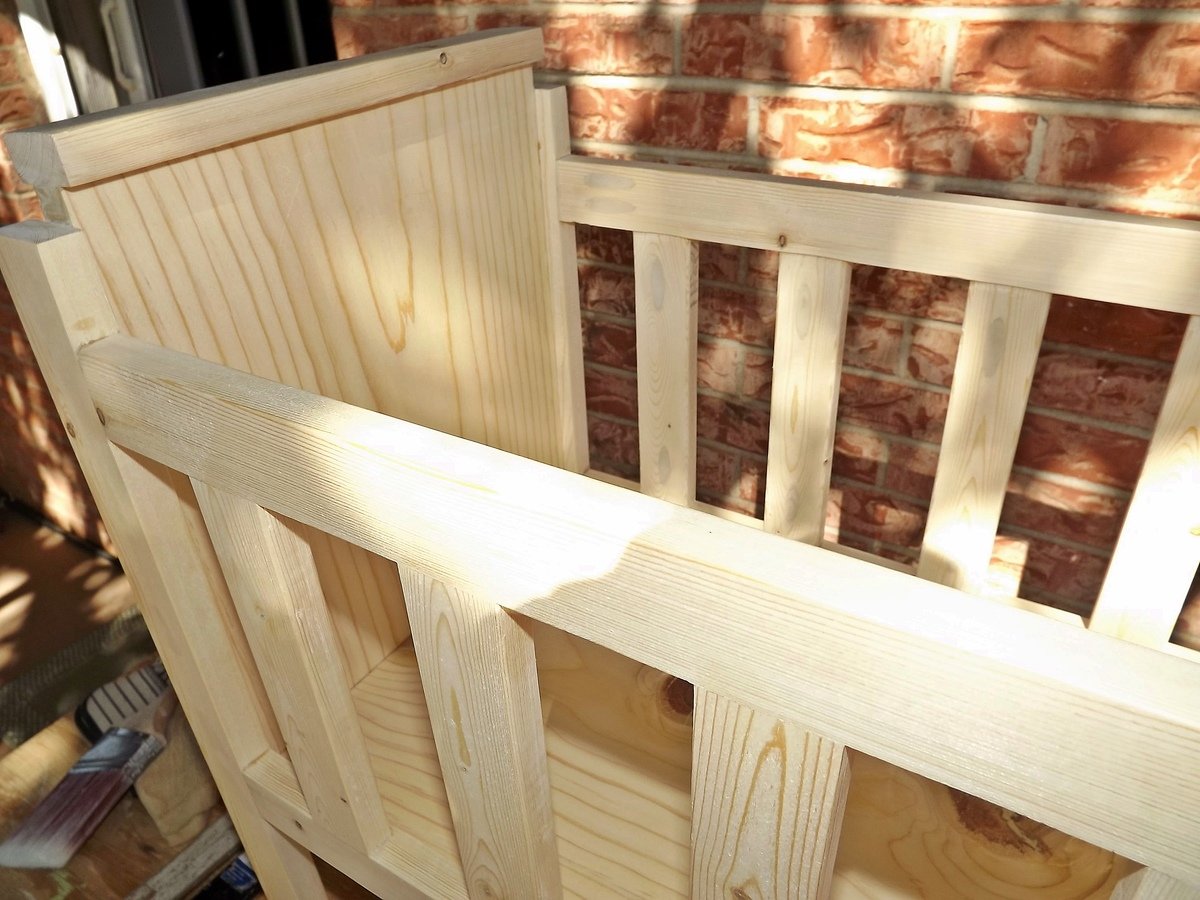
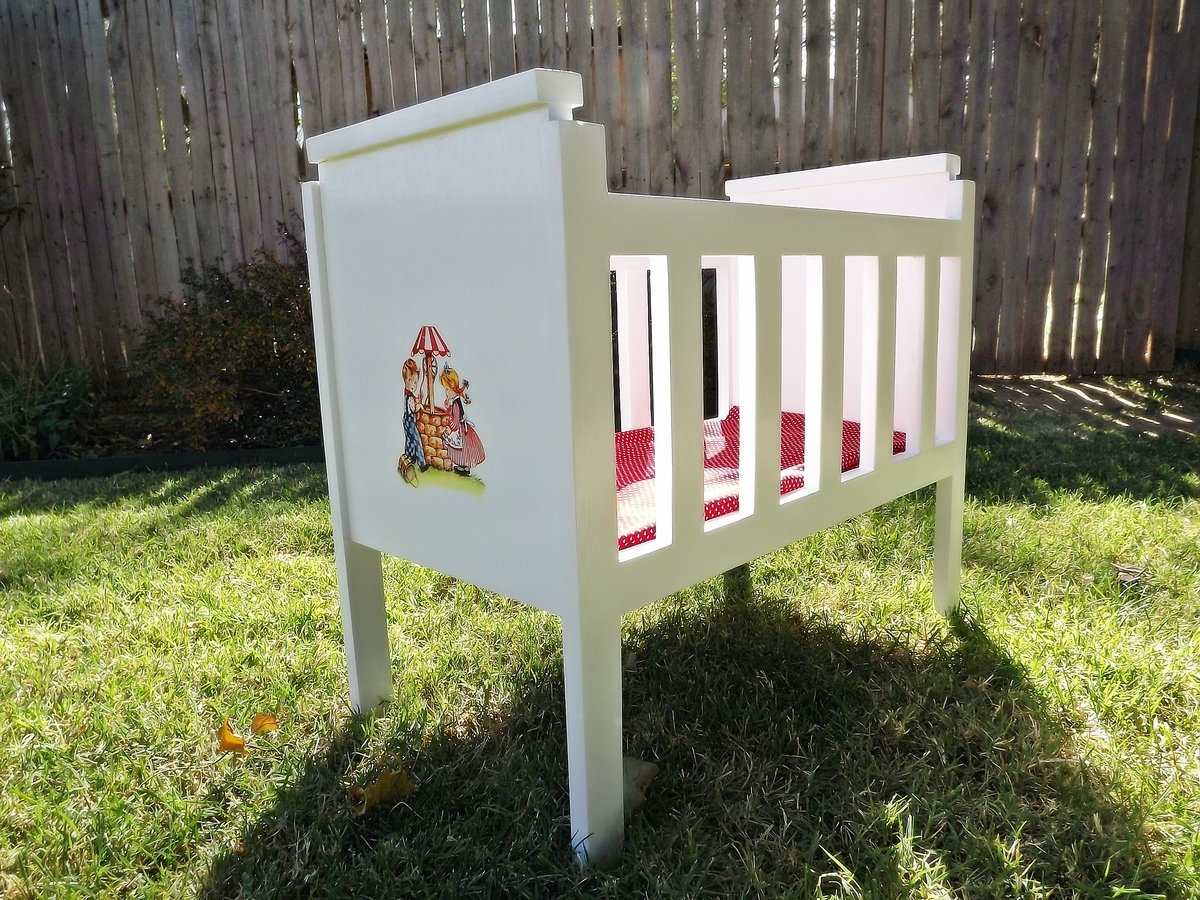
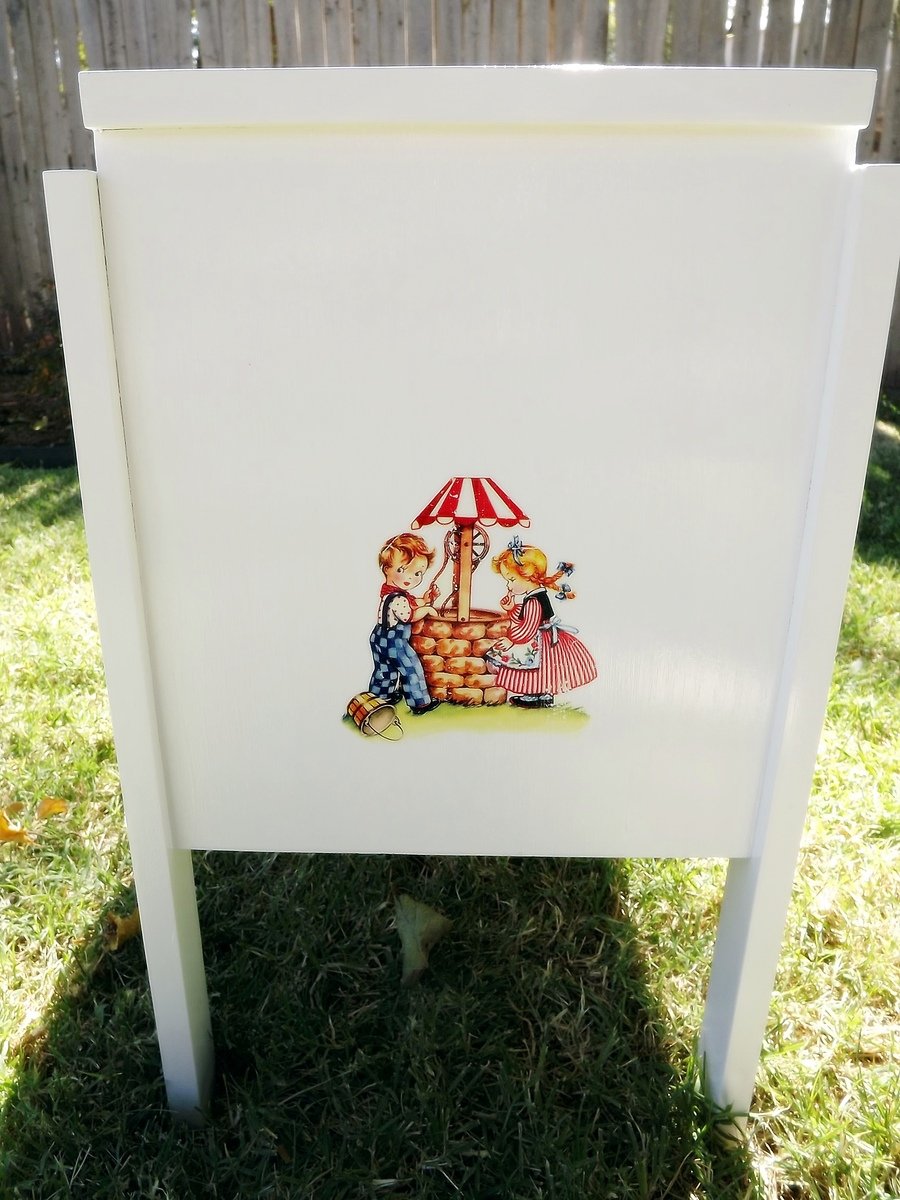
This doll crib is for another grandniece who loves both her baby boy and girl dolls, hence the Jack and Jill decal. This bed is modified from the Fancy Doll Crib plans using 1 x 2 for the side rails instead of dowels, and also a flat top. It is also larger than the plans: 21" long and 20" legs. My sister found a vintage J & J fabric piece which we plan to use as the mattress cover.
I said this is a day project but it takes me several days in between other activities, and I am very slow and methodical. (I also make sure to fill in all of the pocket holes with wood filler, usually two "coats" to get them perfectly level with the surrounding wood. After painting, it's very hard to tell where the fasteners are unless you know where to look.) It would take most people much less time than I. This is my 5th doll bed, and I have at least one more to go.
I followed the plans pretty closely. As you can see, I added an extra 2X4 inside the uprights. This gave me room to mortise the 2X4s that run under the table top. Very sturdy and useful. The third pic shows when we used this table for a birthday party. Matched up exactly with our dining room table! It only took one extra 2x4 to make the alterations.
My wife has been asking me for quite some time to build her a bench for the front porch. I finally found some time to make one. I looked at a lot of different benches on Pinterest, YouTube and other websites and I presented the options to her, and she liked this design the best. She only had one request and that was for the top to match the front door and the frame to be white. I have a step-by-step video of how I made the Farmhouse Bench (Click Here) to see the video.
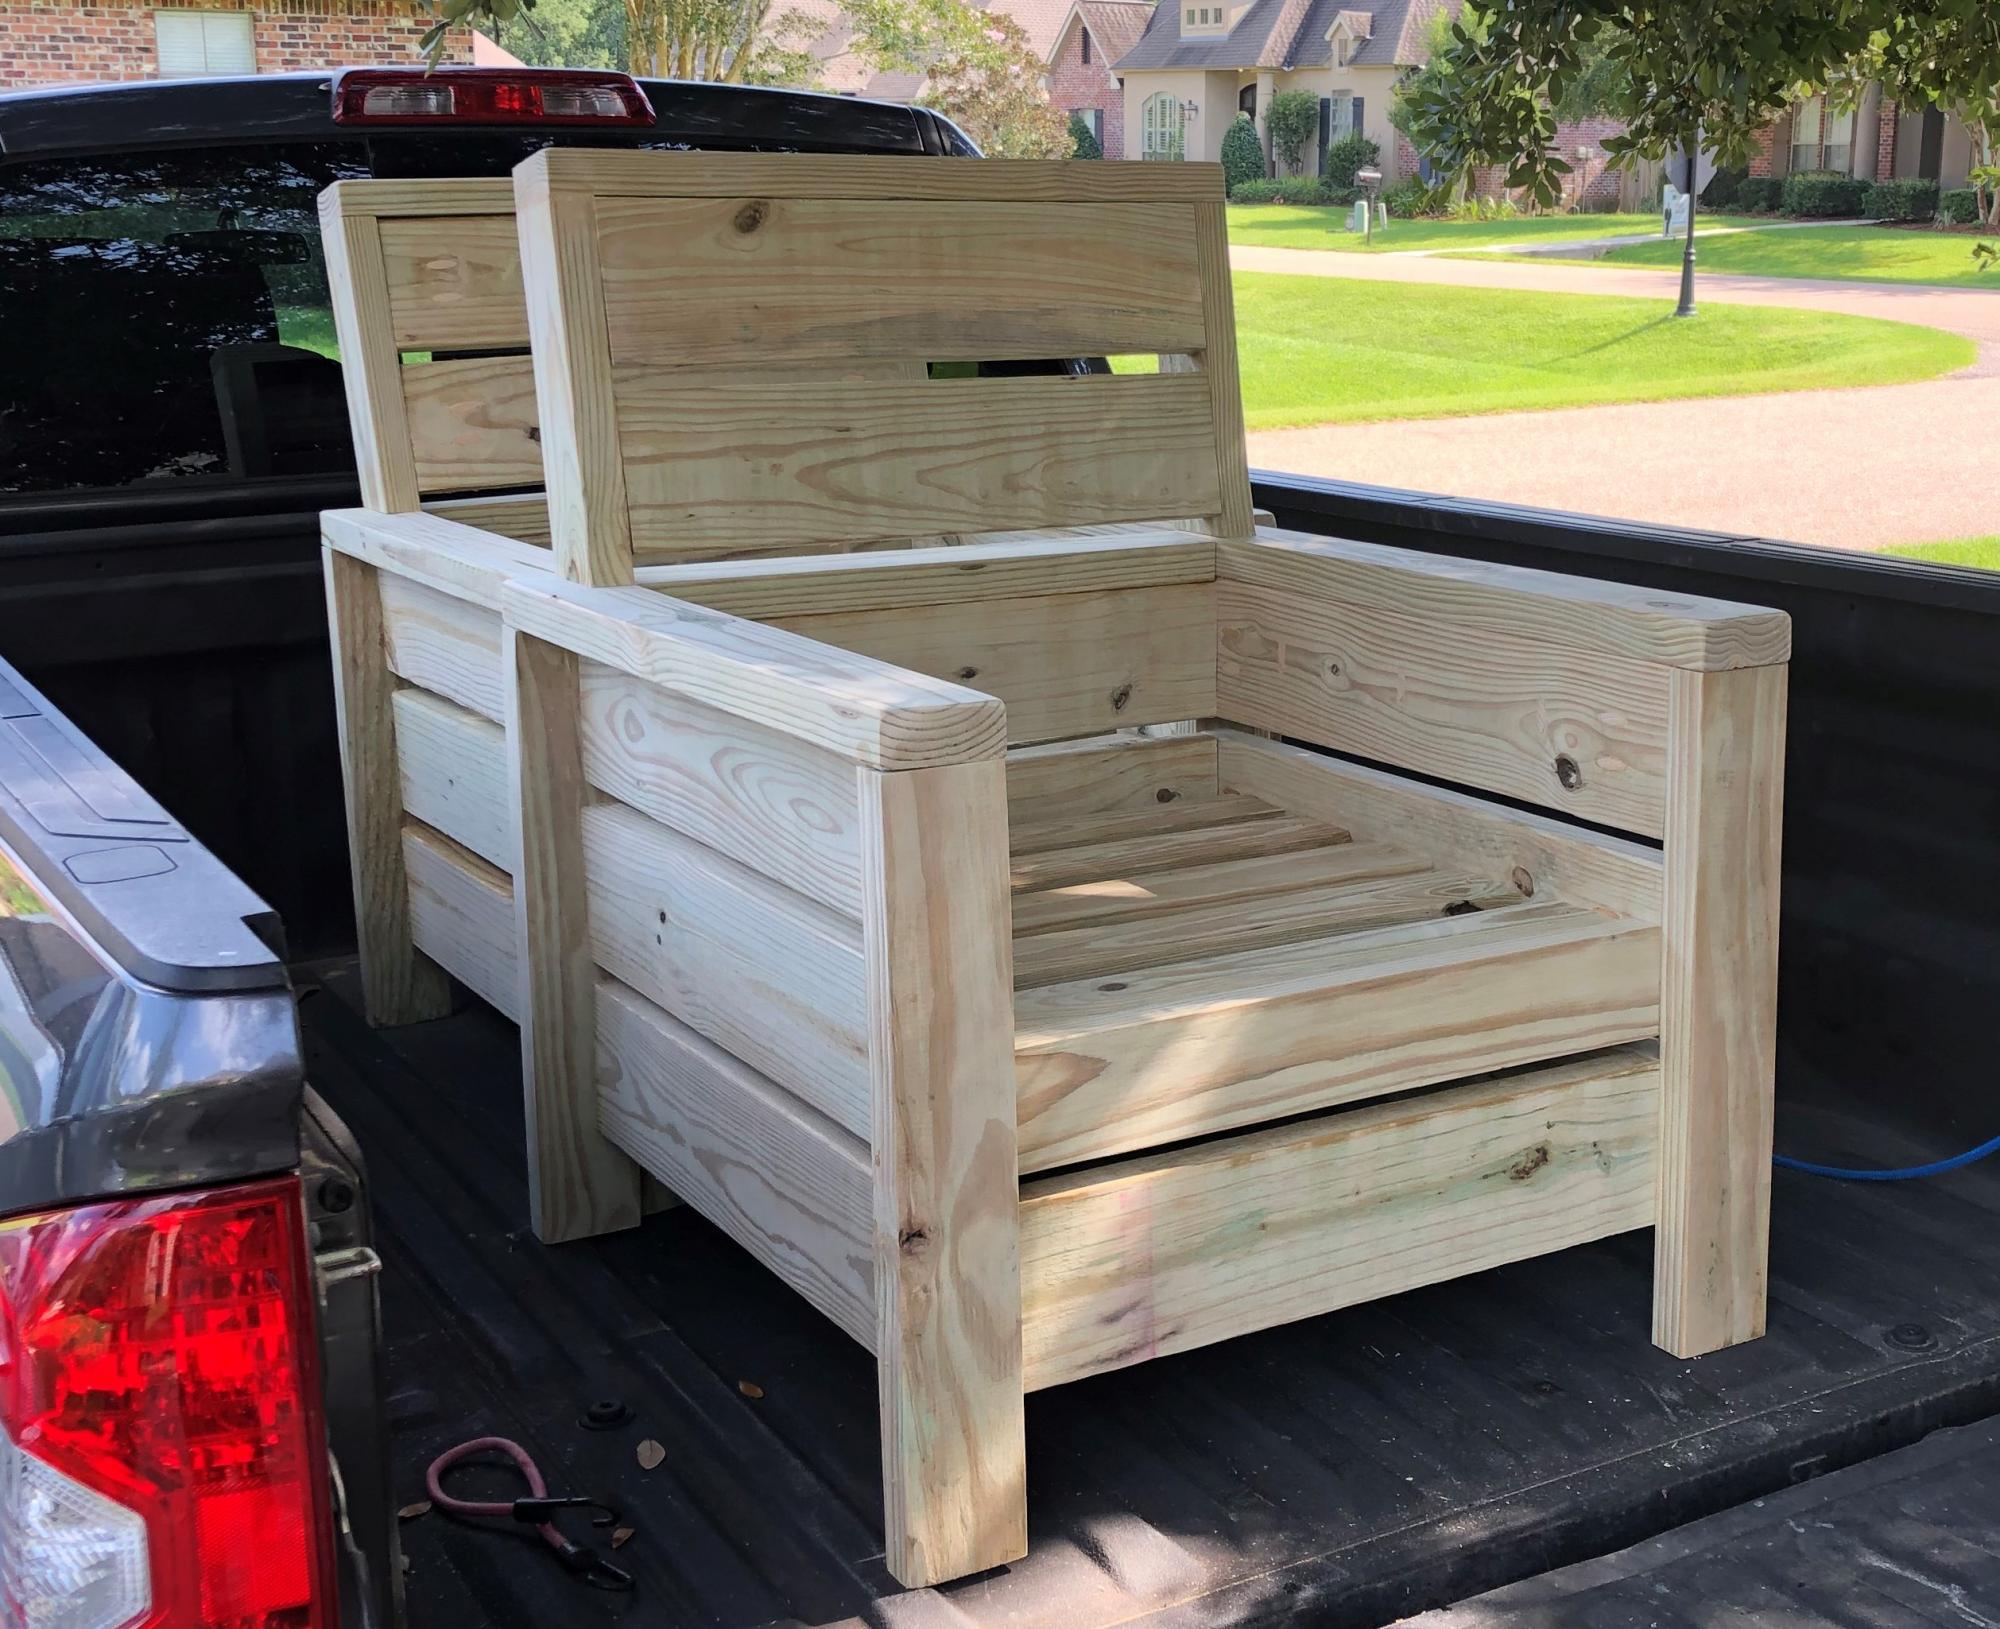
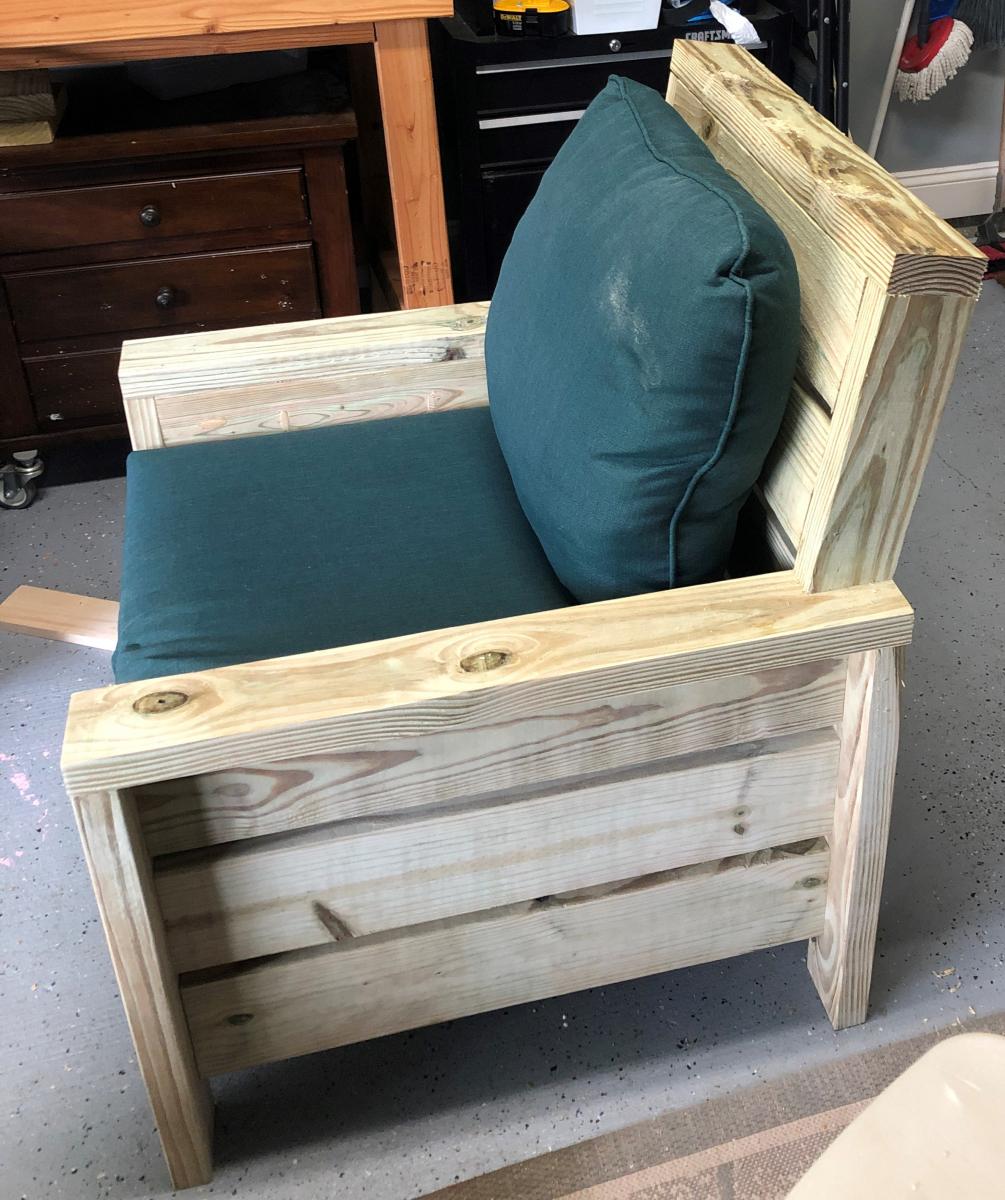
Per request of my wife, I opted to add a backrest to the chair. I feel as though my backrest design keeps with the style of the original build. I accomplished this by cutting the 2x4 vertical arms of the backrest at 13 inches with a 10 deg miter cut at the base. This allows you to keep with the 3/4" on the 2x6 backrest slats. I finished it off with a 2x4 top plate. I'd also note that I made slight modifications to the plans to accommodate 24" cushions.
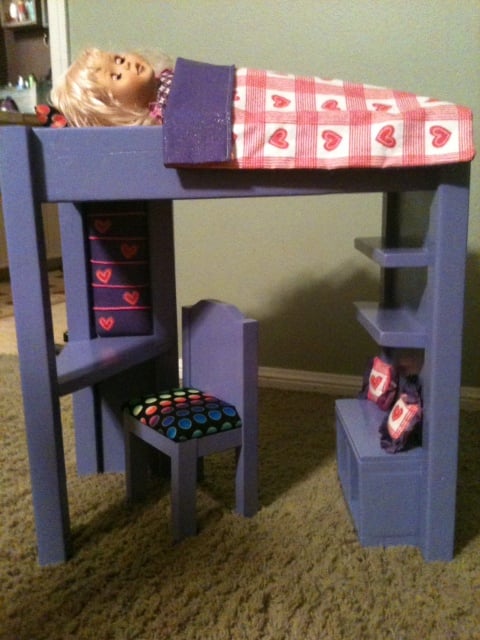
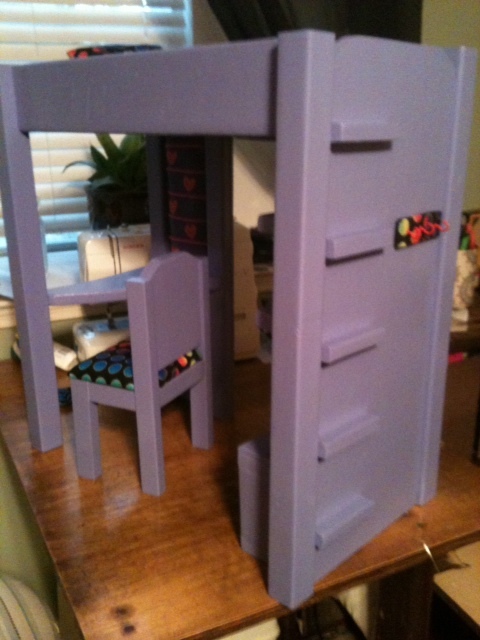
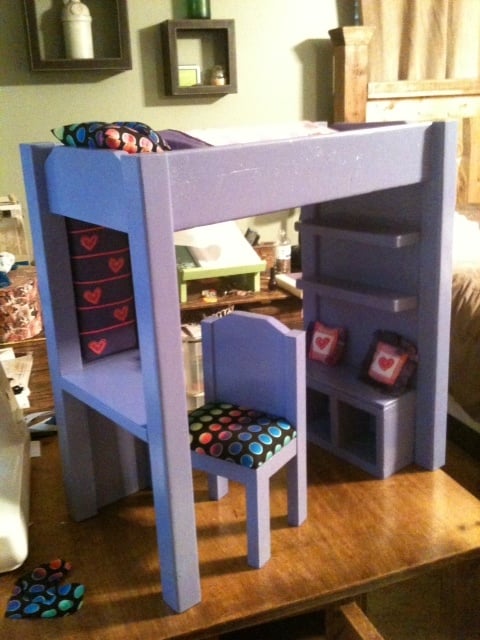
My niece wanted the purple AG loft bed for her doll. Since, the one online is $225 and back ordered until December...I came up with this one for free! I used scrap wood and fabric that I had left over from other projects. The bed has a built in desk top, shelves, cubbies, ladder, bulletin board, and coat hooks. It took me a couple of hours to build the bed and the chair and about an hour to sew the comforter and pillows. The painting took a little longer because I was out of purple spray paint! grrrrrrr!
Thu, 11/08/2012 - 17:50
Do you have a time frame when you plan to post your plans? My daughter wants one of these for Christmas and was going to get started trying to reverse engineer based on photos. Then decided to check internet and found this! Would love to get plans do not care if scanned pieces of paper. Thank you!
This is the third time I built this table. Everyone who has it loves it because it is the "perfect size". This last build was someone not as rustic, so I opted a premade round table top. This probably added $15 to the project but saved at least an hour.
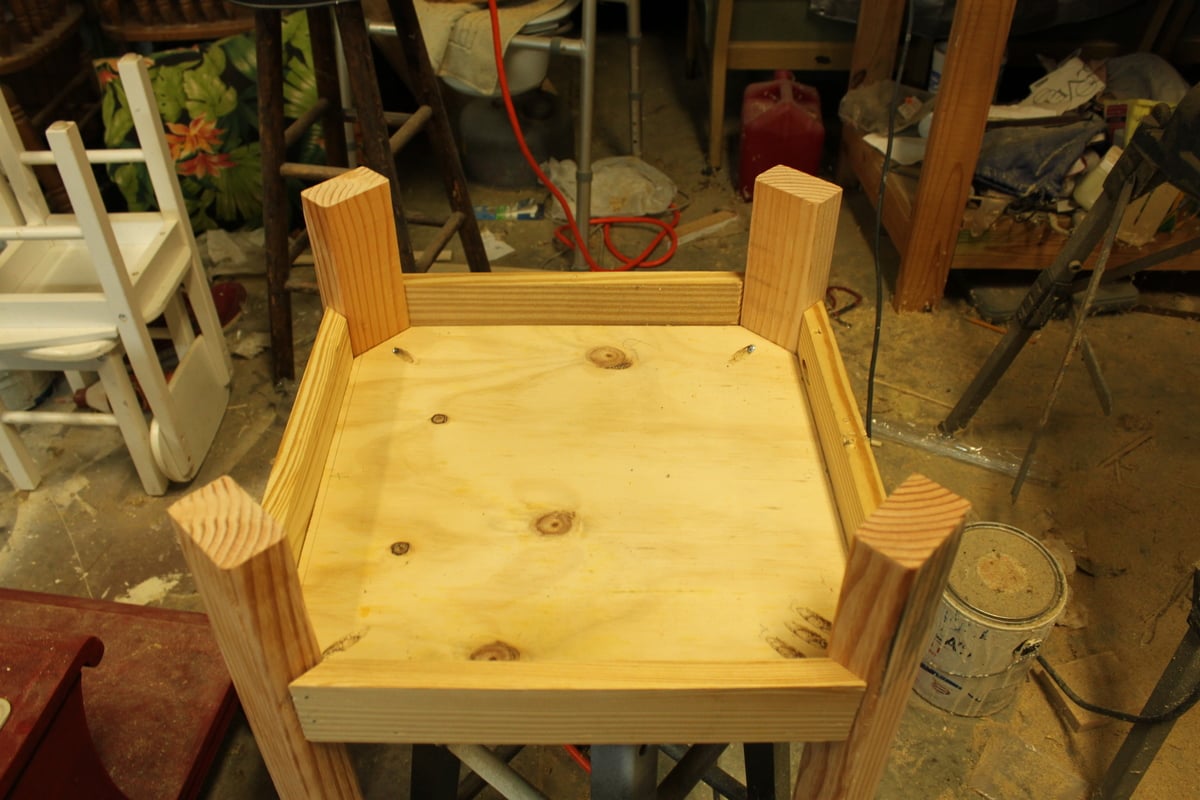
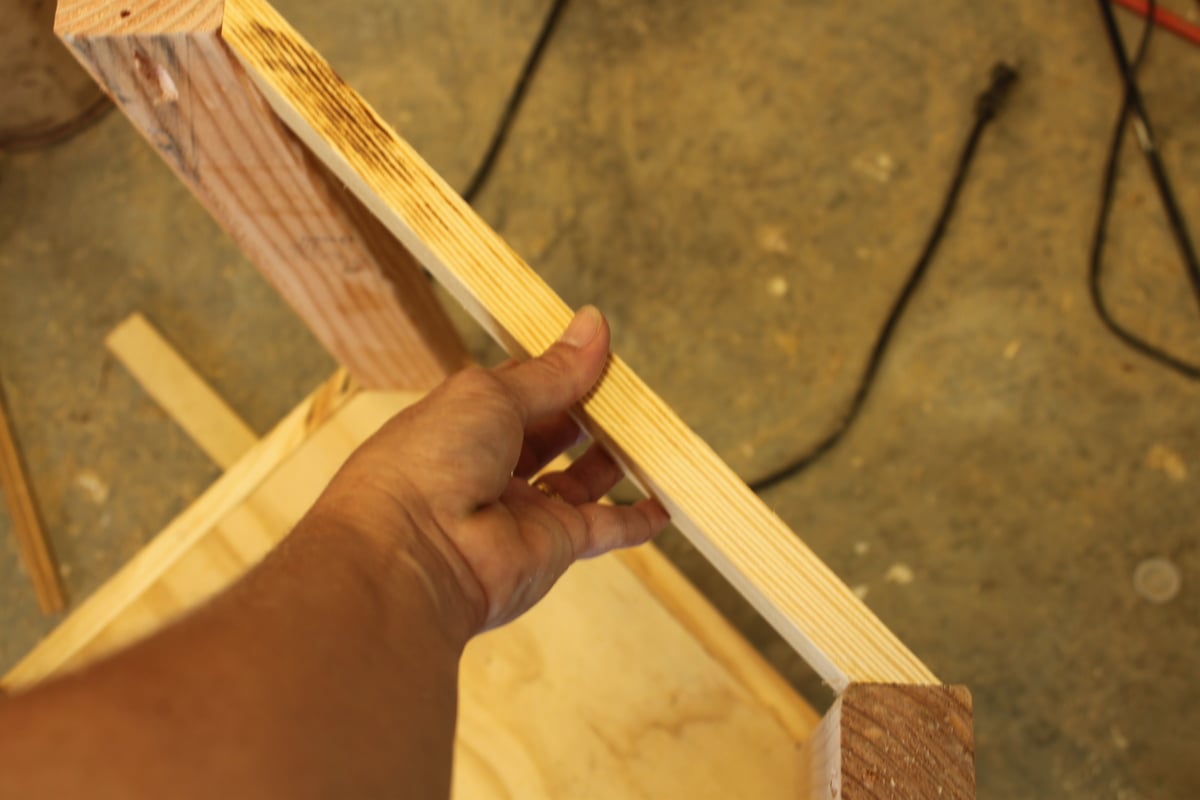
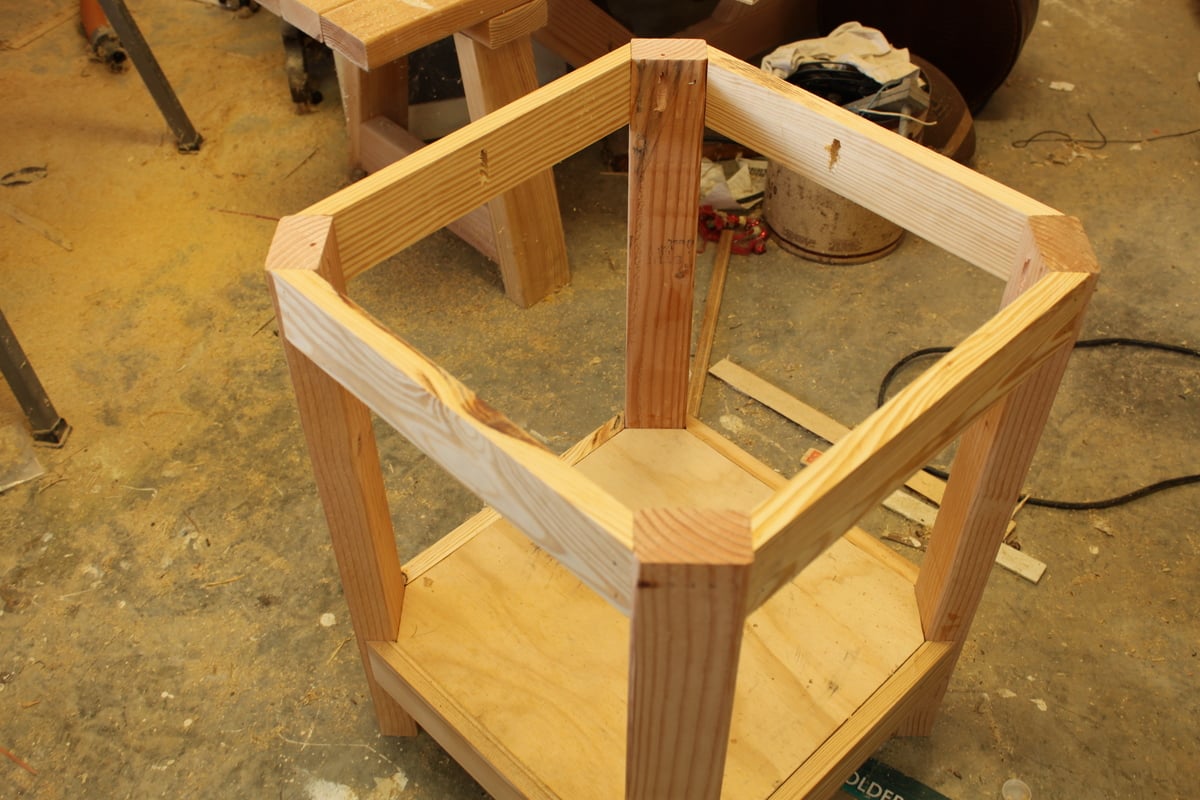
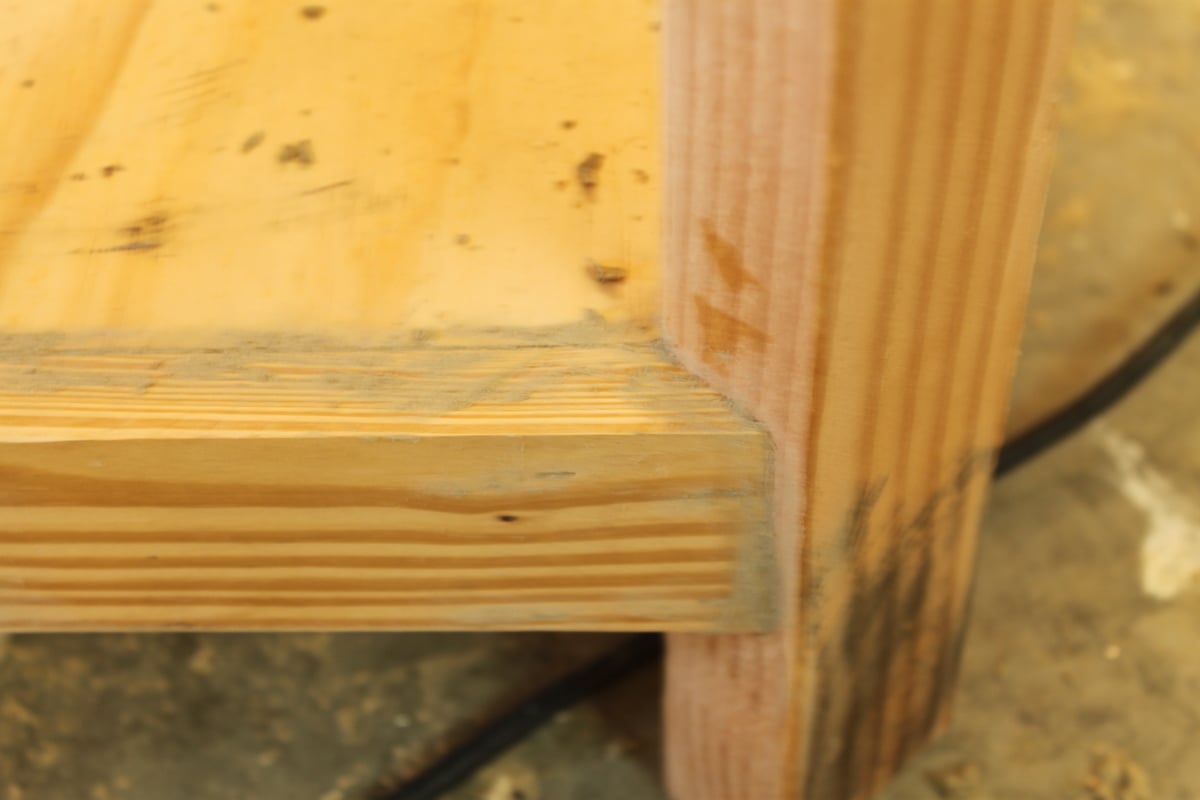
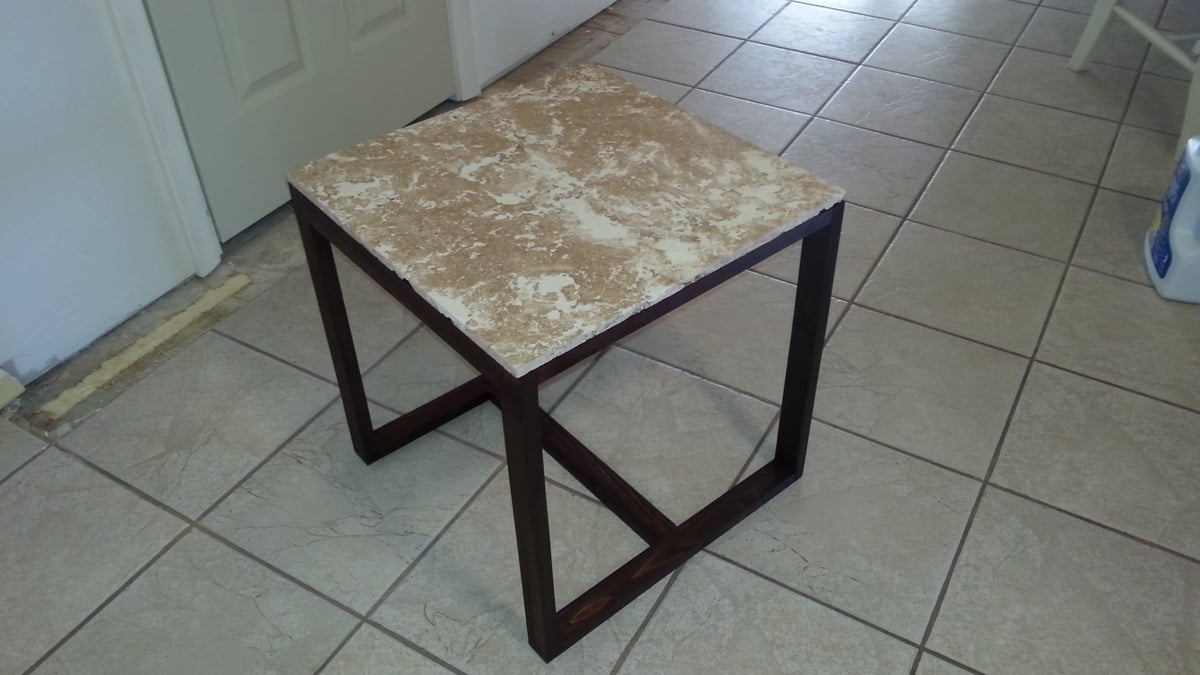
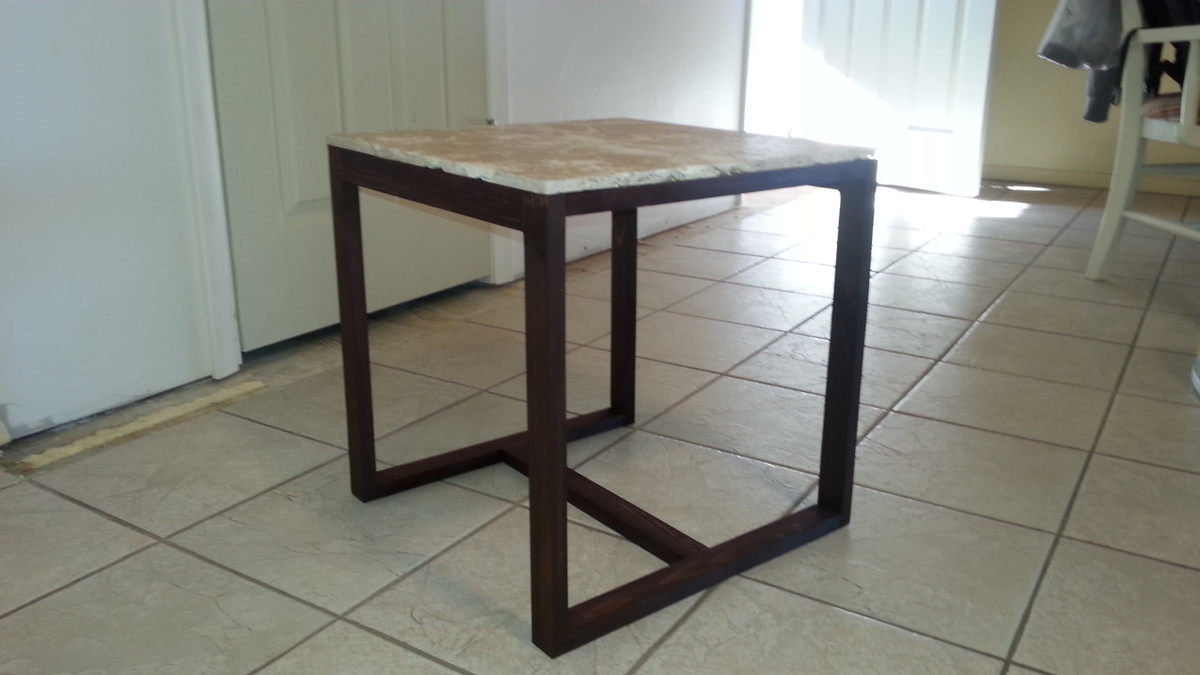
I really liked the sleek design of the concrete topped patio table. I needed a plant stand for an epic boston fern on my front porch, so I modified this design to use 1x2 cedar and topped the stand with a piece of travertine tile. I like the way it turned out. It's winter here, so no front porch photo, only a sad photo in our kitchen which we are in the process of remodelling.

5 8’ 2x4s were not enough. I could not figure out how to get the needed cuts from 5 boards. We had to go back and get more (a 3 hour round trip) which didn’t help with keeping costs down.
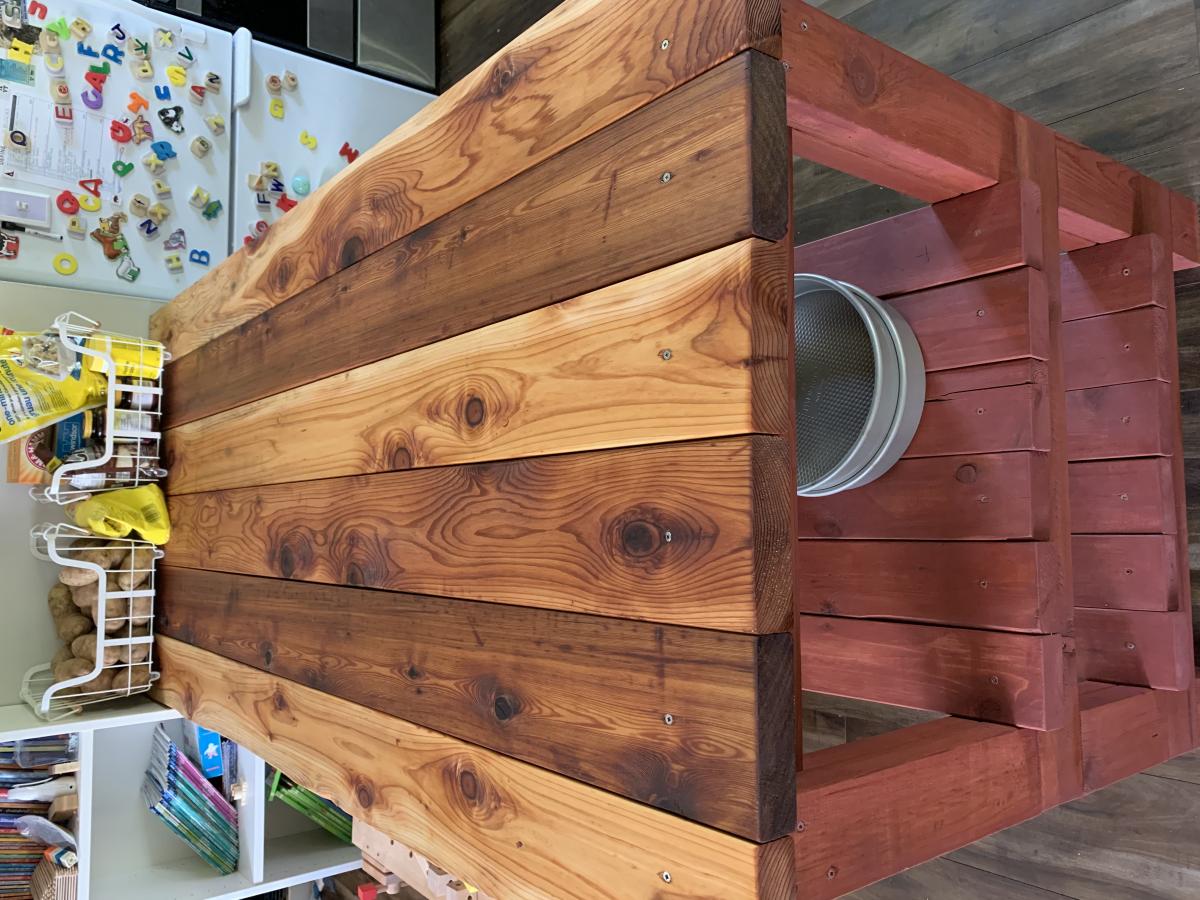
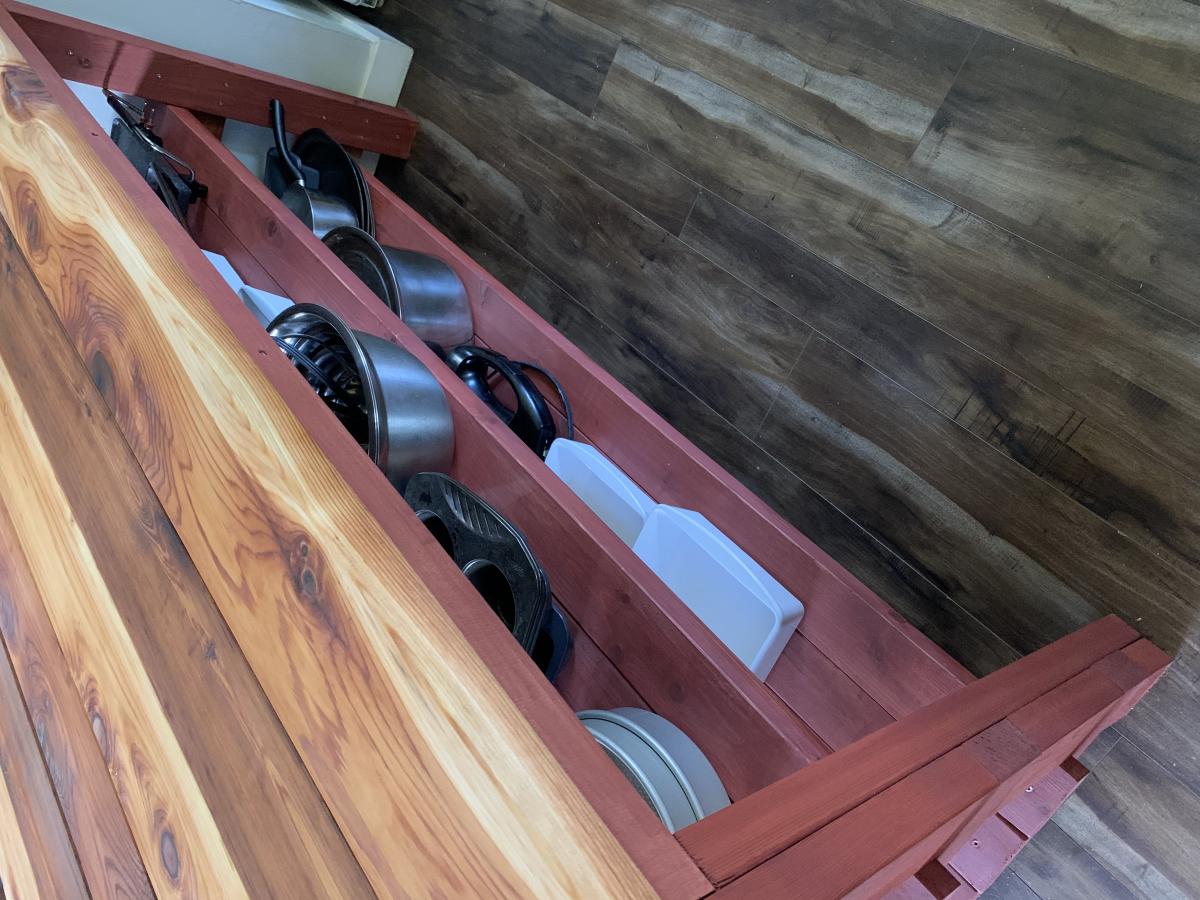
I’ve wanted this built for a looong time and finally roped my husband into building it for me. We used cedar. 2x8s weren’t available so we substituted for 2x6s. We have 6 of those boards across the top, making a few inches of overhang on either side. I liked it just as it was so I didn’t trim the ends of the shelf boards.
The top is stained with pure tung oil for waterproofing. The frame and shelves are painted with milk paint stain. 2 coats of this left it pink until a light coat of tung oil brought out the nice darker colour. Waiting for the tung oil to dry killed me because I wanted to be able to use it right away.