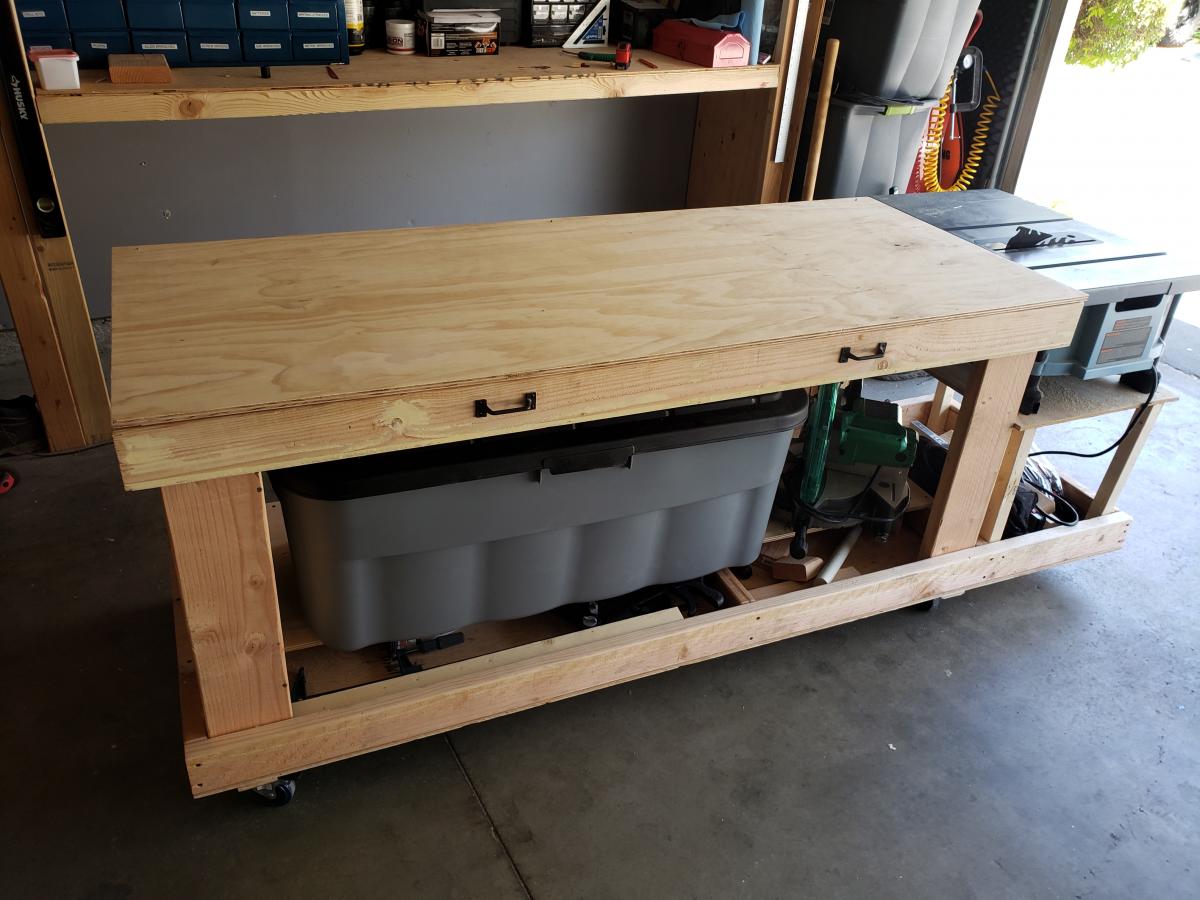
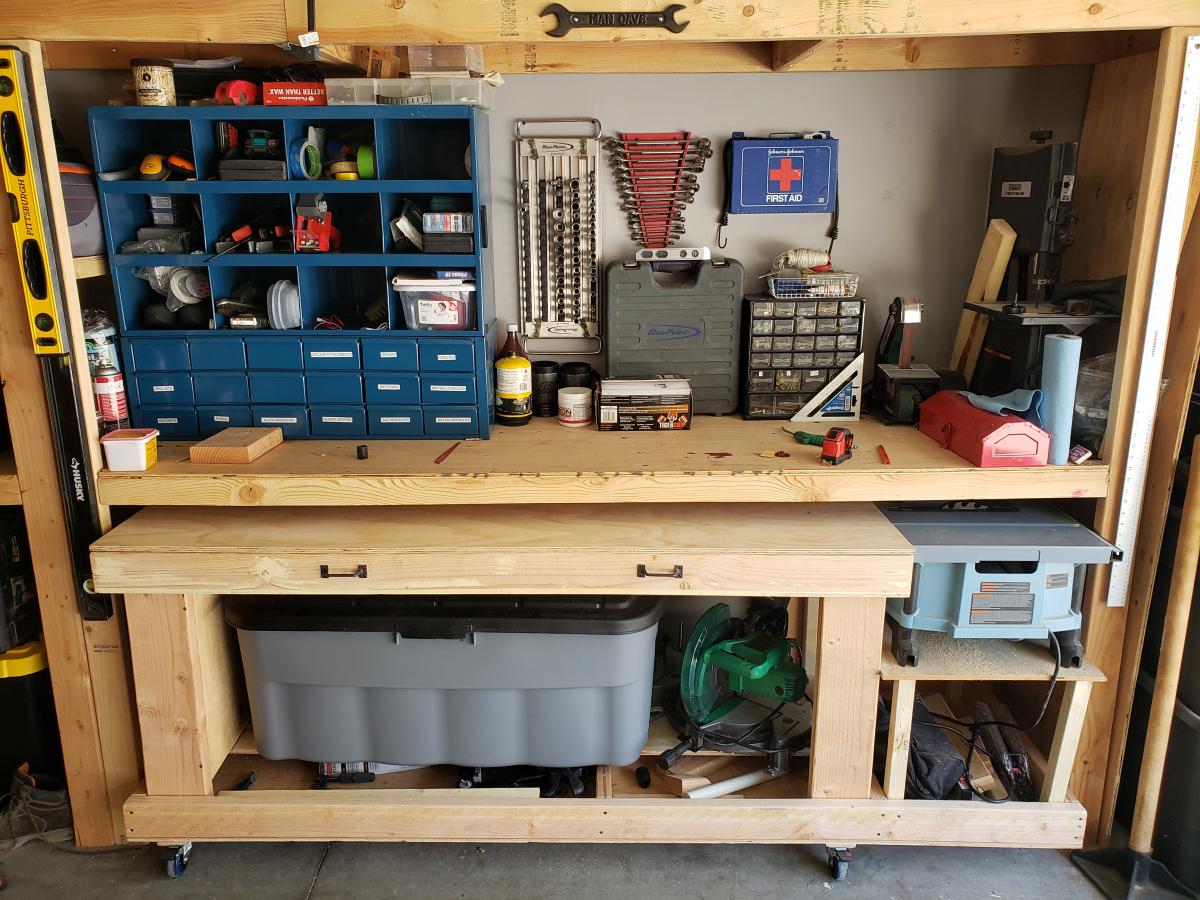
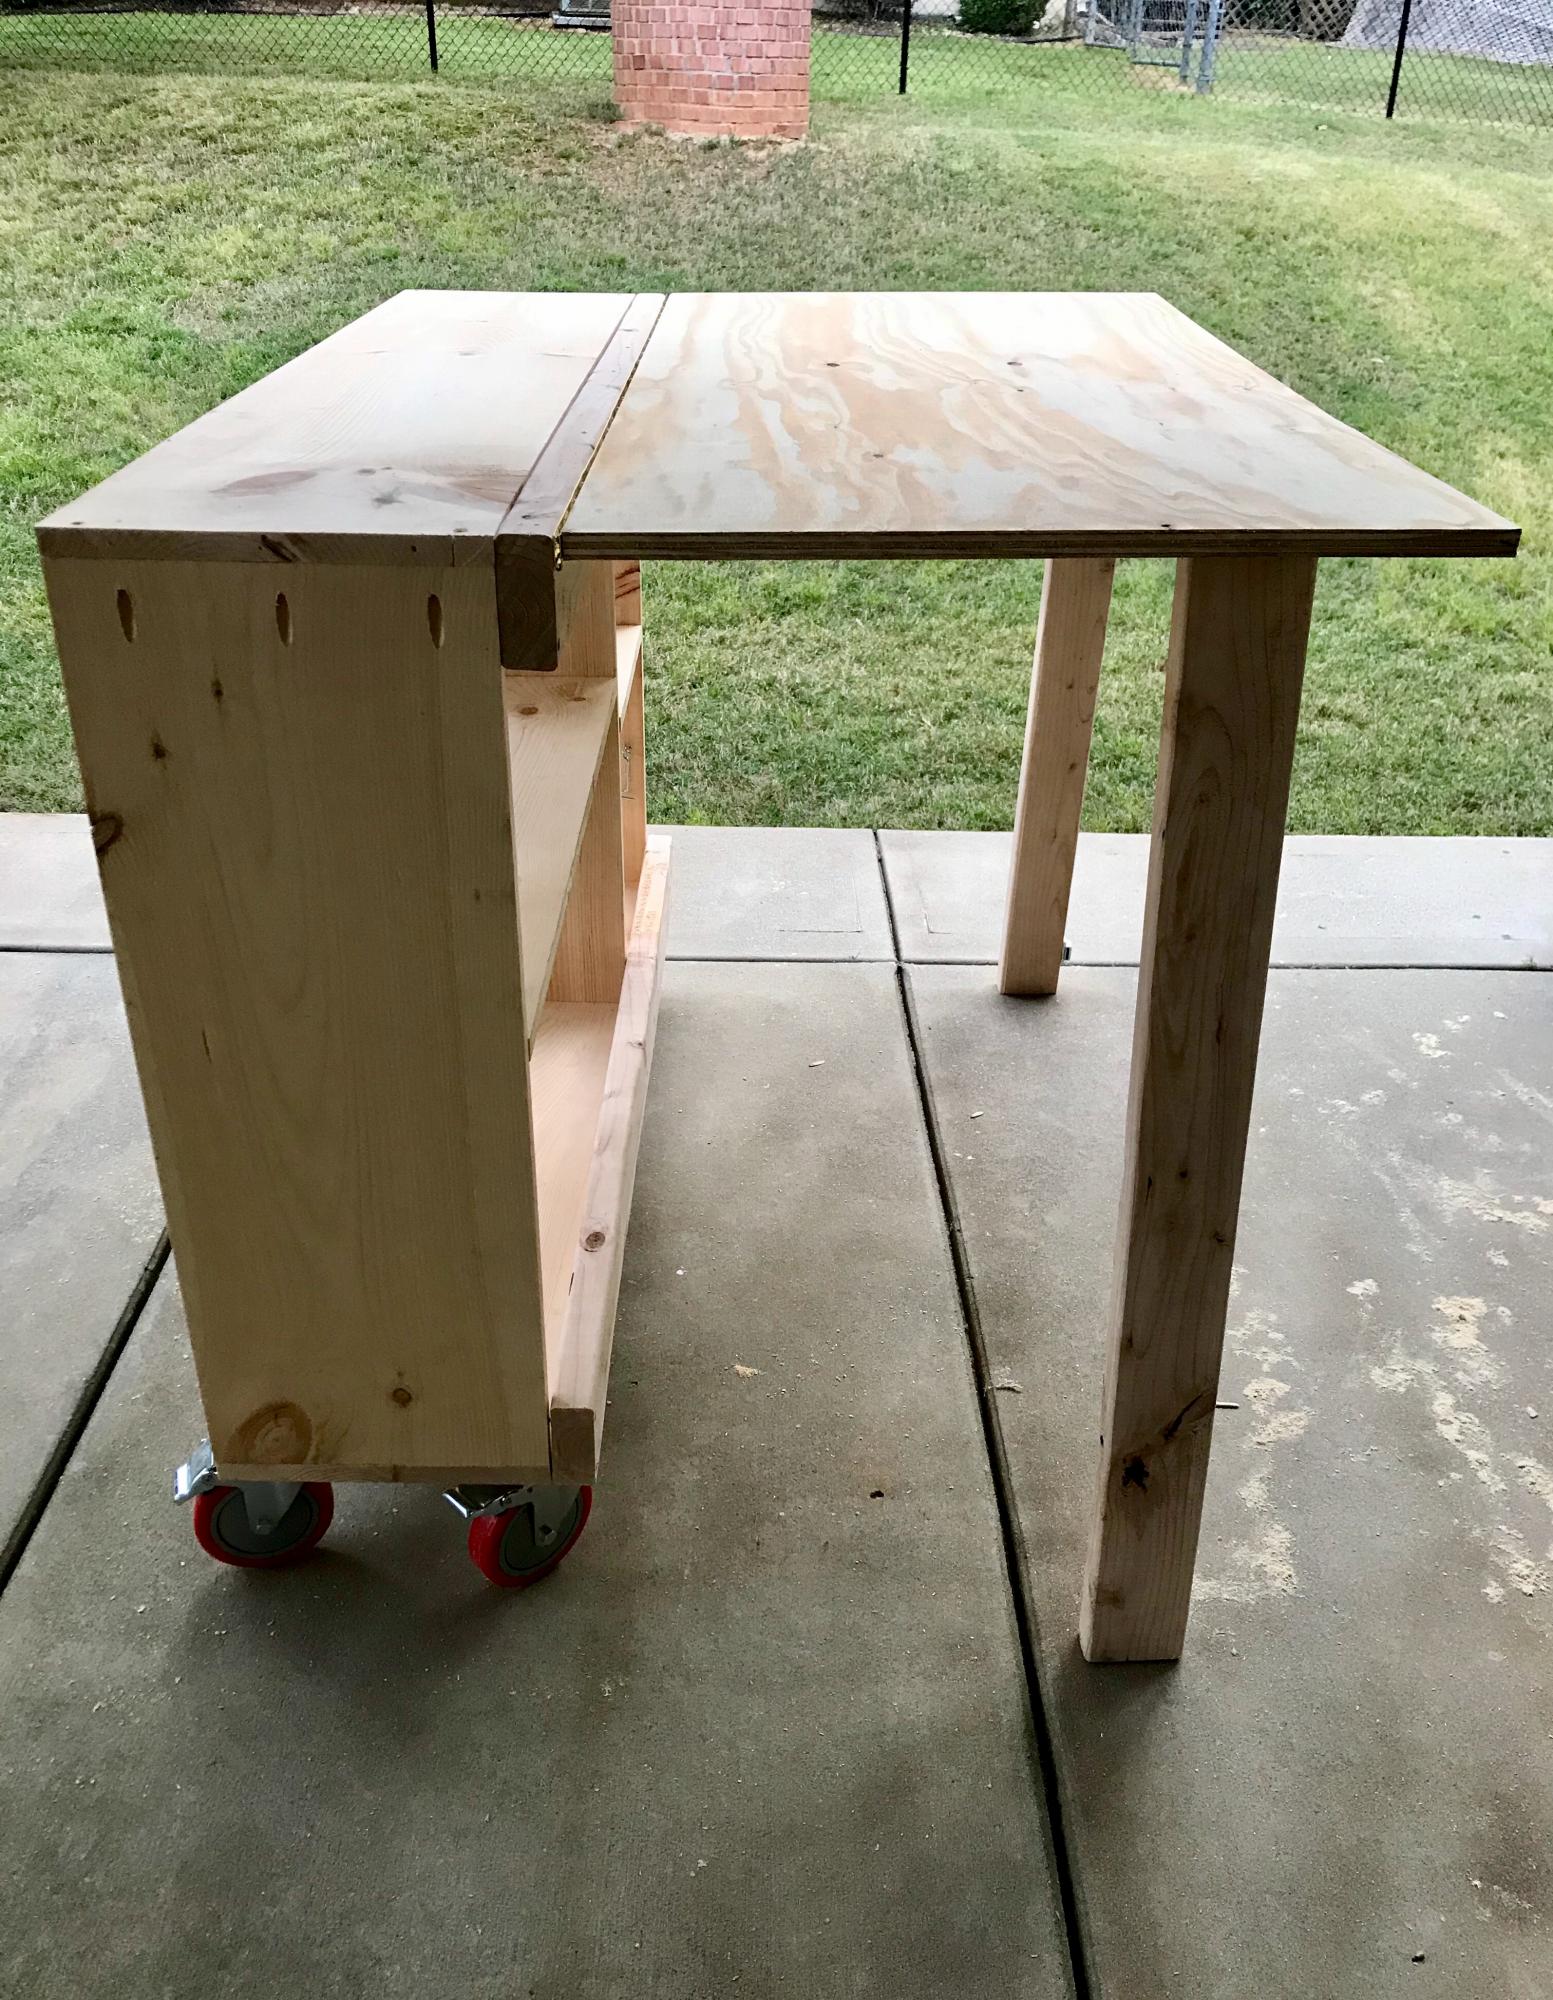
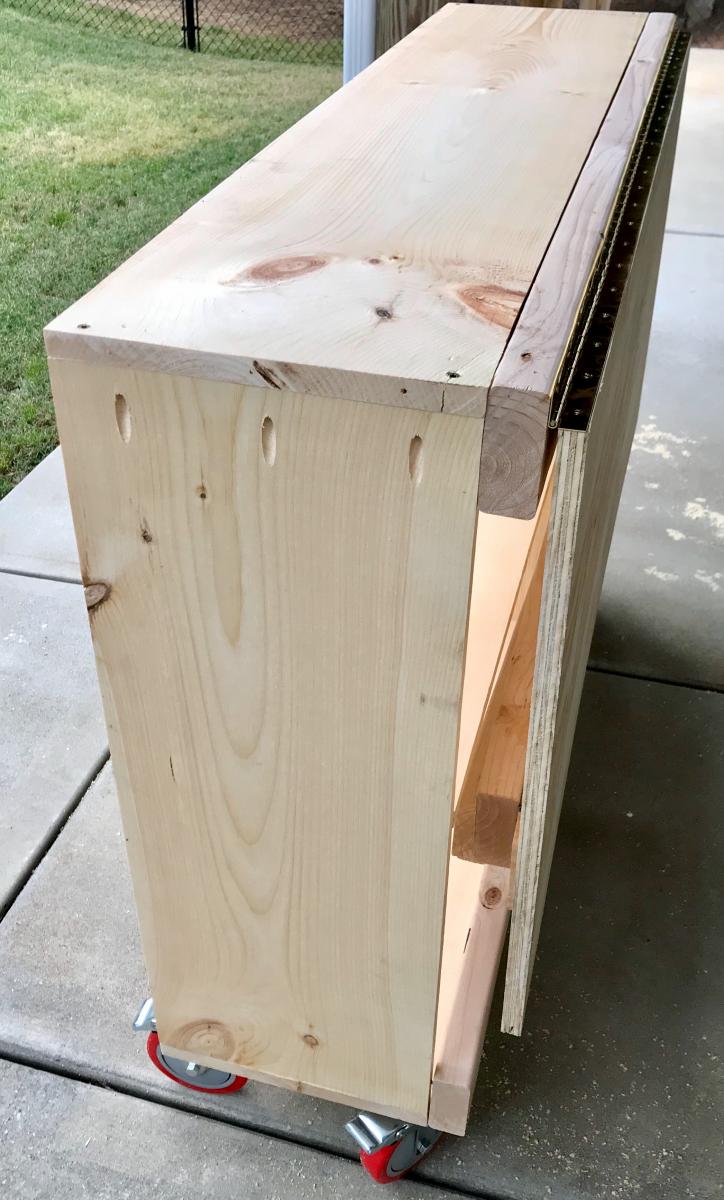
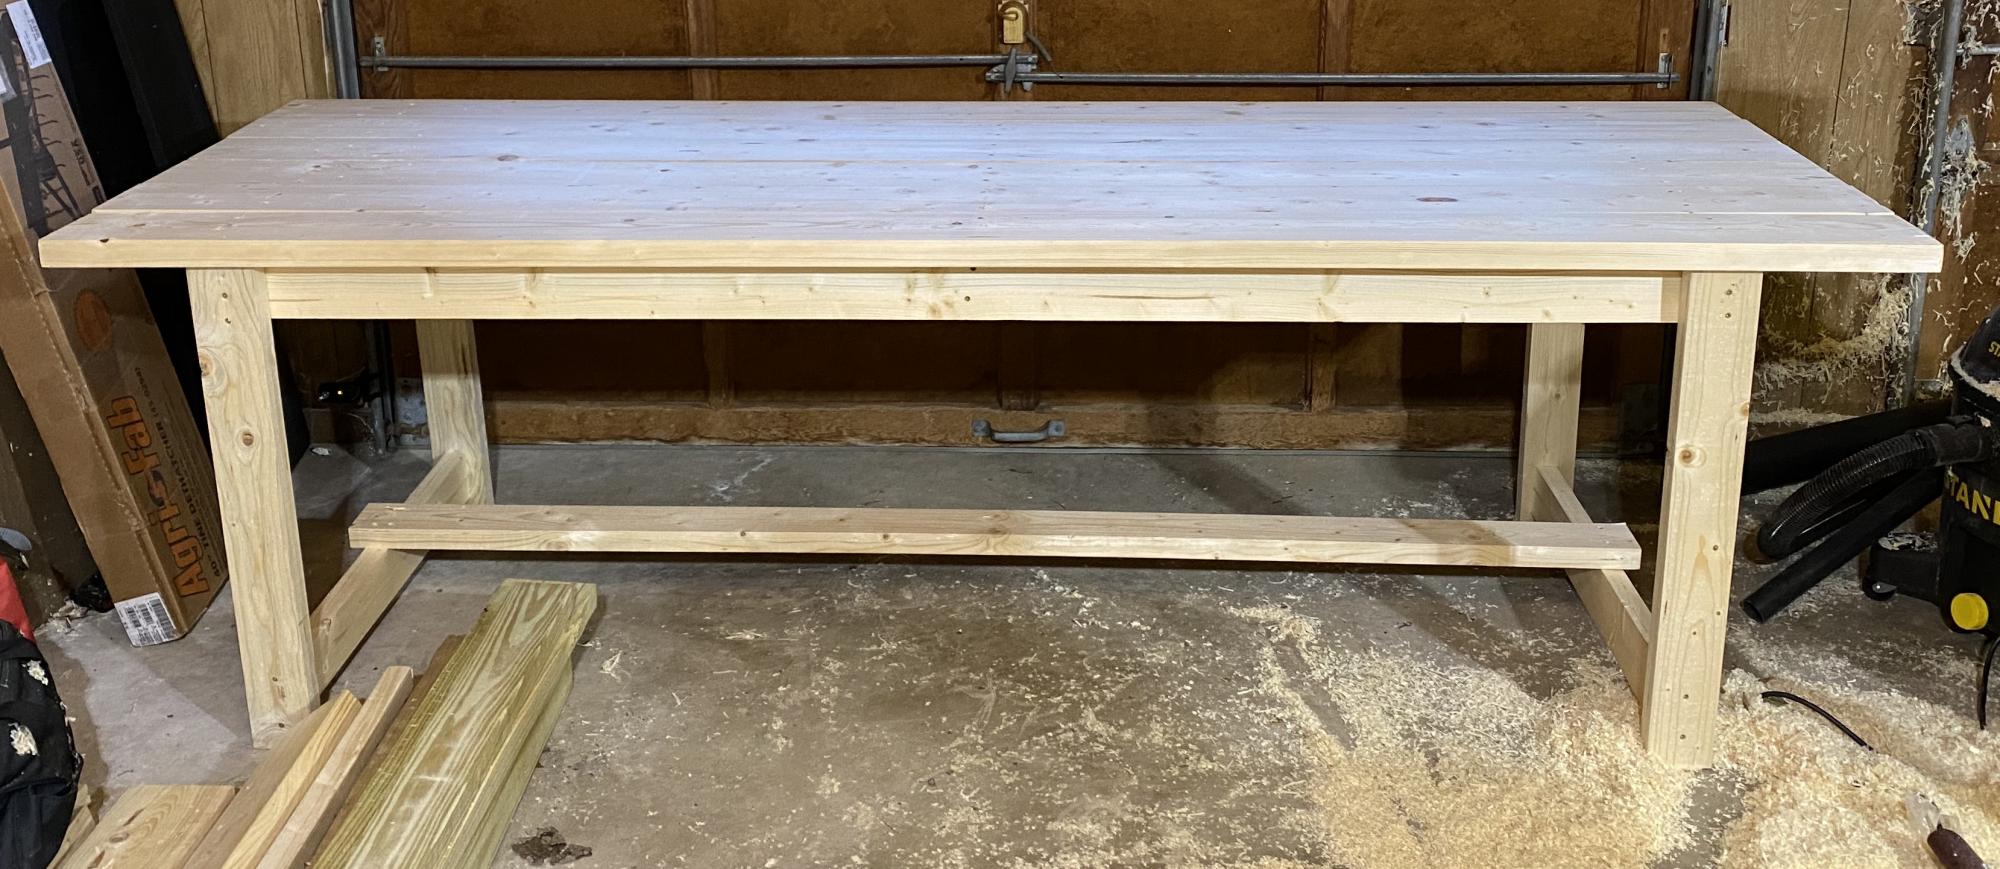
Modified workbench
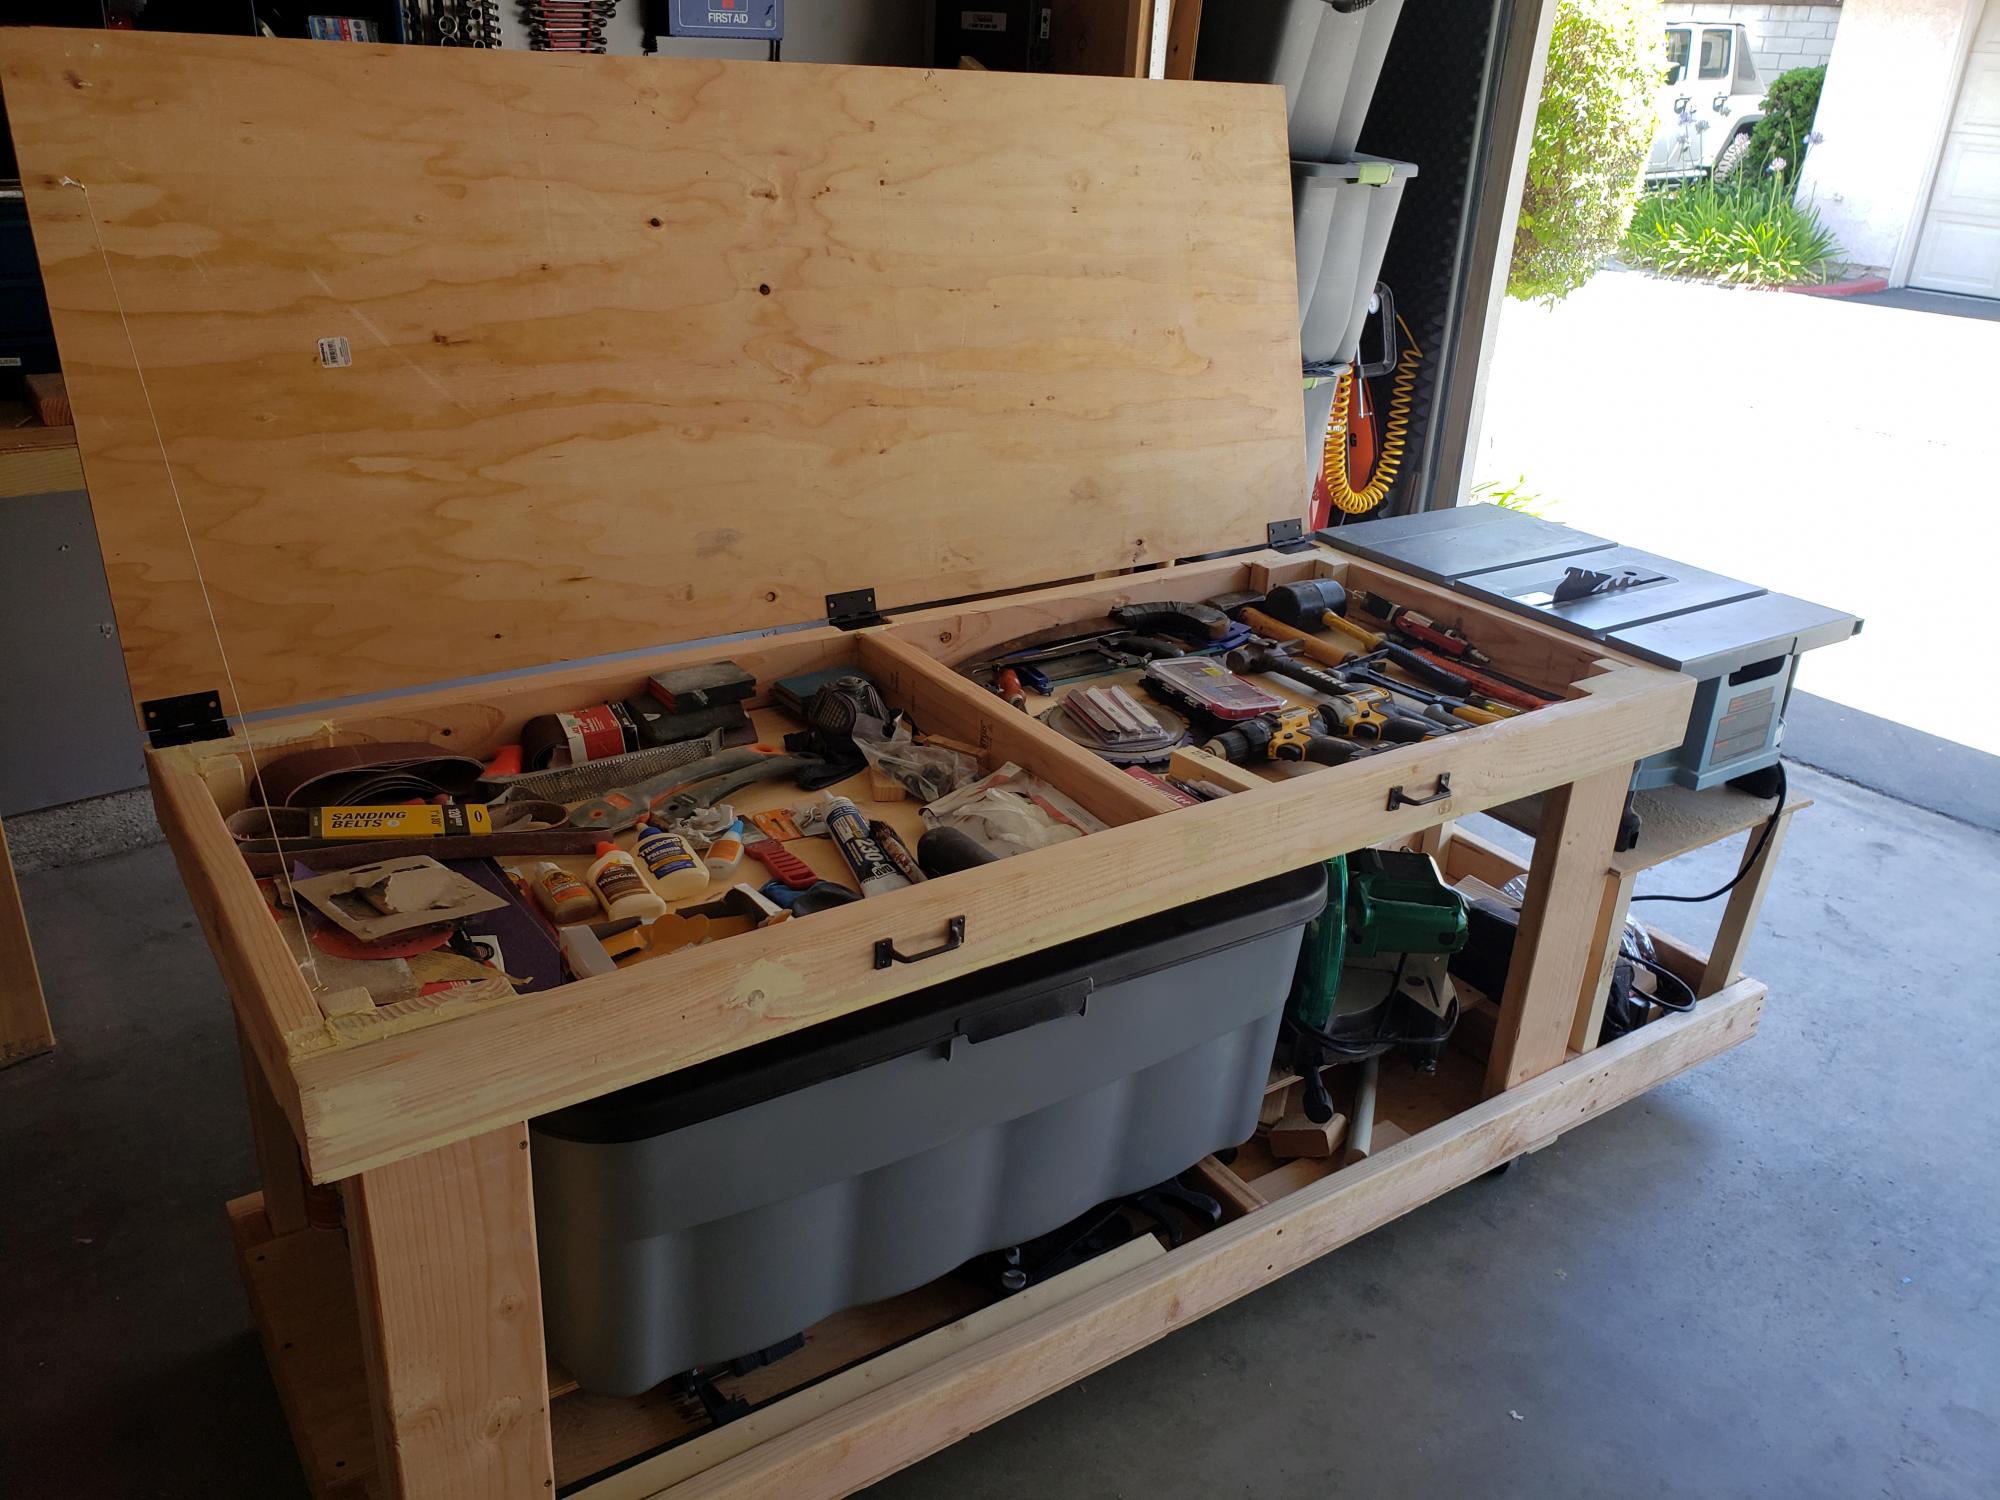
A modification of the traditional work bench. Great for storage. Bench area of 70 inches with 18 additional inches for the table saw.
Built from Plan(s)
A modification of the traditional work bench. Great for storage. Bench area of 70 inches with 18 additional inches for the table saw.
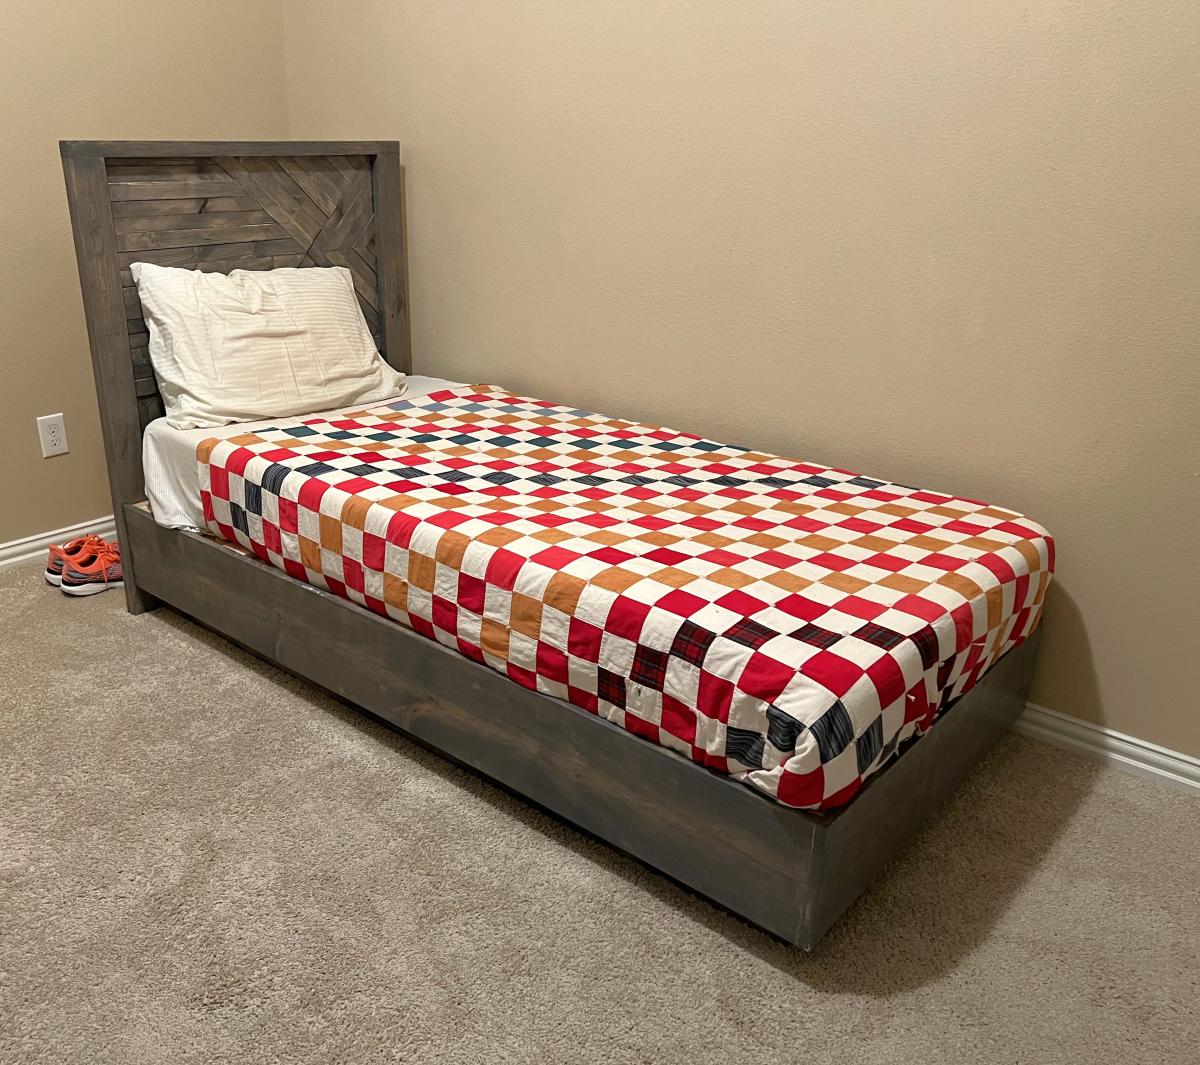
Twin Floating Bed
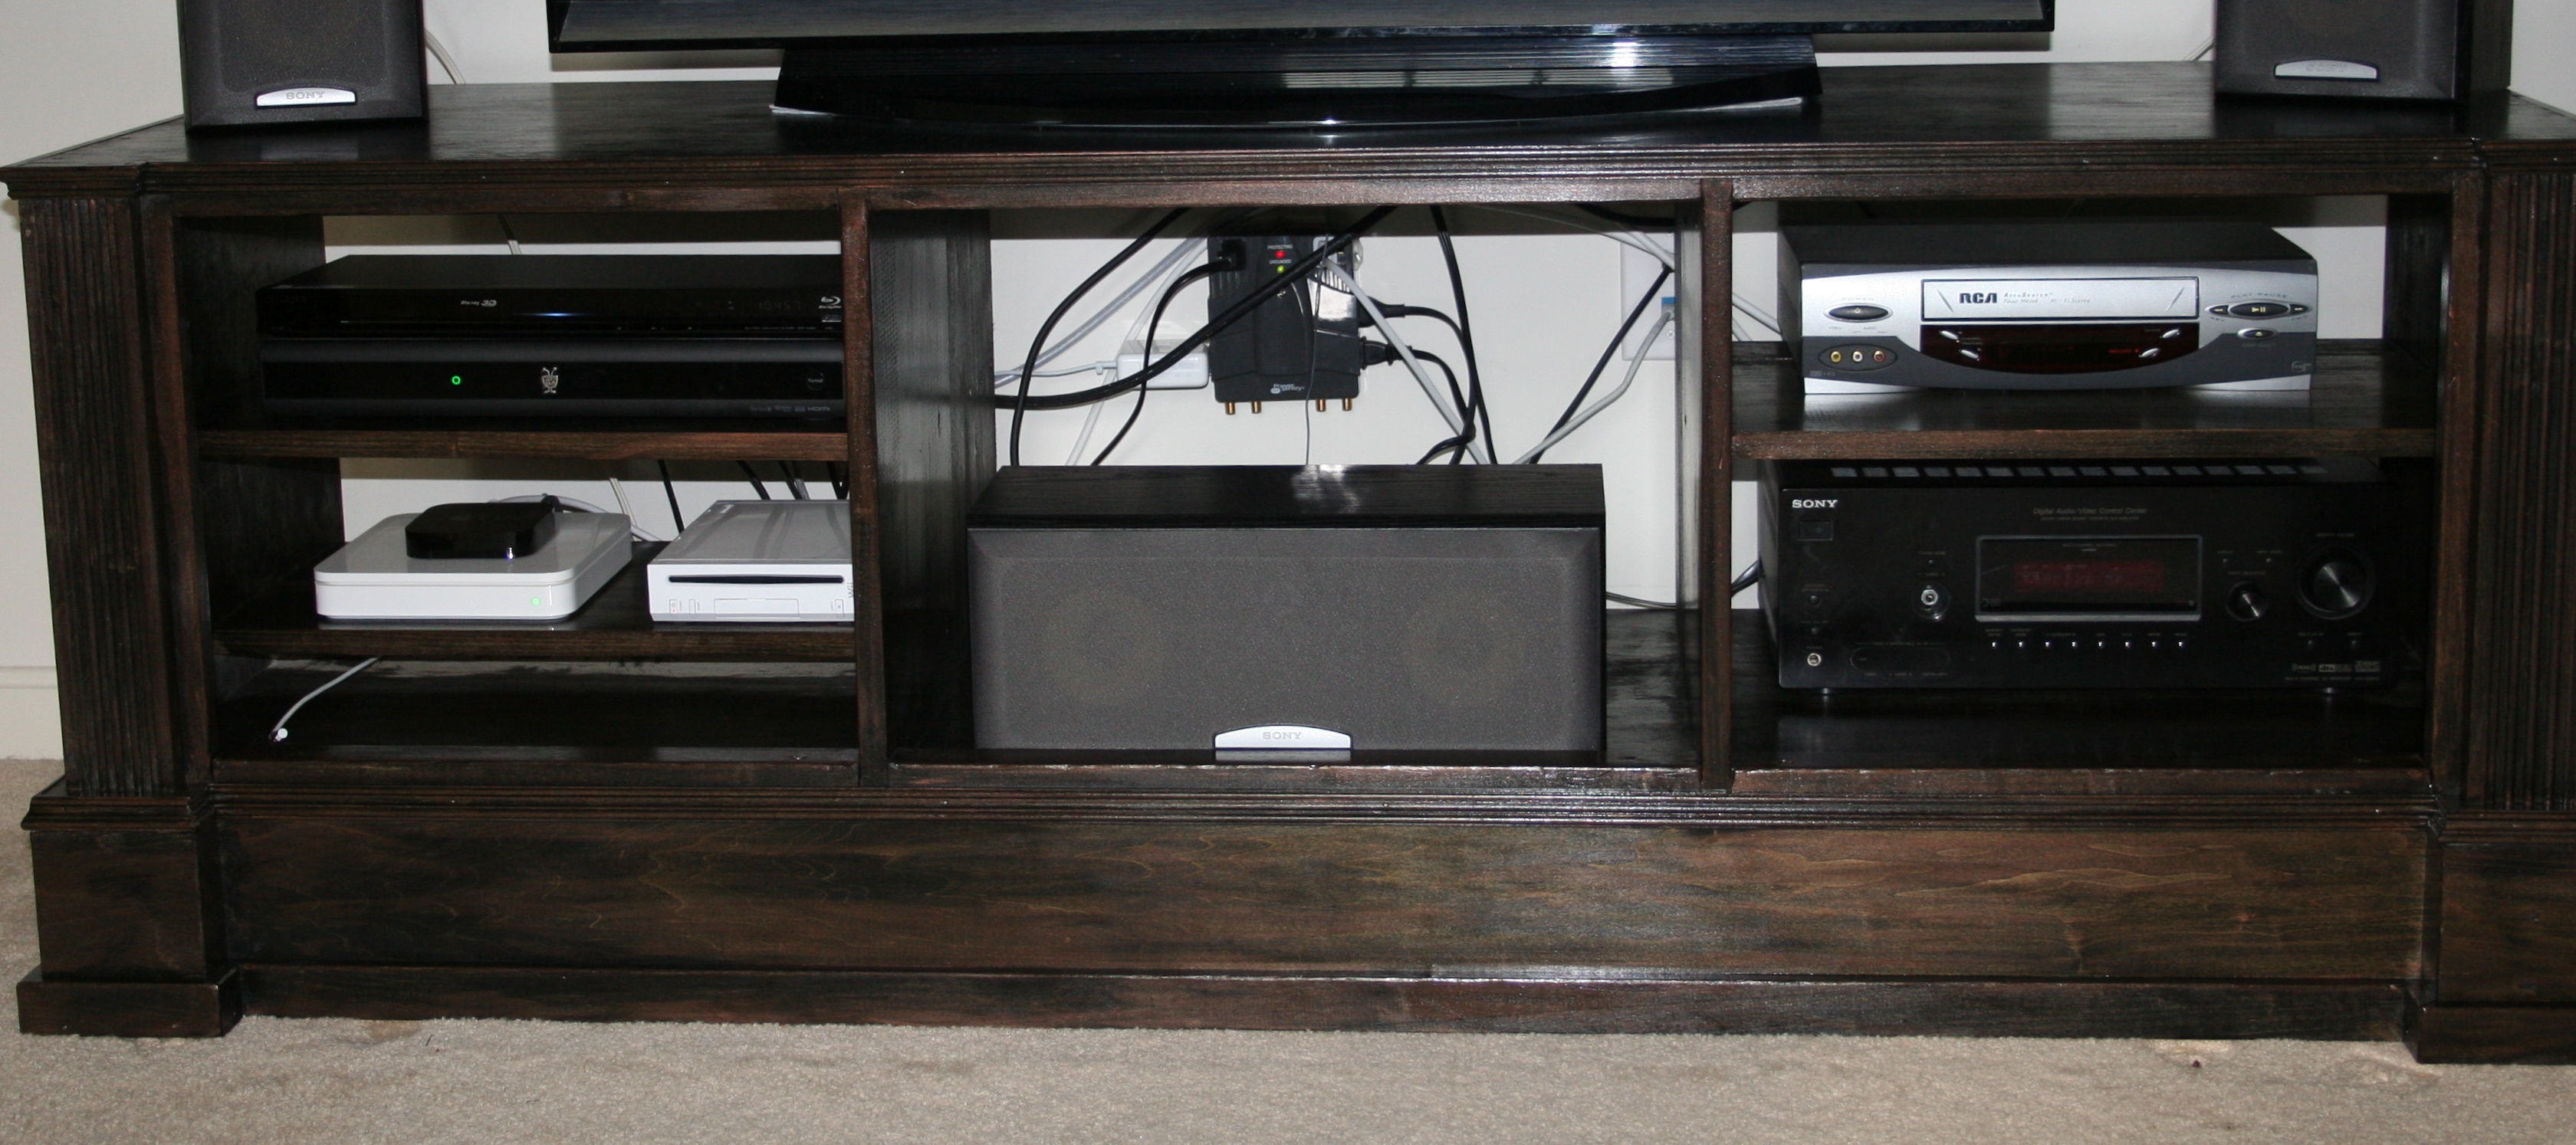
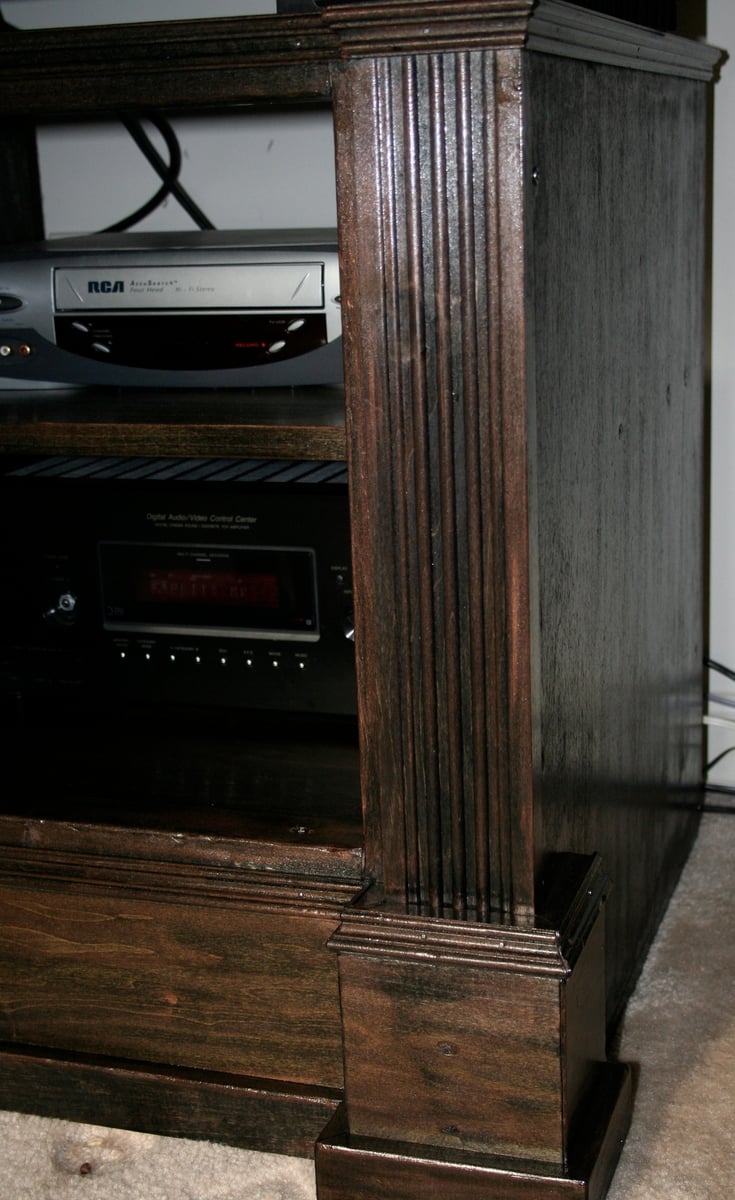
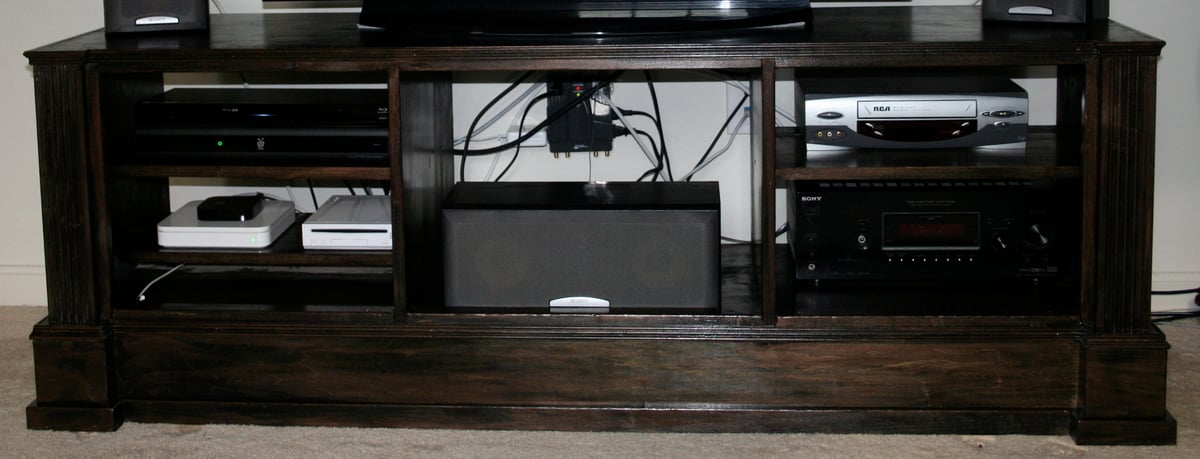
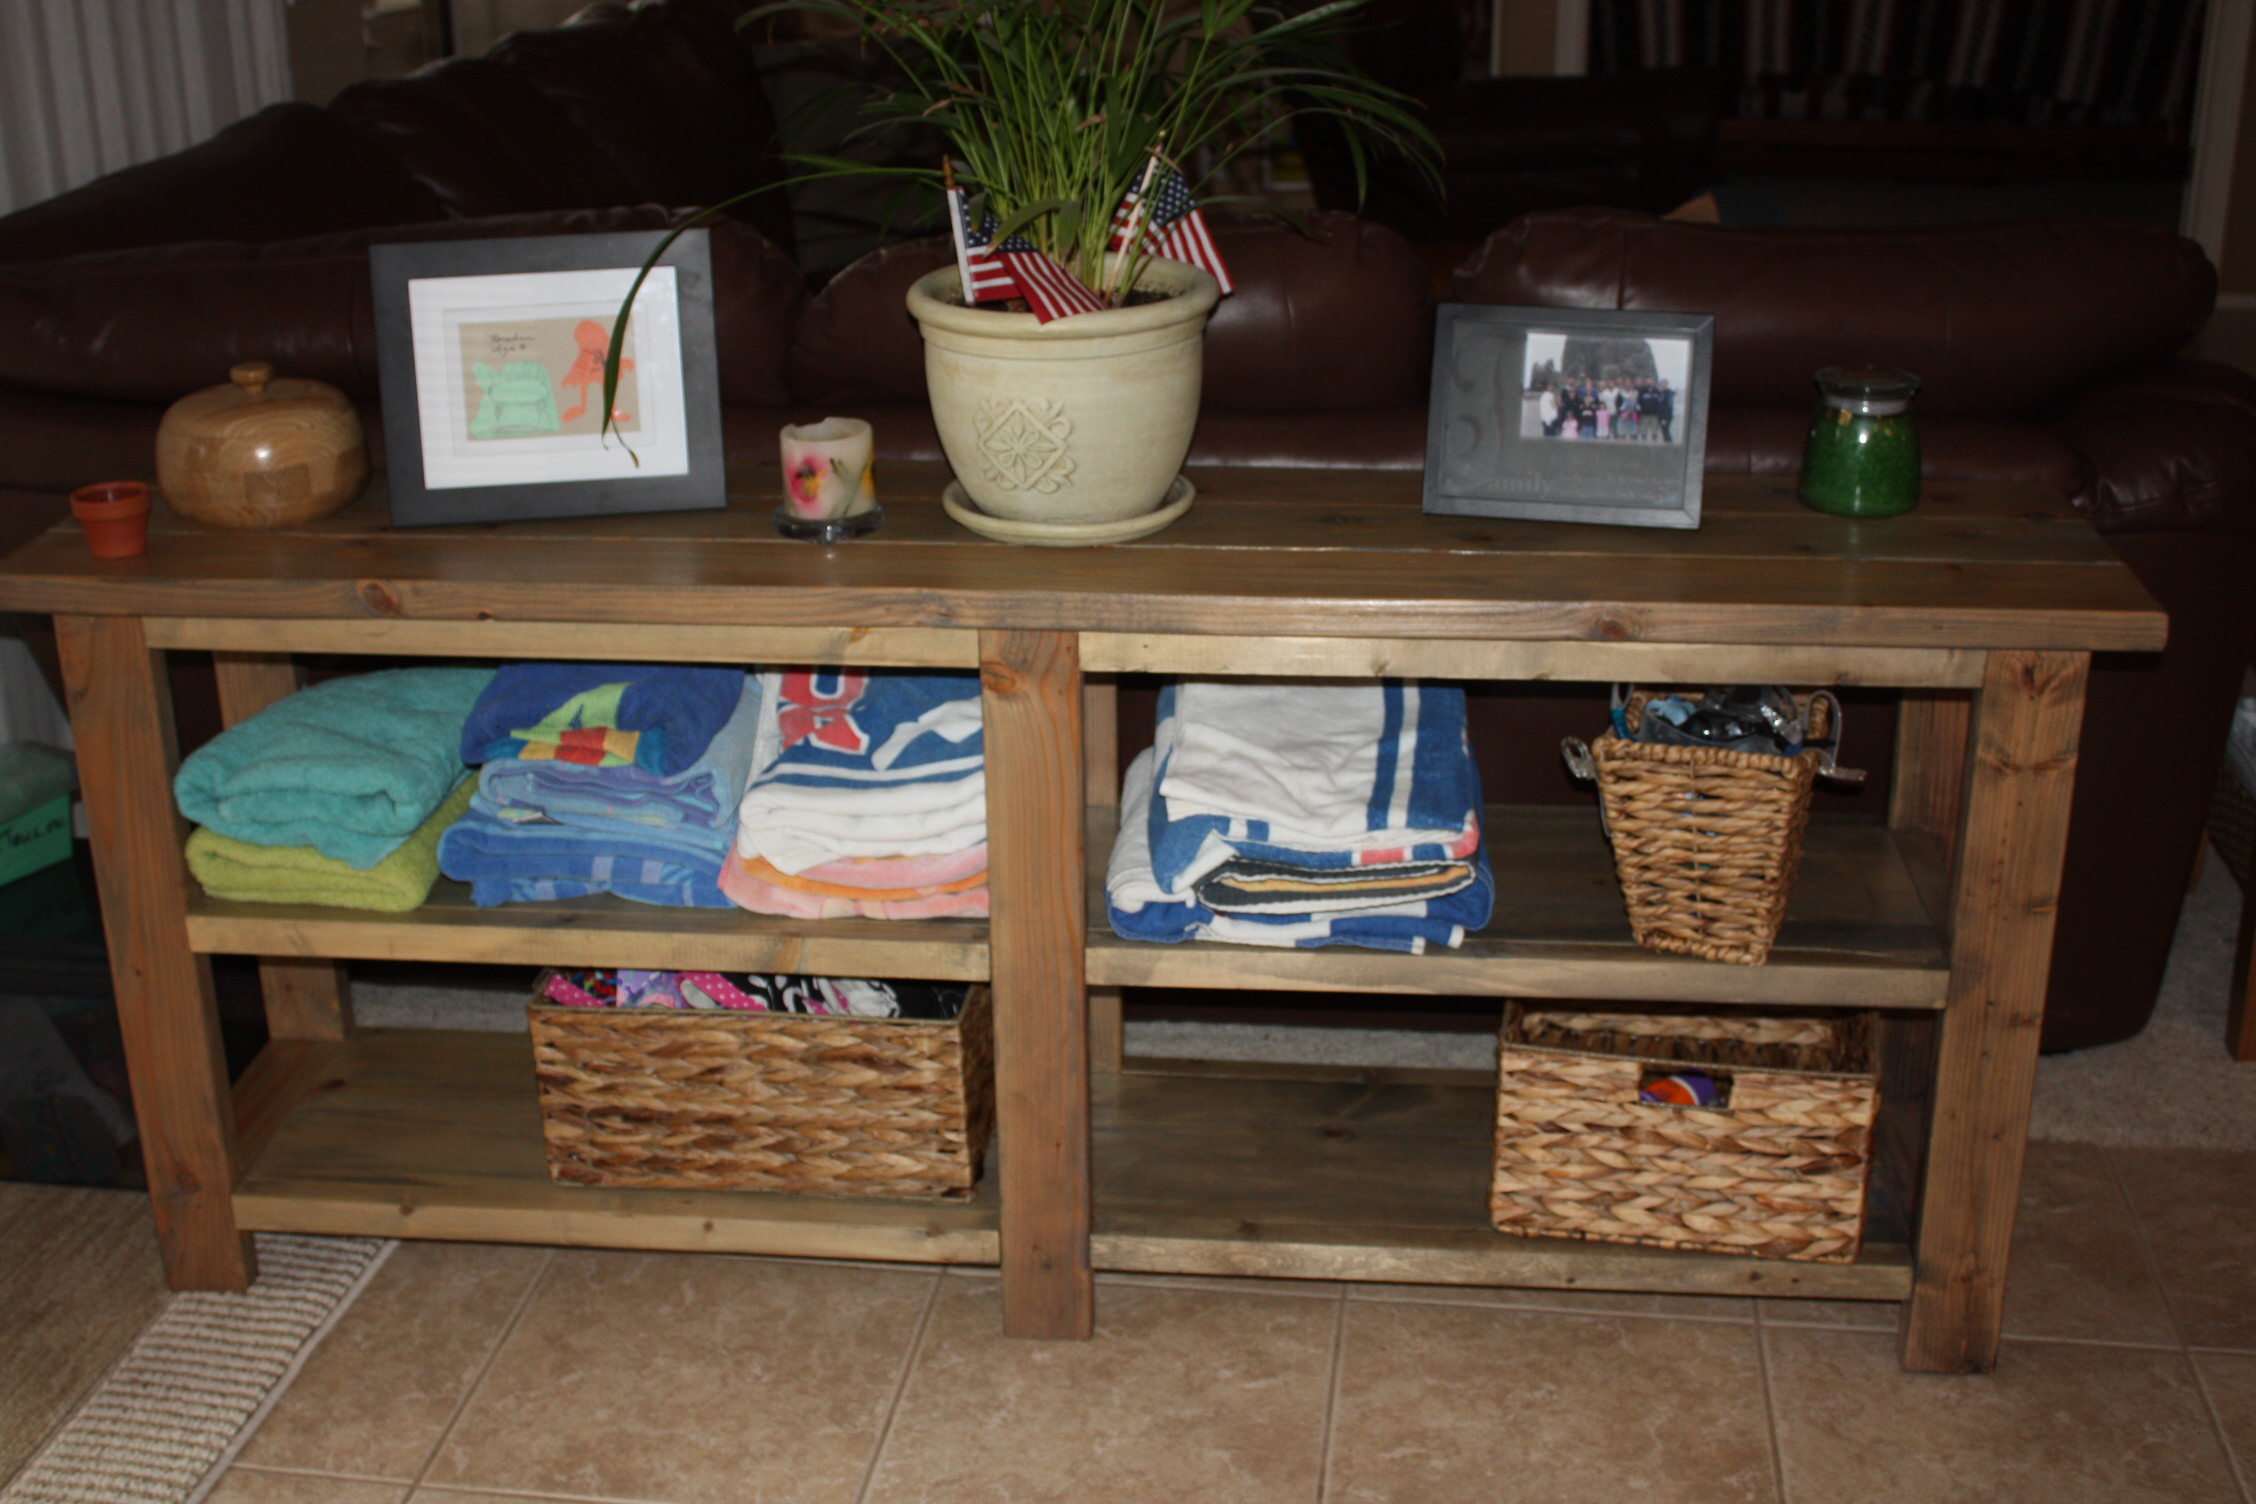
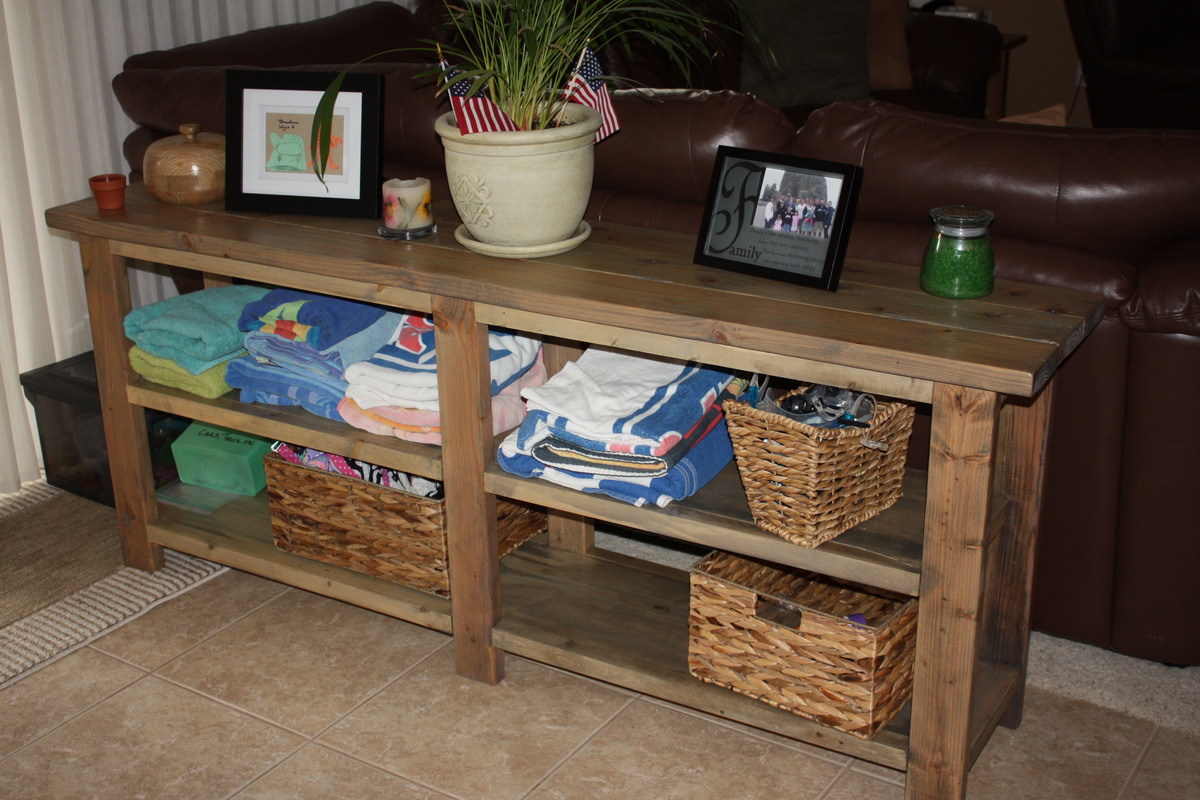
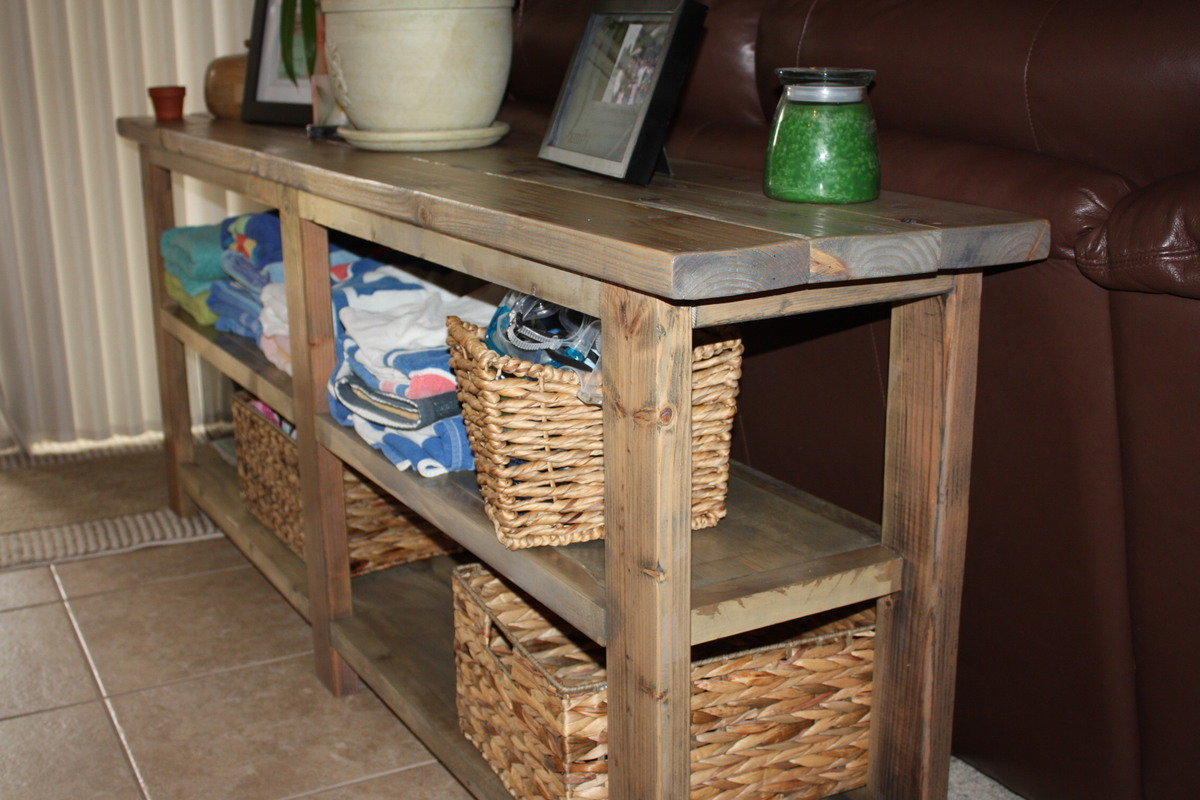
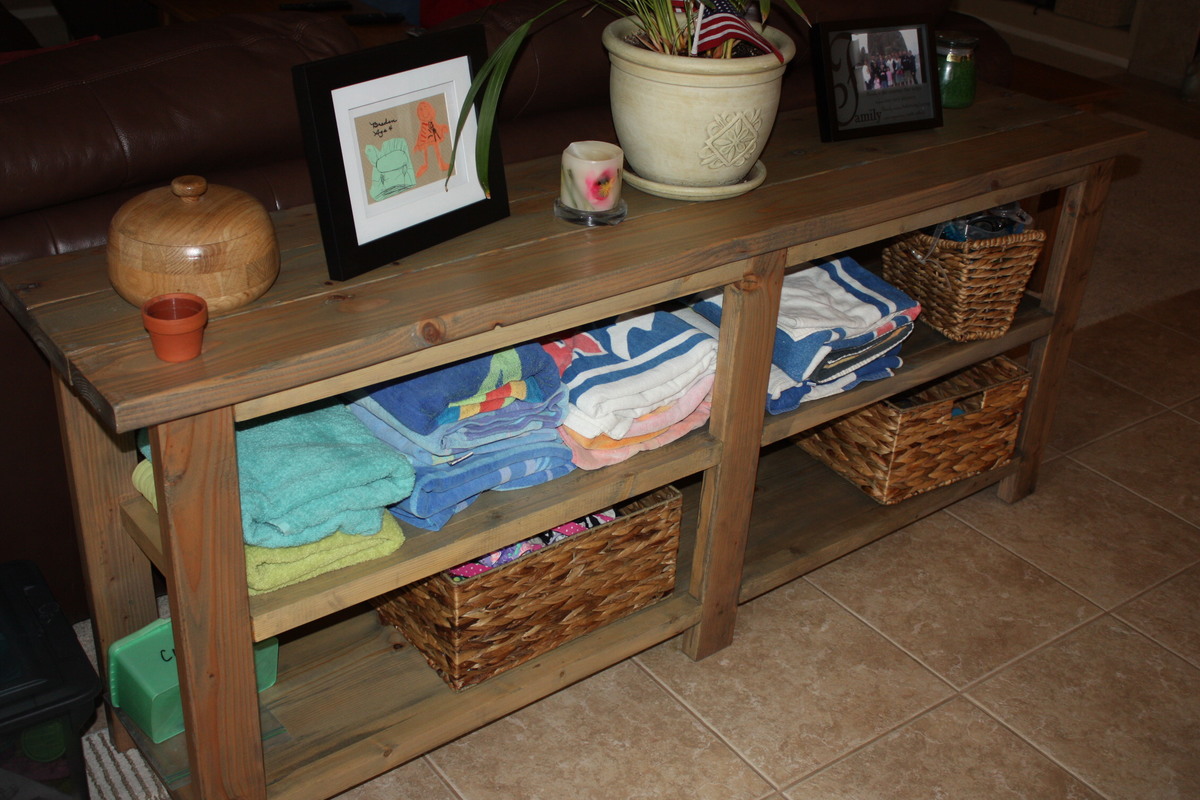
I have been needing an entertainment center for so long. When this plan popped up, my husband and I went into action. We designed this piece a little differently though. For one, the plan is too narrow for us and our tv-so our console is wider but shorter-to save on costs. Another note-we needed a place to put our computer so it can charge without our twin boys getting ahold of the cord. You can see that feature on the lower left hand corner. I also used a picture in a very well known catalog and I used the picture to get the stain just right. This might just be my favorite piece so far. I will be adding the bookcases and hutch to this. I am also in the process of adding 2 doors to this console. They needed to be stained before I could add them though.
Wed, 07/18/2012 - 10:22
I also wanted to note-we will be adding bead board behind the middle part of this console. We are leaving the other 2 backs exposed because I don't have a router to notch out holes in bead board. :)
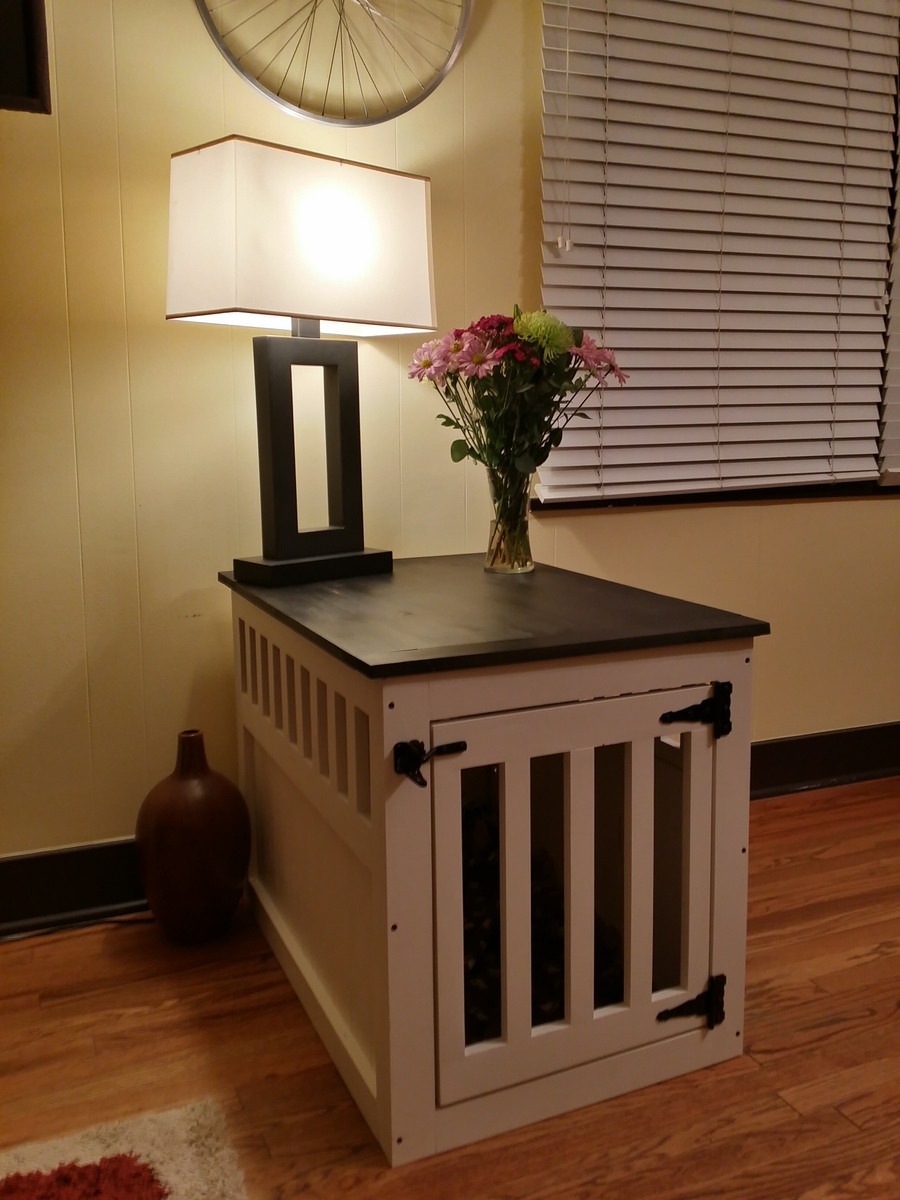
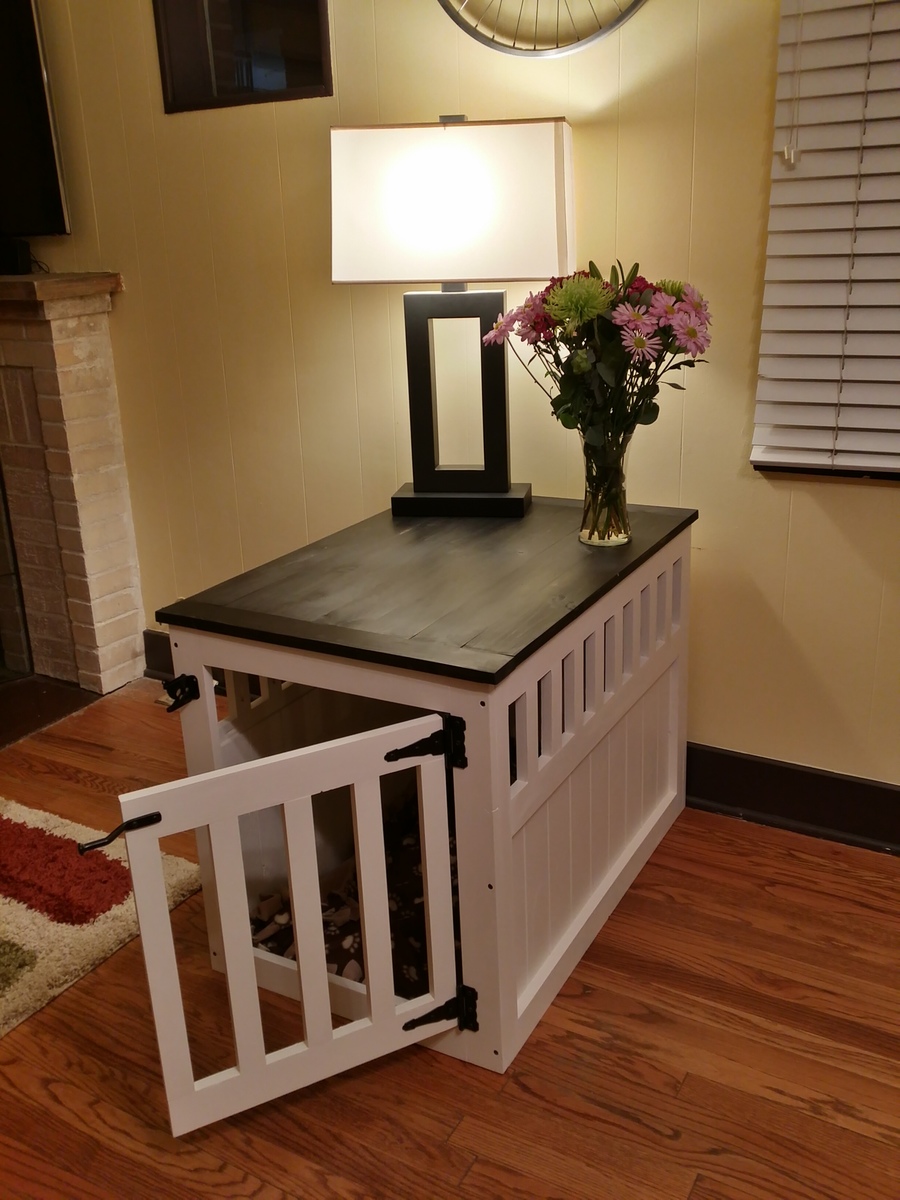
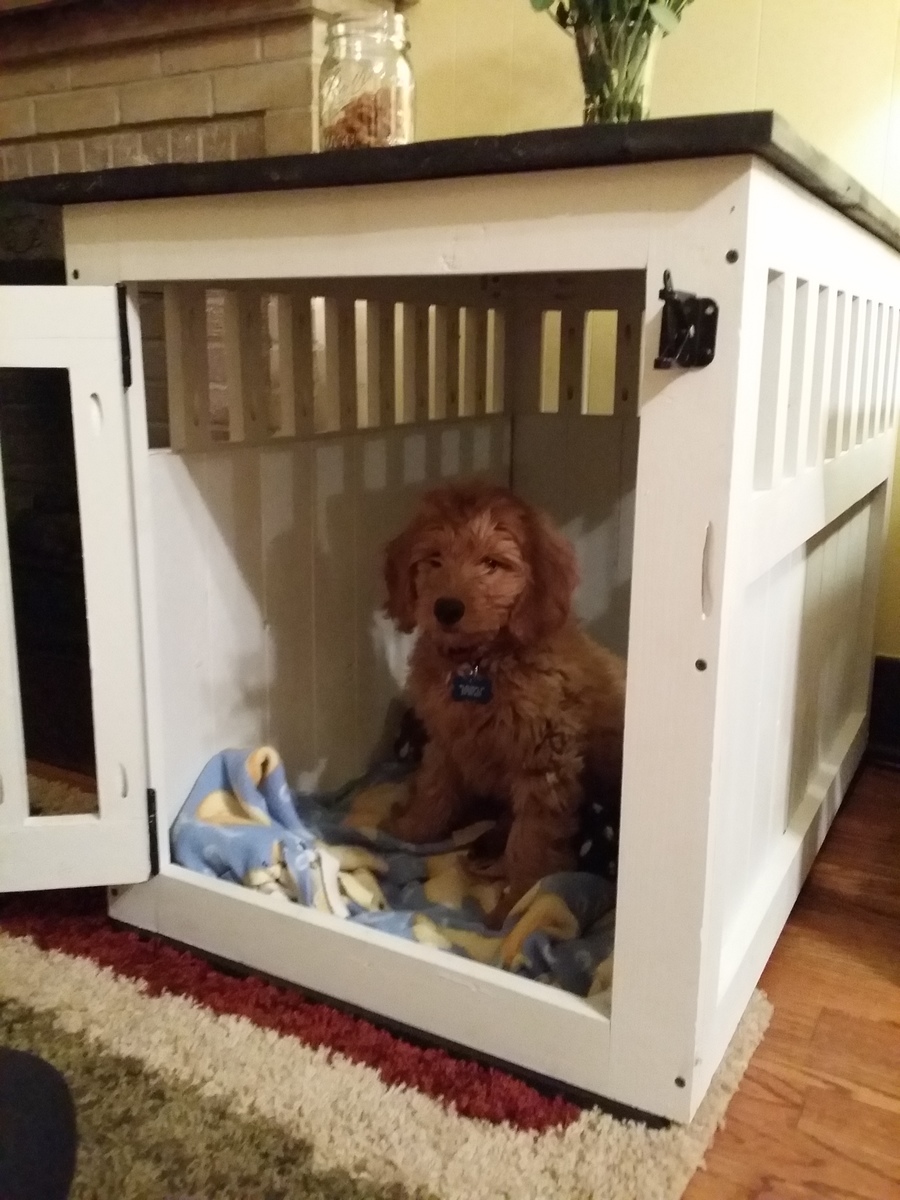
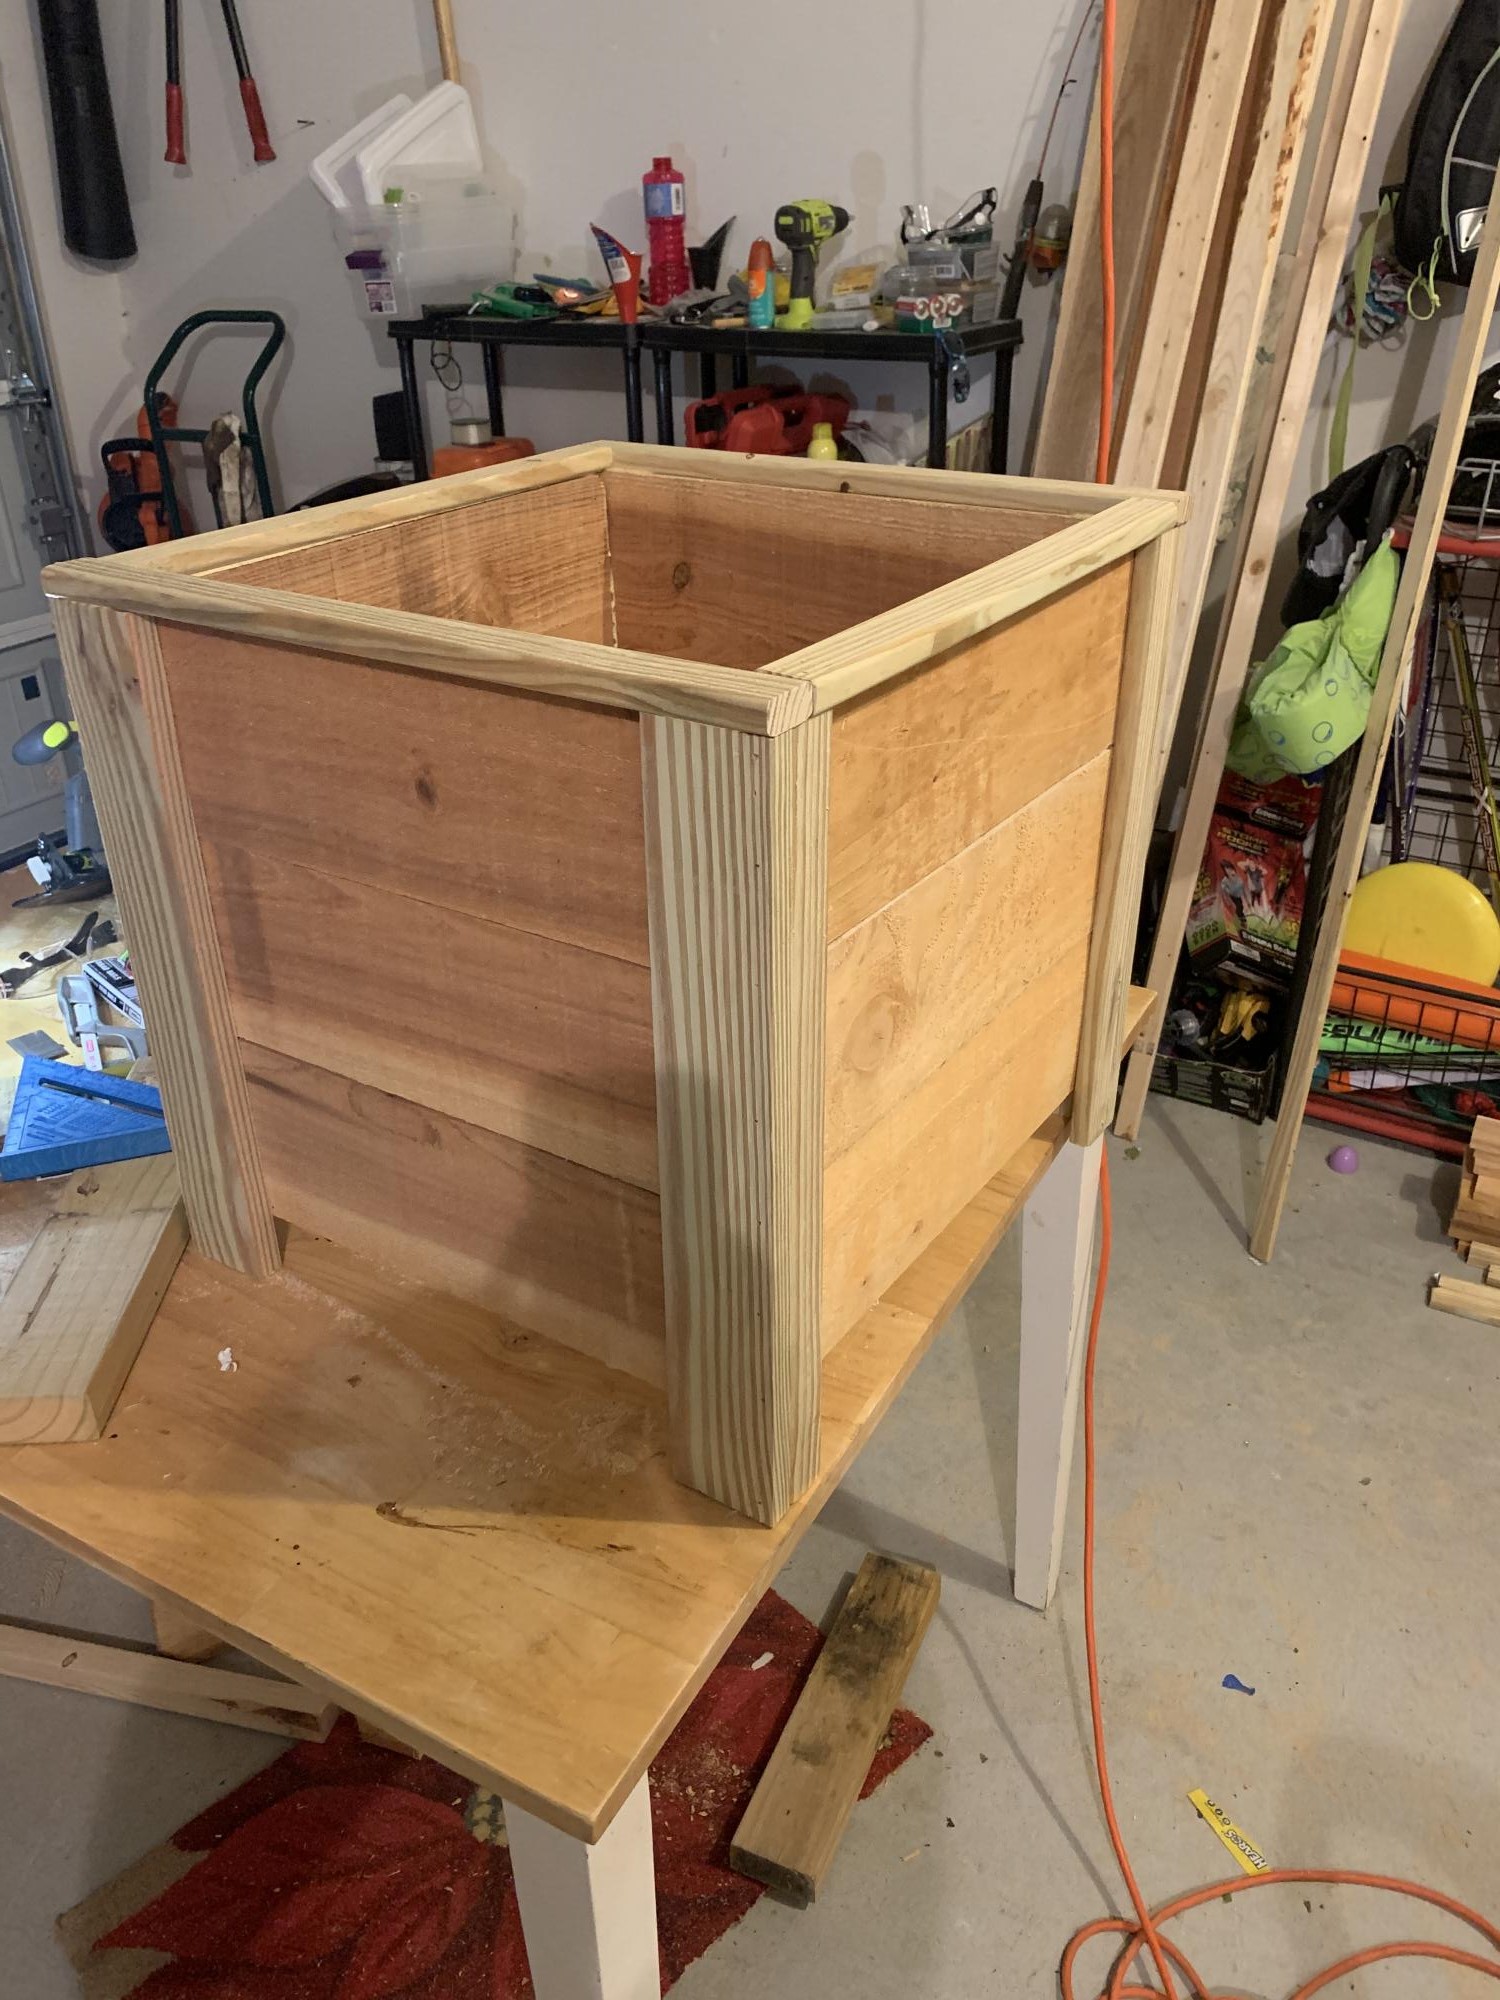
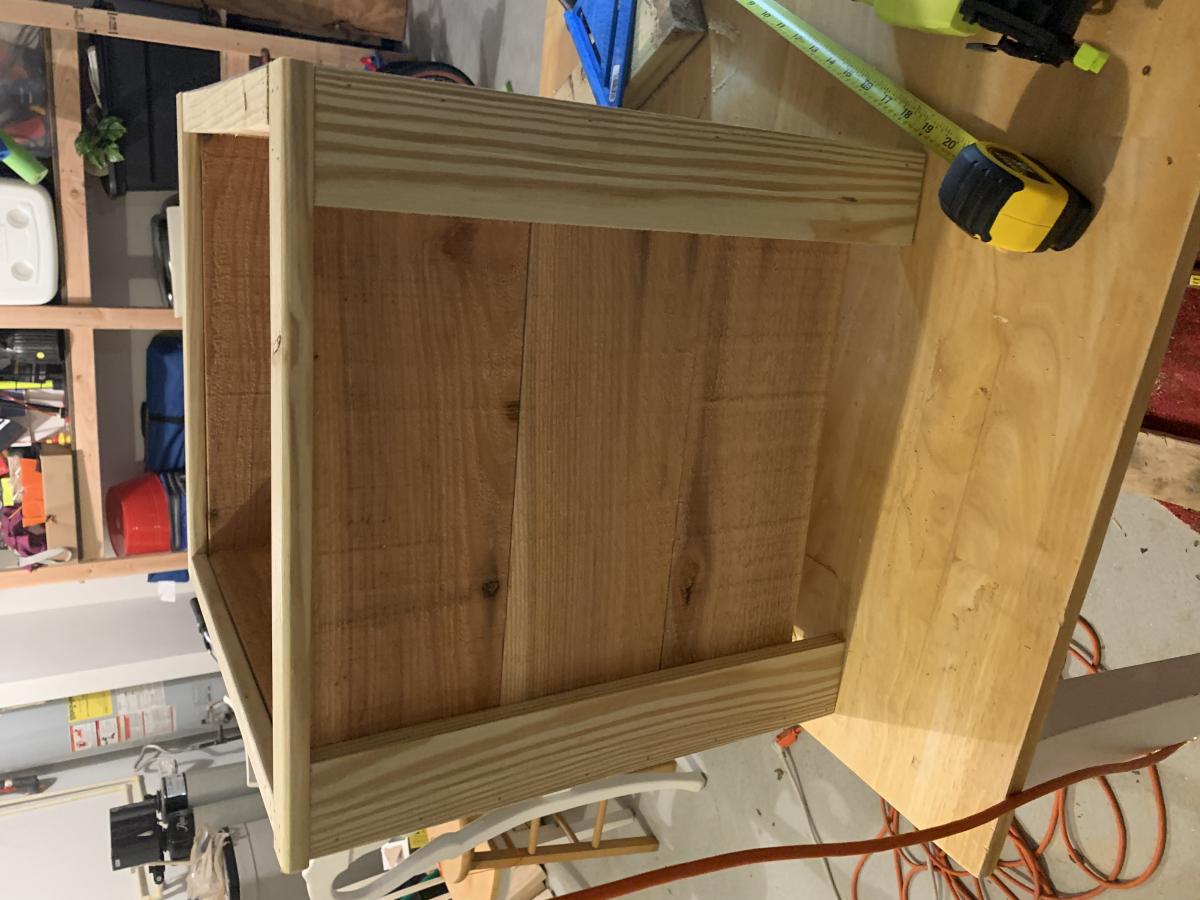
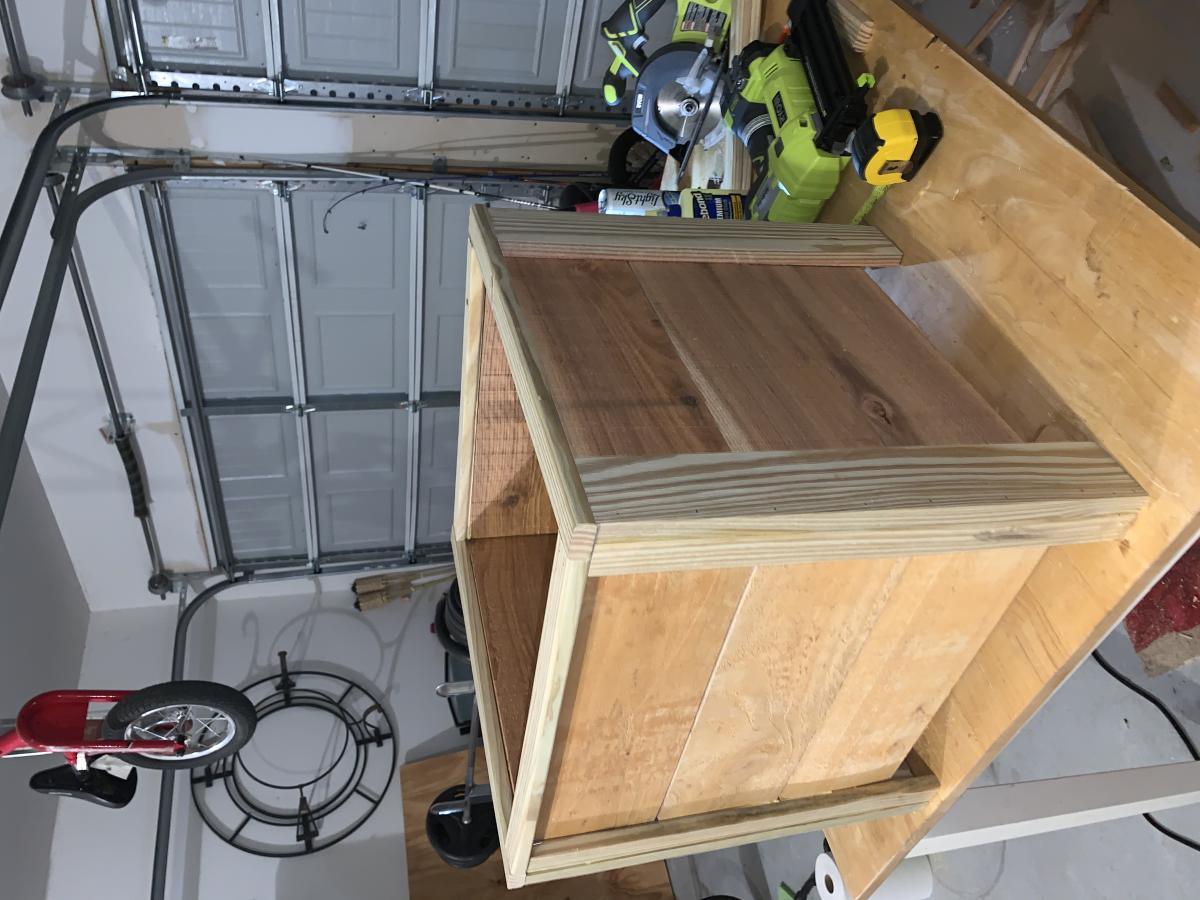
Recently I added a family member and his name is Myles. He needed a home so before we picked him up I built him one of these for him to grow into. The one pictured is actually the second one I built that was built for a friend. I followed the original instructions. I used a couple different bits of material. My table top is 1x4's and for the sides i used bead-board. I painted it an off white with eggshell finish. The table top is stained with Minwax Ebony stain. I love how it turned out and most of all my puppy enjoys it as well.
I left the bottom open. The dimensions in the plans make it so you can set the crate right on top of a crate replacement trey series 700 from PetCo. This makes it very easily to clean by just lifting the crate off the trey and hosing it off and also prevents the wood from absorbing any liquids.
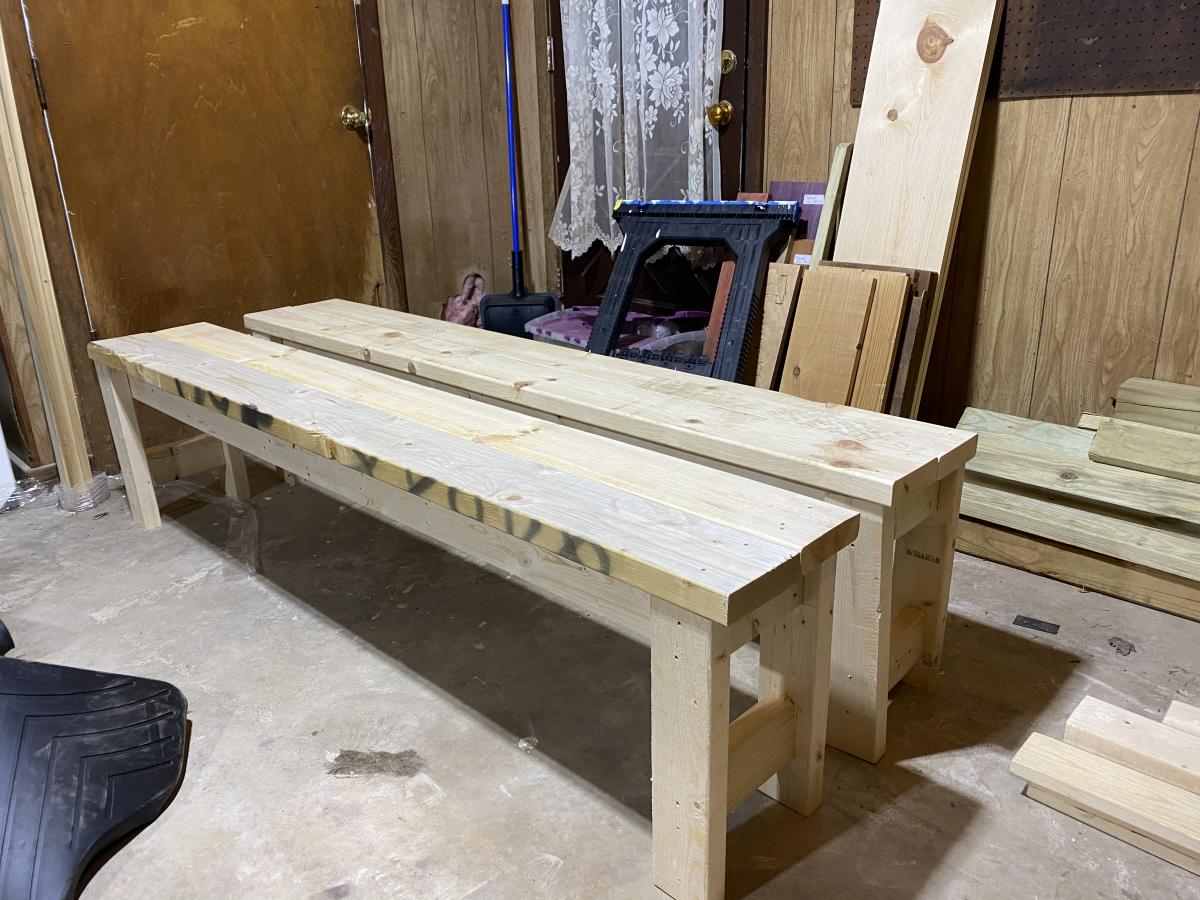
Shortened to 5ft length.
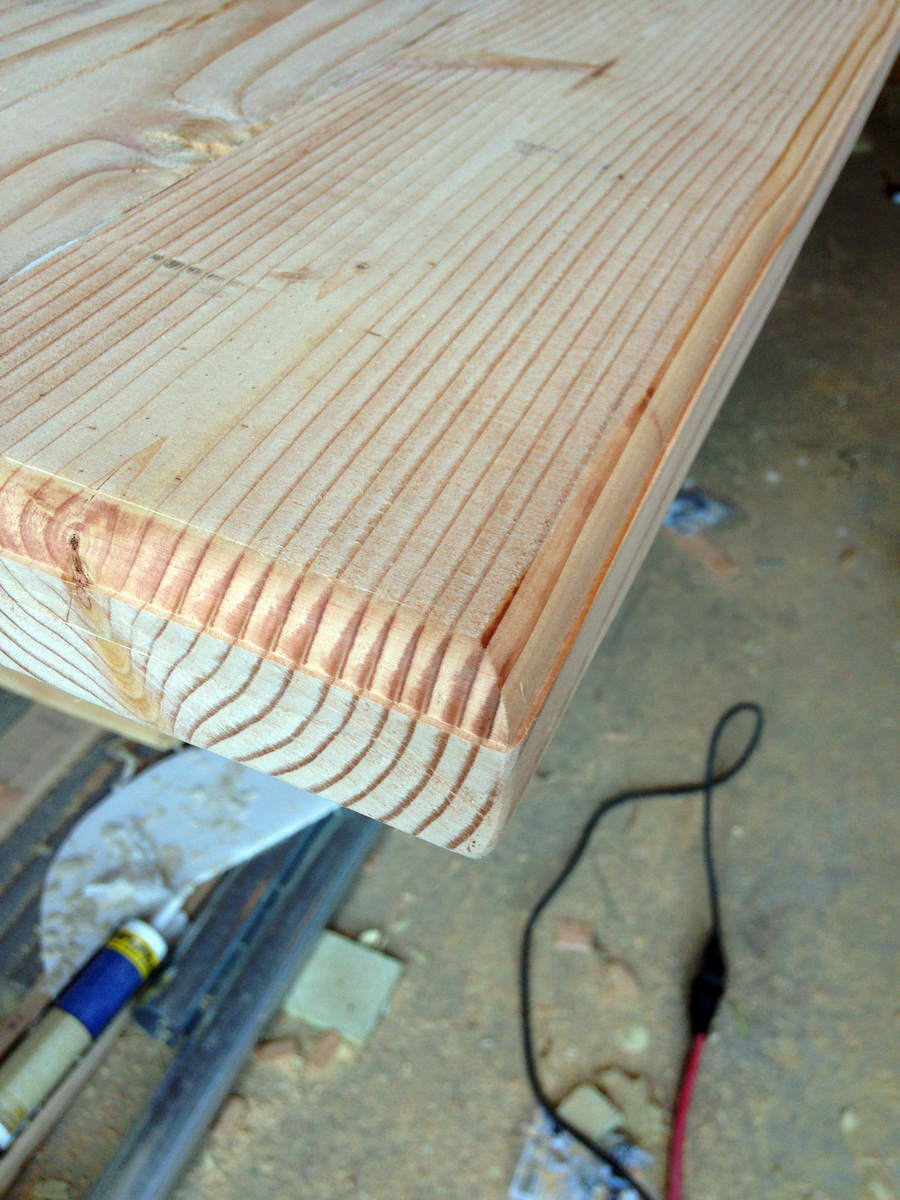
I used a lot of extra screws in the legs for additional supports, and filled all the gaps and screws with wood filler. I also used electric planer on top to flatten surface and then sand, sand, sand.
I have a small workshop so this workbench allows me to bring the work outside. It was my first project and I think it came out great.
This was a new project idea my wife wanted me to do. It was relatively simple to follow. I felt it turned out pretty good. I've always felt that Ana's plans were well thought out and simple to follow. Even for a beginner like me.
Robert Gilliam
My wife wanted a sofa table near our sliding door going outside to backyard / pool. She was looking online and found some cheapo "made in China" types at some of the big box store sites; yuck.
I had to come home from our family vacation sooner than the wife and kids which meant I had 12 days at home alone to make some sawdust. The wife got her sofa table which she really digs. My boy got a bed (different post) and daughter got her room painted.
I didn't add the "X" feature at the ends as I like the console better without them. Also spray painted some corner hardware; L brackets and lag bolts a textured black / copper spray, but didn't add them; wife liked the table without the added decor so it stays as is.
Sun, 09/30/2012 - 09:59
I love this console because it looks good either with the x's or without! Yours turned out great and I'm sure your wife was ecstatic at your accomplishment in her absence!!
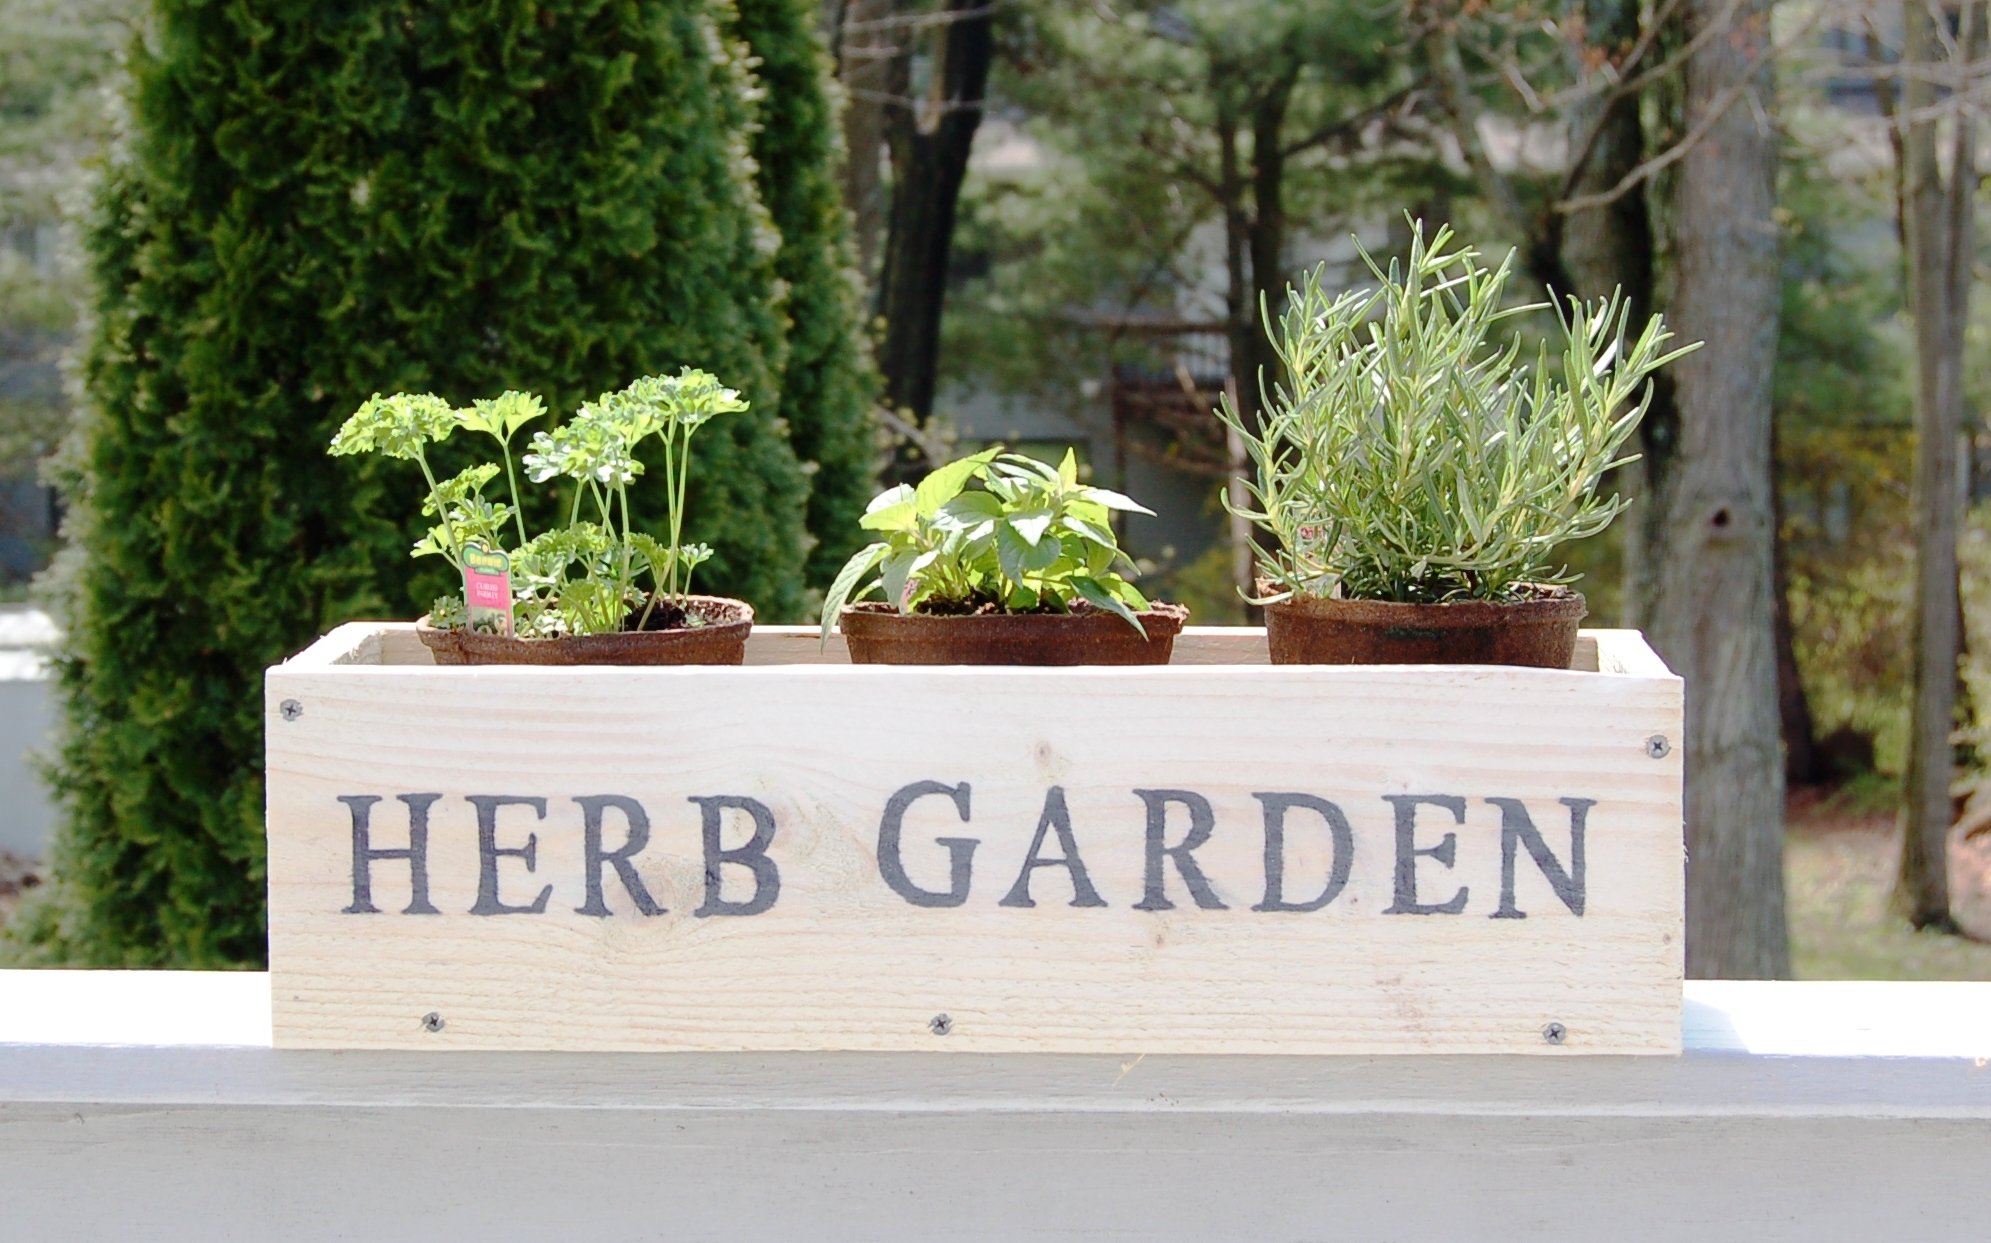
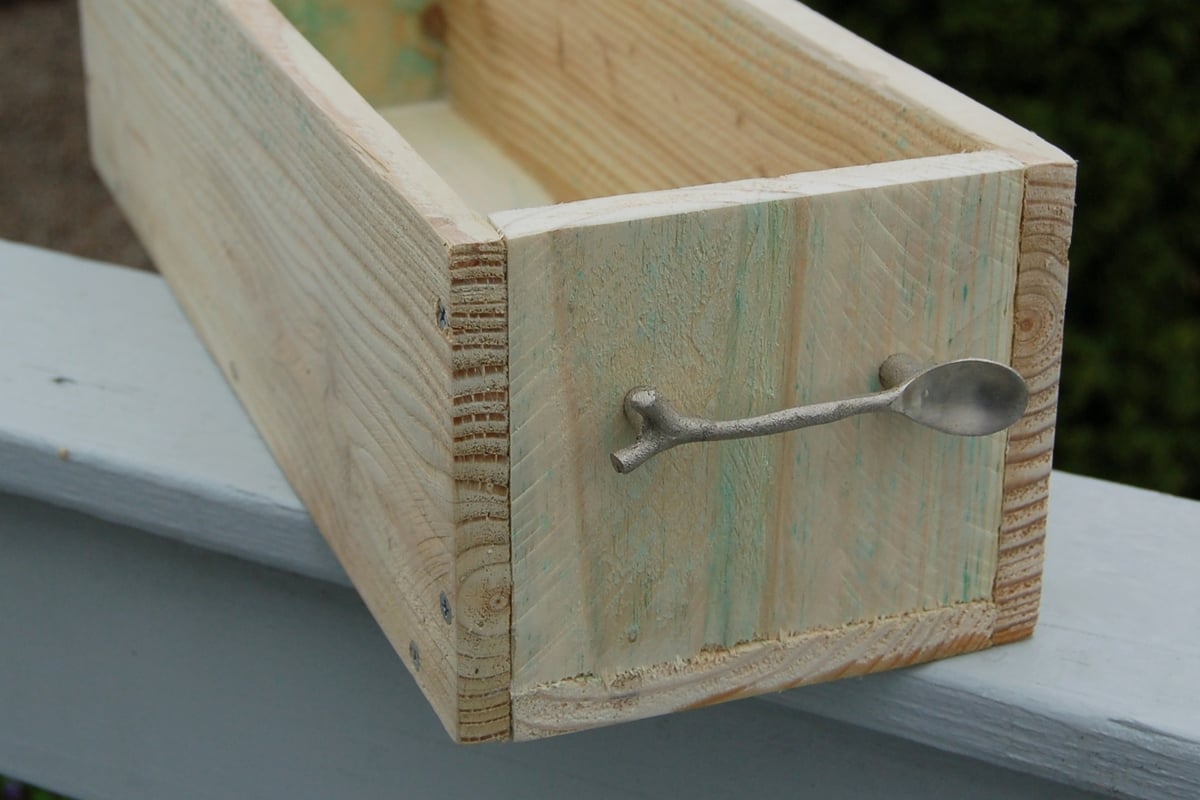
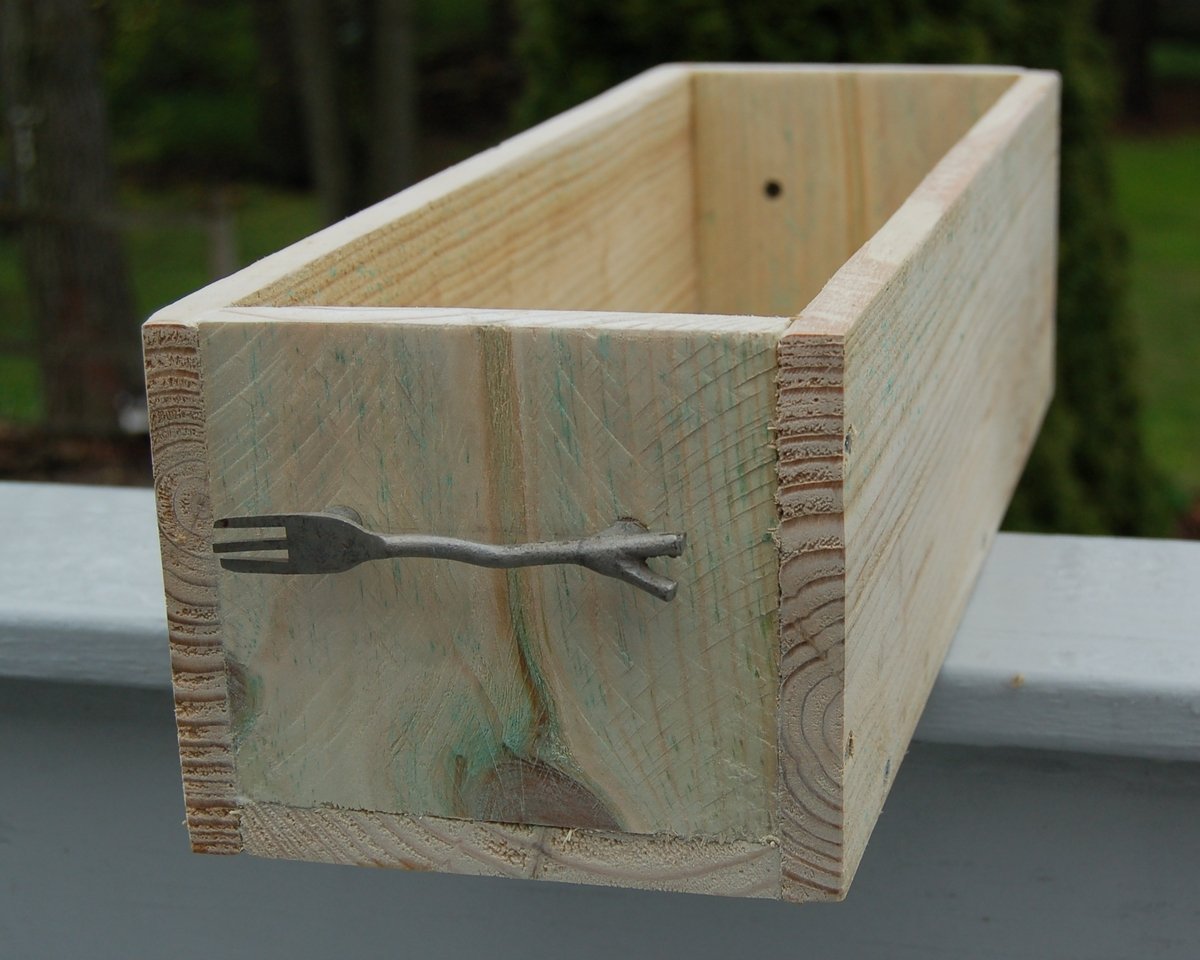
I'm just in love with all the Ana White projects. I tackled the faux fireplace mantel, made quite a few toolbox planters so this little box was easy. My biggest mistake was not verifying the thickness of the wood pickets I used. I couldn't find the cedar ones at Home Depot or Lowes so I used pressure treated pine pickets, on sale for $1.16 each! What I didn't realize until I was putting the first box together is that they were 5/8" thick instead of 1/2". I questioned my woodworking skills when everything didn't fit together correctly, but soon figured out the problem. Since I had cut out two of them together, I finagled the design slightly to be able to use the cut pieces. You'll notice the end pieces are on top of the bottom piece of wood on certain ones. I continued to build a third box and it went together smoothly. Wow, I wish that I had a nail gun! I used 1 1/4" exterior screws and pre-drilled the holes. I have three more pickets left and I'm going to run to Home Depot to find some galvanized nails for them. I wish I could find some cedar pickets, the pressure treated pine is rough to work with. I also printed out "HERB GARDEN" on my ink jet printer, then traced the letters using carbon paper. I outlined, then filled in the letters with a Sharpie paint pen. It came out rustic looking because the wood was rough. I was hesitant to sand the wood because I didn't want to breathe in the sawdust. I put a white wash finish on the stenciled box. The other ones are still unfinished. Looking through my stash of hardware, I found the cutest fork and spoon handles, saved from an old birdhouse. I put the picture on my Facebook timeline and a friend sent me a message asking to buy it for her daughter's birthday. I'd better get busy making the next three.

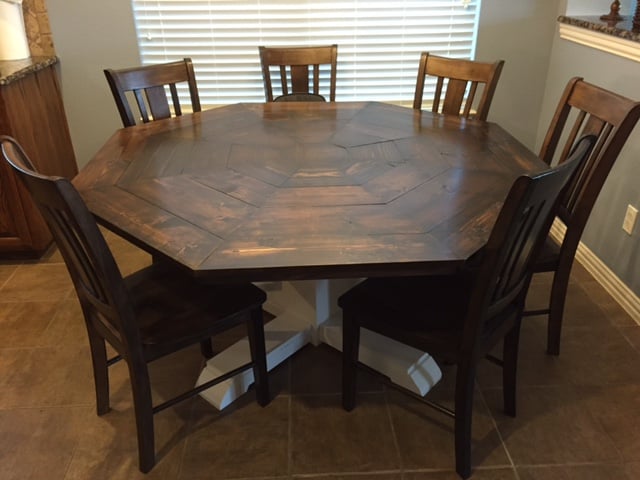
Octagon table for dining room
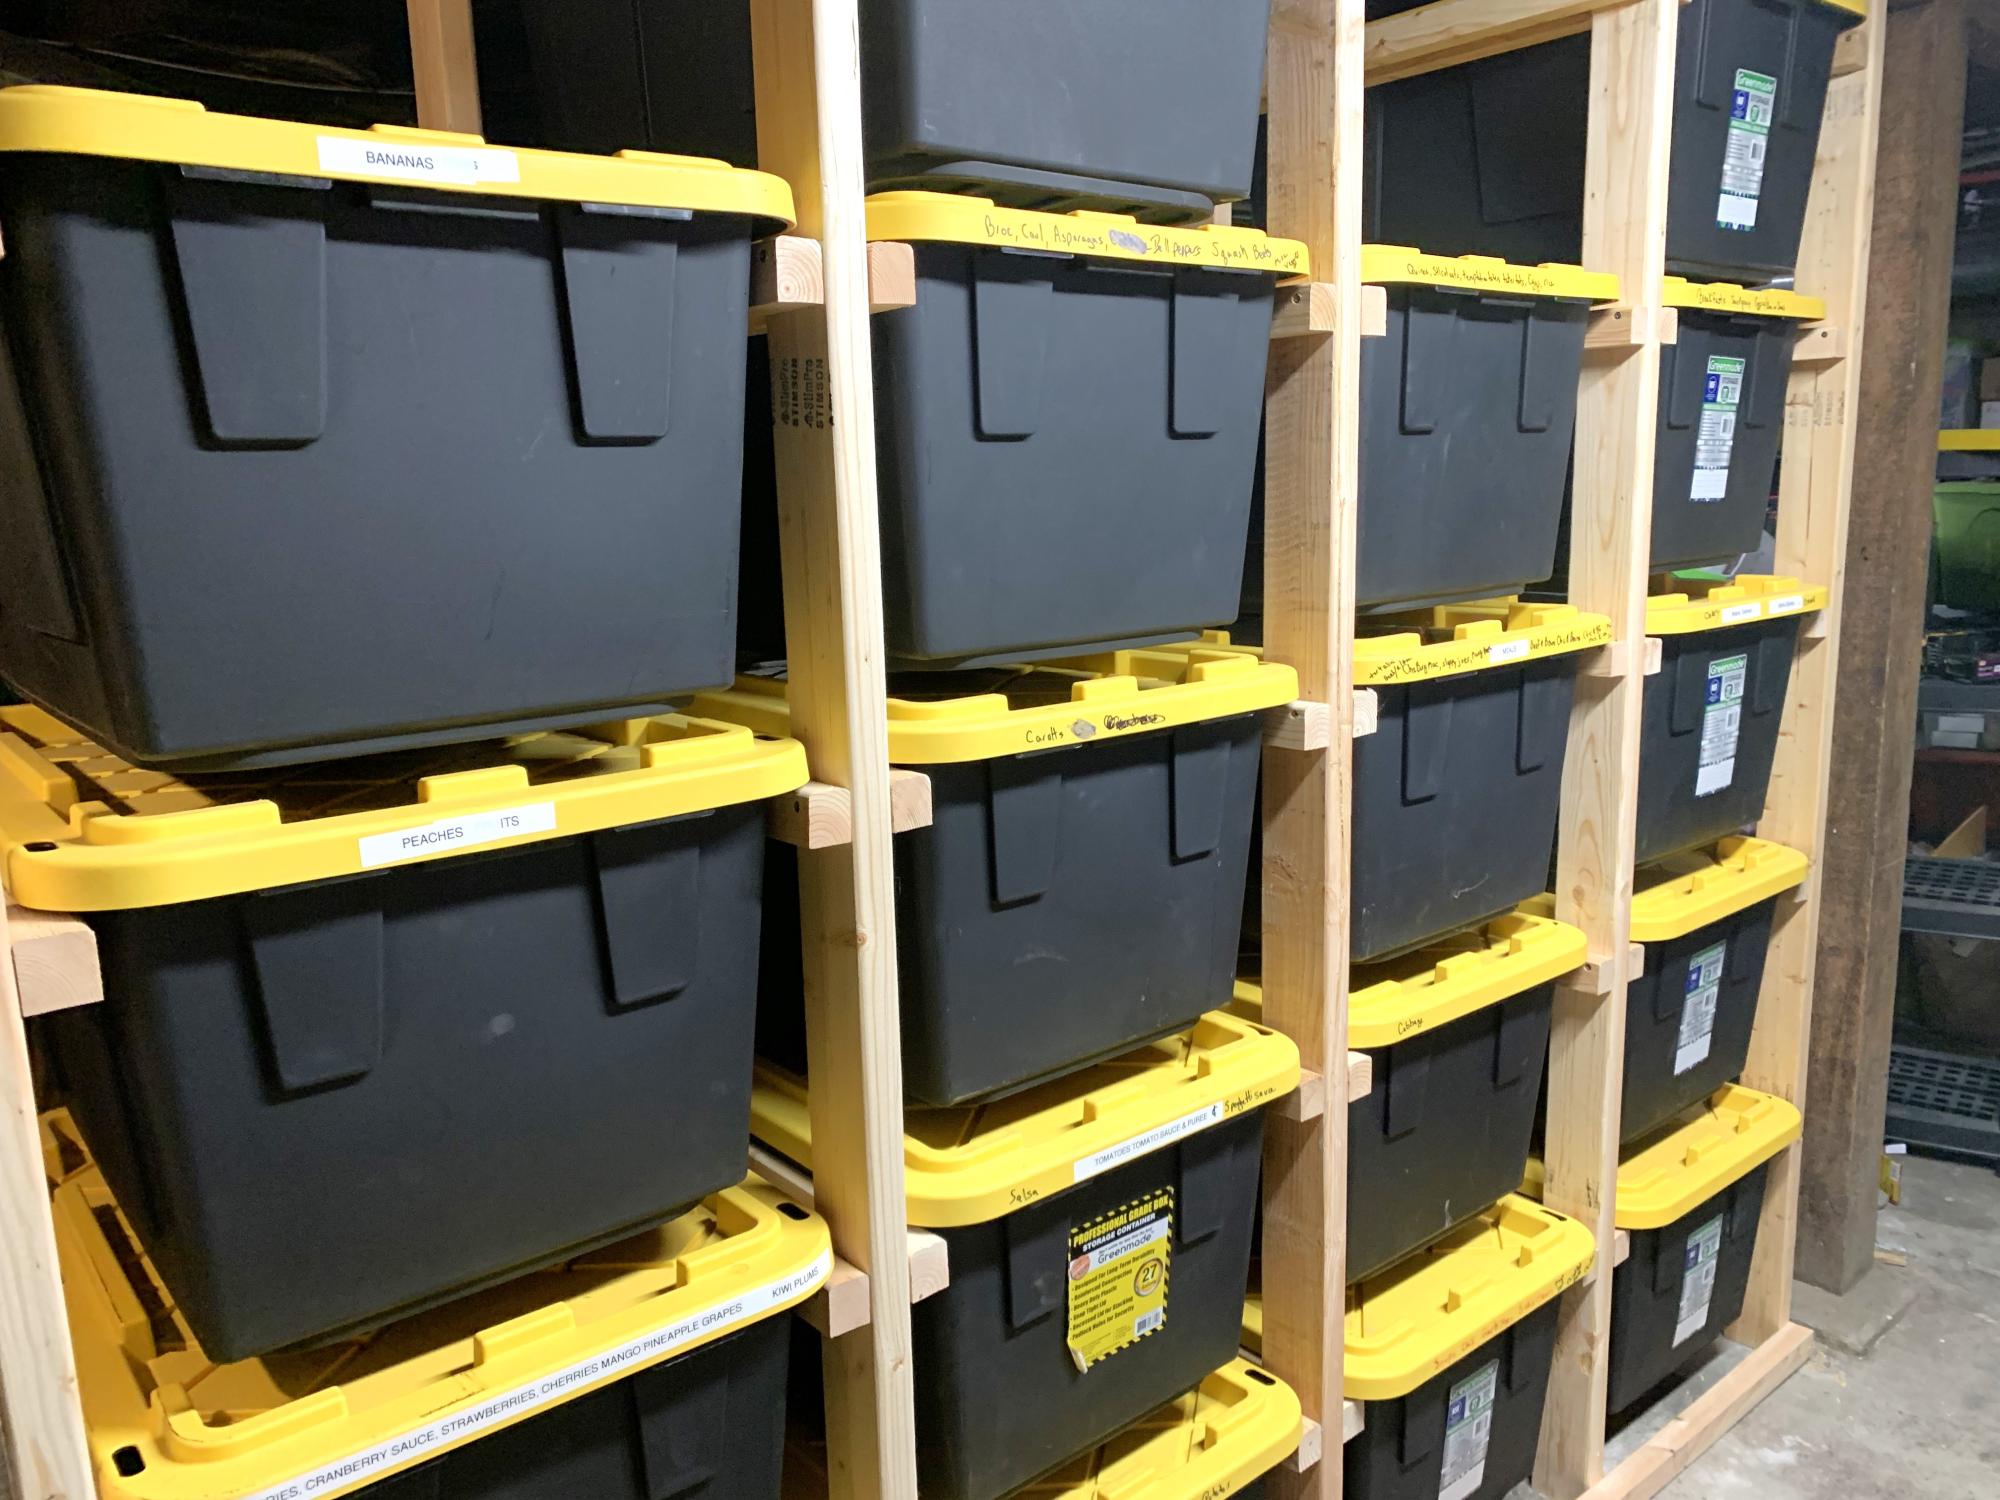
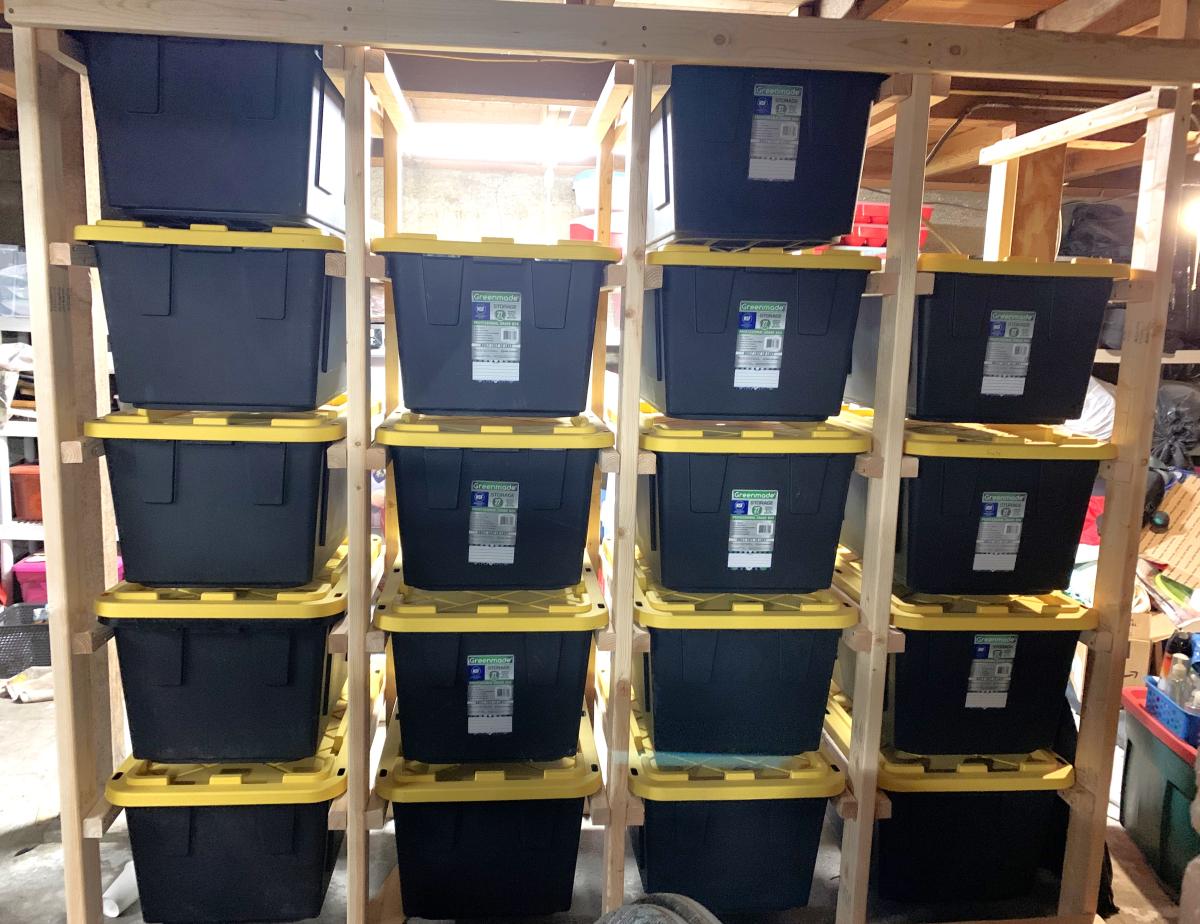
storage for totes - can be made to accommodate any size totes - just adjust the measurements basically it is "ladders " 2x4s for legs 2x2s for "runs" 2x4s across the bottom & top this is in a basement with short ceilings so if you have a taller space you can go taller or you can go shorter.
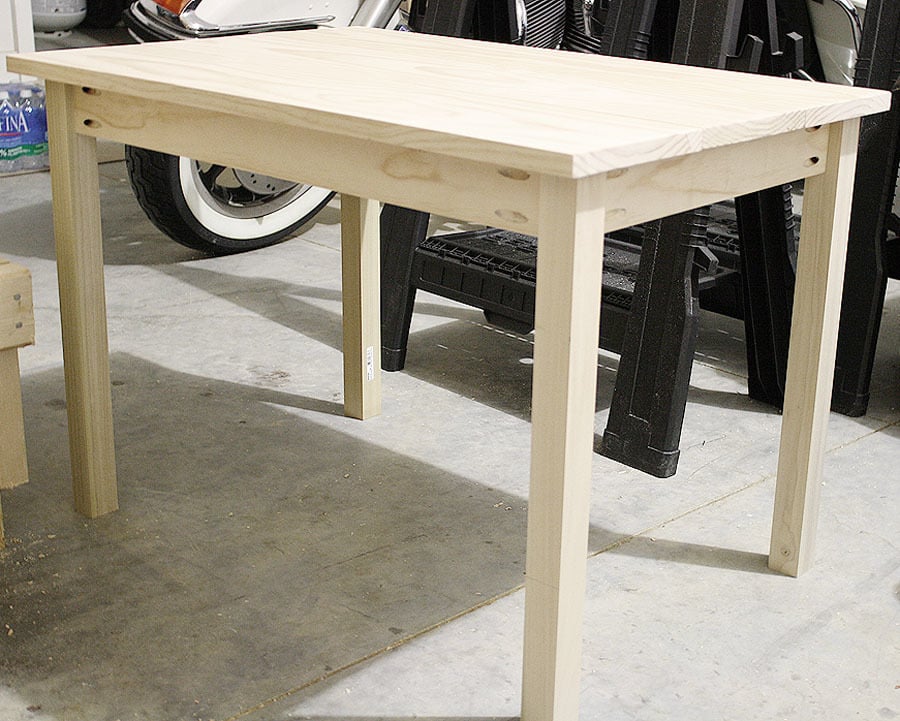
This table was super easy to build... it took me only 3 hours! I opted to use hardwood poplar 2x2s for the legs because furring strips frustrate me to no end (bowing boards, splitting wood, etc.) and the poplar also made it sturdier. Had I used furring strips, this table would have only cost me $15, but I opted for the more expensive route... but still, $35 ain't bad!
Also, I used the Kreg Jig for this project, set on 3/4" with 1 1/4" pocket hole screws - EXCEPT when I drilled the base frame onto the table top. I used 1" pocket hole screws for that, just in case the 1 1/4" screws were too long and came poking out the top of the table.
Click my blog link for the complete play-by-play!

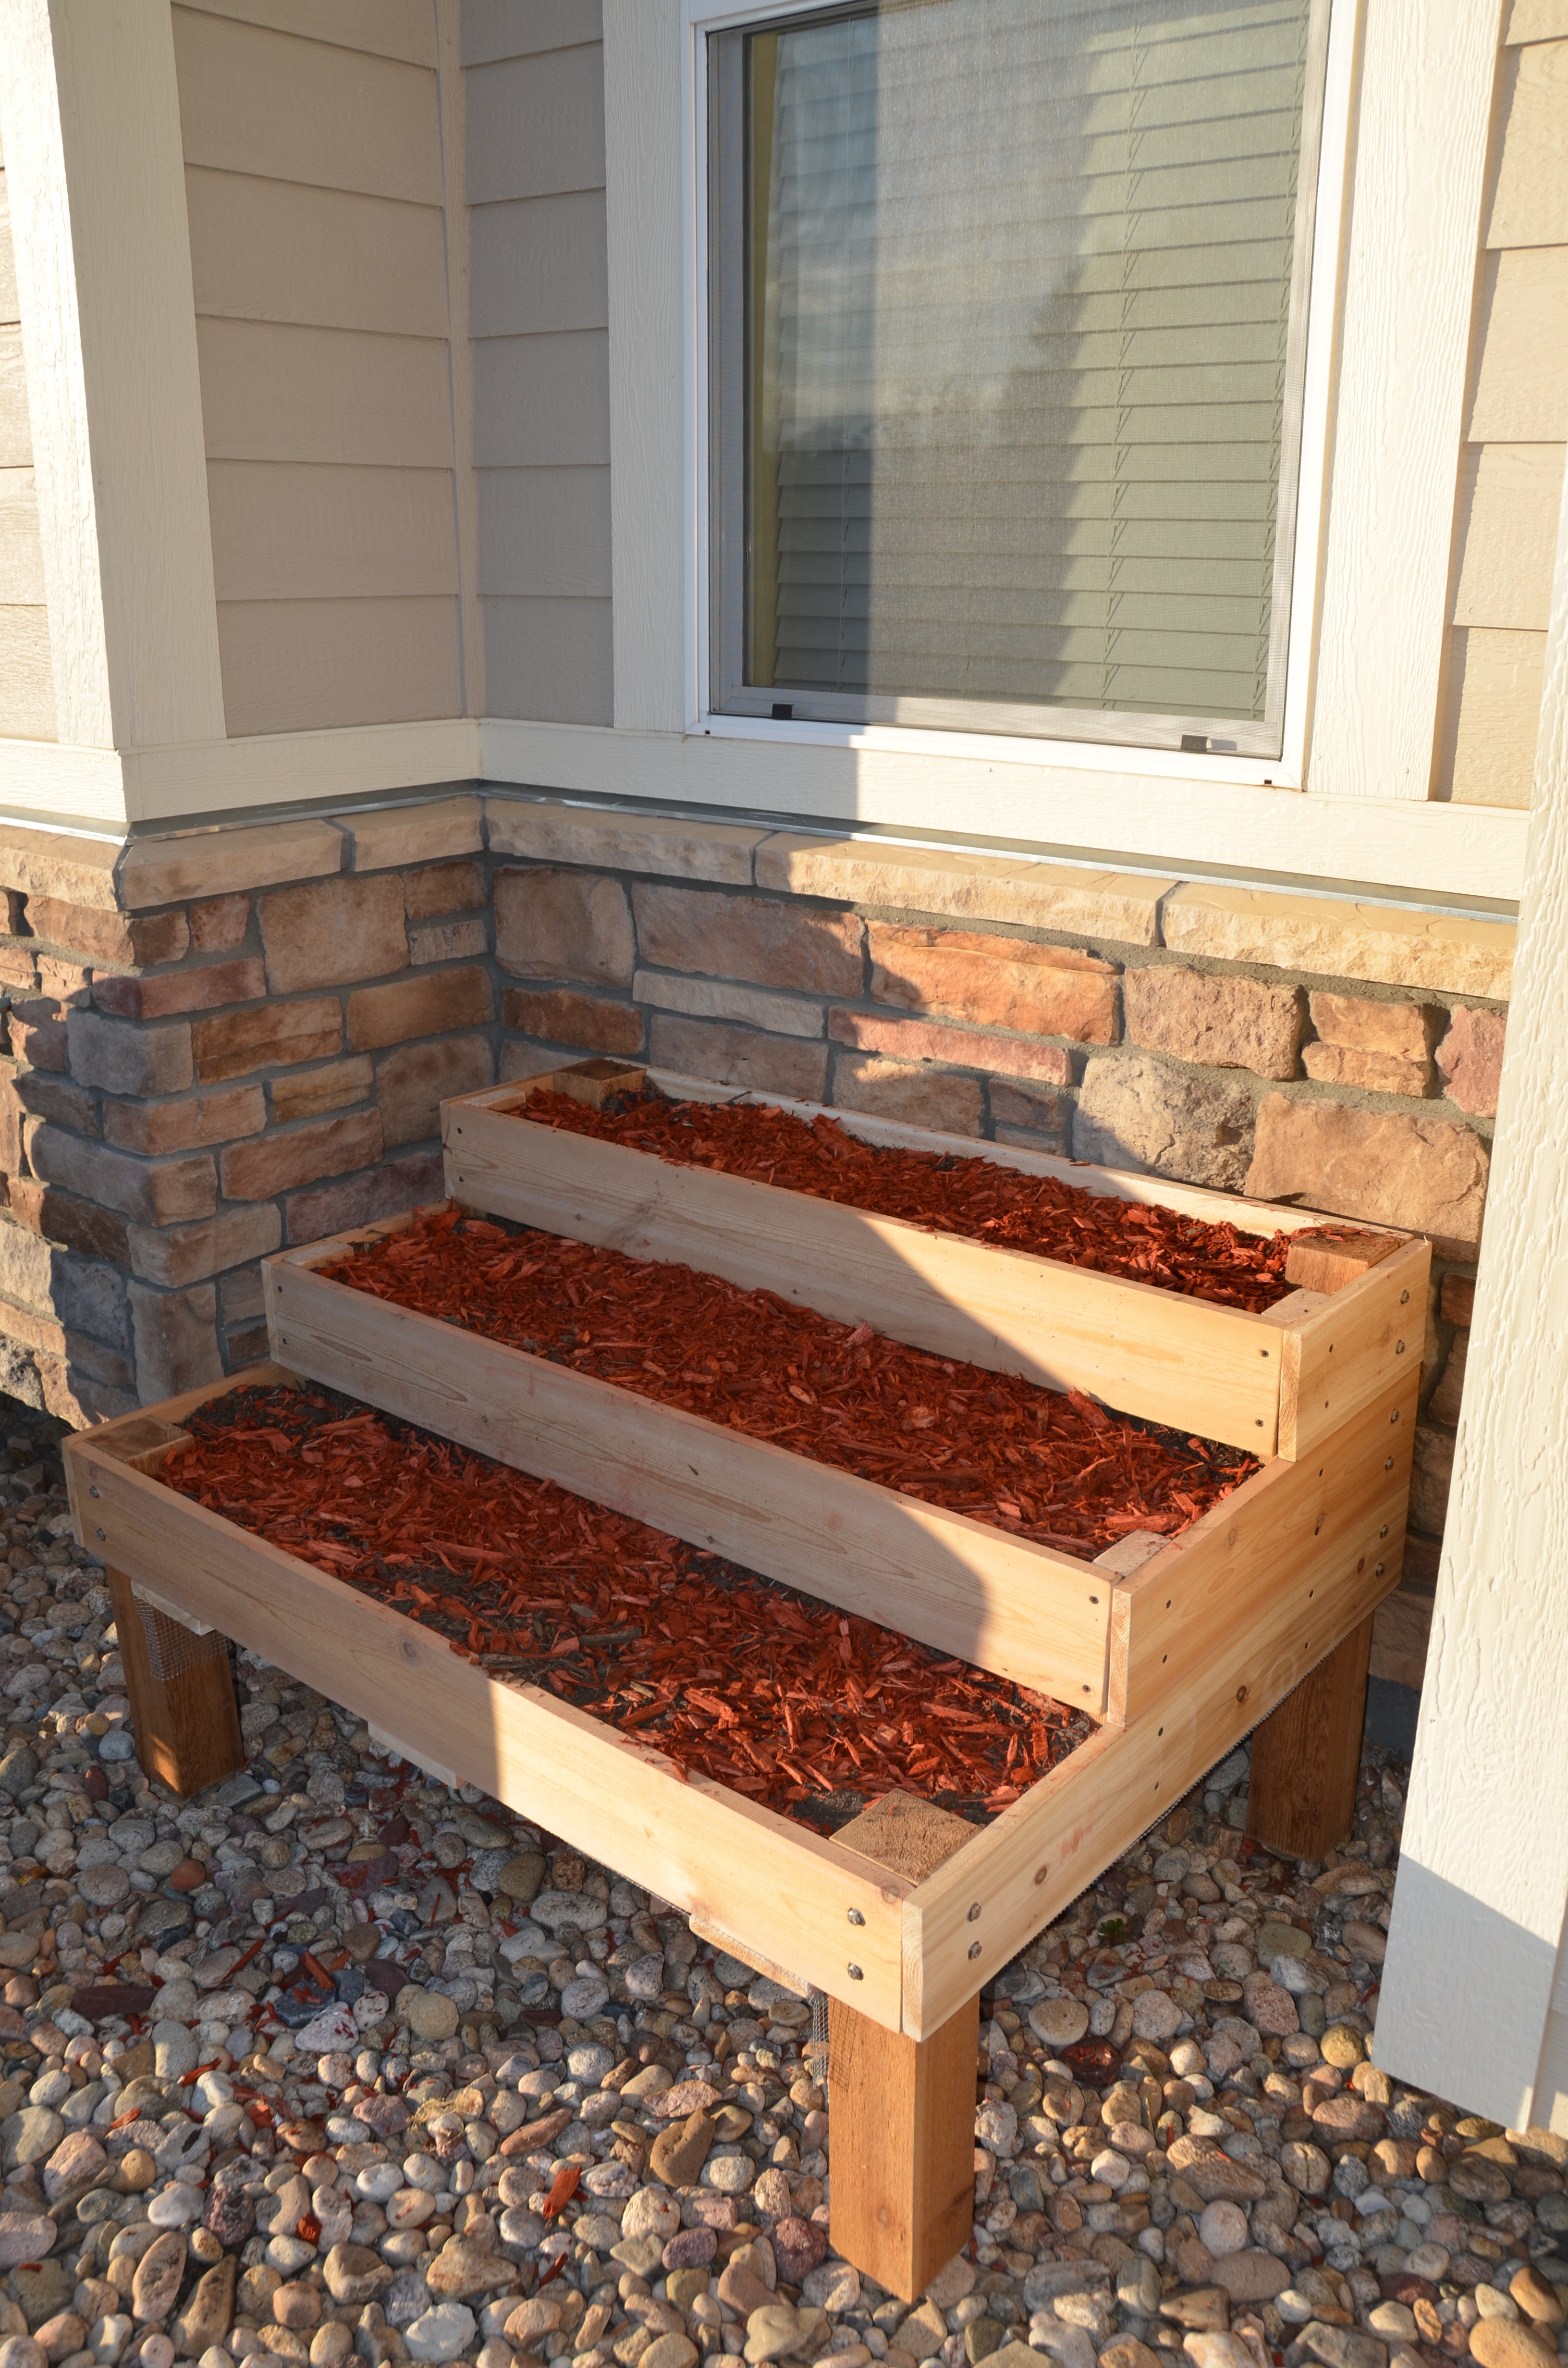
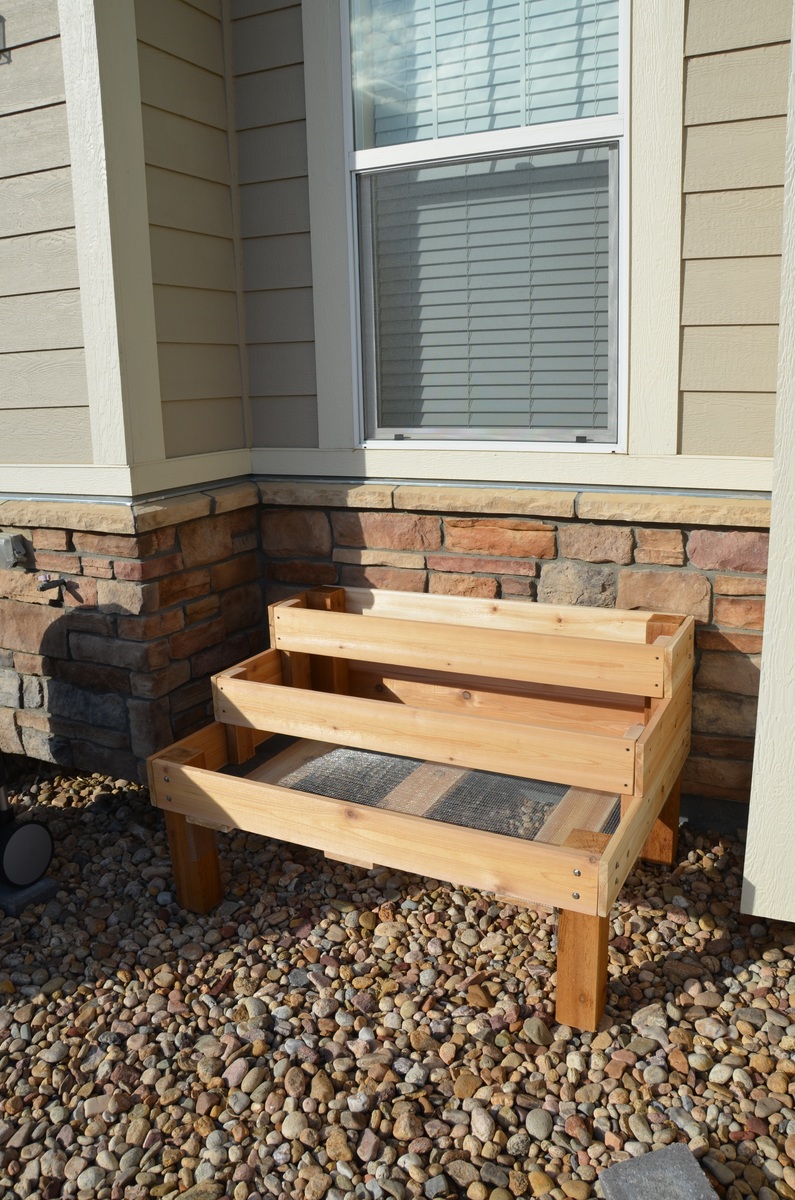
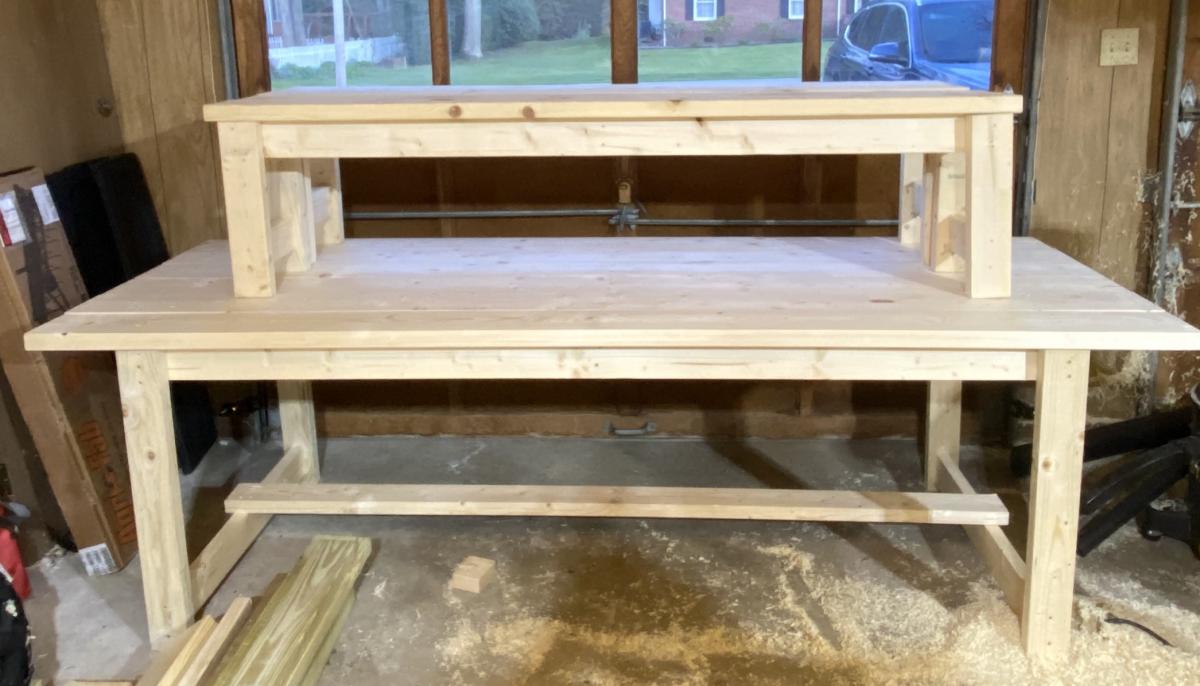
A modified version with tiered areas. 2x4's tie layers together. Happy Mother's Day!
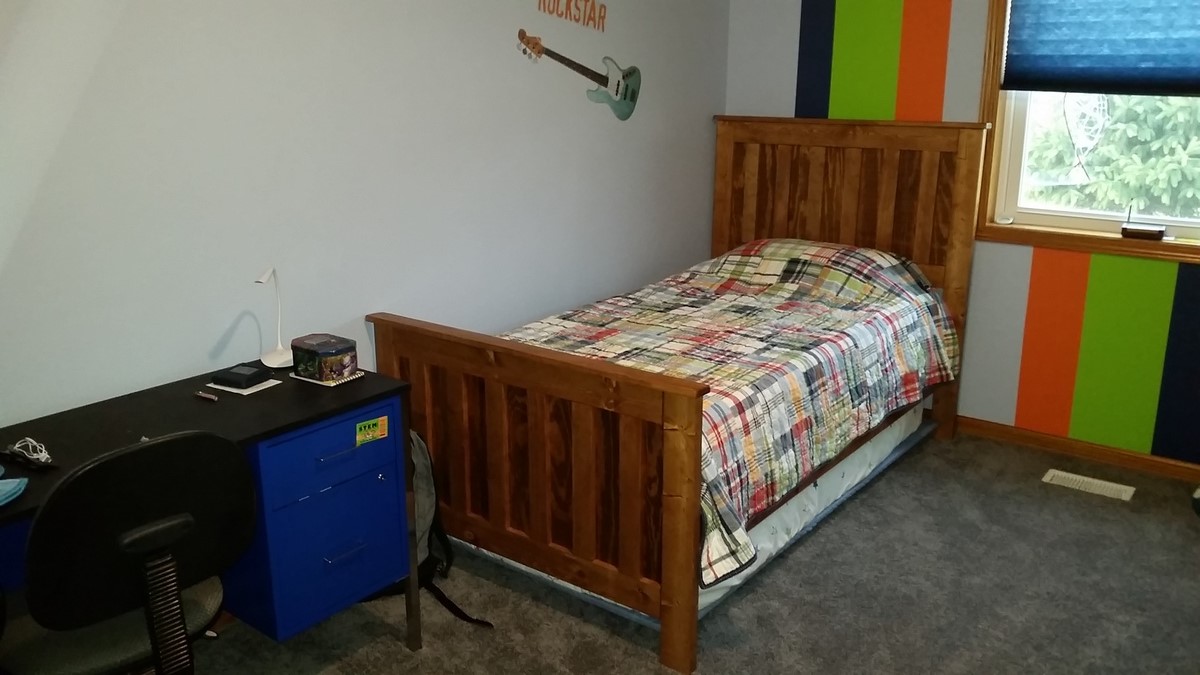
I wanted to build my 10 year old son a new bed after getting rid of bunk beds. We both liked this one and worked on it together.
Great family project, thanks Ana!

My neice wanted a bed just like hers for her American Girl Doll. I did manage to find one, but I also found plans here! Thank you!! :) So I modified the plans a little bit to add the back of the daybed. She loves it!

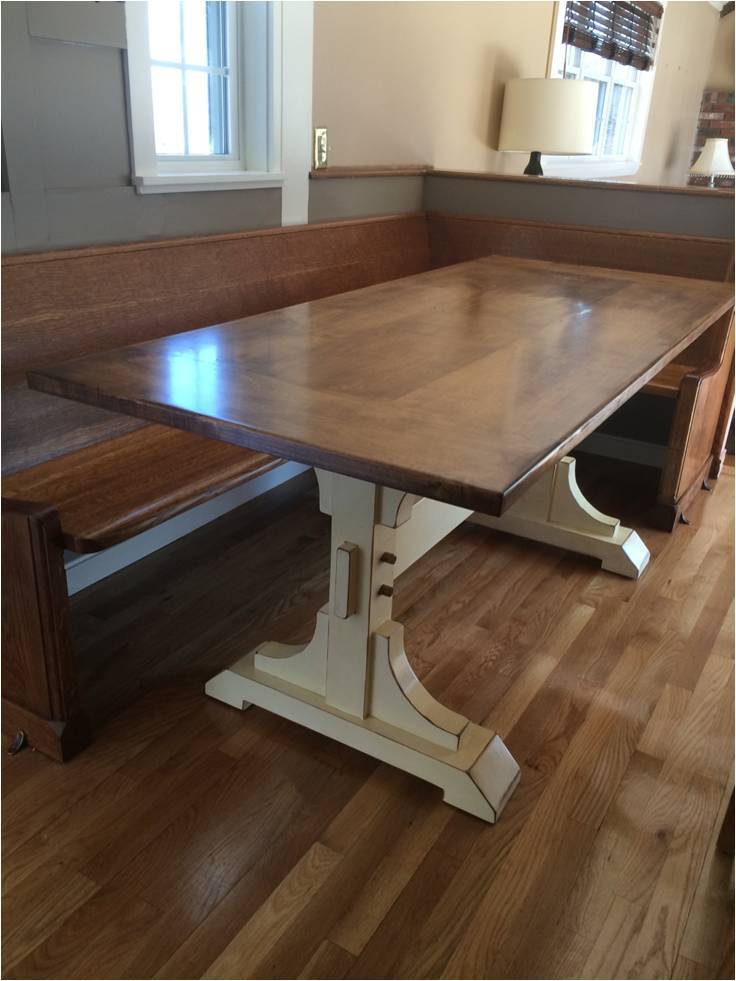
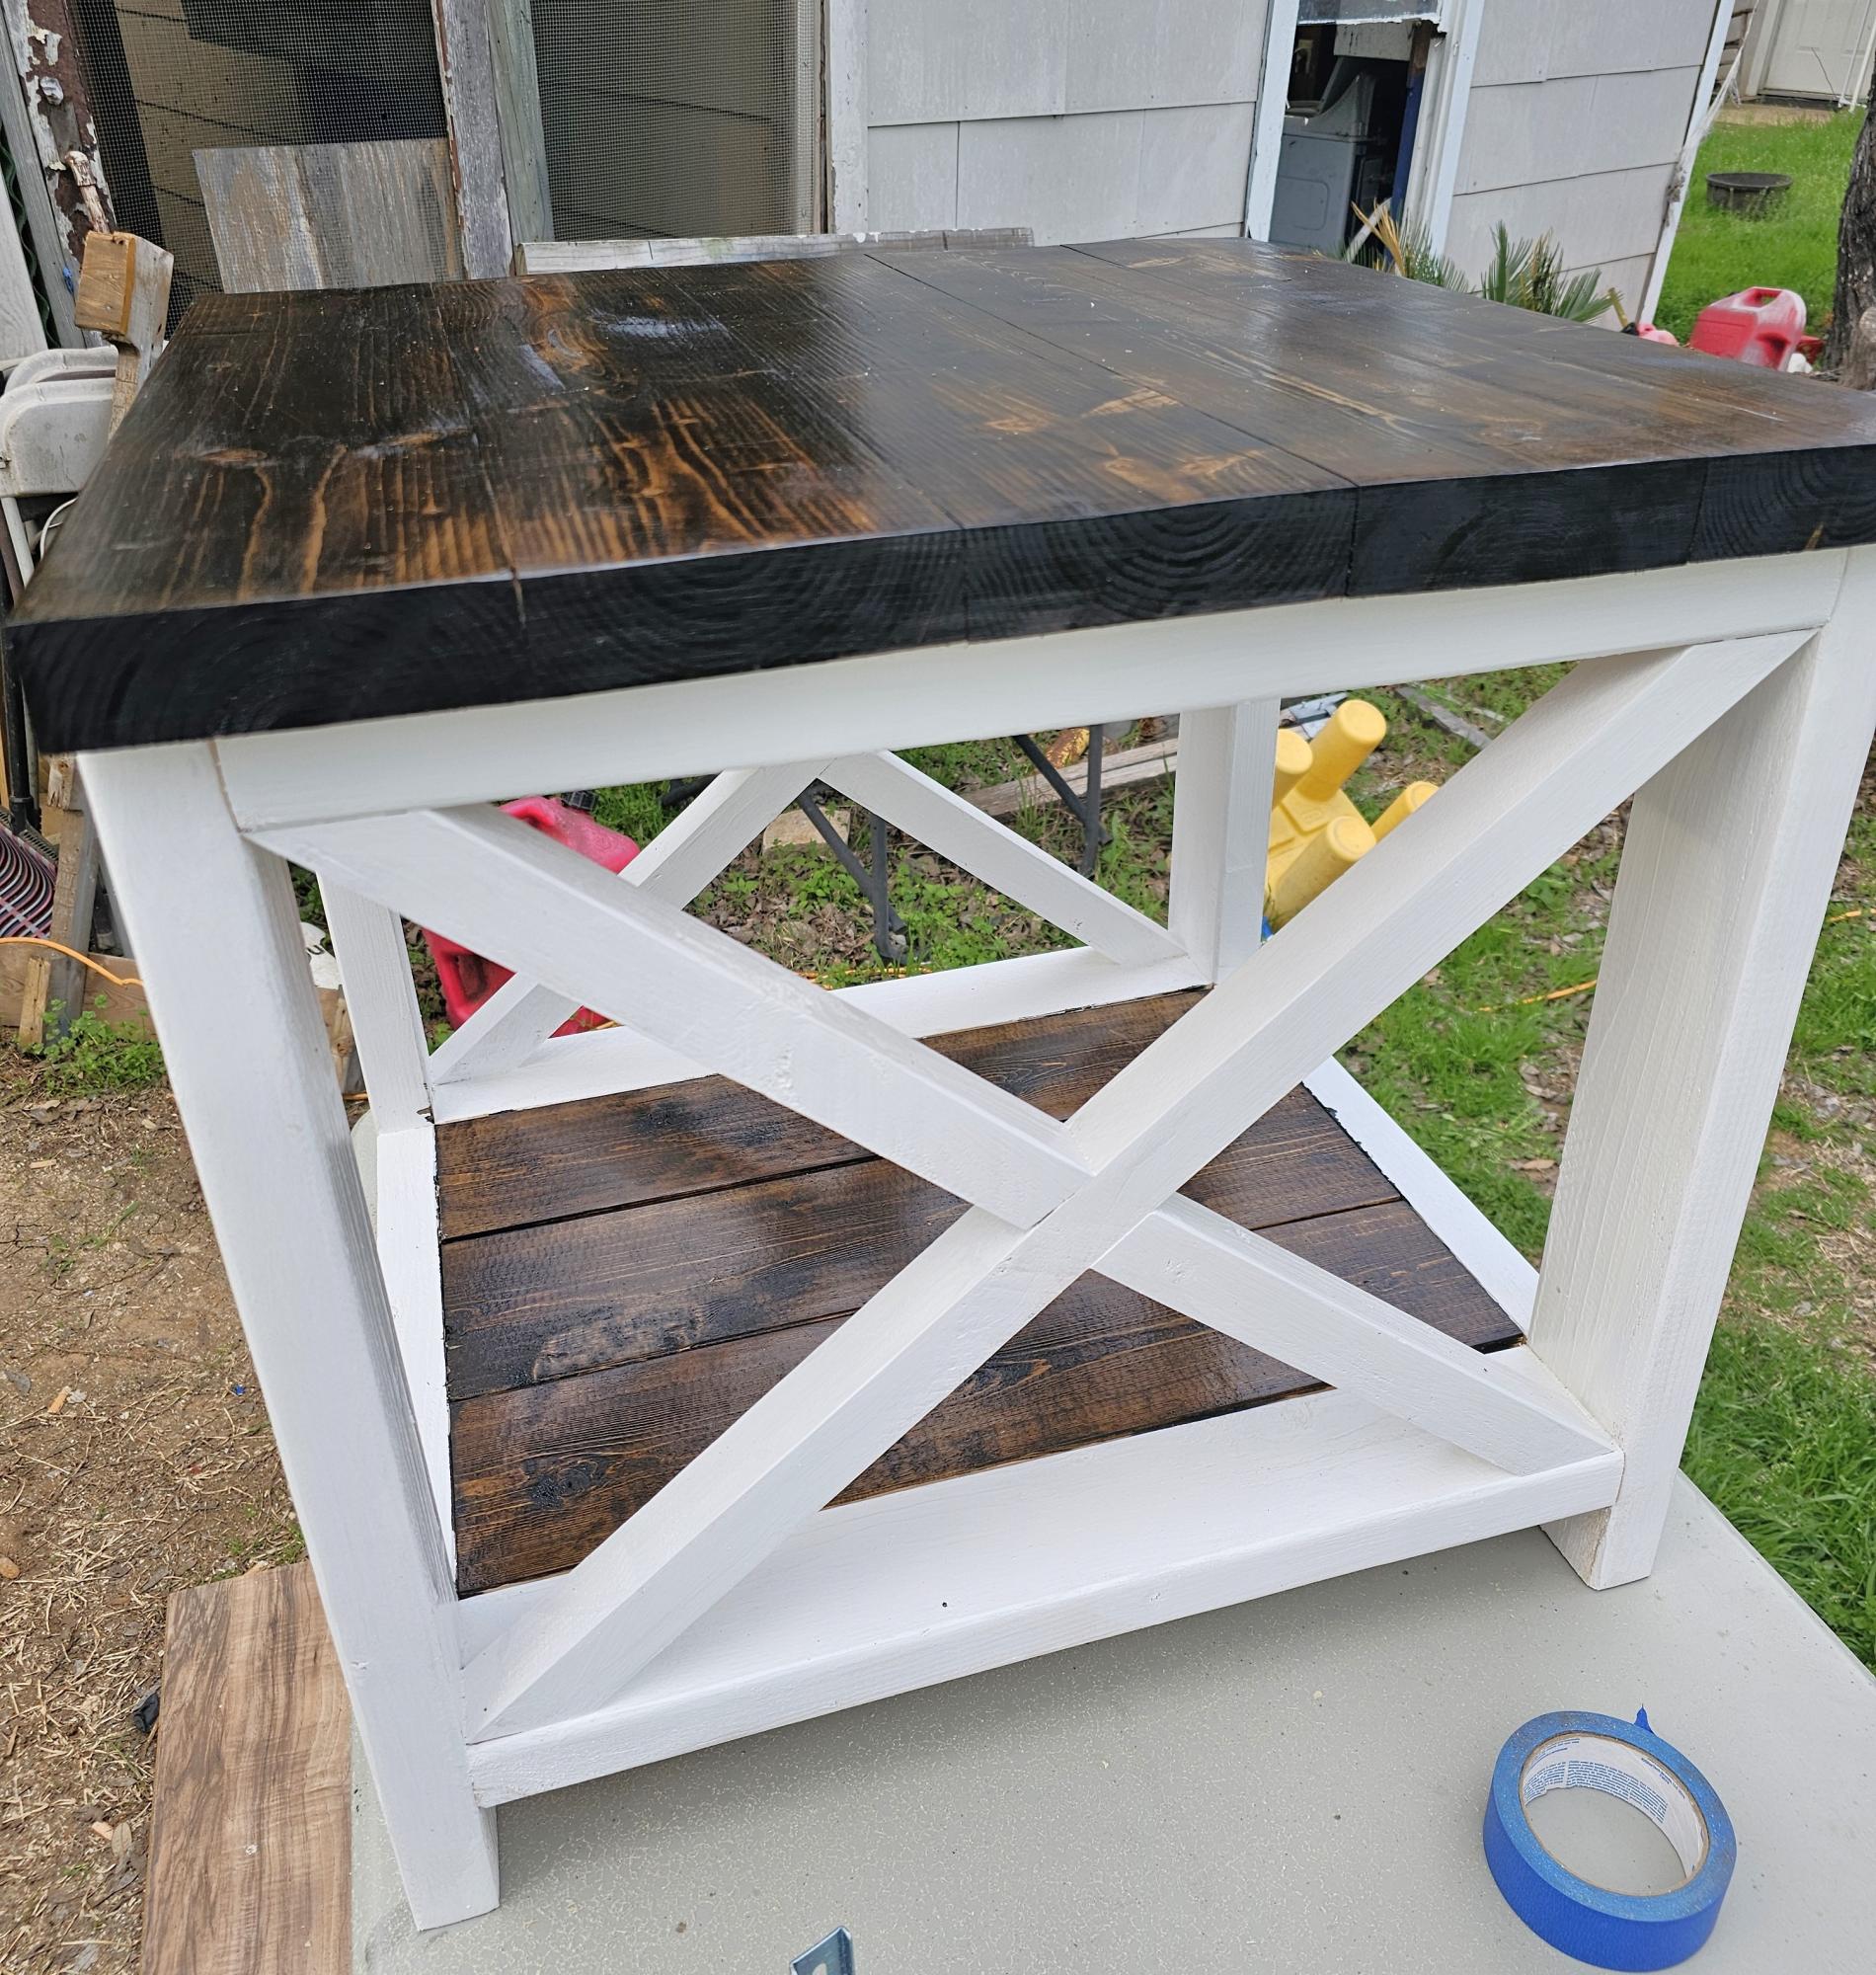
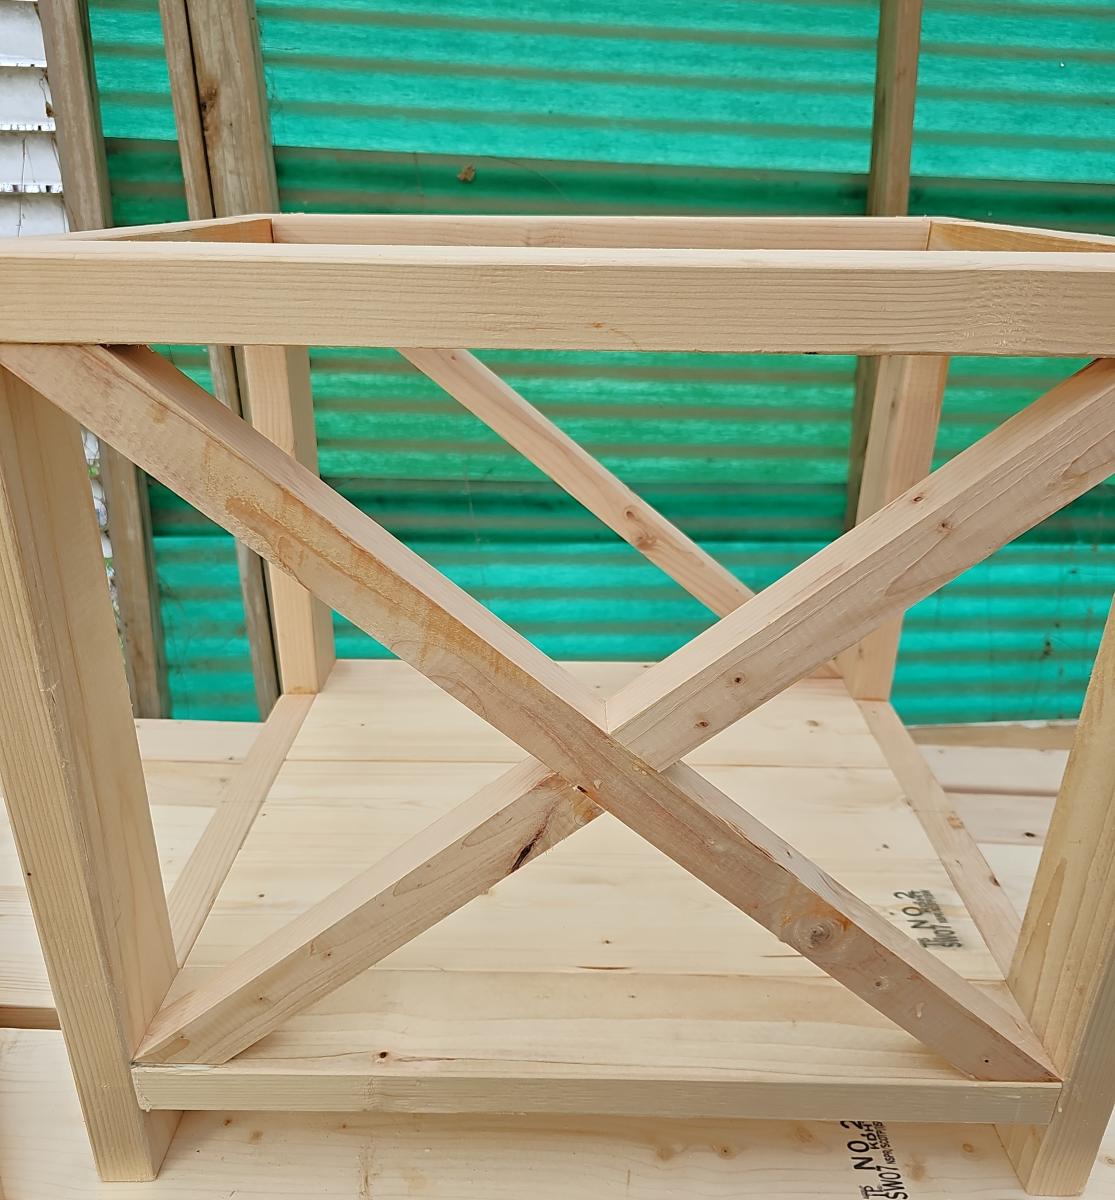
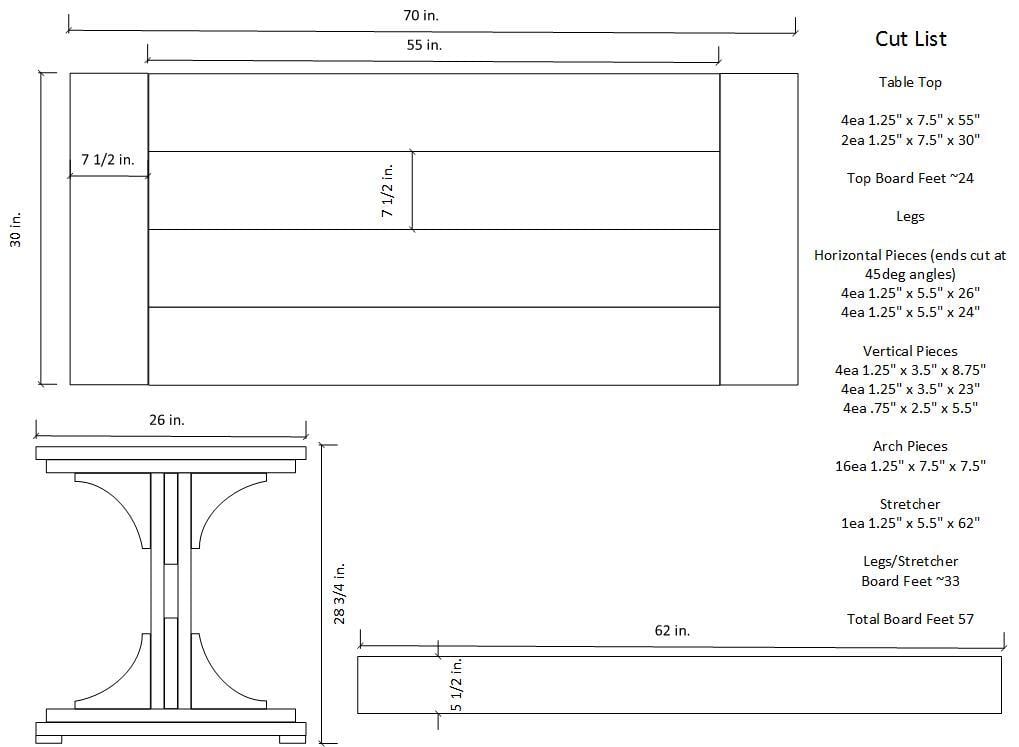
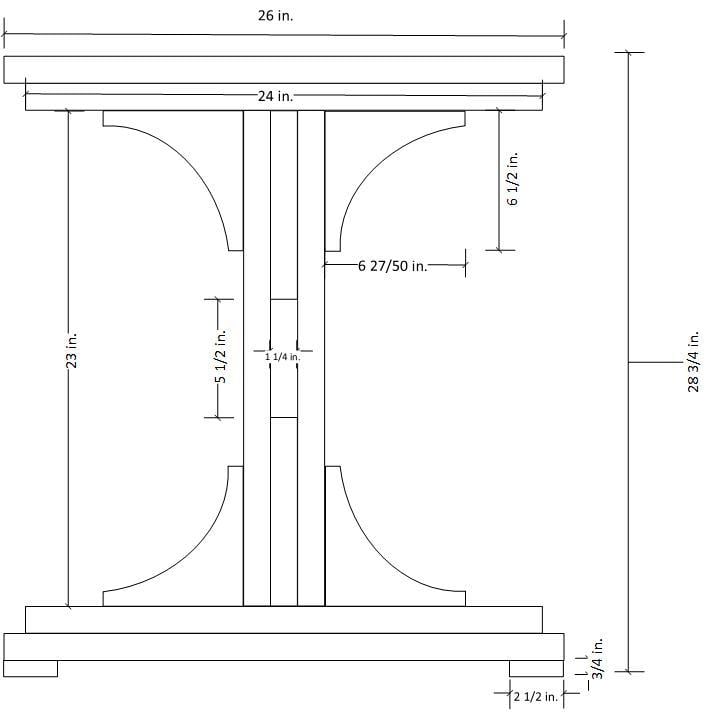
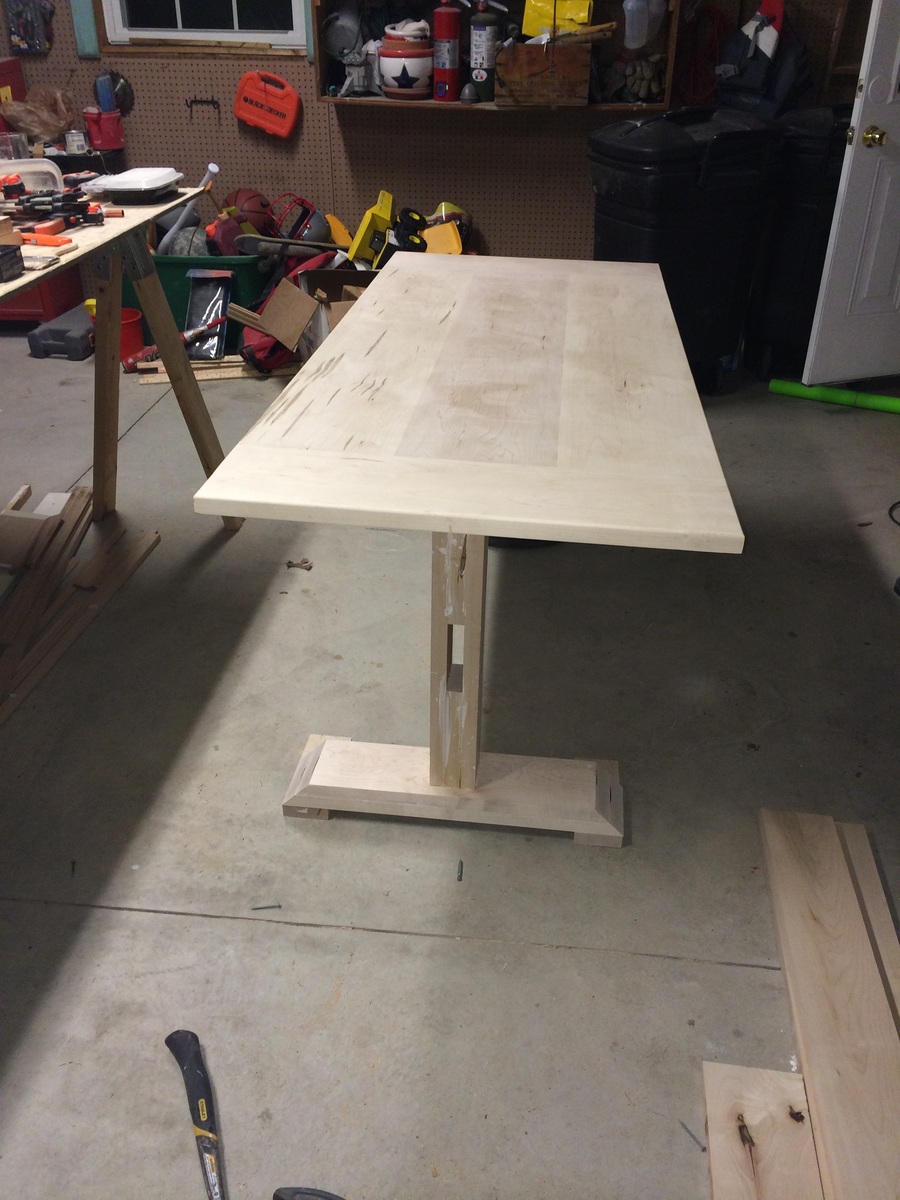
Farmhouse table made from distressed (worm hole) maple.
My neighbor was able to get me the 5/4 distressed maple for about $2/bd ft - I ended up buying 100 board feet and had plenty leftover. The finished board feet for this project was about 60 if I remember correctly. So the $200 was the bulk of the expense. The only other costs were sand paper, I bought a Kreg Jig, screws, Minwax Marker, paint, stain and urethane (much of which I already had).
It came out better than I anticipated. The antique white finish was not difficult at all.
Tip - When following the instructions for the finish here, I applied the first coat of urethane with a brush almost immediately after applying the Minwax marker to all of the sanded edges. I did this in haste, but ended up with some unexpected results that really added a nice touch. The stain from the marker incorporated a bit into the urethane as I brushed it giving it an antique, yellow hue. At first I thought I made a big mistake, but it turned out to add a really nice look.
Mon, 05/19/2014 - 07:29
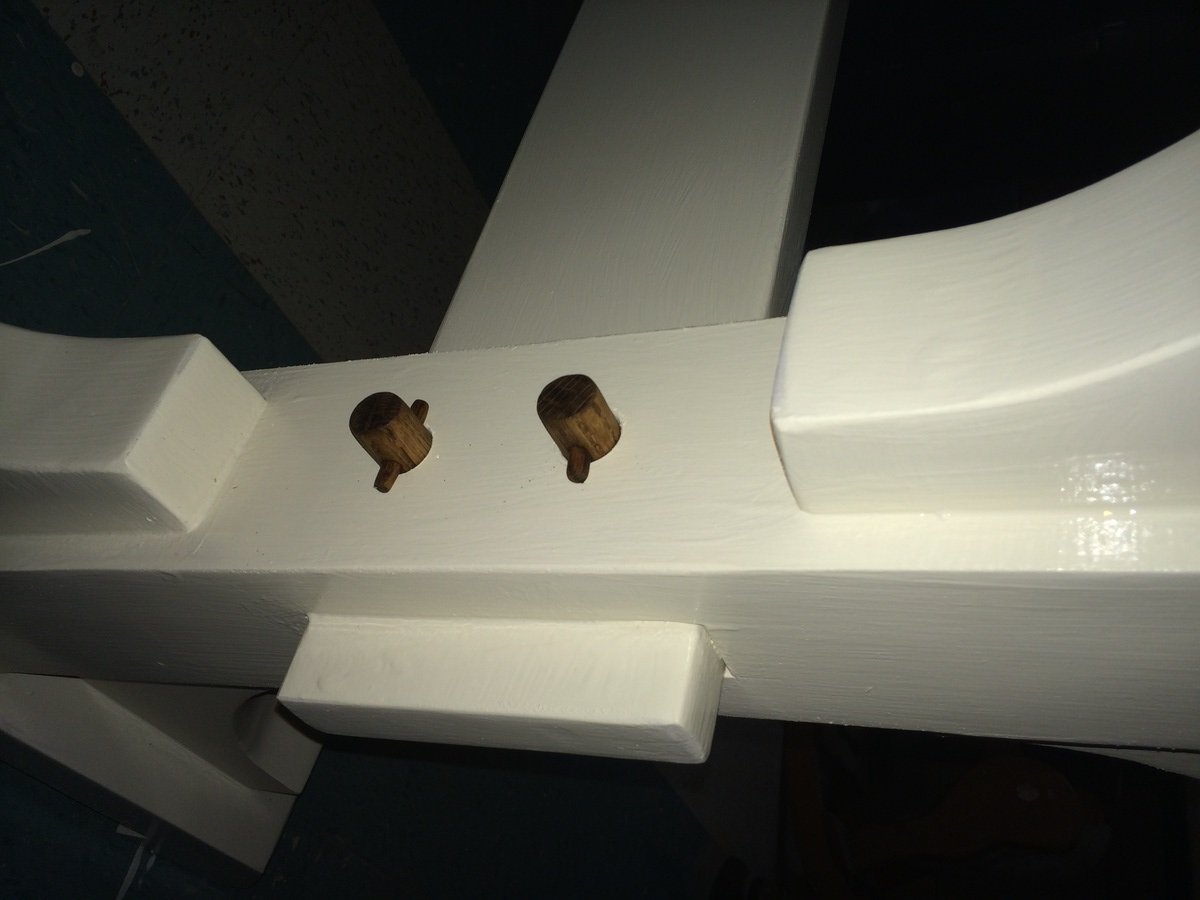
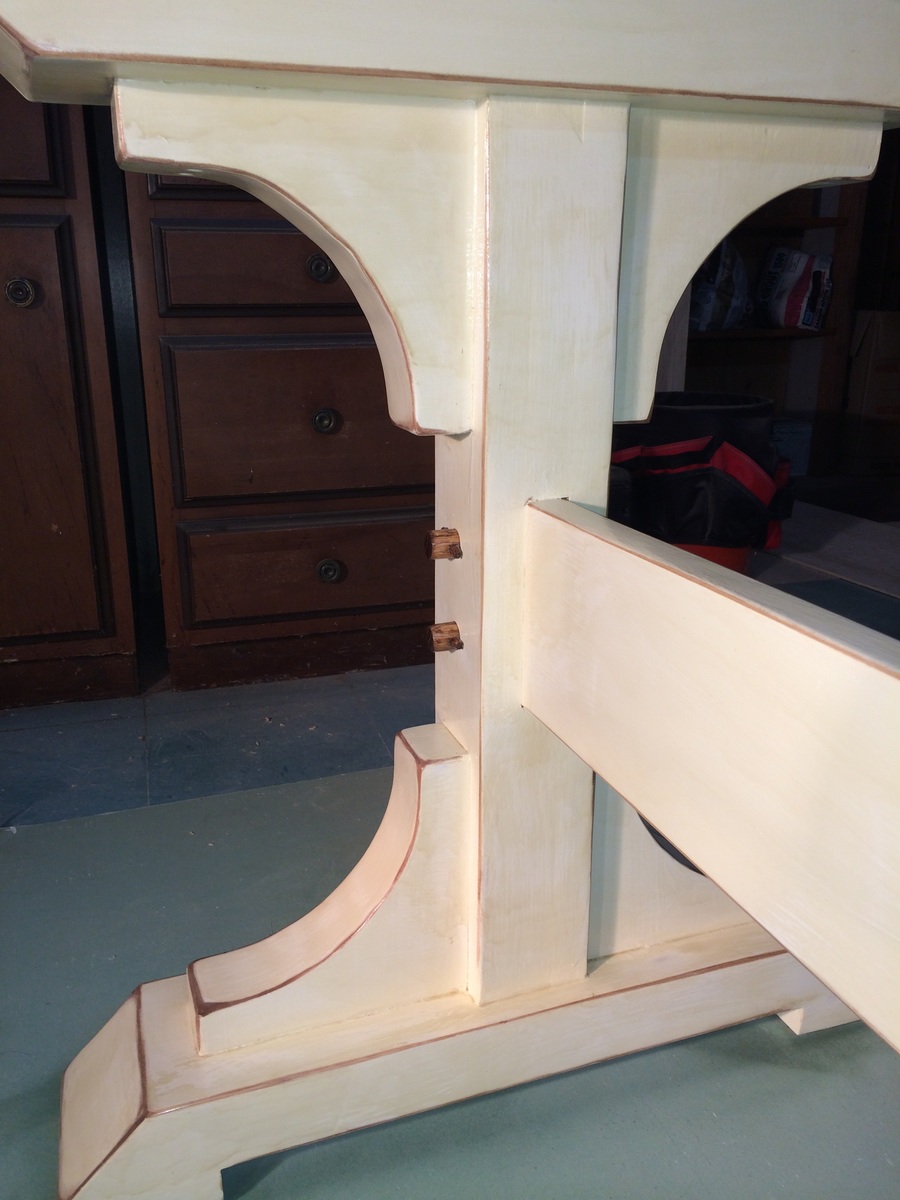
CSaintD - The top can be removed as I did not glue it. I set 3 dowels on top of each of the 2 legs so that the top would always lign up correctly if disassembled and reasembled. The stretcher could be removed, but would probably cause some damage to the finish as it was a tight fight when I finished it. The stretcher would be removed by removing the dowel pegs that I fabricated on each leg.

In reply to Disassembly by g82martin
Mon, 05/19/2014 - 08:21
Thanks. I really like the dowel pegs on the legs/stretcher. Very nice top finishing as well. Did you square the boards to get them to be so smooth when joined?
Mon, 05/19/2014 - 08:26
I cheated a bit on the top. My neighbor who got me the wood works in a furniture reupholsery shop. He planed and joined the boards for me, which saved me a good amount of time. I'm confident I could have done this at home with my table saw, miter saw and hand plane, but what he did in 2 hours probably would have taken me 10.
Fri, 08/05/2016 - 20:35
Love the dowels you added! Planning on building this exact table pretty close to your dimensions and have a very long church pew as well! Trying to decide between L-ing my pew and cutting to straigjy 6'. Do you mind sharing the dimensions of your pew? And how did you miter the pew?
Tue, 01/21/2020 - 09:40
Beautiful table. I love the pegs added to the legs and stretcher, they add a historic detail lost in a lot of today's building techniques
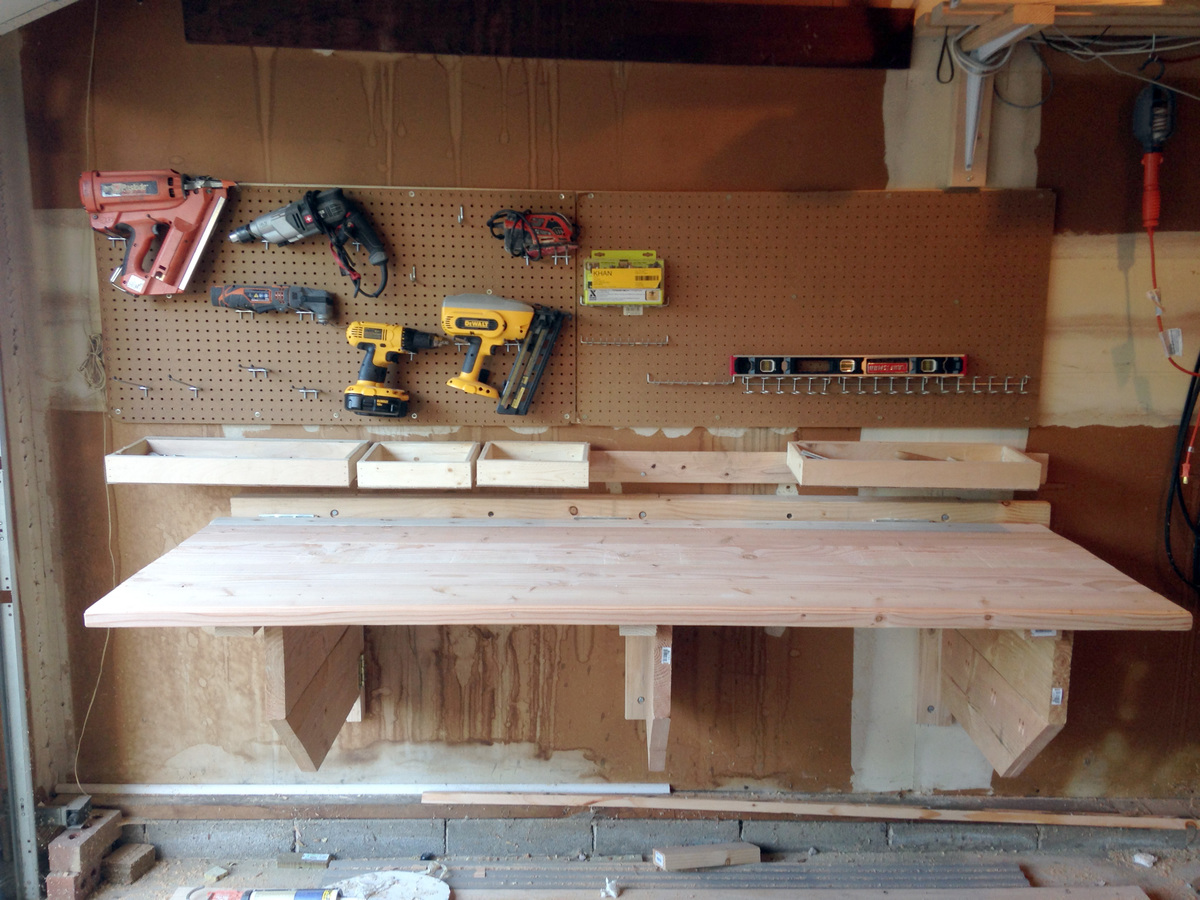
Digging through my scrap wood collection, I came across some pieces of pegboard from our previous home that I had forgotten about. I had just relocated a lot of garden tools to the shed, and there was an empty wall in the garage that would now be perfect for the pegboard. After mounting the pegboard and hanging up some tools, the wall still looked a little empty. I had a vision of mounting a heavy duty folding workbench to the wall. This was the perfect location, and if the workbench folded, we could still fit the car in the garage. You can read all the details about my folding workbench on my blog at:
http://www.justmeasuringup.com/blog/building-a-folding-workbench-with-french-cleats
The workbench is a perfect addition to my garage, and its used every day. Best of all, I just fold it down when I need to park the car!
Directions were perfect! This is my 3rd project and I really enjoyed it! Fast and easy.


Comments
Livb528
Wed, 08/02/2023 - 12:15
Great ideas!
Do you have plans for this? I think this is the perfect bench!