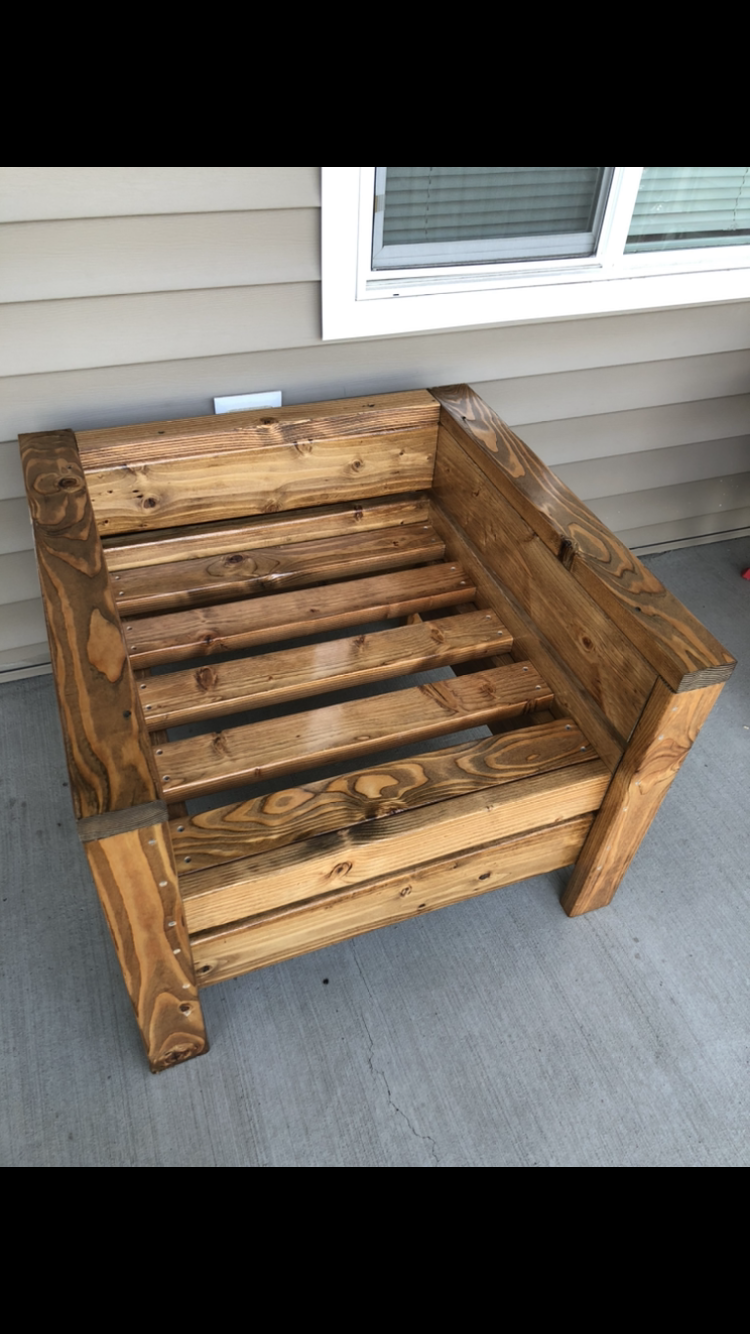
DIY Garden Bench

My name is Nan Farley. I am attaching the finished garden bench (my 2nd wood project) that I created with the help of your free garden bench plans. Thank you so much for sharing your videos and plans with us.
Built from Plan(s)
My name is Nan Farley. I am attaching the finished garden bench (my 2nd wood project) that I created with the help of your free garden bench plans. Thank you so much for sharing your videos and plans with us.
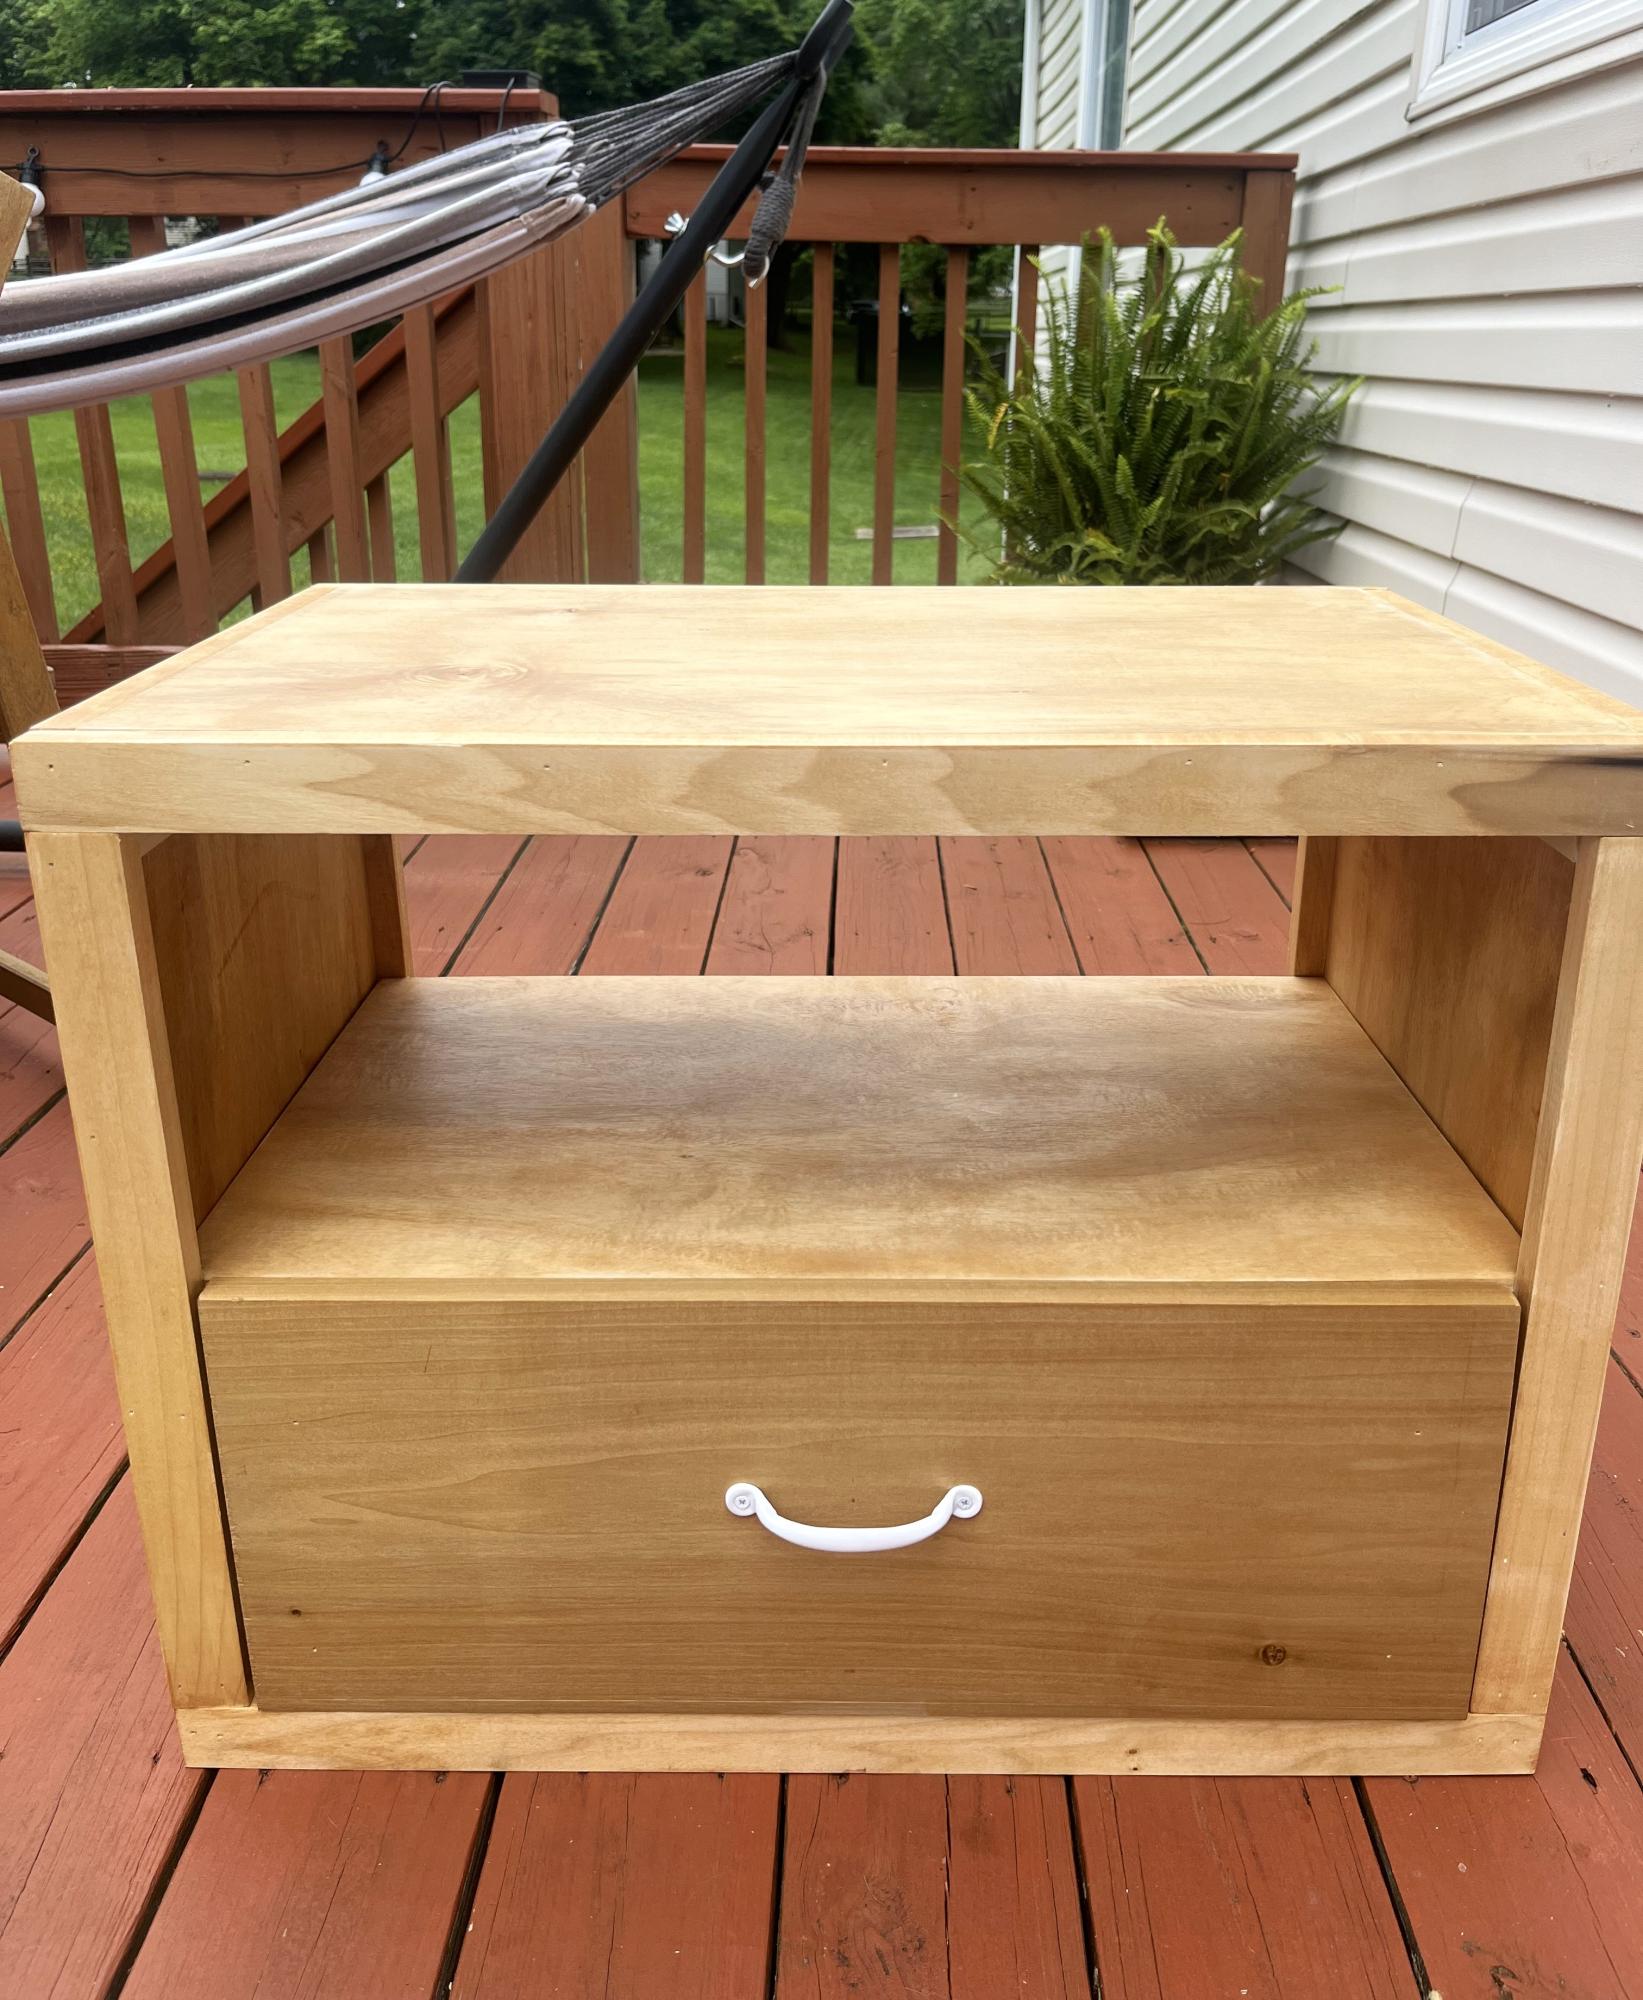
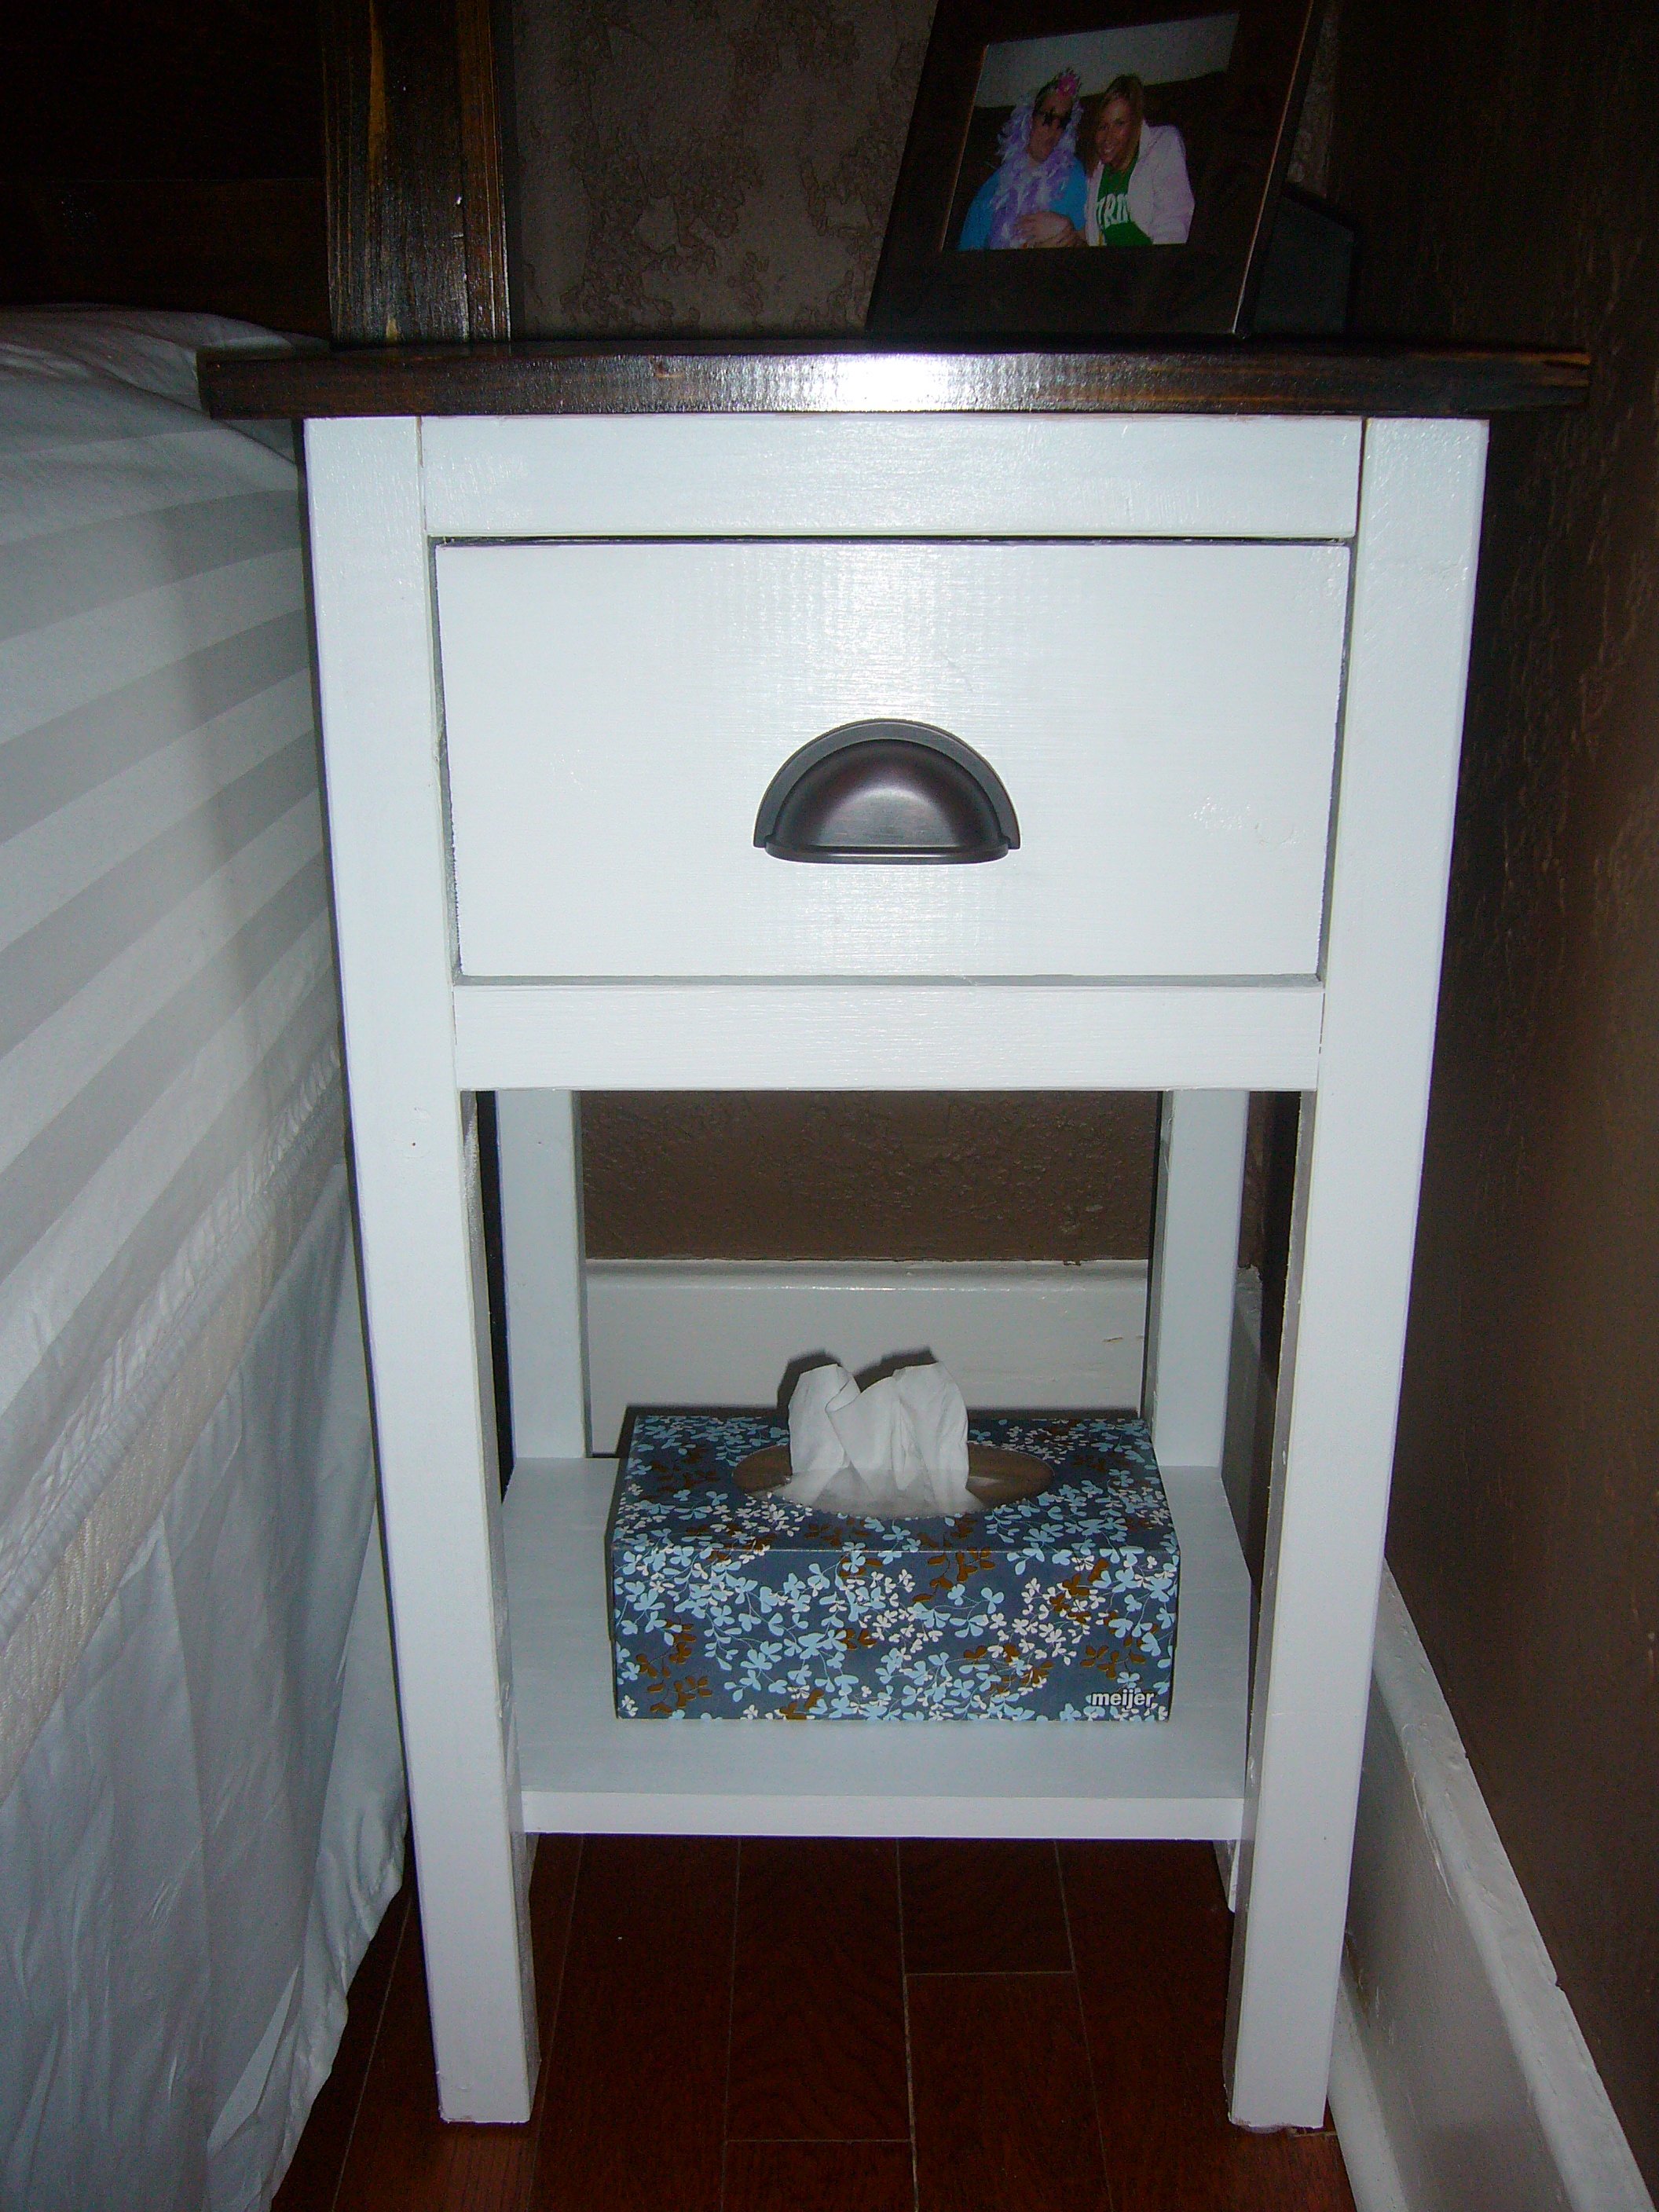
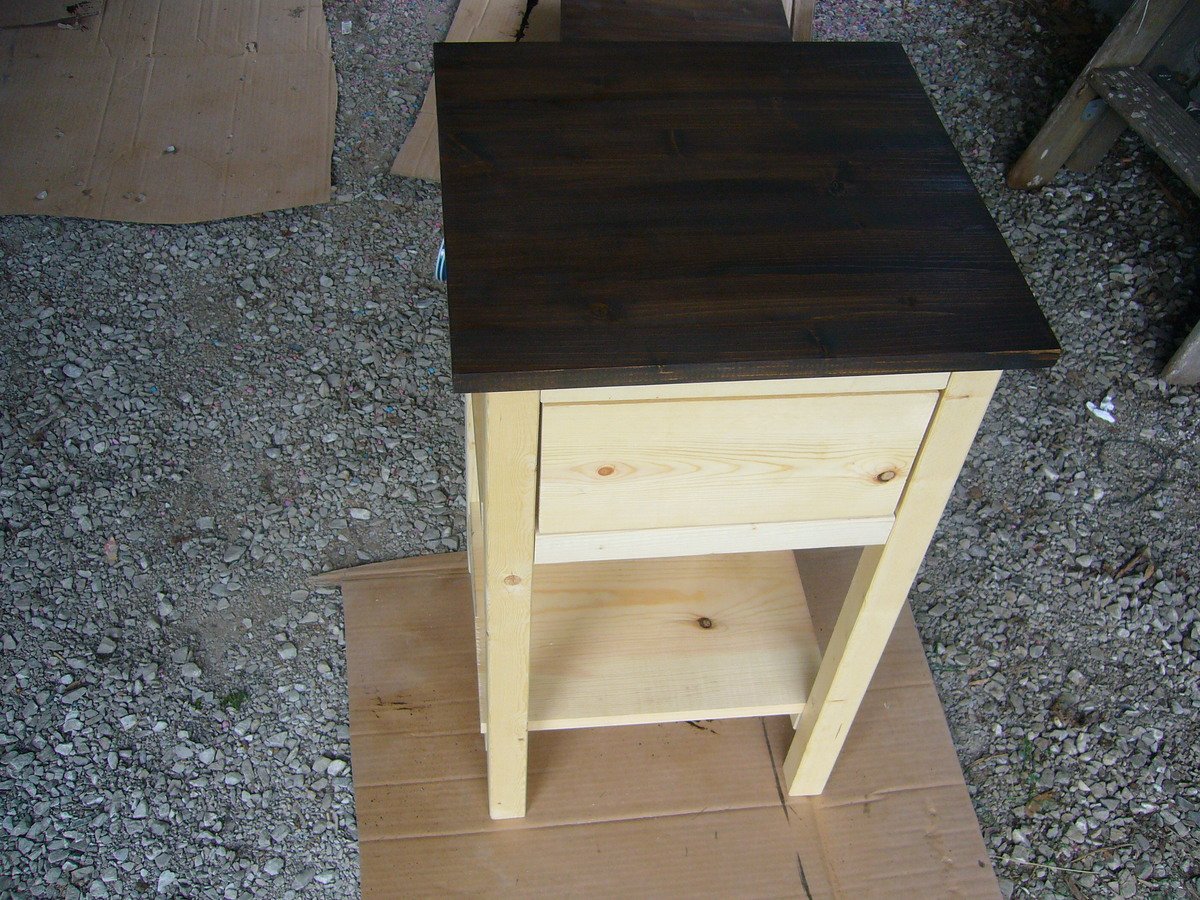
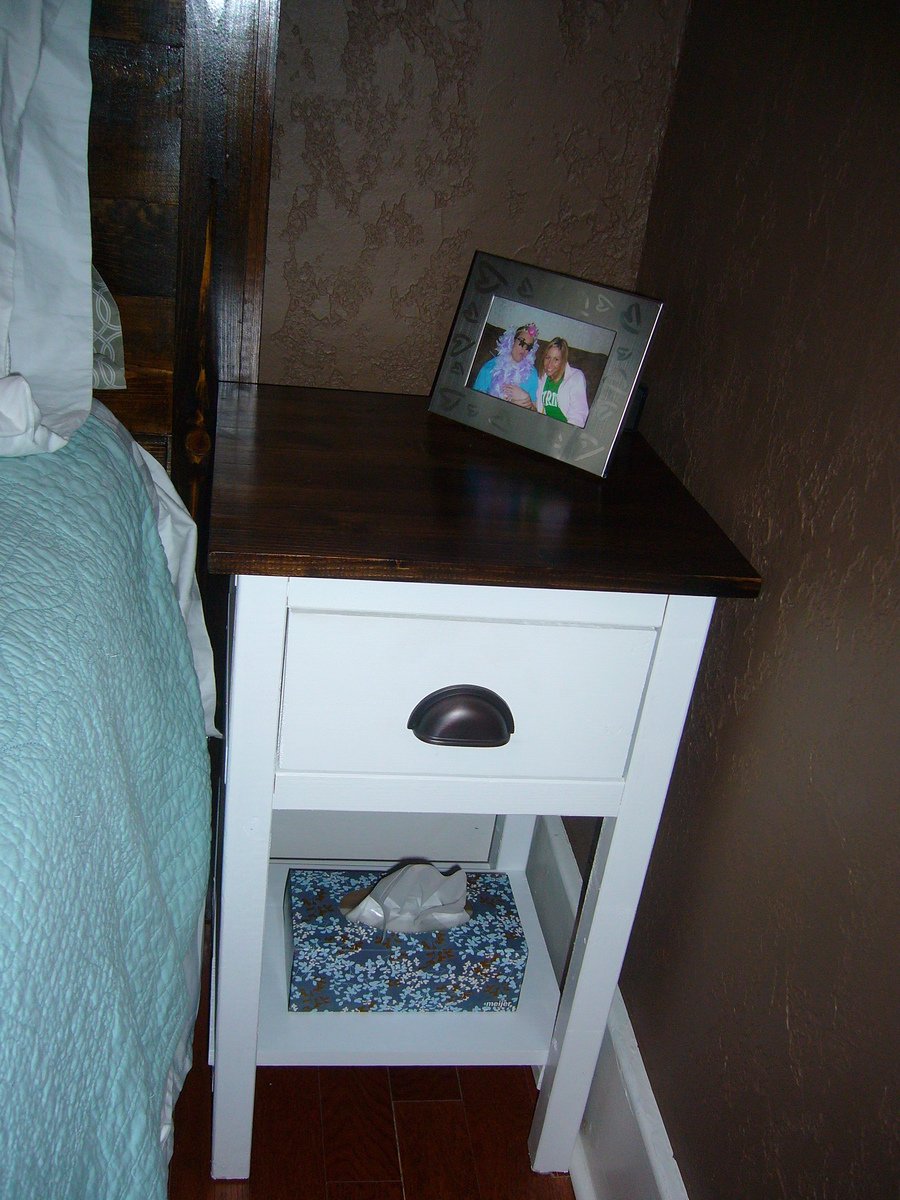
I love this plan and this table. This was my first project, and I think I turned out really well.
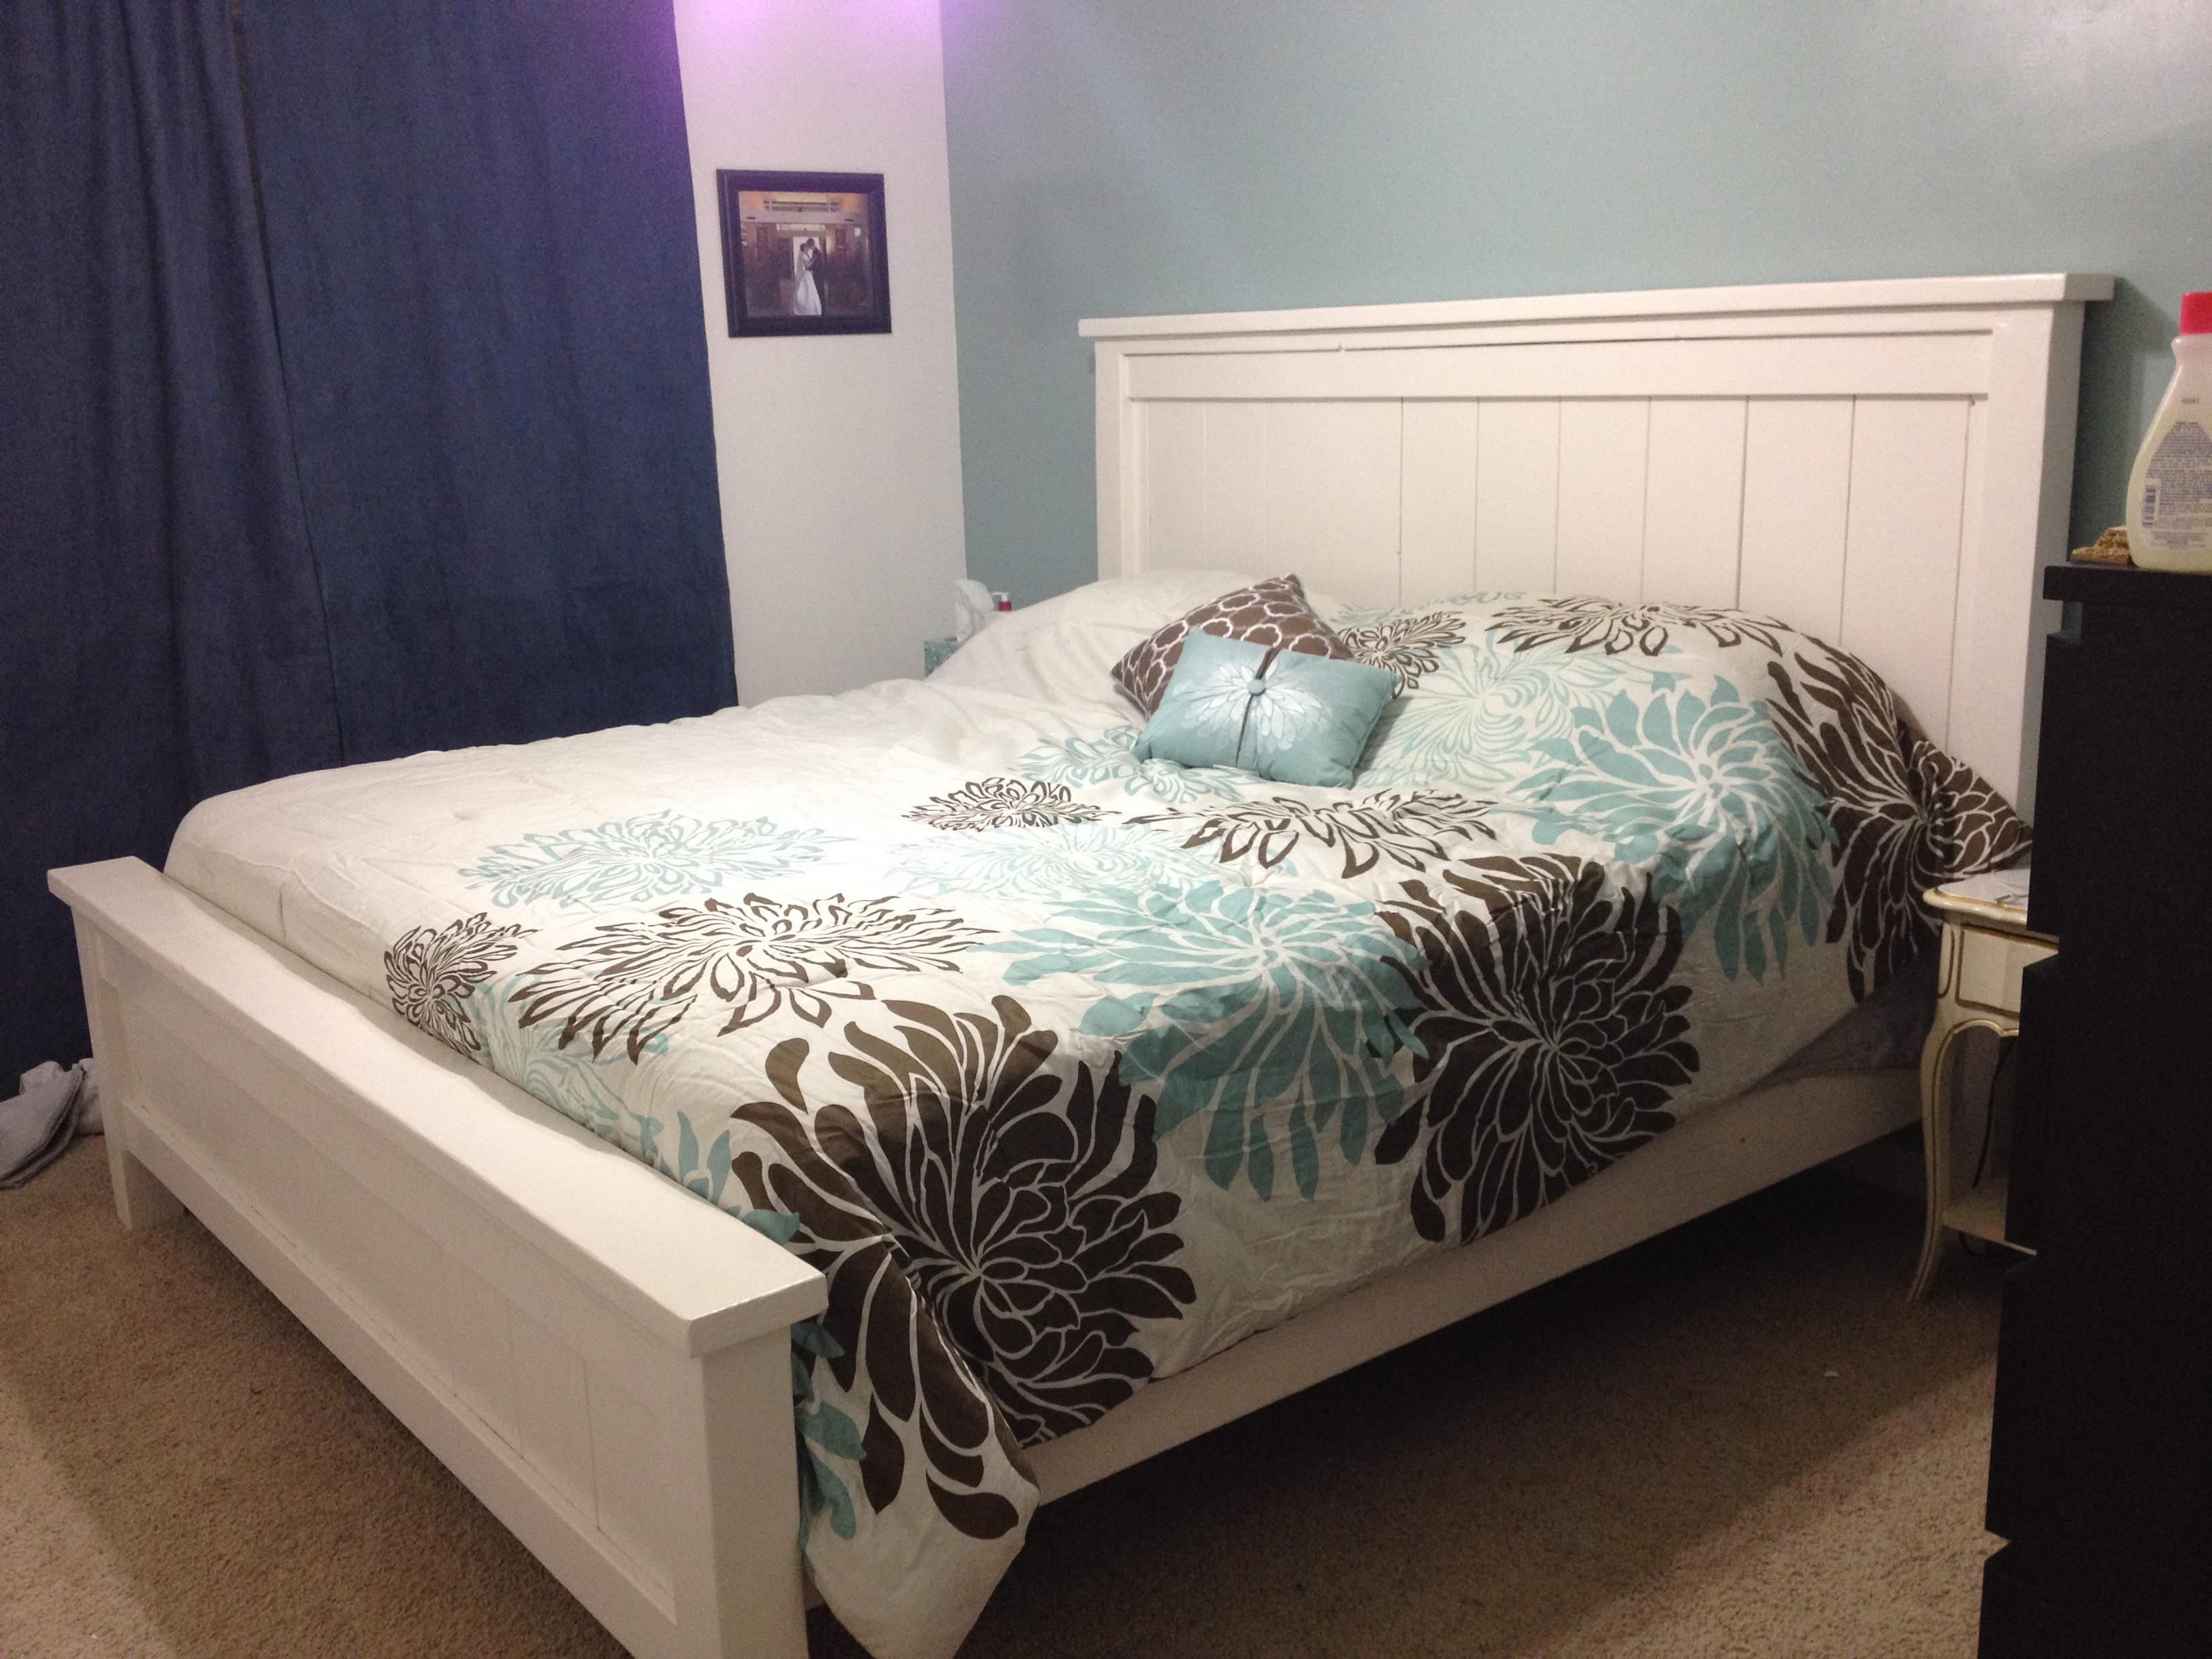
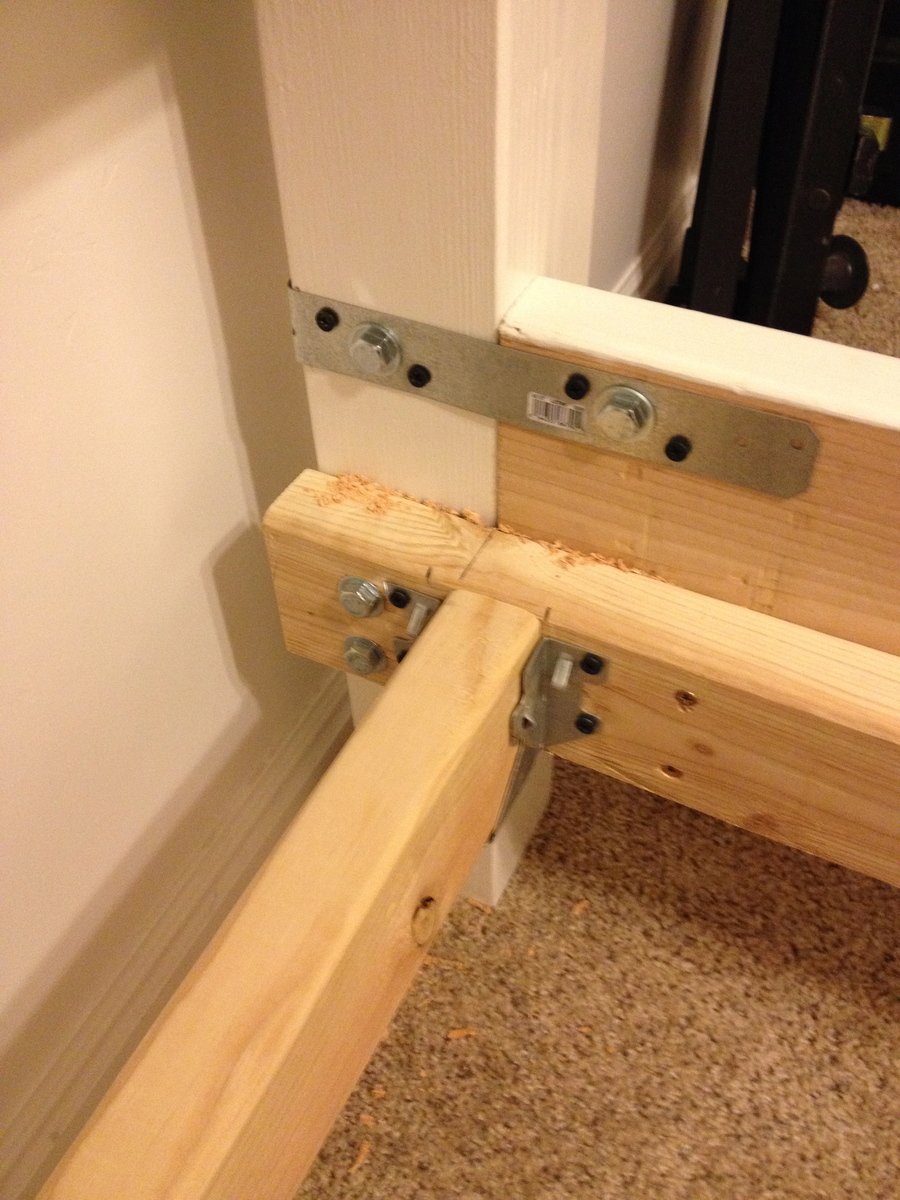
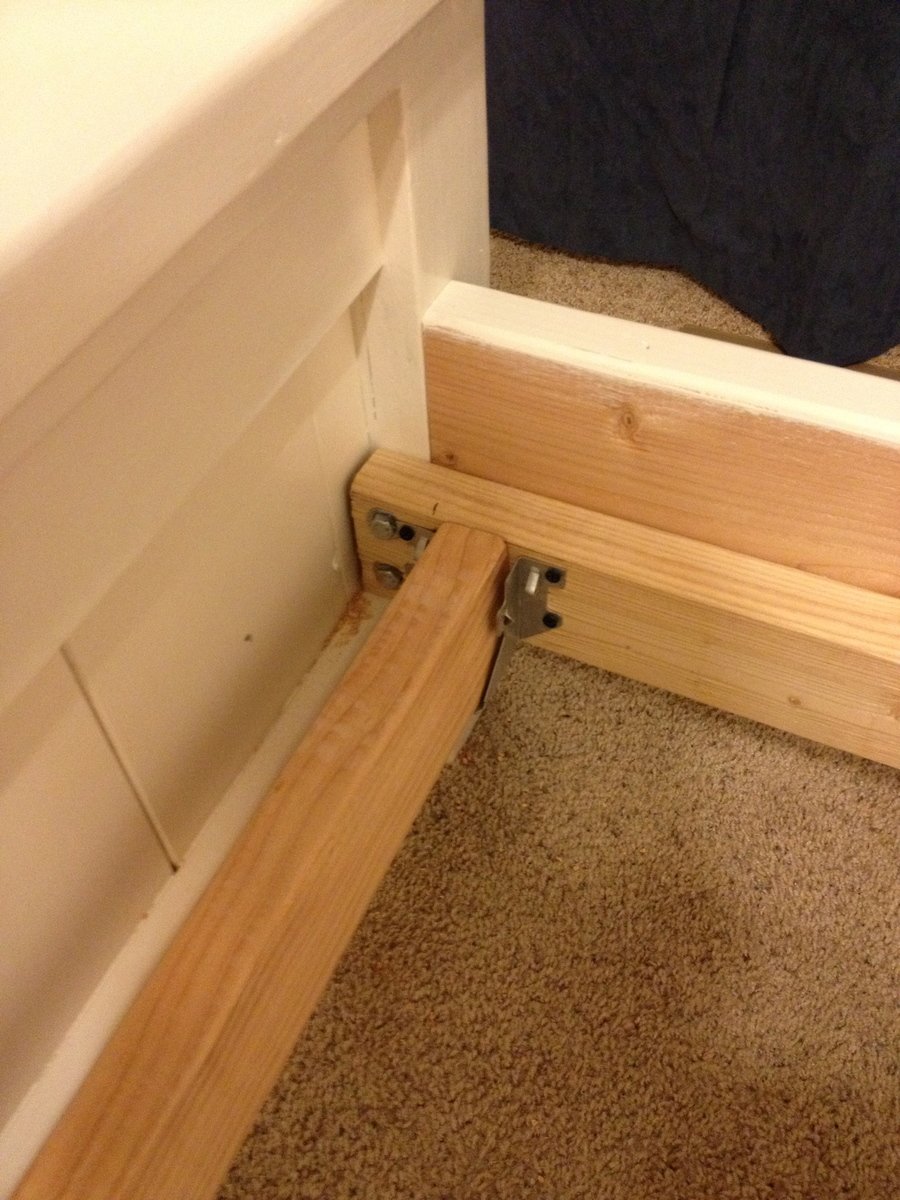
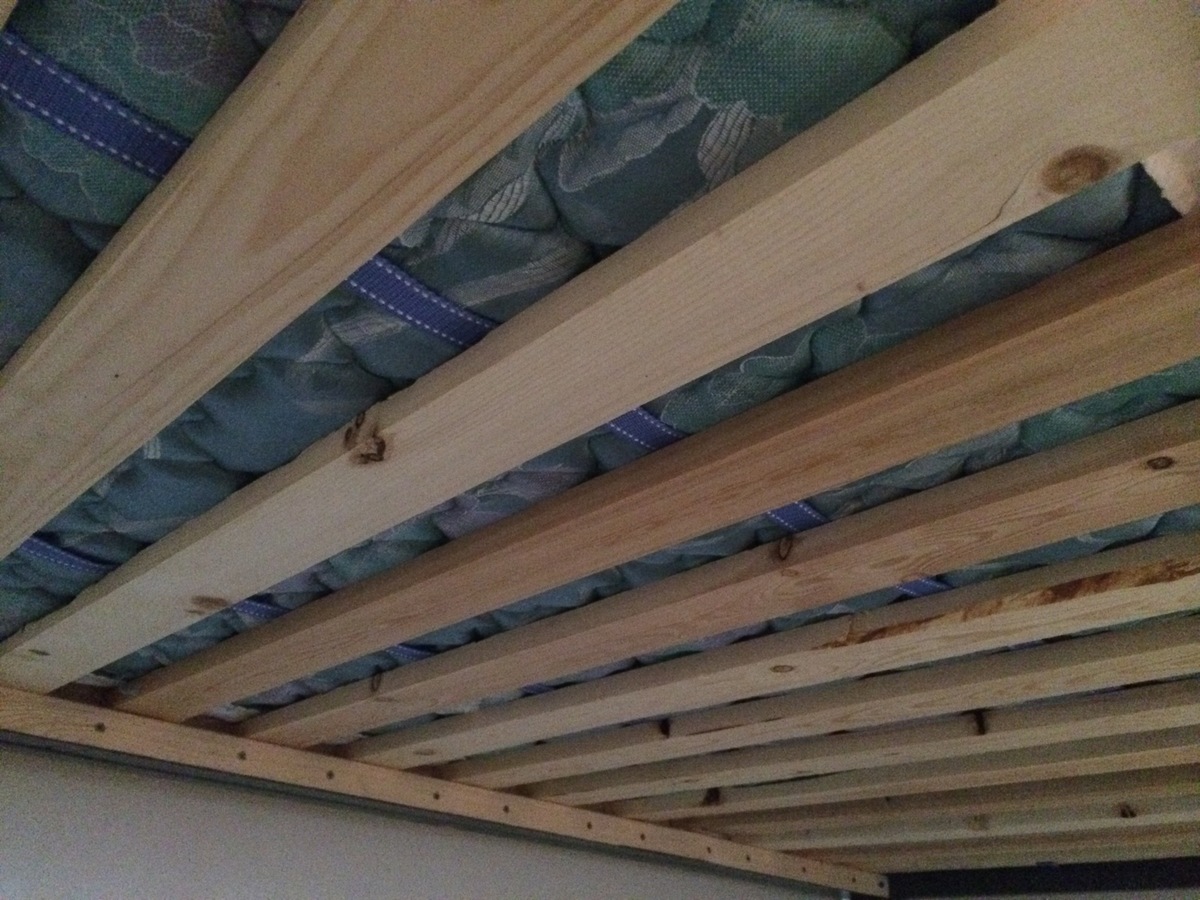
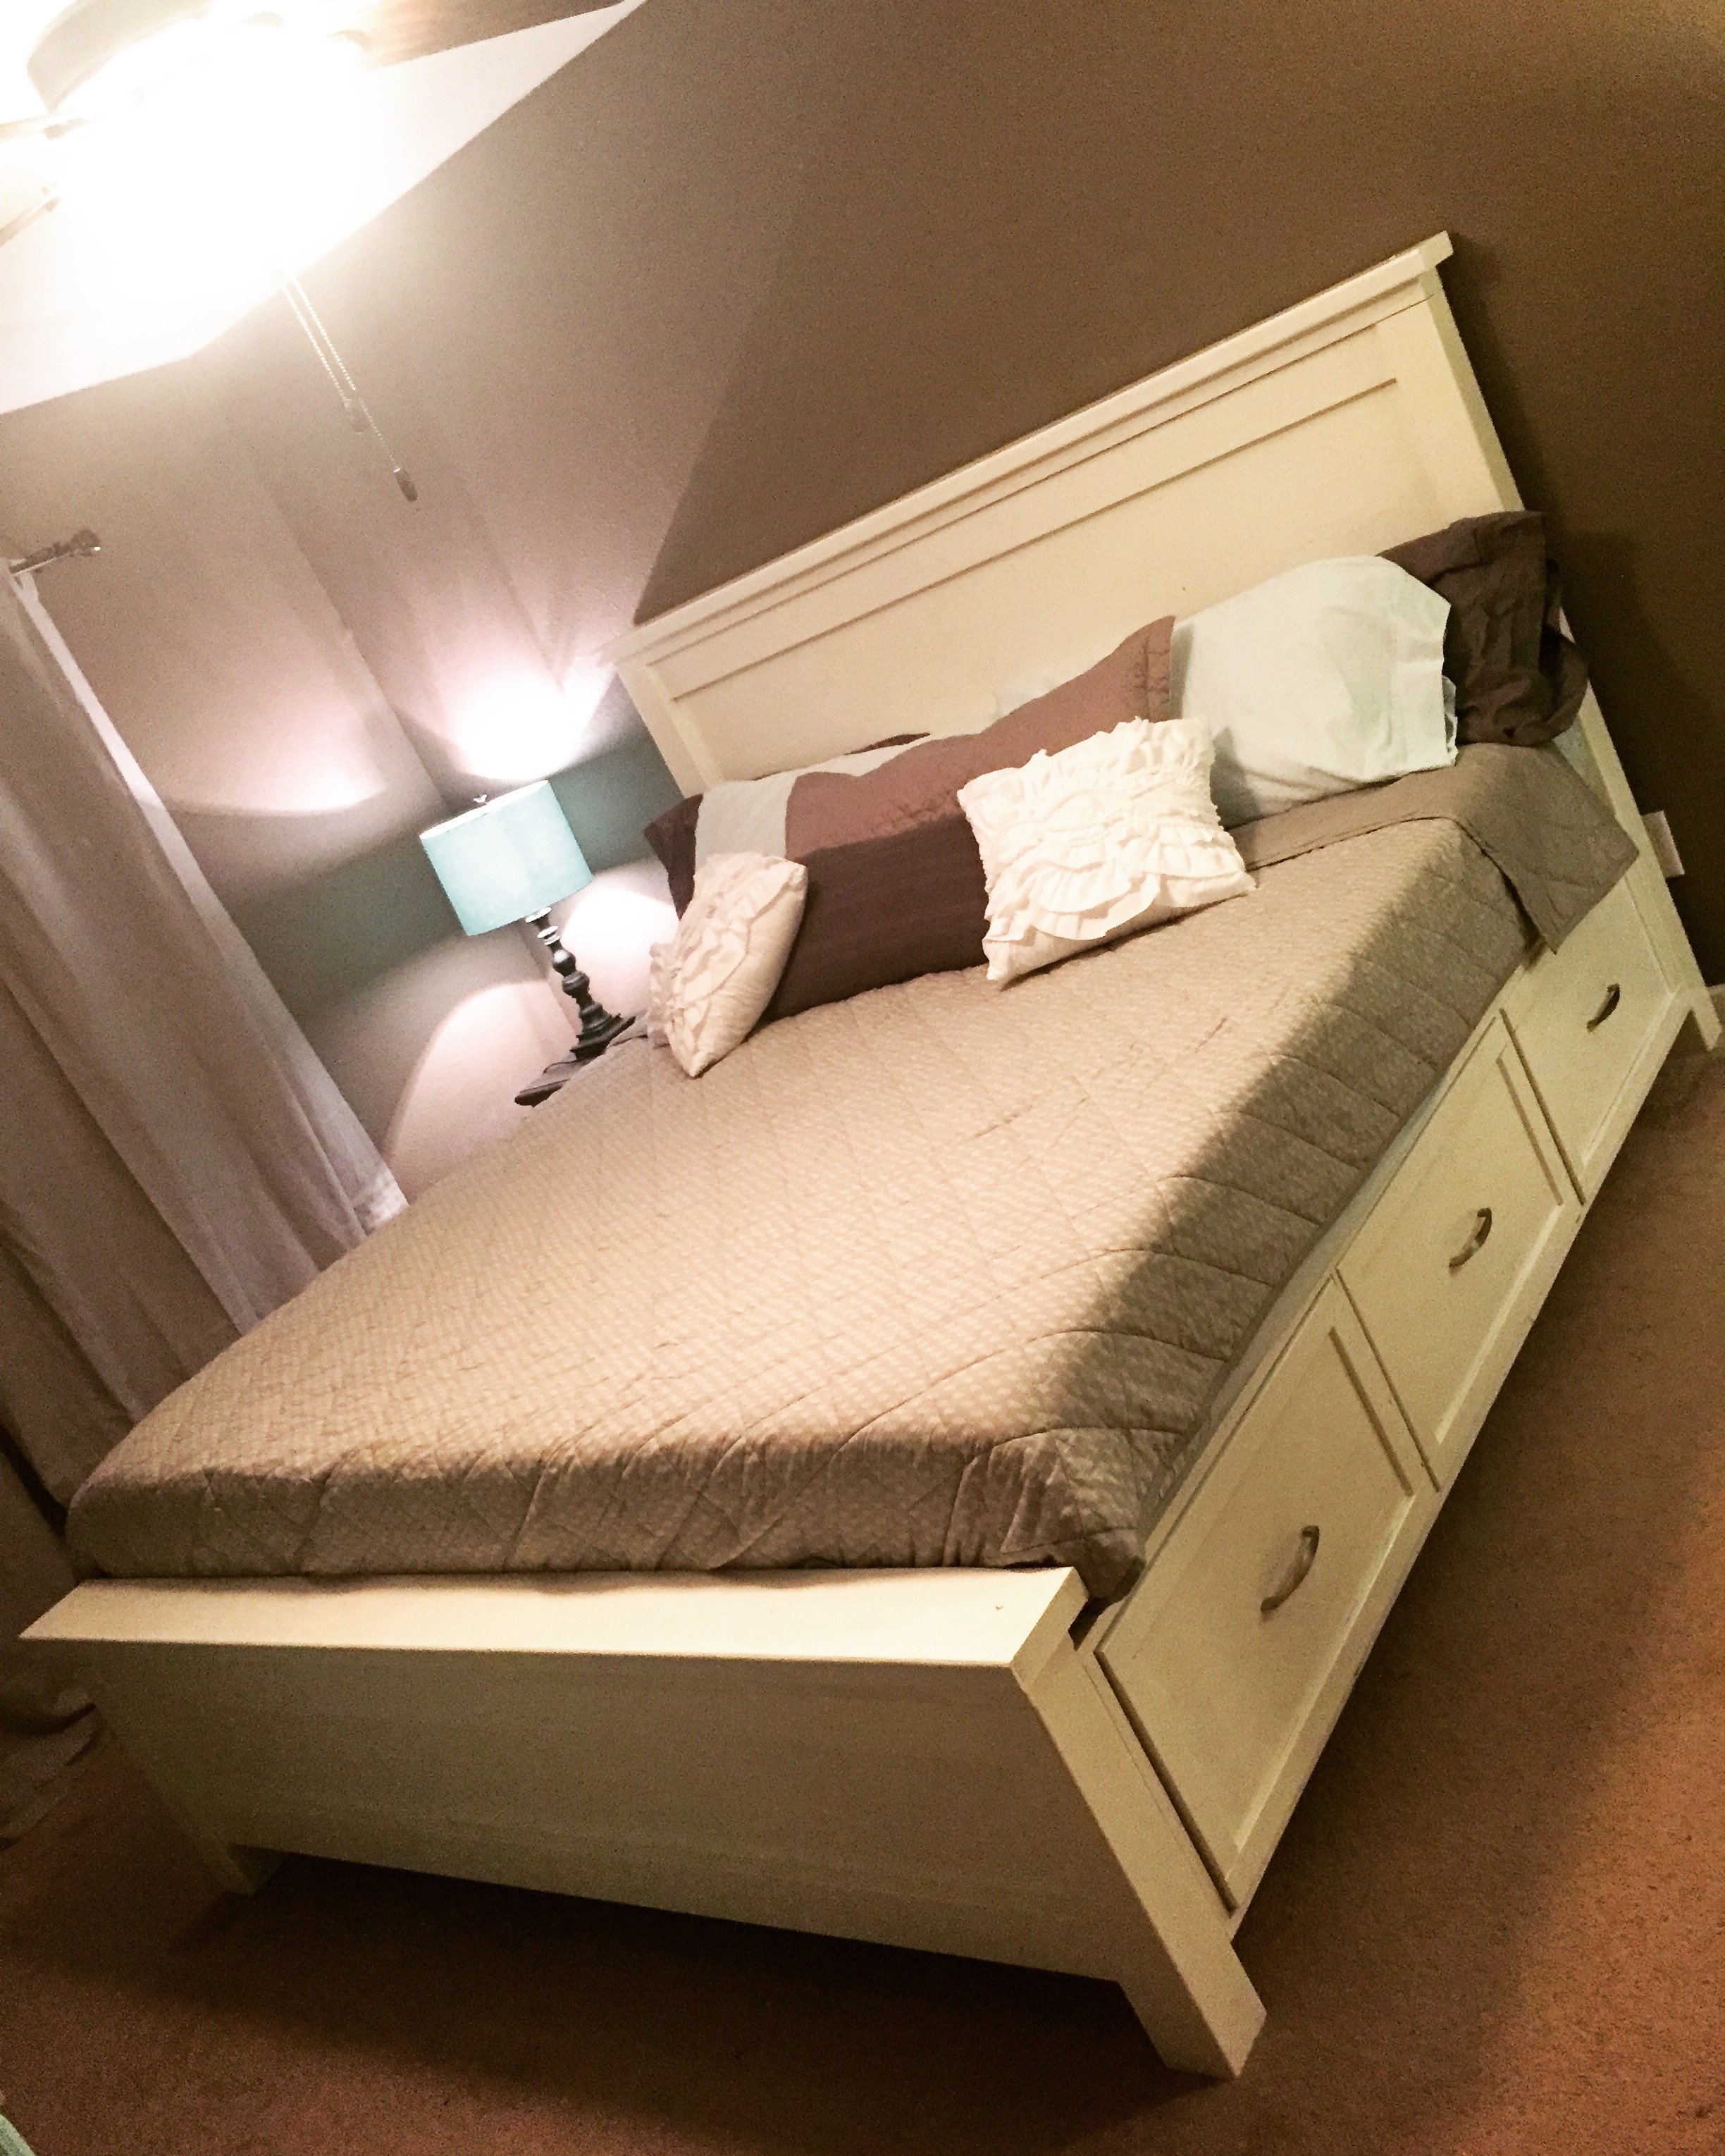
We built the farmhouse king size bed over the last week. We used 2x4 hangers to hold the 2x4's in place and used 2x4's to support the mattress. We put 7/16" plywood on top of the 2x4's to support the mattress. We struggled with how we were going to attach the side rails to the bed frame and finally came up with a way we felt would be strong enough. Please see the pictures included to see exactly how we attached the rails to the bed frame. We used lag bolts, and metal brackets.
I shrunk the size and dumbed down the plans to fit my skill level.

Mon, 10/10/2016 - 09:08
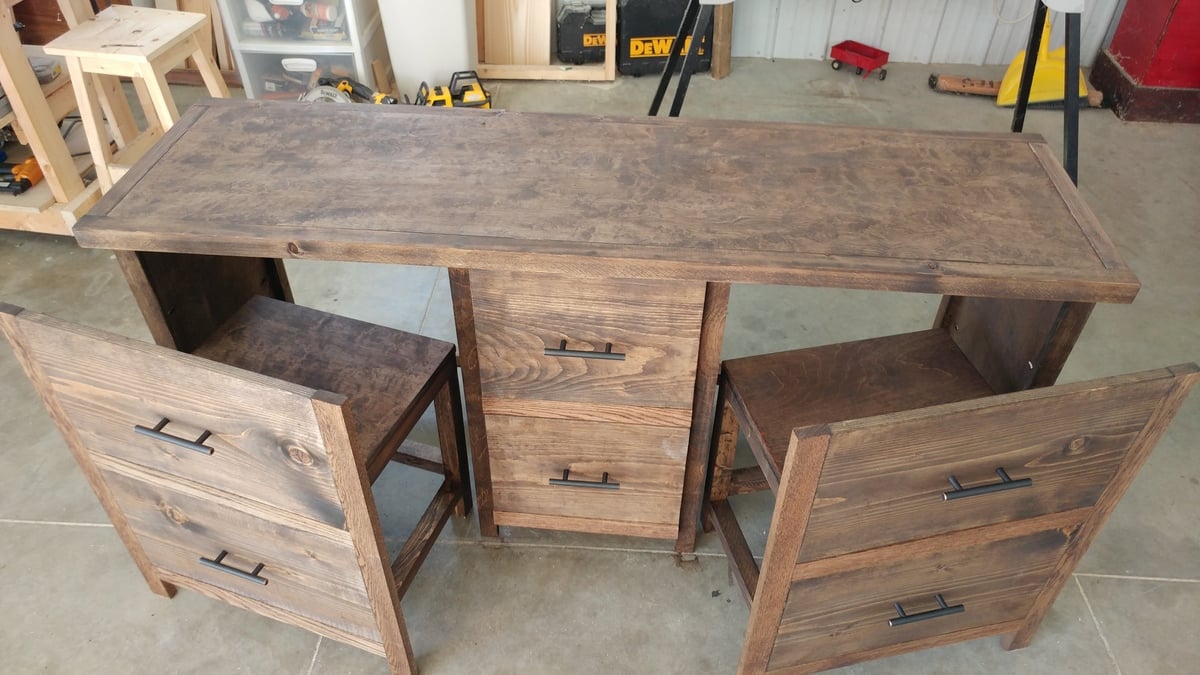
I love what you did! It looks so great! I prefer this style, which is more simplistic than the other. Great work!!

Mon, 10/10/2016 - 10:28
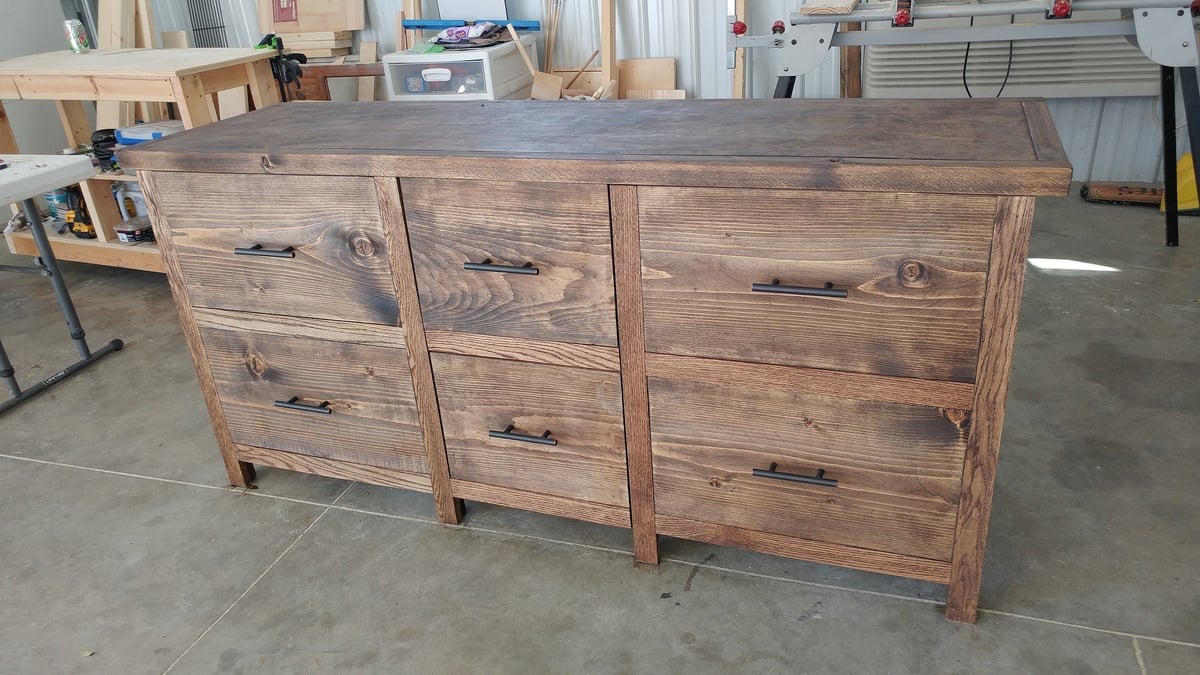
Love how this turned out - the simpler drawers is just as (if not more) beautiful!
Tue, 10/11/2016 - 14:56
Thanks! I wish I would of set up an account before I posted so I could get notifications. I honestly didn't think anyone would notice it :)
Tue, 10/11/2016 - 14:58
I am so excited that people noticed this :) Is there any way of putting this under my account? I didnt make an account until today and I would like to get notifications. I have my project on my facebook page and can prove that I made it with other pictures. Thanks!
Mon, 01/20/2020 - 07:44
I would love to see this in a farm-house (rather than rustic) aesthetic along with drawers under the seats for extra storage. Maybe on casters with a fold up extension on the other side? So many ideas running through my head with this!
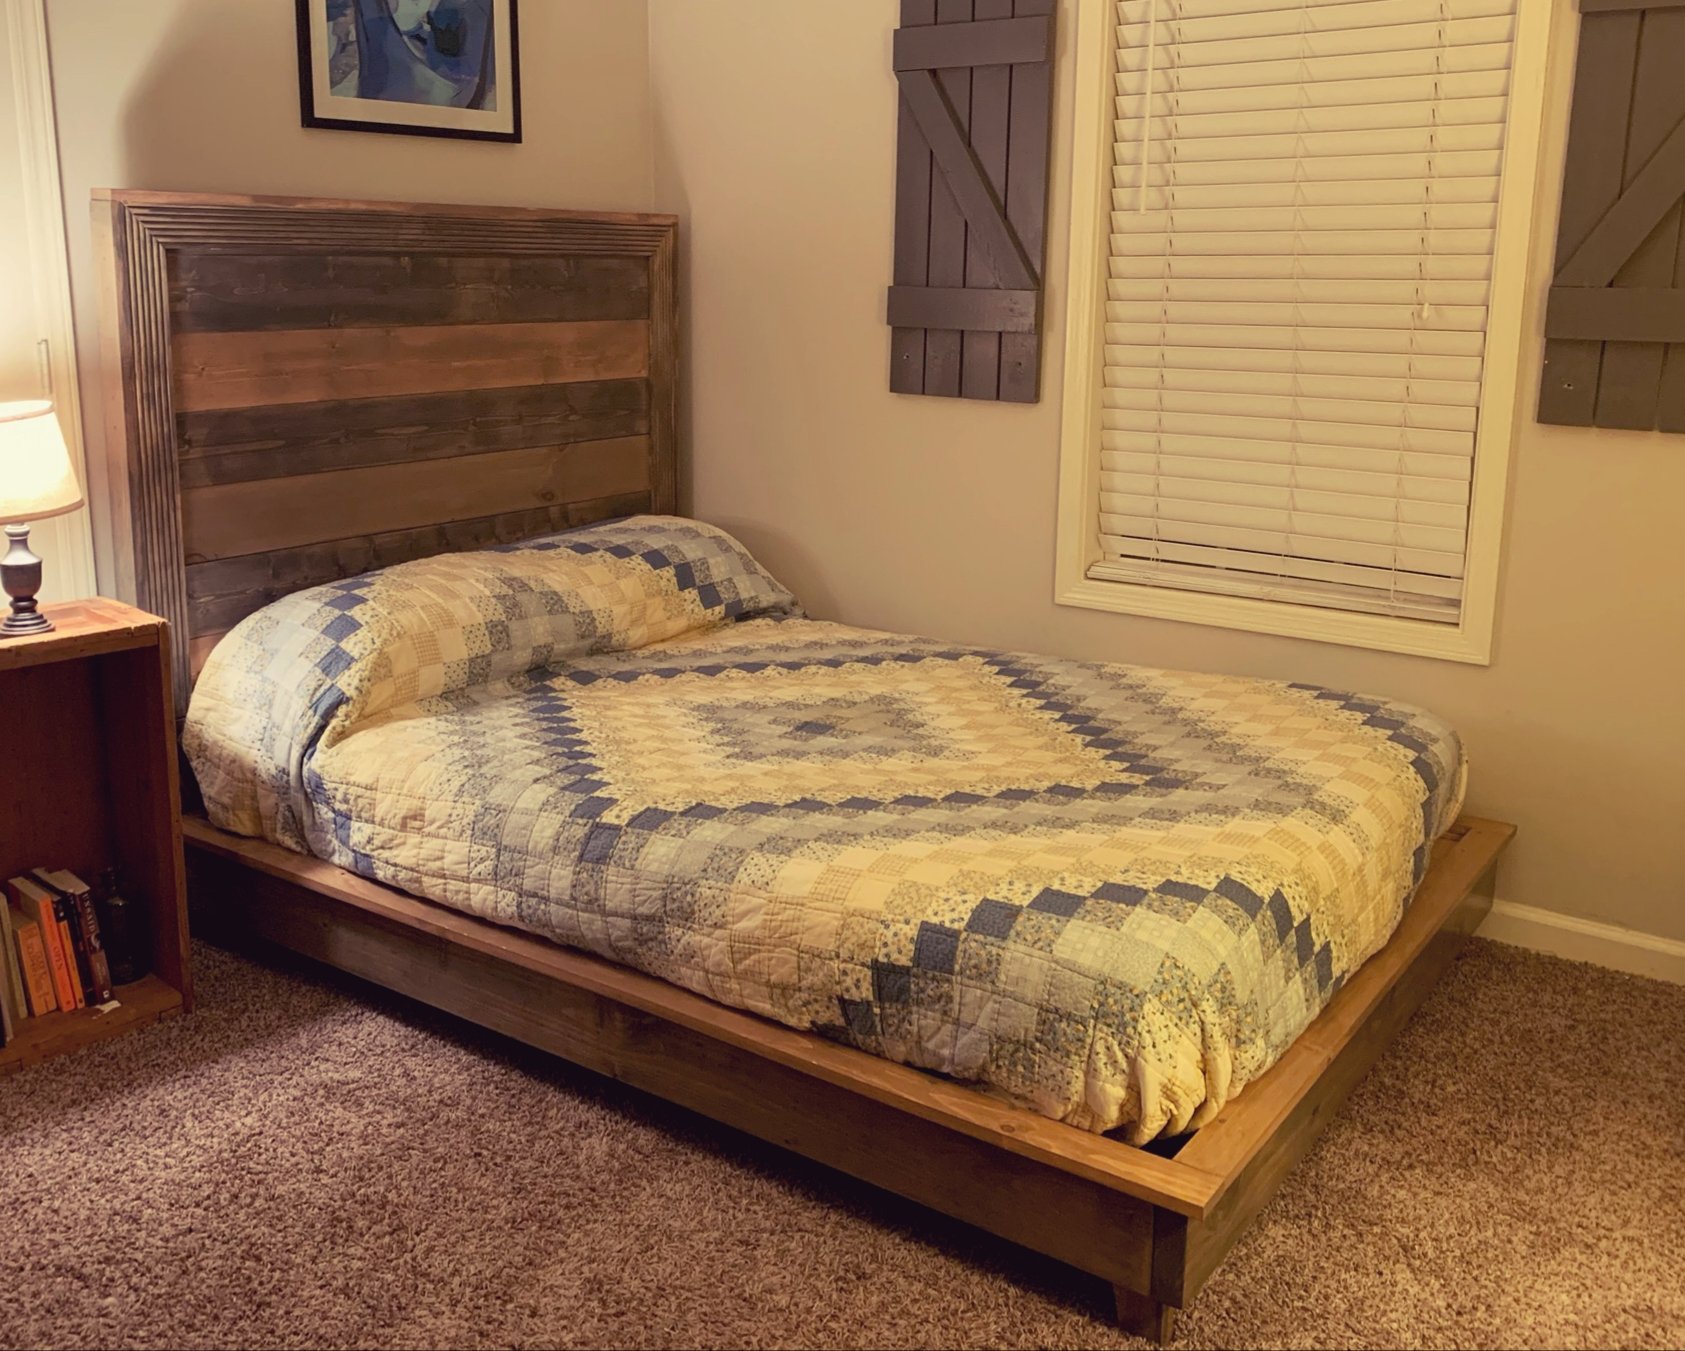
I'm just beginning to experiment with furniture building, but I am pleased with how the bed came out. The plans were easy to follow. I didn't have a finish nailer at the time, so I had to use 2 inch finished nails which I hammered in. Although you can see the nail heads along the side of the head board, I don't think it distracts the eye.


Followed your plans and it was so much cheaper than buying one online for over $300!!
Thank you!
Annie & Tony
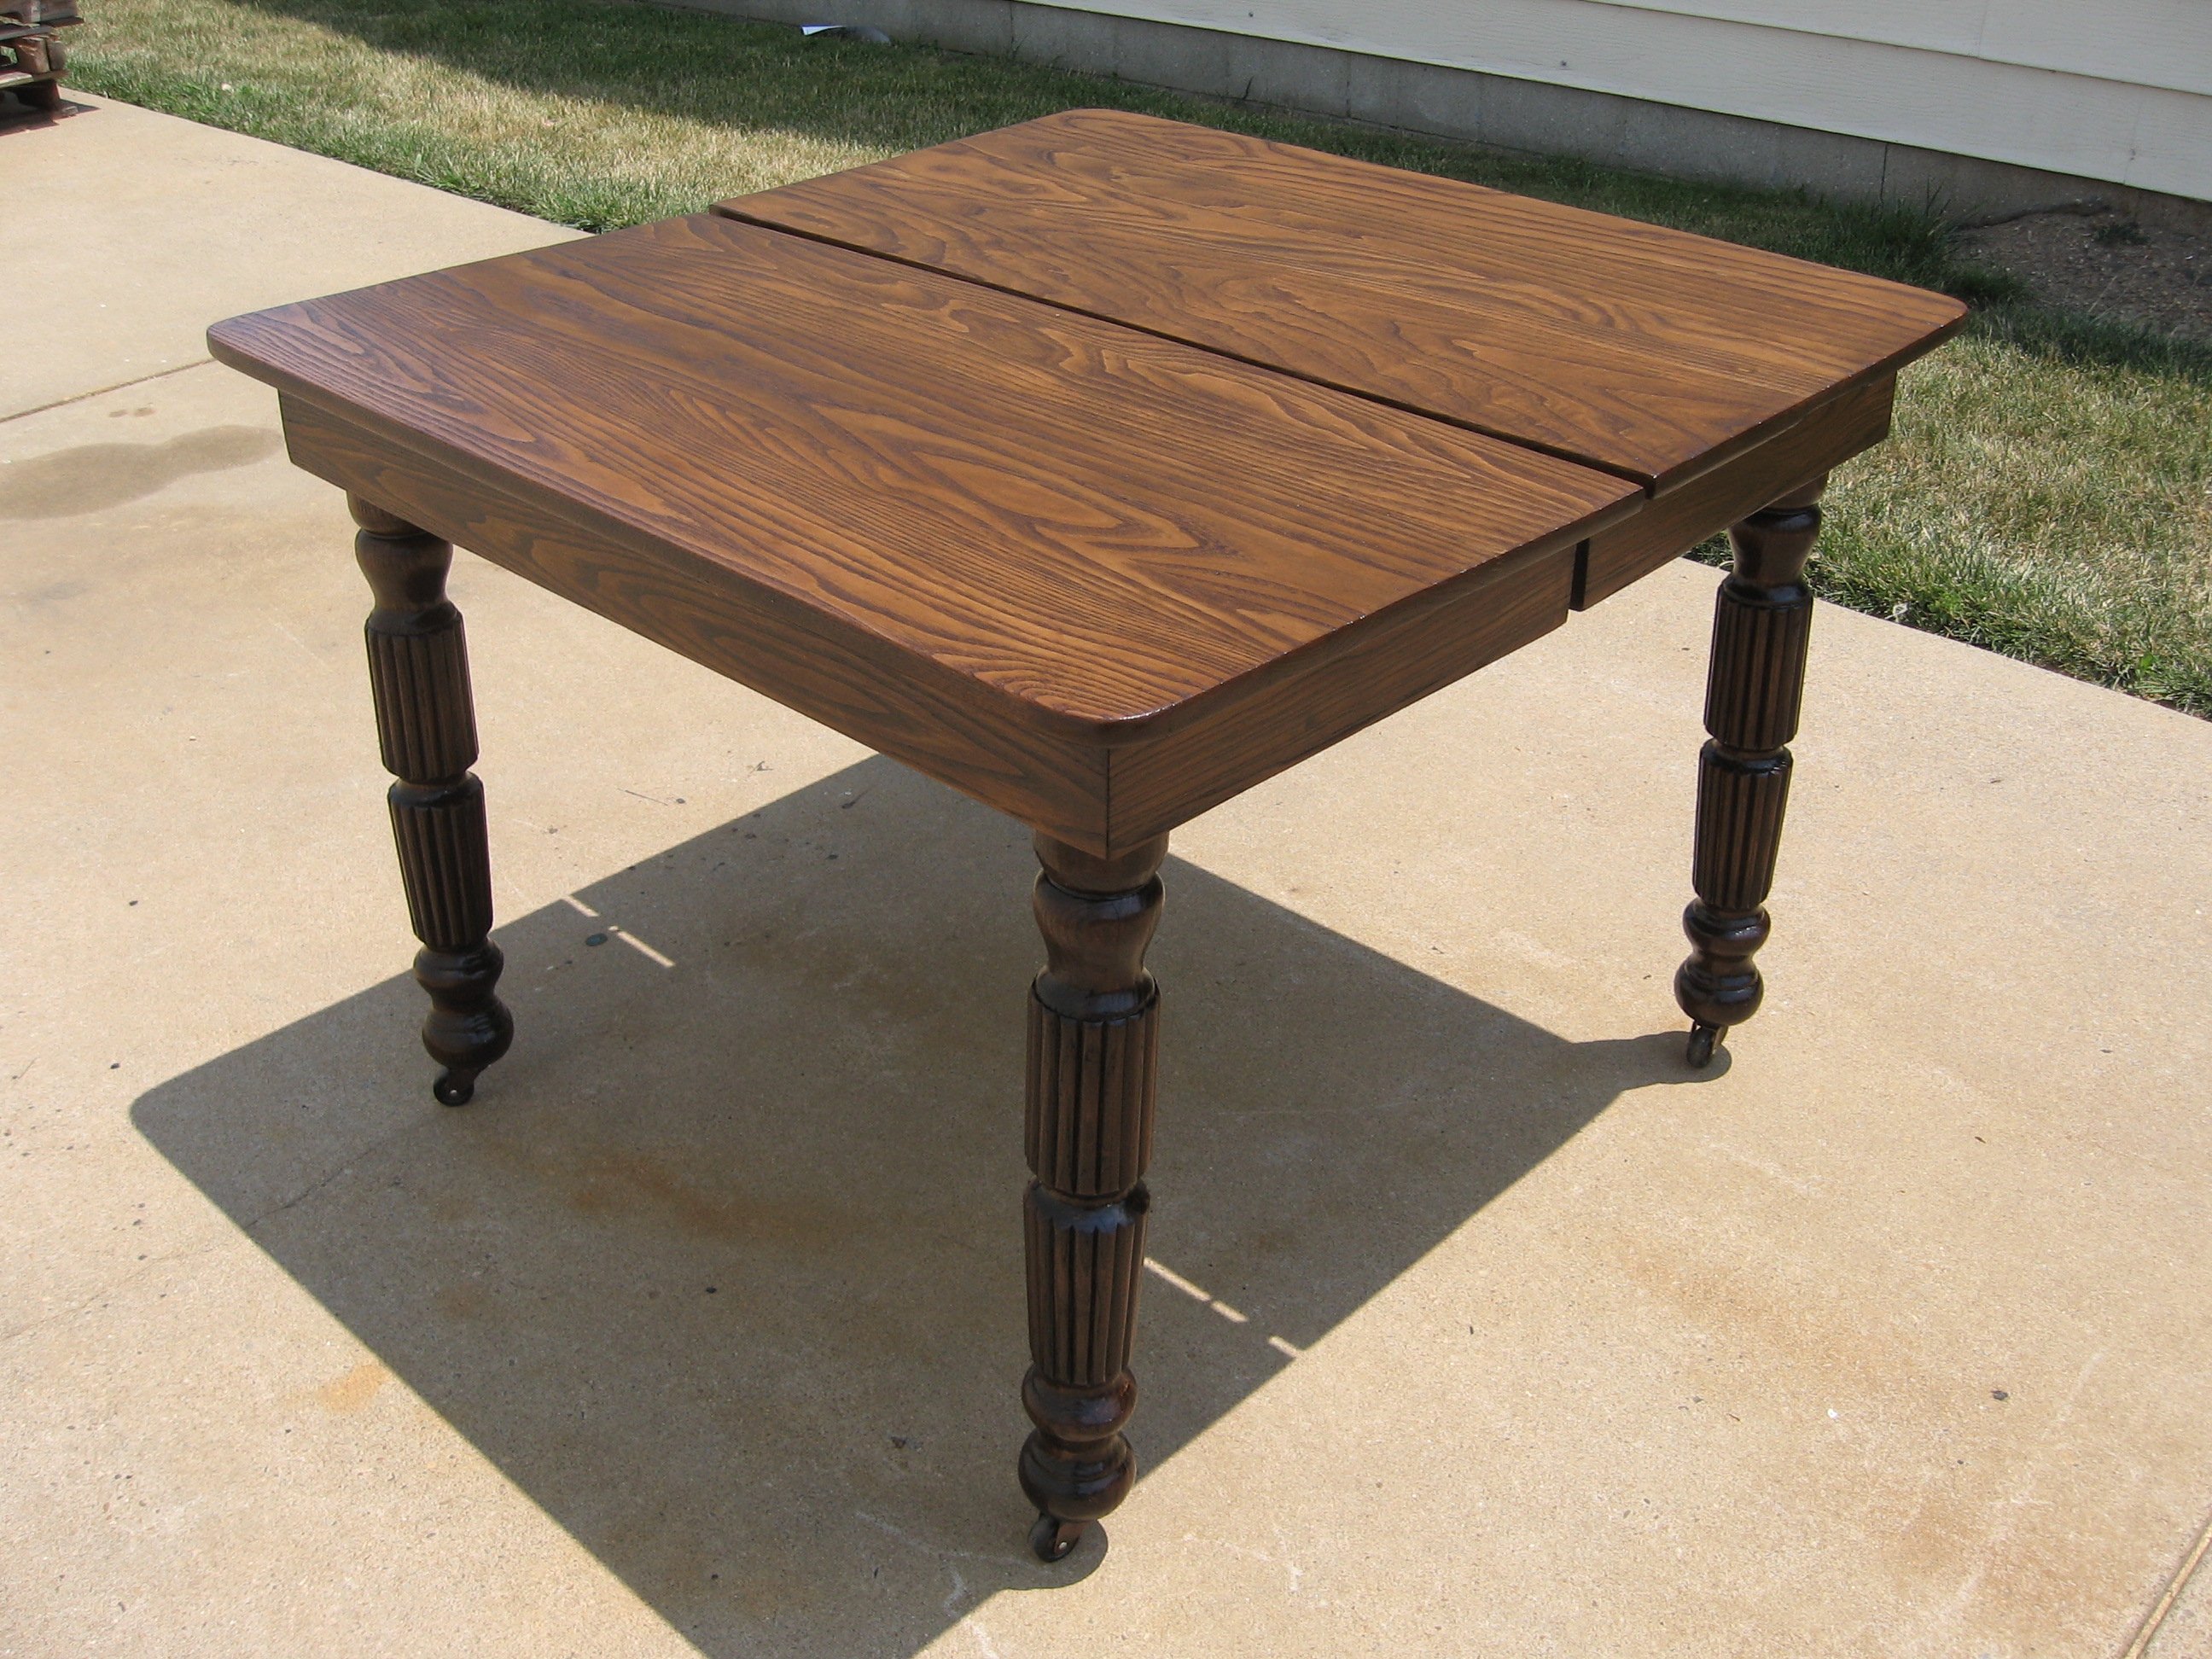
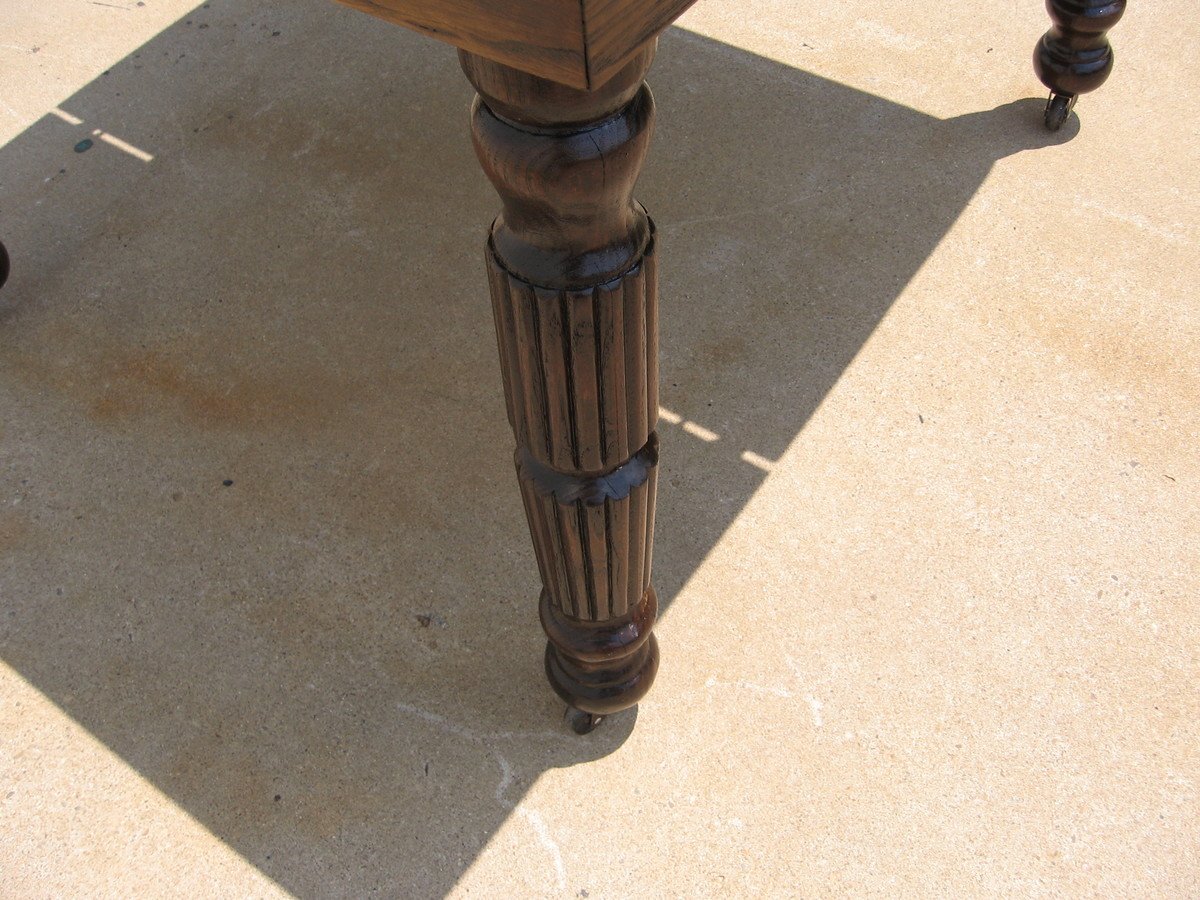
My father loved his woodworking and refinishing antique furniture. He built a wood shop years ago and loved spending he retirement years in there. He enjoyed going to auctions and the like and picking up antique pieces for $5 and $10. He had an antique oak dining table that someone had given him years ago. Cancer took him 4 years ago and he still has that shop full of antiques. I came across the old table and it was in sad shape. It was literally in several pieces and the legs were cracked. I decided to refinish the table.
I had some oak plywood and 1" by oak left over from other projects. I went ahead and removed all of the bracing and replaced all of it. I began stripping off all of the old finish. The underside of the table had been painted. The legs were the real challenge. Not only were the legs turned, they are fluted. I stripped off what I could with liquid stripper. I then used a power washer to help remove more. I then began sanding by hand every nook and cranny. I then filled all of the little cracks with wood filler. I used pin nails on the larger cracks. Once everything was stripped I began seeing a beautiful patina that only time can create.
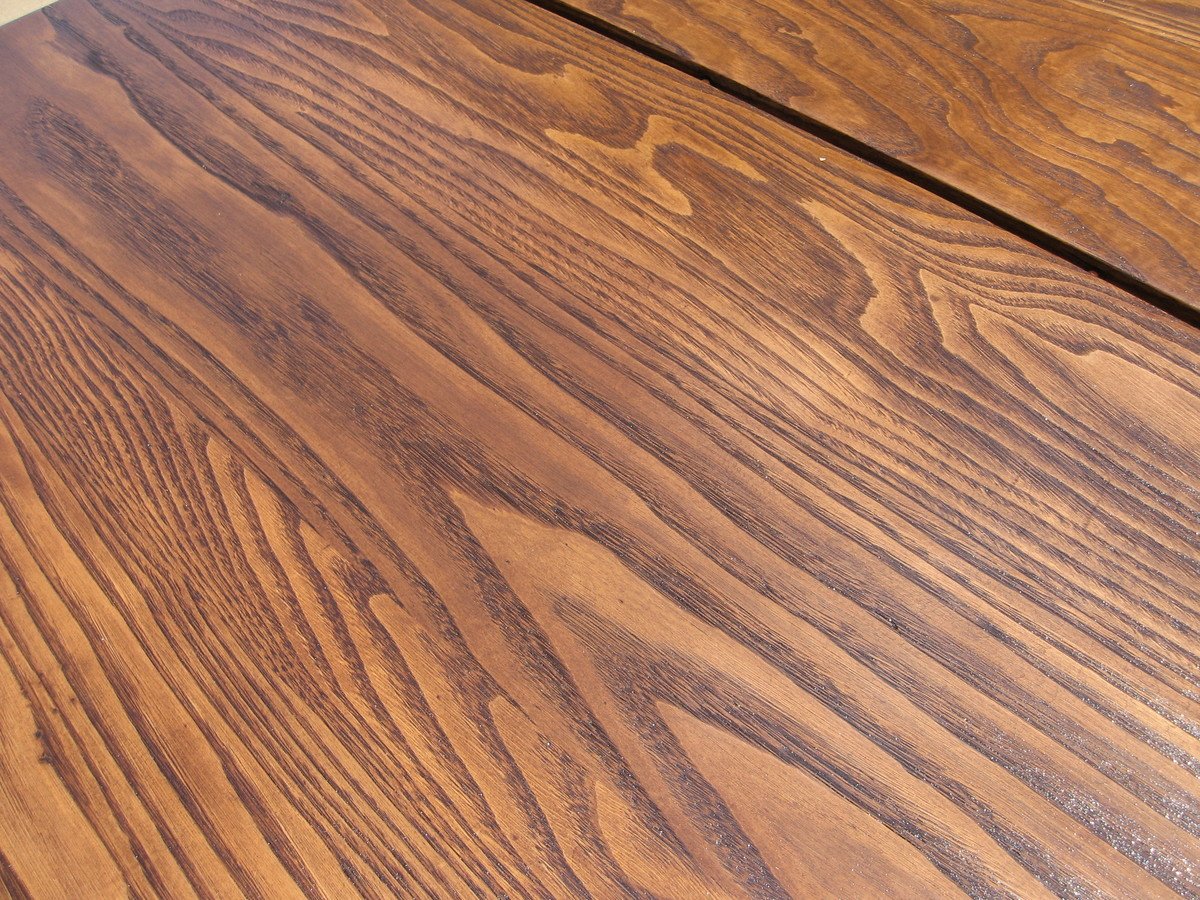
I then began staining with Minwax Aged Oak gel stain. I used 2 coats on parts and up to 4 coats on other parts trying to get a uniform appearance to the wood. I used between 3 and 6 coats of Minwax quick drying polyurethane on the table. I sanded with 220 and 320 grit sandpaper between coats. I think it turned out pretty well.
The only thing I really had to buy was new casters. I think I spent about $10 for them. Everything else was left over from other projects. I worked on the project here and there between other projects I was working on. I think I probably had around 20 hours total on the project. Stripping and sanding the legs took the longest time. Somehow I think dad is smiling down at me when I finish his projects he had on the back burner.
Sat, 04/05/2014 - 11:53
Hello,
I have almost the exact table that you featured on a different project where you refinished an antique white oak 5 legged fluted table. I was wondering if you could provide info. on removal of these antique castors? My husband is tall and we would love to remove the original castors and possibly add wood furniture feet to add to the height of this short beauty. Any info. would be much appreciated. Thank you for your time!

In reply to Antique caster removal by Coconutpalm79
Wed, 01/21/2015 - 22:58
I'm sorry I have not been on in a while. Most casters come in two parts. The wheel usually has a stem on it. This can usually be removed by simply pulling it down. If it is stubborn then you may have to use pliers or channel locks. Once this is removed, you will find a sleeve that fits into the table leg. These tend to rust over time. Also they become quite stuck. I usually use a very fine standard screw driver to work them out. Occasionally the outer rim of the sleeve breaks off. I have used a drill and drill bit that fits the same size of the inner diameter of the sleeve. Use a very slow RPM on the drill and it should come out. Good luck with your table.
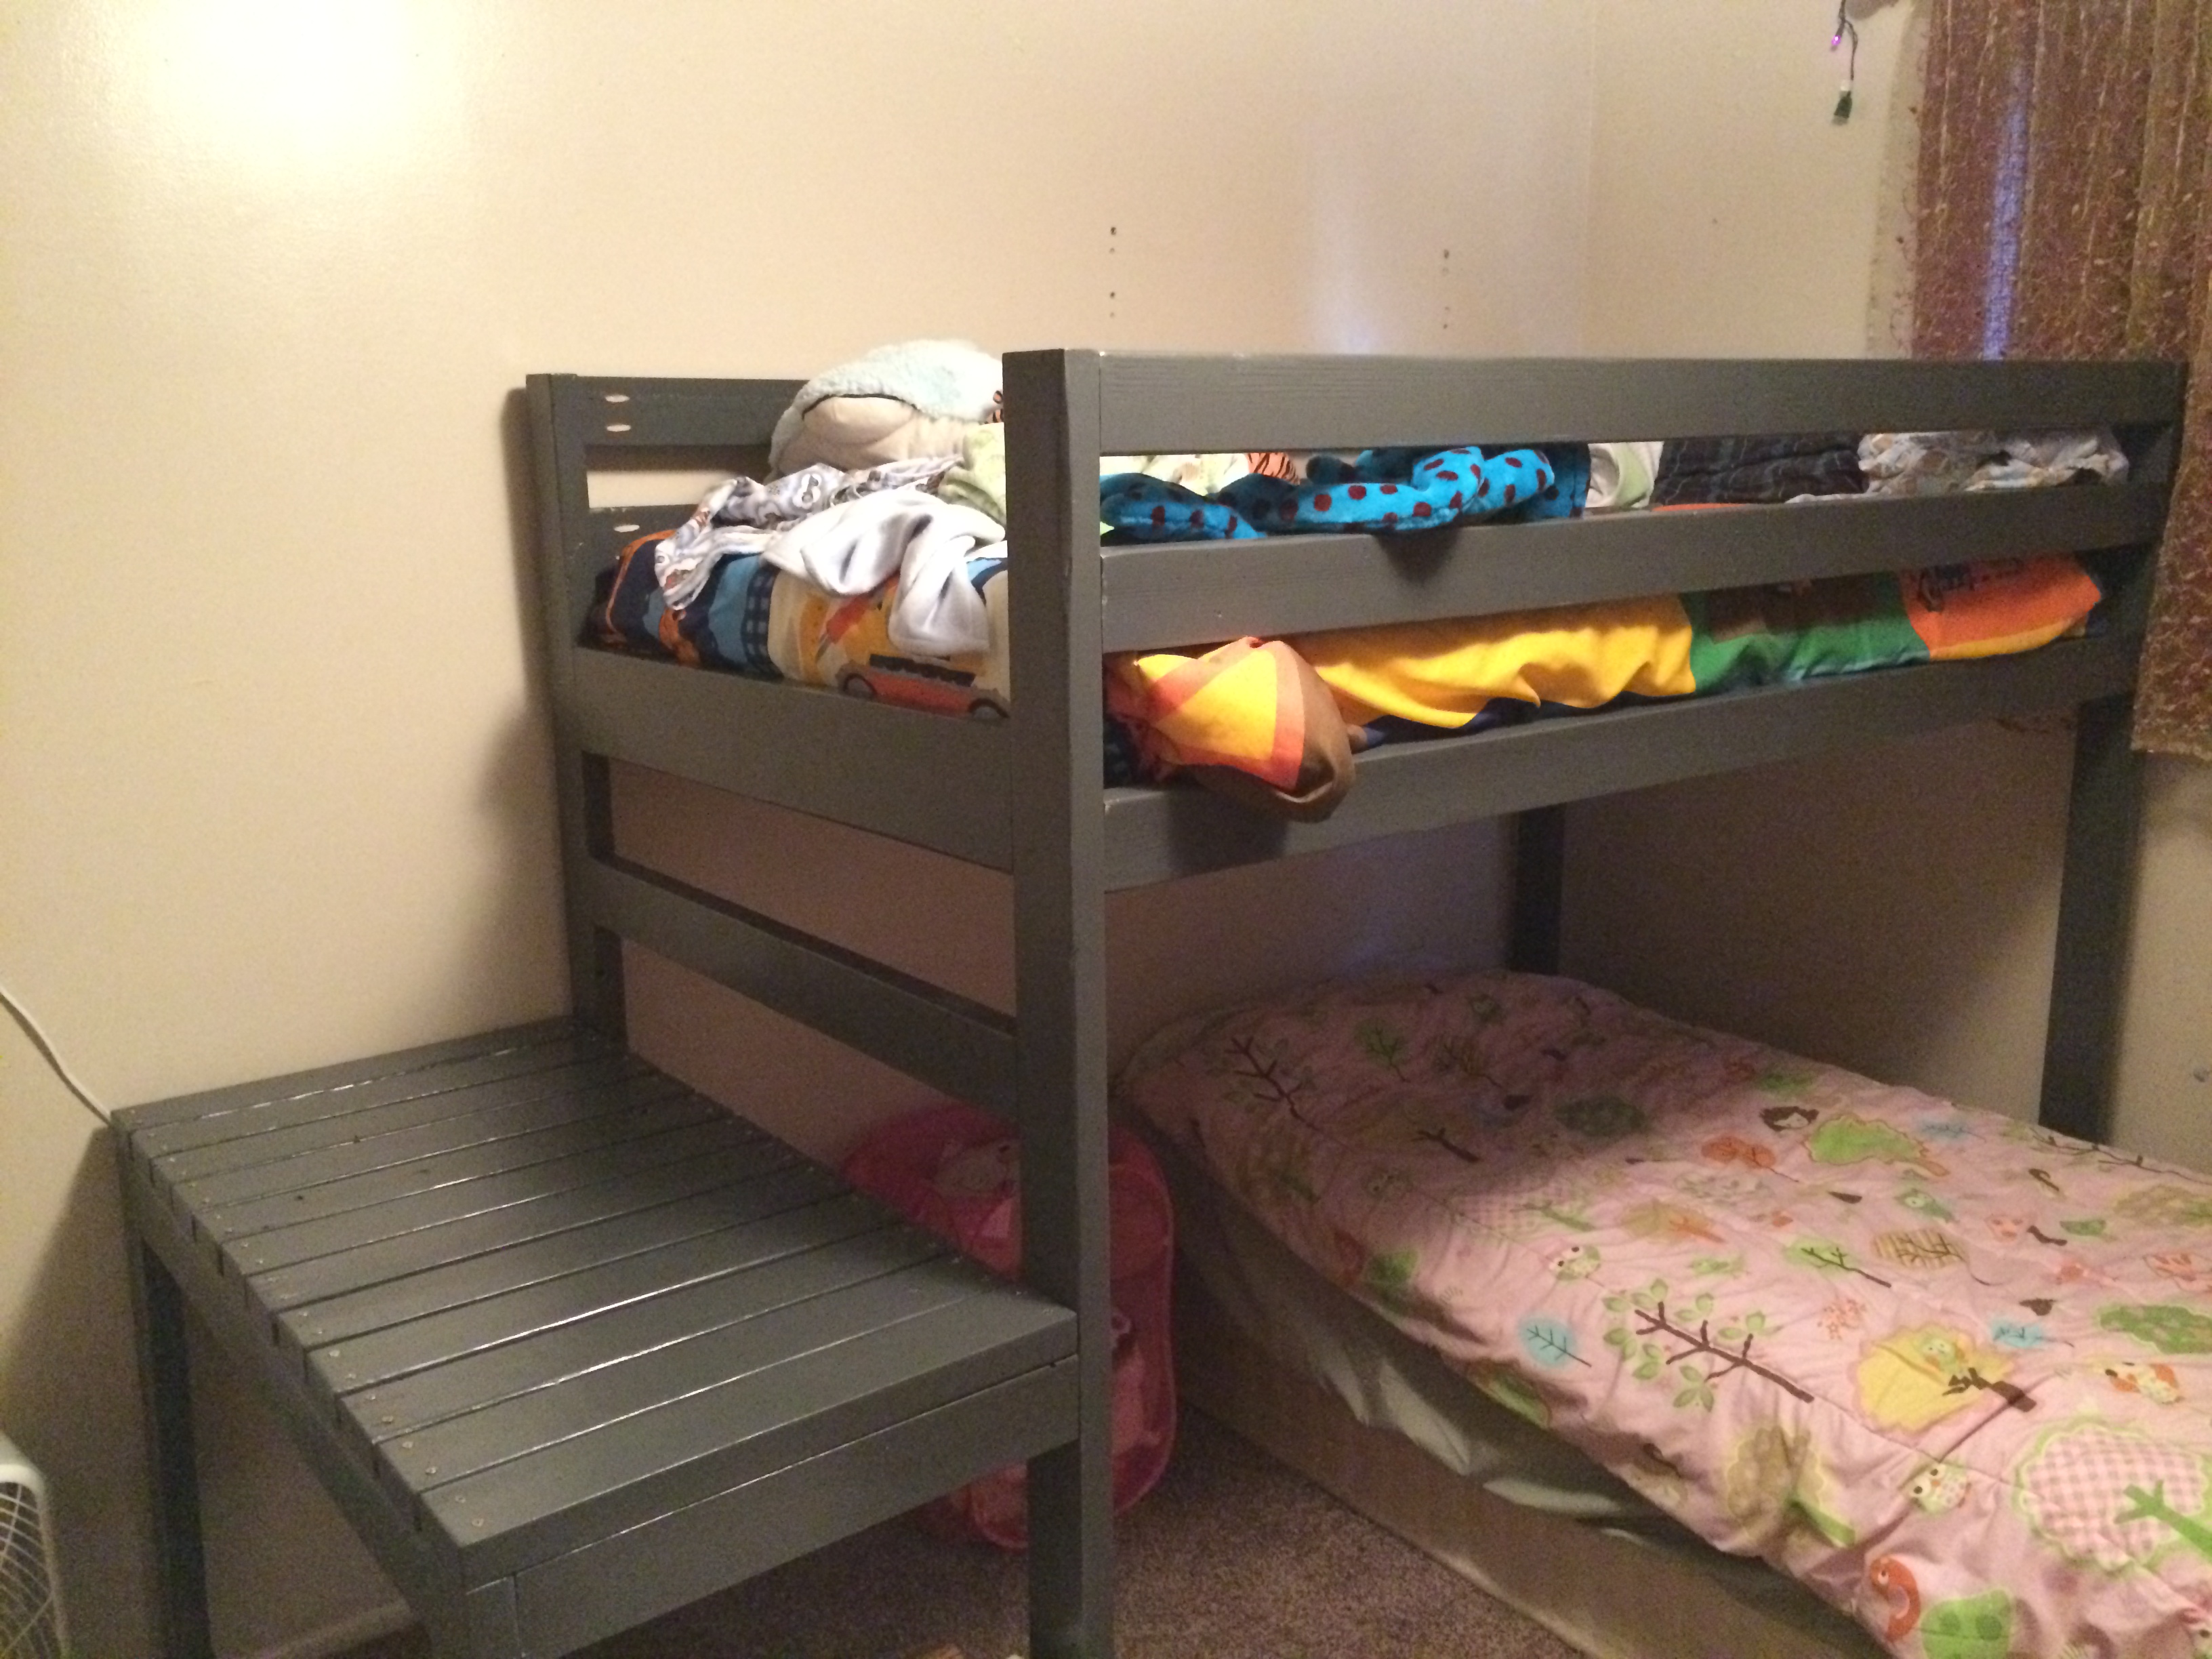
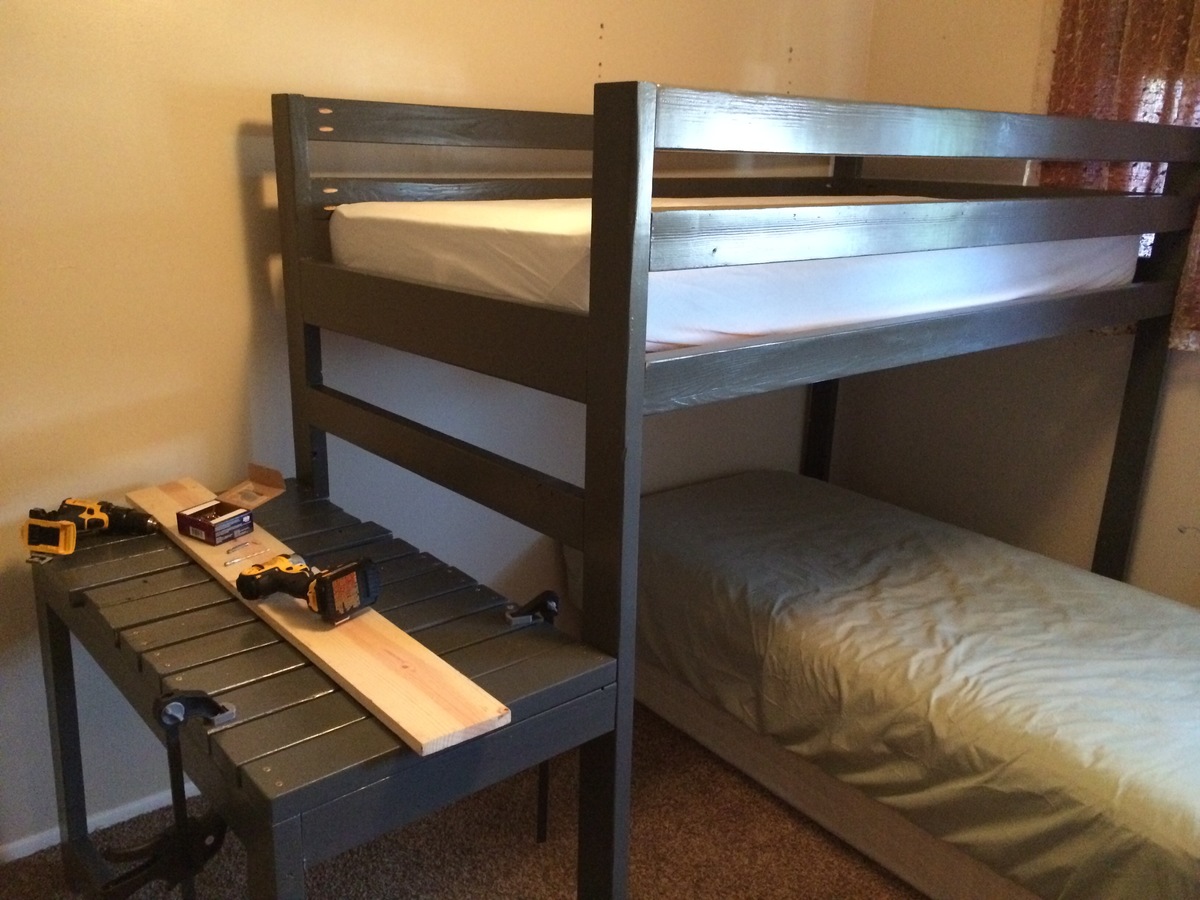
Made this loft bunk a few hours at a time, over the course of several months. Spare time and weather in Utah has been less than cooperative. I used some back pack strapping screwed to 1x3's for the mattress supports. For the finish I used 2 coats of paint with primer, and 3 coats of high use water base polyurethane. With a 5 and 7 year old I didn't want to be worried the paint would be getting dented and chipped off for a long time. I wanted to stain it originally but failed to remember to wipe off the wood glue before it dried so it got painted. This was a very fun project to build, my son loves it. Now to build another one for his sister.
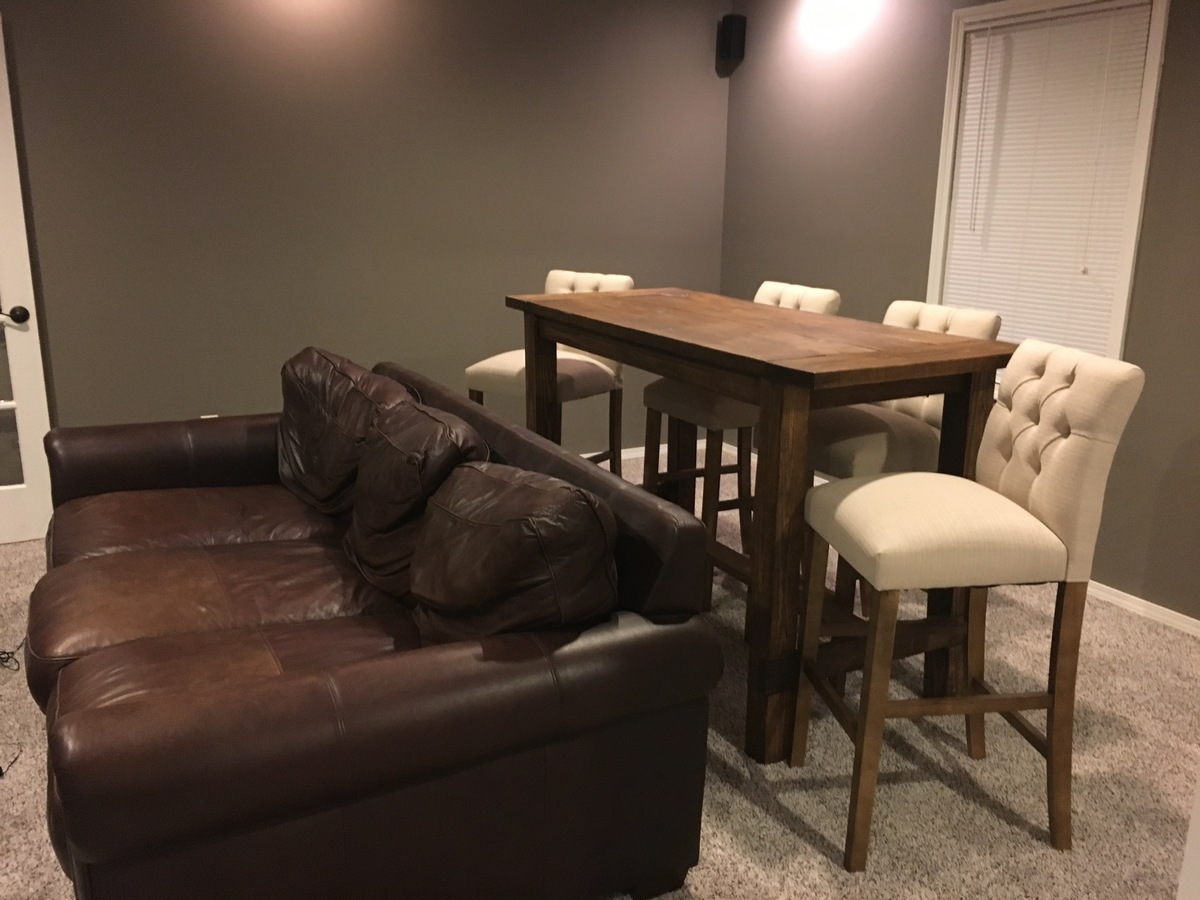
I made several changes to the original Ana White plan. I wanted to build a bar height table for my husband's man cave. I left the length at 5ft long, but instead of dinner table height, I raised it to be a bar top. It perfectly accomodates typical bar height stools, as seen in the picture.
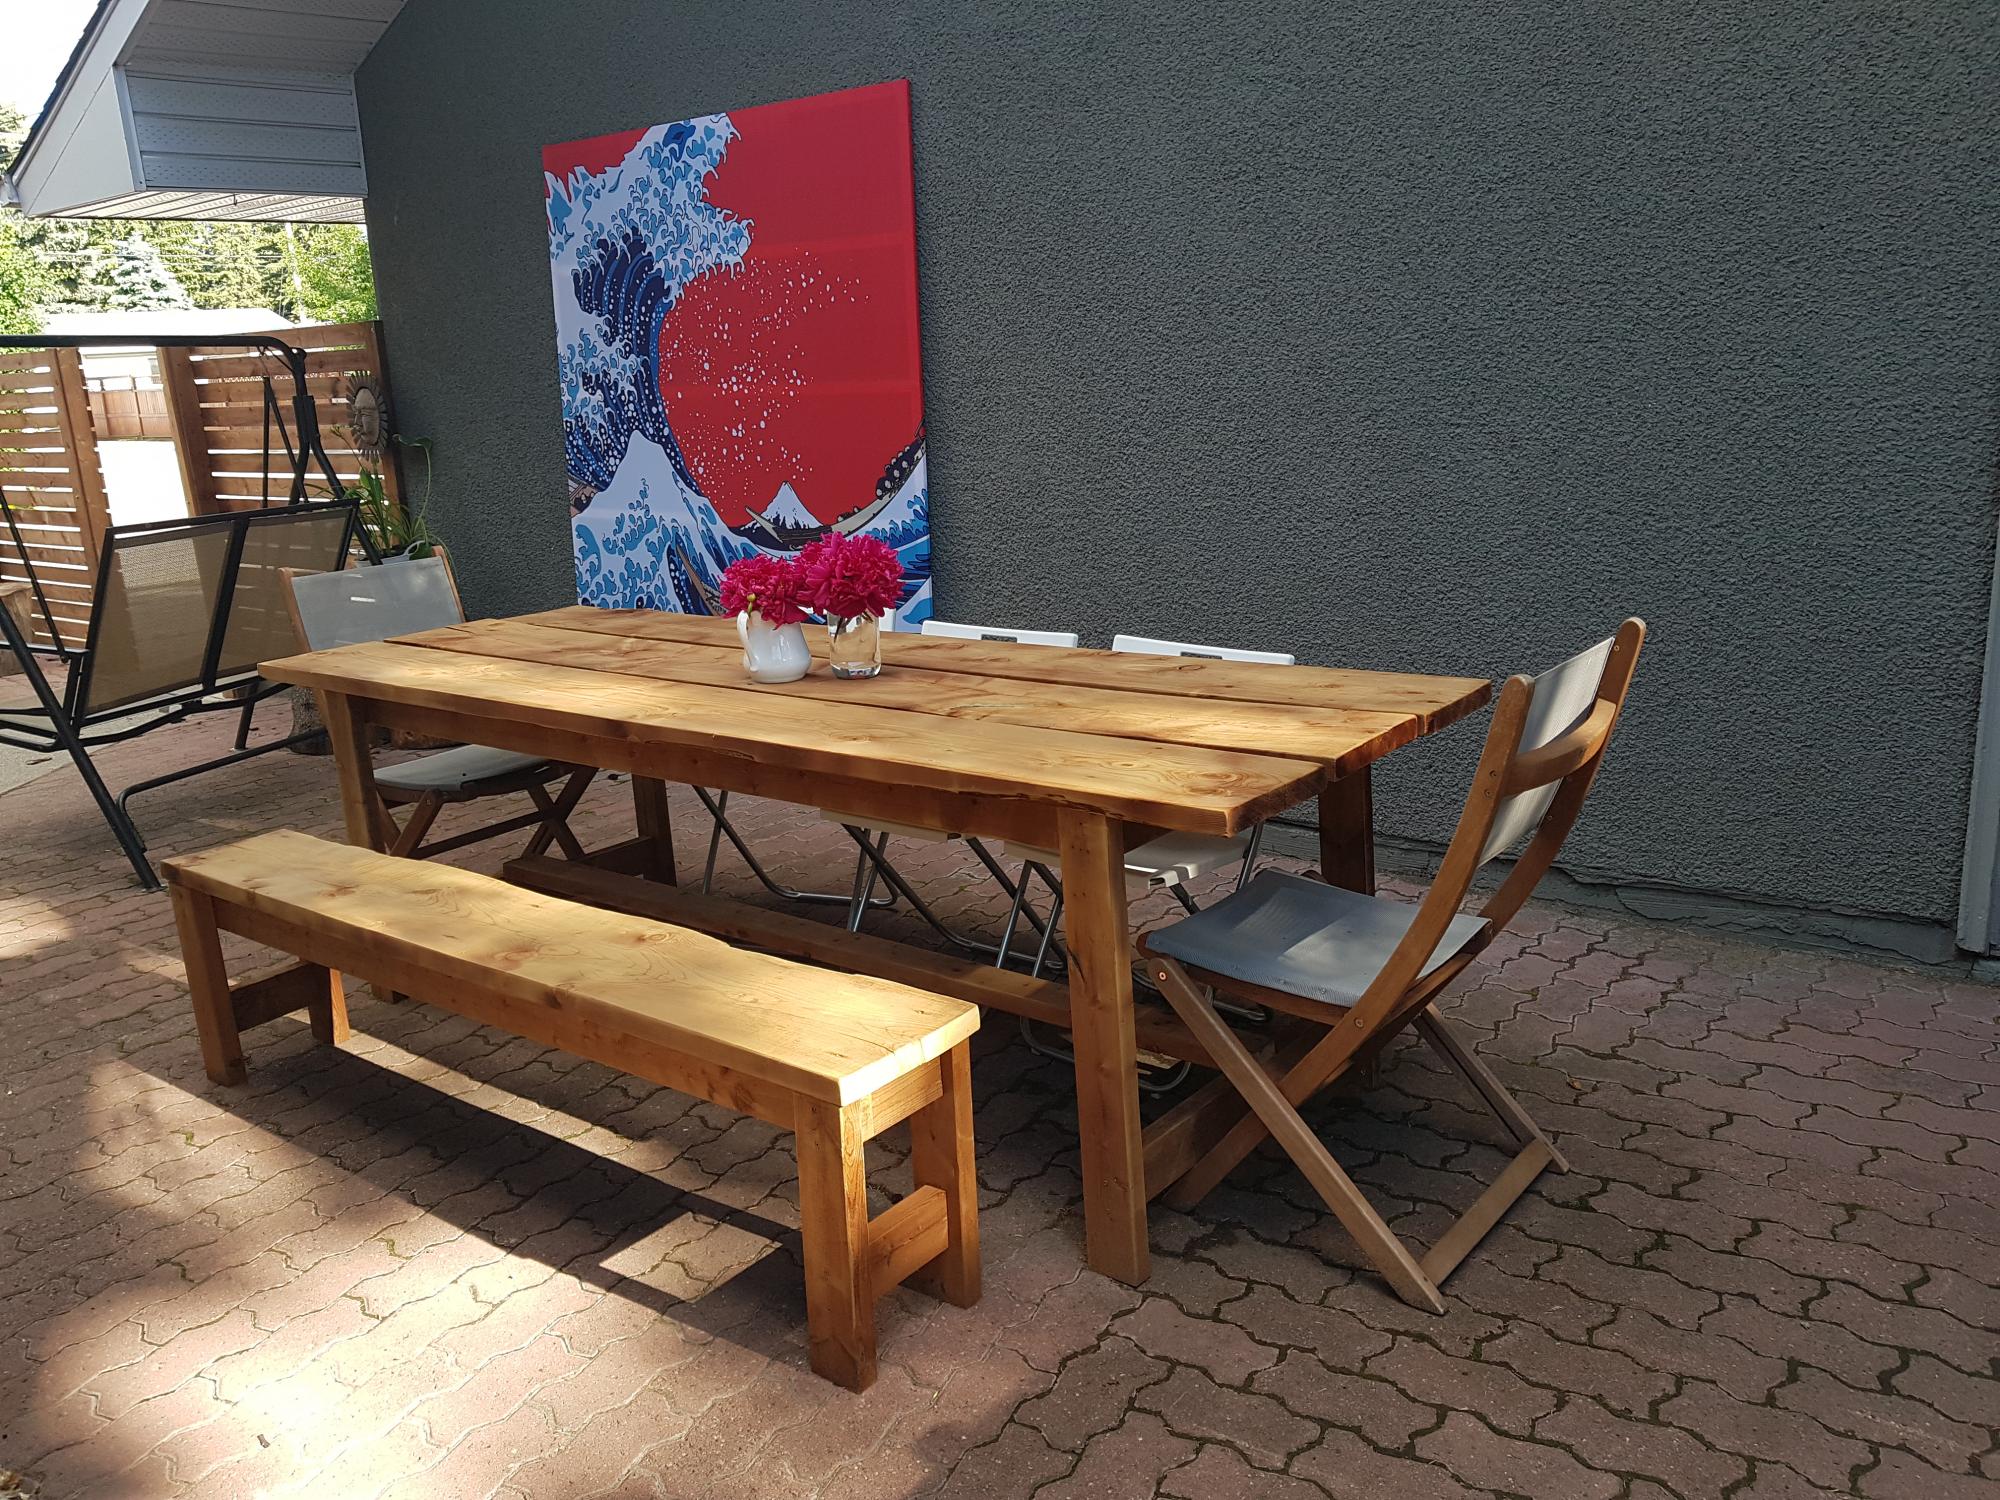
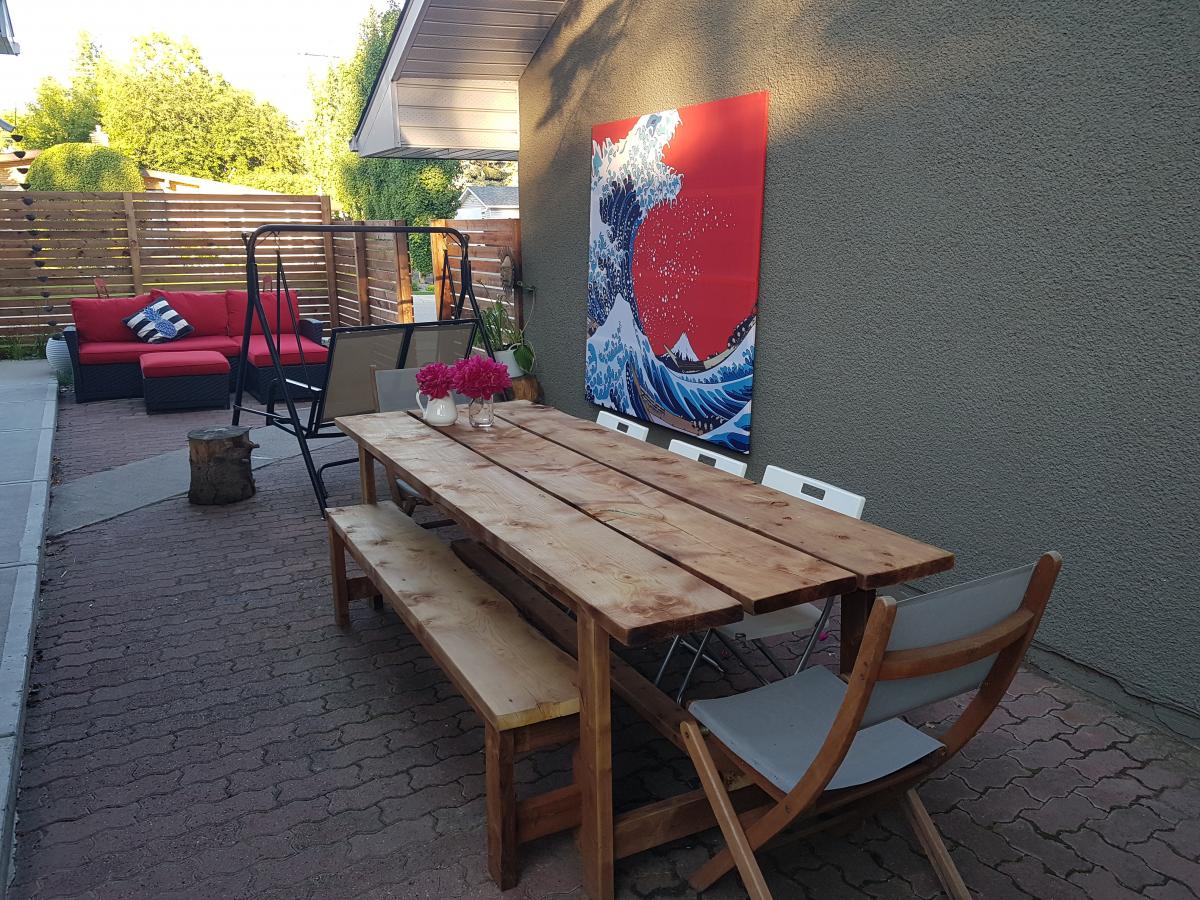
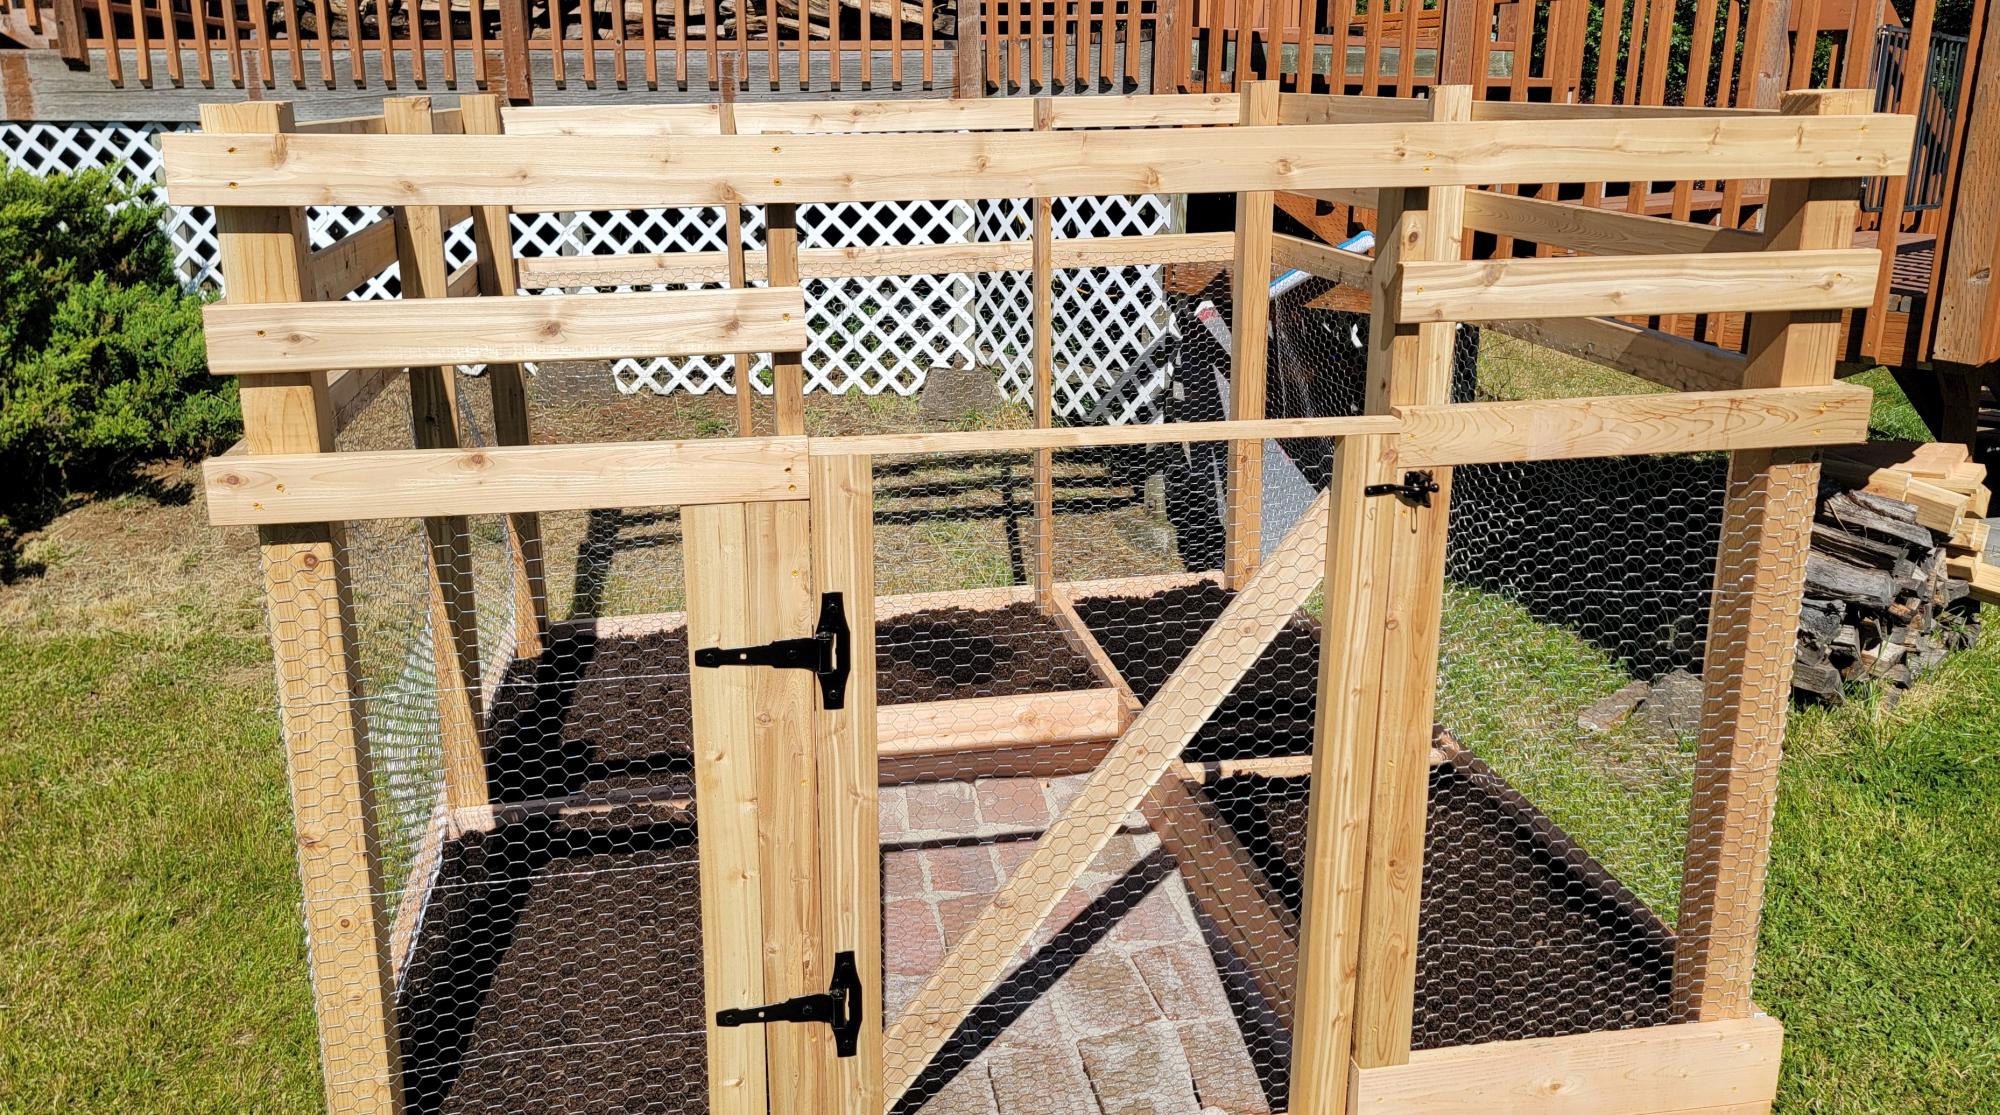
I needed an outdoor dining table for our very long narrow paved side yard. I looked just about everywhere for a table I liked and that was even reasonably priced. Gotta be honest, there was no way I was paying $1000.00 for something I didn't like. That's when I stumbled on the plans for this table on Pinterest. I have never built furniture before, but I had just finished building a privacy fence so I thought I would (could) take it on. It took me about 4/5 hours, by myself, to make the table and I practically burst into tears when I saw how stunning it was!! I altered things a bit and used three 12-inch boards rather than six 6-inch boards (and I used 1/2 inch spacers so that rain water could move through). I was so excited by the table, that the next day, I built the bench! Same alteration as well. I used a single 12-inch wide board (with a gorgeous raw edge--sanded for comfort and safety) for the seat. I'm so damn proud!!! Thank you so much for this spectacular plan! It has inspired me. My next project is the Farm House bed frame for my teen daughter!!!
First time woodworker so it’s not the prettiest thing but looks good!
Gabe
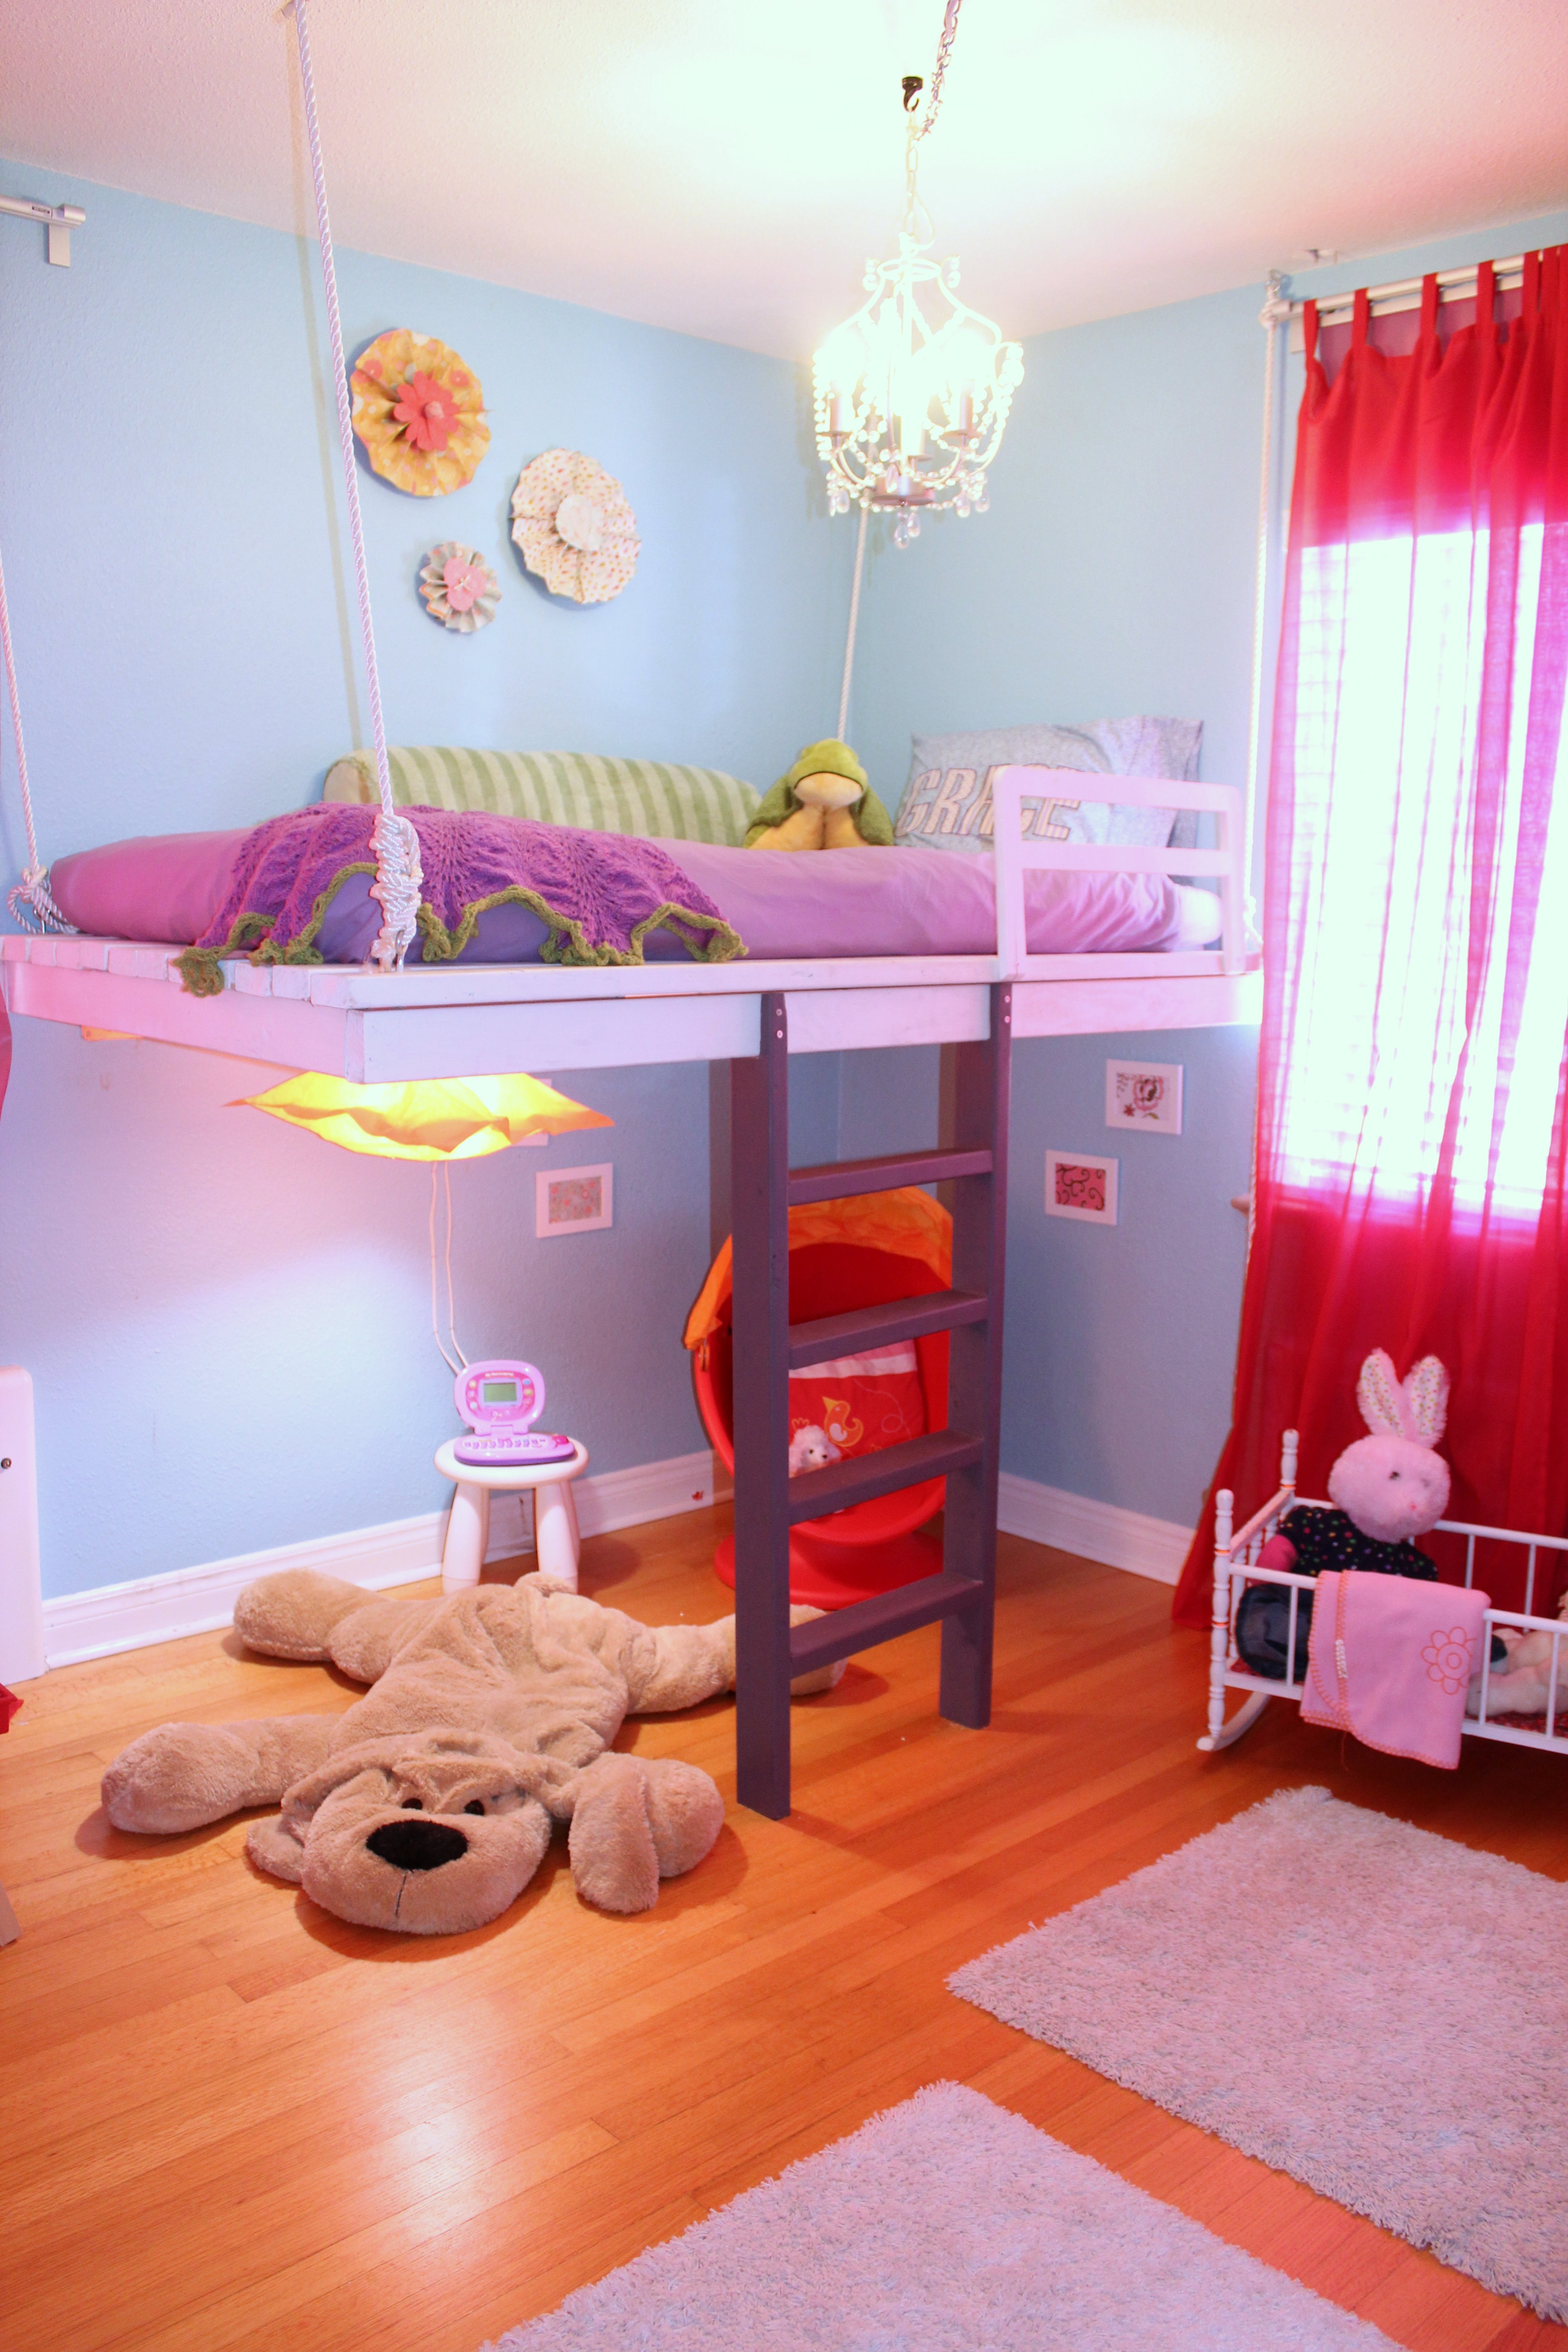
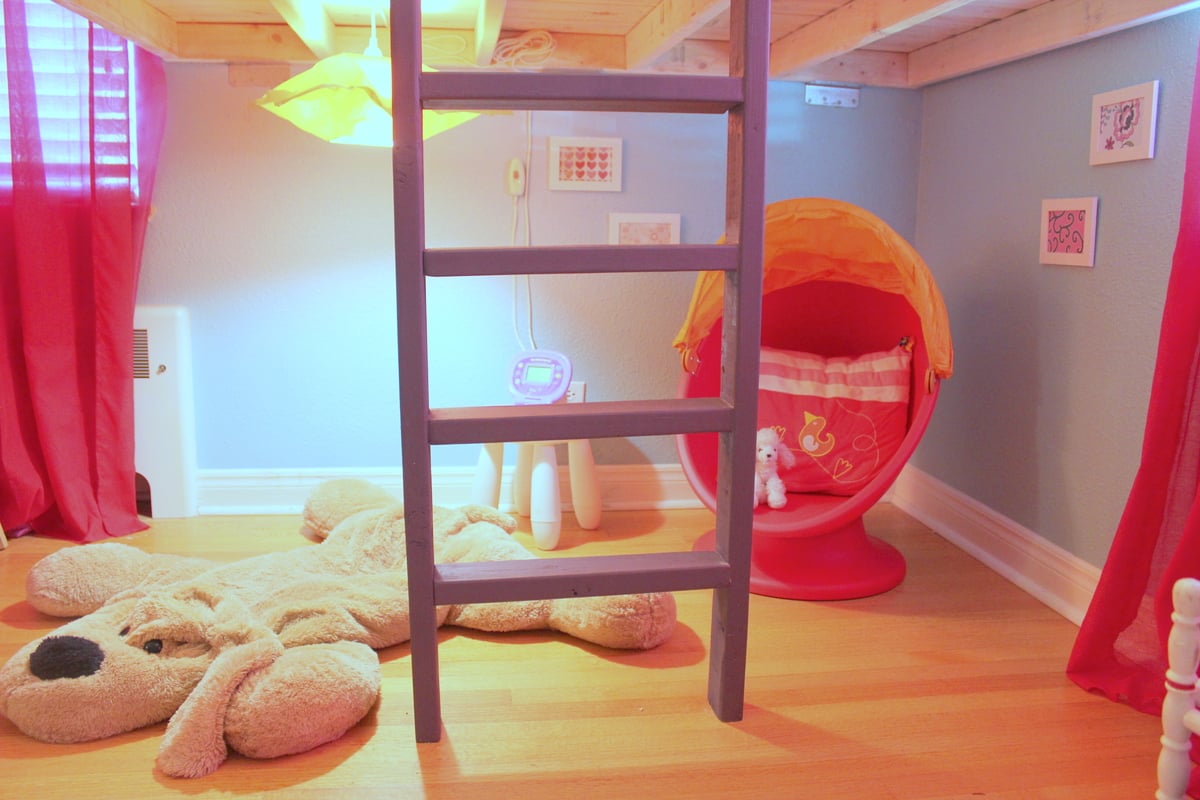
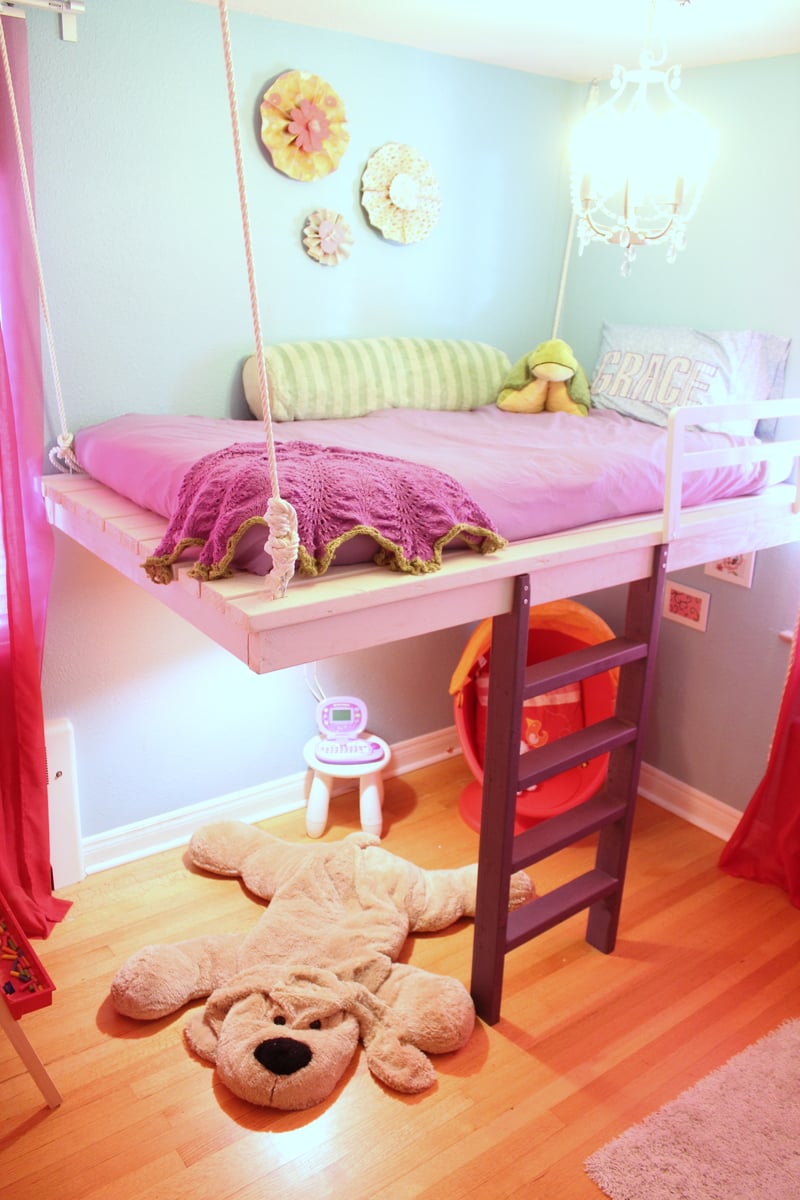
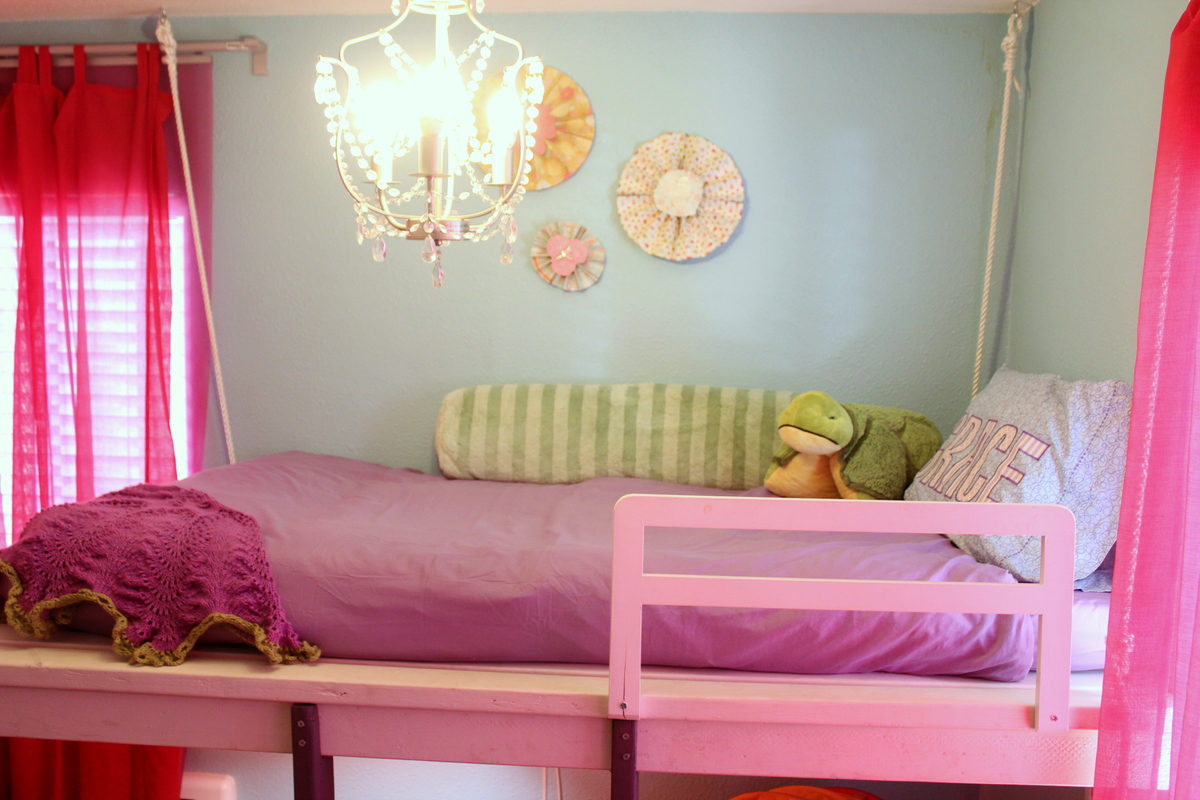
When it was time for a big girl bed for my daughter I was so excited because I had been WANTING to make the Hanging Loft Bed since first spying it on The Bumper Crop and Ana White. I'm a novice so this was the perfect first project for me and my daughter LOVES it. If you have unique space challenges in any of your bedrooms this is the bed for you.
Wed, 09/12/2012 - 23:10
That turned out great! Very well done first project.
Tue, 12/18/2012 - 17:17
What a great idea! I can't wait to make one for my little girl next weekend. Can I ask a few questions? How did you affix it to the ceiling? I will not be able to get on top of the ceiling so I will be finding he joists with a stud-finder. I assume you screwed in eye-bolts?
How did you make the rail and ladder? Any help is GREATLY appreciated. Thanks so much for the idea, my Daughter is going to love it!
Thanks,
Rob
Tue, 12/18/2012 - 20:48
Thanks Rob!
I replied to you on the blog...
Jennifer
Thu, 08/01/2013 - 06:03
I just wanted to say that I just came across this and absolutely love it! My daughter and our new baby will be sharing a room and now I have inspiration on how to make it work! Can't wait to try this out! Love the ladder...how did you make the ladder?
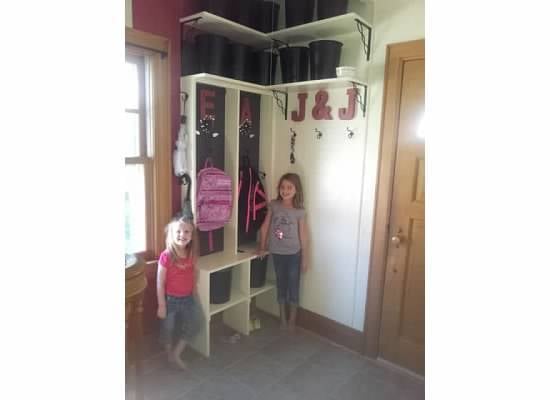
I had always wanted a bigger entry way at my front door. Last year my husband was gone for 3 weeks (military training) and I had the perfect opportunity to make it happen.
as you can see the original closet took up half of the entry way, and was not very functional as far as storage. It was always crammed full of stuff and there was just no good way to organize it.
With the help of my mom and sister (huge thanks) we tore out the closet, put in a new floor in the entry way, built a bench with nooks for my girls, shelves below for shoes, and shelves above for storage containers.
The new floor was added as we found after the closet was out that the oak flooring did not continue under where those walls had been, and after consulting with a wood floor specialty guy, I was informed that the flooring in my house has not been made for some 50 years now. We added new flooring (which has been better with wet shoes anyways) and moved on.
The bench/ shelf was built by us with the size of the space in mind, and the height of the tallest shoes also in mind (my husbands boots) there are two cubbies and enough bench to seat one at a time to get shoes on or off. the back of the cubbies is painted in magnetic paint. very helpful when the girls need to take notes to school with them, I simply hang them up and they stuff them in their back packs on the way out the door. we have found that friends pictures go up through the school year there too. The round black containers that you see are perched along the top two shelves. They are $1 discounted, plastic garbage cans that I spray painted black to match. They have recently been labeled, gloves, hats, scarves, flip flops, out door chalk, etc. the very top shelf which you need a step stool to reach hold the off season bins and the lower shelf holds the in season bens. there are also 2 bens below the bench seat to hold, flip flops or gloves and hats for easy access for my girls.
Over all, the overhaul (:) has been great. people can now actually get into my house and out of the weather more then one at a time. the storage is much more efficient, and I feel much cleaner looking.
and best of all, because I like to change things up all the time, I can change out the bins to square or rectangle and any other type of material, anytime I like, I wont always have to stick with the repurposed garbage cans that I am using now. although these suckers hold a lot more then I ever would have thought.
This was my first really big project. and I am pretty proud of it. - And my husband actually thought he was in the wrong house when he came home from training :)


72L x 18W x 36H
Made a few subtle changes. Excellent plans. Clear and easy to follow. Thank you.
Cynthia Dinardi (Oregon)
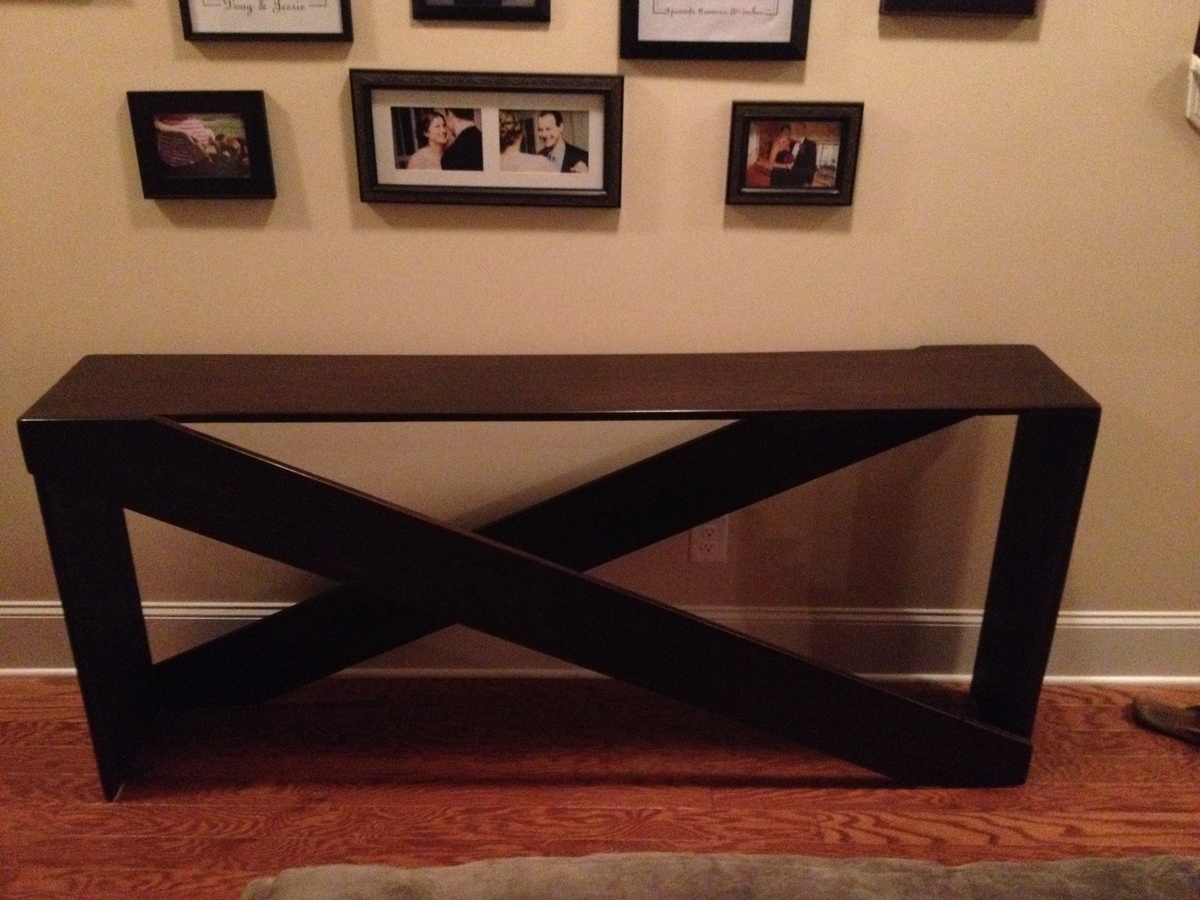
mini farm house tables
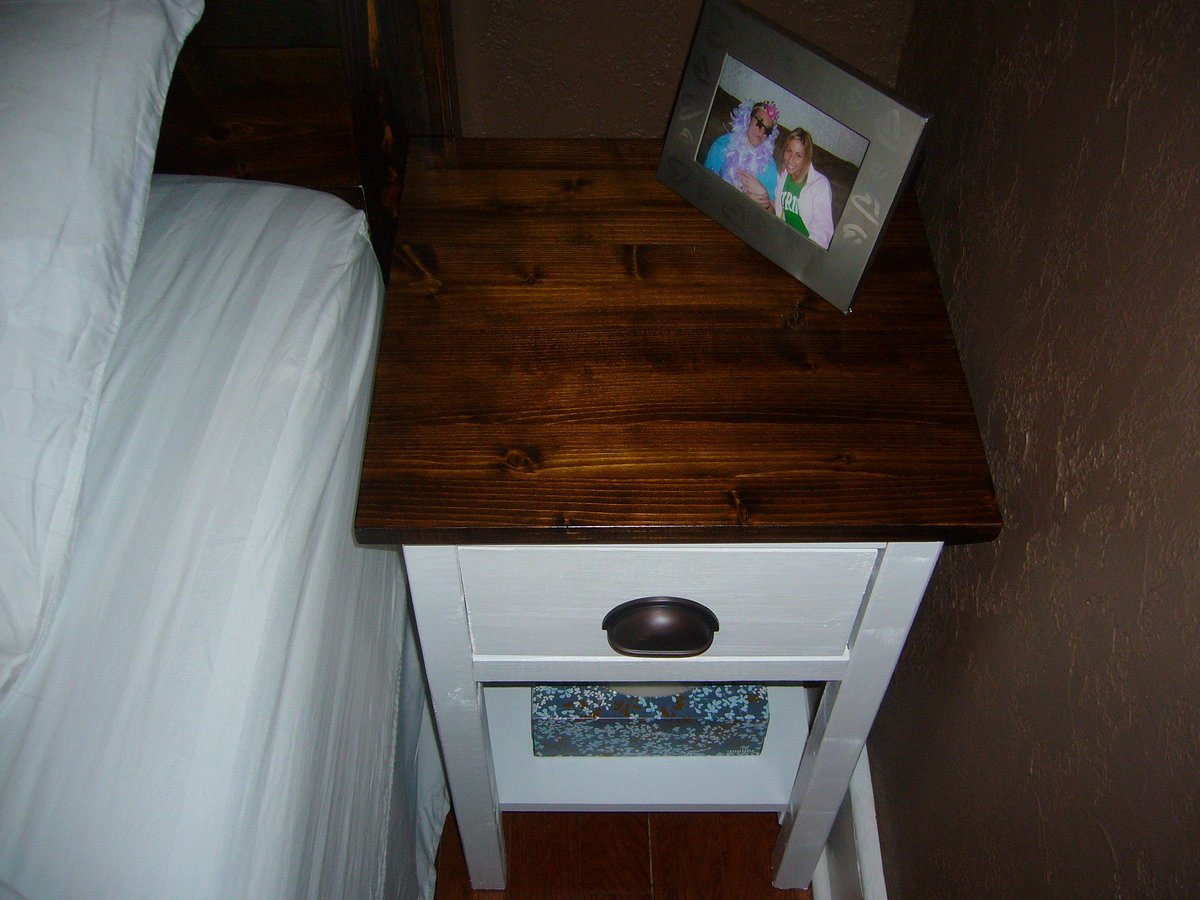
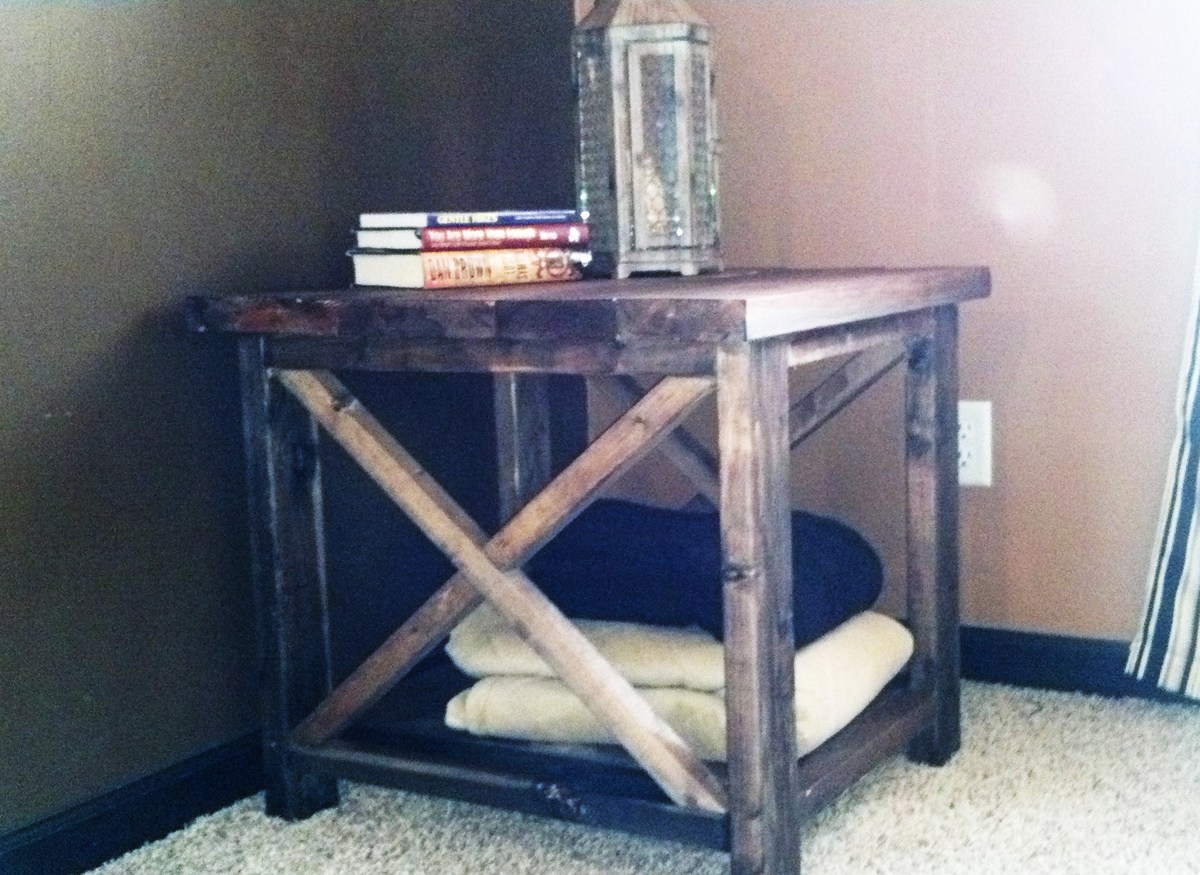
My brother-in-law built this plan as an end table for my wife and I as a present. We wanted to build a hallway table, so I decided to modify the plan to fit in the long hallway. It looks great and is very sturdy. I listed it as a weekend project, but it was VERY easy and fast to build, but the finishing took a while because of so much surface area & drying time.
Took be about 2.5 weeks to build this bed, working evenings and a couple full days on the weekend. I HIGHLY recommend getting a Kreg Jig. It made life so much easier.
To go from a queen to a king, simply add 16" to all of the width pieces. All of the length pieces will be the same for a queen and king.
I added one 2x2 support beam down the middle of the bed, with two 16 3/4 inch legs attached to it, for added support. I screwed the slats into all 3 of the 2x2 support beams.
The drawers are the trickiest part. Make sure you follow the plan in order, waiting to install the drawers until after you have screwed the storage bins to the headboard and footboard.
Stained with Minwax Early American, and sealed with Polyurethane. In the process of completing a 2nd to make a set
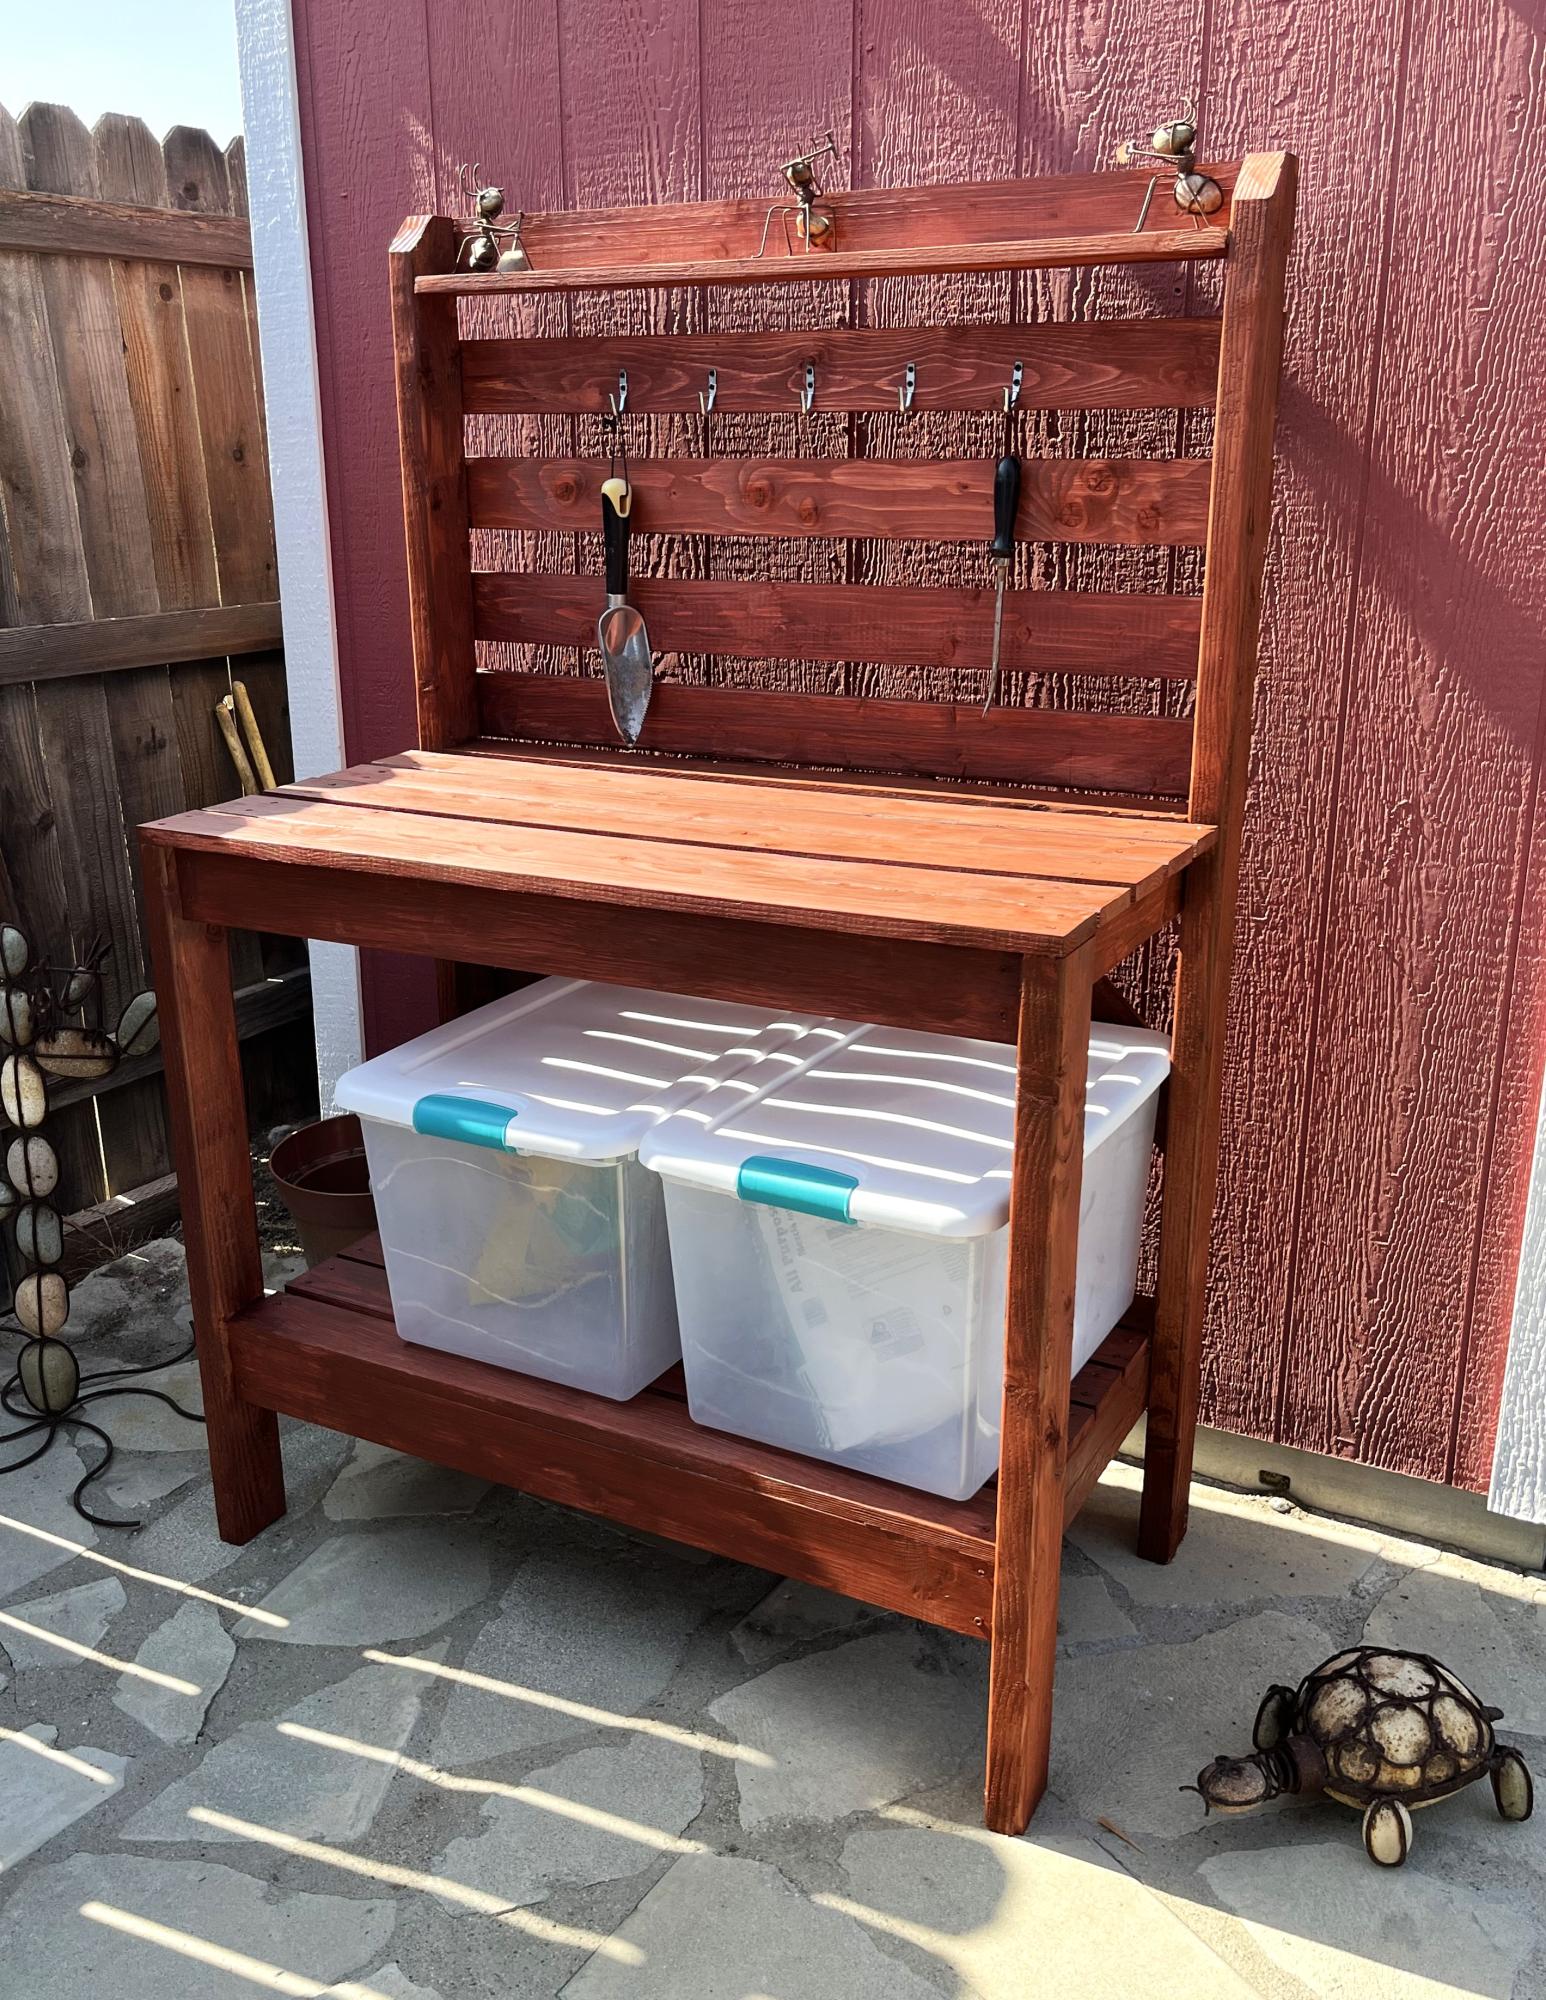
2X4 Simple Potting Bench.