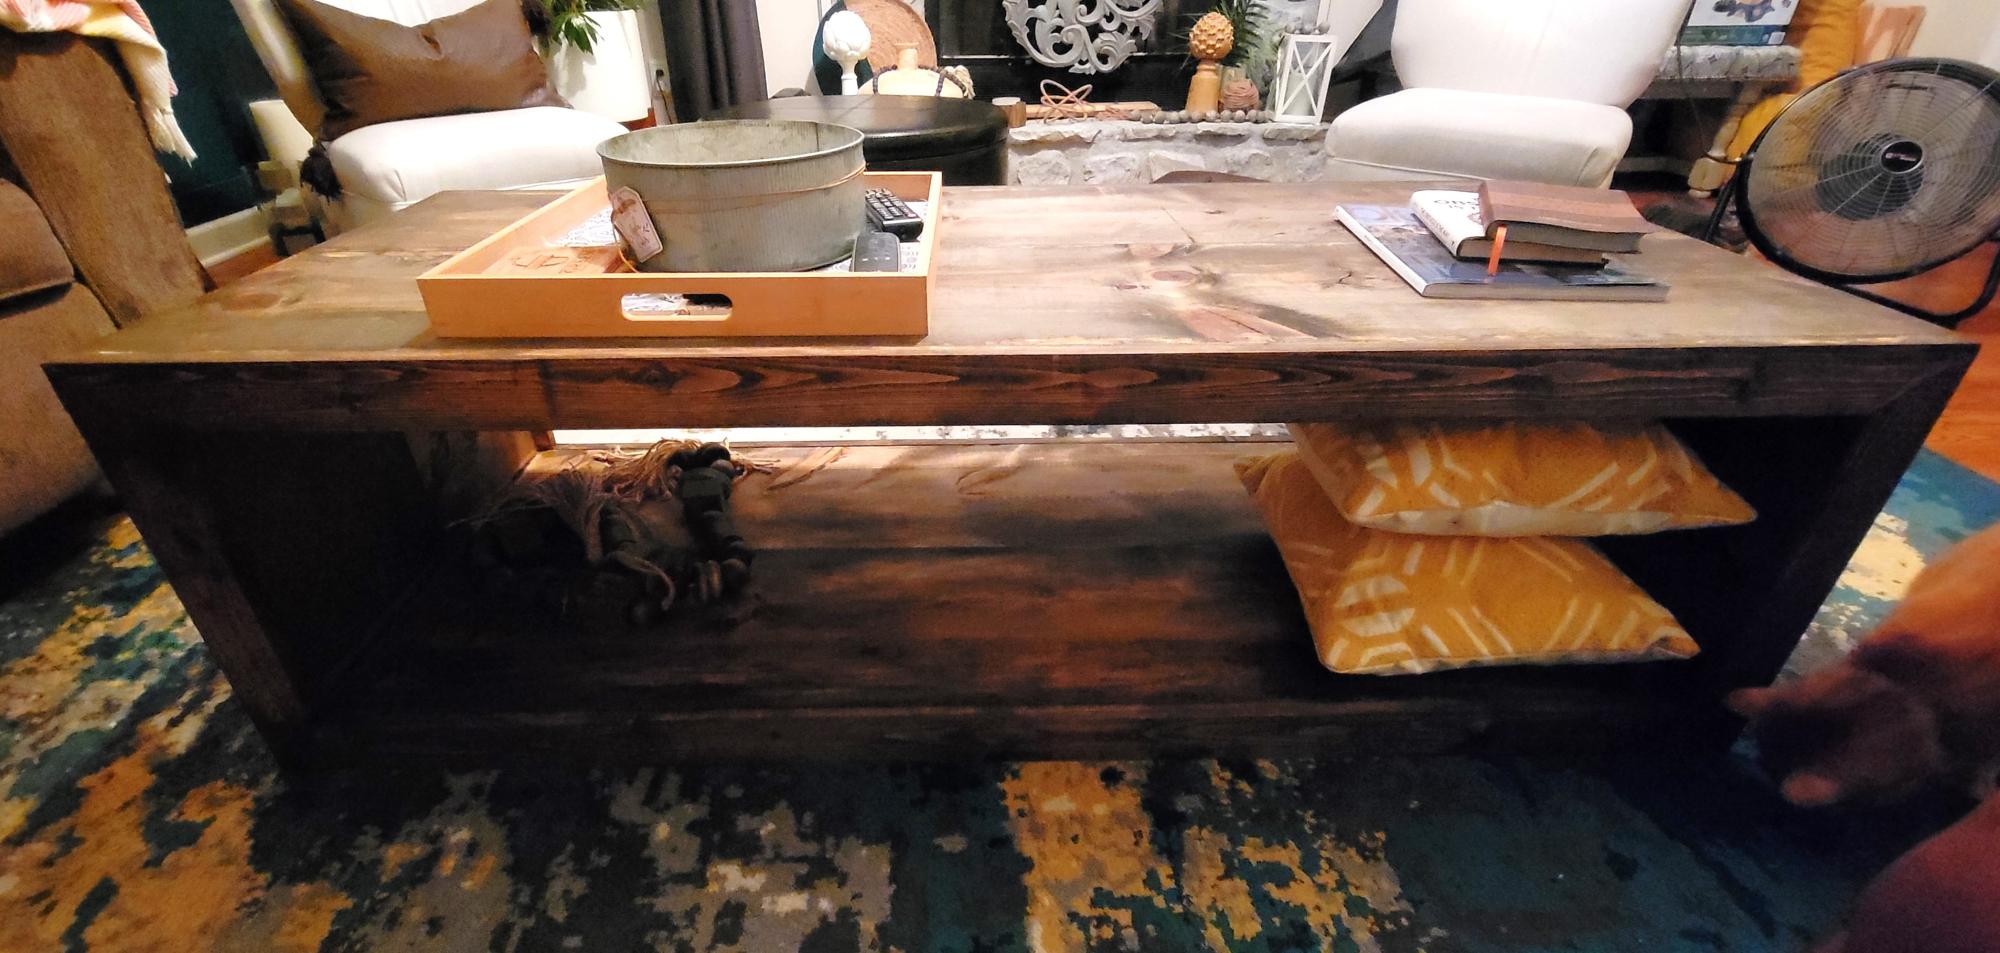
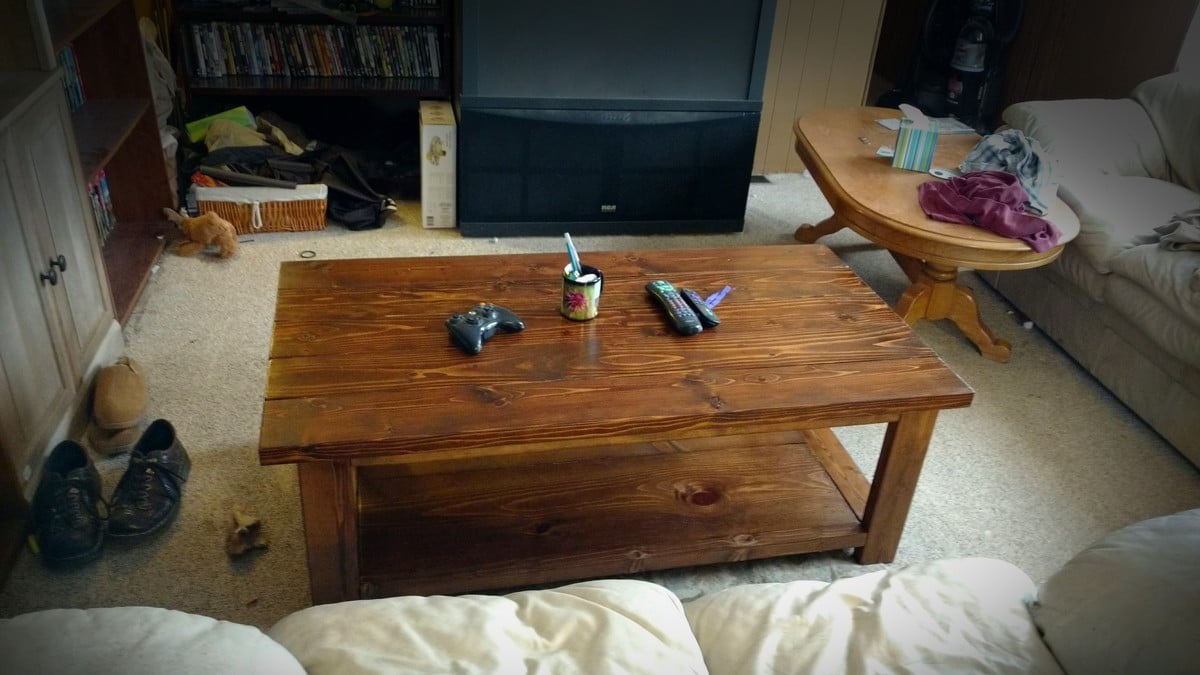
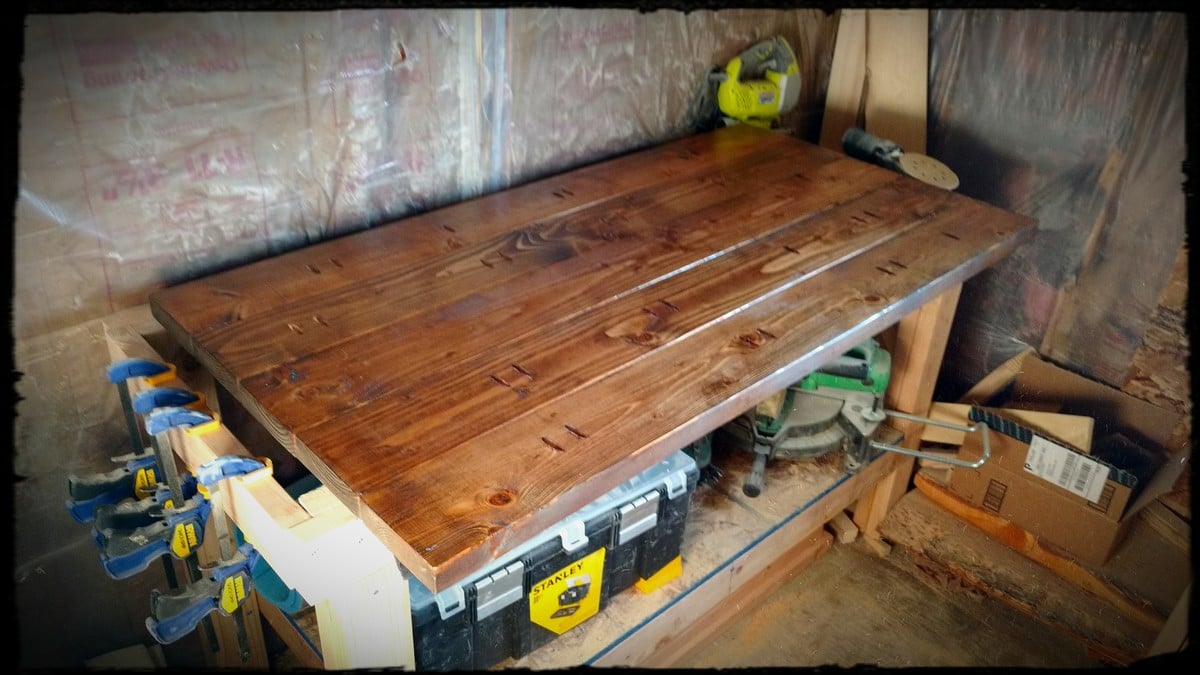
Waterfall Coffee Table
Ana White Coffee table.
Vallerie Brown
Built from Plan(s)
Ana White Coffee table.
Vallerie Brown
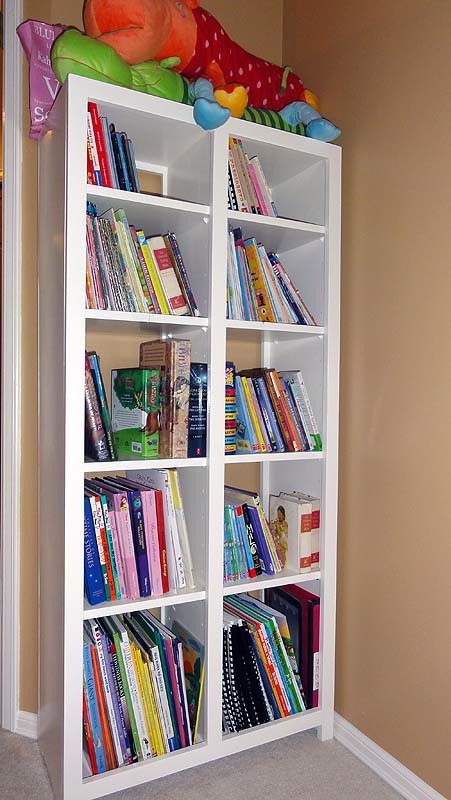
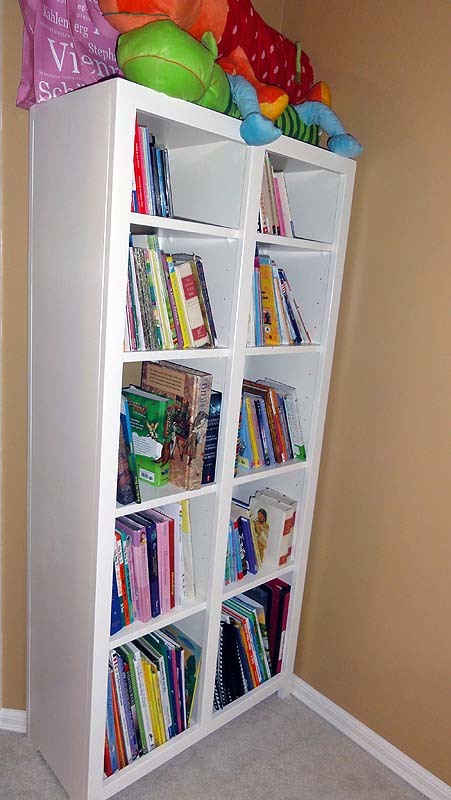
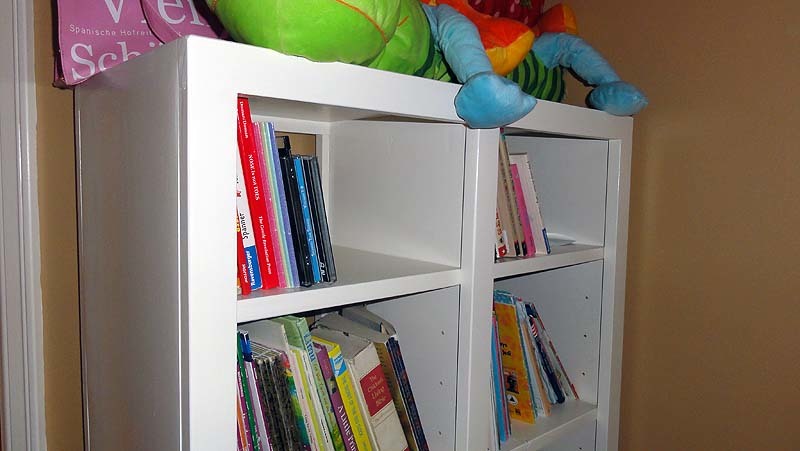
My youngest needed a new bookcase so bad! All she had was an old baby bookcase that hardly fit her books anymore. I was so excited to see Ana's plans for the simple cubby bookcase. Yay! I made it a smidge narrower to fit the space and taller so she could have more adjustable cubbies. :)
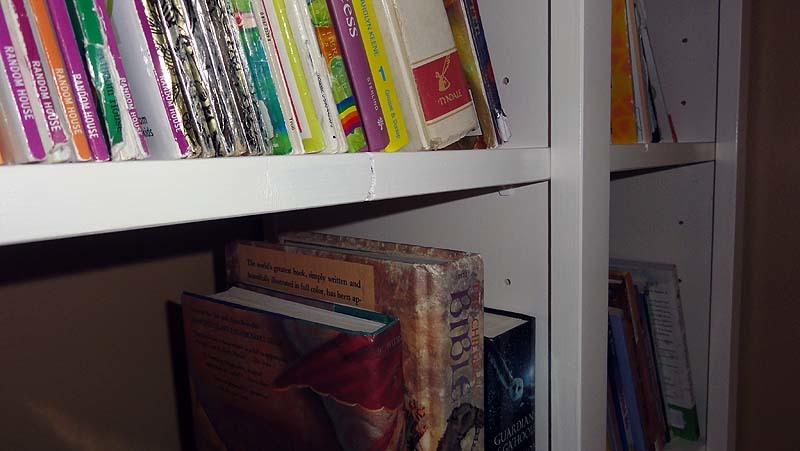
I used pine 1x12 boards for the box and pine 1x2's for the trim. I used my Jig-It Adjustable Shelving Jig and drilled every other hole. Didn't feel like I needed quite as much "adjustability" for books. :-)
I wanted a more rustic look, so I left a lot of brush strokes on purpose and didn't fill any obvious knots in the wood. I really like how it turned out. :) When we were putting all of the shelves in, my daughter was so cute - she made sure all of the knots were facing OUTWARD so she could see them. She thought it looked neat that way.
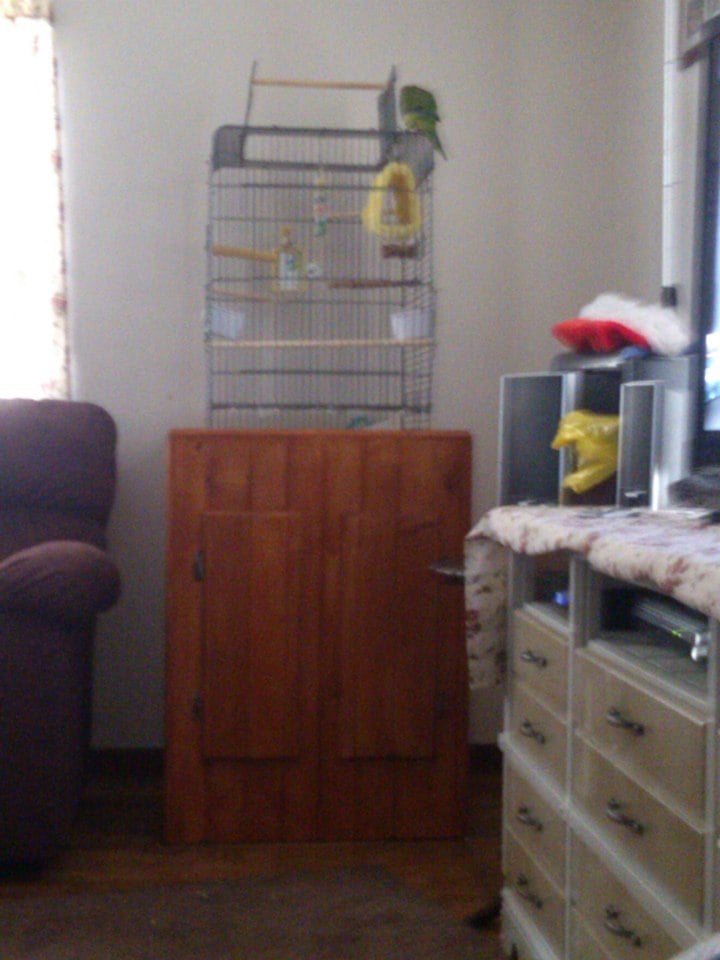
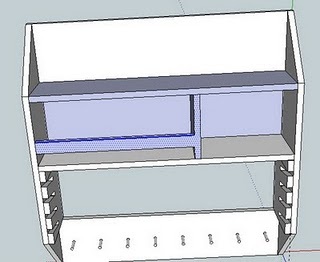
I wanted our bird's cage up higher and on something that the kids wouldn't be able to tip over. So my Husband came up with this. Its car siding. and stained. it has 2 hinged doors and a shelf.

Loved doing this build, I have been thinking of making these for a while.
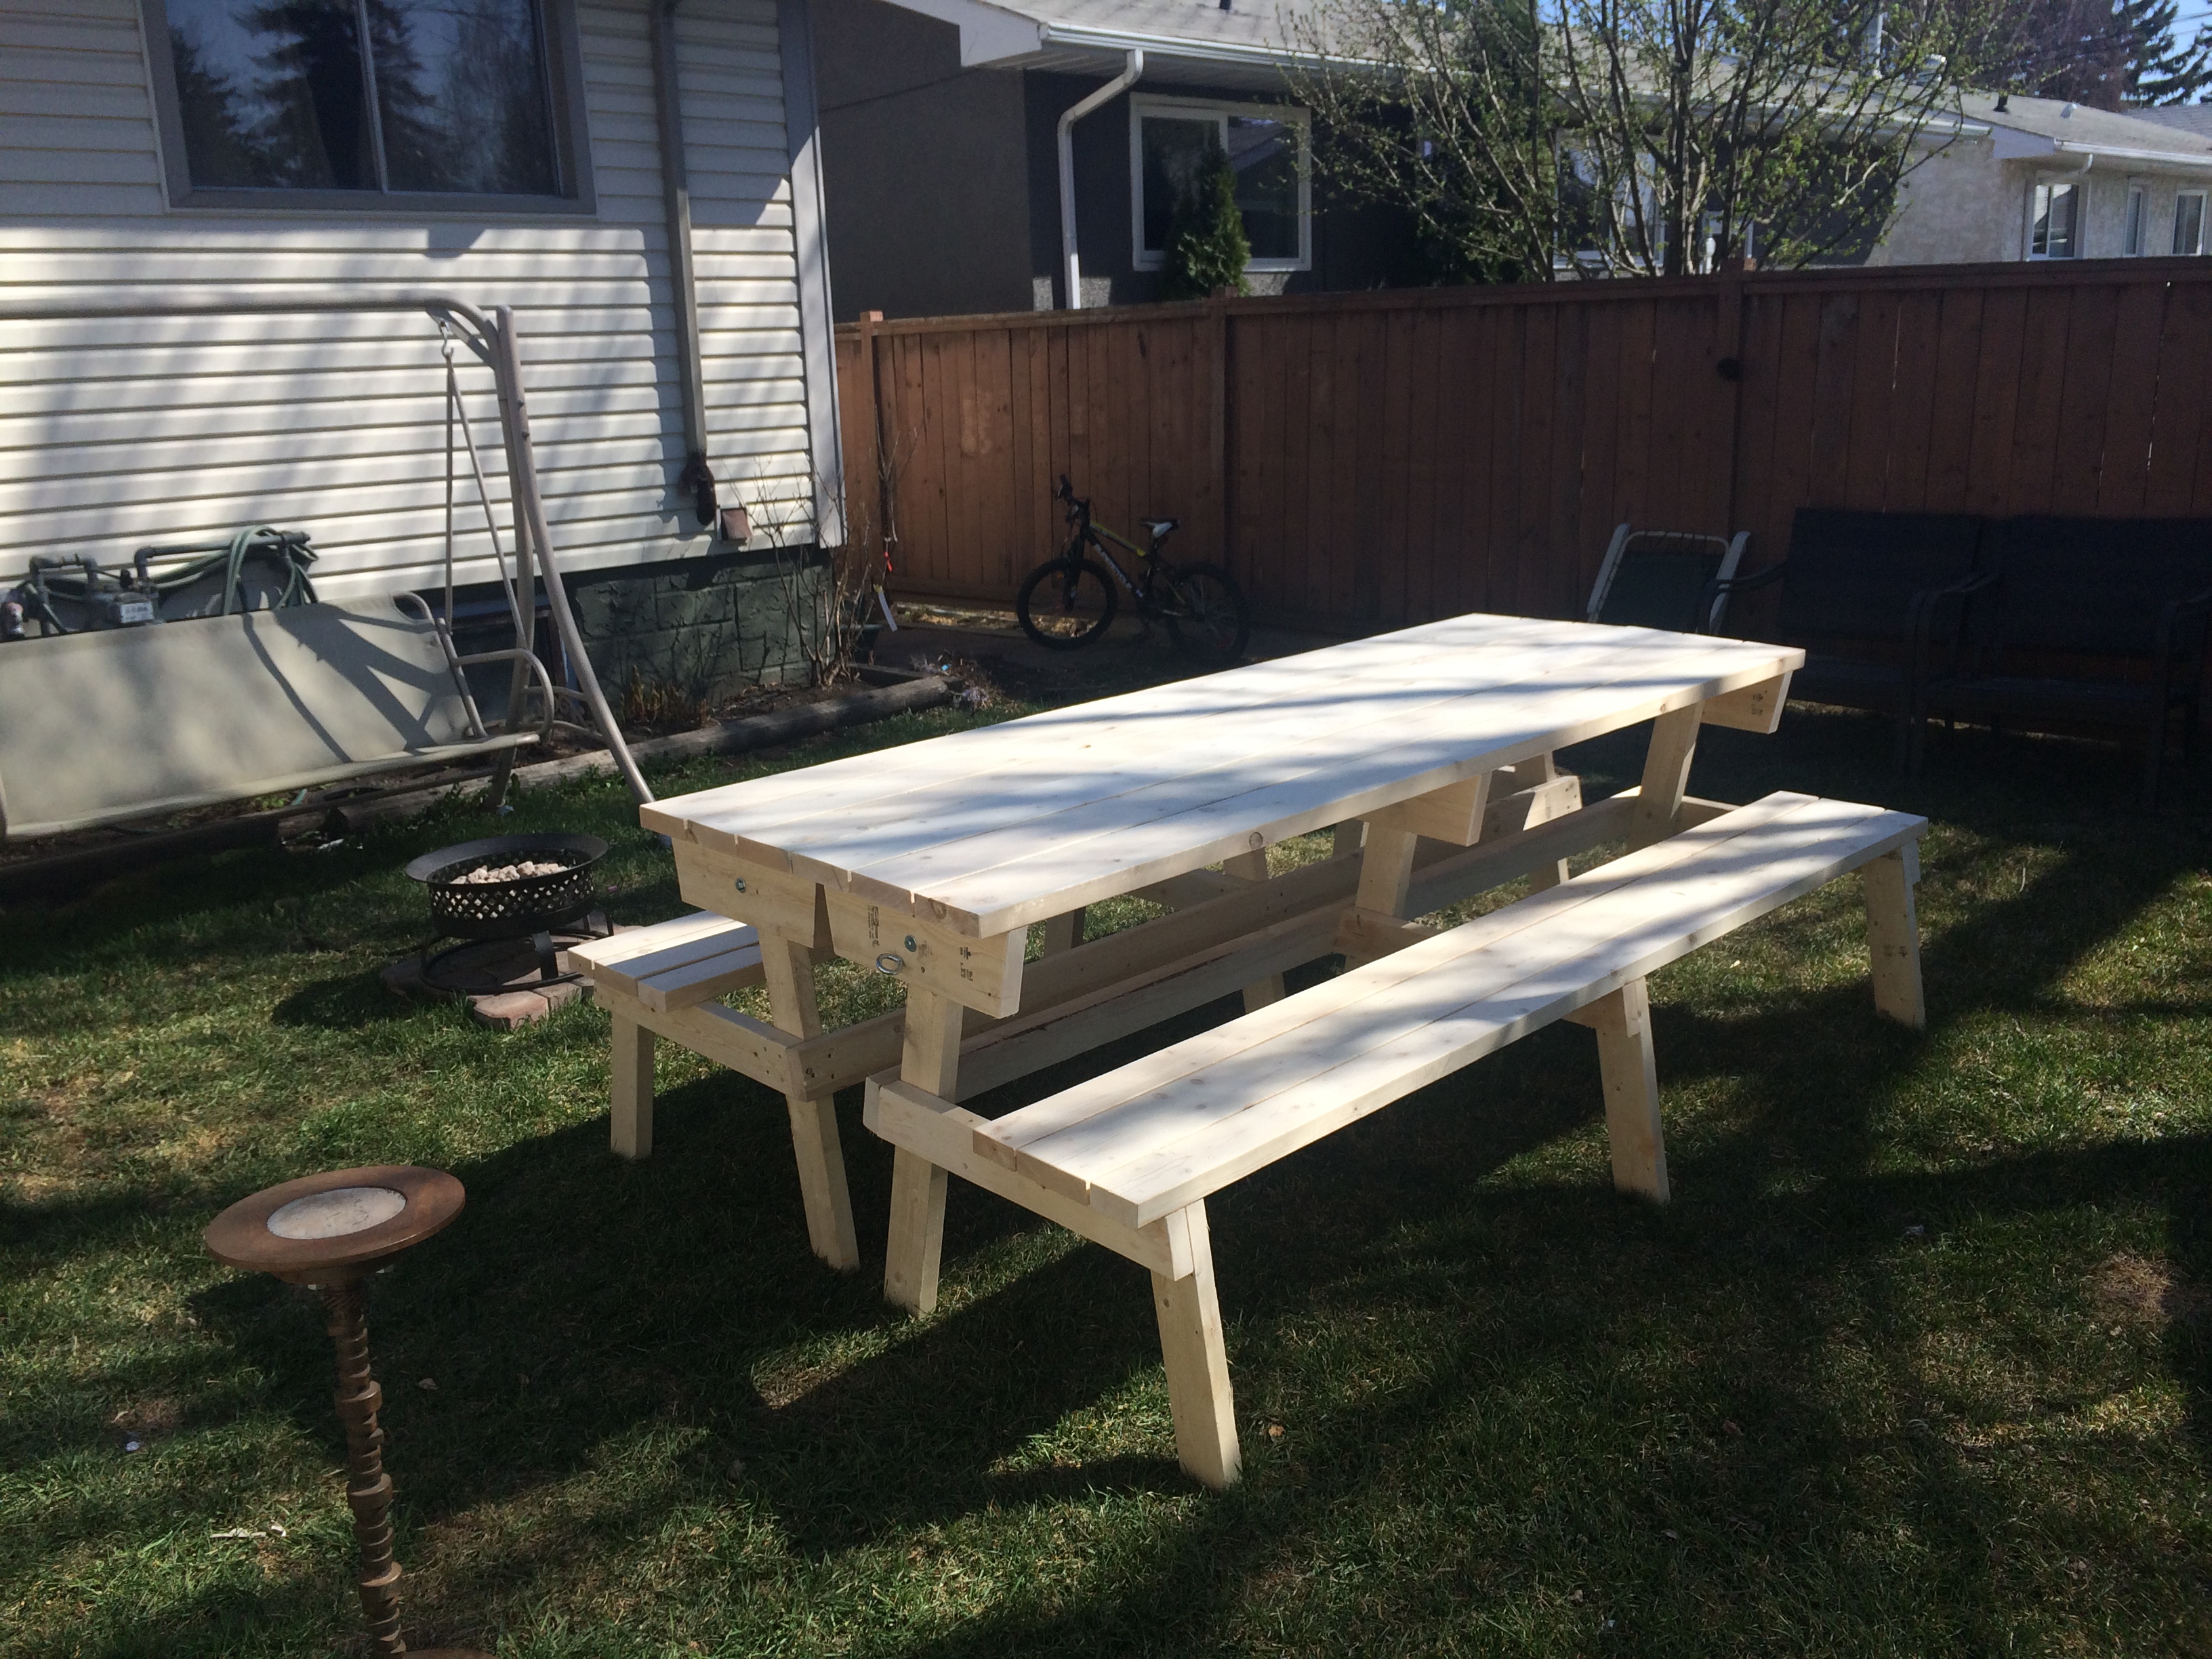
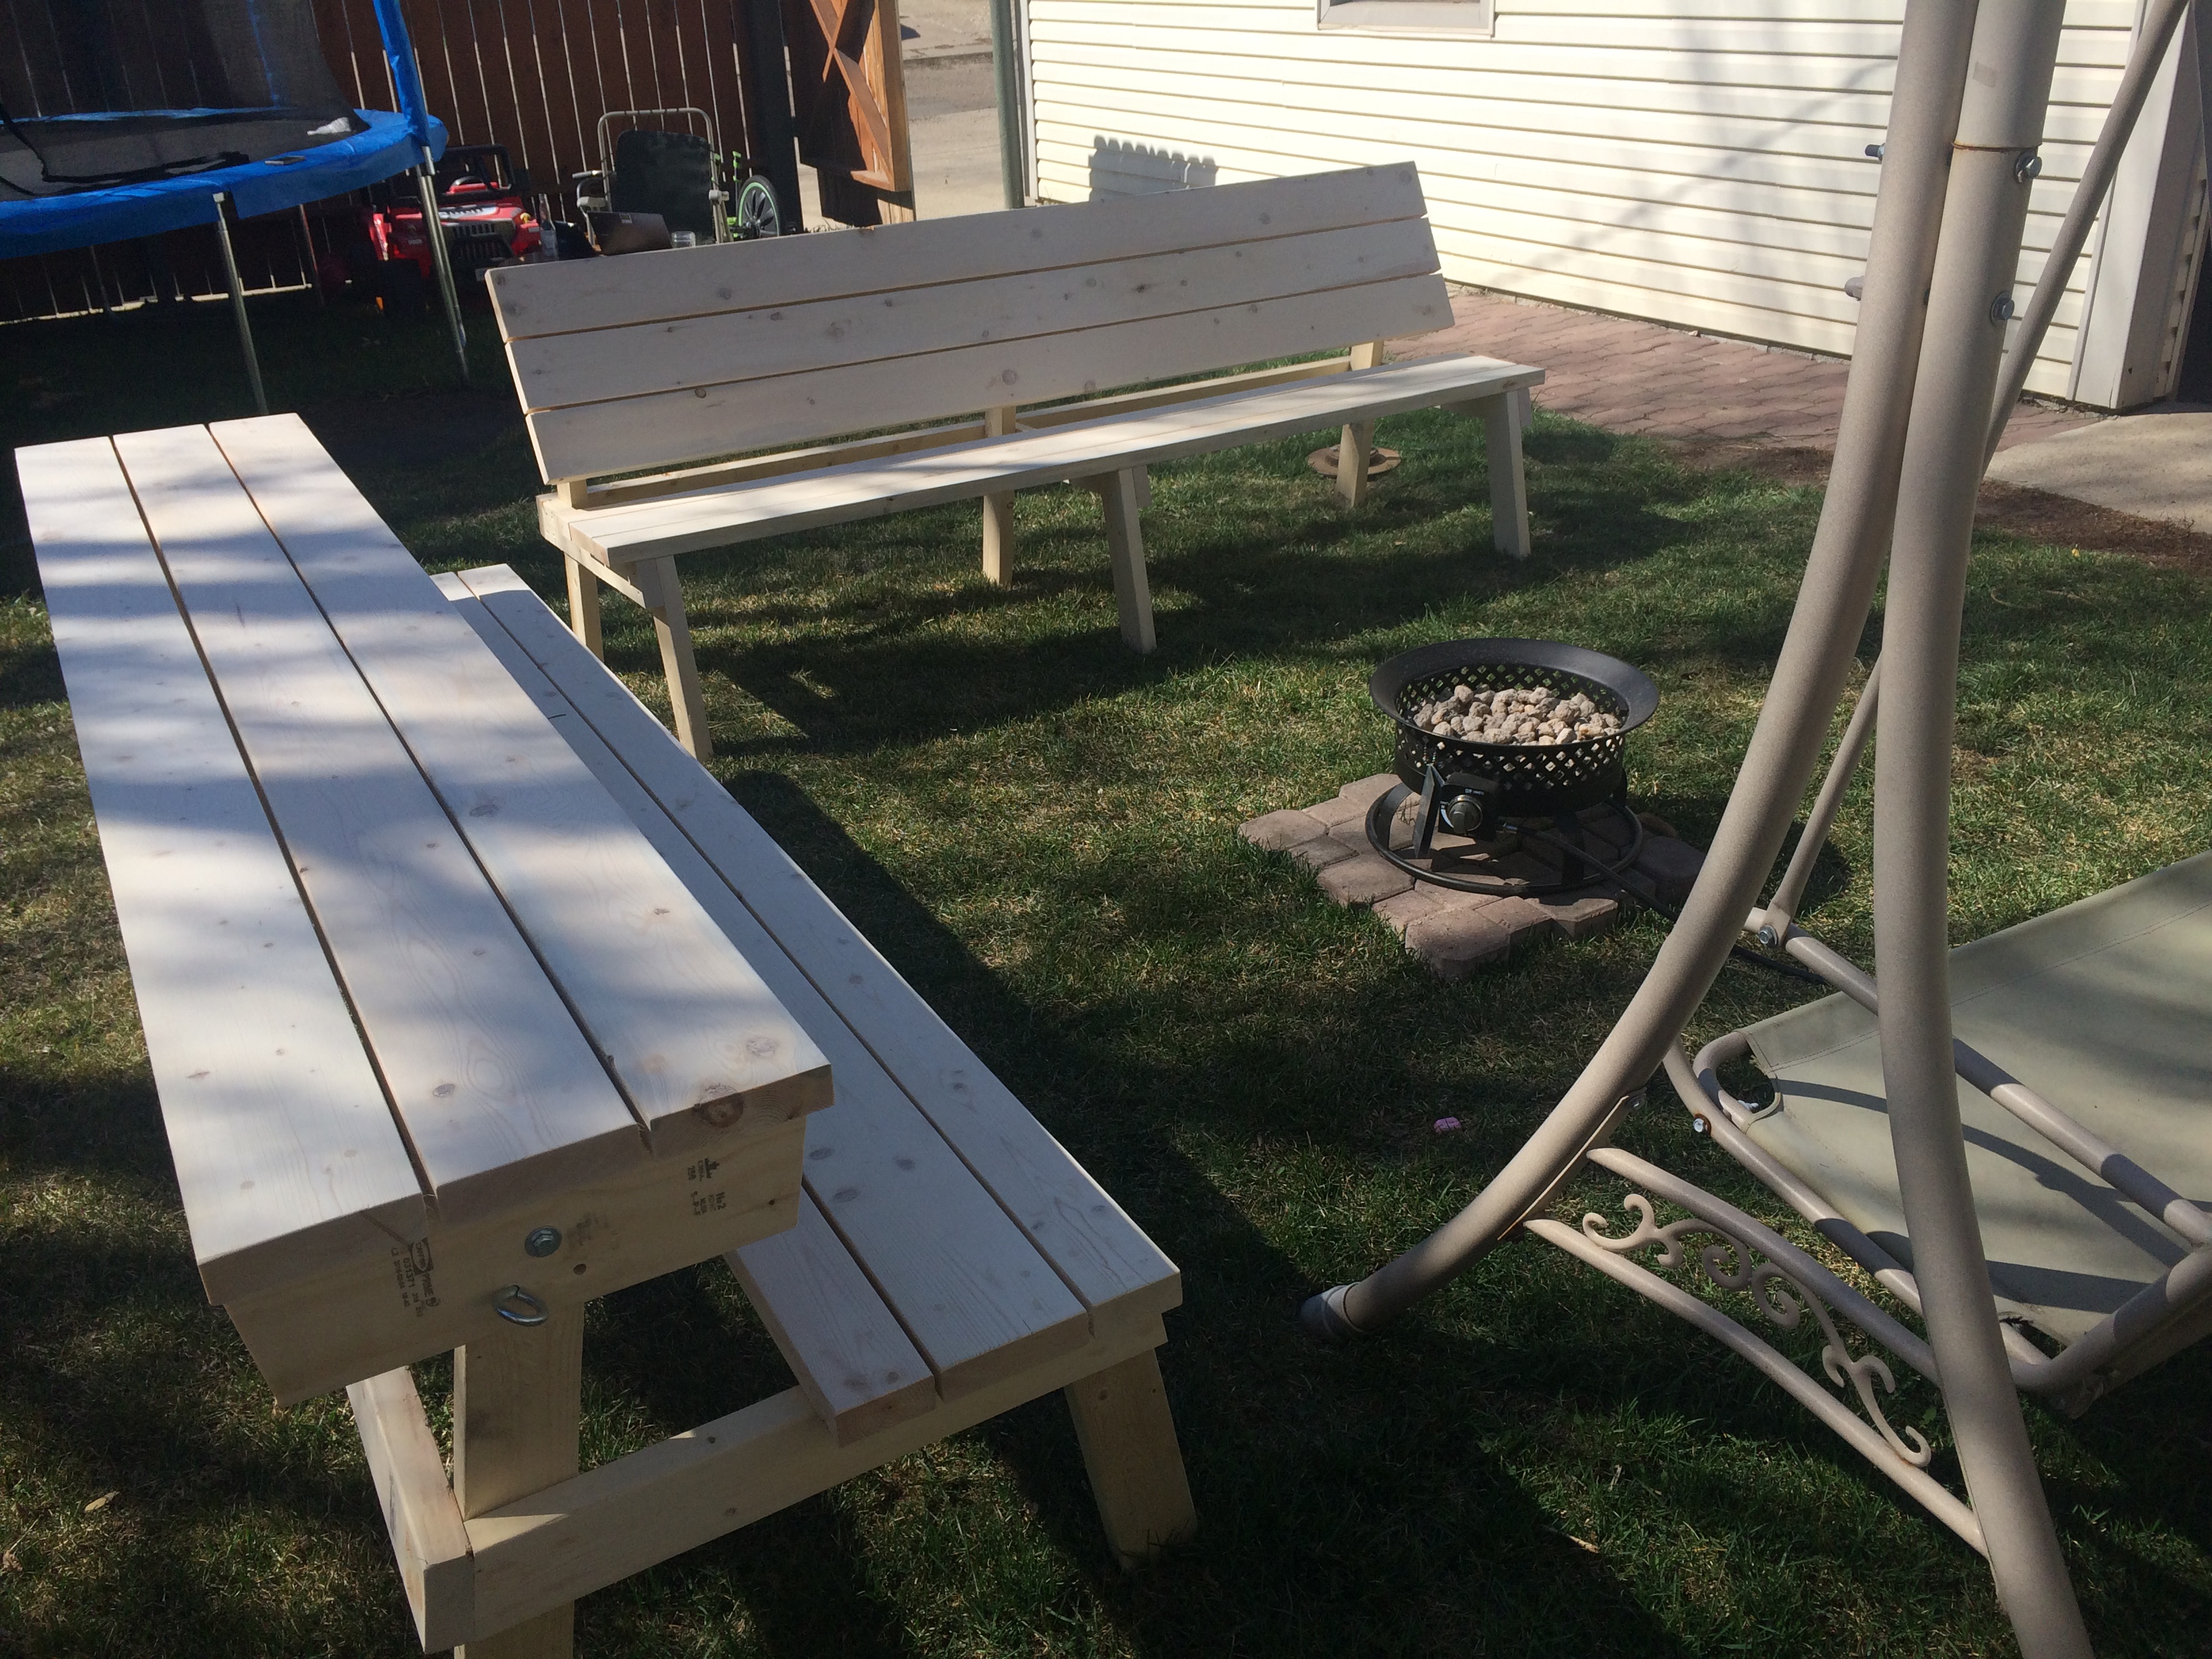
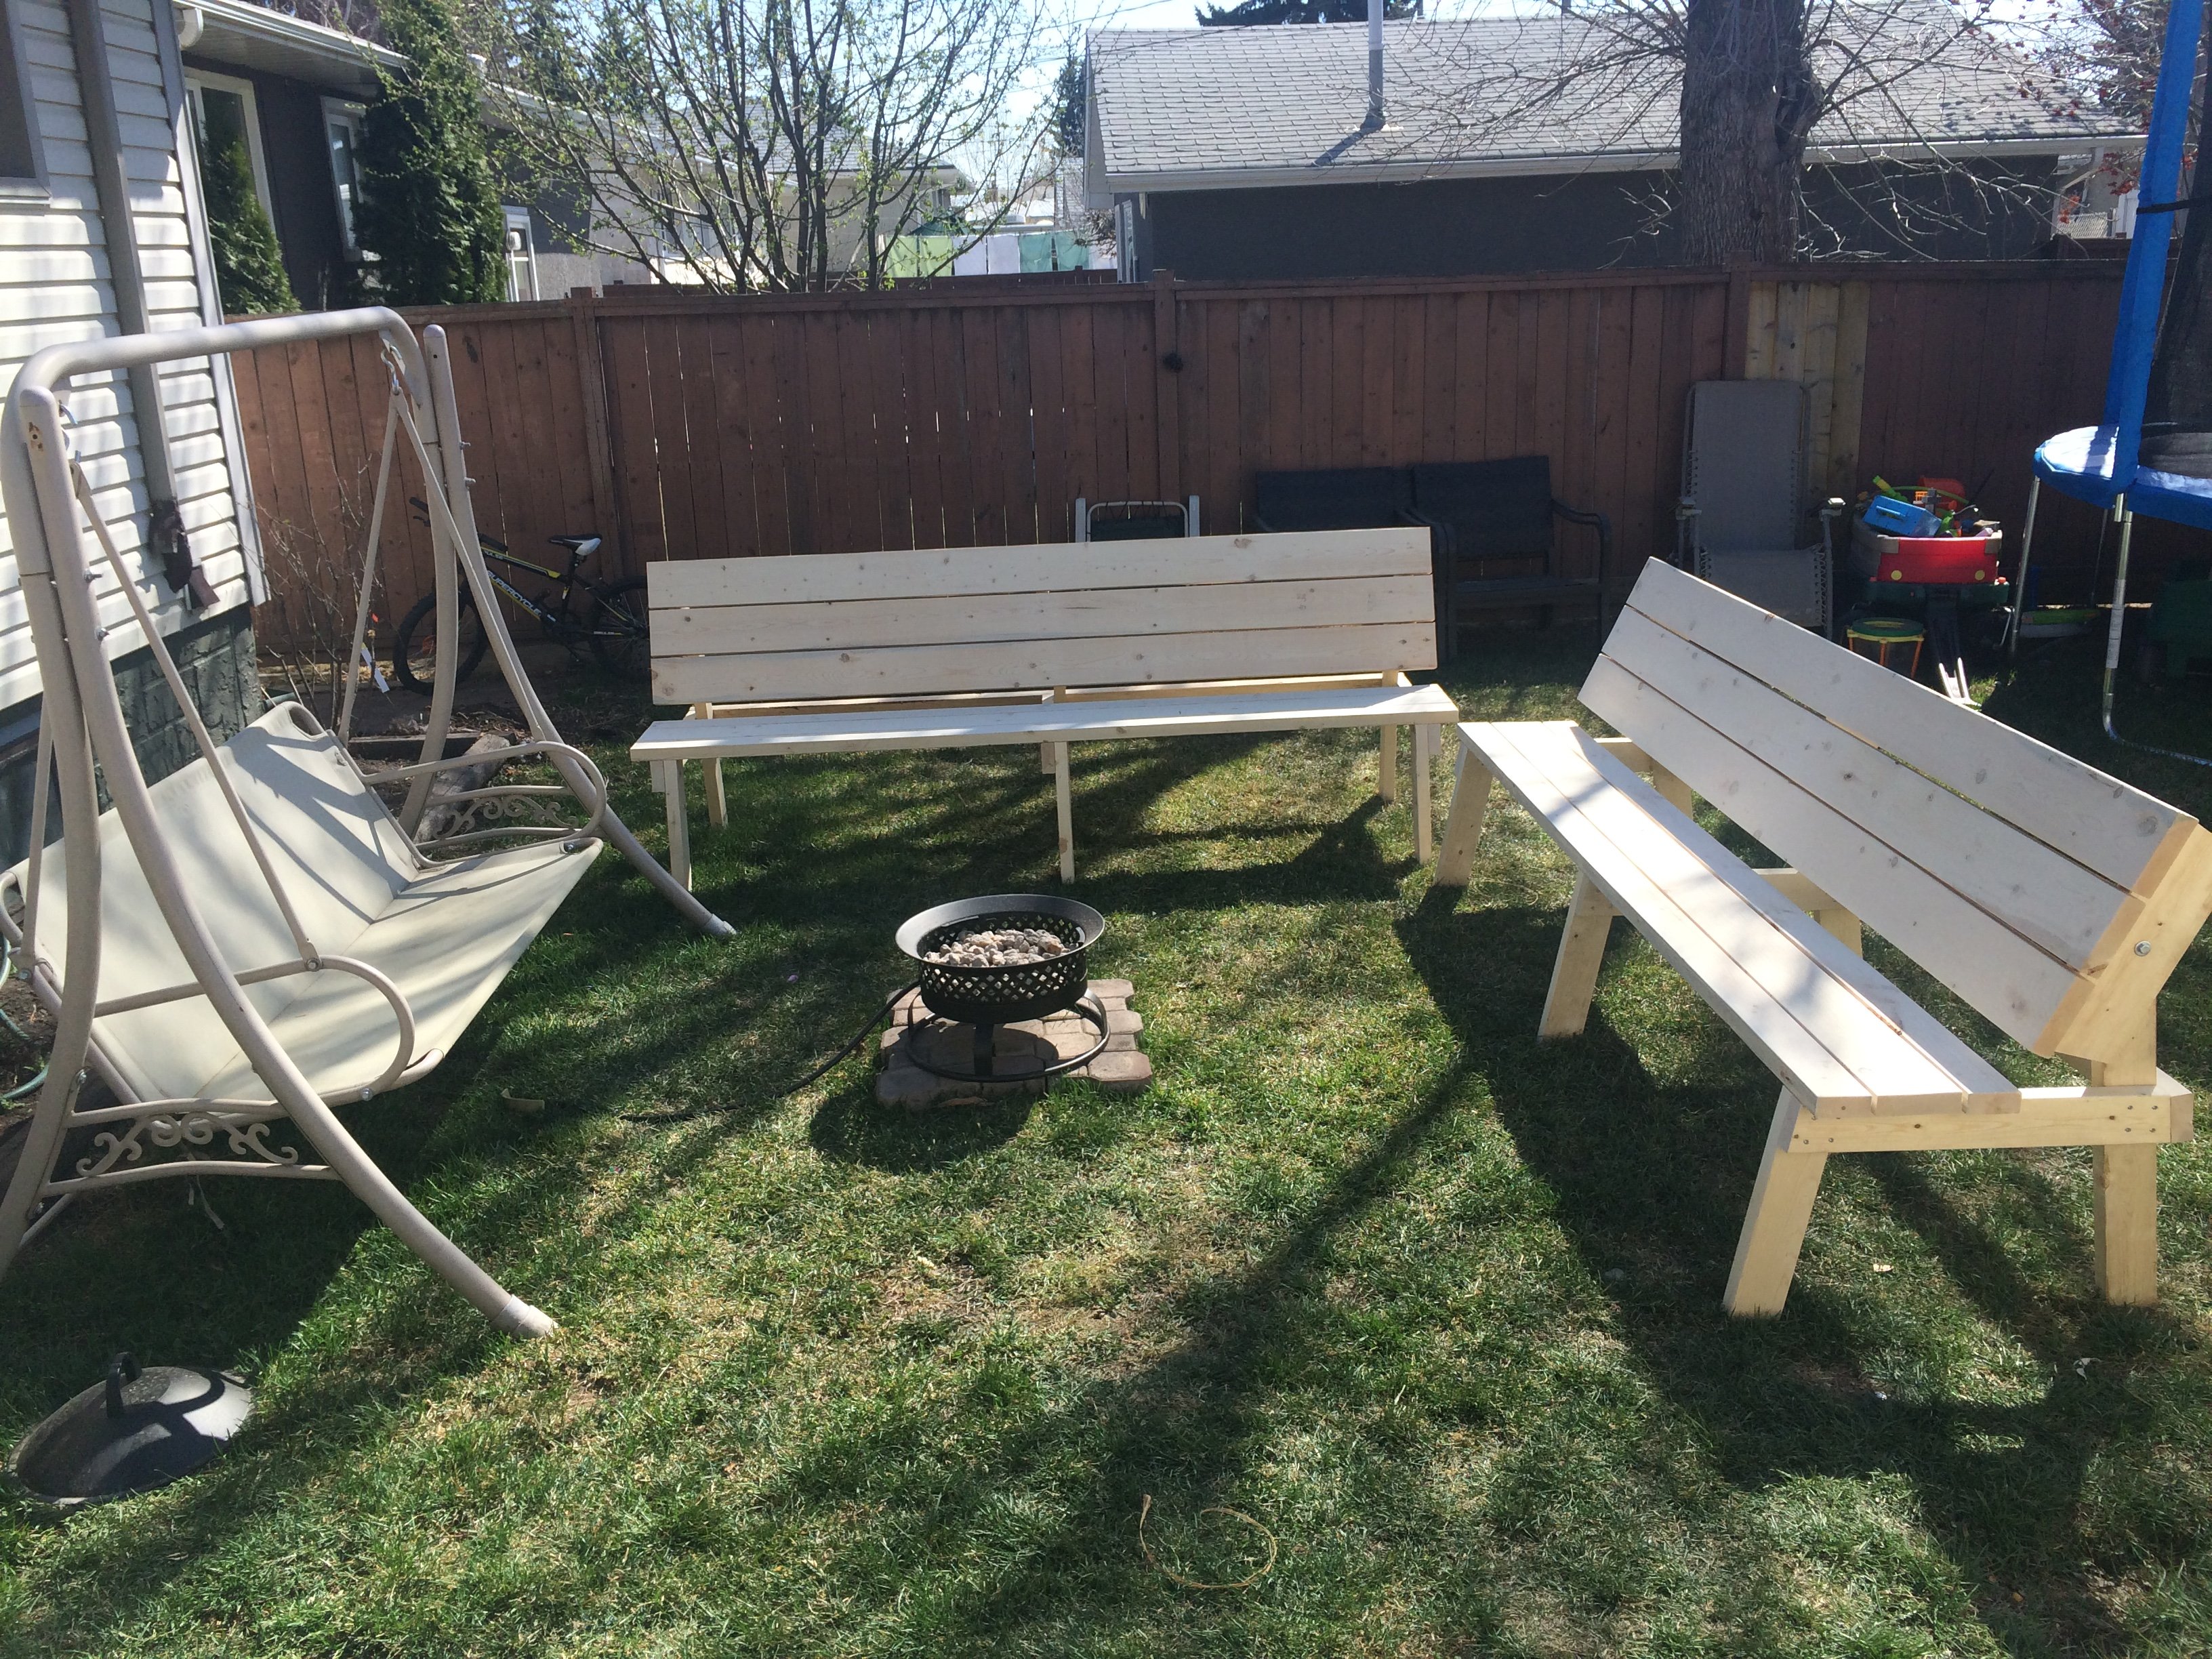
Based off of a few of the comments I read, I modified the plans a little bit. Instead of using three 2 x 6s for the benches, I used two 2x4s with one 2 x 6 in the centre. Shortened up the bench support length by 3" to make up for the difference. This allowed for a smaller seat, which is easier to get in and out of when in table mode, but still plenty to sit on when used as a bench.
I am trying to come up with an alternate system for pinning the table in each position. I have found that after only a few uses, the table has some wiggle in the top, most likely from the bolts going in and out repeatedly. I would love some ideas on how to get these to hold nice and snug when in each position!
I posted a few pictures of these on my Facebook page, where I now have been asked how much I am selling them for and have about 3 orders already placed! Looks like the spring will be busier than expected!
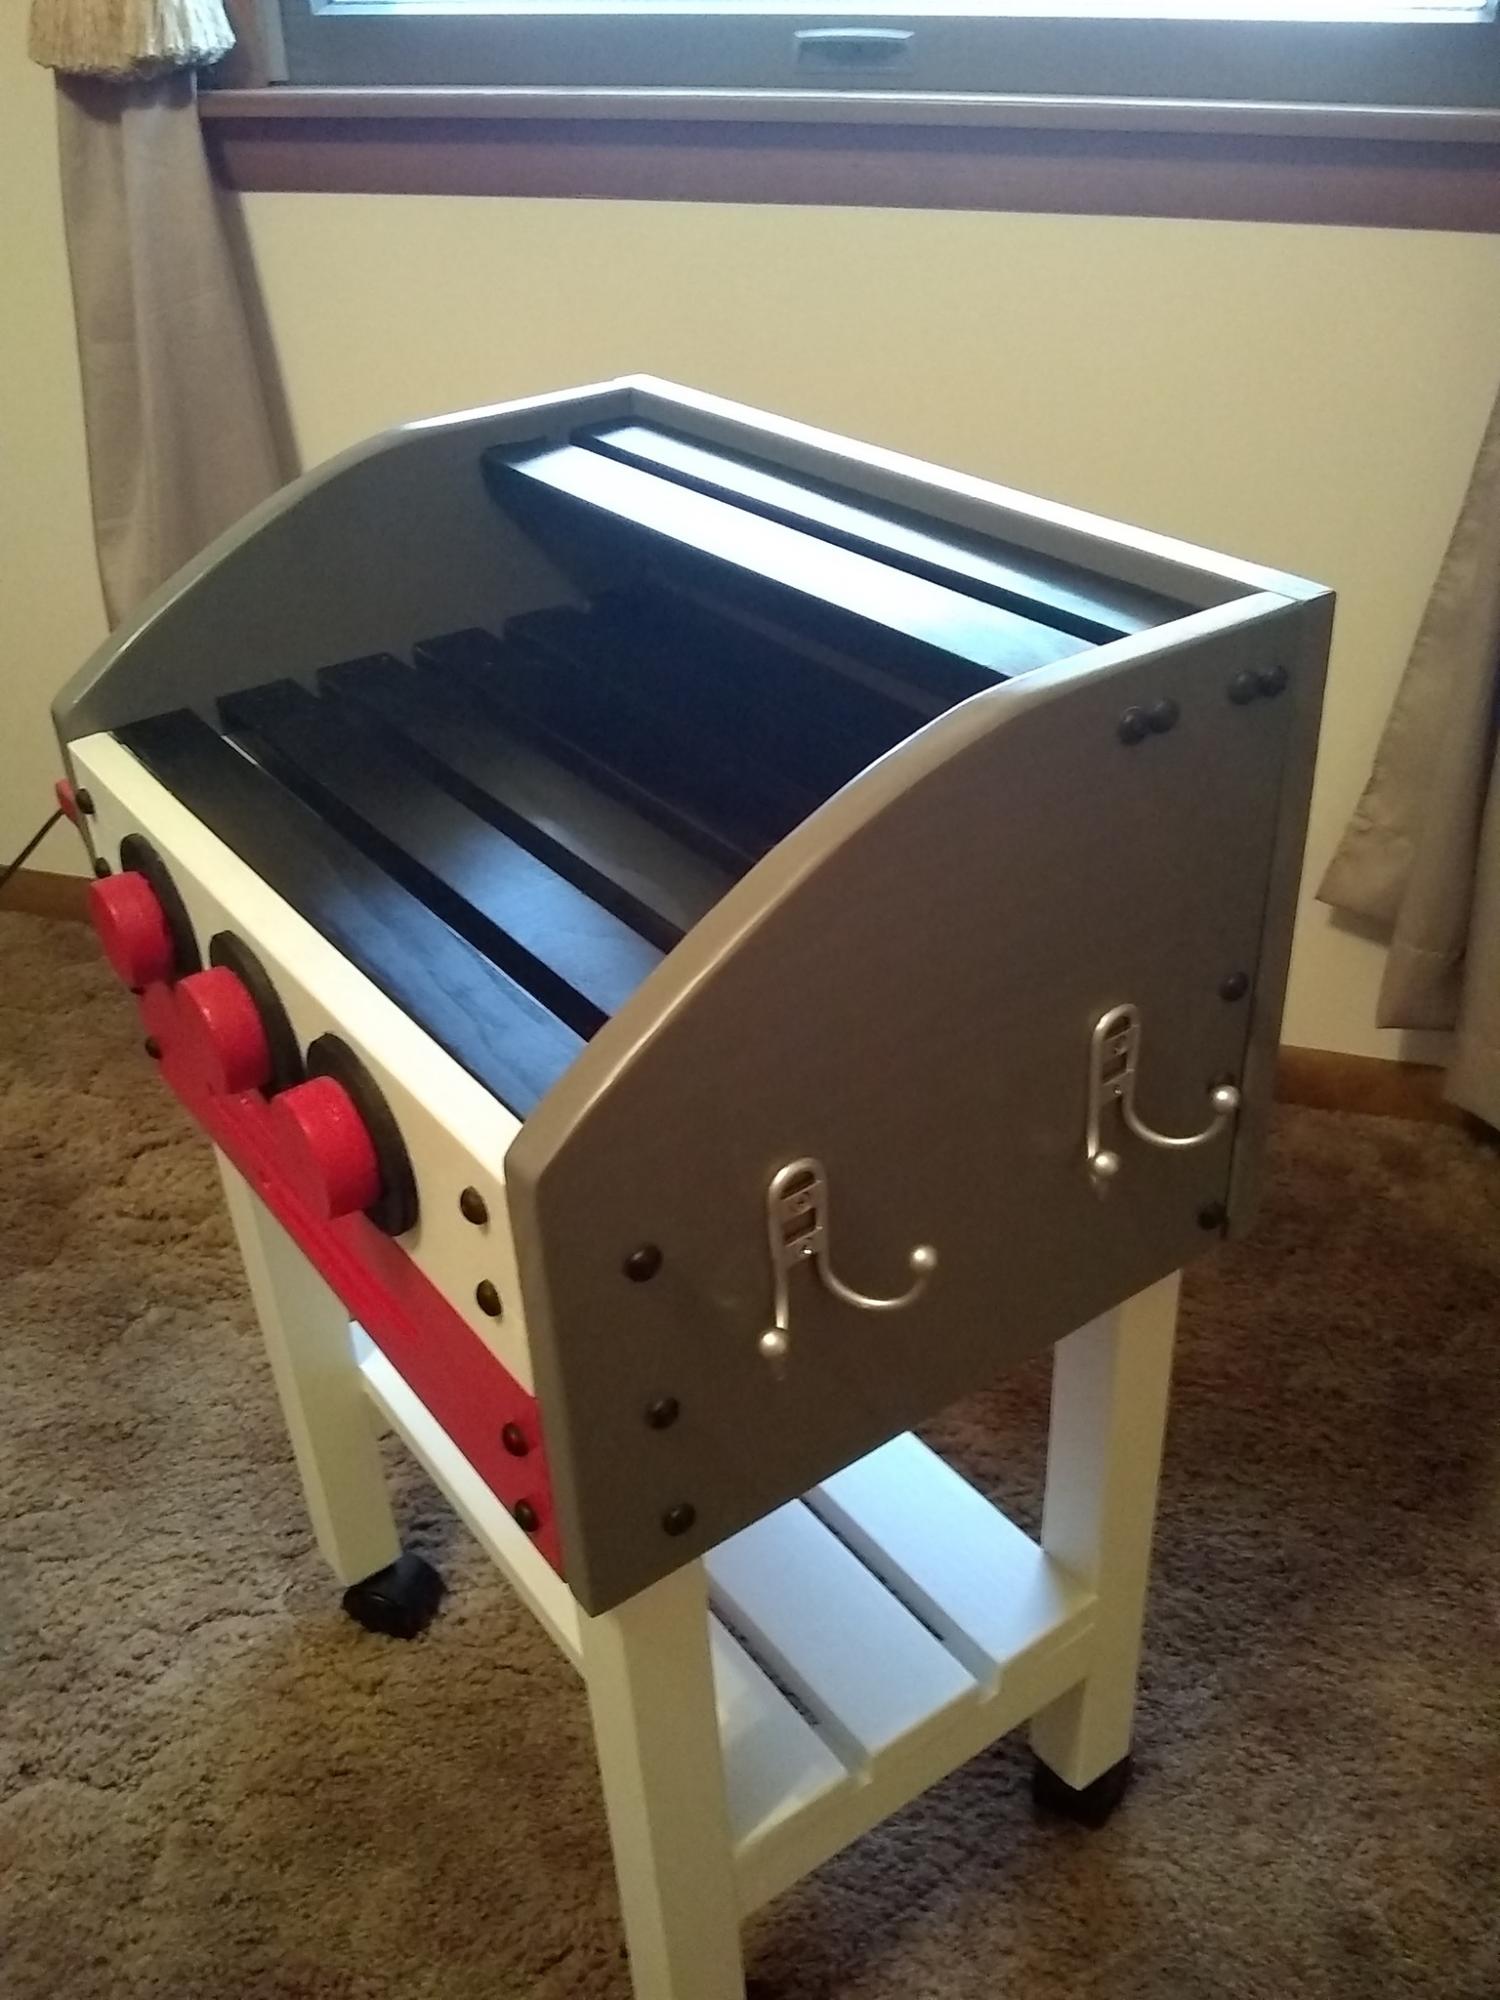
As in a lot of plans I made them to fit my needs. This one was no different. I love Anna and her site. Sometimes things are not always clear. With simple knowledge you can solve most of the problems. I made this version for my 5 year old niece for Christmas. I decided to use 1x12 in place of the plywood . It was easier to work with and made it much stronger With the solid wood I think I lost 1/4 inch in height. I also had extra 1x3 boards I used them for bottom shelf. For the dials I used what I had. I used my hole saw and filled in center with filler. It was cheaper than buying a dowel. I think it is easier to mount the shelf before you put the sides on. Top grill I stayed with 1x2 I thought it looked much vetter that 1x4 board. I finished it off with castors I think that put the icing on the cate and made it even better. She loved it.

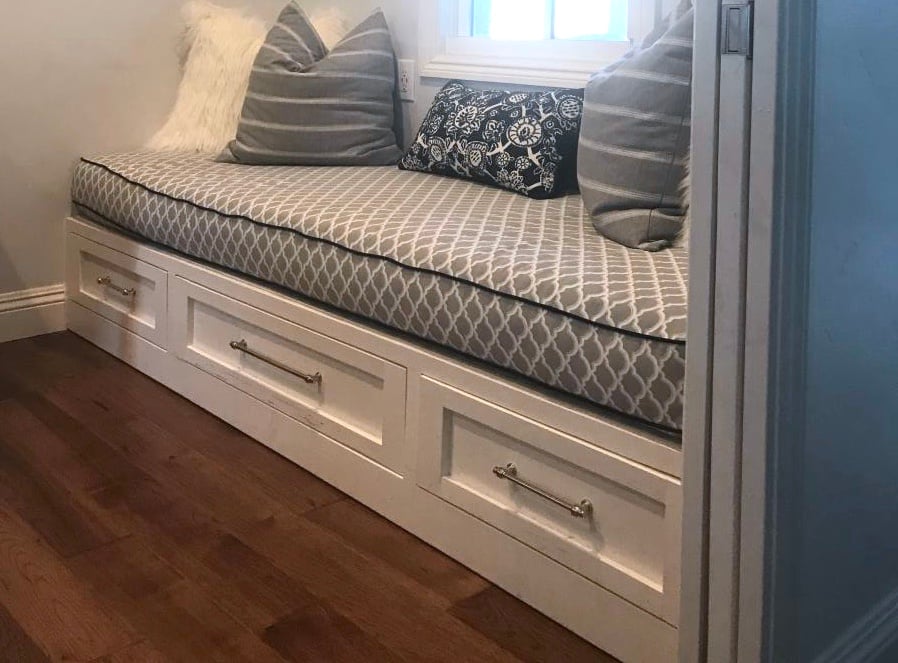
Exercise/Yoga nook. Built using the base plans from Ana's Shoe Bench Front with Hidden Storage and Easy to Build Floating Shelves.
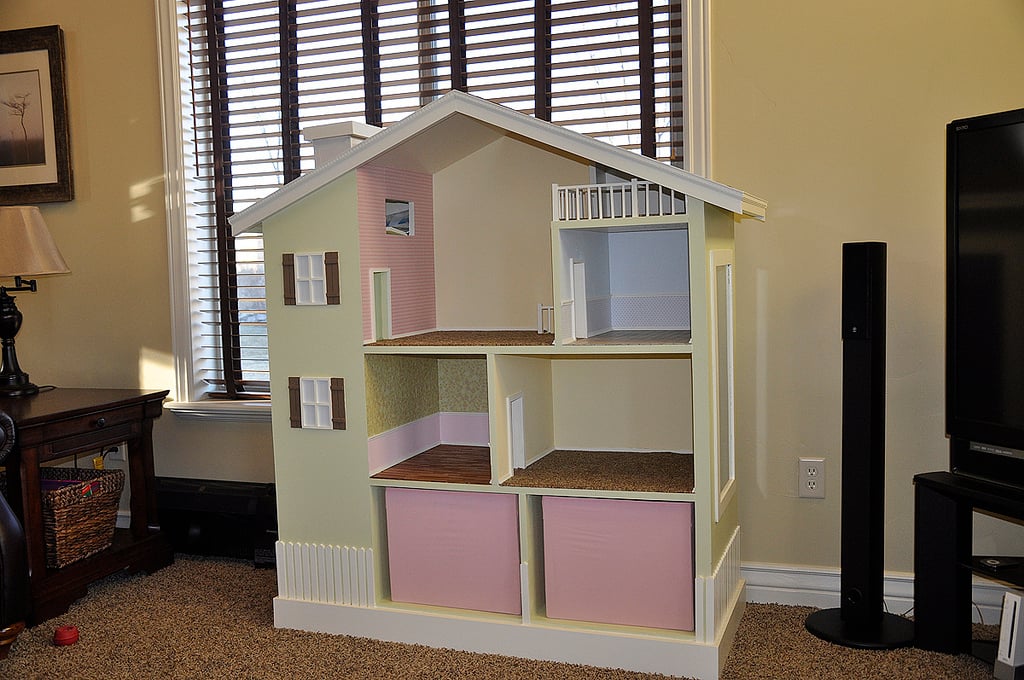
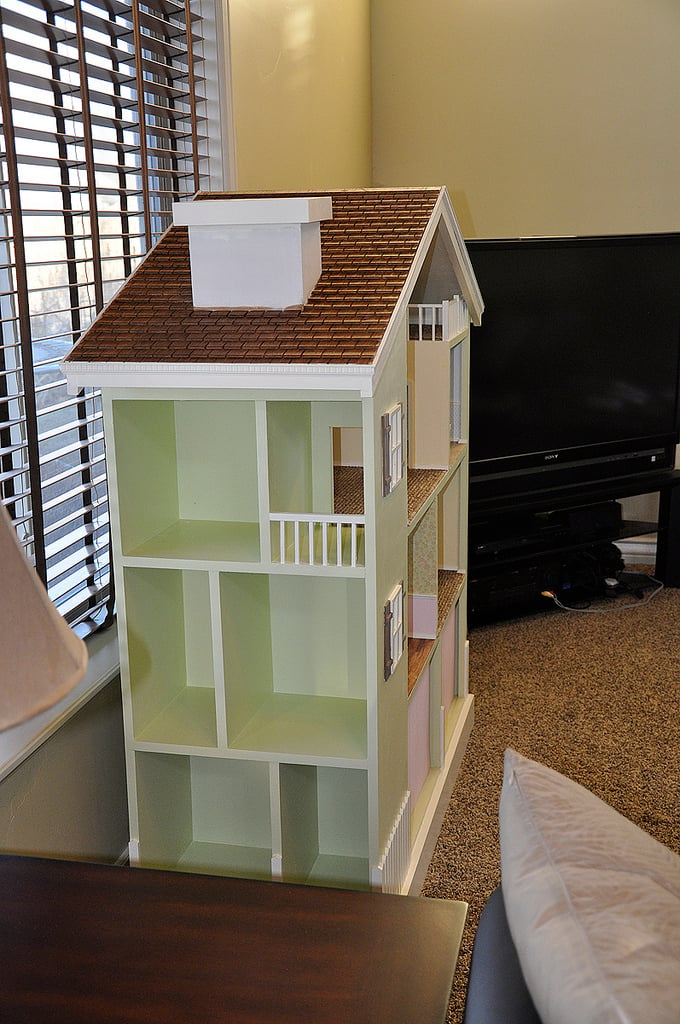
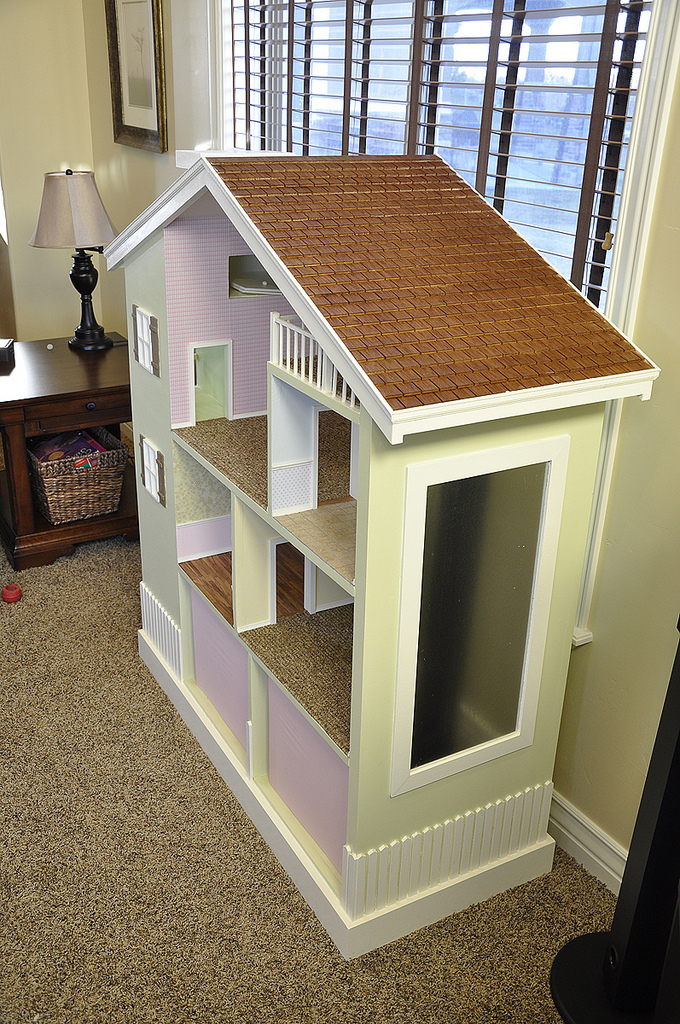
After much deliberation, I decided to make a dollhouse for my daughters Christmas gift. The aesthetics of the bookshelf-style dollhouse appealed to me over the more intricate and fancy designs. I took the literal meaning of the style and incorporated an actual bookshelf/DVD rack into the dollhouse. On the apposing side I built a magnet board for my daughters given that my refrigerator is not magnetic. About the project: I knew my design would end up being heavy so I started by building a basic frame out of construction grade 2x4's. The frame is placed on four casters and is concealed by the baseboard. When on carpet, the casters are not visible and have come in handy. Working upward, the majority of the construction consists of 3/4" cabinet grade plywood which you can find at Home Depot. The "carpet" I chose was an inexpensive bathroom rug that I purchased at Walmart. The scale & thickness of the berber seemed appropriate for the dollhouse and I attached it using carpet glue. For added security I tacked the perimeter with some staples. For the bathroom tiles, I cut some groutable adhesive tiles into squares on the table saw (use a cross cut sled if you have one) and attached them to the bathroom floor. Make sure your surface is free of dust, and a heat gun or a propane heater will accelerate the drying process and create a better bond. Make sure to use unsanded grout for the joints. To make the shingles, I cut a 4'x8' (used about 2/3 of the sheet) piece of 1/4" mahogany veneer into 2.5"x4' strips. The cuts were made perpendicular to the wood grain to give the desired aesthetic. This gave me a robust shingle construction with the look of shake shingles. I then cut about 3/4 of the way through the strips with approximately 1 1/4" separation between each shingle. Attaching the shingles was easy. I didn't want to wait for glue to dry so in addition to some wood glue, I also tacked the row of shingles in place with 3/8" brad nails. When placing the shingles, make sure to start at the bottom and work your way up to the pitch of the roof. This will allow you to overlap the shingles about 3/4" to cover the uncut portion to give it the appearance of individual shingles. You will also want to offset your rows to change the vertical alignment of the shingle spaces. I marked each row with a pencil prior to cutting the final width. You may also consider which side of the shingles you want facing up. I opted for the rough side to give it a more weathered look. With some of the extra shingle material I made hardwood floors for the kitchen.The veneer I purchased was mahogany on one side, and oak on the other which allowed me to alternated sides and give it a unique look. Attach the floor using wood glue and allow 24hrs before sanding. Place weights on the floor to secure it while drying. I applied both a stain (Minwax Golden Oak) and some wipe-op polyurethane for the finish. The storage bins are Ikea boxes that can be easily removed to allow for additional play areas. The piece of sheet metal I used for the magnet board was already cut to the desired size at Home Depot. I attached it using some 3M spray adhesive, then secured it with some poplar strips. I also used the 3M construction adhesive to attach the craft paper/wallpaper. With all of the chaos surrounding Christmas I wasn't able to quite finish it. Here is still what's in progress: - Painted white ladder to loft - Stained mahogany stairs to family room - Kitchen cabinets - Cobblestone chimney - Closet doors

Thu, 04/12/2012 - 02:56
Your attention to detail is amazing! What a beautiful build! Blessed daughters!
Fri, 04/13/2012 - 15:18
How did you make the railing? It looks great, but wouldn't it be fragile? What did you use for trim and molding throughout the house? Did you use a dremel to work with the small details? This is an amazing looking doll house that my daughter would love. I just may need to do this sometime before Christmas.
Mon, 04/16/2012 - 17:32
It gives the appearance of individual shingles, but I actually just cut strips with grooves in them. I have seen several dollhouses with shingles that have fallen off so I wanted to avoid that :)

Sat, 04/14/2012 - 04:00
Those are the coolest bookshelves I've seen in a while. Love it.
Fri, 06/08/2012 - 20:32
Super duper good job on it :) Wish I had time to make one like that for my 4 yo. She's so particular, can't let her see the pictures ah ah. Lucky girls! Talented mama!
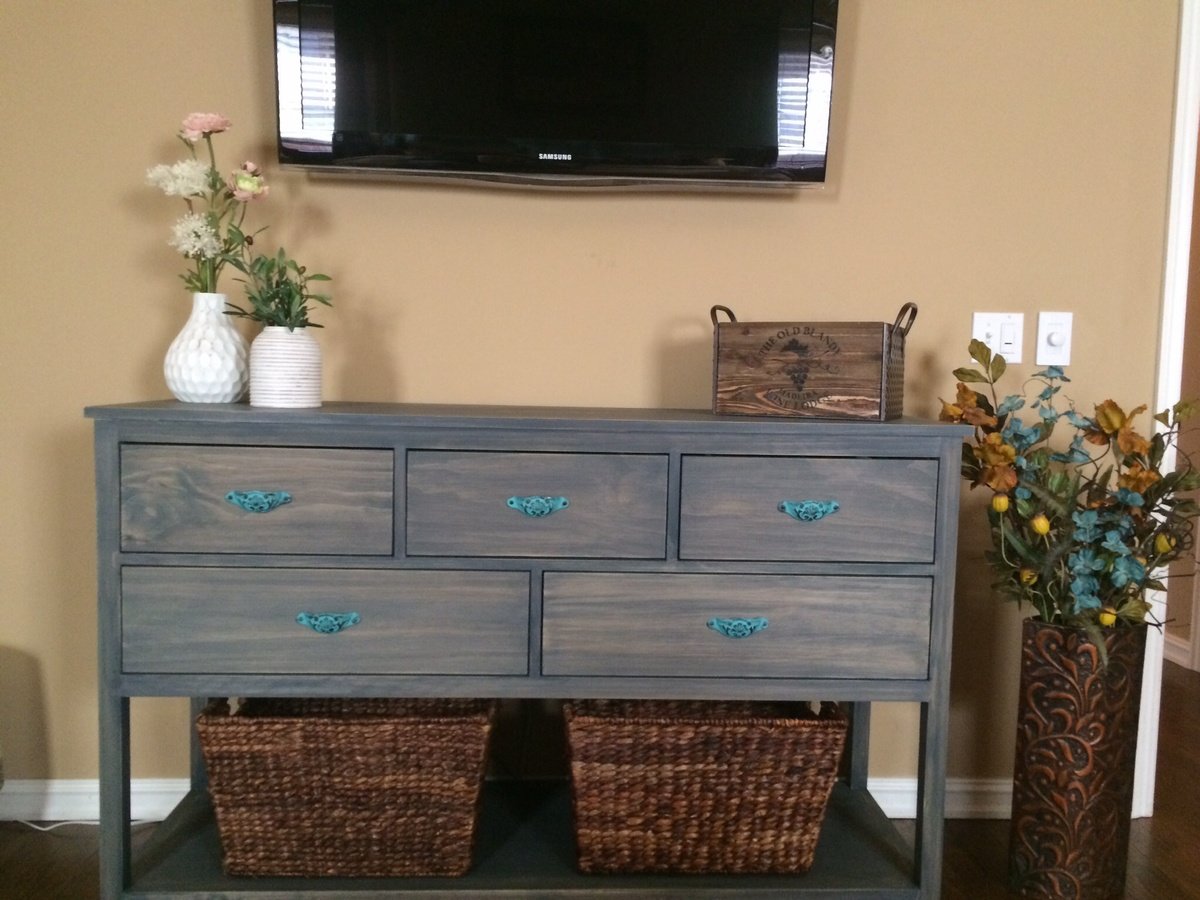
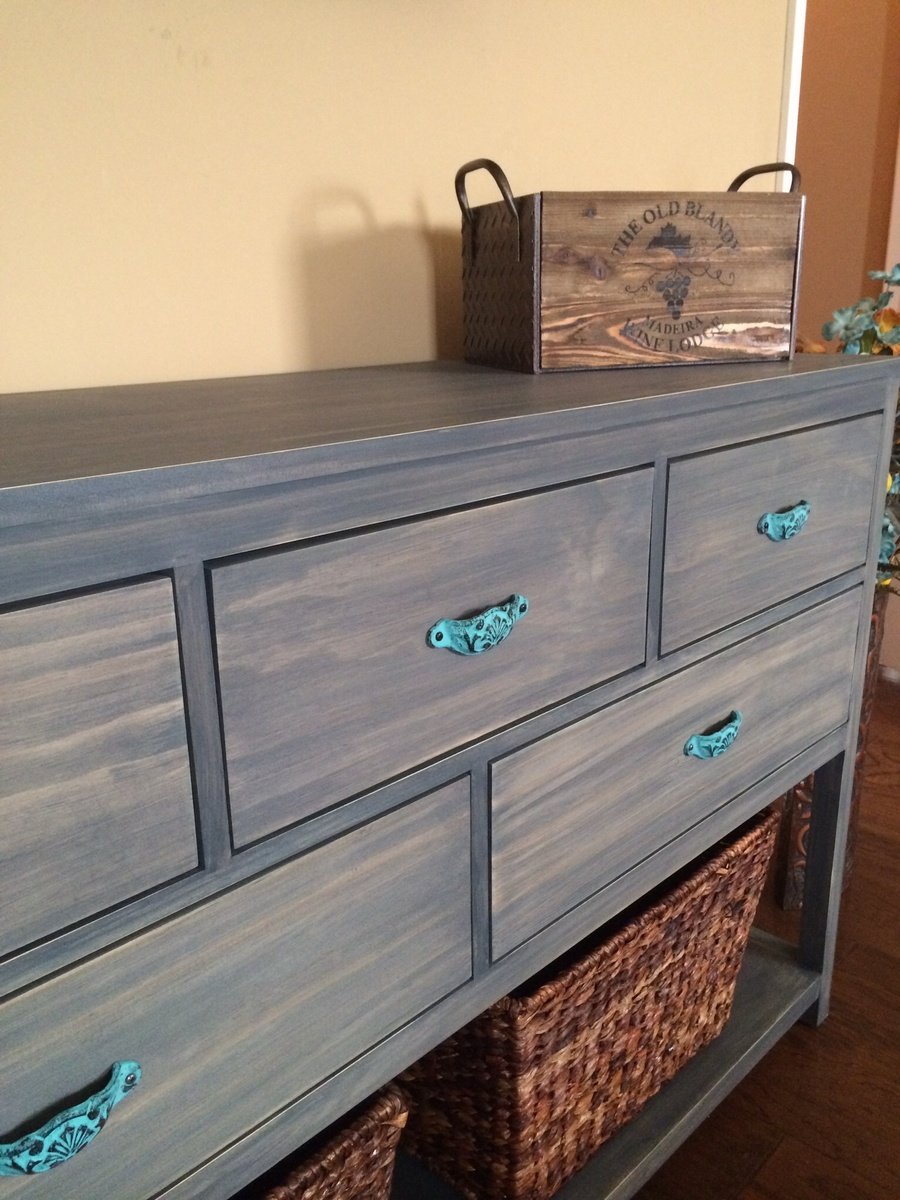
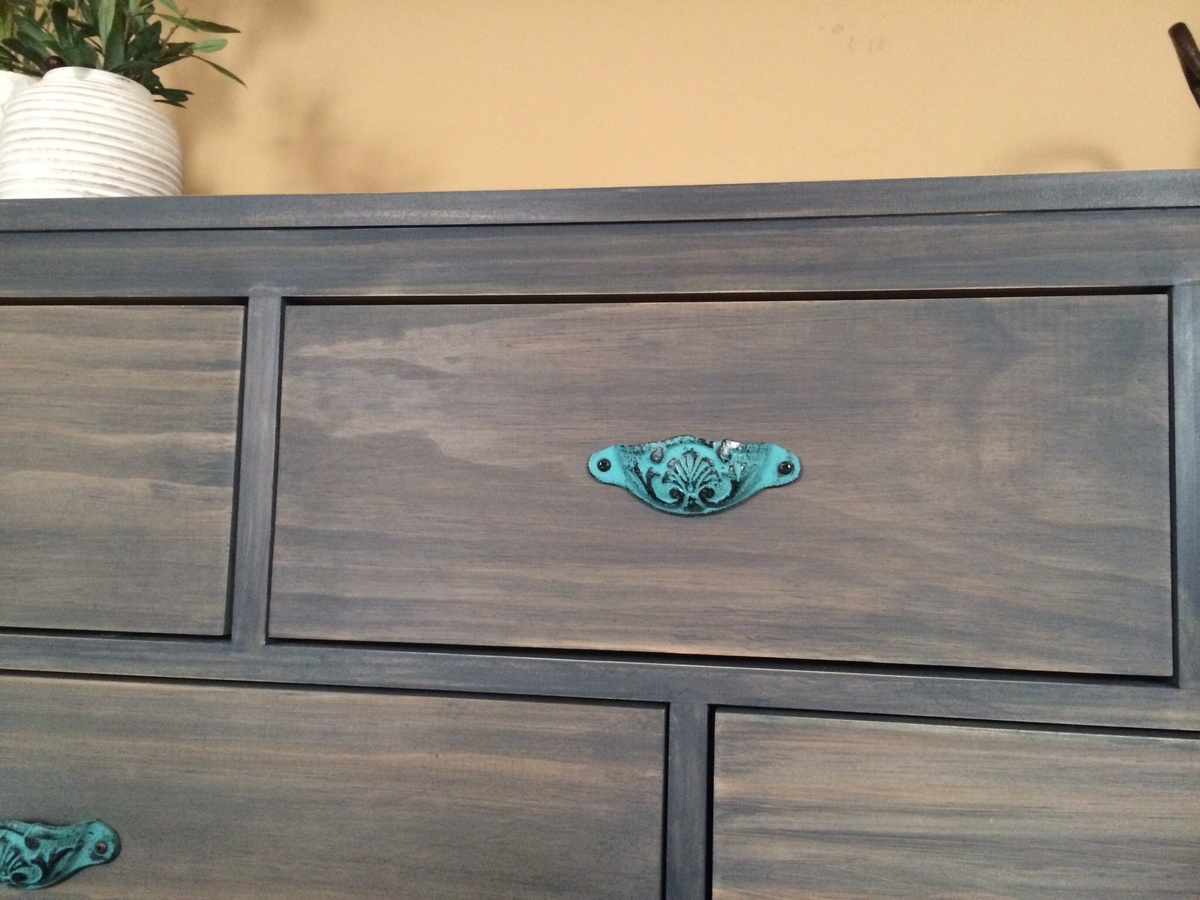
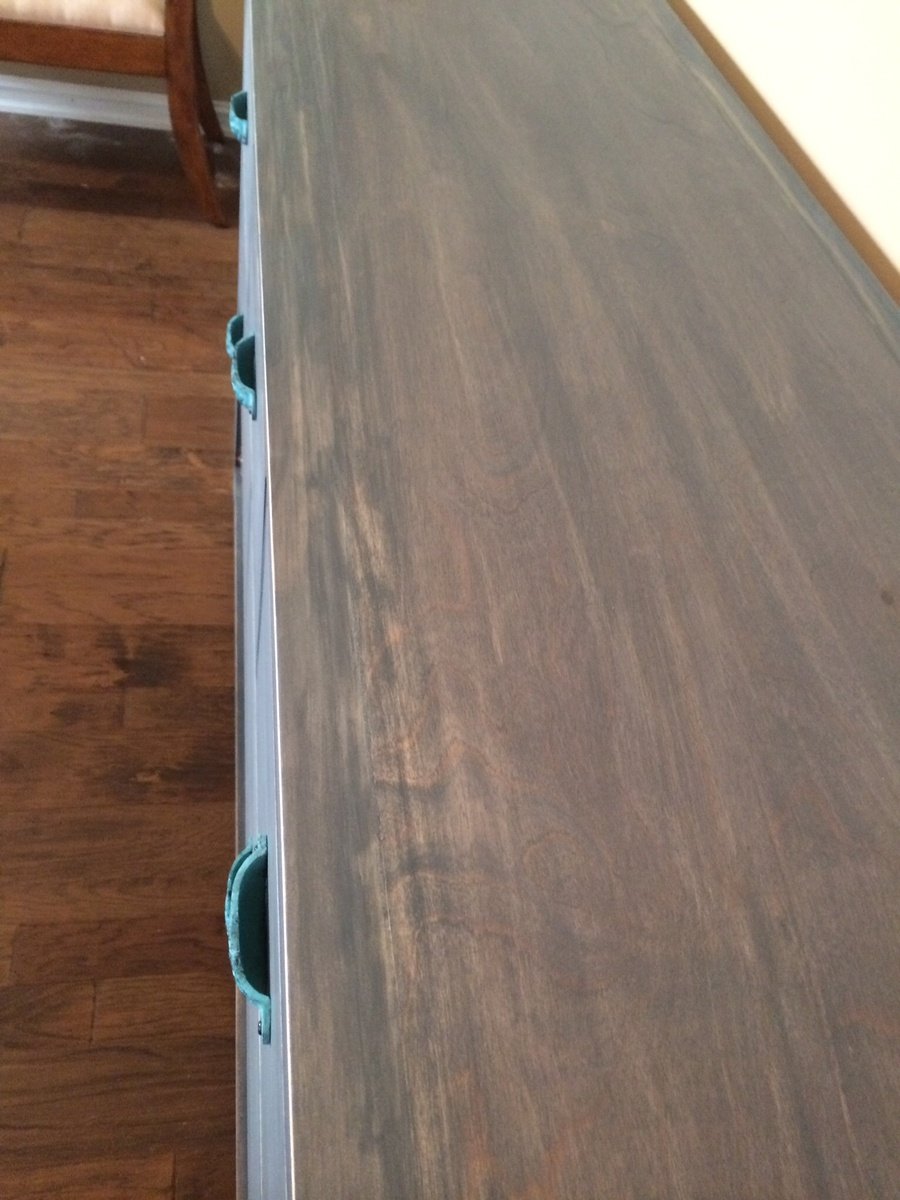
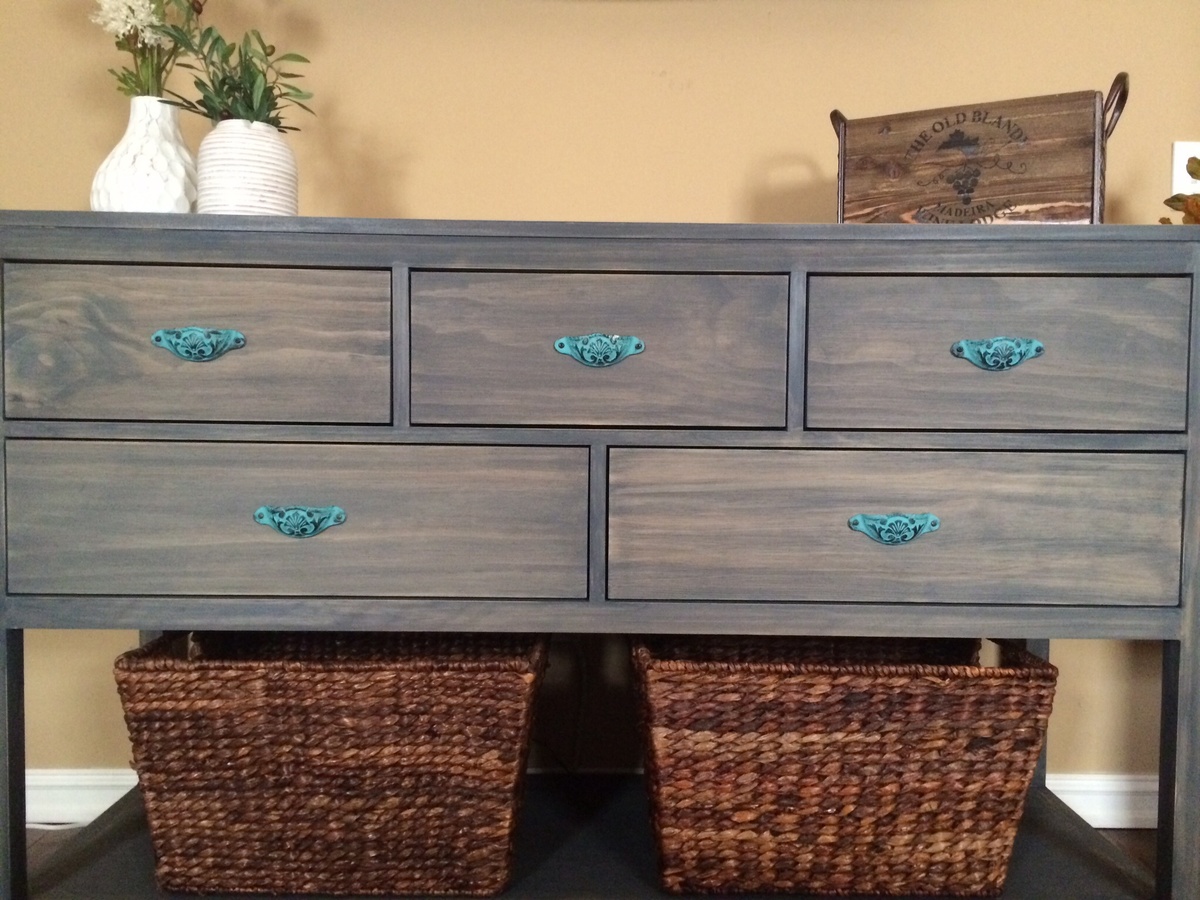
Wide cabin dresser from pine, charcoal grey wood stain, soft-close drawer slides, and turquoise hardware.

Tue, 01/28/2014 - 08:07
I absolutely love the finish and the turquoise handles! So pretty!
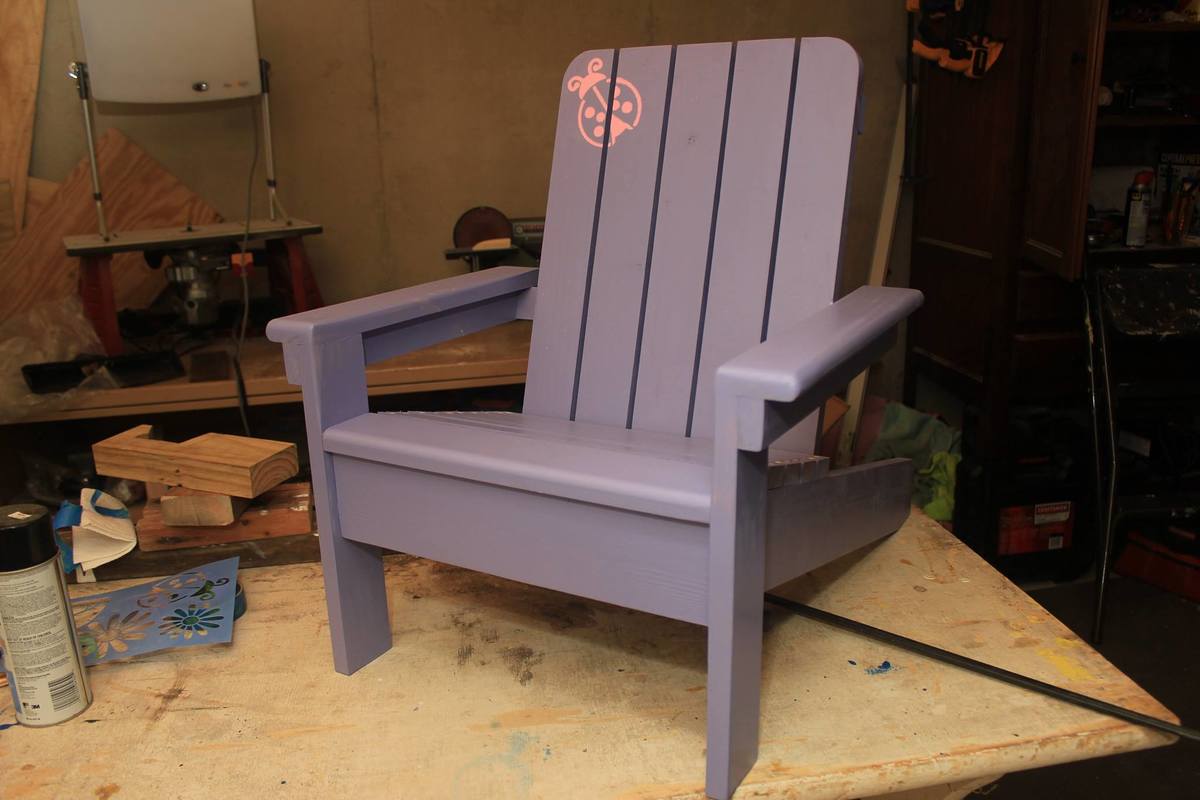
This was a true joy to build. I plan on making at least three to four more of these. Couple tips I learned though: I used pocket hole screw where I could to prevent drilling so many holes that would need to be filled: Ft board, Rear boards, and a couple others. Also I routed the edge of the very front board where the child's legs will be dangling from, as well as the inside/outside edges of the arm rests. Smoother the better I thought with little kids. Lastly, I painted all the boards and then put it together as recommended. However, I would go through the plans and only paint the surfaces that you know will either touch and will be difficult to get to or sides that won't be drilled out; unless you don't plan on filling the holes and painting over them. It will save you paint and time if you plan out what sides of what boards you'll paint first than doing them all at once.
First attempt at trying this.

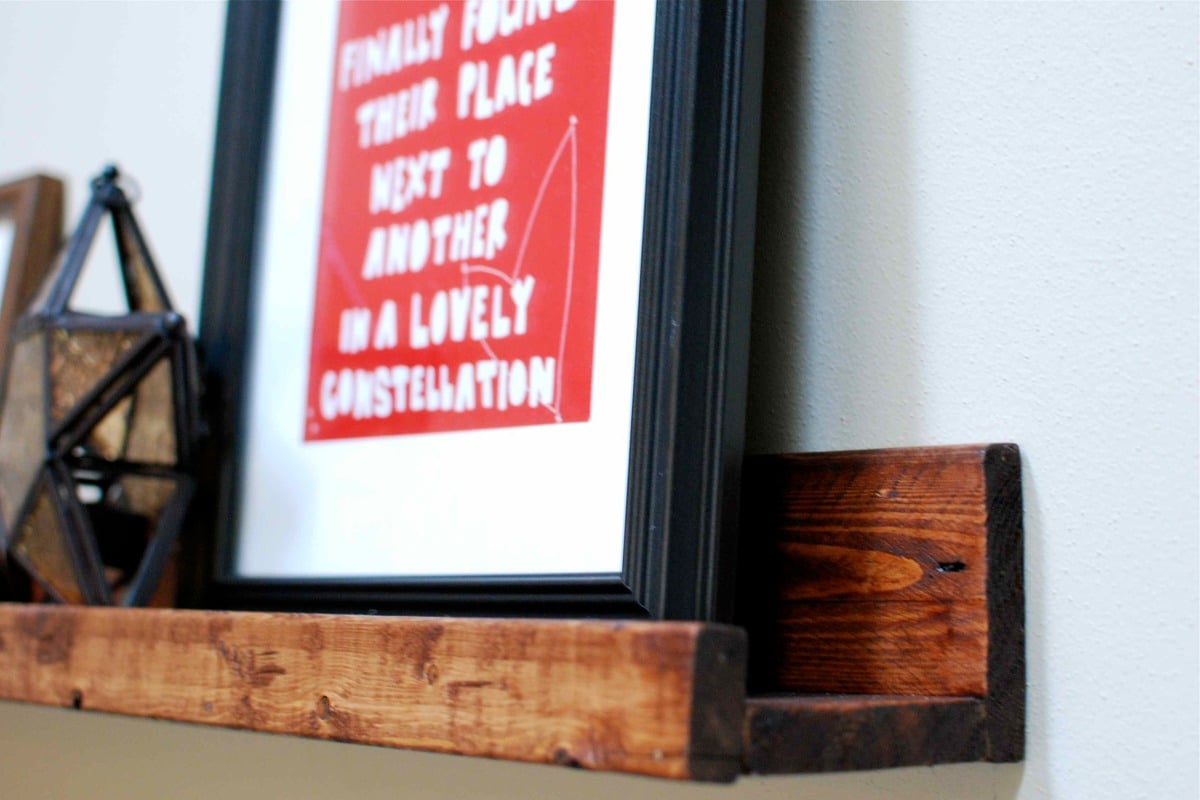
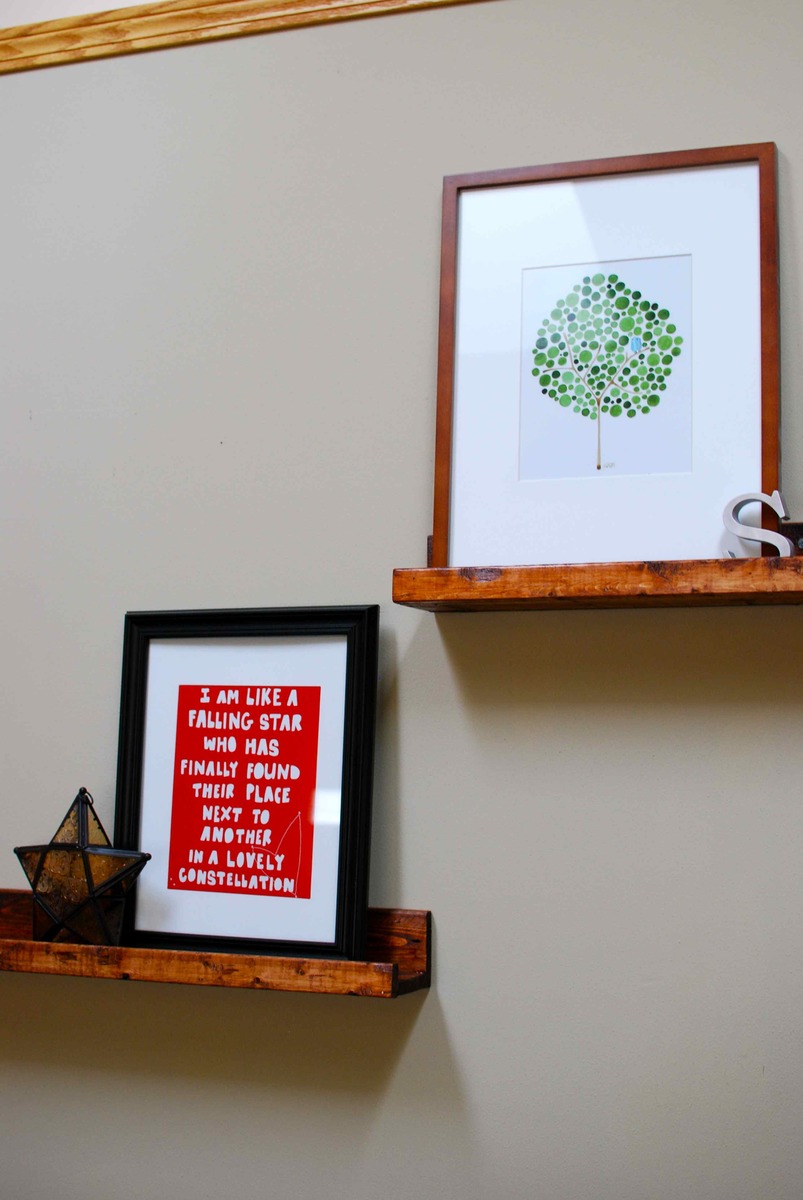
Our take on the 10 dollar ledges. We definitely wanted a rustic look. I love them!
Mon, 10/08/2012 - 00:37
Hello, these are gorgeous! What kind of stain/finish and in what color was used on these shelves? Really love it and would like to know how to make them look liek this.
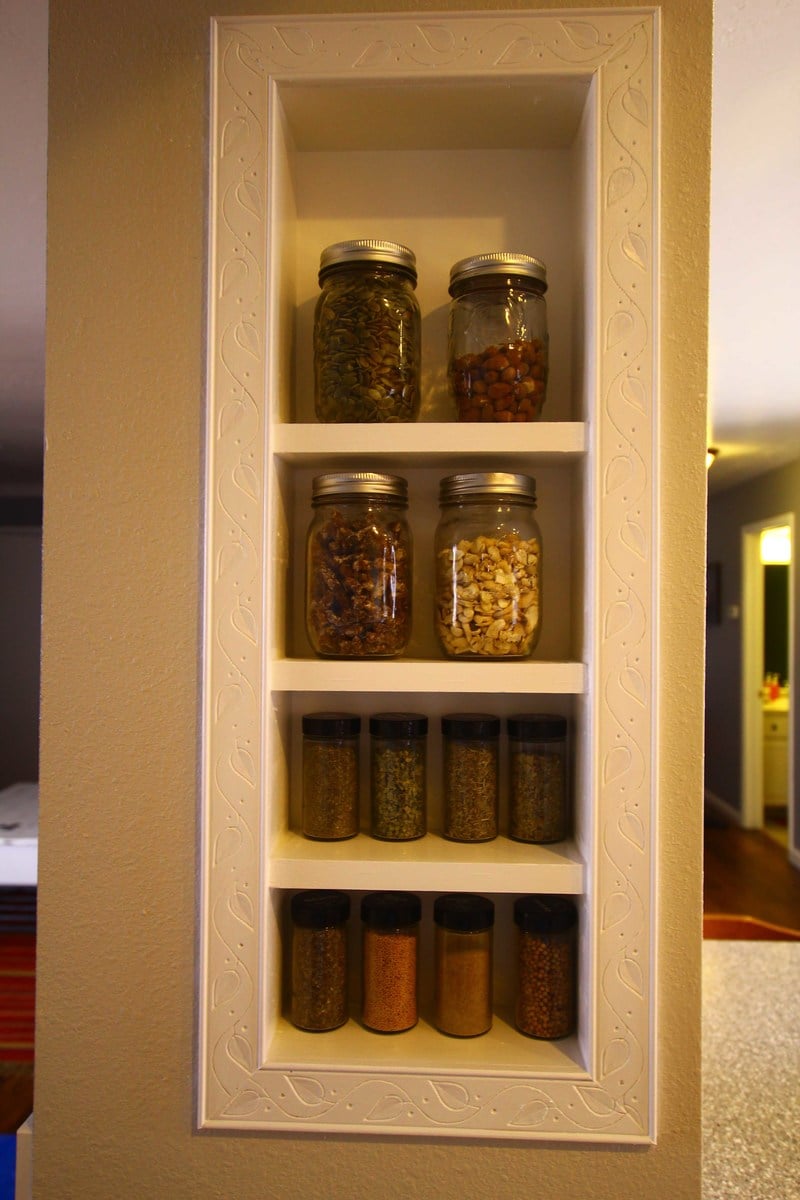
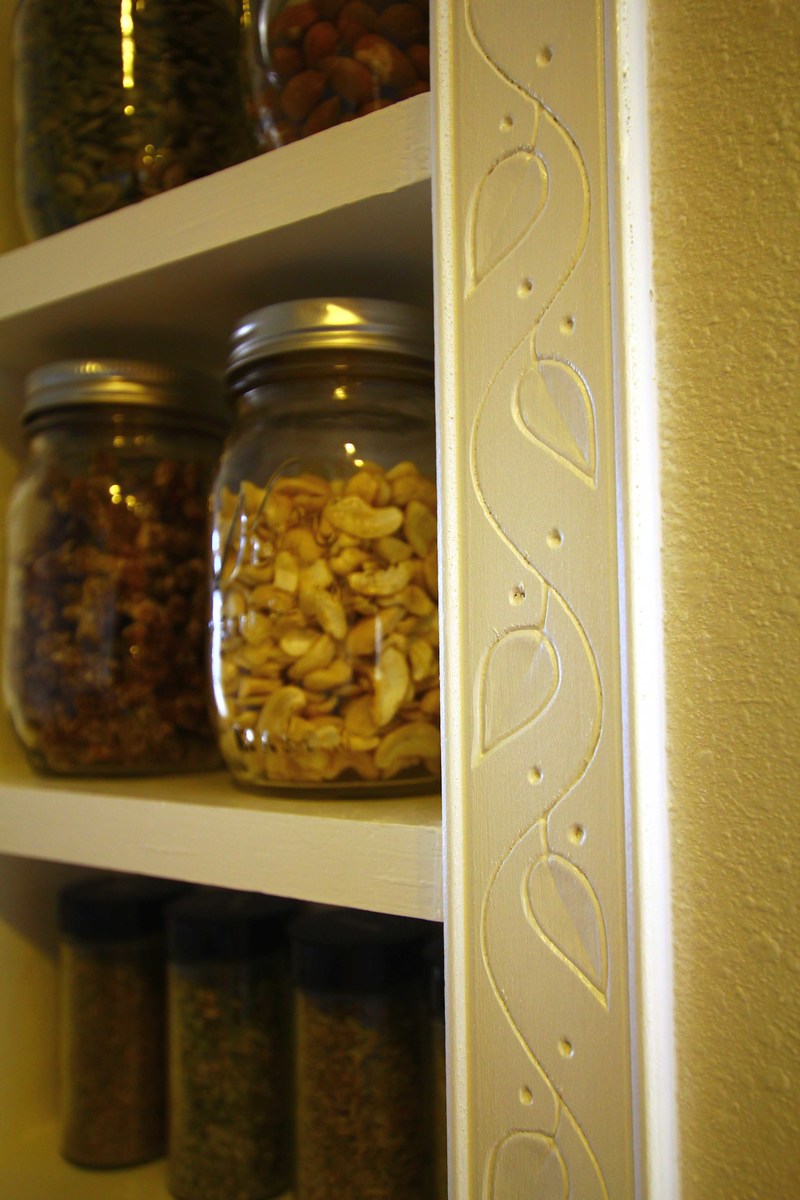
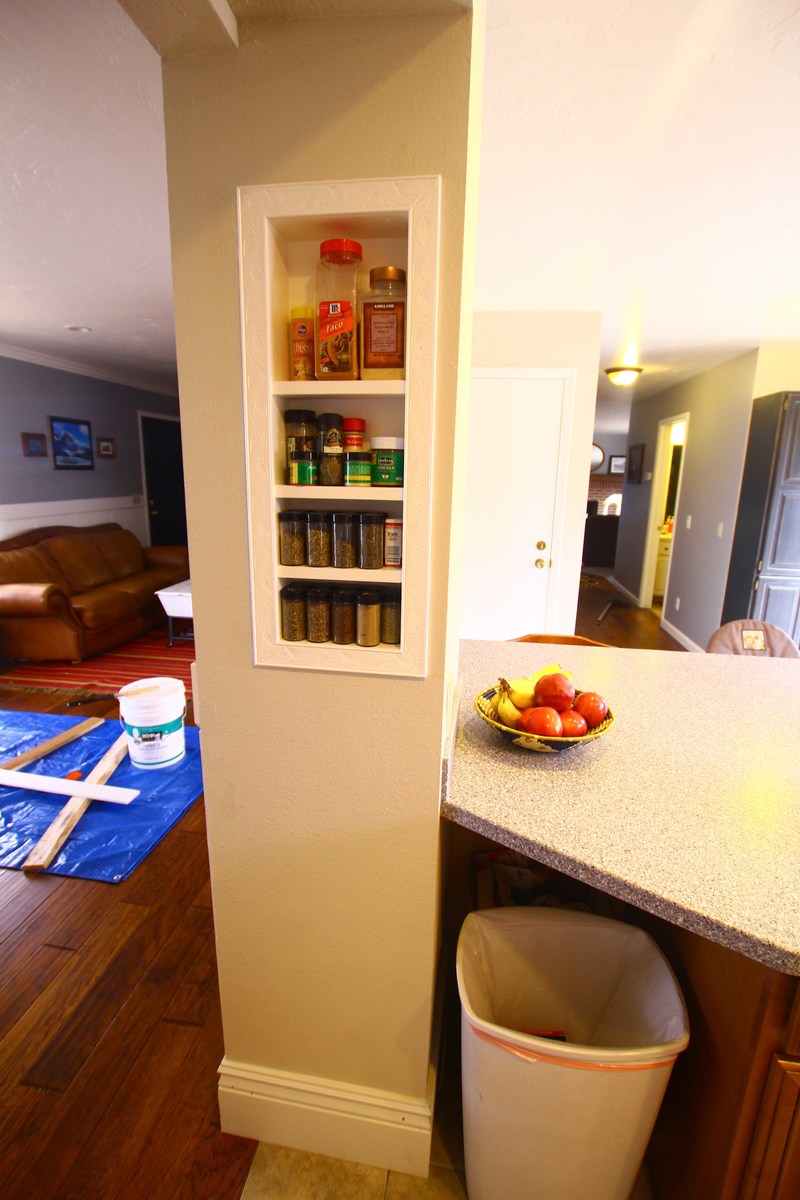
I followed the spice rack plans but put this right inside my wall and added a face frame. I love the detail in the carved wood!
This was my 4th build, and only took a few weekends to do, working on it a few hours at a time each day. Pretty easy, though I didn't include the X braces on the sides due to miscutting them (just got the angles backwards). I used Minwax Provincial and Minwax polyurethane. Excuse the mess in the photos.

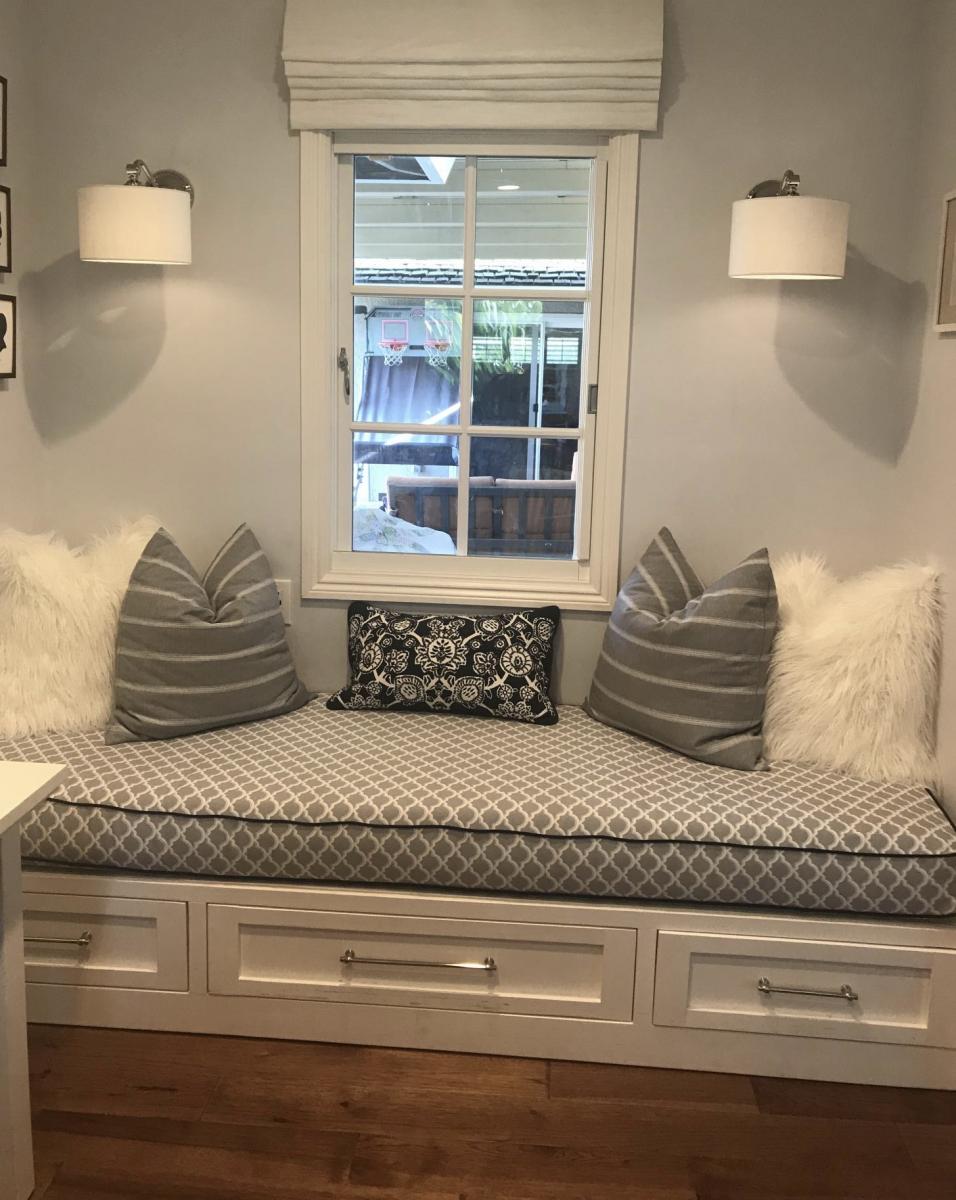
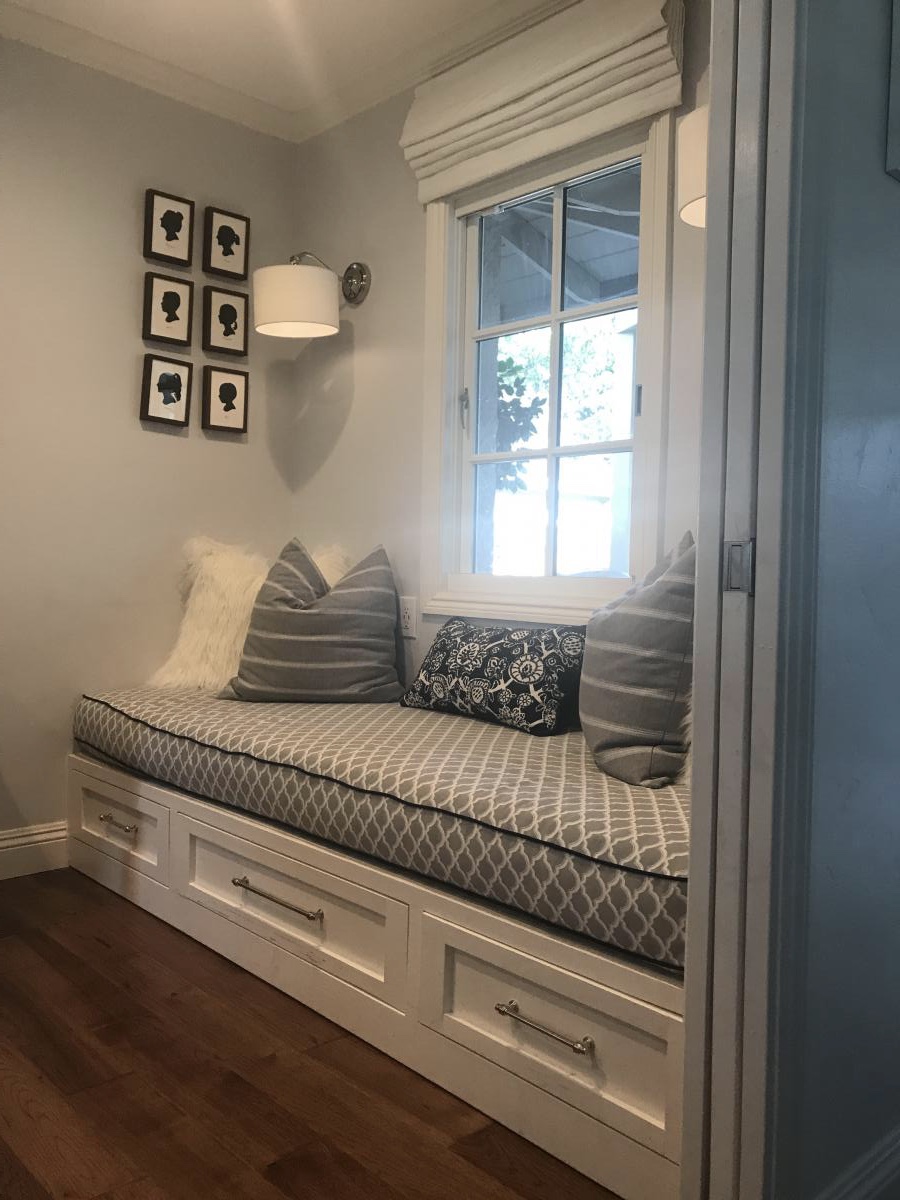
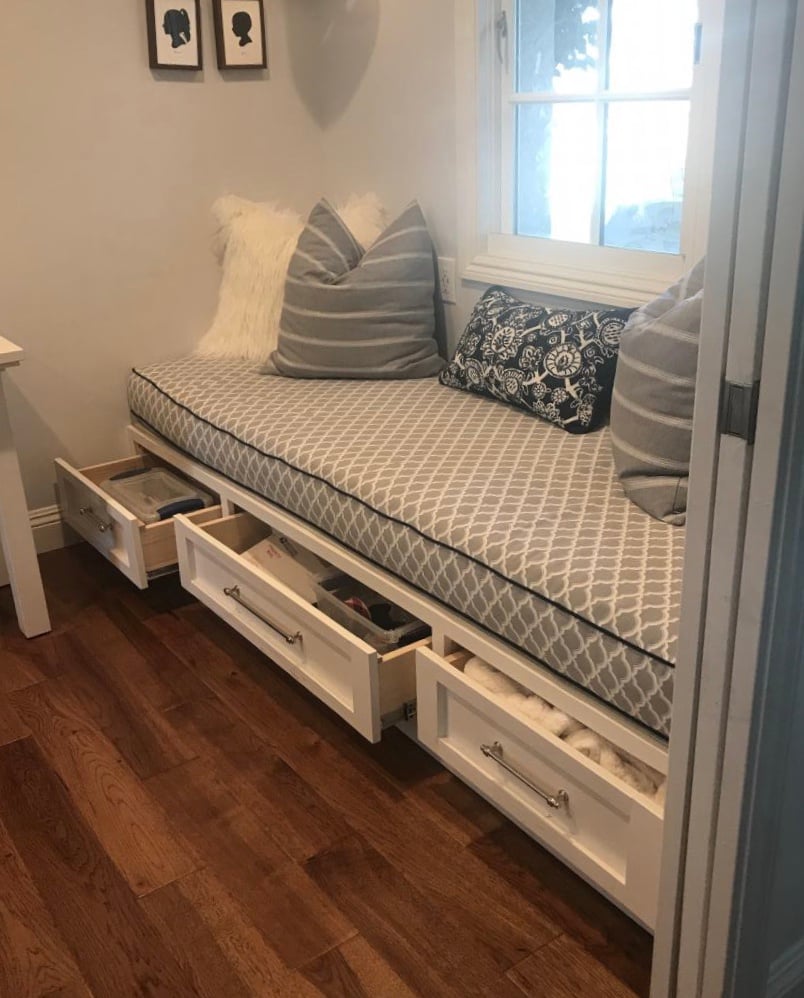
Ana White, you inspired me! My husband bought me a miter saw for Christmas but I was too afraid to use it for all of my woodworking dreams...and then I found your blog!
I am a mother of six young kids but I watched your videos over and over and I reworked your plans to fit our little build-out and voila! We are beyond thrilled with the results! We have a new bed for overnight guests and a great reading nook for 2-3 people at a time!
Thank you for empowering women in the BEST way. My husband was there to help me with the heavy lifting and to cheer me on when I needed it. But if I hadn’t found you, I’m not sure I would have tackled it in the first place. Thank you and God bless your family!!

Sat, 03/14/2020 - 14:11
We are building a bed for my son with drawers. Would you mind giving the dimensions of the drawers you mad? Thank you

Extra large chalk board for church coffee shop. Made from plywood 90 x 40 (cut by Home Depot), chalk board paint, pine boards for frame. Used stencils for most lettering. The board on right is attached with Velcro strips so it’s removable so that I can change out every season. Super easy to build.
Sheri Robertson
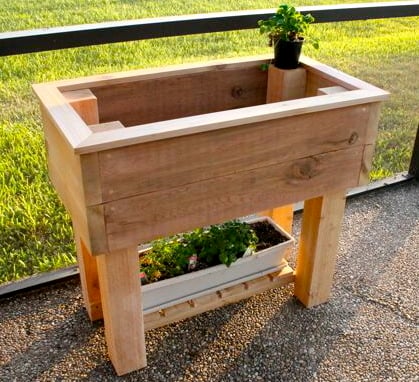
My husband and I decided that we want to learn how to do some gardening and thus decided to build an elevated planter box. A full tutorial is available here
http://sawgrasshome.com/?p=1495
We love it and hope you will too!
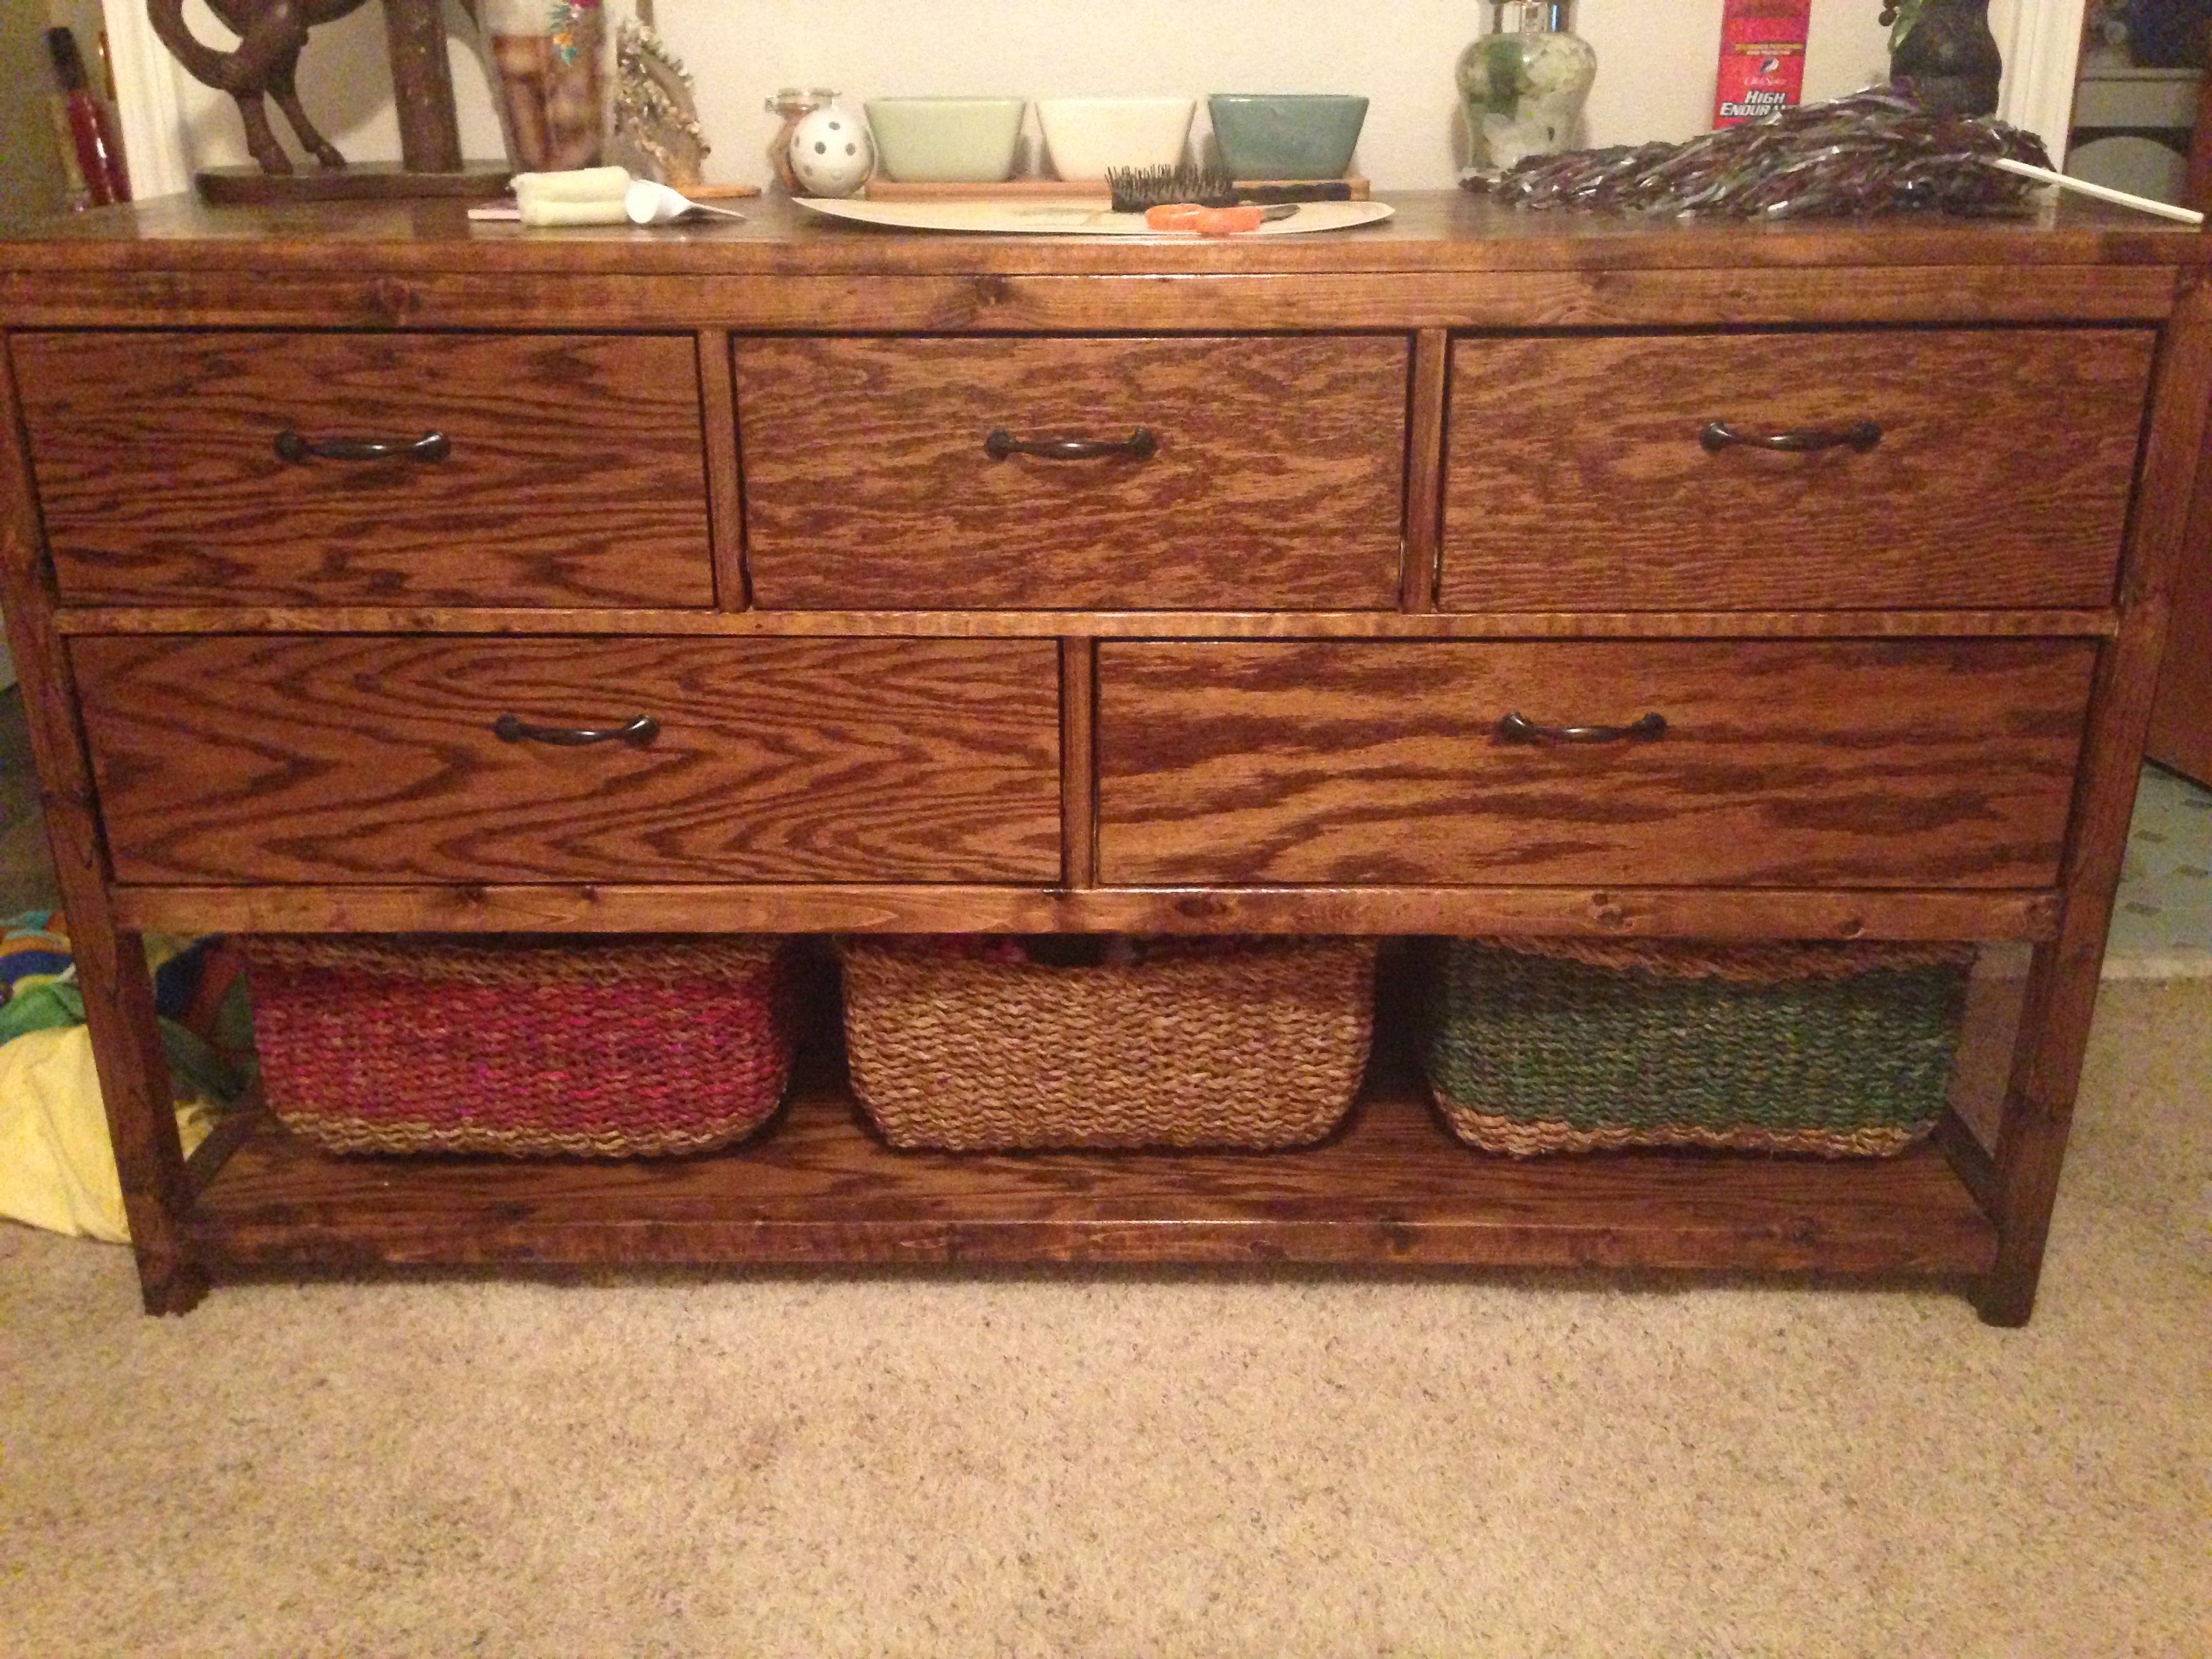
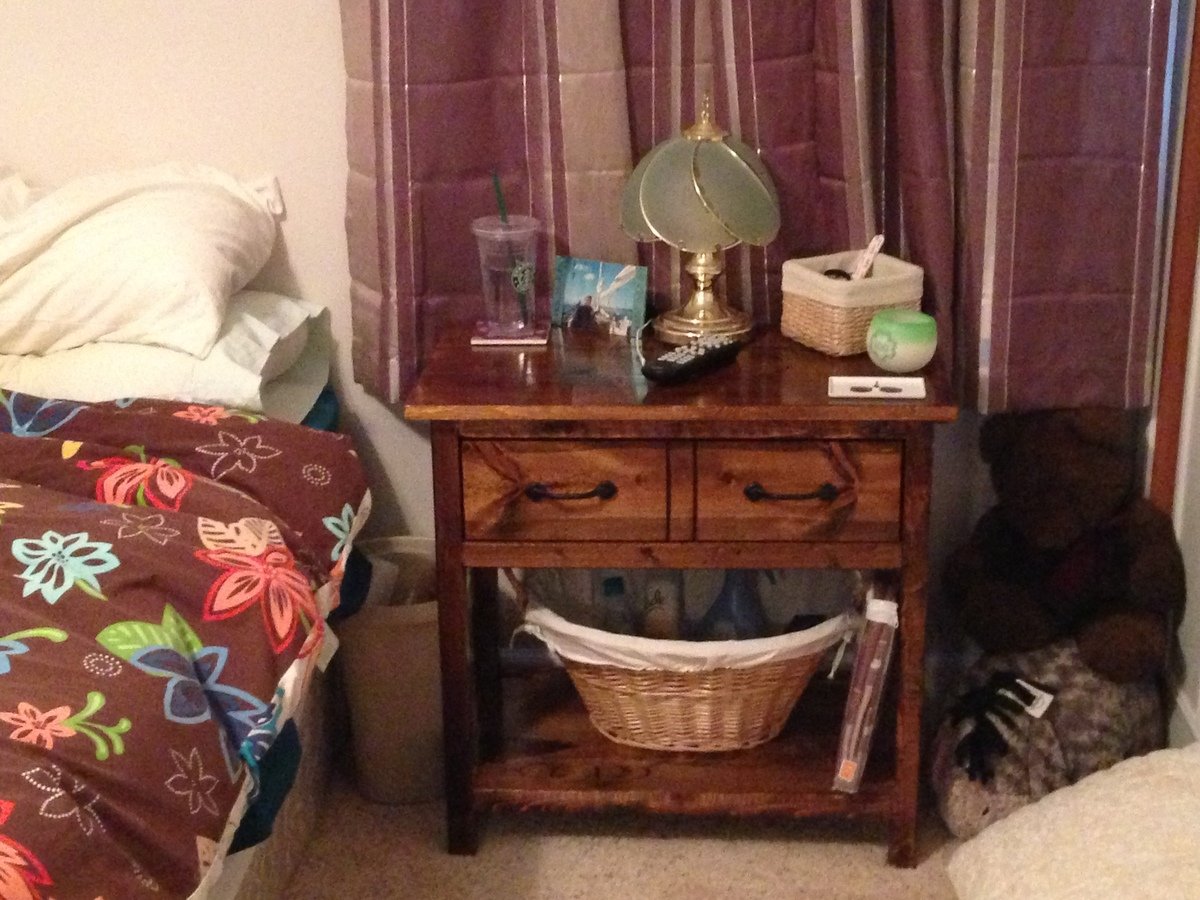
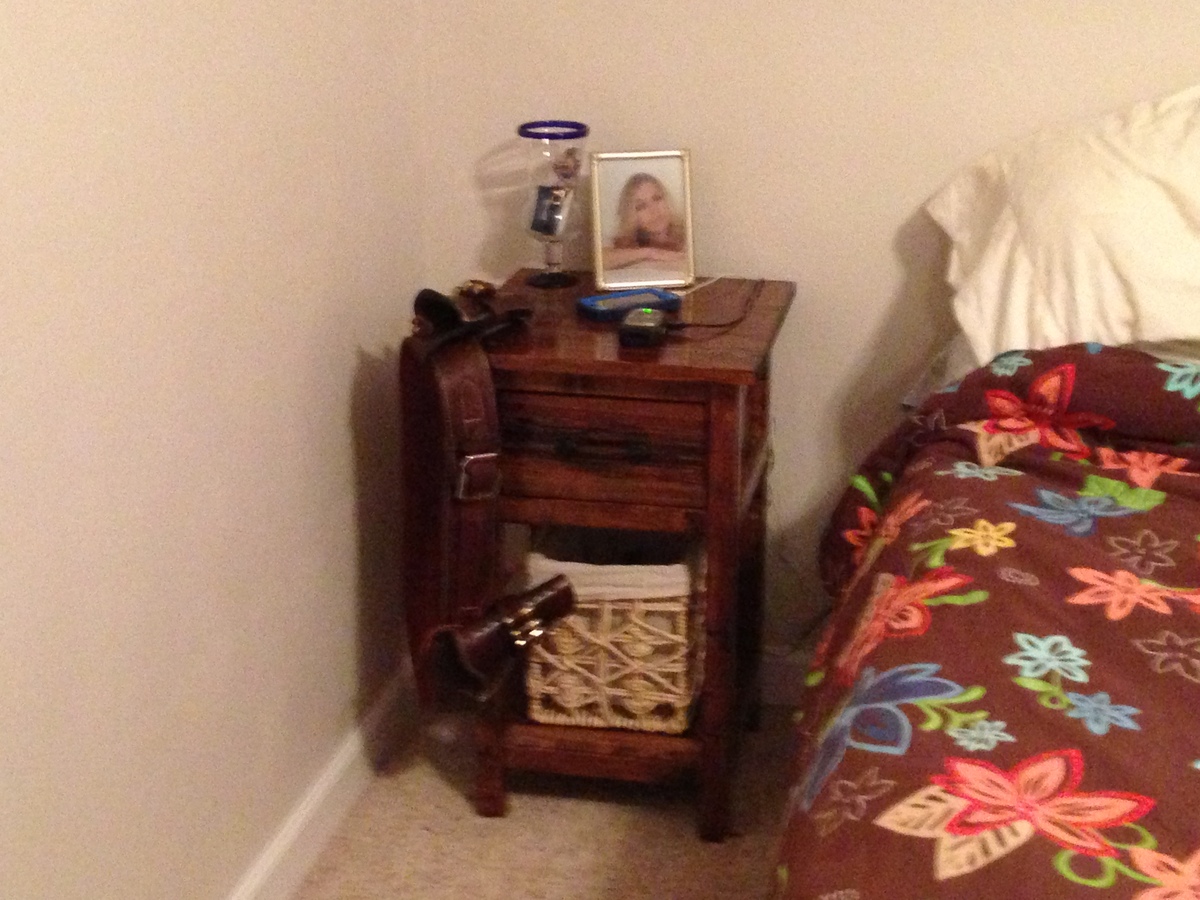
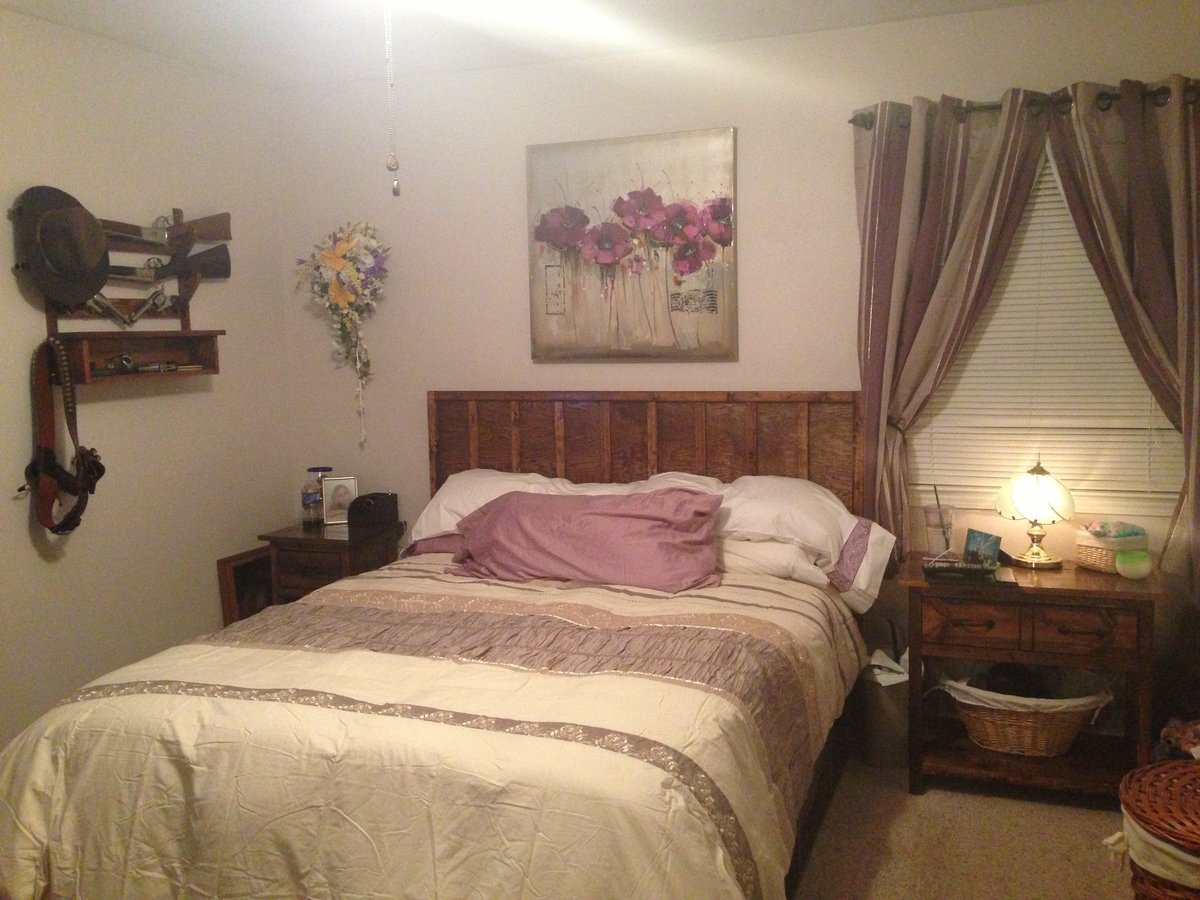
This was my first big project...I wanted to get rid of the store-bought bedroom set that overwhelmed our small room, but I still needed to keep all of the storage space it provided. I started small with the Farmhouse Nightstand, then moved to a double size nightstand. I couldn't stop once I got rolling! The most challenging was the dresser, but I have no complaints! It was a wonderful challenge. Lastly, I made a queen platform storage bed - it has open cubbies underneath with baskets for drawers. I couldn't be happier or prouder of how this came out, our bedroom looks 10 times bigger! I've always been a do it yourself kind of gal - but I surprised myself with this one!
The tables were quick to build, they can both be done in a day. The dresser was a weekend project as was the bed. The finishing has to be done over several days. I'd say this could be done over a week if you have the time. I did this over 3 weekends and finishing in the evenings after work.

Fri, 01/31/2014 - 20:47
Your farmhouse bedroom looks awesome! Looks like you used all your available space beautifully and to its best advantage. And the finish is gorgeous! Great project!

Fri, 01/31/2014 - 22:46
You did a great job and I love the finish!! Im looking at building the dresser soon.
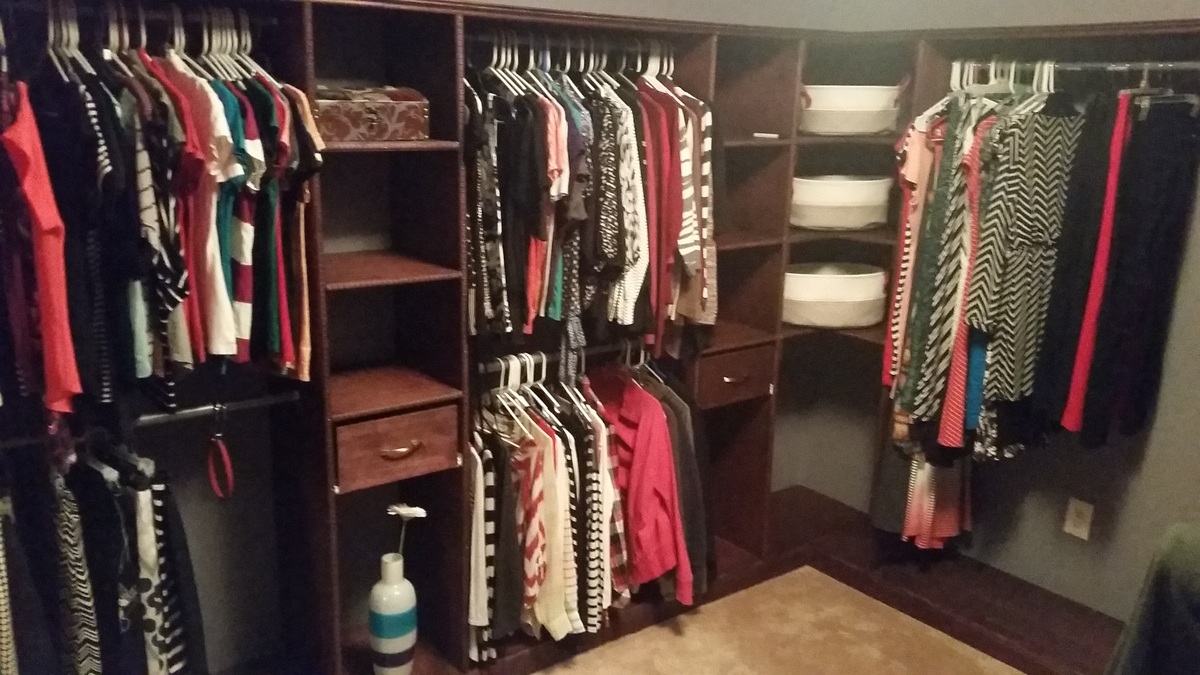
I thought I'd wait and take these glorious after photos once I was done - but nevermind that idea. Here are some pictures of progress, start to finish. I still plan to build some shoe cubbies for the towers so that my wife has a little more shoe-room.
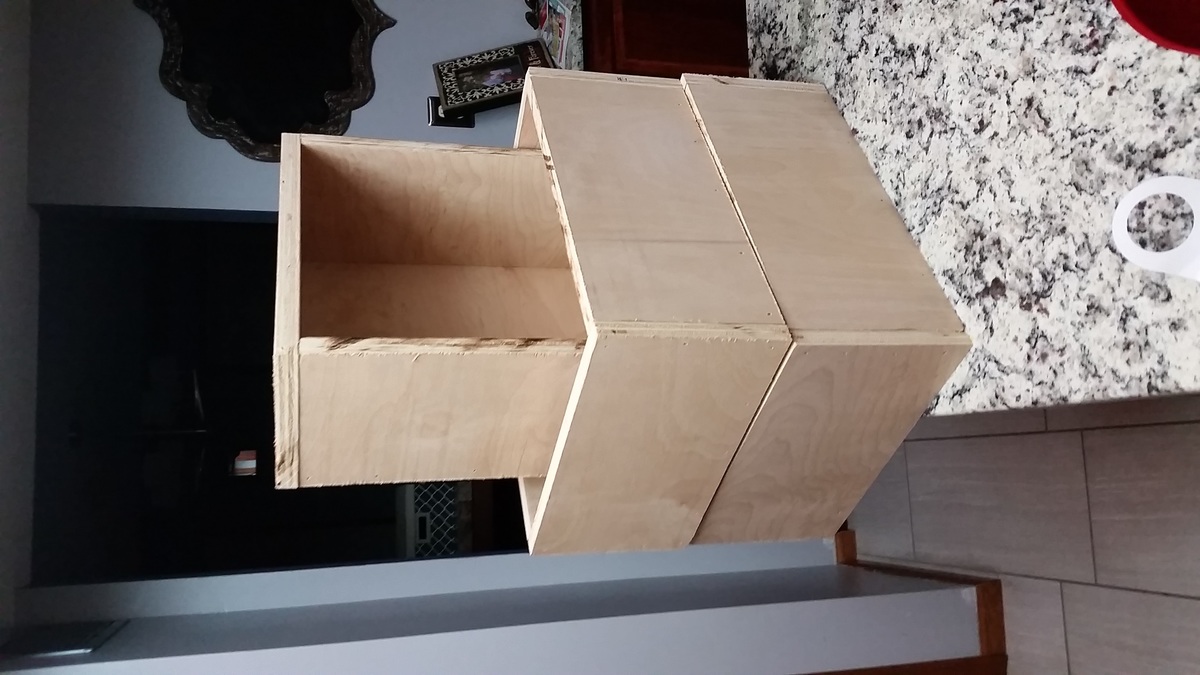
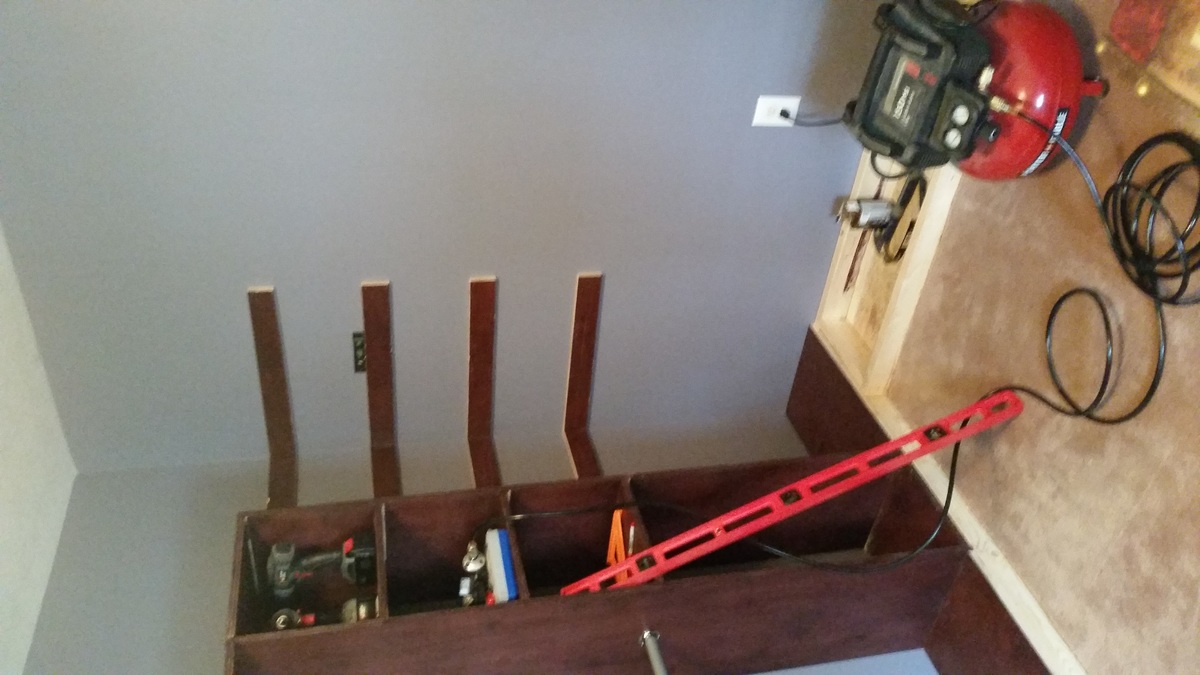
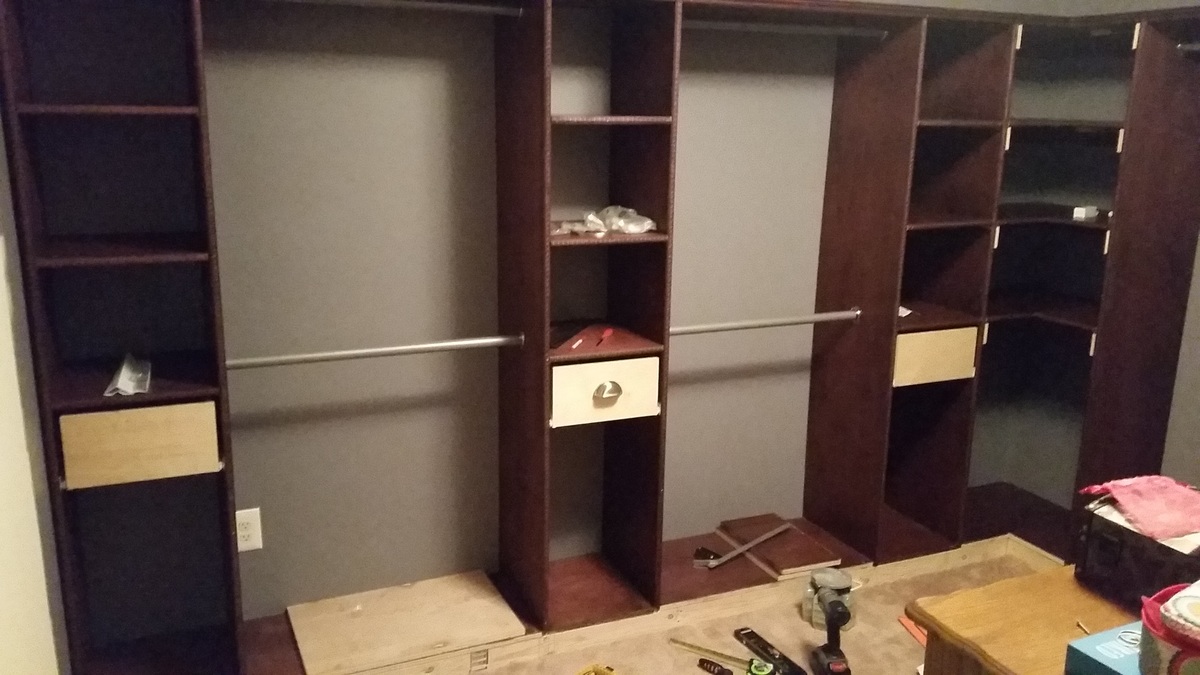
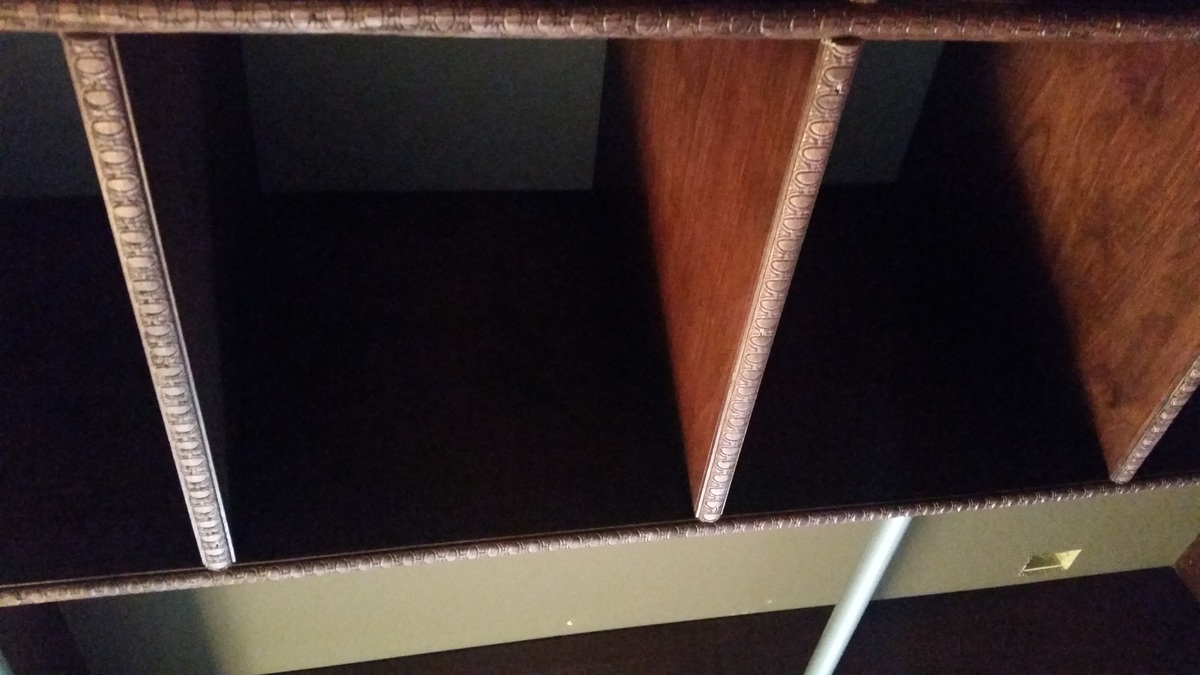
We have a 5th bedroom directly off the master with a double door entrance where the 5th bedroom's closet would have been. The room had been an office for the previous owner and my wife decided it would be a perfect closet for her. I followed the plans quite closely for the towers. I wish I had considered my 8+ foot ceilings and just built the towers taller because 1) storing stuff on top will look messy, and 2) The hanger rods aren't spaced quite well enough for longer clothing. Because of this, I had to build her another hanger on the other side of the wall, which increased the complexity of the project (corner shelves, more wood, more staining, more finishing, etc). In the end, I think it turned out great. I will walk through the process very quickly.
That is pretty much it. I think I have about $500-600 in it. Probably 60-70 hours. If I did it all over again, I could do it better and faster and on the same budget. As noted in the plans, SQUARE is the most important thing. I had to fix all the tower shelves once I had them mounted to the wall because they just were not level/square enough.

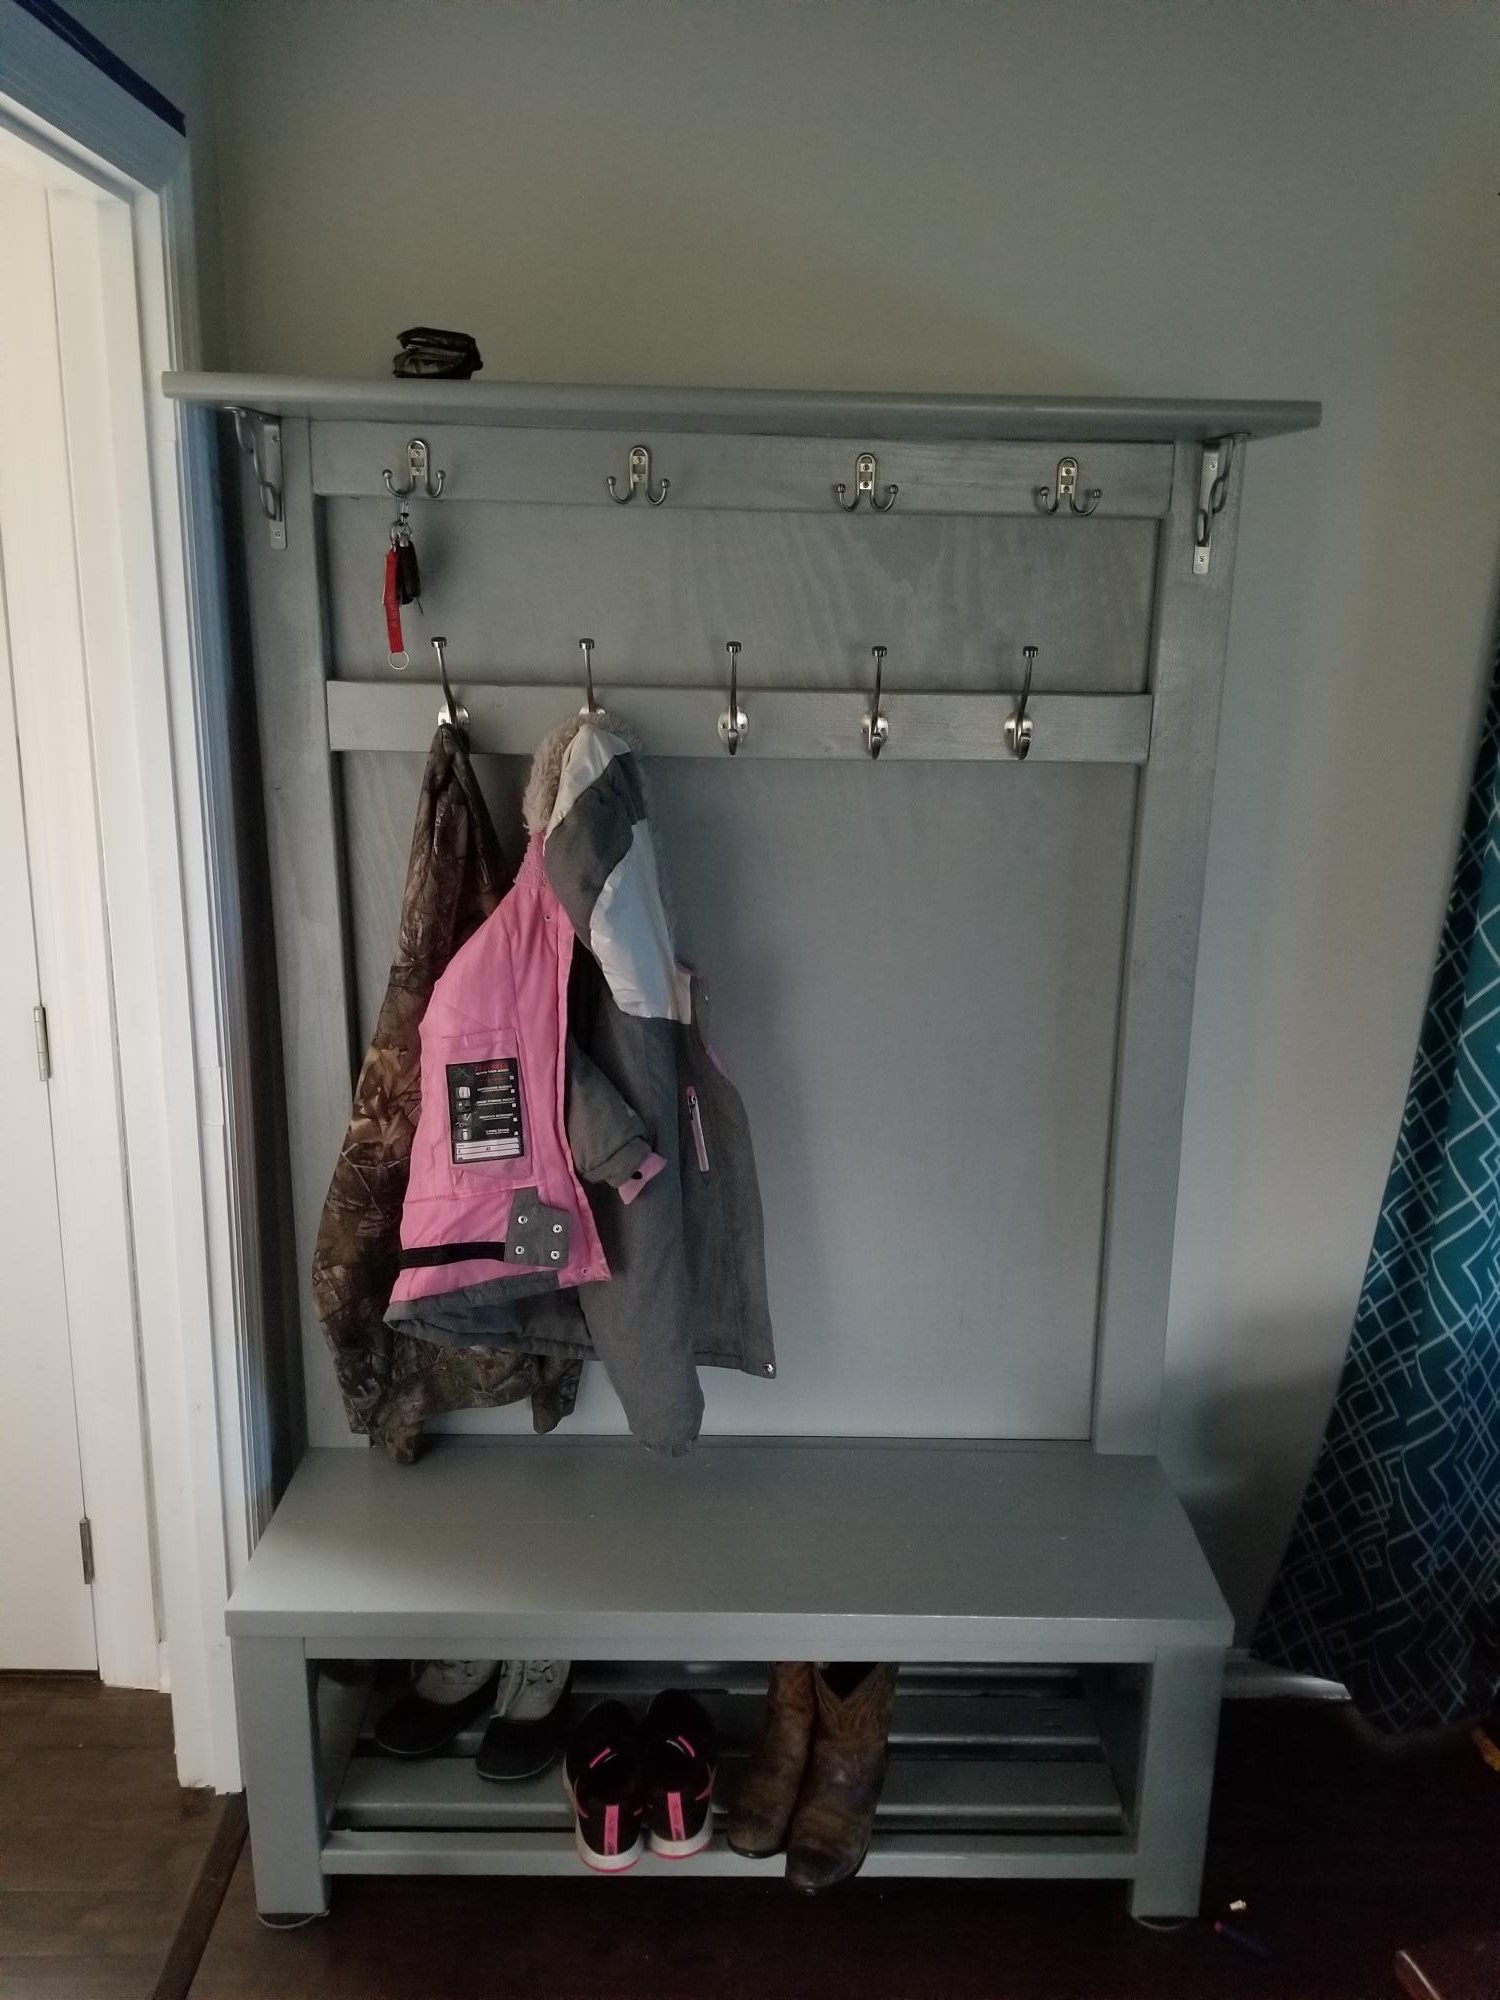
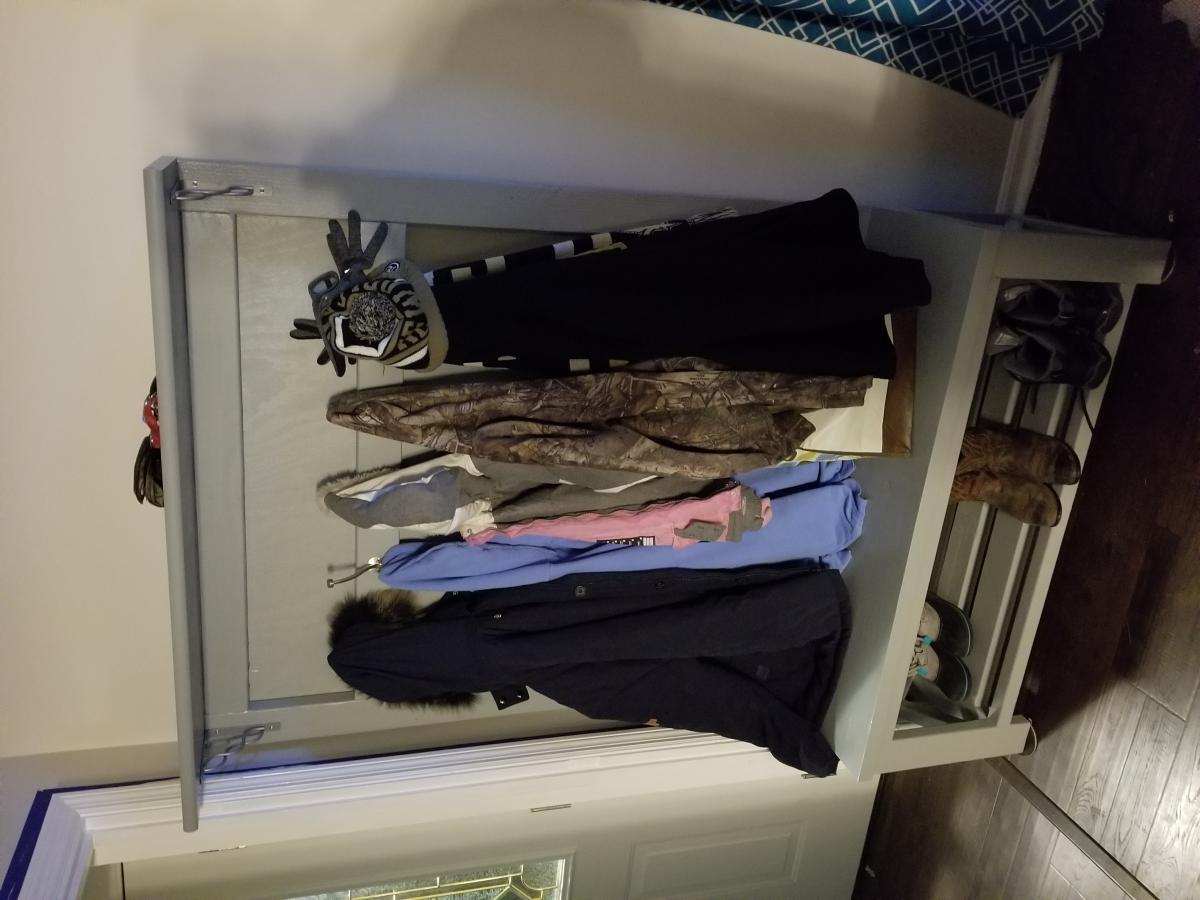
These plans were awesome! Thank you so much for sharing!! I added a few hooks on top for my keys and found this top board at Lowe's for $10, no I have a place to lay my wallet and phone. I tweaked mine to fit my needs but again, this plan was amazing, that KS for sharing! I look forward to making more of your projects.
Note: I chose this project as a weekend long project because I applied paint and it did take much longer for the paint to dry in this cold weather. The build was approximately 1 day.
Modified two building plans into one farmhouse style table. Two of Ana’s benches as well.
Grace LeBlanc