Community Brag Posts
Step Stool
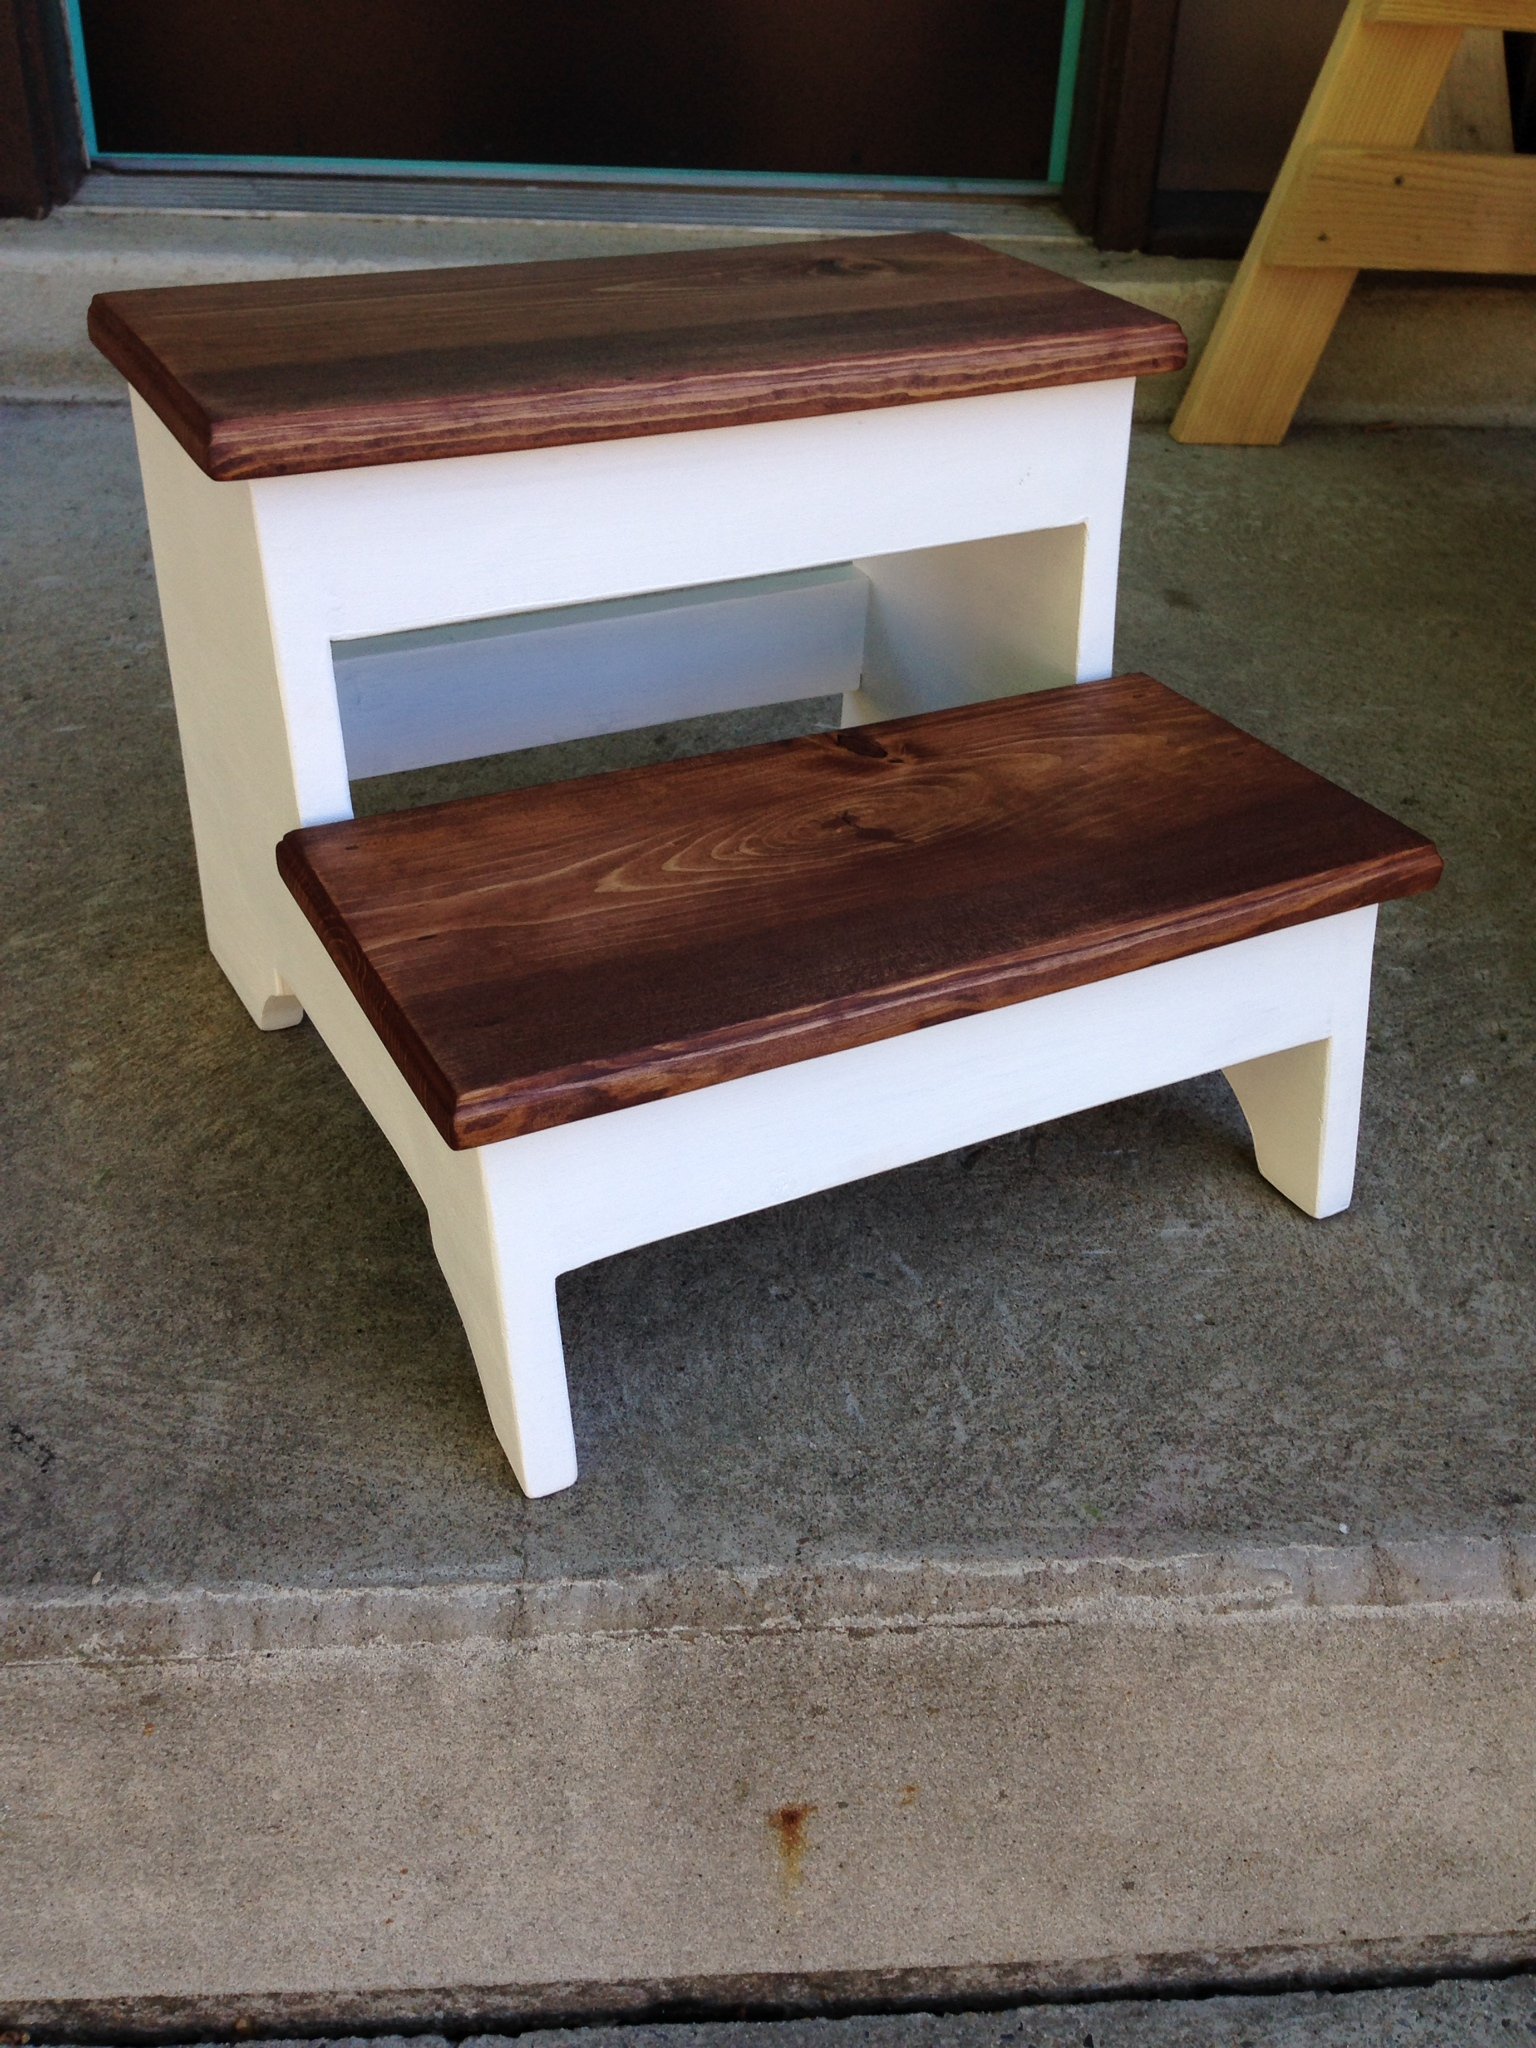
I needed a step stool for my son to be able to reach the bathroom sink to brush teeth and wash hands. This plan was exactly what I was looking for. As I do with all first time projects, I built this out of inexpensive pine. It is very sturdy, and holds me without a problem. I routed the edges of the treads, and used 1x3 material for the braces as opposed to the 1x2 called for in the plan. The plan was easy to follow and the cutting list worked perfectly. The most challenging part was creating the curves with the jig saw, but truly wasn't bad at all.
Built from Plan(s)
Estimated Time Investment
Afternoon Project (3-6 Hours)
Finish Used
As I am contemplating switching out our carpeted stairway to hardwood, I wanted to play with the white and stained look. I used semi gloss Valspar paint, and Minwax English Chestnut stain. I also applied 3 coats of polyurethane to provide added protection from water.
Recommended Skill Level
Beginner
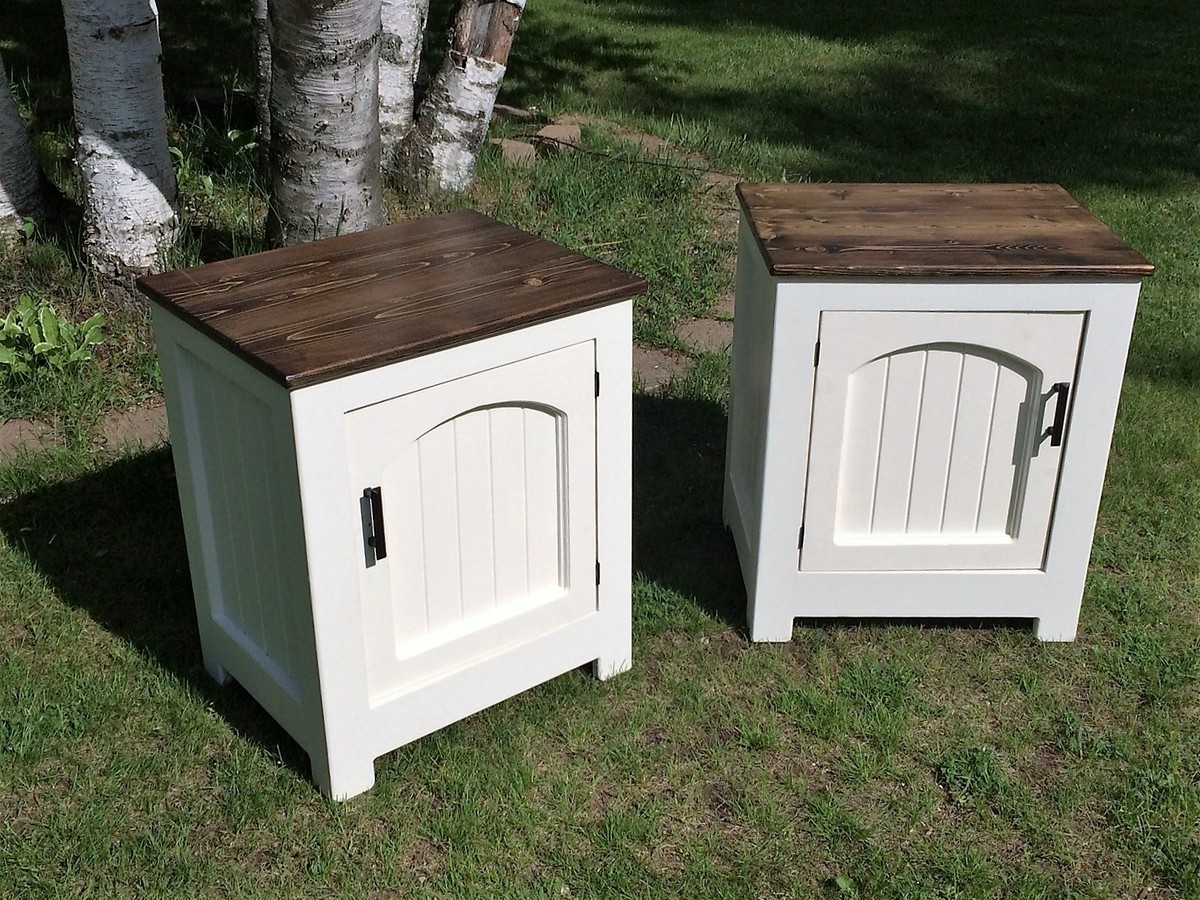
Night Stands

I finished these night stands this past spring. I followed the Kentwood night stand plan from Ana-White, but made a few design changes. I decided to arc the doors to give the tables a little more character. The material I chose was 3/4" pine. The table bases are finished off with 3 coats of Sherwin Williams paint, and the tops are walnut stained with 3 coats of poly. The contrast between the base and the top came out great, the stands look beautiful in our bedroom and offer lots of storage.
Built from Plan(s)
Estimated Time Investment
Weekend Project (10-20 Hours)
Finish Used
Paint, Walnut stain and poly.
Recommended Skill Level
Beginner
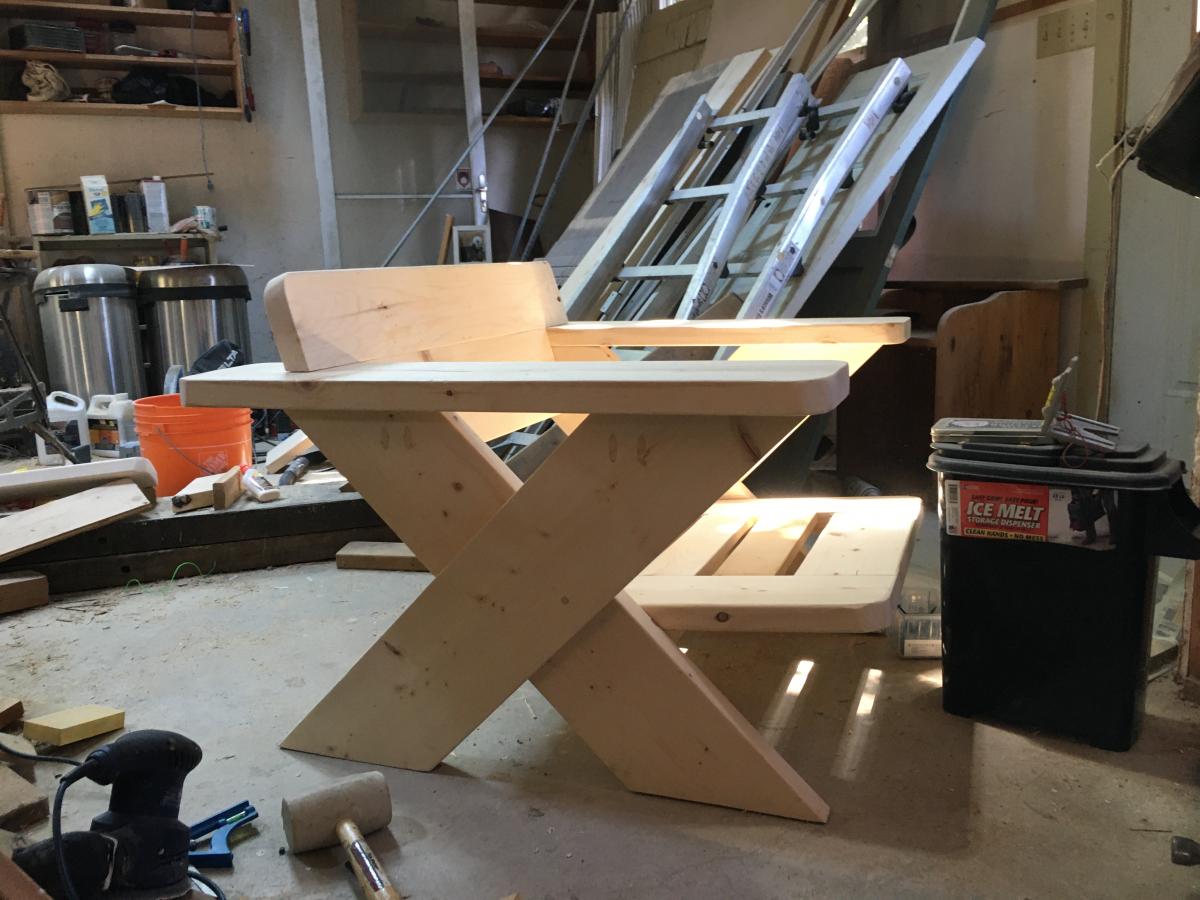
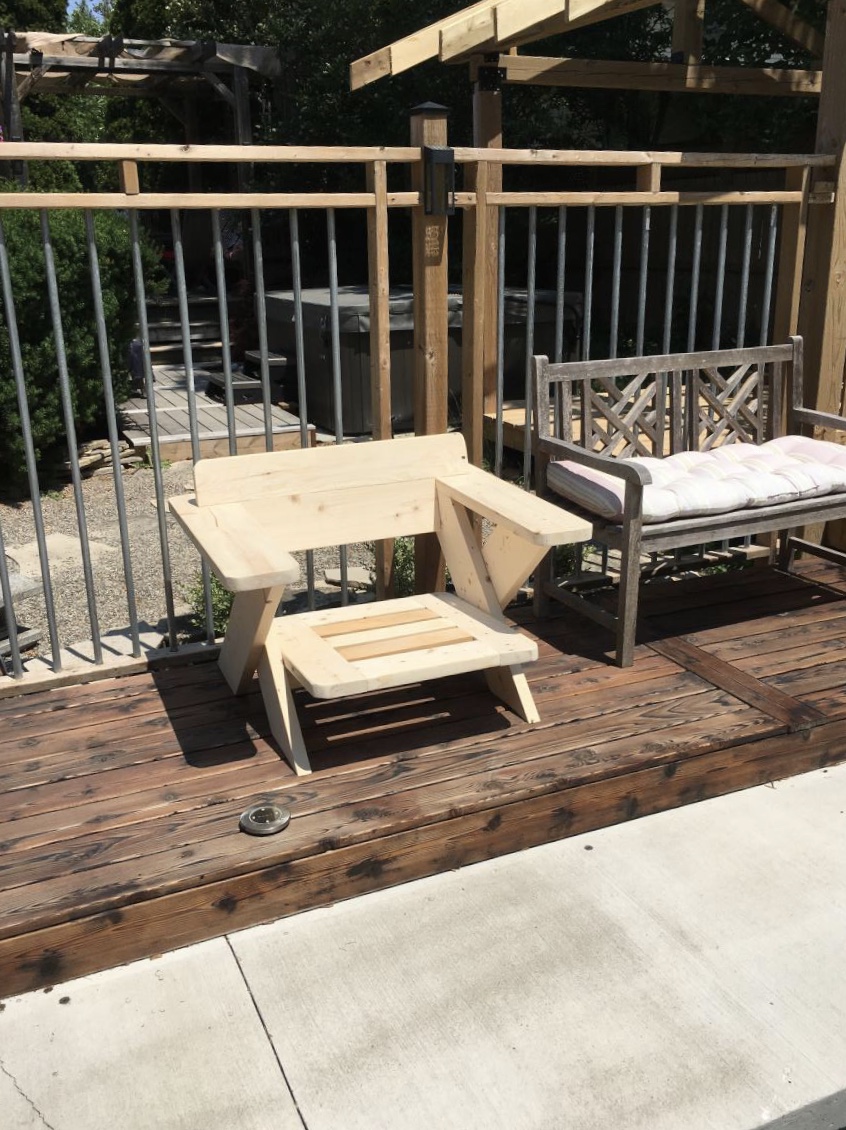
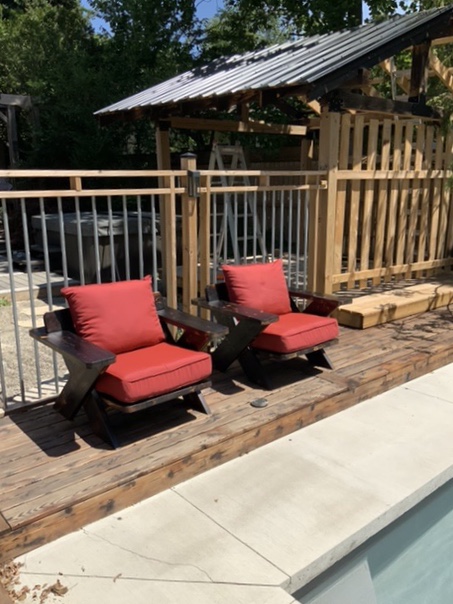
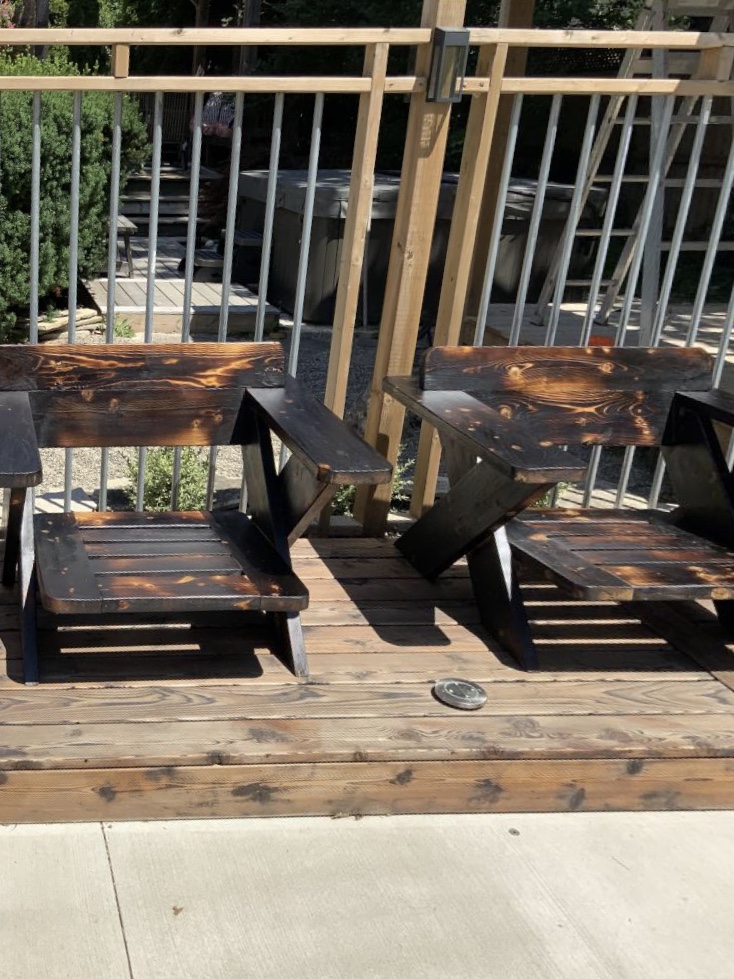
X chair copy

I saw these chairs online at a cost of $5,580 each . I thought they were very nice, but way too expensive. Using the online photo and dimensions I was able to more or less figure out the way it was made. The tool required are a mitre saw, table saw, kreg pocket hole jig, drill and palm sander. The chairs were then burned with a torch to waterproof them and bring up the grain in the wood. 3 coats of spar varnish cut with mineral spirits were applied to finish the project. The cost was about $130 Canadian each including the cushion, around 2% of the chair seen online.
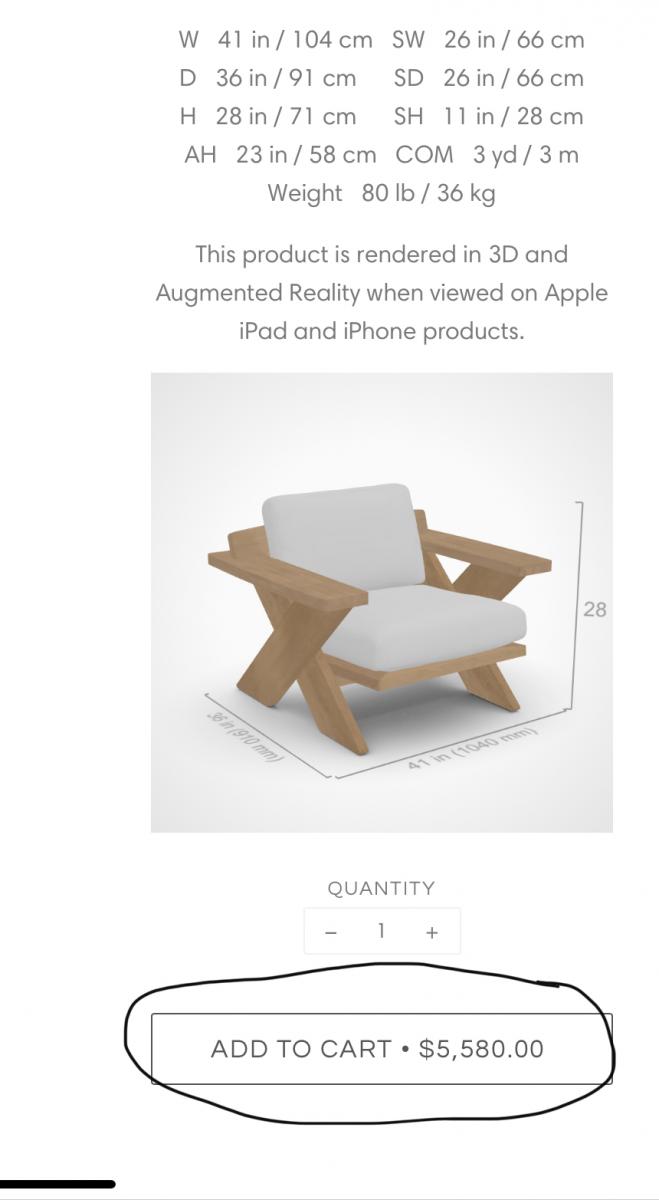
Estimated Cost
130
Estimated Time Investment
Weekend Project (10-20 Hours)
Finish Used
First shou sugi ban (Japanese wood burning technique) the wood and then 3 coats or spar varnish.
Recommended Skill Level
Intermediate
Wood Waterfall Framed Console Table
DIY Wood Waterfall Console Brandy Robinson @beautylikebran on IG
Built from Plan(s)
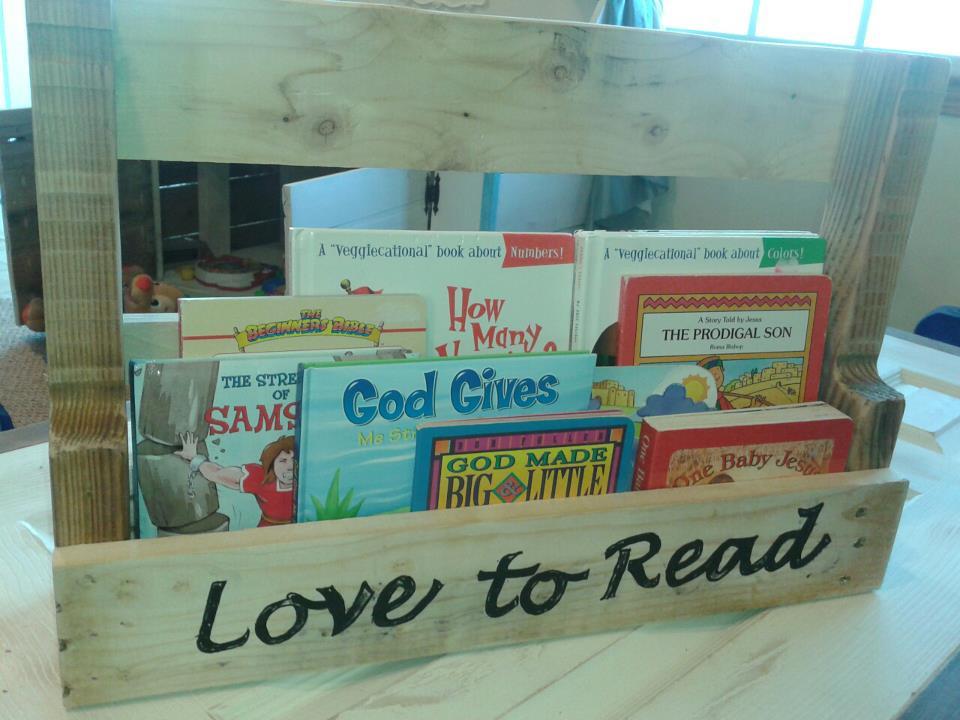
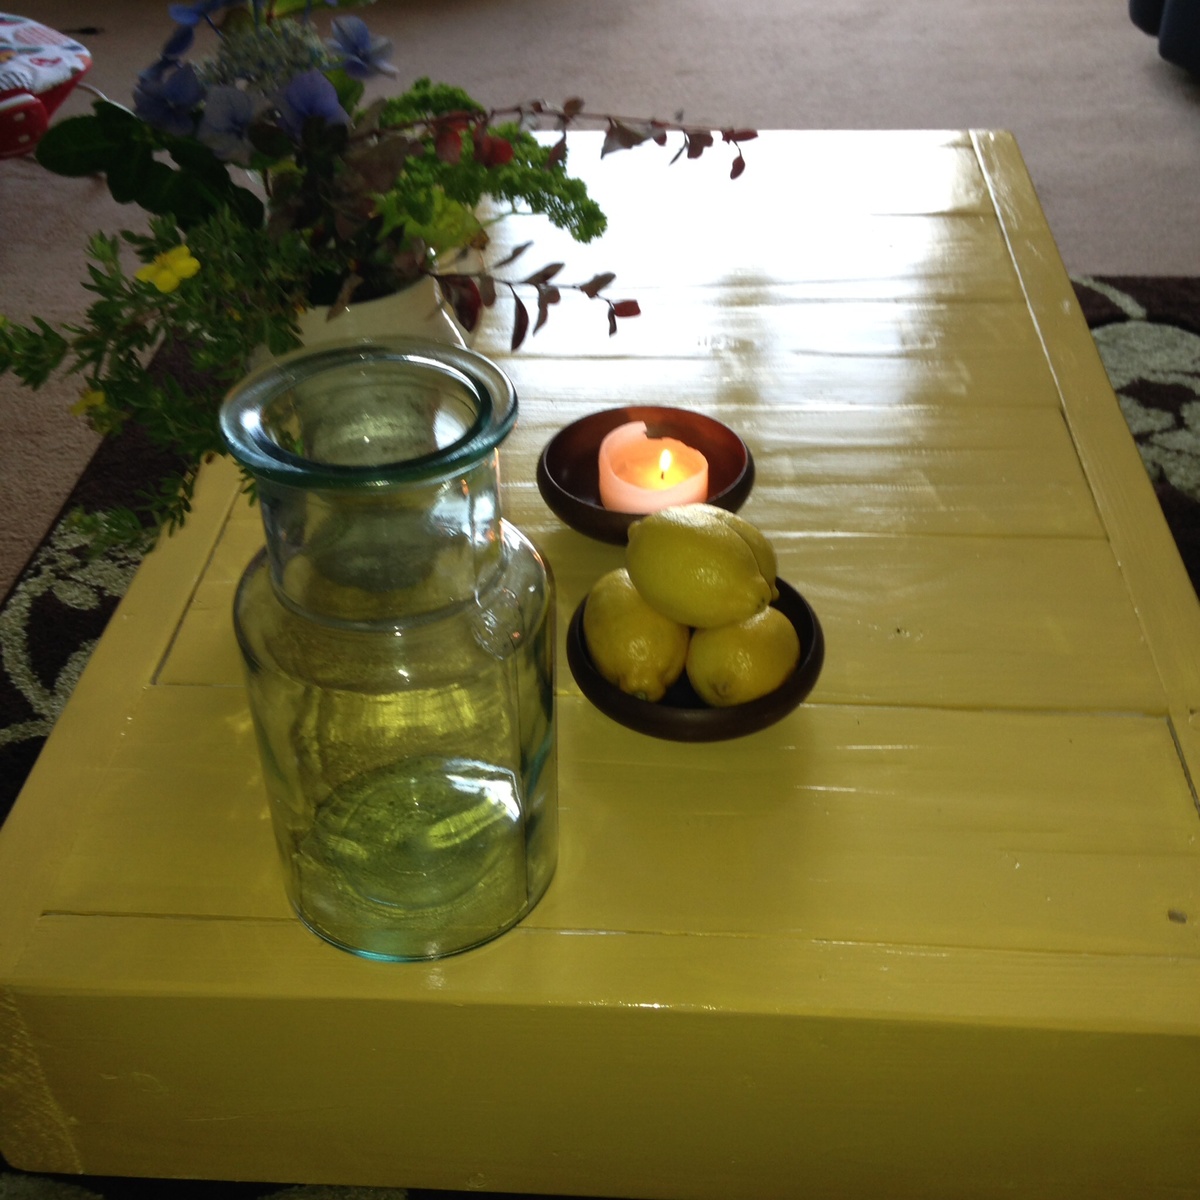
cubby seats

These are the cubby seats featured on Shanty 2 Chic's site along with Pottery Barn inspired Trestle table. This was a lot of fun to make because it was the first project I did using my hand saw. I normally have the wood cut at home depot. But now I can do it on my own!! you can check them out on my blog: goldhoopstochickencoops.blogspot.com
Built from Plan(s)
Estimated Cost
$25
Estimated Time Investment
Afternoon Project (3-6 Hours)
Finish Used
Rust-oleum aqua and lemon grass
Recommended Skill Level
Beginner
Gaby Kitchen Island
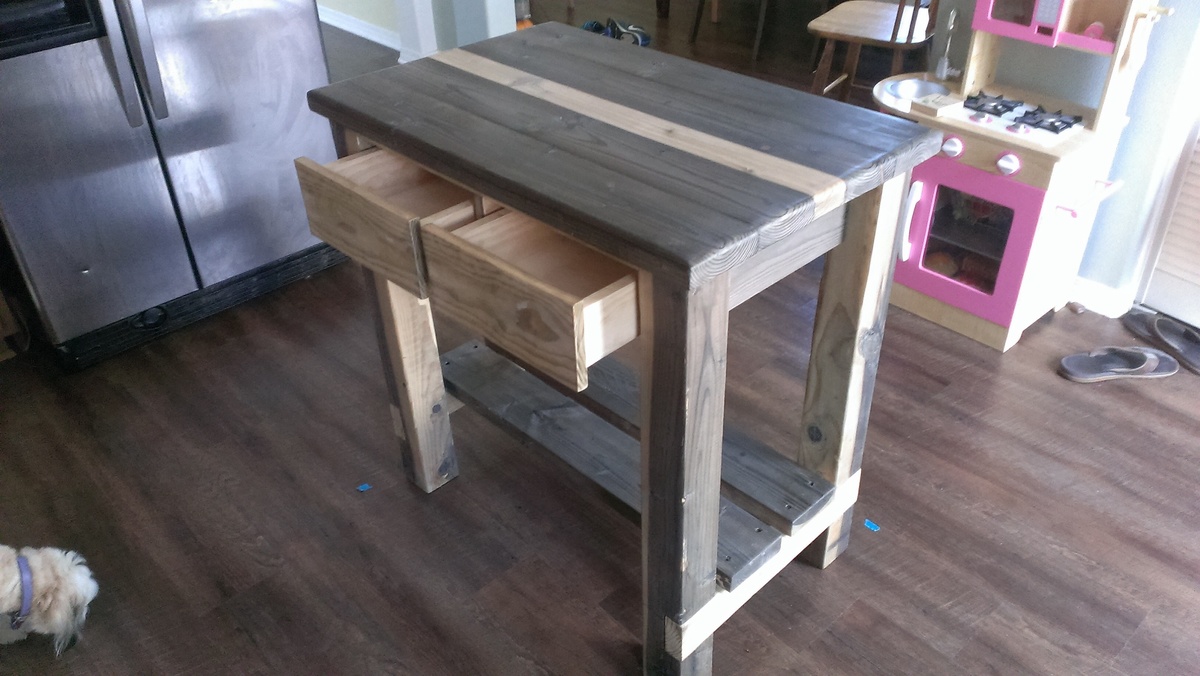
I used Ana's Gaby Kitchen Island plans and shortened the island to fit our small kitchen. I did not have reclaimed wood, so I used a vinegar and steel wool solution to transform the fir and pine into a completely unexpected look. For the top, I trimmed the edges of the 2 x 6s with my table saw to get a smoother top surface, then routered the edges with a 1/2 inch round over bit (thanks Steve Ramsey). I used white pine down the middle to make up for the edges I removed which looks like a cool custom stripe. (I also used the white pine for the side supports so hopefully there's some cohesion.)
Thank you Ana for the inspiration and great project! Can't wait for the next one :)
Estimated Time Investment
Weekend Project (10-20 Hours)
Finish Used
Vinegar and Steel Wool Solution for color; Min Wax Finishing Paste.
Recommended Skill Level
Beginner
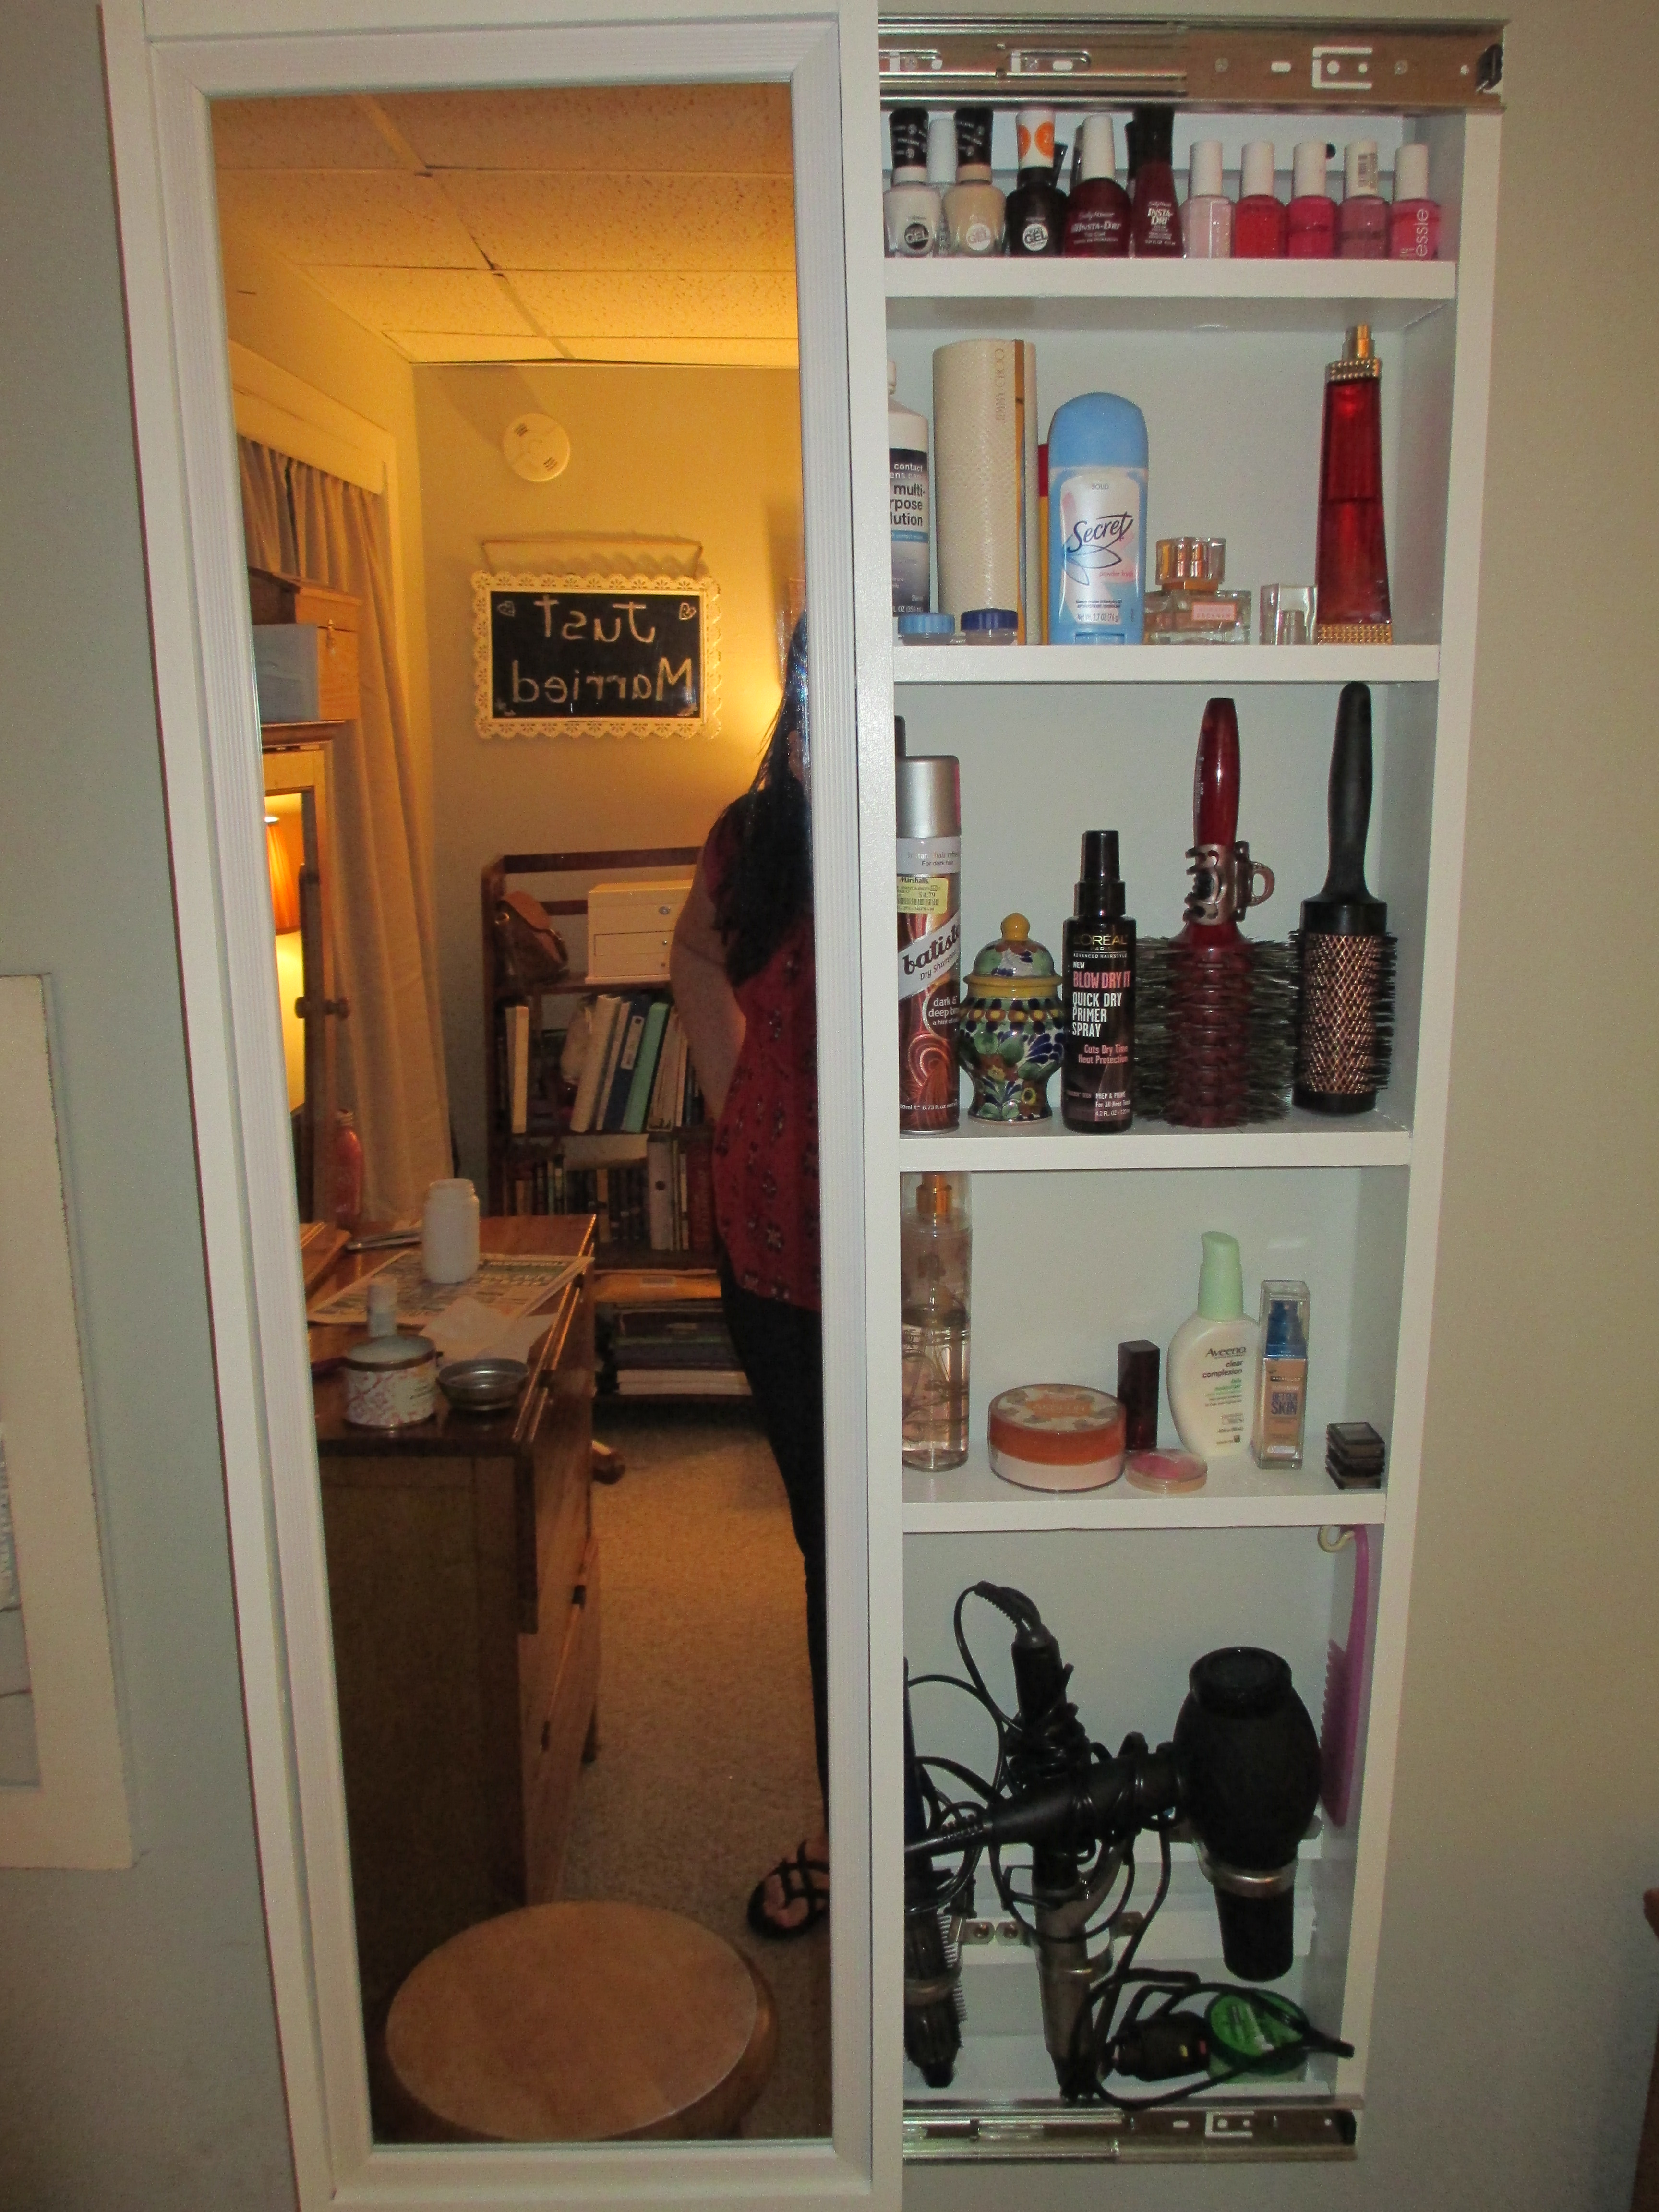
Mirror cabinet
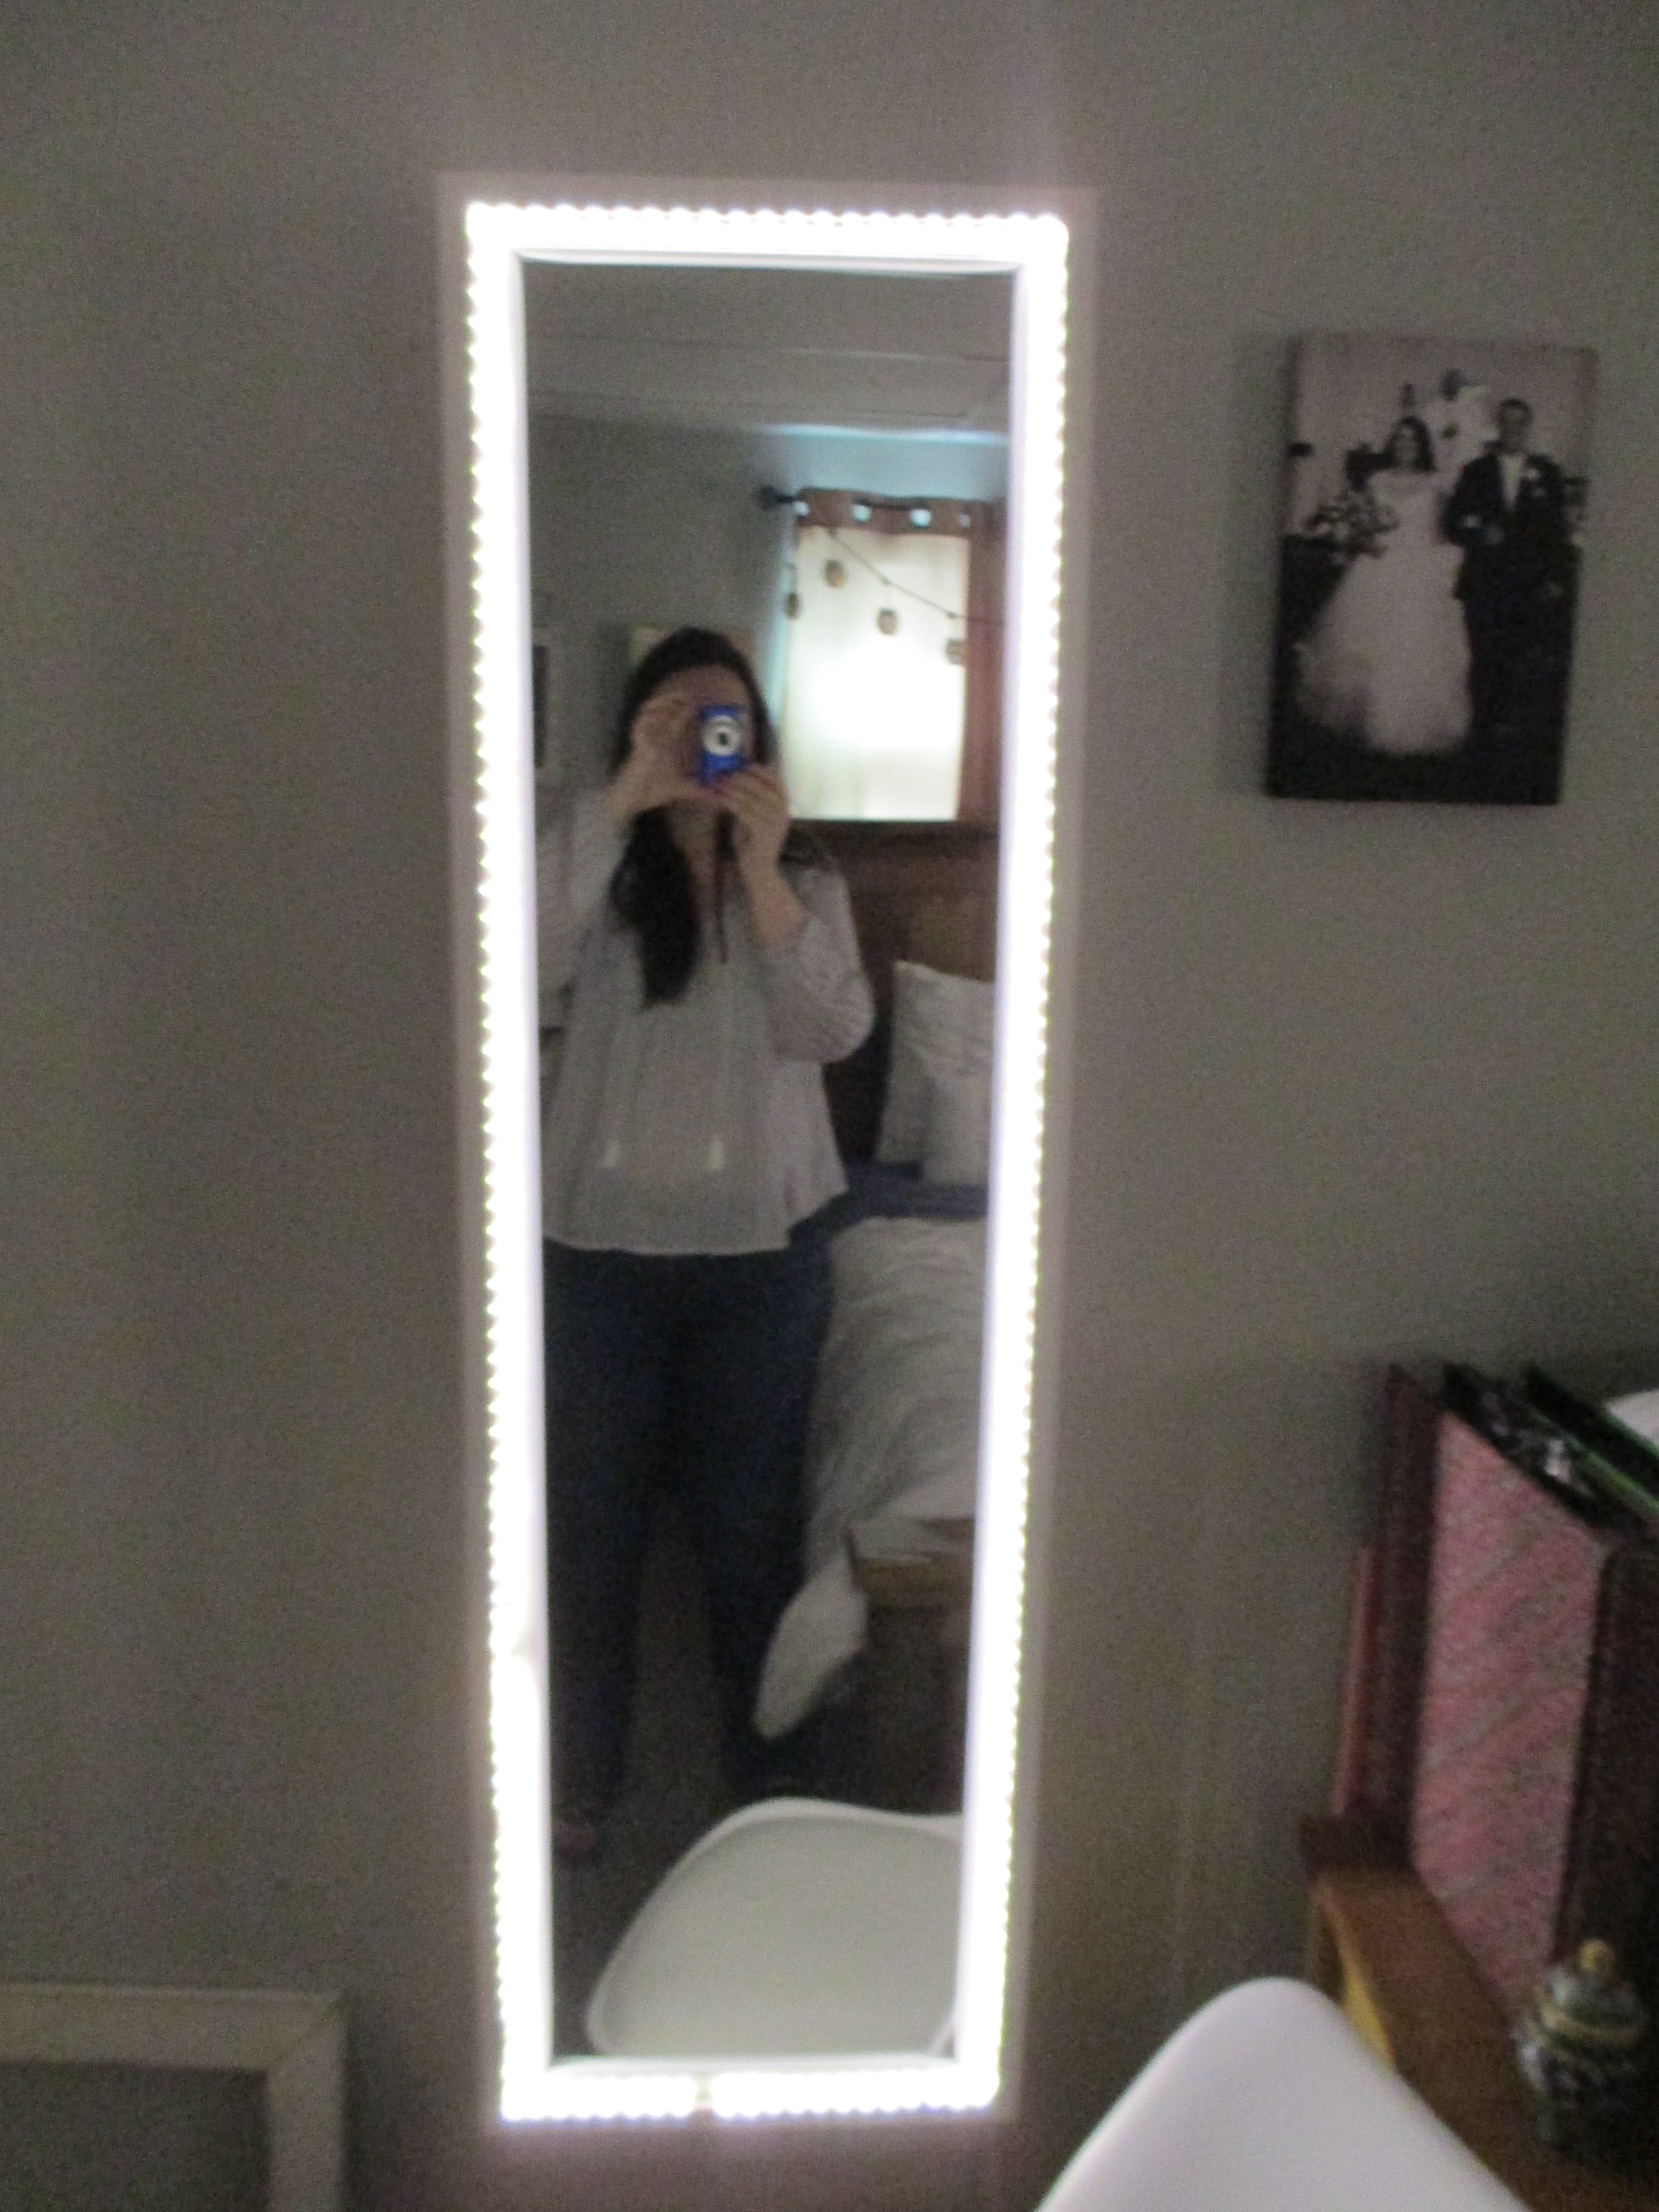
This was my first ever time building anything, even though I've wanted to for a really long time! It was great! I love this website. Wish I had a nailgun at the time I did this project, but I did get one after I realized how much I love carpentry. Thanks Ana!
Built from Plan(s)
Estimated Cost
$75(including the lights)
Estimated Time Investment
Day Project (6-9 Hours)
Recommended Skill Level
Starter Project
Comments
Sun, 09/17/2017 - 20:49
attaching rails
How did you attach rails? I still cannot figure out the best way to do it...
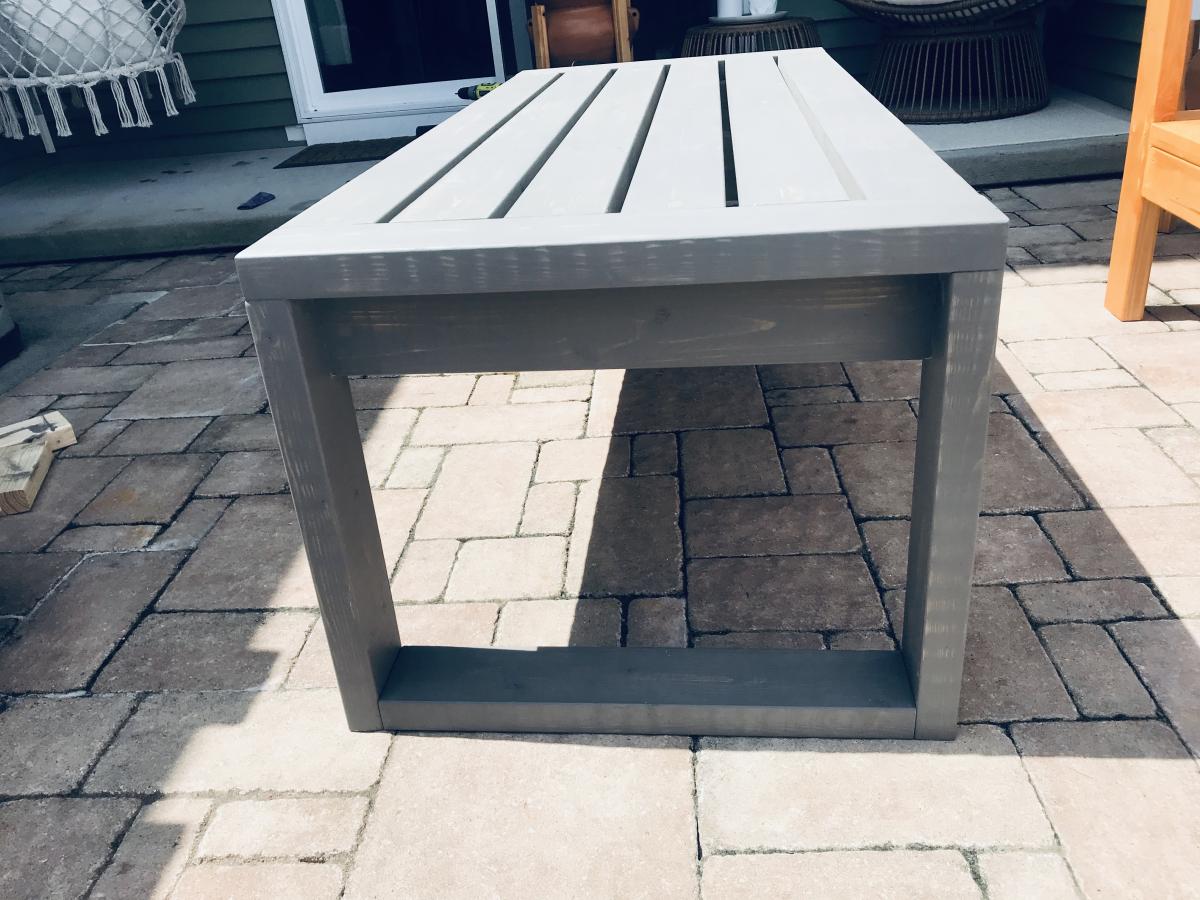
Patio table
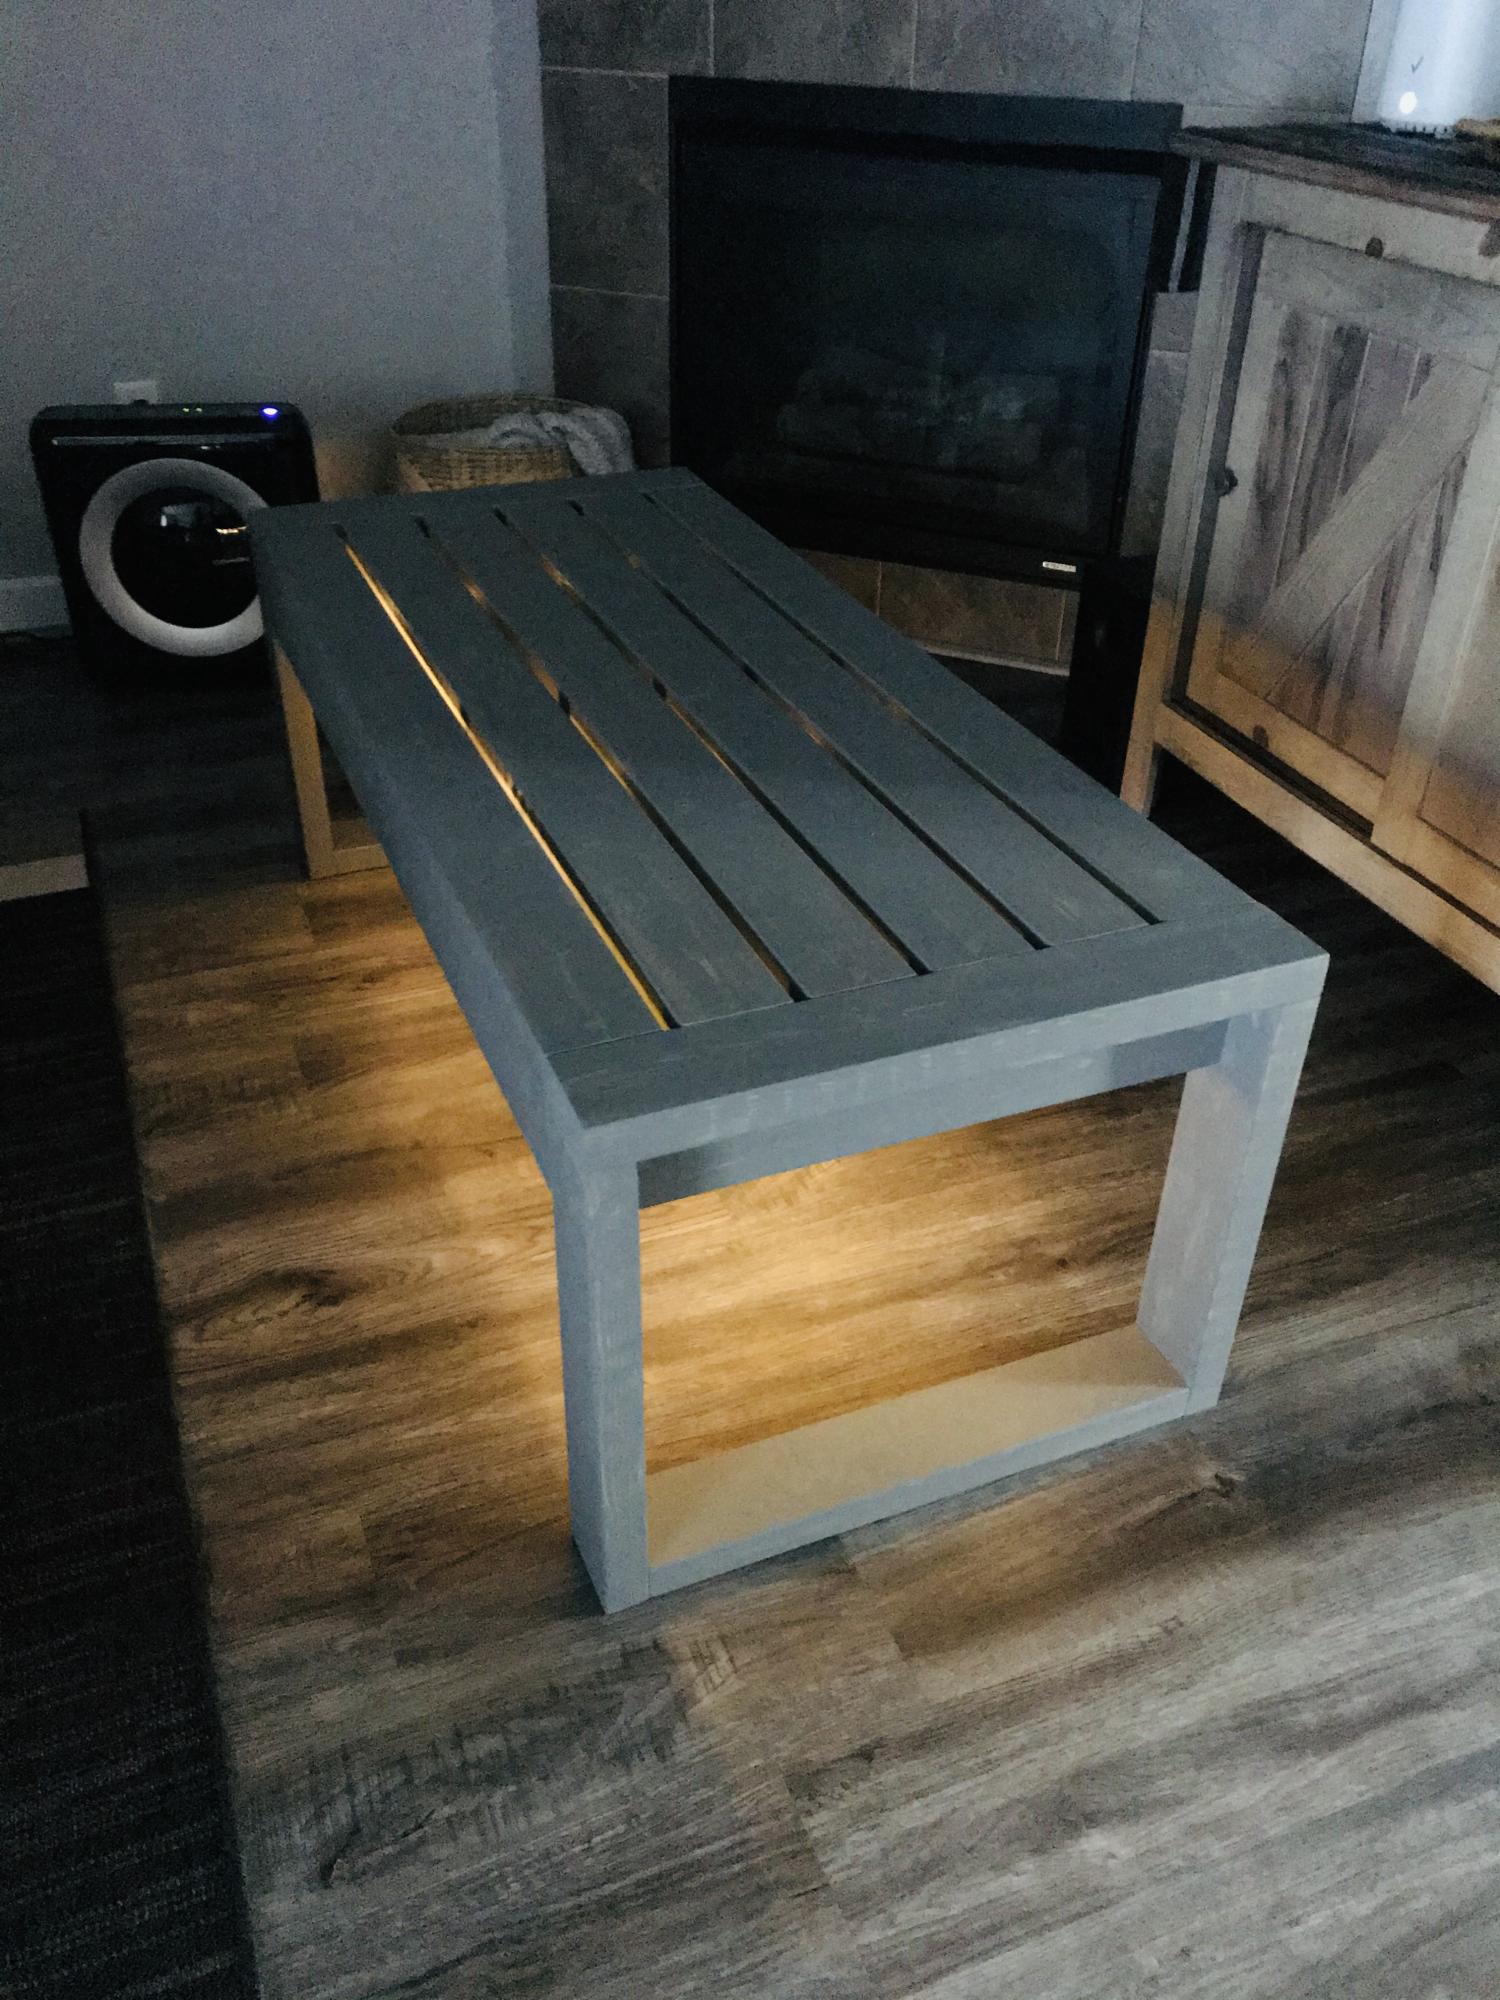
Modified some measurements and squared the legs. Also added LED lights under it for night mood setting.
Built from Plan(s)
Estimated Cost
$50
Estimated Time Investment
Weekend Project (10-20 Hours)
Finish Used
Used Stain + Sealer from Behr brand. Color is called Pewter.
Recommended Skill Level
Beginner
DIY Modern Farmhouse Beds

I enjoy all of your plans that you make available. I made these beds with a few minor adjustments.
Debra

Built from Plan(s)
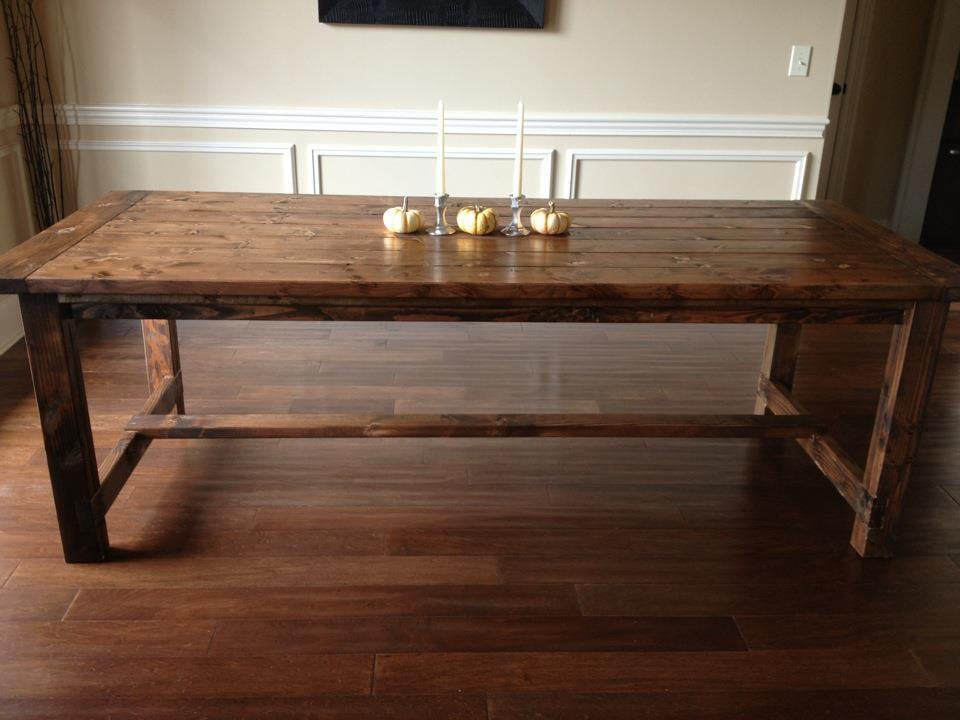
Farmhouse diningroom table

I loved the plans for this table. My husband and I spent about 5 hours making it yesterday. The plans and instructions are well planned and easy to use.
I've made a few projects from Ana's website, it's always so easy to understand and such beautiful projects.
Estimated Cost
$75.00
Estimated Time Investment
Day Project (6-9 Hours)
Finish Used
Minwax (Dark walnut) One coat only.
Recommended Skill Level
Starter Project
Comments

Sun, 11/18/2012 - 20:08
Thank you so much. We love
Thank you so much. We love this table. I'm still looking for two special chairs for the ends.
We are currently almost done building the farmhouse queen bed.
Double Chair Bench
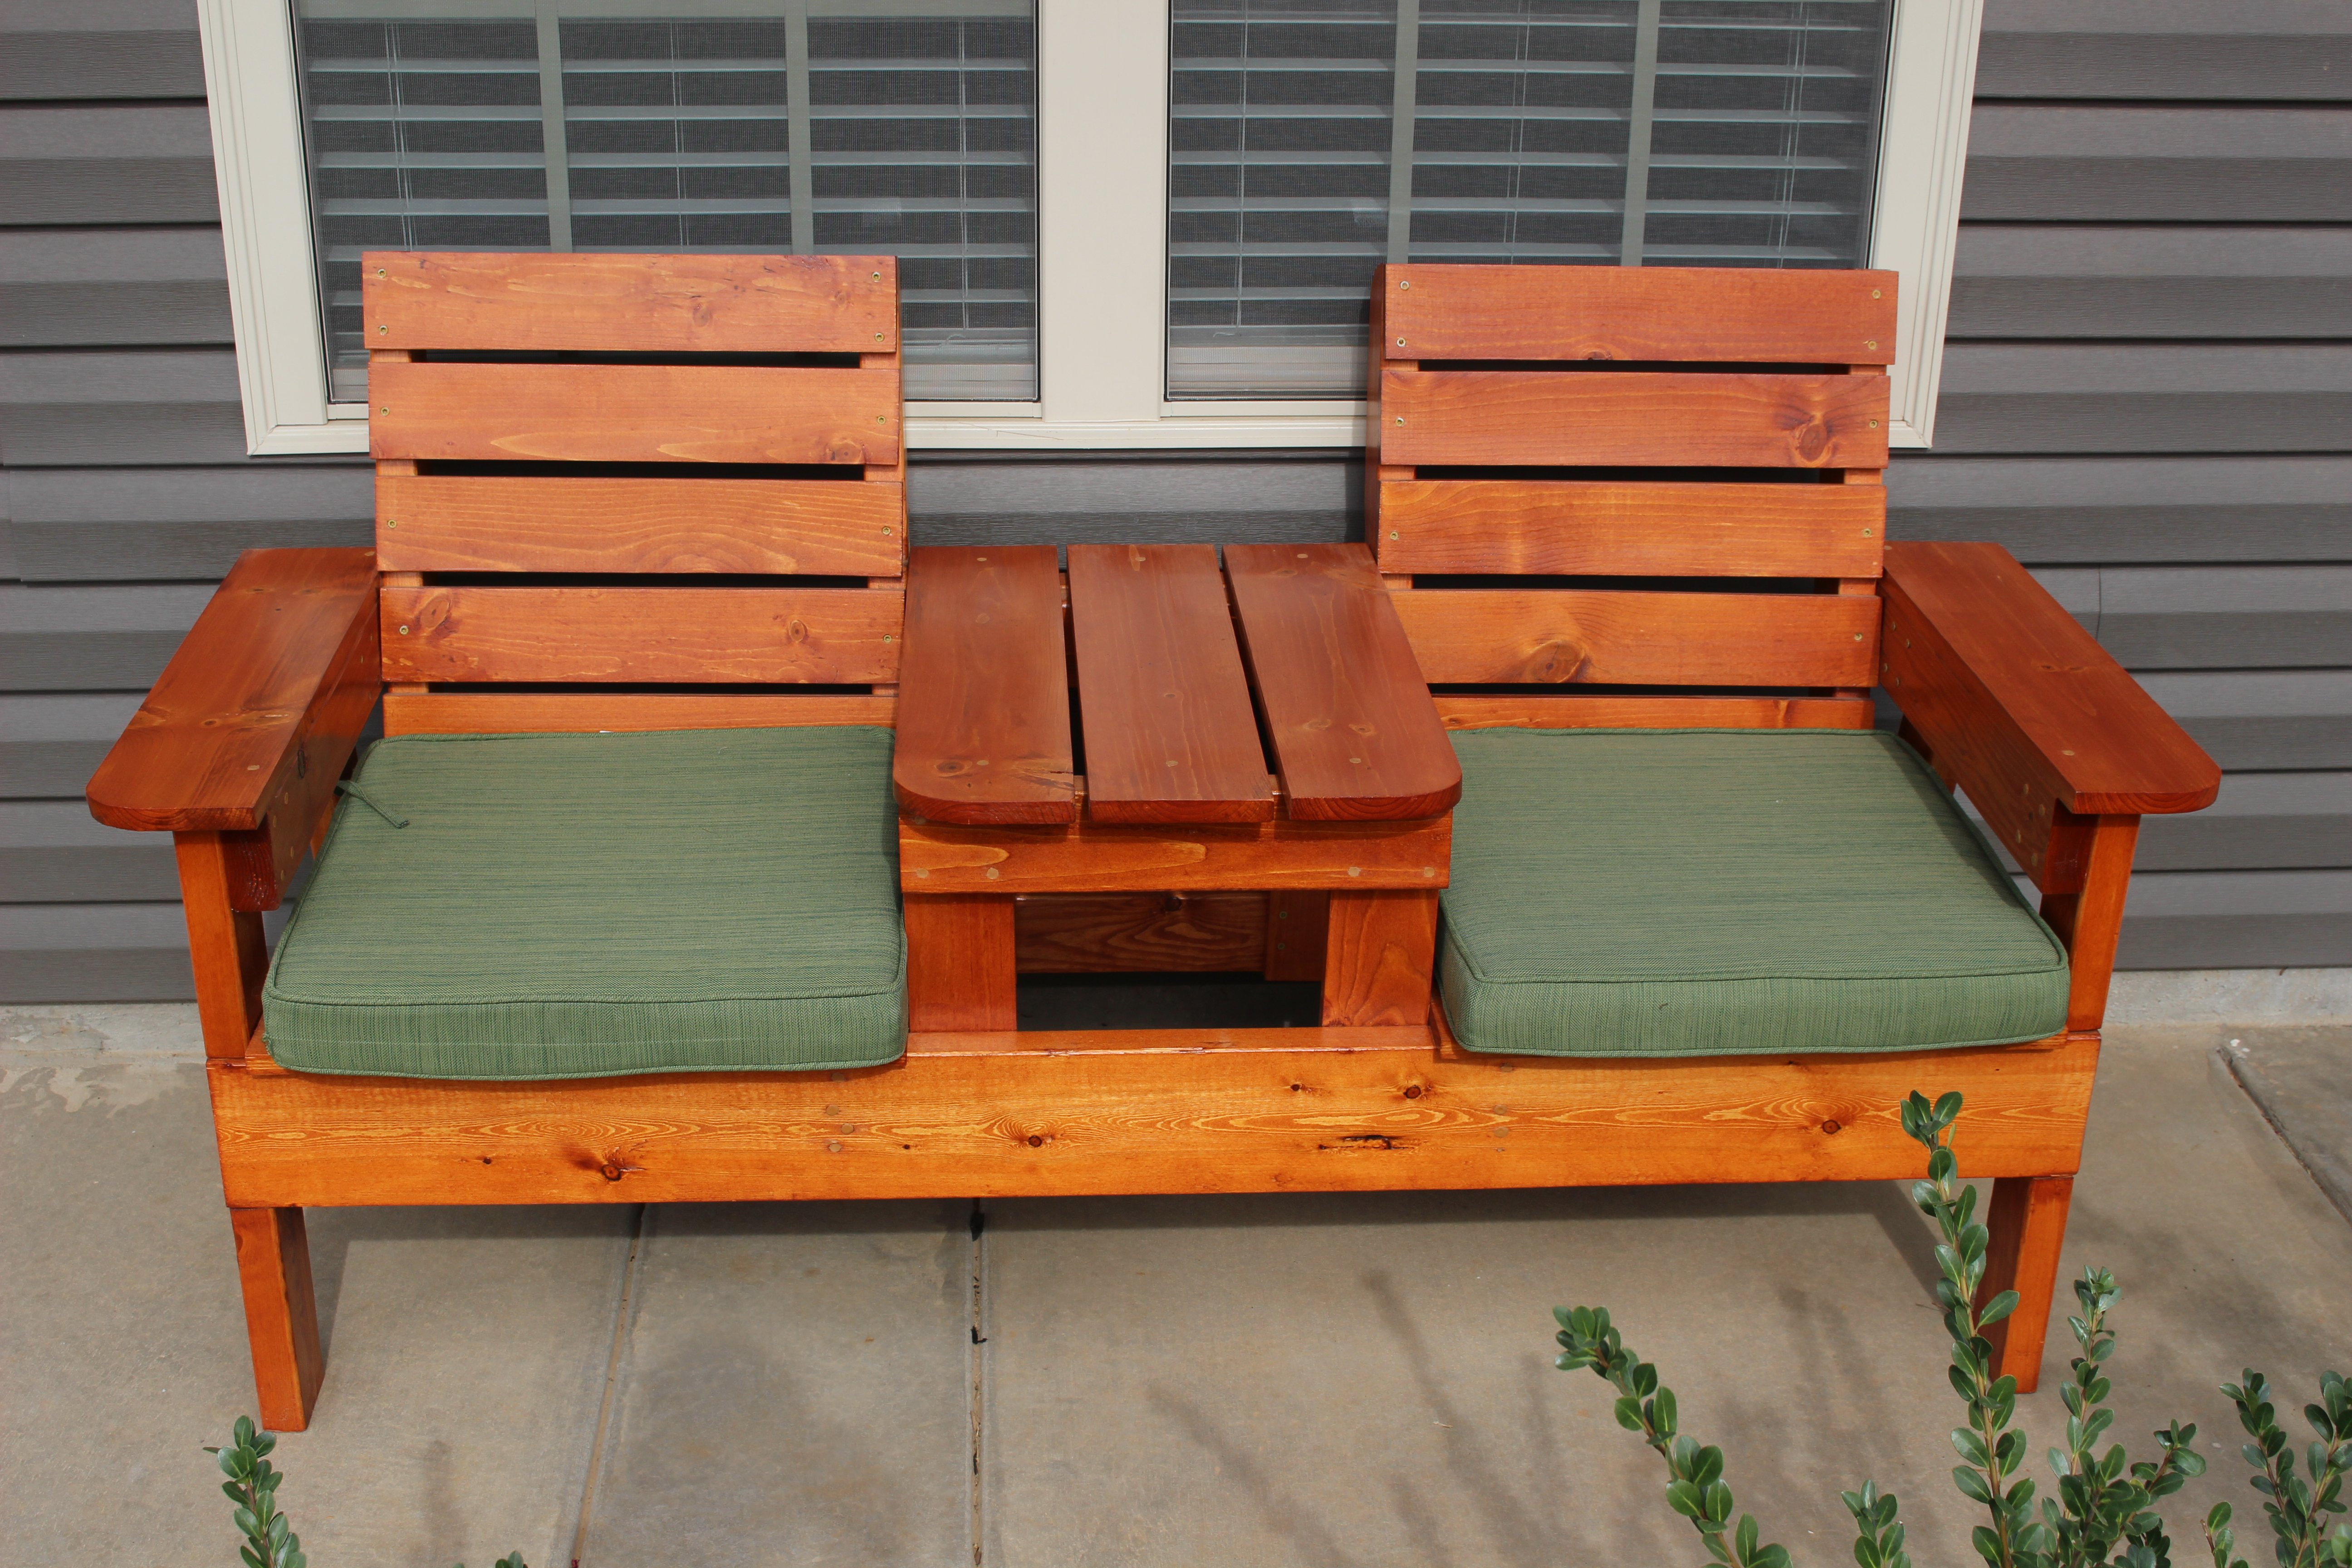
Built from plans from diyPETE.com.
One day project (another day for poly)
Built from Plan(s)
Estimated Cost
$100
Estimated Time Investment
Day Project (6-9 Hours)
Finish Used
Minwax Wood Finish penetrating stain: Gunstock 231 (2 coats), Minwax Helmsman Spar Urethane. (3-4 coats)
Recommended Skill Level
Beginner
Outdoor Sofa & Coffee Table
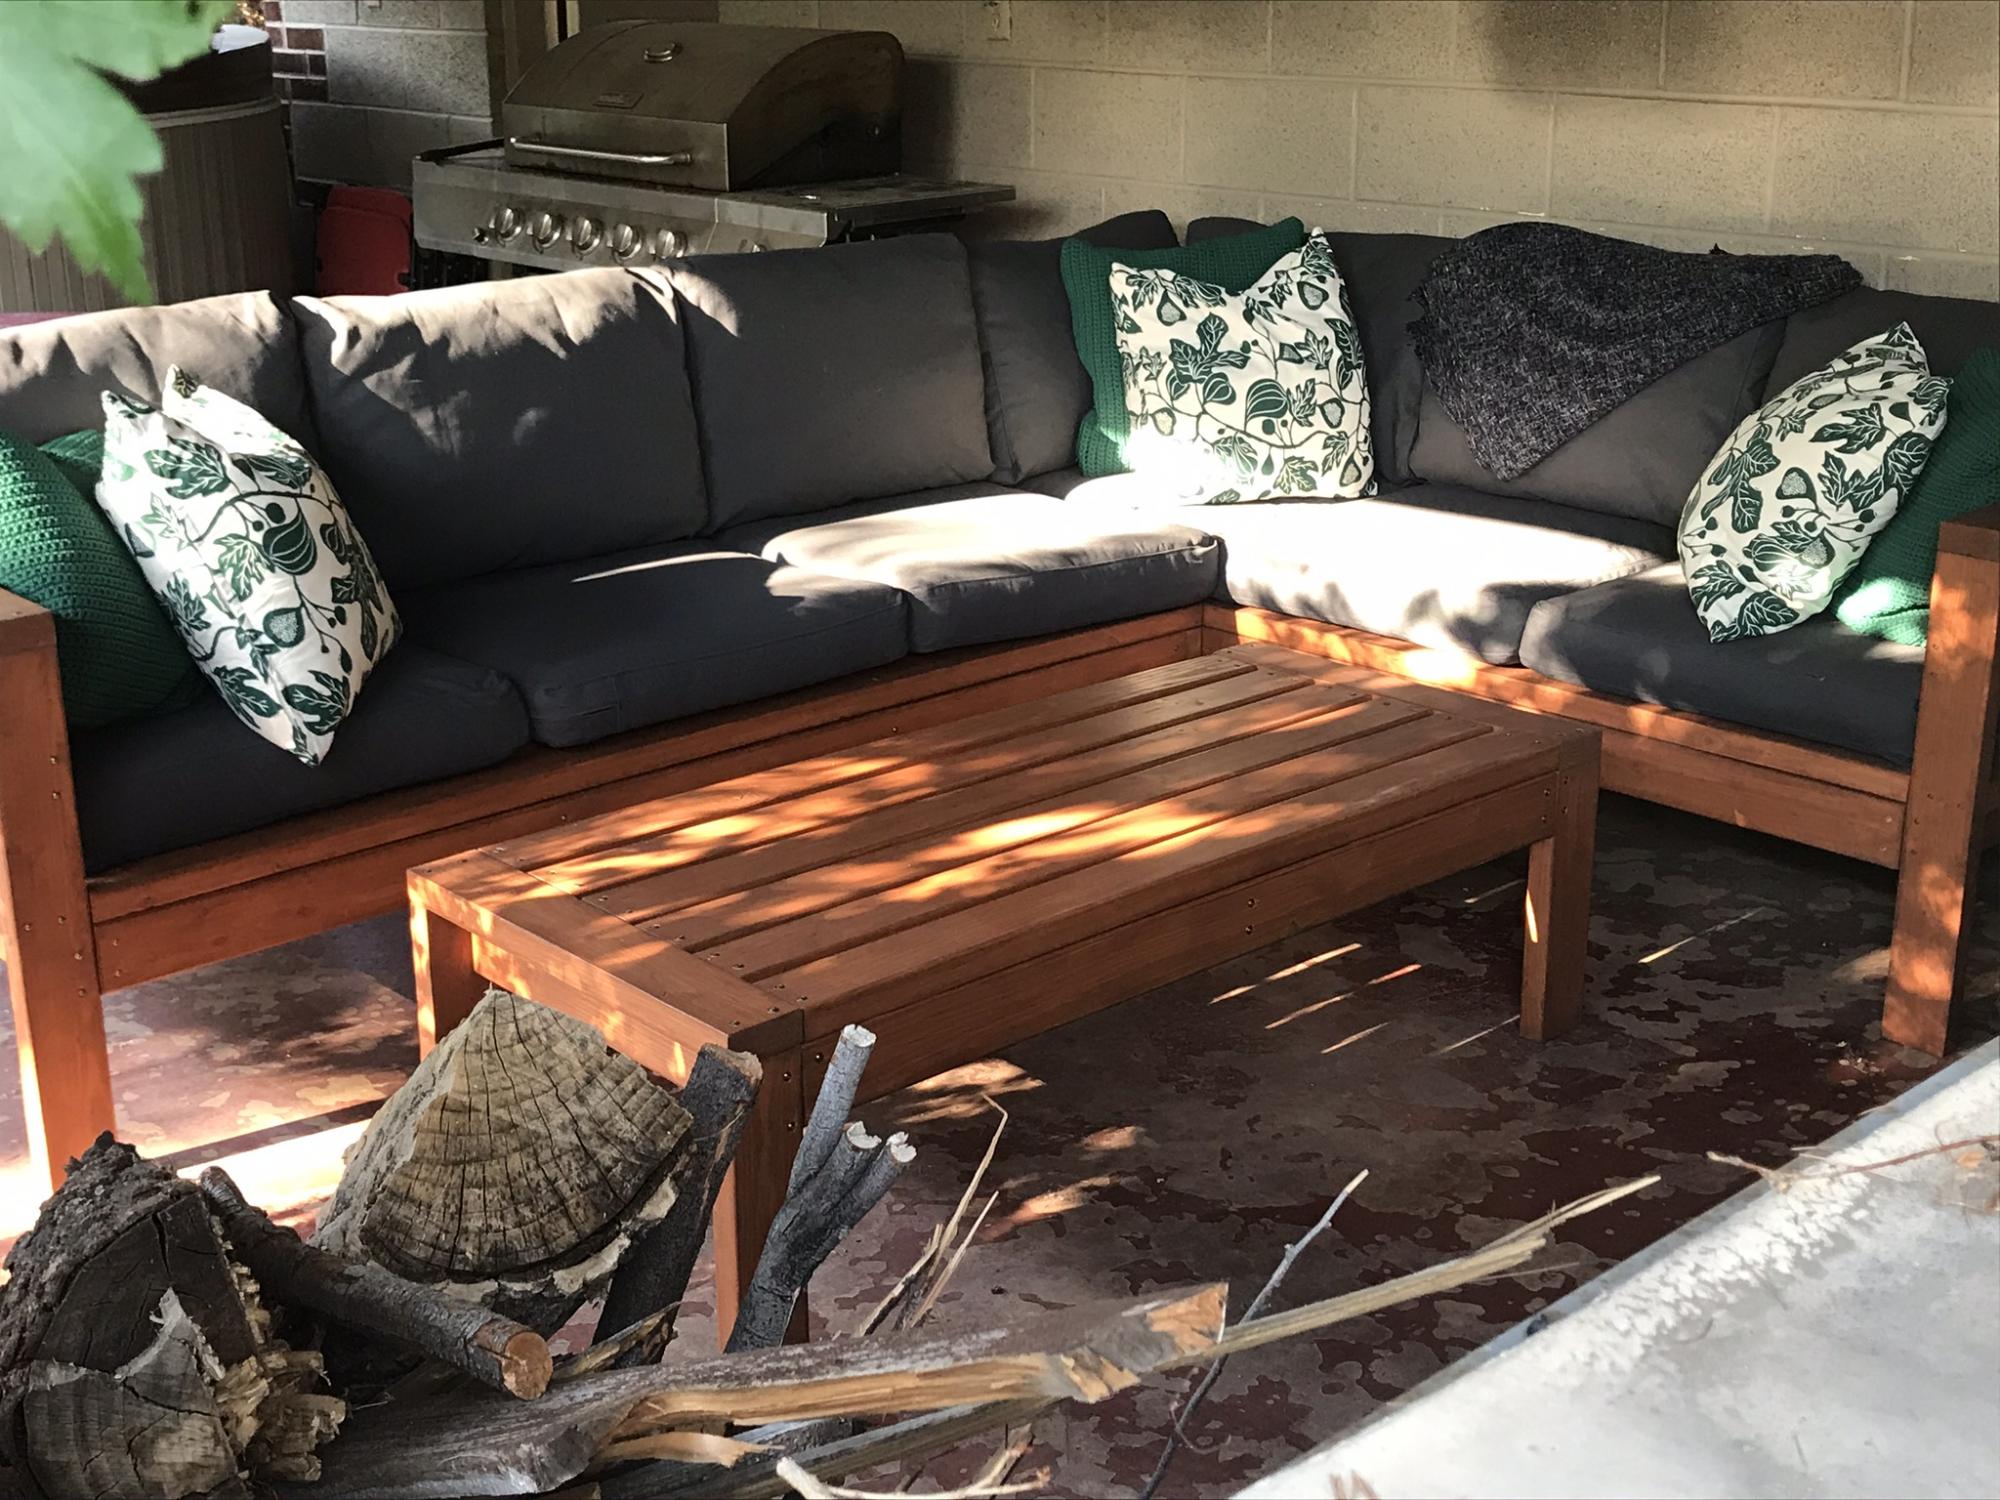
This project took a while. Stained everything before assembly which made it easier. Plans are easy to follow. Thank you for making them available. Our property is starting to look a lot like your website.
Built from Plan(s)
Estimated Cost
180
Estimated Time Investment
Weekend Project (10-20 Hours)
Recommended Skill Level
Beginner
Comments
Mon, 08/02/2021 - 08:35
Joining method?
Looks amazing! What method did you use (pocket holes, dowels, deck screws, etc) to join the visible portions like the arms?
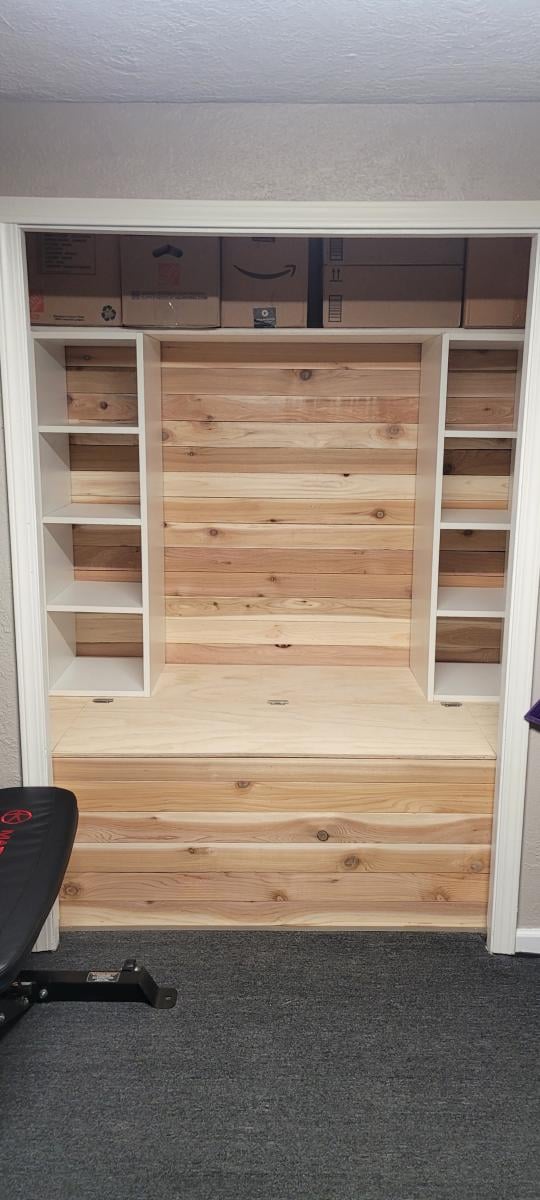
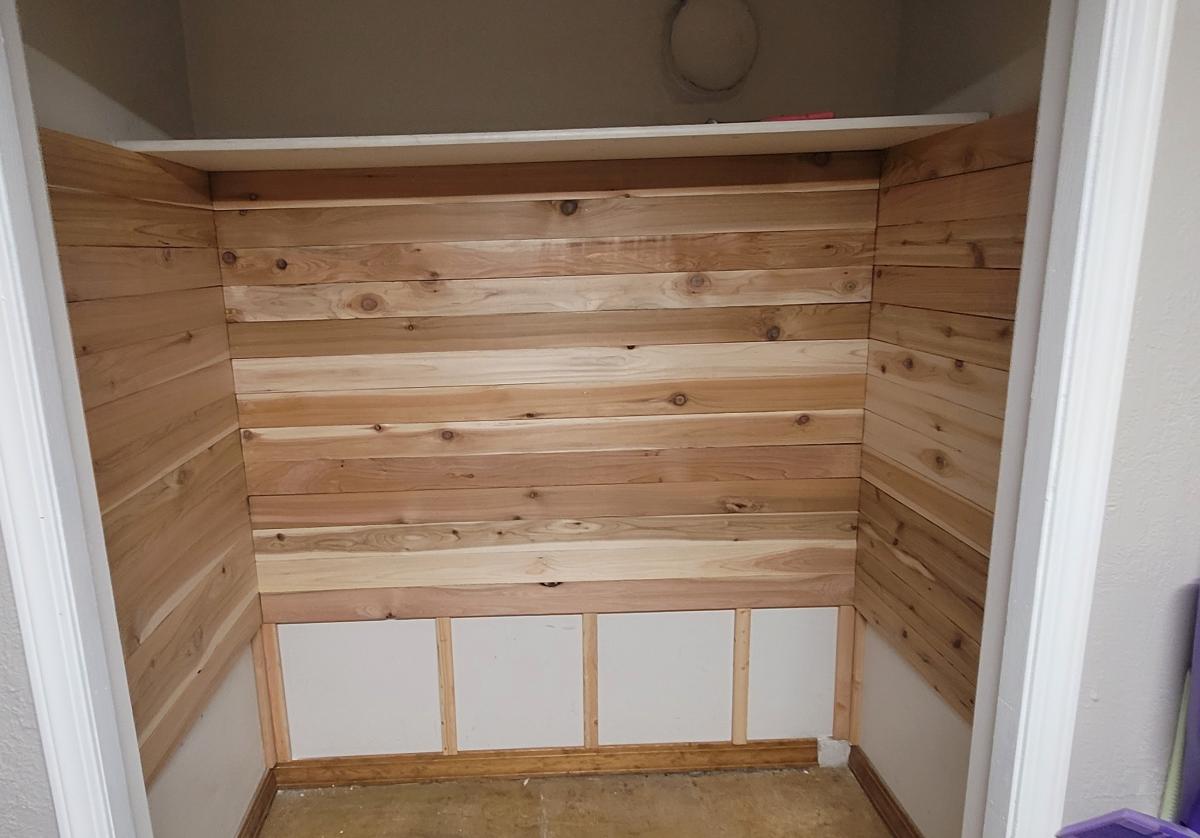
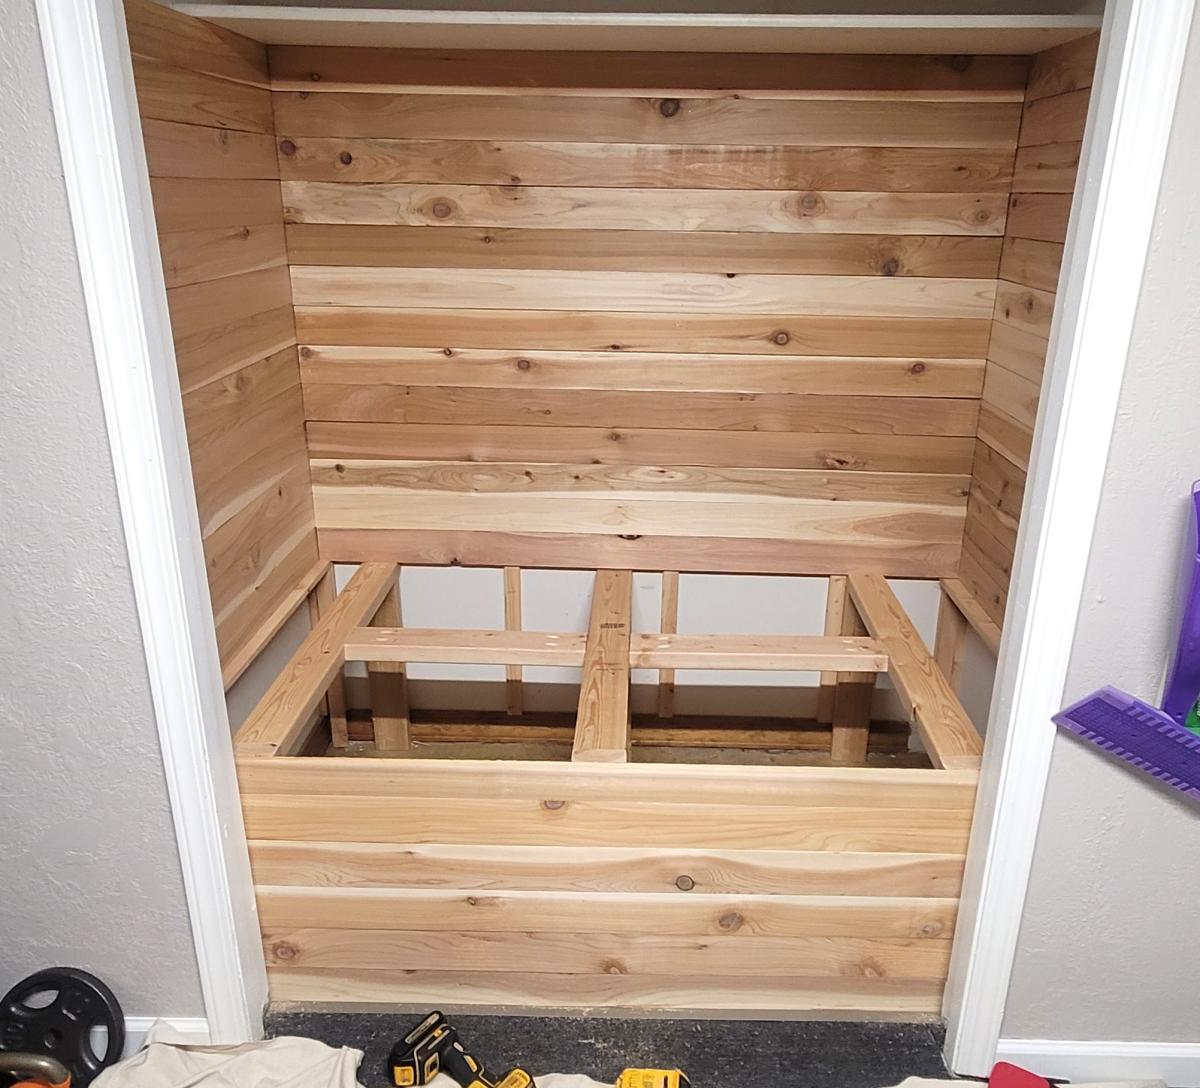
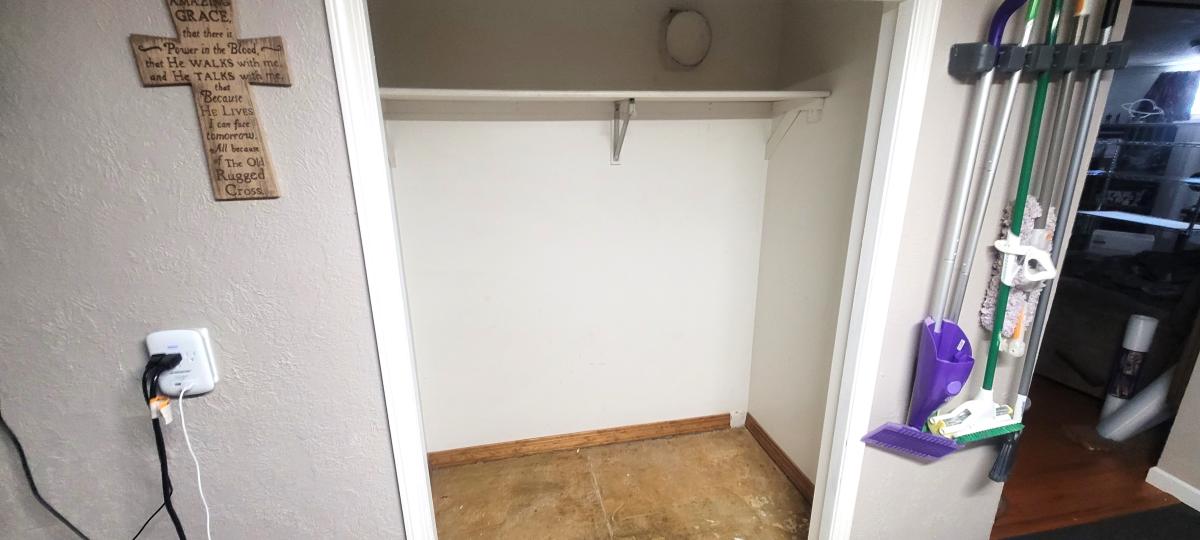
Basement Closet Upgrade

This is our basement closet. We wanted to make it more useful. We were inspired by the plans for the closet makeover.
Crystal L.
Built from Plan(s)
Seasonal And Holiday
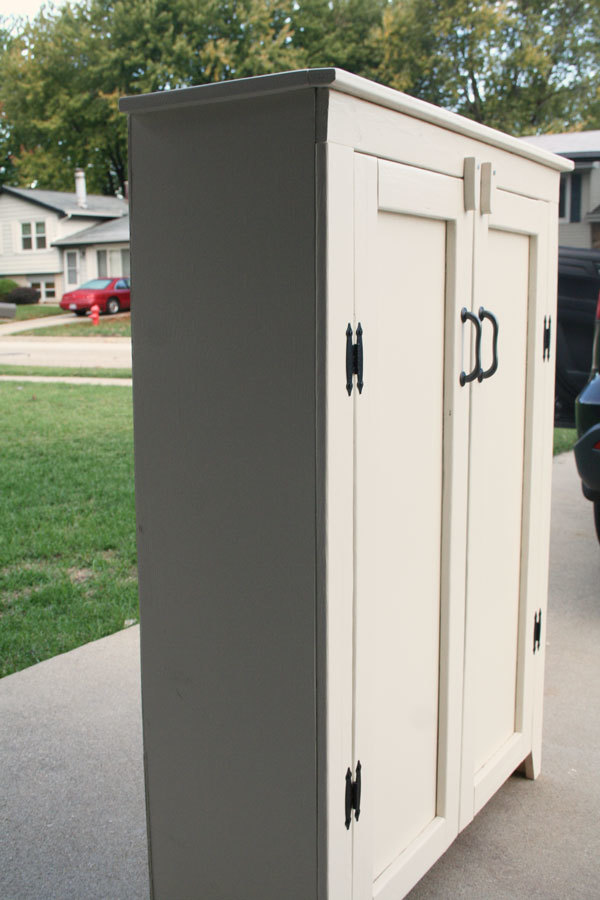
Jelly Cabinet for Heather
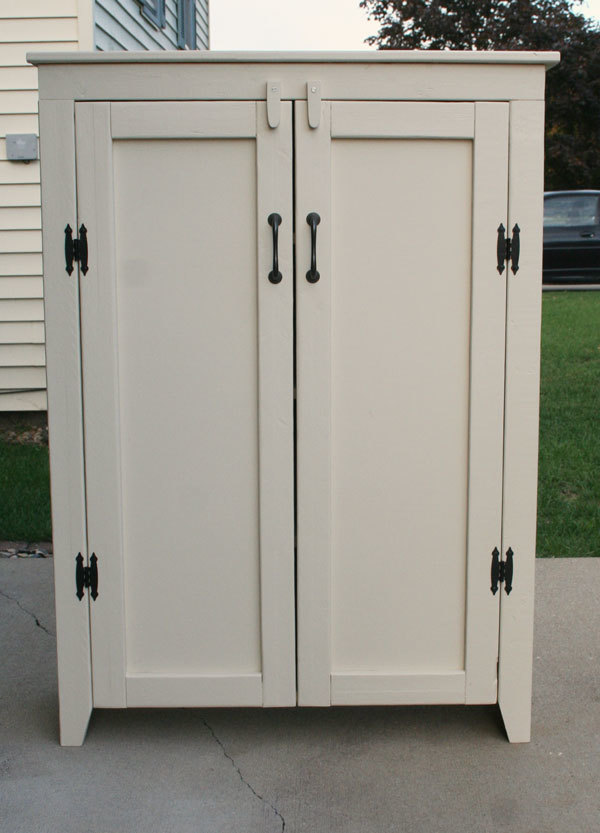
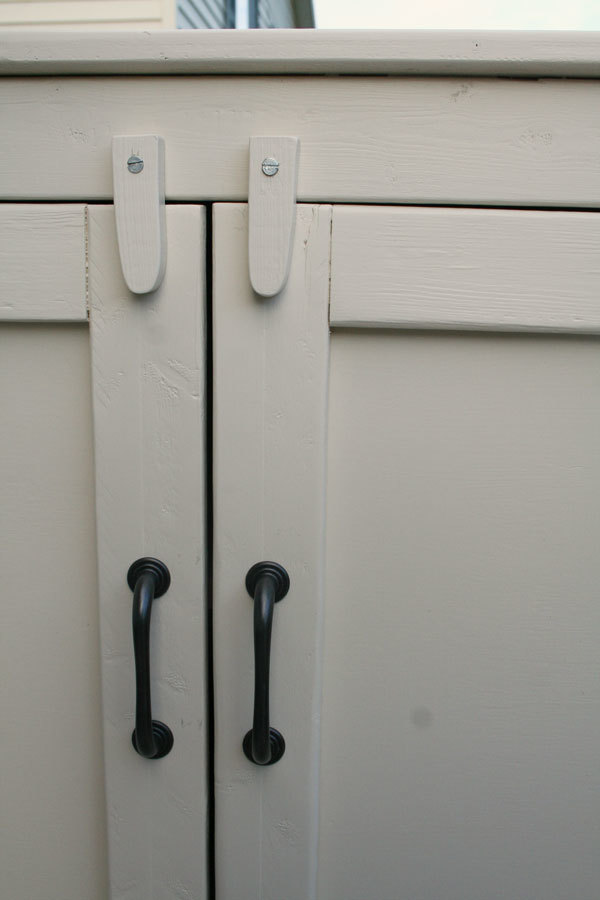
This project was built by my husband, for our daughter who needed some storage for her card-making and scrapbooking supplies. I had the easy part of doing the painting and purchasing the hardware. The hinges and handles are from Home Depot. It is a challenge to find good lumber at our big box stores. That was probably the most difficult part of the build...dealing with warped wood. This piece is suited for the primitive and rustic look so it didn't matter that the wood had some dings and splintering from the edges. Everything was sanded well and these marks just added to the character. He did encounter some problems with drilling the 1 and 1/4" kreg screws into the frame of the door. The wood wanted to split. Also, the plans called for magnetic closures but we could not determine how those would be installed as the shelves do not reach to the doors. So we cut some wooden swinging closures and attached them to the top of the cabinet. They seem to work well. One modification if he builds this again (and our other daughters are now putting in their orders!) would be to add a wooden support down the center front so that the doors would have something to close against. The way it is now, the doors could be pushed inward and put a lot of stress on the hinges. We were very pleased at how this project turned out! Thank you for the plans.

Built from Plan(s)
Estimated Cost
$75.00
Estimated Time Investment
Week Long Project (20 Hours or More)
Finish Used
Top coats are Benjamin Moore Regal, Pearl Finish in Frappe color. I started by thoroughly sanding and then primed using Ace Royal Shield Primer (latex). Then I sanded again to remove the raised grain. The final coats of the Benjamin Moore Regal were applied using a Fuji HVLP spray gun. The inside of the cabinet (shelves) were sanded but not finished in any way. We like the look of the unfinished pine for the shelving.
Recommended Skill Level
Beginner
Comments
Tue, 10/09/2012 - 13:20
Looks Great I had same issues
I like the way that came out and I agree its hard to get good wood at the big box stores it took me a while to go through the stacks they had there to find straight pieces. The other thing I had an issue with was the 1 1/4"
Kreg screws as well but if you dont over drive them it generally will not crack the wood. Just be gentle and if it still does turn the clutch down on the drill that will help as well.
Thu, 10/11/2012 - 18:11
Kreg screws
Lawson4450,
Thank you for your comment, and for the advice on the Kreg screws!
We are in the process of cleaning up our garage, so that future building projects are easier to do! One thing my husband also built was a small workbench, with a lower shelf to store the Kreg jig, screws, etc on. It comes in handy as we always know where to at least find the Kreg stuff! We should also keep some notes on the shelf, too, to refer to when the wood cracks, etc.
-Ann
Wed, 10/10/2012 - 10:37
You could solve the door not
You could solve the door not reaching the shelves problem by installing the magnetic closures on the underside of the top piece so it would also act as a stopper for the doors so they don't swing to the inside. I think that's what Ana meant in the plans. Kinda like this:
Thu, 10/11/2012 - 18:04
Magnetic Closure
Aisha,
Thank you for the photo of the magnetic closure. That makes a lot of sense! We could still add those, and also leave the swinging locks in place, too.
-Ann
Sat, 10/13/2012 - 10:43
Love this!
I am the lucky receiver of this jelly cabinet. It is exactly what I had in mind when I was on the hunt for one. I was so pleasantly surprised when my parents came to visit and showed me my early birthday present in their trunk! :)
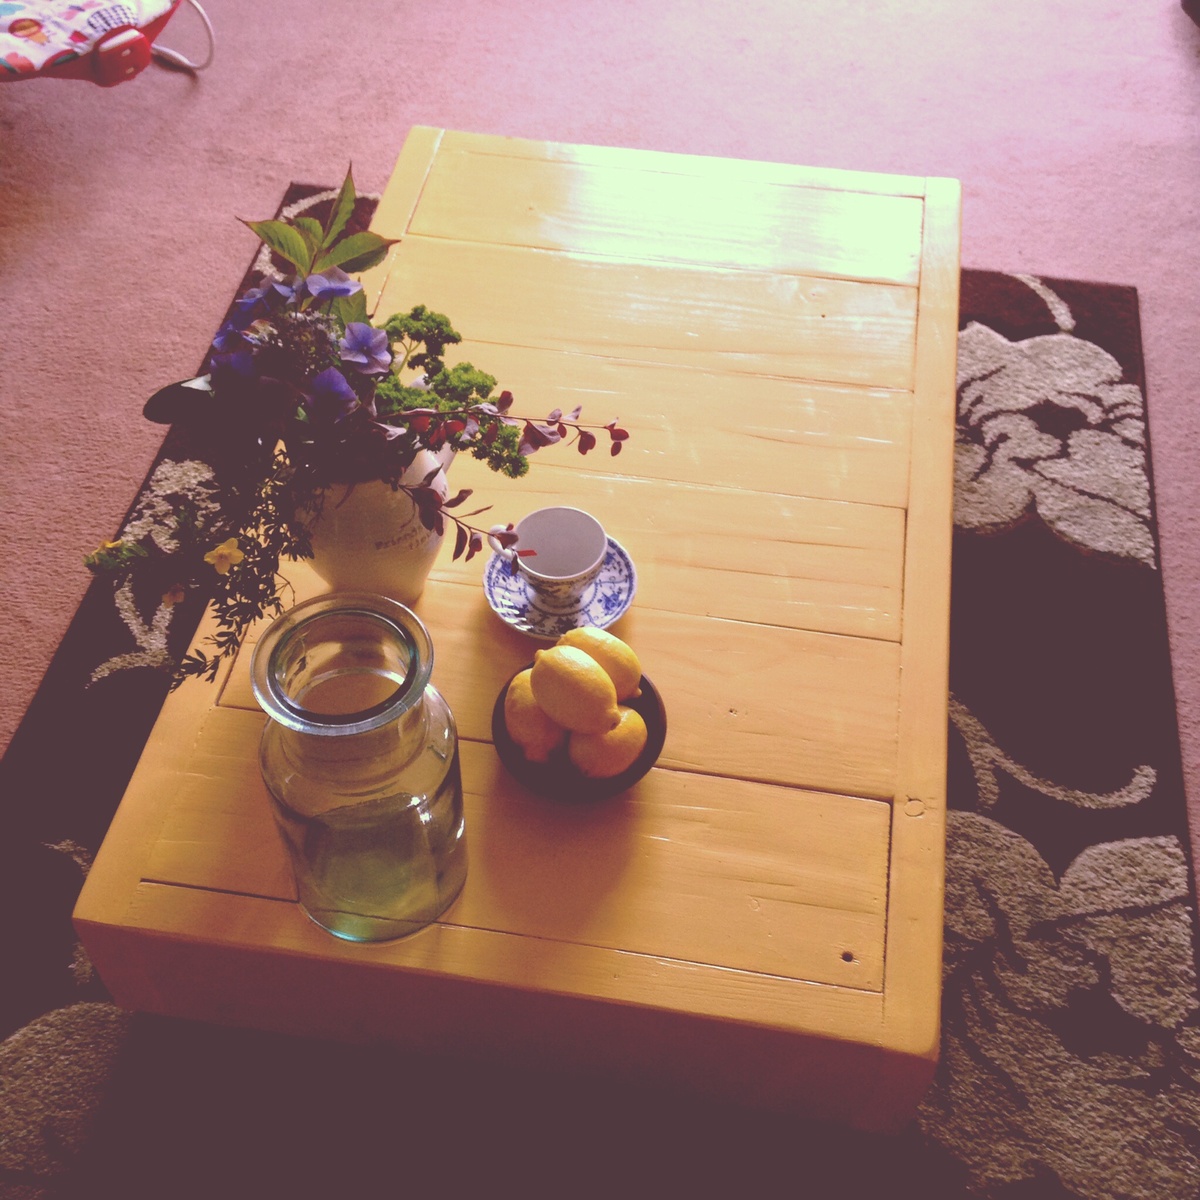
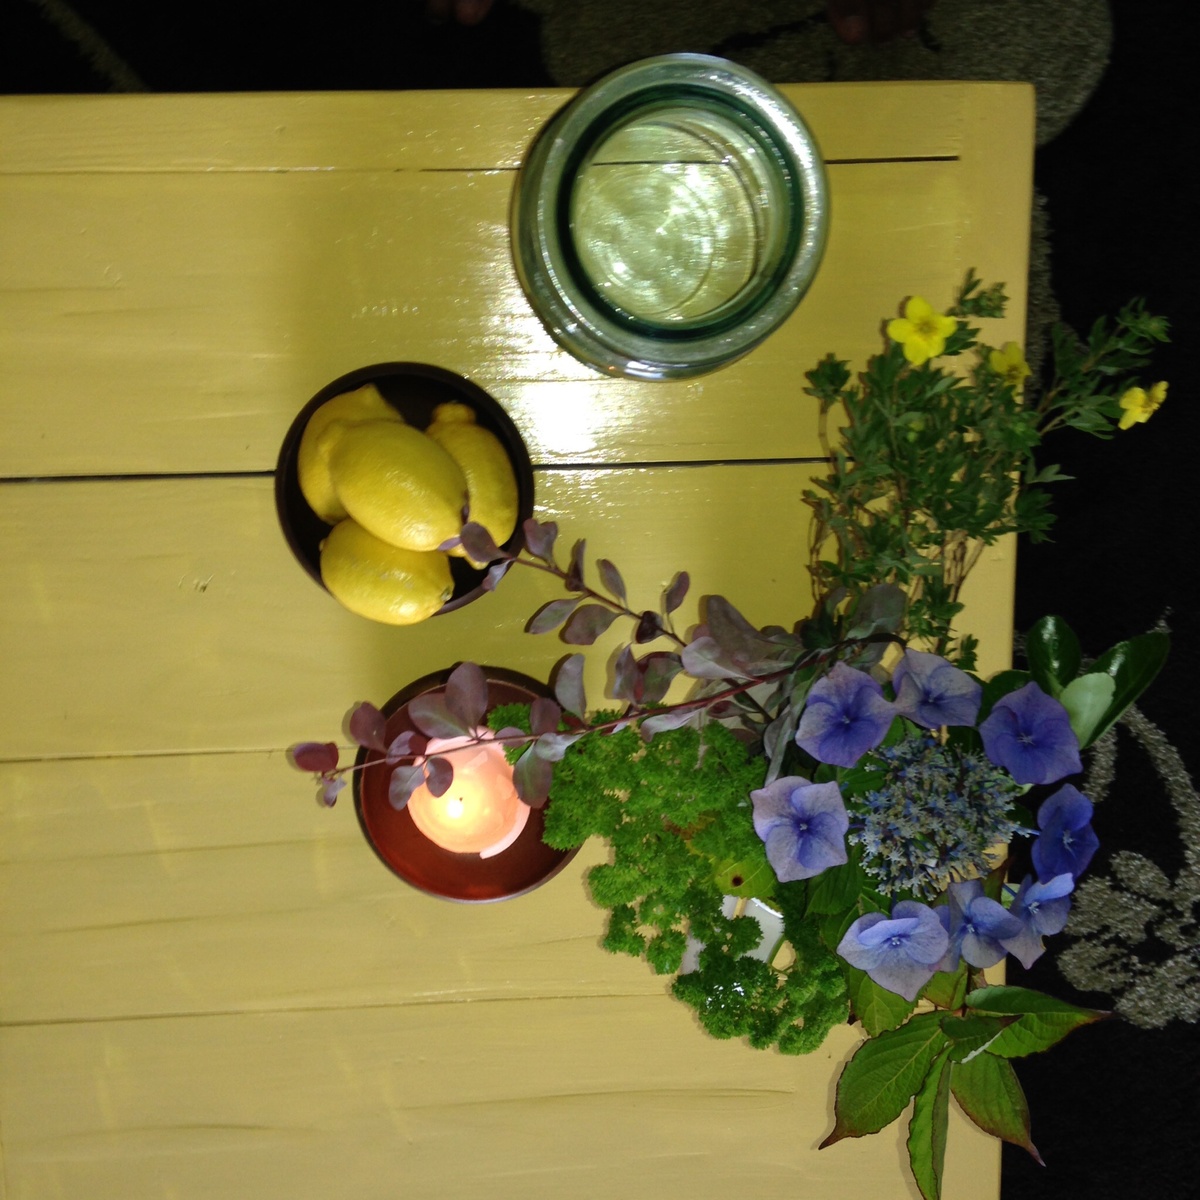
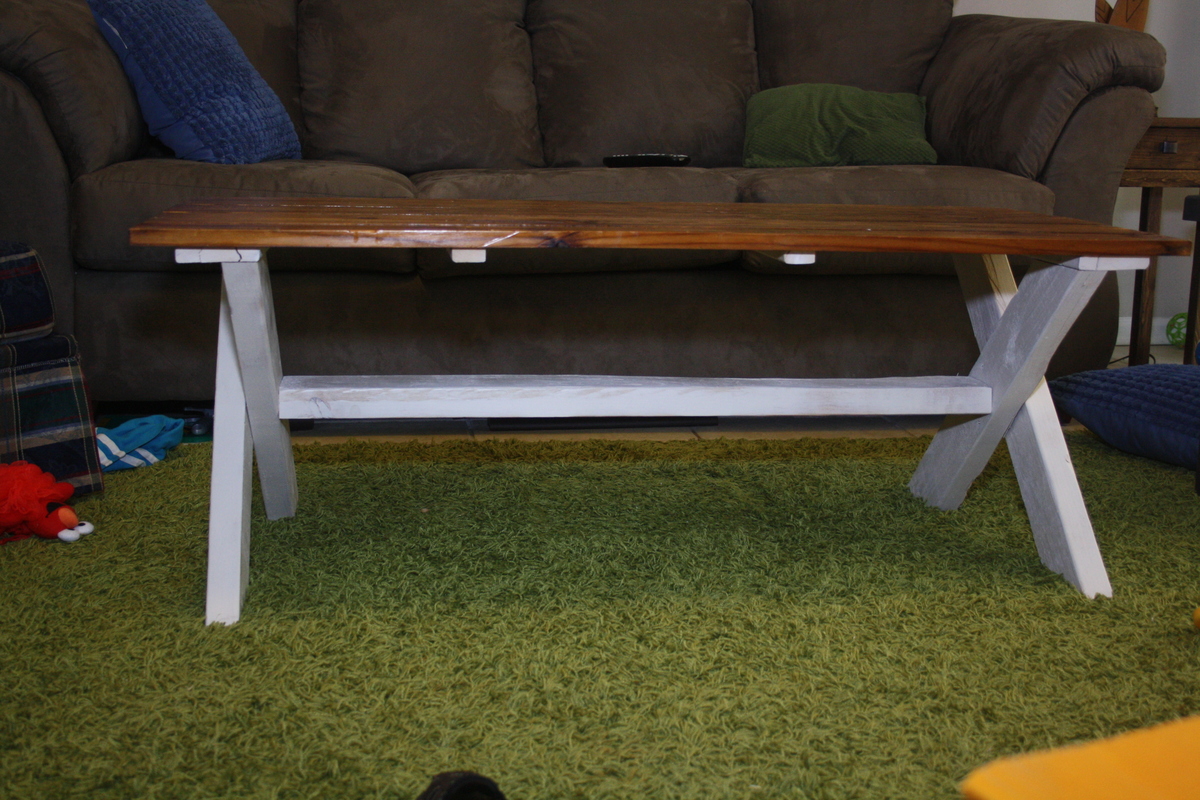
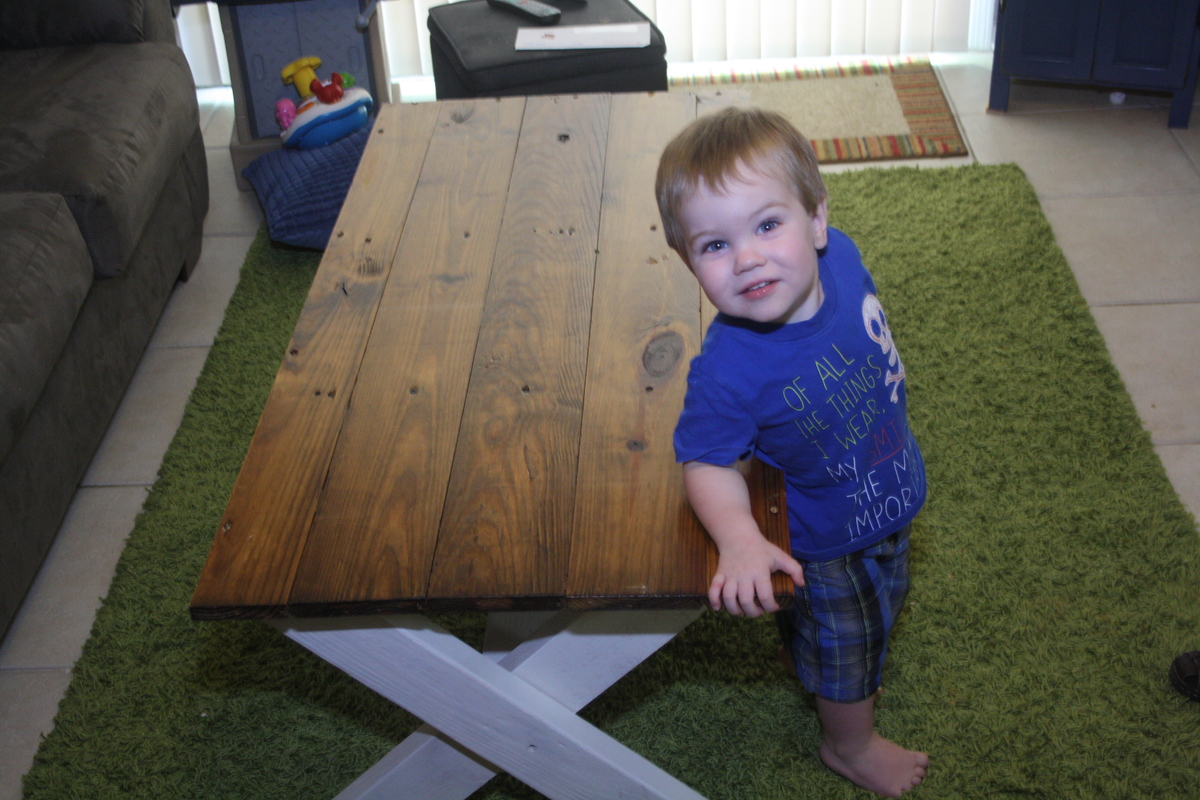
X- Coffee table
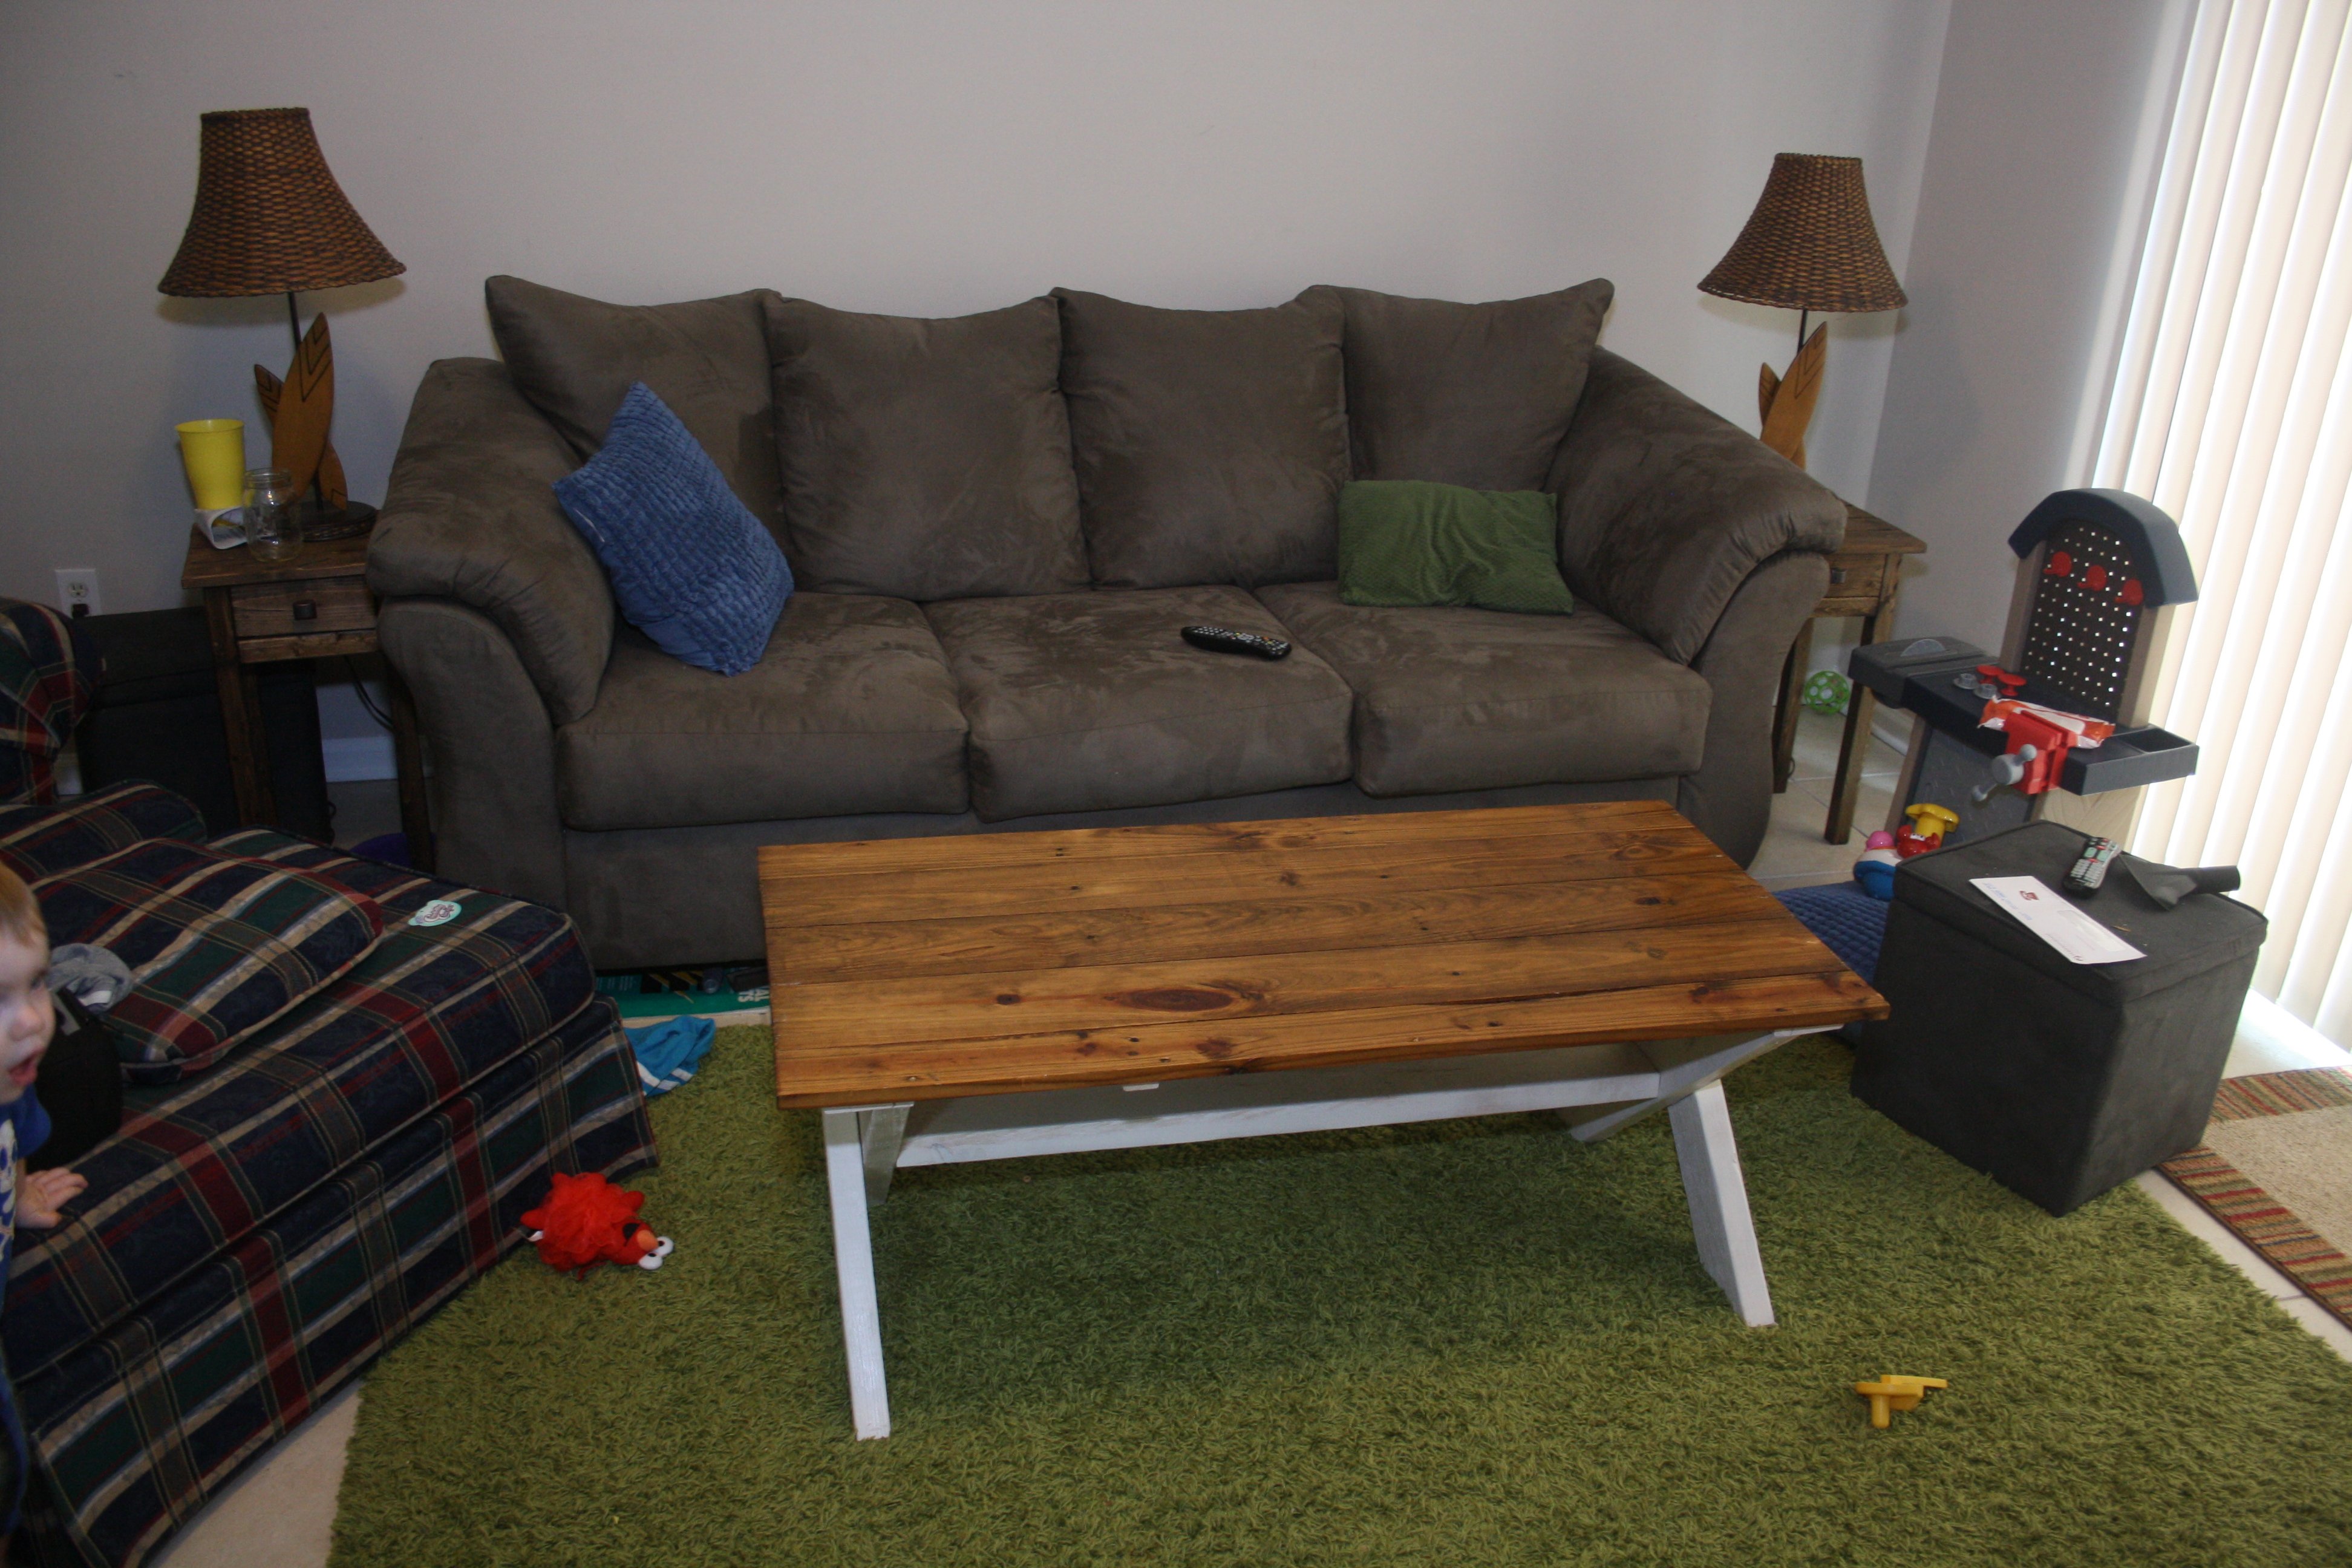
I've been meaning to build a coffee table for a few months now. About a month ago we received a hutch from some family friends. The back of it was made of 3/4" tongue and groove boards. So, I used those boards to make the top of the table and a couple of 2x4's to make the base. It's got a cool rustic feel that goes really well with the beach chic design that we have in our living room. For the design i really liked the look of the x picnic table, so I modified it for a coffee table.
Built from Plan(s)
Estimated Time Investment
Day Project (6-9 Hours)
Finish Used
I just put a polyurethane on the top. The base is Rustoleum Heirloom White with a clear coat top finish.
Recommended Skill Level
Beginner
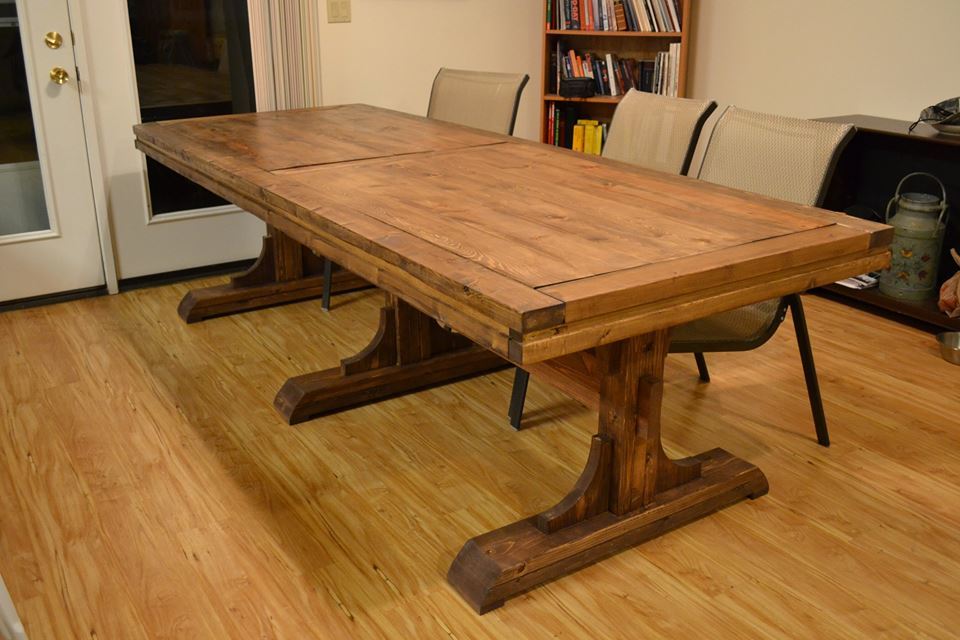
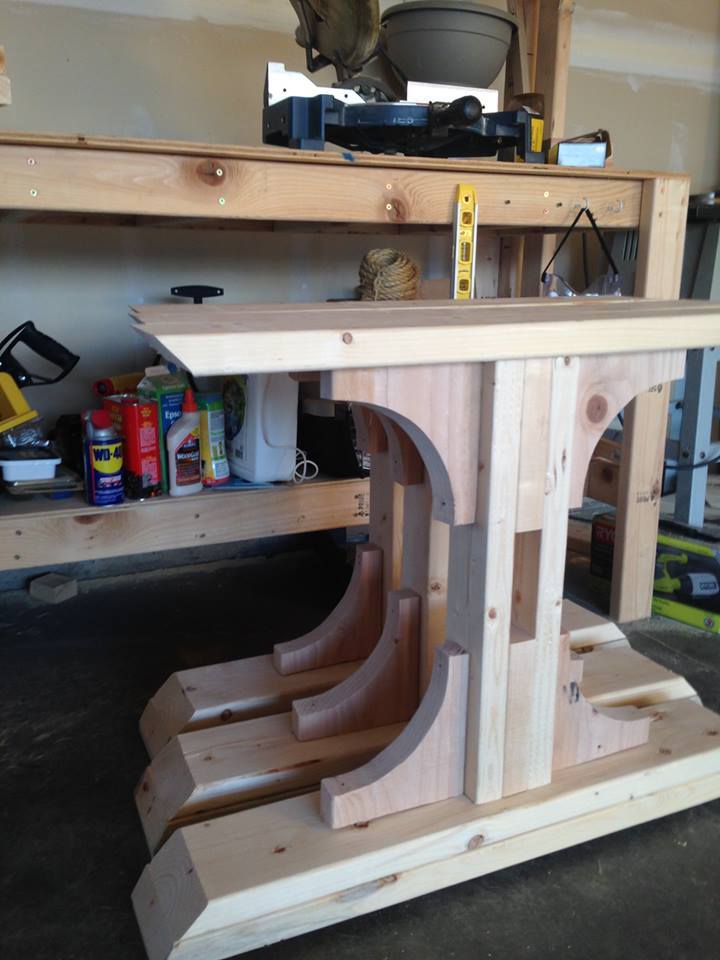
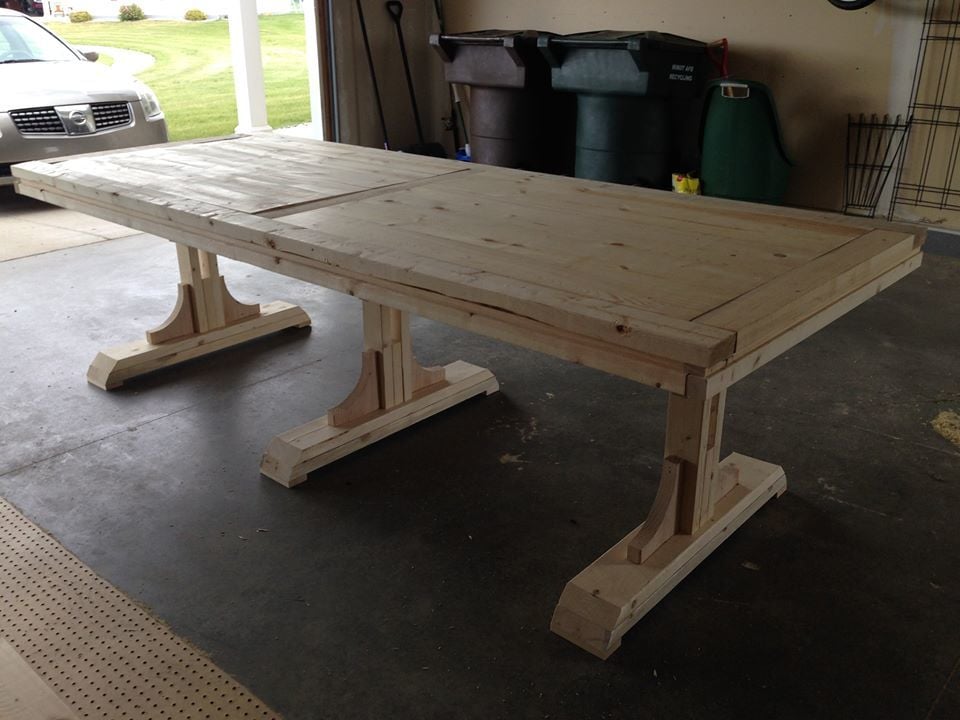
Farmhouse Table Build
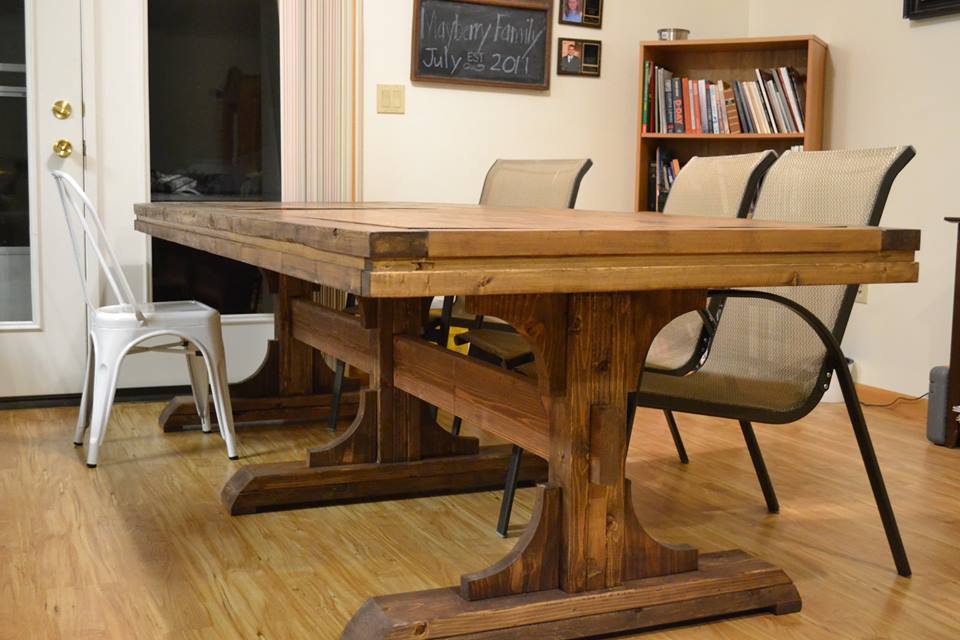
I modified this plan slightly in how I attached the legs to the table top. I put screw inserts into the bottom of the table so I could screw the legs in and not worry about the wood stripping. We move often and I can't move the whole table assembled. Also, I haven't secured the cross beam, so this table will completely flatten and be easy to pack.
Built from Plan(s)
Estimated Cost
$150
Estimated Time Investment
Week Long Project (20 Hours or More)
Finish Used
Special Walnut stain and clear brushing lacquer.
Recommended Skill Level
Intermediate
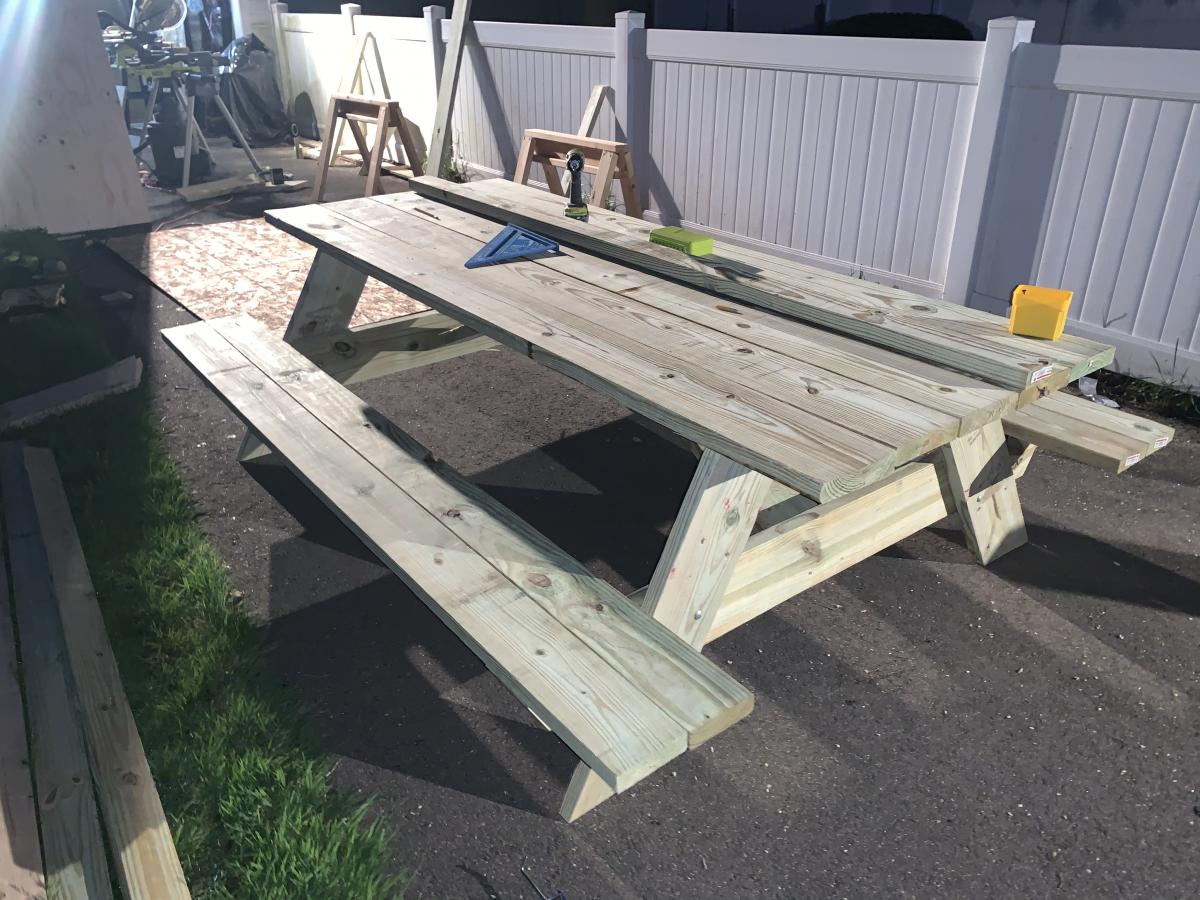
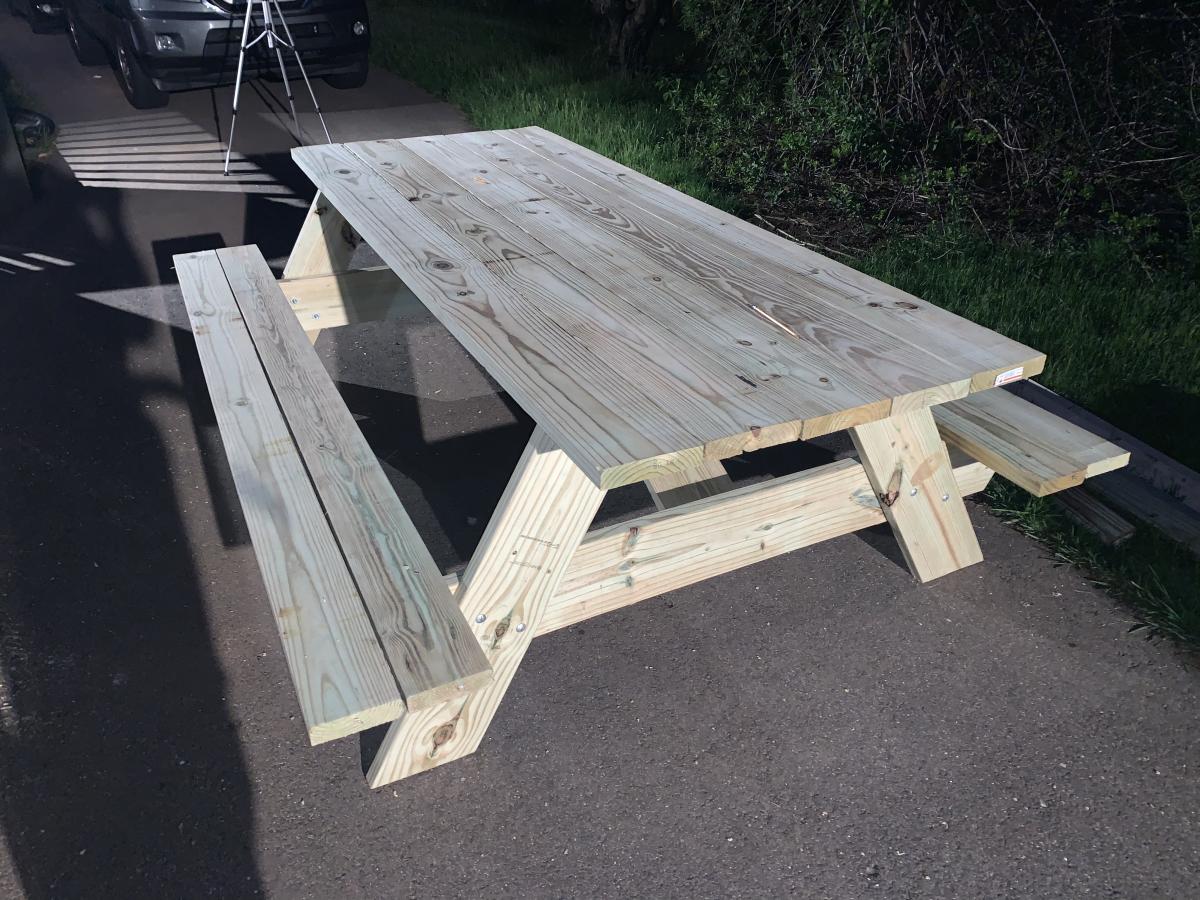
Picnic Table
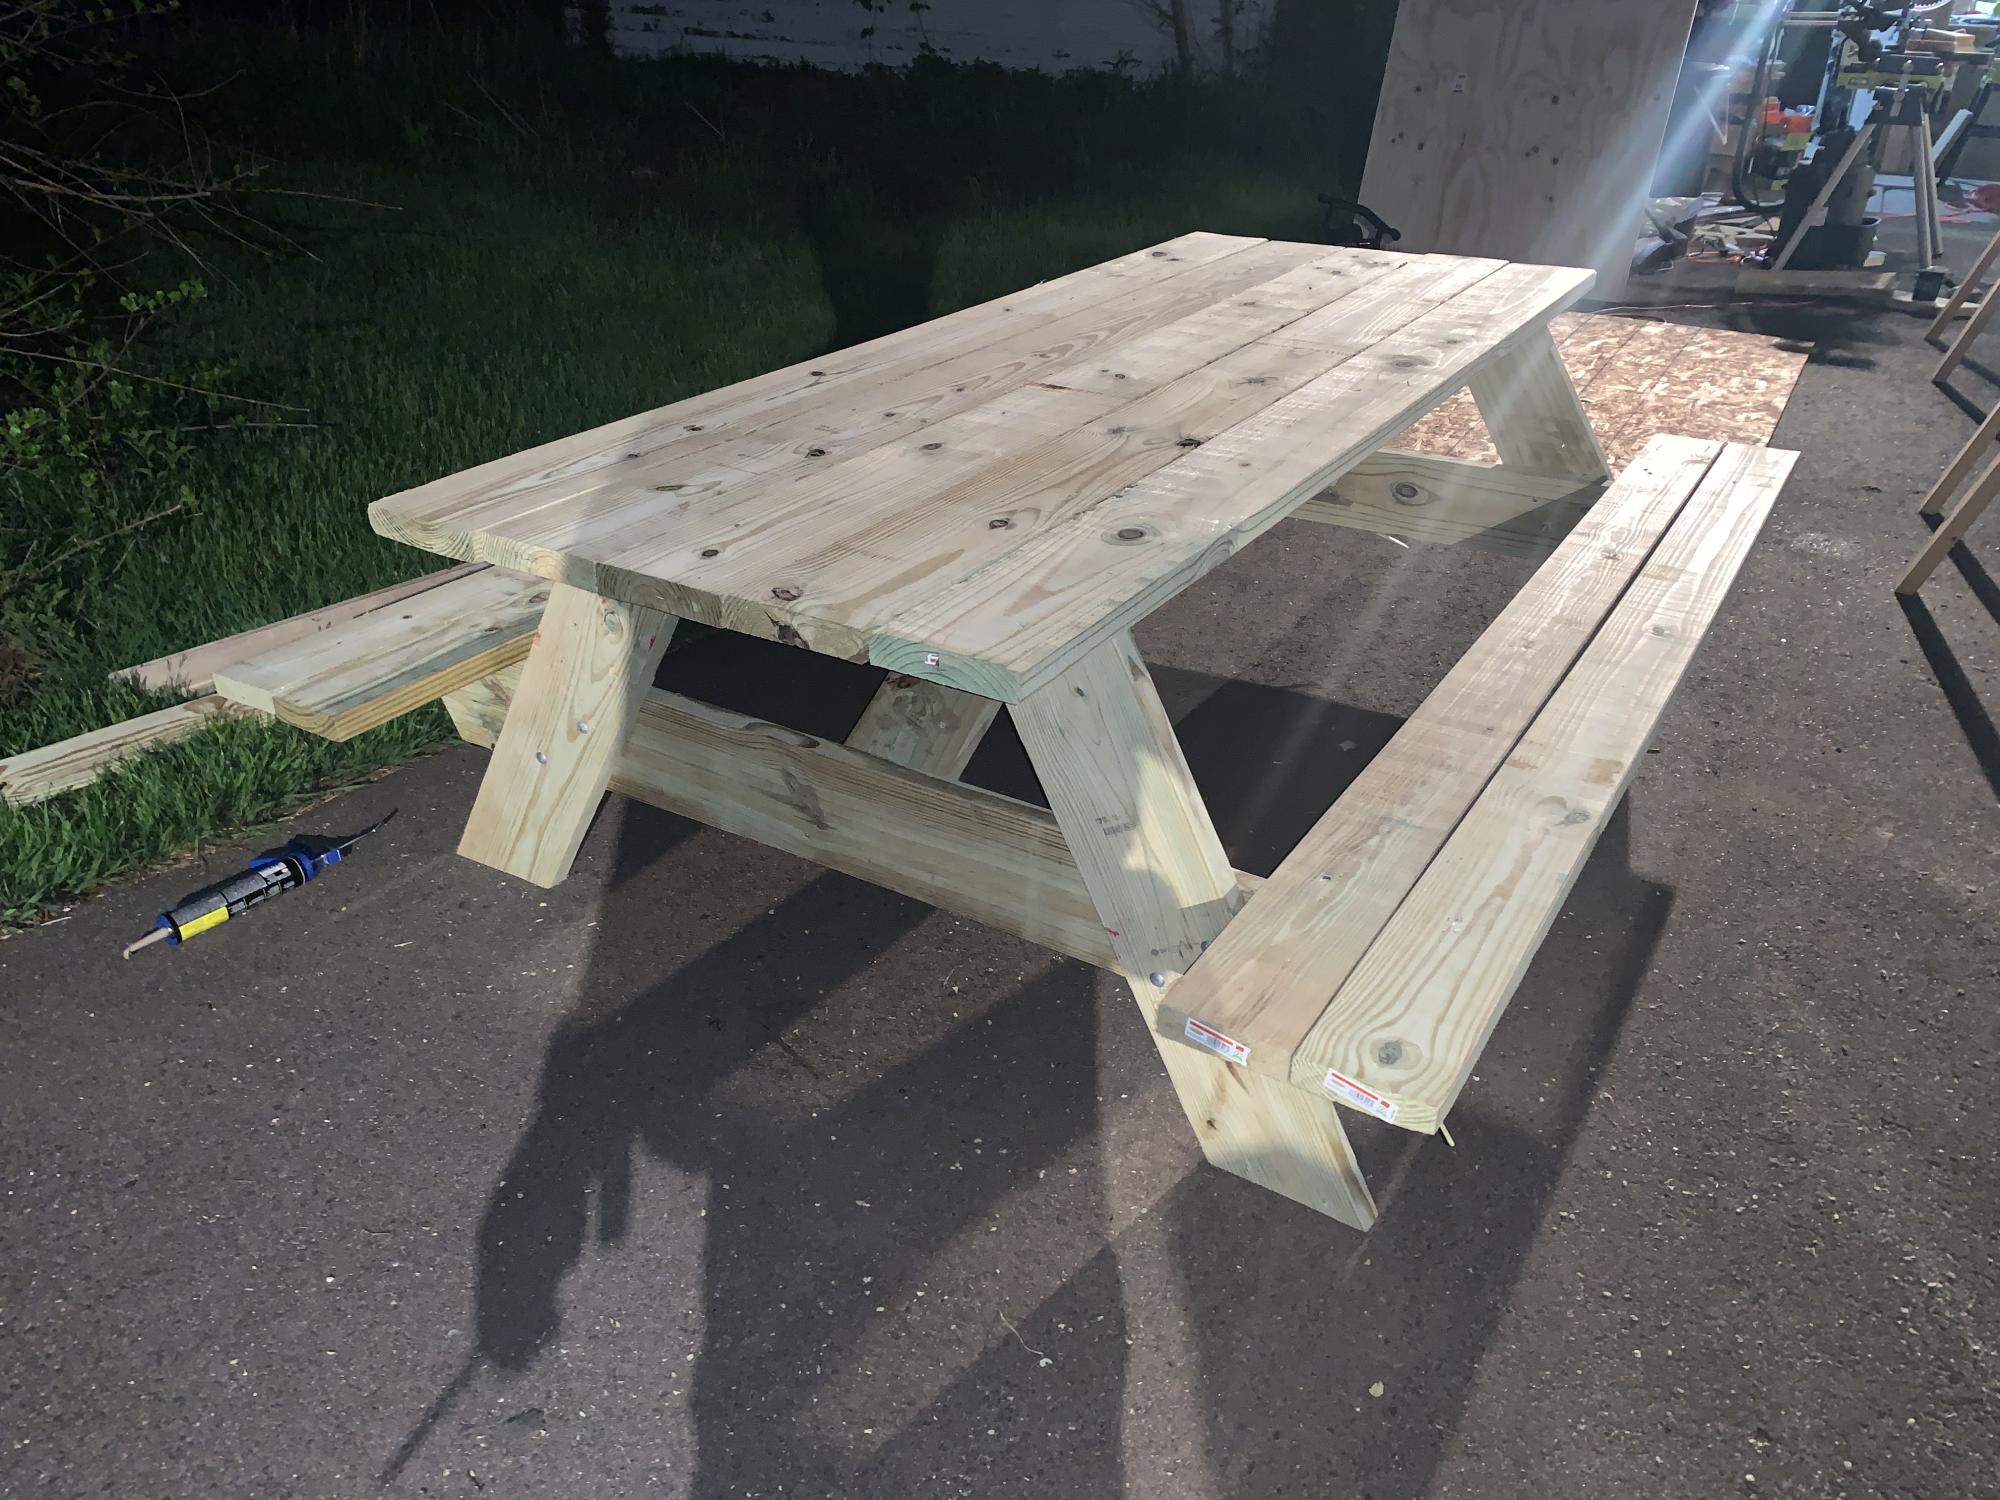
8’ x 3’ Table
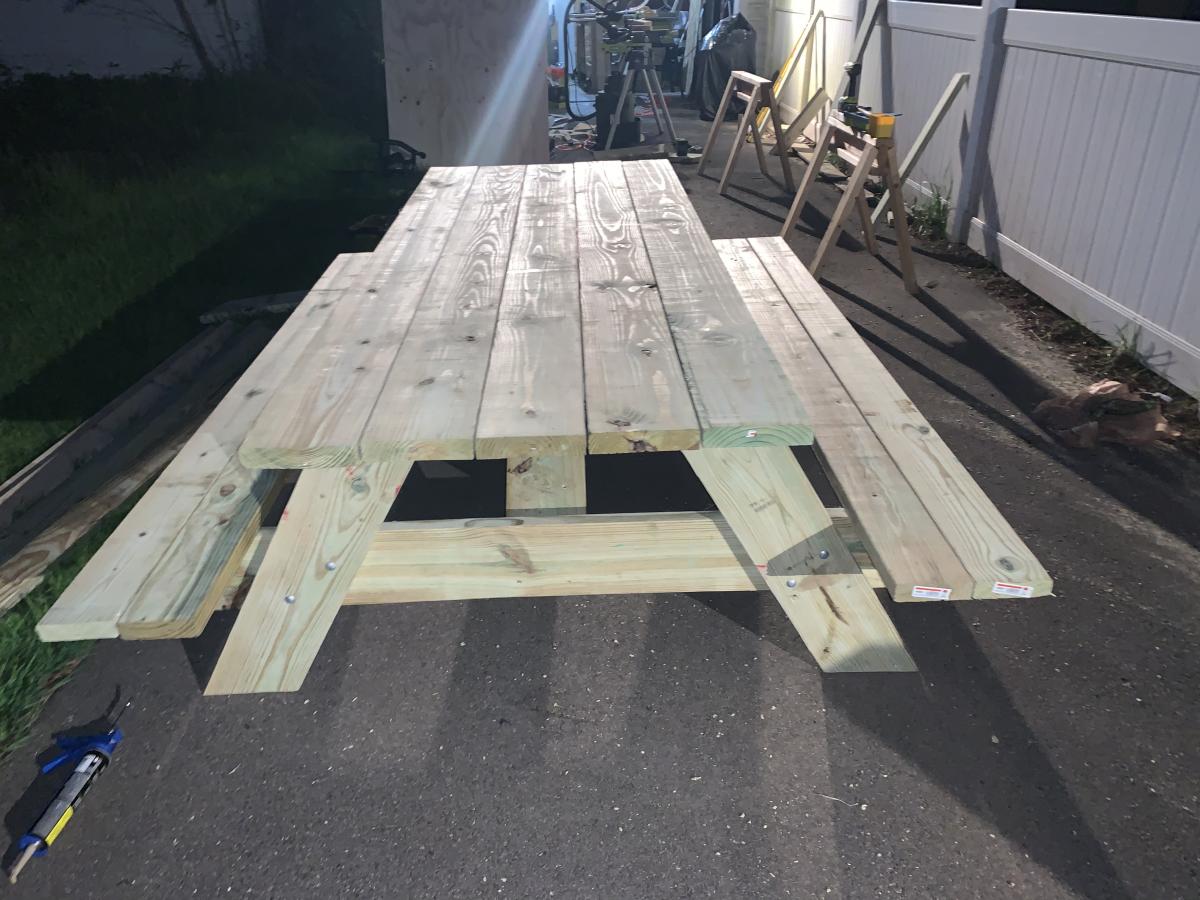
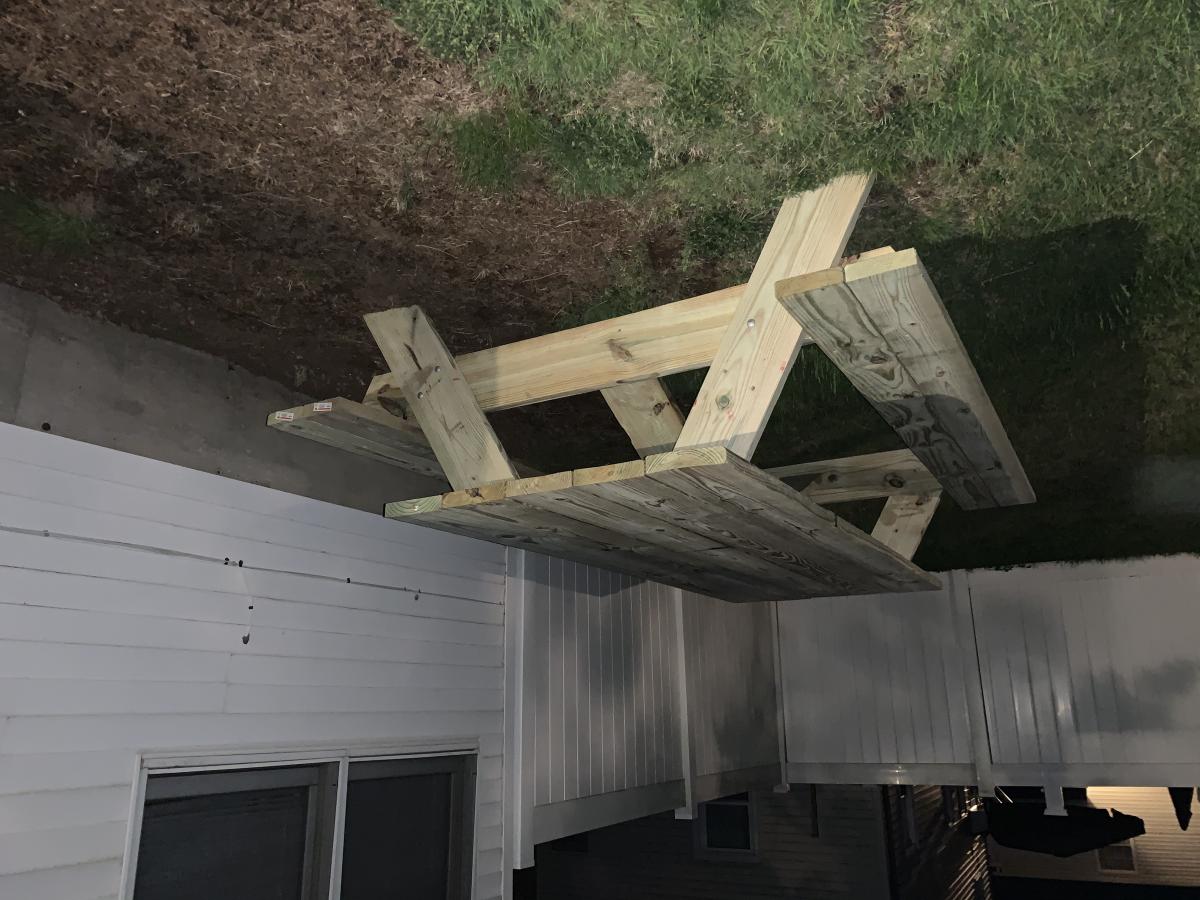
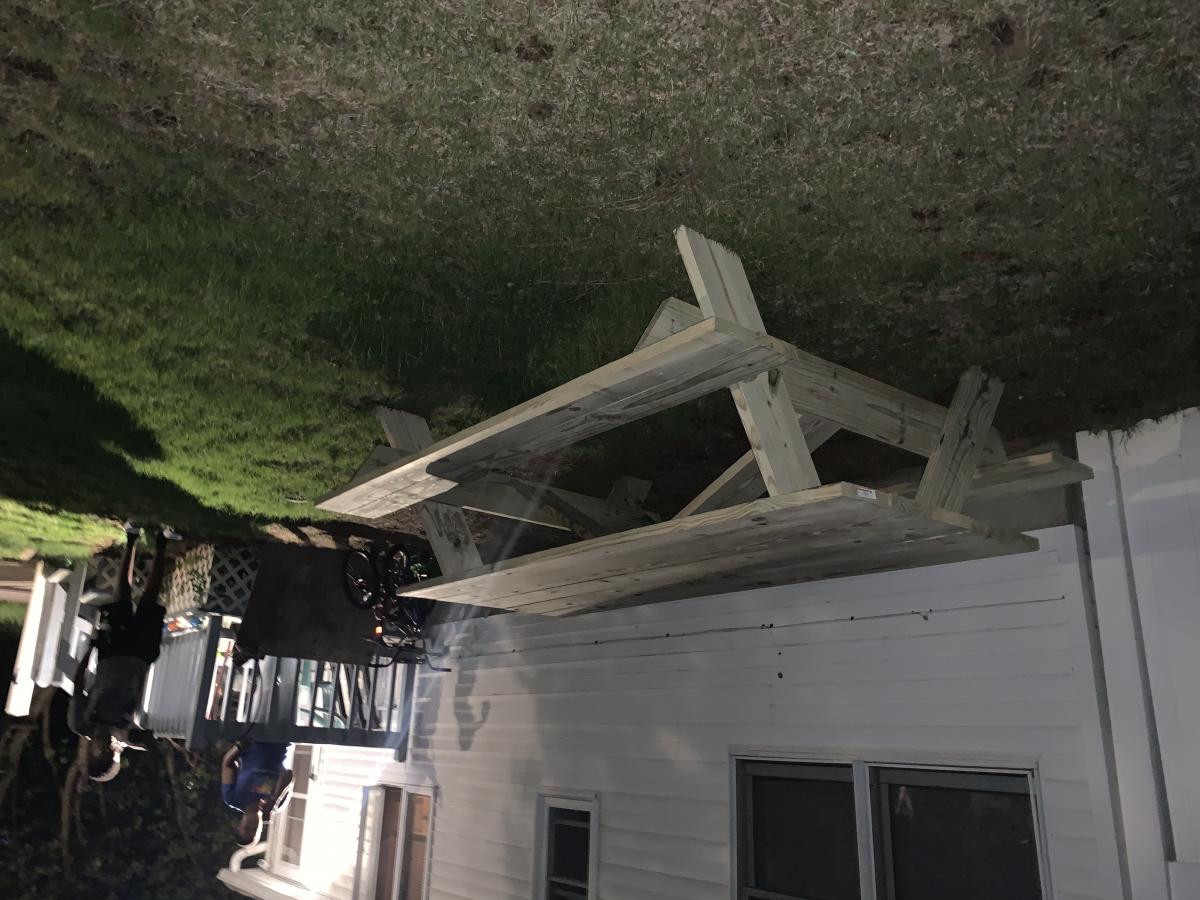
Built from Plan(s)
Estimated Cost
$150
Estimated Time Investment
Afternoon Project (3-6 Hours)
Recommended Skill Level
Beginner
DIY Wood Adirondack Chair
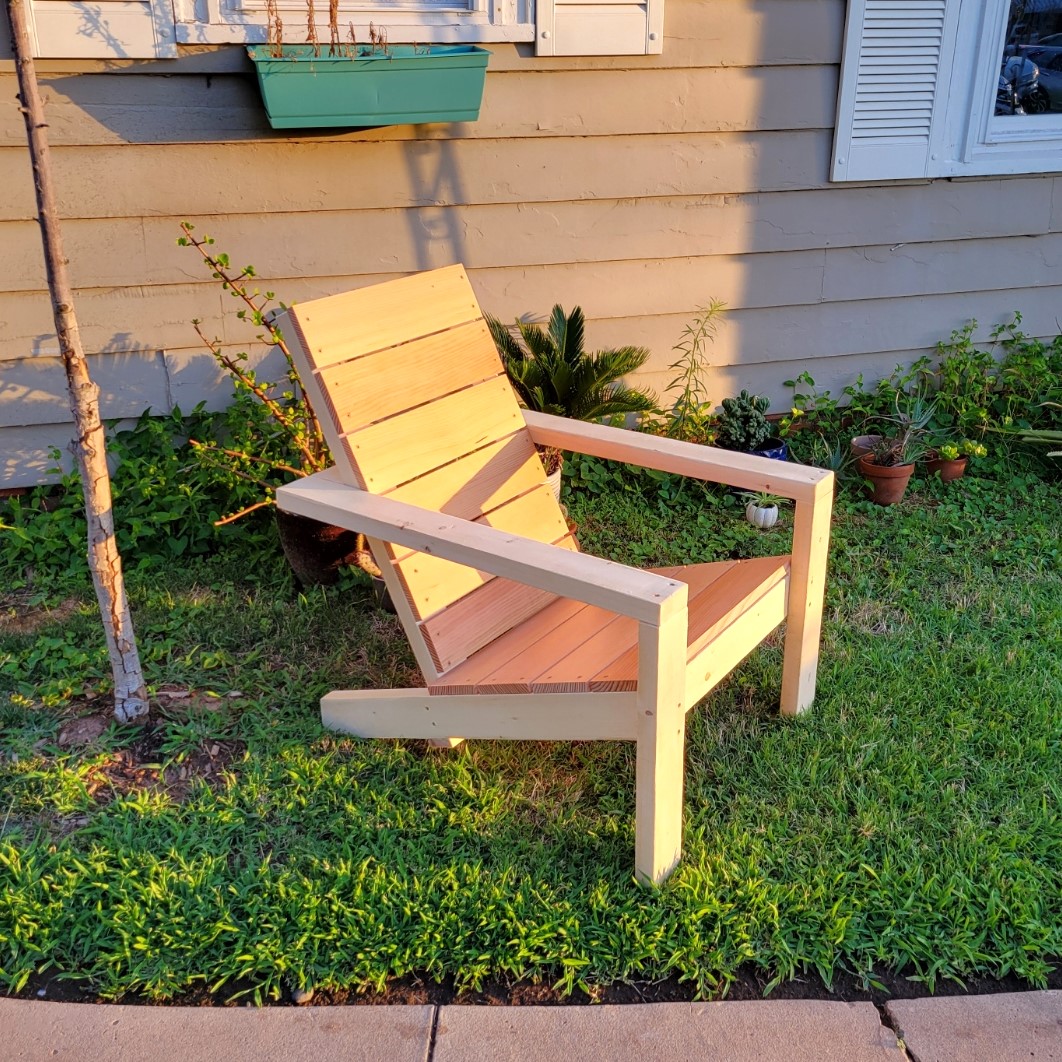
Modern Adirondack Chairs
Joseph Knauf
Built from Plan(s)
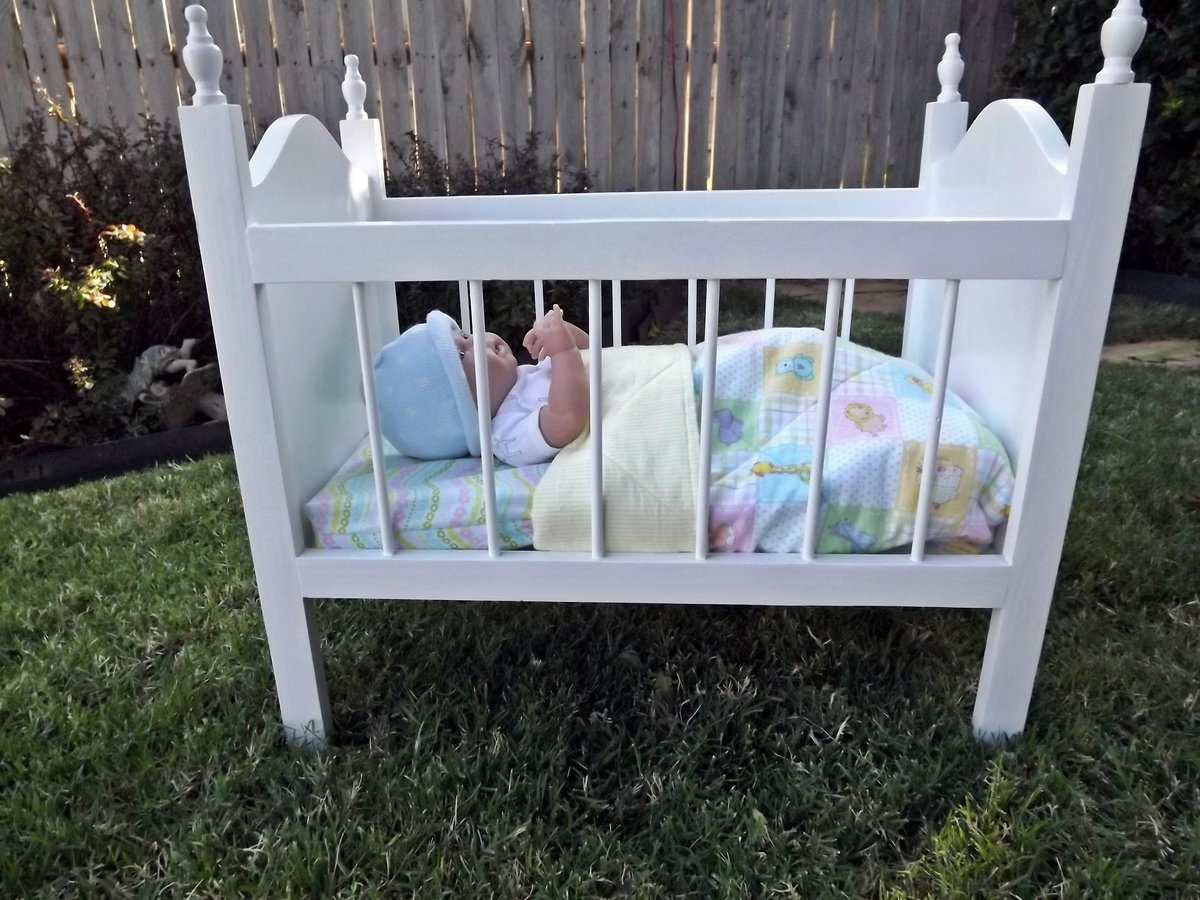
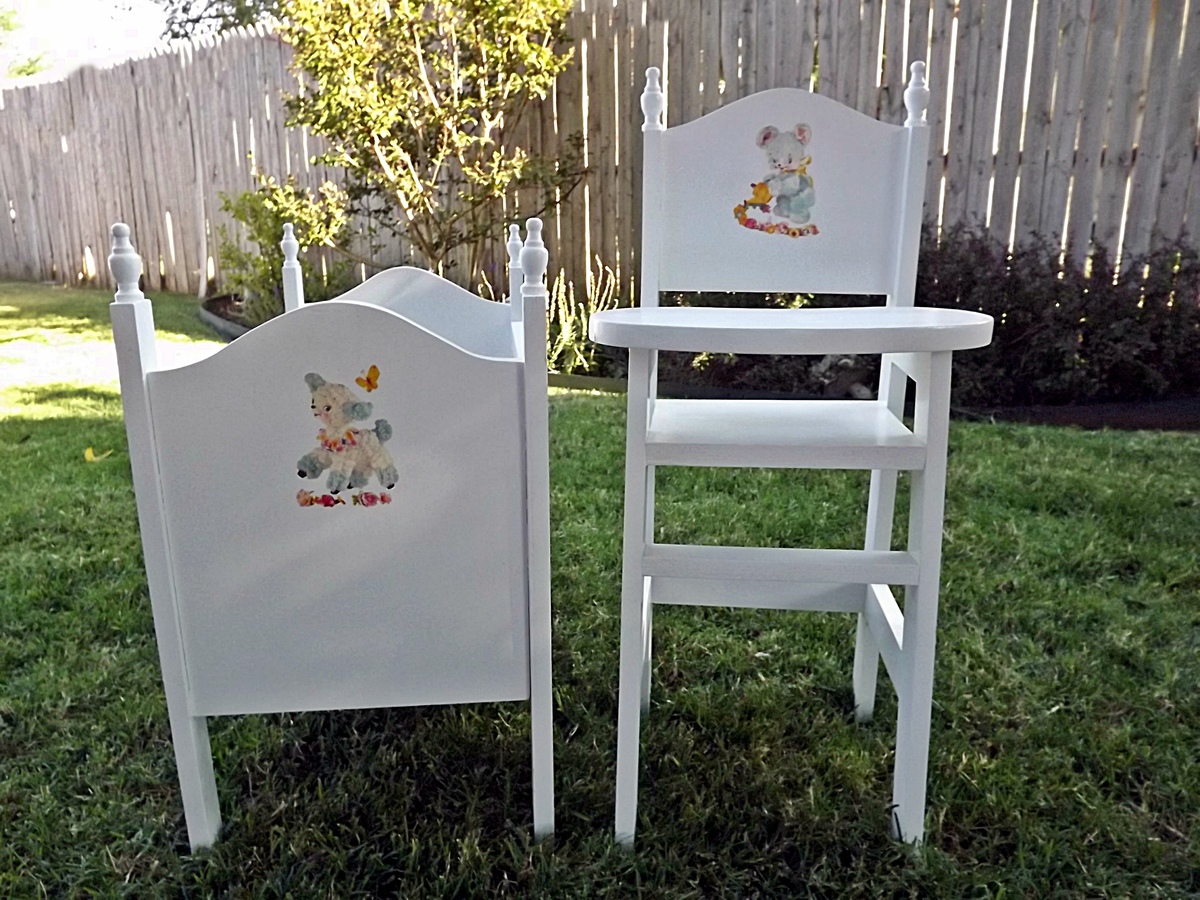
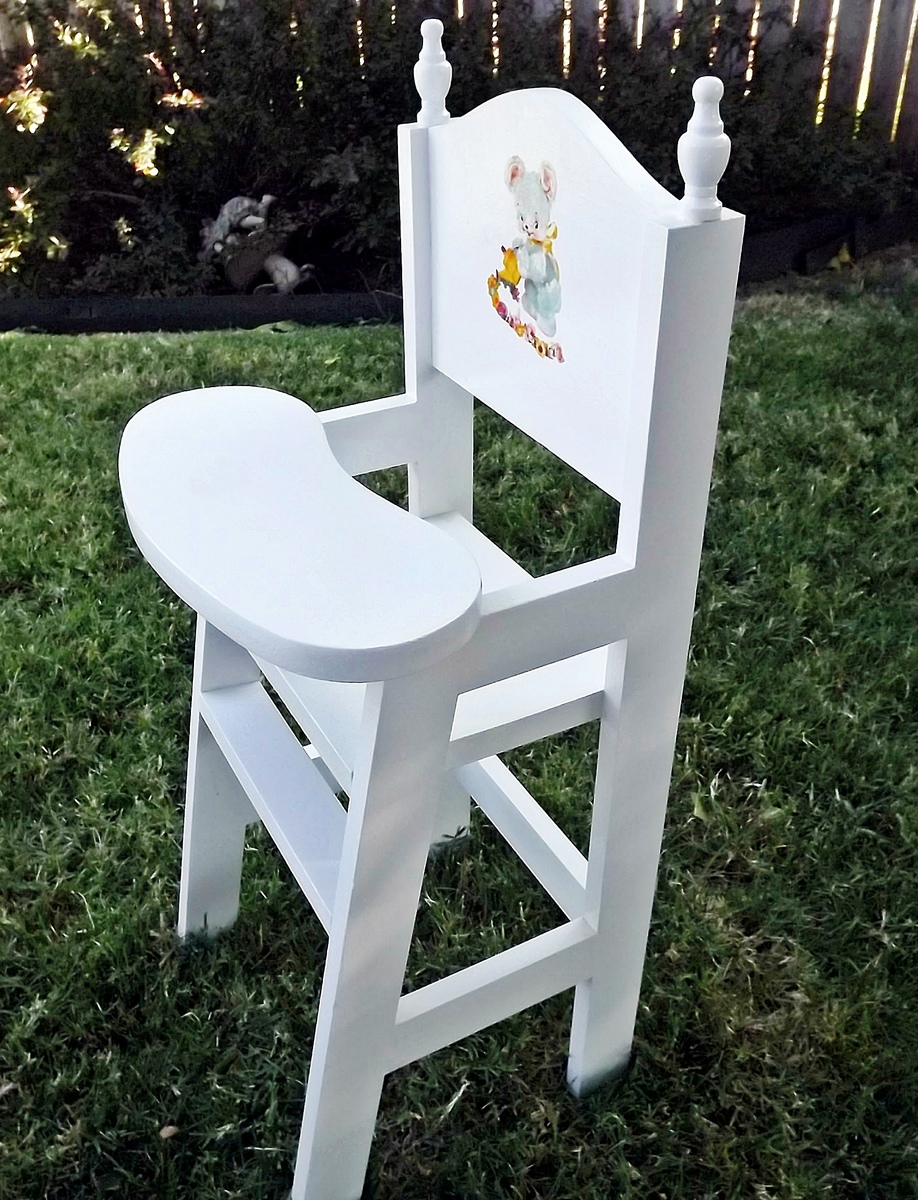
Fancy Doll Bed
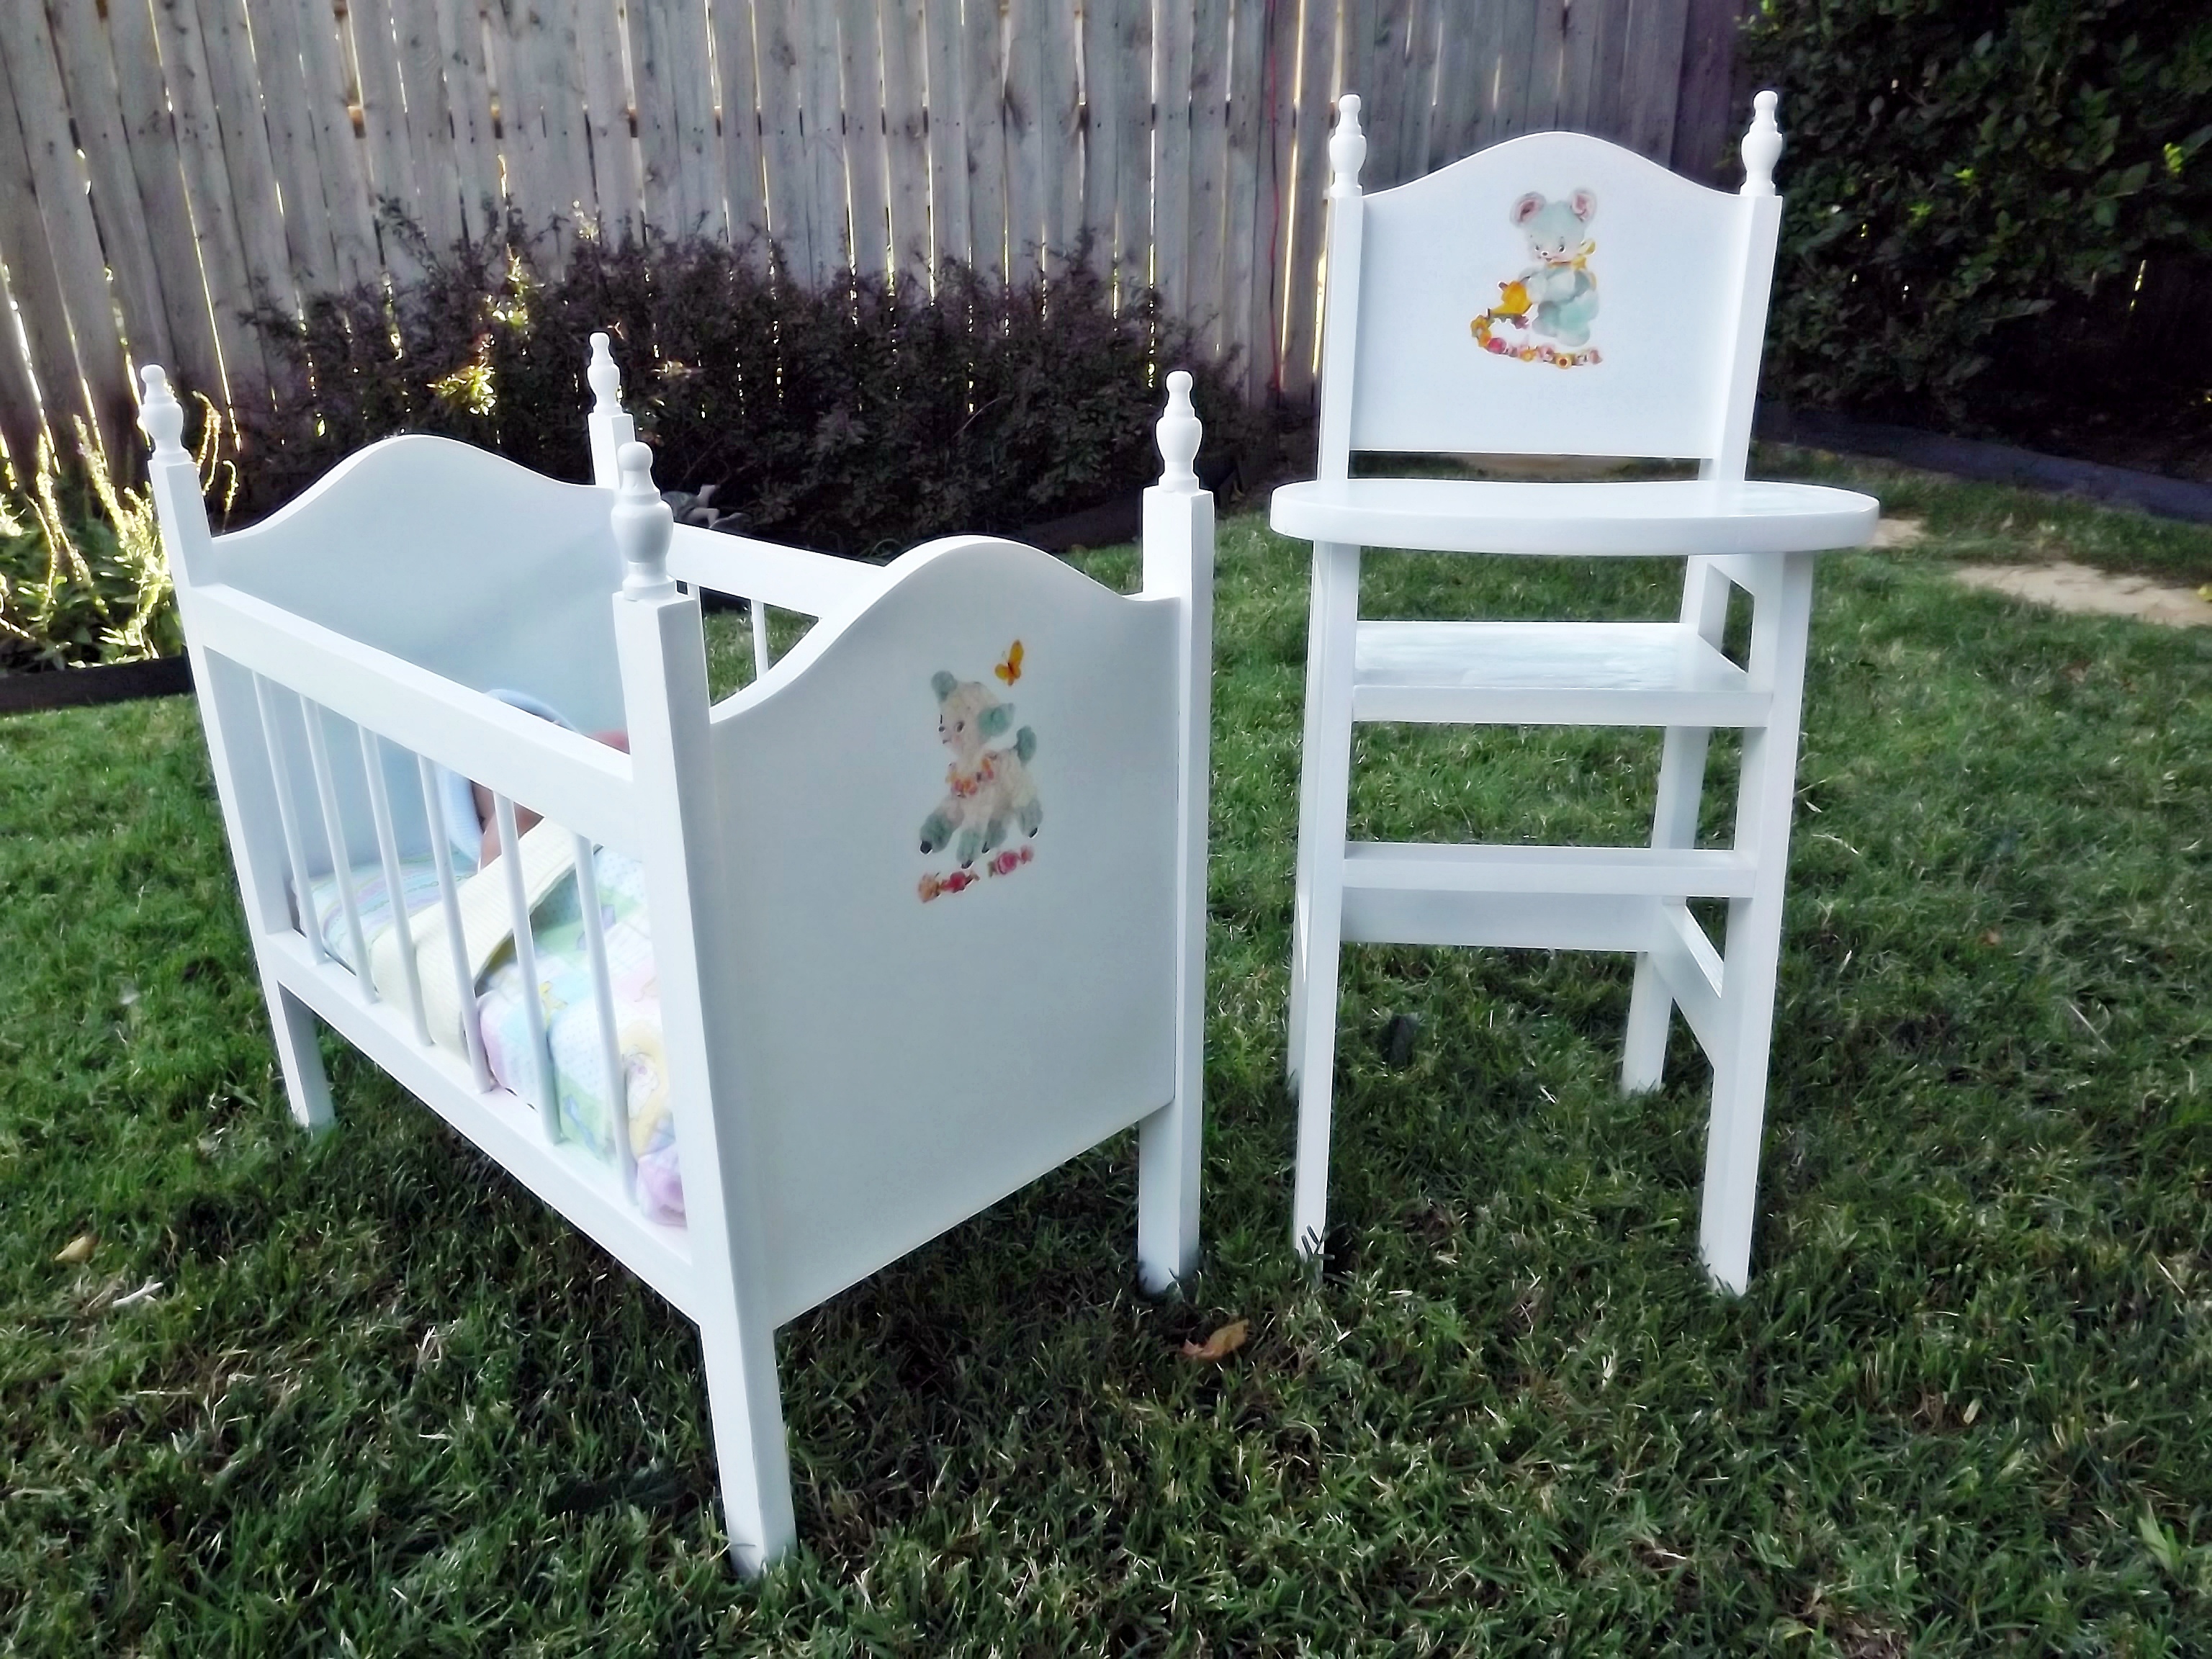
I made this set for my granddaughter using the Fancy Doll Crib plans. On this build I enlarged the size of the Fancy doll crib to be closer to the Olivia crib. For anyone interested: ends-13 5/8”; bottom-21¾”; side rails 21”; legs-20”; 12- 3/8” dowels @ 8¼”. I thought the scale of the finials from Lowe’s were too large, so I found some I liked better at Hobby Lobby: 3 pcs per pack @ $1.47, item #165274. Since I got 6 altogether, I put two on the high chair. Love the look. I also changed the shape of the curve of the ends and replicated that on the highchair back. The shape of the highchair tray is also curved and slightly cantilevered over the side ends; the tray is 4¾” x 13” to allow for the curve, cut from a 6” wide length of scrap. The vintage lamb theme that I used with my great-nieces is carried out with this set, too. I found the water-slip decals at www.decalcottage.com.


Built from Plan(s)
Estimated Cost
Not including the bedding, between $20-25
Estimated Time Investment
Day Project (6-9 Hours)
Finish Used
I primed using Kilz, then I used left-over Olympia bright white interior paint which I sprayed on. I mistakenly used a water-based brush-on acrylic urethane which yellowed. So I will sand and repaint the one piece.
Recommended Skill Level
Beginner
Comments

Sat, 10/13/2012 - 18:53
Love this!
This looks great! I wouldnt have immediately thought of finials on these... fantastic look!!

Sat, 10/13/2012 - 21:31
This is so sweet! Reminds me
This is so sweet! Reminds me of the set I had when I was a little girl. Someday I'll have grandchildren to build these for...
Comments
Adam_Scheetz
Fri, 09/28/2012 - 12:19
Quick rundown
This particular one is made of 1x4's (4) and 2x4's (2). The notches in the 2x4's were already there. Attach one 1x4 on the front and three evenly spaced on the back. And Done! Add stencils for creativity!