Counter Height Table and Chairs
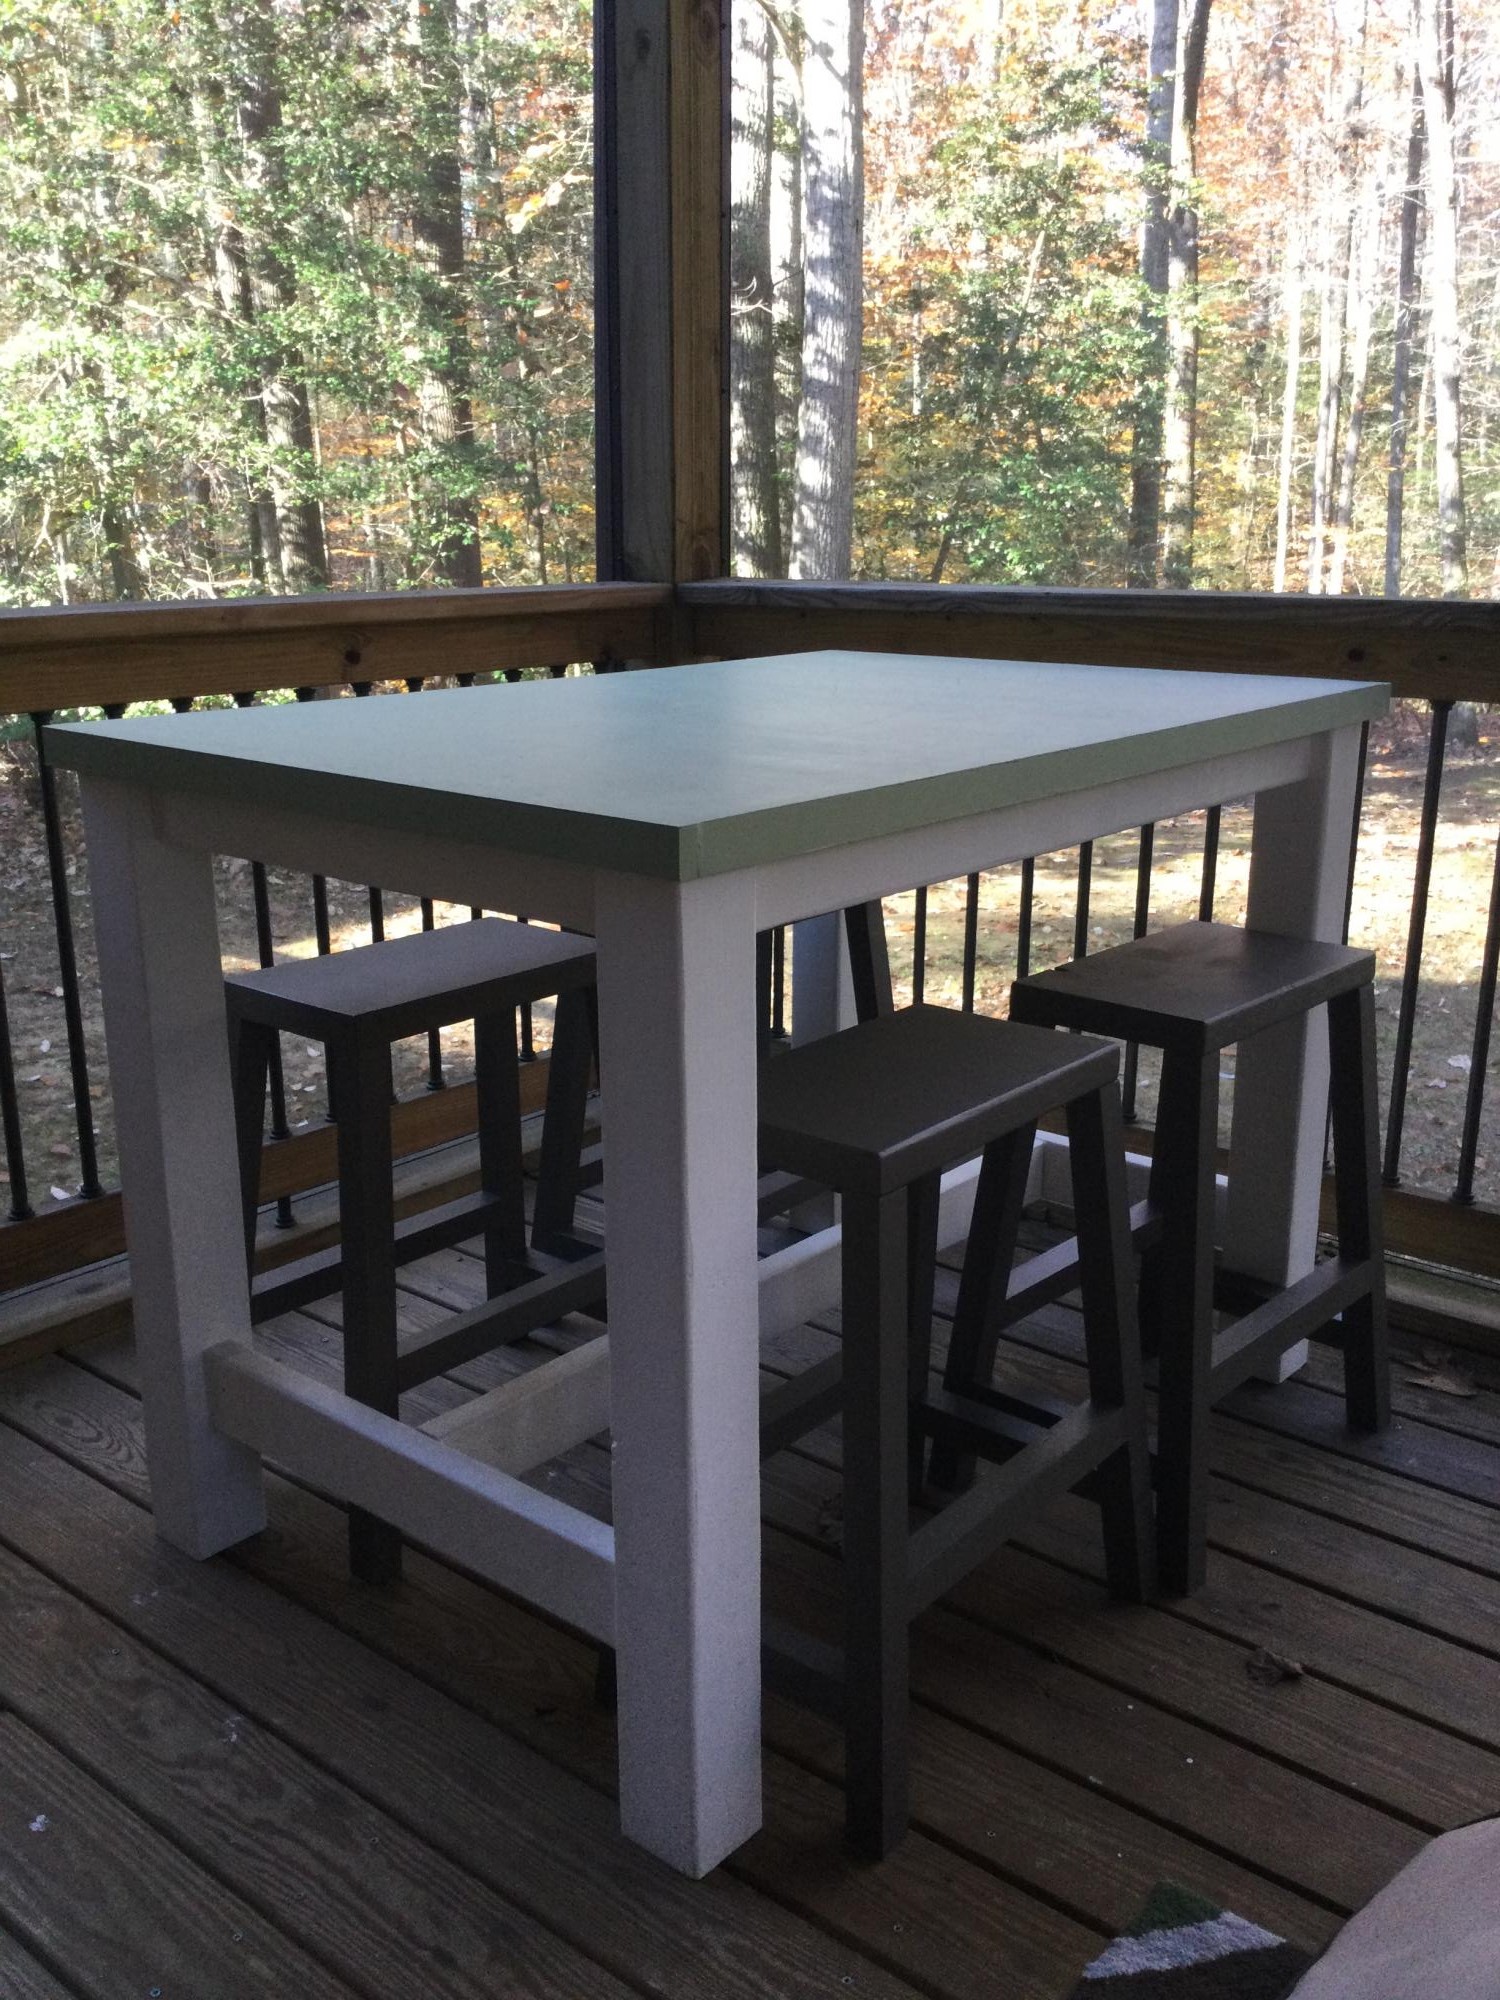
My husband and I made the table and chairs for our screened porch. We really like how the project turned out. Many more Ana White projects on the our list!
Built from Plan(s)
My husband and I made the table and chairs for our screened porch. We really like how the project turned out. Many more Ana White projects on the our list!

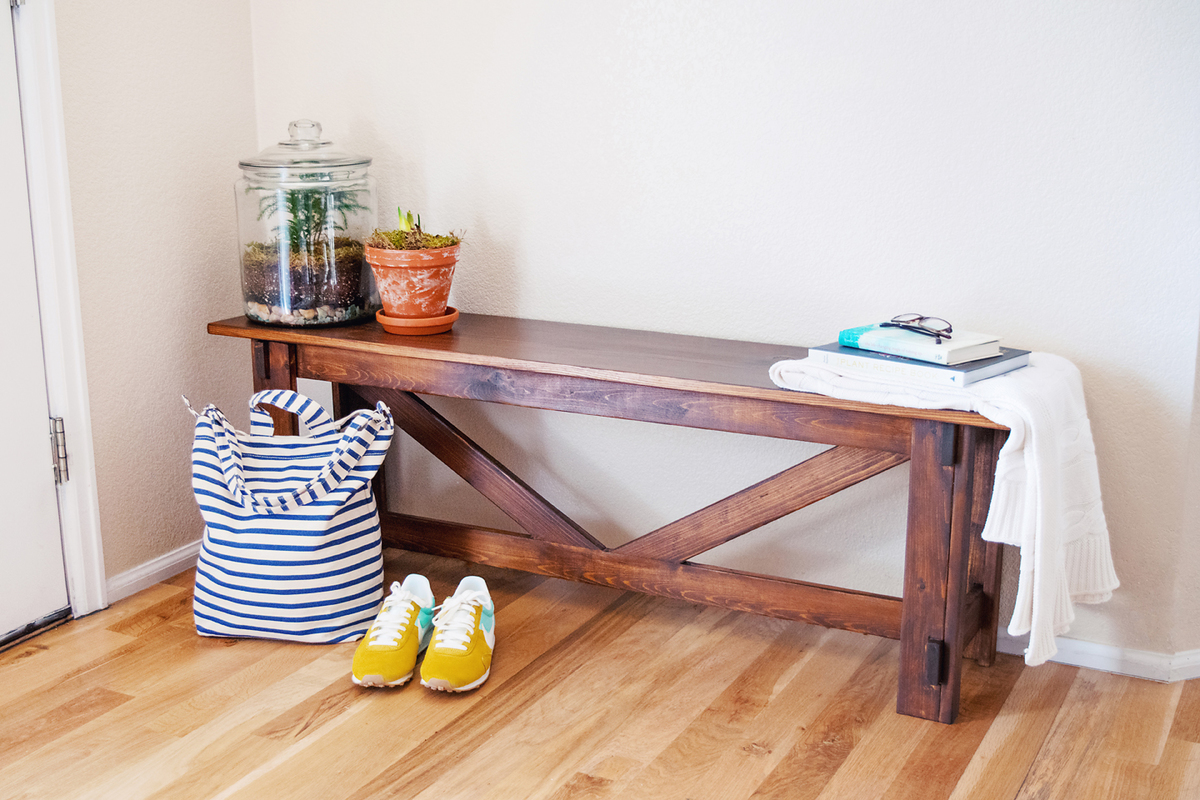
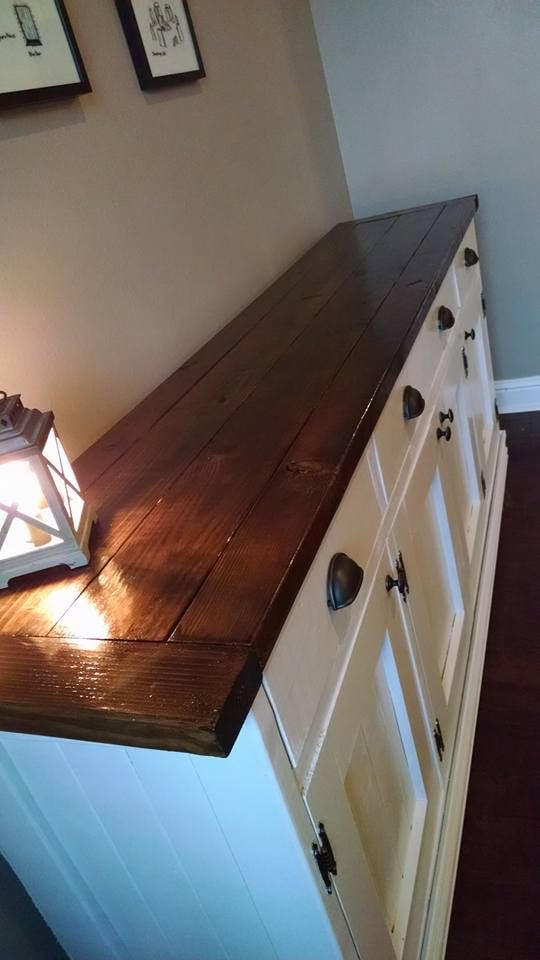
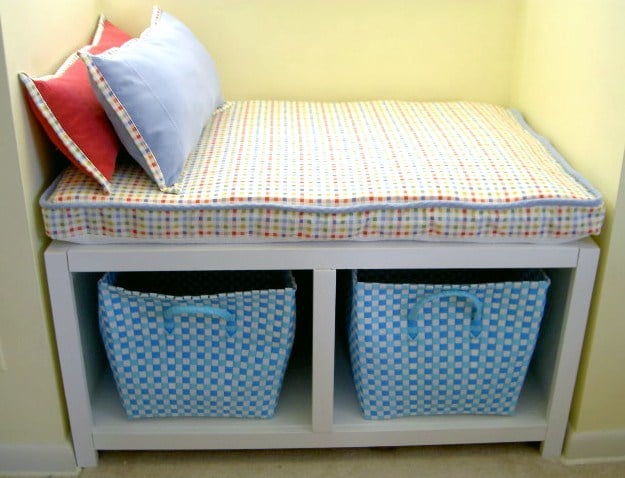
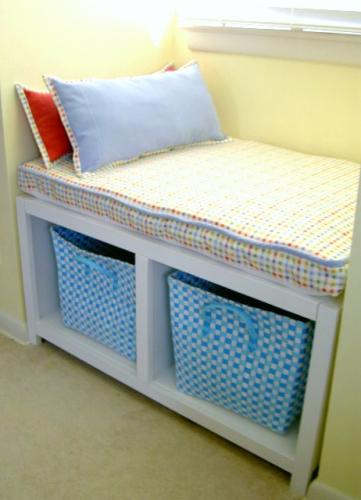
I made the entryway cubby from the book and finally couldn't stand the pile of shoes (3 year old) in the front entryway any longer! So I made the bench and my son is thrilled that he can open and close it and put things in it. I have a few touch-ups to do yet from the pocketholes and countersink holes, but I love it! It was really easy to do. I did modify the plans to fit my entryway, so it's about 36 inches long.
I love it!

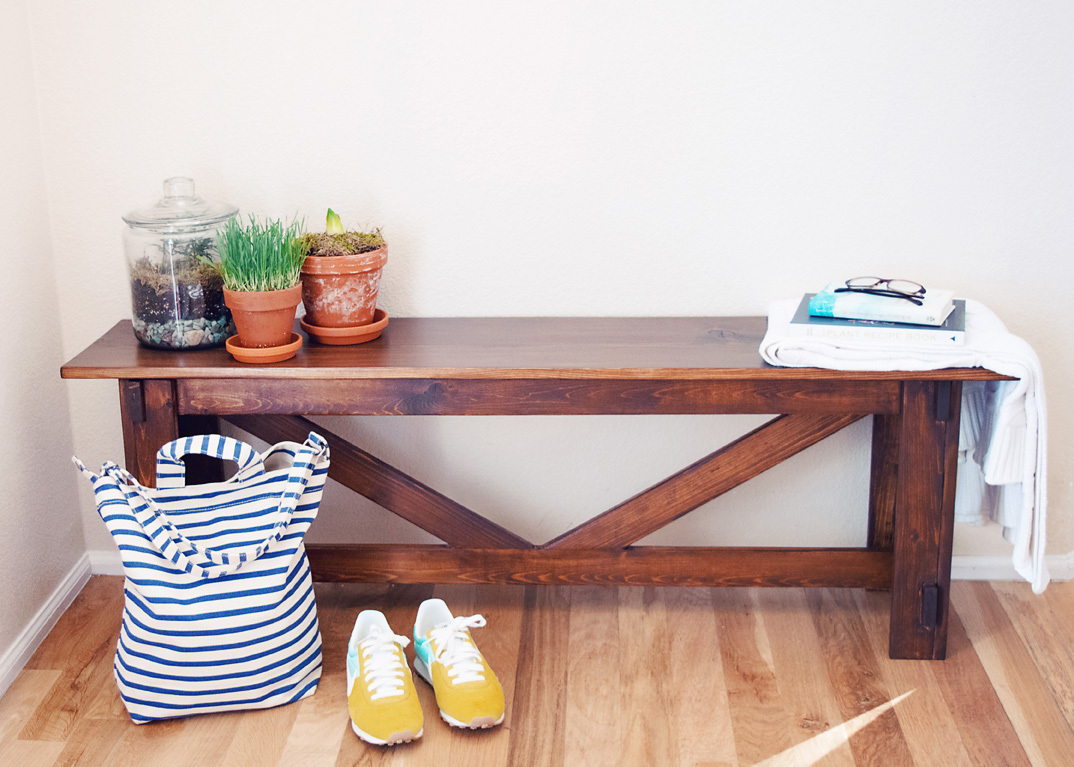
I love how this bench turned out! It's one of my favorite builds so far. It's simple but really beautiful to look at. I have a few pictures of the process and the stains I used to finish it up on my blog. Thanks, Ana, for another great plan!
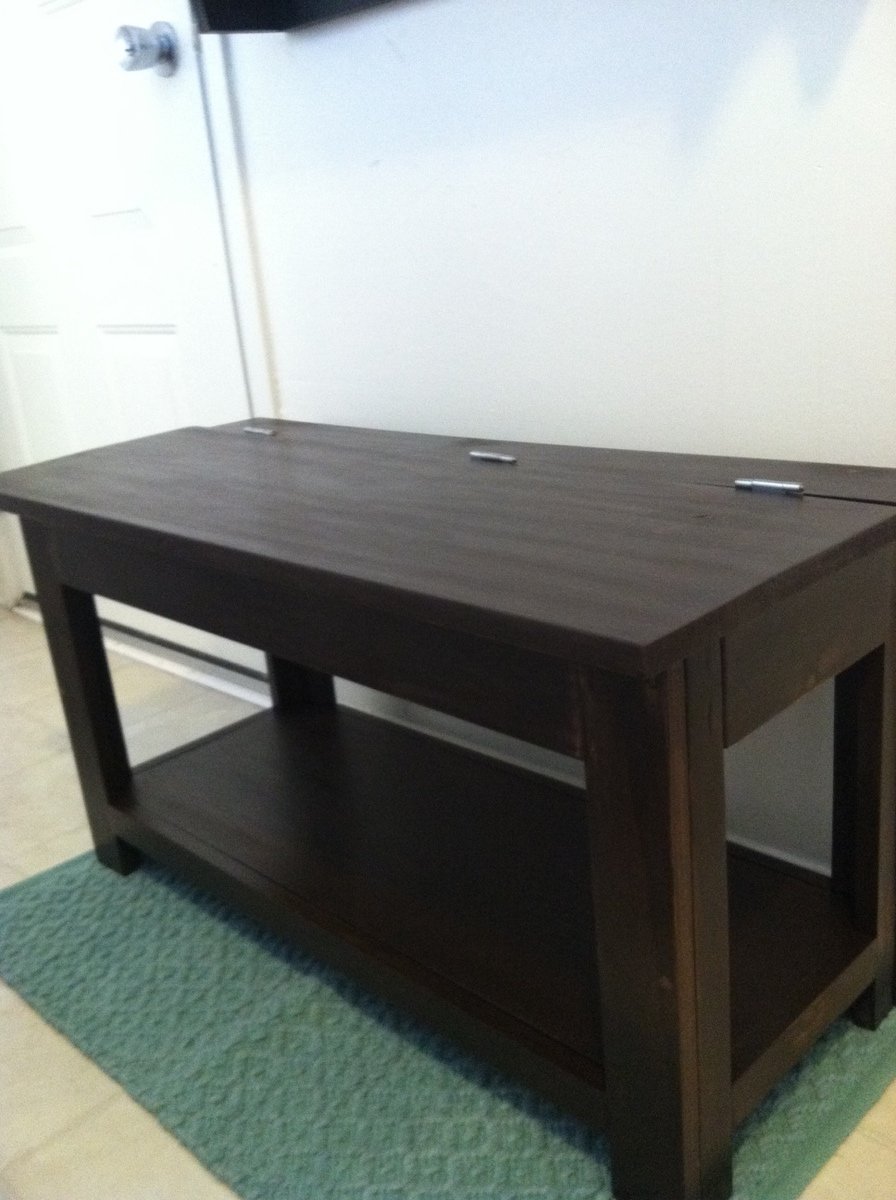
This took me about a month to build. Ana's plans were great. Installing drawers was the toughest part.

Love, love, love your projects. I have made 3 of the modern 2 x 4 chairs, with a modification. I had purchased both seat and back cushions for my chairs and the back cushion had nothing to lean back on, so I added some height and personality to the chair.
Your plans are easy to follow and make very nice, heavy furniture that I know will not blow away and end up in the field next to my house. Keep those plans coming!
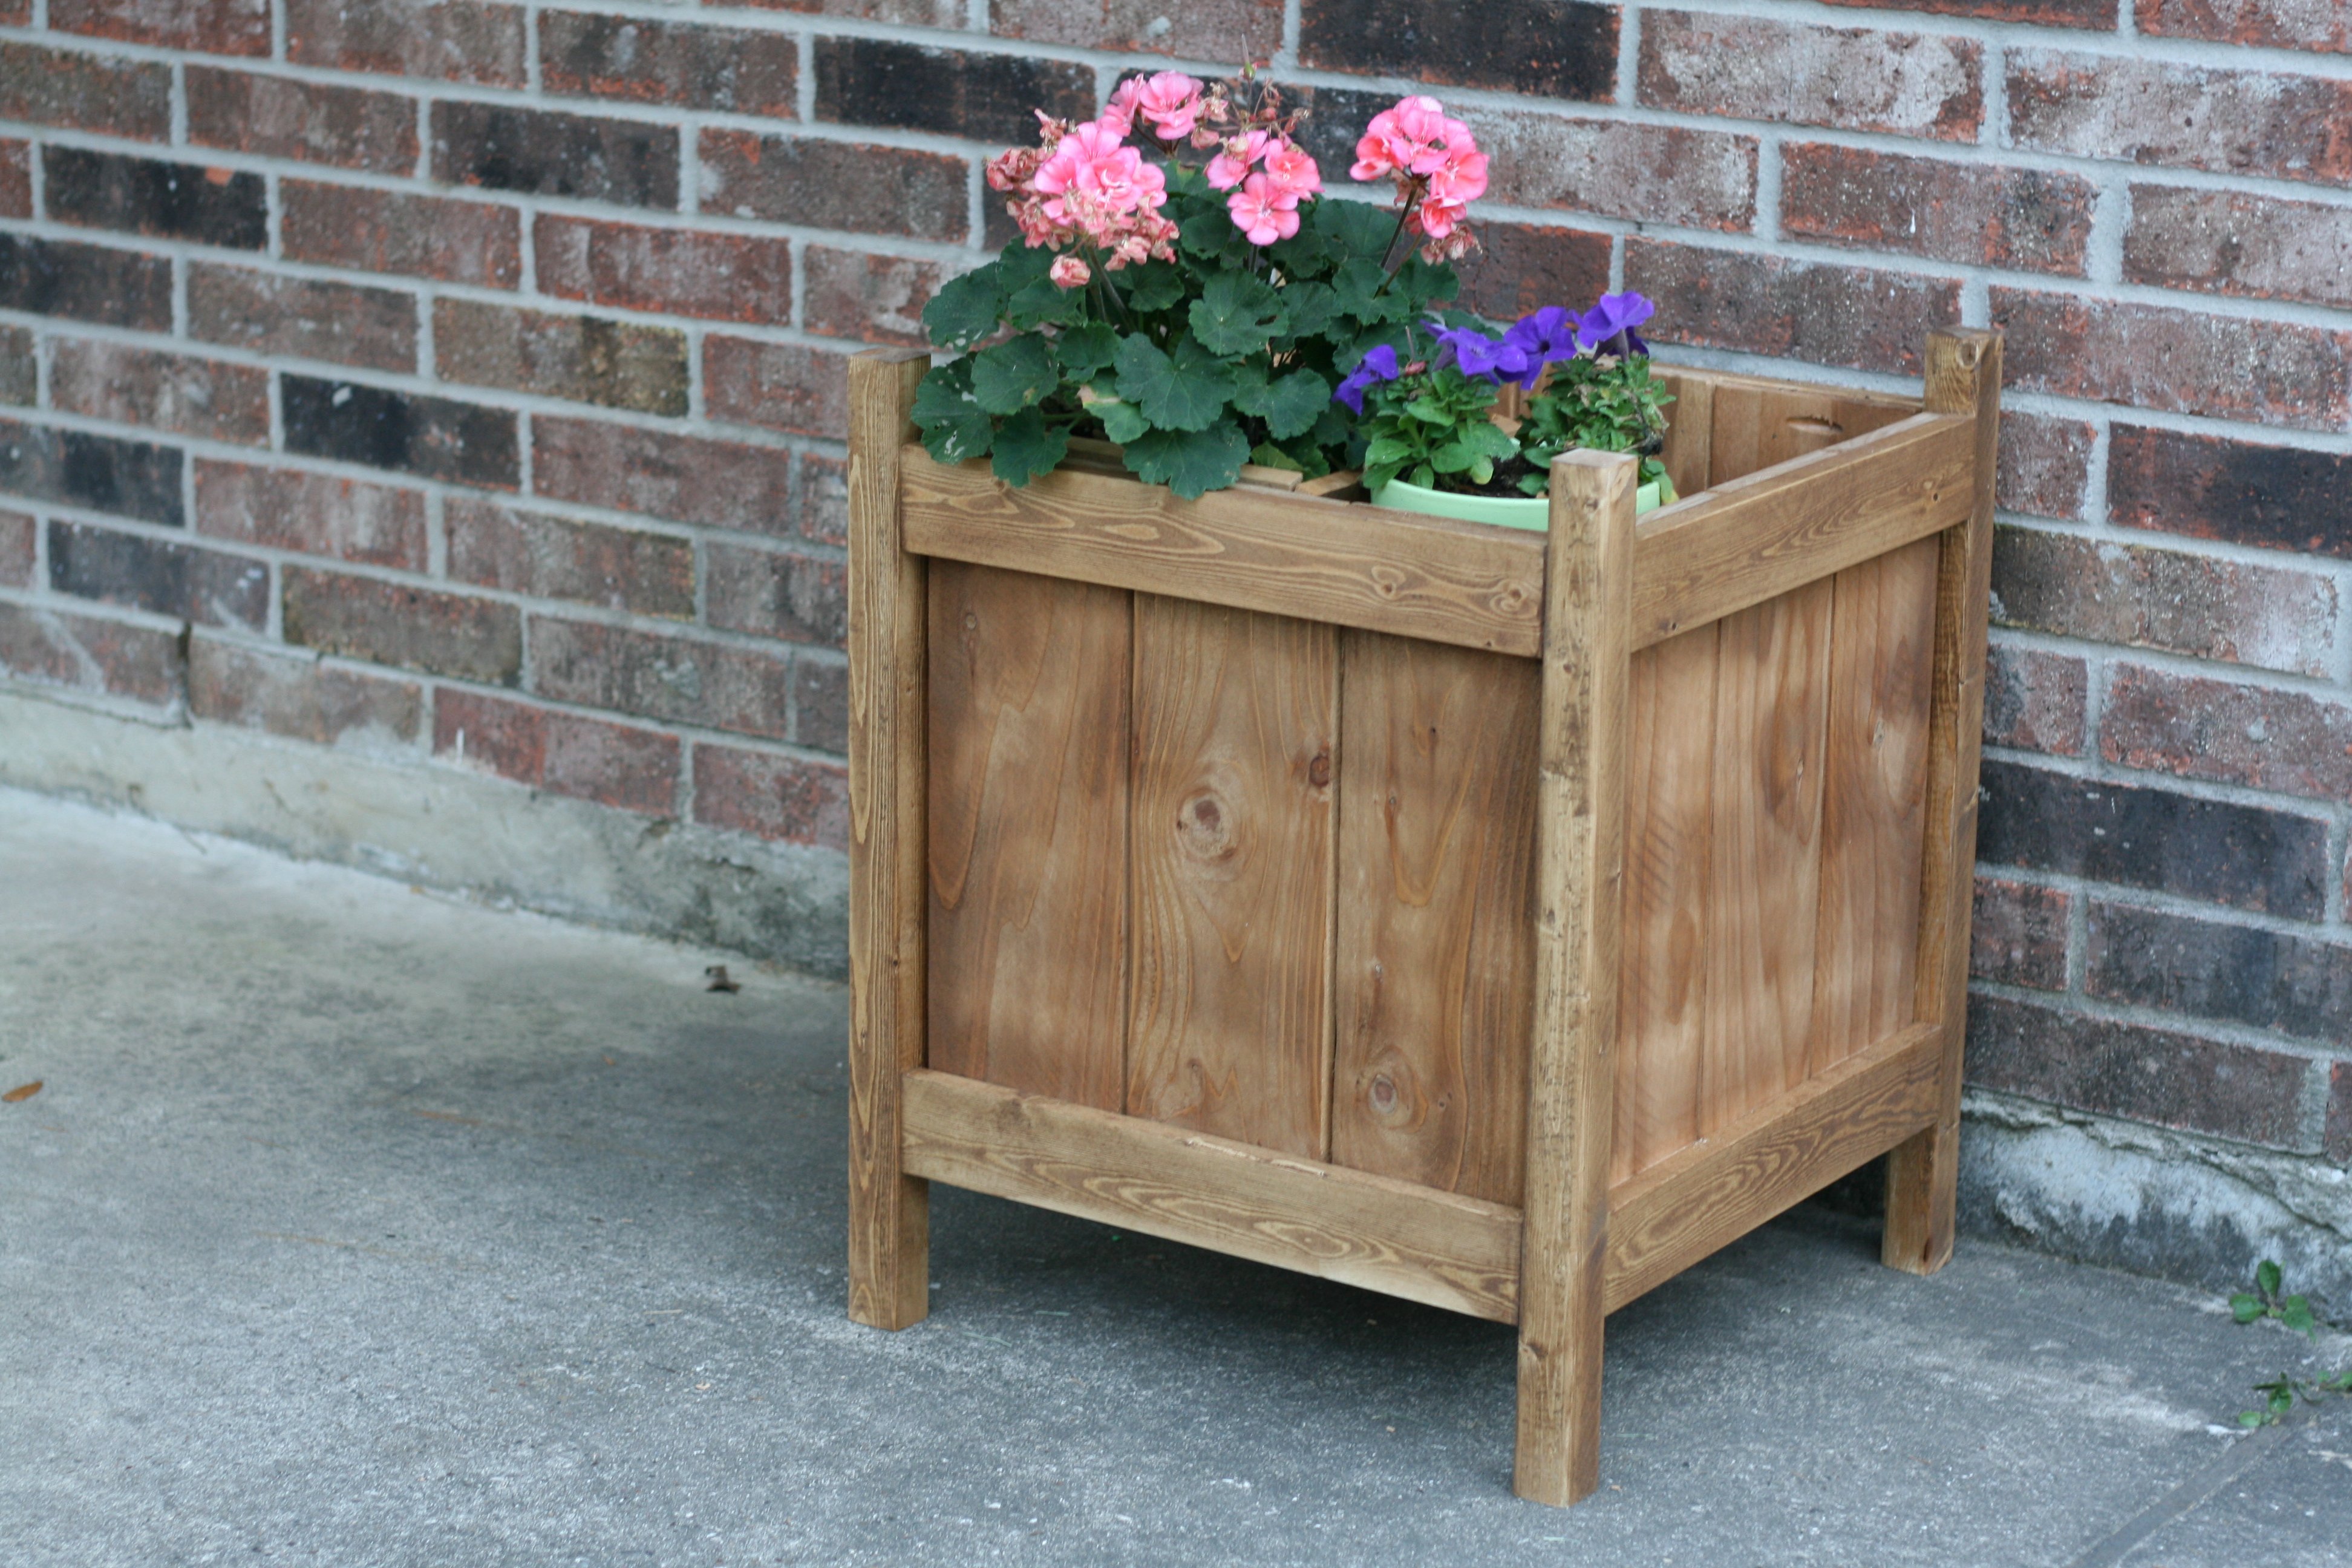
We made this for my husband's Granny who has a bright green thumb, campared to my slightly black one. It turned out great.
This is also the project I learned how to use a Kreg Jig. Amazing. My husband is hooked.
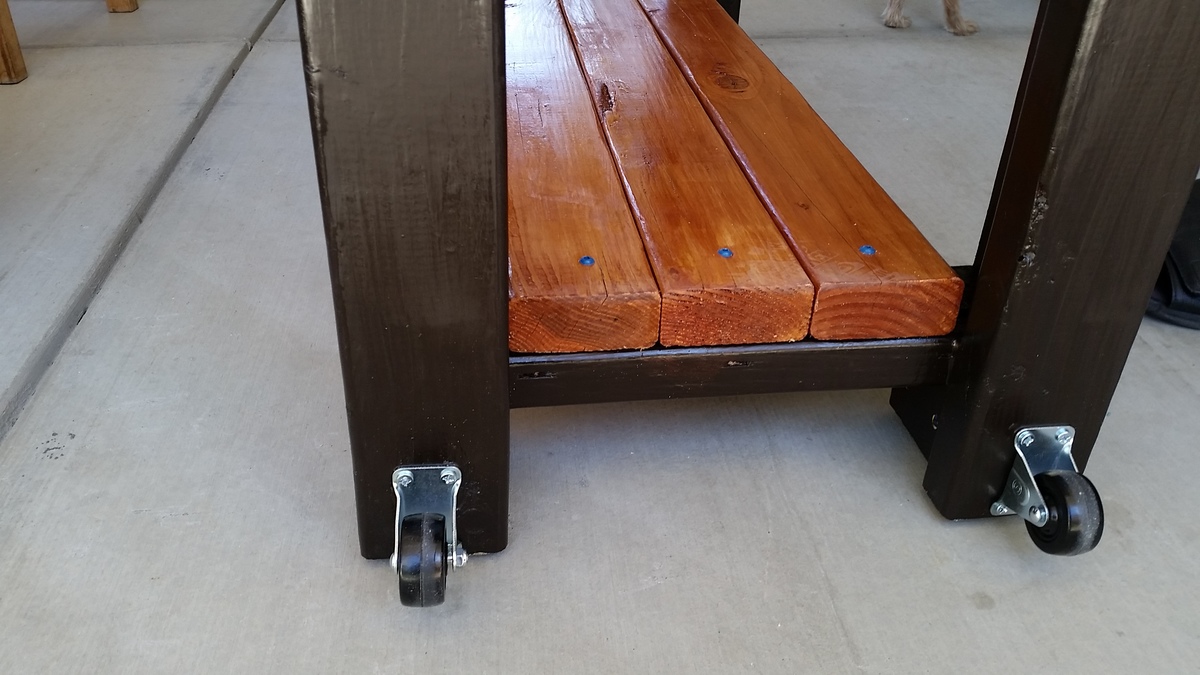
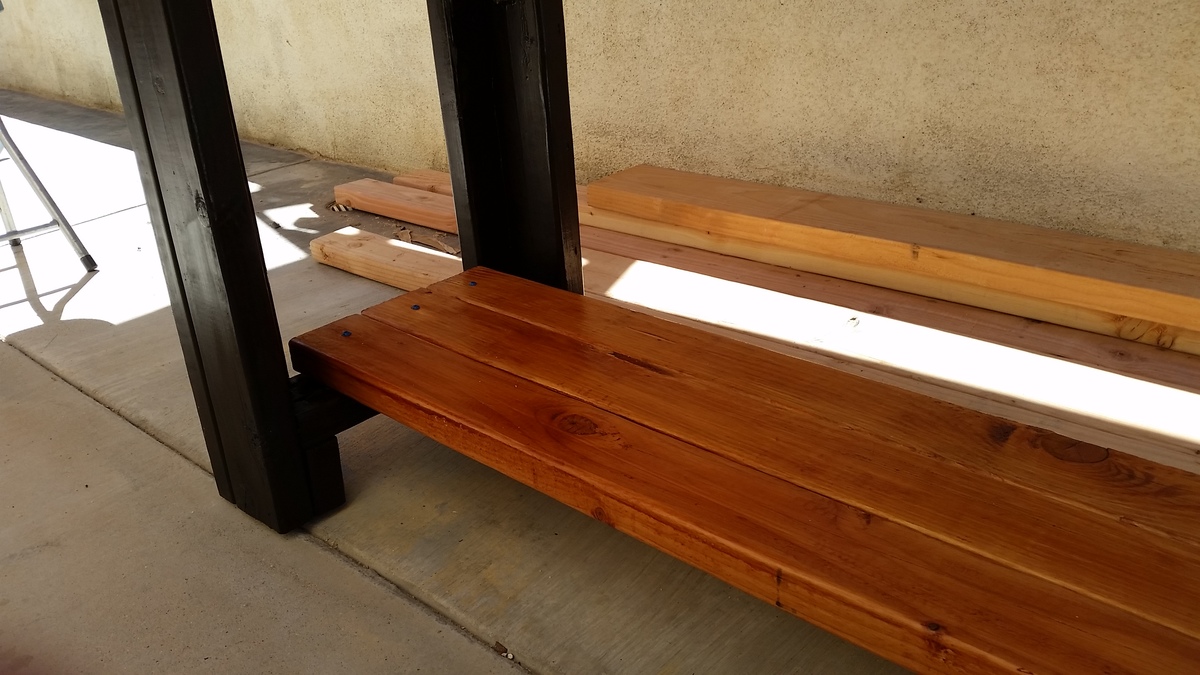
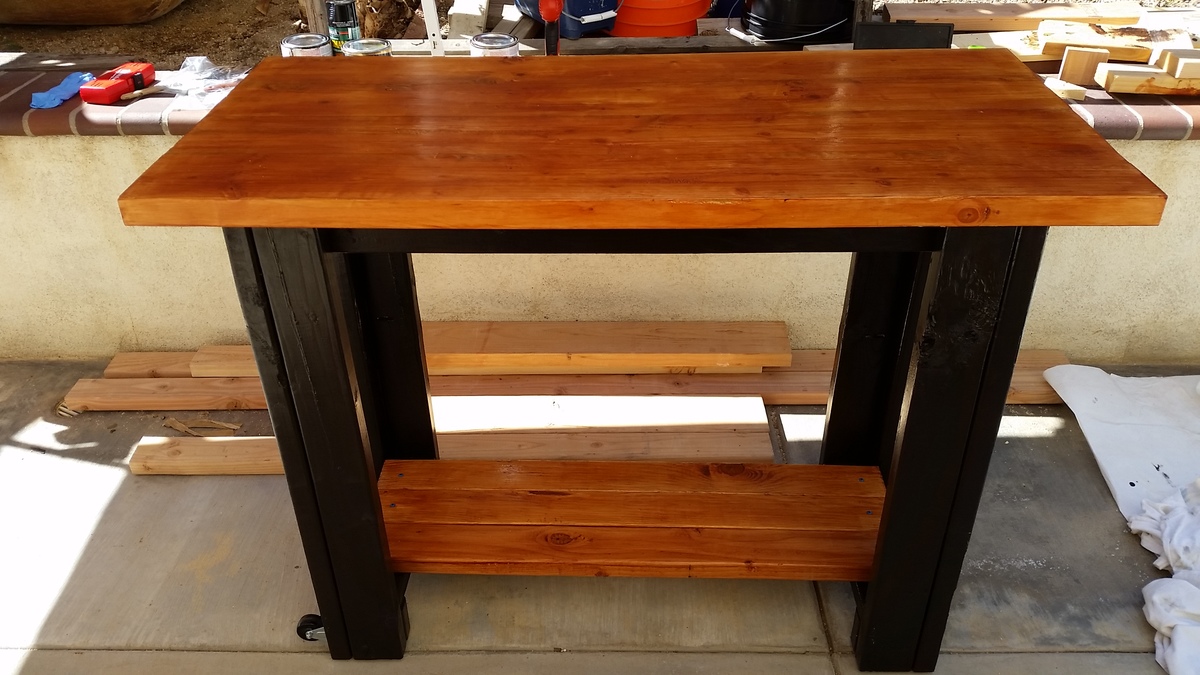
Built this over a week because the table top needed to dry and harden. I decided to paint the whole thing to make it look decent. I Kreg jigged four 2x6's together and added wood hardener to the table top. It was pretty weak because the wood was still wet so I had to dry it out for a few days. I also filled in the gaps with wood filler and then used a belt sander to smooth everything out. Everything else were just 2x4's. I knew it would be heavy so I added wheels to move it around and as a final touch I am adding 90 degree iron accent brackets to the table corners but I haven't got those delivered yet. I also added rubber screw-in feet so that the bottom doesn't chip when you move it around. Got those from Home Depot for $3
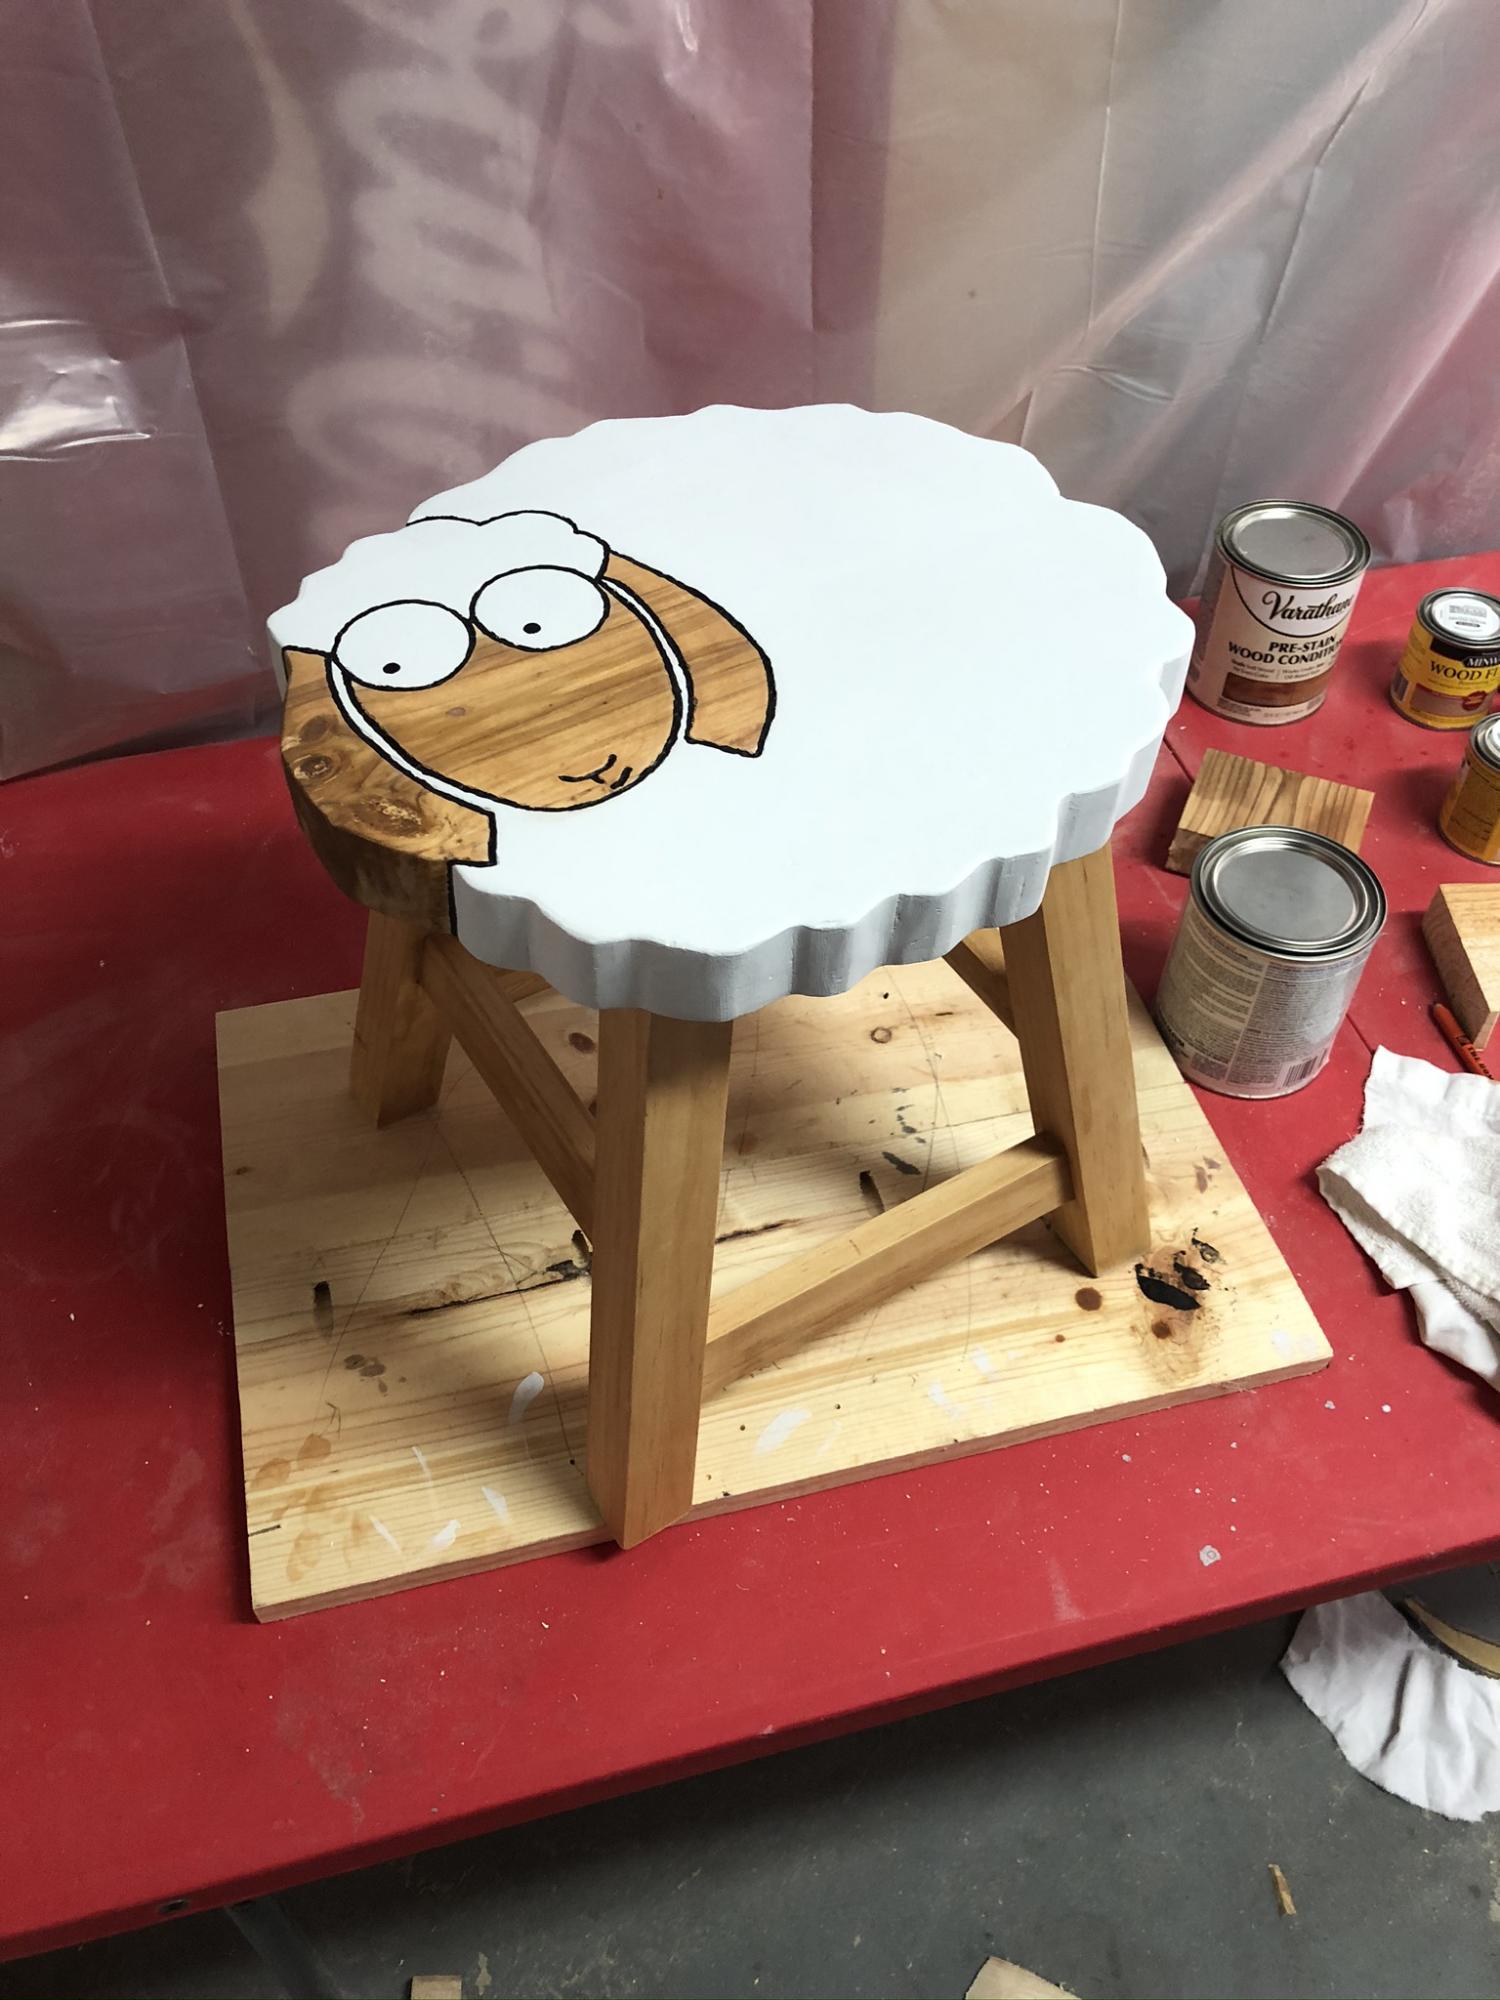
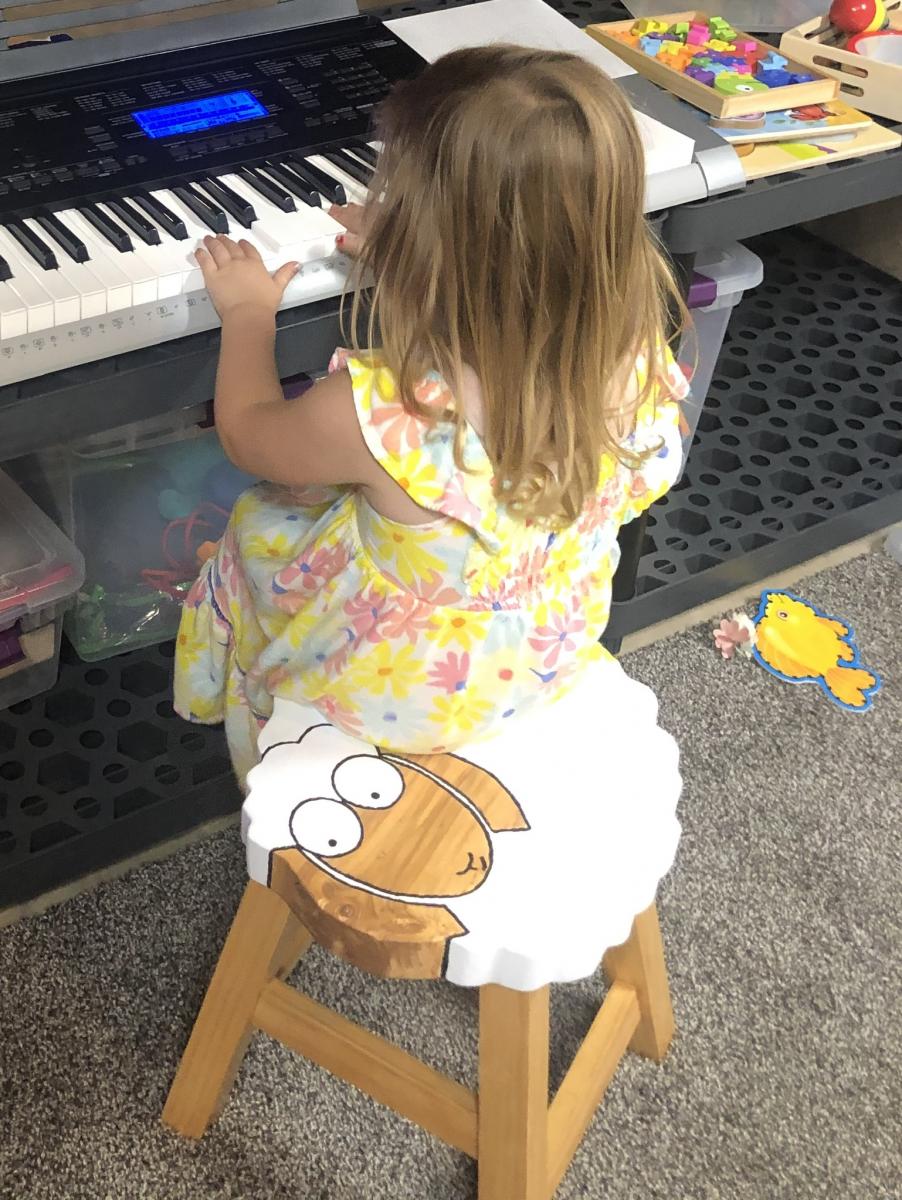
This was a gift for my goddaughter along with a keyboard for her third birthday! I love the way it turned out, and it fits perfectly in with the animal theme in their playroom!

This is made from cedar, but I painted it anyway. Used a standard single mattress. I highly recommend painting everything first before you put the project together. Full plans are here. 

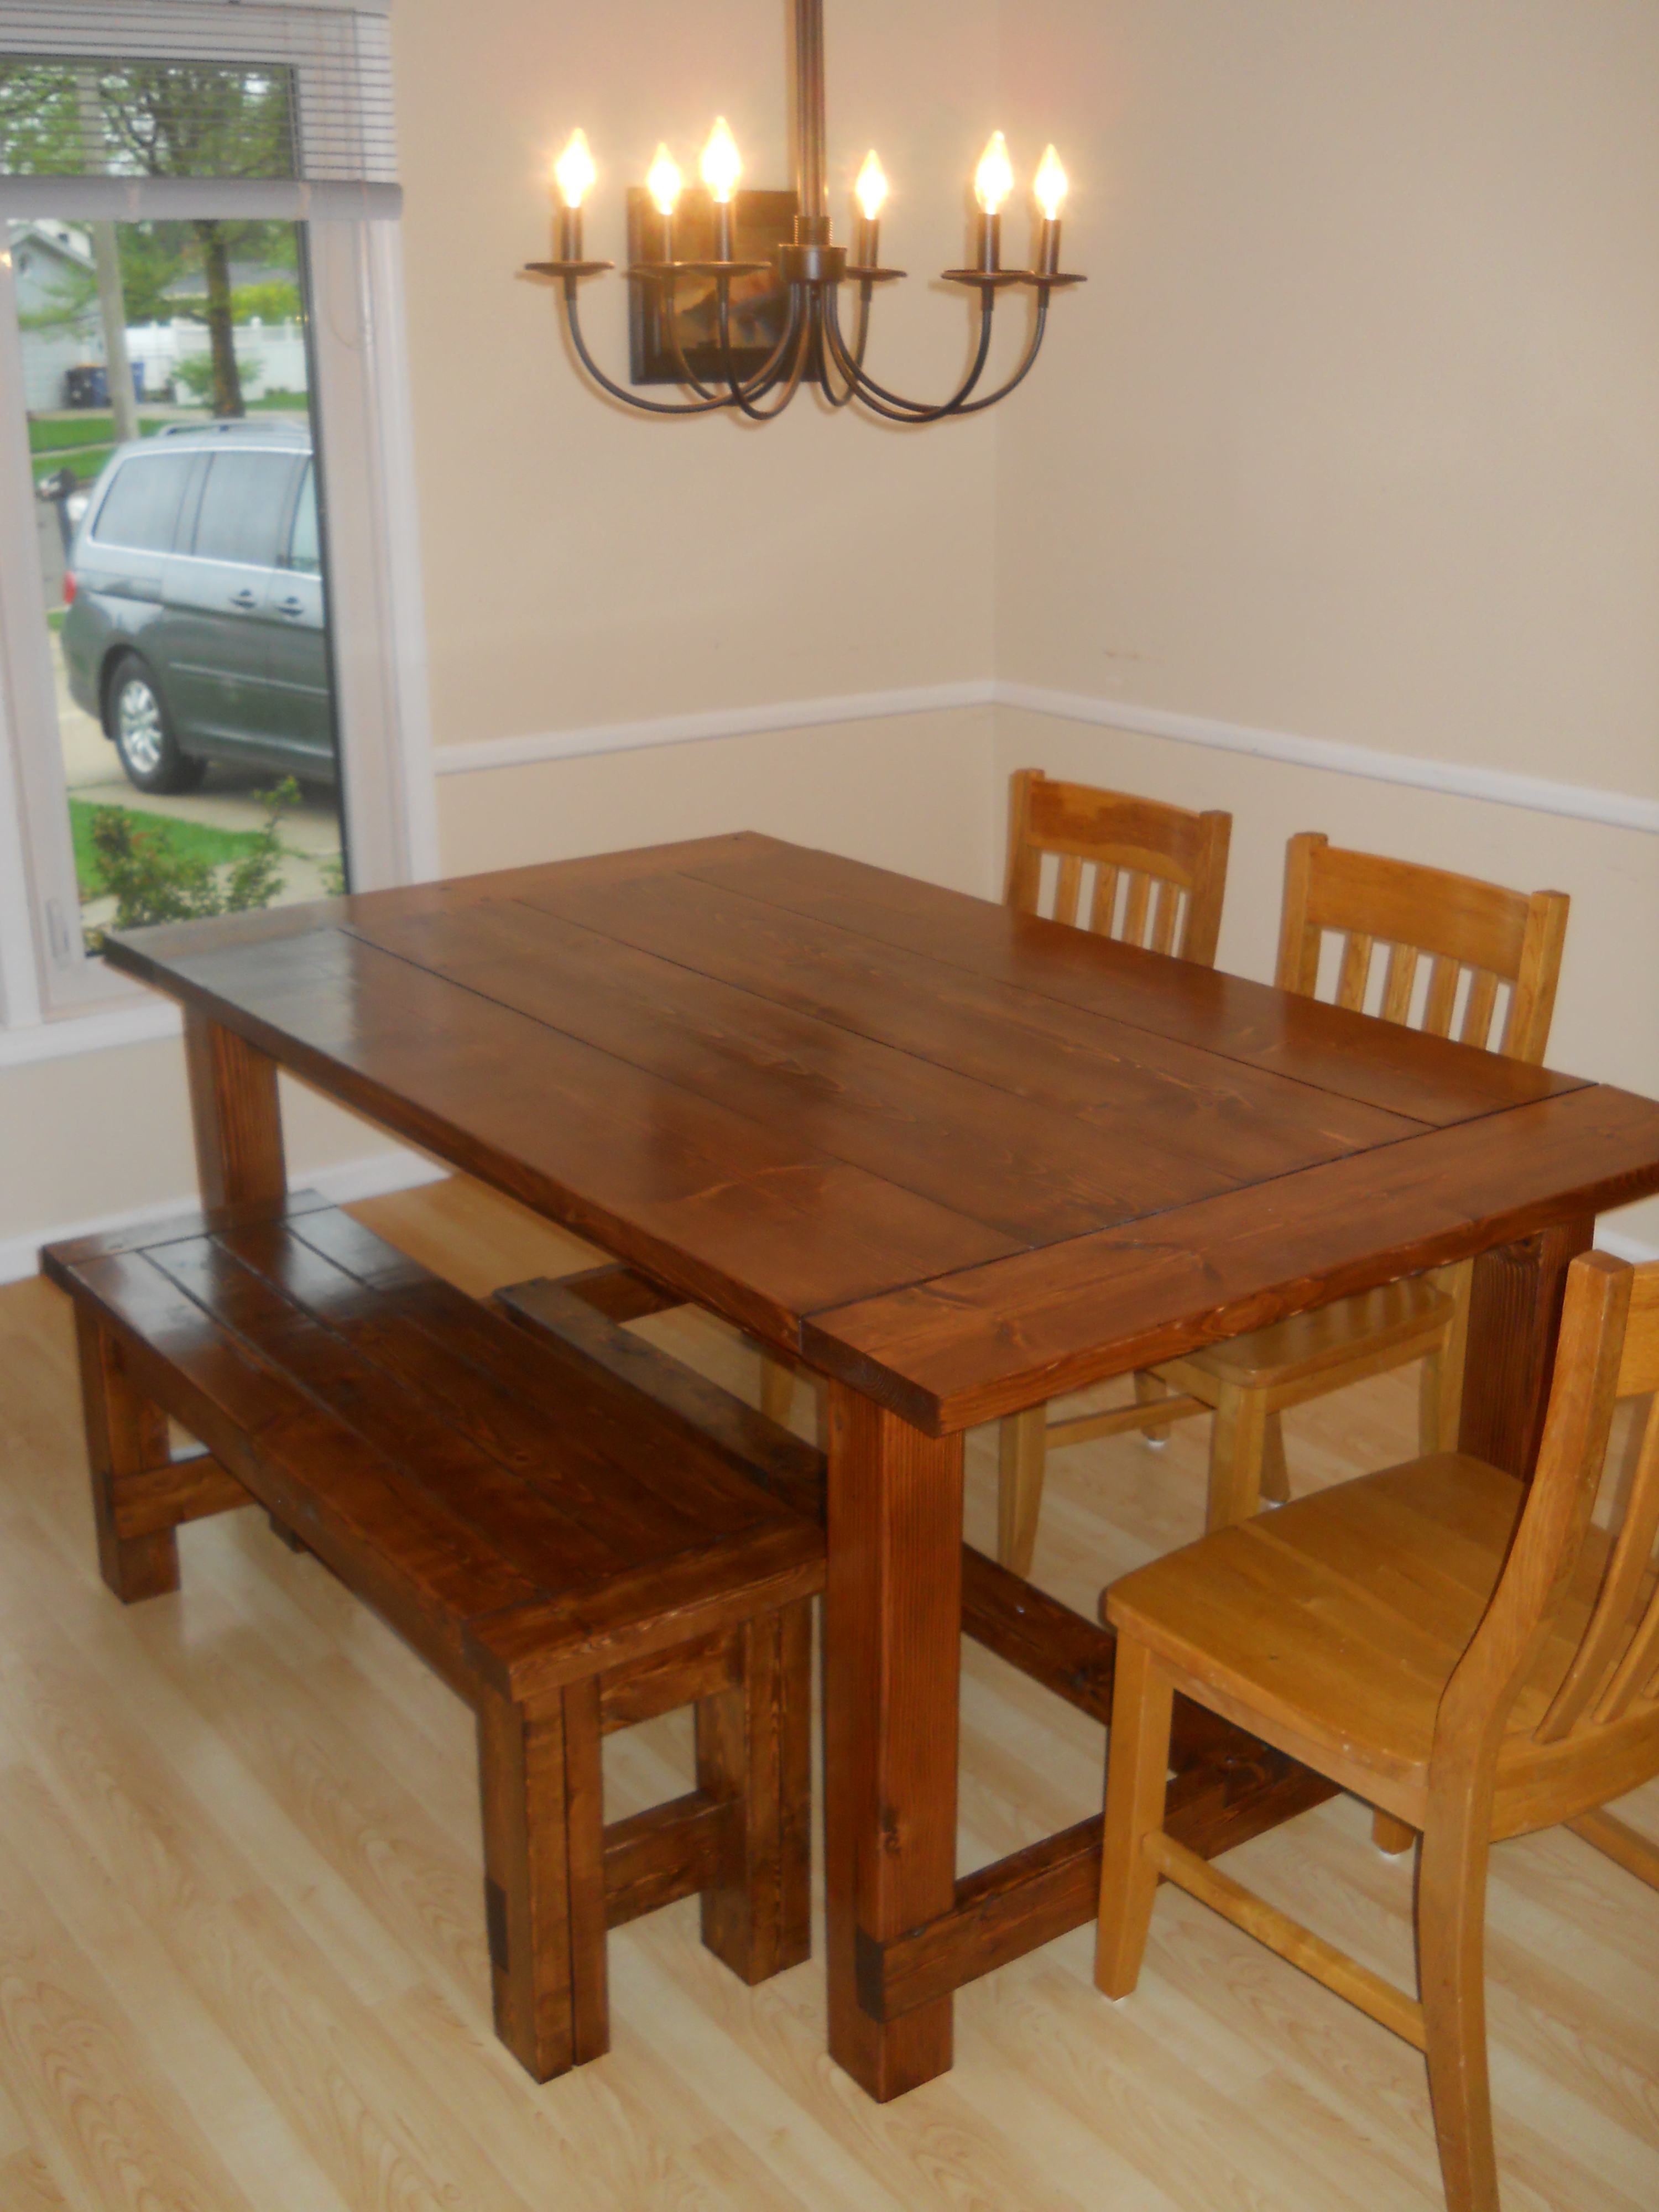
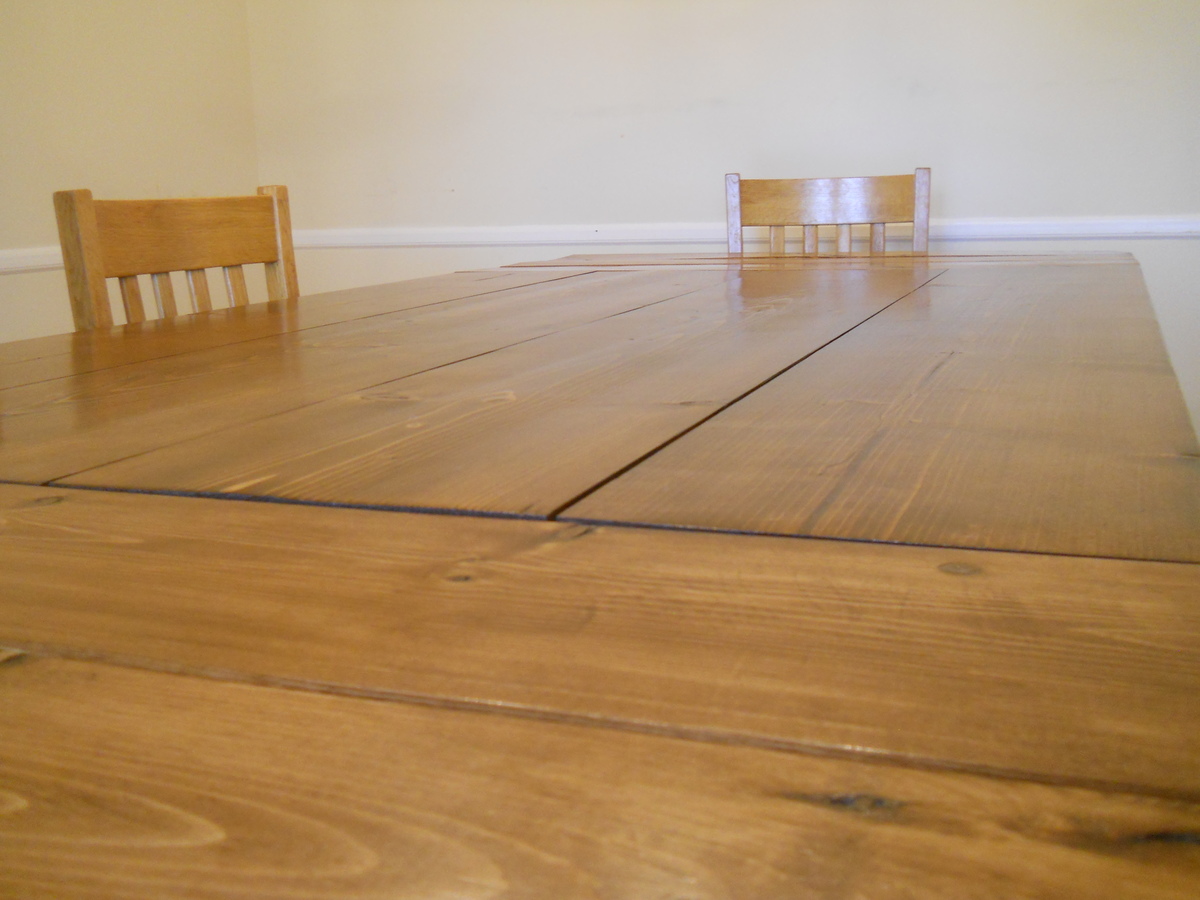
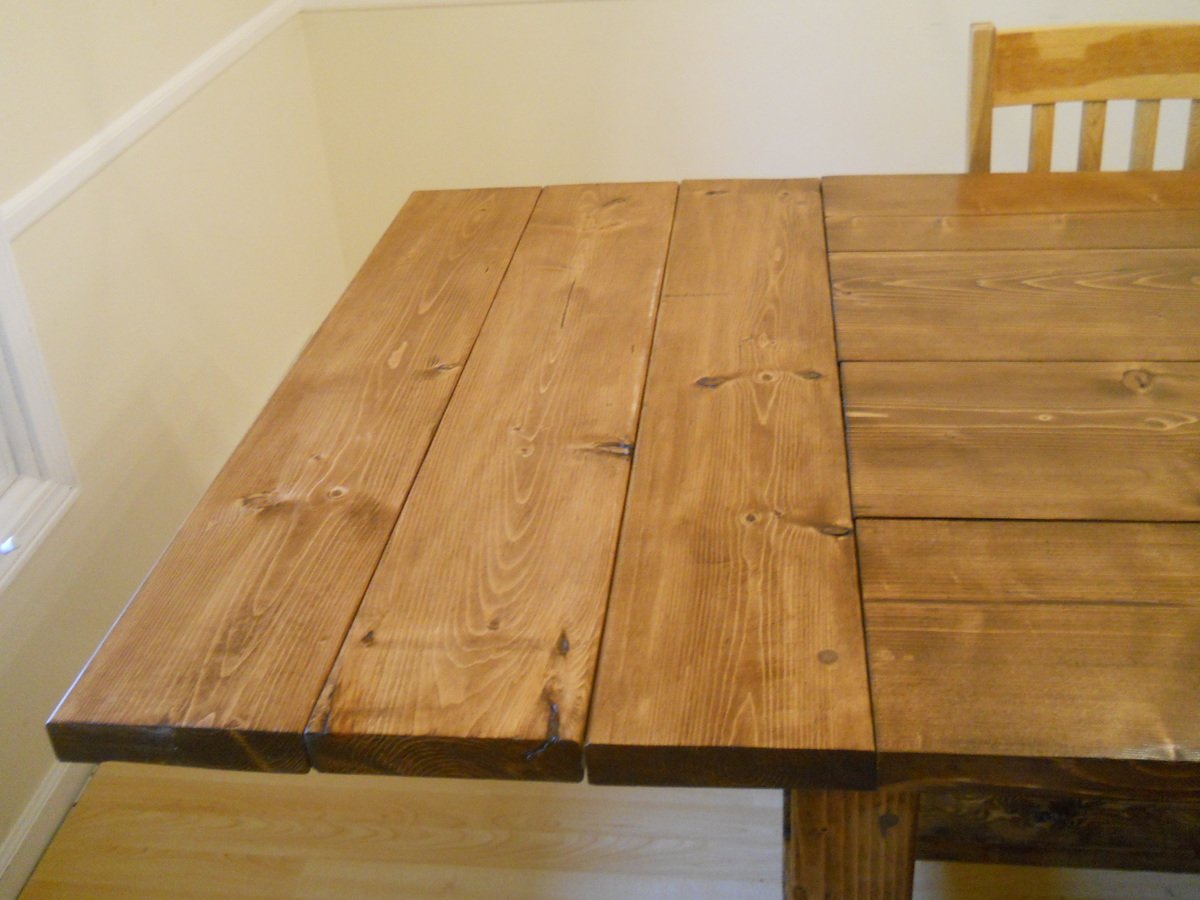
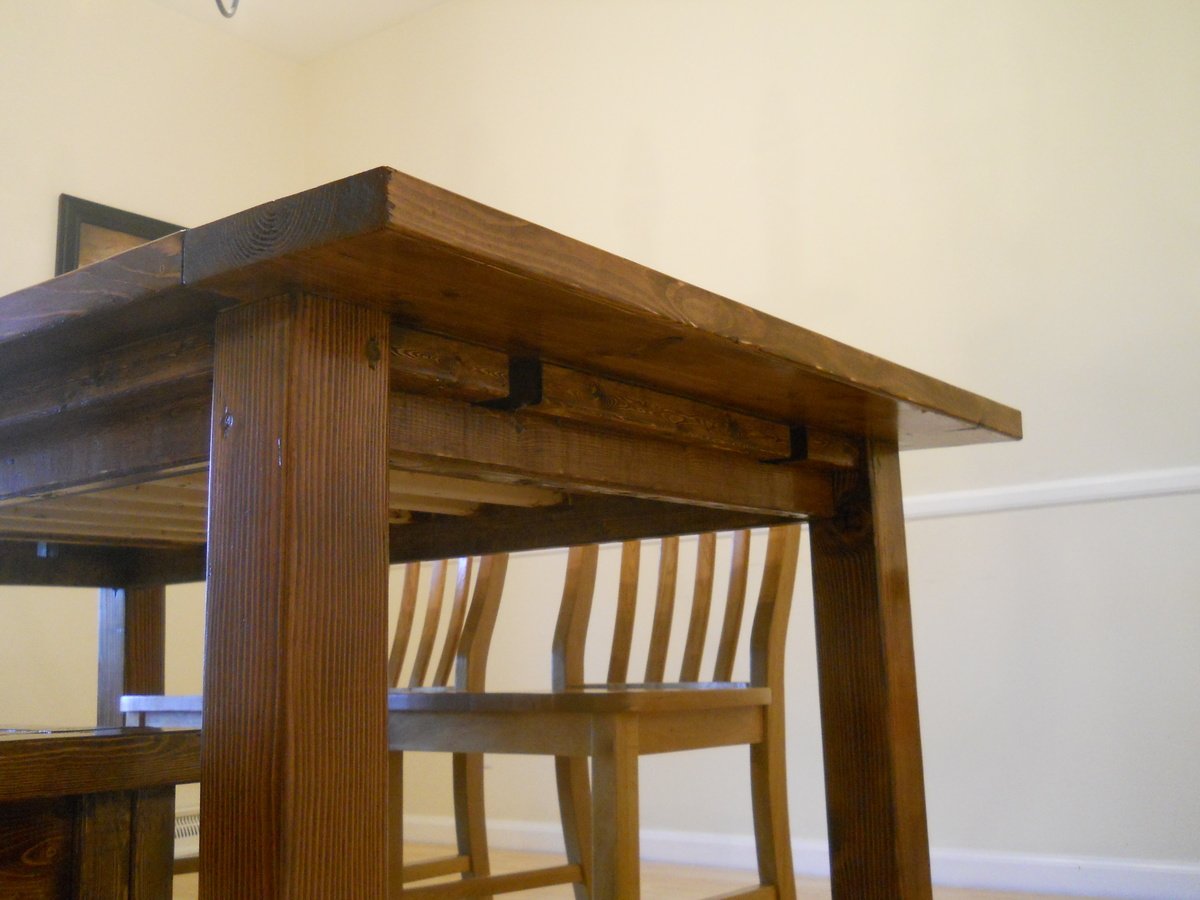
This is a modified plan for Ana White's Farm House Table.
I shortened the table to about 72 inches with breadboards on the ends and added removable breadboard extensions for a total of about 100 inches of table for a 12x11 room. I also built the Farm House bench but shortened it to 48 inches.
The wood is white pine and Douglas Fir 4x4 legs. The total cost was $198 for the wood/screws and about $30 for the stain and sand paper. I bought an additional set of countersink bits for holes.
I used the following tools:
It took about 35 hours of work.
The stain is English Chestnut and we pretreated the wood to accept the stain by using wood conditioner. This made a dramatic difference in leveling out the stain between the white pine and Douglas Fir. I used 3 coats of clear polyurethane and 2 coats of satin on the top with gentle sanding in between coats.

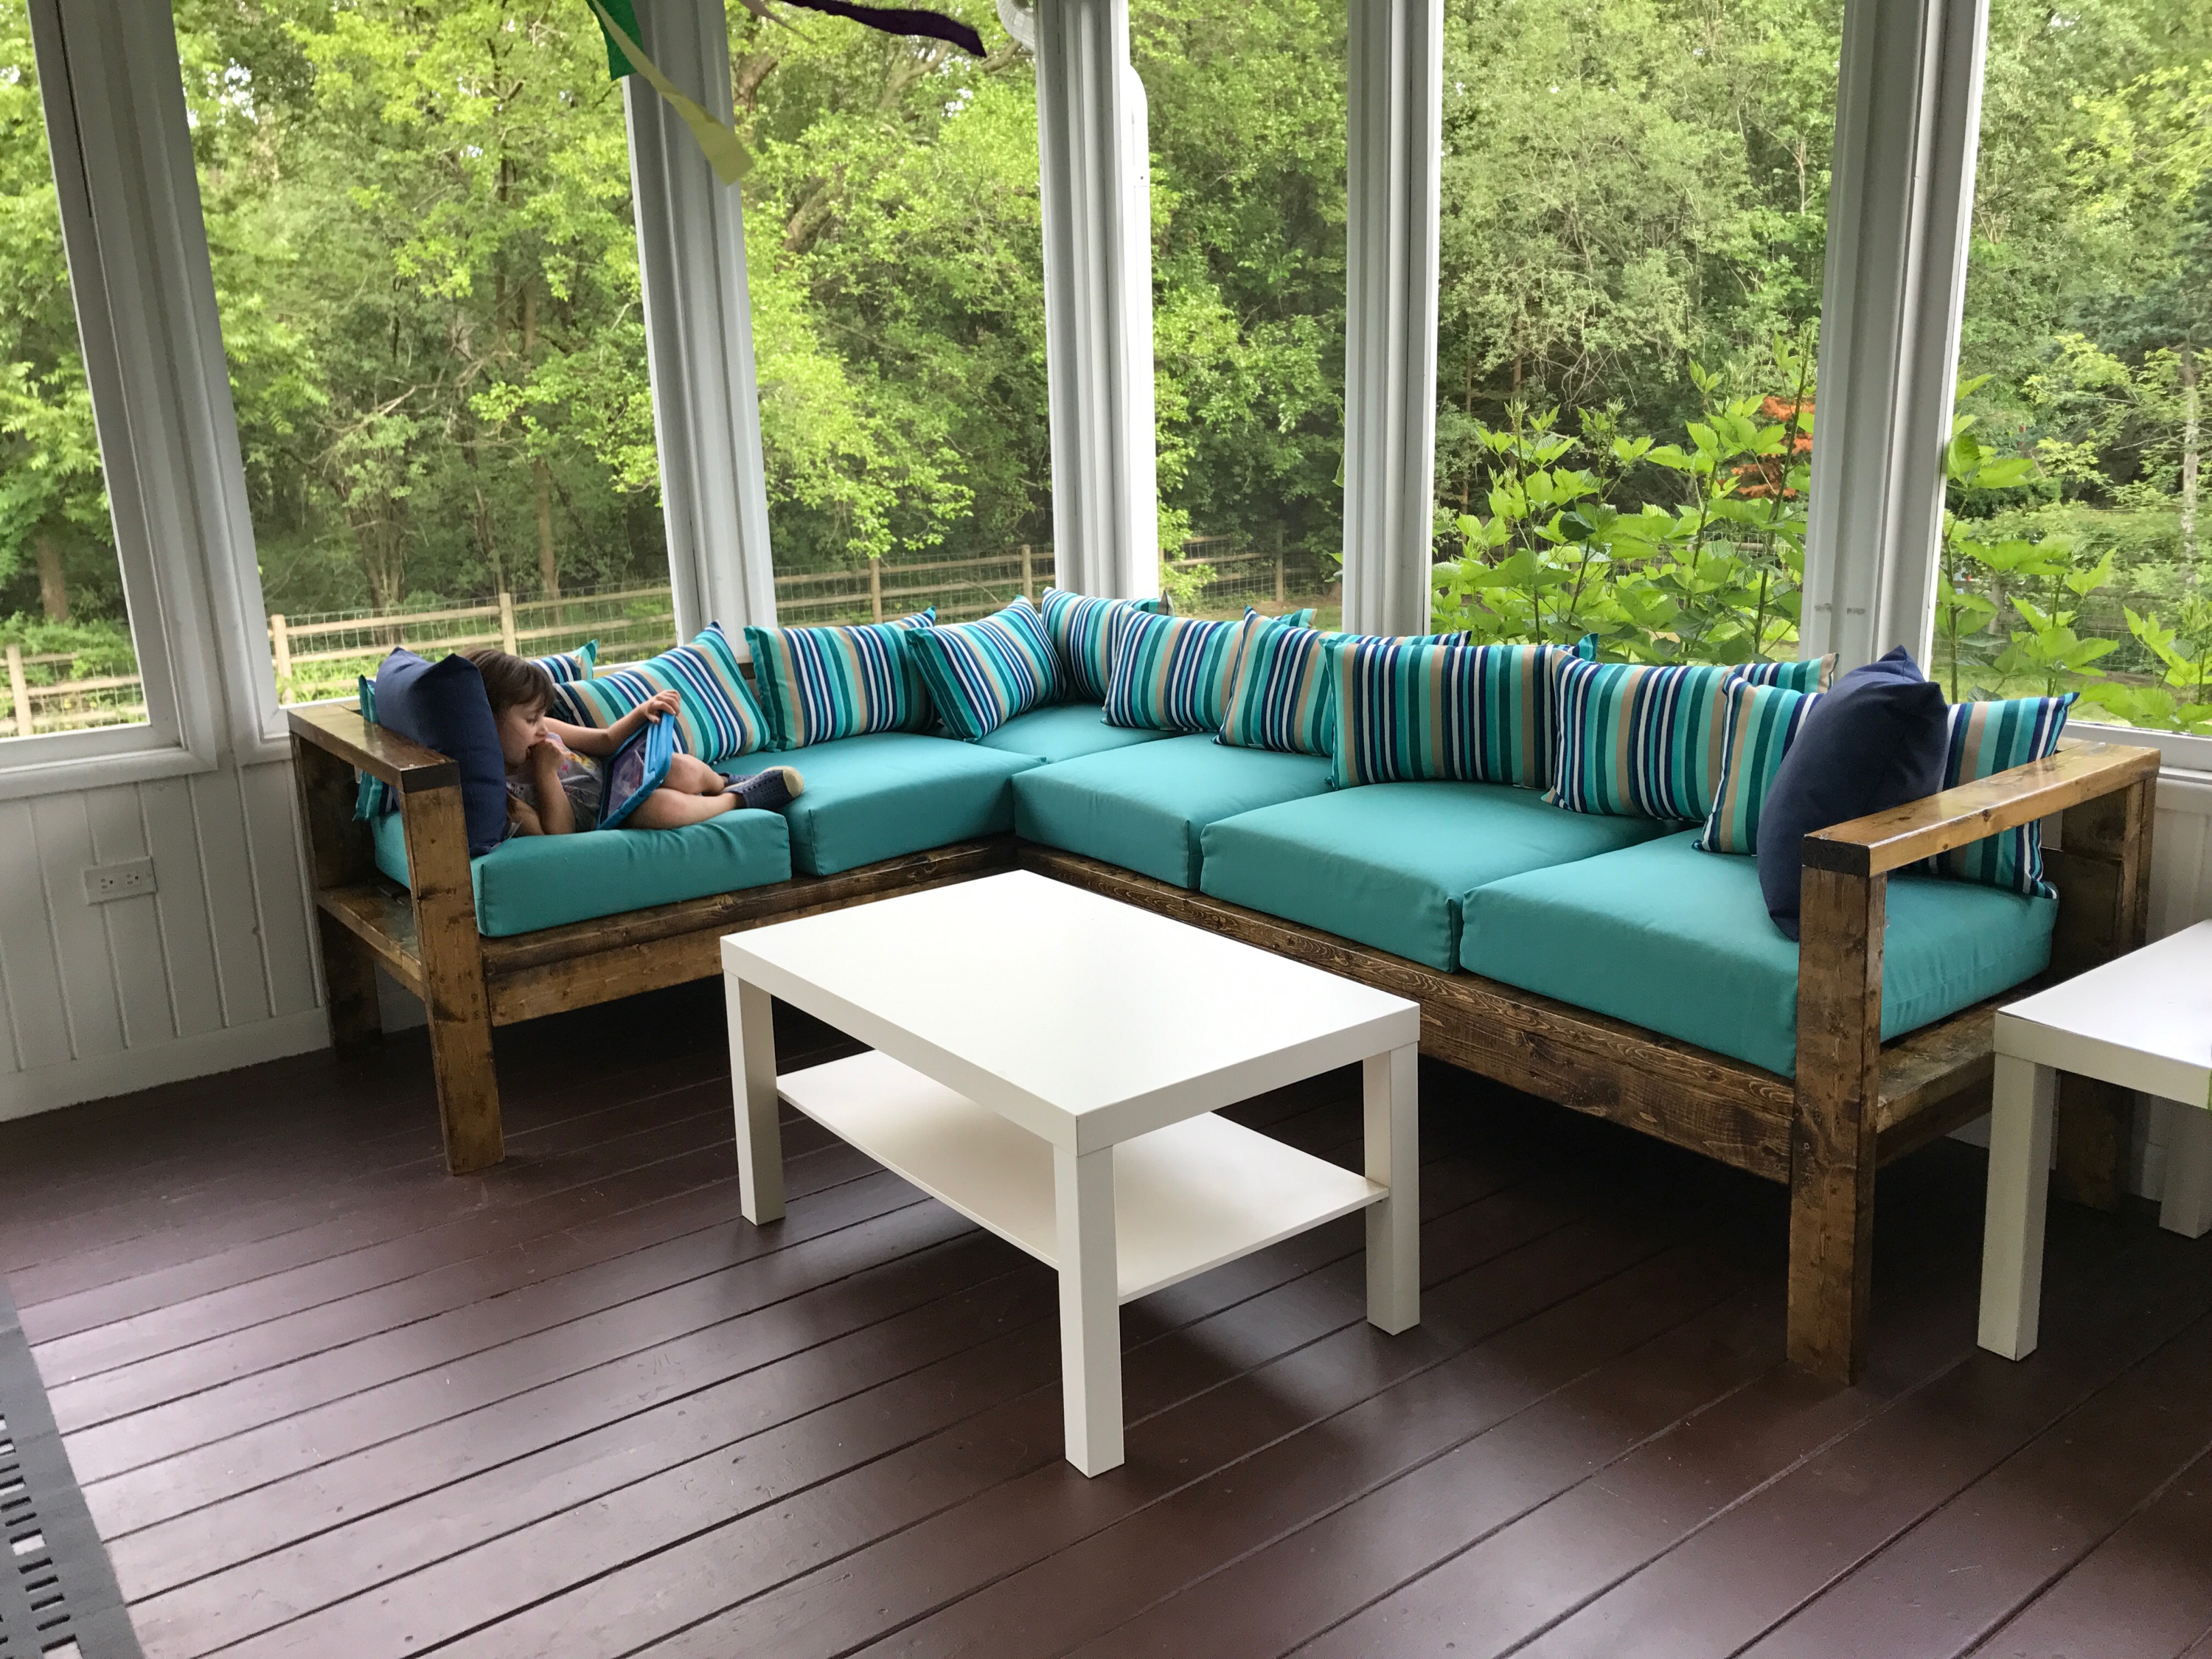
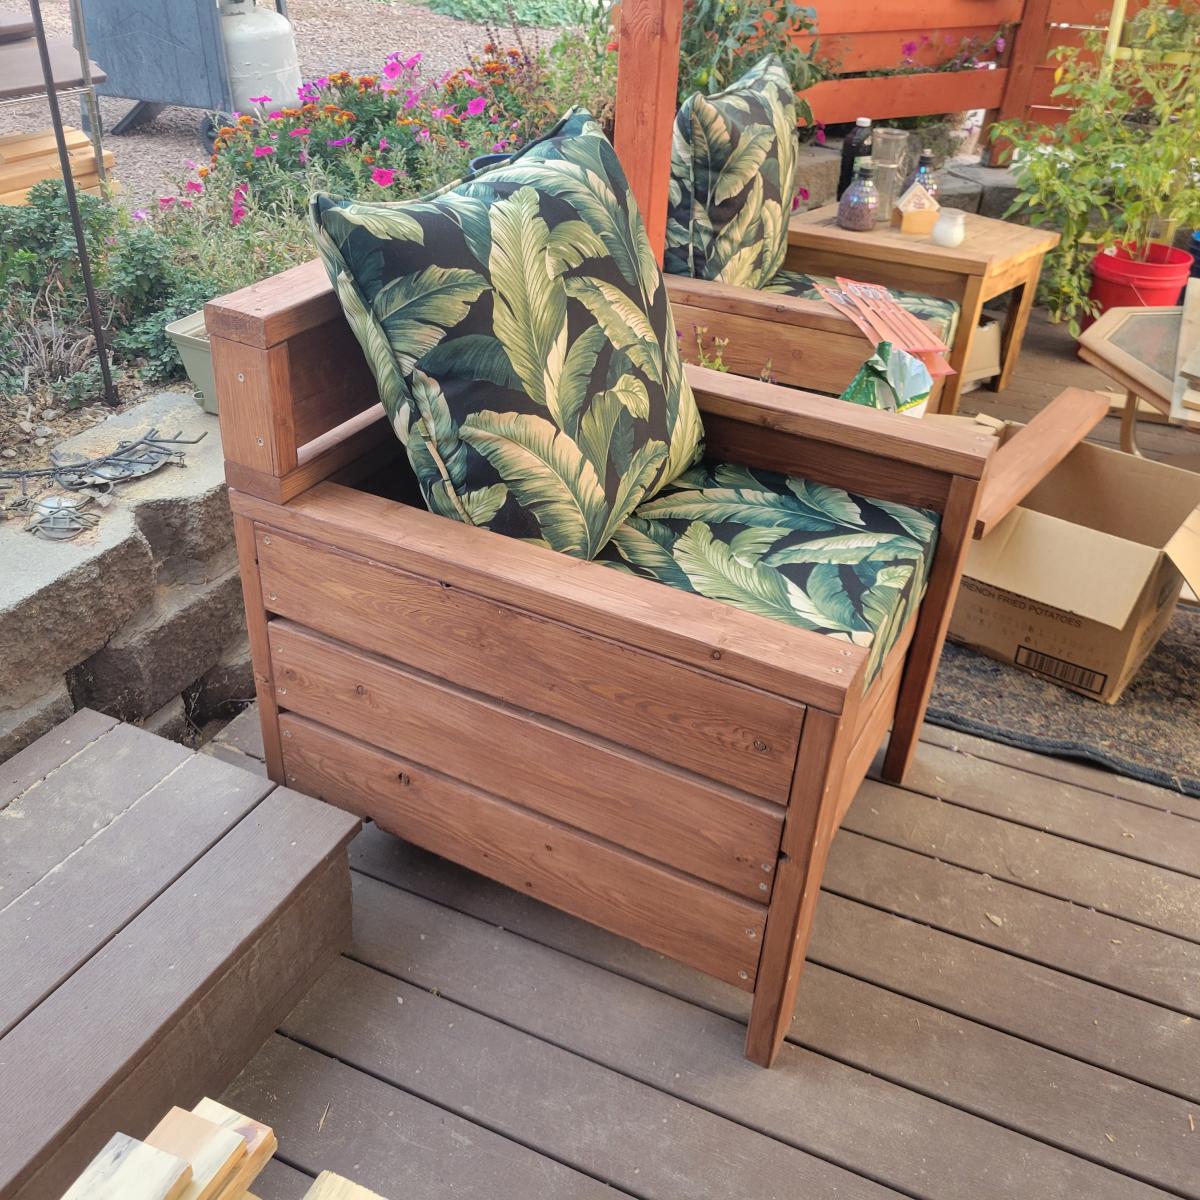
Our version of the outdoor sectional. We couldn't find 24" wide pillows so we modified the design to accommodate 22"x24" ones. We also added a 1x8 held on with pocket screws to provide some additional support on the back and help keep the pillows from falling through.
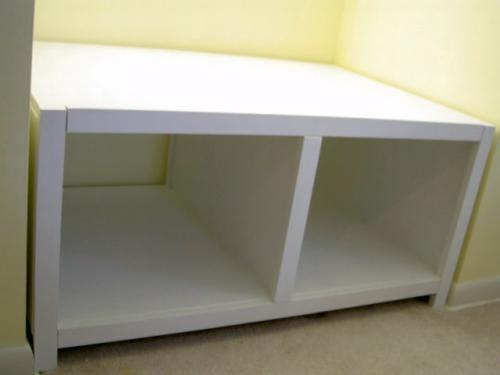
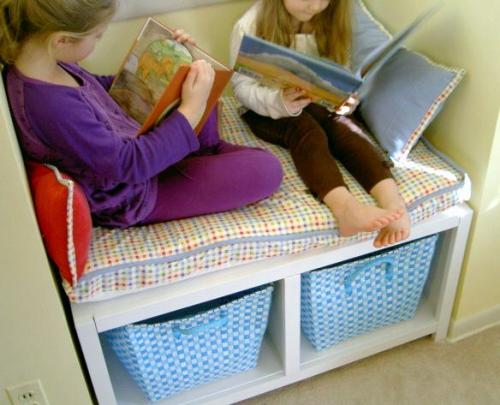
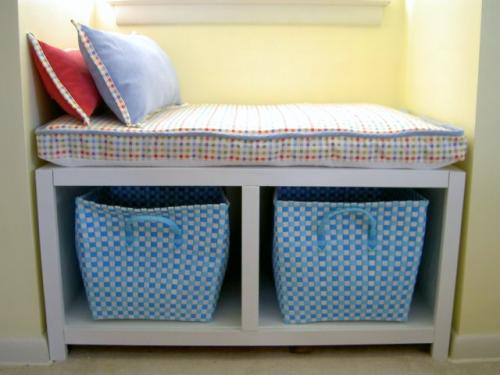
Custom bench to fit dormer space.
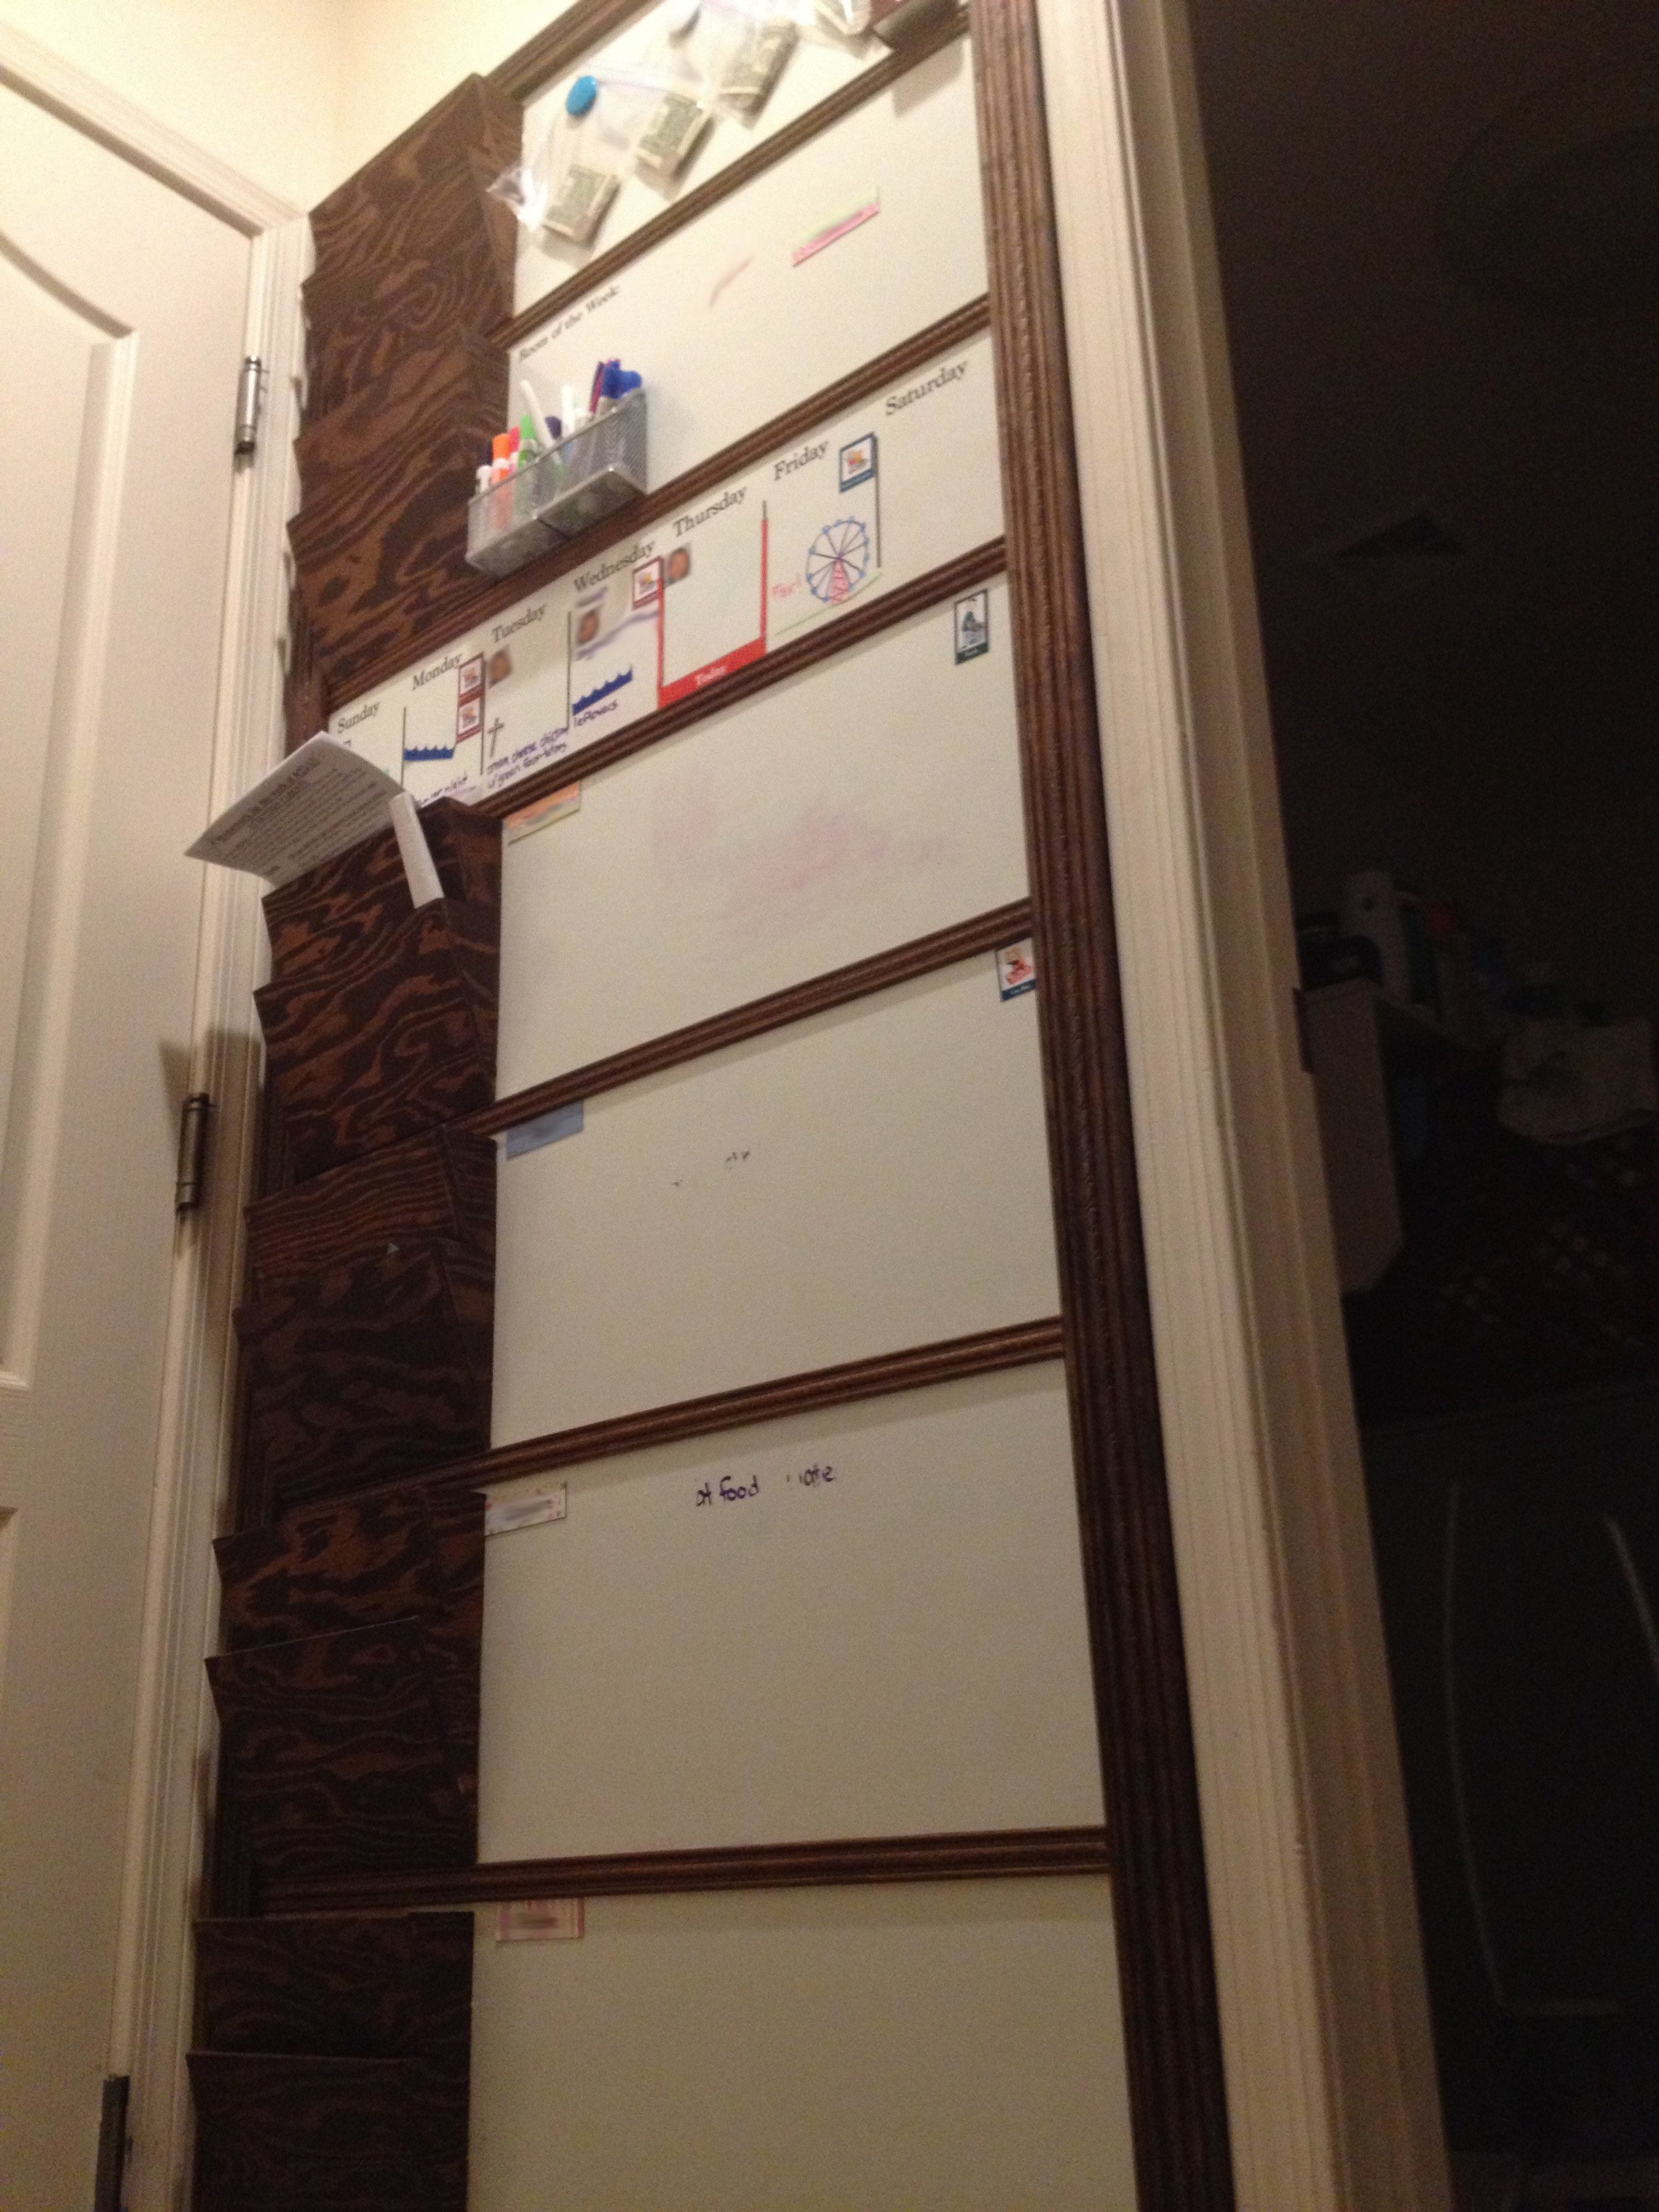
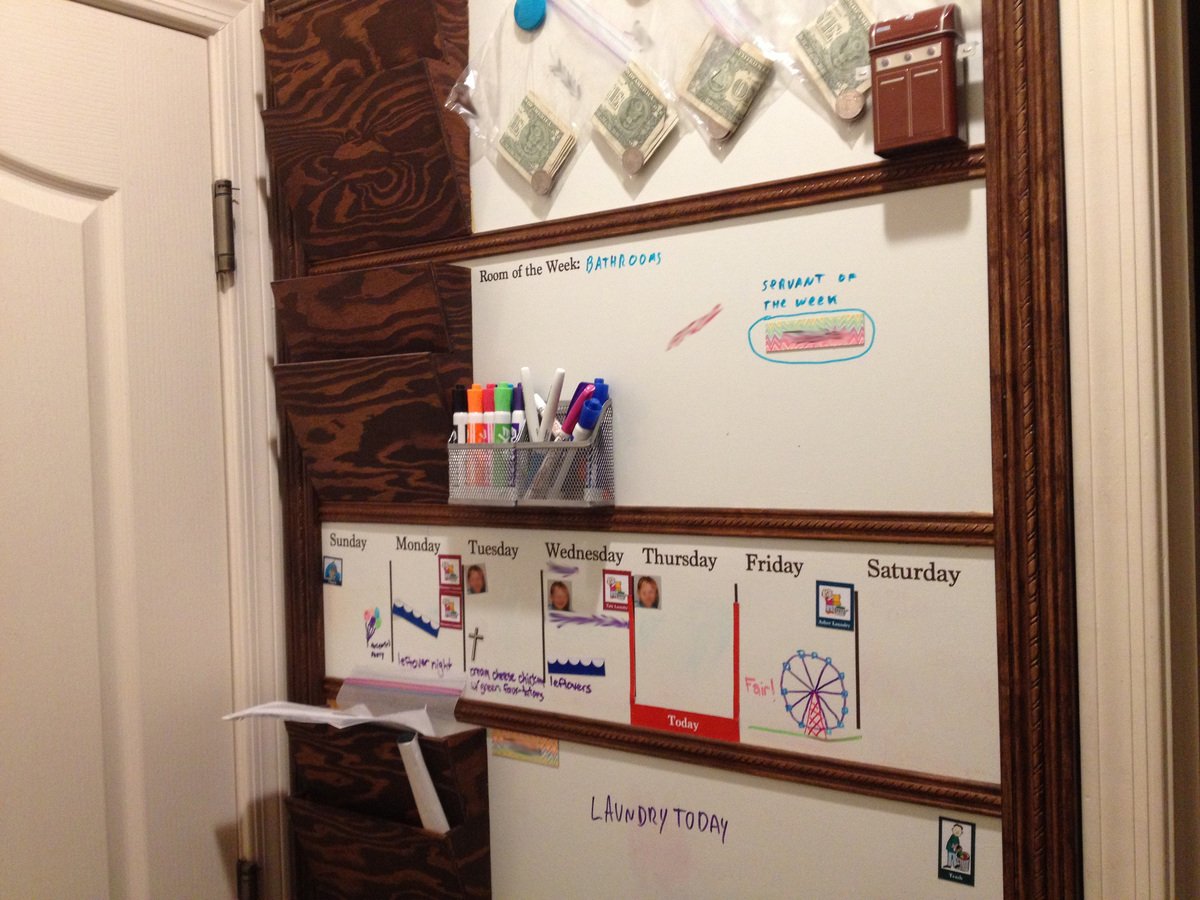
Easy project that has helped us stay more organized. We use Cozi to maintain the calendar, but this allows us to highlight things that the kiddos need to know during the week. We keep the chore schedule, laundry schedule, meal plan, and out of routine activities on the week calendar so the kids can tell what is going on at a glance. The allowance is also hanging up at the top as an incentive to get their respective jobs done for the week. I used galvanized sheet metal glued onto a 1/4 inch plywood base and coated it with whiteboard paint. This allows it to be magnetic and easily written on. Love the letter holder for homework and important paperwork.
Things we have used it for so far:
Activity schedule (swimming lessons, soccer practice, etc.)
Meal plan
Unusual activities (parties, movie night, etc.)
School stuff (project due, spirit week, etc.)
Chore schedule
Laundry Schedule
Room of the week: what part of the house gets a deep clean this week.
Servant of the week: which kid is the designated helper for non-chore activities when an extra hand is needed.
We are still figuring out all the ways to use this to good effect, but the kids really like being able to see what is coming up in the schedule for the week.

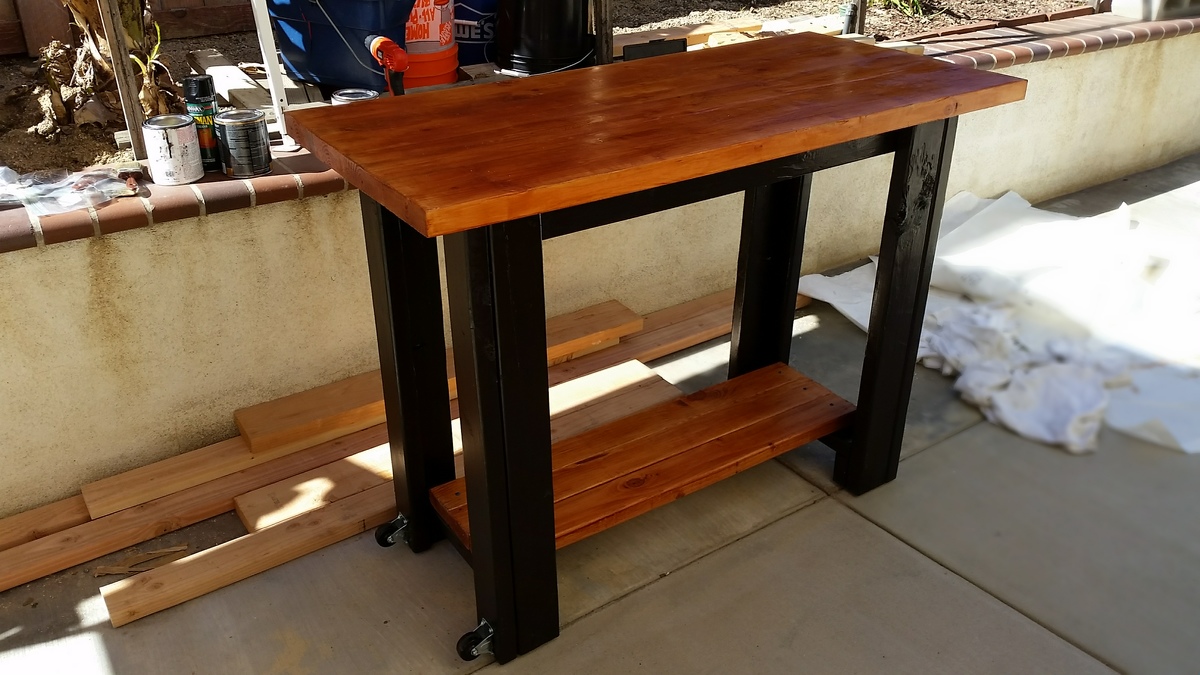
I needed a small nightstand and was able to build this with wood left over from the Farmhouse table project, it's not perfect but I love it.


I made this a little shorter and less wide to fit between my two windows. Thanks so much for these plans!
Tue, 10/05/2021 - 09:49
Perfect solution for between the windows, thanks for sharing!
We needed a table to compliment our Apothecary cabinet we built prior to this project. We needed a big table b/c our furniture is so bulky. We have a 6 month old, and an 8 year old, so toy storage is a must. We built the table in one evening. We swapped the top trim 1x3s w/ 1×2. The bottom shelf only sits 1 inch from the floor, so I can fill it with itso bins for additional baby storage! The top board is not cut in half, rather we drilled 1 inch holes on both ends. You can’t see them in the pics, b/c I hid them, with the cutest thing ever, bear coasters. The coasters are too protect the table b/c we cant use poly here in the winter.
I wanted a David Bromstad cow rug & hubs said no. Bear Skin Rug style coasters for $20 from Urban Outfitters are our compromise. I love this table. It’s super heavy & I hope it lasts forever.
I added metal corners made by bending 1 1/4 x 1/8 inch flat bar and attached with 1/4 x 1 inch lag bolts
Decided to build these as I could find anything tall enough to be bedside tables. Easy to follow plans that came together quickly.

Love your projects!
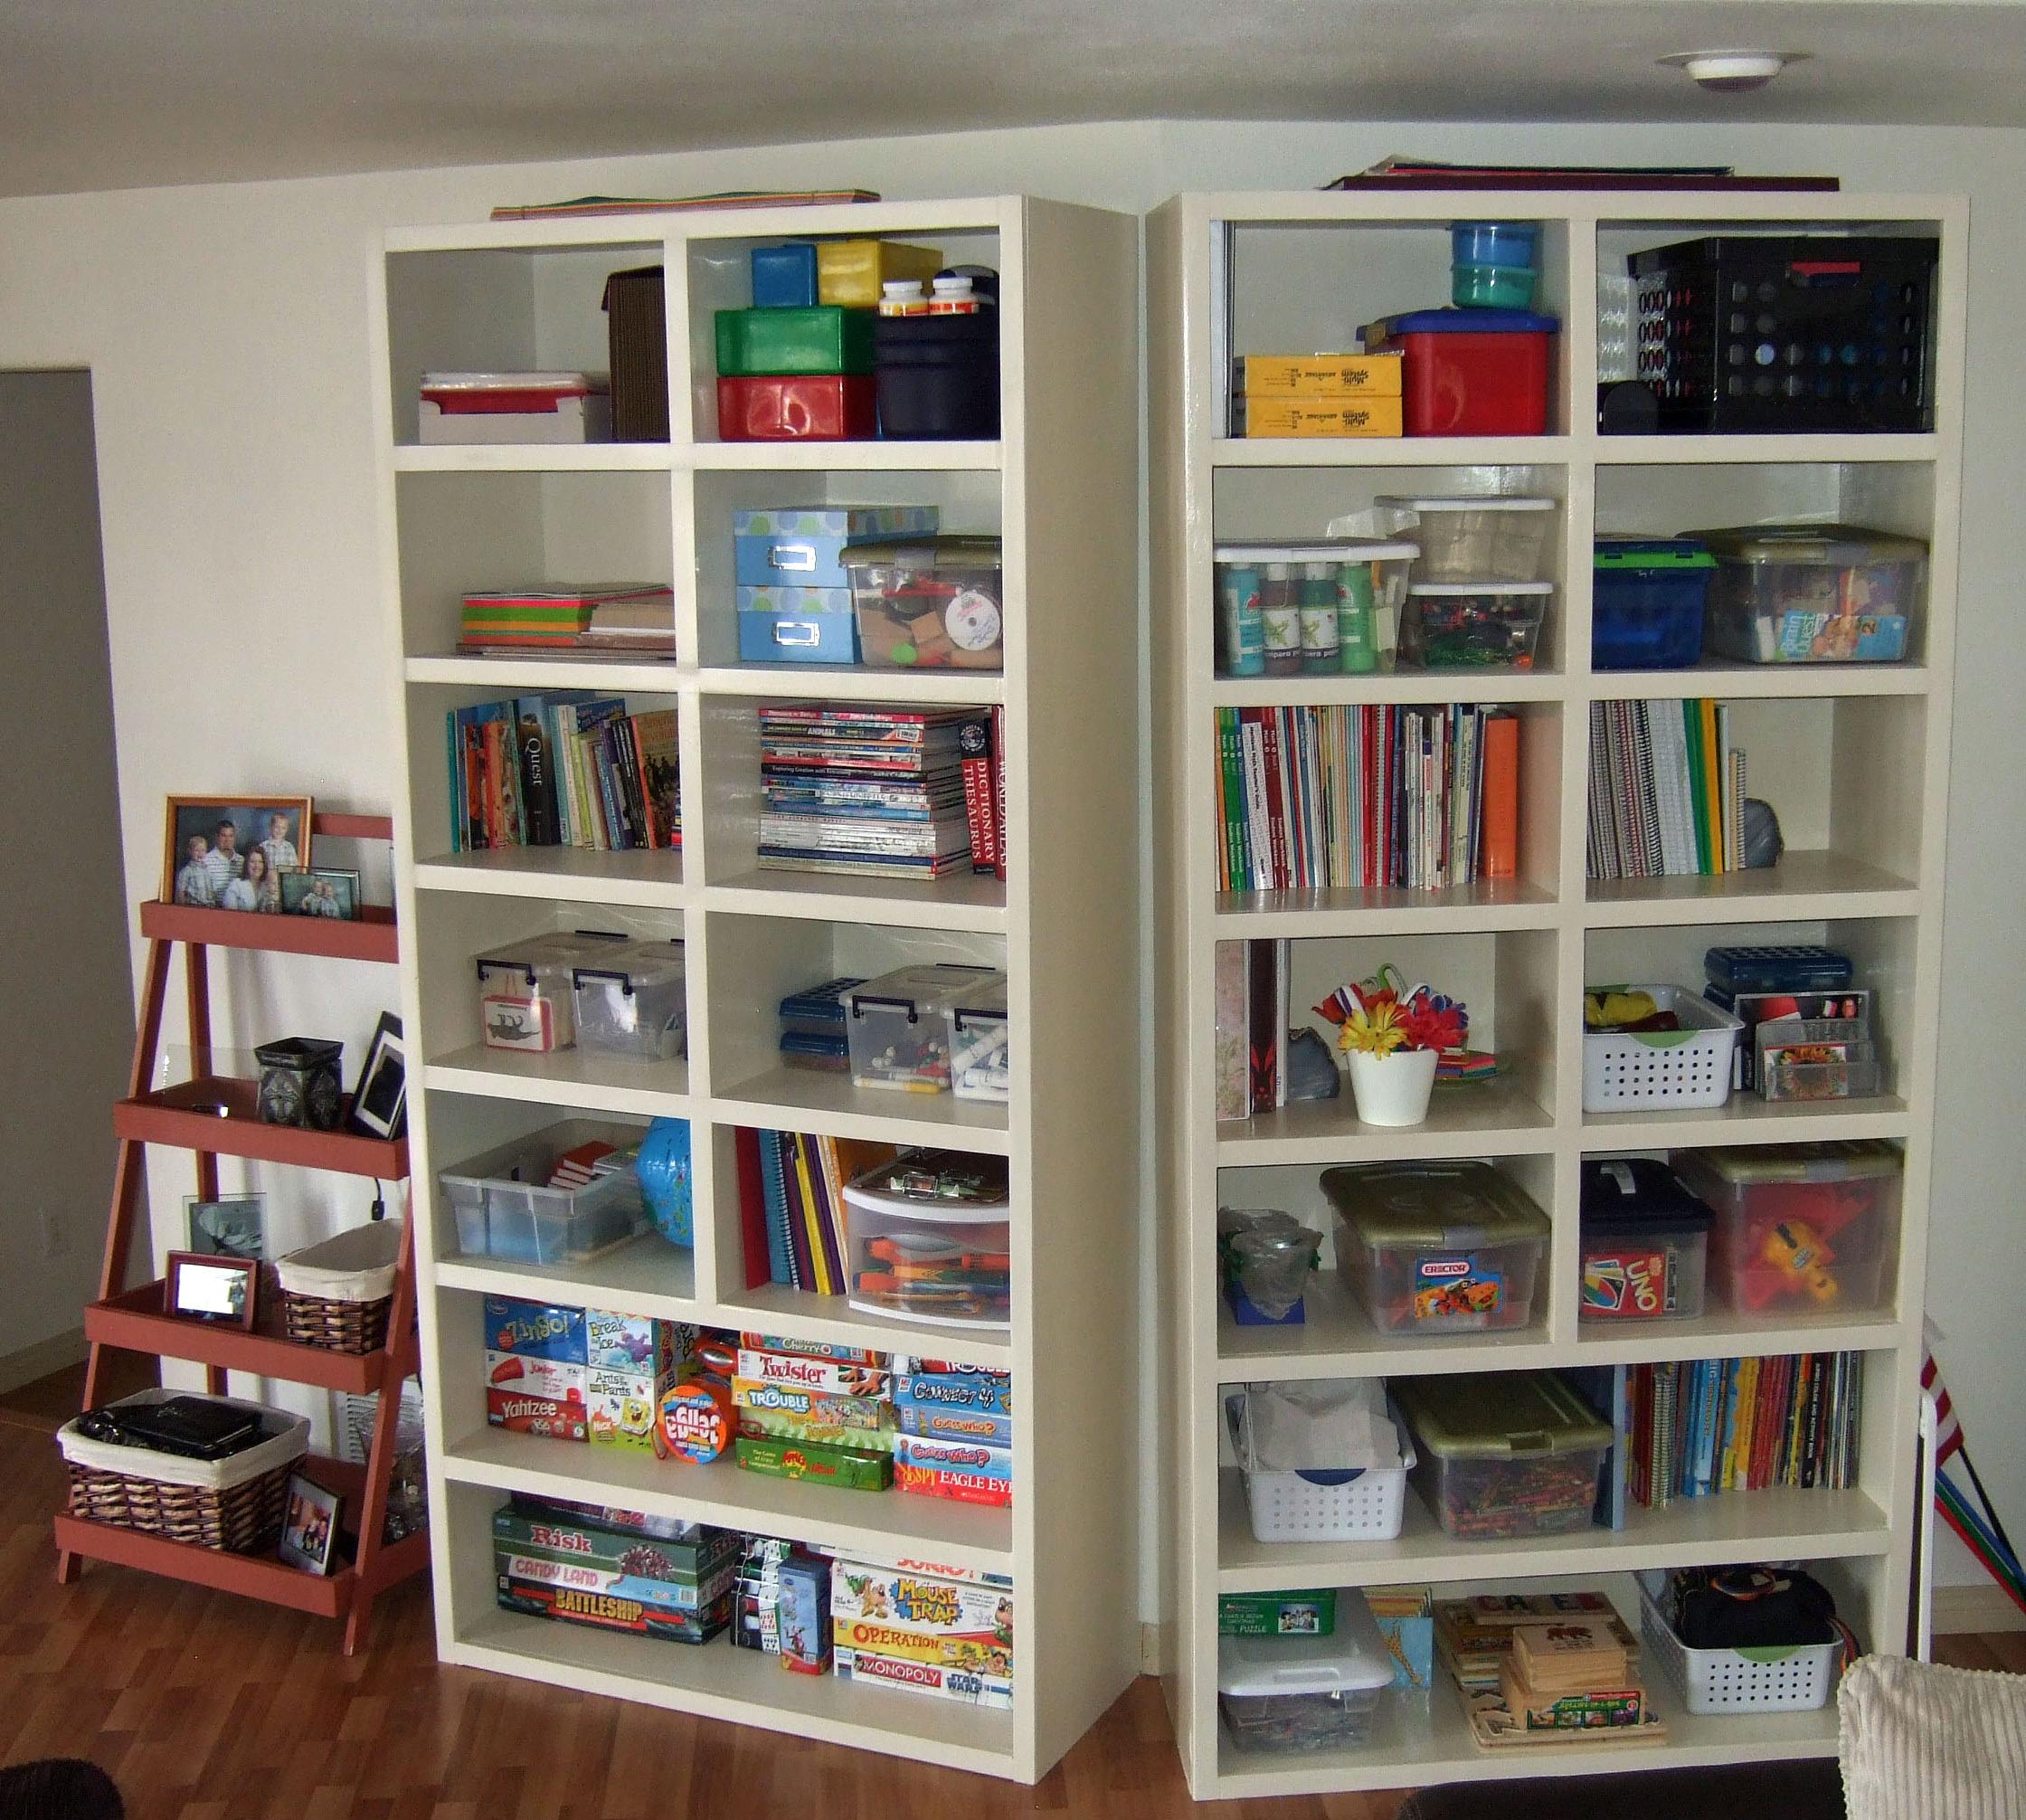
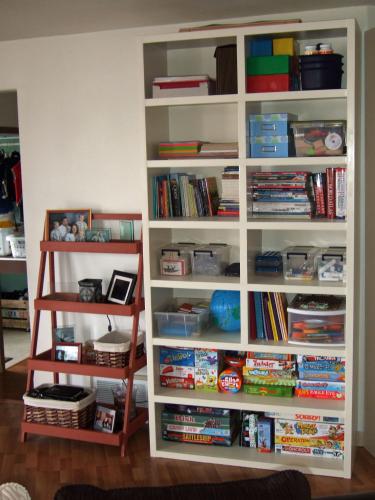
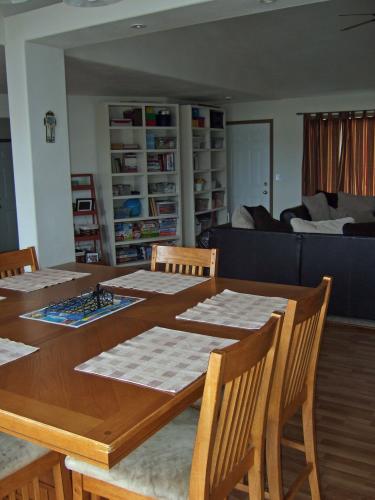
I designed these to specifically work for my homeschool storage needs. My husband built two of them for me and they are exactly what I hoped they would be! They're strong and heavy and sturdy and still manage to be stylish, I'm proud to look at them and have them in my home!!


Comments
Ana White Admin
Tue, 10/05/2021 - 11:53
Lovely addition!
Great build and love the option to eat outdoors!