Patriotic Cornhole Boards
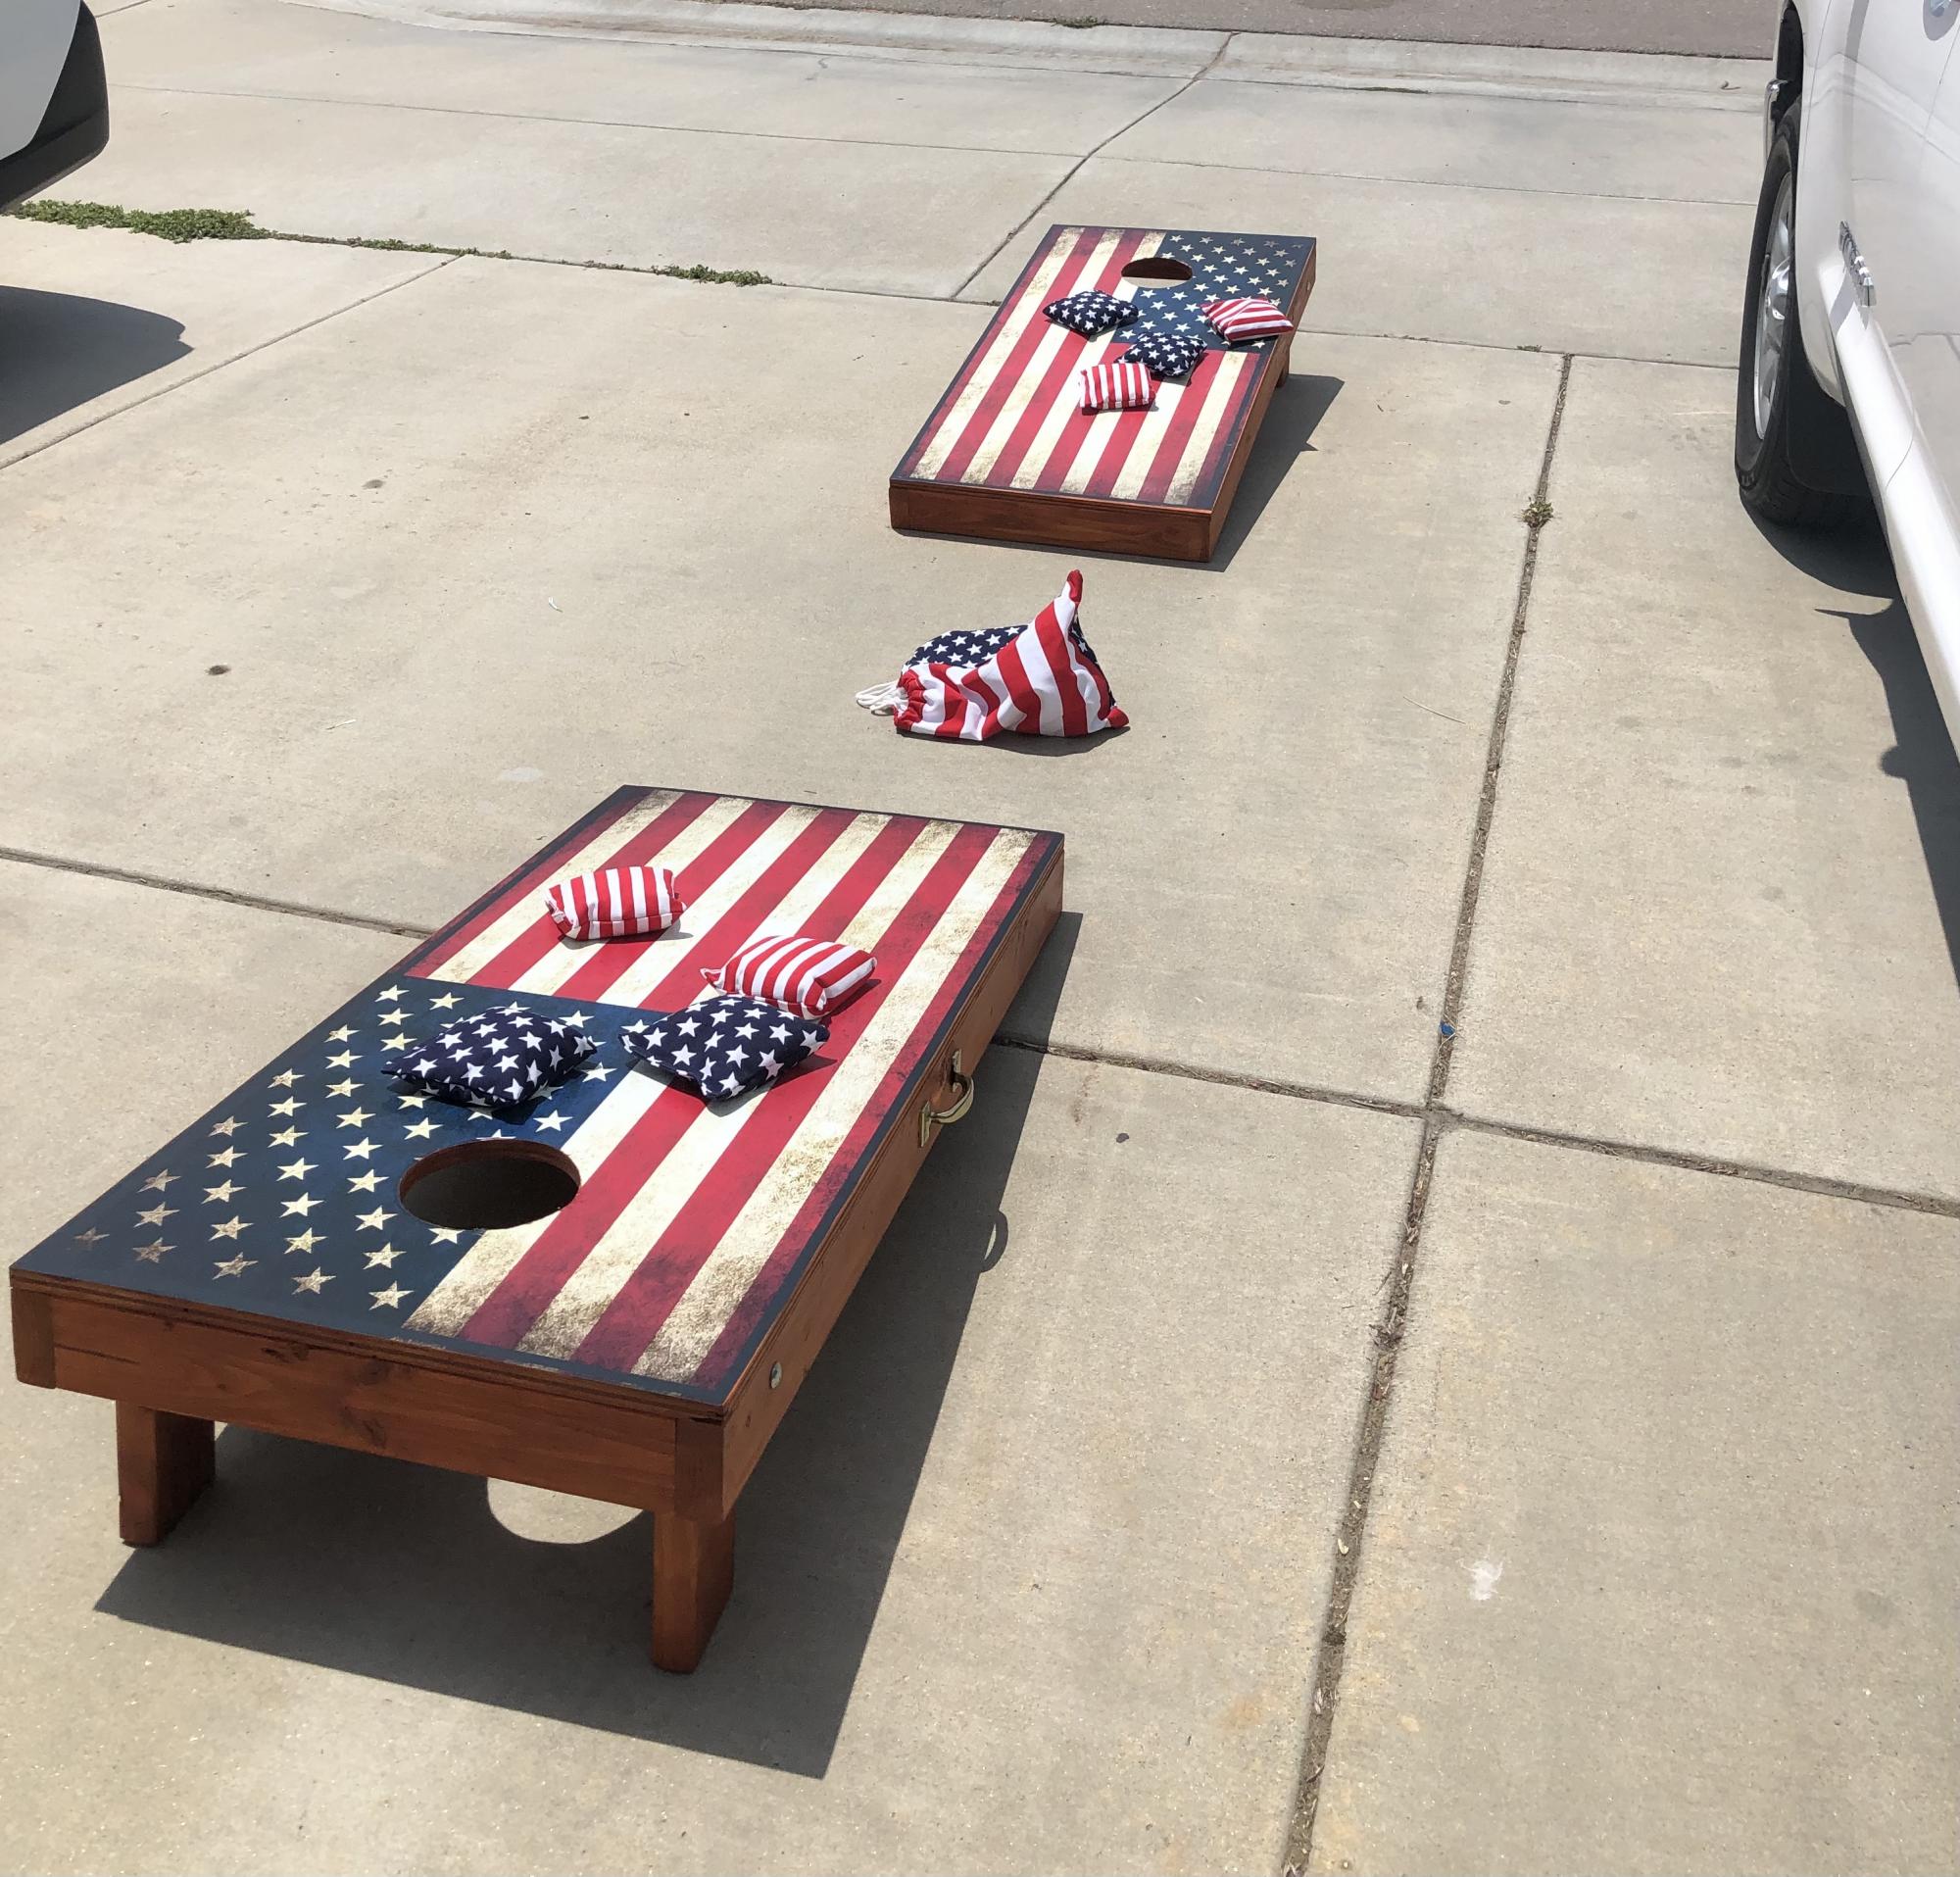
I wanted some Cornhole Boards and I wanted to make them myself. I used some vinyl stickers (distressed American flags) that I got on Amazon! I also bought the Cornhole Bag set on Amazon as well! I added some carrying handles from hardware At Home Depot. I found the link here on Ana's website! I love them!
Estimated Cost
$150
Estimated Time Investment
Weekend Project (10-20 Hours)
Finish Used
Stained the base with Valspar Redwood tone from Lowe's. Then applied some water-based poly over the top.
Recommended Skill Level
Intermediate


Comments
Ana White Admin
Fri, 07/16/2021 - 14:30
SWEET!
That is so cool, love the vinyl sticker idea!