Community Brag Posts

Double Decker kitchen island

We took the basic plan but made it a smidge higher (36" high) and added a second shelf. The island is longer that the plans, at 60". Provides us space for all our pantry items.
Built from Plan(s)
Estimated Time Investment
Weekend Project (10-20 Hours)
Recommended Skill Level
Intermediate
Hall Tree

For the top I followed the plans for the most part. I made this for my mother for Christmas and she wanted shelves under the bench instead of a storage bin so I modified the original bench plans. I purchased the baskets for $12.99 each from "At Home" and the medium size fits pretty good.
Built from Plan(s)
Estimated Time Investment
Week Long Project (20 Hours or More)
Finish Used
I used Minwax "Early American" stain and finished with gloss polyurethane. The rustic looking wood on the back is actually paneling that had been printed that way.
Recommended Skill Level
Intermediate
Office space - ladder desk and shelves
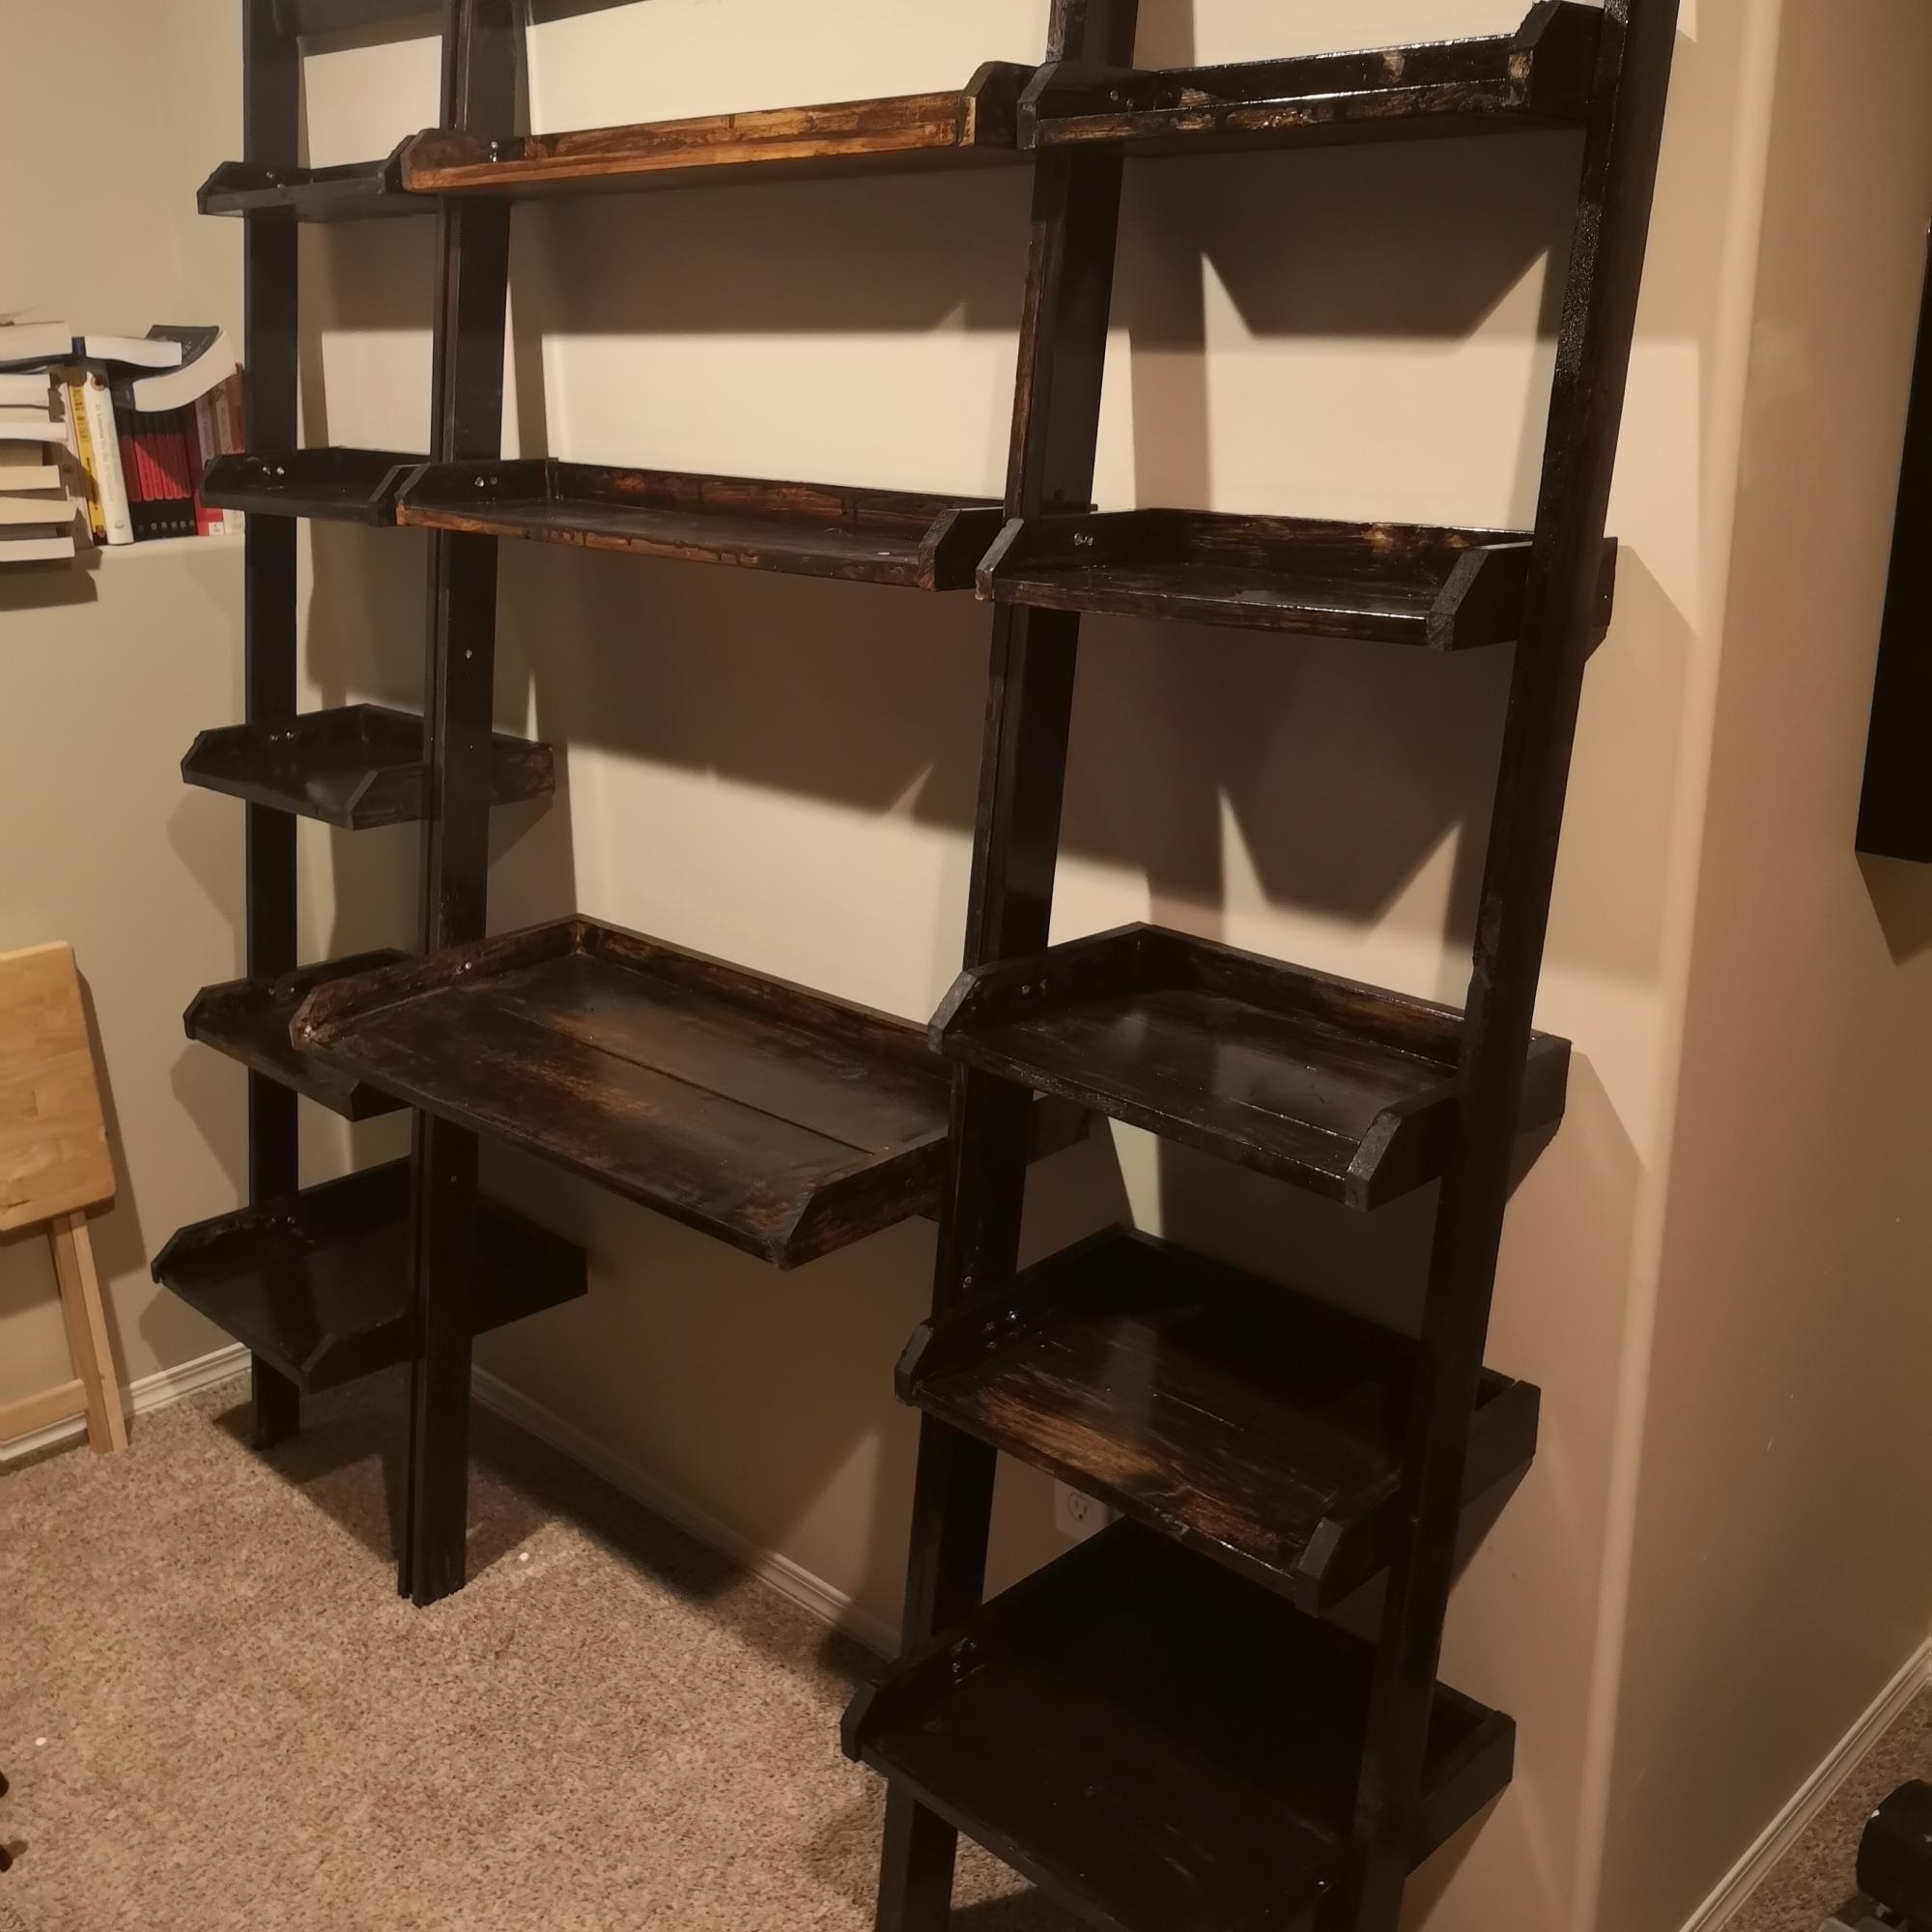
My wife needed an office space and the ladder desk and bookshelves was the perfect plan for it. In fact when I was looking at the pictures and plans online she thought I was looking at an online furniture store! She said "I like that,we should buy that" I made the desk part first and surprised her with it one evening.
Unfortunately I don't have a garage and not a lot of tools, so the desk is mostly hand cut and some of the bookshelf as well. I finally borrowed a mitre to finished off the cuts and (redo the ones I screwed up) It is a little rough but I love this space! And so does my wife!. My next project I hope to improve my staining skills! Lol. I admit I'm kinda proud of it. On to more projects!
Built from Plan(s)
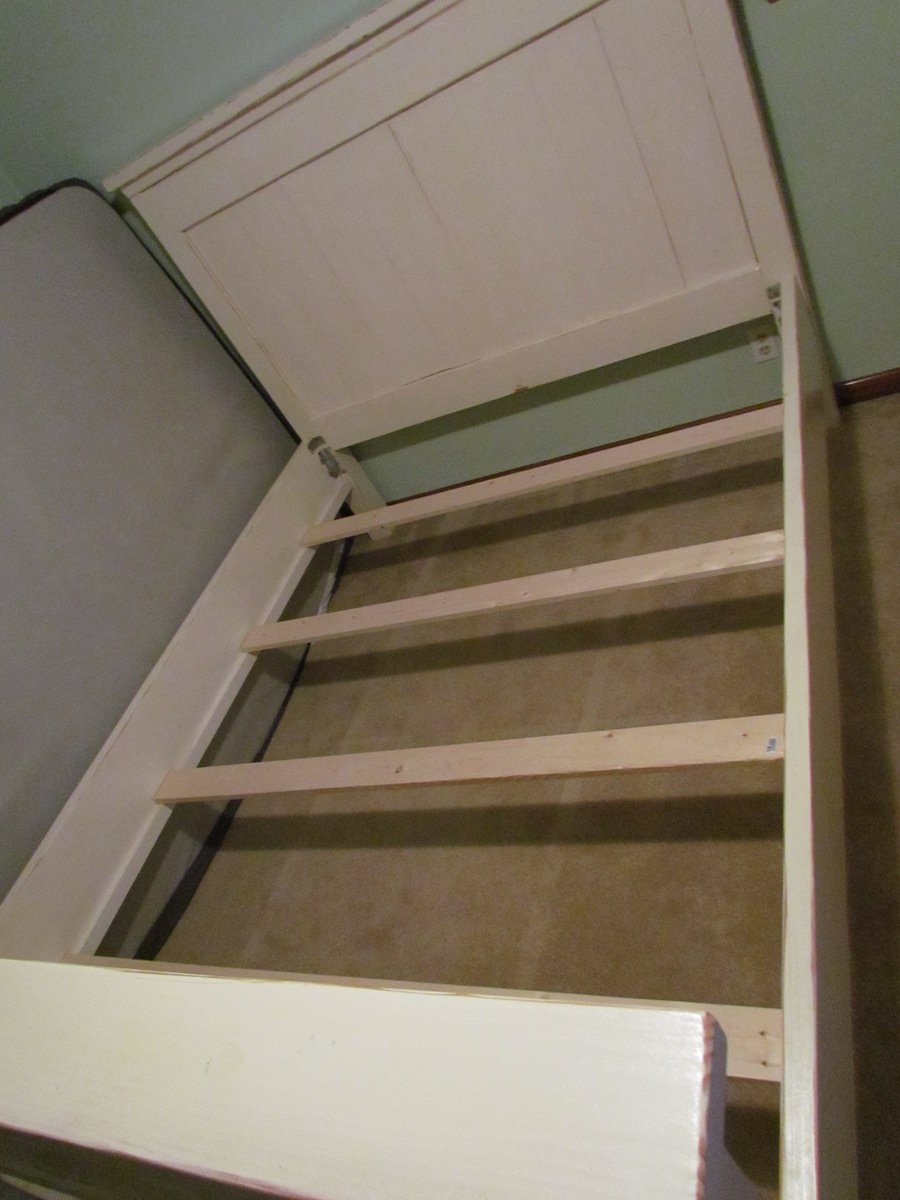
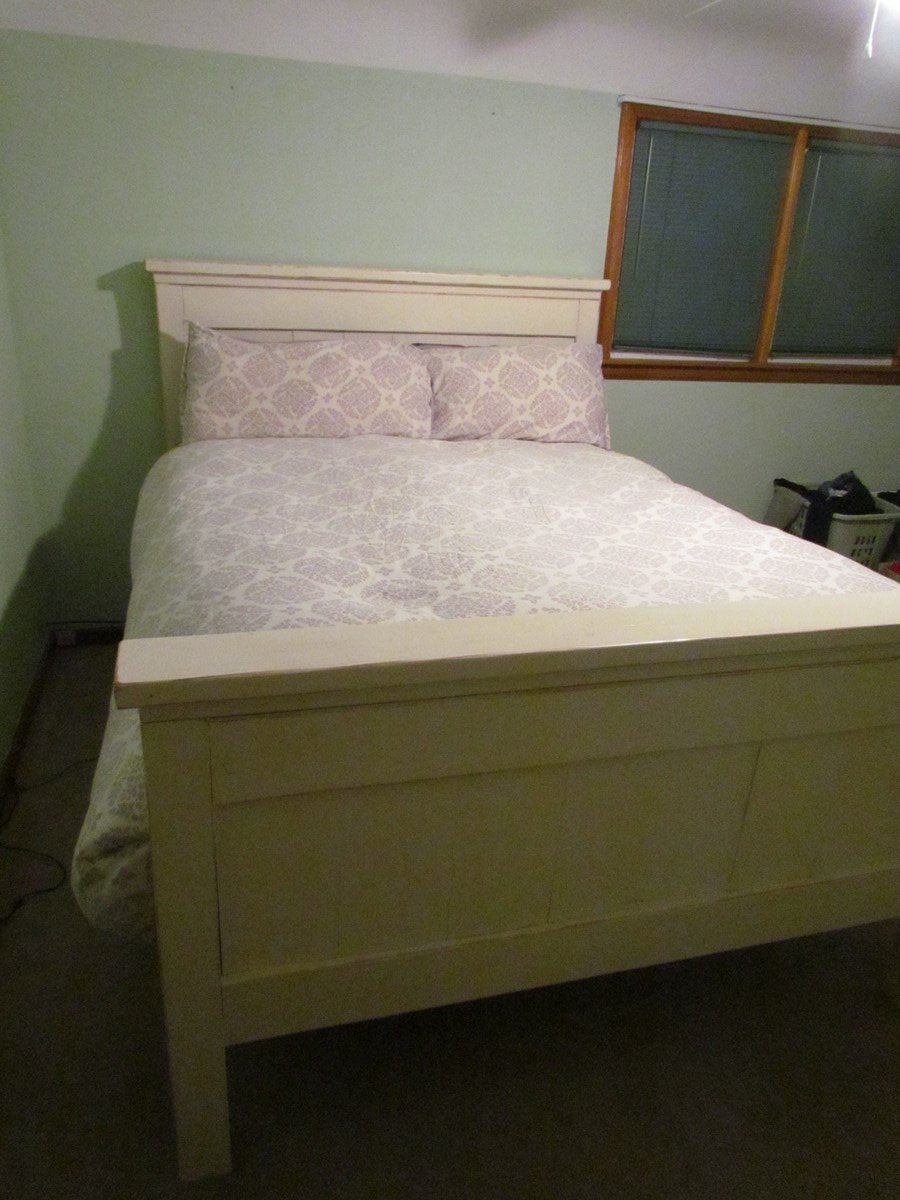
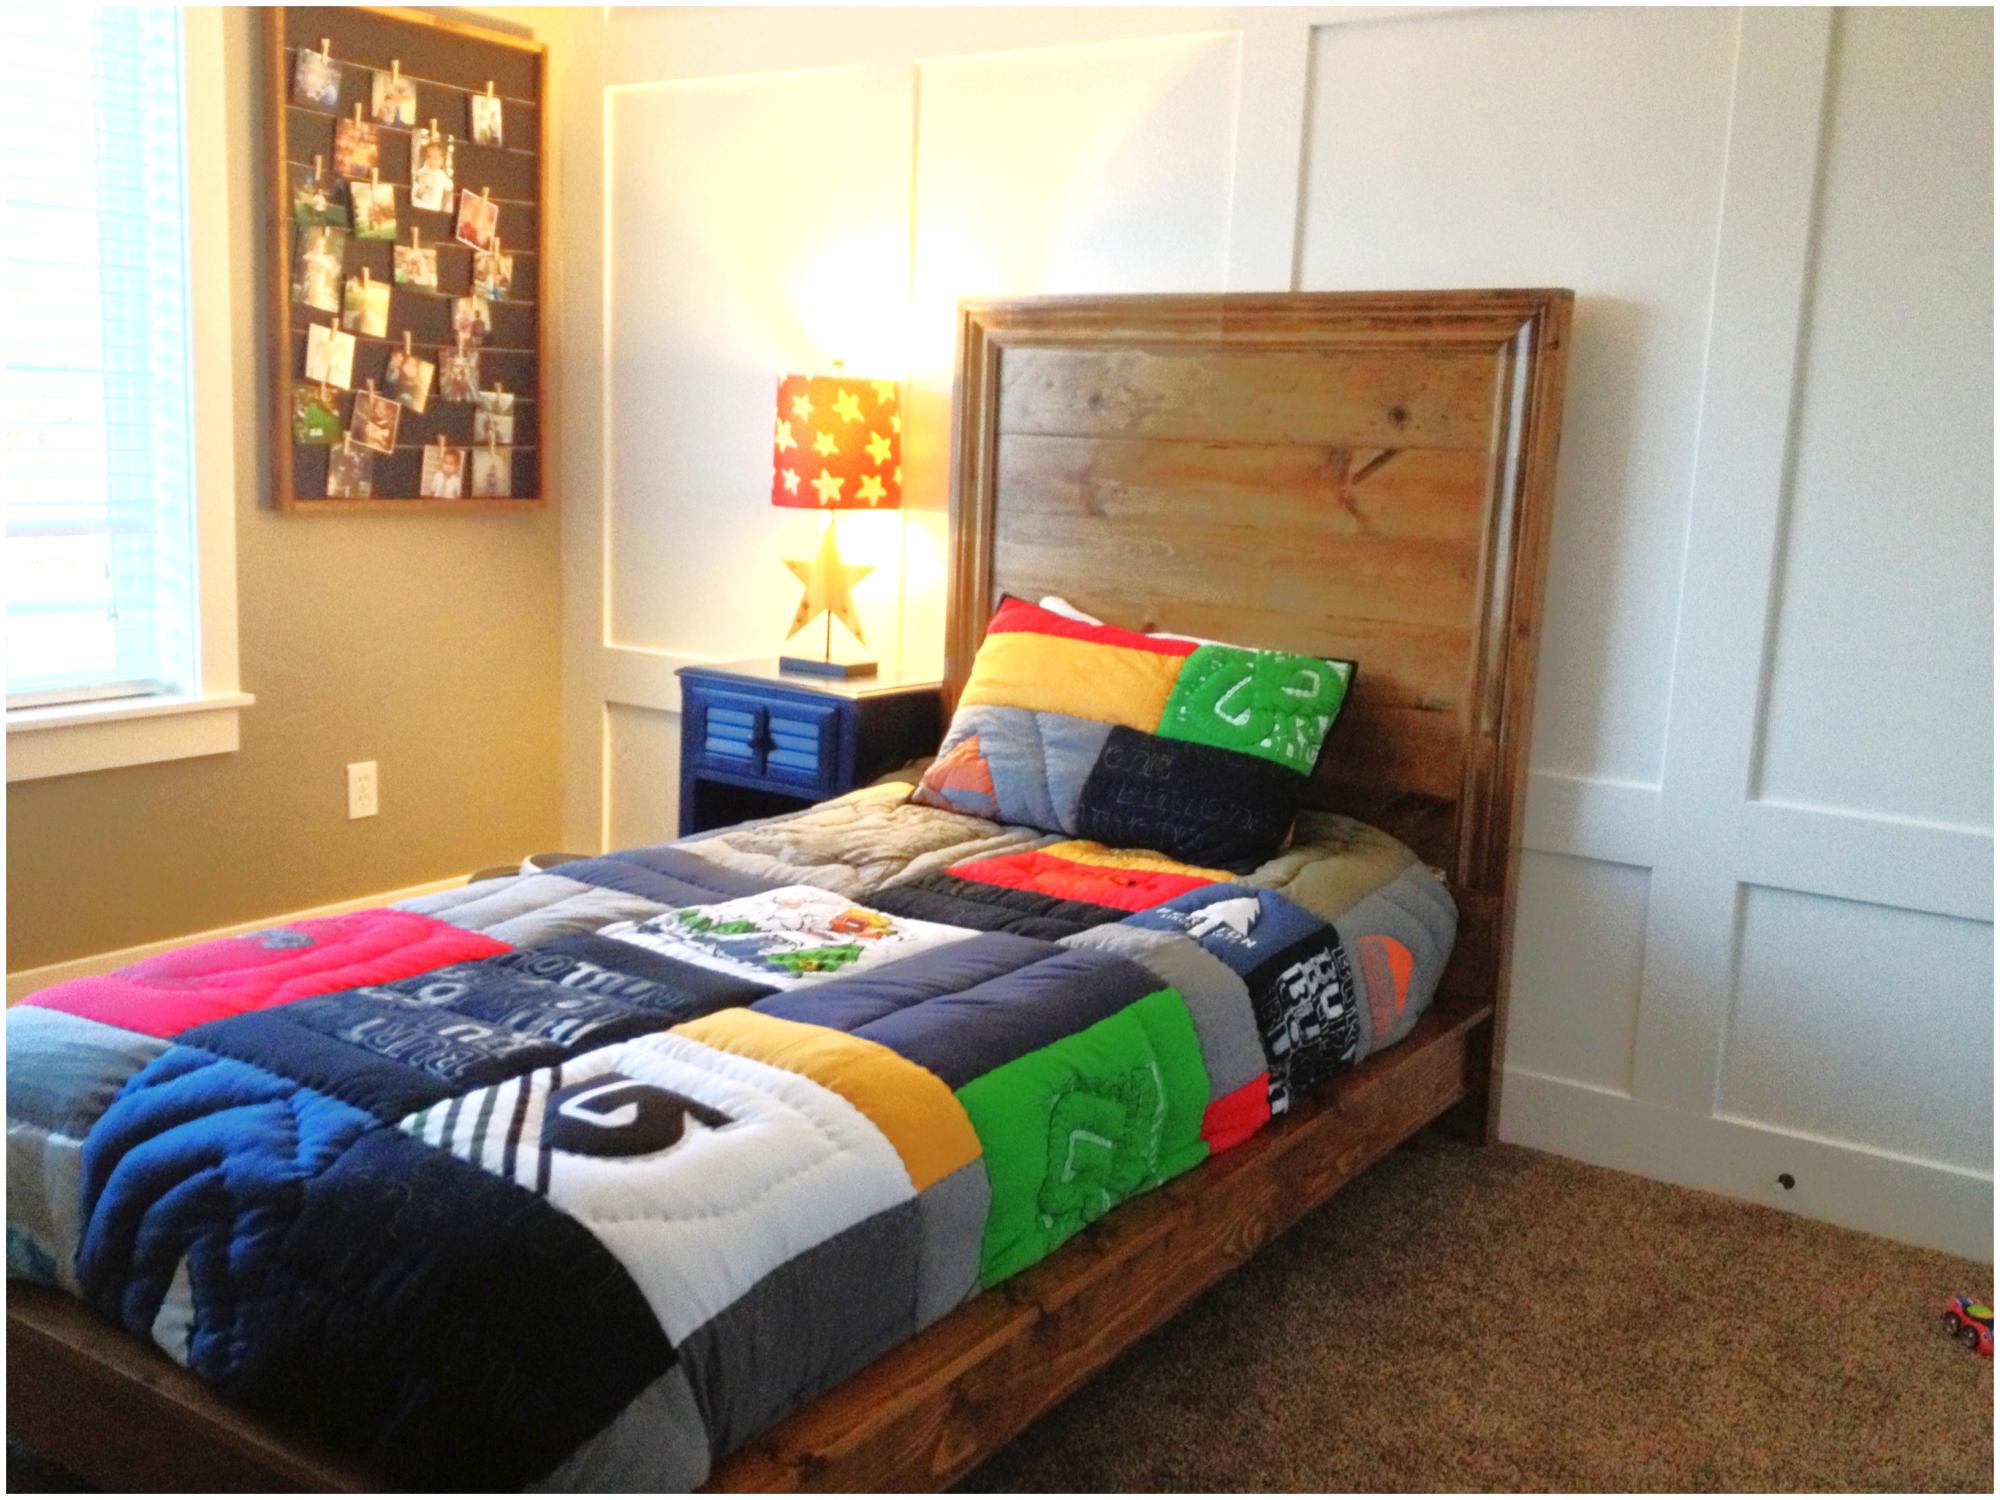
Modified Queen Farmhouse Bed
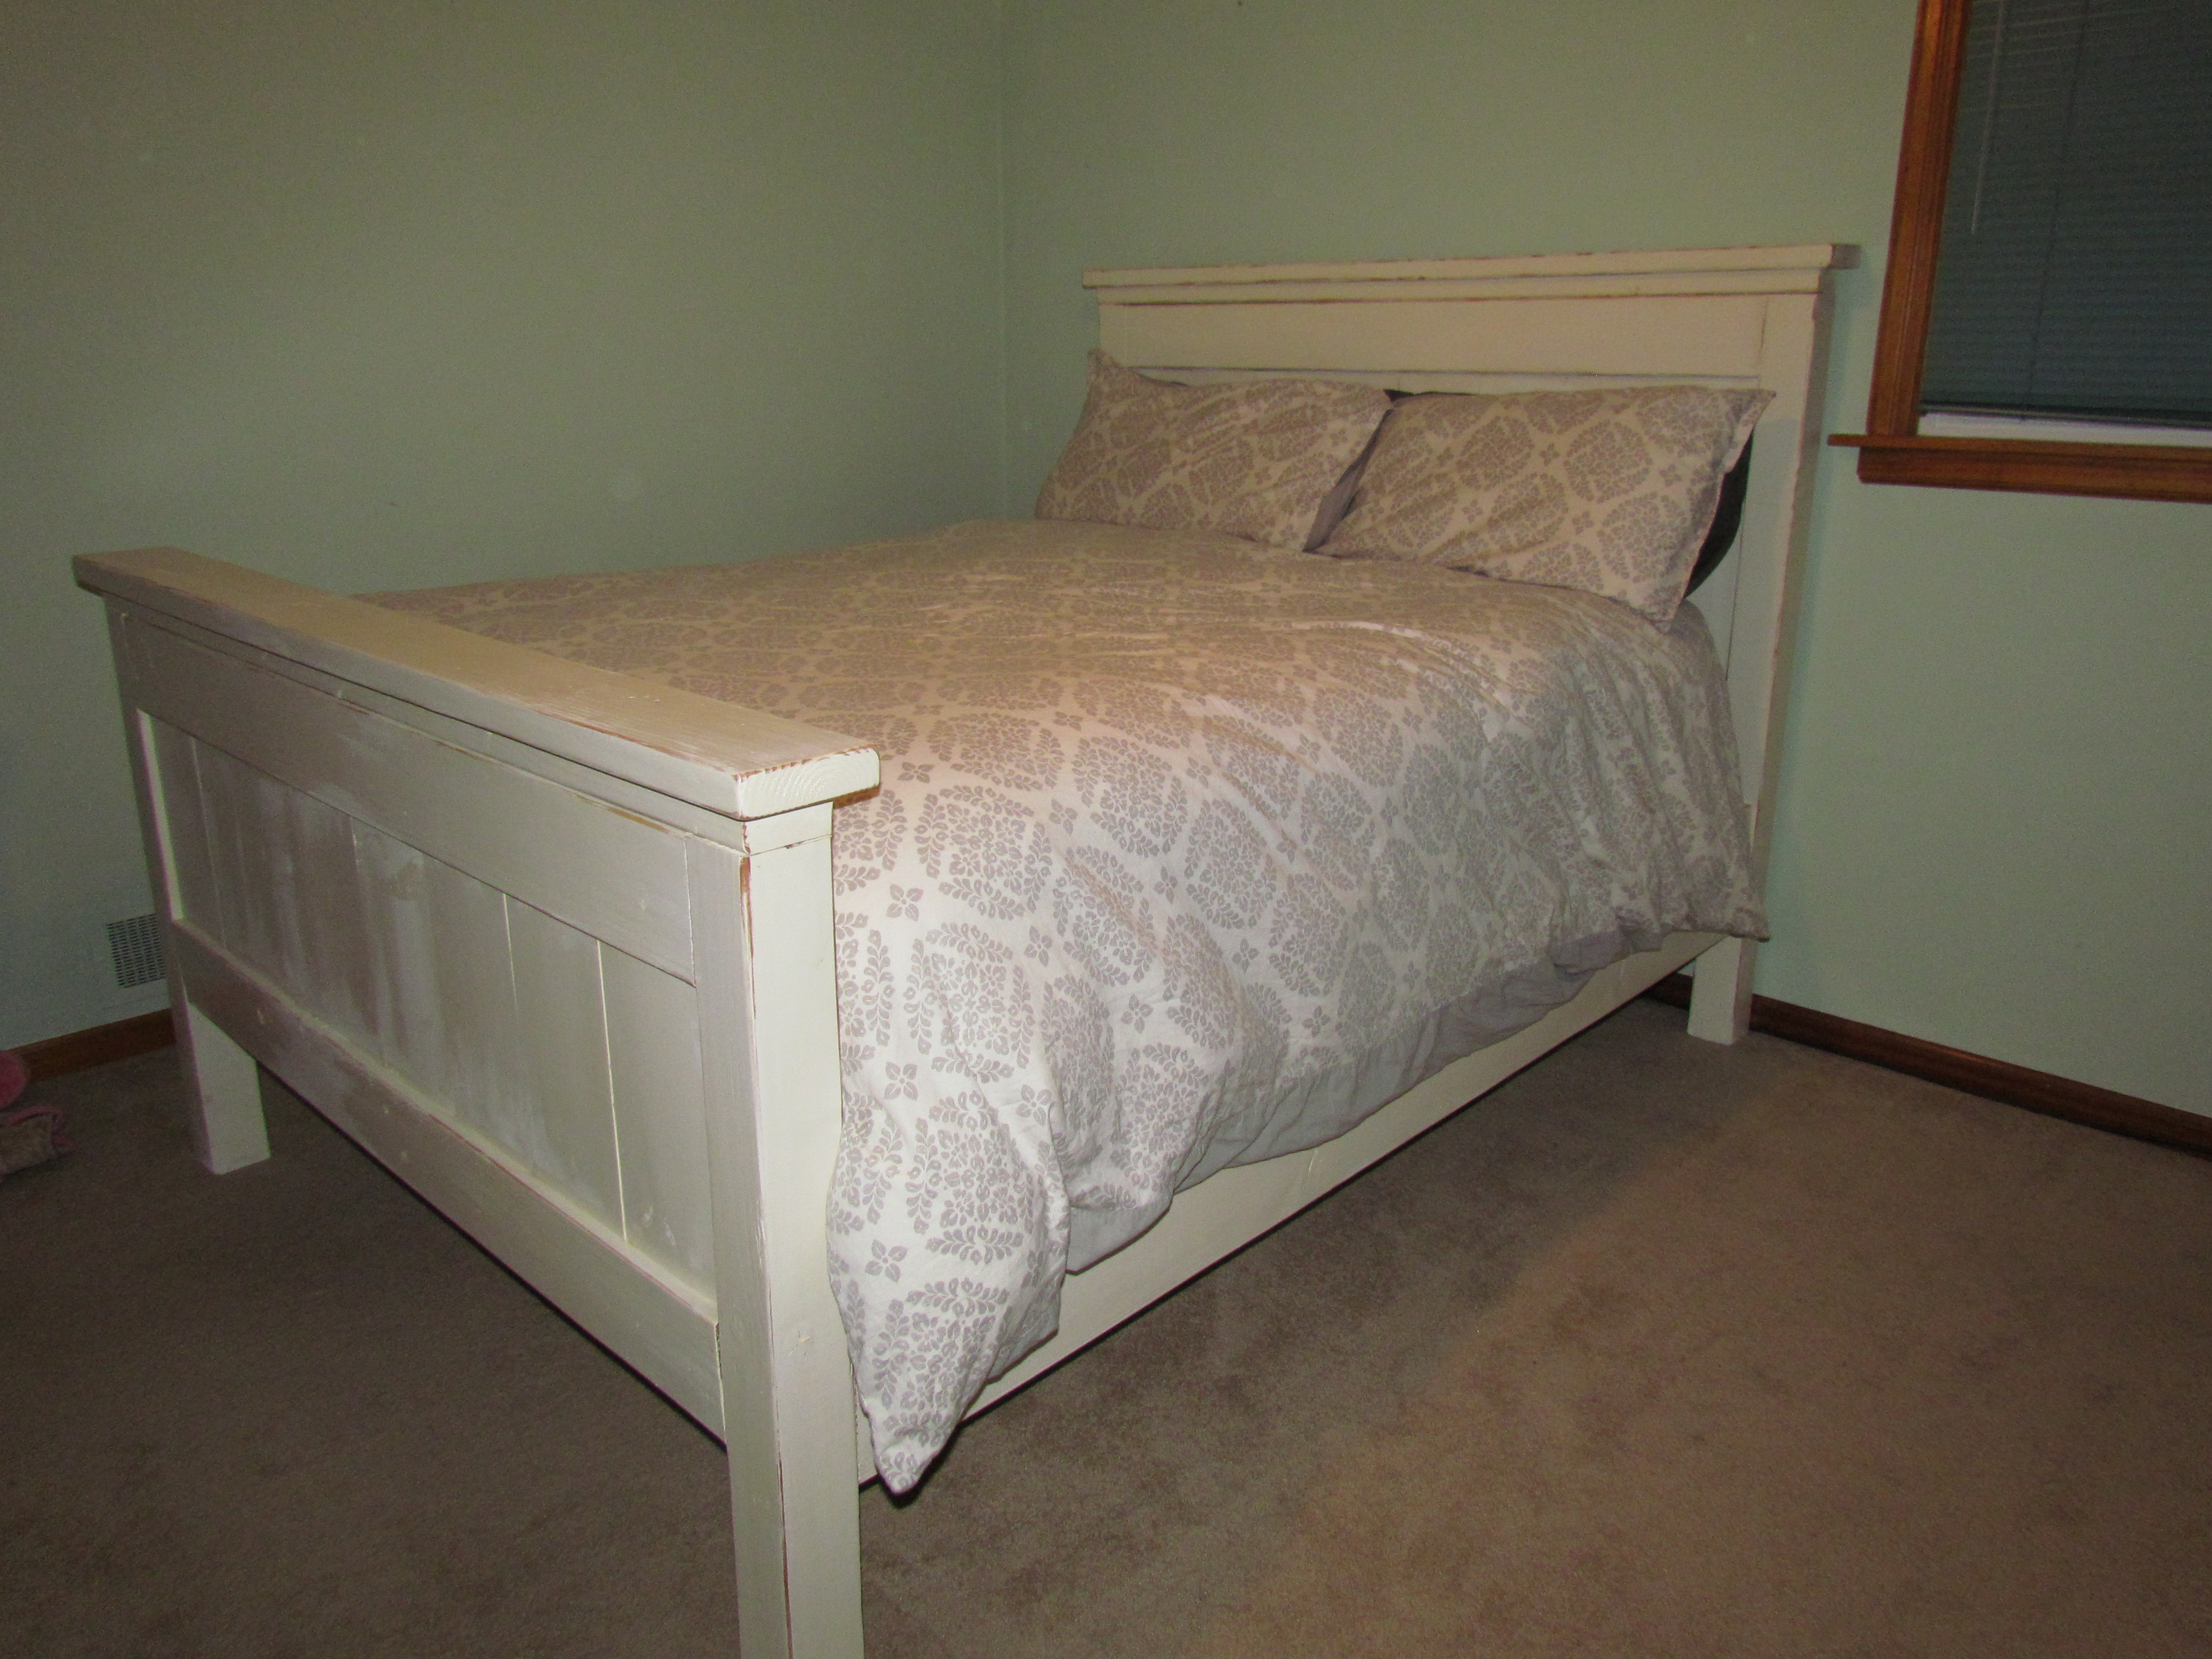
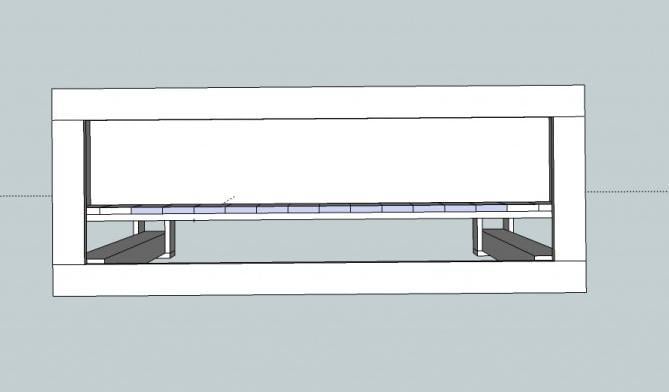
I used Ana's Queen size Farmhouse bed with the modifications for the box spring. I also changed the plans slightly, instead of the 1" x4" on the footboard and head board I used 2" x 6" at the bottom. I don't have a nail gun or finishing nails so this provided the stability and saved me a few dollars. I also made the corner posts longer than the plans to make the bed taller.
I love this bed, I made it extra tall, so you have to jump into it. And there is plenty of storage underneath!
It took me and my dad about 4 hours of actual cutting and assembling, but an additional 10-20 hours of sanding and painting. It took me a few months to actually finish it after work.
THANK YOU ANA for the plans!!!
Built from Plan(s)
Estimated Time Investment
Week Long Project (20 Hours or More)
Finish Used
Off white paint, sanded to antique, then a clear varnish.
Recommended Skill Level
Starter Project
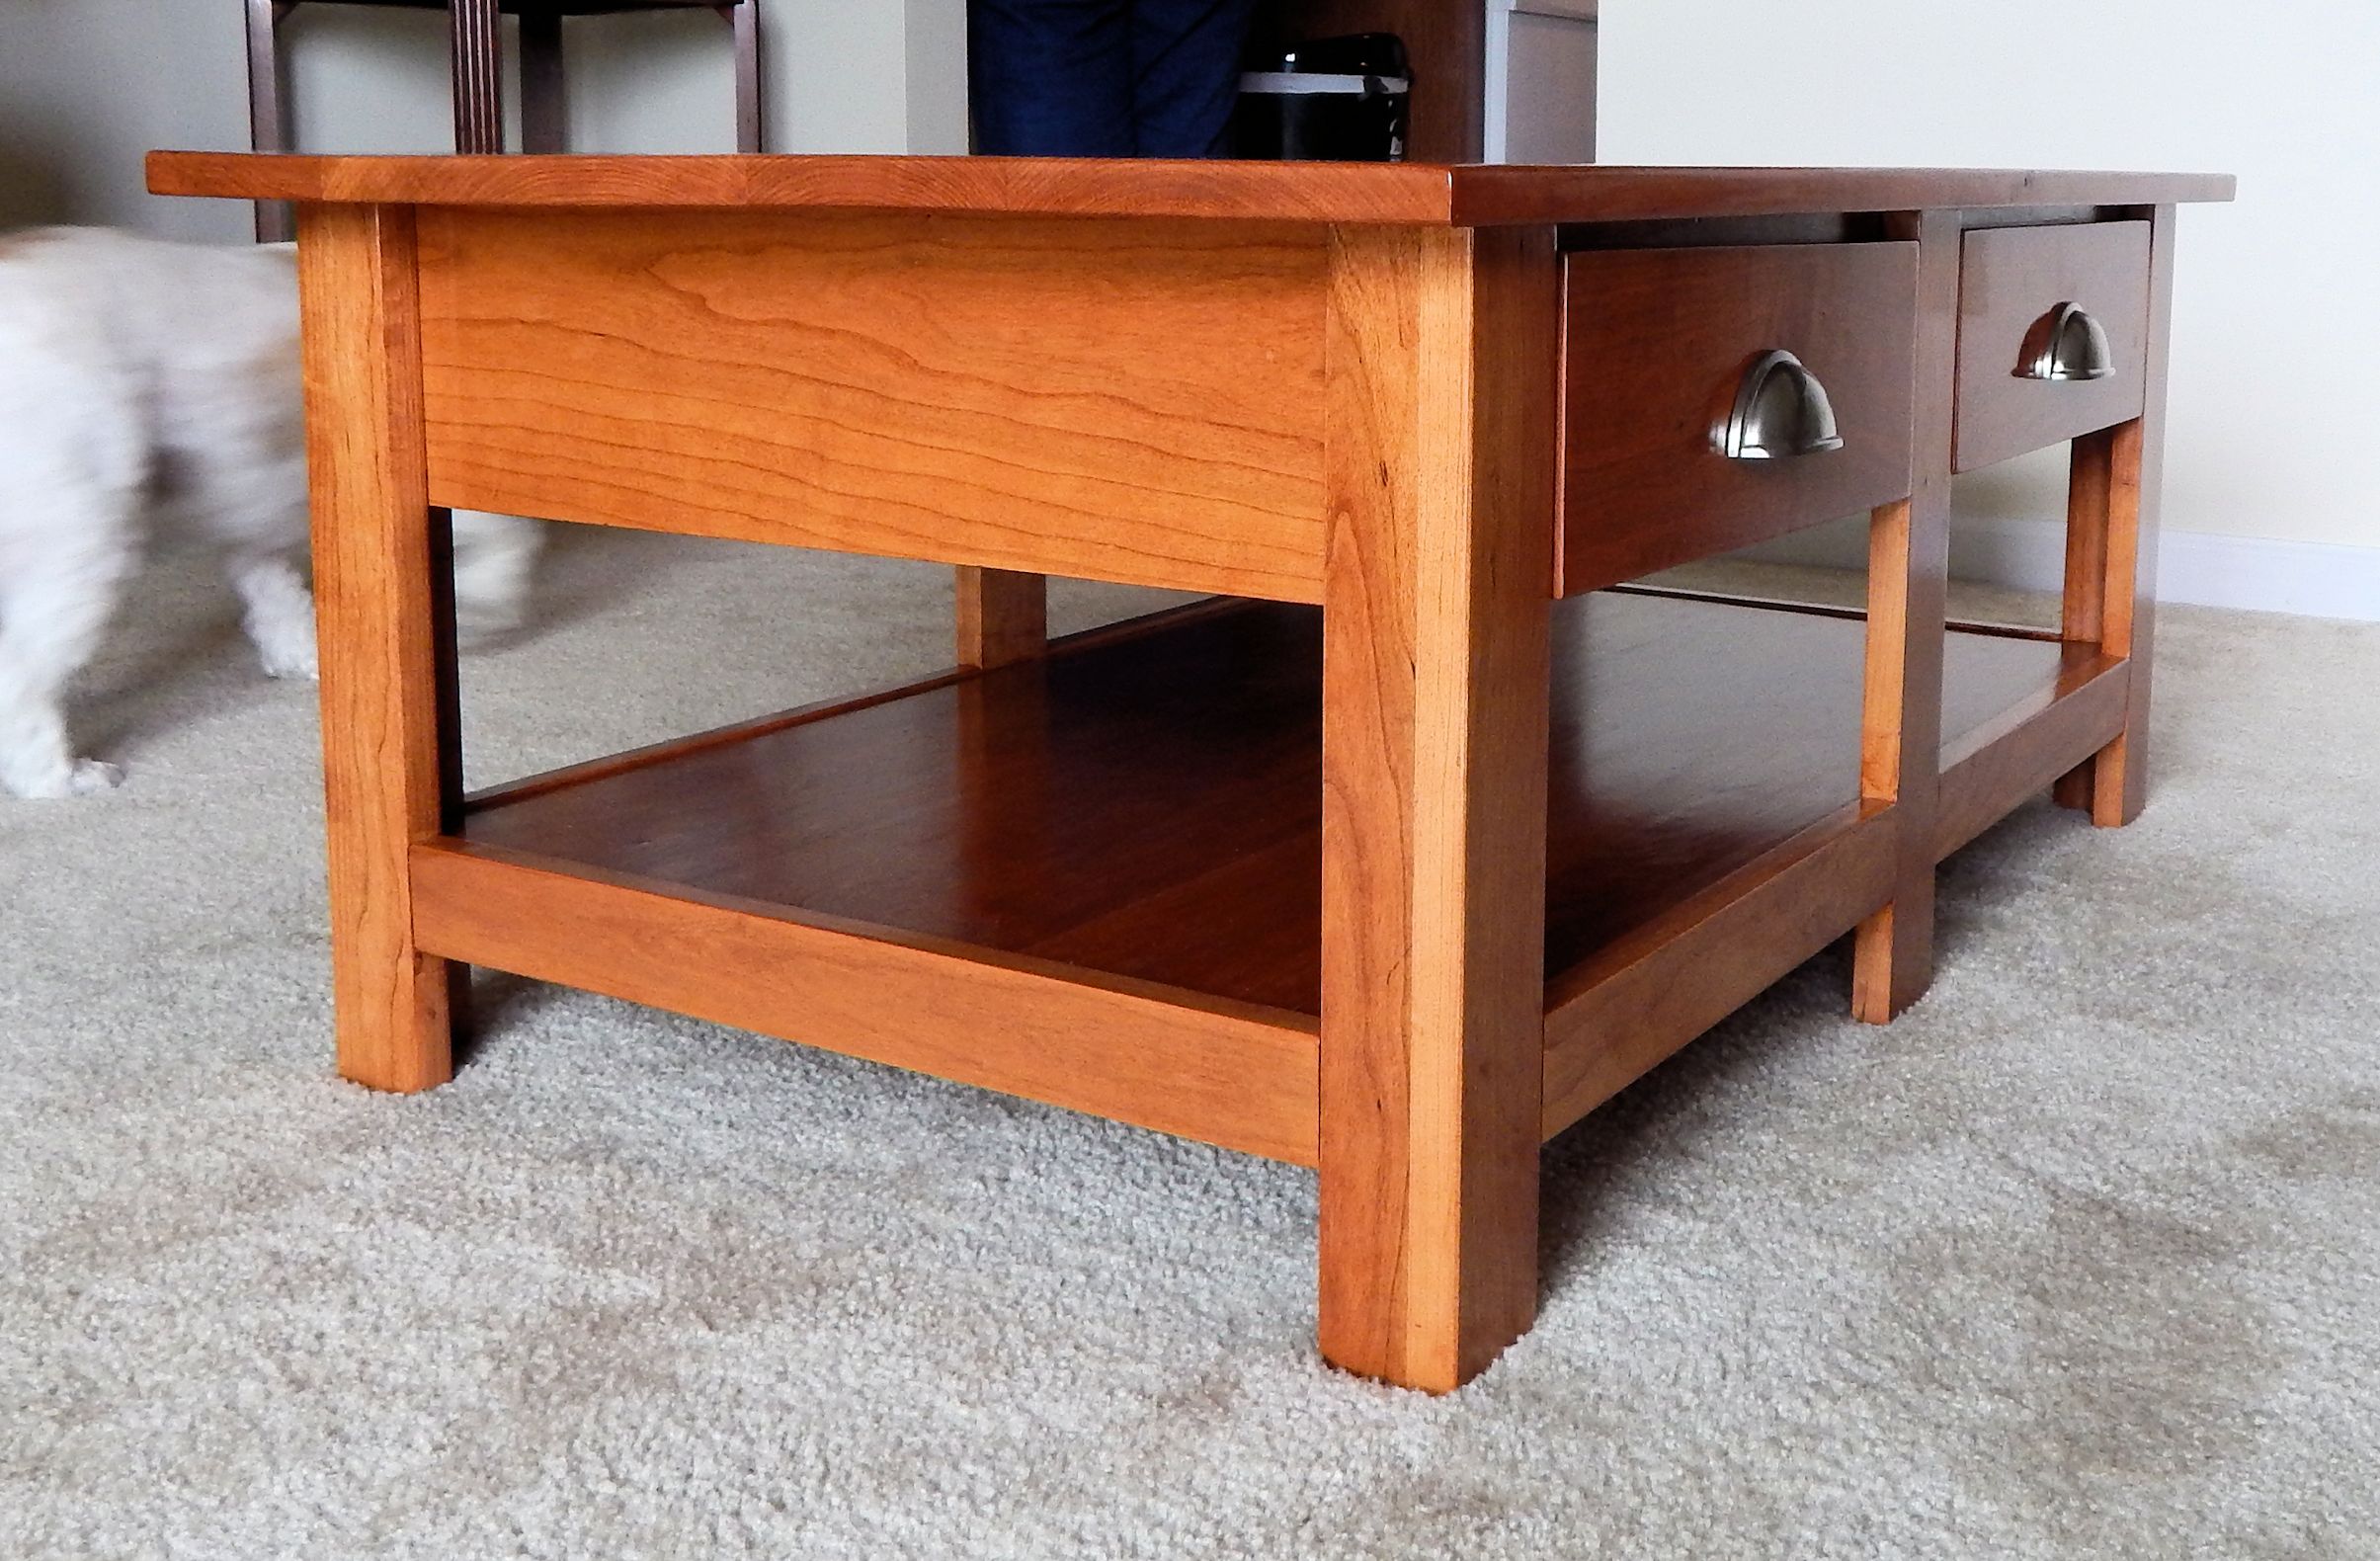
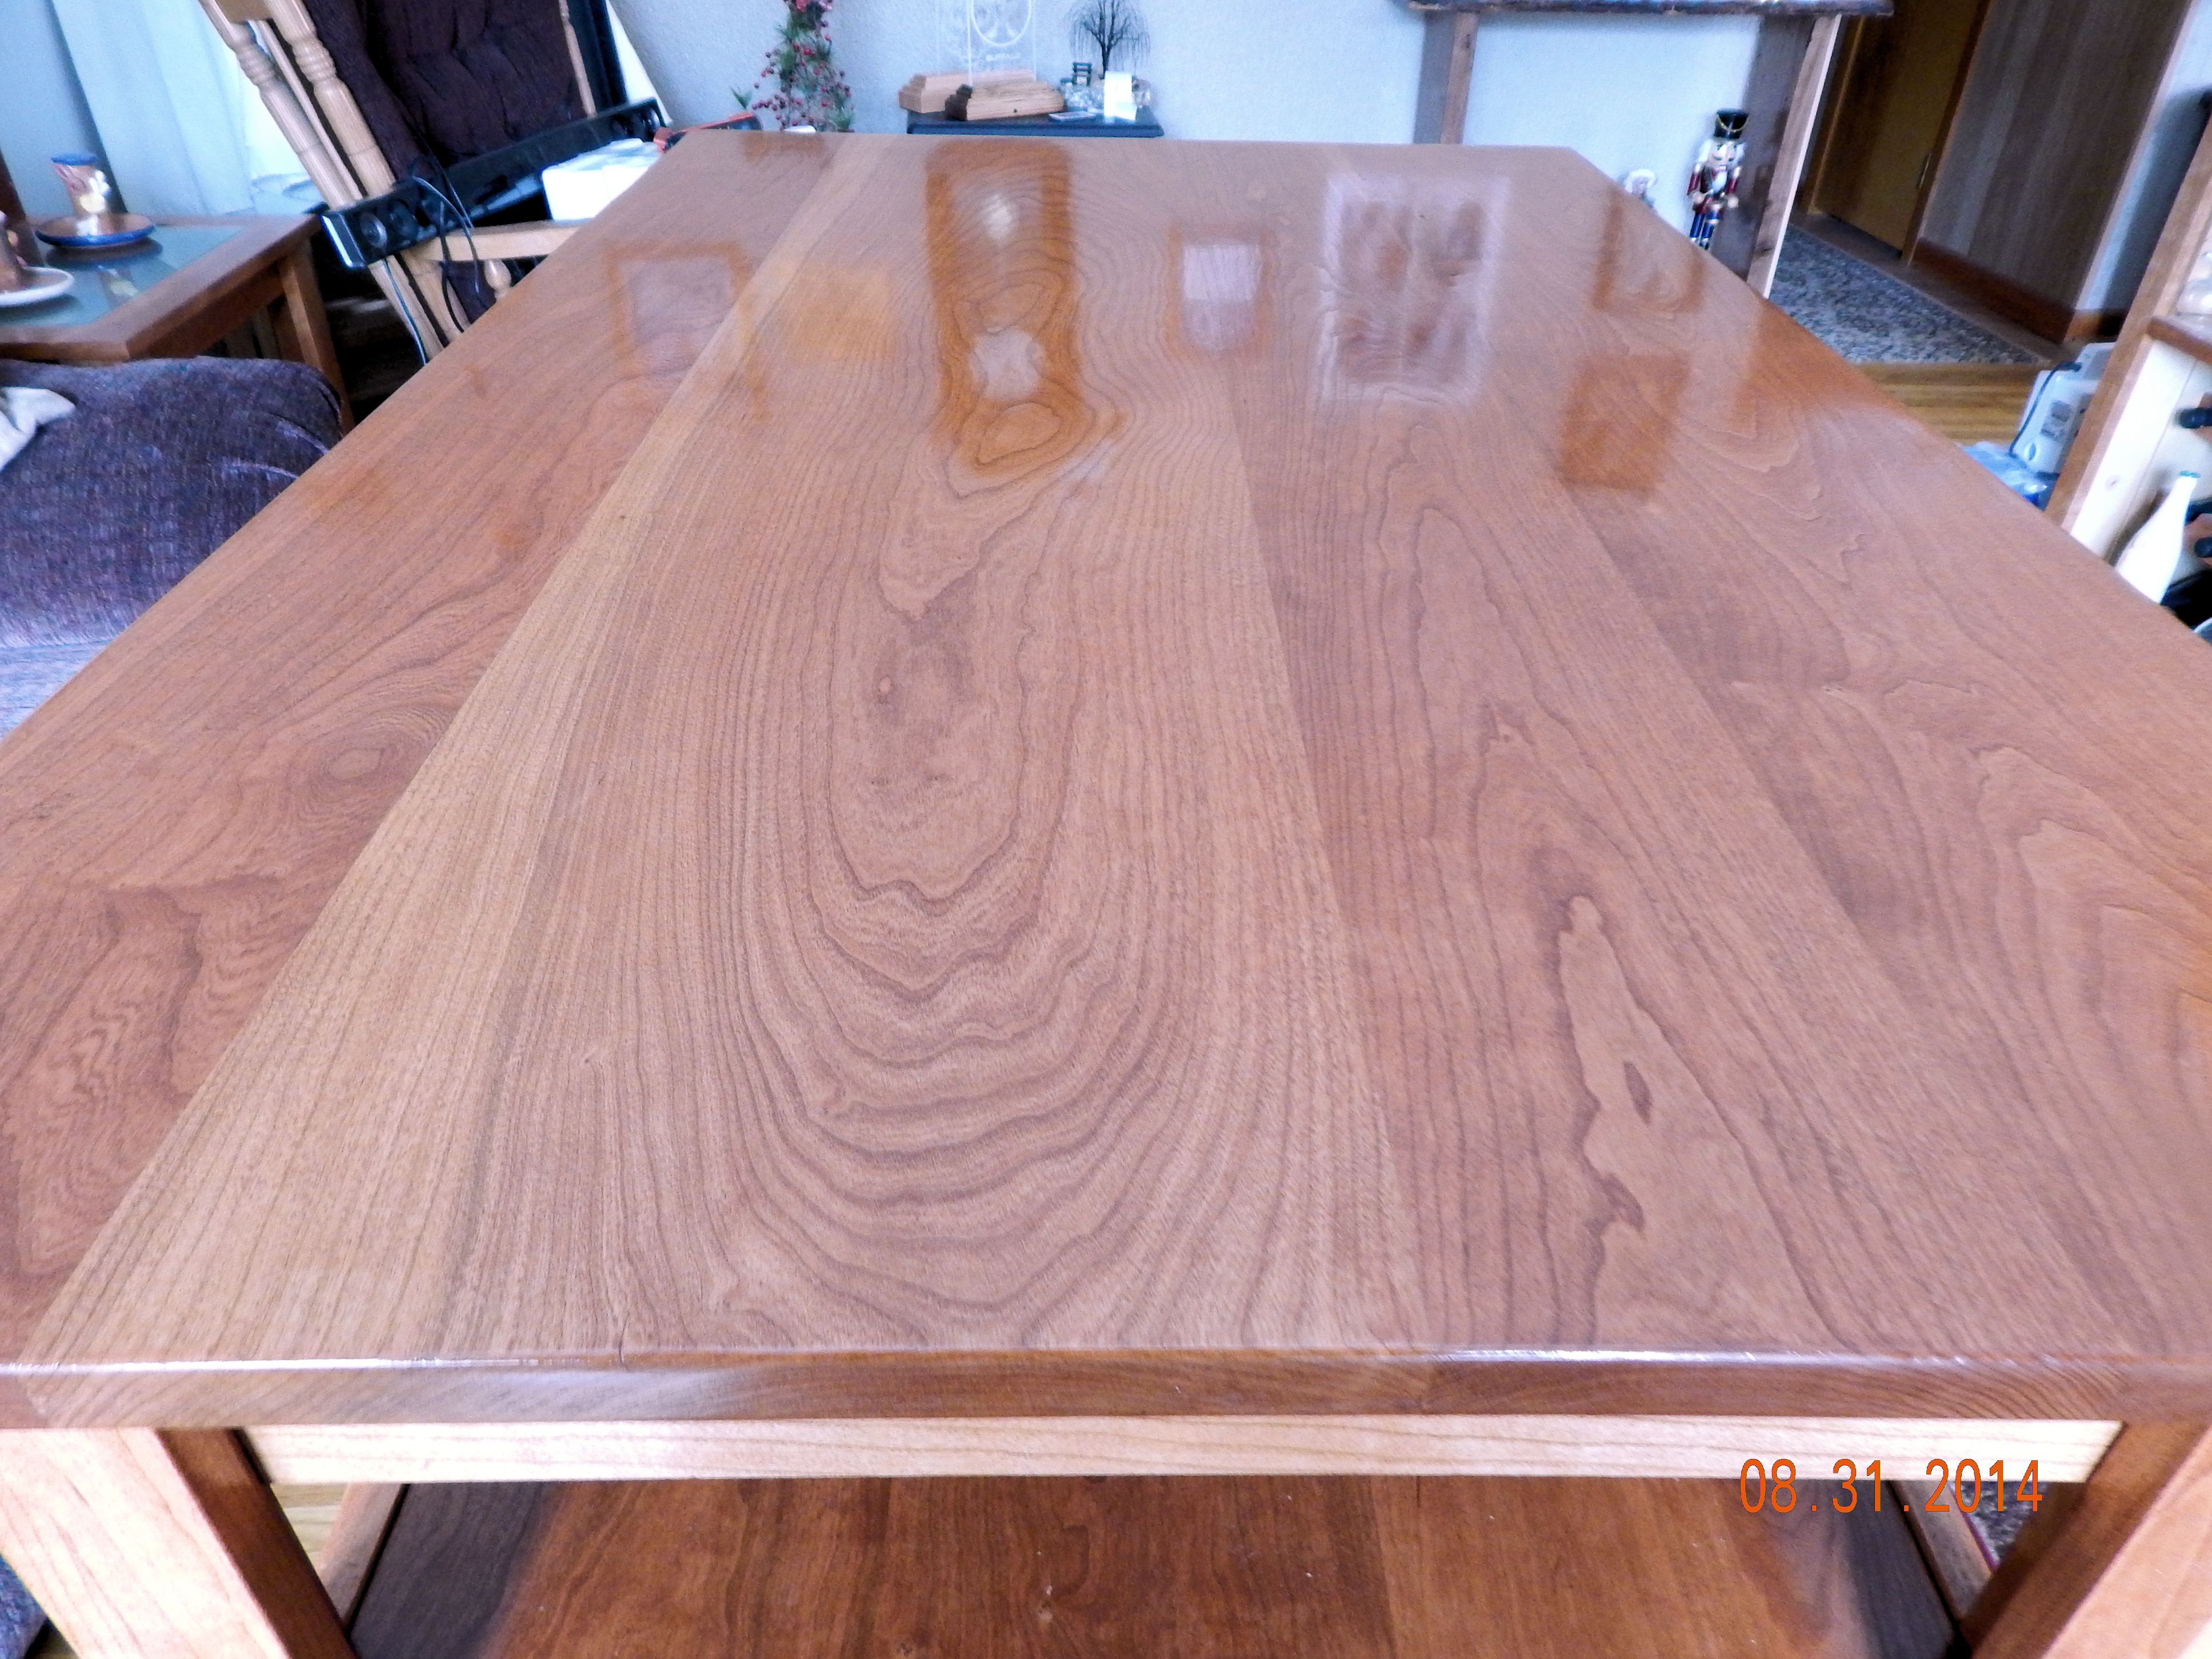
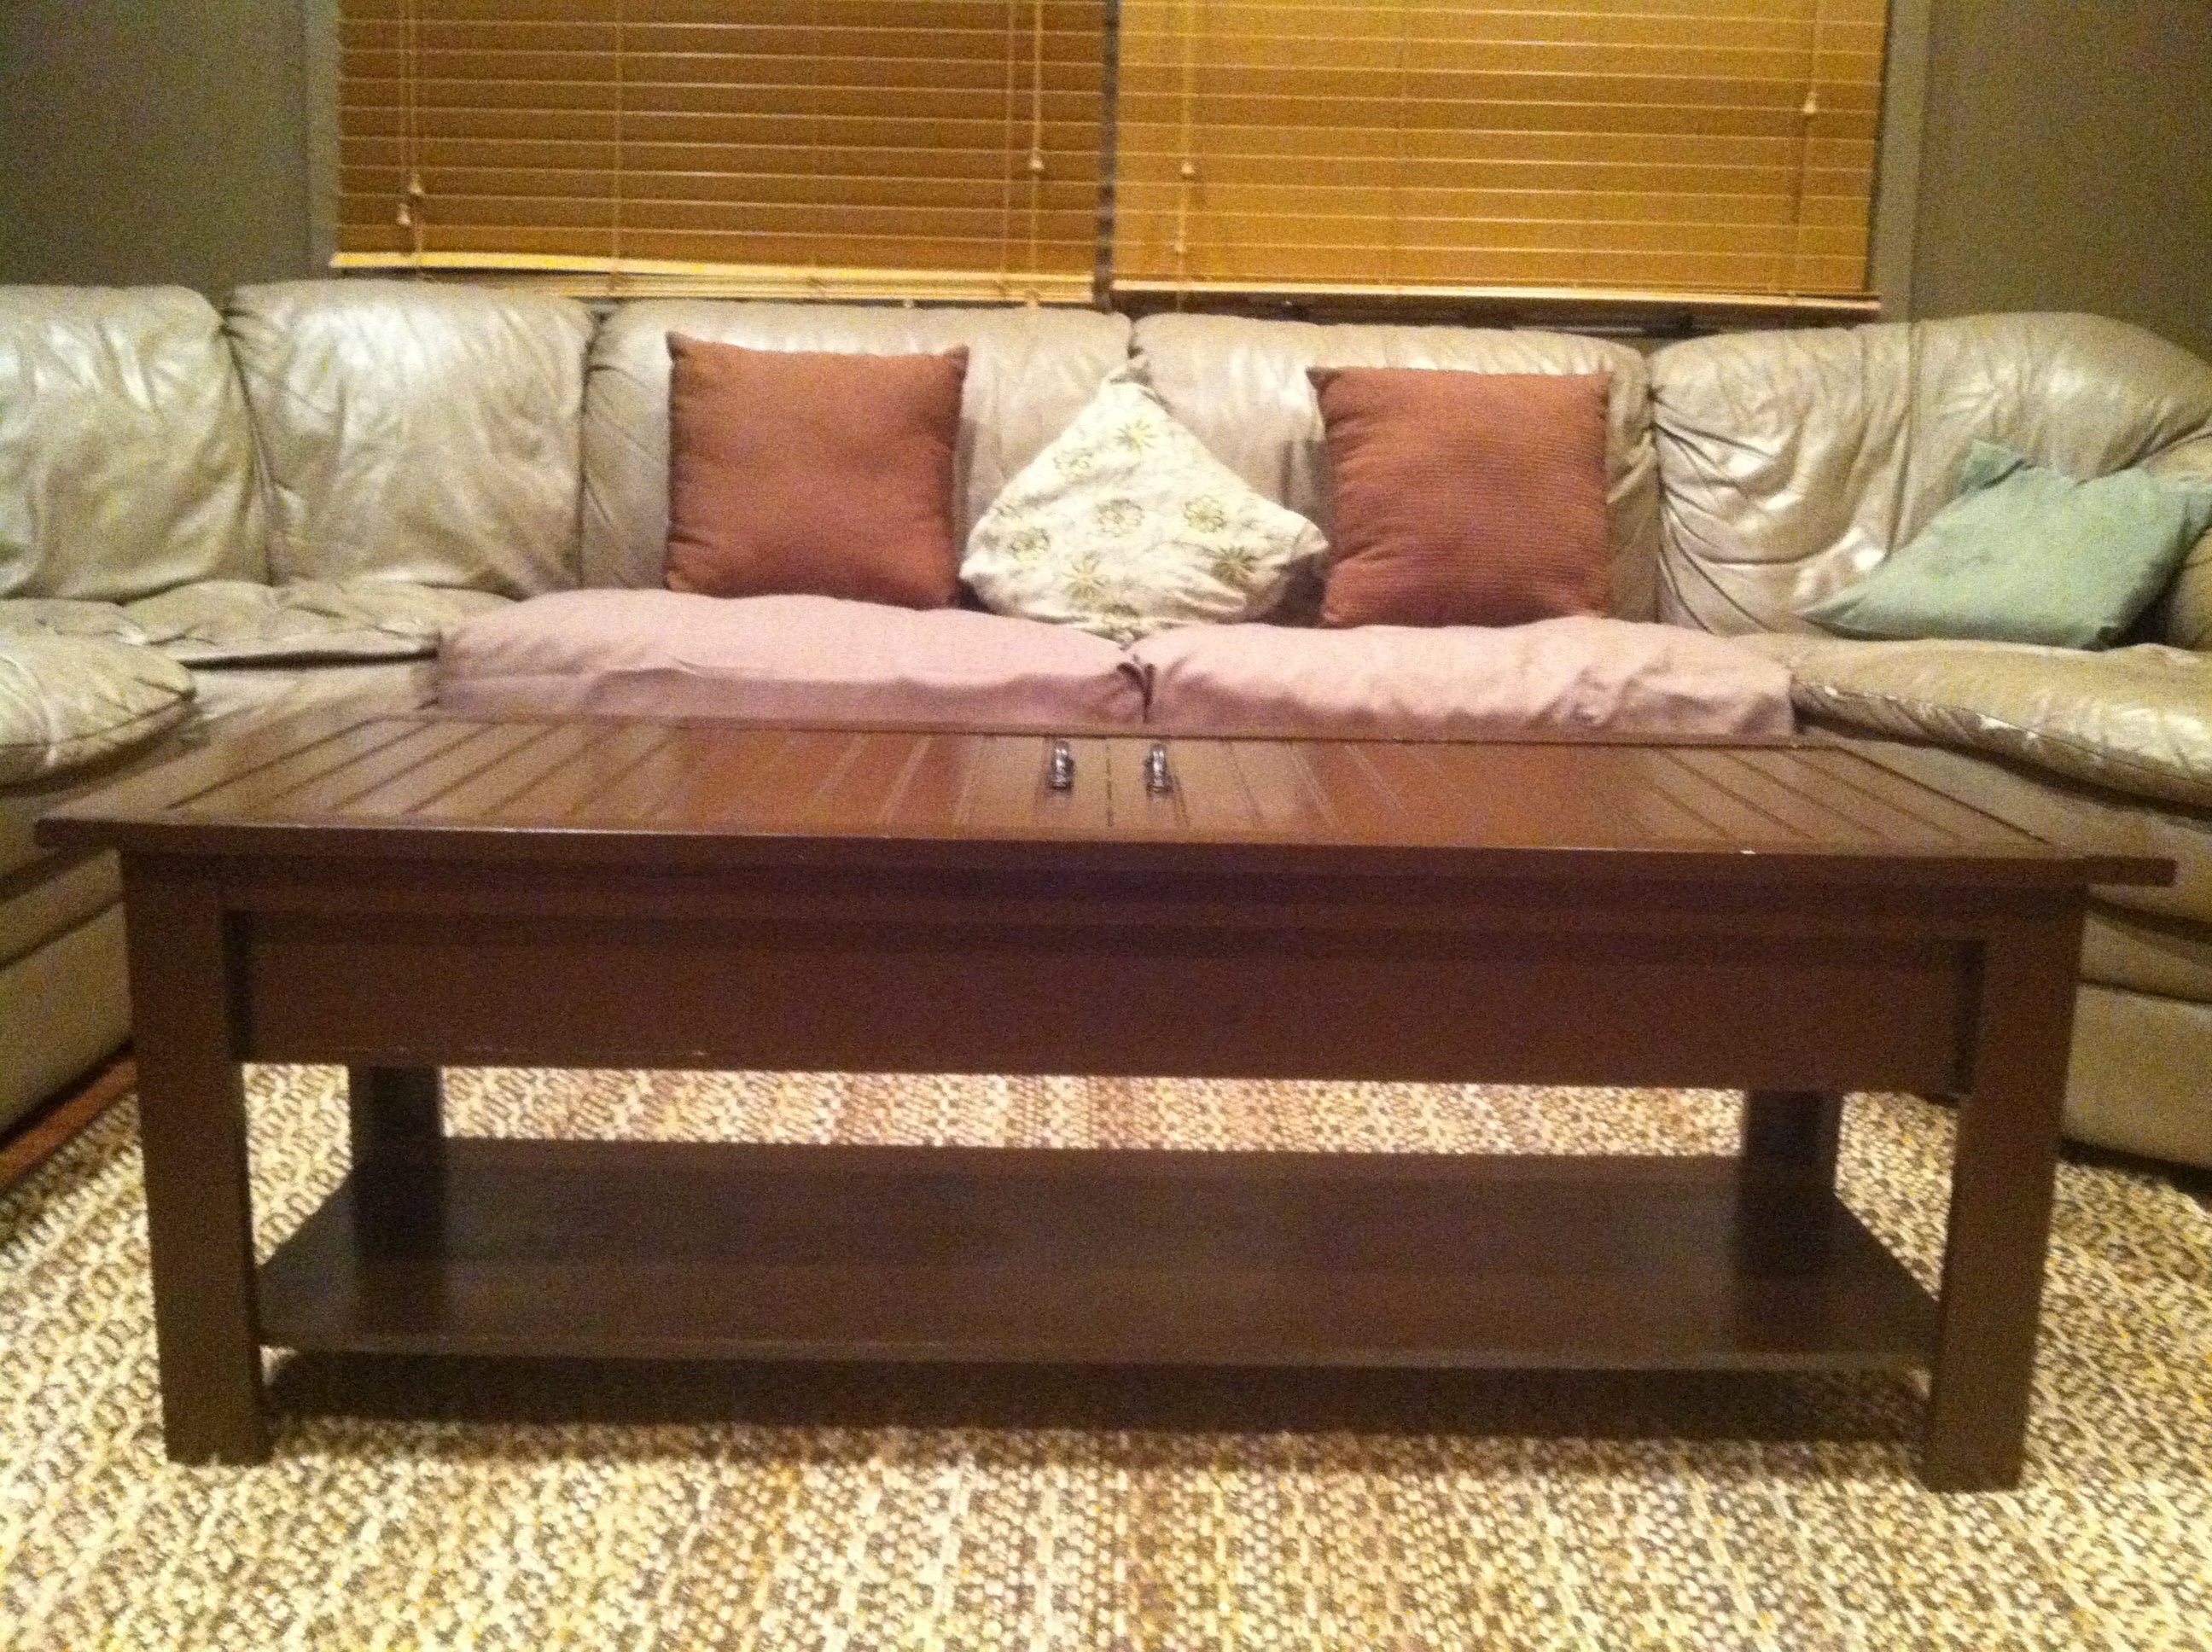
coffee table
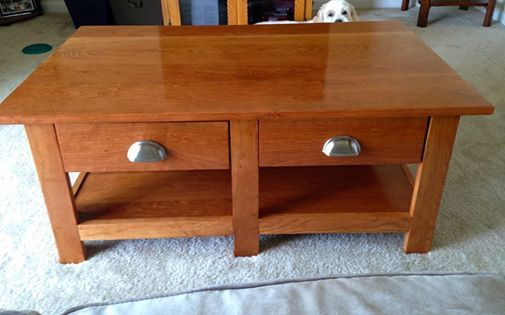
My version of benchright coffee table. Made this for my daughter. It's made of solid cherry.
Built from Plan(s)
Estimated Time Investment
Week Long Project (20 Hours or More)
Finish Used
Poly 3 coats
Recommended Skill Level
Intermediate
Comments

Patchwork Dresser

This was an anniversary gift, so I wanted it to lean more "chic" than "shabby" and as a result I spent a little extra money. Instead of using different colors of stains, I used different kinds of hardwoods to provide the color contrast. I changed the dimensions to fit our space and my wife's requests. In the end I believe the dresser was 50" wide, 31" tall (not including legs) and 20" deep.
Carcase - The carase is made of 3/4" plywood and the the divider is held in place by a dado groove. I used a roundover bit to soften the edges. I then applied a vinyl spackle to the edges of the plywood so the paint would go on uniformly.
Drawers - The drawers were made with 1/2" plywood for the sides and 1/4" for the bottoms. Isntead of nailing the bottoms to the drawer sides, I routed a dado groove into the sides that holds the bottoms in place. I used full-extension ball-bearing drawer slides, which in hindsight may have been a mistake. Combining the the full-extension with weight of the hardwoods created a decent tipping hazard. As a result, I've needed to add wieght to the backside of the dresser for stability.
Feet - In lieu of casters, I bought some premade 6" legs from a local big box store for about $10-$15. I don't regret this purchase as they worked out very well.
Finish - The paint I used was super thick and covered great but was difficult to brush on with any consistency or finesse. It was like painting with pancake batter. I had impossible visions of being able to sand the finish down to an incredible flat surface but after redoing it twice, I settled for a brushed look.


Built from Plan(s)
Estimated Cost
~$600 but with a slight design change and not screwing up the finish, it could've easily been ~$400
Estimated Time Investment
Week Long Project (20 Hours or More)
Finish Used
Tung Oil on hardwoods and Black Dog Salvage Paint with Rustoleum Chalked Matte Clear topcoat.
Recommended Skill Level
Intermediate
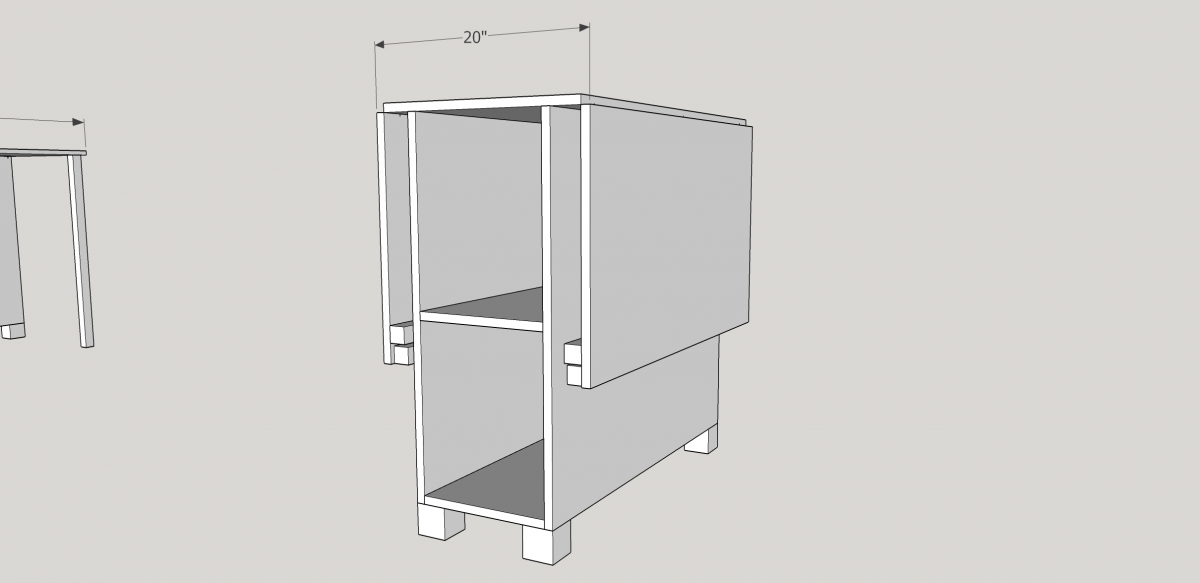
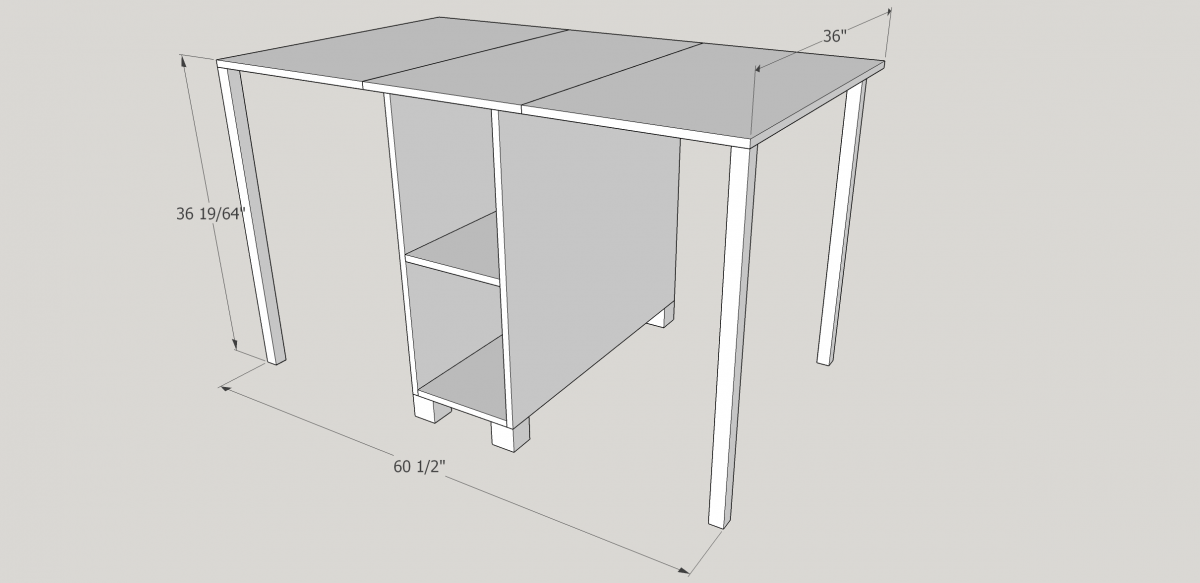
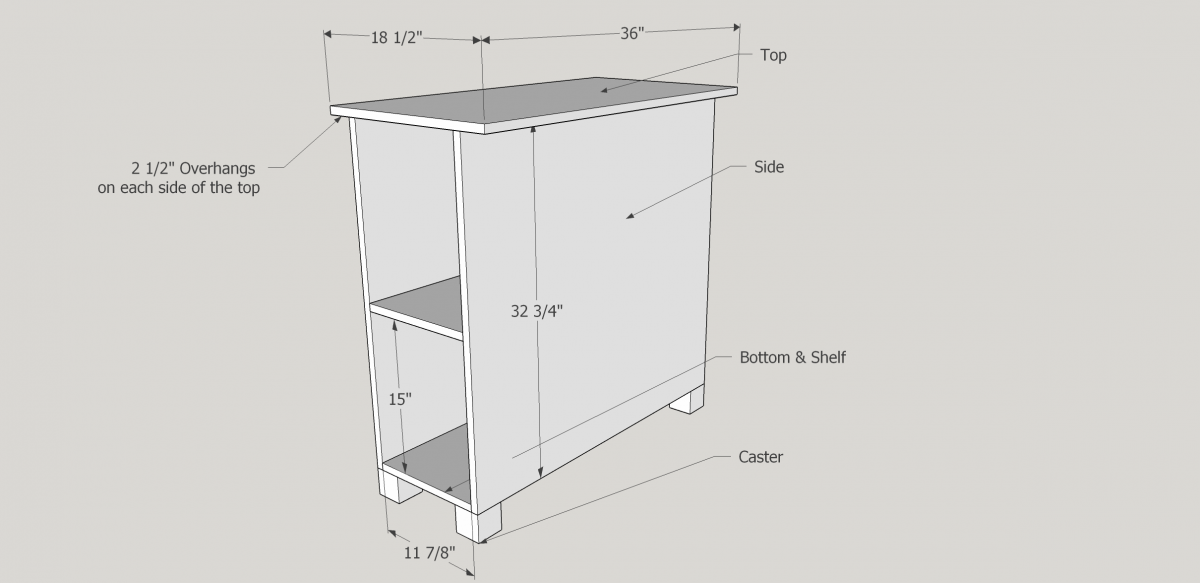
Cutting Table for Sewing room
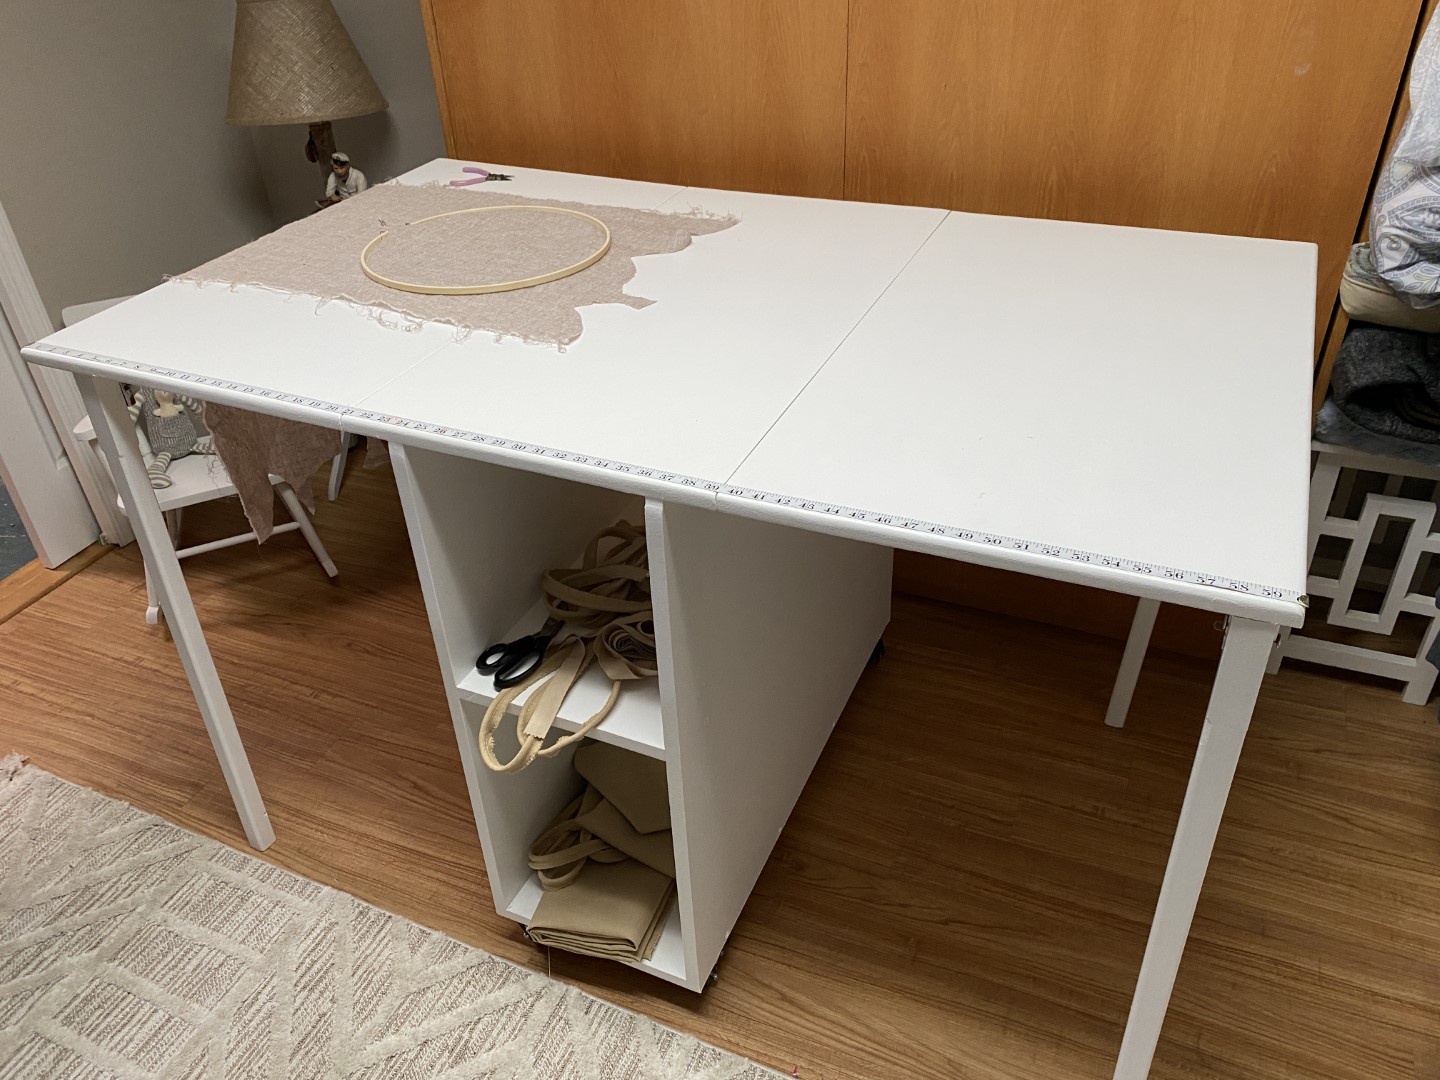
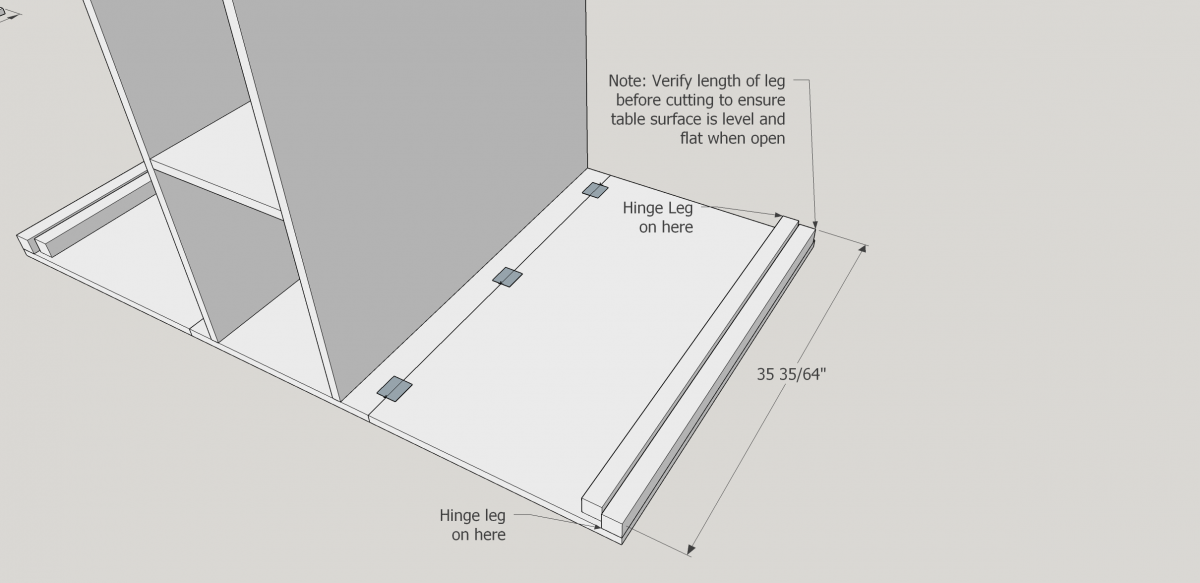
Jennifer wanted a cutting table for her sewing room and so I took Ana-White's Sewing Table plans and made them taller into a cutting table. We aimed for 36" (Standard Counter-Top Height), but ended up at 36 19/64" due to the casters not being exactly two inches. Jennifer's a little short so I was really worried about the extra 19/64" (but don't tell her I said that :)
We decided to use MDF instead of plywood to avoid the risk of snags on finer fabrics.
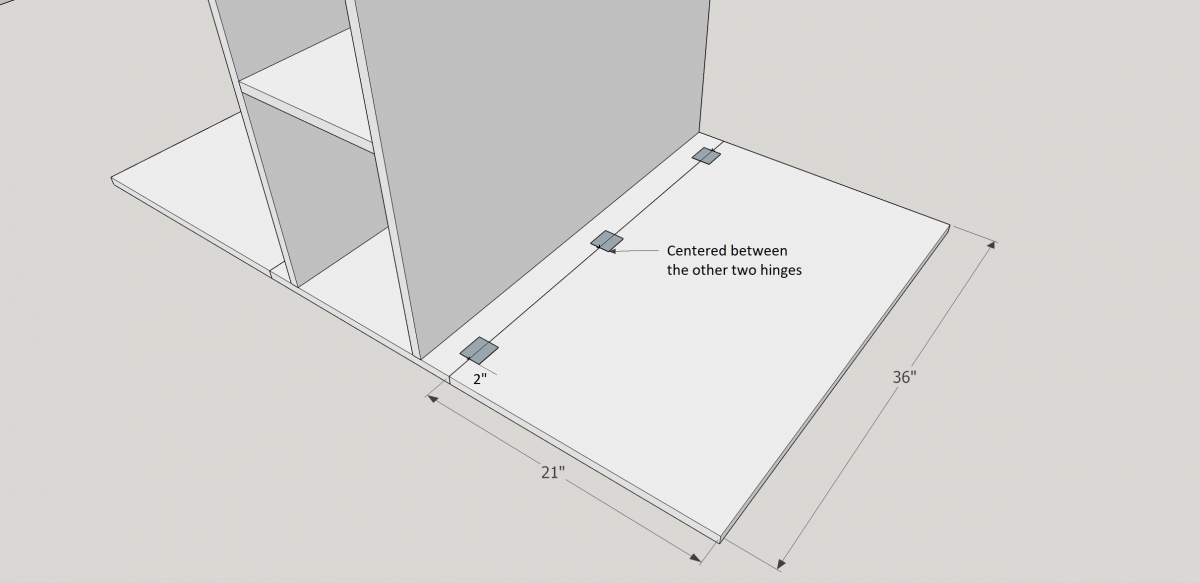
Instead of simple hinges for the legs, I chose locking hinges available from Lee Valley https://www.leevalley.com/en-ca/shop/hardware/table-hardware/legs/leg-b… ($38 for all four).
We purchased 2" Casters from Amazon.ca https://www.amazon.ca/gp/product/B07G84R9Q9/ref=ppx_yo_dt_b_asin_title_… ($22.99 for all four).
The base was cut from one sheet of 3/4" MDF
We used 2 1/2" screws and glue to build the base. We pre-drilled and counter sunk the screws, ensuring squarness all around.
We attached the casters with the screws provided.
Then we cut the leaves from some scrap 3/4" MDF and attached them with some old door hinges we had.
Once the leaves were attached, we attached the locking hinges for the legs.
We cut and planed the legs a little, and then routered the corners to give them a bit of a nicer look.
Once assembly was finished we applied a coat of primer and two coats of white, satin, interior paint.
The whole thing came out really well and is a nice addition to the sewing room. Once again, I found the plans on this site to be really helpful and easy to understand. Thank you!
Estimated Cost
$150
Estimated Time Investment
Weekend Project (10-20 Hours)
Finish Used
Interior Primer and White, satin, interior paint.
Recommended Skill Level
Intermediate
Queen Farmhouse Bed (Rough-cut lumber)
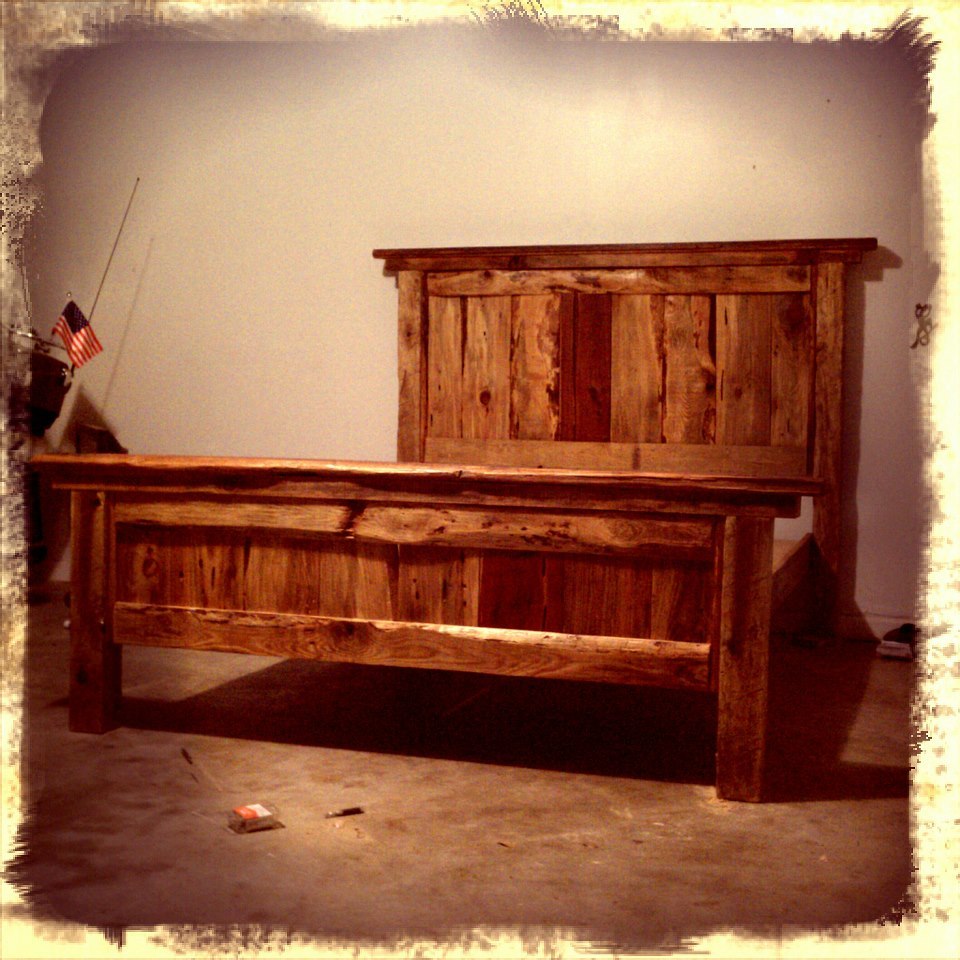
We constructed our farmhouse bed from rough-cut lumber (mostly pine with a few eastern red cedar panels). However, the top rails of the headboard and footboard were reclaimed from an old railraod depot and maintain their faded red color. I will admit, using rough-cut lumber practically tripled our efforts because nothing was square or even, but all in all, I think it was worth it!
Built from Plan(s)
Estimated Cost
$200
Estimated Time Investment
Week Long Project (20 Hours or More)
Finish Used
Clear Satin Lacquer
Recommended Skill Level
Advanced
Comments
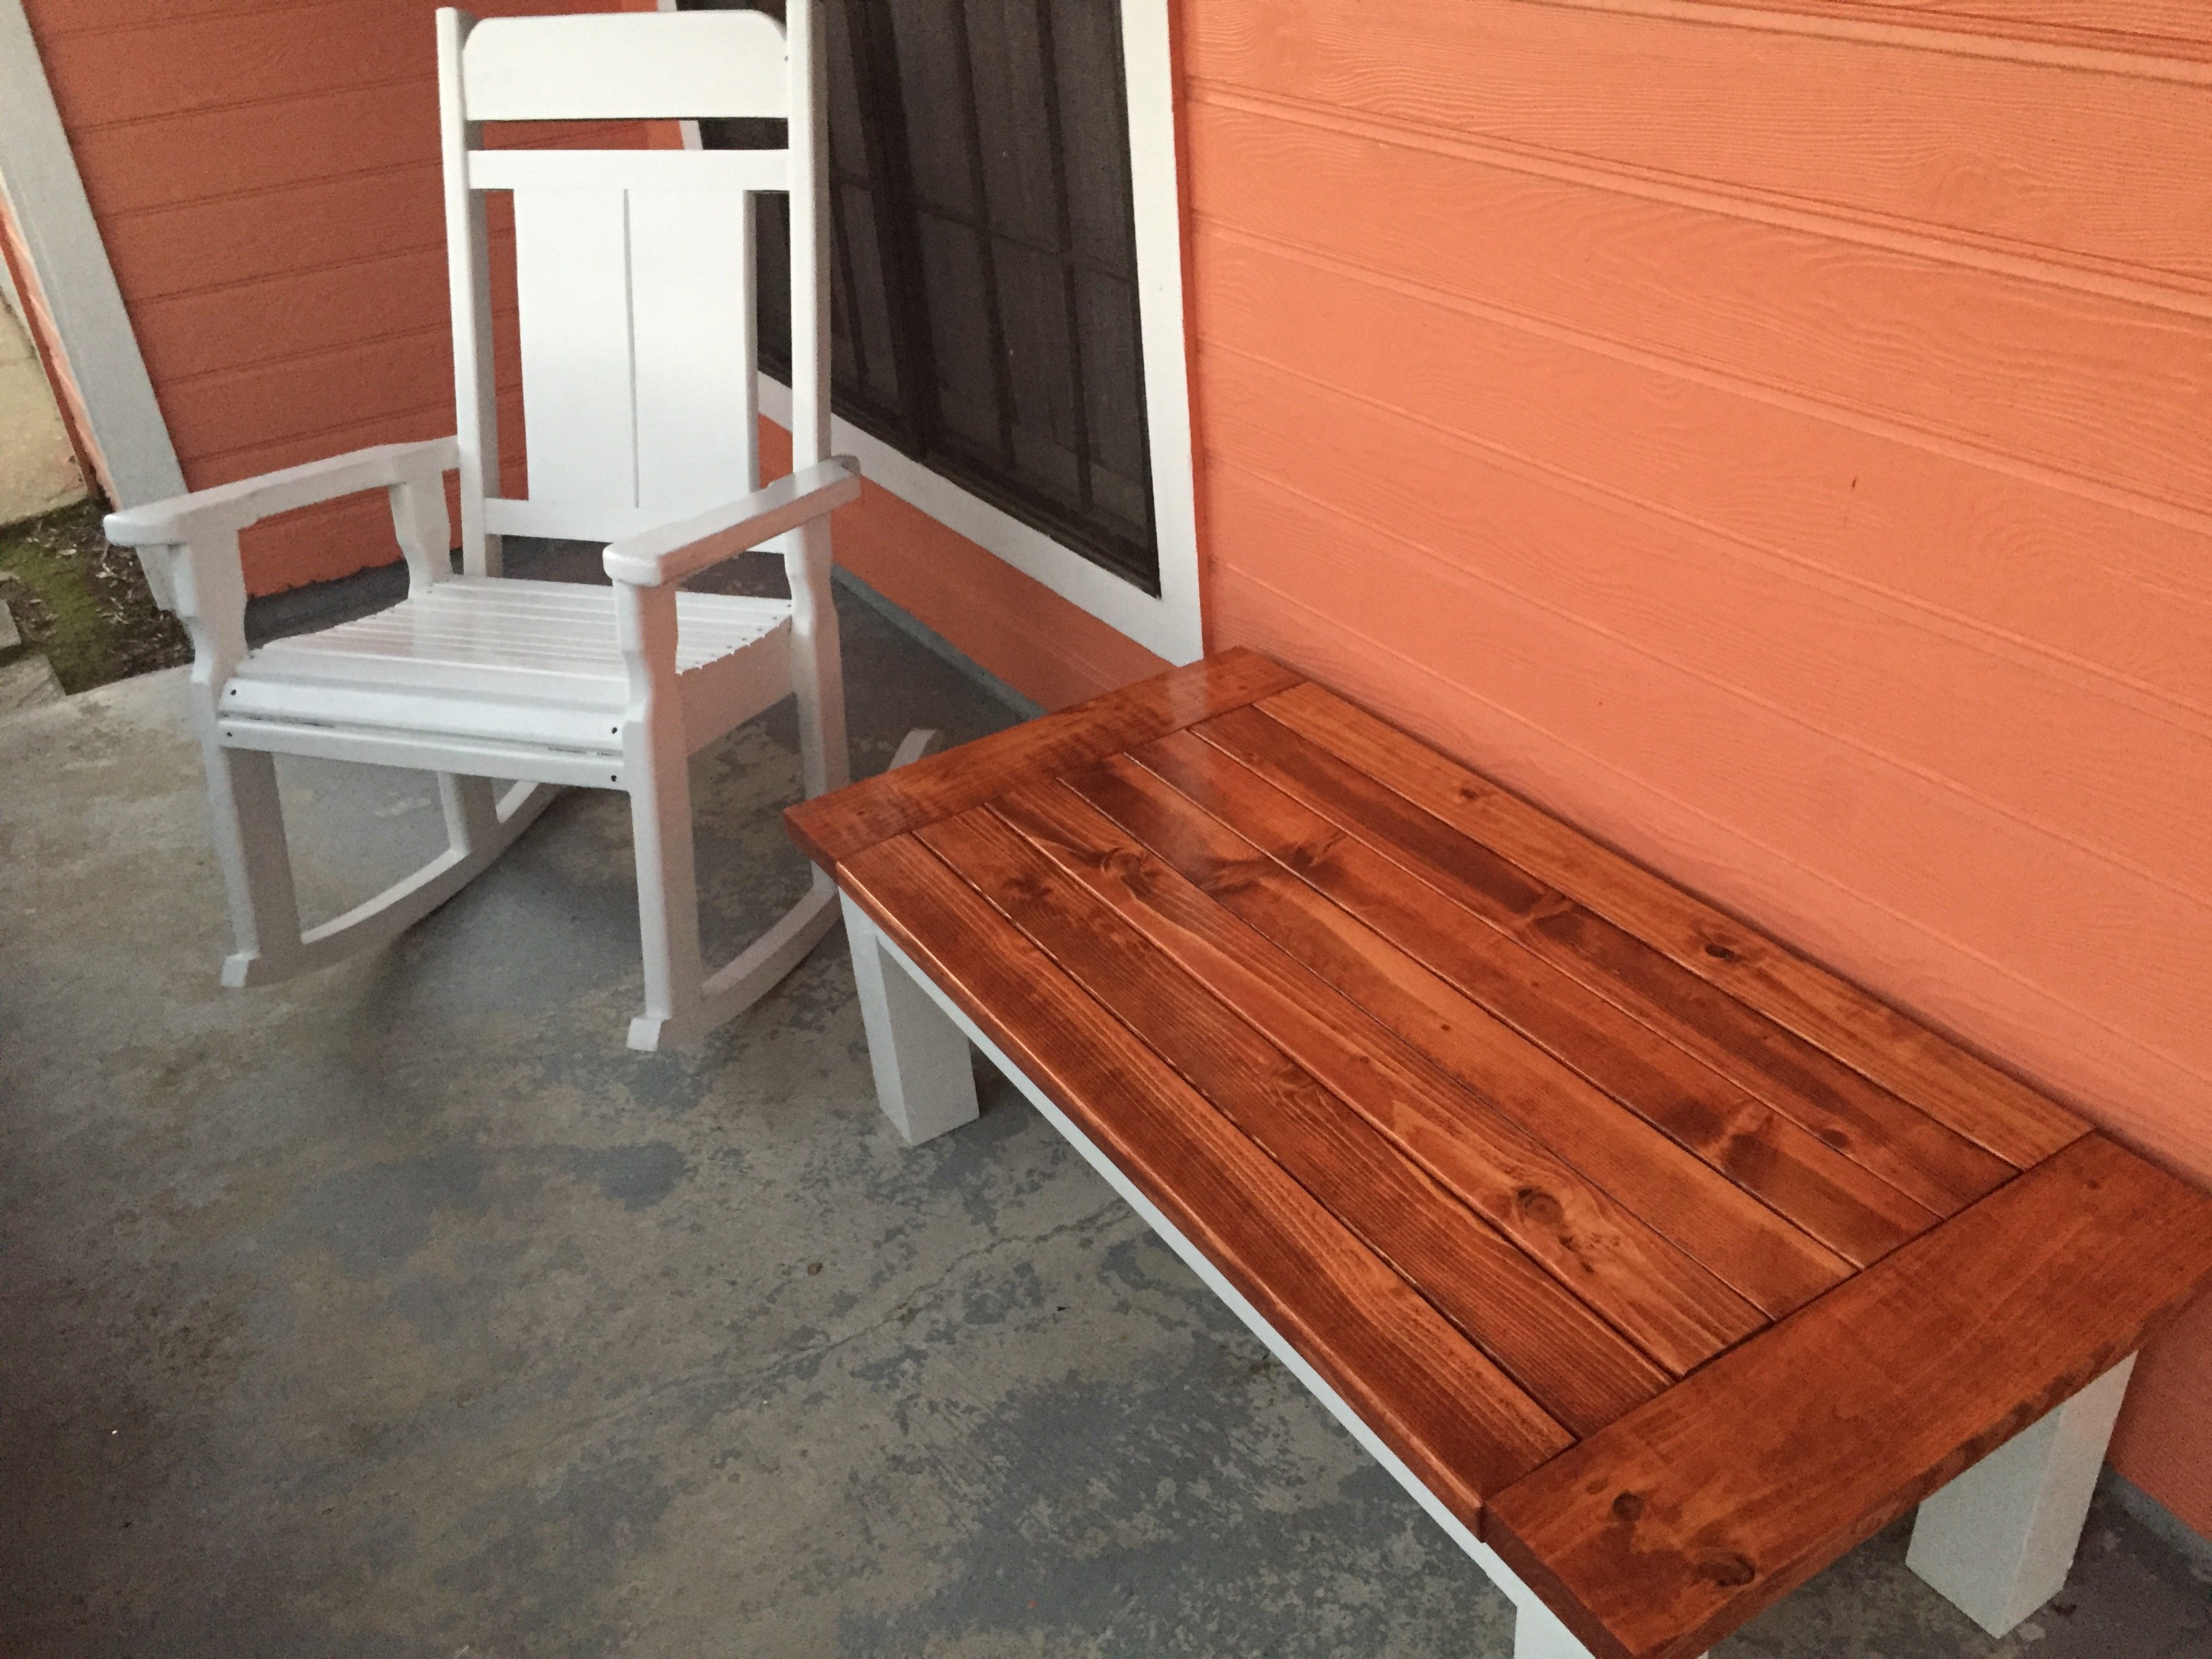
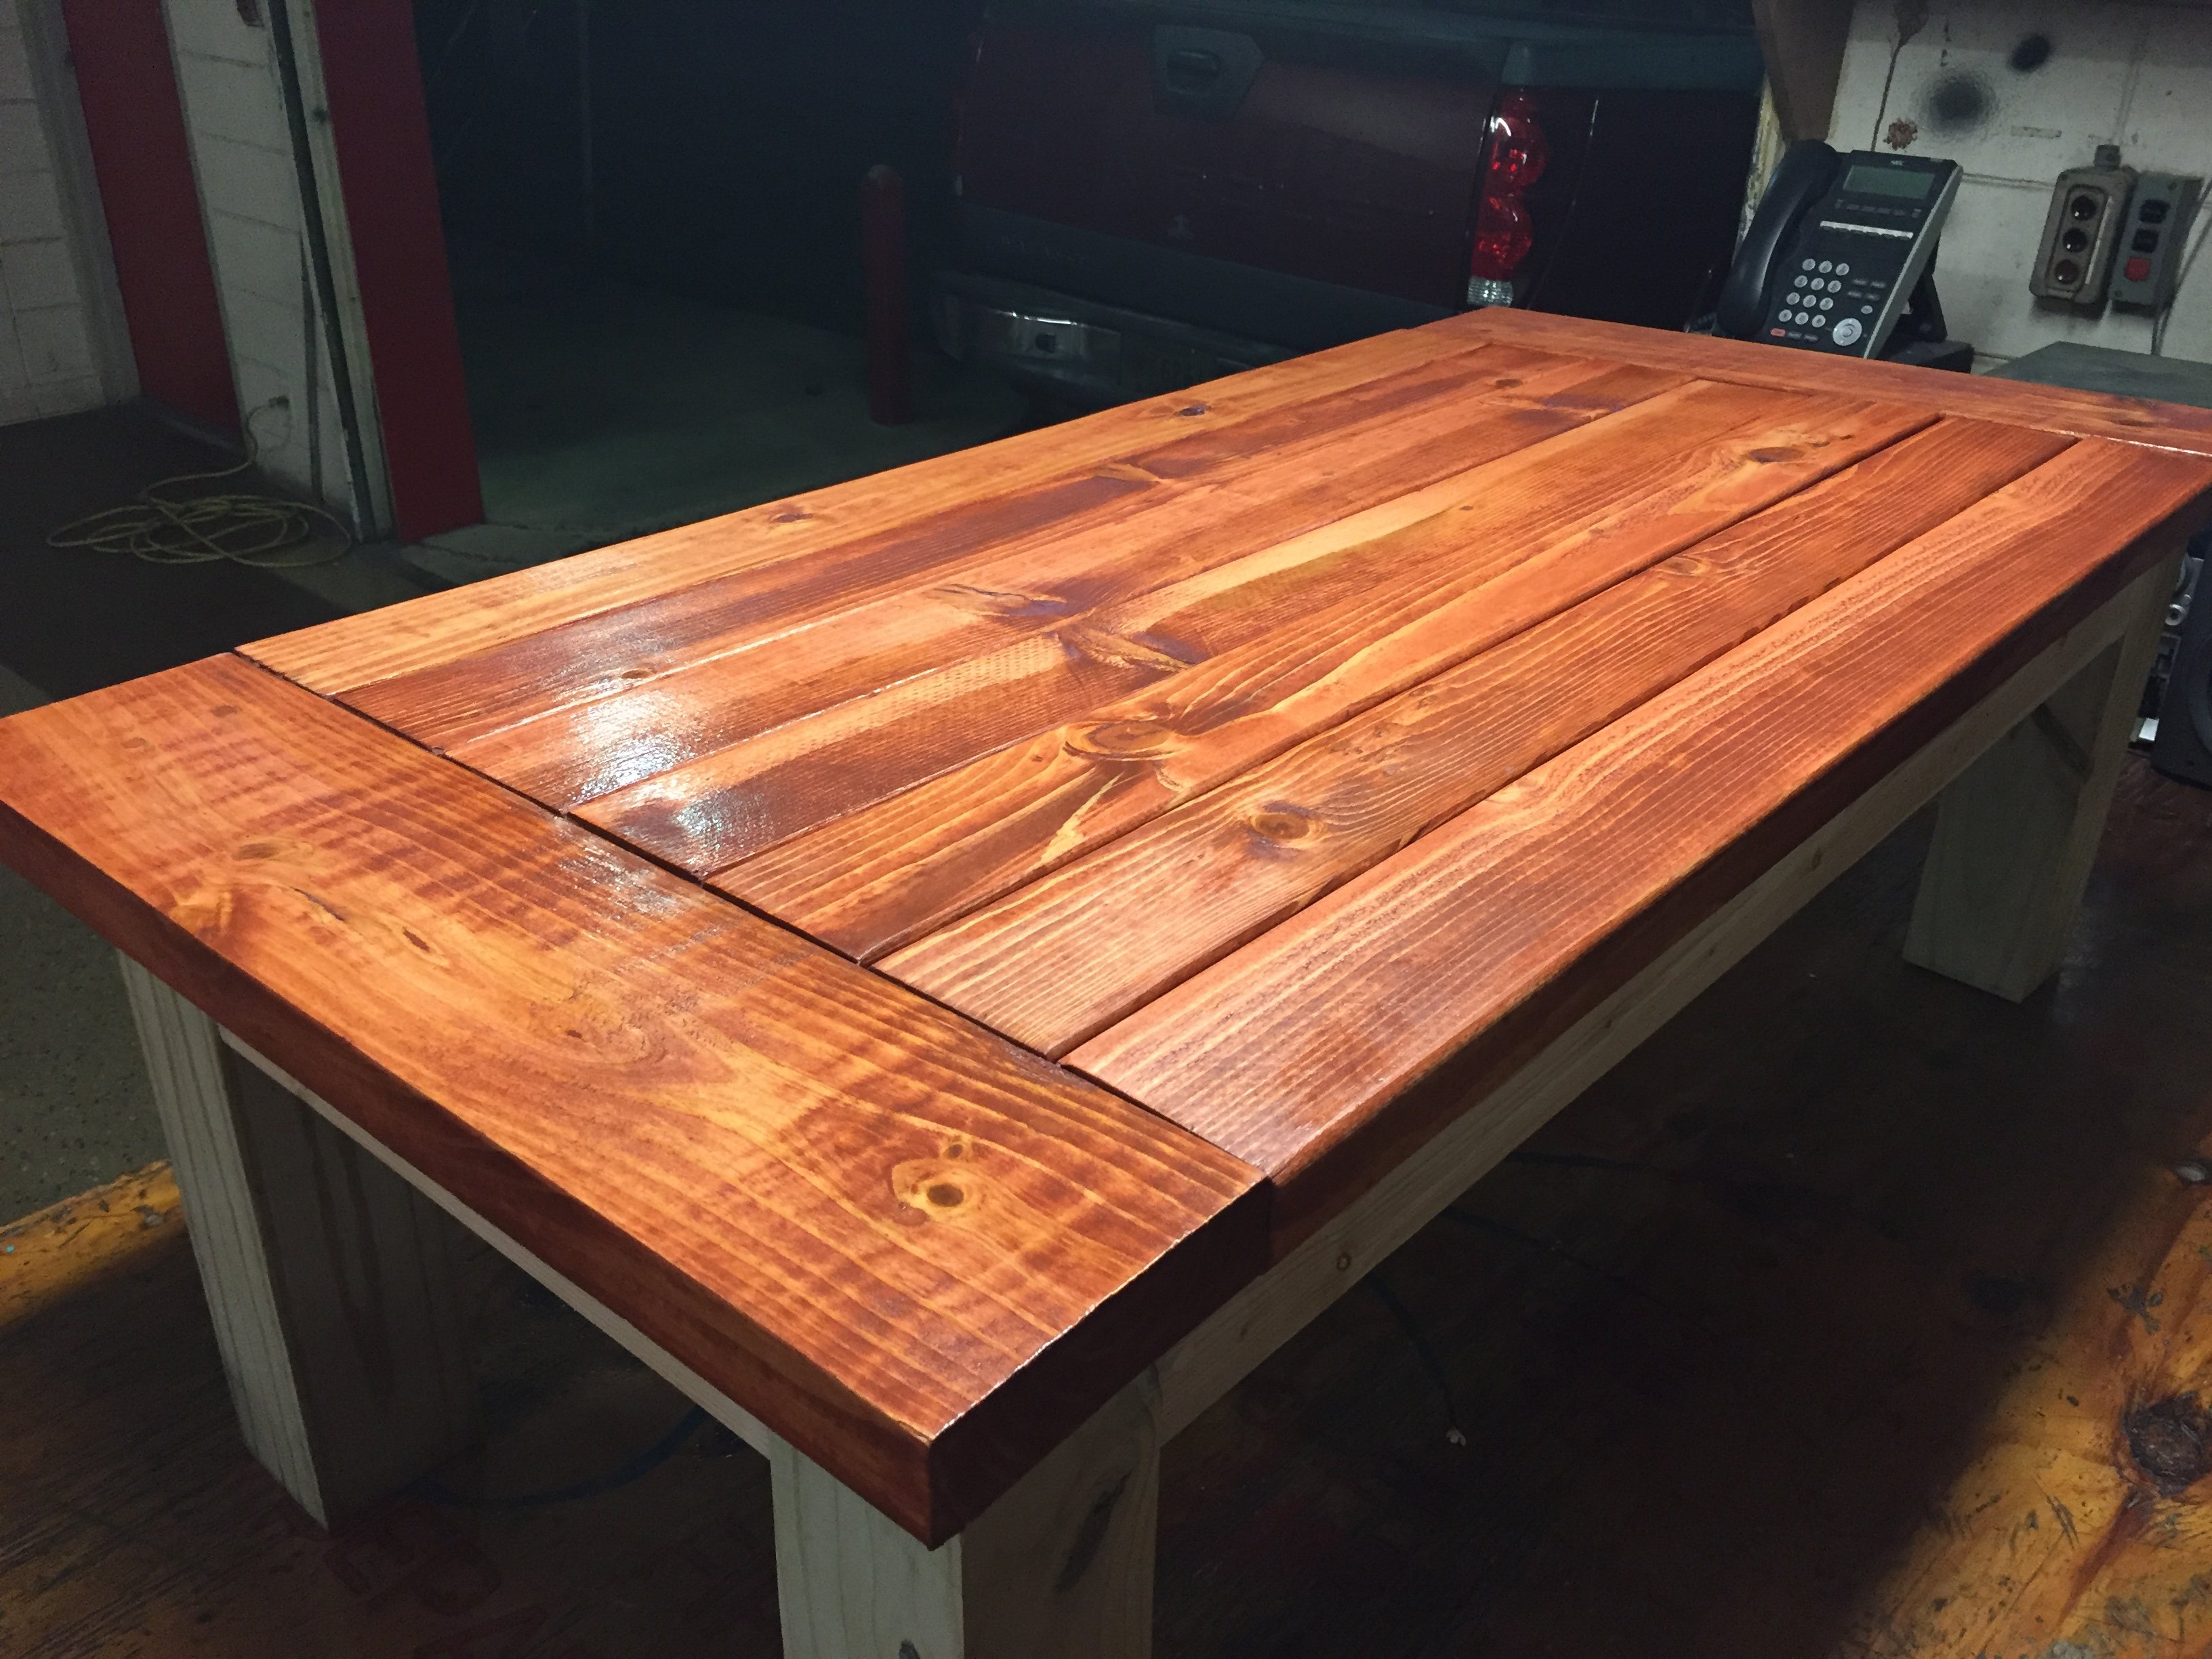
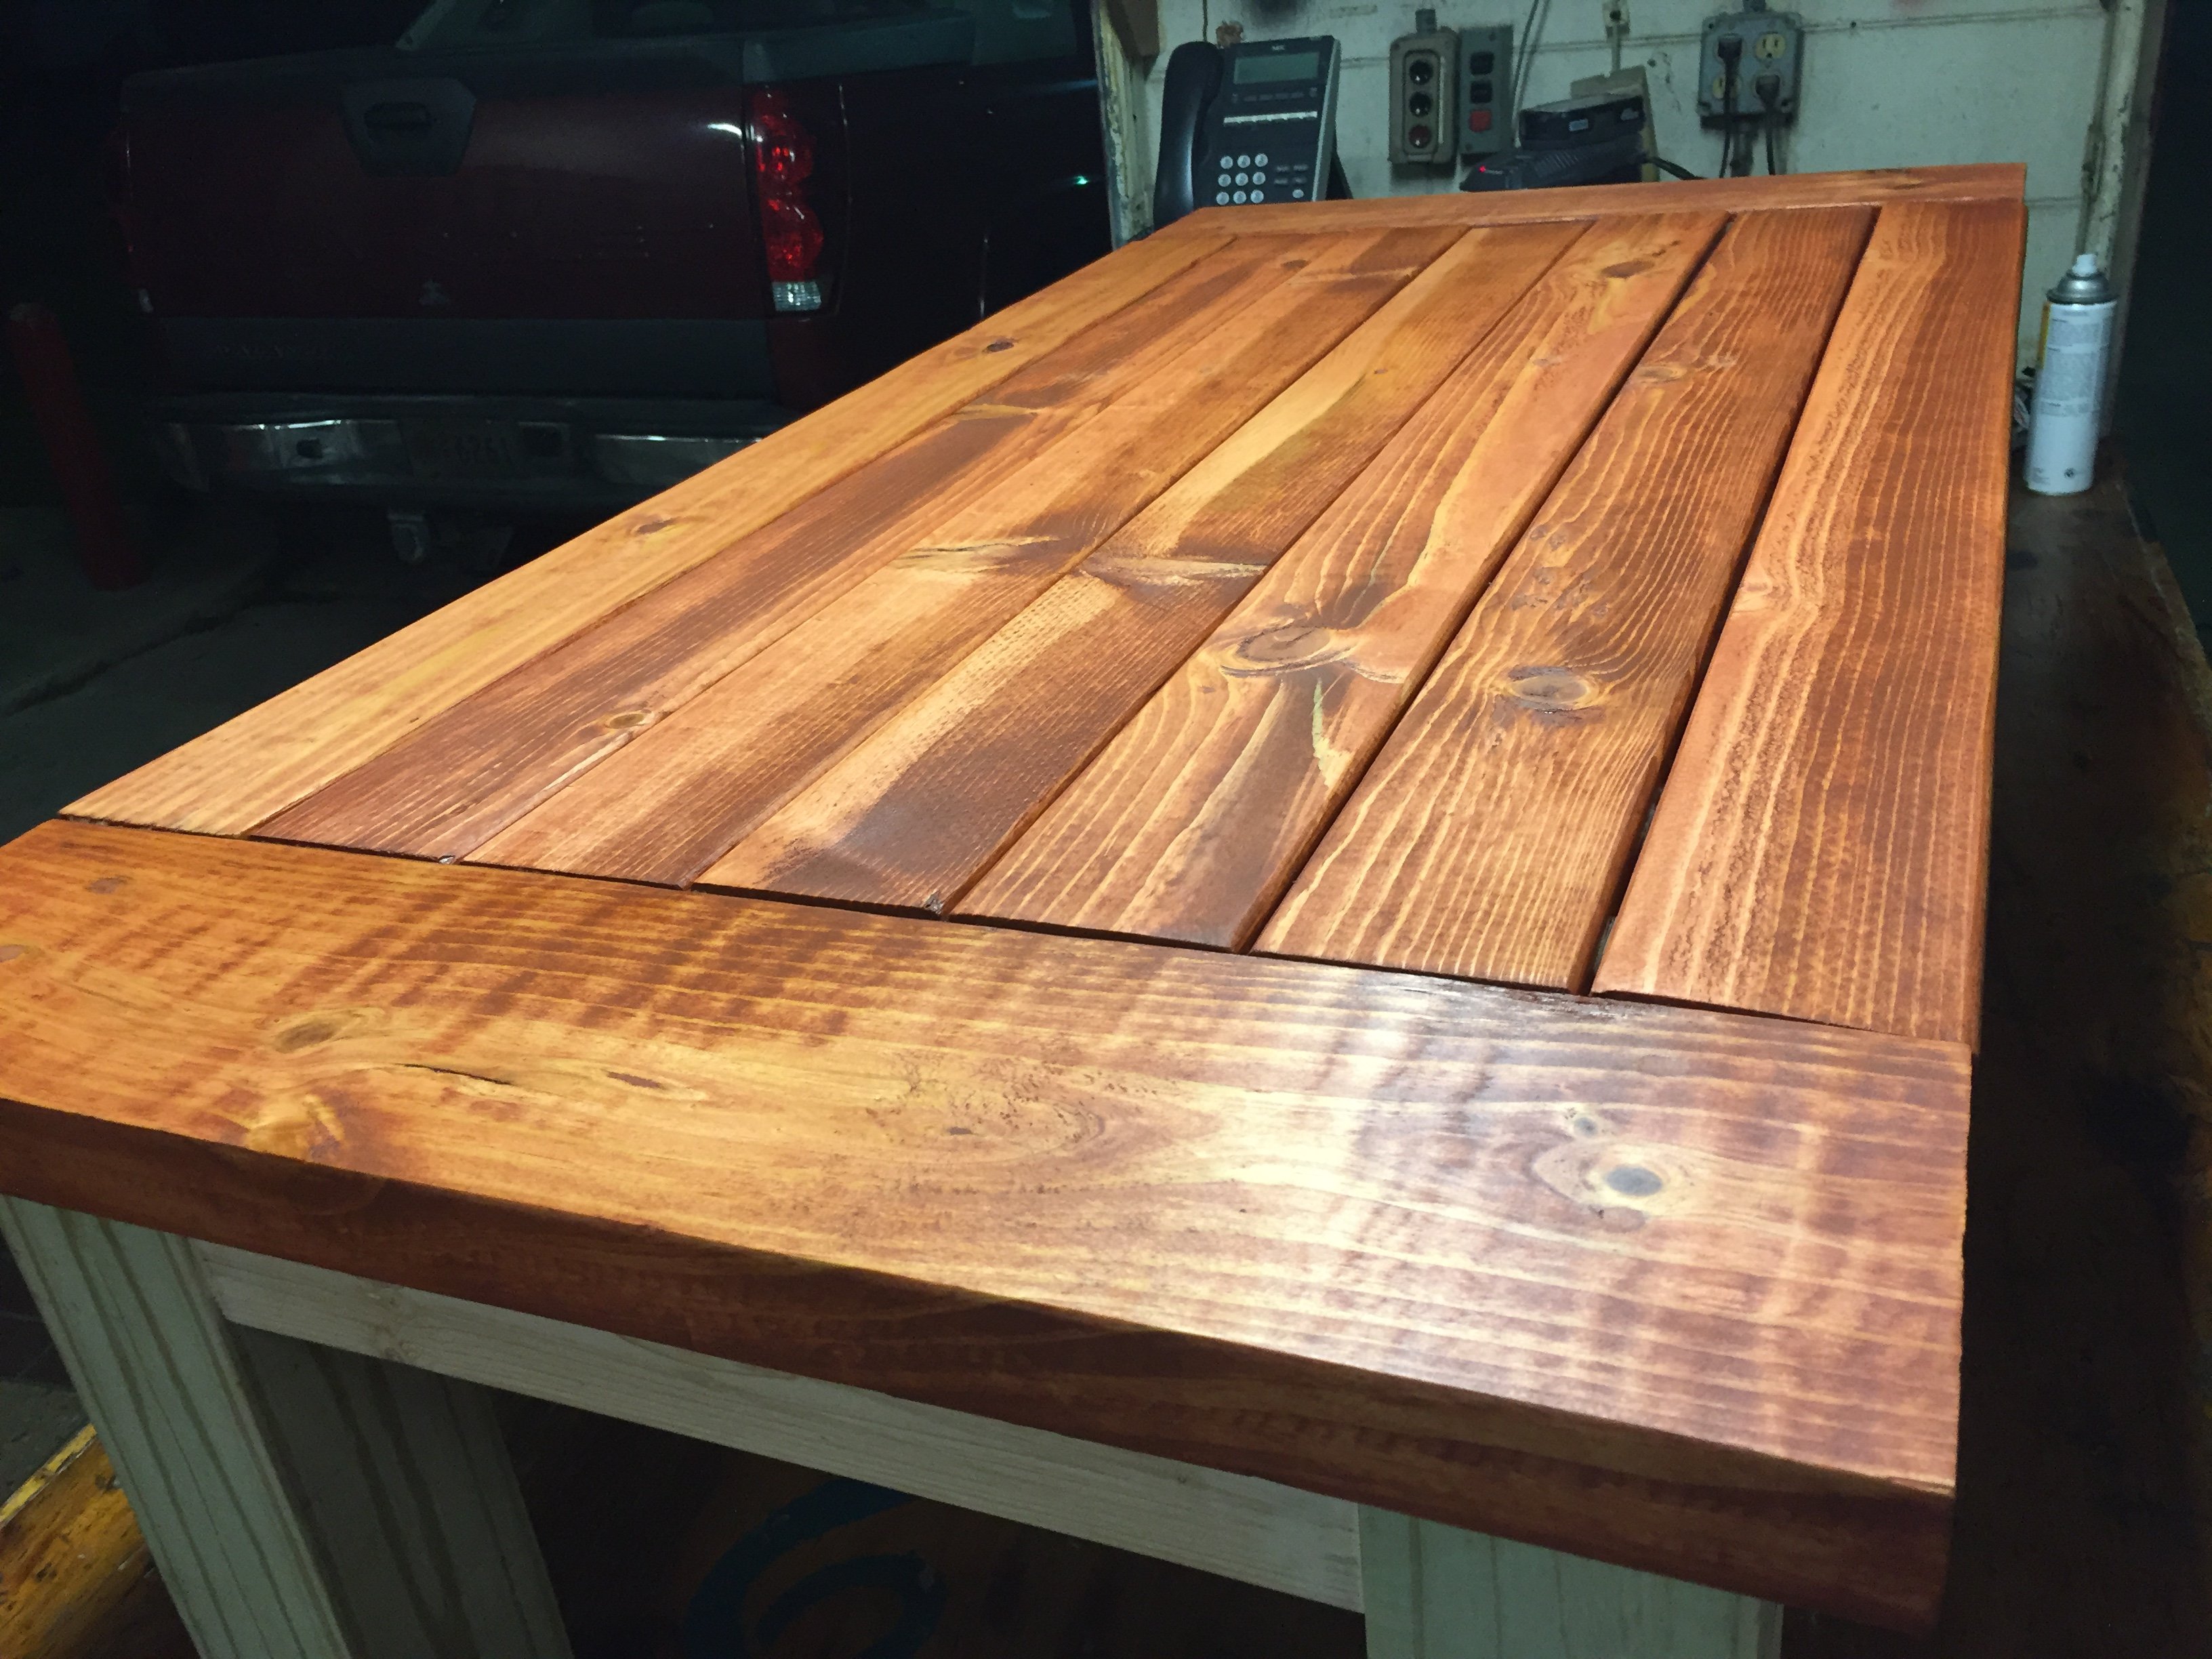
Outdoor concrete/wood coffee table w/ browning emblem

My first project using countertop concrete mix. This specific concrete calls for very low water mix ratios, and I was hesitant to over water the mix. I should have used more because it came out very pourous. Not bad over all though. I used a urethane Matte finish on the concrete and a semigloss poly for the wood base that is made from 4x4's and 2x4's. I used a special walnut color stain from minwax for the base and used a browning triler hitch cover for the emblem.


Estimated Time Investment
Weekend Project (10-20 Hours)
Finish Used
Minwax Special walnut for base color
Urethane Matte on concrete
Semigloss polyurethane for the base
Urethane Matte on concrete
Semigloss polyurethane for the base
Recommended Skill Level
Beginner
First project
First project since high school woodworking class. I was pleased with the outcome but, I had a few bumps along the way. I learned from my mistakes so the next one will be better!
Built from Plan(s)
Estimated Cost
About $30
Estimated Time Investment
Weekend Project (10-20 Hours)
Finish Used
Light Walnut, Gloss white, Poly
Recommended Skill Level
Beginner
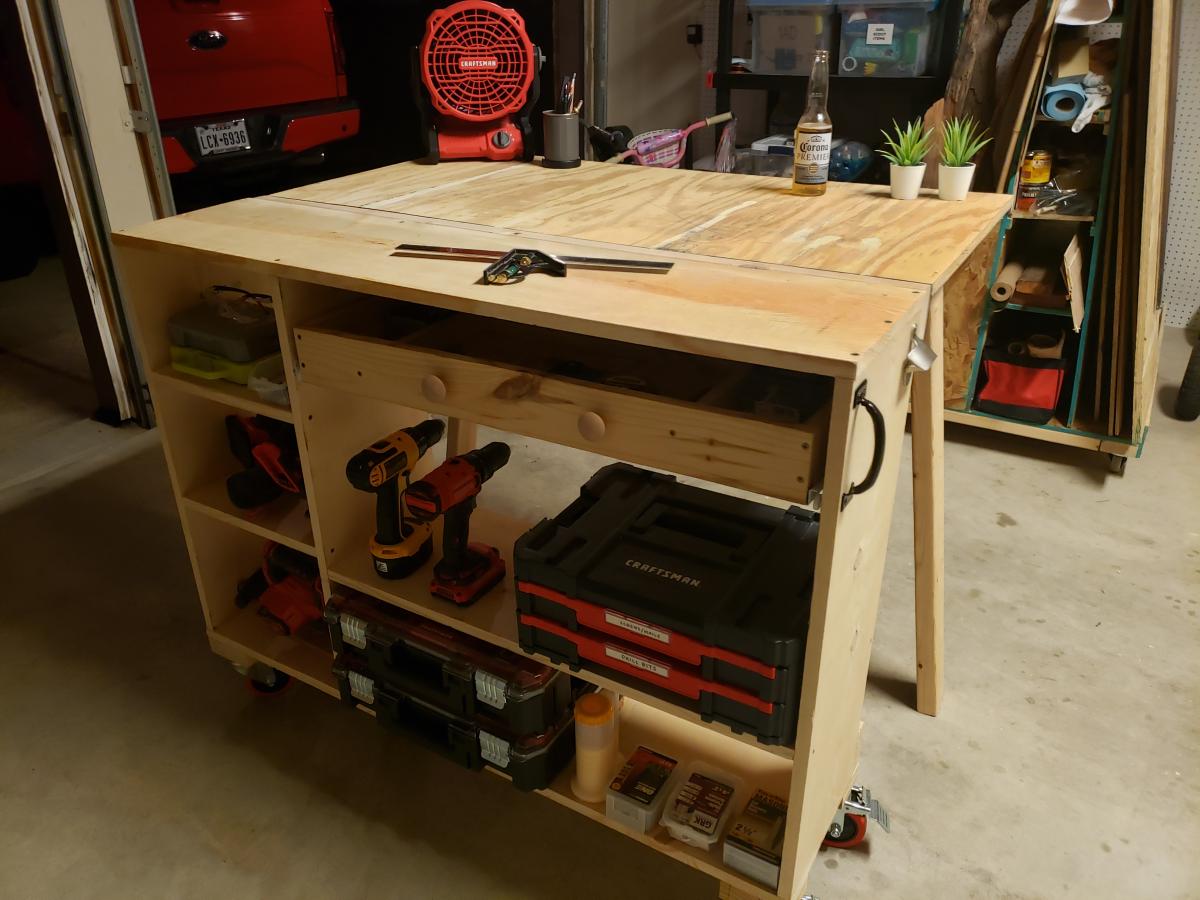
Folding Workbench
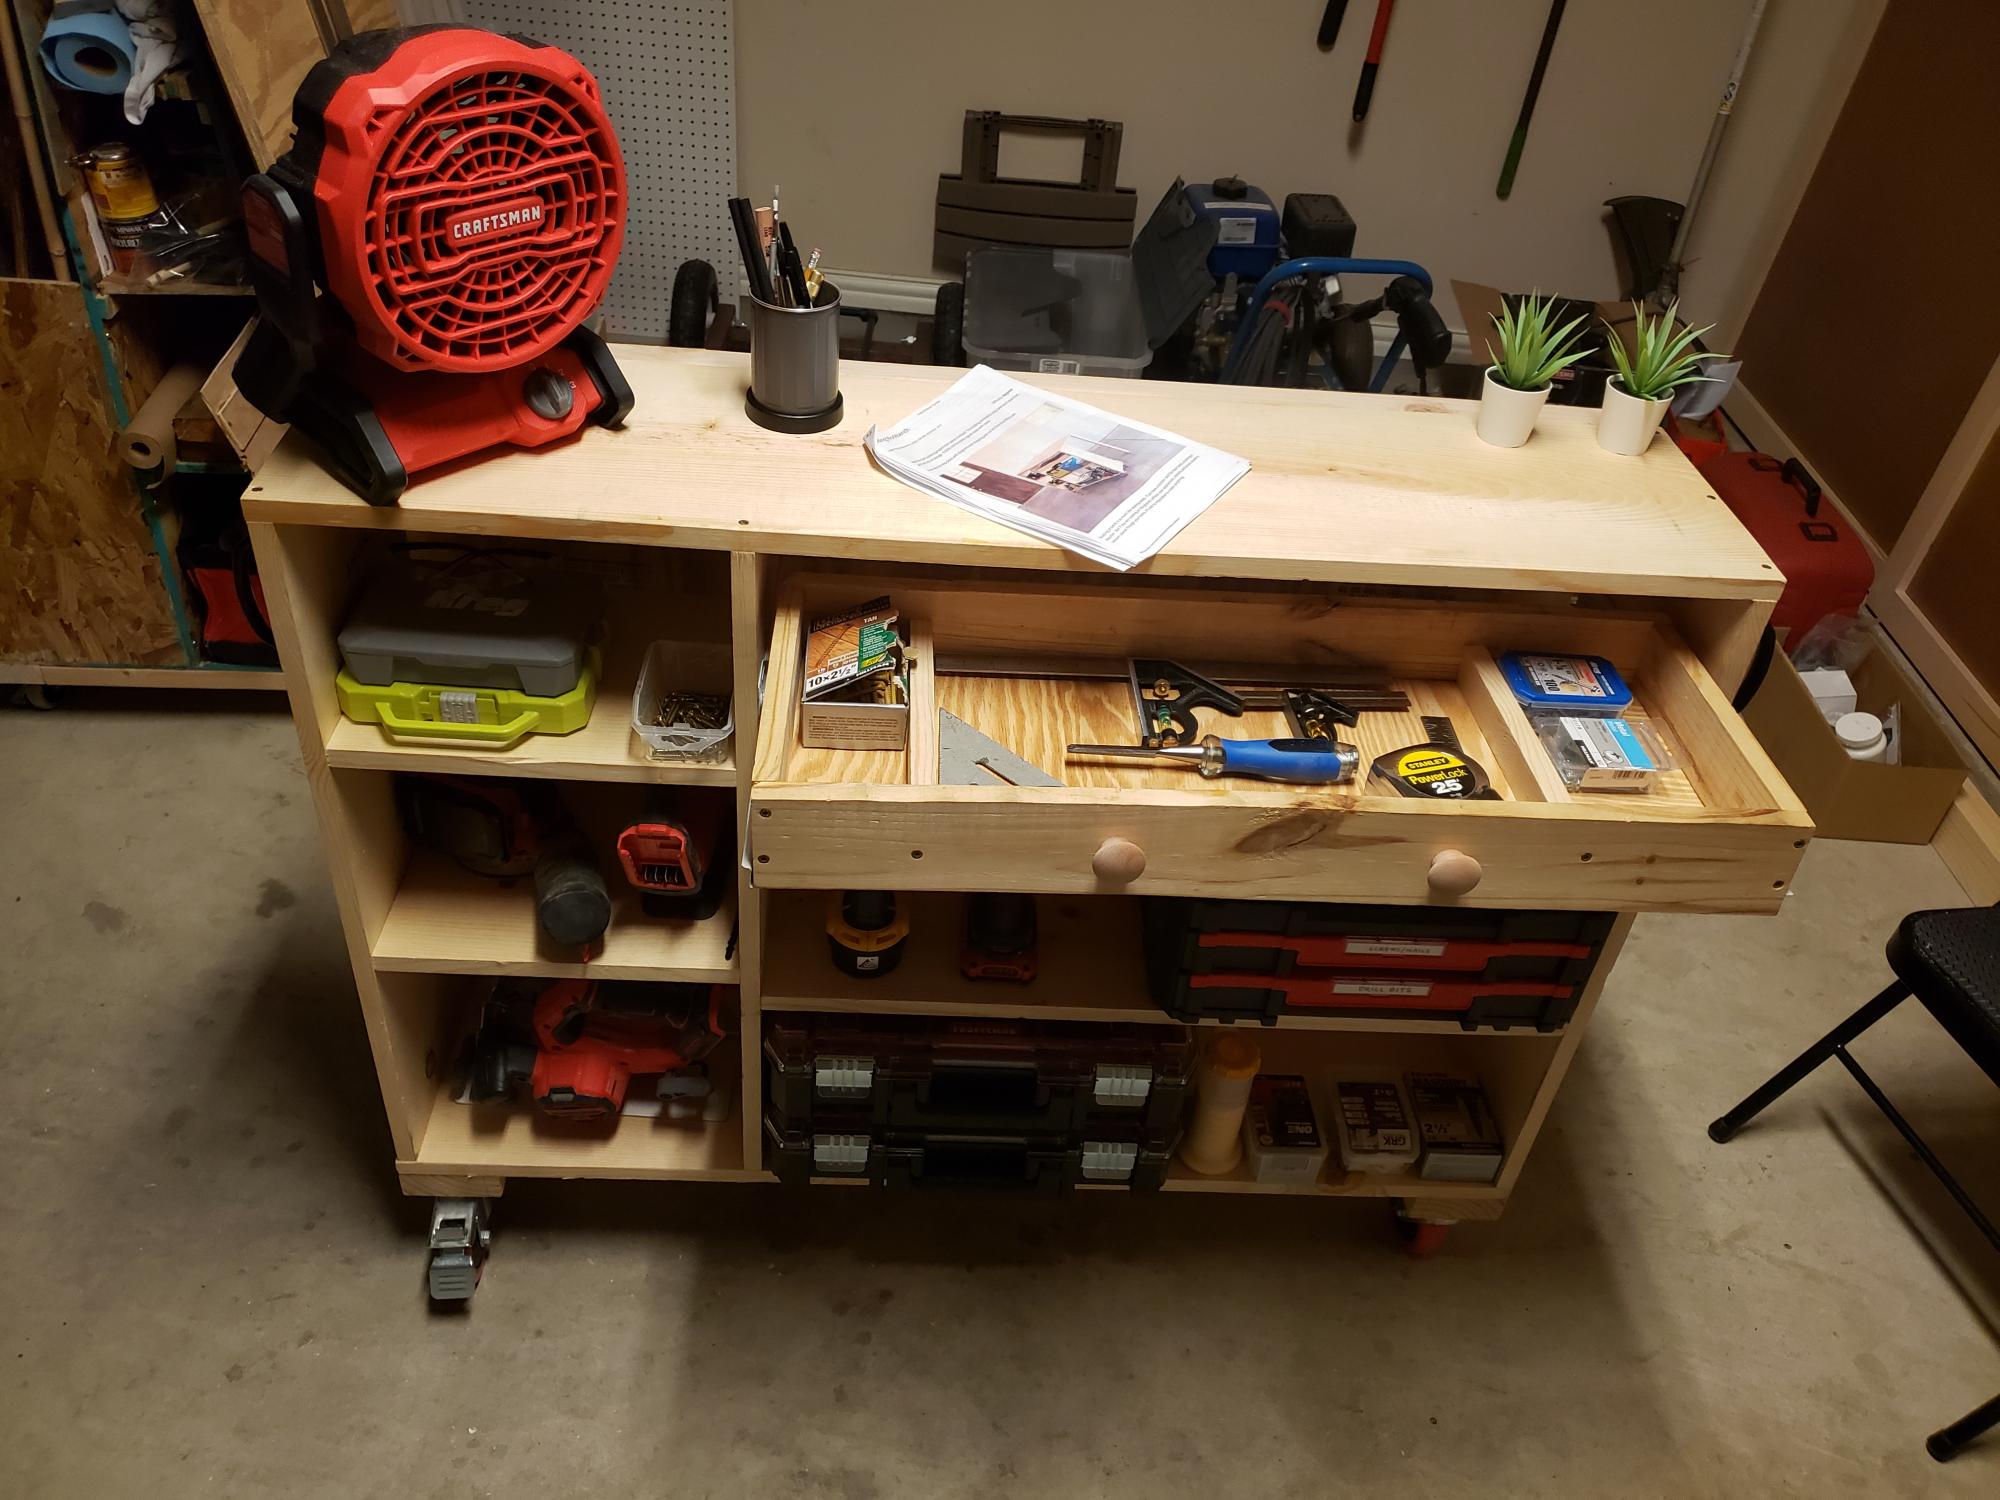
Made a folding Workbench for my small workshop.
Built from Plan(s)
Doll Bunk Beds

I was looking for something to make for my niece for Christmas that could be treated as an heirloom to hand down to future generations...thus, it had to be sturdy. My mother made the mattress, pillow, and blanket sets. I loved the way this turned out and my niece was pleasantly surprised!
Built from Plan(s)
Estimated Time Investment
An Hour or Two (0-2 Hours)
Finish Used
White paint and primer, with additional sanding to soften the sharp edges and create an aged effect.
Recommended Skill Level
Starter Project
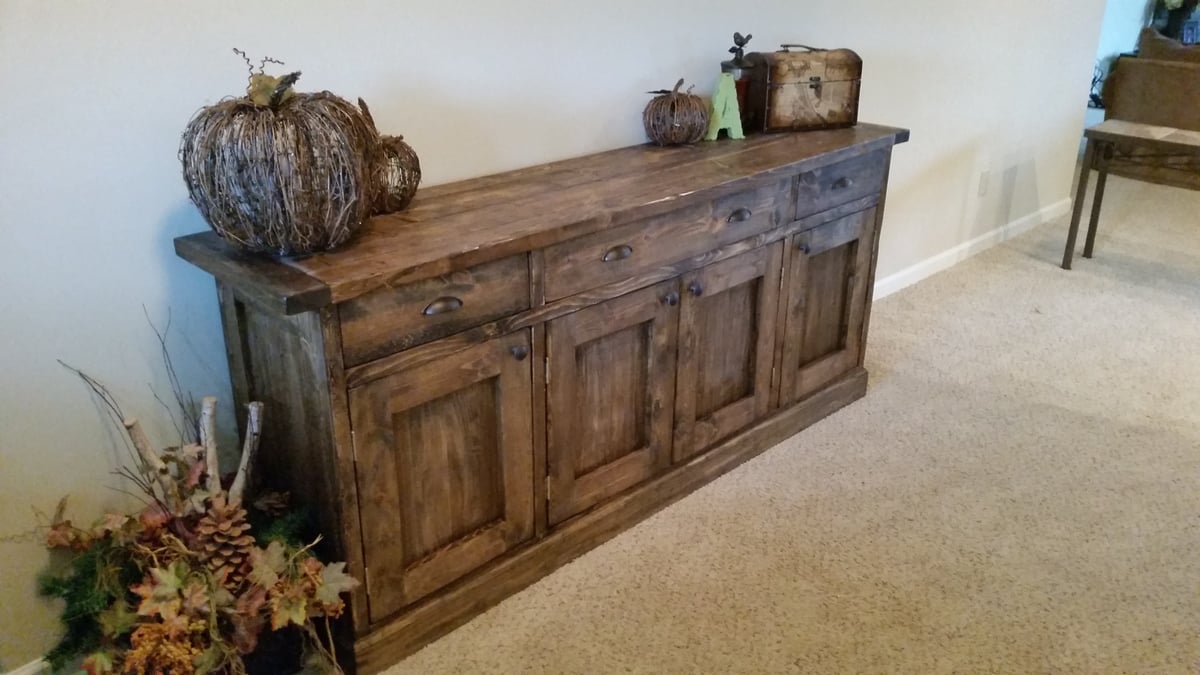
Planked Wood Sideboard - 2nd Ana White Project
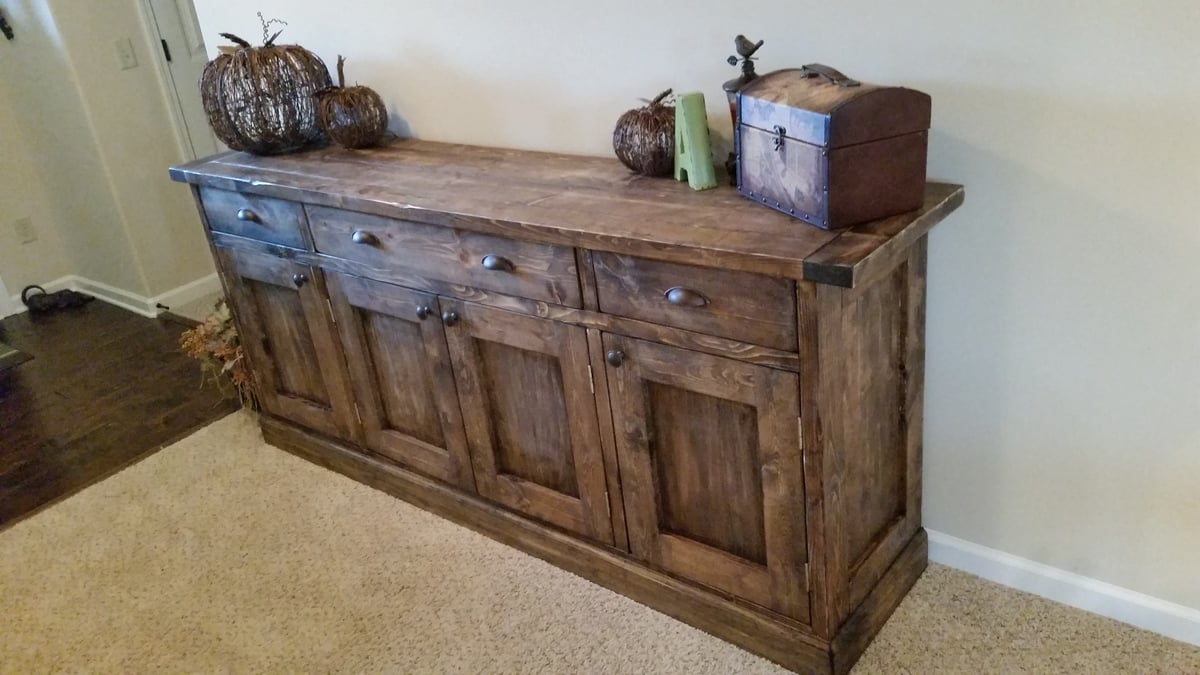
My wife and I looked all over town for just the right piece of furniture for our entry at our new home. After looking and looking I decided I would build this plan. Turned out amazing and all our friends want help building their own.
Built from Plan(s)
Estimated Cost
$350
Estimated Time Investment
Weekend Project (10-20 Hours)
Finish Used
Dark walnut minwax and polycrylic finish
Recommended Skill Level
Intermediate
Comments

Fri, 02/06/2015 - 03:27
Nice Finish!
You did a great job on this project. I love the stain and finish on this piece. Thanks for sharing!
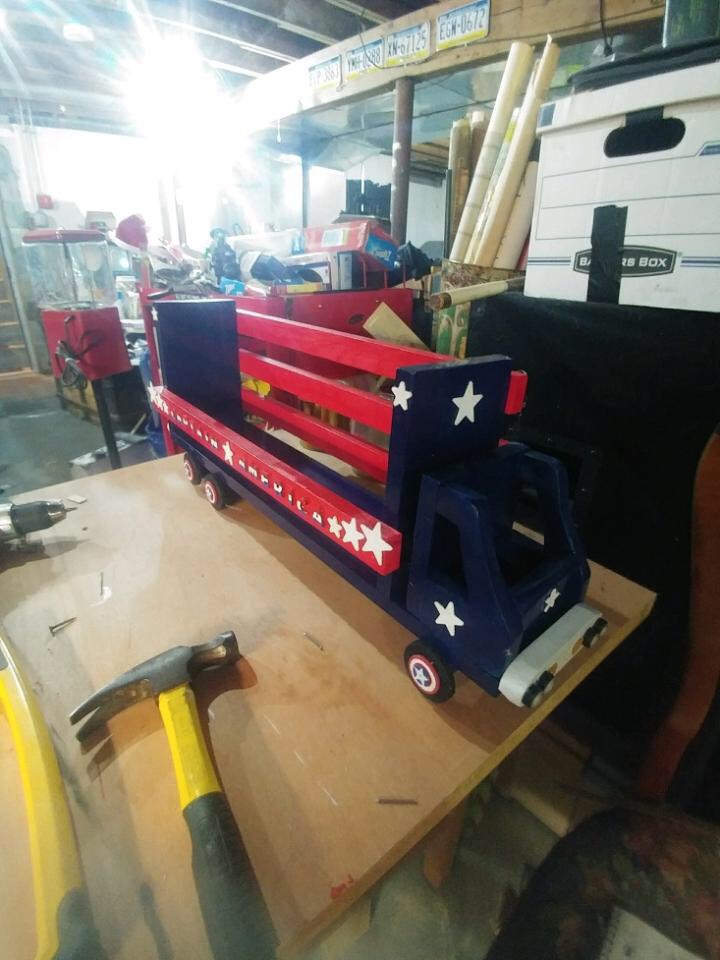
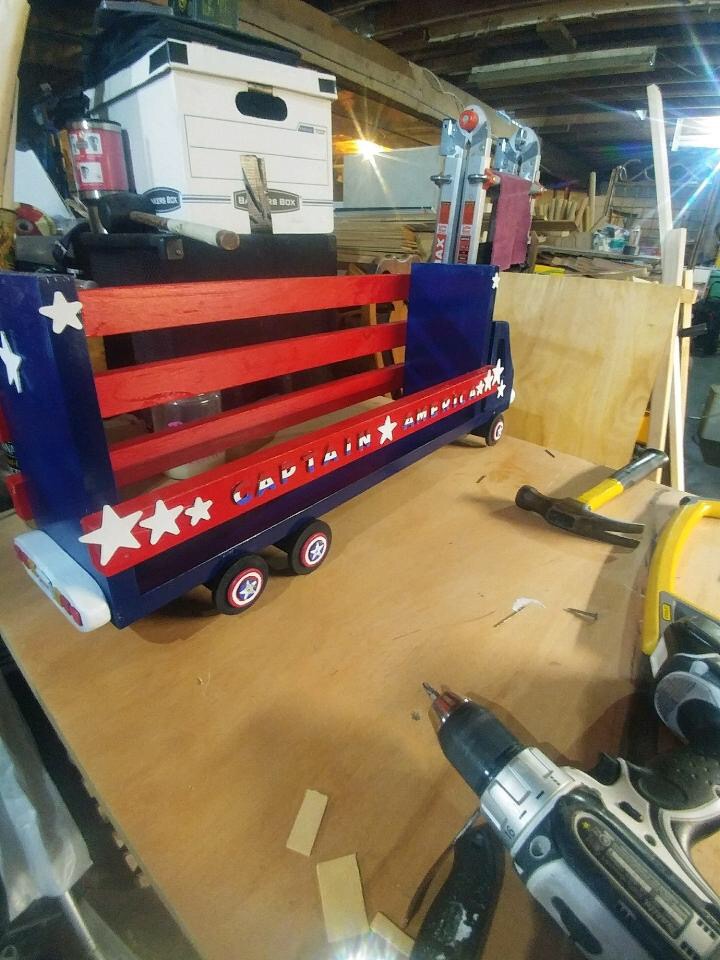
Captain America for Grandson #2
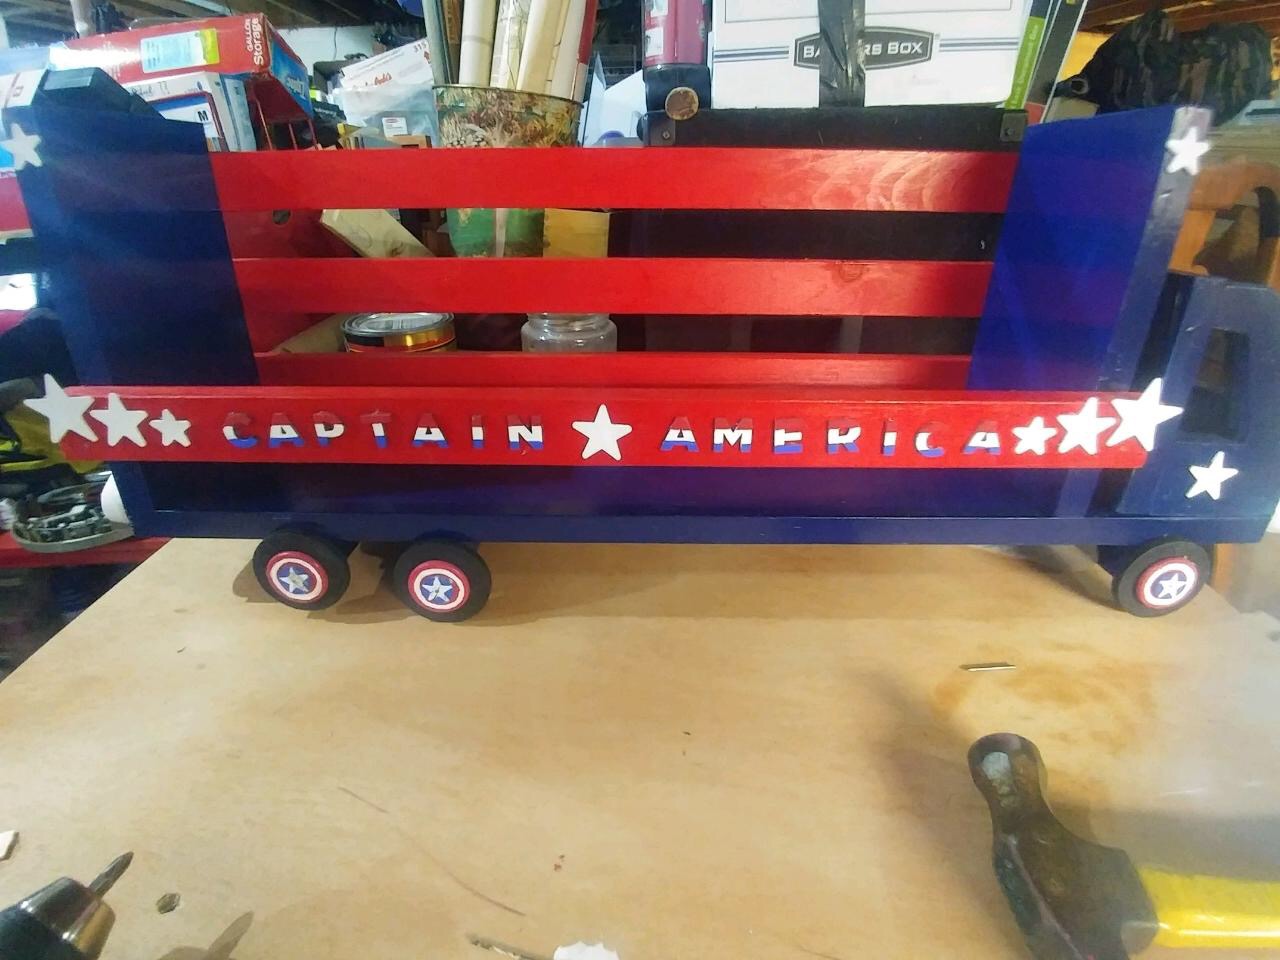
A fun project to make ending with a functional product to boot! I went all out making sure that each truck/shelf would coordinate with each grandson's theme/decor in their bedrooms. Chase, who will turn one next month, has a super heroes/comics theme for his room. Therefore, I selected Captain America as the star of the big rig shelf. Red, white & blue paints, some wooden shapes and some creativity and Captain America was ready for Mr. Smiles.

Built from Plan(s)
Estimated Cost
$75 ~ supplies on Ana's suggested list plus the extras I purchased to create my 'star'
Estimated Time Investment
Weekend Project (10-20 Hours)
Finish Used
Rustoleum apple red and navy blue and crafter's choice snowfall (white)
Recommended Skill Level
Beginner
Vintage x back step stool

Super easy step stool to put together. We made it from reclaimed white oak from side table made in the 50s by a family member. The stool is for a grandchild that is due in December for all of her adventures in mischief.
Estimated Cost
Nails and glue
Estimated Time Investment
Afternoon Project (3-6 Hours)
Finish Used
A childs step stool
Recommended Skill Level
Beginner
Lego Table Plan from Ana's Book
Built this table using plans from Anna's amazing book. It was a much easier build than I anticipated. The actual finishing took longer than the construction. I did a slight modification by attaching beadboard to the top of the table. I had some leftover from a headboard my daughter and I made so I put it to use! Anyway, LOVE the table! Thanks, Ana! I would never have ever attempted building furniture without your virtual encouragement! Blessings!

Built from Plan(s)
Estimated Cost
$75
Estimated Time Investment
Day Project (6-9 Hours)
Finish Used
Rustoleum Espresso Satin spray paint. I sanded, sprayed, sanded, and then a second coat of paint. Waited a full day and then applied Minwax Fast Drying Poly. Put on 2 coats with a light sanding in between.
Recommended Skill Level
Beginner
Extended Barn Beam Ledges
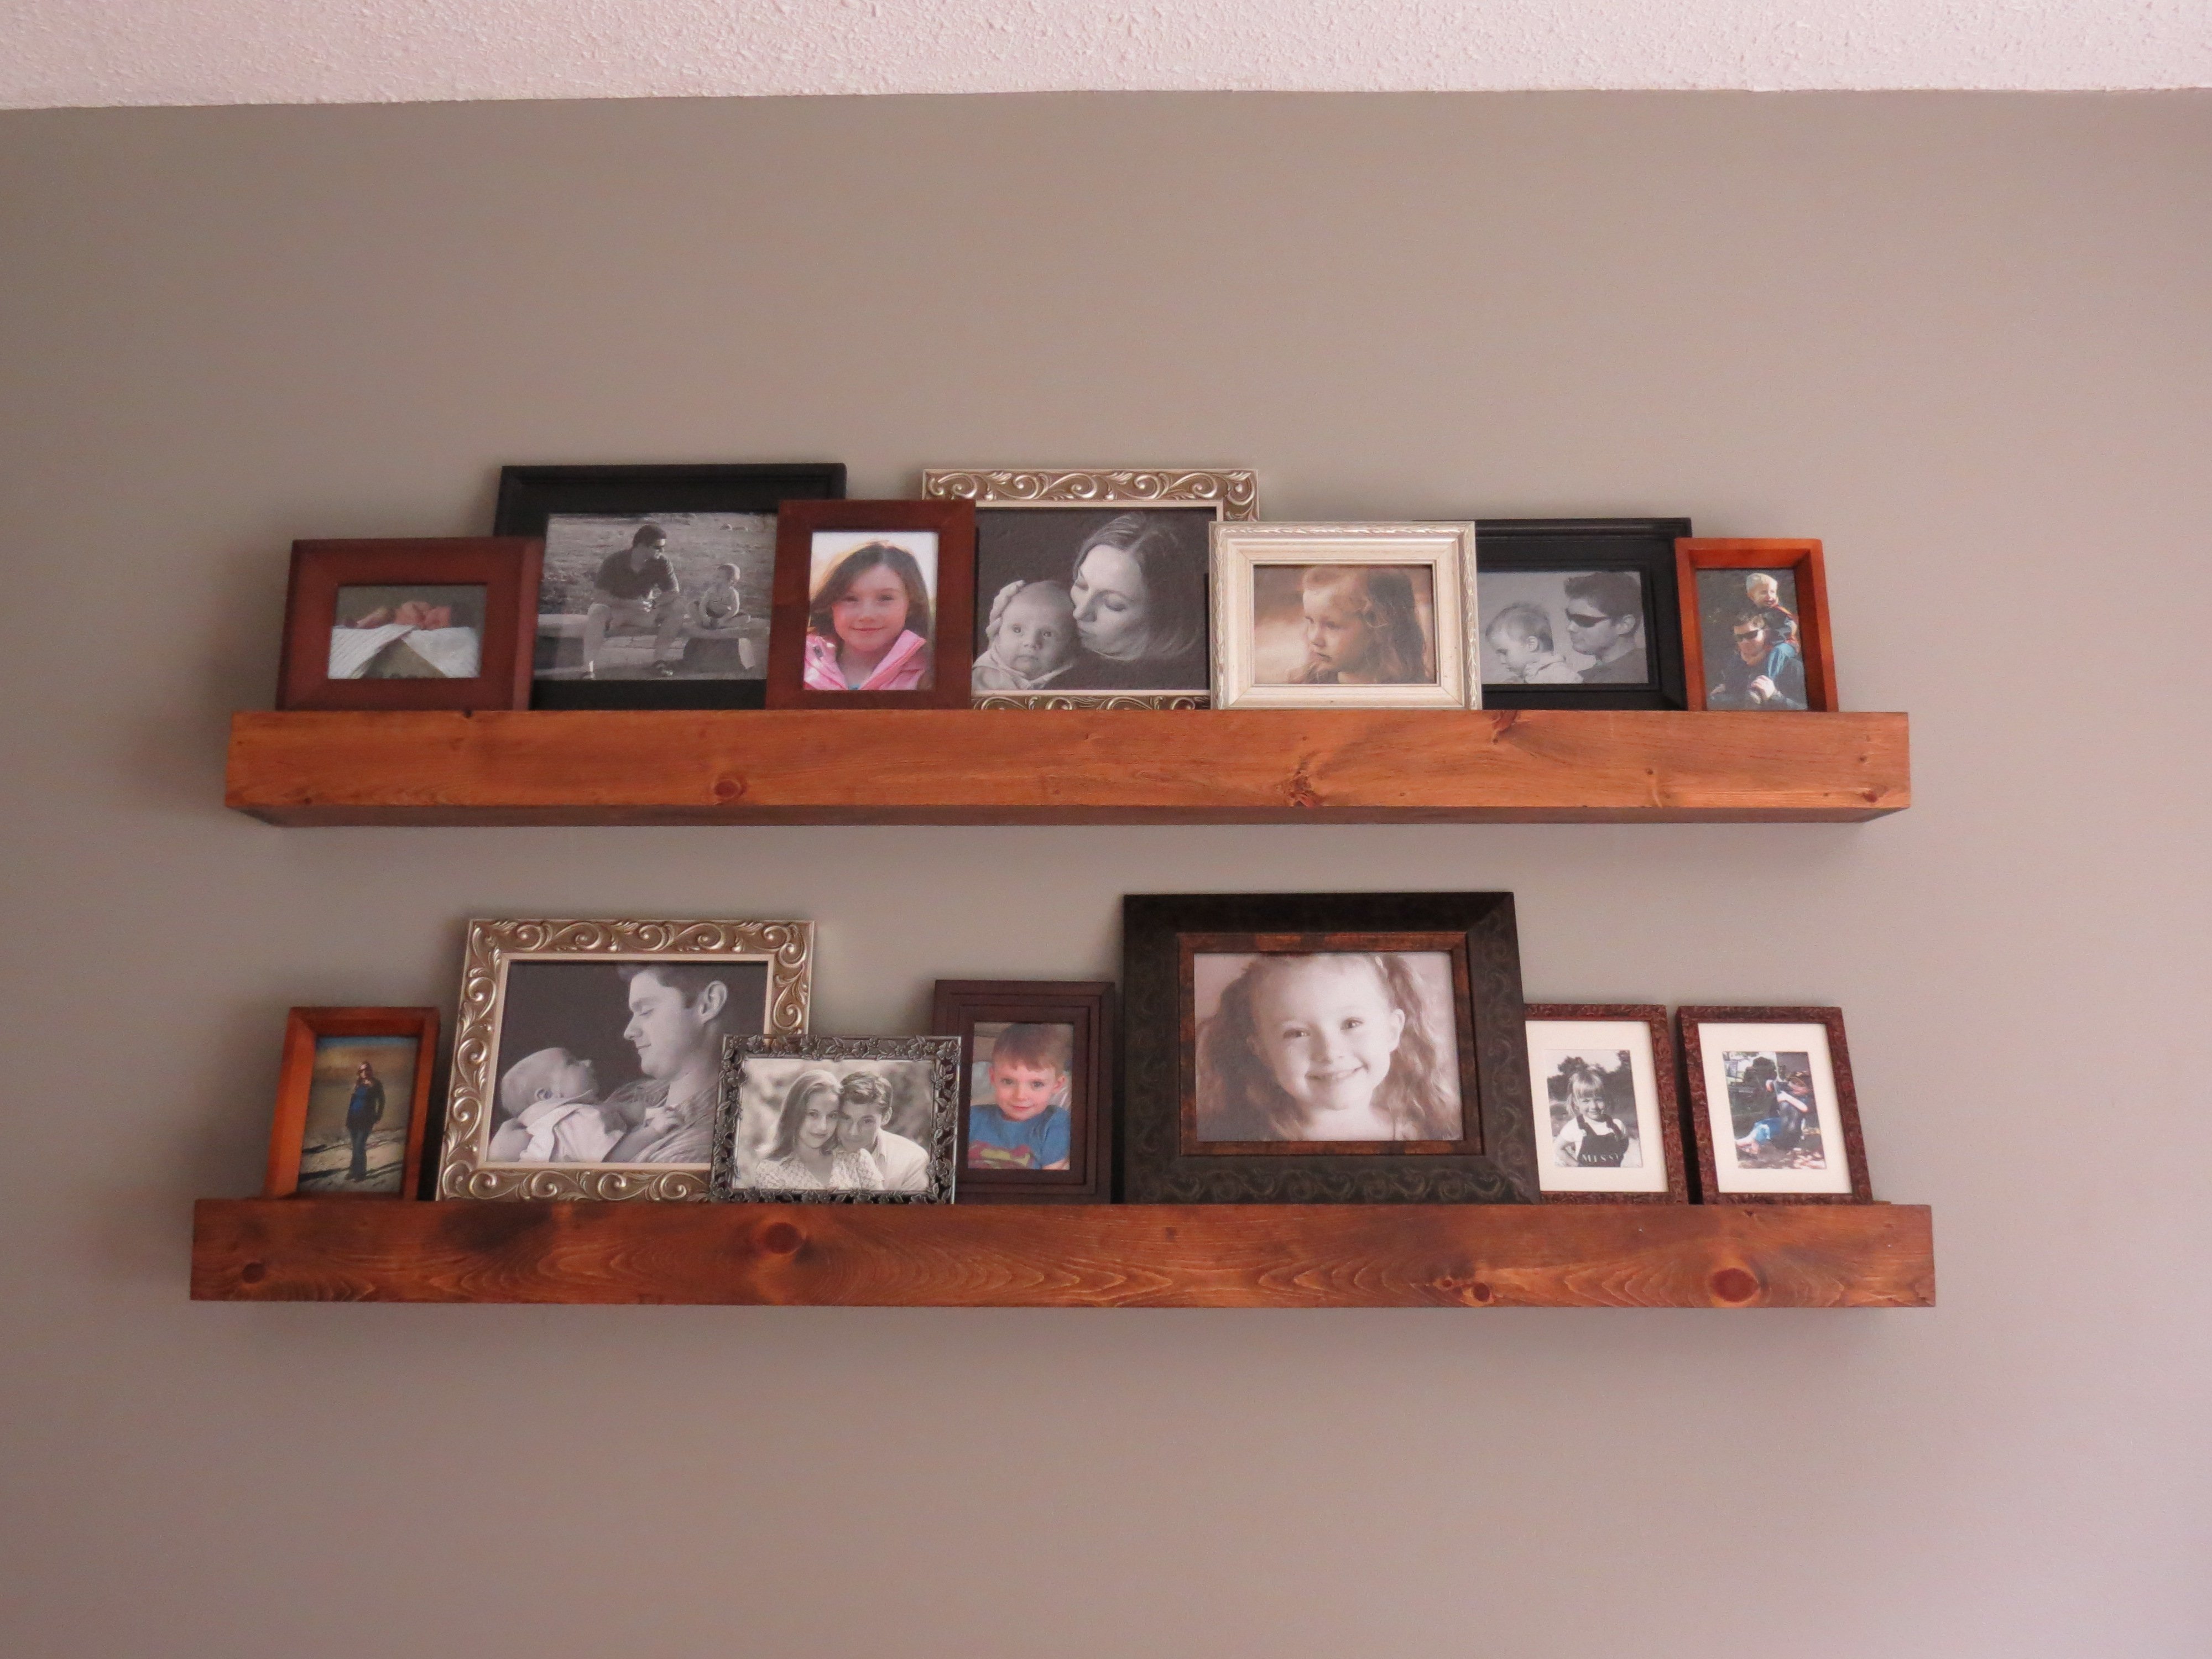
Built these some time ago, but I forgot to post my brag til now! I took Ana's plans for the Barn Beam Ledges and simply modified them by making them into 5-foot lengths. They were very easily and quickly built. The longest part was waiting for them to dry! There are three keyholes on the back of each, aligned with the studs, so they sit nice and flush against the wall and no worries of them falling down! They hold lots of picture frames, which I love. No individual nail holes all over my wall! lol Very happy with the end result. :)
Built from Plan(s)
Estimated Cost
unsure
Estimated Time Investment
Afternoon Project (3-6 Hours)
Finish Used
I mixed different walnut stains we had on hand.
Recommended Skill Level
Beginner
Desk made from Ana White plans

Biggest tip for everyone is to make sure you are square at all times! I would also recomend springing for the better drawer slides. I used the cheap white ones and regret it. Overall, this was fun to make and looks great in my office! Thank you for the plans

Built from Plan(s)
Estimated Cost
$300
Estimated Time Investment
Weekend Project (10-20 Hours)
Finish Used
Minwax Jacobean Stain, 2-3 coats. Minwax semi gloss polyurethane, 2 coats
Recommended Skill Level
Intermediate
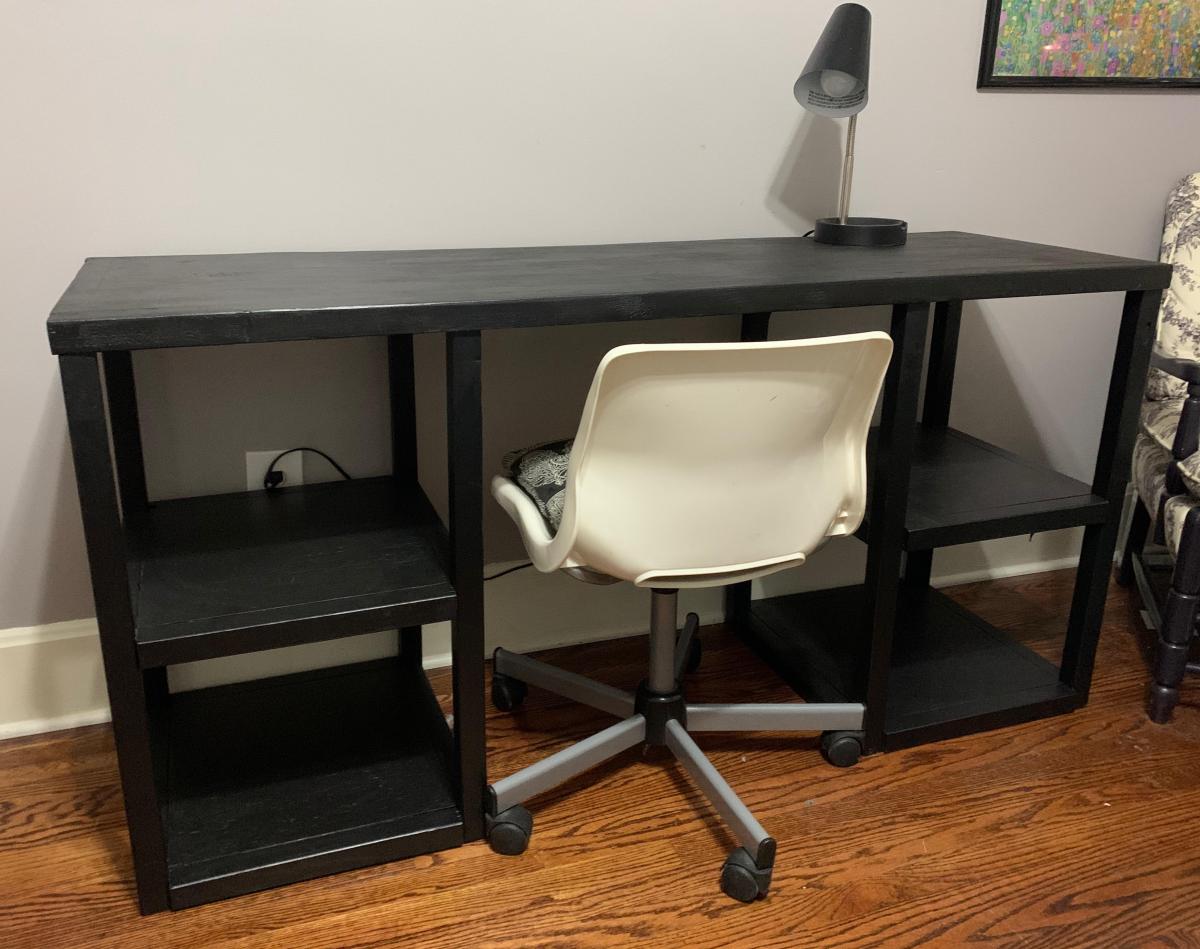
Parson Tower Desk for my daughter
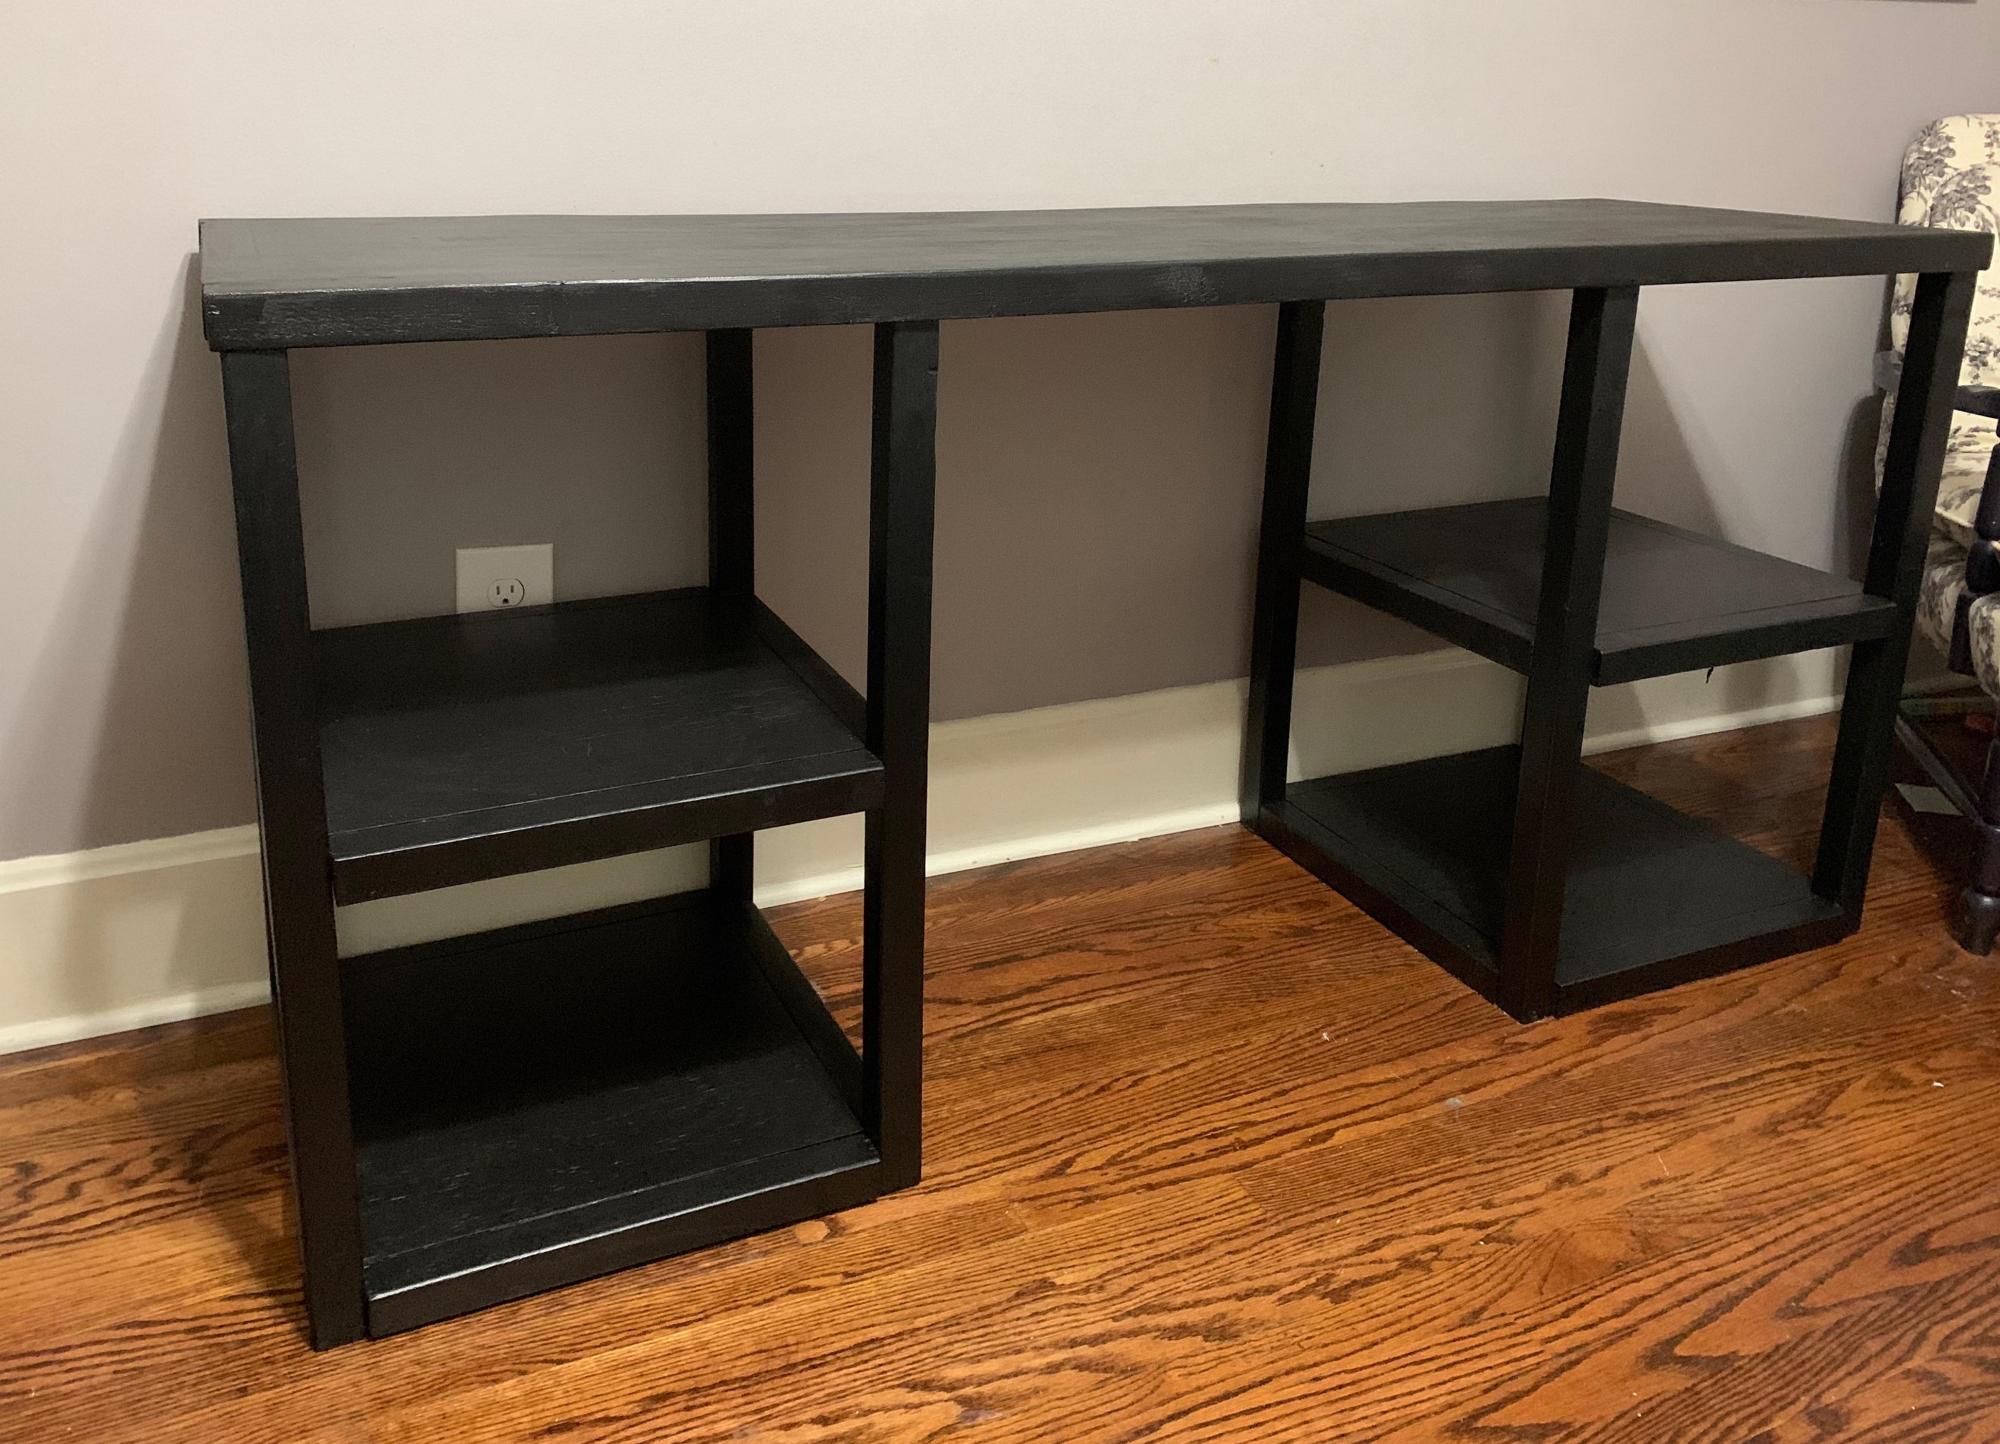
This is my first woodworking project - a desk for my daughter. She picked out the plan and chose the black matte paint. It was a pretty simple plan but I learned so much! Thanks Ana for sharing this plan!
- Liz
Built from Plan(s)
Estimated Cost
under $40
Estimated Time Investment
Day Project (6-9 Hours)
Finish Used
First coat of Kilz primer followed by 2 coats of matte black Rust-Oleum® Painter's® Touch Ultra Cover Multi-Purpose Brush-On Paint
Recommended Skill Level
Starter Project
Comments
Thu, 09/17/2020 - 10:14
Great first build!
Excellent job, thank you for sharing, can't wait to see your next woodworking project!
Hailey Platform Bed
Filled all the Knots with wood filler and sanded with 150g sandpaper. I used a Minwax Pre Stain Conditioner. Used Minwax Provincial 211 Stain. Finished with 2 coats of Minwax Semi Gloss Poly.
Built from Plan(s)
Estimated Cost
$100
Estimated Time Investment
Weekend Project (10-20 Hours)
Finish Used
Filled all the Knots with wood filler and sanded with 150g sandpaper. I used a Minwax Pre Stain Conditioner. Used Minwax Provincial 211 Stain. Finished with 2 coats of Minwax Semi Gloss Poly.
Recommended Skill Level
Beginner

Comments
Pam the Goatherd
Fri, 11/23/2012 - 21:11
Lovely!
Lovely!