Community Brag Posts
Corner Cupboard
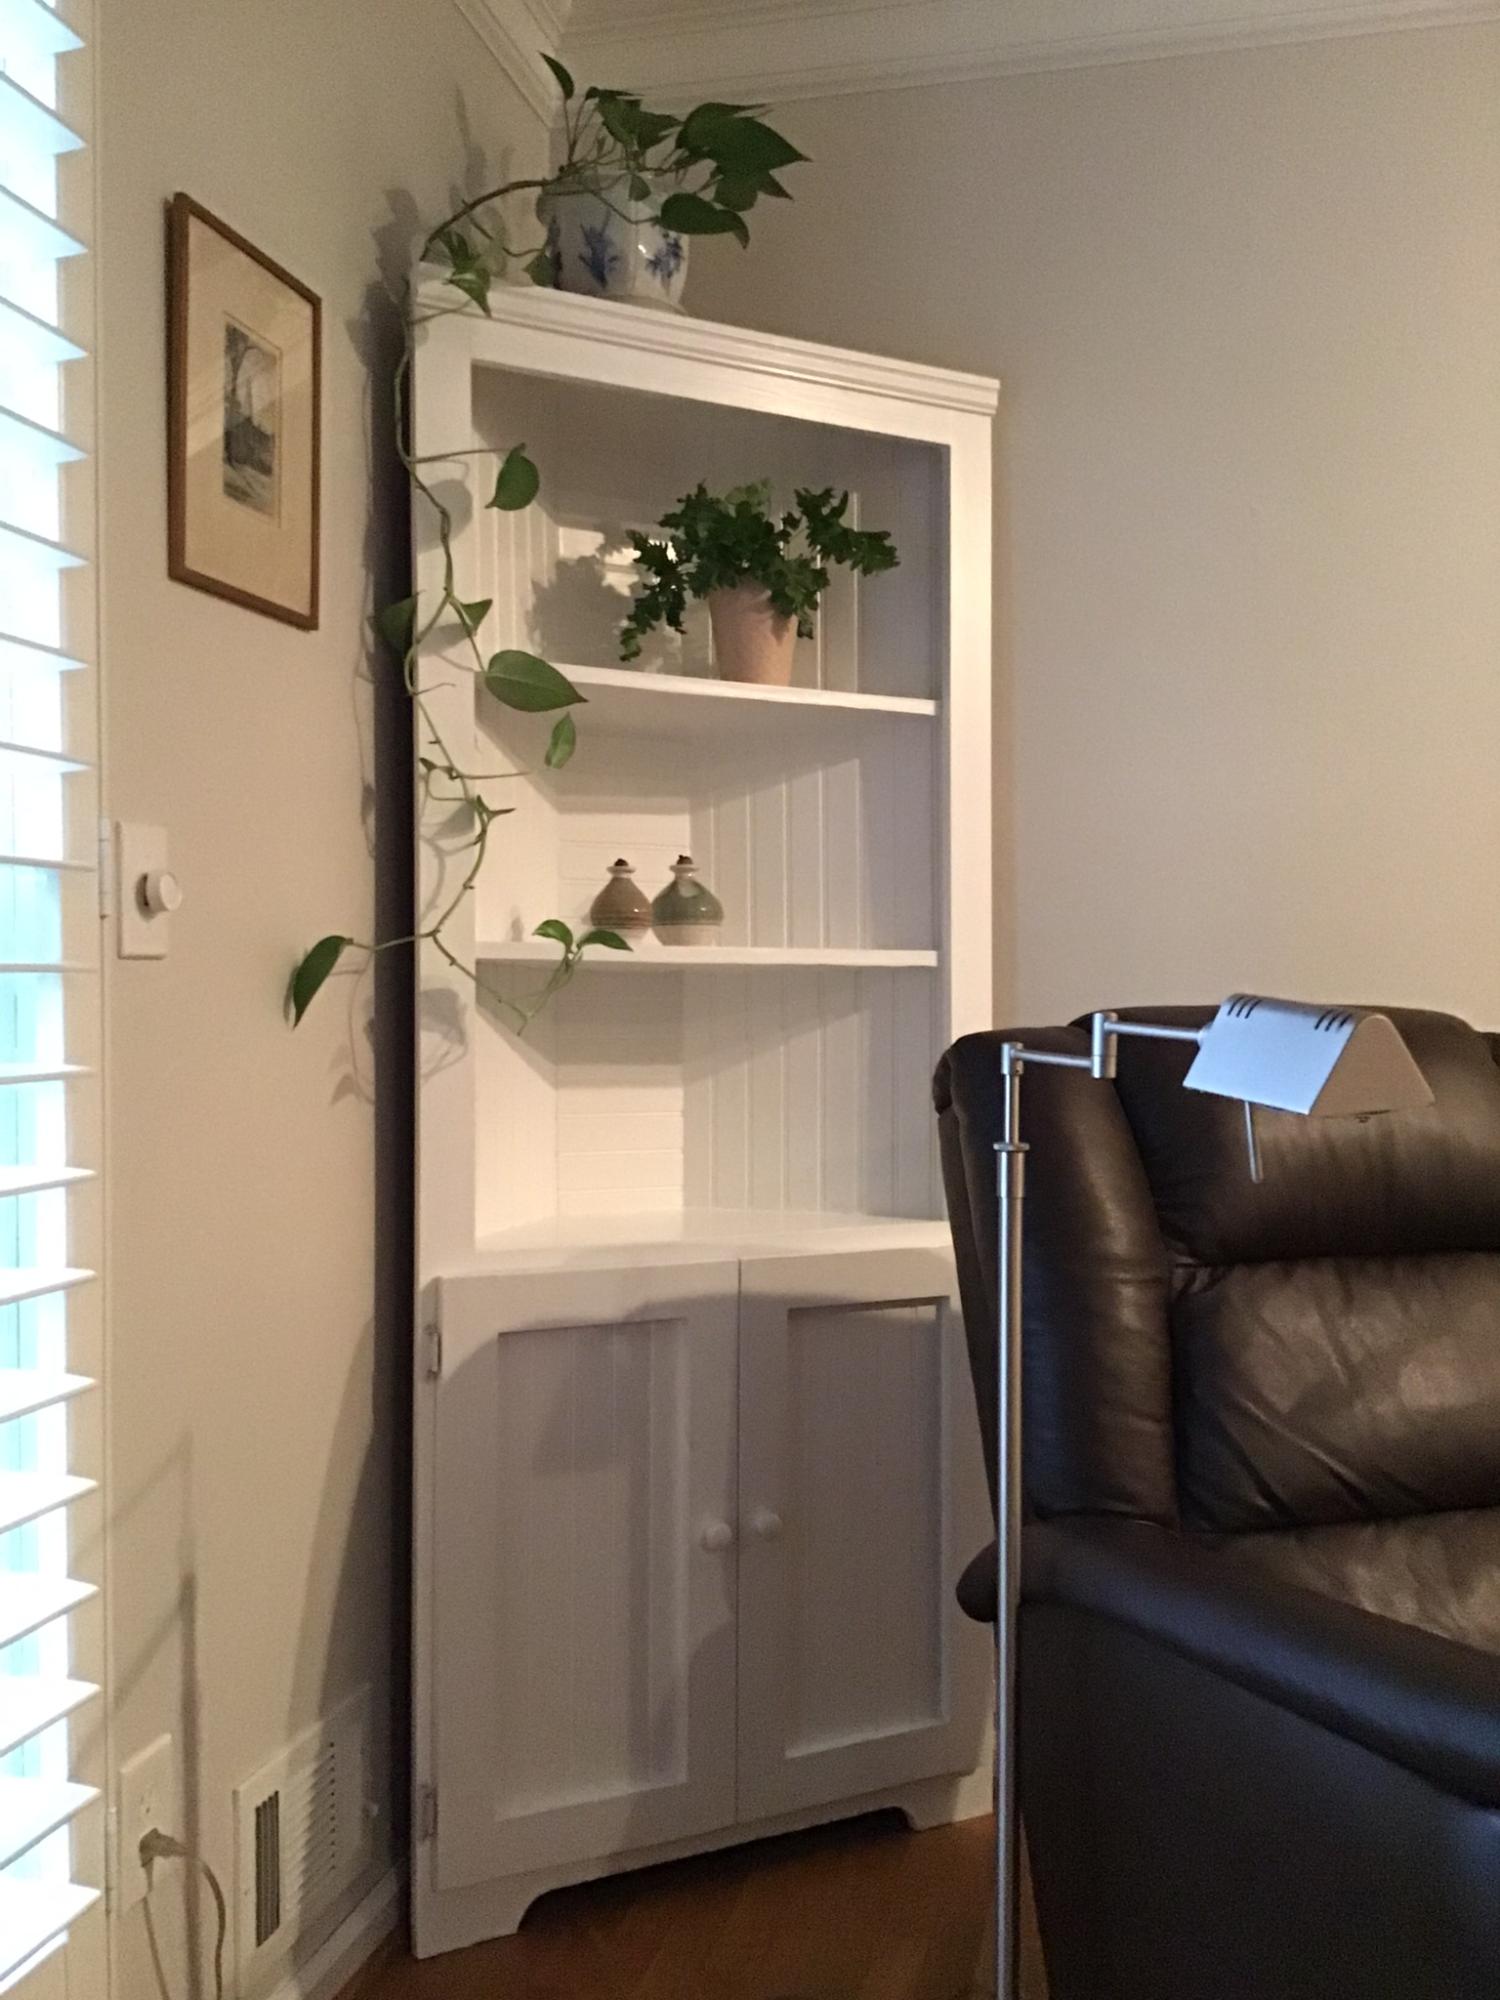
Finally I have made a project that is nice enough for our living room. Now I am so i spired to build more!
Built from Plan(s)
Comments
Sat, 11/26/2022 - 14:48
Wonderful corner storage!
Beautiful job on your corner cabinet, thank you so much for sharing!
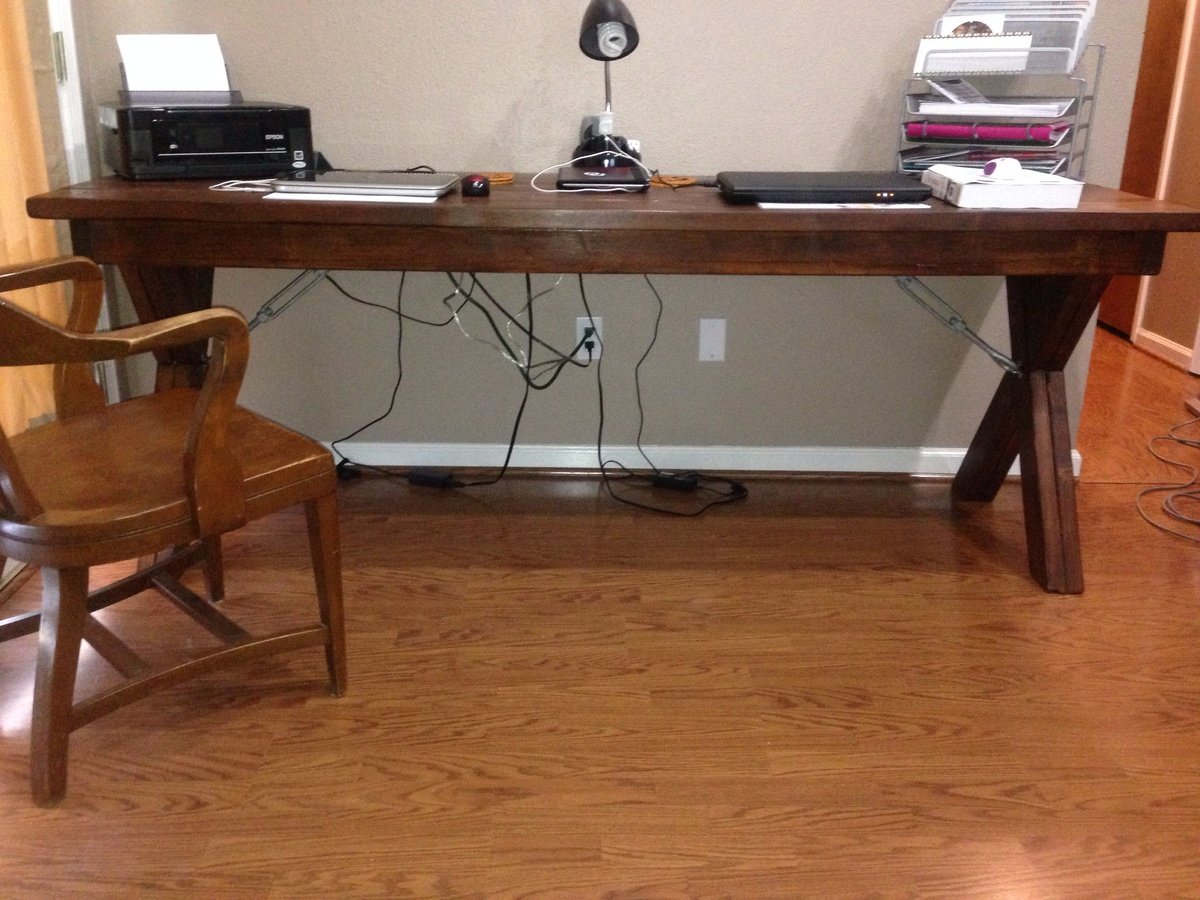
Long desk
I was looking for a long desk for two people and wasn't able to find anything that wasn't custom. I decided to try and here it is! I now have a massive and sturdy desk I can be proud of.
Estimated Cost
$100
Estimated Time Investment
Weekend Project (10-20 Hours)
Finish Used
Stain/poly mix
Multiple coats and used steel wool between each.
Multiple coats and used steel wool between each.
Recommended Skill Level
Beginner
Comments
Mon, 01/23/2017 - 13:47
What plans were these from?
I love your desk and would love to build it for my home office. Are there existing plans you worked from? Or was an original design of yours? In either case, can you forward the plans to me? [email protected].
Thanks!
Chaz
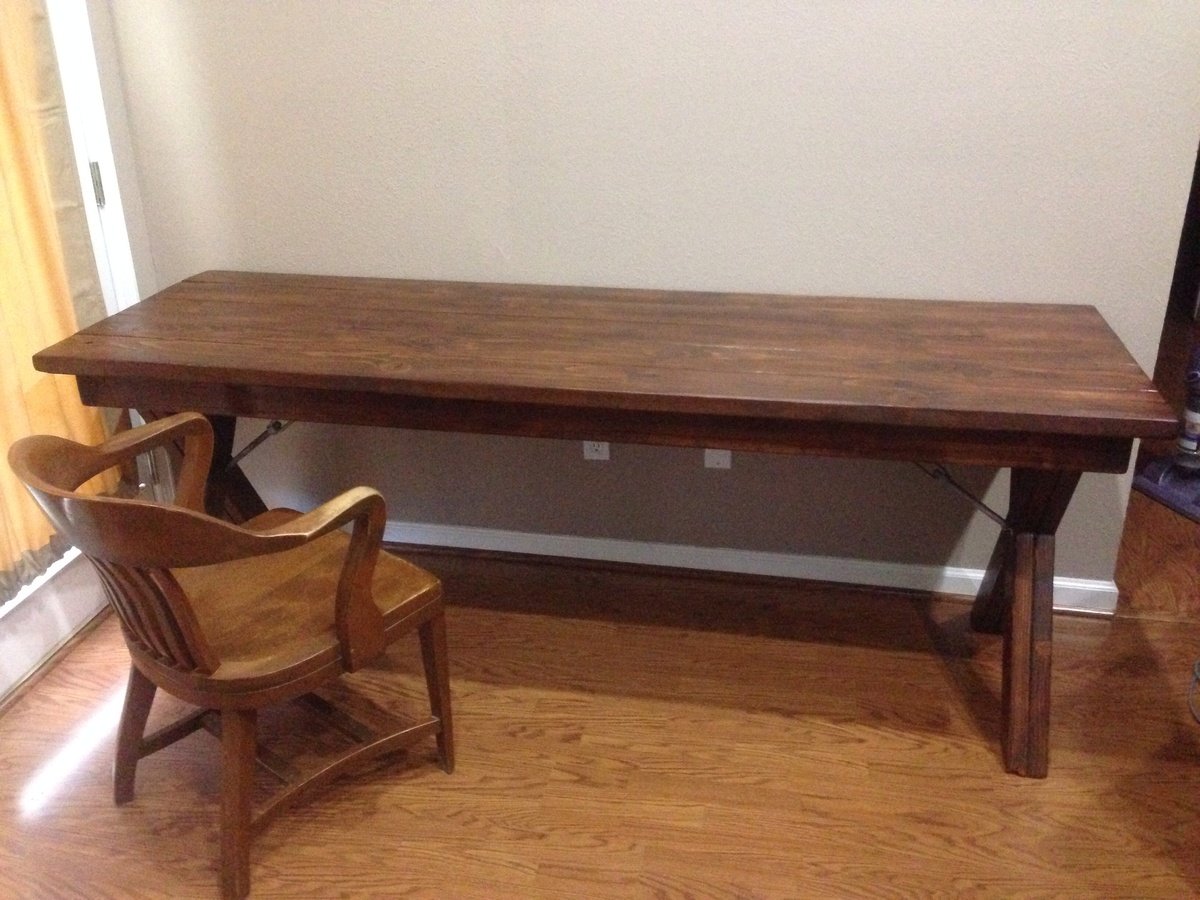
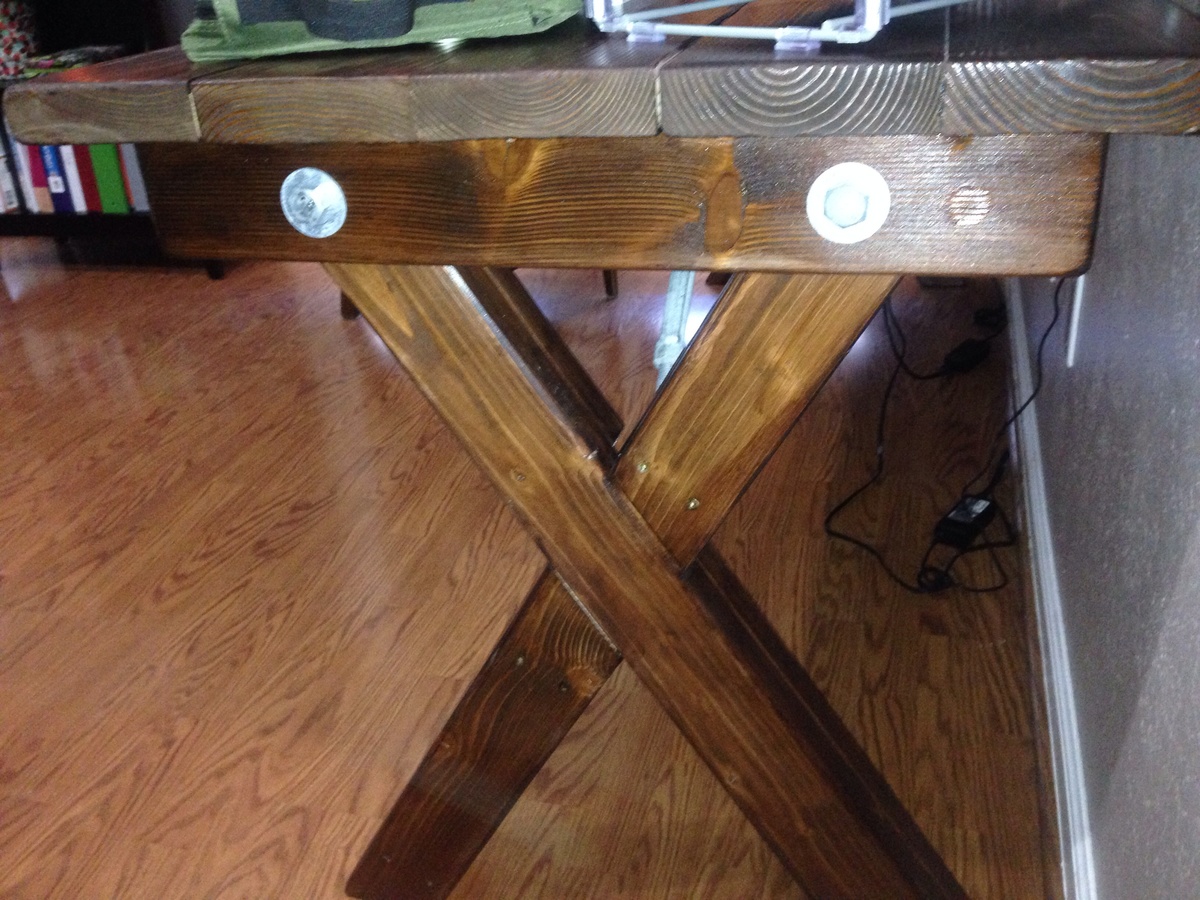
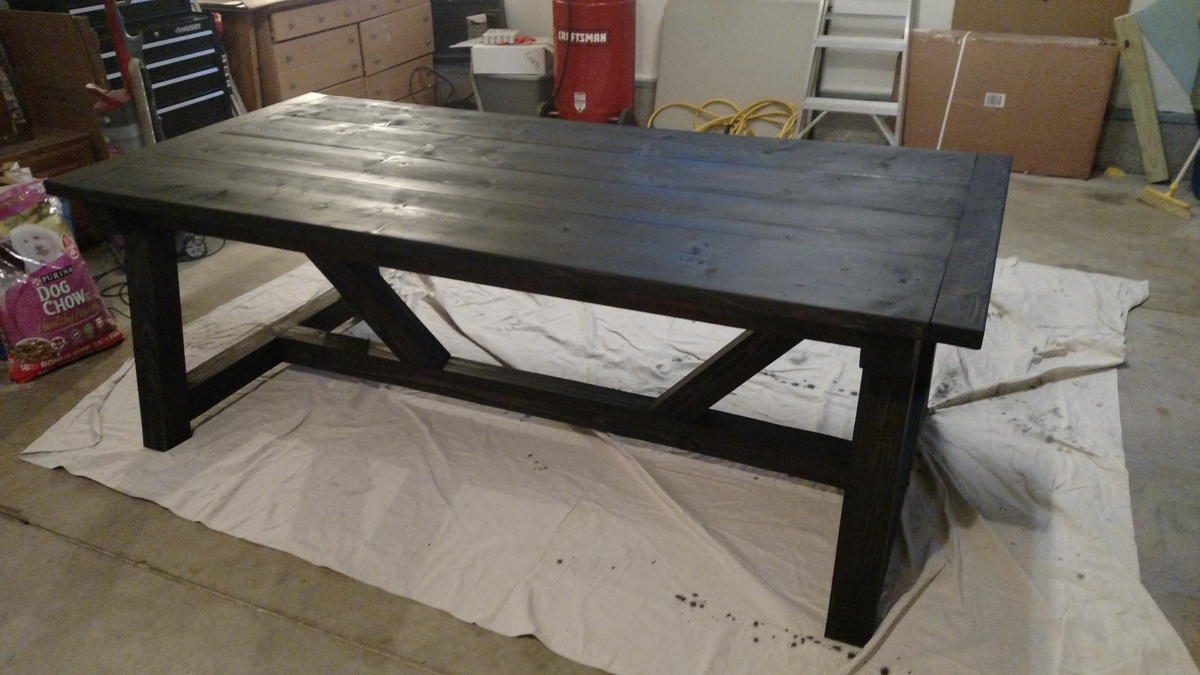
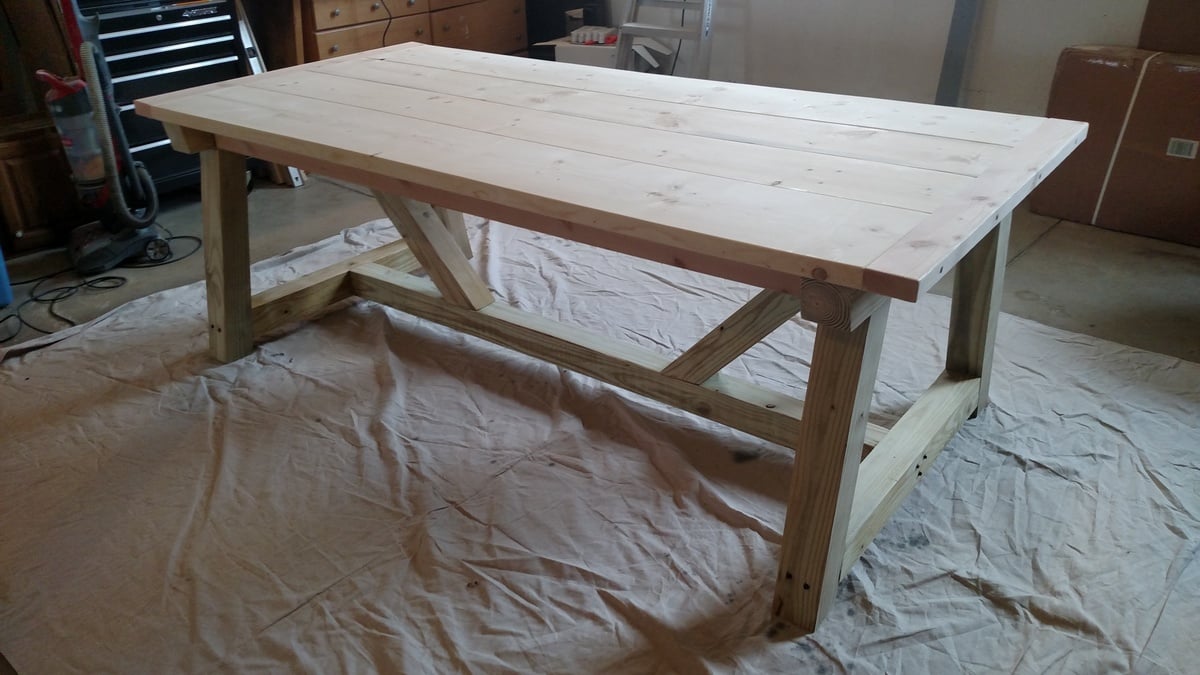
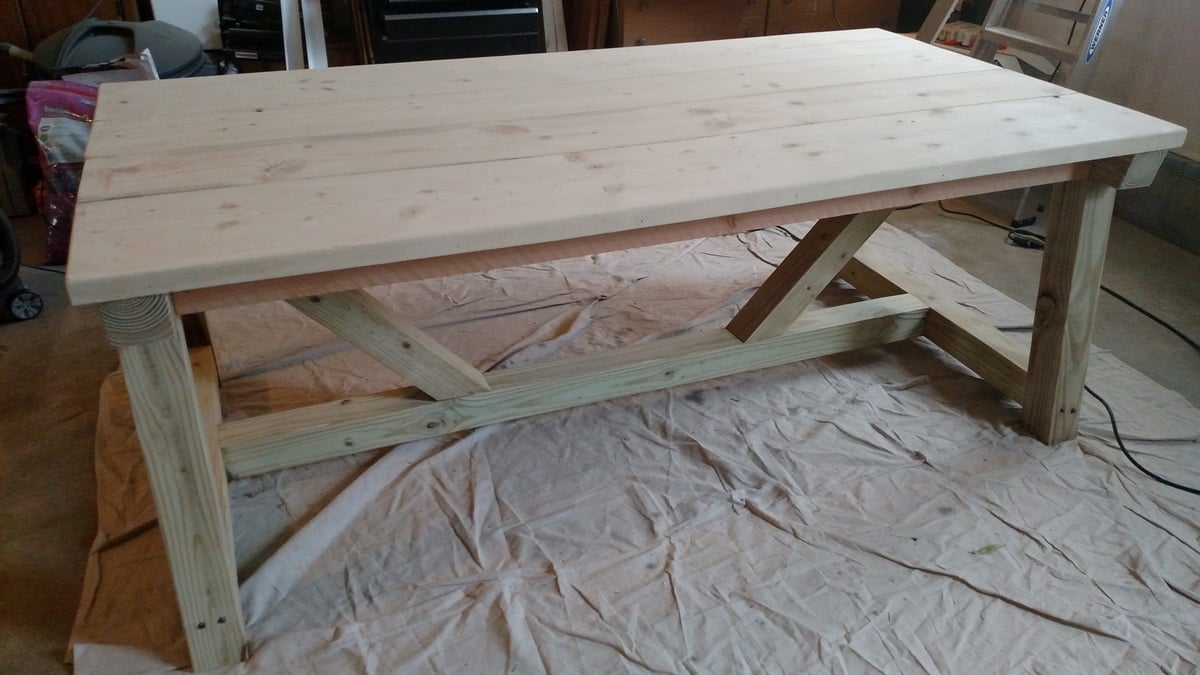
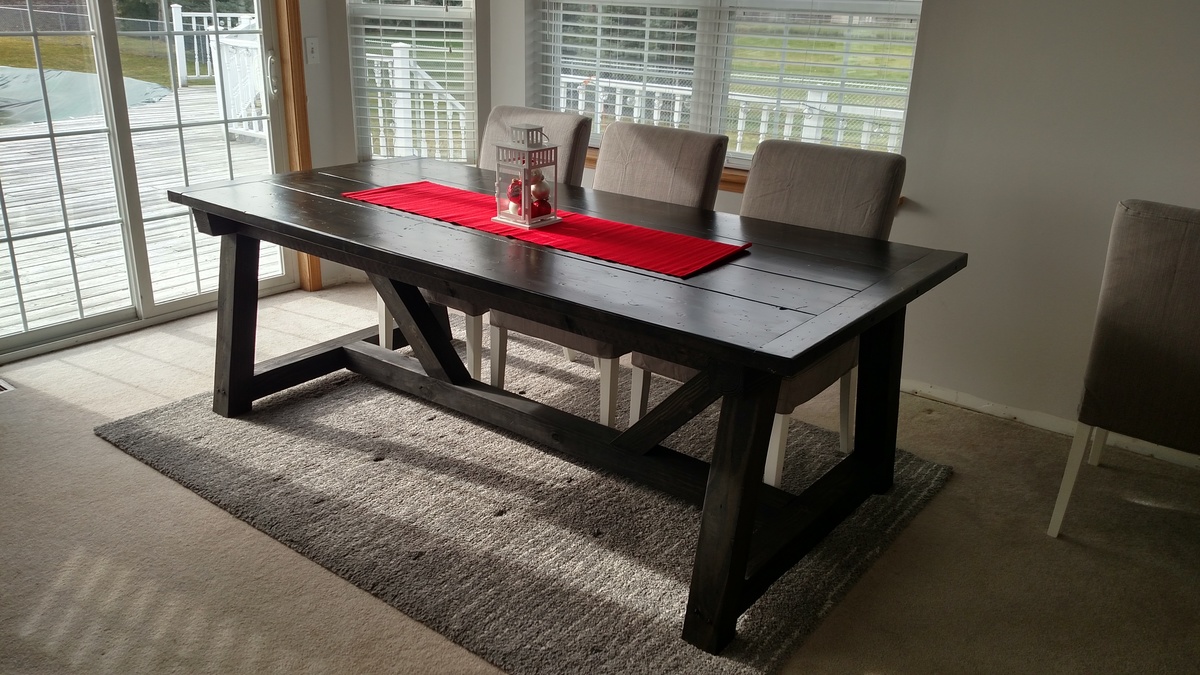
Farmhouse Truss Beam Dining Table
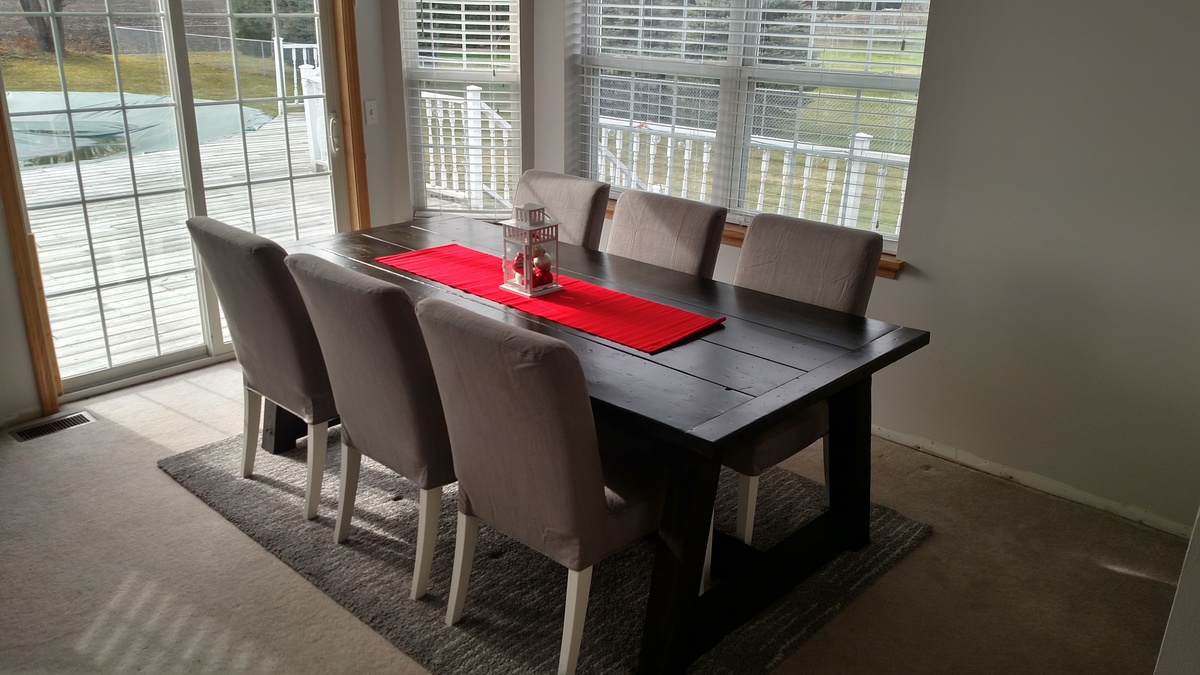
I changed some of the original dimensions so that it better fit my dining area. My table top is 41" wide x 87" length. To accomplish this width I used 2" x12"s for the outer boards and 2"x10"s for the two inner boards. My inside supports were all cut to 72" (6 ft) so that we could comfortably seat 3 chairs on each side. I used 2"x4"s instead of 2"x10"s as the breadboard ends (just personal preference). I used 6" lag style screws to assemble most sections and I left the heads (black in color) of the bolts exposed for a more rugged apppearance. The top was secured through the bottom of the 4x4 using counter-sunk 4" screws and 2" pocket screws for the 2"x4" cross boards. I distressed the entire table and sanded smooth.

Built from Plan(s)
Estimated Cost
All together I would put the price around $230-$250 to complete.
Estimated Time Investment
Weekend Project (10-20 Hours)
Finish Used
Finally the stain is Minwax Ebony and 3 coats of Minwax Helmsman (Satin) from Home depot. Must sand between each coat.
Recommended Skill Level
Intermediate
My Rustic X Coffee Table
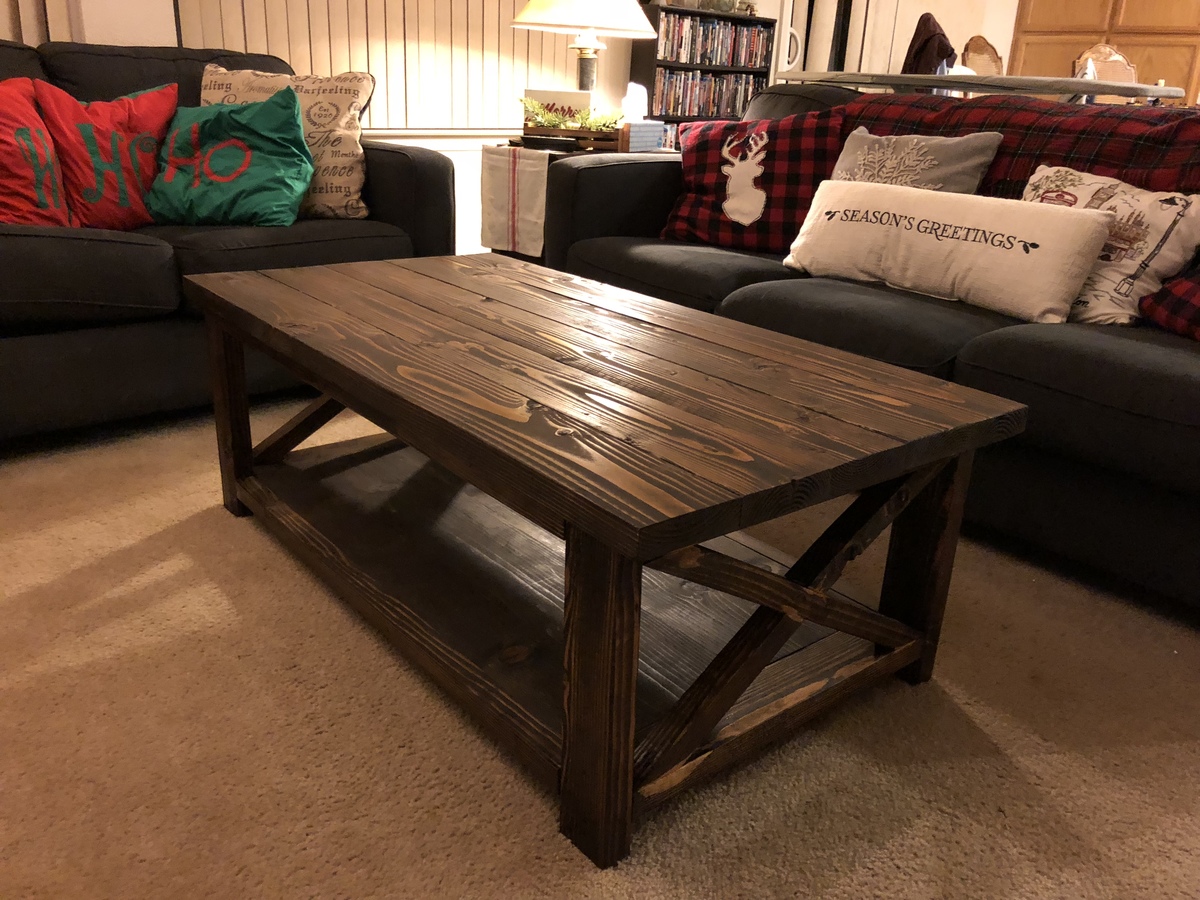
Rustic X coffee table I built from the plans on this website. This is the first piece of furniture I’ve built.
Built from Plan(s)
Estimated Time Investment
Weekend Project (10-20 Hours)
Finish Used
Walnut Finish
Recommended Skill Level
Beginner
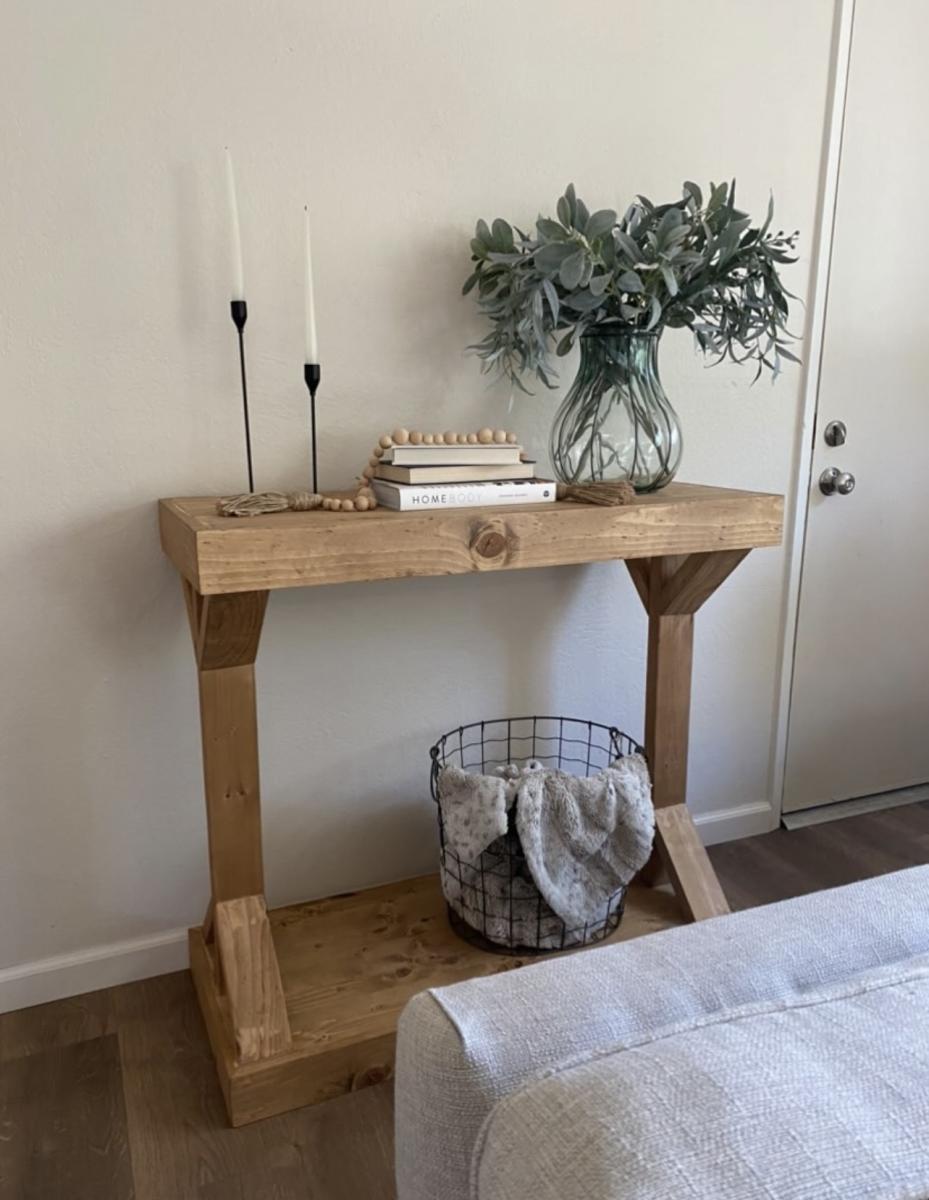
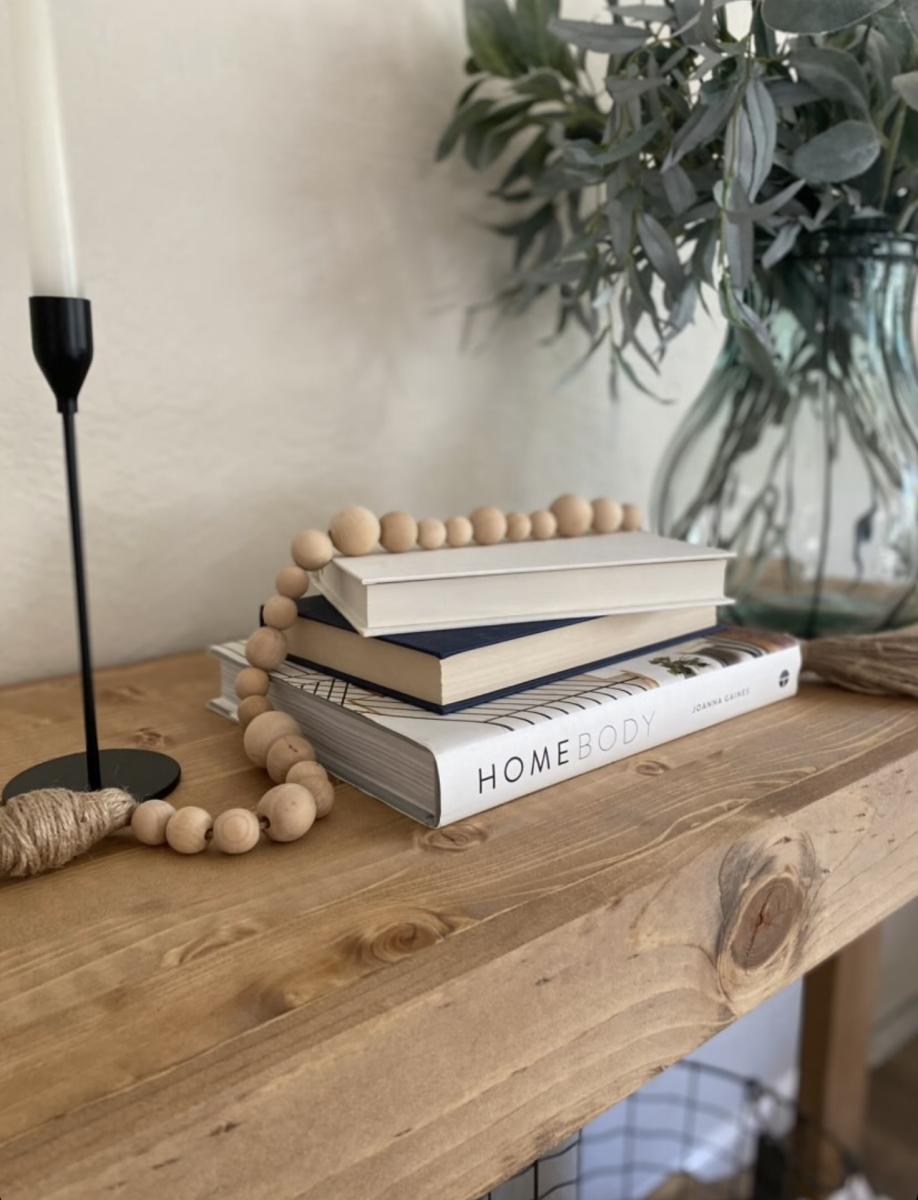
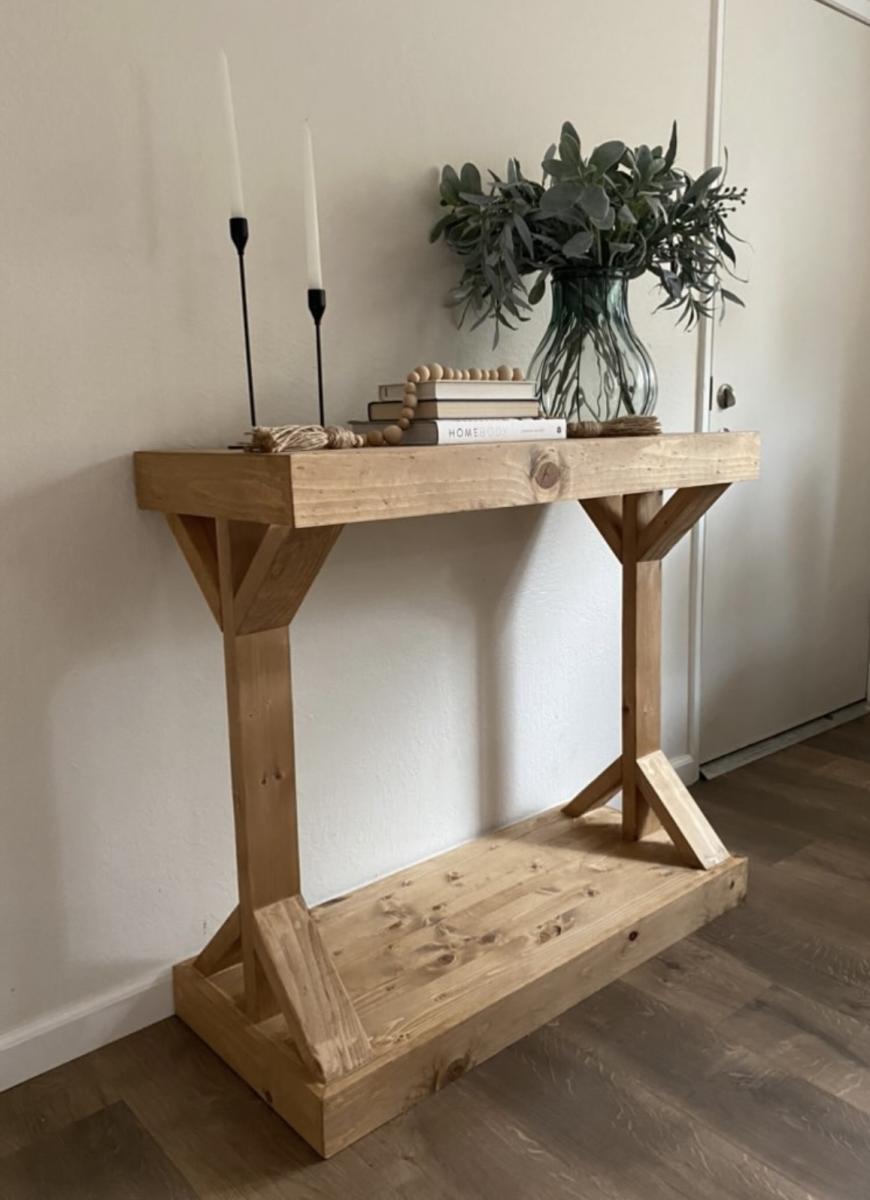
Modern Farmhouse Console
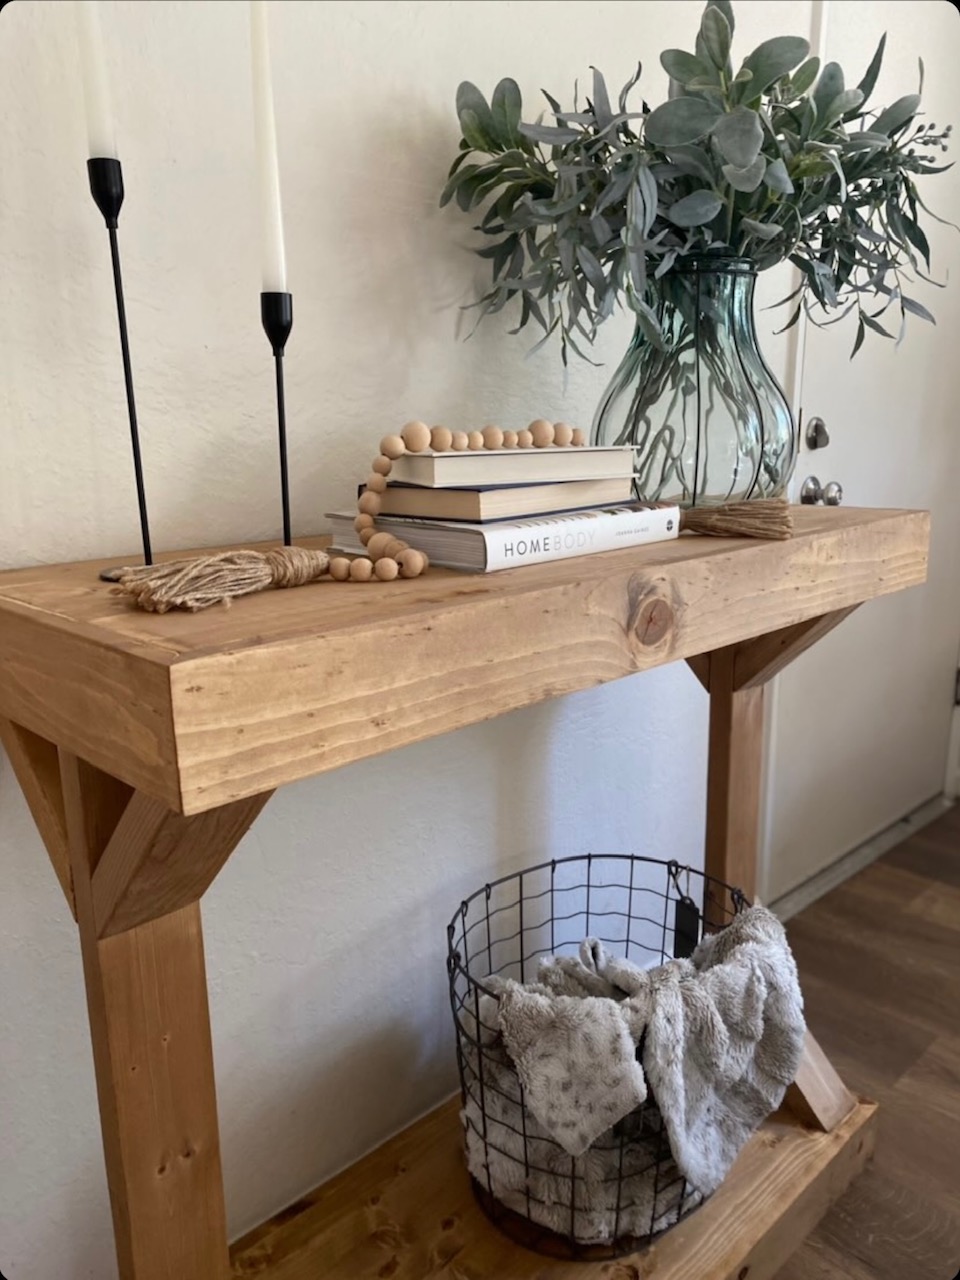
This narrow farmhouse table brings a feeling of elegance and grace to an entryway.
Built by The Rhino Home
Built from Plan(s)
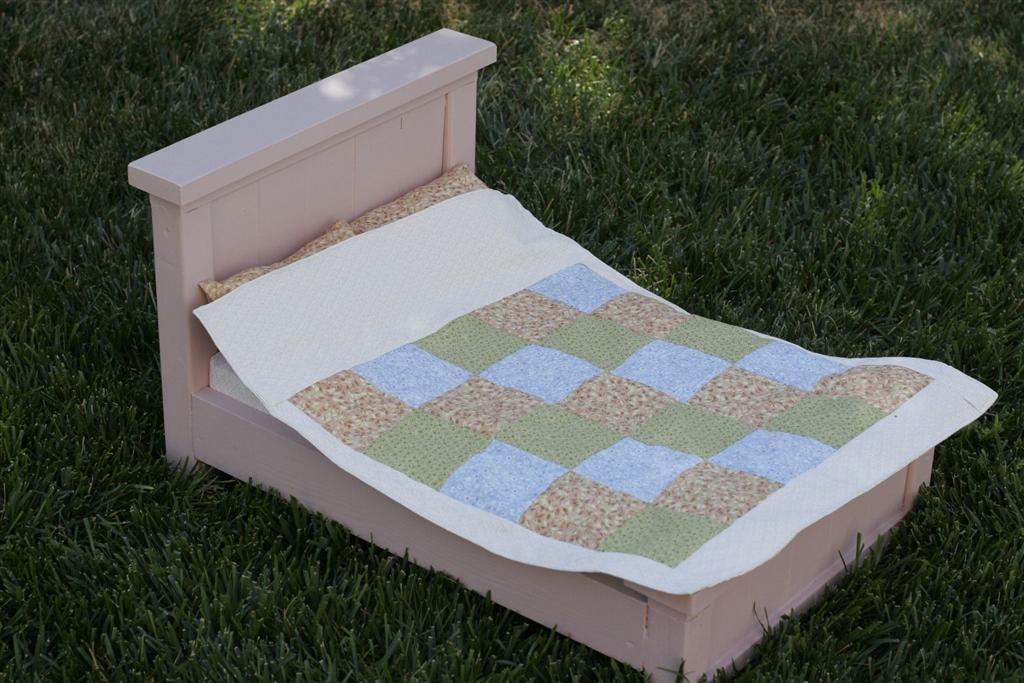
Doll farmhouse bed as a present
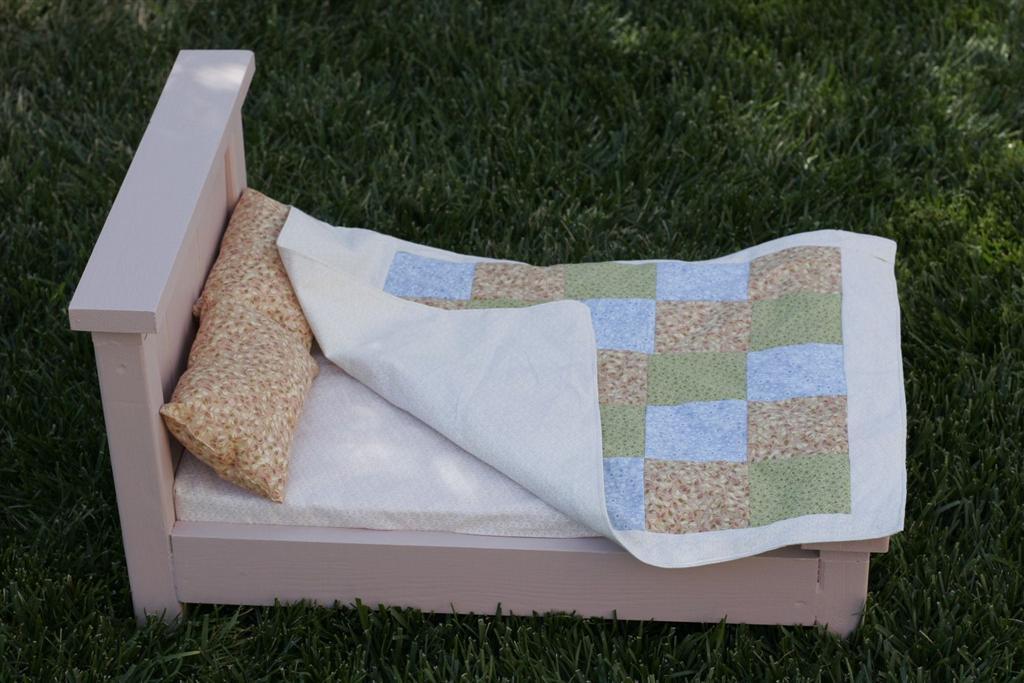
Built this cute doll bed for a friend's daughter's 3rd bday. I hear she loves it :)
The bedding (which took the longest) was made from my stash, followed loosely the plans at
http://fromanigloo.blogspot.com/2010/11/dolly-bed-fitted-sheet.html
and http://fromanigloo.blogspot.com/2010/11/dolly-pillows-and-pillowcases.h…
I wish I had a nailer; this project would have been faster with that. Predrilling etc took more than I care.
Mostly used left over 1x3s, and the rest was brand new pine.
Built from Plan(s)
Estimated Cost
$10
Estimated Time Investment
Day Project (6-9 Hours)
Finish Used
Oops beige paint, tinted with some crazy pink I had to make my own pink mix.
Recommended Skill Level
Starter Project
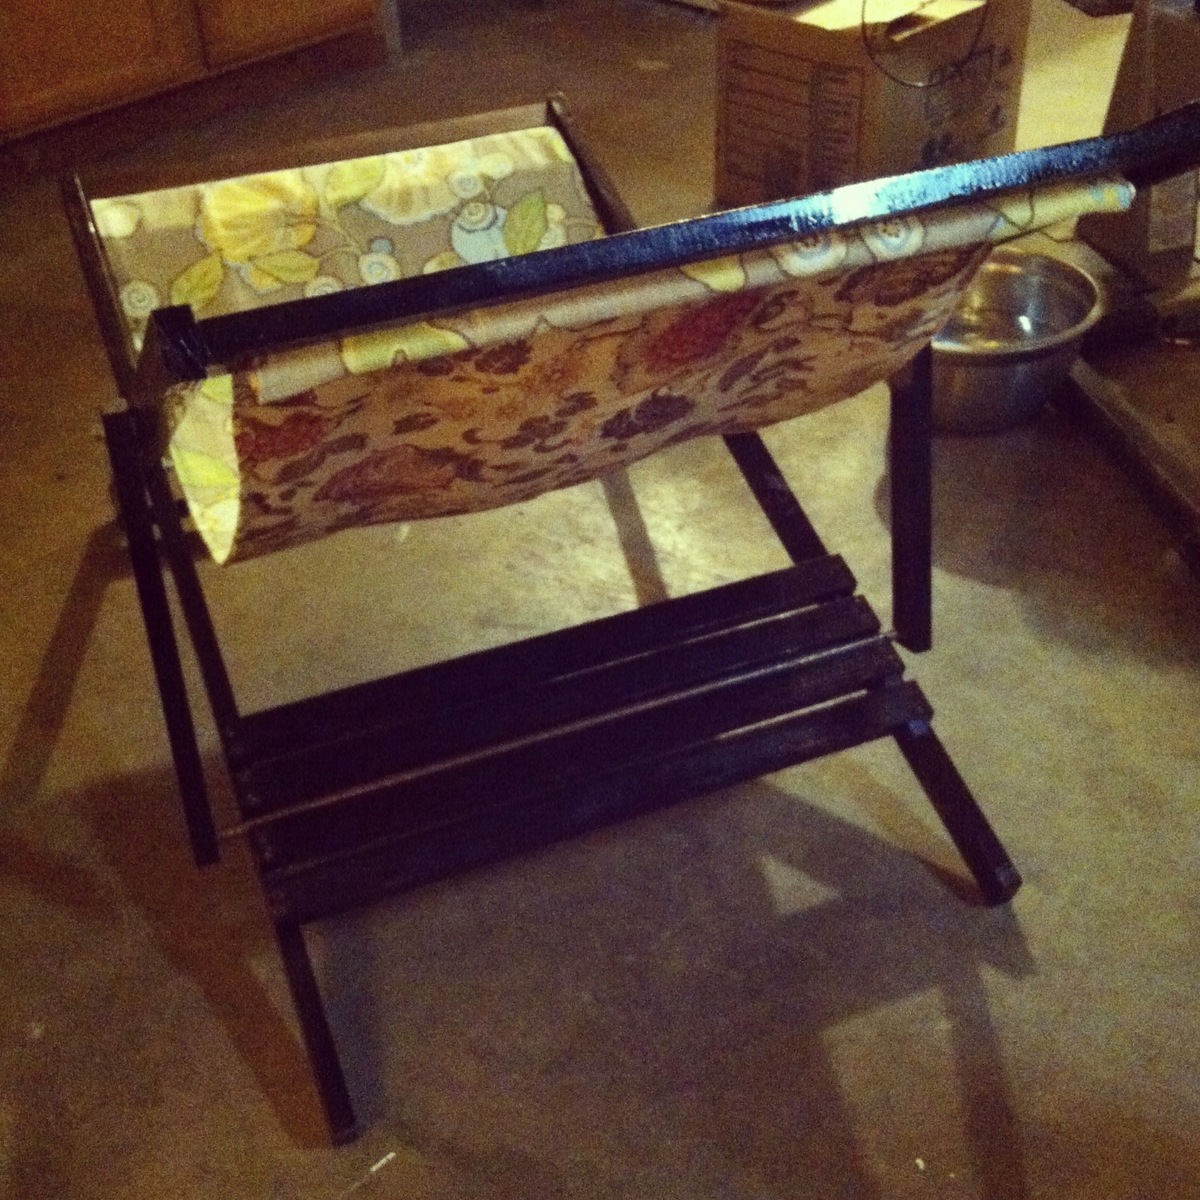
Folding Sling Chair
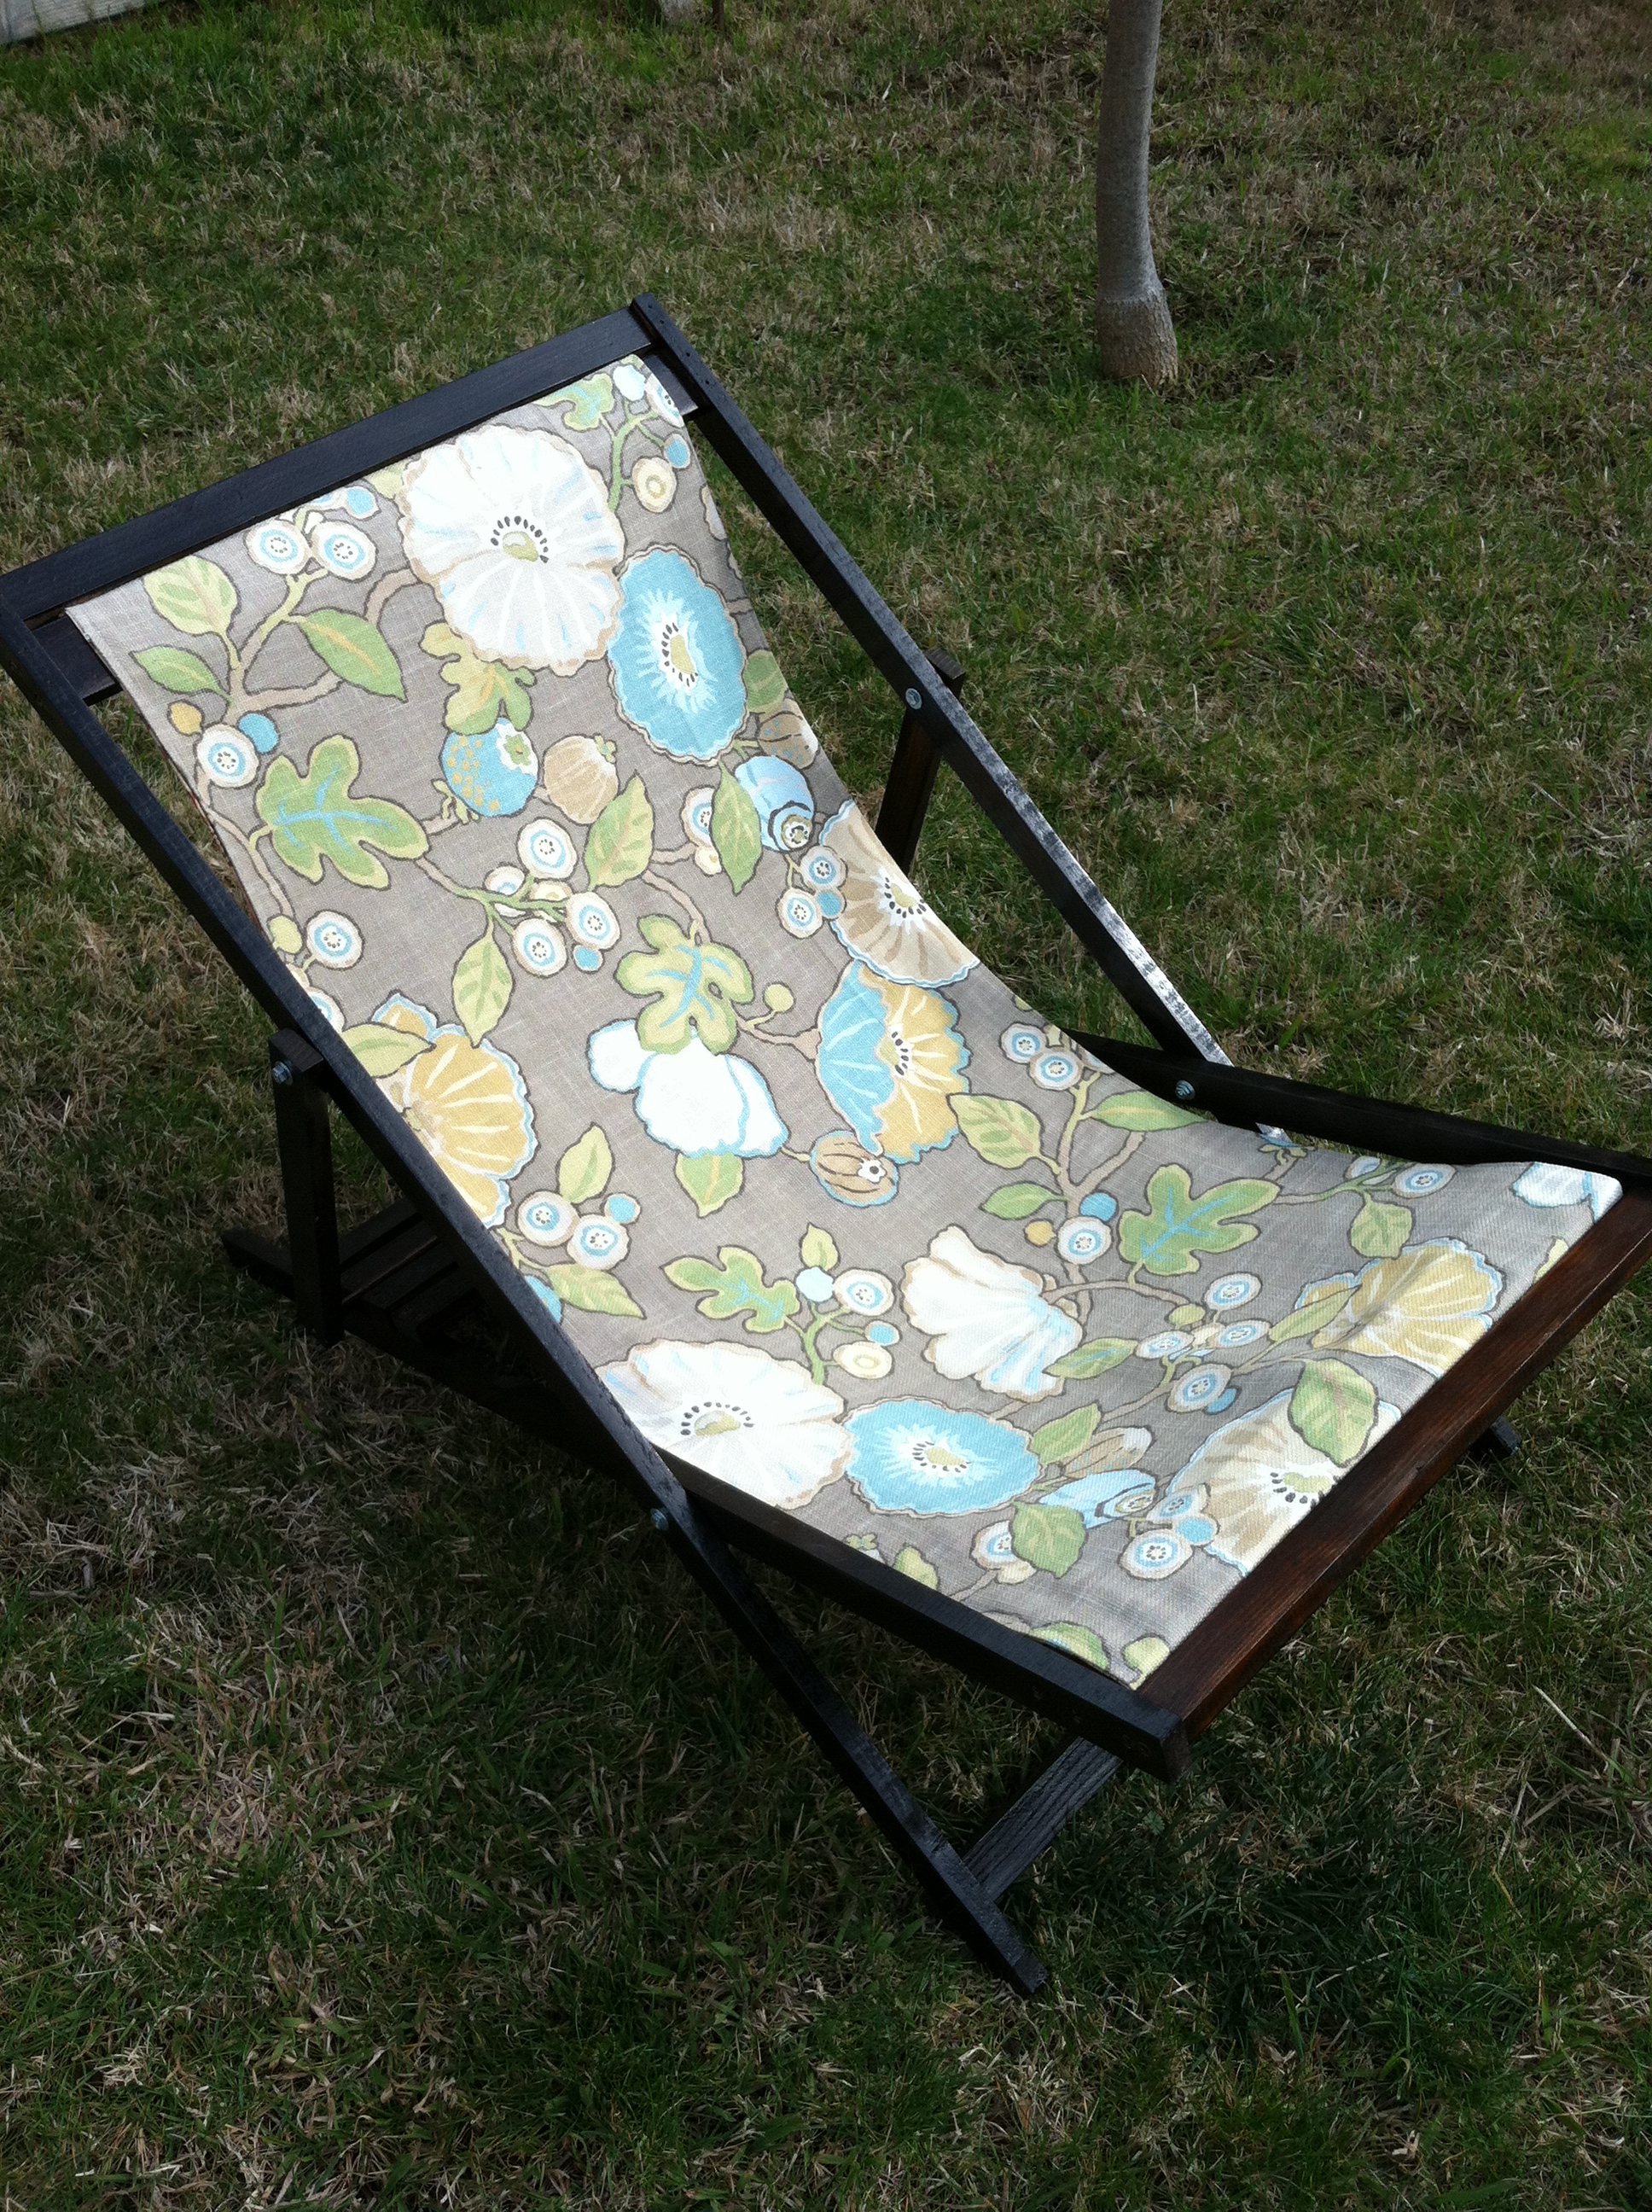
Note to self: don't sit in chair out back when you have a dog that likes to lick. This chair puts you right at licking height....
Built from Plan(s)
Estimated Time Investment
Weekend Project (10-20 Hours)
Finish Used
Espresso polyshade
Recommended Skill Level
Beginner
Table and chairs for my grand daughter
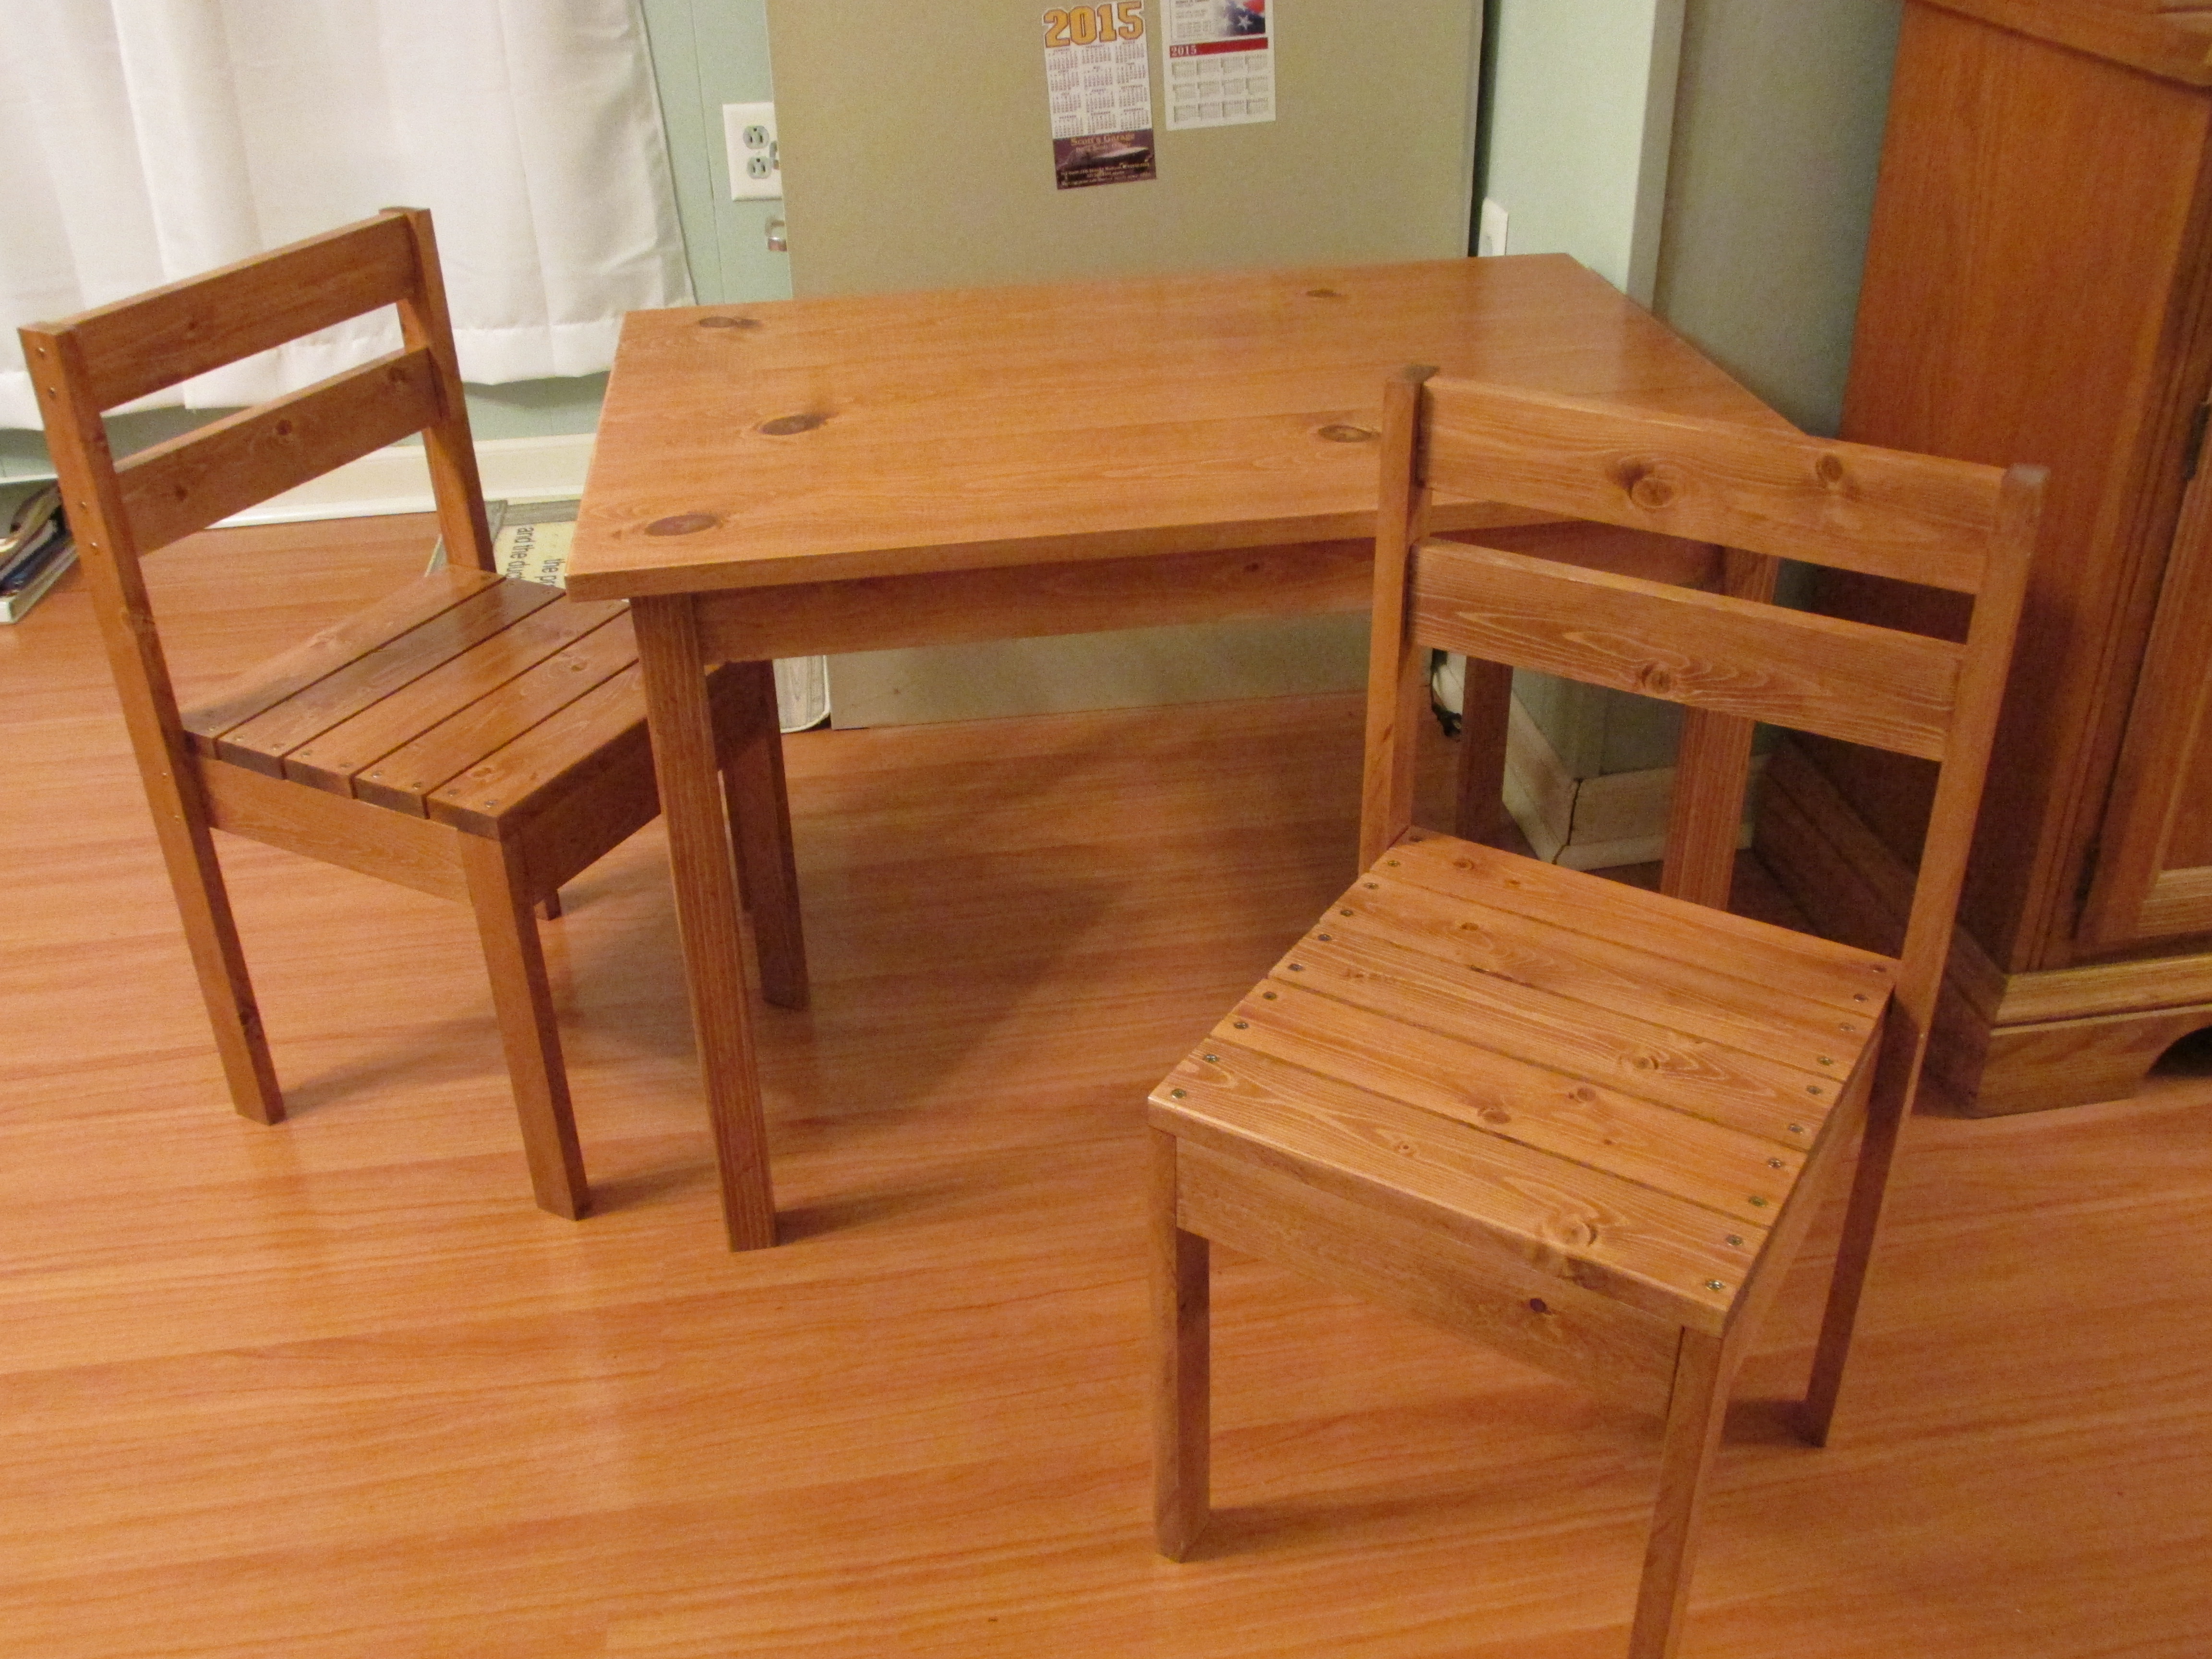
This was a fun project to build! The plans were very easy to follow and the table and chairs turned out just like they were supposed to. I ended up buying a Kreg jig to put the furniture together. The jig cost $40.00 at Home Depot and it was well worth it because I'll be able to use it on other projects. The plans showed the furniture being prepped and painted but my daughter wanted the pieces to look close to their dining room table so I took the time to stain and varnish them. I built the table and chairs out of pine and I used average dimensional lumber so the whole project only cost around $35.00. If you're looking for good children's furniture these would be good to build.
Built from Plan(s)
Estimated Cost
$35.00
Estimated Time Investment
Weekend Project (10-20 Hours)
Finish Used
Minwax Cherry #235 Stain - 3 coats
Minwax Helmsman spar urethane Clear Semi Gloss - 2 coats
Minwax Helmsman spar urethane Clear Semi Gloss - 2 coats
Recommended Skill Level
Beginner
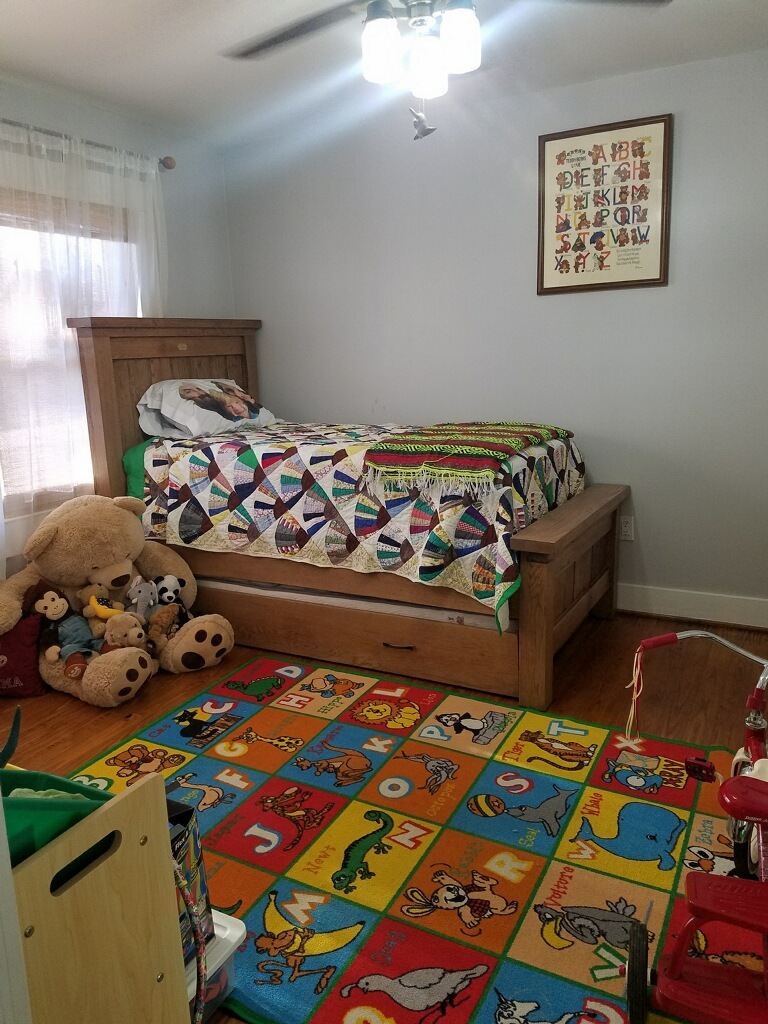
DIY twin bed
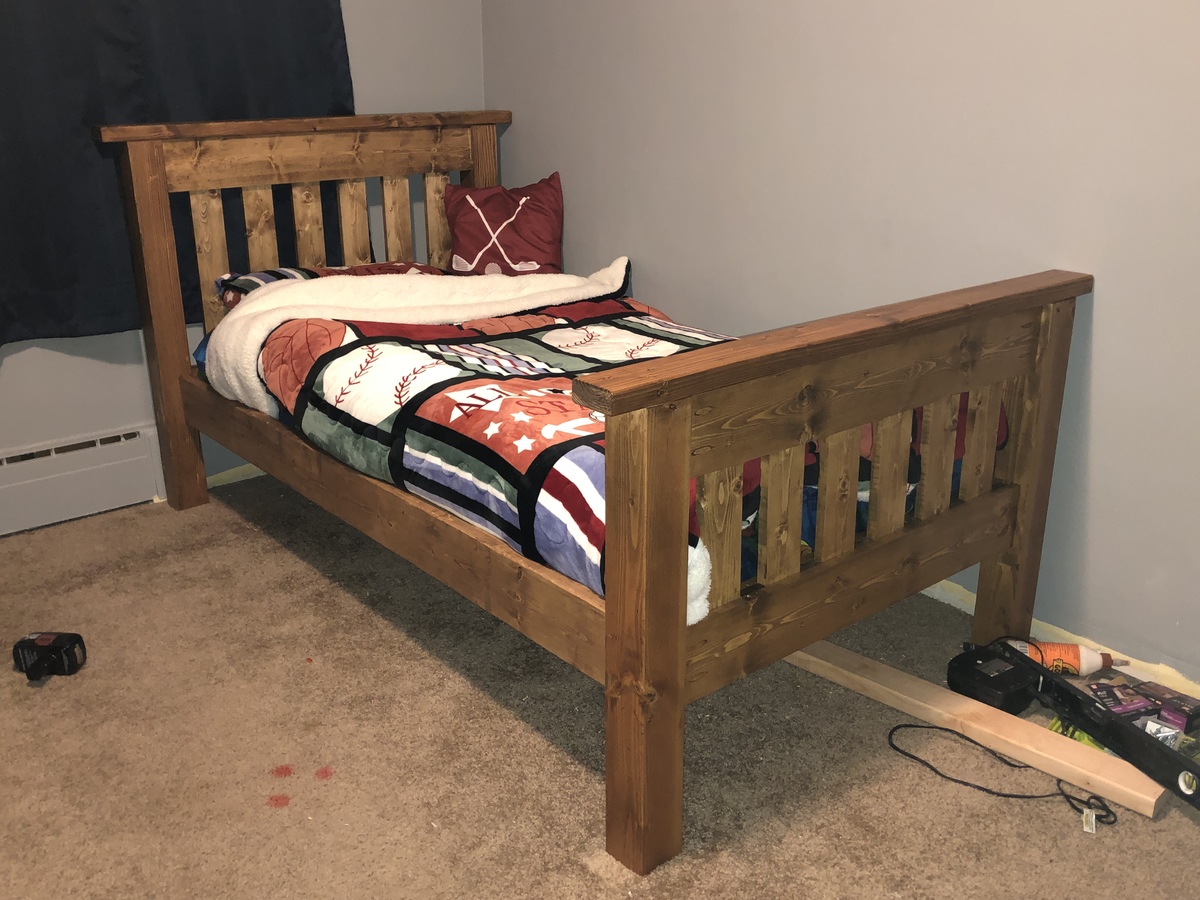
Fun and easy. Bed is extremely sturdy. I used pocket screws for all four corner connections.

Built from Plan(s)
Estimated Cost
$125ish.
Estimated Time Investment
Weekend Project (10-20 Hours)
Finish Used
Varathame early American stain, with clear satin poly.
Recommended Skill Level
Beginner
Farm House Table and Benches
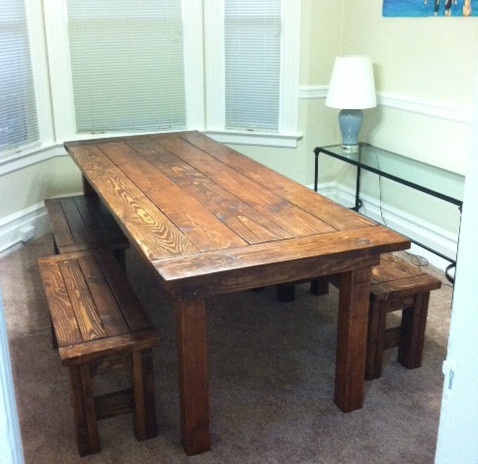
I wanted a big rustic farm table, didn't want to drop thousands on one from a store, so I decided to make my own!
I built it in the (formerly empty) dining room, with tarp on the floor and plastic to seal the doorways.
Was a big project and my first project so I started with the benches as this site and users recommended.
I used the farm house bench plan - just shortened the dimensions so that I could have two benches on either side of the table. Then I merged the two table plans so that I could have the top with the bread boards but legs that attached underneath (like the rustic table) so that they could be removed when we move. I'll work to upload my plans too.
Used Minwax Wood Stain in "english chestnut" and Deft Satin Wood Brushing Lacquer (instead of a Polyurethane).

Built from Plan(s)
Estimated Cost
approximately $300 (for wood, finish, sand paper, stain, screws..)
Estimated Time Investment
Week Long Project (20 Hours or More)
Finish Used
Minwax "English Chestnut" and
Deft Satin Wood Brushing Lacquer to finish.
I prepped the wood by sanding it down to 220 (could have done an even better job sanding, and sanded the table and bench tops even finer).
Used a sponge brush to apply the wood stain, wiped off rather quickly (only a few minutes on the wood).
Used brush to apply Deft Sating Wood Brushing Lacquer. Used spray can of Deft when I ran out of liquid. Didn't go on as thick. Although using a brush is more of a hassle, it had a better coat.
Recommended Skill Level
Beginner
Comments
Sun, 09/25/2011 - 12:18
Great Work
Your use of short benches makes the set more family and guest friendly. I usually hand rub my finish, I think i want to build this and probably use 0ak 2X12's (know it will be heavy).
Suggestions?
I will use it on a Florida roofed concrete deck for an outdoor dining area. Typically more formal dinners. Deck overlooks beautiful cove.
Thu, 10/13/2011 - 11:00
Can you explain how you
Can you explain how you merged the plans to add the bread boards? I would love to do the same!
Tue, 03/06/2012 - 01:30
Would love to see the plans
Would love to see the plans for this!
Looks amazing!!
Are the table legs 4"x4"?
Fri, 06/01/2012 - 09:09
Exactly what I am looking for
This is exactly what I am looking for in a table to build. We want bread boards on the end and we don't want stretchers on the bottom. How did you combine the two to do this. Can you send me a copy of your plan? [email protected]
Fri, 06/08/2012 - 12:59
farm table
i would the plans for that table my daughter loves and wants me to build her one
send to [email protected]
Mon, 06/11/2012 - 13:19
Farm Table
We love this table! Could you please send plans to [email protected]
Thanks so much!
Mon, 06/11/2012 - 13:21
Farm Table
We love this table. Please send plans to [email protected]
Thanks!
Fri, 06/15/2012 - 10:00
Exactly what I'm wanting to do.
Your table turned out awesome!
I already have old boards waiting on plans to be turned into a table. Any chance you could send the plans for your table to [email protected]?
Sat, 08/04/2012 - 13:35
Plans for this table.
Could you please send me the plans for this table? I love it and would love to attempy making it. Thanks so much!
Sun, 09/23/2012 - 14:37
Plans
Hi, Can you please send me the plans to make this table?
Thanks!!
Alex ([email protected])
Sun, 09/30/2012 - 18:34
Love this
I love this table. Can you please send the plans to [email protected]
Sun, 11/04/2012 - 11:07
Farmhouse table
I would love to attempt this!Would you please share your plans?
[email protected]
Thanks so much
Sun, 11/04/2012 - 17:17
Loving the farmhouse table
This table is exactly what I've been looking for!! Could you please share your plans? [email protected] Thank you.
Sun, 11/04/2012 - 17:25
Loving the farmhouse table
This table is exactly what I have been looking for! Could you please share your plans? [email protected]
Tue, 01/01/2013 - 06:09
Can you send plans for this
Can you send plans for this table build to [email protected] thanks.
Wed, 01/02/2013 - 15:53
table plans
Your farm table and benches were exactly what I was looking for. Please send me the plans if they are available. Thanks
Wed, 01/02/2013 - 19:18
Love the Table Plan
I would love your table plan. This is absolutely gorgeous!! Please forward table plans to [email protected]
Wed, 01/02/2013 - 19:23
Farmhouse |Table
I would love a copy of the plans for this gorgeous table you made. I am inspired.
Fri, 01/18/2013 - 18:01
plans please!
Could you please send plans? I love the look of your table!
[email protected]
Sat, 03/16/2013 - 20:12
Beautiful table!
Can I please please please have the plans? I have a very narrow dining area and this table is PERFECT. Thanks
Sun, 05/12/2013 - 14:30
Plans
I would REALLY like the plans for his version as well. I am going to combine them. Can someone ask him to post or his he sending via email? If so, [email protected]
Thank you SO much!!!
Wed, 06/26/2013 - 13:09
Awesome!
Thu, 06/27/2013 - 13:34
Plans?
Fri, 06/28/2013 - 10:49
Plans
Great table! I too would like plans - please send to [email protected]
Thanks!!
Mon, 07/15/2013 - 09:48
plans
just bought a cabin and need all sorts of furniture. I love what you did and would sure love to have your plans and how you merged the two----both for the table and especially for the benches. Trying to do a 10' table for huge family gatherings. Thanks so much! You rock!
Tue, 07/23/2013 - 14:28
Perfect
This table and bench set is exactly what I am looking for. You did such a great job!
Do you have plans that you wouldnt mind sending to my email? [email protected]
Mon, 08/26/2013 - 13:09
Merged Plans
Hi! I noticed MANY requests for the merged plans. Did you post them somewhere or can you please email the plans to me at [email protected]?
BIG THANK YOU! Tina
Fri, 09/06/2013 - 13:49
Pretty please can I get the plans?
I would love the plans for this table... could you please email them to [email protected]?
Thank you so much!
Beth :D
Fri, 01/09/2015 - 19:54
Plan Guidance
Hi everyone,
Well I didn't see all these comments! Sorry to have ignored your requests for plans!
This is the bench I made (I did four of these, and adjusted the measurements so they were each about 40" long)
http://ana-white.com/2011/01/farmhouse-bench
I was going to do this table, because it matches the benches, but decided I wanted a table with removable legs so it would be more maneuverable when we move!
http://ana-white.com/2009/12/plans-farmhouse-table-knock-off-of.html
I ended up using more of this plan in terms of how I assembled it, but adjusted the plans to have the tabletop include breadboards (the plank on top perpendicular to the long tabletop planks) and I used 4x4s for legs, plus the top was from 2x8s not 1x10s. I put in the optional cross supports too, and additional supports under the breadboard to connect it to the table frame and table top slats.. this is more info than you need, all to say, plans are flexible and you can do what you want!
http://ana-white.com/2010/03/plans-very-rustic-table-and-cool.html
Sorry I don't have detailed notes. I was very picky about the dimensions (based on space) and how high I wanted the table (about 1.5" taller than a normal table). I also measure the distance between the underside of the table and the tops of the benches so I could cross my legs under the table (an odd requirement).
Happy Building!
Sat, 03/21/2015 - 17:34
Plans for table from two plans
could you send me the plan for this rustic table that was made from the farm house and rustic table if they are available? Email to [email protected]
Sat, 03/28/2015 - 12:45
plans please
can you please send me the plans [email protected]
i love it!!!
Wed, 04/01/2015 - 15:10
love the color
I like the english chestnut stain. That works so well with this type of lumber. Great job. I plan to use the same stain on the Tryde coffee table I am building. Thanks for sharing your work!!!
Sat, 08/08/2015 - 12:30
plans please!
Thu, 08/13/2015 - 19:17
Previous comment is NOT spam
Sorry! I accidentally hit the spam button but I really would like the plans for the table. Sorry for the confusion!
Thu, 08/13/2015 - 19:23
Third time's the charm
Ok, now I feel really silly. Obviously, this is my first time leaving a comment. I love the table. It is exactly what I've been looking for. Could you email the plans to [email protected]?
Thanks!
Fri, 01/08/2016 - 17:38
Table and Bench Plans
Fri, 01/08/2016 - 17:40
Table and Bench plans
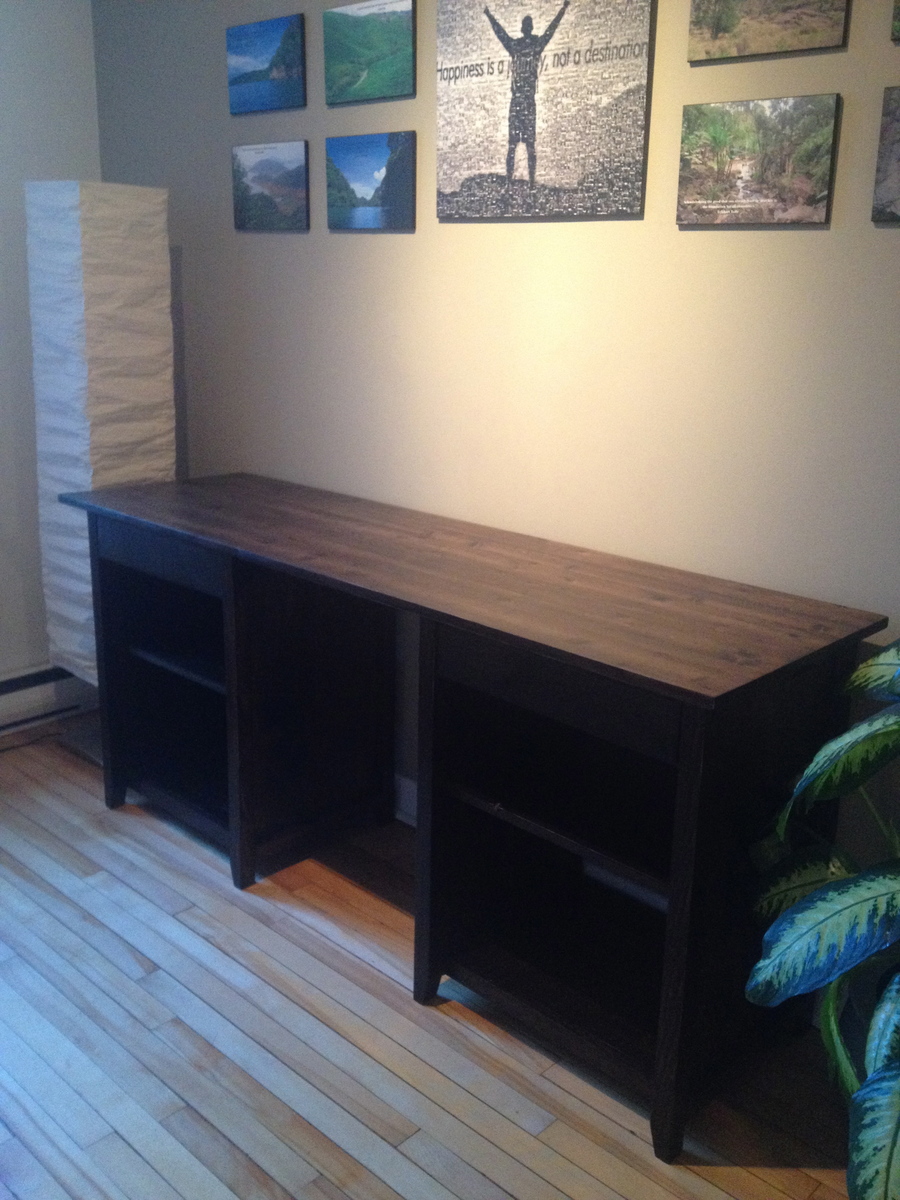
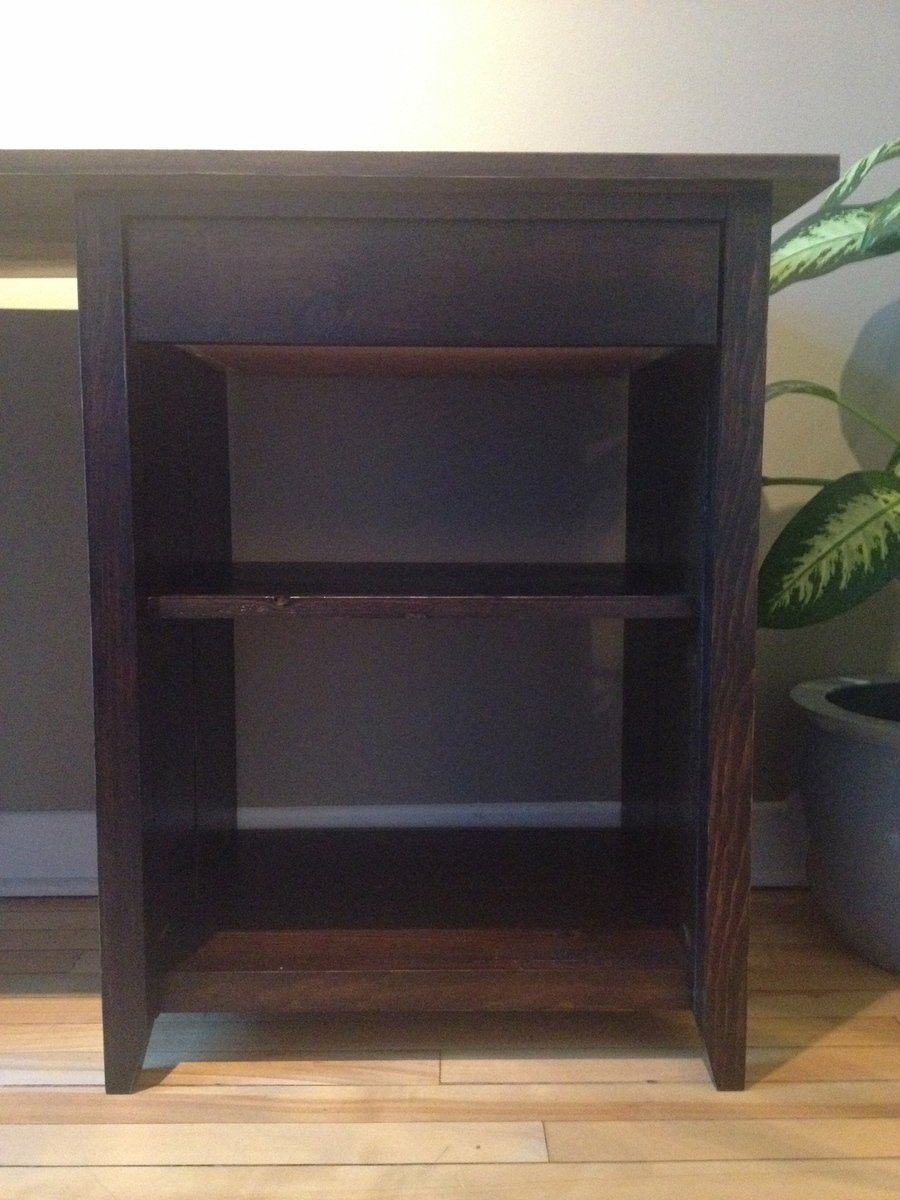
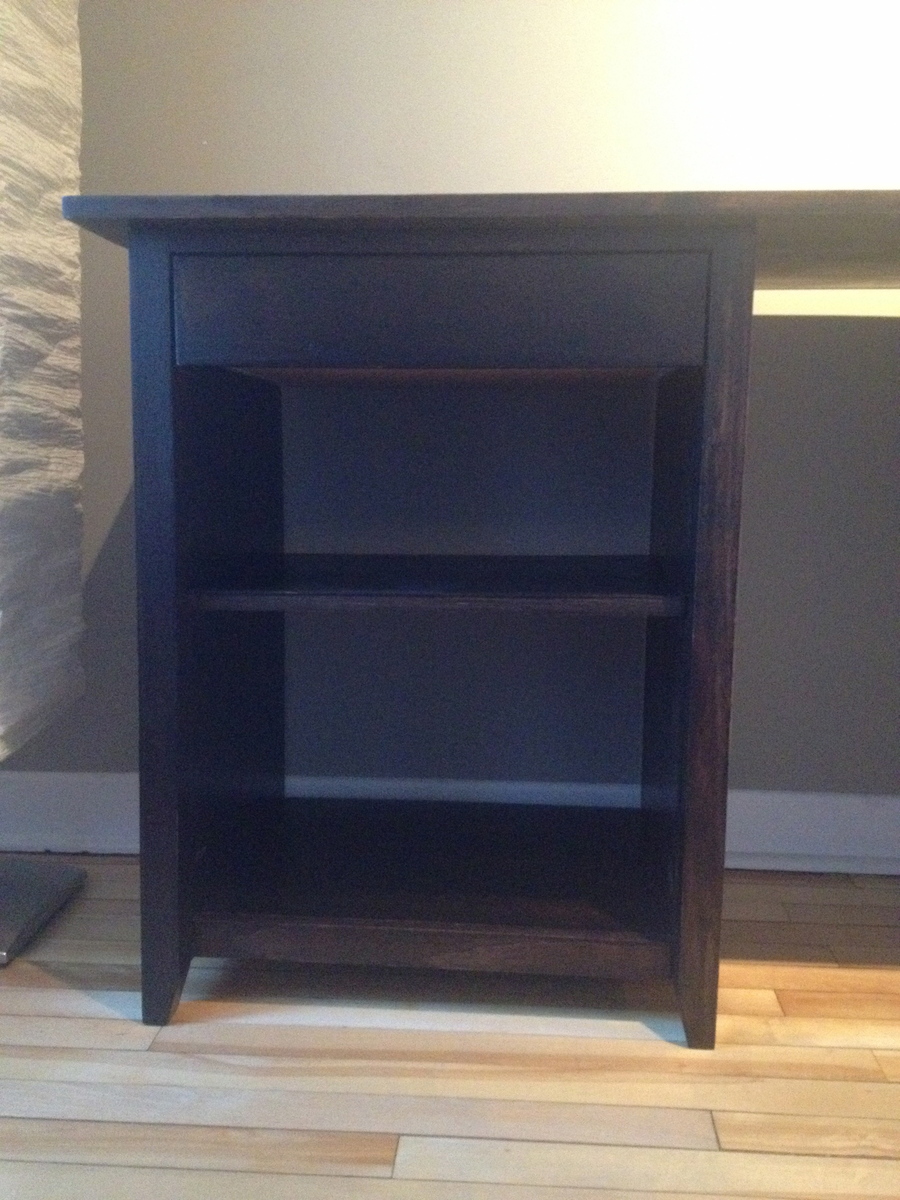
Dark Stain Channing Desk
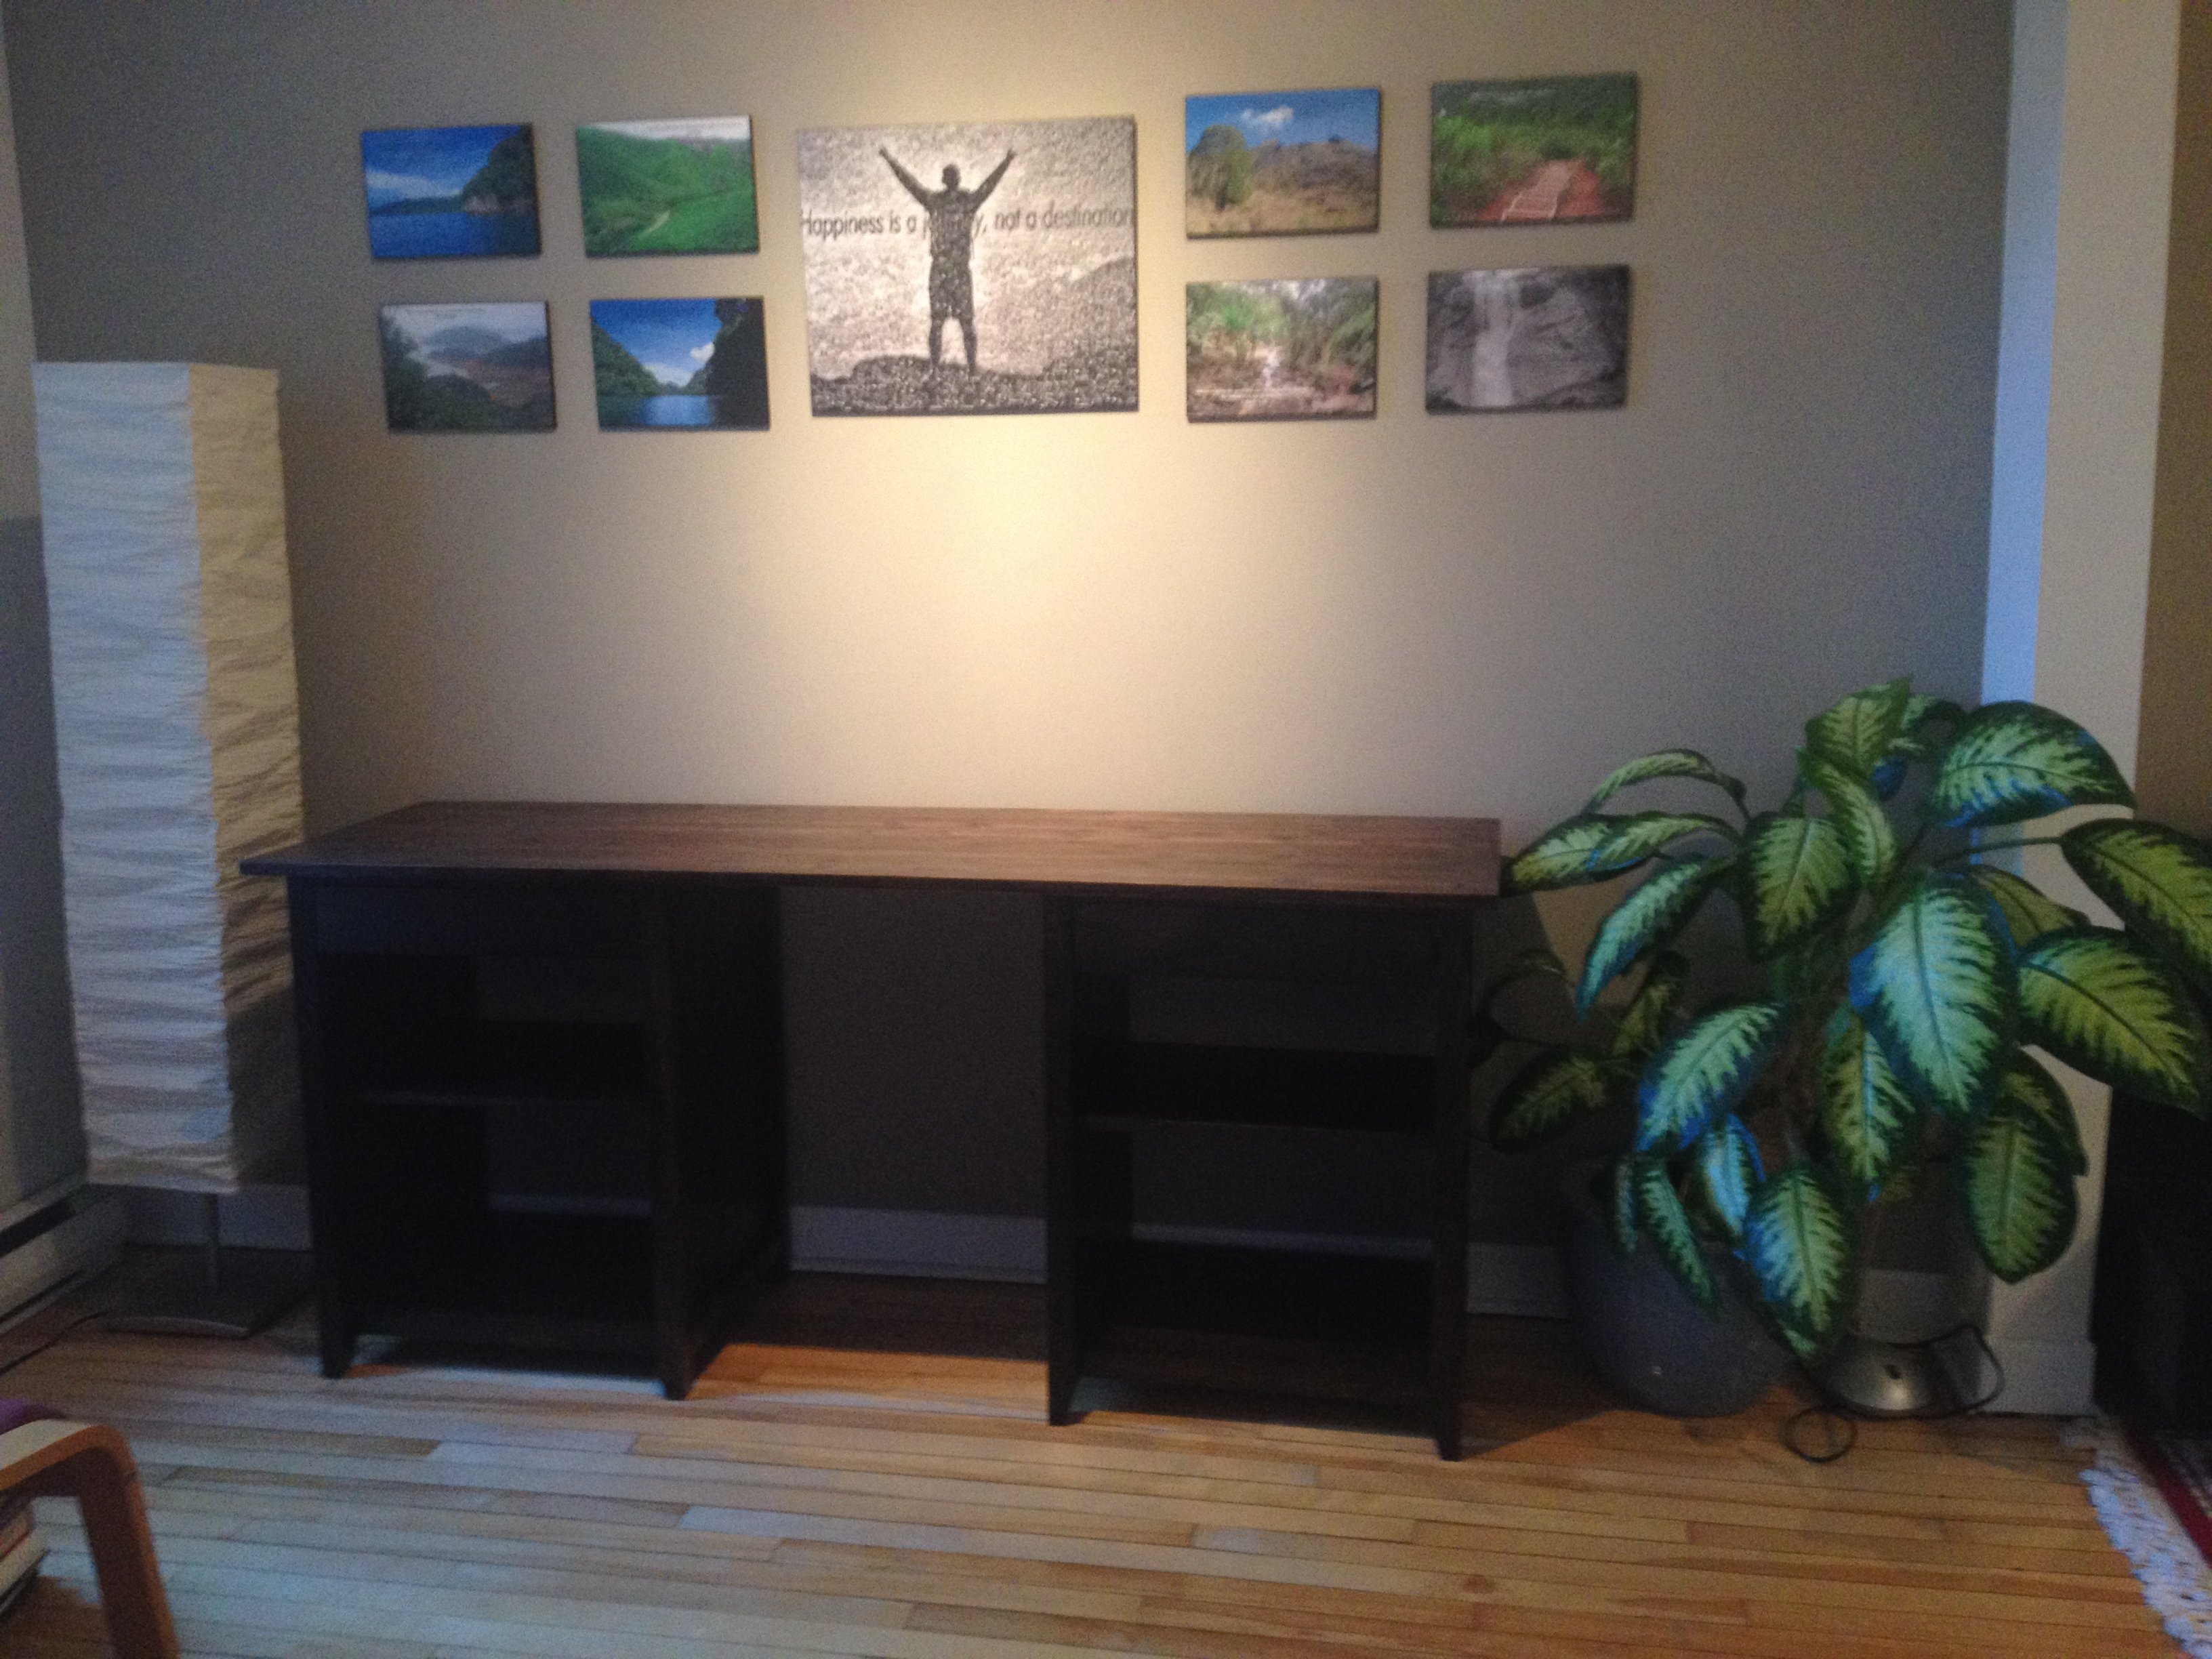
My first big project! Decided to make two cabinets and drawers to make the desk more symmetrical and a better fit to the room. Also decided to go without the knobs and bottom trim under the drawers so that I could just pull them out from the lip underneath. Just a personal preference for me.
I definitely had lots of fun building this desk!

Estimated Time Investment
Weekend Project (10-20 Hours)
Finish Used
1 x Minwax Prestain
2 x Minwax Dark Walnut Stain
2 x Minwax Polycrylic Finish
2 x Minwax Dark Walnut Stain
2 x Minwax Polycrylic Finish
Recommended Skill Level
Intermediate
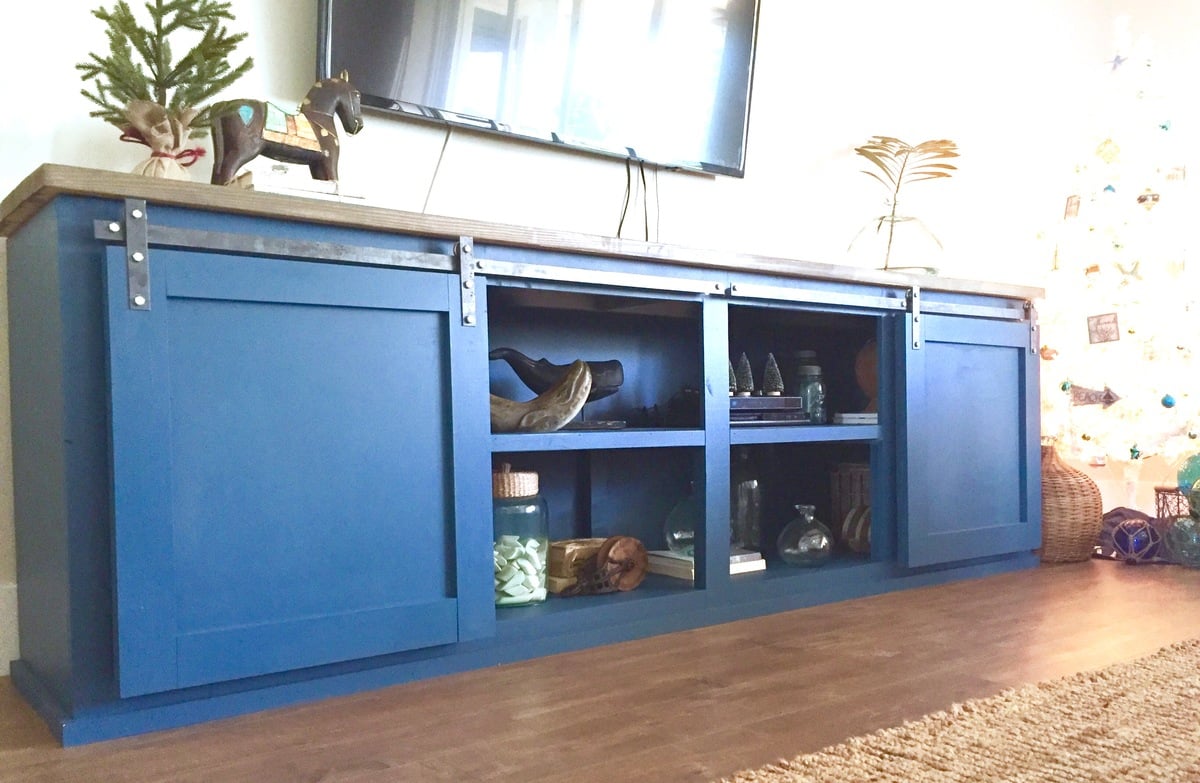
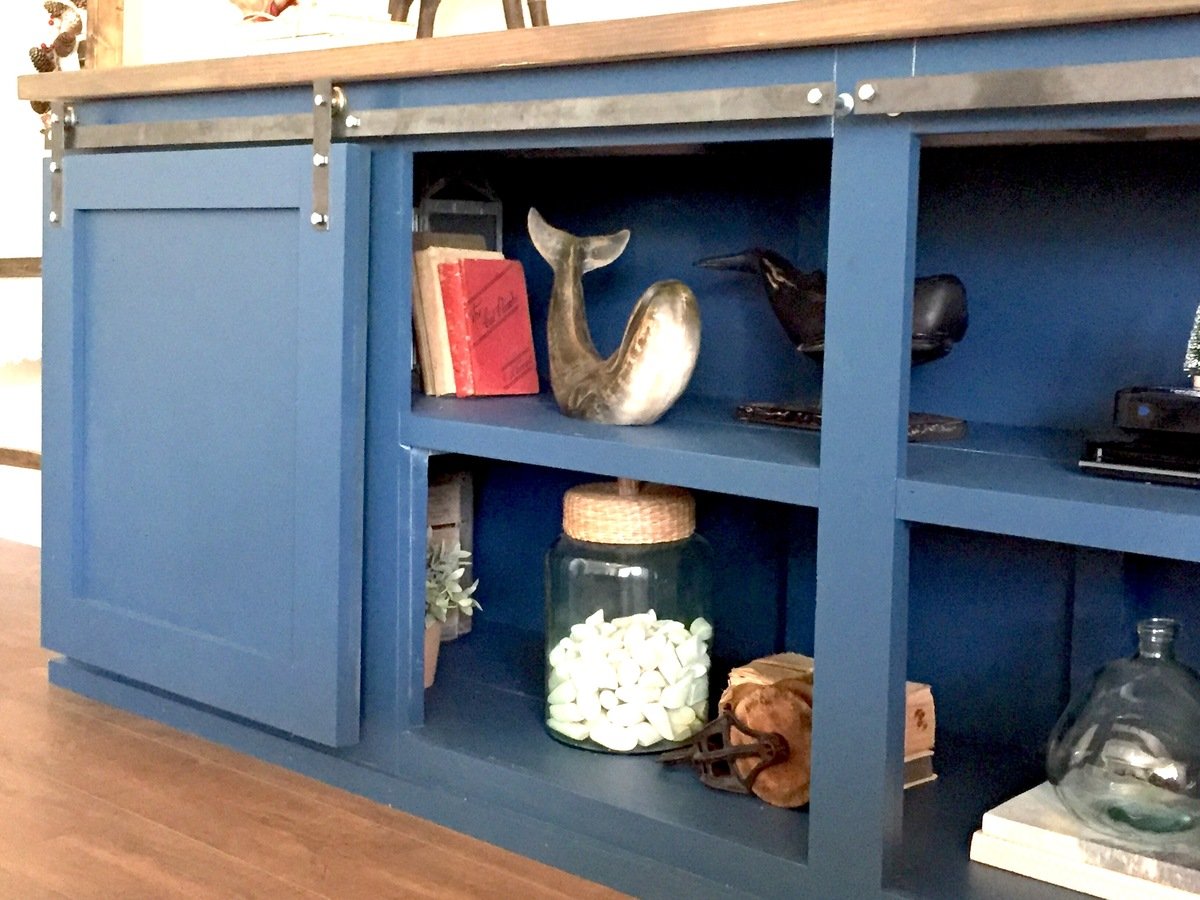
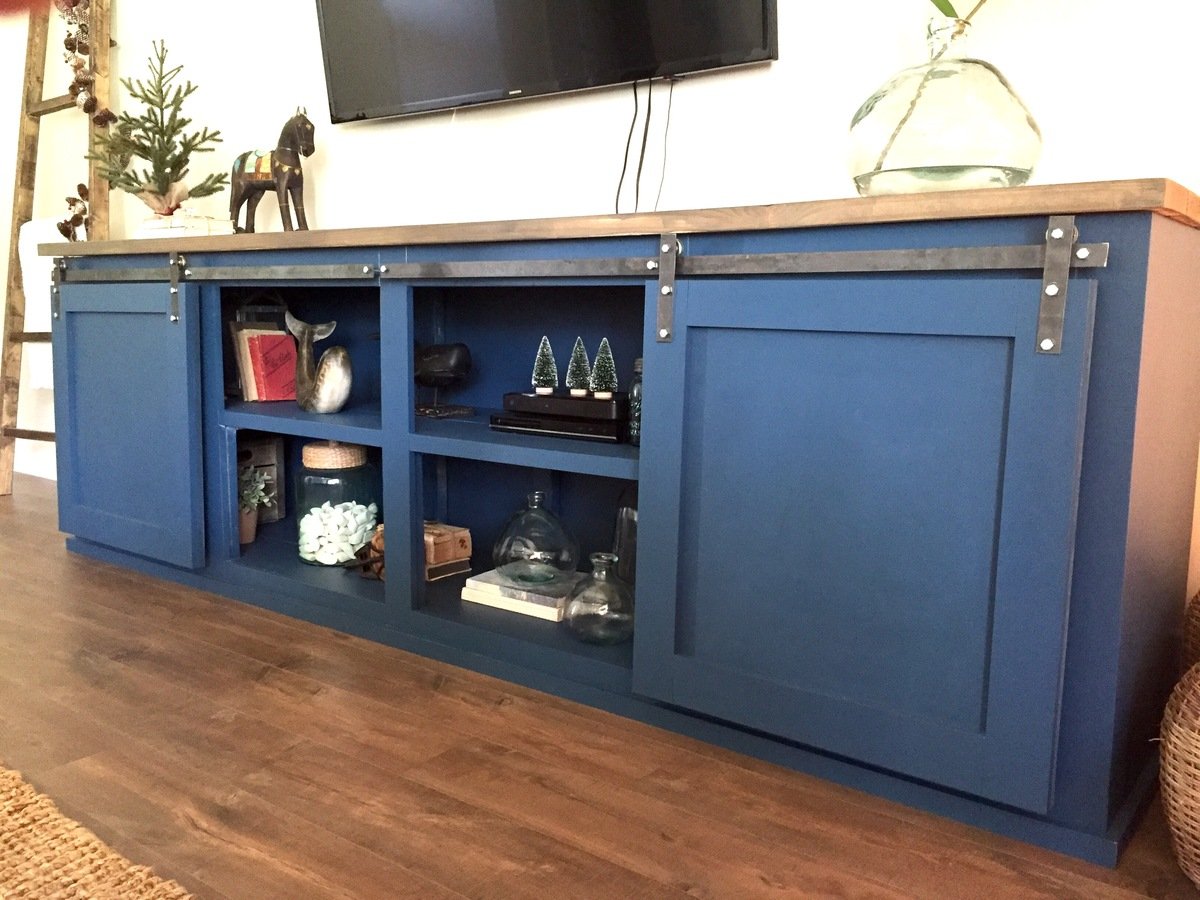
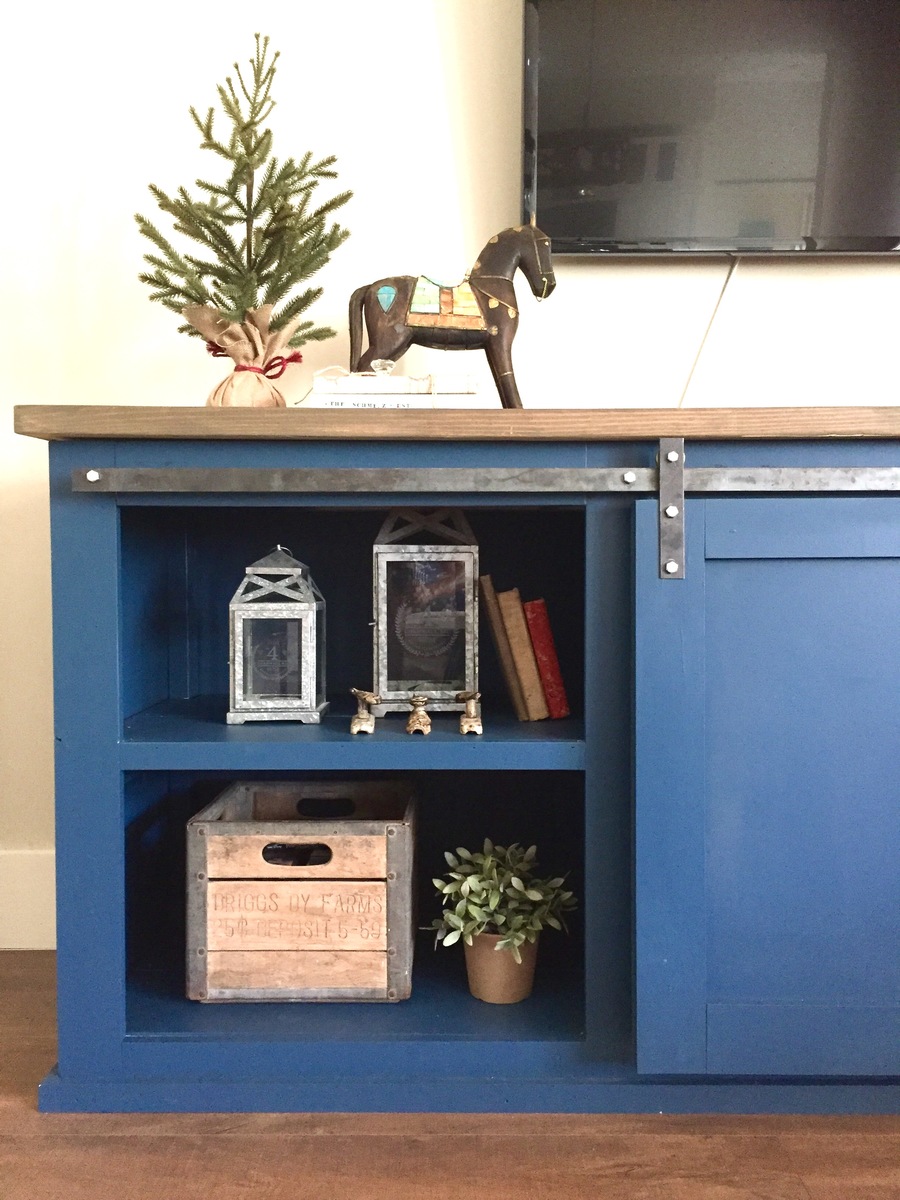
Barn Door Console

$
Built from Plan(s)
Estimated Time Investment
Week Long Project (20 Hours or More)
Finish Used
Marea baja by SW and weathered oak by minx for the top
Recommended Skill Level
Intermediate
Comments
Sat, 02/13/2016 - 05:04
Barn door console
Your console looks wider than some of the others and exactly what I am looking for. Can you provide the dimensions of your console; including the dimensions of the doors? Where did you find your hardware. Thx.
Adirondack chairs with funny back legs
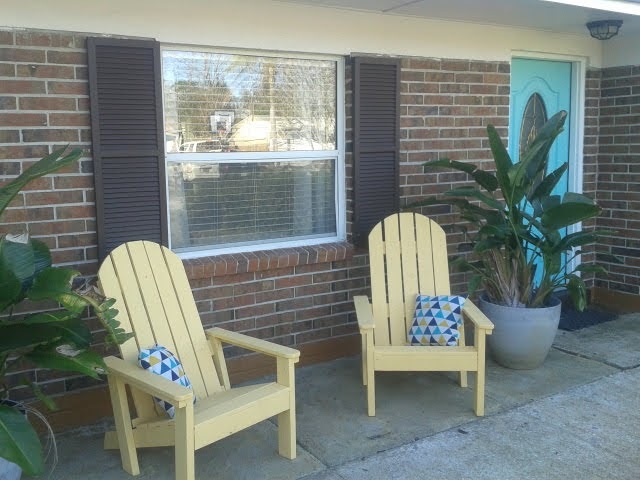
The project was easy and fun. The plans are perfect, provided you follow instructions. I assembled the back legs backwards and that complicated the instalation of the back rest. I liked the result in the end.
Built from Plan(s)
Estimated Cost
~ $100 for the pair.
Estimated Time Investment
Weekend Project (10-20 Hours)
Finish Used
Exterior Behr Marquee Matte
Recommended Skill Level
Starter Project
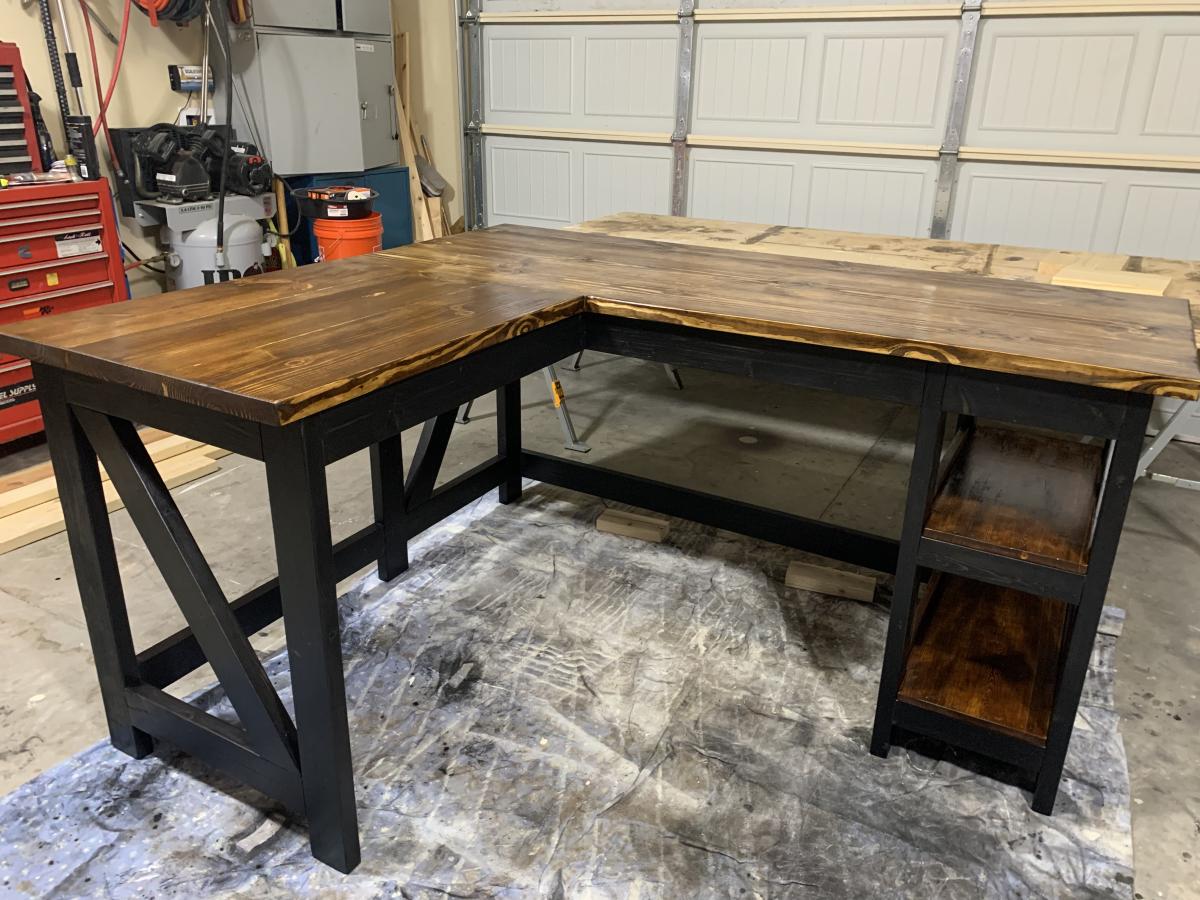
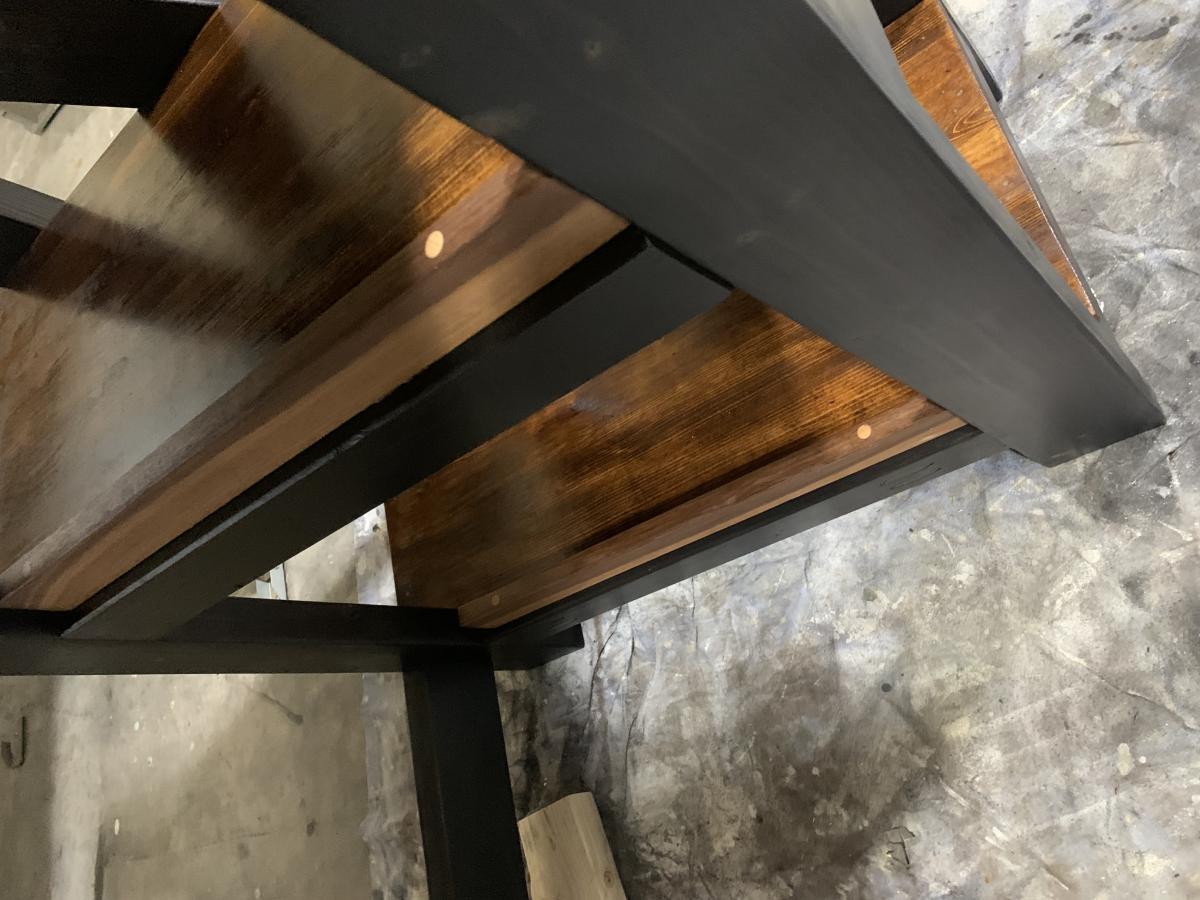
L shaped triple x desk

We built this desk over Christmas break with my son for his bedroom.
Ran all wood through a planer and used pocket hole screws and Tite bond 3 glue. Black stain and satin polyurethane (3 coats) for the frame and my own stain concoction for the shelves and top treated with 2 coats of Odies oil.
He was very pleased and we enjoyed our time working on this project

Built from Plan(s)
Comments
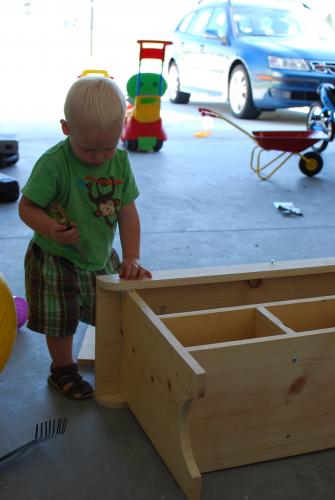
Numbered Cubby Shelf
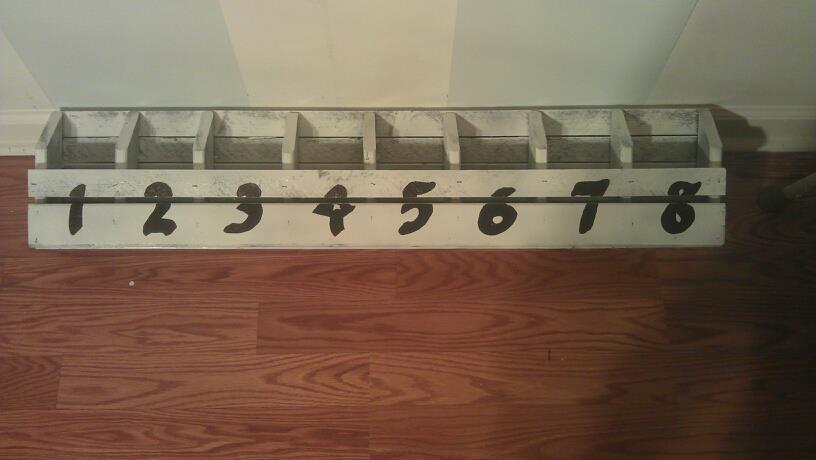
I loved this project and knew I had to do it. I decided it would work great for all that little stuff I had accumulating on my scrapbook table like glues, pens, scissors etc, now I will have room to actually scrapbook!
Built from Plan(s)
Estimated Cost
Under $20
Estimated Time Investment
An Hour or Two (0-2 Hours)
Finish Used
I used spray paint, first I sprayed black, then white over it and used paint markers for the numbers.
Recommended Skill Level
Starter Project
Revised barn bookshelf
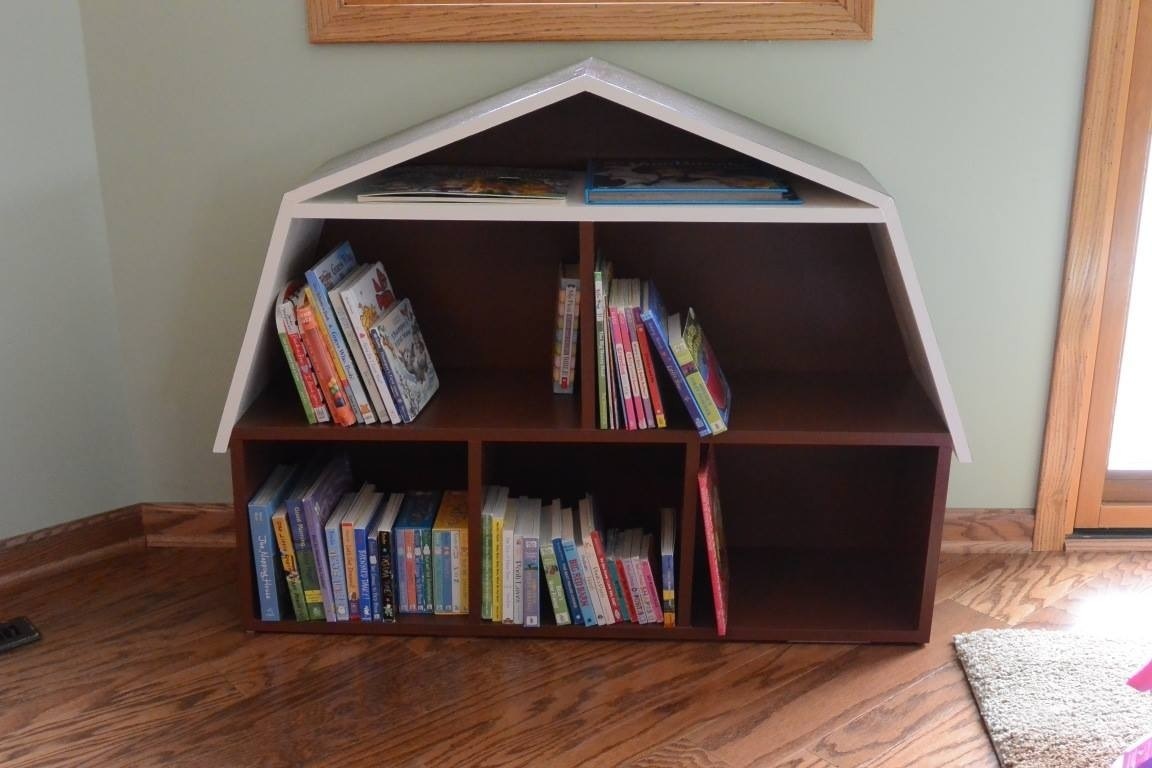
I changed the overall width (now 42" & height 34") to fit my space. All roof/shelf angles are cut at 22.5 degrees still. I used a circular saw beveled and upon assembly, I needed to caulk the seams. I also caulked the joint of divider and shelf and filled in the pocket holes to make it "prettier" before painting. I made a barn door to go in the middle cubby on the bottom to make the bookshelf interactive, but the dividers weren't quite square and the door made it more obvious. Definitely a fun build!
Cut changes:
bottom - 40.5 inches
middle shelf - 42 in at longest point
loft shelf - 32.5 inches
top roof pieces - 17.75 inches (I originally cut these at 18.25" & then removed another .5" from each piece)
Built from Plan(s)
Estimated Time Investment
Week Long Project (20 Hours or More)
Finish Used
Painted with leftover cream & red paint from our actual barn. Spray painted roof exterior in brown. 2 coats of polycrylic to finish.
Recommended Skill Level
Intermediate
My Santa & Sleigh

All hand cut accept for runner are attached with biscuits
Estimated Cost
$12
Estimated Time Investment
Day Project (6-9 Hours)
Finish Used
Red Rustoleum paint
Gold trim
Stars are starch made candy. (very stable)
Antique Santa from thrift store
Gold trim
Stars are starch made candy. (very stable)
Antique Santa from thrift store
Recommended Skill Level
Intermediate
End table
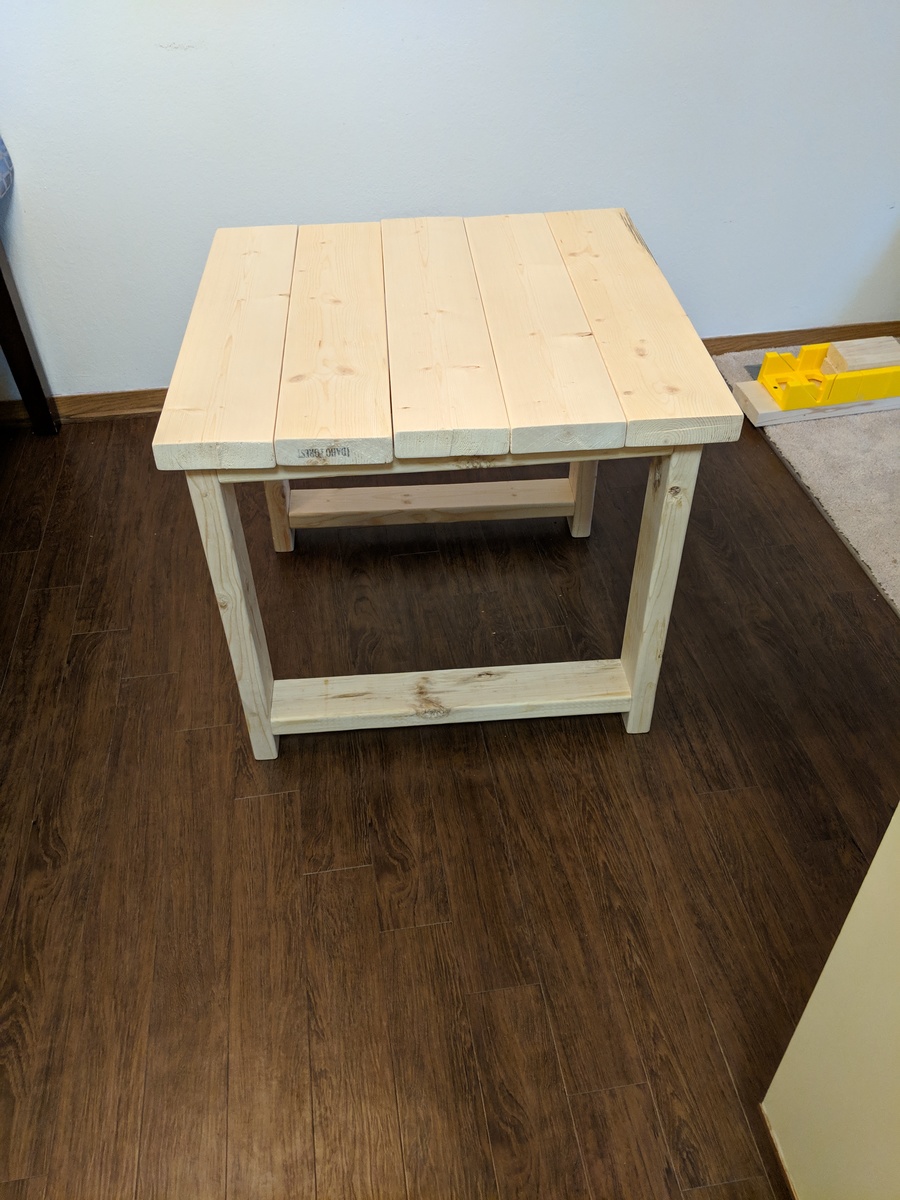
This was easier than I thought. My kids helped me with it. I decided to leave the bottom shelf off as it can be added at a later time if desired.
I'm going to take the same concept and make two loft beds for my kids.
Estimated Cost
$58.00
Estimated Time Investment
Afternoon Project (3-6 Hours)
Finish Used
Weathered Oak 270 minwax.
Recommended Skill Level
Beginner
Kalakoa Planter
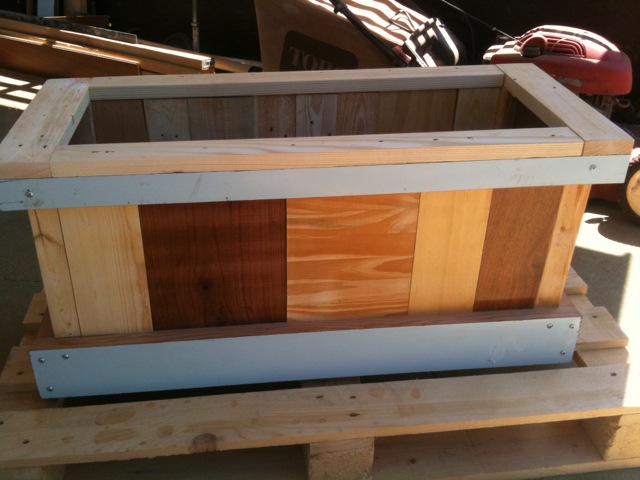
This planter was made from all reclaimed woods from a door, book shelf, a pallet, and a fence that was being thrown away. I like to try to keep the landfill from overflowing by reducing as much waste as I can. Every piece of trash counts you know! Reduce, Reuse, Recycle, Reclaim! Me go eco....you go too!
For the story visit my blog:
http://me-go-eco.blogspot.com/2011/09/so-what-do-you-do-with-these.html
I'm on twitter if you want to follow me: Me_go_eco
Thanks for stopping by. Have an awesome day! =)
Estimated Cost
Free...all reclaimed wood.
Estimated Time Investment
An Hour or Two (0-2 Hours)
Finish Used
Exterior clear varathane
Recommended Skill Level
Beginner
Comments
Faux fireplace
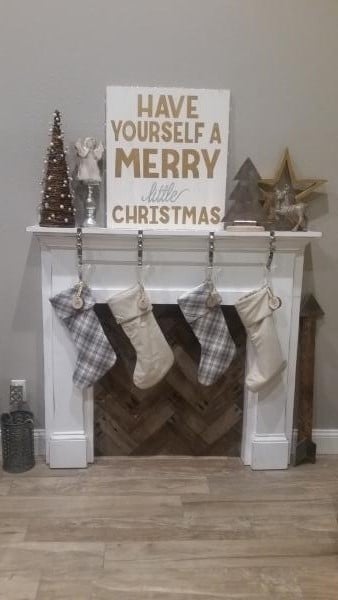
Faux fireplace
Built from Plan(s)
Recommended Skill Level
Beginner