Community Brag Posts
First Project-Dog Kennel/End Table
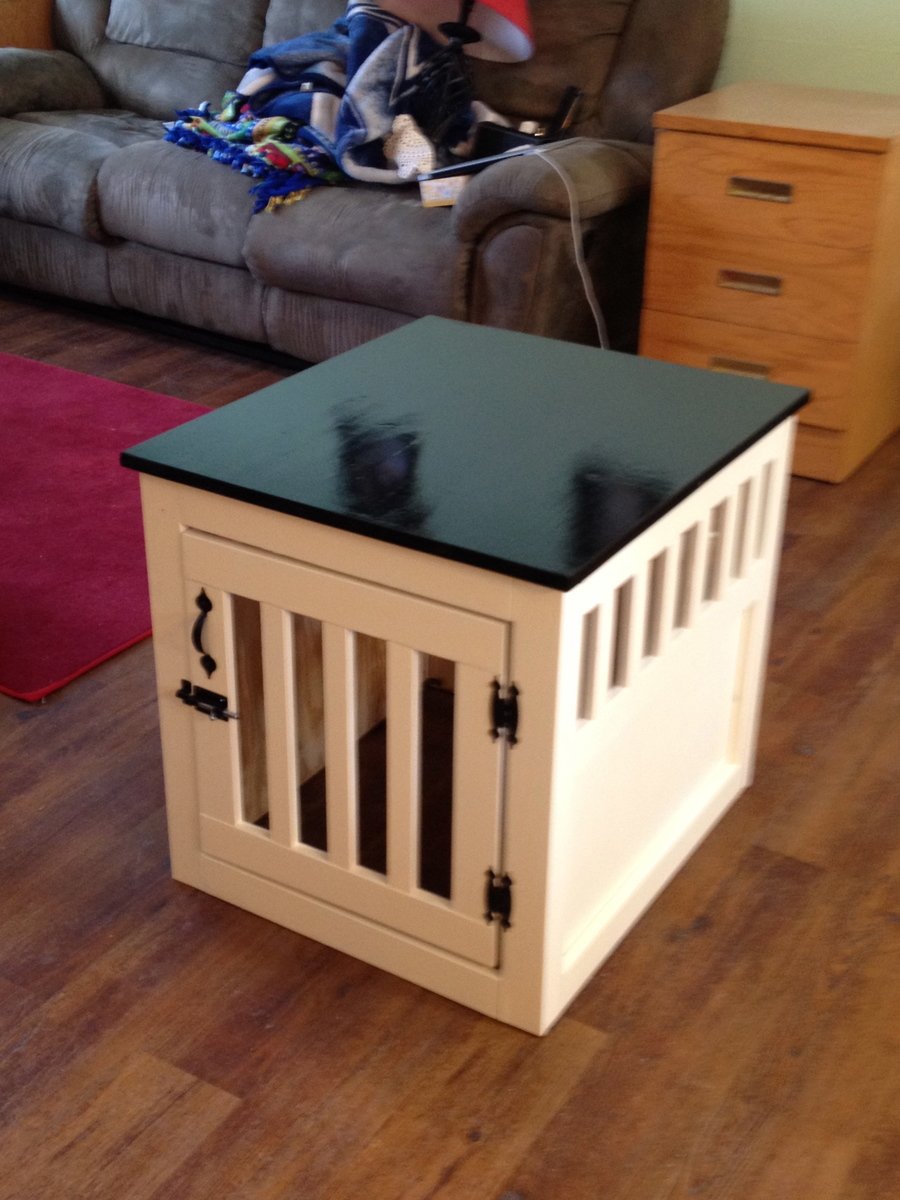
I just finished my first project with a Kreg Jig, I used the colors from another kennel project that we found on the site because we thought it would go well with our living room. I adjusted the plans to fit our furniture and dogs, so it is shorter and not as deep as the the original plans show.
Built from Plan(s)
Estimated Cost
$60
Estimated Time Investment
Day Project (6-9 Hours)
Recommended Skill Level
Beginner
Comments
Thu, 05/31/2012 - 18:35
dog kennel
This is a fabulous idea. We live in a small space and this is a two for one idea. I think we will be making this soon. Thanks so much for the idea. I would have never thought of this on my own.
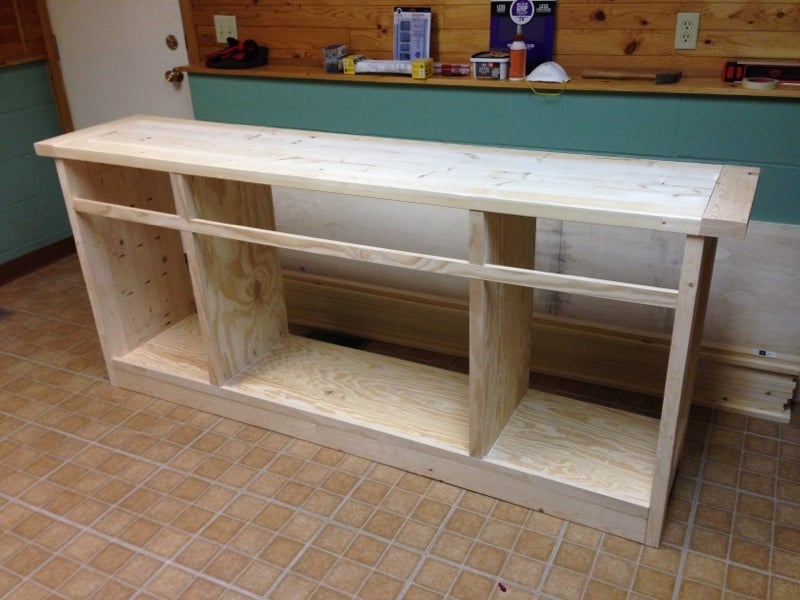
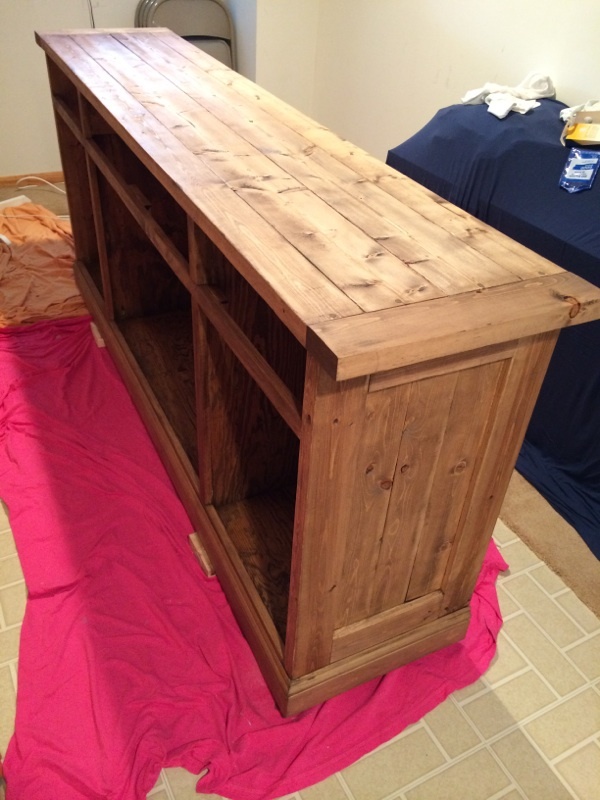
Planked Wood Sideboard - Rustic Yet Refined
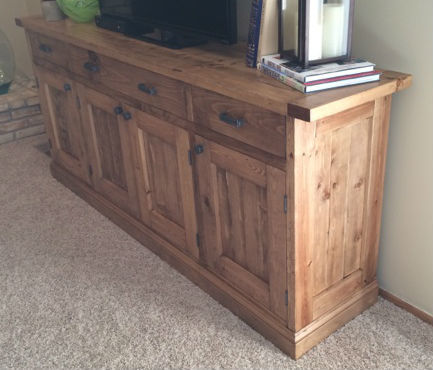
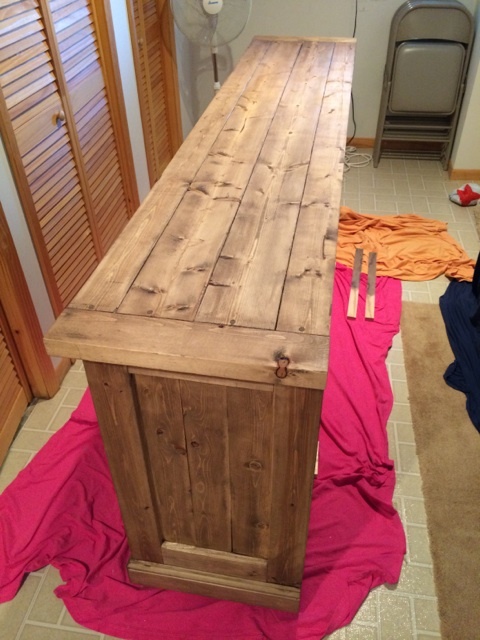
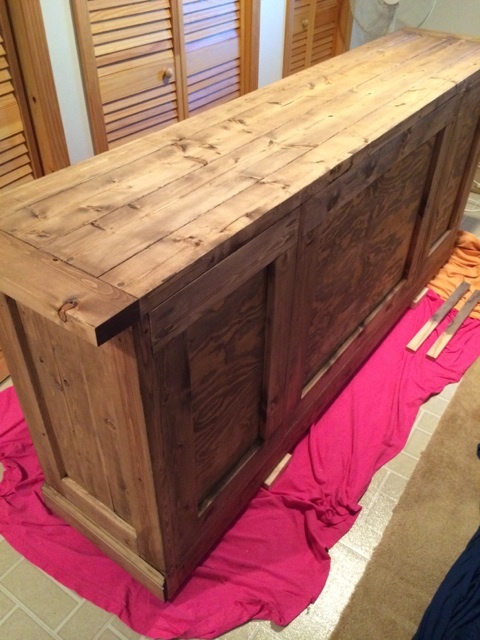
This was my first finished project using plans from Ana's site, and I am very pleased with the finished product. Every aspect of the finished sideboard is based on something from the site. I started with the plans for the Planked Wood Sideboard, and made no modifications as the dimensions were perfect for our basement family room. I decided to inset the back (http://www.friendly-home.net/2012/02/gigantic-rustic-sideboard.html) as Ana explained that Hillary had done, and love the final result. This will allow us to use this to potentially divide a room in an open concept space at some point in the future.
For the finishing process, I decided to follow the "Rustic Yet Refined" finish tutorial highlighted on both the Ana-White site (http://ana-white.com/2013/08/rustic-yet-refined-wood-finish) and Jen Woodhouse House of Wood (http://jenwoodhouse.com/blog/2013/06/07/diy-dining-table/). I fully intended to complete the 9 step process, but found that after we applied the Minwax pre-stain wood conditioner, followed by Minwax special walnut stain and wiped it off within 15-30 seconds, the finish mirrored the restoration hardware finish that we were going for. We decided not to proceed with layering on the weathered oak or applying the whitewash, and went straight to the spar urethane satin coats.
Overall, the project was a success, but was difficult to finish during the Minnesota winter as it was unbelievably cold and was forced to complete the finishing process in our basement/laundry room, which extended the length of the project. I am very excited to begin building other pieces from Ana's plans.

Built from Plan(s)
Estimated Cost
$250-300
Estimated Time Investment
Week Long Project (20 Hours or More)
Finish Used
Minwax pre-stain wood conditioner; Minwax Special Walnut (natural bristled brush); Helmsman Spar Urethane in Clear Satin (natural bristled brush)
Recommended Skill Level
Intermediate
Comments
Mon, 03/03/2014 - 10:01
Absolutely beautiful! Thank
Absolutely beautiful! Thank you for all the details on how you did this!
In reply to Absolutely beautiful! Thank by moosmani
Thu, 03/13/2014 - 07:09
Thank you!
Thank you so much for your kind words. I am extremely impressed with your brag posts as well, and you may have been inspired to take on the picket storage shed project as soon as the snow melts.
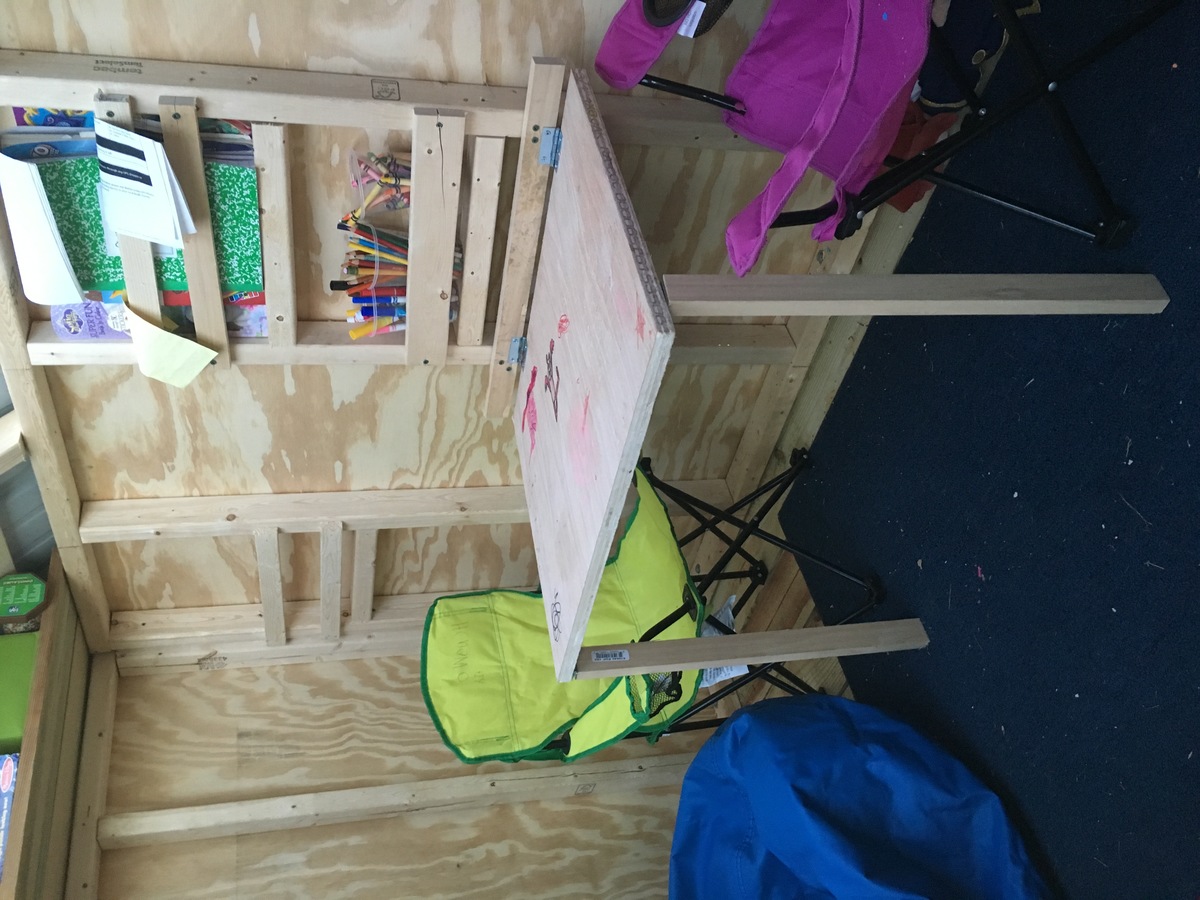
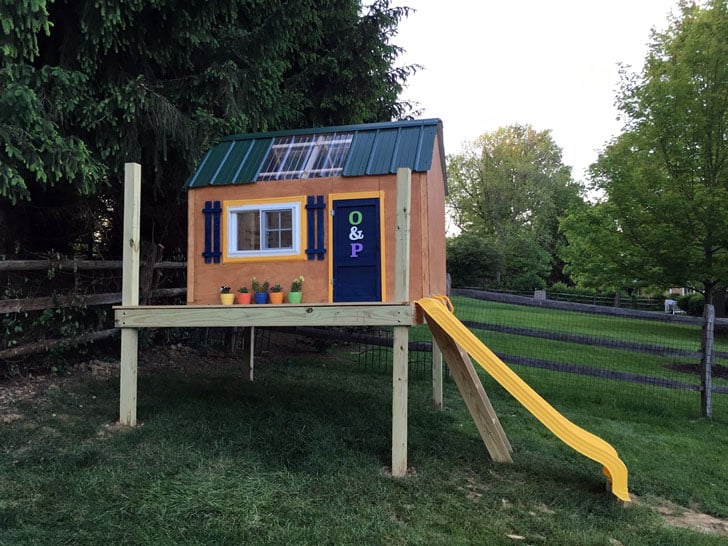
Playhouse with Swing Set

We really enjoyed building this playhouse swing set for our kids. We have a decent slope to our backyard, so we needed to sink our posts, which required a bit more work thank Ana's plans. We also used a real window (my dad just happened to have in his garage) instead of the 3 open aired windows Ana's plans called for. Inside we built a fold under table, shelf, and a chalkboard for thier entertainment.
Built from Plan(s)
Estimated Cost
$800
Estimated Time Investment
Week Long Project (20 Hours or More)
Recommended Skill Level
Intermediate
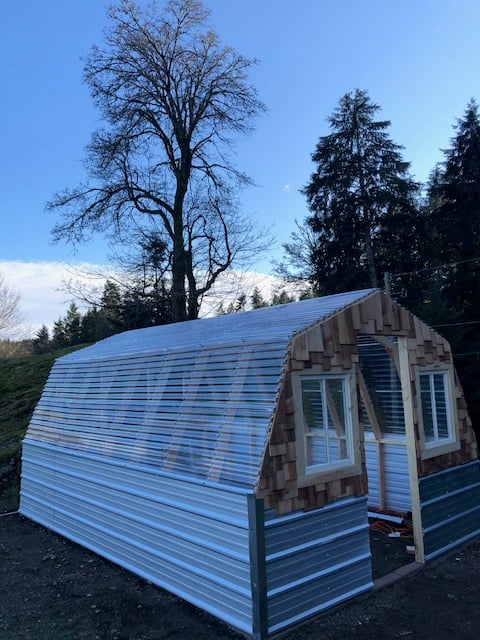
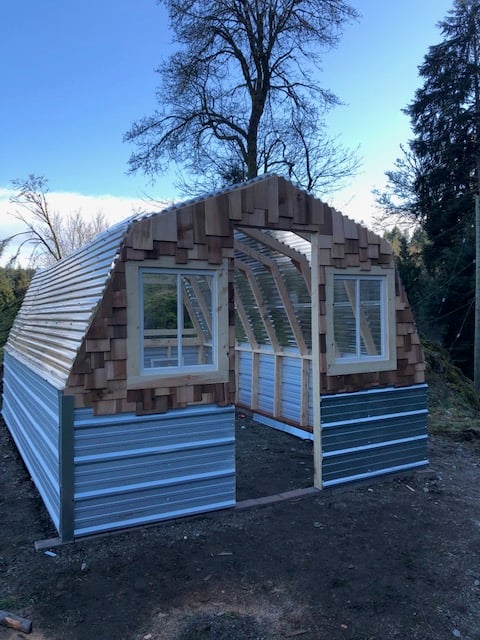
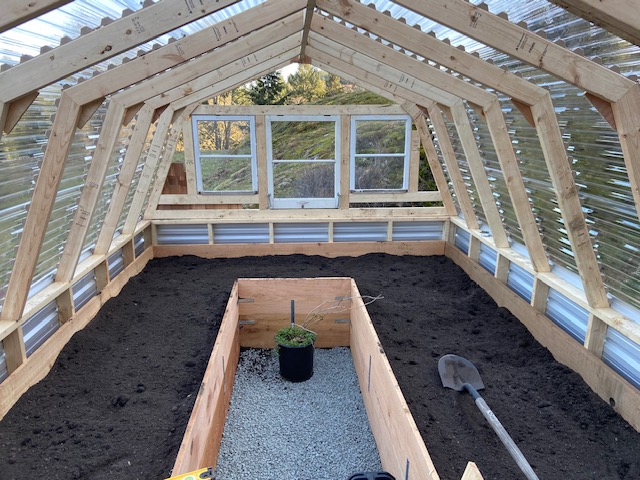
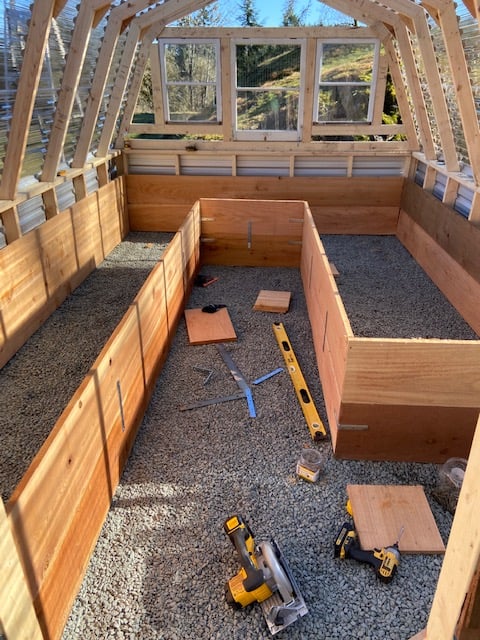
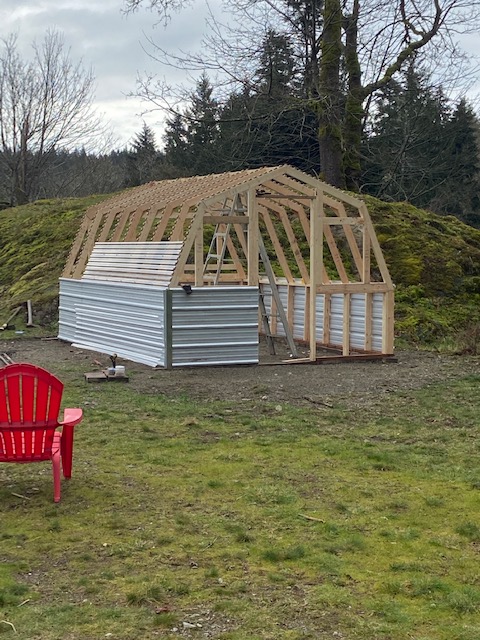
Greenhouse - BC, Canada
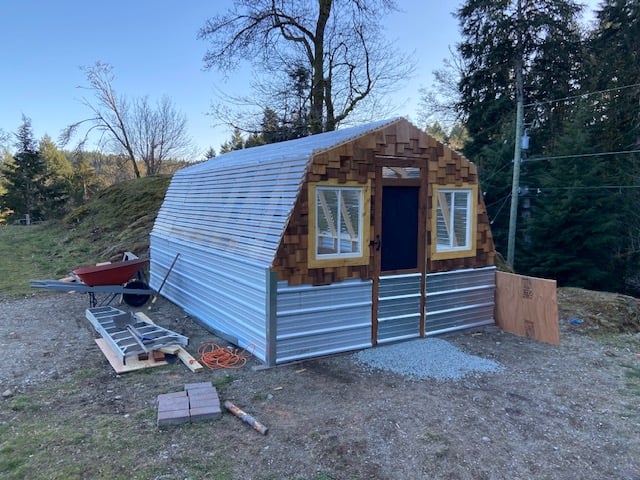
*NOT SURE MY PICTURES ARE UPSIDE DOWN??* This is the second time i've built this greenhouse. We recently moved to a bigger property so I built it 4ft longer at 16ft. I had some old windows to I modified the front and rear so I could incorporate them into the design. The cedar shake really adds to the appeal of the greenhouse as well. I still have to flash it off, but we are very happy with this greenhouse.
Built from Plan(s)
Estimated Cost
$2000
Estimated Time Investment
Week Long Project (20 Hours or More)
Finish Used
Stained the cedar shingles with a clear stain
Recommended Skill Level
Intermediate
Comments

Wed, 03/25/2020 - 10:13
Got the photos straightened…
Got the photos straightened out, thank you for posting!
This is amazing, thank you so much for using our plans and sharing photos, it is much appreciated!
Tue, 05/05/2020 - 12:35
Great greenhouse, I'm just…
Great greenhouse, I'm just starting to build one the same. What height are your beds?
Rustic Banquette Bench with Storage
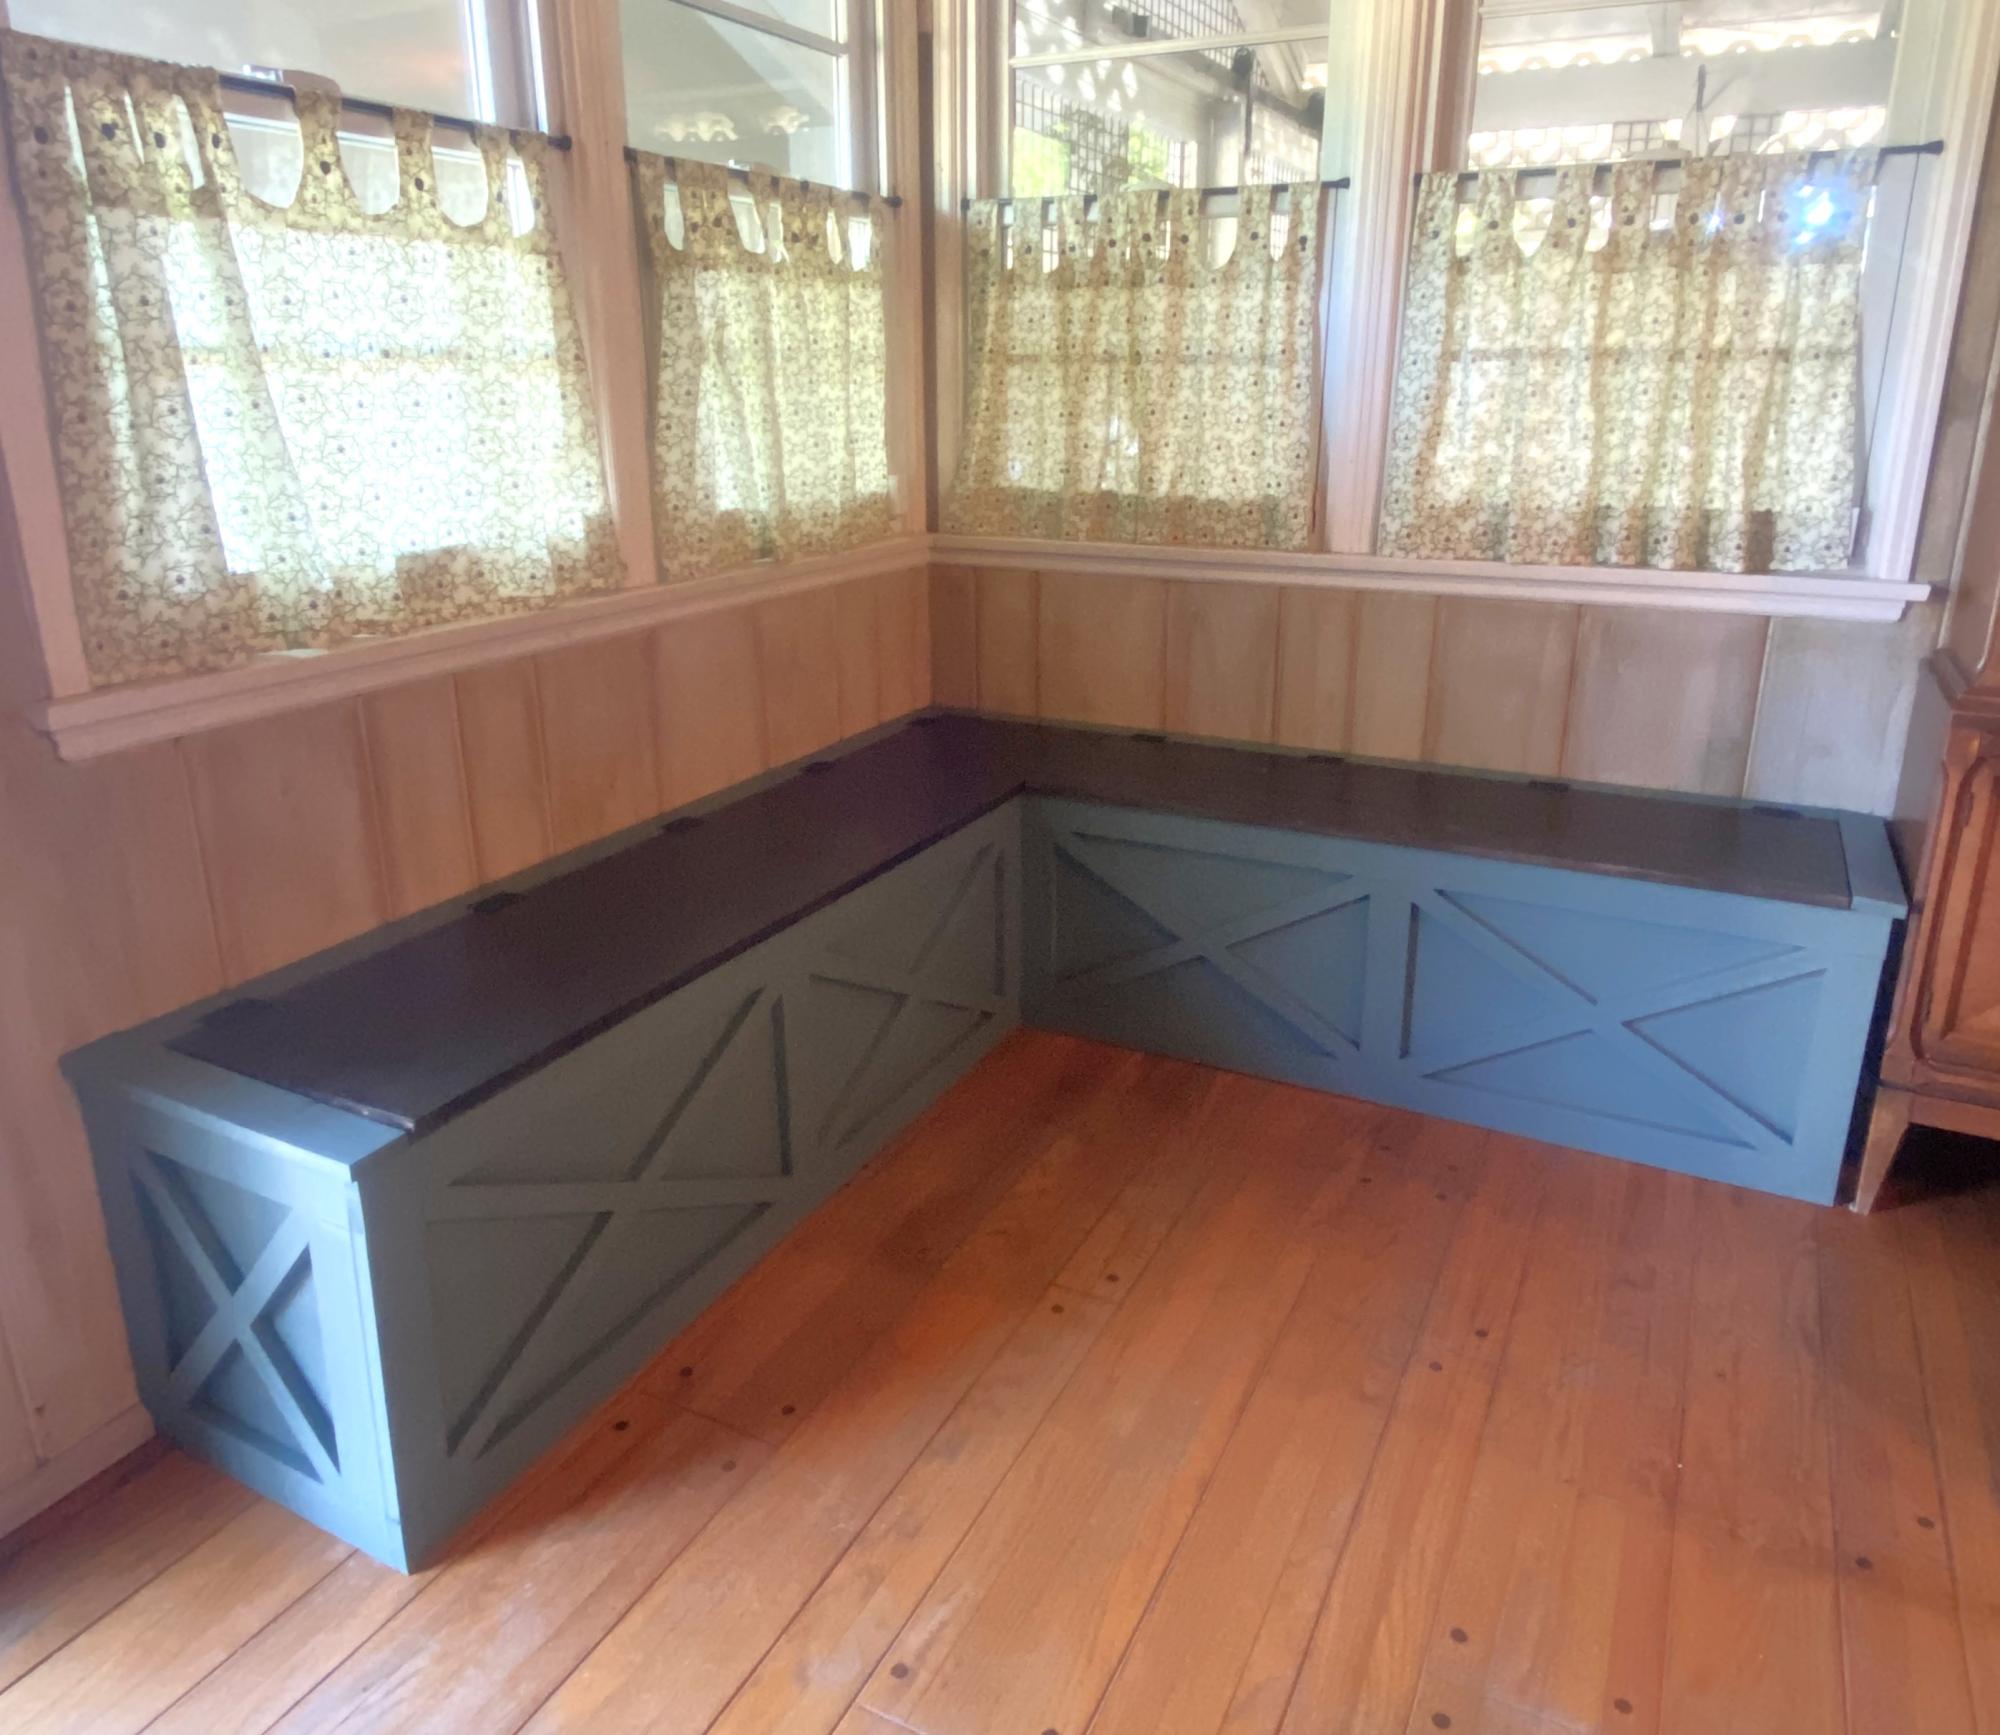
I needed some extra storage space and have always wanted a storage bench in this corner of my dining room. It took me a week to build from start to finish. I’ve never done any woodworking before, so this plan was good for me, as it was easy to follow with the color coding. The only thing that was “off plan” were the X’s on the face of the bench. I had some leftover 1x1 trim, from a handyman project a few years back, that I was happy to use up. It fit perfectly and I had just enough for all X’s. My biggest challenge with this project were the lids. They have a very minor bow, so one of the corners isn’t flush. But, it’s not enough to bother me or need to re-do the lid. All-in-all, I’m super happy with this banquette and may have caught the woodworking bug!
Built from Plan(s)
Chalkboard Shelf
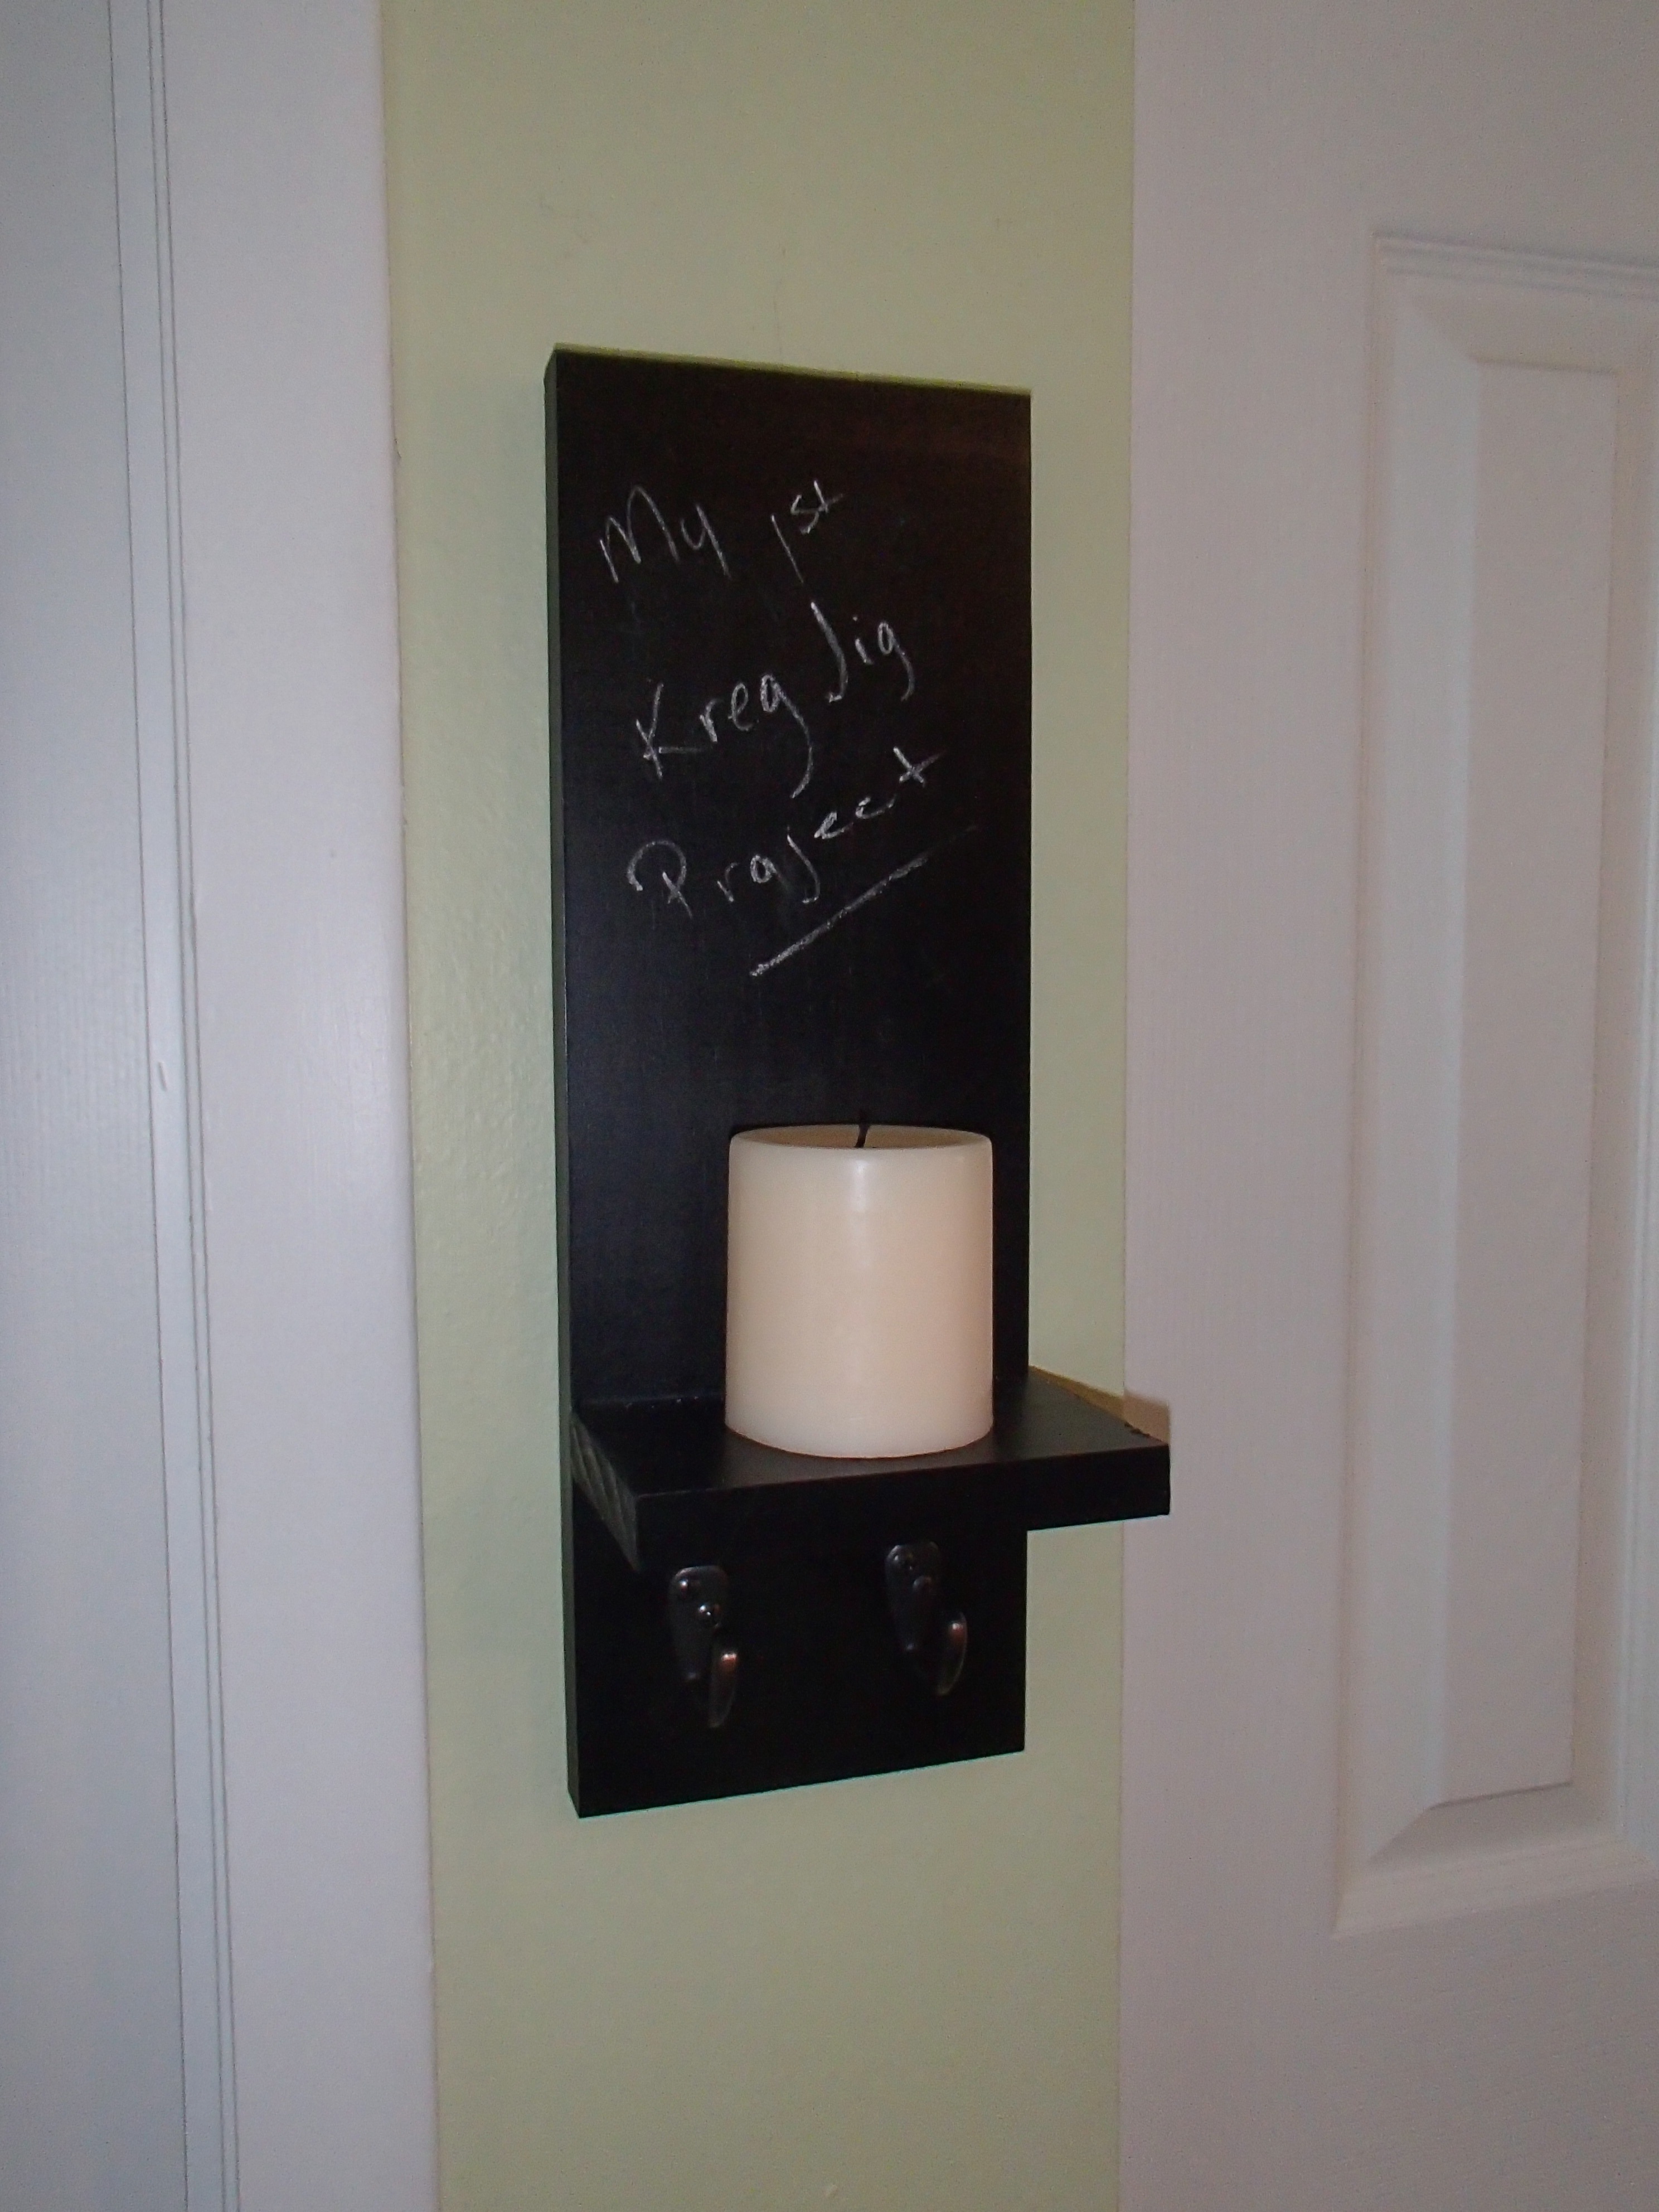
This is a smaller version of the easiest chalkboard shelf. We needed a smaller shelf to fit between the garage door and coat closet so this was it. It was also my first time using my Kreg Jig, which I love. Such a simple little project but I am excited.
Built from Plan(s)
Estimated Cost
Less the $10
Estimated Time Investment
An Hour or Two (0-2 Hours)
Finish Used
Chalk board spray paint.
Recommended Skill Level
Starter Project
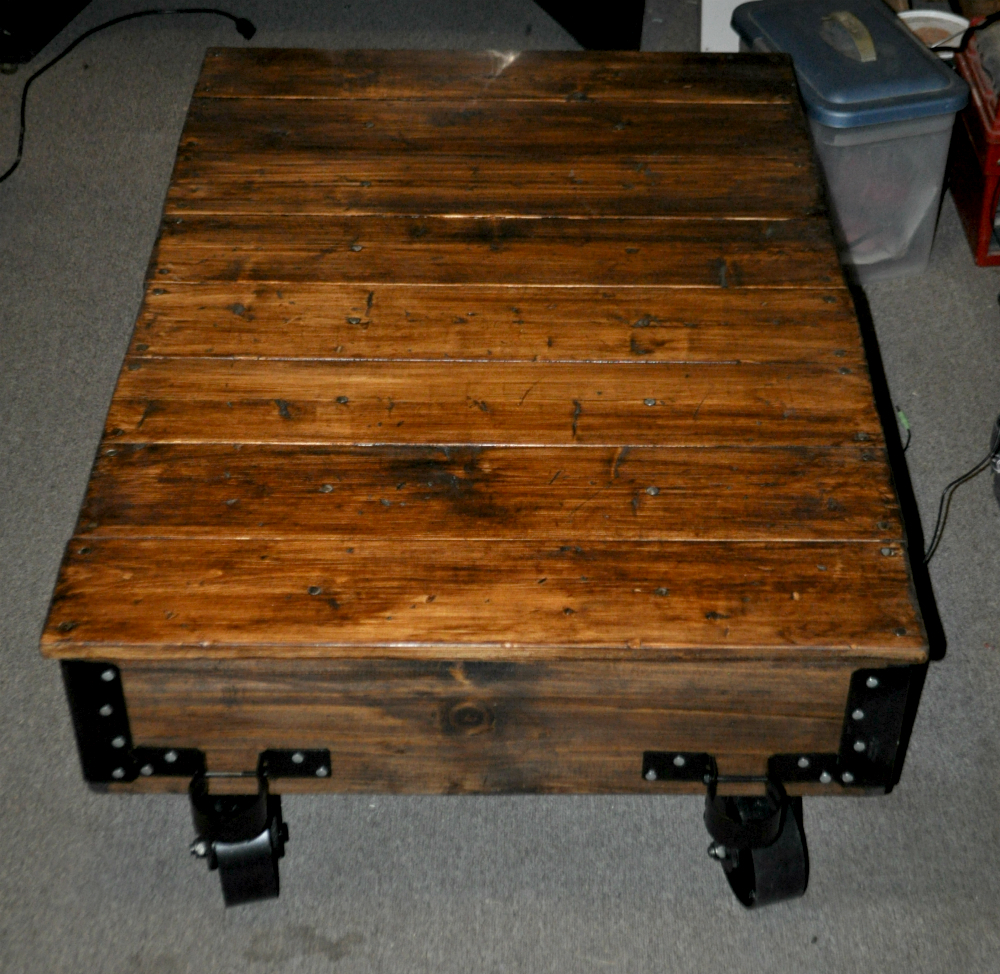
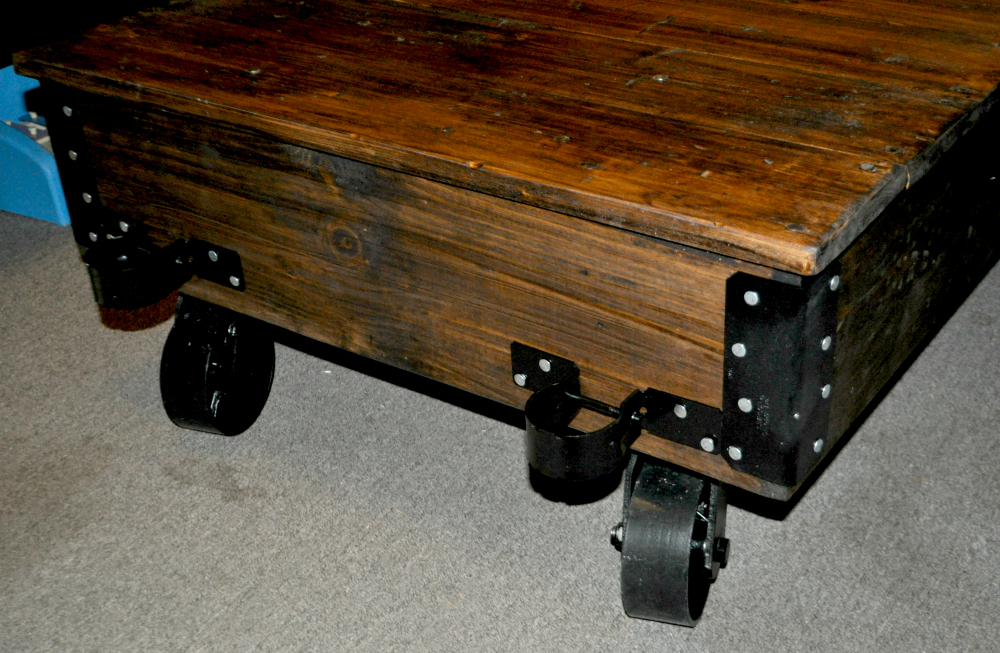
DIY Factory cart coffee table
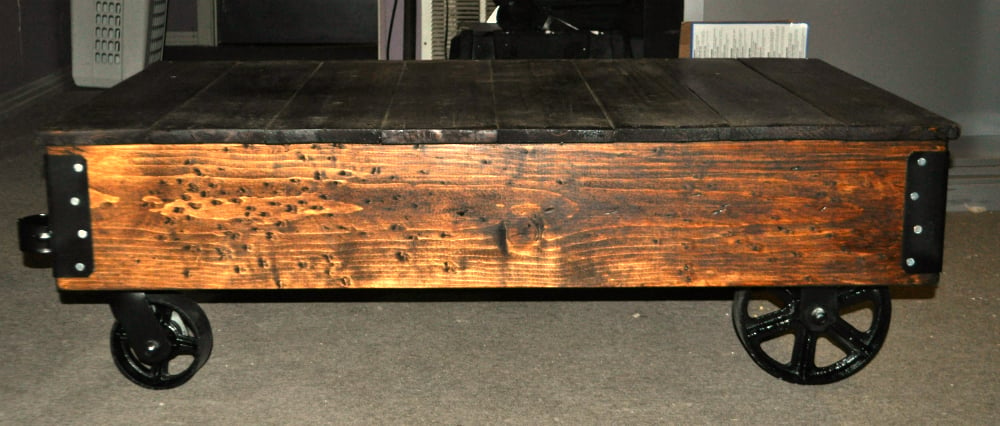
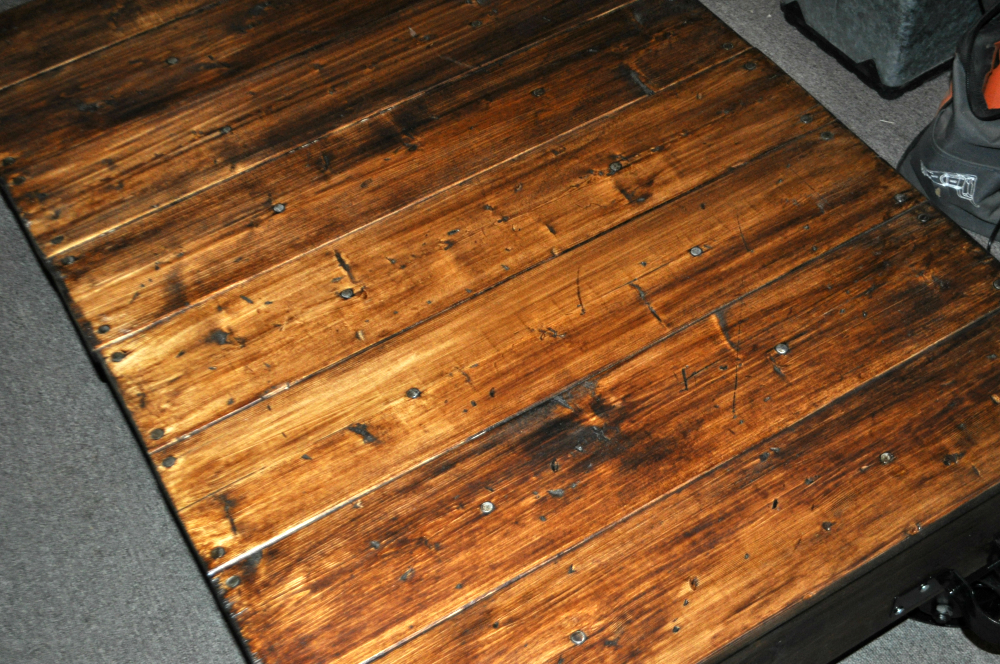
After seeing the plans for the Factory Cart Coffee Table on this site, I decided I should build one. I didn't actually follow the plans exactly...really just used them as "inspiration". I went with 5" swivel casters and 8" fixed casters, and the stain is Minwax hickory poly that has been sanded back a bit. I'm really happy with how it turned out.
Now on to the next project !
Estimated Time Investment
Day Project (6-9 Hours)
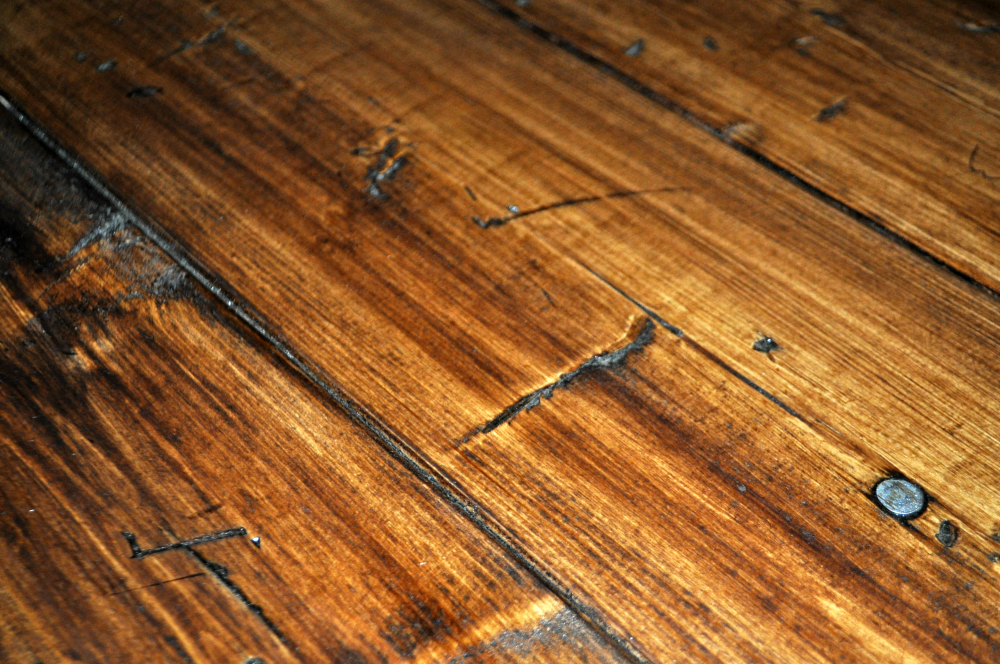
Finish Used
Minwax Hickory Polyurethane
Wiped on for about 5 minutes, wiped off, then sanded back a touch to give a more worn look.
Wiped on for about 5 minutes, wiped off, then sanded back a touch to give a more worn look.
Recommended Skill Level
Intermediate
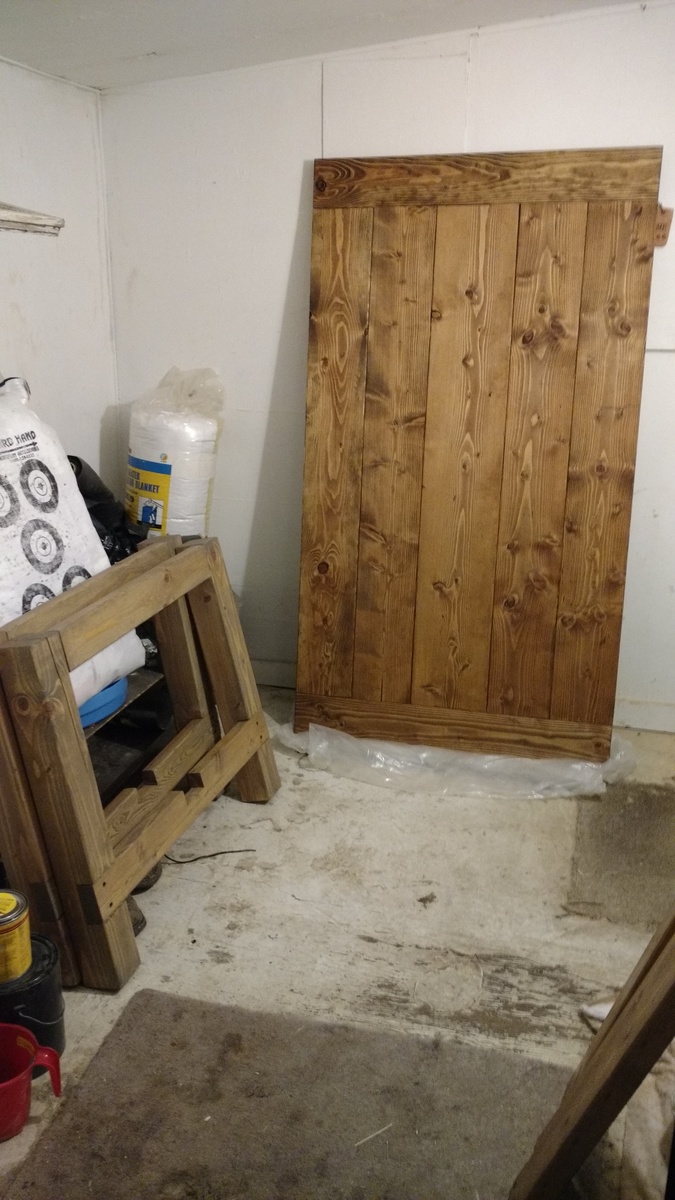
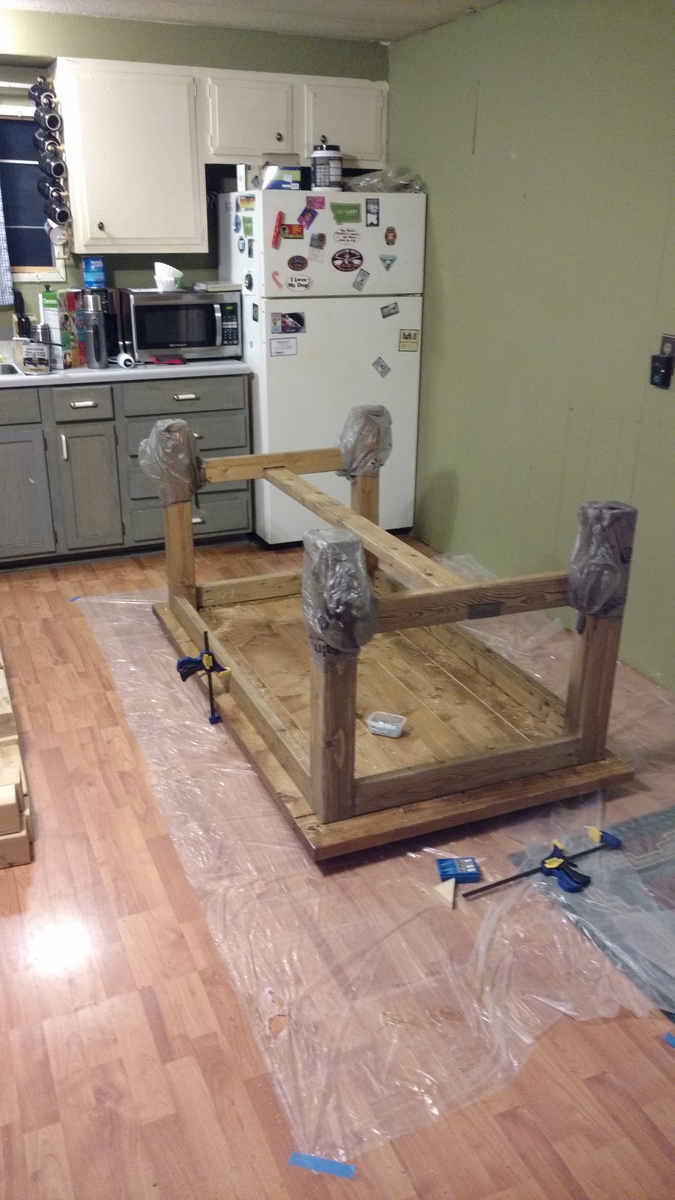
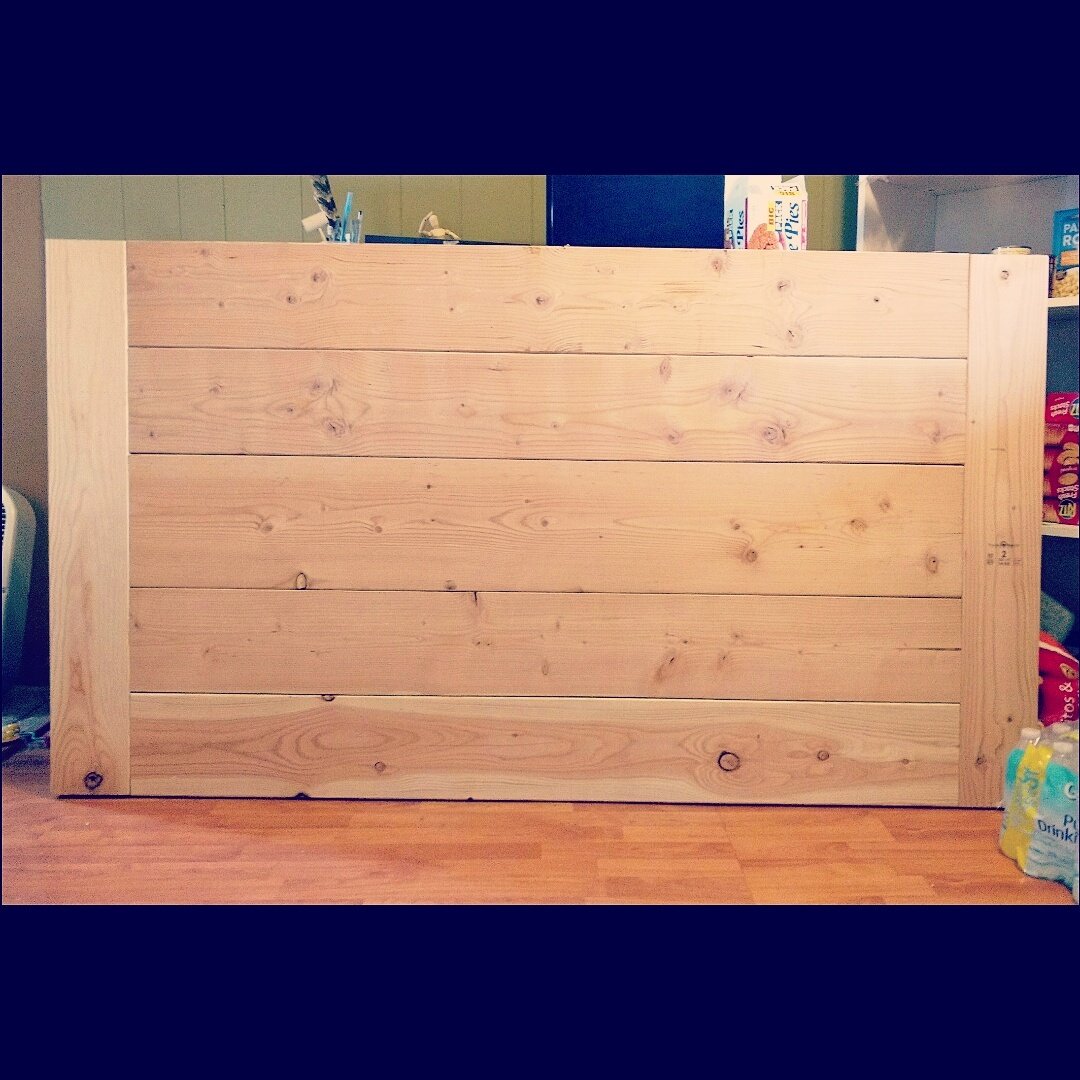
Farmhouse Table
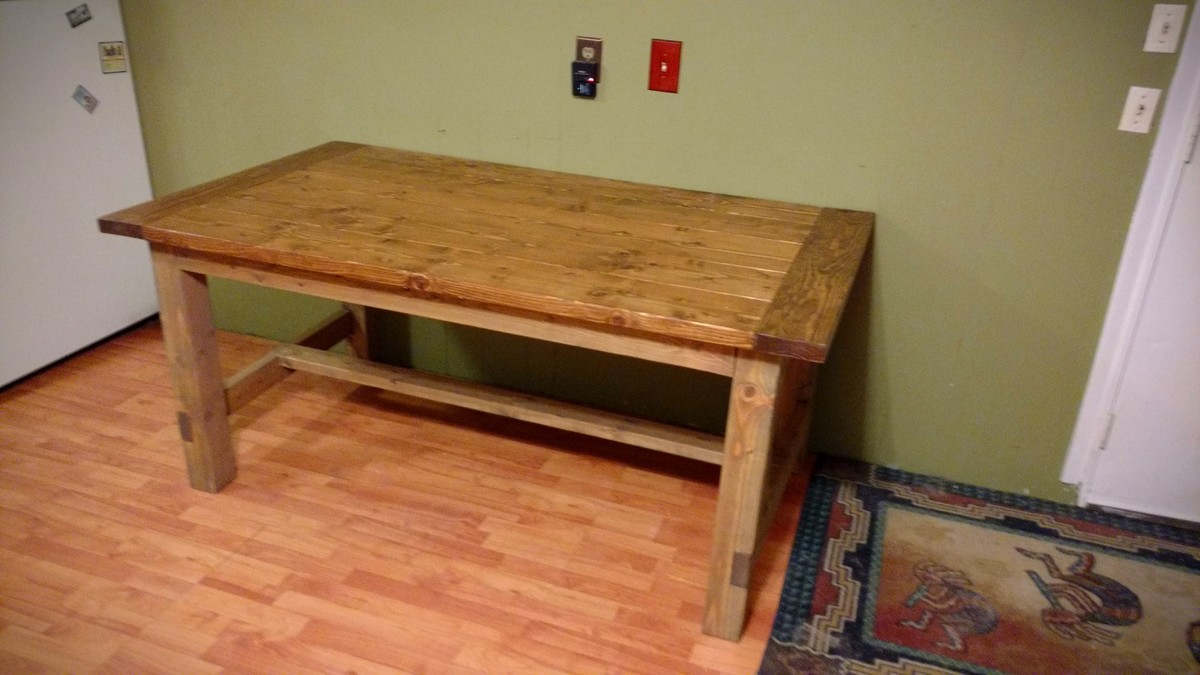
This was my 5th build. Took a few weekends working in the morning. Table is Weathered Oak (base) and Early American (top) stain. Modified the plans to make it slightly smaller so it would fit better in my kitchen. Very sturdy and table looks gorgeous in person, very happy.
Built from Plan(s)
Estimated Cost
$110+/-
Estimated Time Investment
Weekend Project (10-20 Hours)
Finish Used
Minwax Early American and Weathered Oak
Rustoleum Triple Thick Polyurethane (2 coats on base, 3 on table)
Rustoleum Triple Thick Polyurethane (2 coats on base, 3 on table)
Recommended Skill Level
Beginner
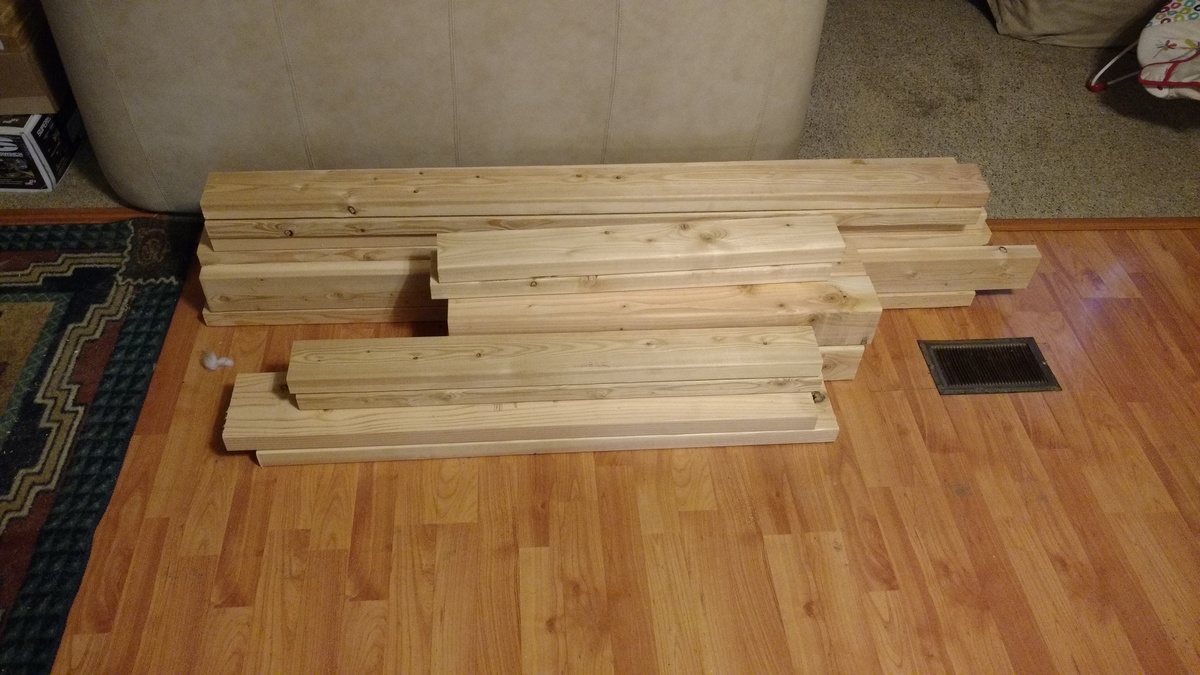
Toy Horse Stalls
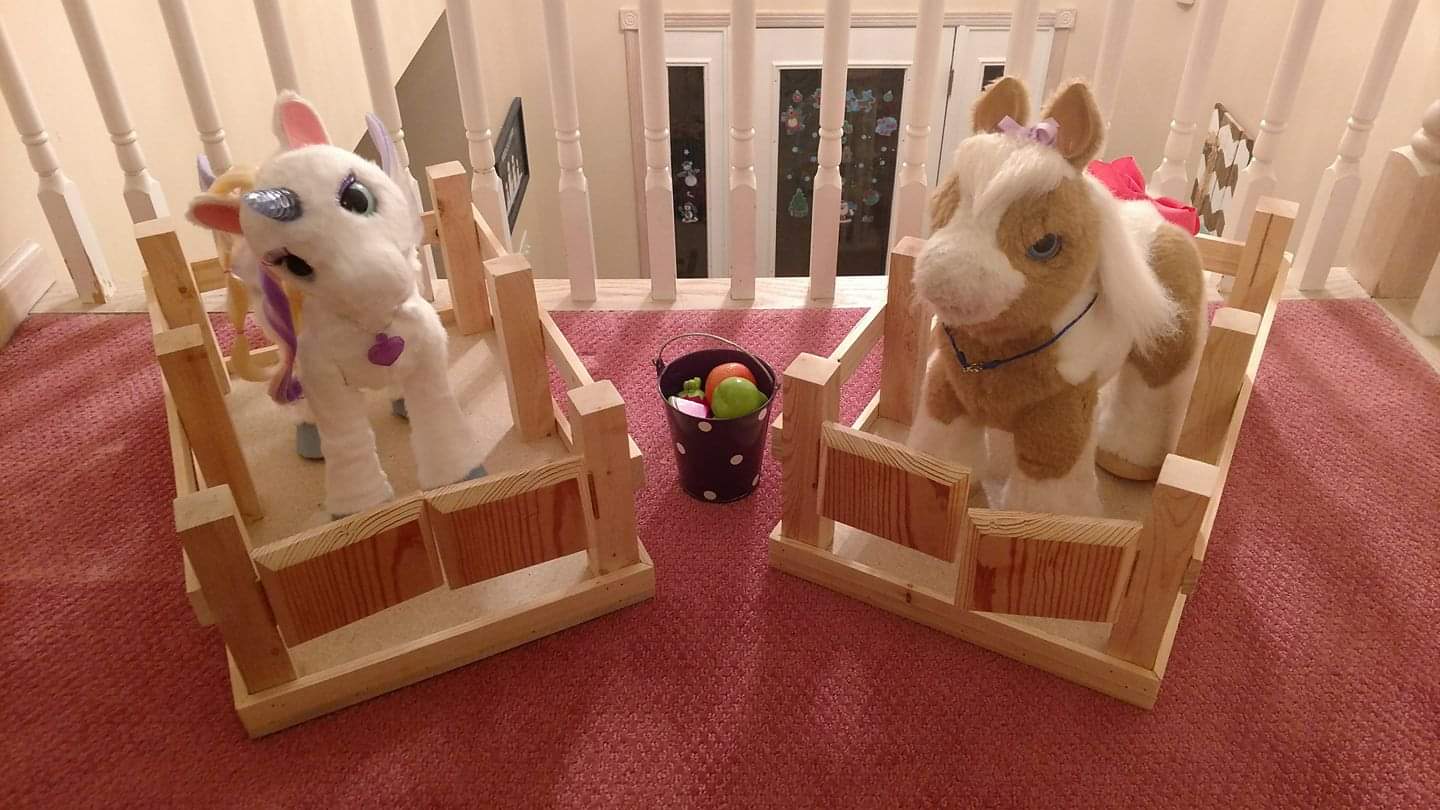
My girls asked for horse stalls for their horses they got for Christmas. I was inspired by plans I saw here.
Built from Plan(s)
Estimated Cost
$0 when it's scrap!
Estimated Time Investment
An Hour or Two (0-2 Hours)
Finish Used
None
Recommended Skill Level
Starter Project
DIY Shed

8’ by 12’ shed with extra 15” of height. Thanks for the plans!
Built from Plan(s)
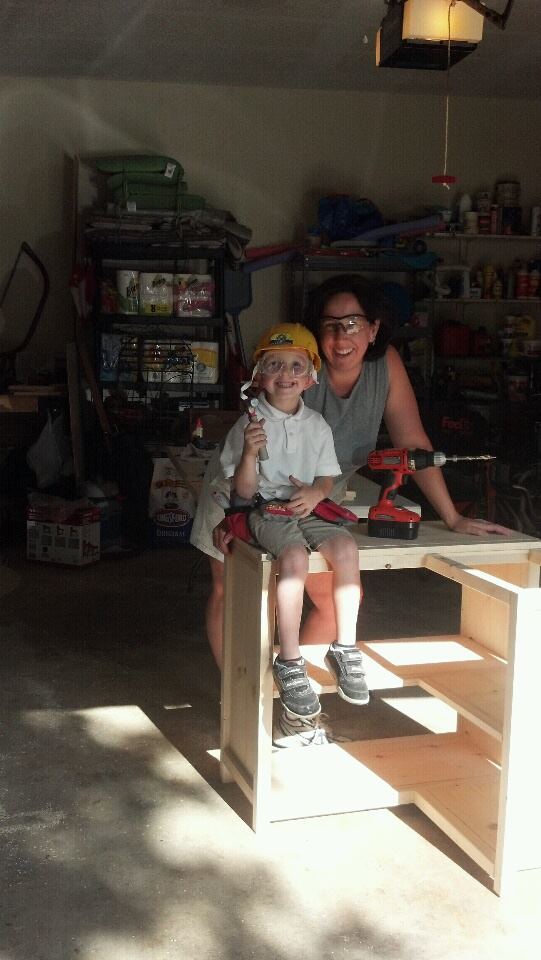
Round the corner bookshelf
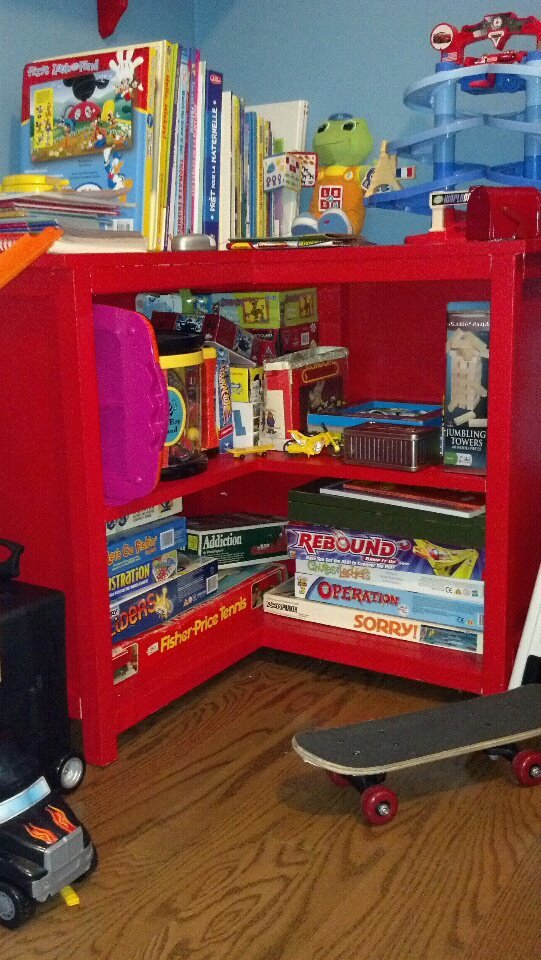
My son needed organization and of course instead of buying something I thought I could build one. I've been eyeballing Ana's site and found this project. This is my very first one. I only had a manual mitre saw so it took a long time to cut all the pieces but it did get done and in the process my hubby bought me a mitre saw! It wasn't hard to put together but the instructions are very detailed. As u can see from the photo, my little man helped me with it!
Built from Plan(s)
Estimated Cost
$50
Estimated Time Investment
Weekend Project (10-20 Hours)
Finish Used
paint
Recommended Skill Level
Intermediate
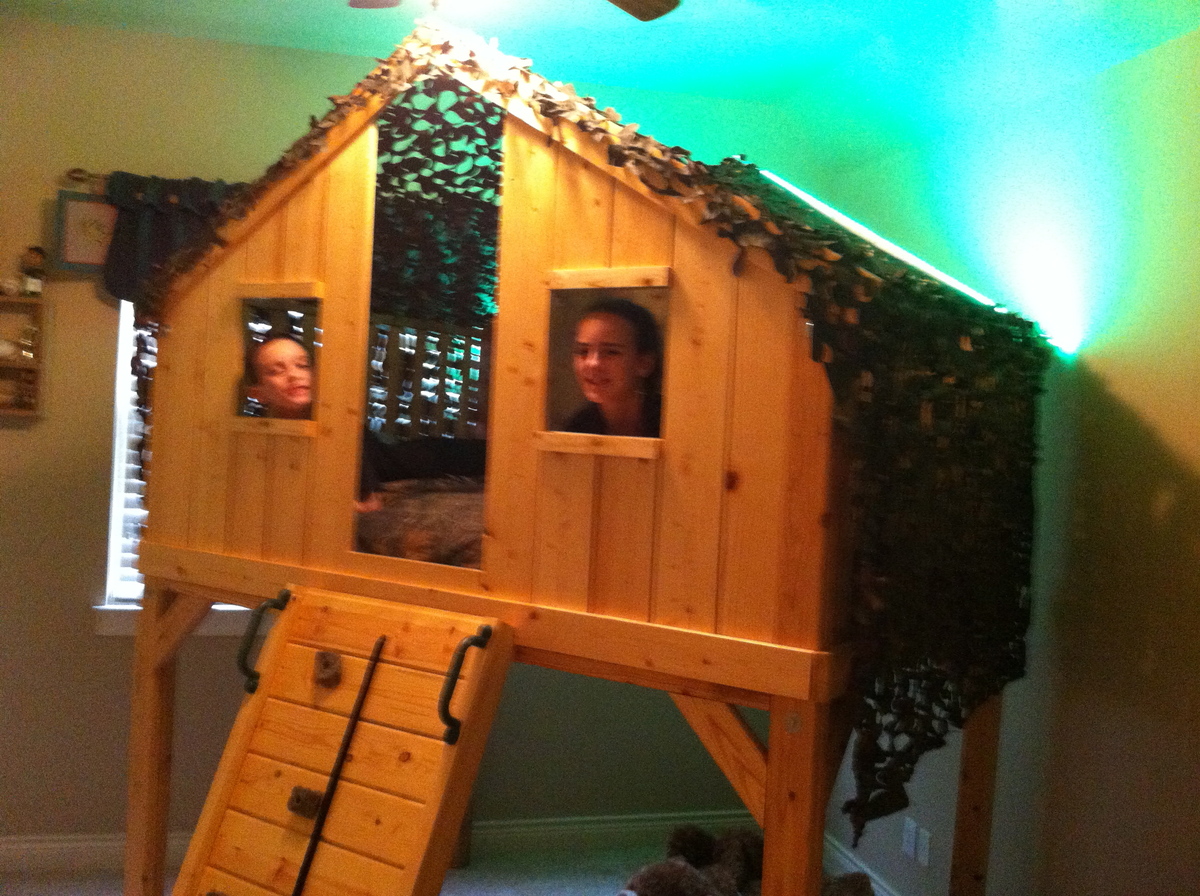
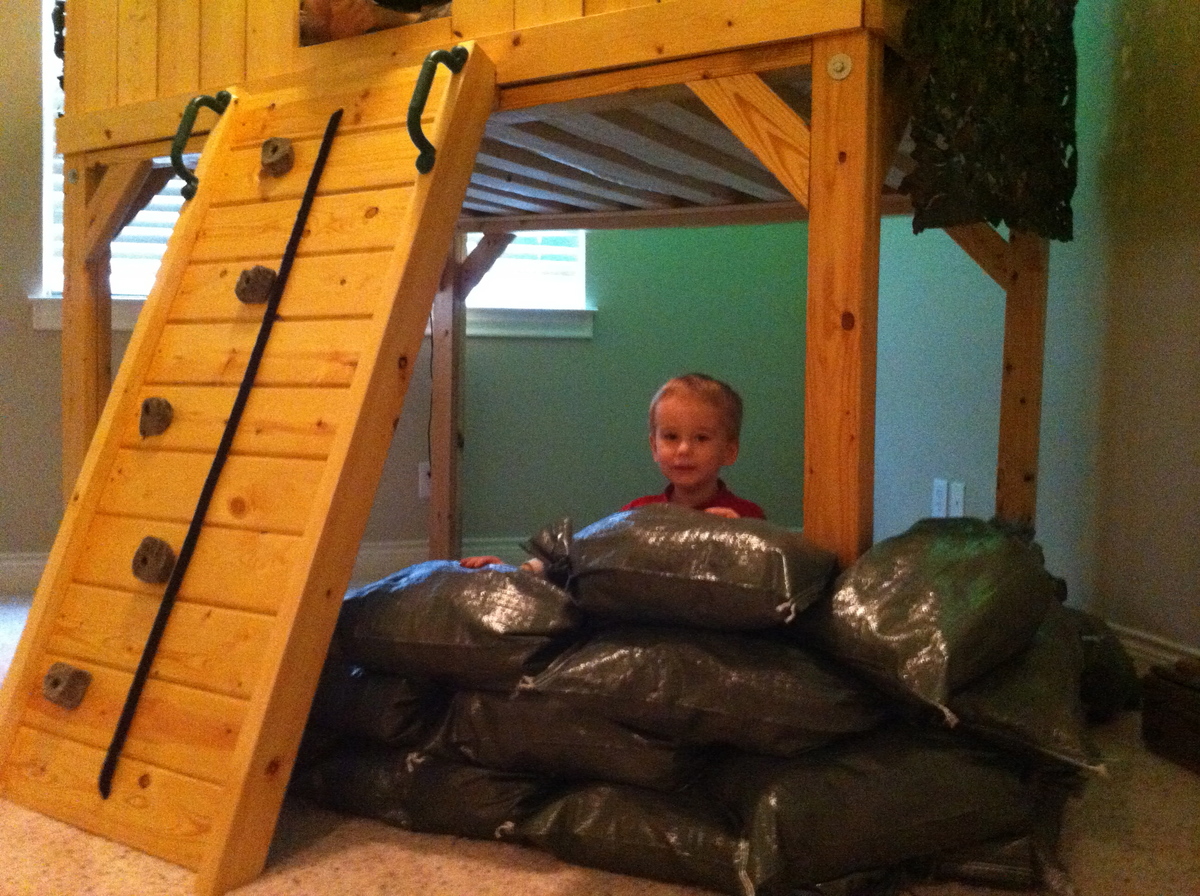
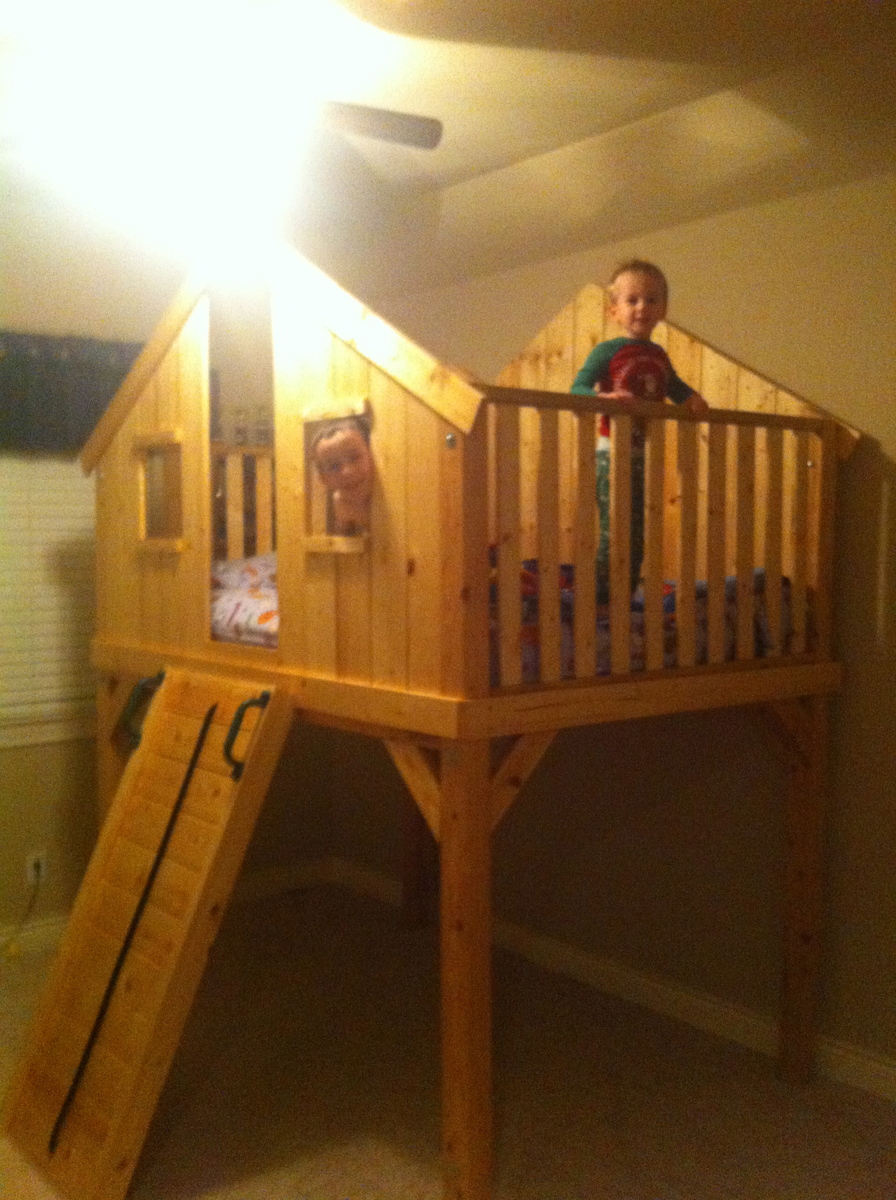
Doing things big in Texas
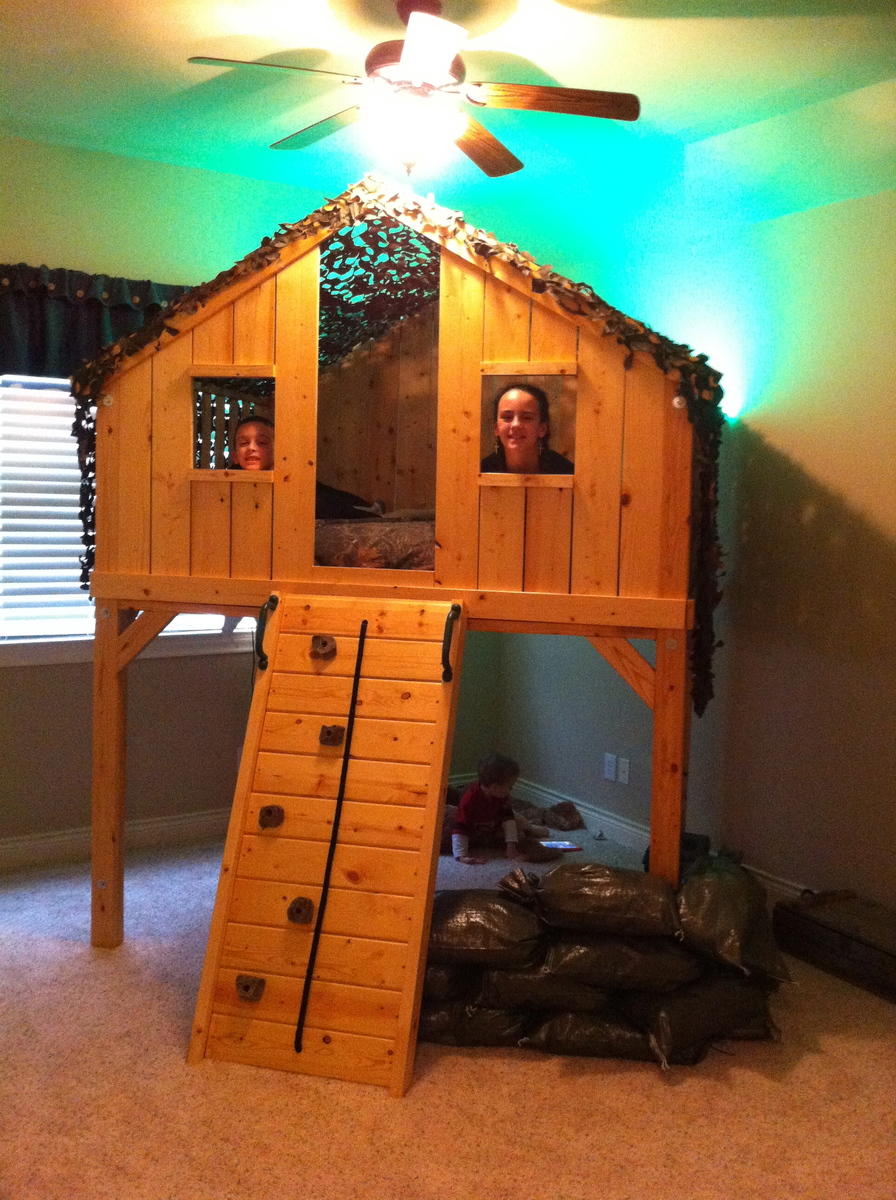
We decided to build this a bit bigger and taller. I will caution you to be careful as we came inches to not making it through our doorways. We expanded the depth 15" to make it a full bed and we extended the length of the legs to allow for 48" clearance underneath.
We also went with a rock wall instead of a ladder. I 1st built the angle too steep; recommend at least a 30 degree angle on a wall. Kid's love it; mom not so much when attempting to make the bed! :)
We went with military theme - green rope lights, camo netting for a roof, and sandbags filled with old clothes from my high school years for a bunker underneath.
Great project! Thanks for the idea!
Built from Plan(s)
Estimated Cost
$350 - materials. Needed to invest $250 in new tools
Finish Used
Natural Minwax stain then clear satin poly
Recommended Skill Level
Beginner
Modified Farmhouse Storage Bed (California King, headboard with bookshelves)
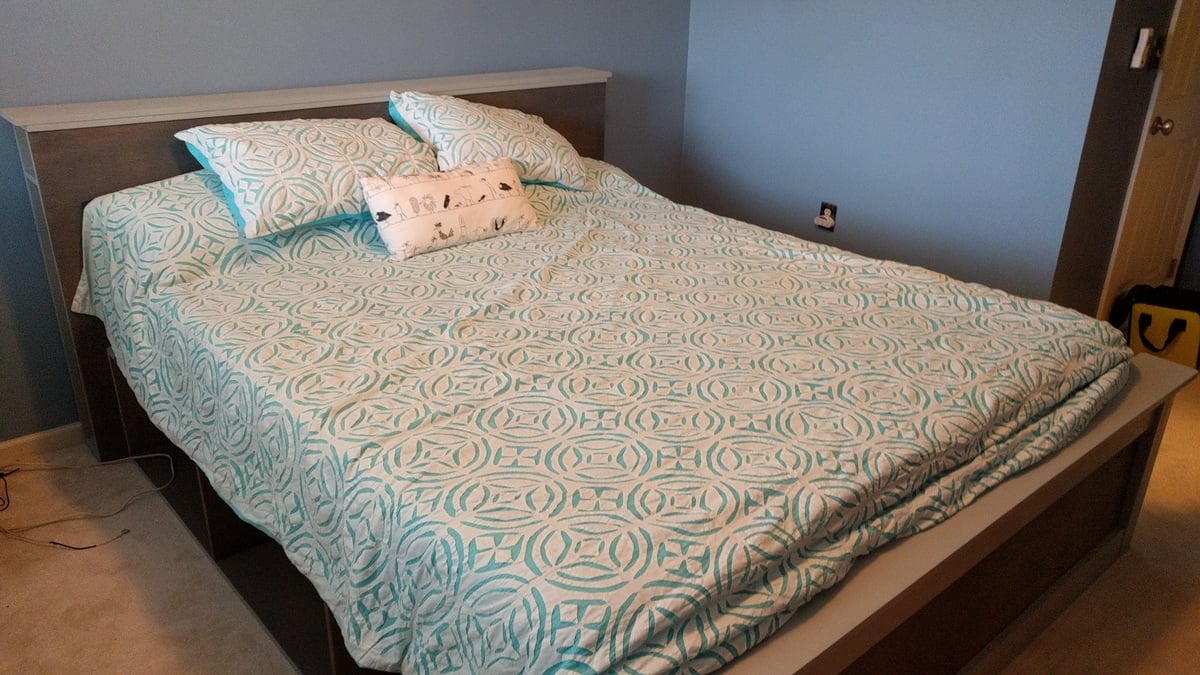
Modified the Farmhouse Storage Bed with Storage Drawers. Changed the design to california king and added booshelves to the headboard. Will eventually turn a shelf into a nightstand for water/light. I LOVE IT!! Thanks for the Design, Ana!
Built from Plan(s)
Estimated Cost
$400
Estimated Time Investment
Week Long Project (20 Hours or More)
Finish Used
minwax grey stain and light grey paint (I can't remember the color, but it's valspar prairie something)
Recommended Skill Level
Advanced
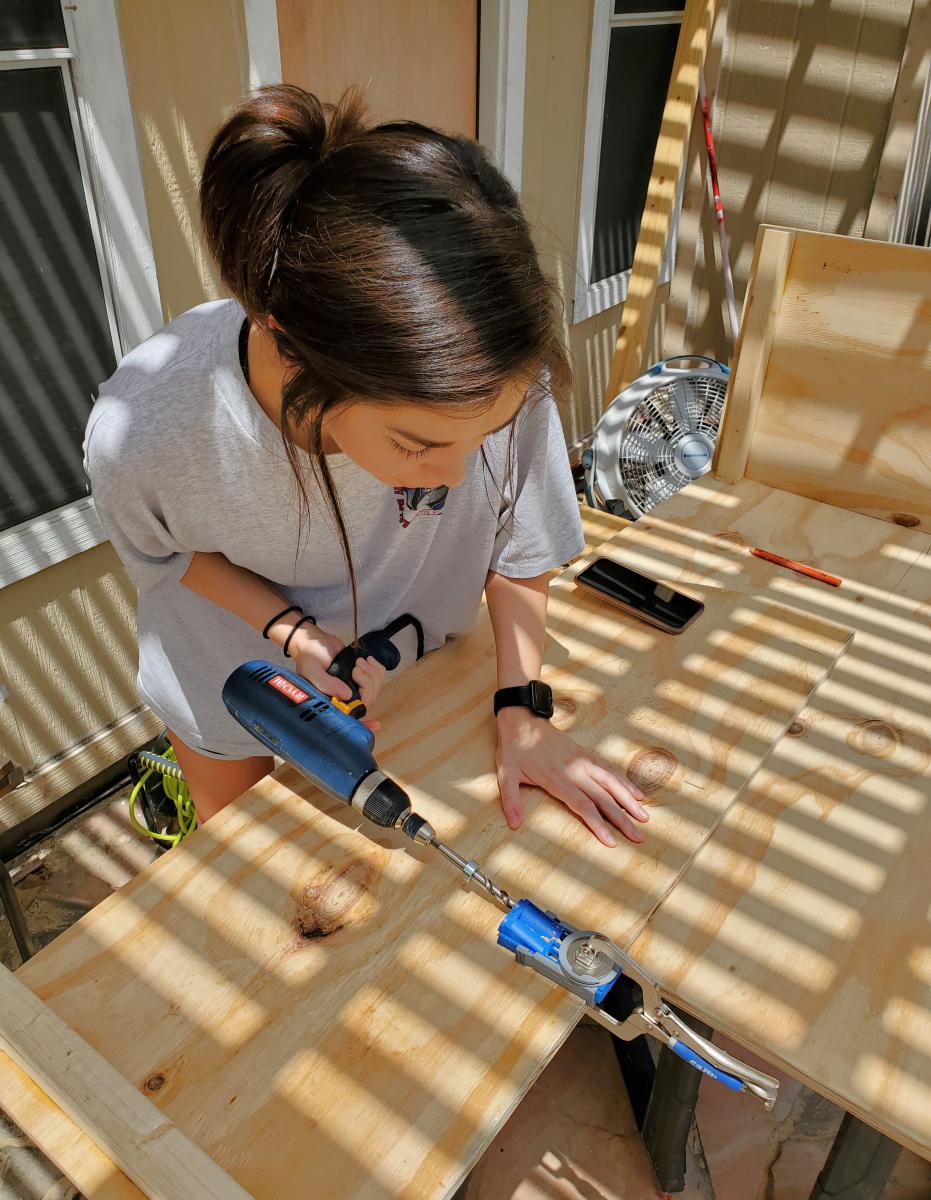
Mudroom Bench, Above Storage and Drawers
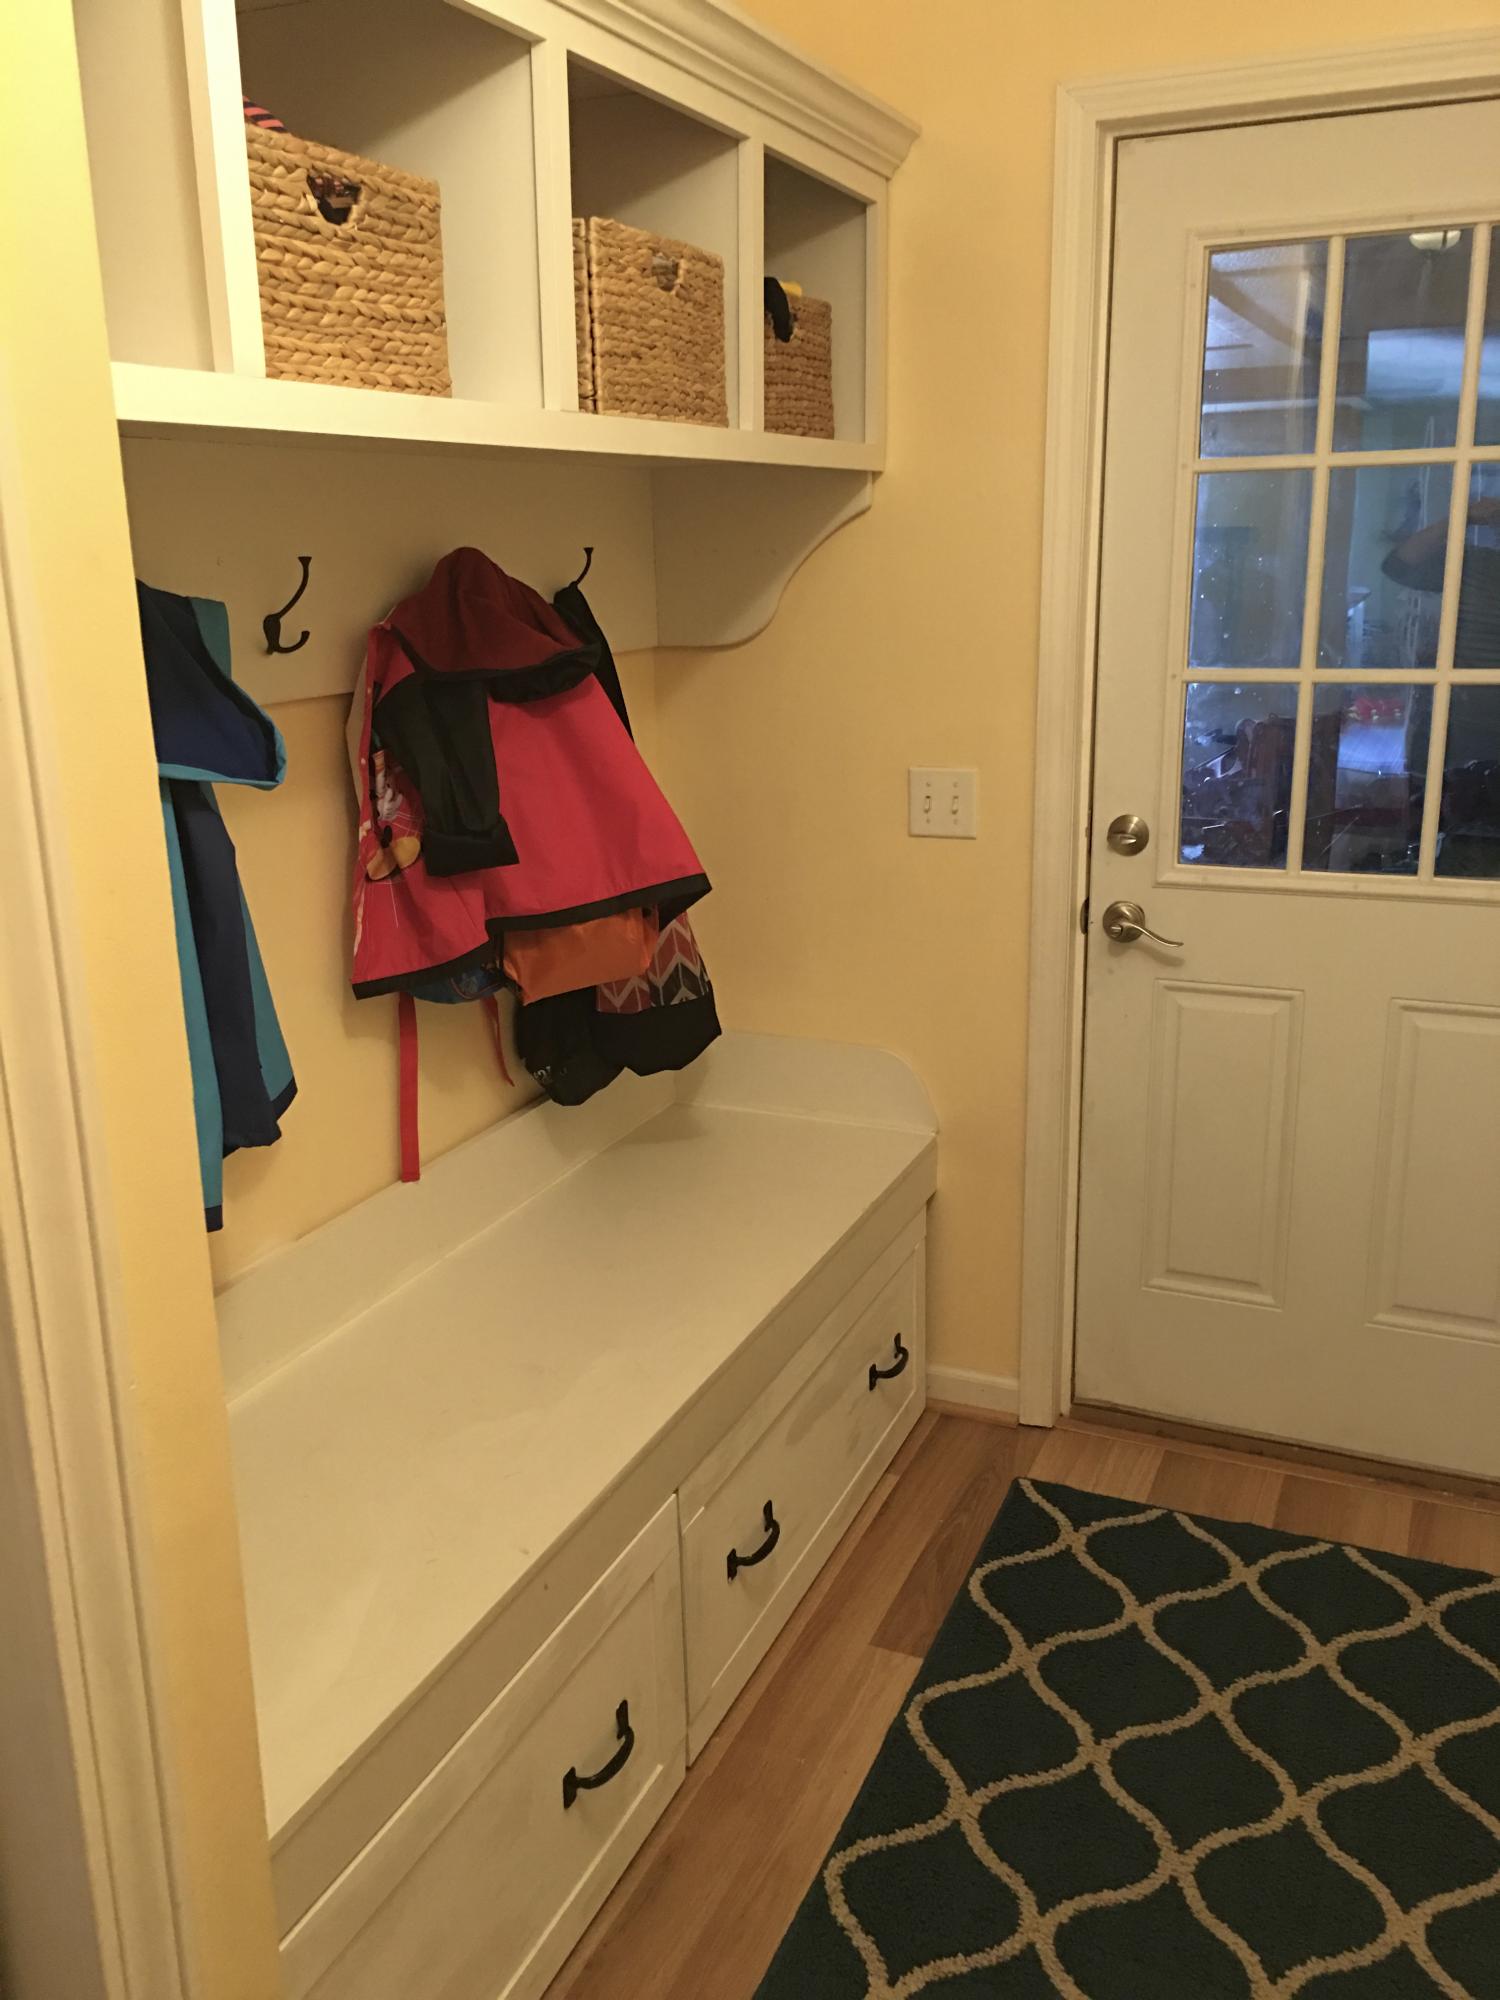
When we moved into our home, this whole area was empty. I don't remember seeing anything in this spot during our walkthrough. But I knew it would be a perfect spot for a mudroom. We were also getting a puppy and I did not want my shoes to be torn to bits. This was my very first build. I will forever be proud of this.
Farmhoue Bed Build
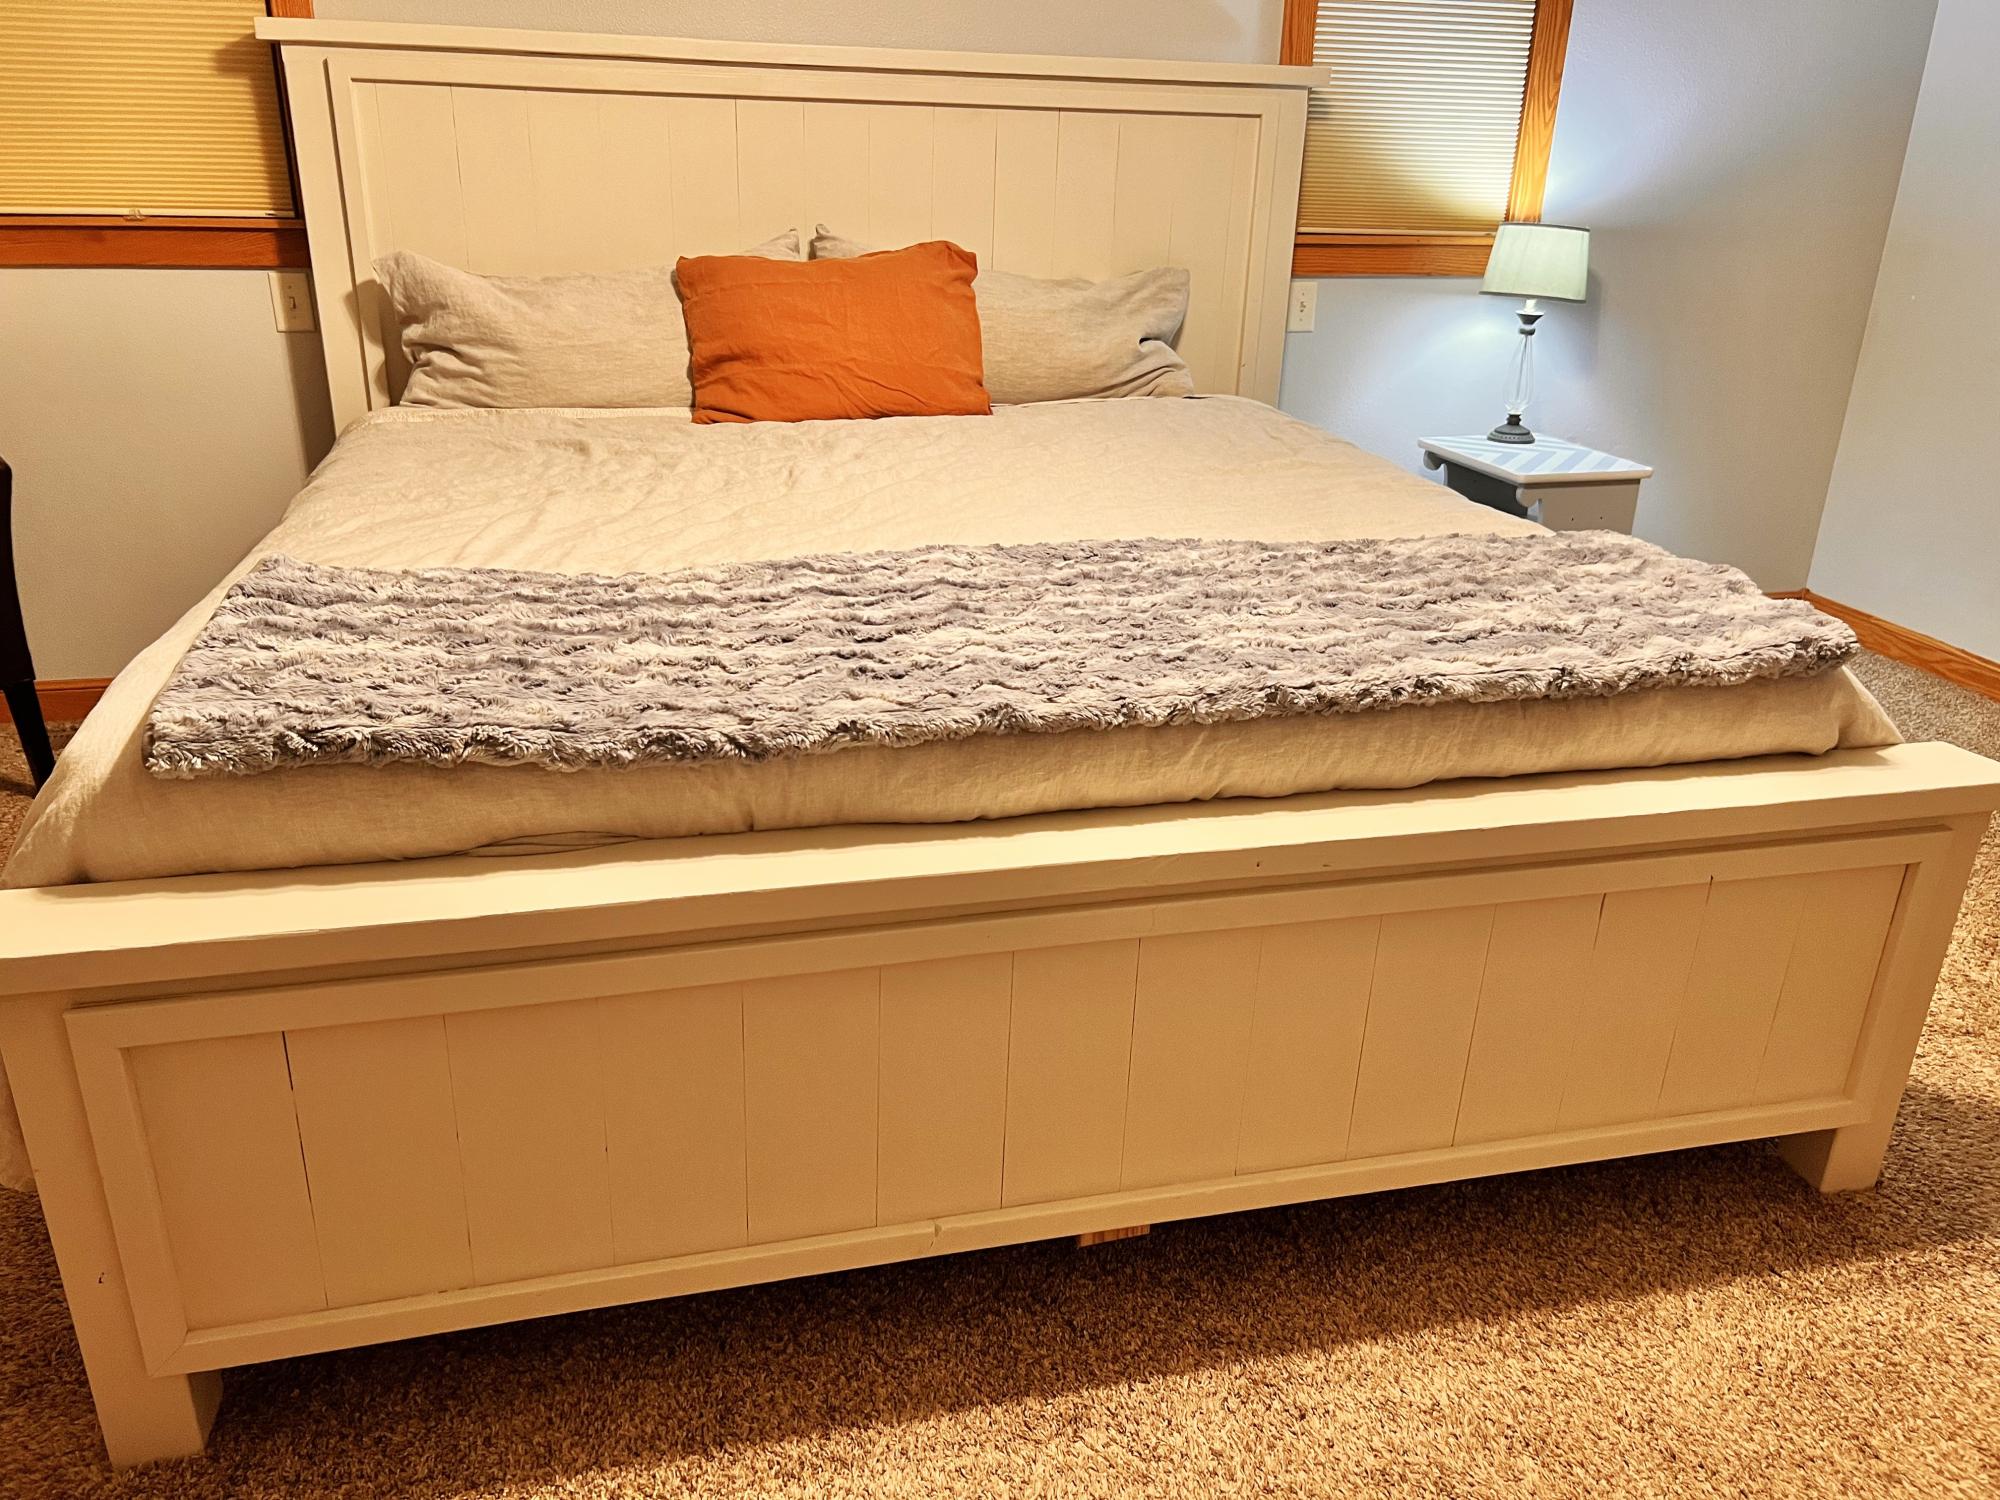
Fairly easy build, I am buying a compound miter saw and making more Ana White!! Thank you so much.

Built from Plan(s)
See-Saw

Built this for our Daughters 4th birthday. Both our girls love it! If we had not painted it with outdoor paint we would have been done in a few hours. It took awhile for the paint to dry and we did multiple coats.
Built from Plan(s)
Estimated Cost
$50
Estimated Time Investment
Weekend Project (10-20 Hours)
Recommended Skill Level
Beginner
Comments
Sun, 05/27/2012 - 11:39
So awesome!!!!!!! I love the
So awesome!!!!!!! I love the paint too! But nothing beats those smiles!
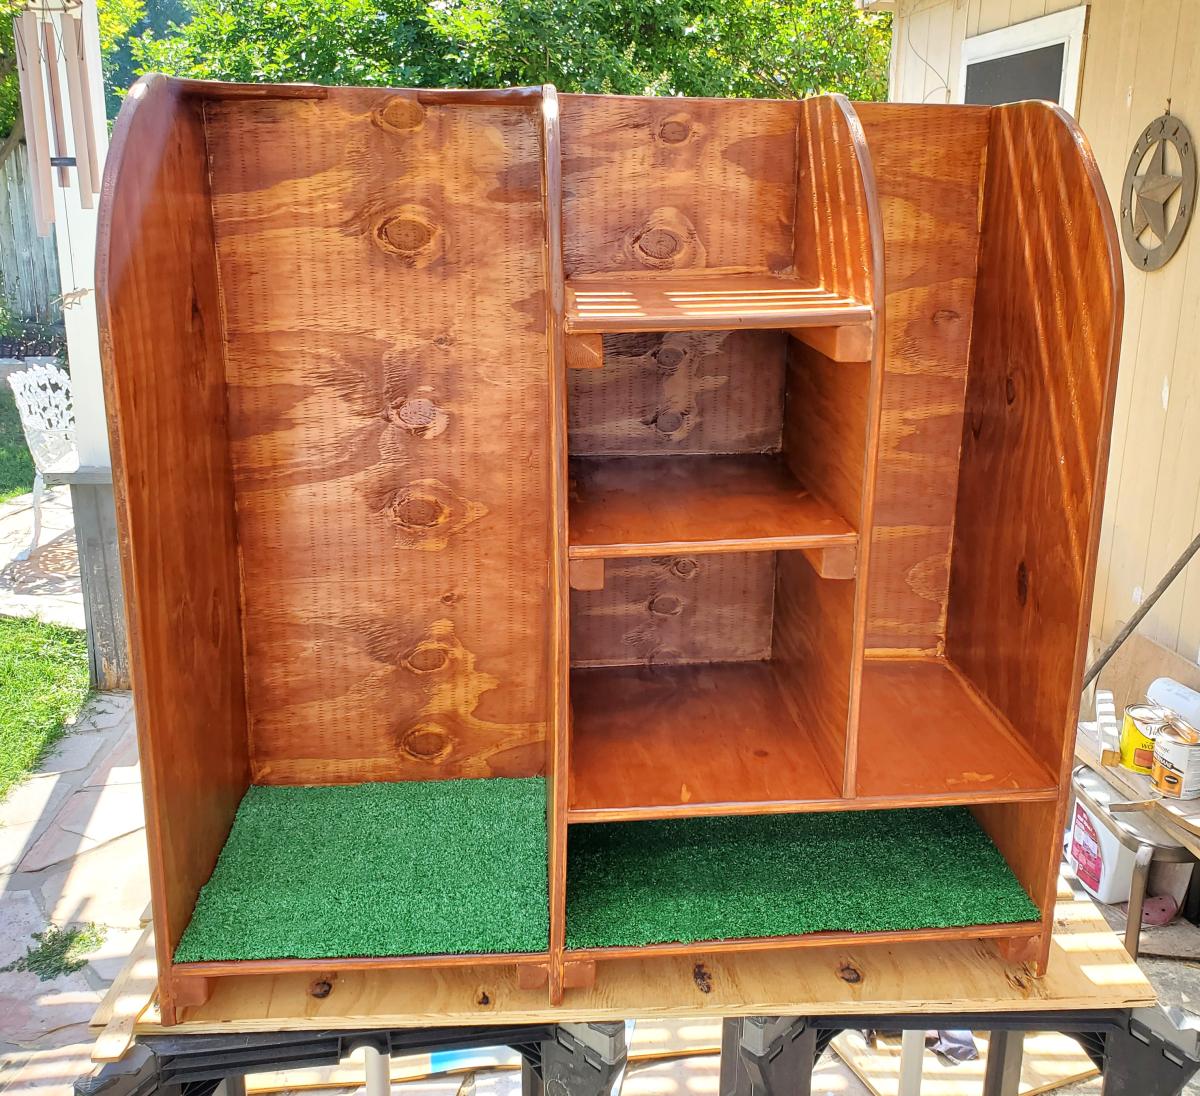
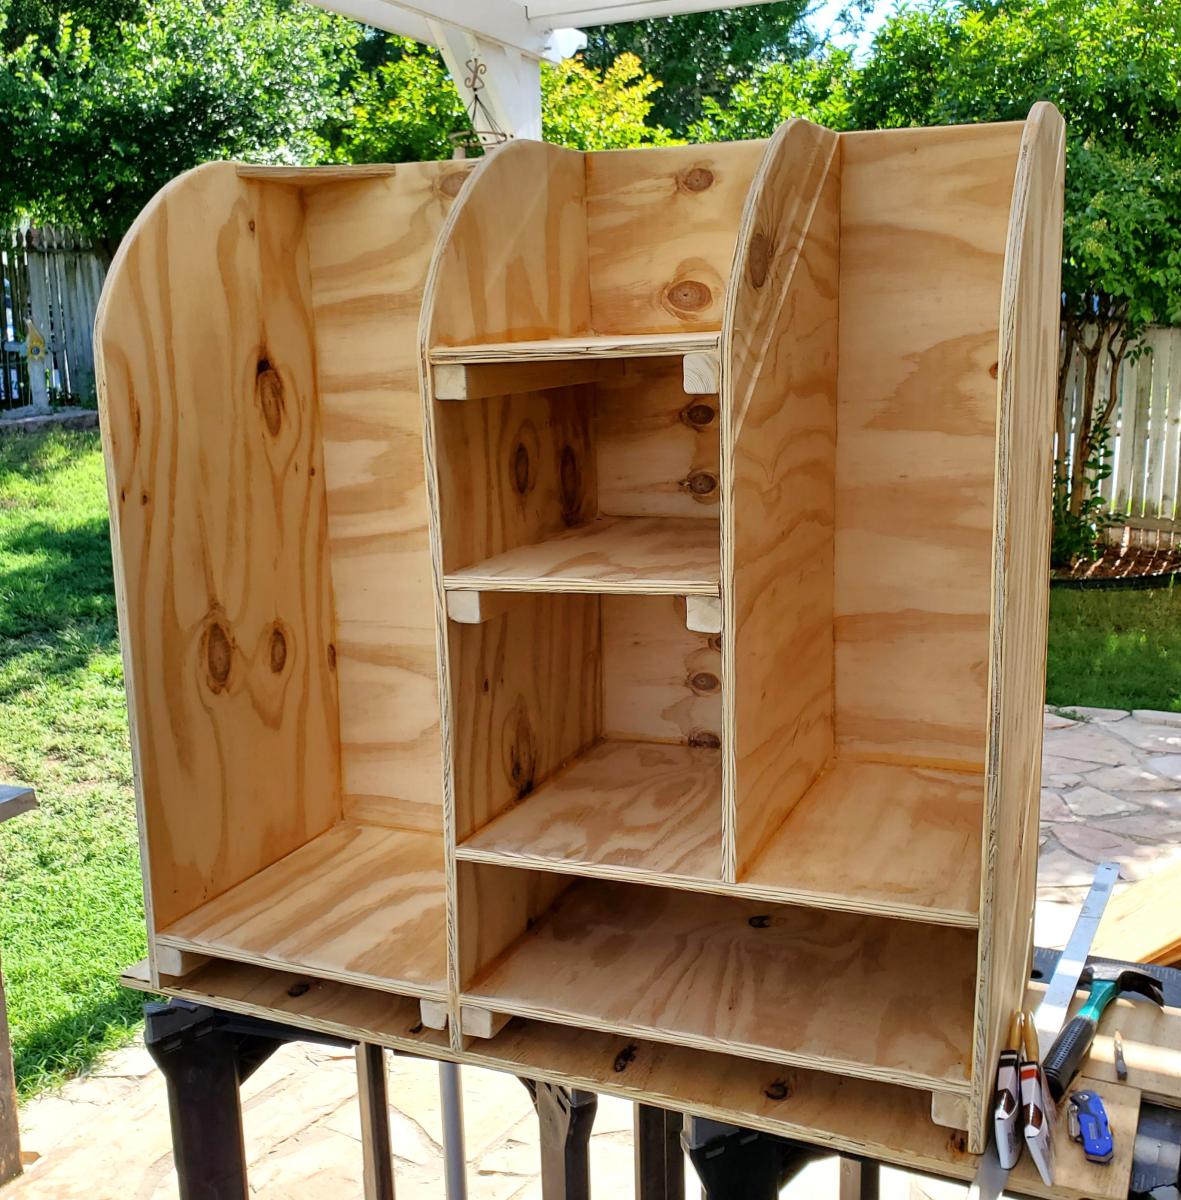
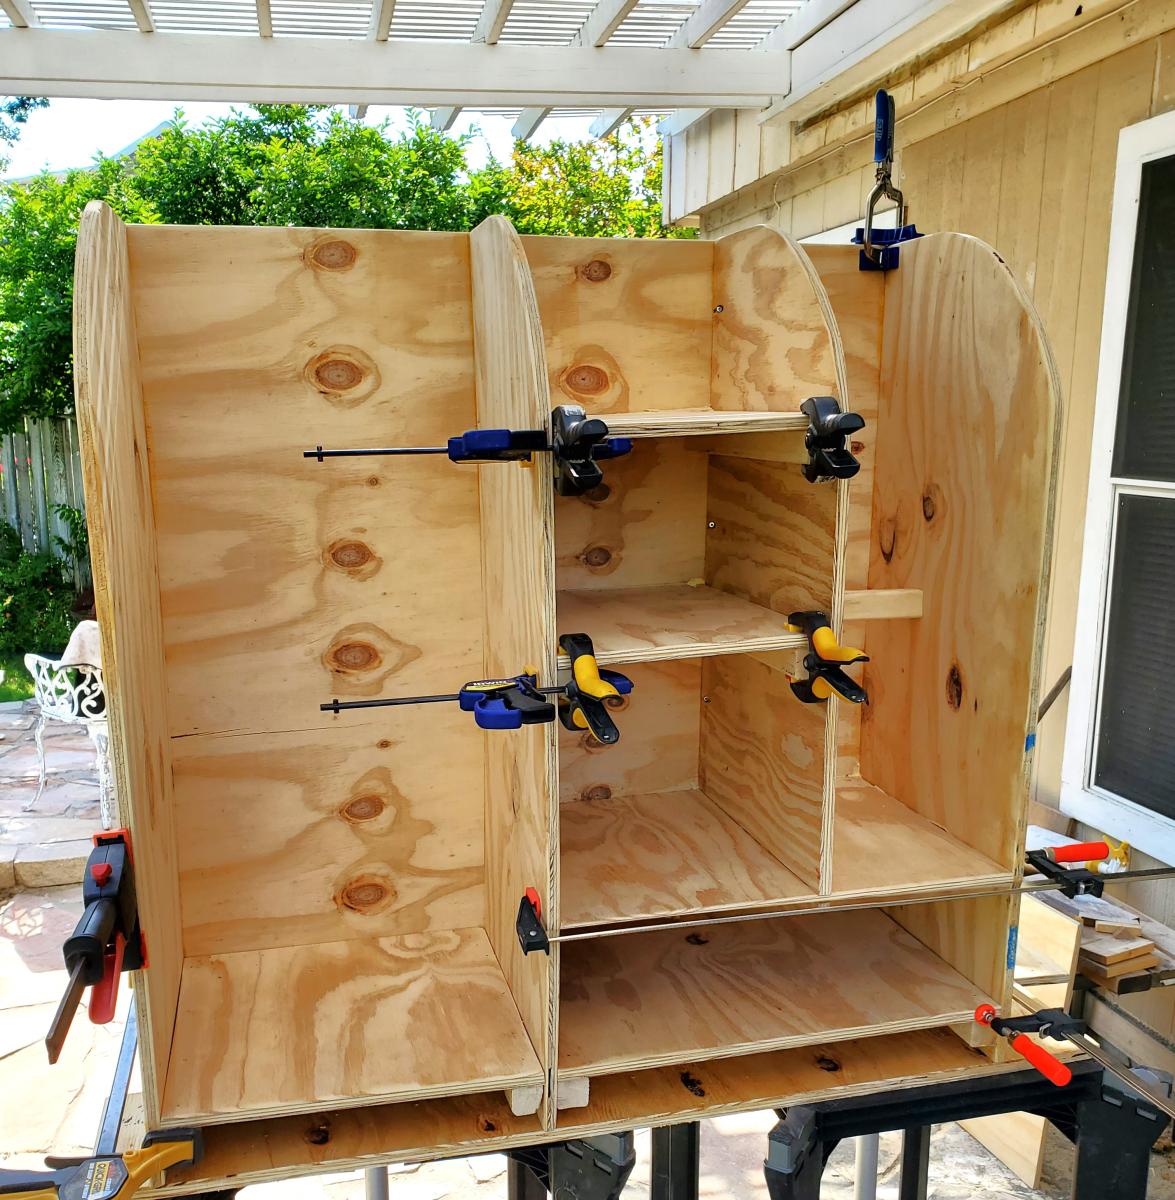
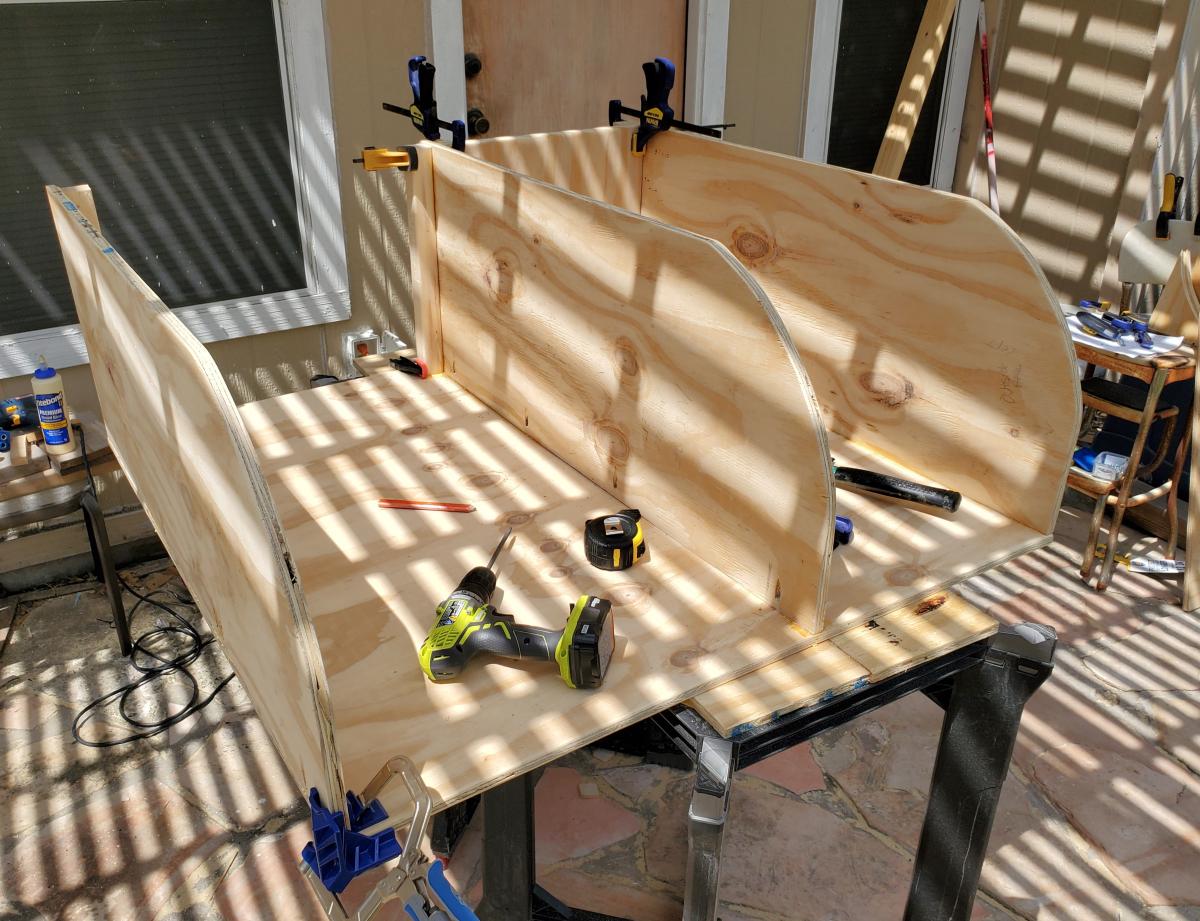
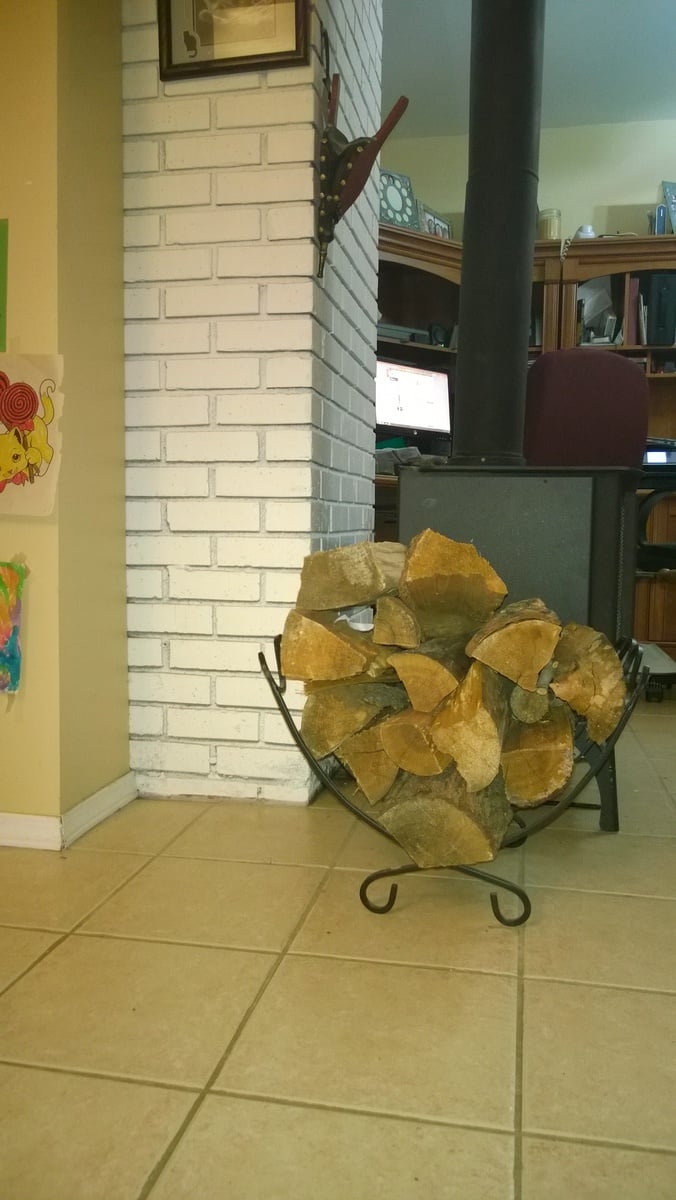
Firewood holder
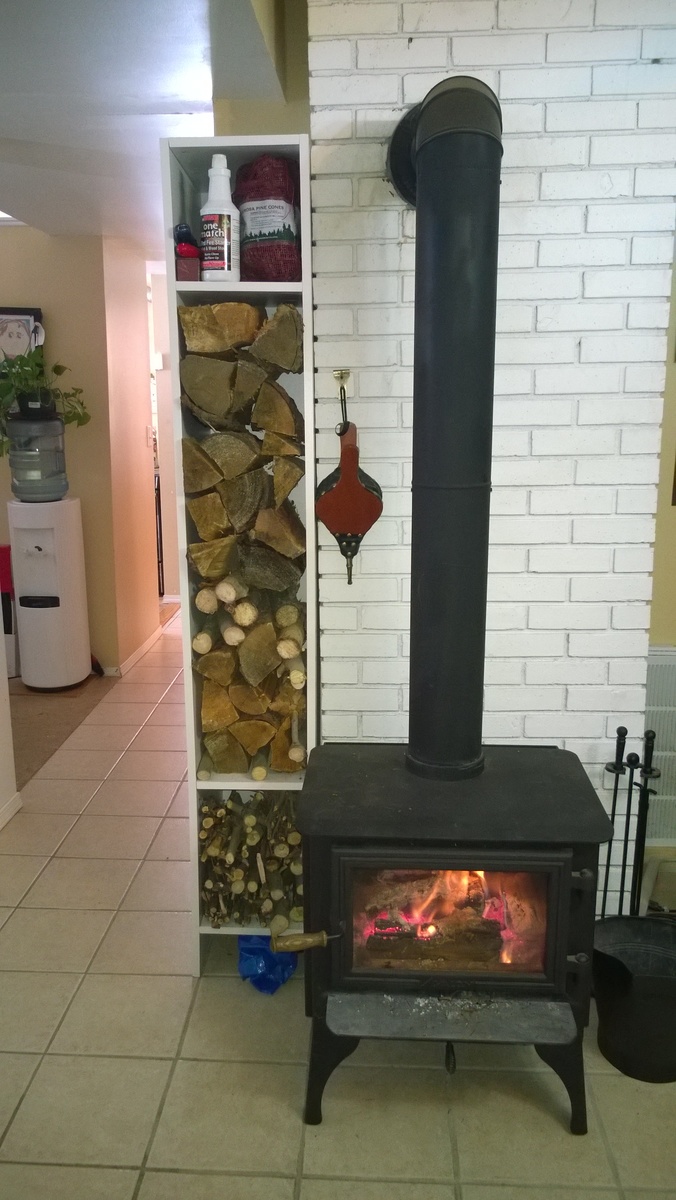
I needed a better way to store my fire wood. The rack that we had only held enough wood for to load the fire place and add 2 or 3 as needed before the wood was gone. I wanted something that I could hold more wood.
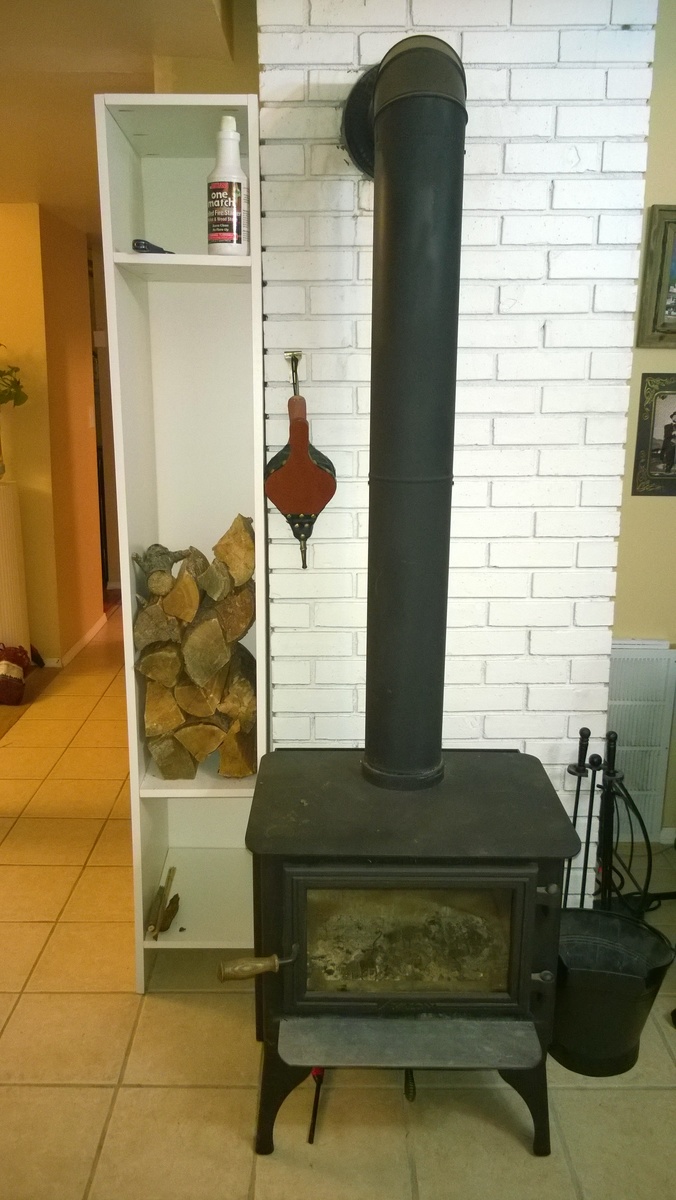
I was looking online at different racks and came across something that looked like a bookcase with no shelves filled with wood. I then looked at where I had my wood and saw that I had a nook to put something like that in. The photo of the shelves with only a little wood is all the wood that was in the metal holder. I had a lot of space left.
After looking at various store for bookcases and shelving, hoping in vain that I could find something cheep that would fit the size I needed, I came to see what plans I could use from Ana's site. I looked at the cube tower and the locker cabinet and finally used the pdf from the locker cab resized to fit my needs.
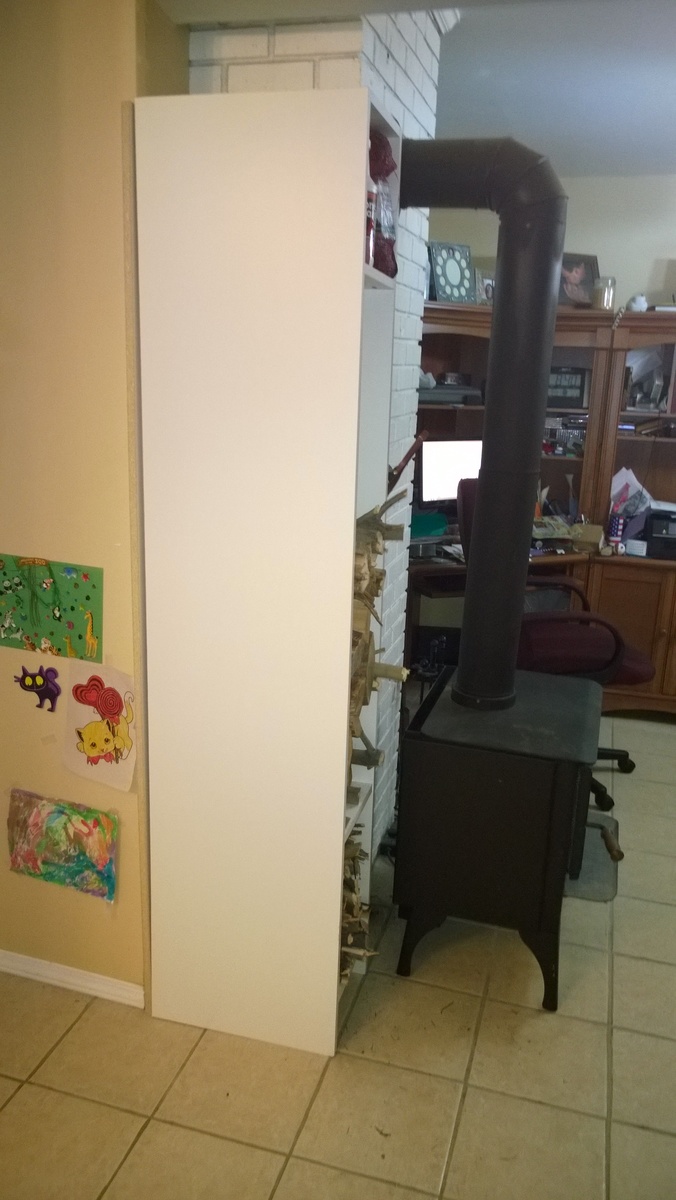
My wife remembered seeing something about banding on here,( http://ana-white.com/2013/11/momplex/finishing-plywood-edges-edge-bandi… ) So we found some white to match the wood. I think the banding turned out good.
I did have a hard time getting the drill in to the pocket holes for the second side of shelf. I started to look on line and found 3" bits at Lowes and HD, but it was 10:30 at night. After looking some more I found a great post on Kreg's site for using a ratchet with a 1/4" socket to hold the bit. http://kregjig.ning.com/photo/ratchetasrtangledriver-1?context=user
My wife also said I should add one more shelf for keeping the wood stable. I told her that I would be fine. Now that I have filled it up all the way I think another shelf would be good to keep the wood rotated. Have one stack of room temp wood, and one of just from outside trying to warm up. So she was right that I should put in another shelf. ;)
I think it has opened the space by the fire place and should help my daughter not to stub her toes like she did with the rack.
The wood was $30 and HD cut if for no charge. It only took one sheet. The banding was around $5 and I had to buy some more Kreg screws.
The Size is 12 1/2"W 18"D and 79" high.
The blue bag under the shelving is an Ikea bag. It is just the right size and strength to carry the wood in.
Mike
Built from Plan(s)
Estimated Cost
$45
Estimated Time Investment
Day Project (6-9 Hours)
Finish Used
White MDF with White banding
Recommended Skill Level
Starter Project
Woven back bench

Built for my parents 50th anniversary
Built from Plan(s)
Estimated Cost
£60
Estimated Time Investment
Week Long Project (20 Hours or More)
Finish Used
Cupronel outdoor furniture stain (teak)
Recommended Skill Level
Intermediate
Farmhouse nightstands
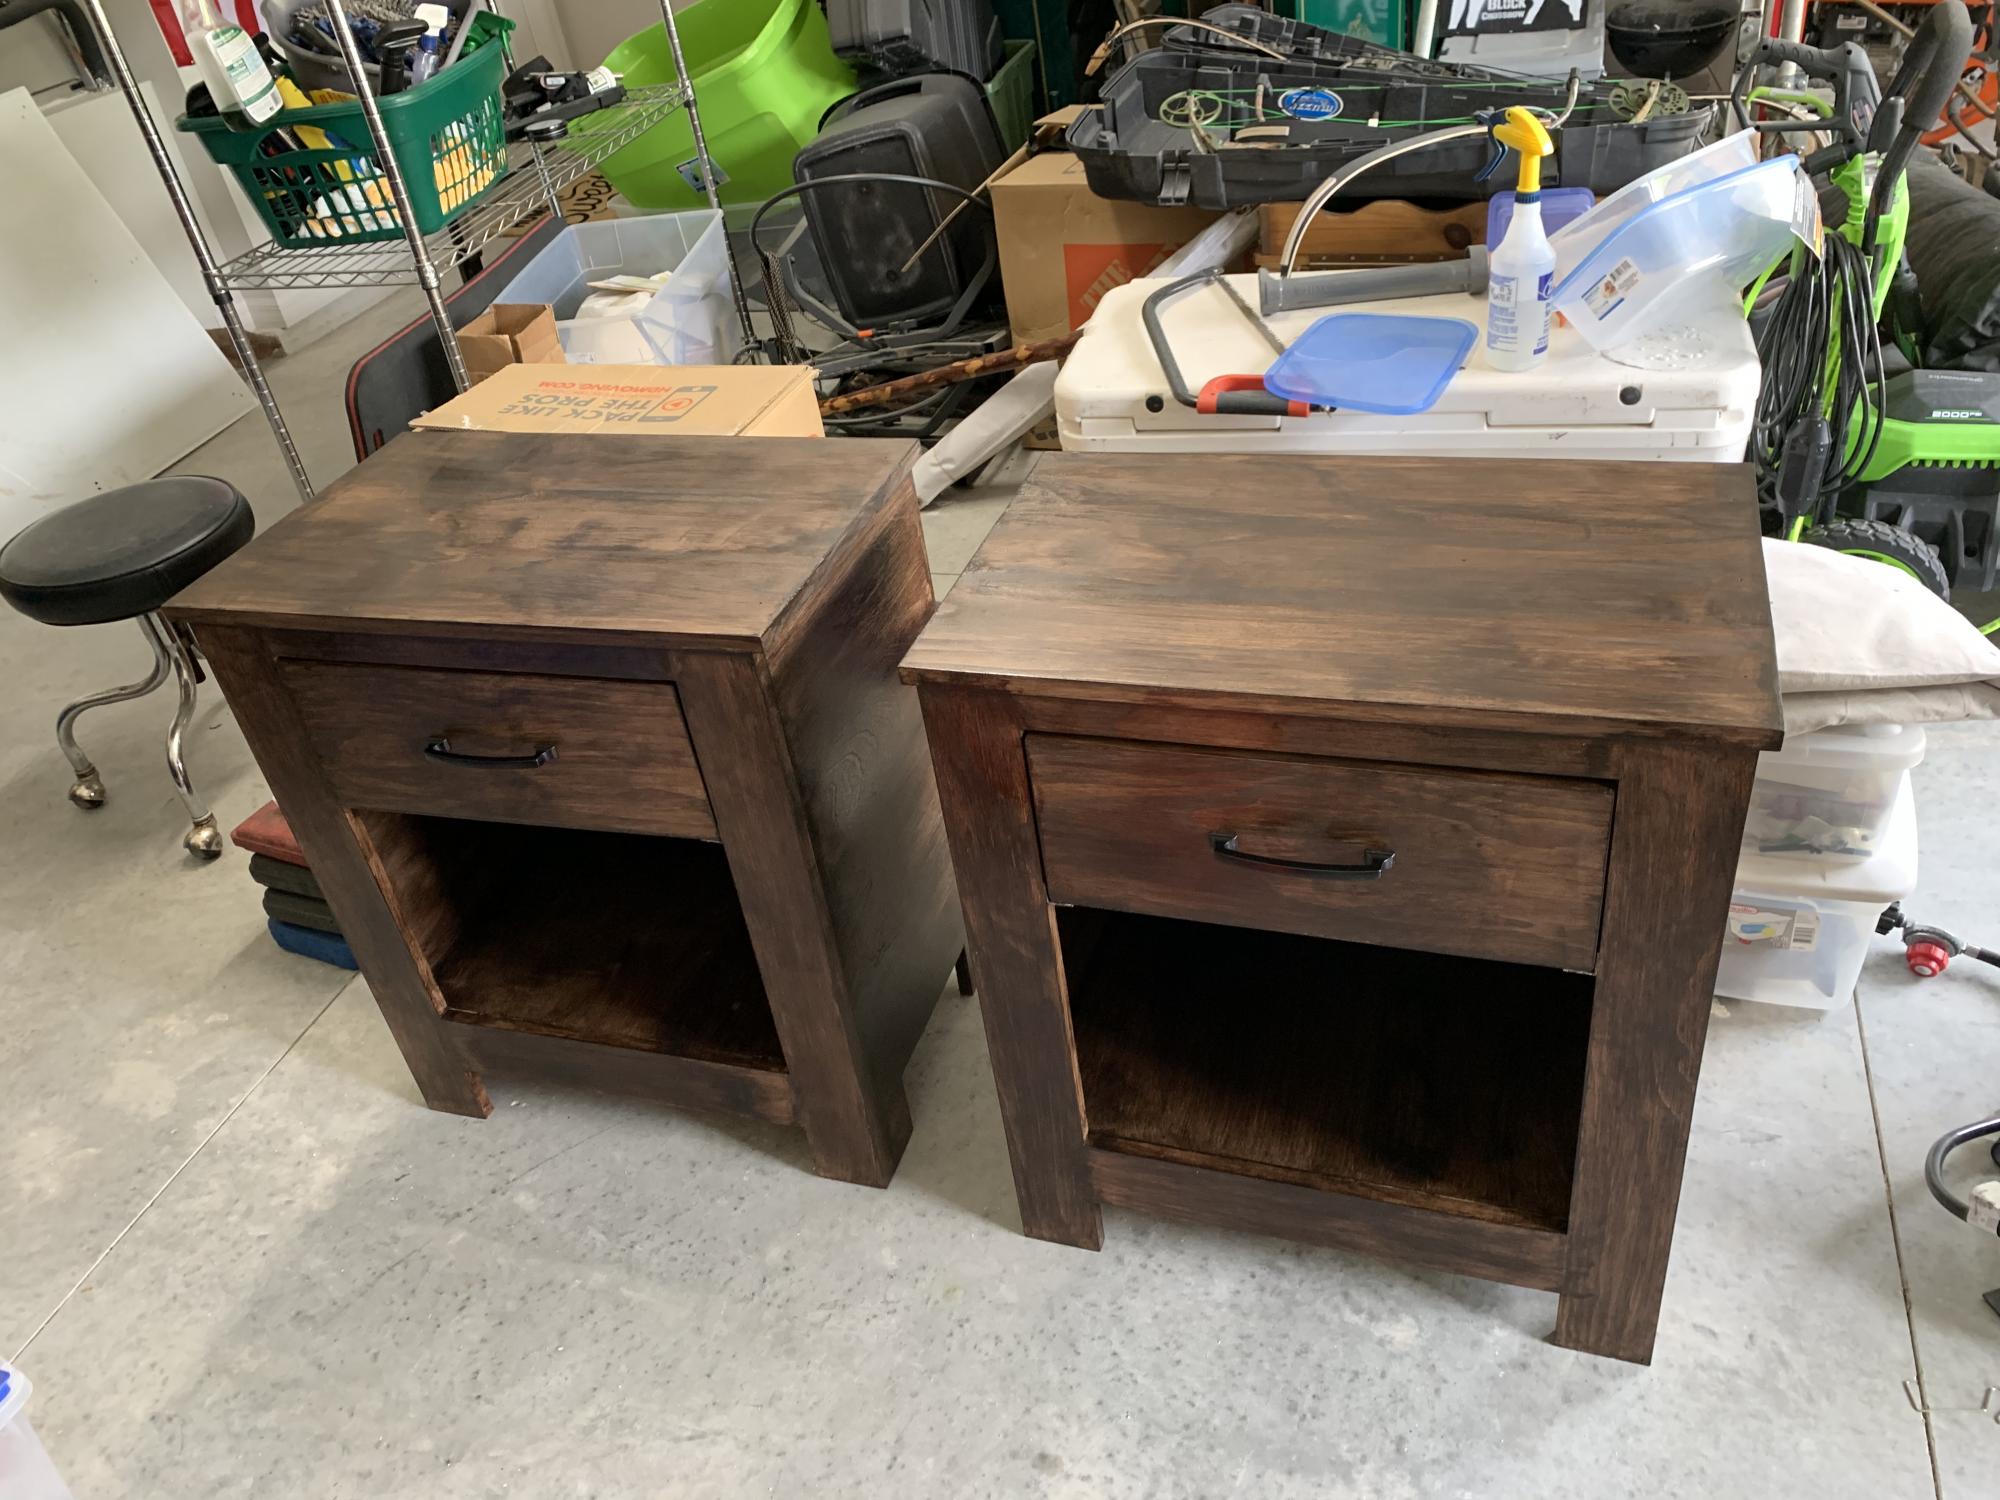
Very nice bed side tables. Very impressed.
Built from Plan(s)
Estimated Cost
$150.00
Estimated Time Investment
Day Project (6-9 Hours)
Finish Used
Varathane poly/stain in one Kona color
Golf Bag Stand
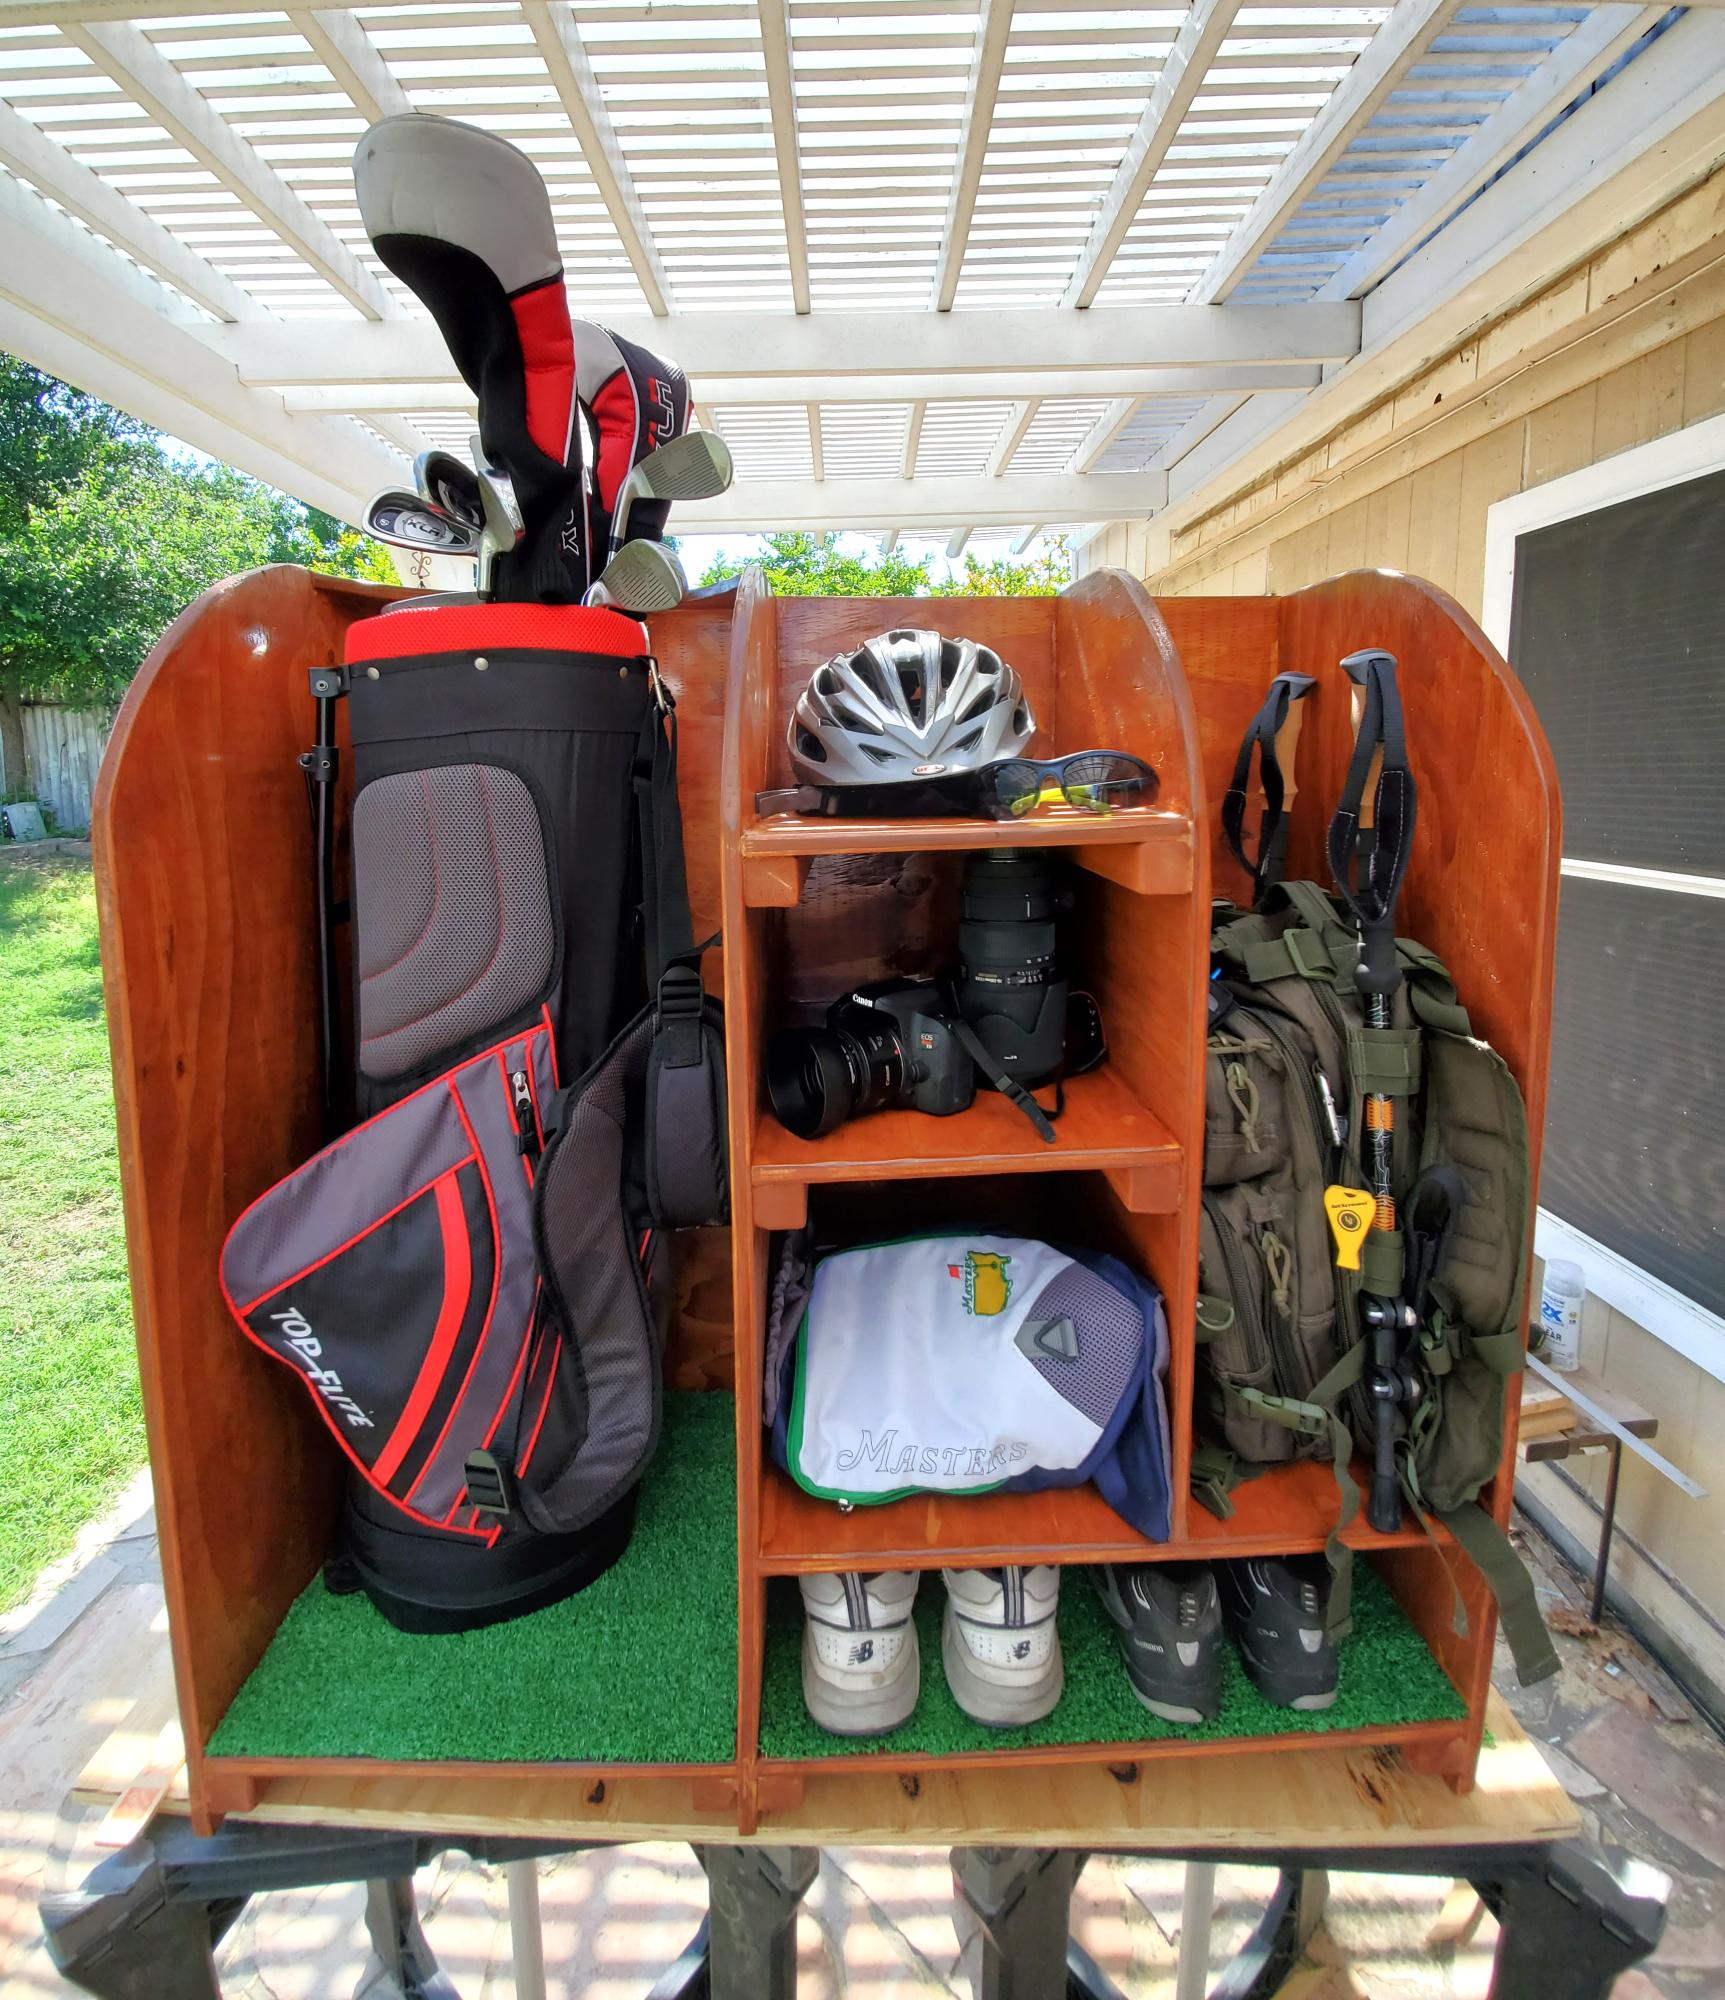
Golf bag stand
Can’t remember if found this plan here or not but get most my plans here. Fun and easy build.