Community Brag Posts

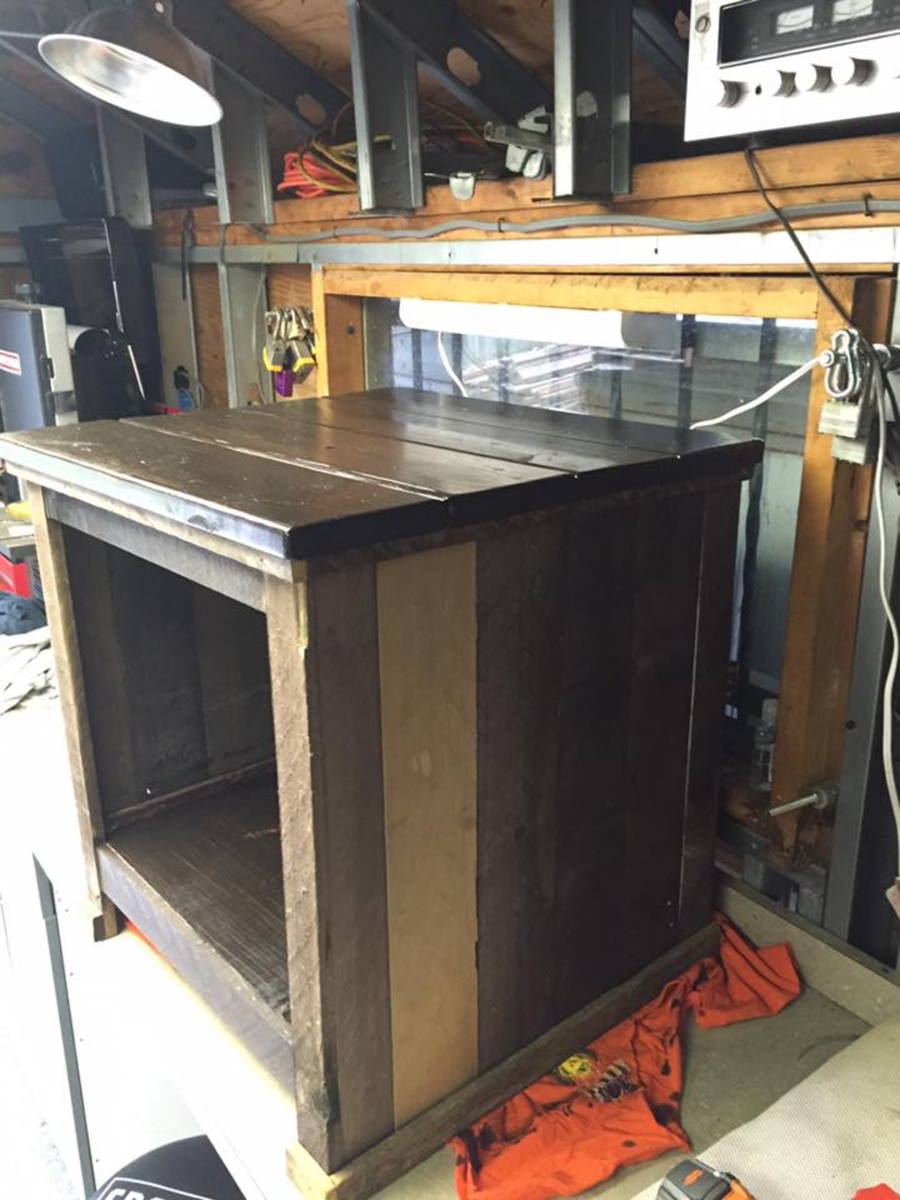
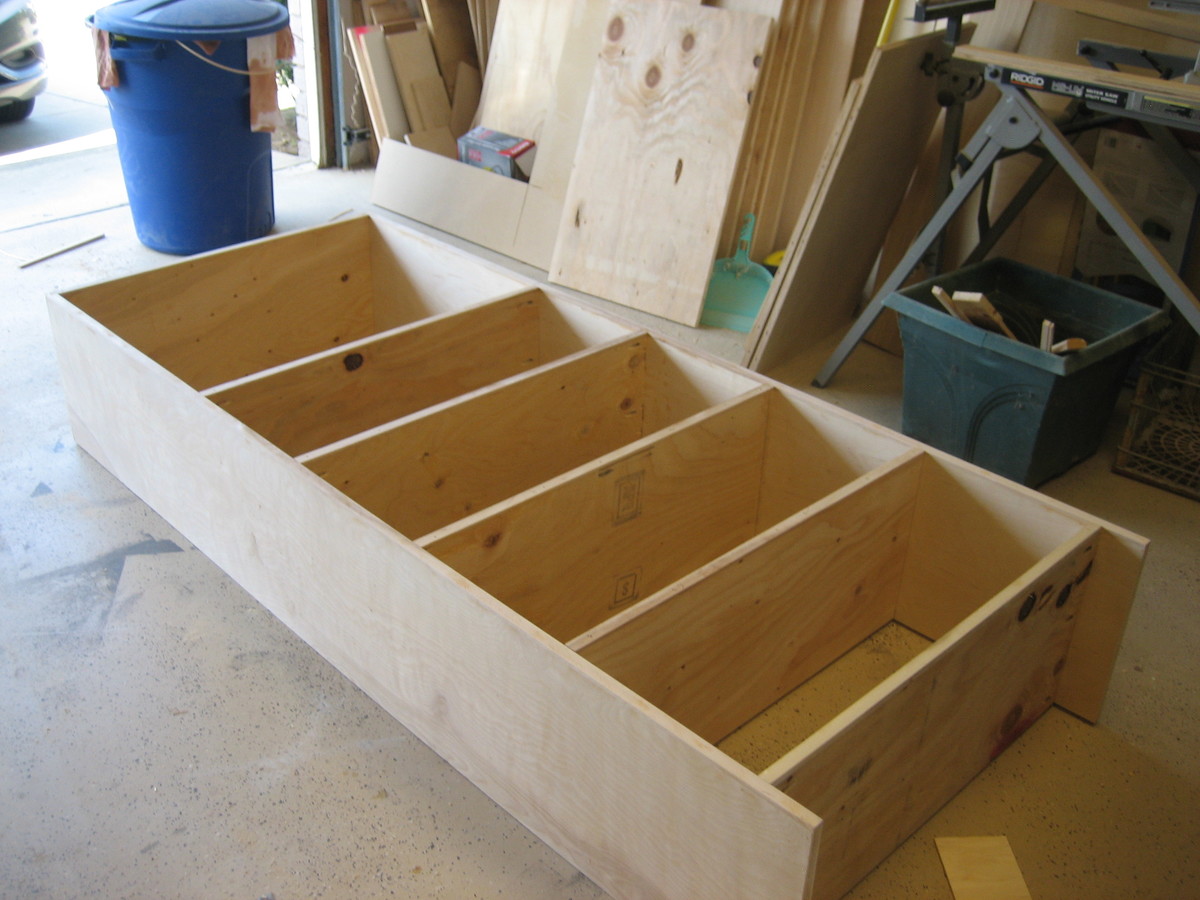
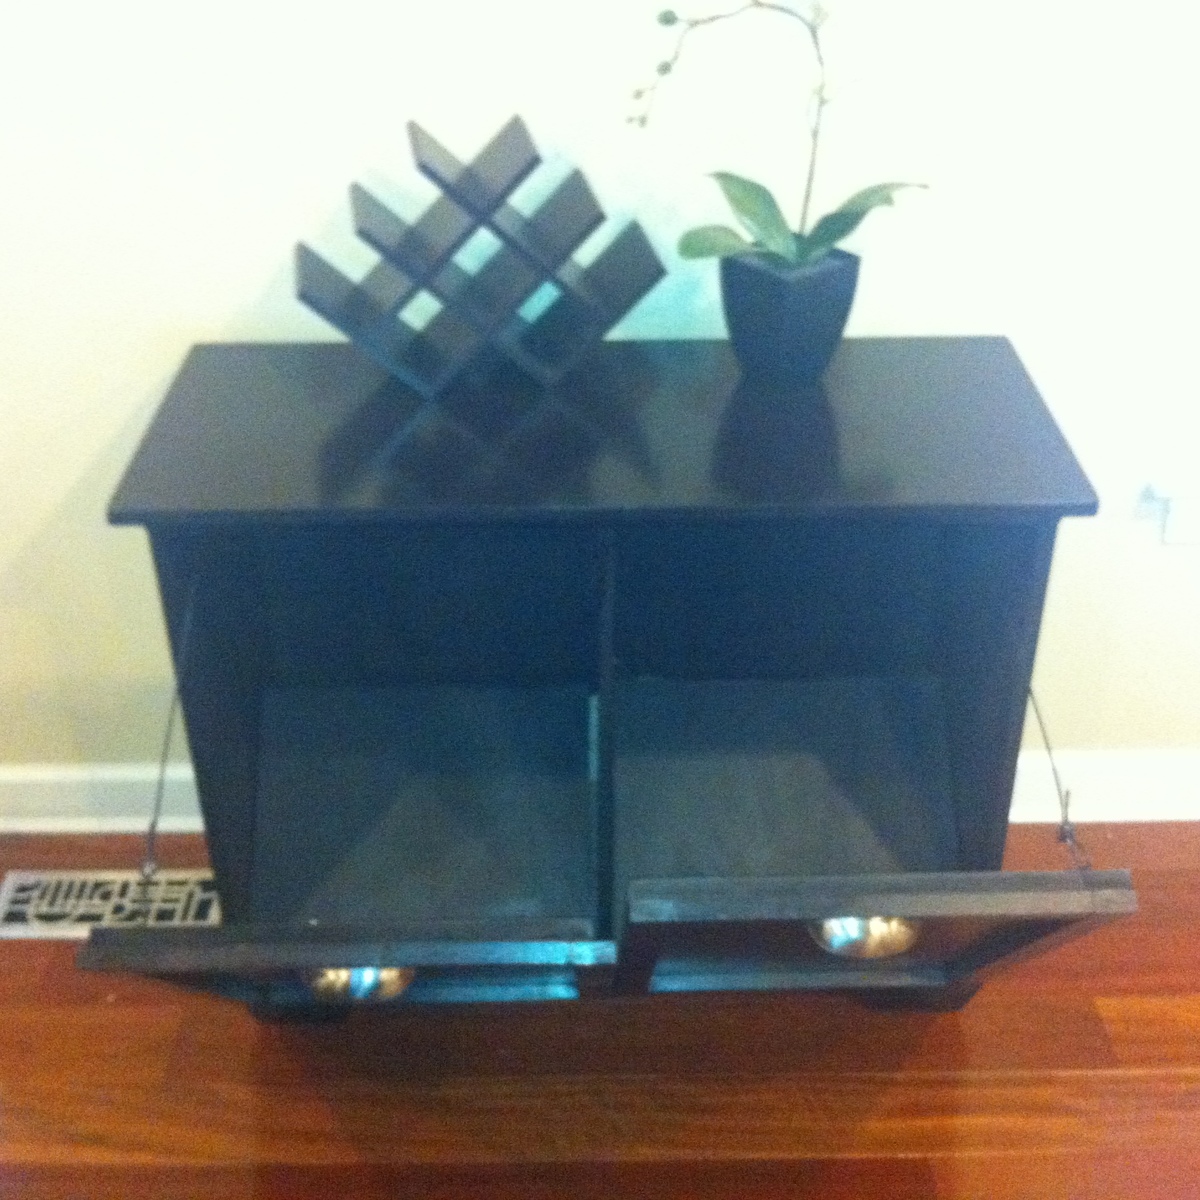
Tilt-out recycling sorter --Modified Build

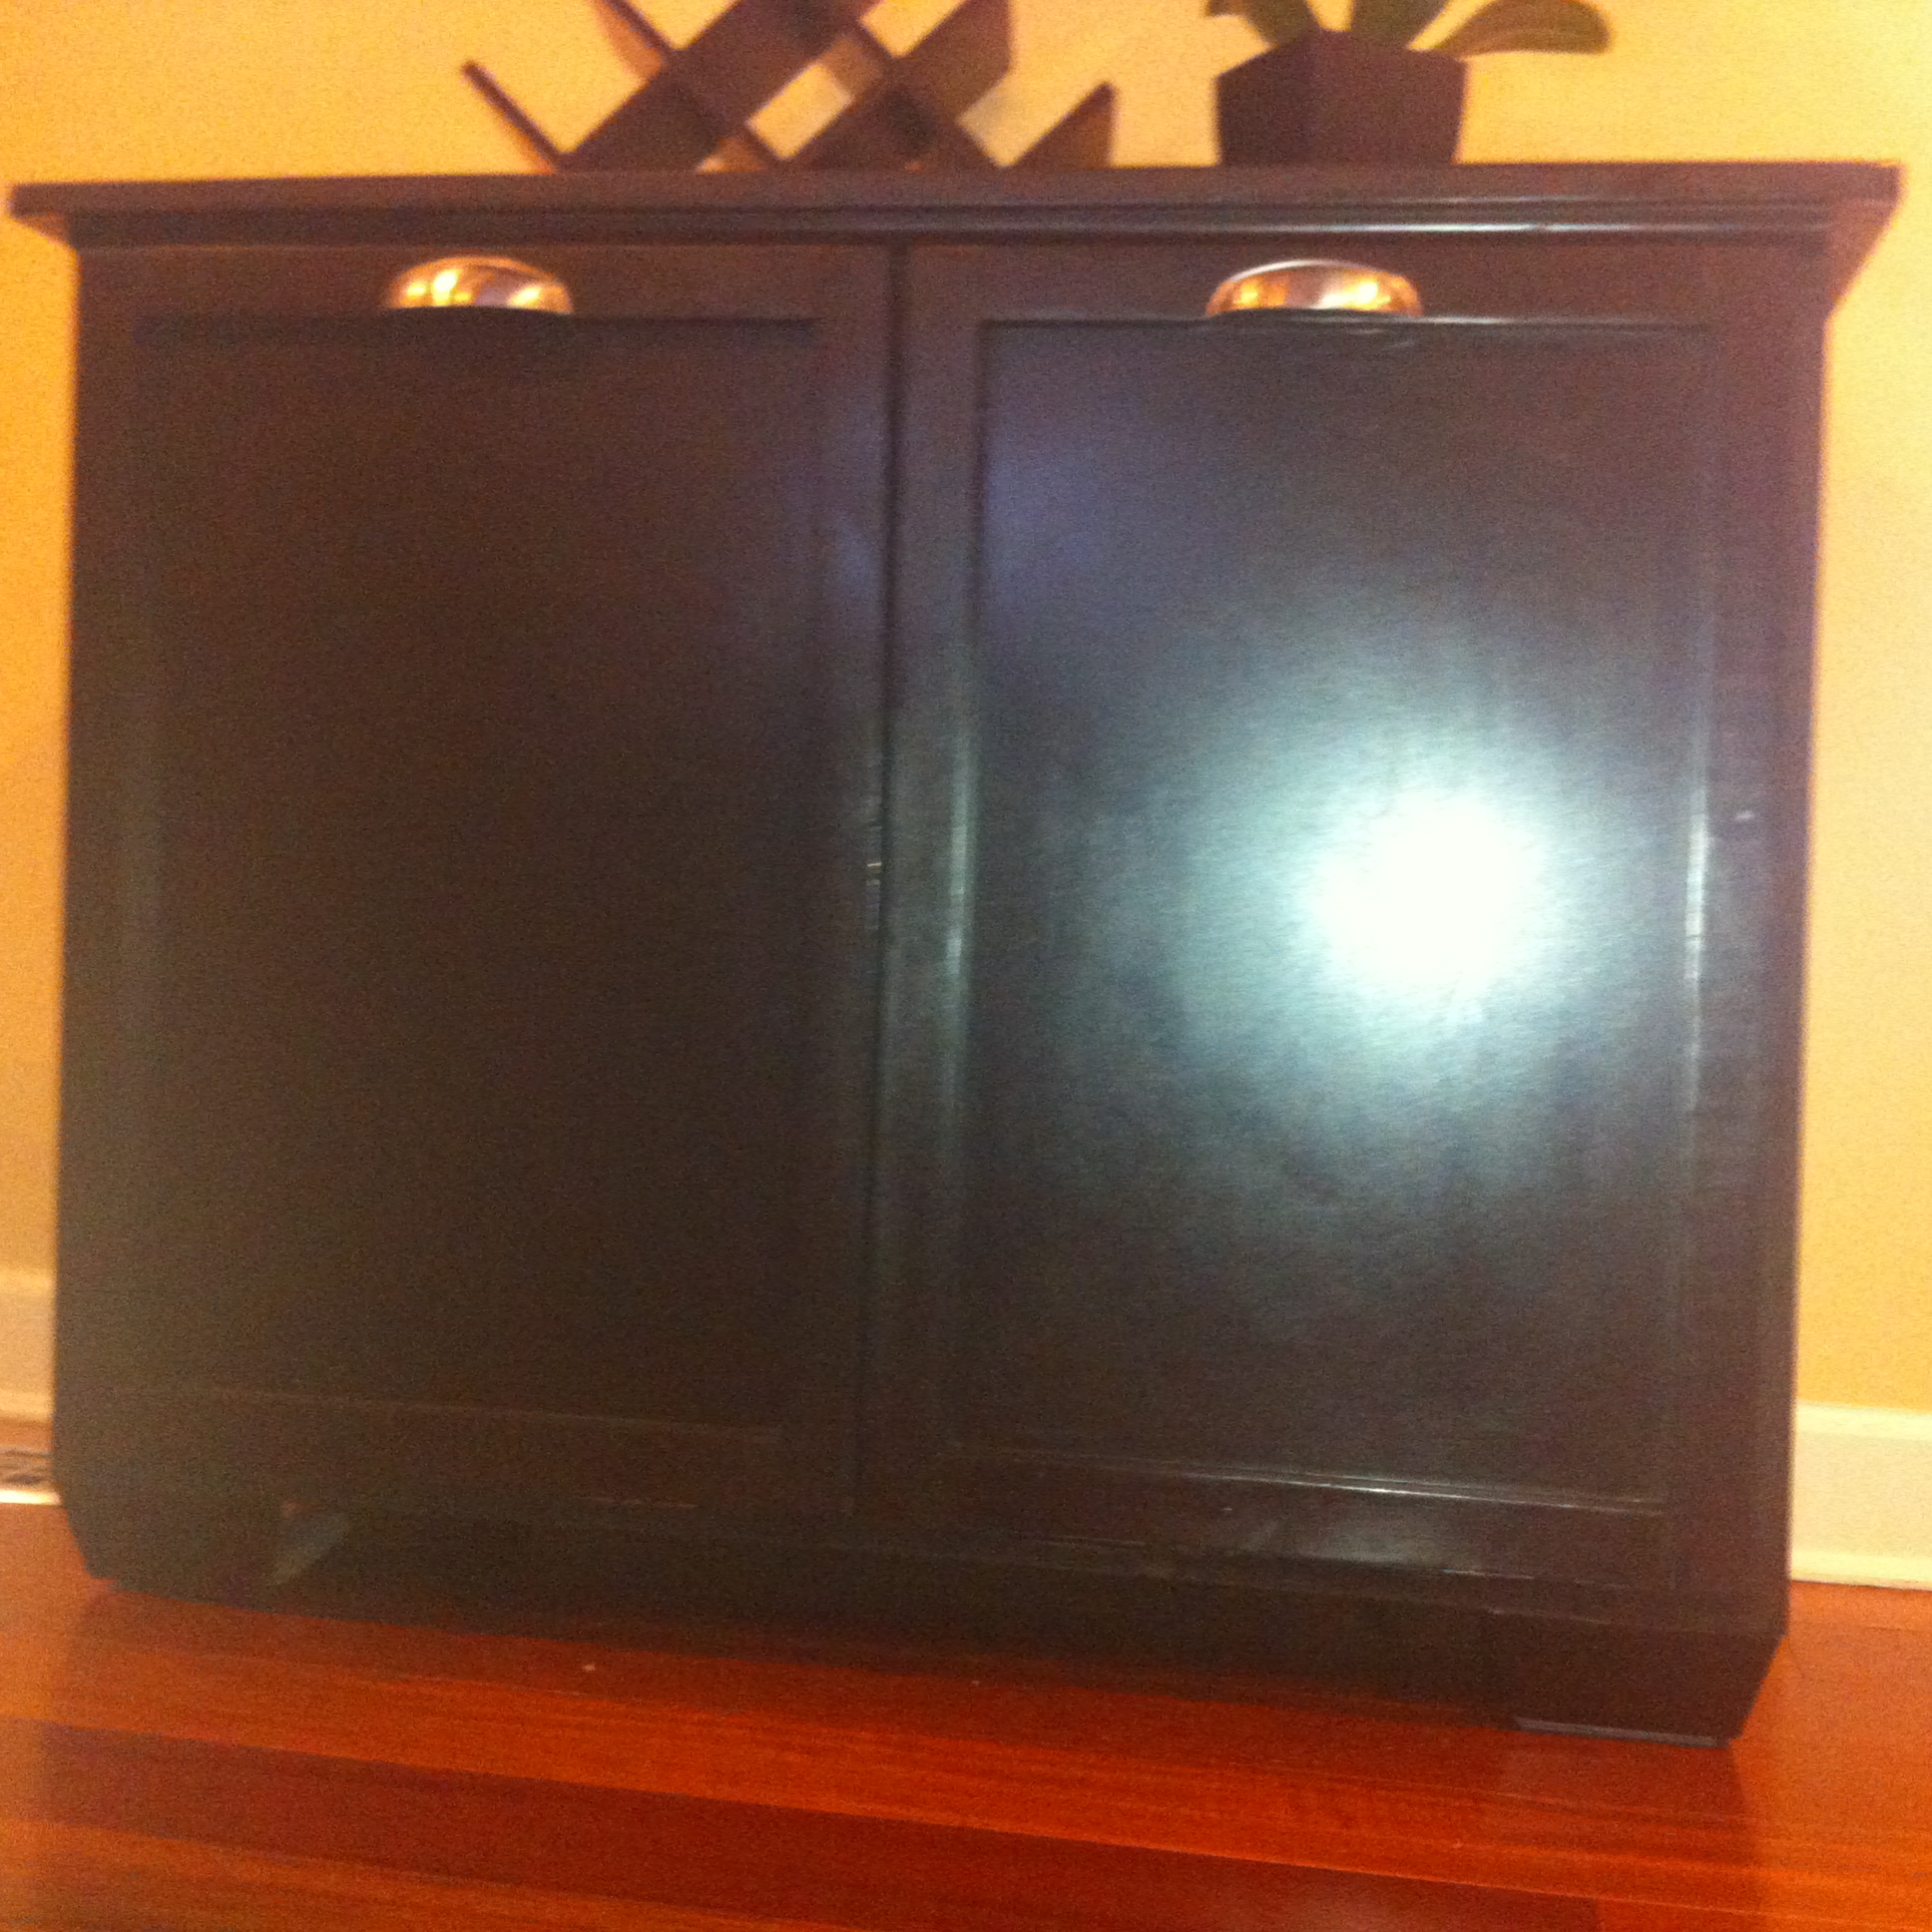
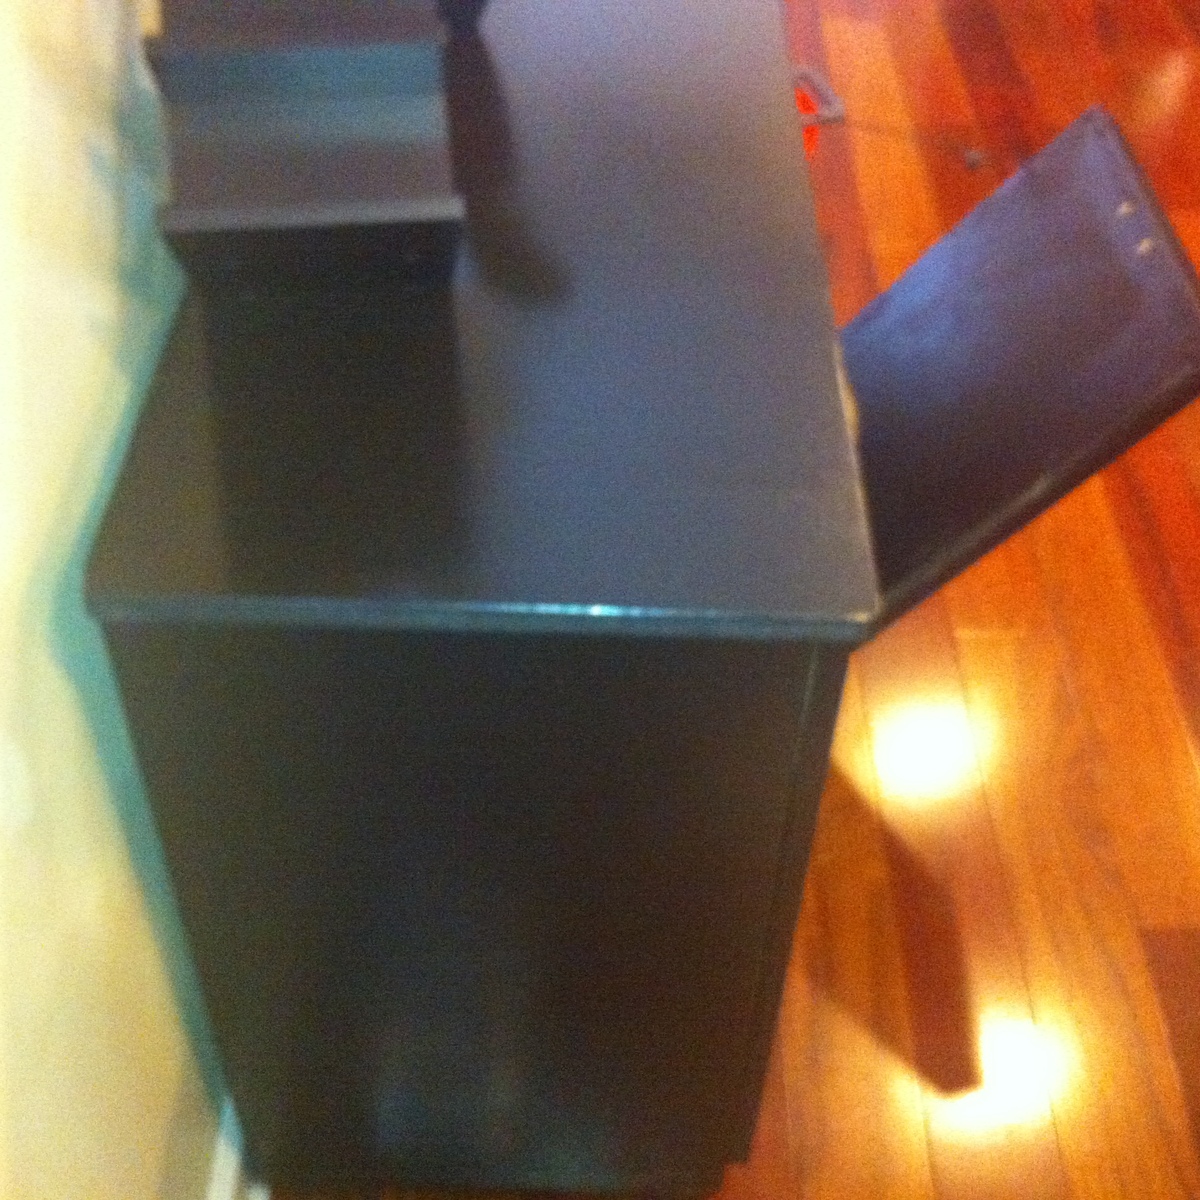
I attached the tilt out portion using a Kreg jig and eventually removed the brace (it wasn't necessary and removing the brace gave it a cleaner look.

I used 2 x 2 as a trim around the outside which also allowed me to hide the hinge.

Other than that -- followed the build pretty closely. I used a cable on either side to stop the tilt out from falling to the floor (which allows me to leave it open as well.

This was my first project and it was a battle to figure out how to install the hinges and I did not love my jig saw work with the plan feet so I bought and installed furniture replacement feet which turned out much nicer (IMO).

Good luck!

Built from Plan(s)
Estimated Cost
$150.00
Estimated Time Investment
Weekend Project (10-20 Hours)
Finish Used
General Finishes Java Gel
Recommended Skill Level
Intermediate

Fancy Jewelry Box

Submitted by Matt L on Mon, 06/29/2020 - 19:52

Great plans and a fun build. I made some modifications. My drawers are 1.5” high and 10” long. It allowed for 6 drawers. Overall height is 13.75” and length is 17.5”.

I used rabbits and dados rather than butt joints. There is flocking in the drawers.

Built from Plan(s)
Estimated Time Investment
Week Long Project (20 Hours or More)
Finish Used
Garnet Shellac at a 2# cut. Wiped on. I used 4 coats sanding with 400 grit after coats 2 and 3. I used 0000 steel wool after coat 4. Then I applied Paste wax.
Recommended Skill Level
Intermediate

Camp Loft Bed

Submitted by jnfase on Sun, 08/26/2012 - 18:25

A bunkie board needs to be added to the shopping list. I used one from a bunk bed that I used to have as well as some metal slats that I used to support the bunkie board. I would imagine you could use boards as well. Also, I would add that 2" screws would be helpful. There were times when 2 1/2 were too long and 1 1/2 were not long enough. It's a very sturdy bed. Definitely recommend using lots of wood glue for reinforcements. I also added L-shaped brackets under the 2x6's to add support.

Estimated Cost
$100 - $150
Estimated Time Investment
Weekend Project (10-20 Hours)
Recommended Skill Level
Beginner

Modified Hailey platform bed - king

Submitted by Syra_87 on Fri, 06/20/2014 - 13:33

We didn't want a platform bed but liked the looks of this bed. We used a 2x10 for the vertical frame. The 'rail' around the top of that is a 1x4. We sunk the supports slightly to hide most of the box spring. I also wrapped the box spring so that it matches our bedroom and isn't so apparent. The legs we did were two 2x4s as we couldn't find a 4x4 in pine. We did two twin beds to support the twin box springs and did a 'footboard' that brings them together. They wouldn't have fit through doorways otherwise. It turned out very well. The headboard is somewhat our own creation.

Estimated Time Investment
Weekend Project (10-20 Hours)
Finish Used
Minwax dark walnut (1 coat) and Helmsman Spar Urethane satin finish (two coats)
Recommended Skill Level
Intermediate

Entertainment center and matching end table

Submitted by Anonymous (not verified) on Tue, 09/20/2016 - 17:34

Decided to use your plans and build an entertainment center for the house. I did however change a couple of things, like it is a little smaller and I used weathered wood for the sides and front, along with deciding on not using the doors. After building this project ...I Loved it !  In fact loved it so much , I built a matching end table.  Thank you so much for the plans and ideas.

Estimated Time Investment
Week Long Project (20 Hours or More)
Finish Used
Walnut stain and clear
Recommended Skill Level
Beginner

Comments

Ana White

Wed, 09/21/2016 - 15:32

The weathered wood is beautiful!  I love your take without the doors.  Thanks so much for sharing!

Husky farmhouse table

Submitted by wayne465 on Thu, 07/02/2020 - 11:19

This was a fun project to replace our old oak table. Anna’s project plans was very easy to follow. My wife wanted a semi plank look so I used a wood jointer and a wood planer to get the top nice and snug without many gaps. I used popular for the sides and I used 3 pocket holes for every frame connection to add strength. 2 pocket holes seemed a little weak. I used valspar aspire white for the paint and Minwax walnut stain. For the poly I used varathane 3x thick satin oil based polyurethane. I tried using semi-gloss but it was two shiny for us. I added 2 cross braces for added support for the lower portion of the table and to add more points of contact to keep the table flat. And secure. Don’t be afraid to have small imperfections. They give it the authentic look.

Built from Plan(s)
Estimated Cost
600-700
Estimated Time Investment
Week Long Project (20 Hours or More)
Finish Used
Minwax walnut stain
Varathane oil based polyurethane
Recommended Skill Level
Beginner

Custom Desk

Submitted by RARAtlanta on Tue, 08/28/2012 - 18:07

I built this custom desk for a customer's 6 year old son. I started with the Modular Office Small Desktop. I had to make changes to the plans because I was using 3", posts, 1.5" solid wood top and the entire desk was made out reclaimed lumber. I also added a cross beam on the bottom to make it more secure. Once we settled on the basic idea my customer said if I found something unique to go ahead with it. They were thinking a cool piece of wood or something like that, however when I found an old boat instrument panel at the used furniture shop where my wife and sell furniture I had to have it. I then pulled all gauges from the panel and installed them in a wood "back splash". I rewired the gauges to work on 120V power so one switch will turn on the gauge lights and the other will make some of the gauge neddles jump.

Finish Used
-Once built sanded everything with 100 then 180 grit sand paper
-Painted it black with oil based paint
-Once paint dried hand sanded with 180 grit sand paper
-Applied paste wax with cheese cloth in small sections then wipe off within 5-10 minutes with a clean cloth
Recommended Skill Level
Advanced

Adirondack Chair

We just built our first set of Adirondack chairs and after sharing with our friends, we have sold a few. We are now building other stuff too!

The only change I did to the original plan is place the 1x3 on the top in the back. Makes it look more stout and clean finish.

We painted it 3 times with a nice red and bought some great cushions at a good price.

Estimated Cost
75.00
Estimated Time Investment
Day Project (6-9 Hours)
Finish Used
Red Paint w/primer
Recommended Skill Level
Intermediate

My workbench

Submitted by Mandy D on Fri, 09/23/2016 - 17:19

This workbench was fairly easy to make and I was able to do it by myself. The hardest part was attaching the supports to hold the two sides together without an extra set of hands but I figured it out. I made another shelf to sit on the bottom so I'd have a space to put smaller stained/painted projects to dry. I love this table, it's exactly what I needed. Supplies were purchased at Home Depot for about $50.

Estimated Cost
$50.00
Estimated Time Investment
Day Project (6-9 Hours)
Finish Used
None
Recommended Skill Level
Beginner

Comments

2 Seater Console Chair with Icebox

Submitted by Anonymous (not verified) on Mon, 04/29/2024 - 09:28

I took one of Ana White’s Adirondack chairs, and made some changes to the back part of it and then turn it into a two seater console chair with ice chest in the center

Norman R

Custom Dresser/Armoire

Submitted by sgilly on Thu, 08/30/2012 - 11:53

I like building things for others, especially when it's something that they can't find anywhere else. In this case, my friend has lived in her home for 20 years and never could find a storage piece to fit in this niche in their bedroom. When she asked if I could build something I was ready to try!

Because the dresser is 83" tall, 14 inches deep, and 33 inches wide, I didn't use one of Ana's plans. But, the Madison Dresser could be used as a jumping off point.

My friend is thrilled with this, and I hope they can use it for many years to come.

Built from Plan(s)
Estimated Cost
$300
Estimated Time Investment
Week Long Project (20 Hours or More)
Finish Used
Minwax stain, I think it was English Walnut. three coats, sanded between coats. Minwax rub on poly in a gloss finish. three coats, sanded between coat one and two.
Recommended Skill Level
Intermediate

Comments

birdsandsoap

Thu, 08/30/2012 - 14:47

great job. It looks beautiful. You have the best of both worlds; not only is it a custom piece, the finish makes it look like professional quality.

Bedside table

Submitted by madoss on Wed, 06/25/2014 - 18:22

Reclaimed wood nightstand

Estimated Time Investment
Weekend Project (10-20 Hours)
Finish Used
White paint
Recommended Skill Level
Starter Project

Kitchen table and storage benches

Submitted by Jilybean on Mon, 09/26/2016 - 10:53

I built these for my son's new home. The bench seats lift up for storage. I was rushed to get them done for the housewarming/adoption party. There are things I would do better if I did another set. 

Estimated Cost
$600
Estimated Time Investment
Week Long Project (20 Hours or More)
Finish Used
Minwax stain and Rockler Rockhard tabletop varnish in satin.
Recommended Skill Level
Intermediate

Patio Set

Submitted by rhn0489 on Mon, 07/06/2020 - 11:45

Ths set is based on the plans for the 2x4 sofa. It is very east to adjust the sizes to create the perfect piece for your space.

Using these plans I simply changed the seat sizes to 24" and 48" to create a chair and loveseat. I have also added a 1x4 across the rear of the seat to act as a bottom support for the 1x3 slats I added for back support. The other major change was using 2x3's instead of 2x4's. With the shortened length these can be a little less bulky with sacrificing stability.

Built from Plan(s)
Estimated Cost
$50
Estimated Time Investment
Day Project (6-9 Hours)
Recommended Skill Level
Beginner

Essential Outdoor Set

Submitted by Anonymous (not verified) on Fri, 05/03/2024 - 13:47

Hi Ana,
thank you for all you inspiring build plans
I have build a few of your 2x4 out door furniture plan
2x4 outdoor sofa
2x4 one arm outdoor sofa
2x4 outdoor side table
2 pcs of the essential outdoor chair for deep seat cushion.

Johan Janssen from the Netherlands

Storage Bed

This is my most ambitious build so far. I wanted to make a really nice piece of furniture and I needed a bed so this is it. I wanted drawers and I wanted to make an upholstery headboard so I this is what I came up with. The headboard was so simple and took only a day. I searched youtube and found a video walking you through the process and was surprised at how easy it was. I built the bed with oak but I would do it differently next time. As it turns out I don't like the grain of oak and its so porous that I spent A LOT of time on the finishing part. I used wood grain filler to take away the porousness and used a series of stains and glazes to get the finished look I wanted. All in all I'm happy with the result but I think I could do it better next time.

Estimated Time Investment
Week Long Project (20 Hours or More)
Recommended Skill Level
Advanced

Aquaponics Garden

Submitted by Chris 1975 on Sun, 06/29/2014 - 08:11

The better way to garden! I built the original, and then the fish got too big for the 55gal tanks below. Had to upgrade to 2 300gal IBC containers. Now I have 50 tilapia that are ready to eat, adn enough vegatables to feed us for the year.... awesome!

Estimated Time Investment
Day Project (6-9 Hours)
Finish Used
thompsons sealer
Recommended Skill Level
Starter Project