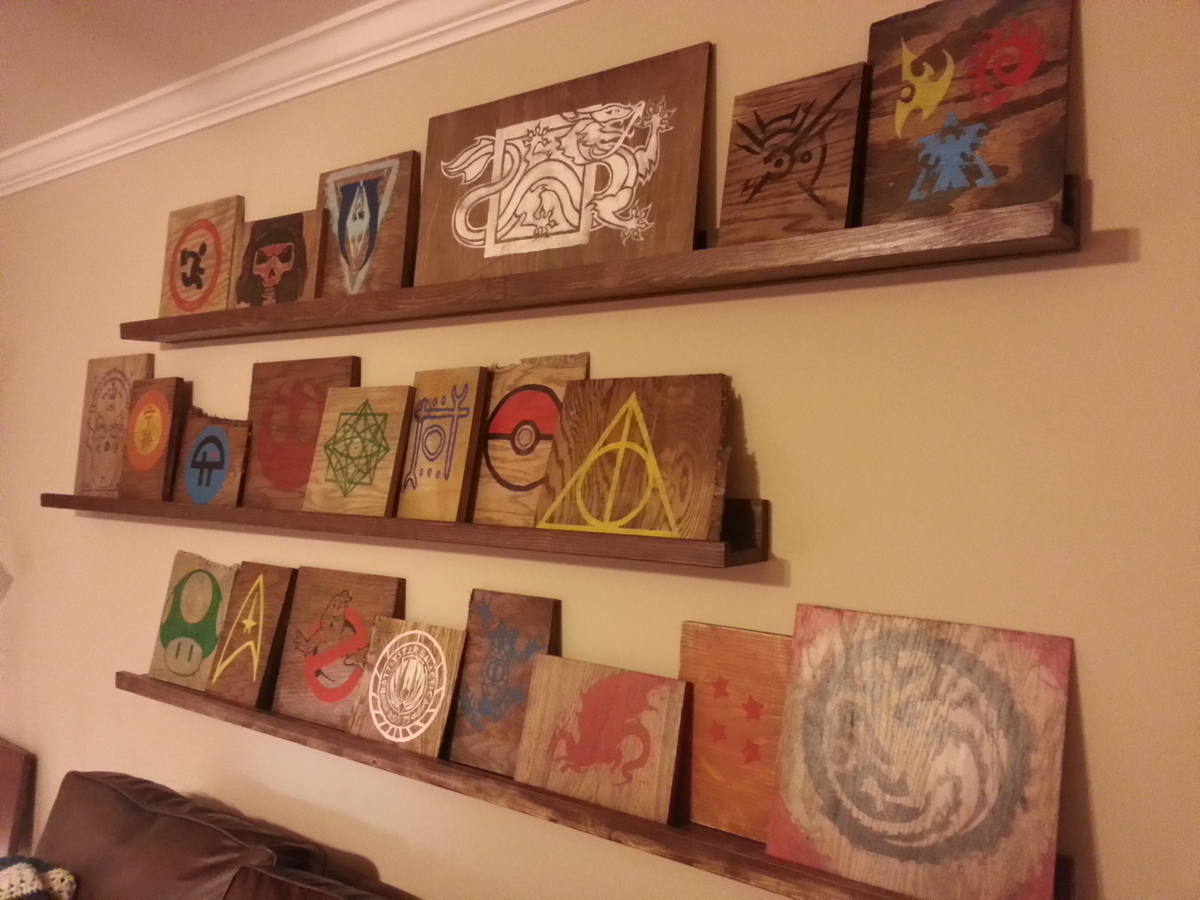
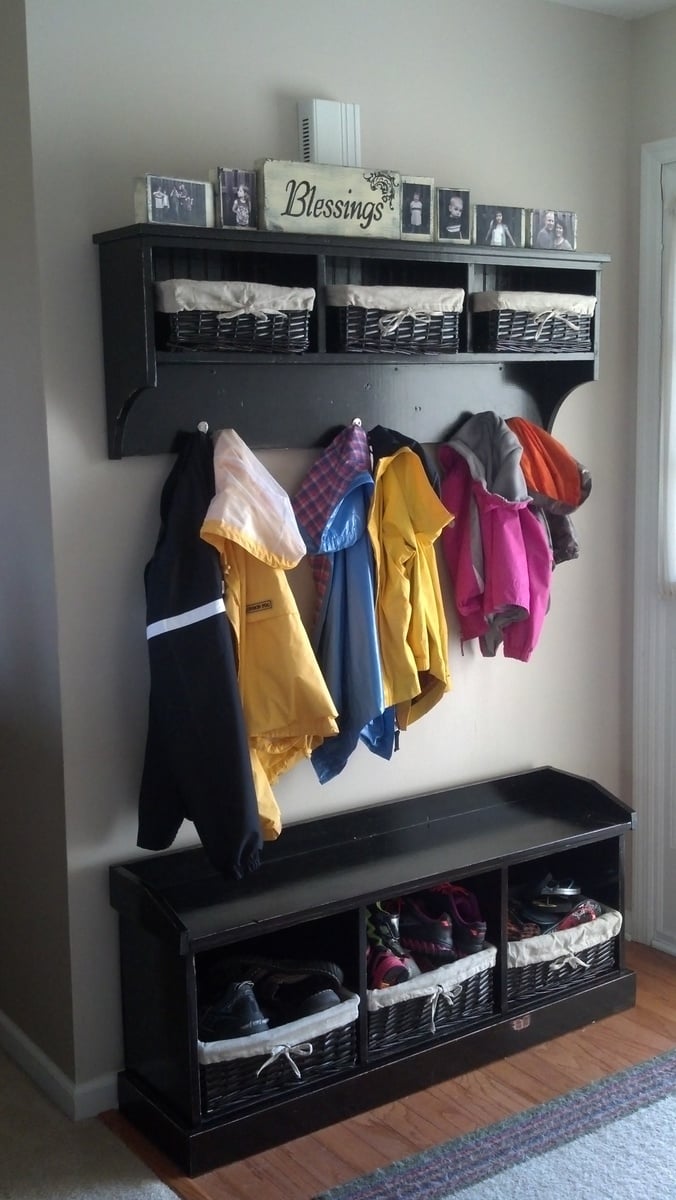
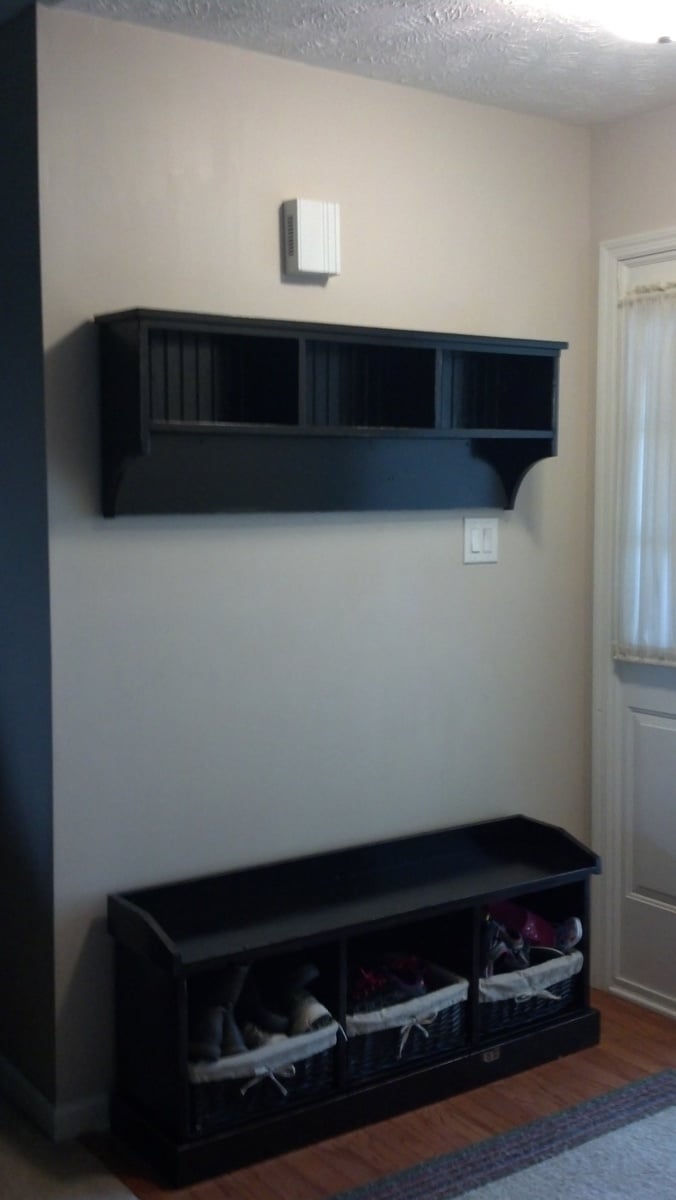
Community Brag Posts

Pallet Reclaim Swing

I work for a large manufacturing company that frequently has 'desirable trash'. Found 3 beautiful, heavy-duty pallets with beautiful wood on them. Took them home, took them apart, and got to work. The wife had been wanting a swing out near our children's playset so she could sit and watch them. Used Kreg pocket holes for everything that I could so as to hide as much hardware as possible.

*Side note regarding why I did the rope the way I did - the original post had mentions of it being a bit tipsy (particularly with little ones!). With this design, there's no flip front or back and the rope only gets tighter the more weight that is applied.

Built from Plan(s)
Estimated Cost
Almost free, only had to pay ~$30 for the rope.
Estimated Time Investment
Afternoon Project (3-6 Hours)
Finish Used
Olympic Cedar Naturaltone Stain, foam brushed on and wiped off with rags.
Recommended Skill Level
Starter Project

Privacy Planter Fence

Submitted by Anonymous (not verified) on Fri, 09/08/2023 - 08:25

Created a privacy planter fence, using multiple planters. Most of the bases were custom sizes due to the existing rock wall. Tongue and groove cedar utilized and coated with linseed oil. I ensured the frames were square and plumb which the directions omit for some reason. Great week long project!

Kyle

Built from Plan(s)
Seasonal And Holiday

My own weathered corner hutch :)

This was my first project. It took me a weekend to build and prime. Since I chose to use a crackle finish, waiting time between coats extended the total time to one full week. My husband and I were supposed to make this hutch together, but I became obsessed and did most of it alone! I adjusted the size a bit to make it larger, so I could fit big pieces on shelves and in cabinets. Thanks for the plan Ana!!

Built from Plan(s)
Estimated Time Investment
Week Long Project (20 Hours or More)
Finish Used
Weathered Crackle Finish done as follows:
1. Killz2 latex primer (highly recommended)
2. Valspar interior satin finish, "Frontier Road" (this is the color that shows in the cracks)
3. Valspar weathered crackle glaze (a suggested substitute that costs less is Elmer's glue)
4. Valspar interior flat finish, "Churchill Hotel Lace" (must be a flat paint, this is the dominant color of your piece)
5. Valspar clear protector (also highly recommended to protect the finish you worked very hard to create, when you paint the same piece of furniture 5 times in one week your sanity will agree!)
Recommended Skill Level
Starter Project

Comments

JoanneS

Fri, 04/13/2012 - 14:47

Wow, this is sooo beautiful! The finish is just awesome. My Hubby hates to paint, and he saw this multi-step finish and said you must have the patience of a saint! :) Congrats on such a stunning first project!

kmsdance (not verified)

Mon, 10/01/2012 - 23:33

Very Nice! What did you do to make it "bigger"...did you make it deeper or wider? Just curious, because I would like to try and make a bigger version as well. Did you still cut the shelves on each side at a 45 degree angle? Thanks!

Long Modern TV Console with Pallet Wood

Submitted by Anonymous (not verified) on Fri, 01/17/2020 - 14:18

This project was a Christmas present for my girlfriend. I modified these plans a little bit to put the open shelf in the middle and used the pallet wood for this instead of it being white. The pallet wood was such a pain to cut up in to usable strips but after cutting them down, gluing them up, and sanding them down (for ages) I couldn't be more pleased with how they turned out. I used Watco Danish in medium walnut for the finish and I think it brought out the imperfections in the wood beautifully. I just used some pre-made legs from Amazon instead of the base out of laziness.

Estimated Cost
$125
Estimated Time Investment
Weekend Project (10-20 Hours)
Finish Used
Watco Danish Oil in medium walnut
Recommended Skill Level
Intermediate

Farmhouse Table

Since I am in the middle of a divorce, my ex- took my dining room furniture. I decided instead of buying something new, or getting a hand me down, I would build a new table. The wood top was made of 3 wood planks from my sister in laws hardwood flooring leftovers. It was sooo fun to make this. The stain was a mix of Minwax Providence and Ebony 3 to 1 mix appx. I did not add the bottom wood piece, as I did not think it needed it, it is plenty strong without it. I am working on the bench and chairs now. This has been by far my most fulfilling project ever. Enjoy!

Estimated Cost
$100 for stain, trim, poly etc. I had a lot of the wood, not the breadboards
Estimated Time Investment
Weekend Project (10-20 Hours)
Finish Used
2 coat mix of Minwax Providence and Ebony (3 parts to one part)
4 coats Polysealant

Recommended Skill Level
Beginner

Comments

brookifer86

Tue, 04/24/2012 - 09:55

I think you came up with a great solution to your dining room problem. As a victim of the "ex furniture snatch" myself, I also decided to build my own instead of buying. It was quite the confidence boost! Love the table with the wider boards. I also didn't use a stretcher for my Farmhouse Table, and it's held up perfectly for over a year now.

KellyJo1180

Thu, 09/27/2012 - 08:38

I am looking to do the same design with the larger boards in the middle. What size are the boards running vertically on the ends? 1 x 6?

justjack5454

Fri, 12/12/2014 - 13:59

I love the table you built thanksgiving day my table went
awol, so I need to get going on your design. P. S. I'm lipstick, sawdust, n wheelchair.

Hall table

Submitted by jcar on Sat, 05/14/2016 - 03:38

This was a great first project.  Thanks for the plans and the inspiration.
I needed to make a hall table so made a narrower version, and had to alter the dimensions to suit the metric system and readily available materials at Bunnings (Australia), and also made the upper and lower sections identical in height.  It ended up about 300mm deep because the shortest drawer runners I could find were 250mm. These are full extension Hafele side rails, opening 100% to make the most of the narrow depth.
The drawer fronts are from a single piece of reclaimed Oregon Pine sourced locally and then stained with various strengths of Victorian Antique Wood Dye from eBay.  The stain is natural/non-chemical and made from walnut husks - just dilute with water to the desired shade and worked well on this timber.
Thanks Ana and thanks Jamison!
 

Built from Plan(s)
Estimated Time Investment
Week Long Project (20 Hours or More)
Recommended Skill Level
Beginner

Great Toy Box Plans

Submitted by dkakridge on Sun, 03/01/2020 - 18:55

So proud of how this turned out.  Plans were so easy to follow.  Thanks for such a wonderful site. 

David Akridge

Built from Plan(s)
Estimated Cost
$120
Estimated Time Investment
Weekend Project (10-20 Hours)
Finish Used
Rustoleum painters touch white gloss, Kilz Primer
Recommended Skill Level
Intermediate

Simple Outdoor Stabackable Chairs and Table

We used cedar for these nice, little chairs and based the table on the chair model, only 24" tall, rather than the 18" of the chair seats. It took longer to cut than assemble these - total time: @4 hours for all.

Thank you, Ana!

Darin

Built from Plan(s)
Estimated Cost
$60
Estimated Time Investment
Afternoon Project (3-6 Hours)
Finish Used
Stain with weather protectant.
Recommended Skill Level
Beginner

Atomic Credenza

Submitted by bethrose on Sat, 04/05/2014 - 19:01

My neighbor loaned me a shop vac and a palm sander to refinish a table, and I fell down a rabbit hole. This is the Brooke Mid-century Console Table from this site. I need to touch up paint the front, and it's not perfect, but this was my first woodworking project. I think the hardest part was wrestling with the drawer slides; I think I had to remount them three or four times. There was plenty of swearing involved with the Euro hinge as well.

I took a "Woodworking: Your Own Projects" class at the local community college, but this project was almost entirely self-taught (although I had plenty of adult supervision while learning to use the saws.)

I bought most of the materials from Building Materials Resources, a local reclaimed building supply store. And then took about a million trips to the local big box home supply stores for "just one more thing."

I had originally stained the project with Minwax Sedona Red and put some wipe-on oil-based poly on it, but the drawer fronts came out blotchy because I had used wood putty over the brad holes, so I painted those and the door brown ("Polished Mahogany" SW2838.) Then the edgebanding that I had applied on the front and stained was peeling off and looking terrible, and I didn't want to redo it.

I gave up and scuff-sanded the whole thing and painted the rest of it blue ("Still Water" SW6223.) I then applied several coats of semi-gloss spray water-based polyurethane, sanding lightly inbetween coats. I finished it off with a coat of Howards Feed N Wax and 0000 steel wool.

One tip that I have is that you can buy enormous (quart sized!) paint samples at Sherwin Williams for about $5 apiece. I used a paint sample for the brown portions, and a "real" quart of paint for the blue portion, and I cannot tell the difference in quality.

Skills learned:
Drilling pilot holes (believe it or not)
How to use the Kreg jig
How to use a miter saw
How to use a circular saw
How to use a table saw
Applying edgebanding
Applying wood filler
Staining
Building drawer boxes
Installing drawer pulls
Installing drawer slides
Installing euro-hinges (and how to use a Forstner bit)
How to use a brad nailer
How to attach table legs
Probably some other stuff that I forgot

Estimated Time Investment
Week Long Project (20 Hours or More)
Finish Used
Paint + Spray semi-gloss water based Varathane
Recommended Skill Level
Starter Project

Rustic end table

Submitted by Anonymous (not verified) on Tue, 05/05/2020 - 15:38

Doing the whole set of rustic coffee/end tables 1st one done! Thanks for the plan!

Built from Plan(s)
Estimated Cost
50
Estimated Time Investment
Weekend Project (10-20 Hours)
Finish Used
Black walnut
Recommended Skill Level
Beginner

Miter Saw Modification

Submitted by Anonymous (not verified) on Mon, 07/25/2016 - 20:55

I followed the plans as listed pretty closely. I added a 2x4 under the main shelf for extra support, and used 2x4s instead of 2x2s at the bottom, so I could have something to attach the casters to. I also opted for 1x3 braces, rather than the hinges to hold up the sides. I need to add the fence and paint it white.

Built from Plan(s)
Estimated Cost
$80-100
Estimated Time Investment
Afternoon Project (3-6 Hours)
Finish Used
white paint (forthcoming)
Recommended Skill Level
Beginner

Distressed Farmhouse Storage Bed

Submitted by atphelan on Thu, 05/08/2014 - 11:33

This is my biggest project to date; I put it together with a few modifications to the plans on this website (as I'm sure everyone does!) It will be my wife and my bed for quite some time and hopefully I can pass it along in the future. Seems sturdy as a rock and the additional storage will benefit us as our home has minimal closet space. The finish is a waxed-stained-sanded painted surface.

I broke this project into 3 phases: headboard, benches, and footboard. Juggling two kids and a wife, its hard to be able focus completely on a project without some (often welcome) interruptions.

One final note: this website introduced me to and this project confirmed that my favorite tool in my tool shed is the Kreg Pocket hole Jig; bought it thinking I would use it on a buffett table I built and have used it on every project since!

Estimated Cost
$350
Estimated Time Investment
Week Long Project (20 Hours or More)
Finish Used
waxed-stained-sanded painted surface
Recommended Skill Level
Intermediate

Comments

Kiddie Chairs

These chairs were easy to build, although I modified Ana's plans a little bit. I opted for solid wood 2x2s for the legs (I wanted it to be sturdier), and a solid seat instead of a slatted one. I notched out the back of the seat so it would fit flush against the back legs. Because of my modifications, my chair was just a couple bucks more.

Also, I was so excited to find solid wood balusters for the chair legs - they're not only better quality, but cheaper than furring strips!

Check out my blog link for a complete play-by-play!

Estimated Cost
$7.00
Estimated Time Investment
Afternoon Project (3-6 Hours)
Finish Used
Primed with Zinsser 3-in-1 Primer, then painted with Red Valspar Paint found in the "Oops" section of Lowes. Three coats of Rustoleum Satin Polyurethane.
Recommended Skill Level
Beginner

Comments

Rustic Outdoor Chairs

Submitted by Anonymous (not verified) on Mon, 03/04/2024 - 11:53

Seen these plans a couple years ago and finally have gotten around to making a set. This was a fun and really easy to follow set of instructions and I think they turned out really nice.

Jeff, with LaBrie Family Woodworking LLC

Seasonal And Holiday

Western Saloon doors

Submitted by tracysmith on Thu, 08/02/2012 - 00:44

I built these doors for a very good friend of mine who actually helped me get started turning my new love for building (after finding Ana's site) into a way for our family to make some extra money.

It took me a little while to wrap my brain around building something without using my Kreg Jig. I used a router table set up with some raised panels bits and put the whole thing together with glue and nails! Wonderful experience!

For the finish, I used a vinegar solution to give the cedar wood an old barn look. I think the final result turned out great and the final step was a clear coat sprayed on out of a rattle can.

Estimated Cost
Lumber cost was about $80
Estimated Time Investment
Week Long Project (20 Hours or More)
Finish Used
Vinegar solution and a clear coat put on.
Recommended Skill Level
Advanced

Comments

birdsandsoap

Thu, 08/02/2012 - 10:51

These turned out great! I haven't seen this style of door in forever! They used to be really popular, I remember my Aunt and Uncle having these in the entry to their kitchen. They were the coolest thing ever when I was a kid! Maybe they are a making a comeback?
I'm really impressed with your routing skills, that's a task I have yet to tackle, but I've got the bits laying around waiting.

Nice job!

tracysmith

Thu, 08/02/2012 - 21:10

Thanks a bunch! My friend is replacing an old set of louvered doors that went into her laundry room. Her family are farmers and rodeo people so the western decor really fits in their house. Great western stuff there. They made a chandelier out of a wagon wheel! Really cool!

This was my first attempt at routing so I really appreciate your compliment! It's really simple if you can get the basics of it. I'm sure you'll do just fine when you get to that point. If I can do it, anyone can do it! Thanks again!!

laneal1987

Mon, 01/23/2017 - 09:32

I really want to try and build this for a closet.  Are there any instructions for this?  This is the first door of this style that I have come across that I absolutely love.

Headboard and nightstands

Submitted by kabm99 on Sun, 06/01/2014 - 14:33

I made this headboard a year ago and it was my first Ana White project. I finally got around to making the nightstands last weekend and I just adore them. My guest room is finally complete!

Estimated Cost
Unsure since part of it was built last year
Estimated Time Investment
Week Long Project (20 Hours or More)
Finish Used
Minwax Dark Walnut with Polyurethane (satin)
Recommended Skill Level
Intermediate

Easy Locker Room Benches

I was asked to build a bench for our high school softball team room and used these plans to build the support. I was planning on building it exactly as it was in the plans, but a kind soul donated some poplar plywood mdf for the top, making it a smoother and more polished finish. I added some accent trim along the wall. Finished it off with school color (navy blue) on the legs and a clear satin lacquer finish on the bench. Love how it turned out!


Back