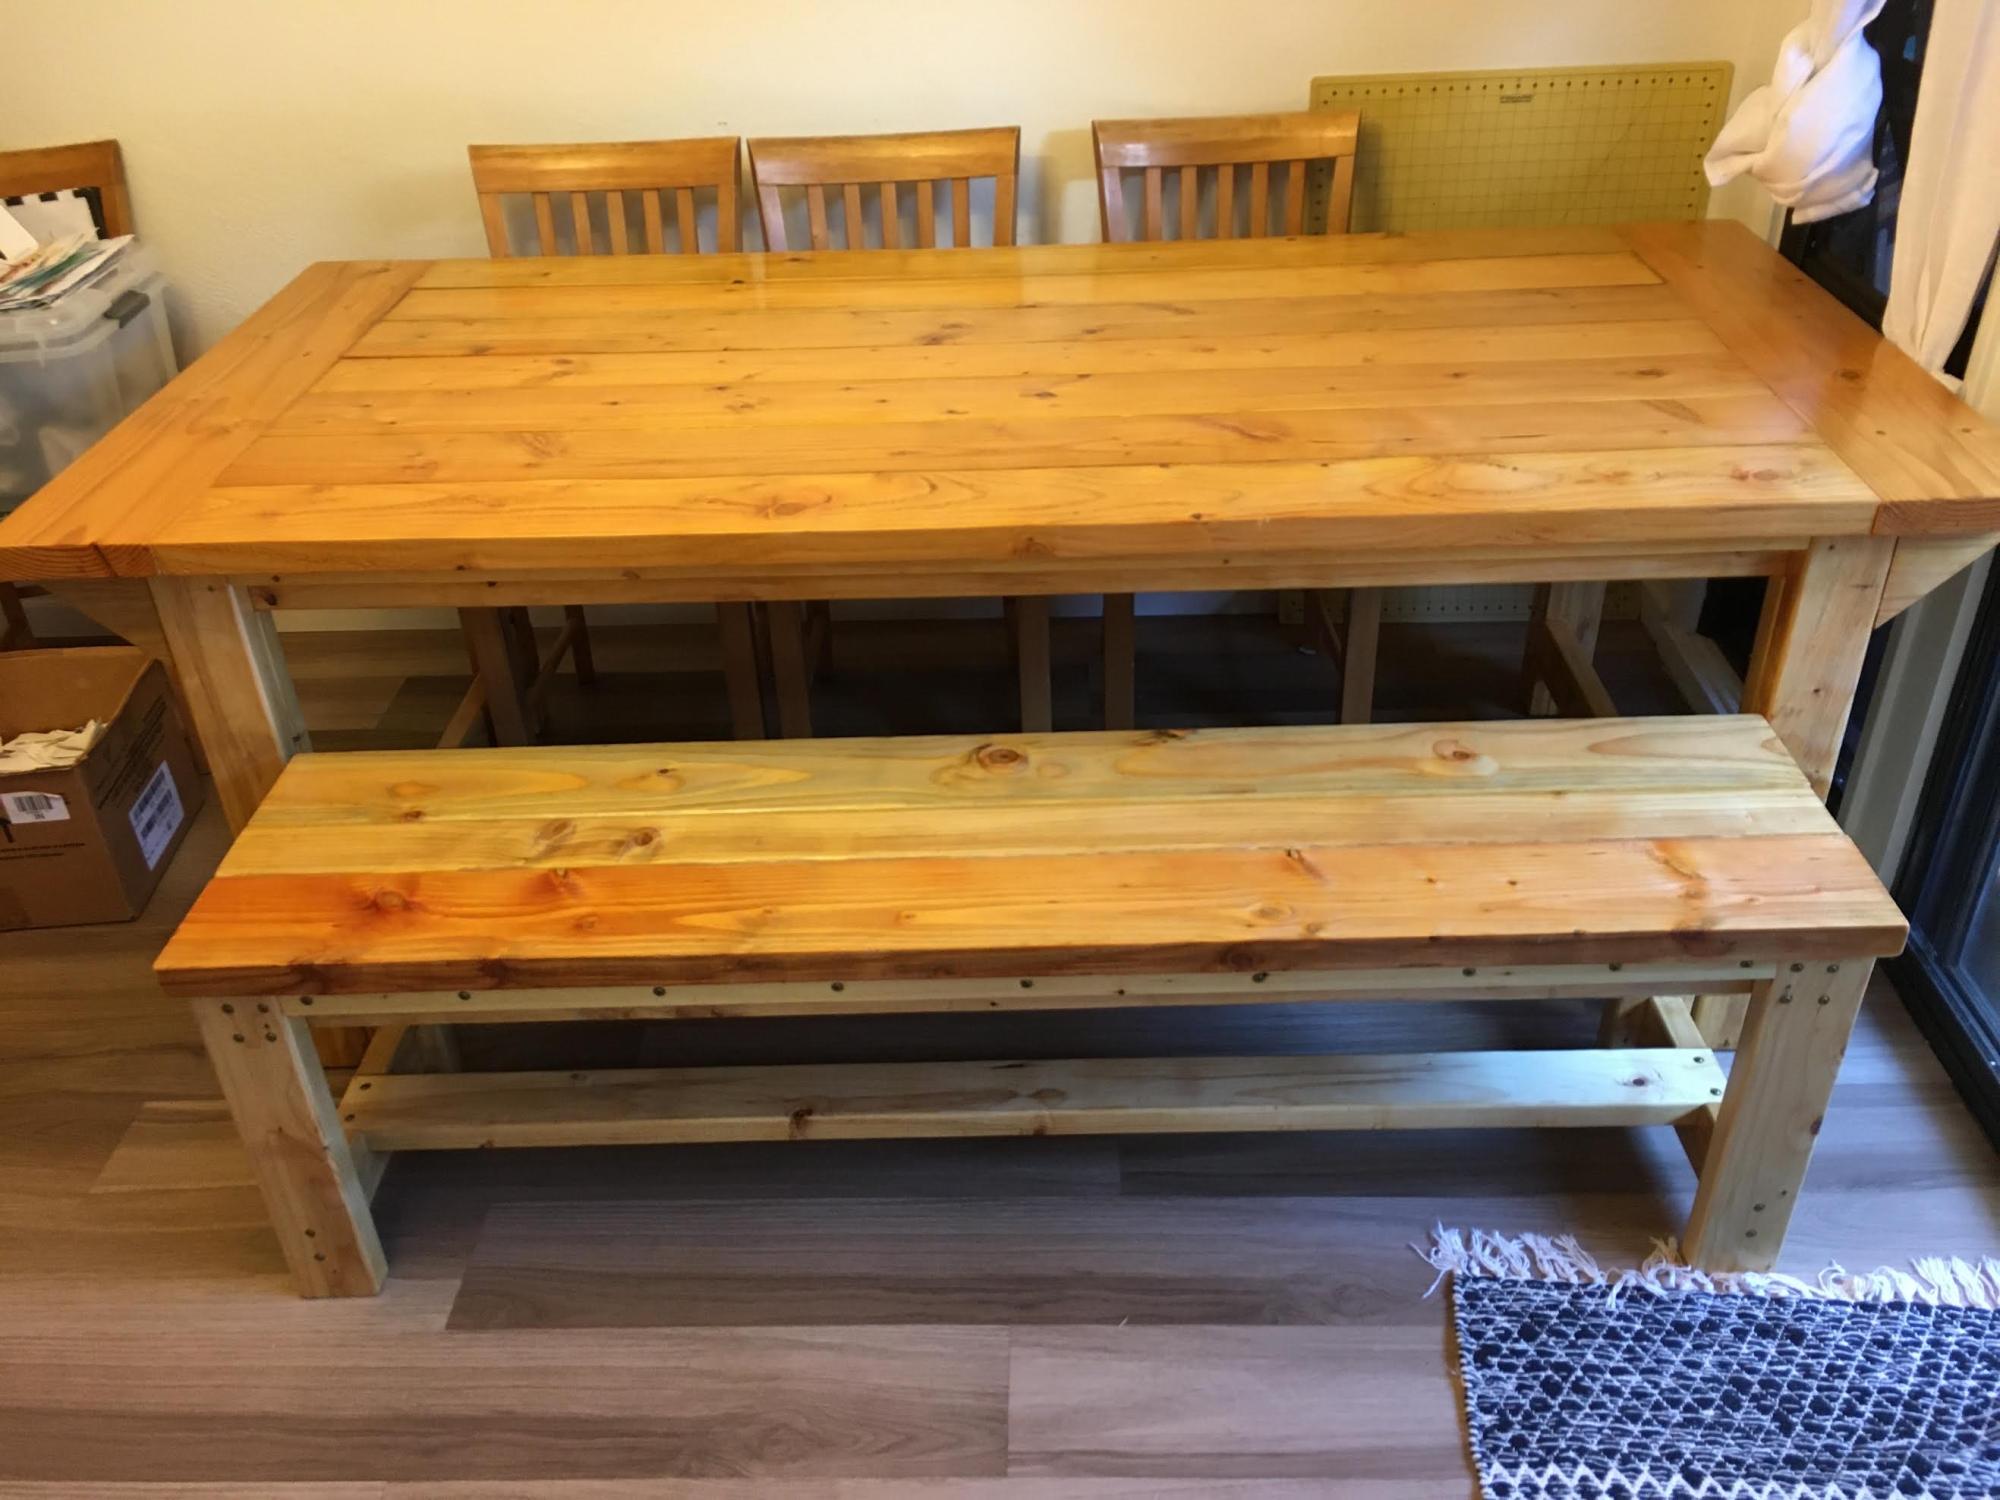
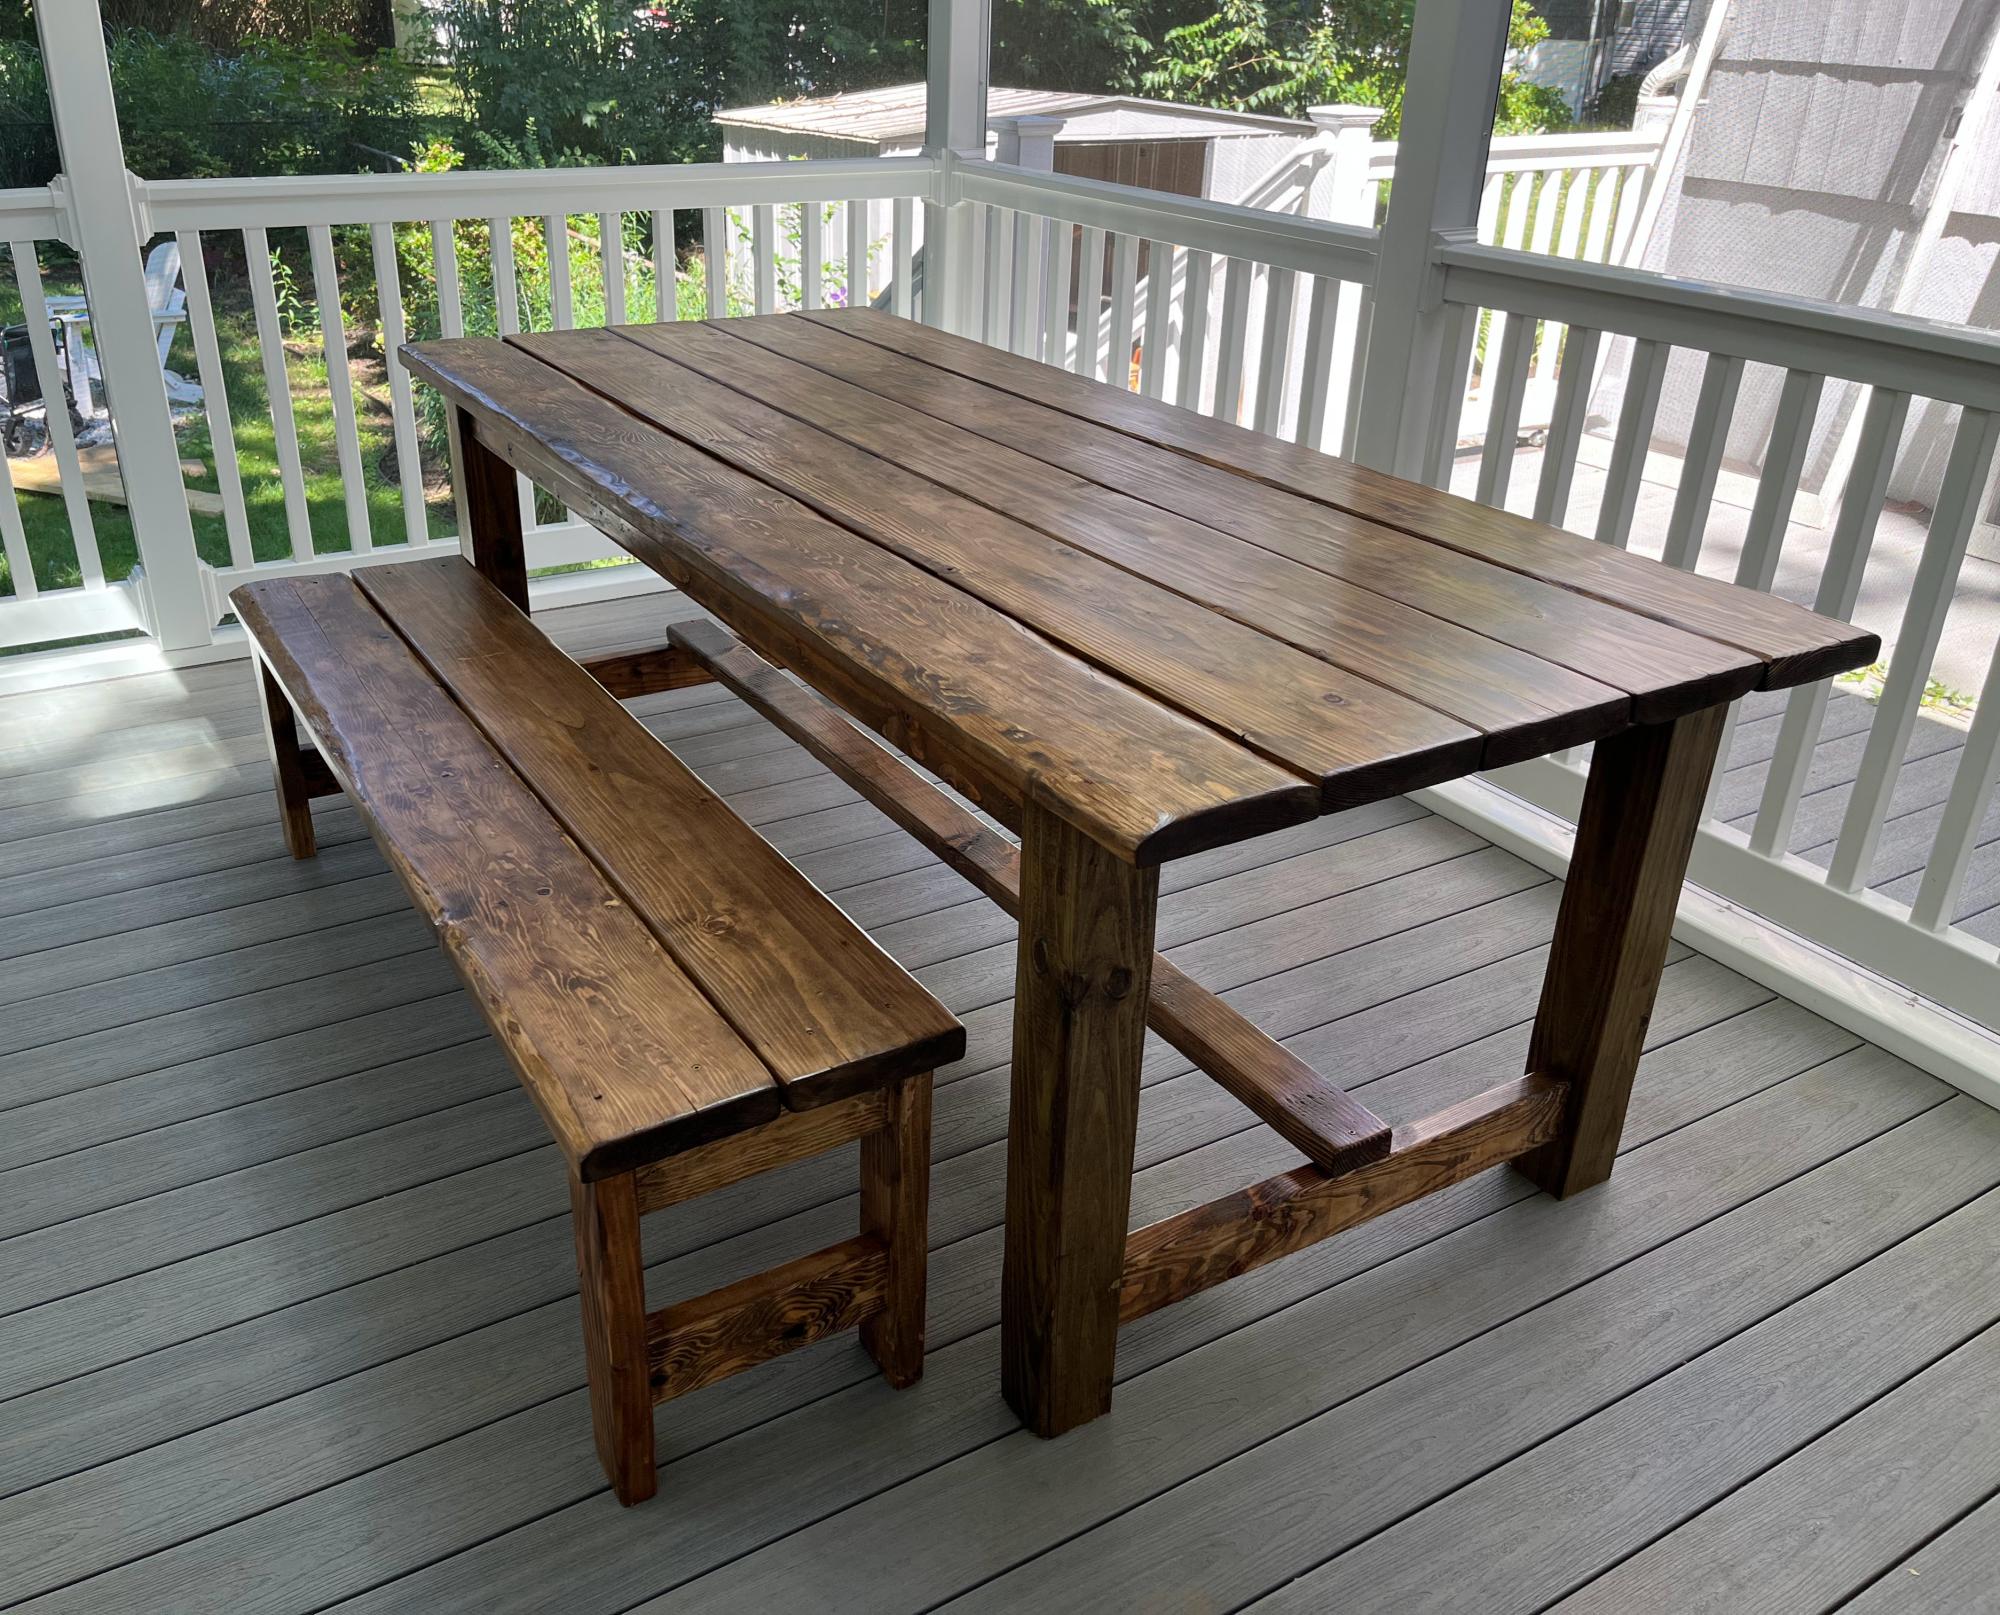
Community Brag Posts

Picnic Tables

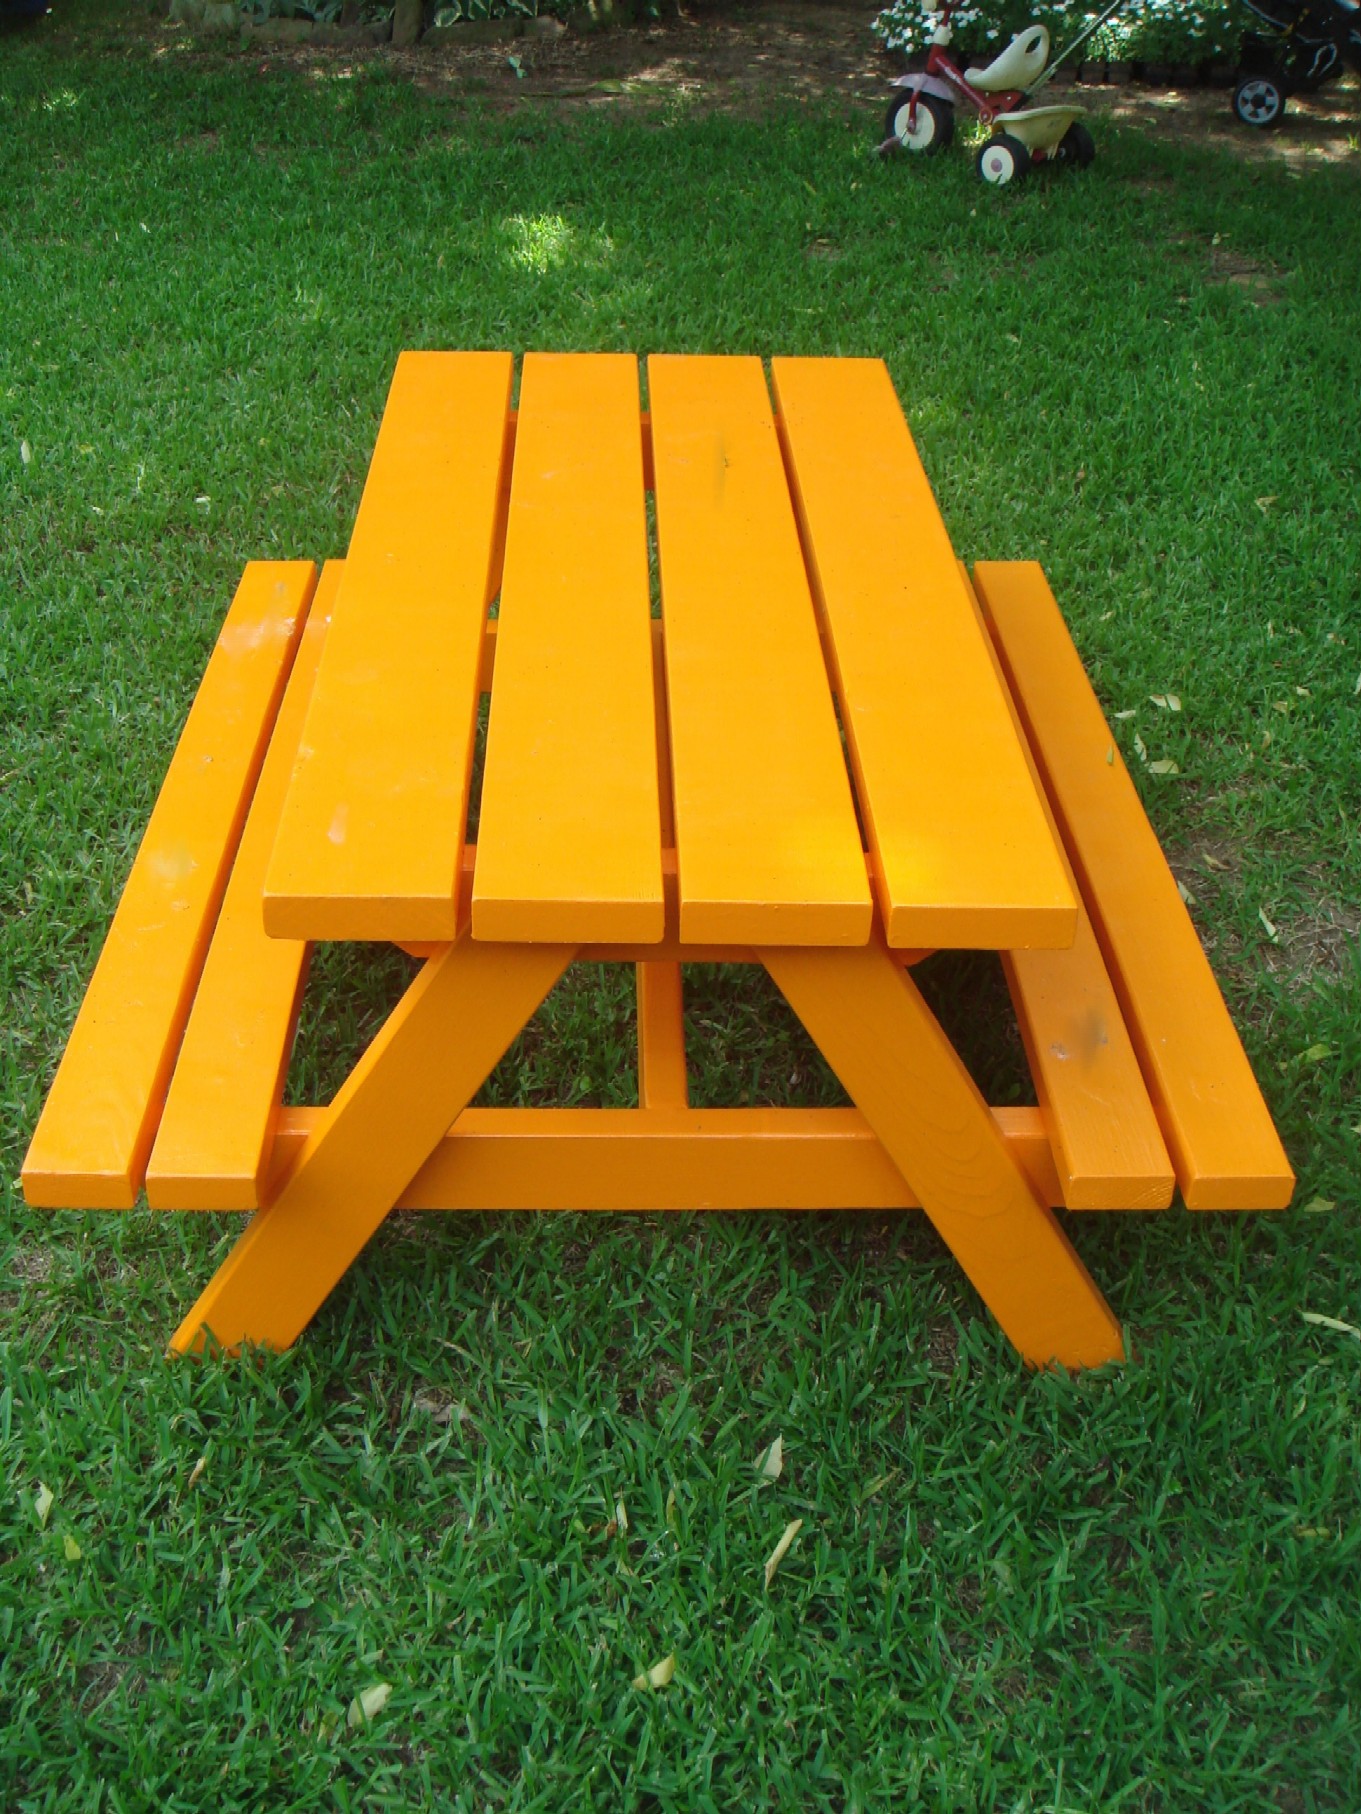
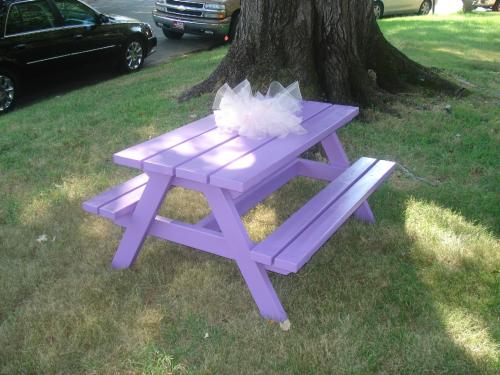
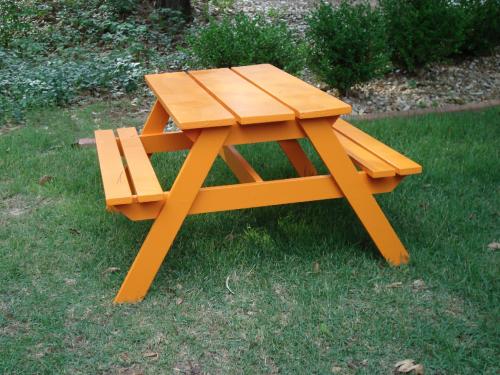
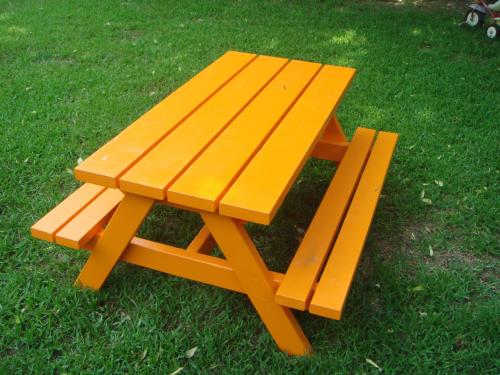
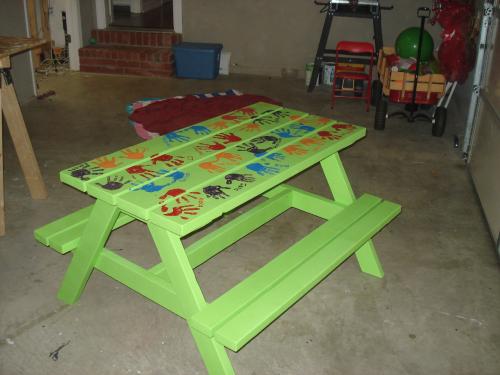
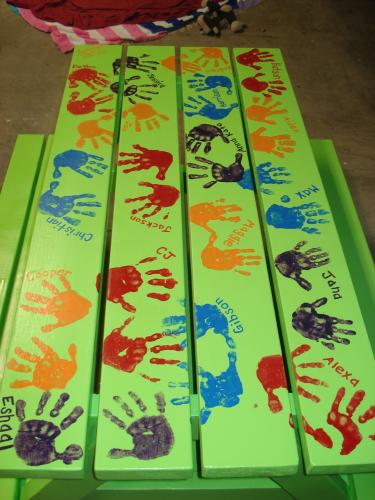
For my son's 4th birthday party, we were doing it at our house and needed outdoor seating, so I took on the task of building 3 Toddler picnic tables and 1 smaller one. Building them was not that big of a deal, but painting all 4 took some time! After the party, we sent 1 to my parents, 1 to in-laws & 1 to my bro/sis-in-law, so only ended up with 1 left over. FYI-the picture on the plan is one of mine, thanks Ana!

Built from Plan(s)
Estimated Time Investment
Afternoon Project (3-6 Hours)
Finish Used
I primed each table, then painted them with 3 coats of paint and sealed them.
Recommended Skill Level
Beginner

Comments

Seasonal And Holiday

How to Build Simple Raised Garden Beds

Starting with Ana's simple $10 raised garden plans, we built ours to be part of our experiment: Growing Vegetables in Our Driveway. Because our boxes are visible from the street, we made them a bit fancier and sturdier than we would have if they were hidden away in the backyard. An easy, afternoon project - with delicious results!

Estimated Time Investment
An Hour or Two (0-2 Hours)
Finish Used
none
Recommended Skill Level
Starter Project
Seasonal And Holiday

Counter height dining set

Submitted by Lukilla on Sun, 10/10/2021 - 10:18

Threw this together over a 4 day weekend. Love how light these chairs are.

Substituted edge glued project panel for the table top and seats instead of joining several planks.

Used a combination dark walnut, jacobean, and early American stain on the finish.

Comments

Platform bed

Submitted by Medickep on Tue, 09/19/2017 - 13:28

Mad this Farmhouse platform bed with storage.  It was a fun build and pretty straight forward!  If I was to do it again, I think I'd make the drawers a little deeper for more storage.  There's space in the middle of the bed that could be utilized to pull this off!

Built from Plan(s)
Estimated Cost
150$?
Estimated Time Investment
Weekend Project (10-20 Hours)
Finish Used
Primed the bed and used an Alkyd paint.
Recommended Skill Level
Beginner

Tree Shelf

Submitted by Alaskagirl on Tue, 12/12/2017 - 22:59

We moved about 18 months ago to a house without a fireplace after having one for almost 7 years. When The Christmas dilemma of where to hang the stockings came up last year, we used an Ana White plan and built a super amazing faux fireplace. After the holidays we decided we'd install it in our bedroom instead of storing it away all year....AND we ended up liking it there so much, that's where it stayed and a bookshelf took its spot in the living room. This Christmas when the stocking question was raised I looked online for ideas and, wouldn't you know it, Ana White to the rescue again!! We are completely in love with our new Christmas shelf. Also as a bonus, we now know how to use a miter saw, which I'm sure will open up all kinds of new project possibilities!

Happy Holidays!

Built from Plan(s)
Estimated Cost
$30
Estimated Time Investment
Afternoon Project (3-6 Hours)
Finish Used
Weathered gray stain with a bit of teal paint mixed in followed by a clear varnish.
Recommended Skill Level
Intermediate

My new yellow cubby shelf

Submitted by kylihoot on Sun, 05/01/2011 - 11:59

Totally lovin' my new cubby shelf. I painted it bright yellow, but I may paint it a more nuetral color after noticing it does not math anything haha! This is a super sturdy shelf...LOVE IT! Thanks ANA!

Built from Plan(s)
Estimated Cost
$30
Estimated Time Investment
Afternoon Project (3-6 Hours)
Finish Used
Primer and Satin Paint. I sanded it with 120 grit, then primed and painted with two coats each.
Recommended Skill Level
Beginner

Narrow Console Table - Farmhouse Collection

I loved this project. Since I can't buy wood, I have to use wood from pallets, or where ever I can find free wood. In this case I used 2x4's from pallets, 1x4 oak slats from an old bed frame I acquired and 1x4's from a large solid maple dog crate I acquired. The top was made from cabinet grade plywood we had left over from cabinets my husband made two years ago when we remodeled the kitchen (so I have to say that was purchased). The maple dog crate had some awesome wood, even tho it had been broken in a couple places. Just had to plane down the reddish finish on it. Since it was going to be painted, I didn't care what kind of wood I used. The only thing I had to buy were the corner brackets. Even the screws were from pallets we acquired, just had to paint the heads black.

Comments

She Shed - Guest Room, Craft Room, Office

Submitted by Chriss45 on Tue, 01/23/2018 - 08:18

I needed an office and also a guest room so i built a she shed and all the furniture.

Recommended Skill Level
Advanced

Comments

junesummer21

Thu, 01/25/2018 - 06:27

I love your murphy bed idea and would love to have plans for it. I too am looking for a guest bedroom and craft area and I know this would work in my space.

Chriss45

Mon, 02/05/2018 - 16:20

I didnt really have a plan when I was building my Murphy bed, I can do a sketchup plan for you if you would like. I used boat chair swivels instead of hinges and there is a YouTube video on how to do this. 

Chris

Nurserene62

Thu, 06/24/2021 - 23:11

Hi Chris! I would love to have a copy of the sketch up of this. I have a small she shed/guest cottage I would live to duplicate this in. Thanks in advance.

cgself12

Mon, 11/08/2021 - 14:18

Hi Chris!
I know I'm coming late to this party but I just found your shed and I adore it. You did an amazing job and I cannot express how impressed I am! I would also like a sketchup plan of both the murphy bed and the adjoining side cabinets. Great job!

Kim Daigle

Thu, 06/06/2019 - 10:59

I absolutely love everything about this she shed!!  I would be interested in a sketch up of the murphy bed as well as the cabinets next to it.  I would at least like to know what the dimensions of it all is.  You did an amazing job!  It's so beautiful!

mcocooper11

Tue, 06/25/2019 - 15:14

Me too!! I built a horizontal Murphy bed so I have that part done but I would like to see the plans for the cabinets on either side with the pull out desk!

so very cute!

Farmhouse table bench no pocket holes or screws on top

Submitted by tjlichat on Wed, 02/23/2022 - 12:55

Liked very much the general design of the farmhouse plans but wanted to avoid buying the pocket hole jig and the puttying of screw holes on top side (exposed) side of boards.

Increased slightly the table top and bench seat board supports (2x2's) which worked well for holding those down and placed the angled wood piece in corner of table leg to support bread board.

Please with the results. We really wanted to avoid attempting to hide the screw holes with putty. Others have posted and we had similar results of blotches on the surface of the top boards resulting from even "stainable" putty. No amount of sanding seemed to help.

Rustic Modern TV Console

Just finished up this unique TV console.  Built from reclaimed pallet wood. 

Estimated Cost
$150.00
Estimated Time Investment
Weekend Project (10-20 Hours)
Finish Used
Clear coat of wax
Recommended Skill Level
Advanced

Comments

Templar

Mon, 12/02/2019 - 22:10

Hi there Im new to site and also have the issue of not seeing the plans for this Rustic Modern TV Console. Are they available and Im doing something wrong or??

Modified Beginner Farm Table and Bench

Submitted by Anonymous (not verified) on Tue, 06/28/2022 - 12:09

Altered the Beginner Farm Table plans to use 2x8s for the top and 4x4s for the legs. I used pocket holes for the table. I followed the bench plans almost exactly, adjusting slightly for the 2x8 tops. I am a beginner and I did it myself! The table and bench are beautiful and sturdy! Thanks Ana!

Comments

Bedroom Dresser Cubbies / Media Stand

Submitted by Debi G on Wed, 07/27/2011 - 14:08

This is inspired by pieces I've seen here, though I sketched it out on paper myself to make sure it would suit the limited space in our room. I built the simple piece to match our bed (made from Ana and her reader's plans, see my photos below).

Originally, I planned to include cabinet doors, but with the limited space we have, this is better for us.

For nightstands, I stained plain wooden crates I had in the basement. Still working on how to hide the cords.

The baskets under my bed are from Bed Bath Beyond. The baskets in the "dresser" are from Target.

Sorry about the poor photo quality.

Built from Plan(s)
Estimated Cost
Built from leftover materials (Baskets $5.99 each)
Estimated Time Investment
Afternoon Project (3-6 Hours)
Finish Used
Minwax Provincial (one coat) and one Minwax water-based poly coat.
Recommended Skill Level
Beginner

Comments

Debi G

Wed, 07/27/2011 - 14:09

I was trying to show that these pieces are a set, but instead the photos look pretty random.

Debi G

Sat, 12/10/2011 - 07:41

Sorry I haven't logged in in so long--the bed follows plans for the king Stratton, combined with the reclaimed wood headboard. The headboard is attached to the wall. We can slide the foot bench part out to hide presents behind, which is really handy (though heavy) to do.

Such a fun build!

I've used Ana's plans for several builds in my house and this one was so much fun to build. I love the way it turned out and think it looks great! Thanks for all the great plans Ana! Keep them coming and I'll keep building. :) 

Estimated Time Investment
Afternoon Project (3-6 Hours)
Finish Used
Teak oil followed by one coat of Minwax Special Walnut. Finished off with 2 coats of Varathane 3x thick semi-gloss poly.
Recommended Skill Level
Beginner

Comments

Custom made easy. Thank you!

Submitted by Anonymous (not verified) on Mon, 10/17/2022 - 12:59

Wanted something that could accommodate two foot stools so I made a couple of changes to the bottom construction and added casters. My version is a bit rough and ready (first time building a piece of furniture) but your plan was easy to follow and it's perfect for our space. Thank you for making these plans available and your comprehensive videos! My husband wants to know when I'm starting my next project.

Comments

Farmhouse Storage Bed in Cheyenne

Submitted by Anonymous (not verified) on Sat, 01/12/2019 - 17:10

First time building furniture and enjoyed the project.  I used better lumber as I wanted to avoid paint but it turned out well for my first try.  Thank you Ana White for a good set of plans.

Estimated Cost
$700 but I used premium lumber, hardware and finished all the surfaces which took more time and money.
Estimated Time Investment
Week Long Project (20 Hours or More)
Finish Used
Minwax black gel stain and 5 coats of minwax polycrylic.
Recommended Skill Level
Advanced

Closet shelving for sloped ceiling.

Submitted by kellystern on Mon, 01/09/2023 - 16:22

I used Ana’s Shelf Help Configurator to build these shelves for a deeply sloped ceiling. None of those well known Closet Organizer Companies could come up with a decent plan for this closet and they charge a small fortune.

Comments

daybed converted to fit ikea kura bunk bed

Submitted by Anonymous (not verified) on Sat, 12/26/2015 - 12:29

We wanted to add some storage to our Ikea Kura bunk bed. We needed to adjust the size of the day bed by a couple of inches but worked awesome. Looks like one finished bunk bed.

Estimated Time Investment
Weekend Project (10-20 Hours)
Recommended Skill Level
Intermediate

Comments

Trakrys1011

Wed, 02/03/2016 - 12:43

Hi i just purchased the lumber to make this following the plan from thw original day bed. Would you happen to still have the changes that you made to put it under the ikea kura bunkbed?

Entryway closet bench

Submitted by ga2akwld on Mon, 02/25/2019 - 13:33

Adapted from Ana's mudroom in closet plans, I made this to fit the small closet when you walk into the house. I slotted it and hung wire baskets for air flow since it will be used mainly for hats and gloves which we wear more than not up here in AK. Next for the closet directly across will be a sho storage project which I'm sure I will find on here. Thank you Ana for your awesome site and work you put in.

Estimated Cost
$80
Estimated Time Investment
Weekend Project (10-20 Hours)
Finish Used
Espresso min wax and satin poly for top. Morning sky chalked paint for bottom.
Recommended Skill Level
Beginner

Pottery Barn Benchright Inspired Side Table

Submitted by robinadams on Mon, 12/28/2015 - 11:12

A great project!!  I love how it turned out!  I used Poplar wood because I wanted a larger top than 1 inch but smaller than 2 inch.  Poplar had an in between size.  I love how it turned out!  Need to make another one now for my living room so that I have a matching set!  Thanks Ana!!

Built from Plan(s)
Estimated Cost
$60 because poplar wood is expensive. I already had the stain and hardware.
Estimated Time Investment
Afternoon Project (3-6 Hours)
Finish Used
Dark Walnut followed by 3 coats of Satin Polyurathane. Sanded with 1000 grit sandpaper in between poly coats.
Recommended Skill Level
Intermediate

Outdoor end tables

I made these two Ana White outdoor end tables for my patio. Next up will be the matching coffee table

Built from Plan(s)

Comments