Toddler / Greyhound bed
![](/sites/default/files/29626FA2-2C59-453A-A741-460AC5B68943.jpeg)
I changed the plan to match the mattress and it looks great!
![](/sites/default/files/935082B0-D649-4ED1-ADCC-EF4273B5CA40.jpeg)
I changed the plan to match the mattress and it looks great!
Project for corner of stair landing at my house. Made in an afternoon using poplar wood -- no finish, only water based matte finish polycrylic. No plan used, please let me know if you would like plan supplied.
This build is a gift for a friend who is retiring. It is made from scrap wood and left over finishes, so the only things I had to purchase were the moulding, hinges and “bling”.
Used Georgia’s Jewelry Box plan, with these mods: made it a little longer with no overhangs; added stop moulding trim around the top and bottom; added some lattice squares for “feet;” added a small sliding tray in aromatic cedar (1/4” cedar closet lining for the tray, stop moulding for the rails), and some self-adhesive rhinestone flourishes (found these at Michaels).
This would be an afternoon build. The finish took longer than the build - probably 2 or 3 hrs (filling, sanding, painting, and attaching the hinges and “bling”). It took me much longer to decide how to decorate it, than it did to actually build it ;)
Some squares of sticky-back felt were also added to the bottoms of the feet.
I’m very pleased to say that this gift was a big hit!
Fri, 10/31/2014 - 15:24
Thank you for the nice comment! :) I might build some more of these for Christmas gifts.
:)
Loved building this recycling center. Basically made three cabinets from the plans and then attached them together. Now the dog can't get in the trash and the recycling and empty cans don't gather in the counter and it looks great! I used piano hinges for the doors which makes them feel much more stable.
More difficult build then I'm used too. Modified it to fit a full mattress but I think it turned out great! It's a lot cheaper to build than most Murphy beds to purchase out there on the market. Enjoyed these plans. Thank you Ana!
We loved the Modern Adirondack Chair pattern so much that we adapted it to have a matching love seat. It turned out beautifully!
Tue, 07/06/2021 - 17:08
Did you have to add any additional supports or just make the horizontal supports and seats/ backs longer?? Love this so much!
Tue, 08/31/2021 - 14:04
Yes, I added additional supports underneath. Two 2x4s going running along the 1x10s.
I really enjoyed making this plan. Only disappointment was the red stain finish I chose, live and learn.
The plans were helpful and accurate!!
Another thing I goofed up on and learned was on the 45's on the legs, I cut along the length instead of the width at first, wasted a 2x4 lol That was a good lesson to learn though. Shouldn't happen again any time soon...
This is our 20-year-old bathroom vanity, retrofitted to resemble the Napoleon Sink Console. This old cabinet is the standard builder size from the 90’s -- 30” wide x 29 ½” tall x 21” deep – fits a 31” x 22” sink top. The 2 outside drawers are working drawers, and the 2 inside are faux (just fronts). It was a weekend project. Since the sink stayed in place, I had to figure out something for the drawers to slide on. I had 3 sticks of ¾” x ¾” S4S in the garage, so I used these and fashioned a frame to hold the drawers, and also used it on the sides of the drawers as slides (figured the frame out as I went along). I used up some scrap 1x12 to cut the drawer faces and supports at the inside back of the cabinet. Since the space was so tight, I used some scrap 1x2 as bracing attached to the original frame, and attached the added face frame to that. The doors are ½” x 1 ½” craft board and ¼” birch plywood. The drawers are 3/8” x 3 ½” craft board with some ¼” plywood on the bottoms. I re-used the existing hinges and used some knobs from a multi-pack (available from Target) and some left over paint that was on hand. I bought about $30 of materials in addition to my scraps.
Now that I’ve got this one under my belt, it’ll be easier to do this in the other 2 bathrooms. I’ll probably use some 1x2’s instead of the s4s if I have to go out and buy the materials for the next one, it’ll just have slightly different measurements.
Great idea for a quick project and it'll definitely make the grandkids happy.
Hand-made vegetable cupboard. Fun and easy project.
I came up with the idea of having something on my back porch to hold all my outdoor stuff.... things I wanted handy, like Pool Towels, Gardening tools and gloves, Sunscreen and Bug Spray. I started looking around for something to buy and finally decided to look for something to build. I was looking on the HGTV website when I found this and thought it was perfect. I'm not sure what exactly made me take it one-step further, but I found a small link embedded in the article and I clicked on it, and a love affair was born. I found the Ana-White website with tons and tons and tons of plans to make all the things I've dreamed about making. So, I signed up, printed the plans and got to work. First time I have built from plans and had to work slowly and not rush to complete it the same day. Snuck away in the evening, after dinner and cleanup, and spent about an hour a night in the garage with the heat and the mosquitos. BTW, tucking dryer sheets in your clothing does really keep the critters at bay. And here is the finished product .... doing exactly what I had planned and fitting perfectly in the location I wanted. On to the next project..... I have several printed out and haven't decided which to start on..... Is it the toy box for my son's toys that scatter around the living room.... or the queen-sized Farmhouse bed for my daughter who has been begging for more sleep room. Or the bookshelves for my room..... So may choices.... and I love that about this webiste.
My wife started looking at expensive patio sets, which I thought were not worth the price, so I decided to build a picnic table. This is not the cheapest table out there, but it's built to last for years!! I used a high quality cedar as I got a price cut from a friend. I also used deck screws, so there would be no rusty screws!! The table top measures 7' long and looks like one you would see at a state park, notHome Depot!
Thu, 08/25/2016 - 09:48
Really like the picnic table - do you have plans for this? (I'm new to this site so apologies if they are here but I just could not see where?).
best wishes
Gerry
Easy and fun. Don't worry yourself over the angle on the left side of the stringer. The 15 degree one matters, the other, not so much. Buy an extra 1x4 unless you want to spend a pile of time figuring out how to cut them to maximize the space!
Modified the plan to use pallet wood and stained it classic grey for a weathered look.
Sun, 01/24/2016 - 22:40
how many pallets did it take to make this. Thanks
I used Ana's Library Base Plan and modified it slightly to include cubby holes on the bottom and an acrylic "window" at the top to create a post office for my daughter. This now also gets used as a "bank" and a "fast food window"! Lots of fun!!
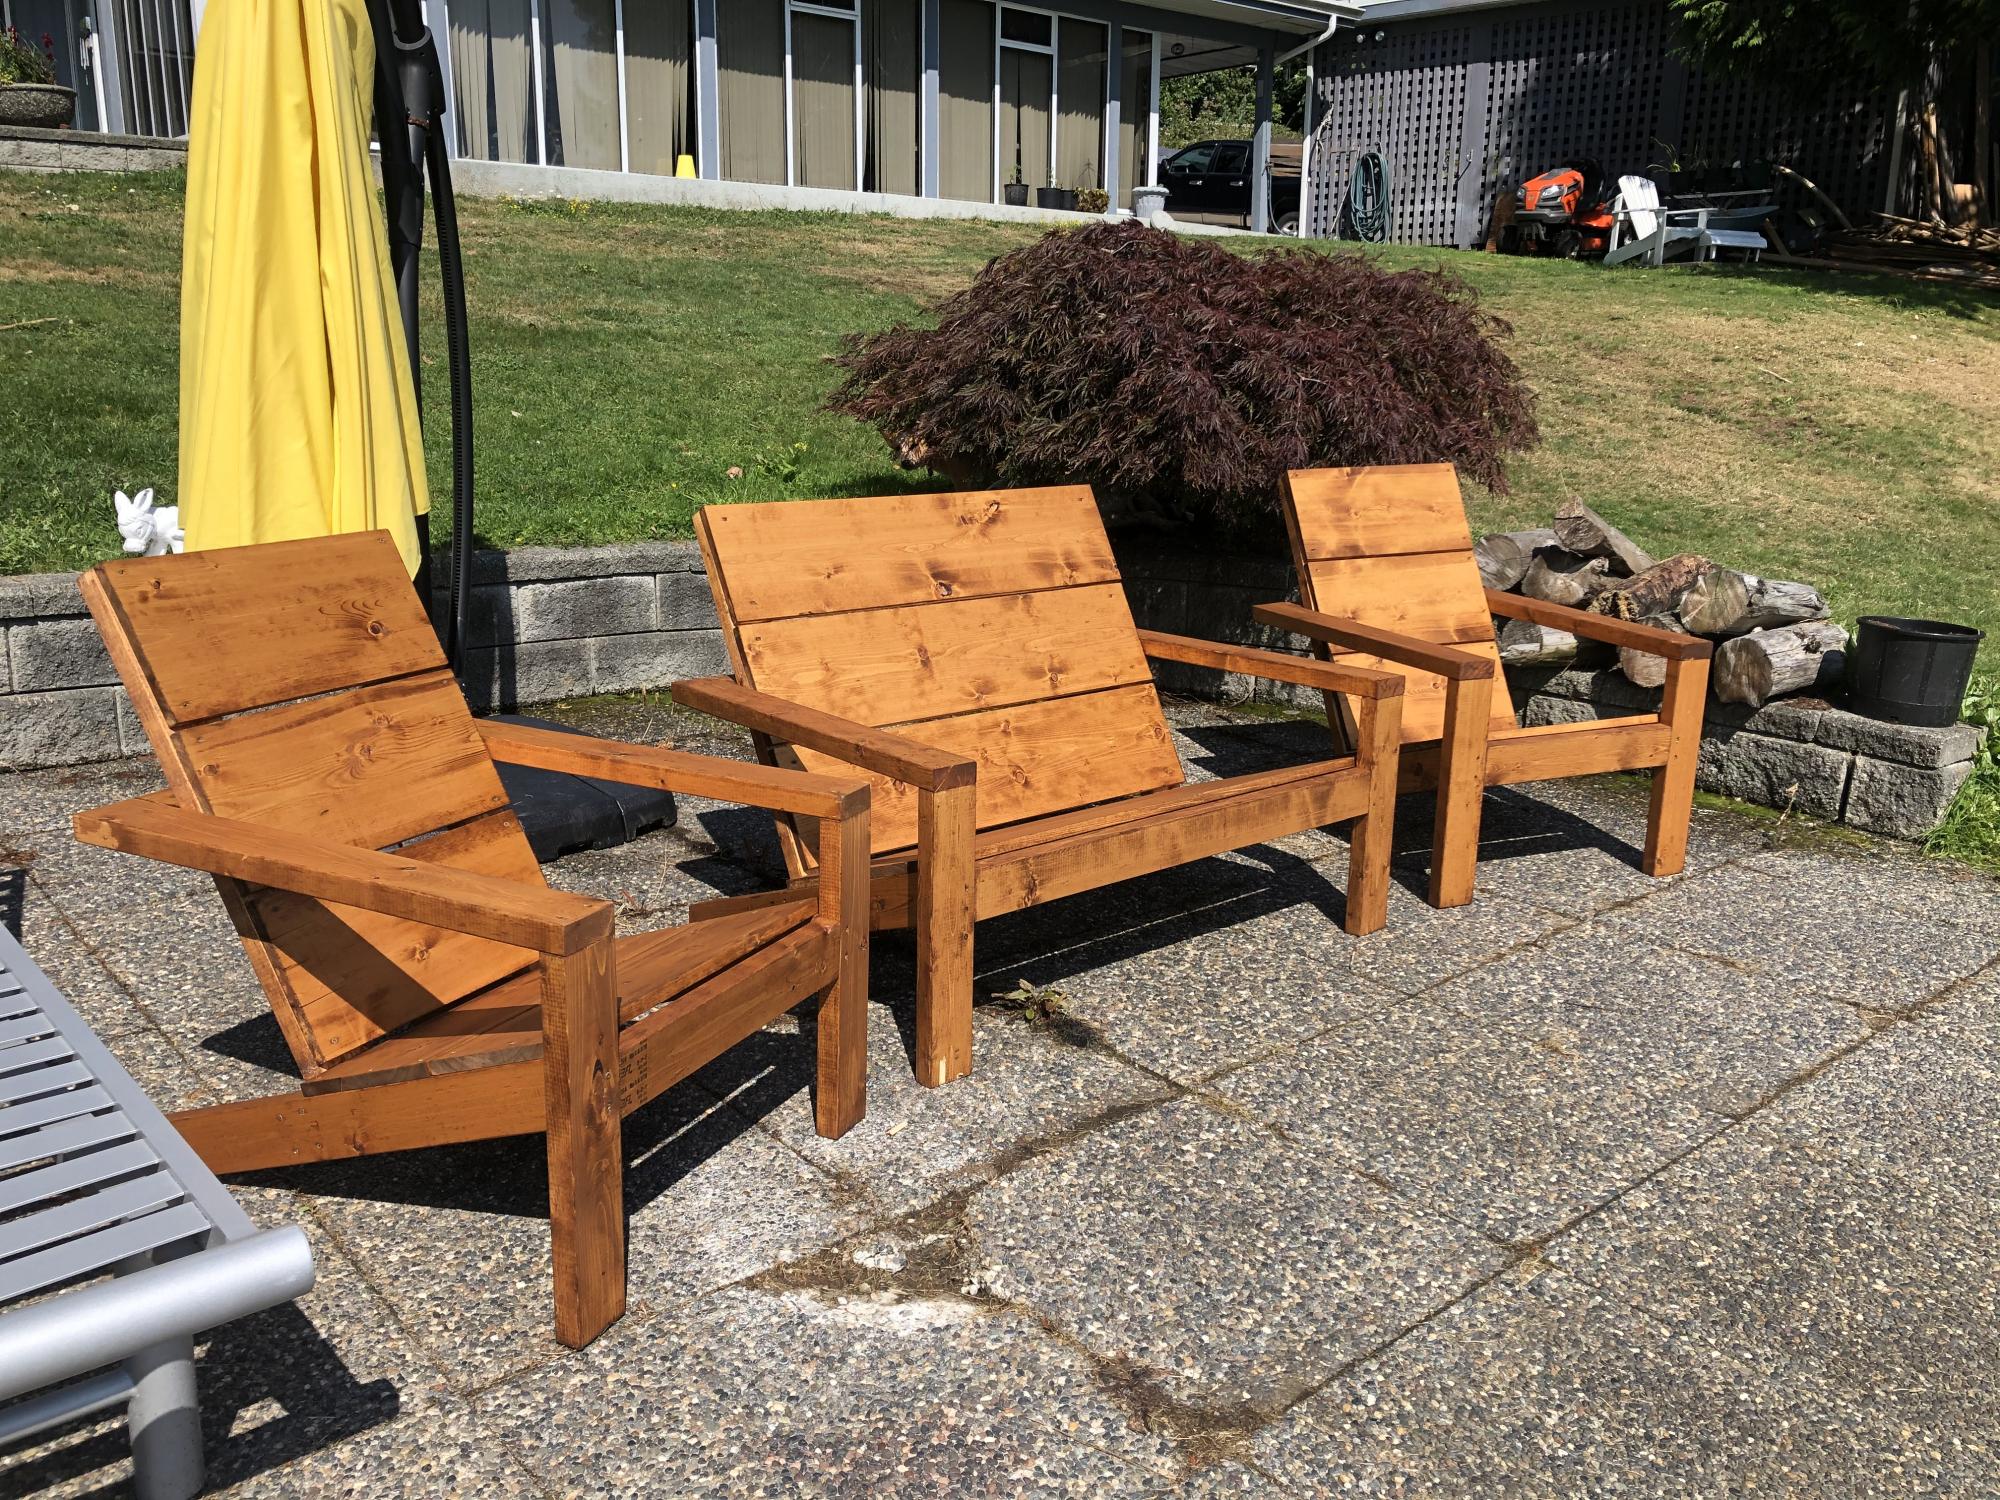
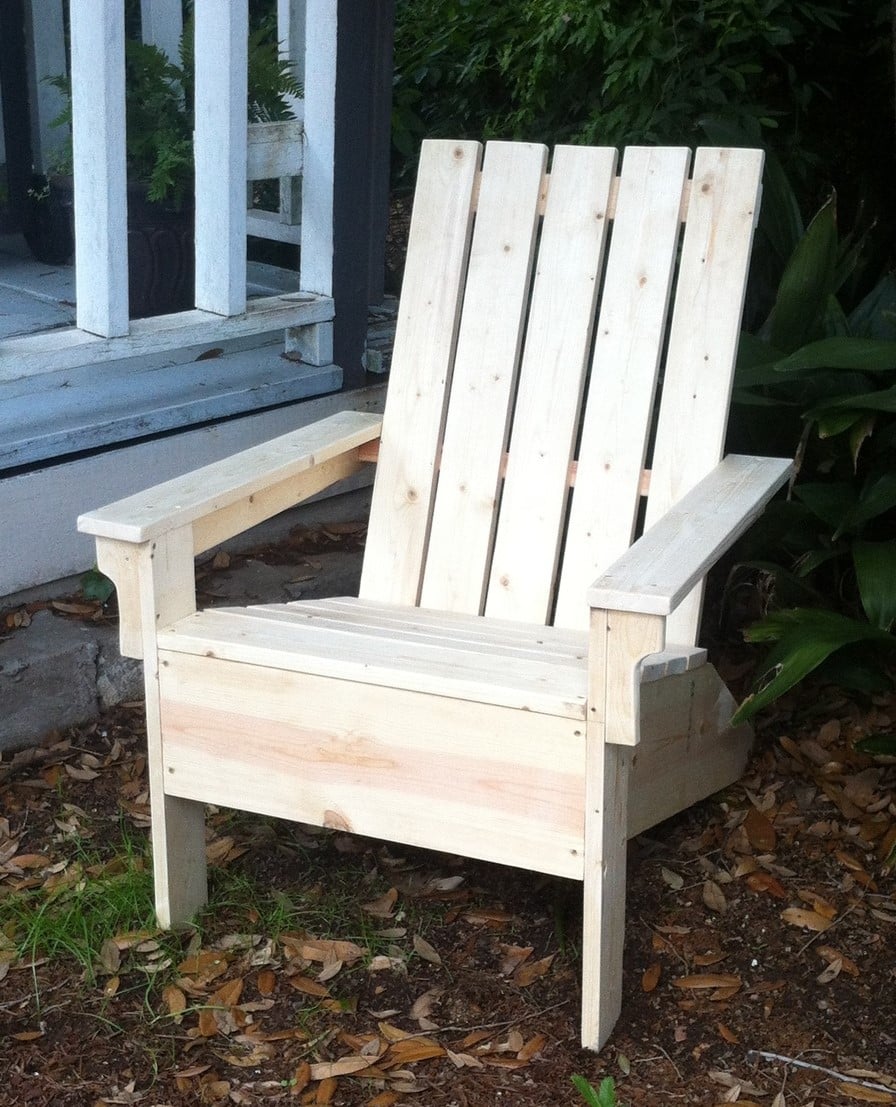
I had built a few of these chairs a year and a half ago similar to the red ones that you have on the step by step instructions. That was my first time at customer building and painting anything. Needless to say, my skills have improved over time.
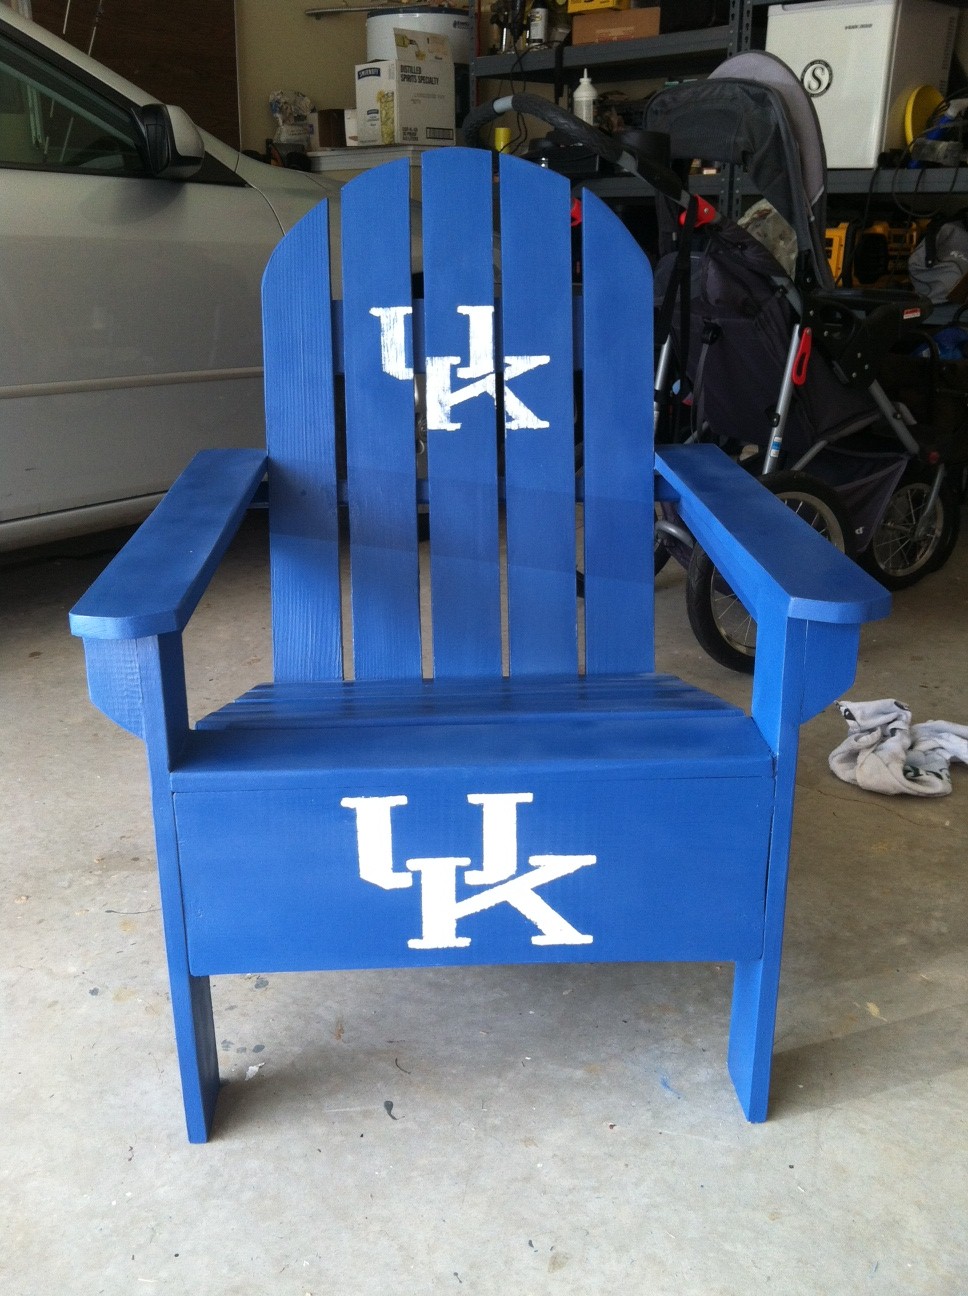
So, I wanted to build this chair for my dad for fathers day. He had an old plastic Adirondack chair sitting in his backyard that was really gross. I wanted to replace it with something nice. So he is obviously a UK fan and I wanted to see if I could paint the logo on correctly while also giving myself the opportunity to build something and see if I can make this chair a lot better than the ones I had previously built.
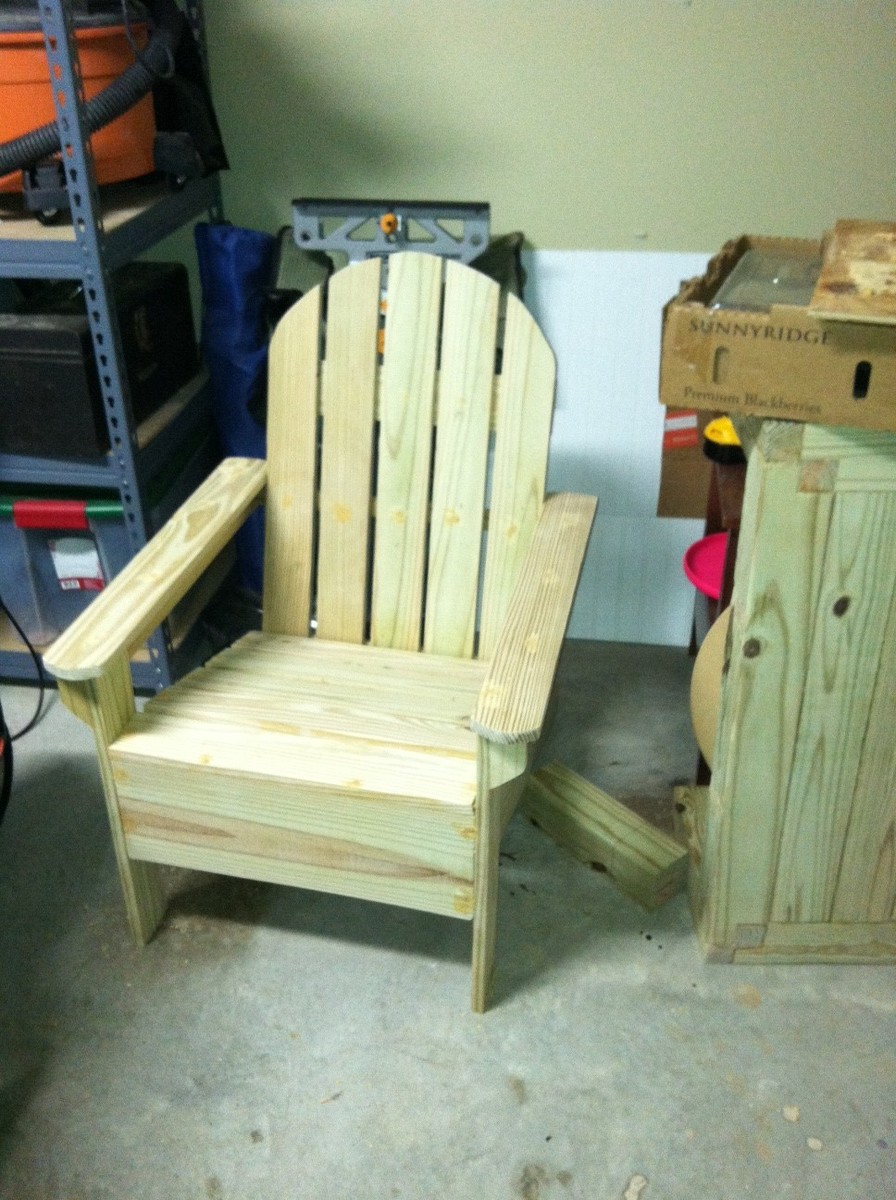
So I decided to curve the back of the chair and curve the ends of the arms. I recently got a nice dewalt random orbital sander which helped out alot in getting it nice and smooth. I made my own wood putty using the leftover sawdust and glue mixed together. I also fastened the wood together using glue and polymer coated screws. Which are supposed to last alot longer than regular wood screws when using pressure treated pine.
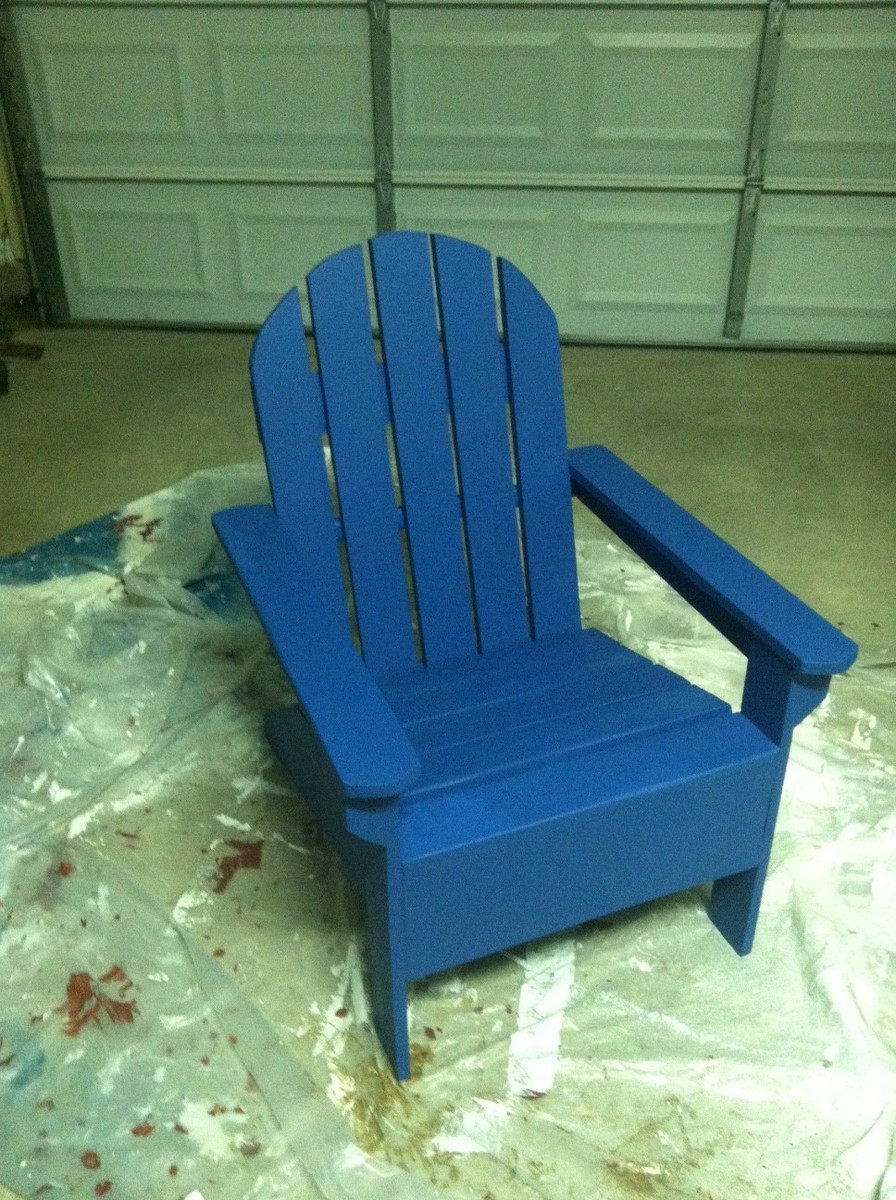
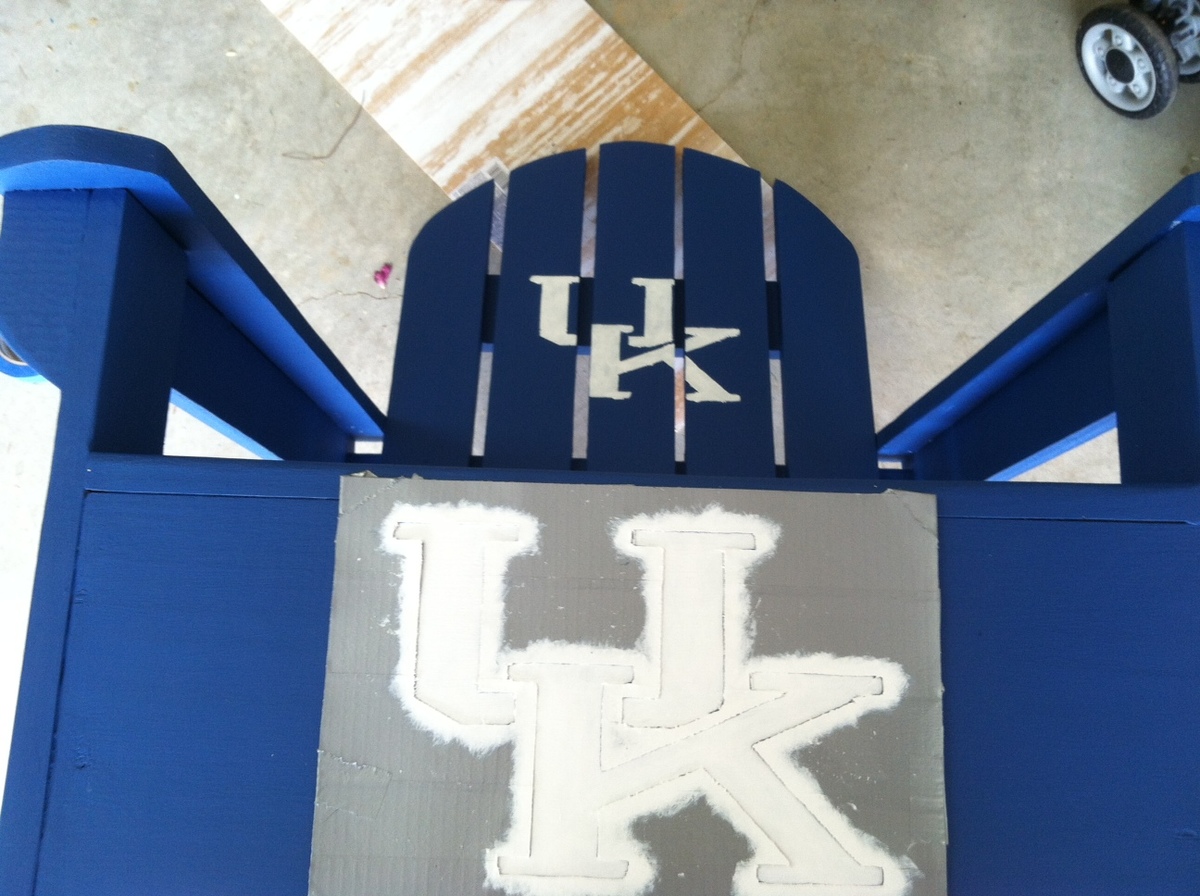
I took my time to make sure the pieces were all square when assembled which was better than previous building projects. Also, as far as finishing the chair, I primed it and then put 3 layers of the Kentucky blue Outdoor paint with a brush (which seems like it took forever). I made the stencil by just printing the logo on a piece of cardstock paper. Then I cut out the logo with a razor, then I wrapped the paper in duct tape to make the stencil it a little stronger and to fix the areas that ripped when cutting the card stock paper. Then I cut out the duct tape where the logo is. I made a couple of test paints using the stencil on some scrap to make sure my technique was good. Then once I felt comfortable, I painted 4 coats of very thin paint on the chair where the logo is. After all was dry, I did a light by hand sanding to make it smooth and then sprayed some clear coat on it for an extra level of protection and to make it shine a little.
It was a fun project and my dad really liked it.
Some things I would have done differently for next time would be to use a router to flush cut the seat slats and also use the router to give a nicer rounded edges for the arms and all of the slats as well. Also, It would be nice to mount a stainless bottle opener to the chair to open your drinks (maybe on the outside of the arm of the chair.
Thanks for the plans. I check your site all the time for ideas.
My wife, and I wanted to upgrade my 5yr old daughters bed. Hopefully this will give her enough encouragement to actually sleep in her room!
The bed turned out great, and my daughter loves it!
This project took a little longer than usual, because with the exception of the couple pieces of plywood all the parts are made from rough maple lumber. The longest part was planing, and gluing all the parts up.
I made this cupboard to hold all of my onions, squash, and potatoes that were previously sitting in piles on the laundry room floor. This little tower has the perfect amount of storage.
Sorry for the poor photo. I will take a better one when I find my camera. We made this bench for our little shih tzu but it soon became a bench for everyone to test out. If I had to repeat this project, I would probably keep the legs from the original plan. These store bought legs don't seem sturdy enough.
I needed a solution to my shelving problem. I wanted something clean looking, modern, and white to flank both sides of my fireplace. Count on Ana White to come up with a plan. Within seconds of sitting down to surf her site, I found that perfect plan to build four floating shelves.
I knew I wanted some of these shelves in my daughter's room but it seems bedroom sizes in Australia are quite a bit smaller than the US! I couldn't spare a long wall to fill with books so chose this narrow space to the side of the window.
The length of time I took for this project was for several reasons:
* I was a total beginner!
* I had to cut all of the lengths of wood with a hand saw & sand with sandpaper wrapped around a block of wood.
* It took about 5 coats of paint to cover the wood properly.
I adjusted the measurements from Ana's plans to fit the smaller space & while daunted at first at the prospect of attaching things to walls, I was so thrilled with how they turn out. I'm looking forward to challenging myself with something a little more complex next (perhaps with some power tools this time to assist!).
Sun, 07/07/2013 - 07:15
Nice work! Your shelves look good, just right for that little space!