Community Brag Posts

Magazine file turned shelf

Submitted by kari on Sat, 04/28/2012 - 10:20

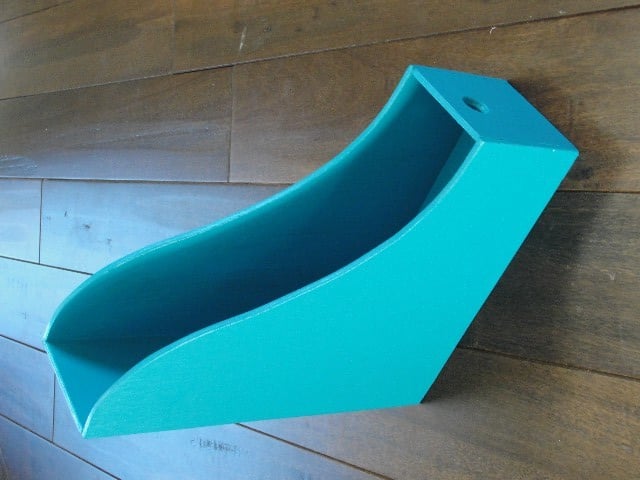
A long time ago I saw a picture of an old magazine file turned on it's side and used as a shelf. I loved it. And it had a curve that I loved too. After waiting over a year for vintage magazine file to fall into my lap, I decided it was time for me to take action.

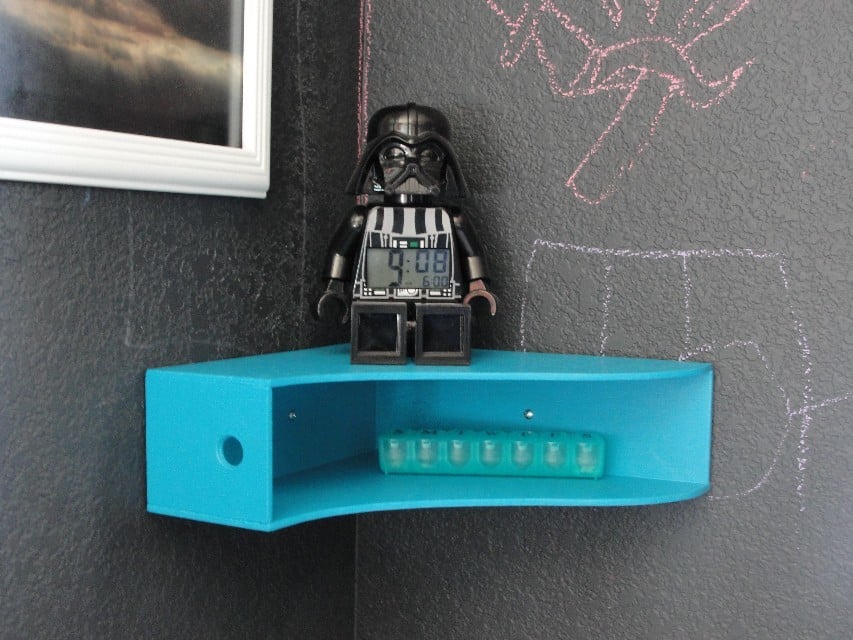
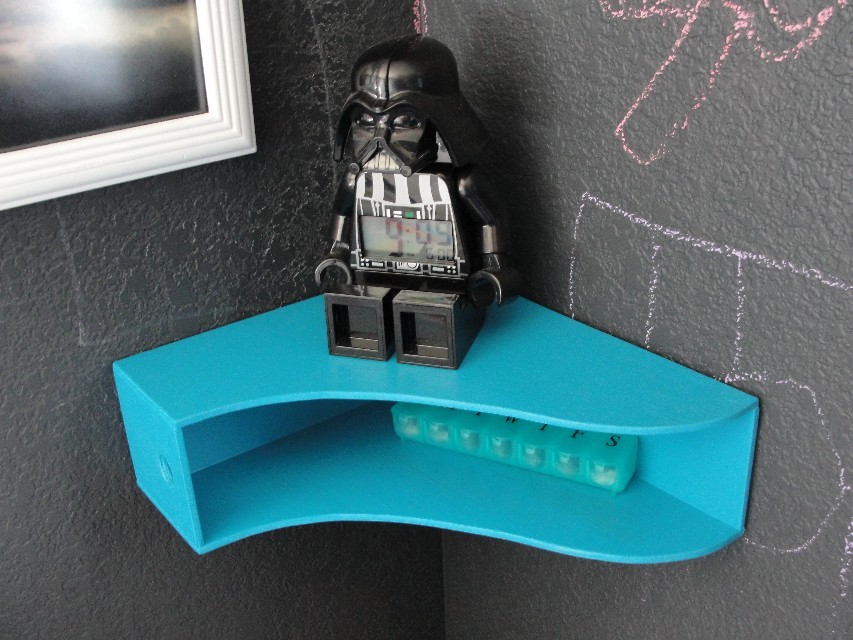
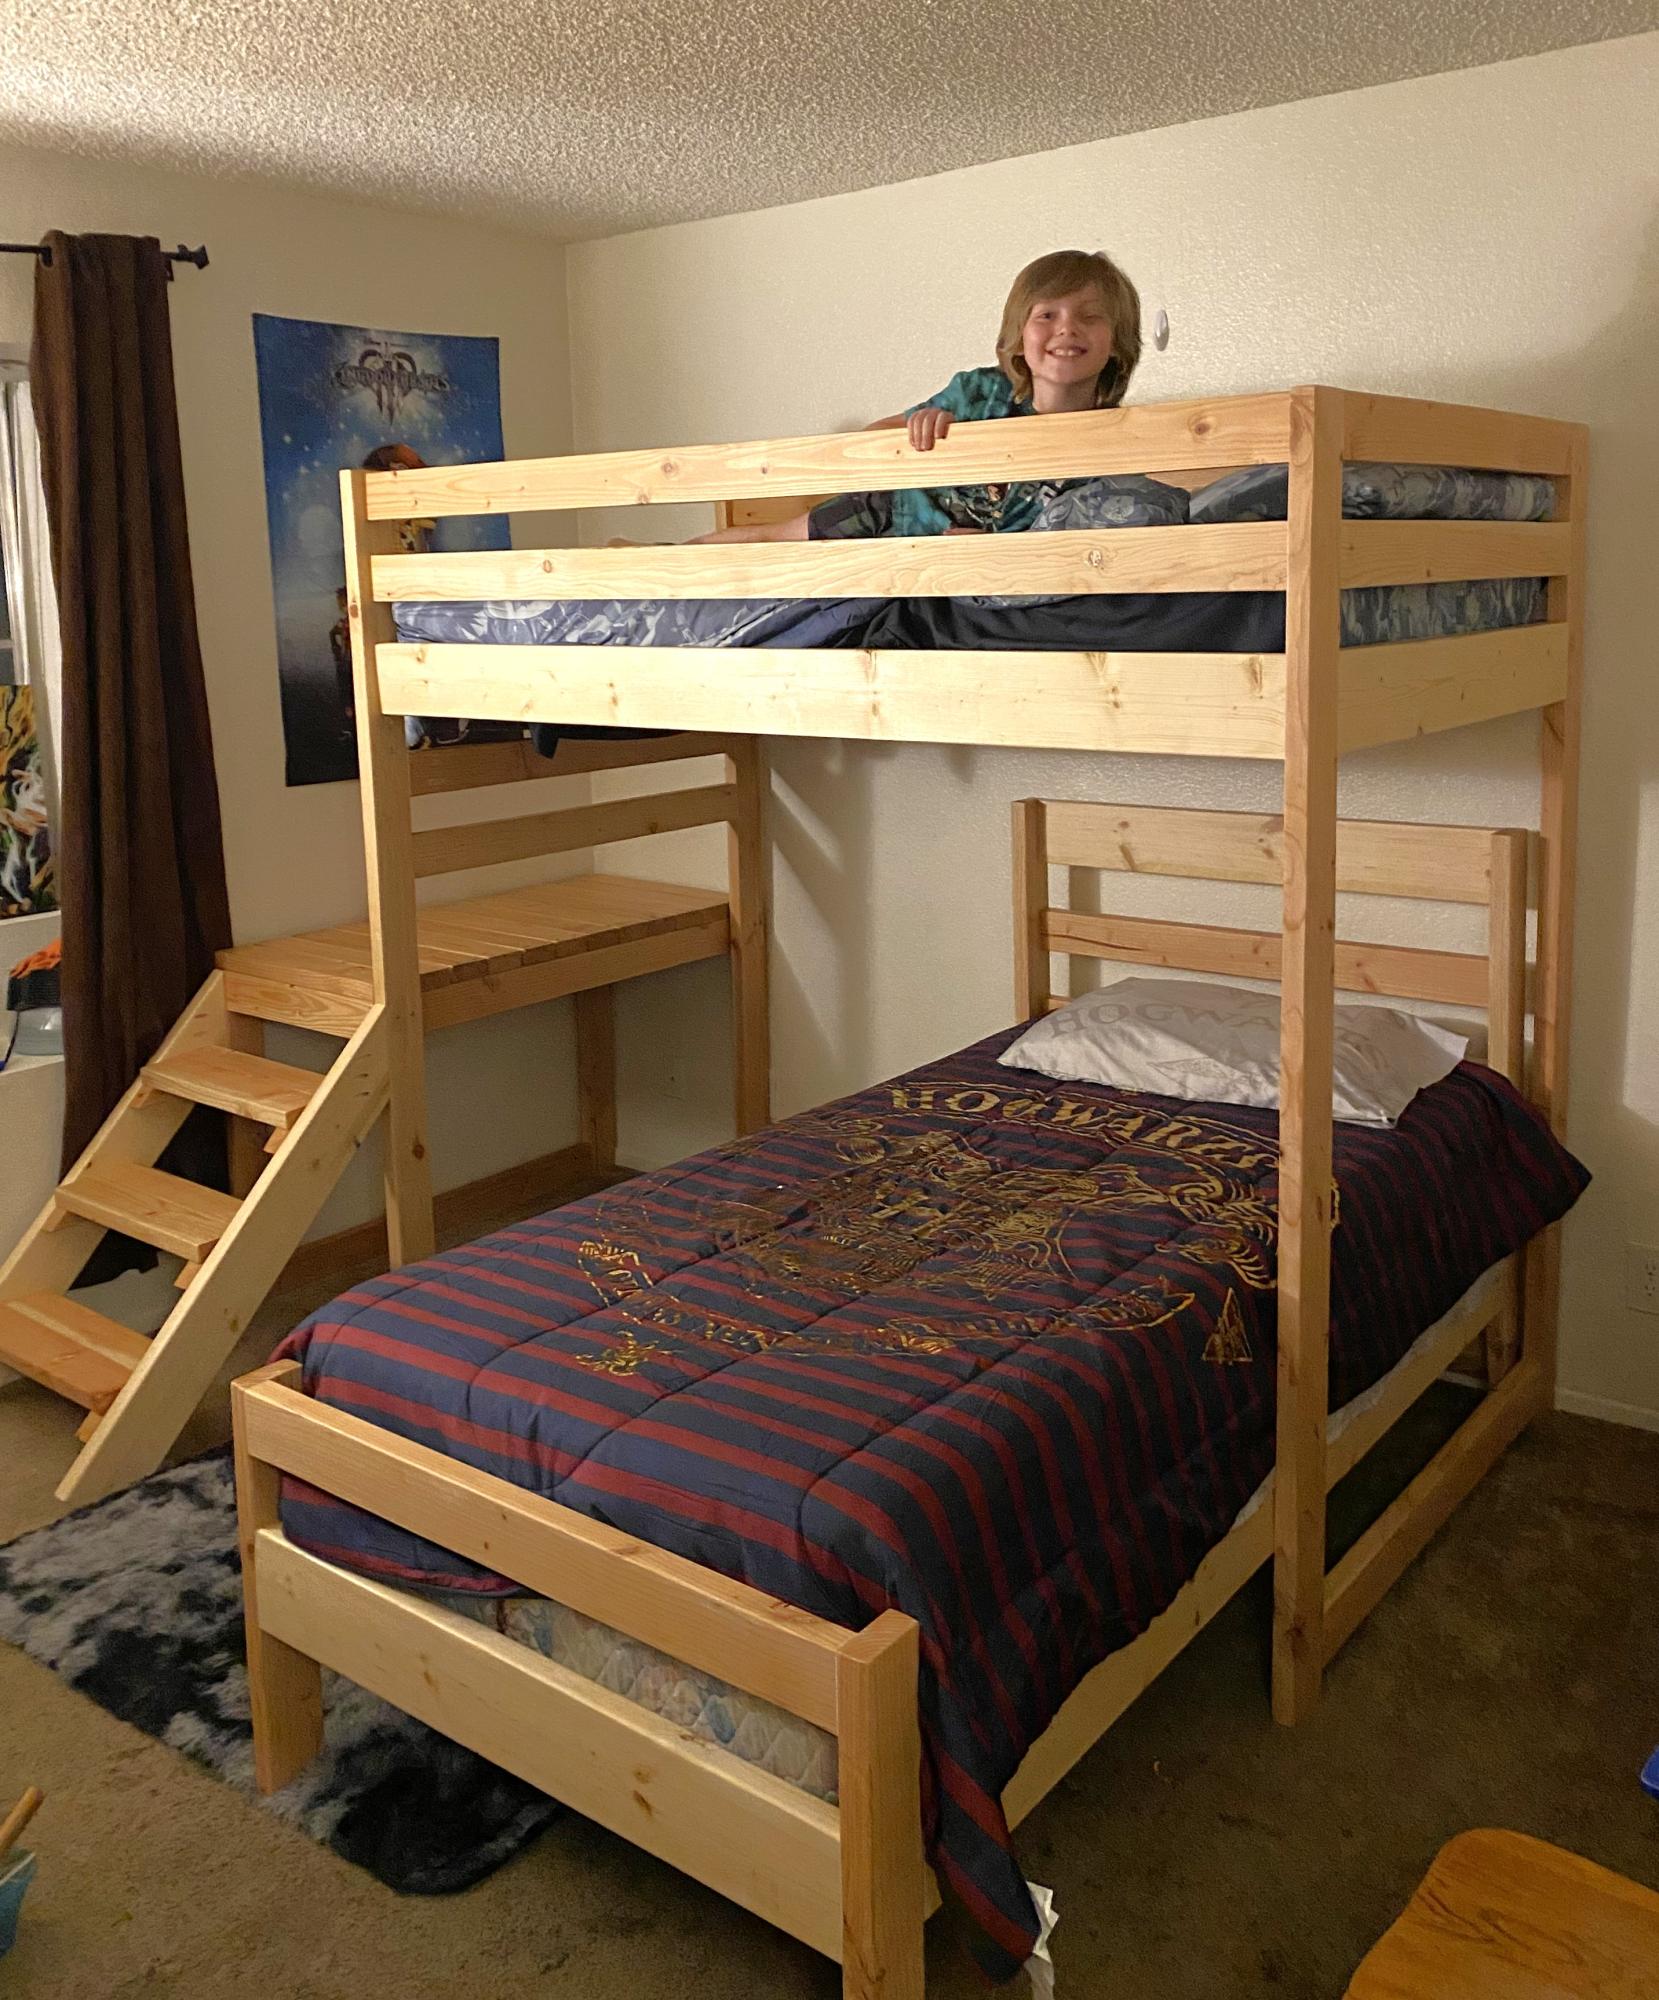
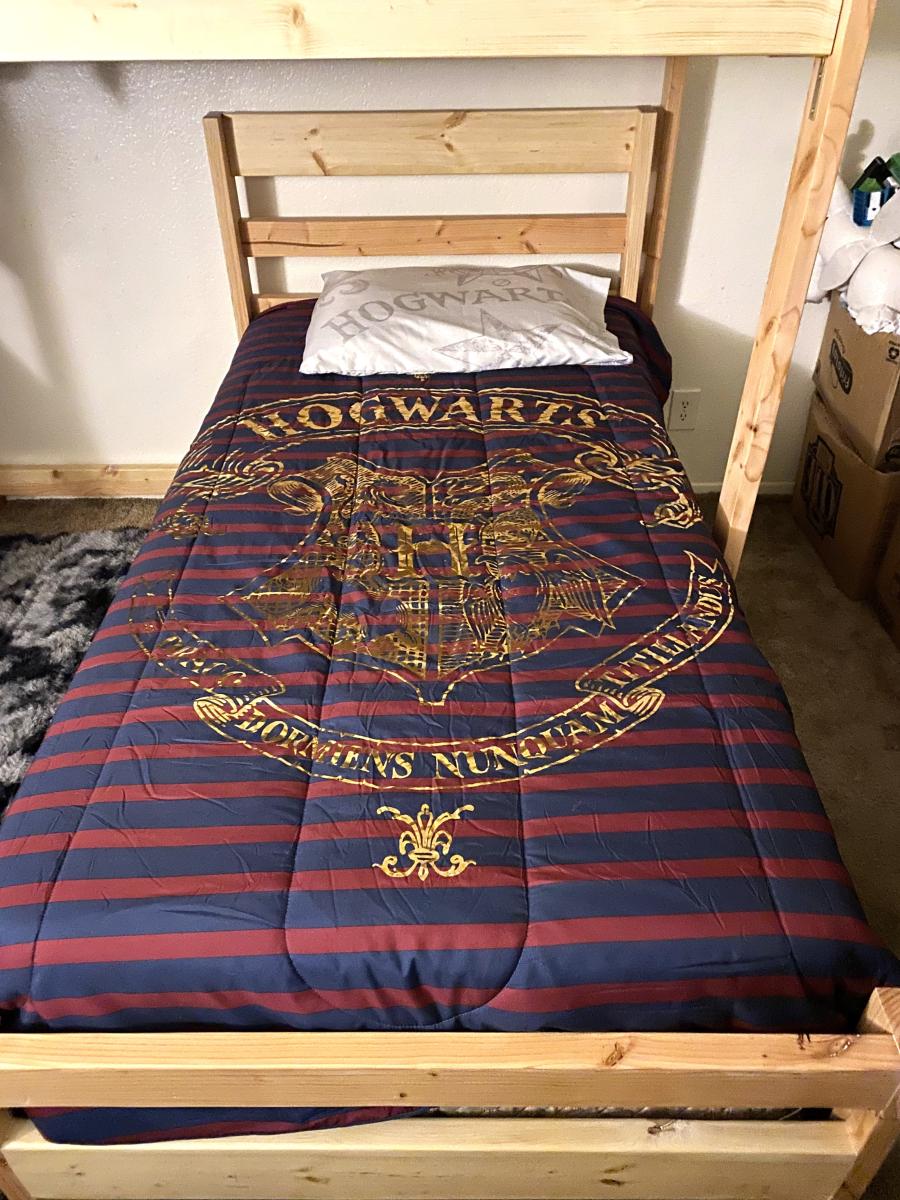
I have it attached in the corner by my son's bed. It is a perfect little spot to hold his glasses, water, pills, and of course Darth Vader.

A few changes I made-
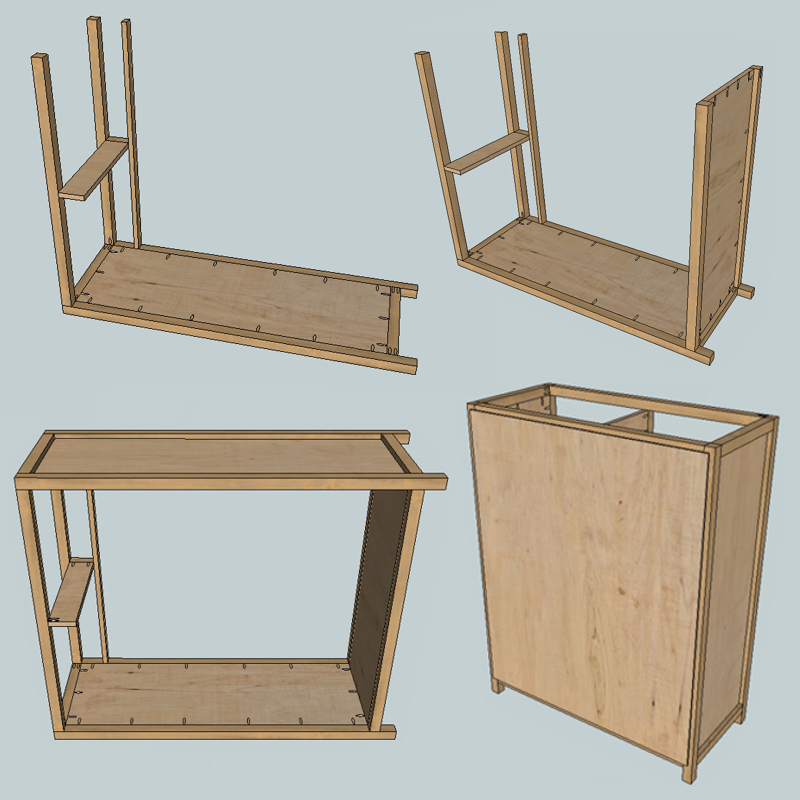
After cutting the side panels I drew a curve on them. It was 12 inches tall, and I started the curve up 4 inches from the front. I used painters tape to hold the 2 side pieces together and cut them on my scroll saw, you could also use a jig saw.

The old one in the picture had a whole on the front, so I added one too.

Because I planned to turn this on it's side, I attached the front and back to the bottom first. Then attached the sides. That way the sides rest on the back and front for a little support. I had to adjust the width on all sides for that.

It was super quick and super easy.

Built from Plan(s)
Estimated Cost
all scraps - so free for me
Estimated Time Investment
An Hour or Two (0-2 Hours)
Finish Used
some blue oops paint I had
Recommended Skill Level
Starter Project

Comments

School Bus Stop Bench

Submitted by Anonymous (not verified) on Fri, 10/20/2023 - 08:36

My daughter asked me to make a bench for her daughter’s school bus stop. After looking at many different plans I chose your plans for a 2x4 bench with modifications. I made it 7’ wide with an additional support piece in the center. I used pressure treated wood for the base and cedar for the seat and back. I finished it with a gloss “school bus yellow” and gloss black. It was very well received by the children and parents.

Ken Shallcross


Seasonal And Holiday

Rolling Rustic Wood Dresser

Submitted by AmJoy37 on Tue, 02/25/2014 - 20:50

We need bedroom furniture desperately! So, I decided, for my second build I would start in our bedroom! The dresser first, because I was going crazy without a place to put my clothes!

Built from Plan(s)
Estimated Cost
$220
Estimated Time Investment
Weekend Project (10-20 Hours)
Finish Used
Homemade chalk paint
Recommended Skill Level
Beginner

Mat's Desk

We needed a desk for the office. I didn't want particle board - or to pay a fortune! Thanks, Ana!

Estimated Cost
$150-200
Estimated Time Investment
Week Long Project (20 Hours or More)
Finish Used
I used Miniwax Ebony Stain for the base and drawers and some Rustoleum Spray Paint in Black for the top. Finished with a few coats of Varathane Diamond Clear. I would use brush on paint instead of spray if I did this again - the spray paint used 3 CANS and was a huge part of the cost!
Recommended Skill Level
Intermediate

Comments

rickfred32

Mon, 02/15/2016 - 10:38

Hey there! The desk looks great! I'm curious do you have a upclose of the top of the desk? Is the top stained as well?

Nice little sofa

Submitted by emilacious on Mon, 05/11/2020 - 17:32

Made from the 2x4 outdoor sofa plans. Needed to make some outside furniture for our deck. 2x4 treated wood bench with a valspar stain. Free handed the end table with 2x4s, 2x6s and 2x2s. Also added height to the back by an additional 2 2x4s and had added some 2x4s perpendicularly for support. Added 3 6inch wood screws in the additional 2x4s vertically so it all ties in together. Made the measurements to fit the cushions. And added some outside throw pillows I found for $6 each

Built from Plan(s)
Estimated Cost
$50
Estimated Time Investment
Day Project (6-9 Hours)
Finish Used
Valspar exterior semi stain
Recommended Skill Level
Beginner

Loft Over Single Bed

Submitted by Anonymous (not verified) on Mon, 01/15/2024 - 18:24

I decided to build a bunk bed for my grandson and his half sister when she came to visit. I enlisted the help of my 7 year old grandson to help with sanding and he was so excited! I was very pleased how it turned out and watching my grandson's excitement was an absolute joy! I can't wait to build more things together!

Norma Jasman

Sling Chairs

Submitted by natehu on Wed, 07/11/2012 - 08:26

I had some leftover wood from building my daughters loft bed and after coming across this plan realized i had all the right lumber on had already so after a trip to the store to buy a few bolts i was ready to build. I built one chair following Ana's plans exactly, using 1x2's for the outside frames, the chair turned out awesome and I wanted another. For the second one, i didn't have enough 1x2's left so I used 2x2s for the outside frame. I kept the inside width (24") of the back frame the same and adjusted the rest of the dimensions to fit. While the 1x2 chair was great and very sturdy, the 2x2 chair is rock solid. I rounded all the edges of the boards with a 1/4" roundover bit and spray painted everything dark chocolate brown. The fabric slings are made of cotton duck cloth. I added a 1" foam pillow sewn onto the top of the sling because my head rests right on the top boards and I wanted a little padding.

All said, including wood, hardware, fabric and the foam for the pillow I think this chair cost about $40 to build and finish.

As my 3 daughters piled on my lap to read on night the 2x2 chair has been load tested to about 300 lbs!

Estimated Cost
$45
Estimated Time Investment
Afternoon Project (3-6 Hours)
Recommended Skill Level
Beginner

Comments

dannibambi

Fri, 08/10/2012 - 14:22

What a great idea! I think I will sew together a wrap-around foam pillow with a velcro closure, so I could easily remove it if I decide to switch to a new fabric. Thank you for the inspiration! And thank you for mentioning how much sturdier the 2x2 wood is. I appreciate it!

Extra long 76" floating shelf

Submitted by Wisteria on Wed, 08/24/2016 - 16:46

I wanted a shelf to extend the entire length of our laundry room. It's 76 inches, so I had to modify the existing plan for one slightly longer shelf instead of three 72 inch ones.

Cut list for 76 inch floating shelf:

2 - 1/4 plywood strips @ 76" x 7 3/4" (top & bottom of shelf)

1 - 1 x 2 @ 76" (front of shelf)

2 - 1 x 2 @ 73" (shelf frame)

4 - 1 x 2 @ 7" (ends of shelf and shelf frame)

6 - 1 x 2 @ 5 1/2" (shelf frame studs)


I was able to build this using scrap 1x2 for the studs and ends. I bought two 8 ft 1x2 pieces and one piece of 1/4 plywood, which I still have a lot left of.

I have children and this was my first time building something on my own, so it took me any spare time I could manage over the course of a week.

I can't wait to build again! Thanks Ana!

Built from Plan(s)
Estimated Cost
$30-40
Estimated Time Investment
Afternoon Project (3-6 Hours)
Finish Used
Behr Ultra Pure White Paint & Primer in One
Recommended Skill Level
Intermediate

Sports Cards Sorting & Storage Cabinet

So... I am a pretty dedicated baseball card collector as well as a new found hobbiest in wood building. It's been an ongoing issue in my household with my baseball cards and boxes cluttering up our dining room. I decided to resolve the issue while still being able to keep my cards in the same room with even easier access without being an eye sore! This just might have saved my marriage! I searched for months for plans for some sort of baseball card cabinet but they just did not exist. The closest I could find for what I was looking for was a storage bench plan here on Ana White. I liked the idea of a top opening for hidden storage. It was too small for what I needed. I then came across plans on another site for an aquarium stand cabinet. I figured the combination of these two projects was what I was looking for. After a week of planing and drafting and 3 weeks of construction/finishing in the little spare time I have, I created what you see. People in the card collecting forums I'm a member of are begging for plans or for me to build them one! Problem is, this is the first thing I have built following my own design and plans. I could pass these on but no one in their right mind would be able to follow my scratches on paper but myself! I'm extremely proud of the outcome but am looking for a way to come up with plans I can share! Hope you all like, and if I can come up with a way to make follow able plans I will share! This was all assembled using the kreg jig system, wood filler to hide the knots and lines where the wood joined and lots of sanding!

Estimated Cost
$300
Estimated Time Investment
Week Long Project (20 Hours or More)
Finish Used
Valspar Black satin interior high def paint, wood conditioner & gunstock color stain
Recommended Skill Level
Intermediate

Comments

CSaintD

Tue, 05/27/2014 - 08:38

Nicely done! How did you make the top? Is that a project board? It's very smooth.
I believe Ana uses "Sketchup" which is a google program to do her designs.

BadgerBen82

Tue, 05/27/2014 - 17:37

The top was a 24x72 edge glued alpine board I found at lowes. Just cut it to size and a little extra sanding. Awesome cut of wood and for only $37.

Jessee

Mon, 10/12/2015 - 17:19

Would you be willing to share some basic dimensions such overall size width, depth, and height and door measurements to get an idea?

Modern tree house

Submitted by Anonymous (not verified) on Sun, 06/14/2020 - 11:24

I modified the modern tree house plan and added some safety features for young kids. I did a spiral up ladder enclosed with a mesh net so they can’t fall very far. I also added more siding and put cross bracing in window wells to limit opening size. Finally, a full porch style railing and the main support beams are pinned at one end and have a self designed treehouse sliding bracket to allow for tree movement in the wind.

Estimated Cost
$1500
Estimated Time Investment
Week Long Project (20 Hours or More)
Recommended Skill Level
Intermediate

Comments

kmccrac2

Sat, 10/30/2021 - 07:09

Hi! I know this post was forever ago, but this is exactly how I want the treehouse to be for the my kids! I am trying to see if there was anyway you could show me how you did the modifications! I’d be forever grateful!

Storage Dining Bench

Submitted by Anonymous (not verified) on Fri, 03/22/2024 - 07:34

Kitchen dining bench with storage. Due to the plugs being in an awkward position, I opted to build this bench with a facade as opposed to adding a back and sides. This also meant it had to be panelled in situ which was a fun challenge! It has piano hinges as well as soft close pistons making for a great storage bench that is in keeping with the rest of our kitchen.

Barn Style Greenhouse

Followed your excellent plans, thank you.
Adapted to make smaller...approximately 10ft X 8ft.
It gave me a very enjoyable project to complete during 'lock-down ' and with Greenhouse.

Built from Plan(s)
Estimated Cost
£800
Estimated Time Investment
Week Long Project (20 Hours or More)
Finish Used
Treated all wood with preservative.
Steel panels (old roofing) were obtain from a kind neighbour for free and all external metal/wood was given several coats of 'Red Oxide' gloss Barn/agricultural paint.
Adaptions made by myself were :-

I put self adhesive 'Flashing' on the bottom wood of the vertical sides...to attempt to protect the wood in contact with the floor from getting over wet......time will tell if it works.

I made additional gussets to support the top piece of wood (attached to each end).

I had trouble with keeping the corrugated roof running parrallel....but the reason for this was that it was not manufactured with straight@right angle ends (when I held a level/straight edge along end - there was a quarter of an inch gap in the centre).
Recommended Skill Level
Intermediate

Tool Organizer

Submitted by Anonymous (not verified) on Thu, 07/02/2020 - 07:02

I’m very happy with my tool organizer. I also used the tool organizer idea for bracket to hang our bicycle rack. We love the way it all came out. Thank you so much for sharing!

We run a fence company. The best thing about this project is that it cost me $0!! I used 2X4 cutoffs that we were going to trash!

Built from Plan(s)

Hall-End Photo Ledges

Submitted by SaraLodise on Fri, 09/23/2016 - 13:03

$10 Ledges made with 1x3s instead of 1x4s and fronted with cute trim pieces I found at Orange store. Finished with Behr Marque sample paint that didn't make the cut for the hallway walls (color: Gotham Gray).

Estimated Cost
Select Pine Lumber = $40
Pine Trim = $17
Behr Marque sample = $4
Total = $61
Estimated Time Investment
Afternoon Project (3-6 Hours)
Finish Used
Behr Marque - Matte - Gotham Gray
Recommended Skill Level
Beginner

Comments

Modern Outdoor Sofa

Submitted by Anonymous (not verified) on Mon, 07/06/2020 - 08:44

We are building memories and patio furniture! We're total beginners and we built an outdoor sofa and coffee table! My husband and I have never built furniture before and really needed some patio furniture as we prepare to host our son and his sweetheart's wedding reception! We learned that it's a lot of work, but so worth it!

The plans we used are from Ana White's website (Ana, you've made a wanna-be carpenter out of me!) https://www.ana-white.com/woodworking-projects/outdoor-sofa-modern-comf…

Estimated Cost
Under $200
Estimated Time Investment
Weekend Project (10-20 Hours)
Finish Used
Minwax Helmsman Polyurethane
Lightly sanded between coats and applied 2 coats all over and 3 coats on arms
Recommended Skill Level
Beginner

King Sized Farmhouse Storage Bed with Storage Drawers

Submitted by mwindsor6 on Sat, 06/28/2014 - 22:04

This was the first project that I have ever attempted, and I do believe it came out very nice. The color is red oak, and it has 3 coats of lacquer on it. I adjusted the plan sizes to make it from a queen sized bed into a king size bed. It took a lot of hours to build it due to measuring and cutting and ensuring accurate cuts, fitment, and square. The bed is made out of primarily Oak hardwood, but the 4x4 posts are ceder because Home Depot did not have oak 4x4 posts. The regular lumber (2x4, 1x3, 2x6 ect.) is white wood.

Estimated Cost
$600
Estimated Time Investment
Week Long Project (20 Hours or More)
Finish Used
Miniwax Red Oak Stain, and Miniwax brush on lacquer.
Recommended Skill Level
Intermediate

Comments

athingvall

Sun, 12/28/2014 - 22:40

Love the bed. I am glad that you were able to make it work. Is there anything that you would change? Do you have enough support in the middle? Storage? I am trying to make the conversion from queen plan to king plan. Any thoughts would be great. Thank you.

mwindsor6

Mon, 01/19/2015 - 23:58

Thanks our for the comment, i would not change my ha of anything inn. the. Not thing I think I think i change and still might in the future is to make the drawers come out a littler further so the faces do not try to sit completely flush and come out about an 1/8 of an inch so the trim I have on it would sit a little more flush and not try to push against the bed.

As for support the is more than enough support in the middle. There is enough cross braces where there is only about 1/2" between them. Also for additional support I used 2 4x4 scap piece in the middle-ish of bottoms of each side on the bottoms. I set them about directly center of the sides of th center drawer. Also for the brackets I used thick house framing brackets with 1/2 bolts because I have been moving a lot over the years so it comes apart easier. If you would be more interested in that I can send additions all pictures.

Hope this helps you, the bed is extremely sturdy and we absolutely love it more than any bed we could have purchased from a store.

emily3982

Sat, 12/31/2016 - 07:56

Hi Great Job. I saw your previous comment. "Also for the brackets I used thick house framing brackets with 1/2 bolts because I have been moving a lot over the years so it comes apart easier. If you would be more interested in that I can send additions all pictures"  Where did you put the house framing brackets and 1/2 bolts?  We are in the process of building two twin beds with storage and the easy take down part is something I am mentally trying to wrap my head around.  If you have pictures of this as well that would be super helpful.  Thanks so much!