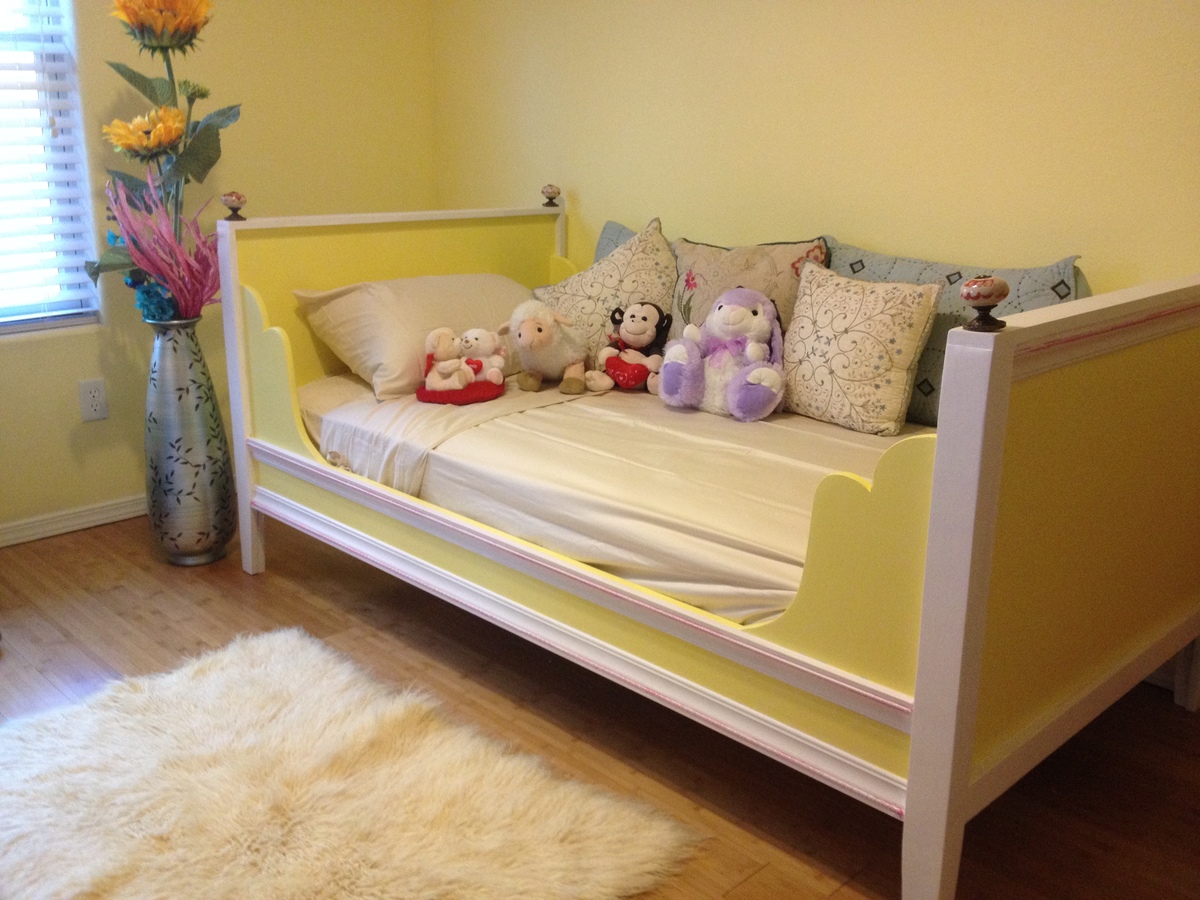
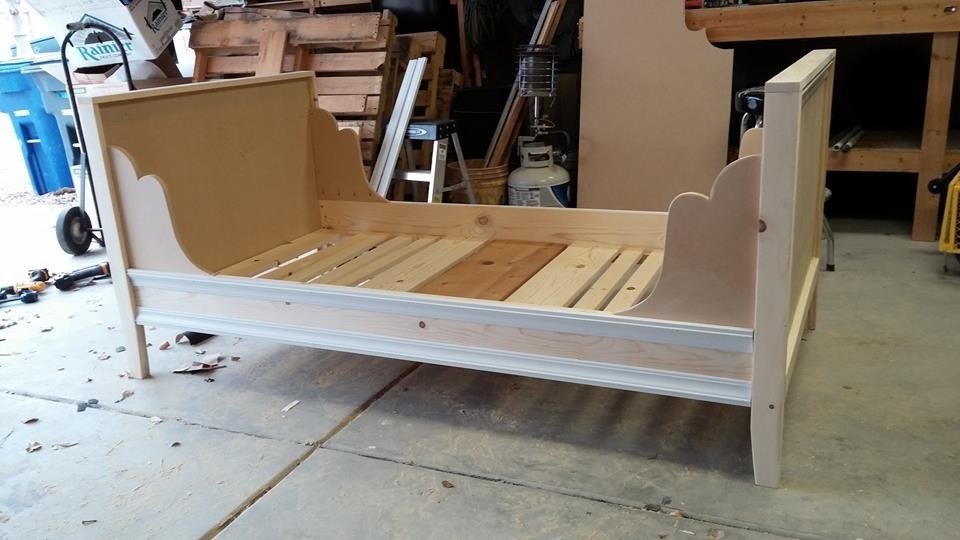
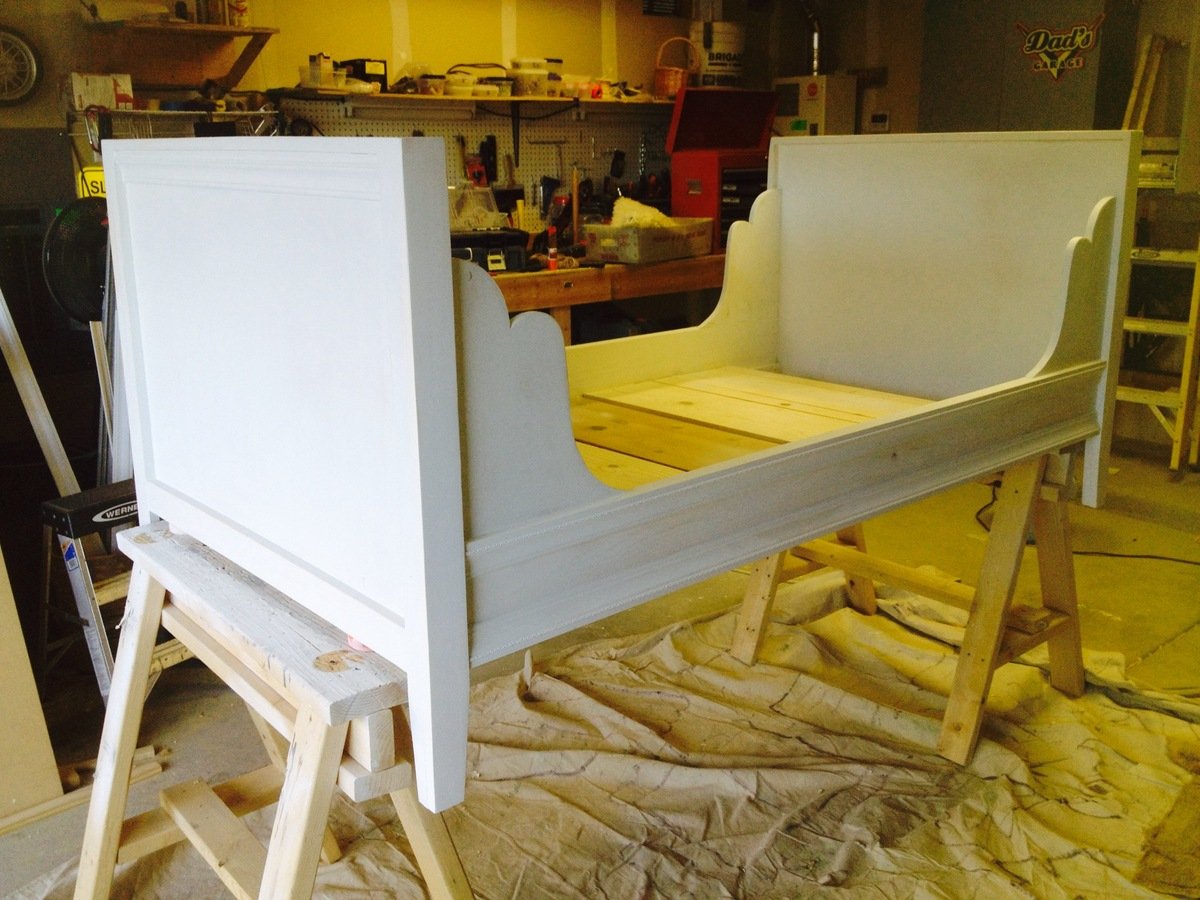
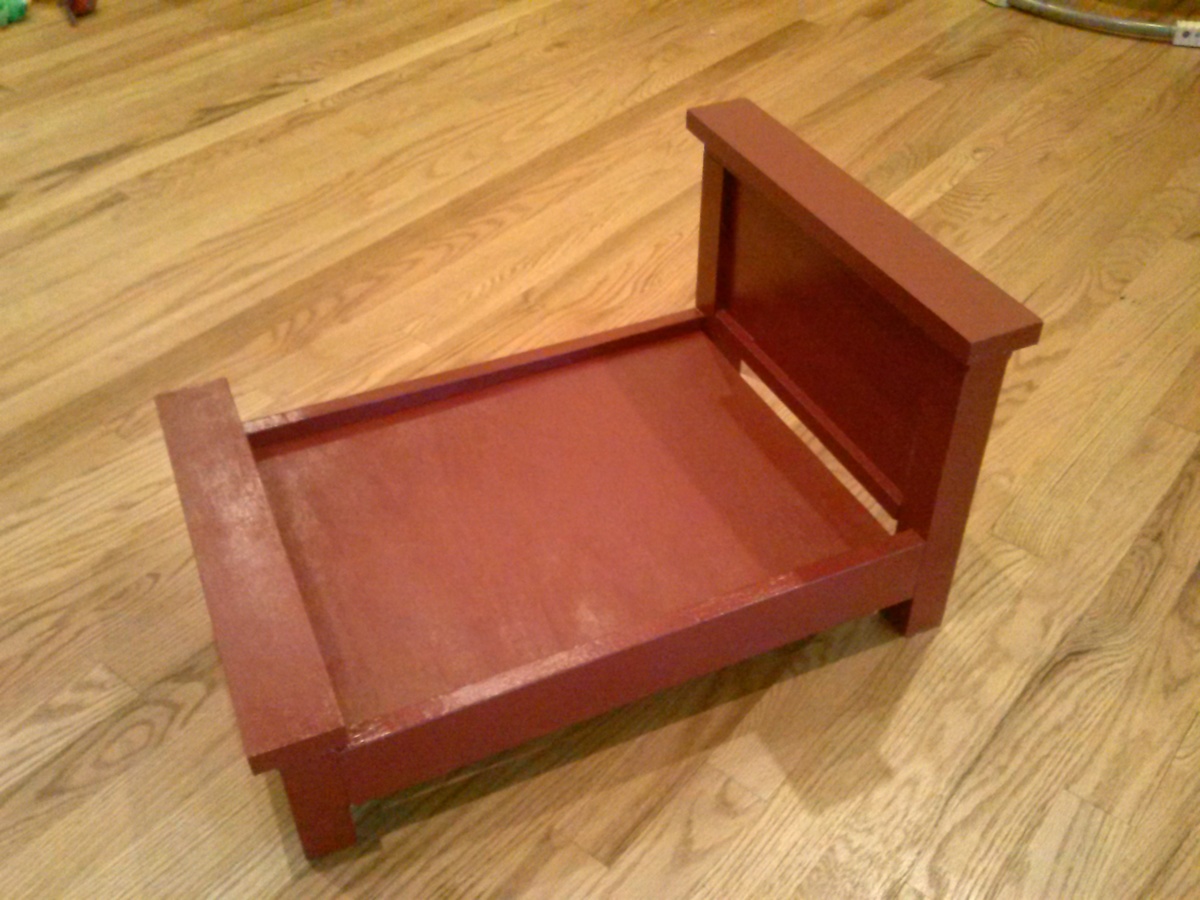
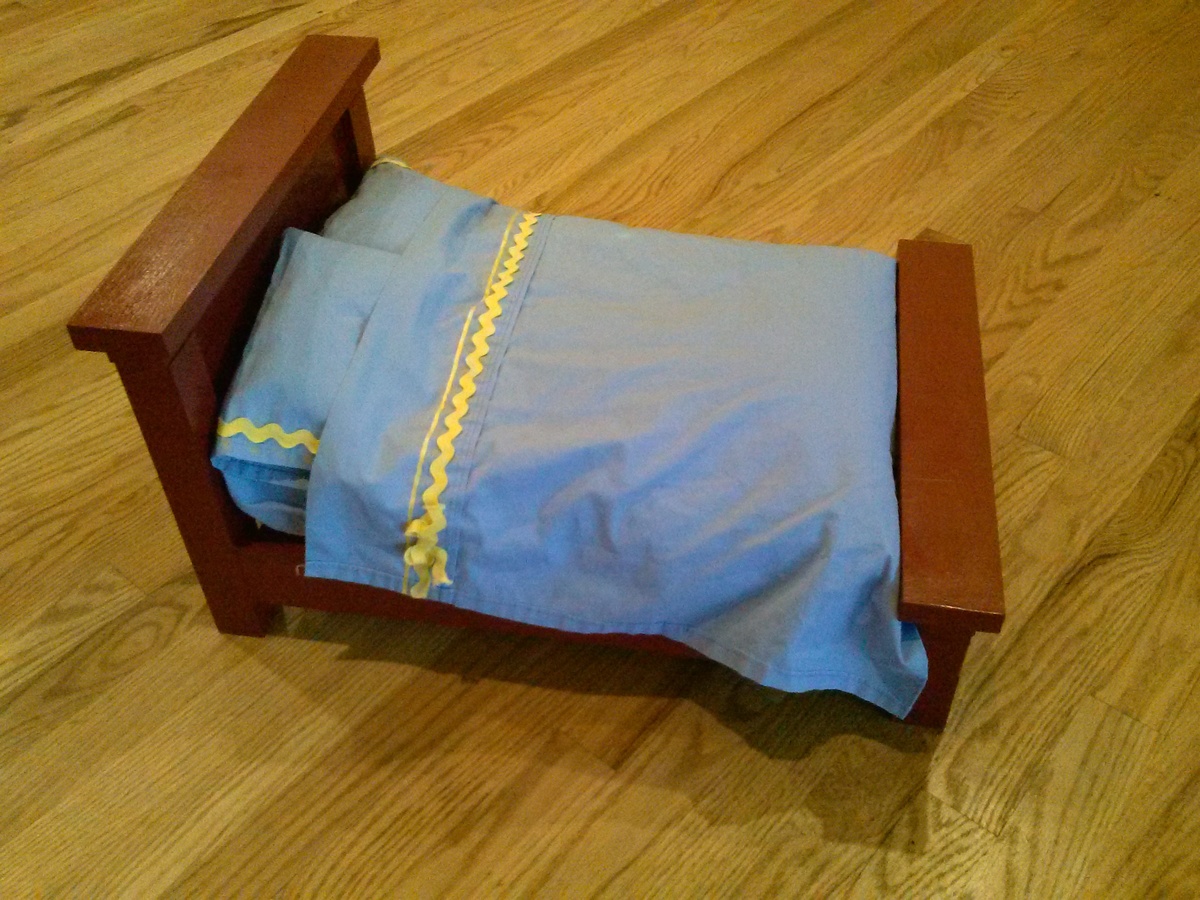
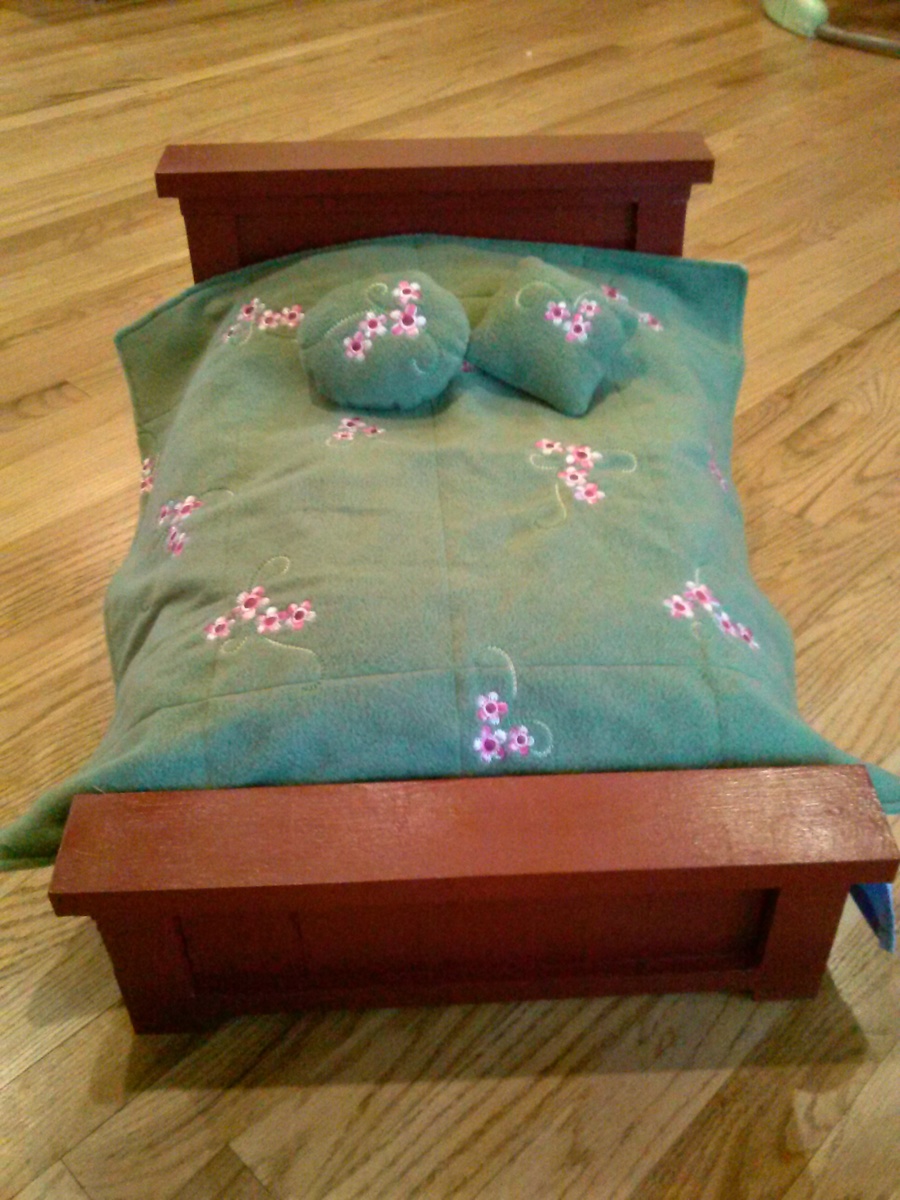
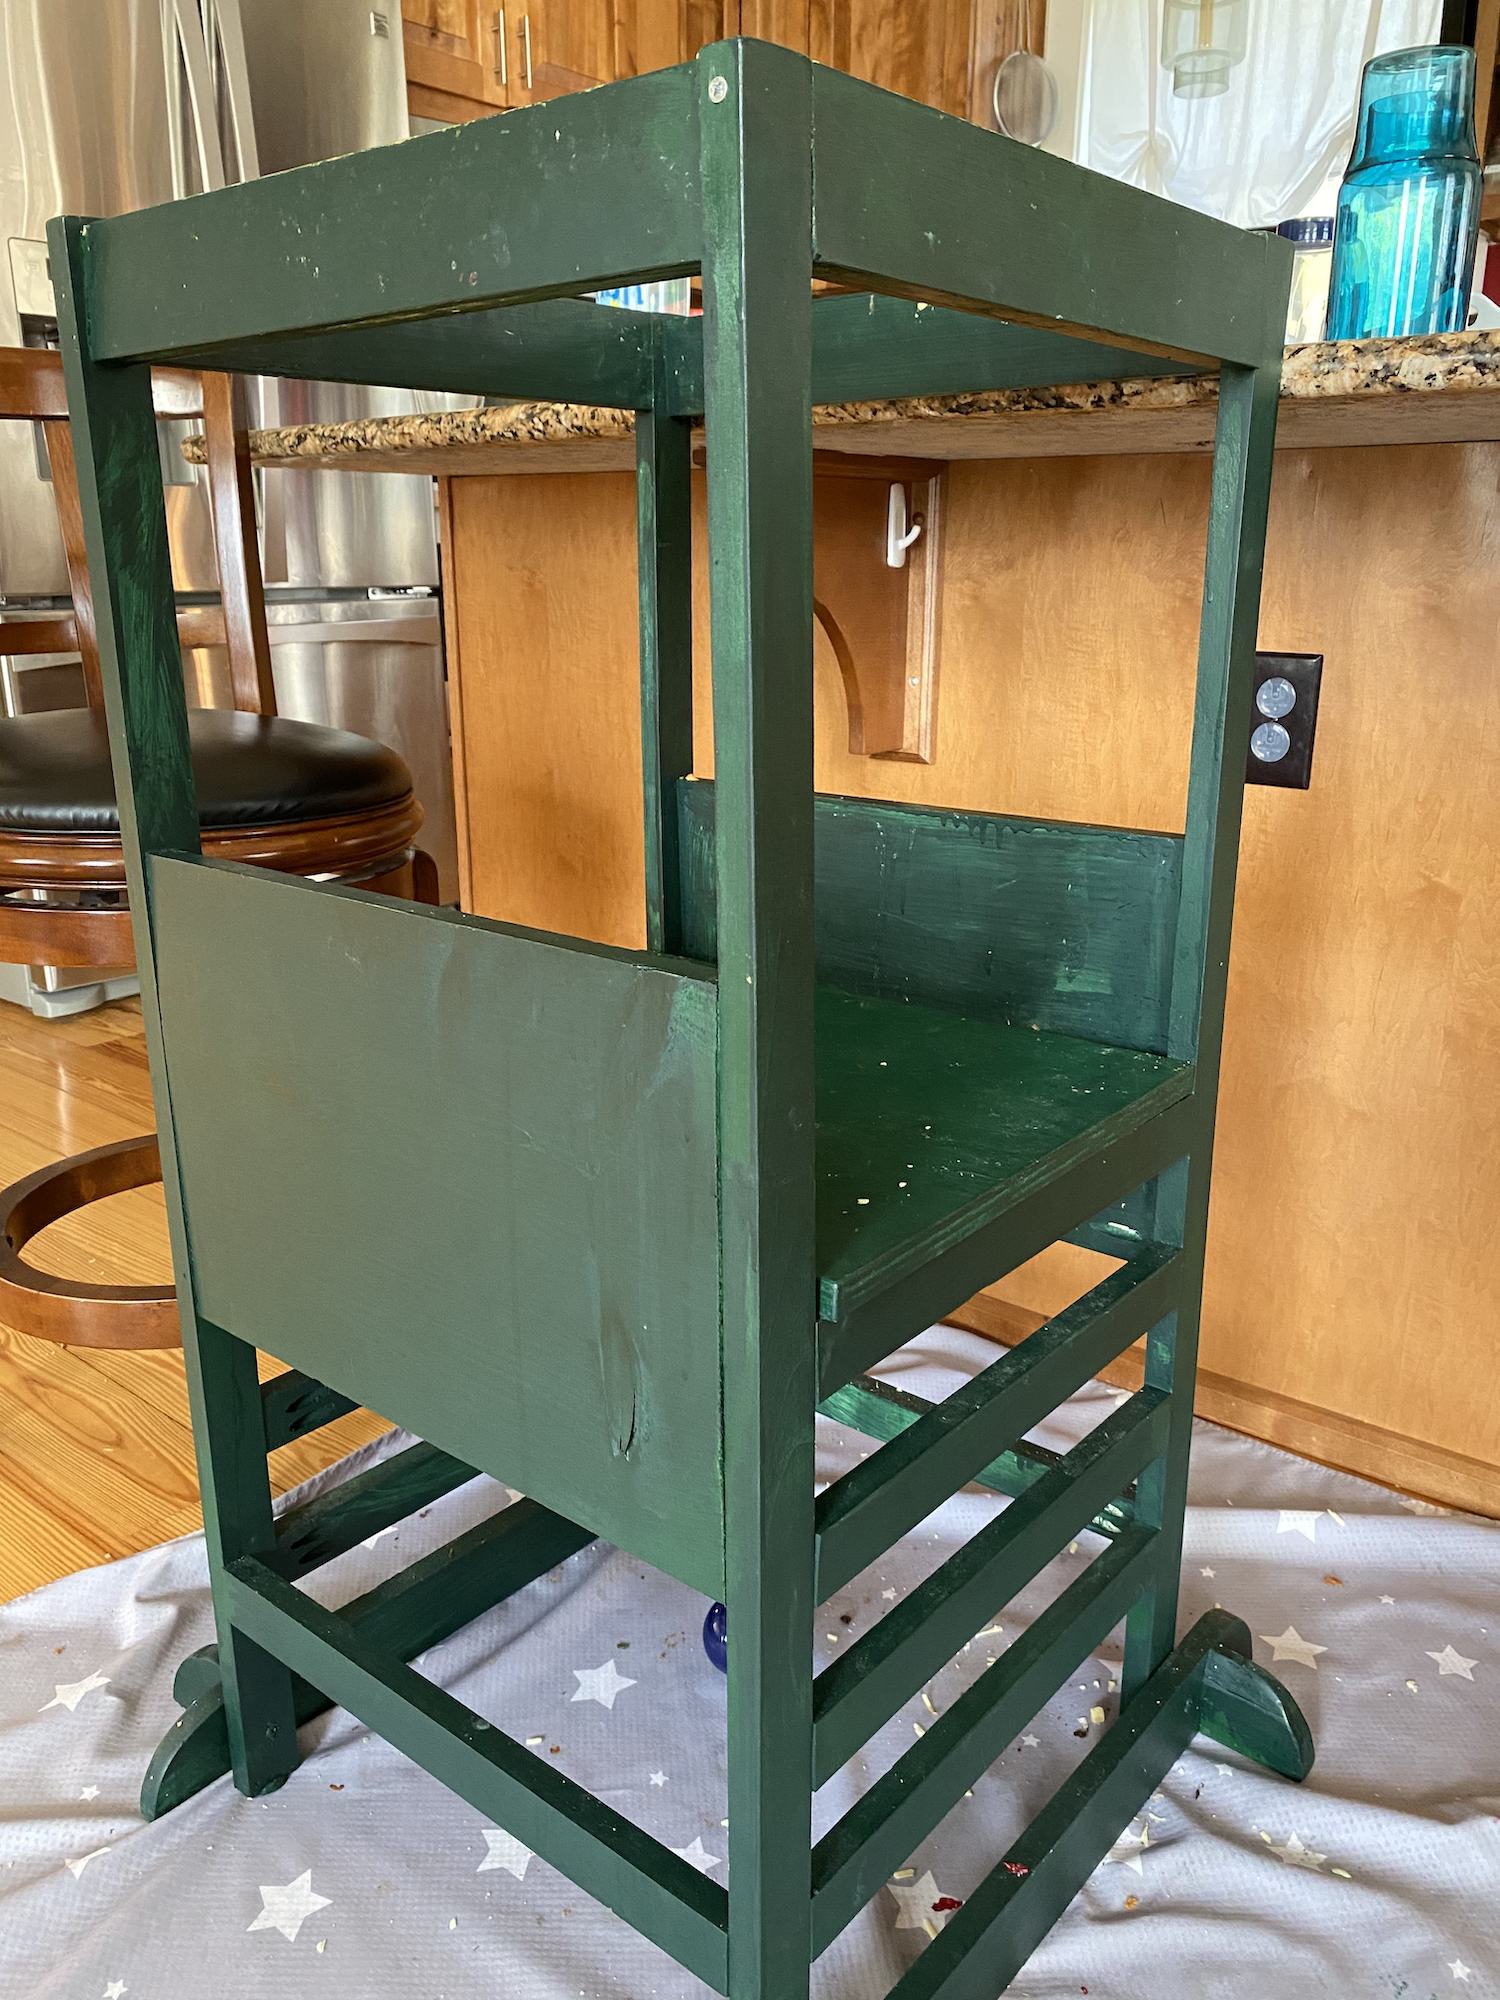
Community Brag Posts

Farmhouse Doll Bed

Submitted by risingeden on Wed, 03/05/2014 - 22:39

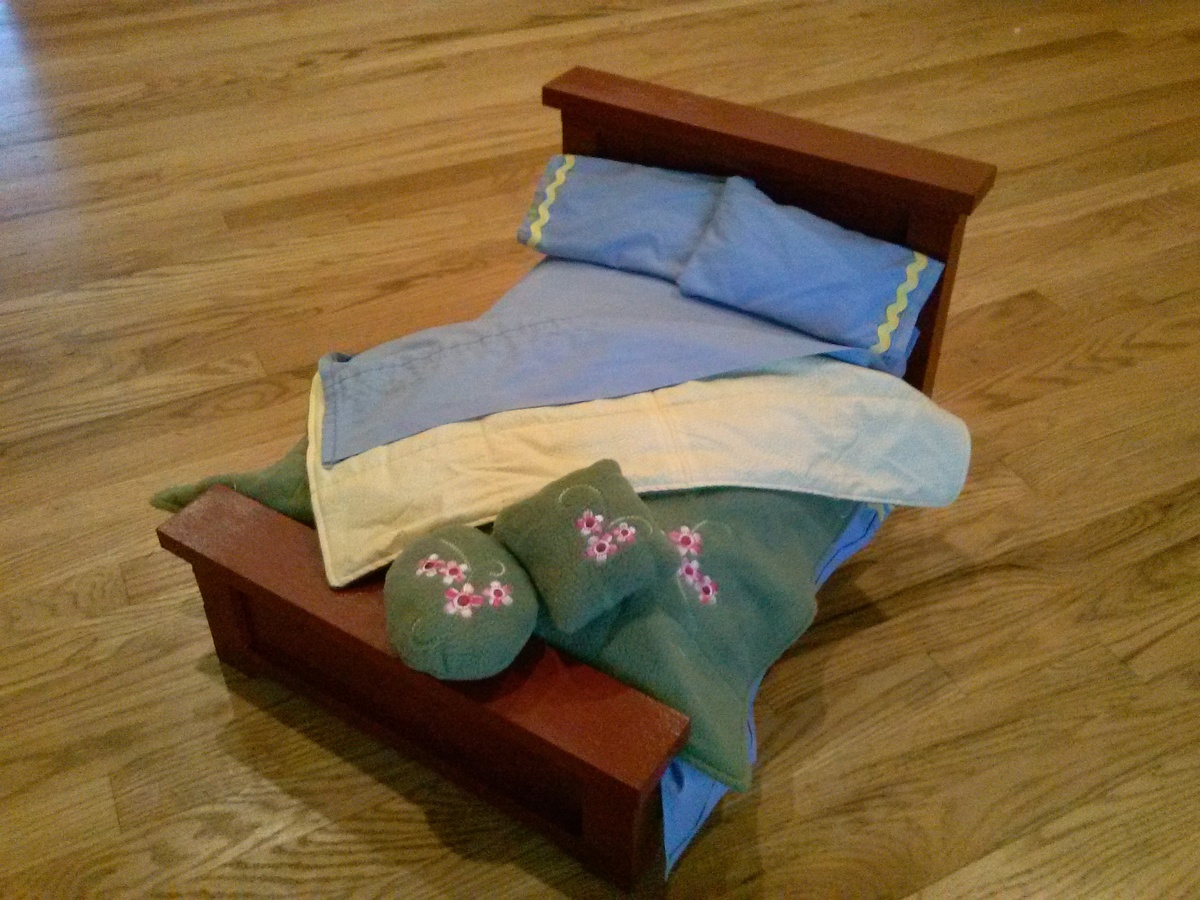
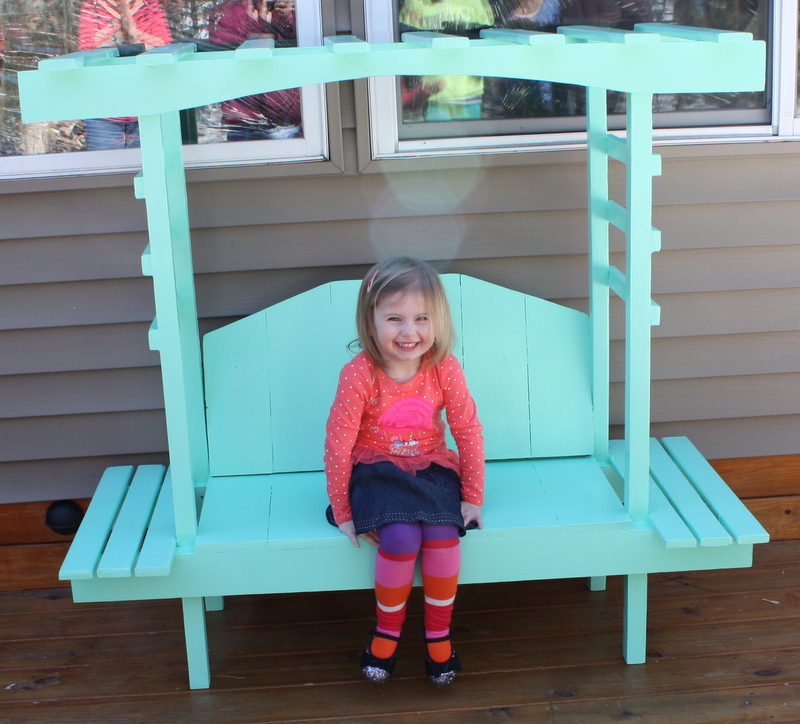
My daughter and I built the farmhouse style doll bed and had a great time! The plans were wonderfully easy to understand and follow. It was a great experience to work together and learn some new skills. She even chose the paint color herself - pretty good taste for a 9 year old! Thank you so much for a great, inspiring website!!

Estimated Time Investment
Weekend Project (10-20 Hours)
Finish Used
We used valspar "posh red" interior paint. Love it!
Recommended Skill Level
Beginner

From Portugal, with minor modifications

Submitted by Anonymous (not verified) on Sun, 06/05/2016 - 10:48

Followed the plans, with minor modifications to adapt the size to the available wood. Bigger modifications are the use of bolts and nuts instead of screws (to allow easier disassembling for storing), and the underneath reinforcements to avoid the table to bend over time.

Thanks for the plans, the kids loved it!

Gonzalo, from Portugal

Built from Plan(s)
Estimated Time Investment
Weekend Project (10-20 Hours)
Finish Used
Water-based pore filler, priming, exterior paint (mate)
Recommended Skill Level
Beginner

Helpful Helper

Submitted by JD_2030 on Thu, 03/26/2020 - 14:53

This was our first wood working project - boy, we were super excited to build this because our little one is Curious George and wants to see everything going on in the kitchen. 

The plans were modified very slightly to save some time and avoid major learning curves. We were very happy with the end result. We've since learnt that finishing a product is a whole new project - we ended up painting this helper. After the noticeable wear and tear, we realized we should have sealed it with poly.

PS: Pocket holes are everything.

Built from Plan(s)
Estimated Time Investment
Day Project (6-9 Hours)
Finish Used
Paint
Recommended Skill Level
Beginner

Modular Desk System

desk
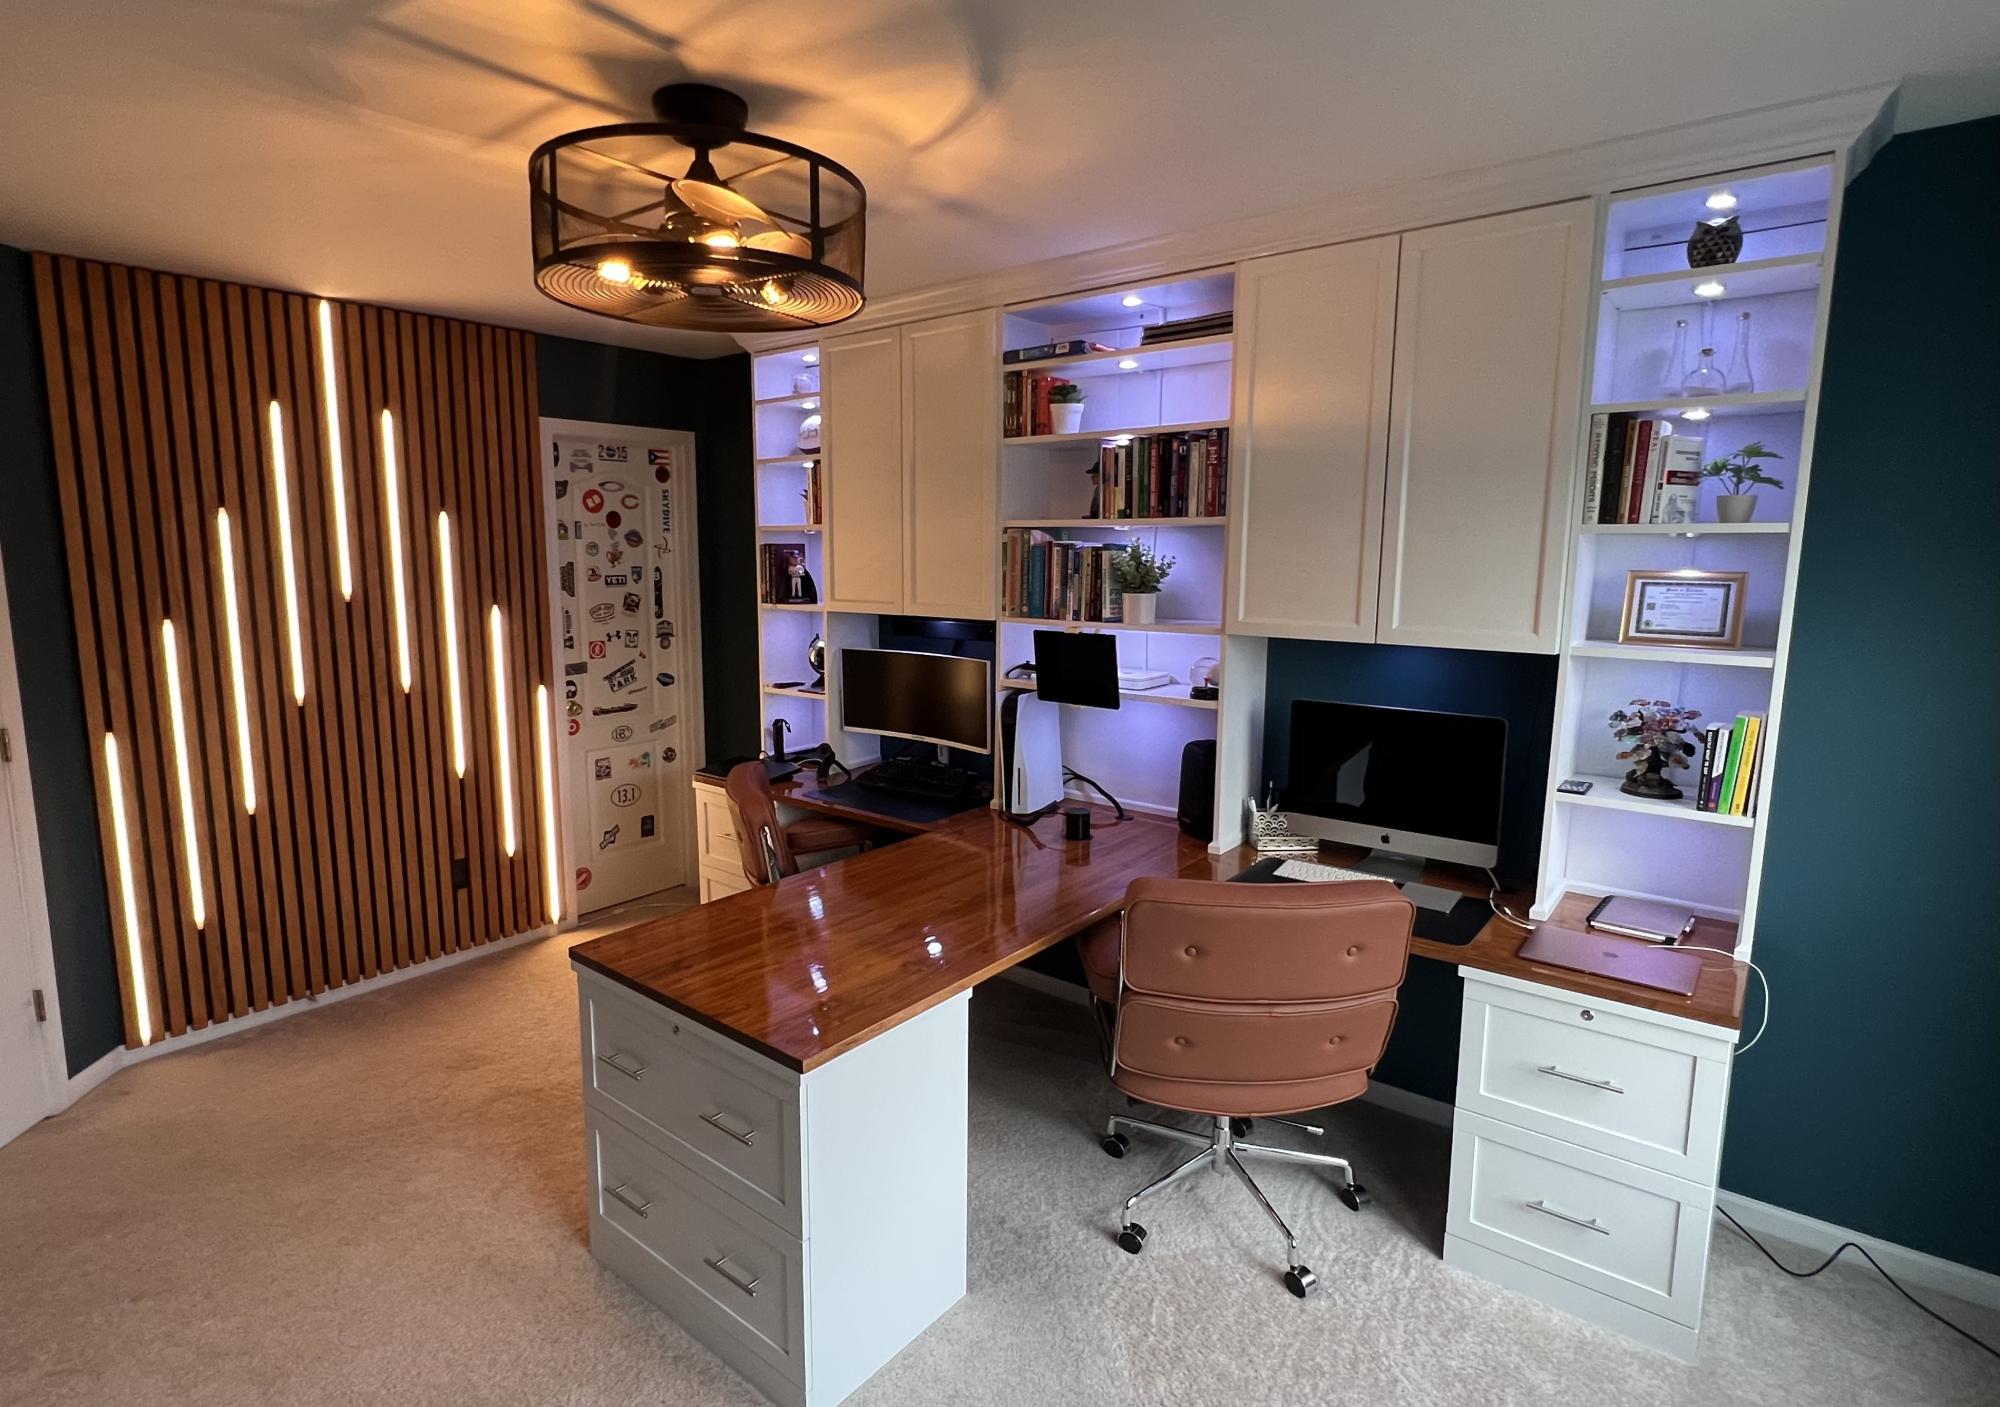
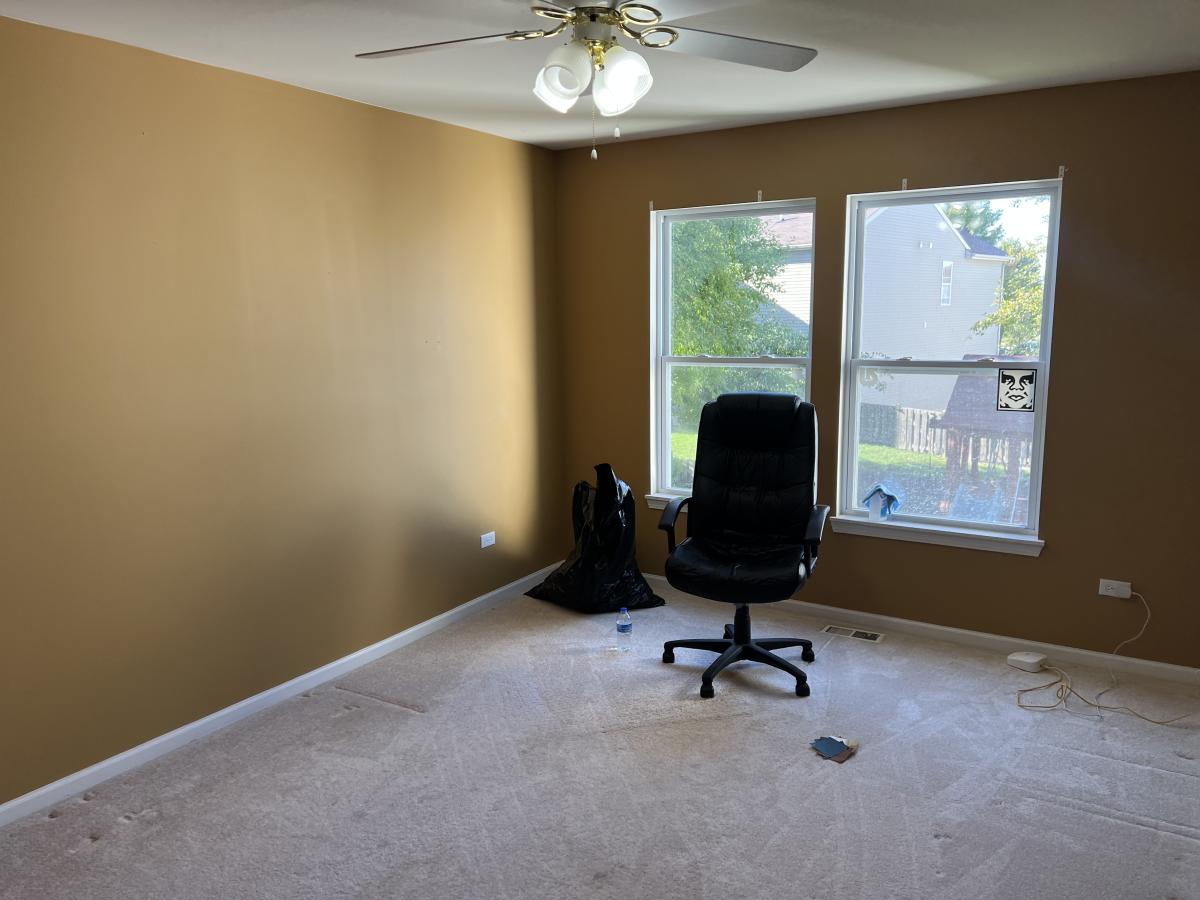
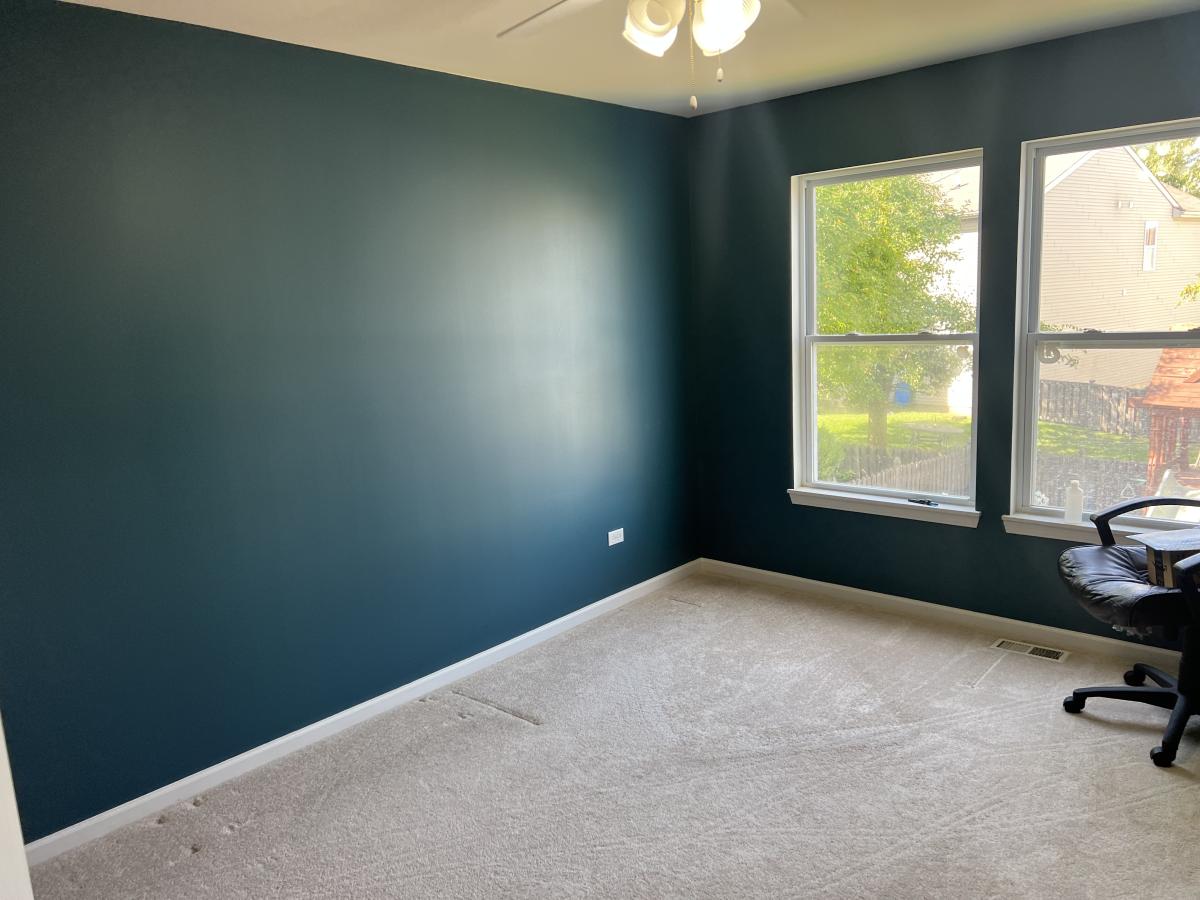
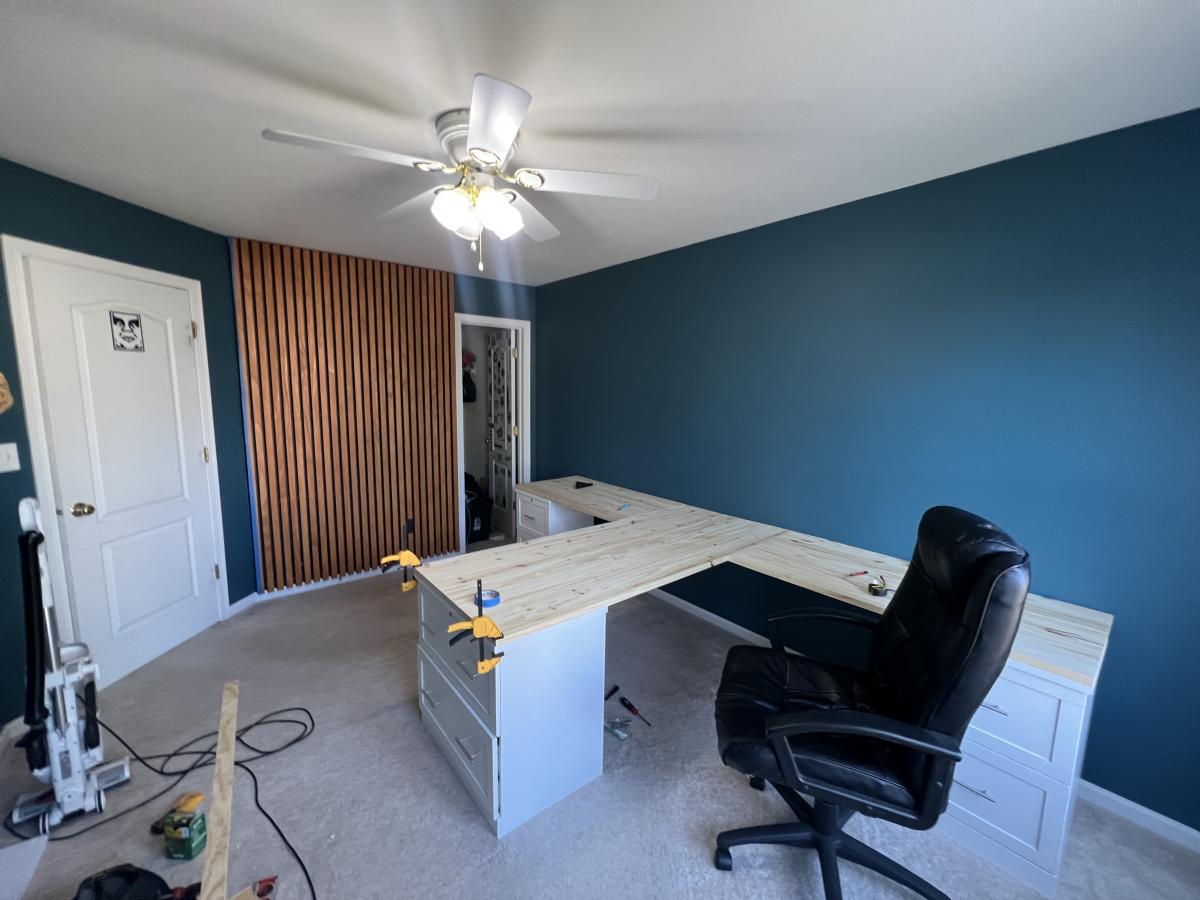
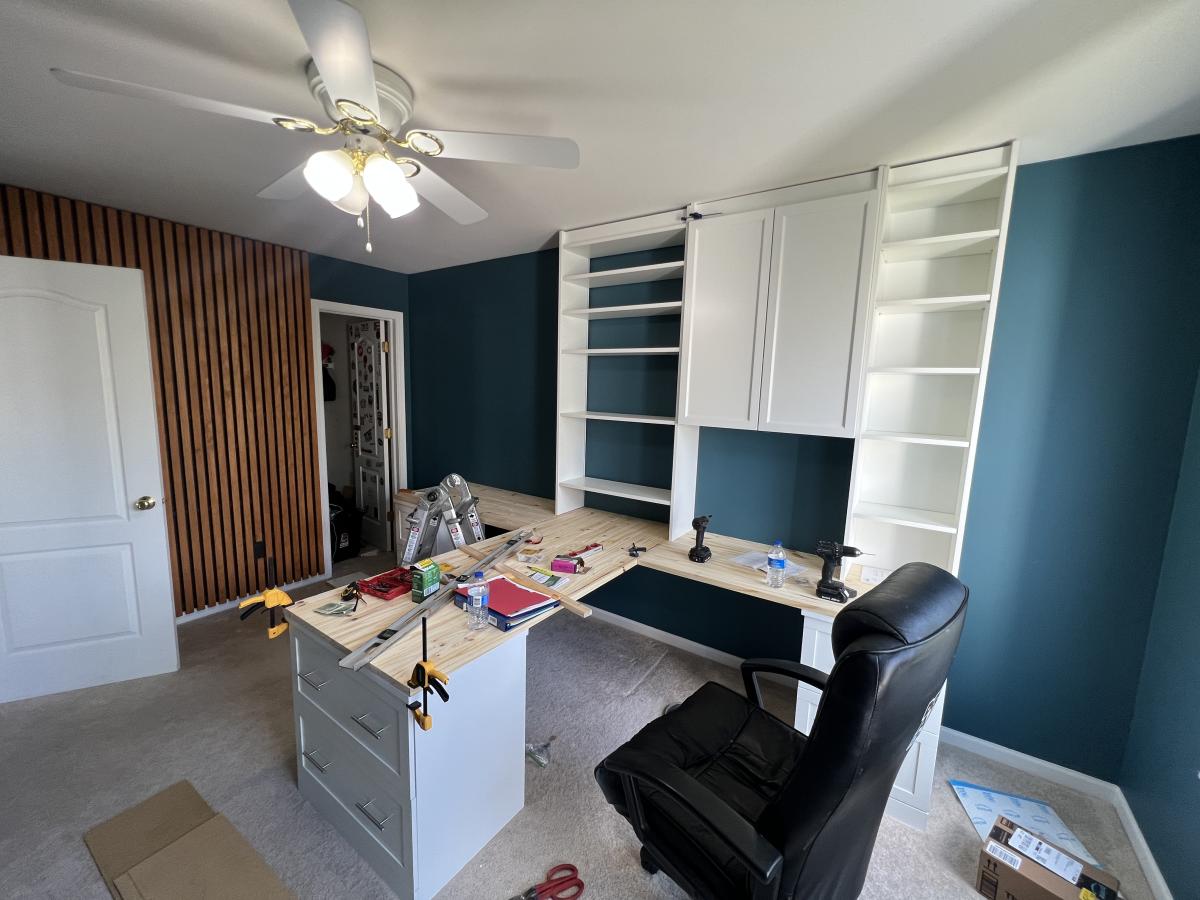
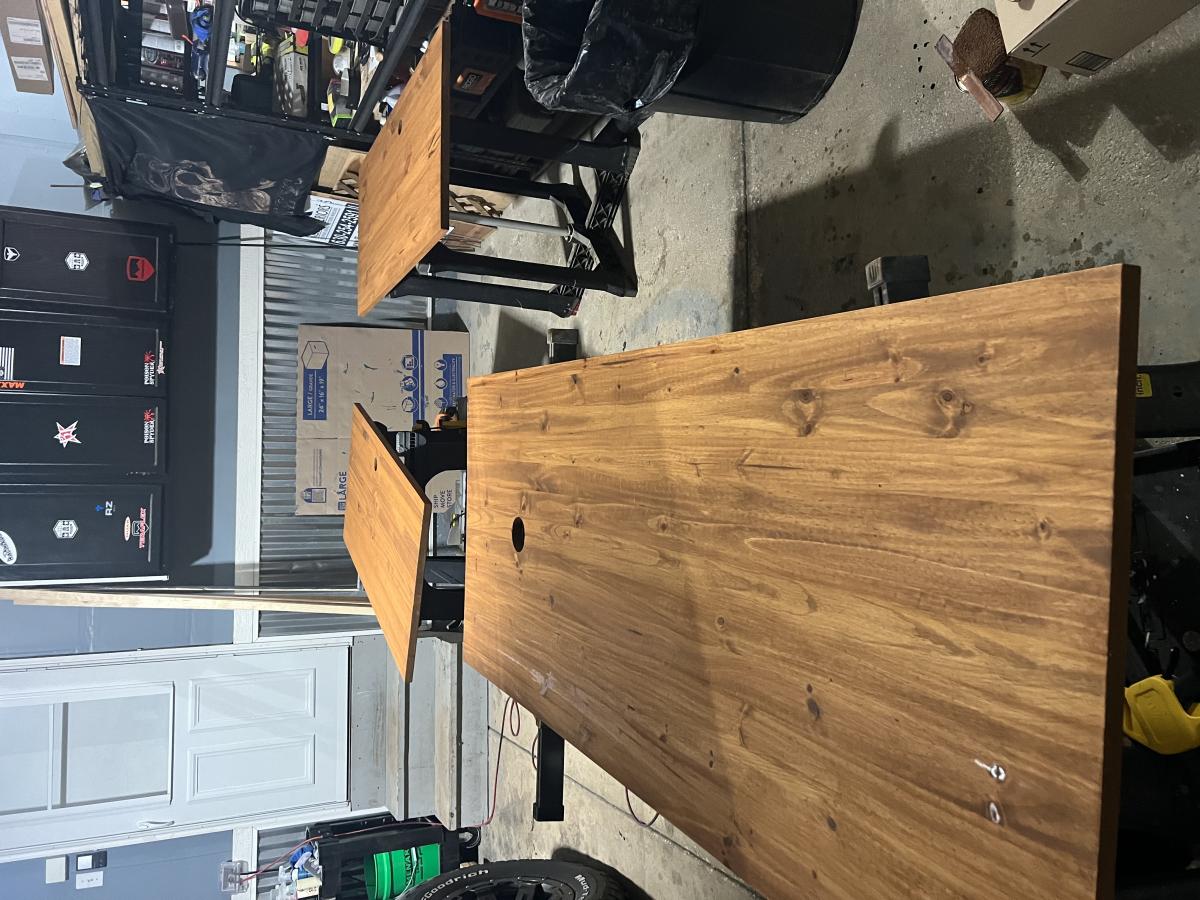
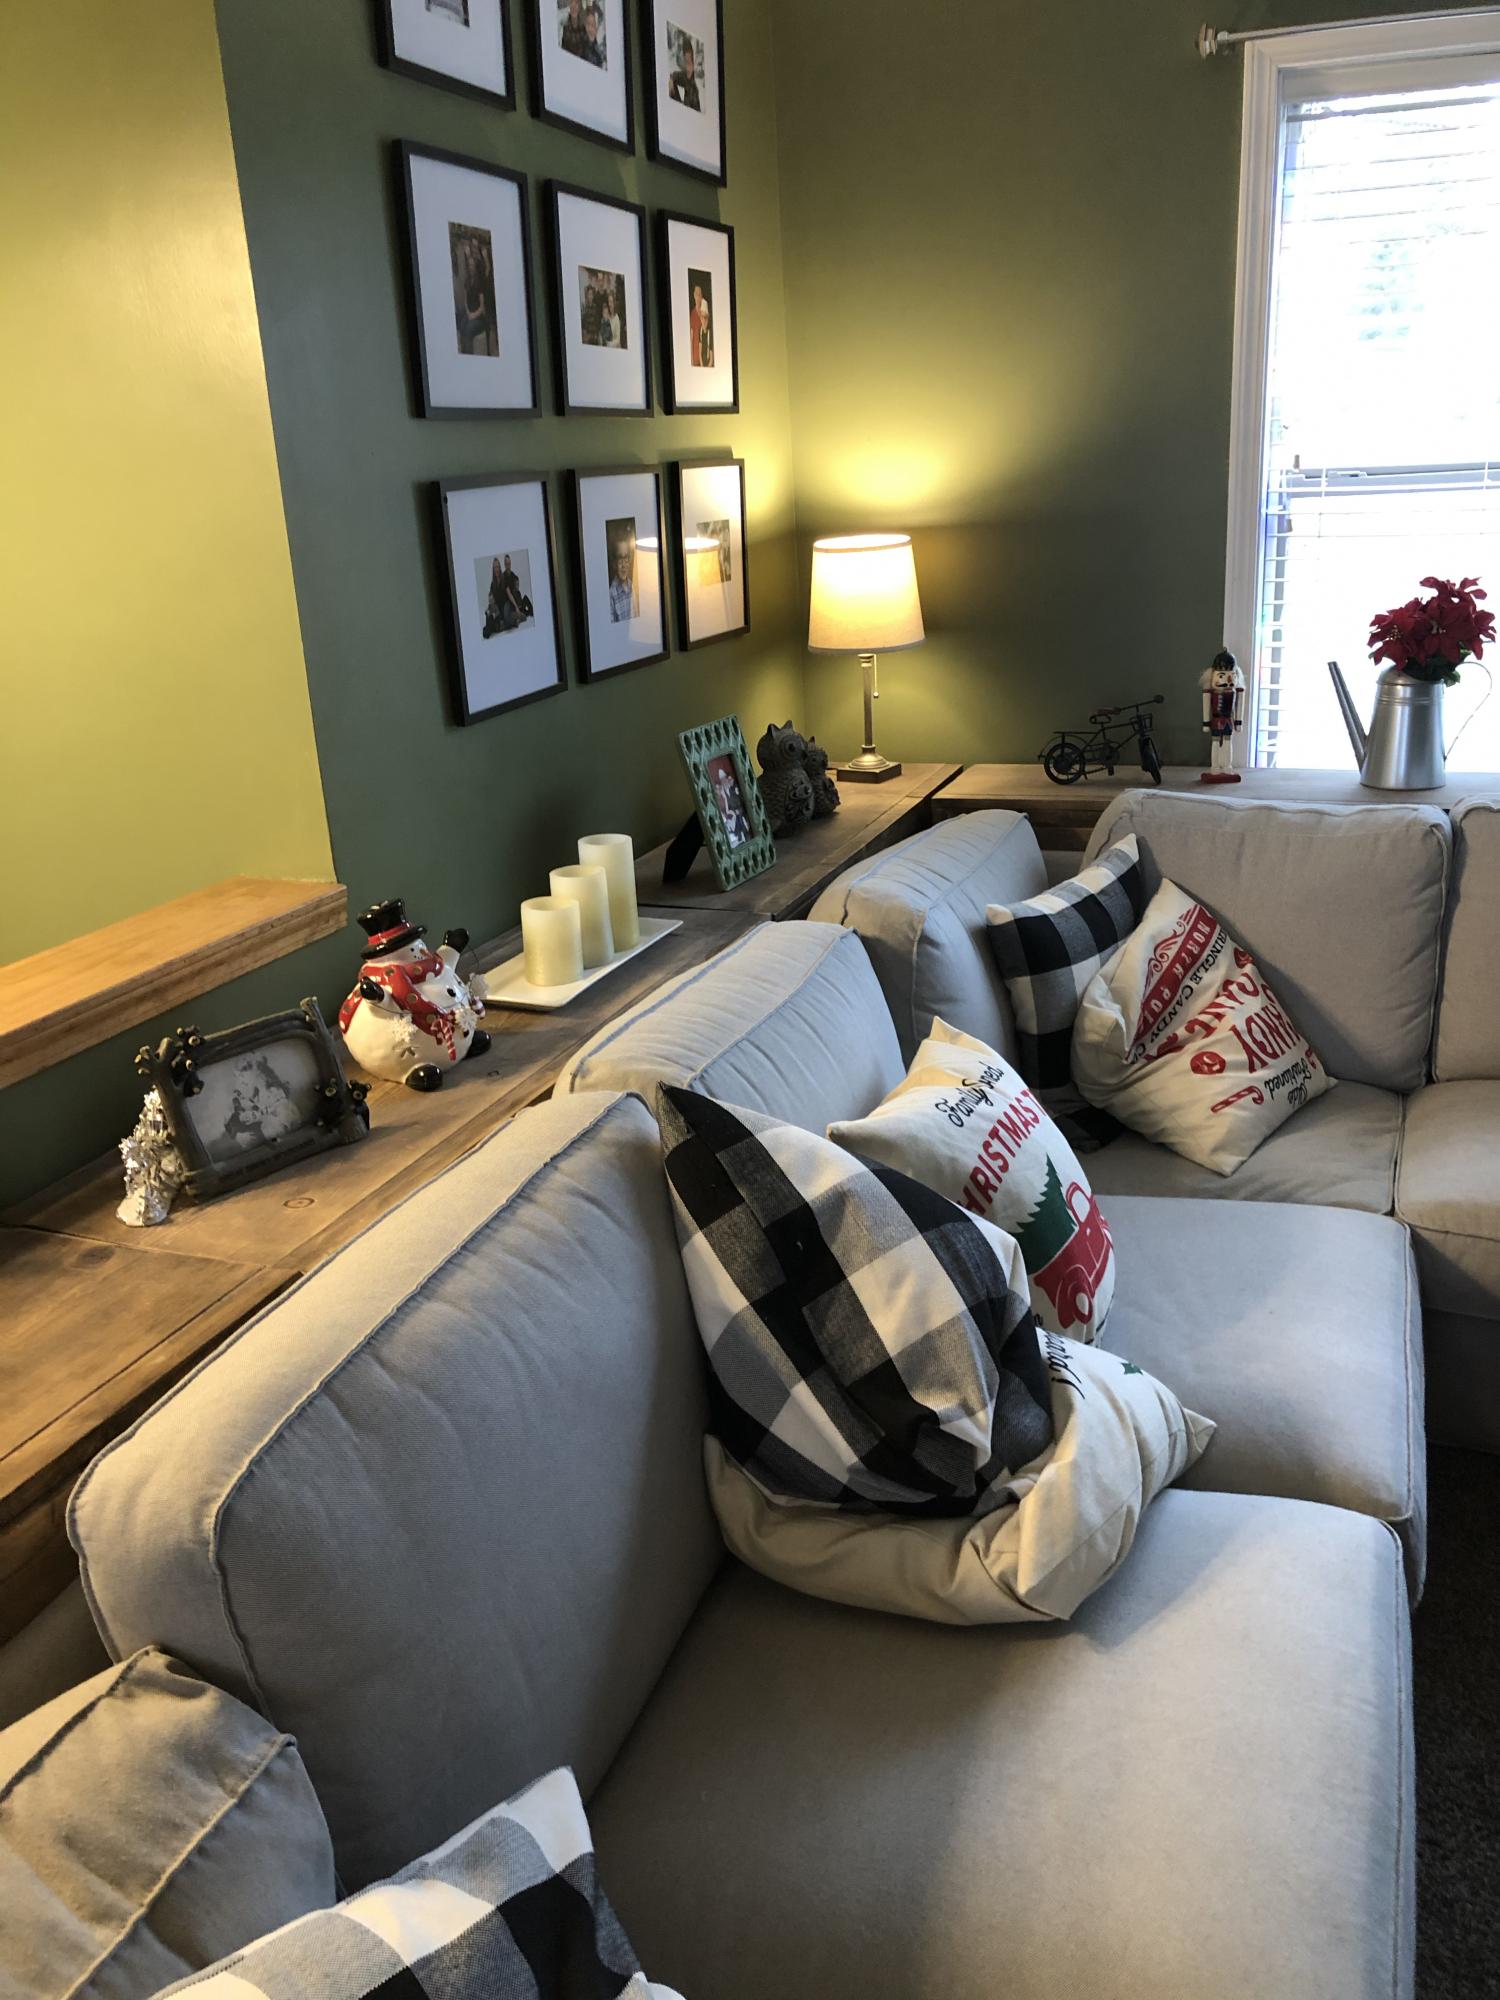
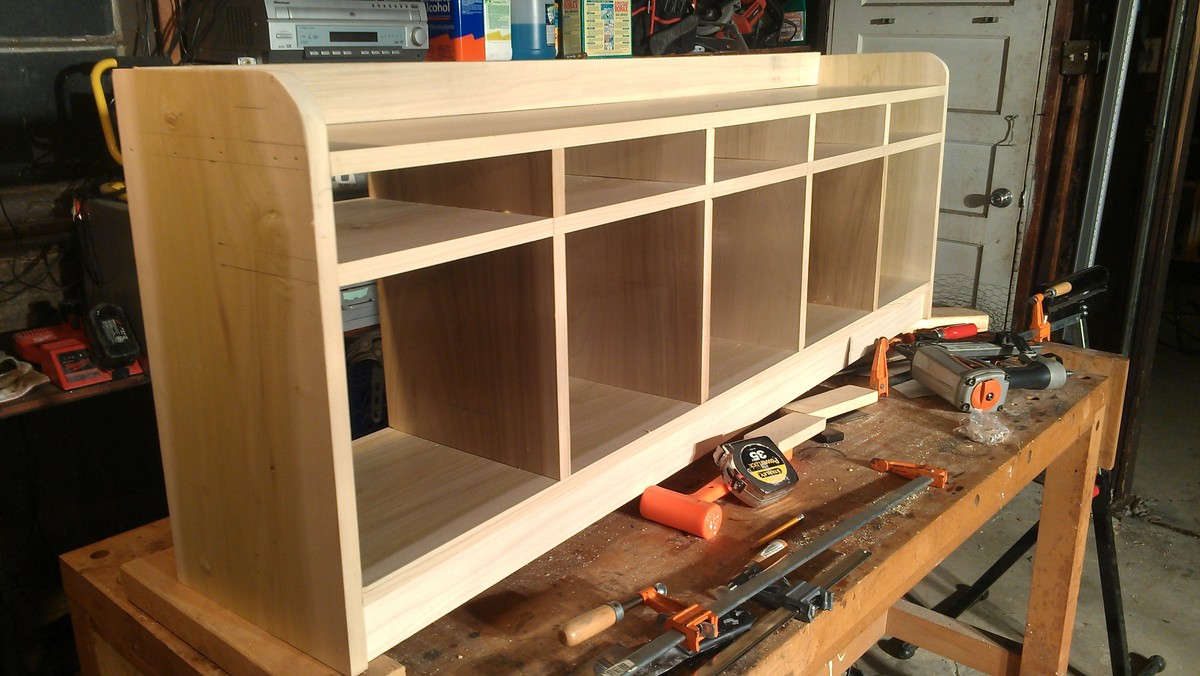
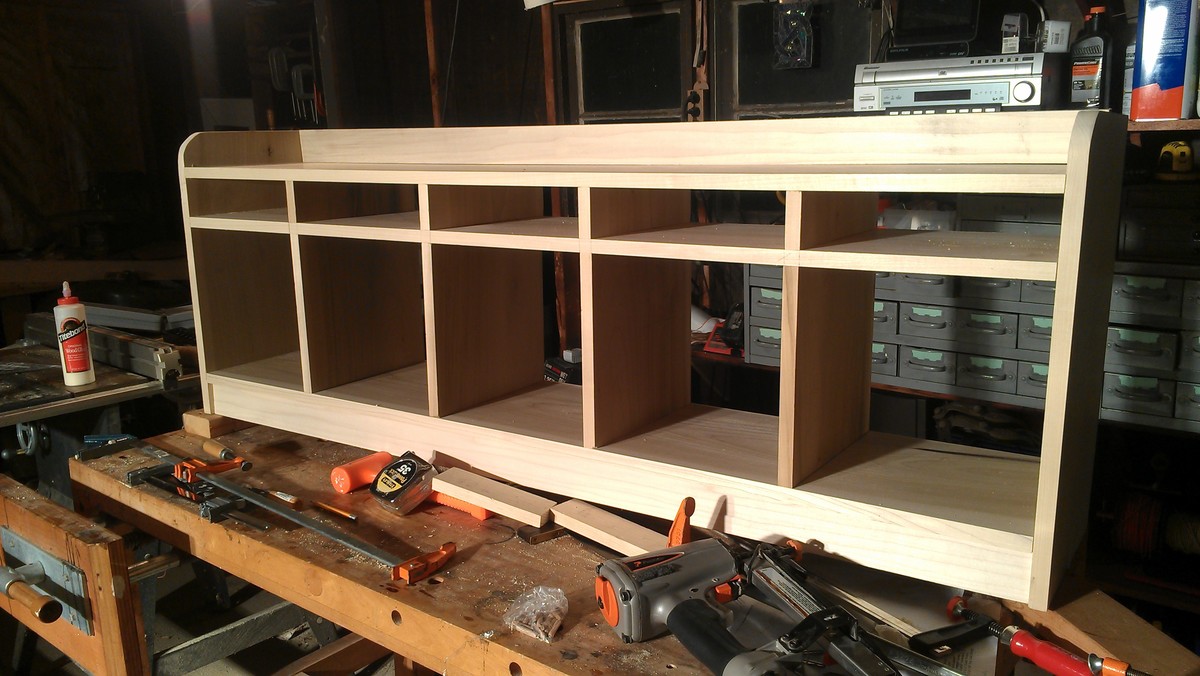
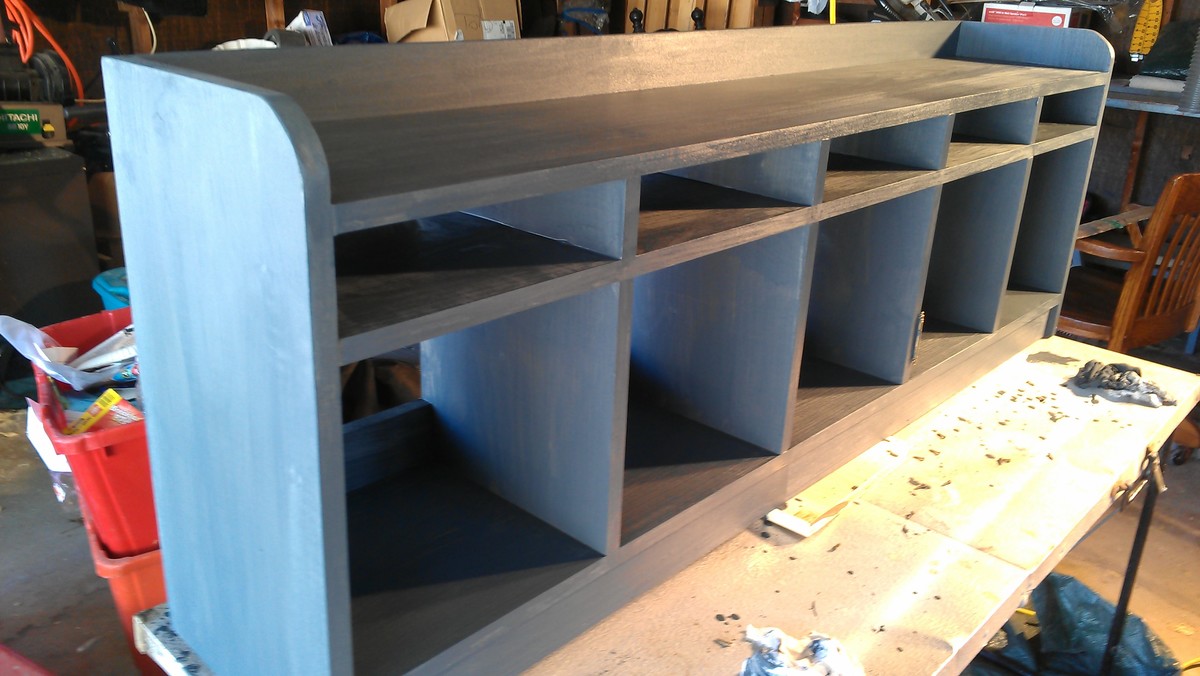
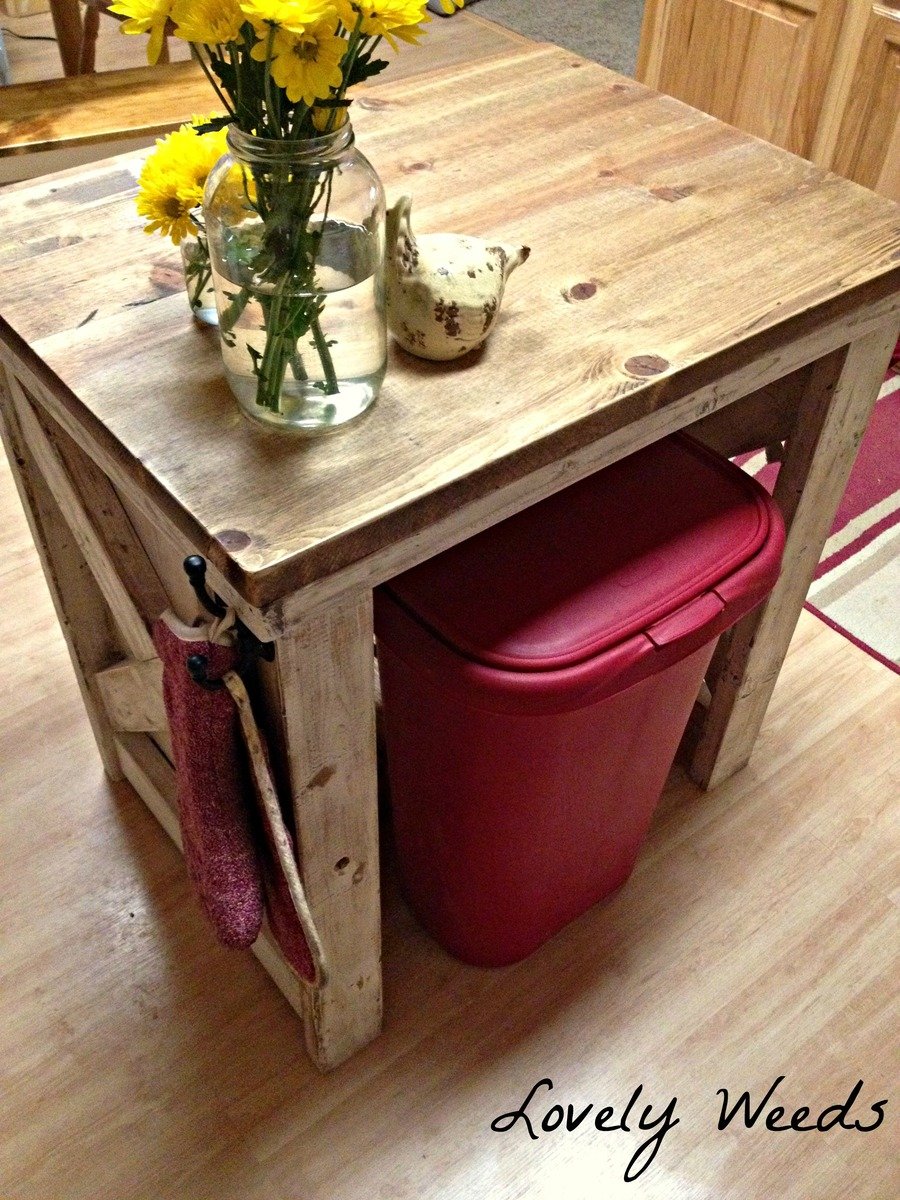
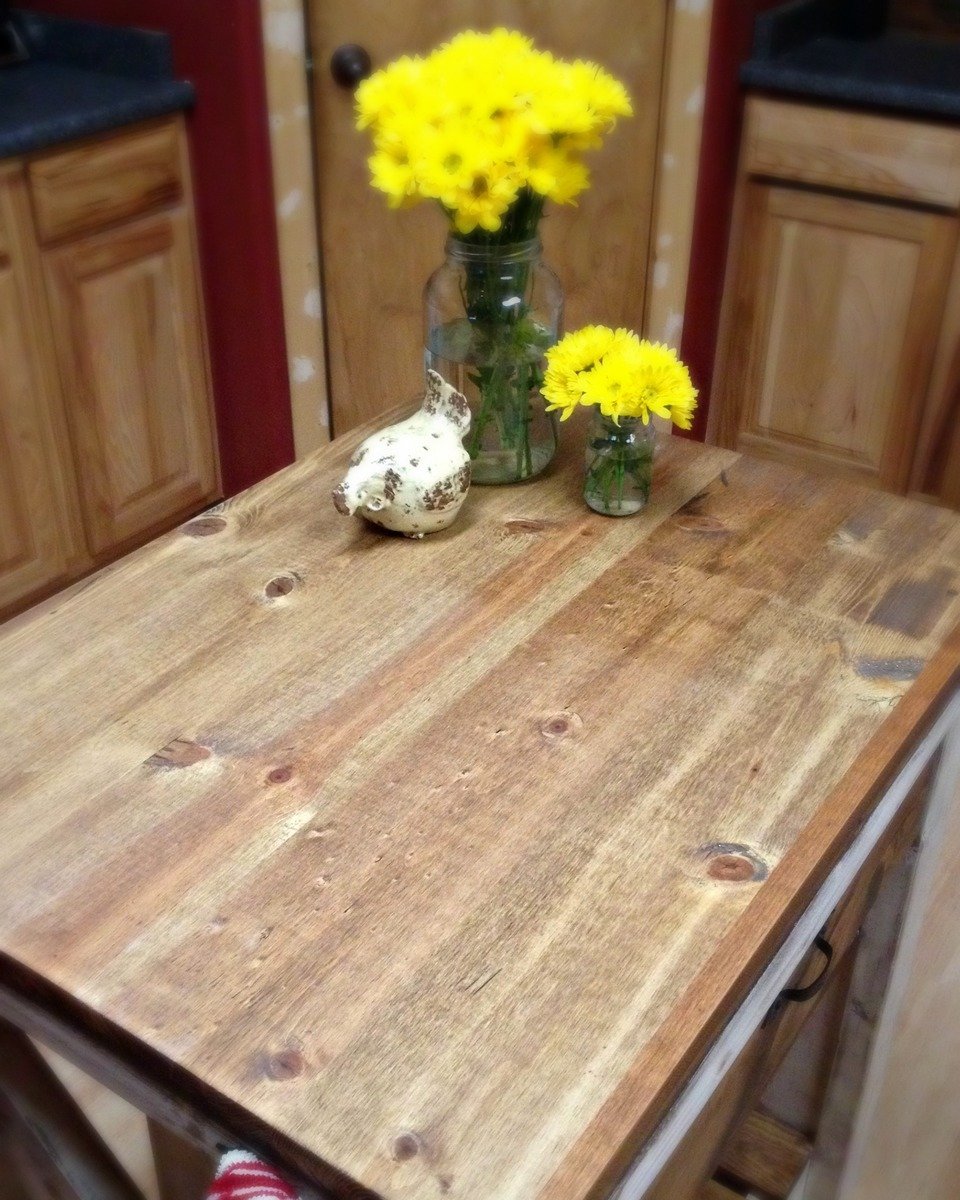
My home office remodel was inspired by a post from Ana White a few years ago. For this project I ended up using IKEA bookshelves and cutting the tops off and flipping them upside down. I used some crown mounding to cover the base of the cabinets on the tops. The desk top bases are file cabinets I found at the office supply store and the desk tops are edge glue pine. Overall I think I only had to make 8 cuts for the entire project. Saving me a ton of time and money. Thank you Ana for all of the wonderful post!
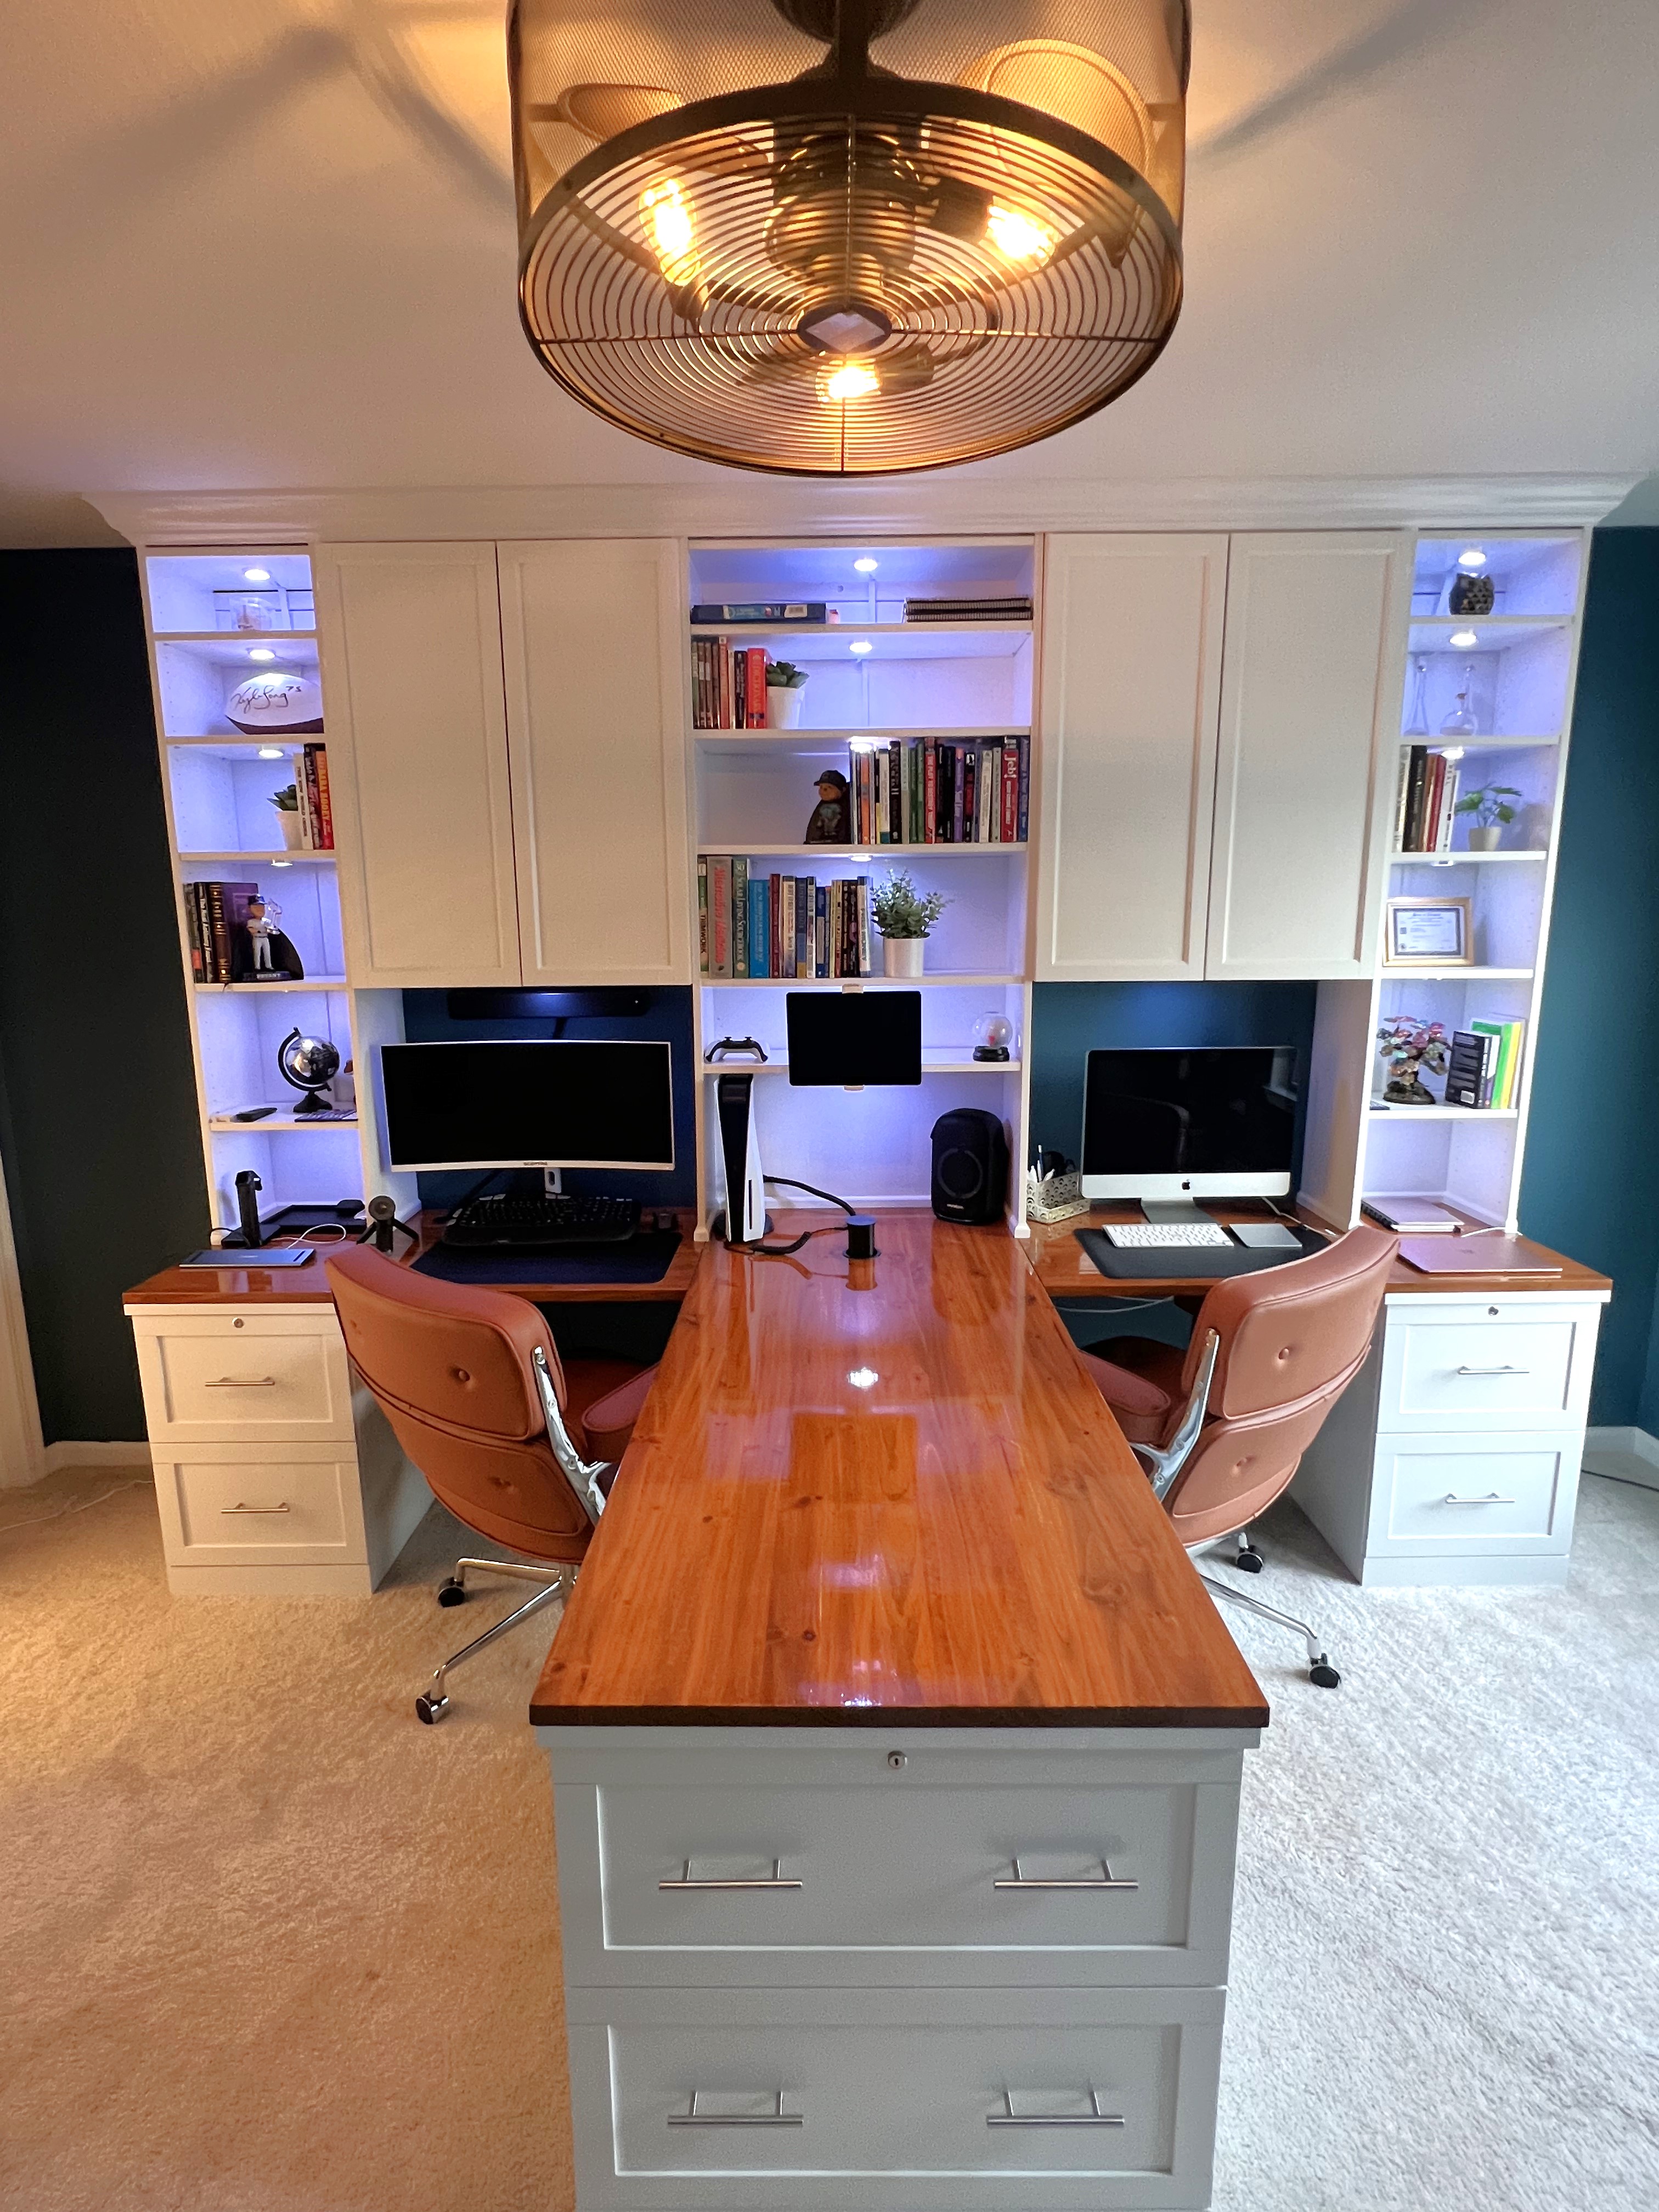
Mark Danreiter on Facebook

Jigsaw Puzzle Table!

I was super inspired by the "iTable" which I am also going to build... but combined the idea with an idea I saw in a fancy home decorating magazine (a jigsaw puzzle stool).... took a lot of fiddling to come up with a 'universal puzzle piece' but in the end it worked out!

Built from Plan(s)
Estimated Cost
$150
Estimated Time Investment
Week Long Project (20 Hours or More)
Finish Used
Polyurethane stain, spray satin varnish
Recommended Skill Level
Intermediate

Comments

spiceylg

Fri, 05/25/2012 - 05:49

That is so cool! Beautiful job. Looks like those curves too lotsa patience, something I seriously lack. Thanx for sharing.

Sue_McL

Fri, 05/25/2012 - 09:09

Would love to have the template for the universal piece... I have to make one of these!!!

FANTASTIC job....

Mariah Papaya

Sat, 05/26/2012 - 06:29

Yes, it took ALOT of fiddling to get a universal puzzle piece template made up -- I was sorta copying one I found (google "Vector Puzzle") but had no way to blow it up so huge. Even after I cut them out, I ended up doing a lot of sanding to make the joints work, but it was fun! If you want, Sue, you could mail me an envelope and I'll trace one for ya!

Elise's Daybed

Submitted by GQuick0330 on Sun, 03/09/2014 - 22:07

We needed to convert our exercise room to a bedroom for our granddaughter visiting from England.

I added additional support inside the legs as I wasn't keen on supporting the rails simply with glue/ screws. This allowed the weight to transfer to the floor directly from the rails. Of course, it was all glued and screwed or nailed. Otherwise I followed the plans found here.

The fenial‎ treatments are antique "looking" door knobs from a national hobby store. To secure them to the uprights, I drilled a whole that was just under the width of threaded rod couplers which were the thread size for bolt from the knob. I tapped with a hammer so the coupler would wedge into and down the whole. The couplers were purchase from a hardware store.

Built from Plan(s)
Estimated Cost
$250
Estimated Time Investment
Weekend Project (10-20 Hours)
Finish Used
Paint from Big Box store. Color names: Quart of White Primer, Quart of Bicycle Yellow, Quart of Bright White, and Sample size of Tutti Fruiti for the pink accent on the moulding feature.

The moulding I used was PVC composite, which I did not prime as I wanted it white anyway and any excess pink highlight would wipe easily. As I applied the pink accents, I had a damp cloth ready to wipe away any excess, drips or smudges on the moulding in areas I did not want. The paint comes off easily if wiped immediately.
Recommended Skill Level
Beginner

Easy DIY Work Bench

This was an after work project. (2.5 hours) Easy build. This bench is exactly to spec of the plans. This is a great little work bench already planning to build a couple more.

Estimated Cost
$65.00
Estimated Time Investment
Afternoon Project (3-6 Hours)
Finish Used
None
Recommended Skill Level
Beginner

Sofa Storage Tables

Submitted by advanlente on Sat, 03/28/2020 - 11:44

Our living room has no closets or storage. As a family we love to play board games and we love to cuddle on the couch with blankets. So, I was trying to come up with a sofa table for our large couch that also had a ton of storage. I looked all over the internet and could not come up with a solution. So, I decided to try here on Ana White and I found plans for a bookshelf. I adjusted the height to be just below the back cushions and went for it. I am not going to lie, it was not easy for me to adjust these plans and I DID make several small mistakes, but I am so glad I made this. We use it daily and it makes life so much easier. The only add I will do in the future is to add stoppers so when you raise the lid, it doesn't fall on your head. It makes life interesting though at the Van Lente household lol 

Comments

GadgetGrrl

Tue, 02/09/2021 - 22:53

I love this idea! Just curious - did you keep the bottom shelf of the bookshelves, or did you leave that off since it's not accessible behind your sectional?

Loft bed for Wyatt

Submitted by Quartney on Thu, 06/20/2019 - 11:47

I did this project 99.97% alone (if you call "alone" with a 1-year old and 3-year old nearby). This was a challenging project that took longer than expected (one full week, working well into the night after the kids went to sleep). I used furring strips for the 1x3s and 1x4s. They cost about $2 less per board! Total cost of this project includes paint, screws, etc.

Estimated Cost
$240.00
Estimated Time Investment
Week Long Project (20 Hours or More)
Finish Used
Zinsser BIN primer, followed by Sherwin Williams semi-gloss enamel paint
Recommended Skill Level
Intermediate

Comments

John Hopkins (not verified)

Mon, 10/22/2012 - 20:40

I have been looking for something similar to this but with a futon in the bottom. Anyone seen plans for such a critter?

Media Console

Submitted by KWTookey on Fri, 03/14/2014 - 14:37

My first furniture Build. My wife wanted rid of our old bookshelf turned TV console. I saw this online and went for it. Finished it with a serious splash of color. We love it so much we decided to go with teal as our primary livingroom accent color. Pretty proud of this little guy. Thanks for the great design!

Built from Plan(s)
Estimated Cost
$100
Estimated Time Investment
Week Long Project (20 Hours or More)
Finish Used
2 coats of Behr Eggshell latex in "Lagoon"
Sanded down corners, edges,
Then Minwax "English Chestnut" for highlights.
Finished with 2 coats of Polycrylic topcoat.
Recommended Skill Level
Beginner

Comments

DIY Rustic Console

I had a friend make a request for a console table.  We came up with this design to fit her space and needs.  It was a pretty easy build.

Estimated Cost
$150-200
Estimated Time Investment
Weekend Project (10-20 Hours)
Finish Used
ECOS Paints Woodshield - Pine Needles
ECOS Paints Woodshield - Satin Varnish
Recommended Skill Level
Beginner

DIY Walk-in Pantry Shelving

Submitted by Greystone1 on Sat, 11/18/2023 - 12:39

Built new shelving in our 6' x 6' pantry using red oak plywood shelving and 2" x 2" red oak corner shelf supports and red oak 1" x 2" trim. Used plans modified from Ana White site.

Pat Edwards, Ashland City, TN 

Built from Plan(s)

Comments

Perfect Cubby Bench - My Take on it.

We saw this cubby bench and thought it could work for us... but there's 5 of us.

So we redrew the plans to add two more cubbies.

I also like the idea of being able to hide everything, so we put doors on.

The issue I had was cutting 1x12 material with the chop saw. Cutting with the circular saw (even with a guide) can sometimes leave you with an "almost" square edge. Even with a 12" saw you can not make the cuts on a 1x12. You need a sliding saw for that.

One option is to cut the boards over sized by 1/4 in and then use the table saw to get a square edge with the miter gauge or rip fence.

I only worried about this due to putting doors on the cubbies. It's your using baskets you don't have to be so exact.

Built from Plan(s)
Estimated Cost
100
Estimated Time Investment
Weekend Project (10-20 Hours)
Finish Used
Minwax water based stain and poly
Recommended Skill Level
Intermediate

Little e's Garden Bench

Submitted by jaime19861 on Mon, 03/17/2014 - 09:28

I made this garden bench for my niece's 3rd Birthday. She loved it!

I was able to use wood that had been leftover from past projects. I only had to buy a few boards. The paint was largest expense.

The most difficult part was the arch. I did that by bending my ruler along some finishing nails.

Built from Plan(s)
Estimated Cost
$30
Estimated Time Investment
Day Project (6-9 Hours)
Finish Used
I used DutchBoy MaxBond semi-gloss exterior paint.
Recommended Skill Level
Intermediate

Shelves for a Shed

Submitted by mtairymd on Sat, 06/18/2016 - 13:30

Build Instructions:
http://www.instructables.com/id/Shelves-for-a-Shed/

I looked at purchasing brackets but I couldn’t get the exact size and the price seemed high for something so simple – plus I had a few excess 2×4s from the last job. Mainly, I wanted to utilize the area in the upper portion of the shed while keeping the floor clear for yard/garden equipment. There are multiple variations of this style bracket online. I took a little different approach by utilizing the existing part of the shed (top plate) for support. I don’t know the load capacity but I’m quite sure it will handle any of the items (tarps, paint cans, etc.) I plan to place on the shelf.

Estimated Cost
$20
Estimated Time Investment
Afternoon Project (3-6 Hours)
Finish Used
None
Recommended Skill Level
Beginner

Fancy X Desk For Home Music Studio

This is only my second ever furniture project. I modified the height to give me extra clearance for a full sized synthesizer underneath. I spray painted the base matte black, stained the top with Minwax Puritan Pine, and sealed it with Varathane Triple Thick Water Based Polyurethane.

I attached the top with heavy corner brackets and 1" hex head lag screws to add a bit of an industrial look.

Built from Plan(s)
Estimated Cost
$60
Estimated Time Investment
Day Project (6-9 Hours)
Finish Used
Used a single coat of Minwax Puritan Pine for the top, and a single coat of black matte spray paint with primer for the base.
Recommended Skill Level
Beginner

Comments

Rustic X Console

Submitted by kamijb on Sat, 06/02/2012 - 16:46

I did it! My hubby cut all the wood for me because the saw still scares me, but I assembled it!

Estimated Time Investment
Afternoon Project (3-6 Hours)
Finish Used
Paint/Dark Walnut stain/Poly
Recommended Skill Level
Beginner

Comments

Janelle Jones (not verified)

Sat, 09/08/2012 - 11:52

hi i love this table do you mine sharing with me the wood sizes and assembly intructions THANKS!

My Rustic X-Side Kitchen Island

Submitted by cassiet717 on Sat, 03/22/2014 - 05:53

I’ve been hoarding my scraps for the past six months or so hoping to build this as soon as possible. I paid roughly $34 for it!
Everything but the 1”x8” drawer face and the project panel top came from my scrap pile. My aunt and uncle’s renovation dumpster provided the missing 2”x4”s. There are nail holes, dings, and some general bruising, but who says that’s a bad thing?
I omitted the piece of trim beneath the drawer to allow more room for storage on my shelf. I absolutely love my island, and as usual Ana's plans were flawless!
You can see details on how I built and finished on my blog here: http://lovelyweeds.blogspot.com/2014/02/island-paradise.htmlit
Thanks for taking a look!

Estimated Time Investment
Day Project (6-9 Hours)
Finish Used
Olympia latex paint, Minwax Special Walnut stain, Minwax Finish Wax (body), Polyurethane (project panel top)
You can see tips for recreating my finish here: http://www.lovelyweeds.com/2014/03/island-paradise-part-2.html
Recommended Skill Level
Intermediate
Back